


Jack12477
-
Posts
5,678 -
Joined
-
Last visited
Content Type
Profiles
Forums
Gallery
Events
Everything posted by Jack12477
-
 Thanks. Very interesting and helpful
 -
Mother Nature did it for me ! The entire collection used to sit on an open bookshelf for years until the Admiral decided to remodel our den right down to the wall studs. So they got removed, dusted off with small brush, some compressed air, a Q-tip, and then stored in plastic storage bins. The "wind-swept dust" is what I could not remove without destroying the decals. Sometimes it pays to be a lazy modeler and not cover or dust your models. Thanks, glad you liked the collection.
-
Hi Mark.
-
@Egilman, thanks for the list of paints and sample photos. I think the model in MM Chevy engine red looks closest. I did find the Mr Color red madder at HobbyWorld USA in NH. Going to order some from there and see how it looks. I do have a bottle of the MM Chevy engine red in my paint stash.
-
Okey dokey Lou
-
Thanks Lou but this may be my only helo, if I stay in plastic I will probably go back to collecting armor again. Of course I still have those two enormous sized planes to build and more importantly find a place to display. Not to mention the AL US Constellation ship model to build.
-
Welcome Craig. Good to have you aboard
-
Ken, the color is called red madder. Mr Color has it, I think I can get it from a shop in NH.
-
Denis, If you mean the one in Egilman post, it is the Trumpeter item number for the 1:35 kit of the same helo as mine
-
1:48 is smallest I want to go anymore. Did try the 1:350 Trumpeter ships tho, wasn't too too bad except the PE was a bear at that scale. I do have my eye on a few 1:35 scale tanks tho. Maybe soon !
-
One of the Fokker tri planes was built by the aerodrome's founder Cole Palen. They have a weekly air show every summer and most of these planes fly
-
There are some reproduction full size Fokkers in the WW 1 Collection at the Rhinebeck Aerodrome
-
That's a steal compared to the hobby shops I looked at online, that's why I went with the smaller scale. Good ! Join the fun ! I found that Mr Color brand has most of the colors needed.
-
Thanks, Phil
-
Oh ! You mean one of these guys !

-
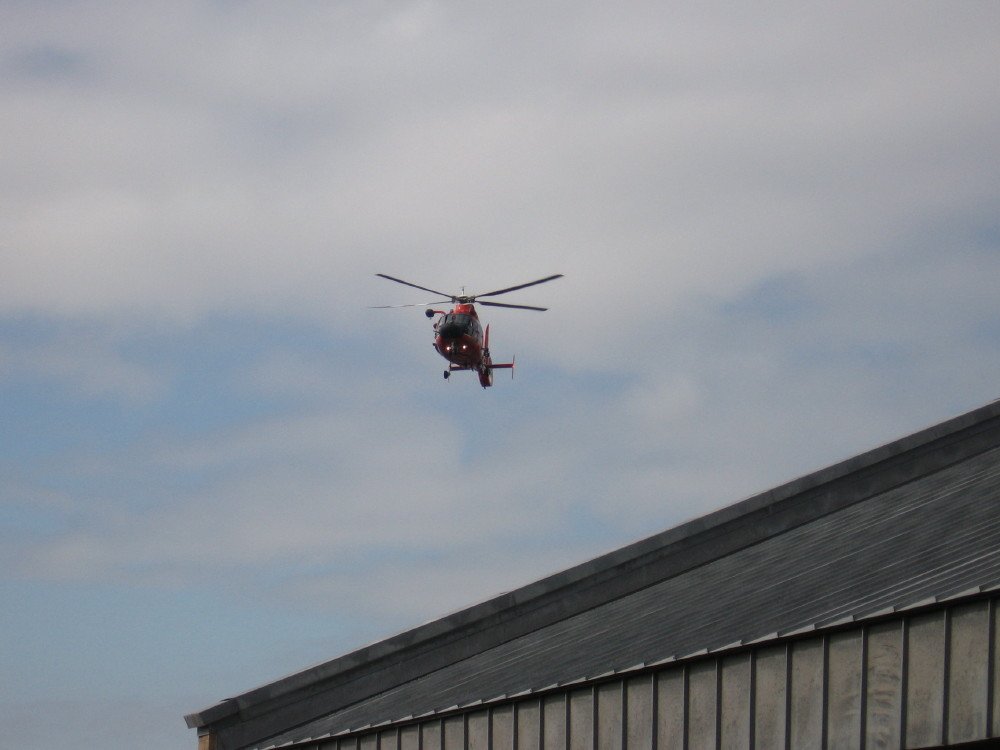
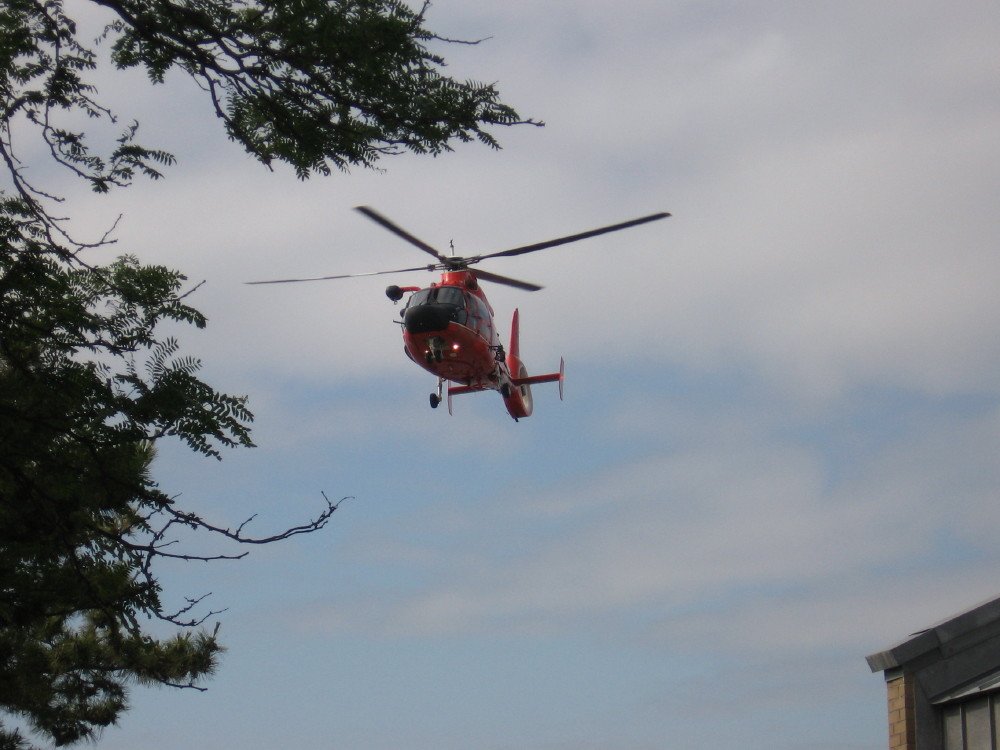
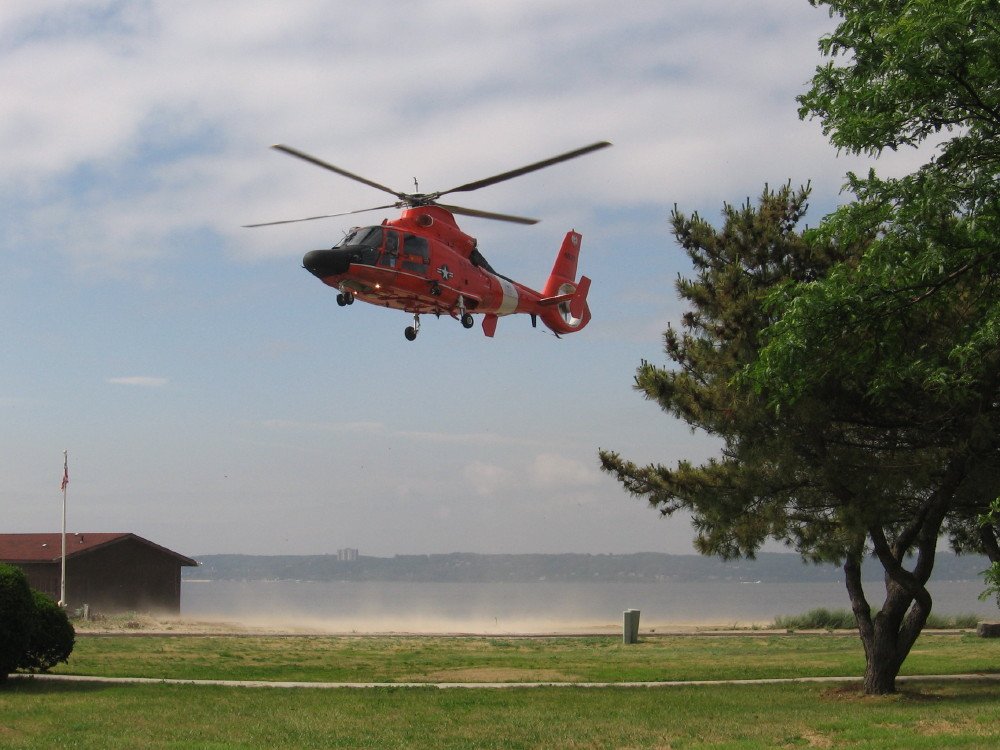
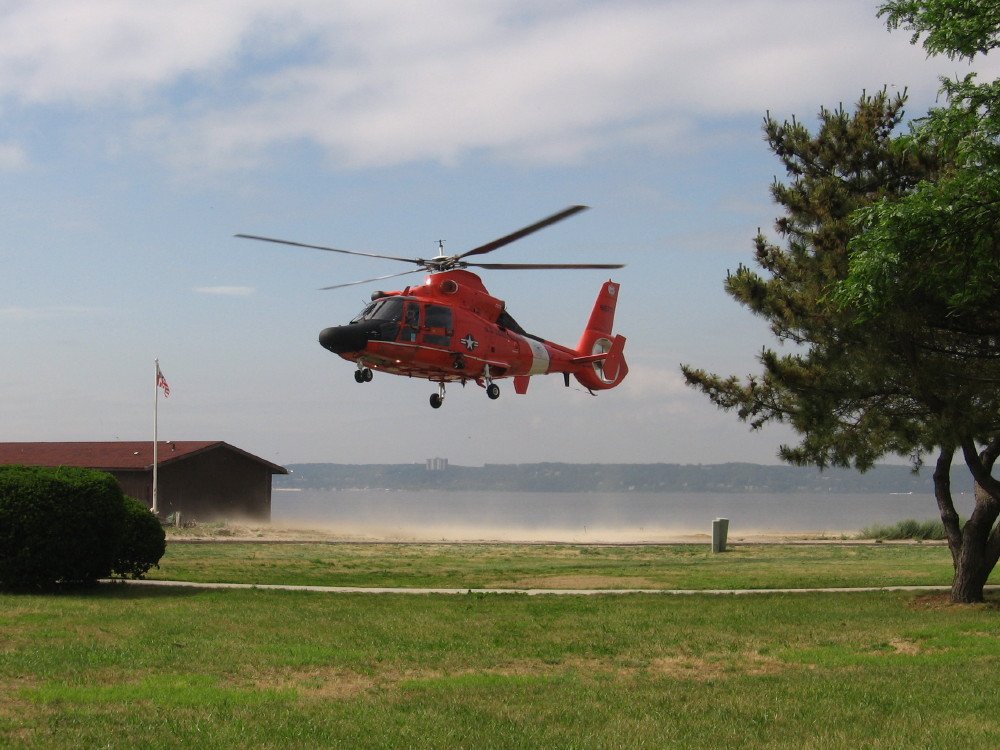
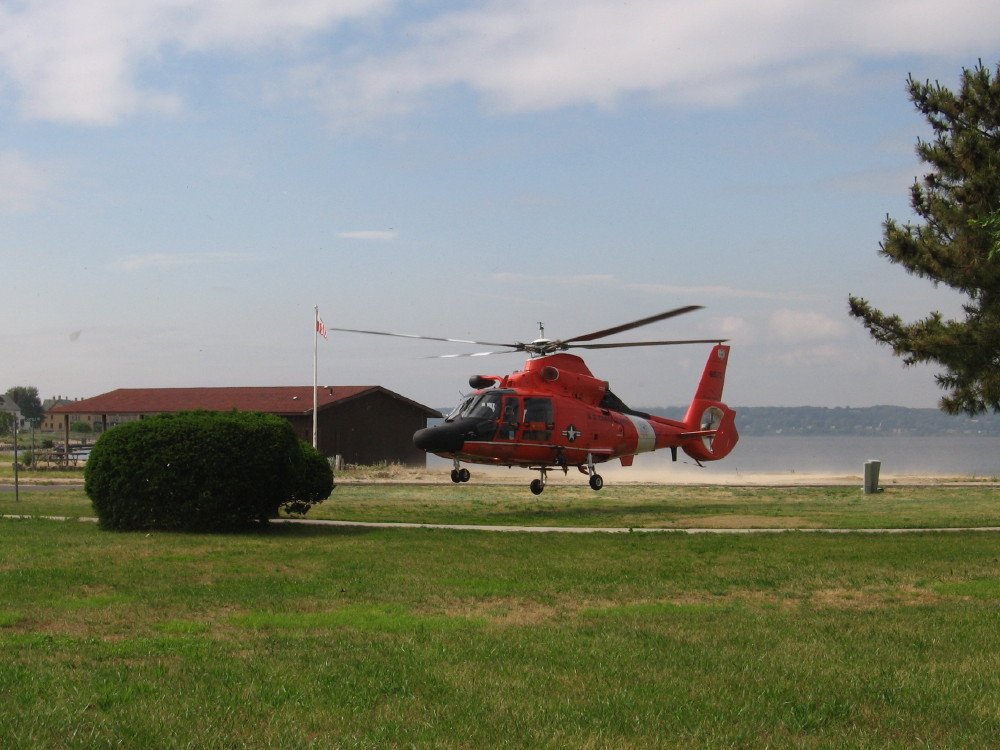
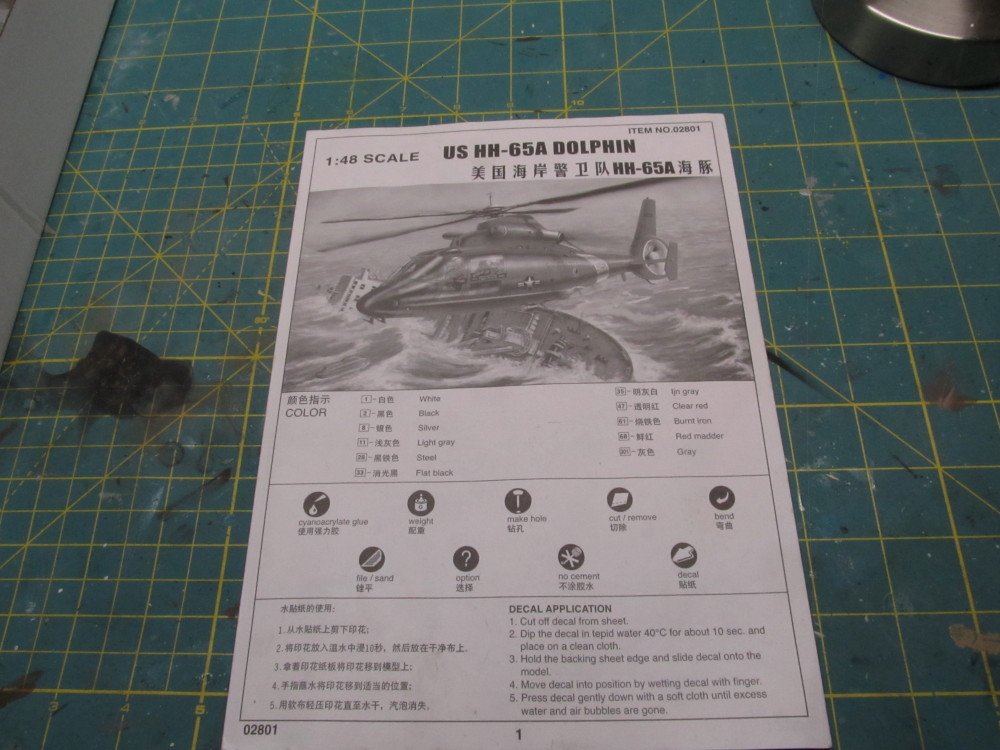
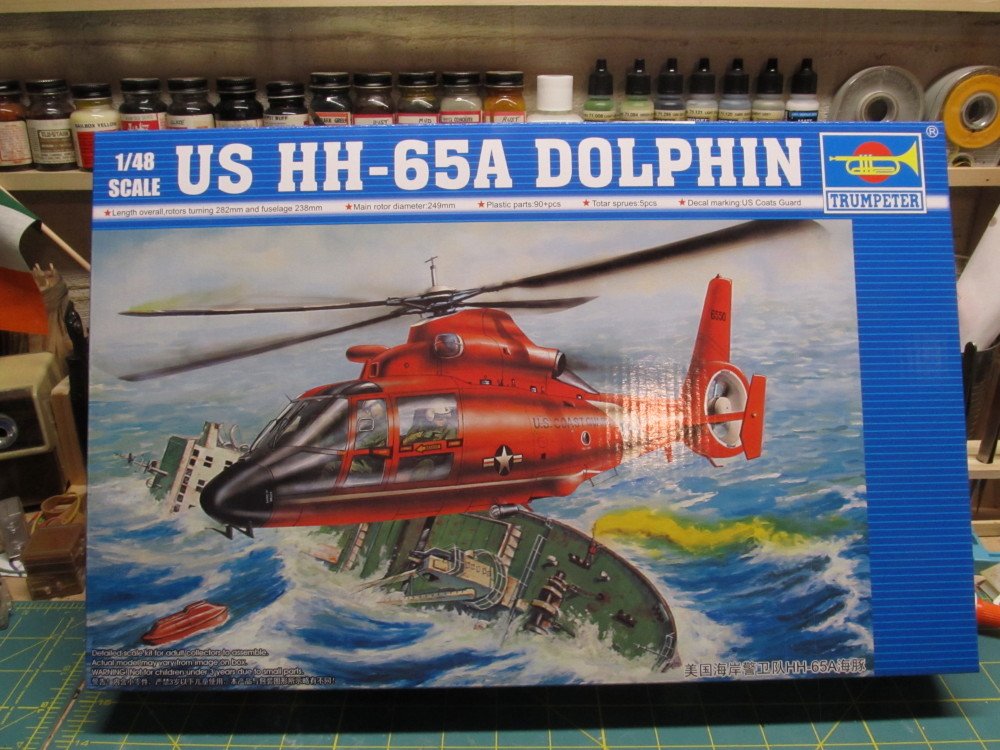
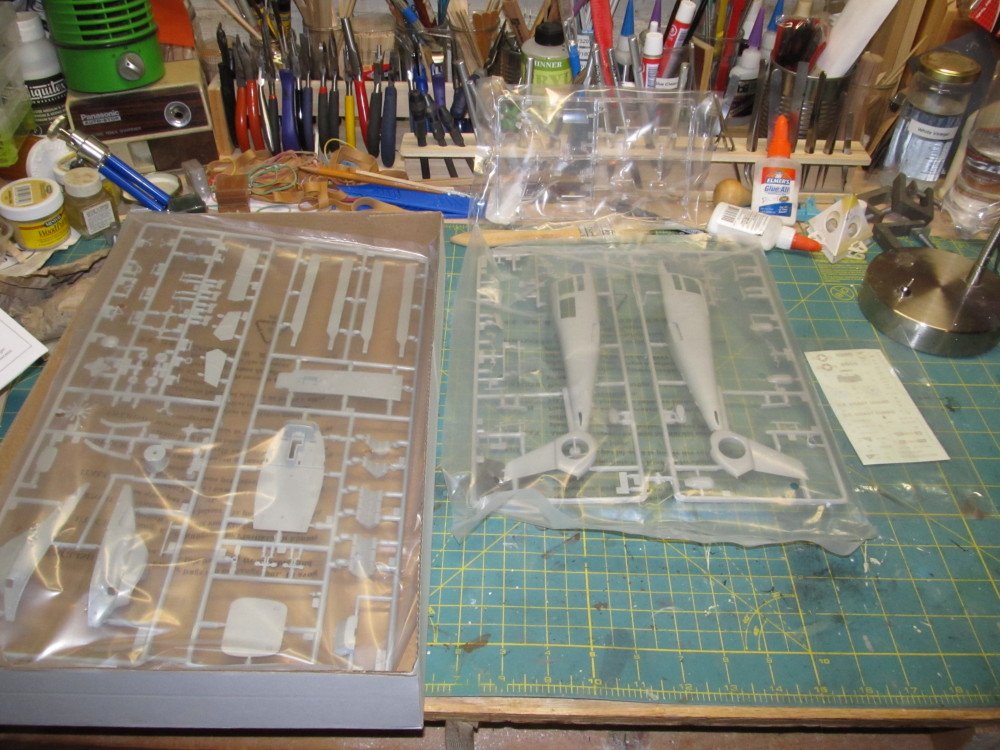
The Borg lost ! Resistance is not futile ! My next aircraft will be a somewhat smaller model than what is anticipated. That is until I can figure out where to display the other two behemoths everyone wants to see built. Some years back I was invited by a close friend who was career US Coast Guard, first as an Enlisted then as a Warrant Officer, to his Change of Command ceremony during which he assumed command of Coast Guard station Sandy Hook NJ. Attending his Change of Command ceremony were members of Air Station Atlantic City who decided to just fly over for the ceremony in one of their Dolphin helicopters. As they approached the beach to land the pilot executed a series of hold and hover maneuvers as the Dolphin descended, roughly at about 10-20 foot intervals; I was able to snap some photos each time he hovered. He is retired now after a 30 plus year in the Coast Guard. Those photos follow: On approach Hover 1 Hover 2 Hover 3 Hover 4 - couple of feet to go Touch down And Watching him descend and hold a hover was quite impressive. And now on to the build The obligatory box and contents and instructions On examining the contents it is a well made kit, like the other Trumpeter kits I've assembled, namely the 1:350 scale ships. The next update may take a while as I need to order some paints for this model. Stay turned !

- 147 replies
-
- 12
-

-
Ah, but Jean-luc defeated the Borg ! Heh heh heh !
-
Both models finished are 2 ft in length, OC, takes a lot of bench space, even more to paint it....... have to do some thinking on this. That's why they are stll in my un-built stash.
-
Or a "skunk works" YF-12 Interceptor ?
-
What breed is it, Denis? Face looks like my Corgi's face - see my avatar picture
-
Hahahaha ! Knew you would take the bait, Lou ! Actually there are only 4 un-built aircraft kits in the stash, all 1:48 scale, and 2 of the 4 are huge. It's not the -C130 cargo, Lou, but rather the Lockheed AC-130A Hercules Gunship. But then I do have veto power . Patience my friend !
-
You guys are seriuosly tempting me to drag out the Testors 1:48 scale AC-130 Gunship kit from my stash. I got it decades ago shortly after I built the Testors 1:48 scale C-130 Cargo plane, measure 25 inches long with wingspan of about 37 inches, give or take. Was going to build both until I realized I had no place to display it. The Borg are calling
-
Glad you liked it, Lou.
-
Thanks Kevin