HOLIDAY DONATION DRIVE - SUPPORT MSW - DO YOUR PART TO KEEP THIS GREAT FORUM GOING! (Only 27 donations so far out of 49,000 members - C'mon guys!)
×


Jack12477
-
Posts
5,665 -
Joined
-
Last visited
Content Type
Profiles
Forums
Gallery
Events
Everything posted by Jack12477
-
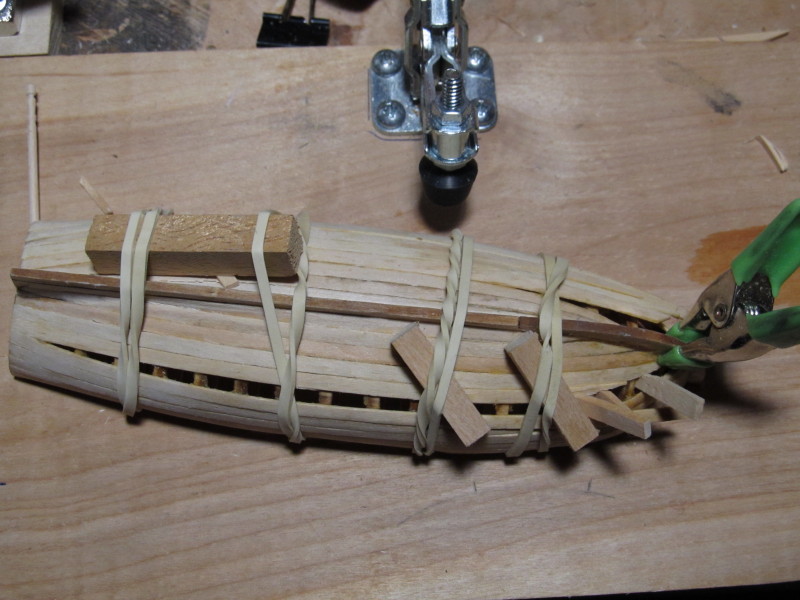
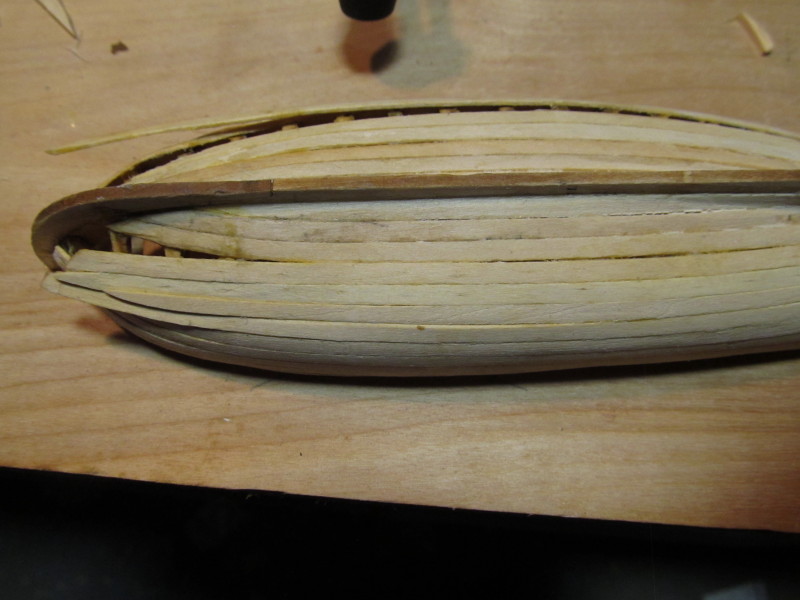
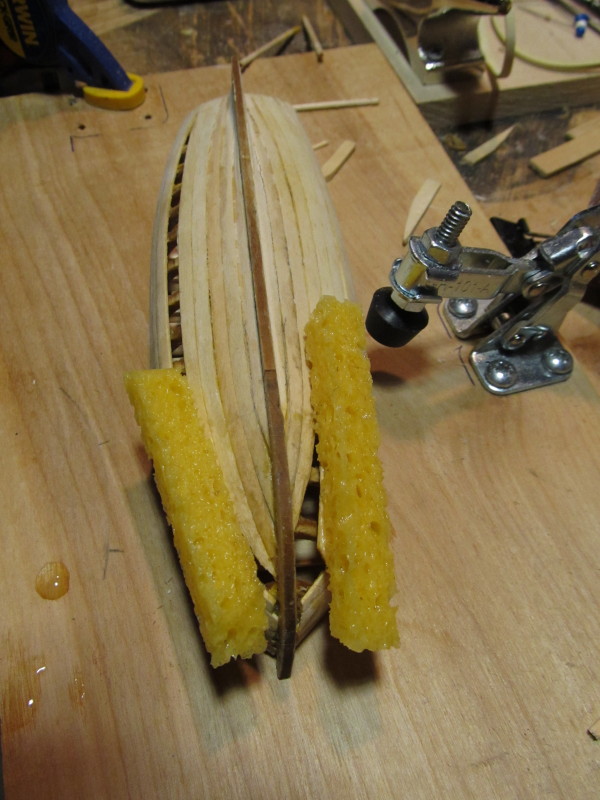
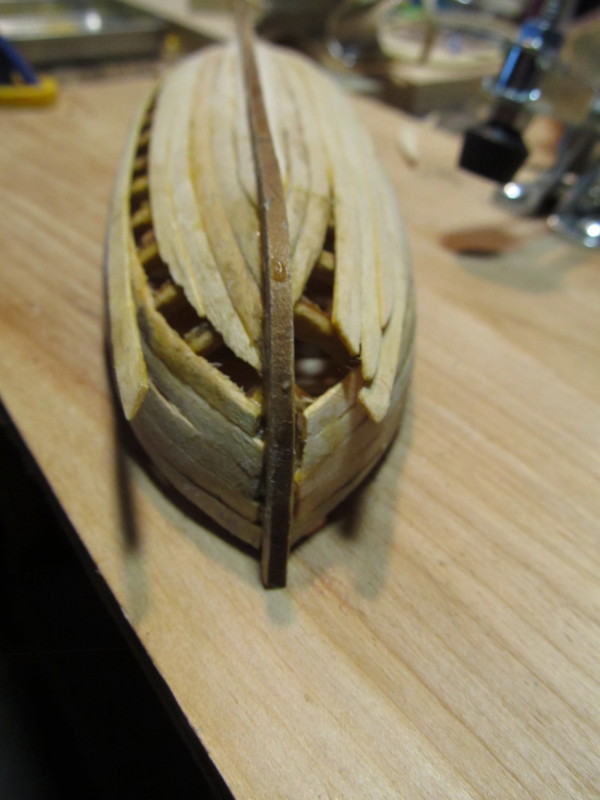
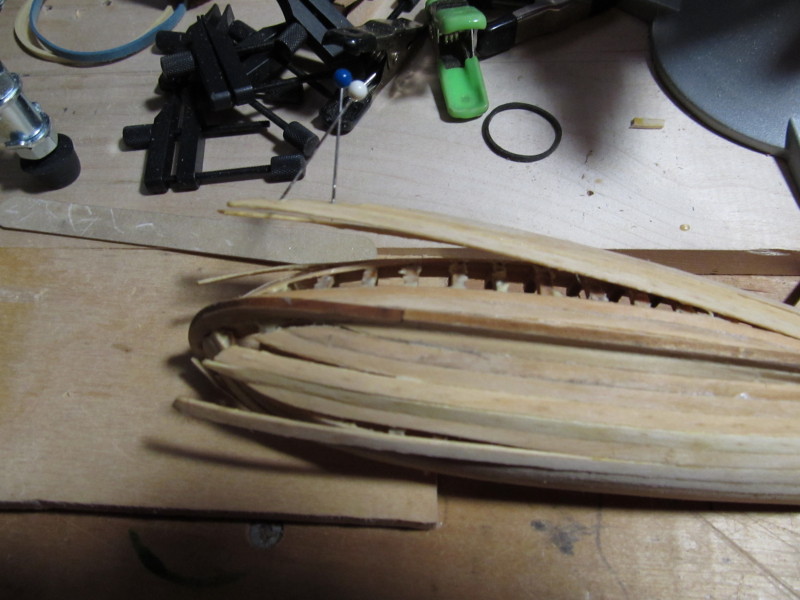
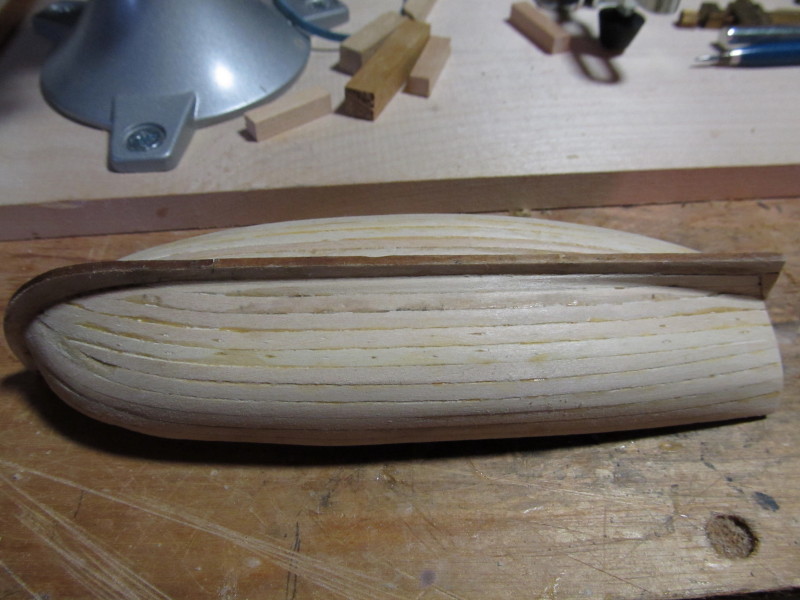
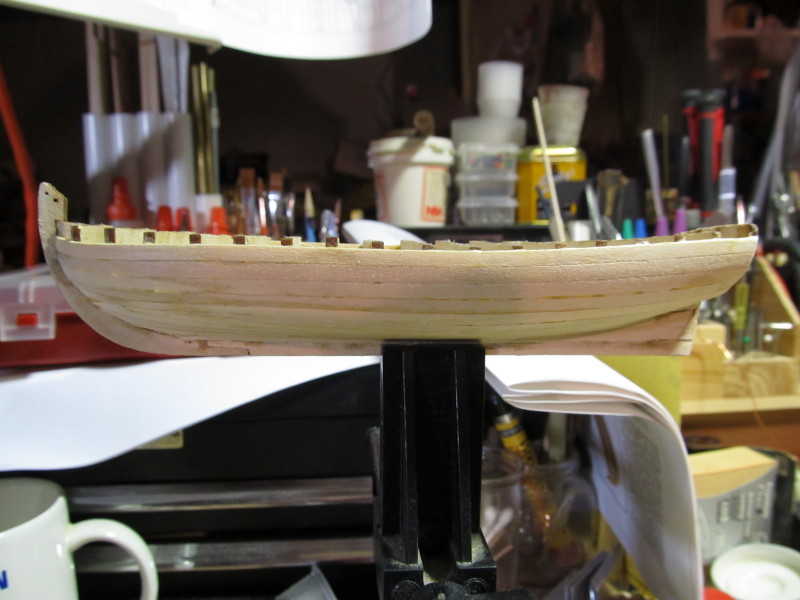
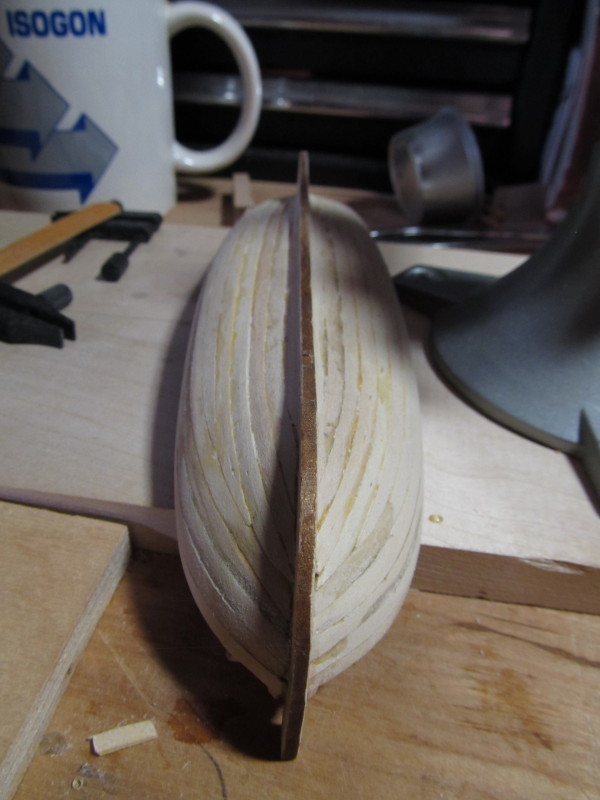
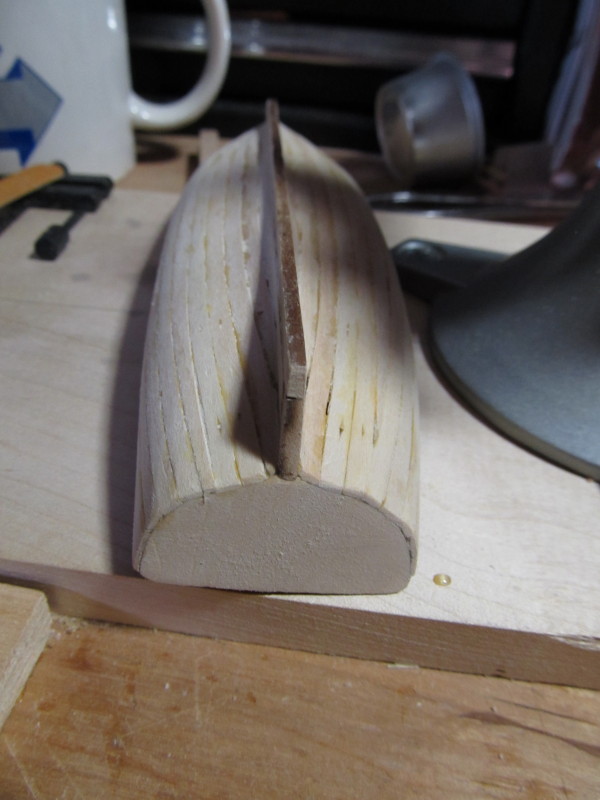
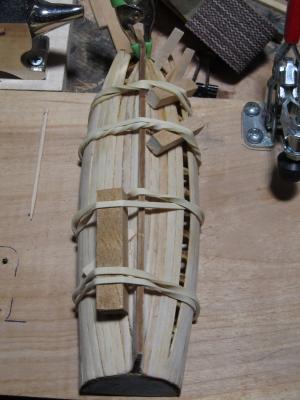
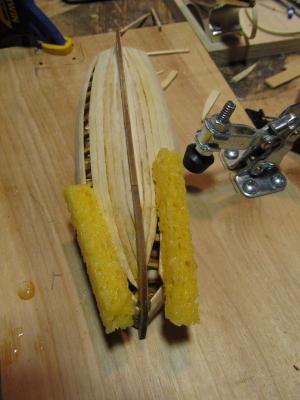
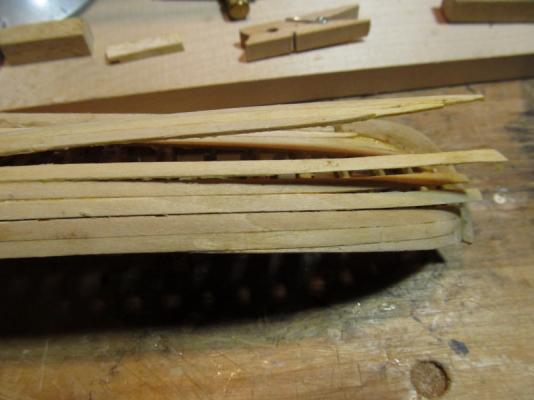
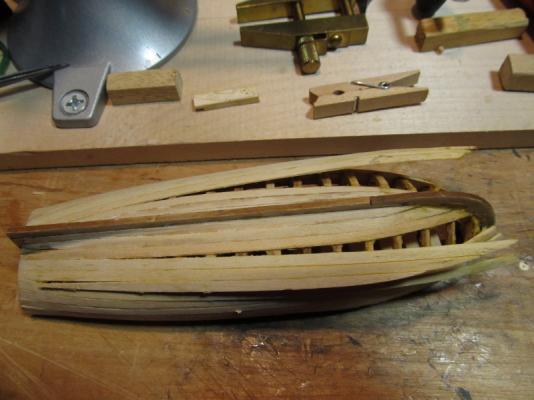
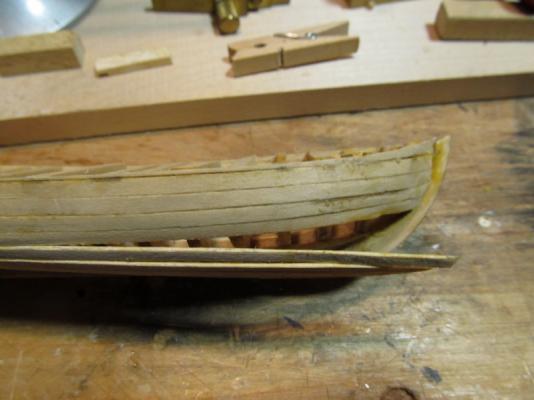
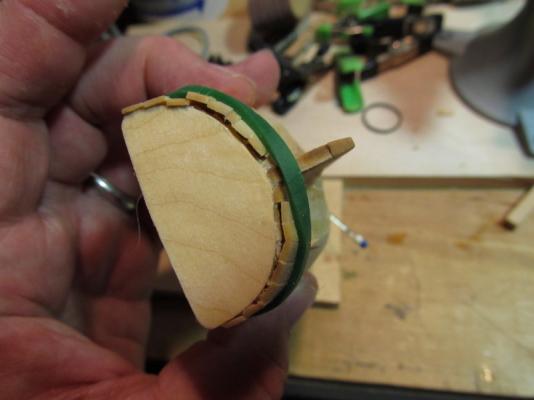
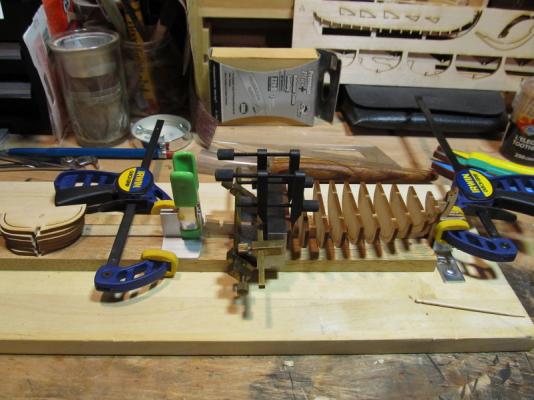
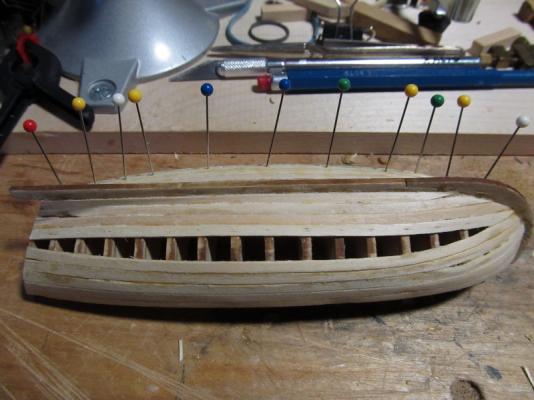
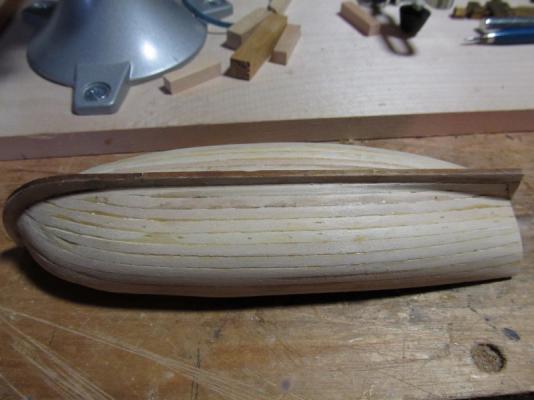
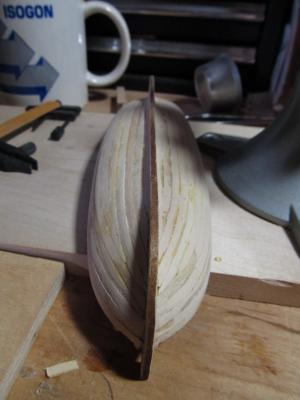
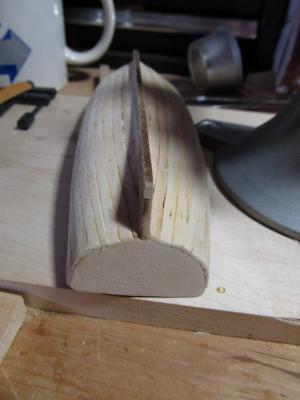
 Floyd, thanks for the encouragement. Yes, I was pretty tempted to just pitch the thing in the trash can. But slow progress is being made. As I said in an earlier post, I took one of my admiral's cosmetic sponges and cut it into narrow strips of varying lengths. I then soak then in water and lay them along the length of the plank(s) I need to re-bend and re-attach, let then soak for hours before attempting to bend them back into place. The attached photos show the current progress: First set re-attached and held by clamps After removing the clamps: Now soaking the remaining planks: The last plank on the left side in photo will be either re-attached (I saved it) or a new one fashioned to fill the gap. Then I can hopefully pick up where I left off without any more stupid mistakes. Happy Thanksgiving to all my American modellers. It's time to get out of the shipyard and go "get stuffed"
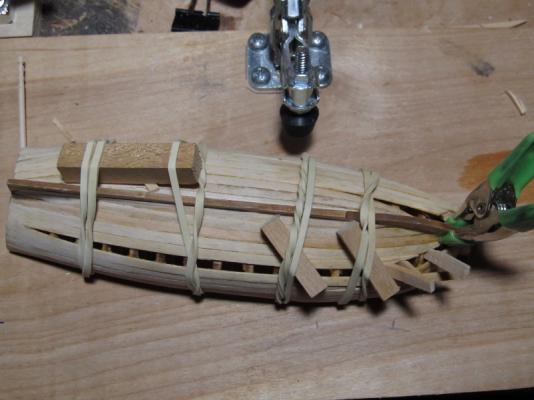

- 41 replies
-
- 5
-

-
- 18th century longboat
- model shipways
- (and 1 more)
-
Gil, just got to see your latest post. Magnificent workmanship ! Absolutely beautiful model.
-
Mike, I have to echo the sentiments of all the others. Truely impressive machining.
-
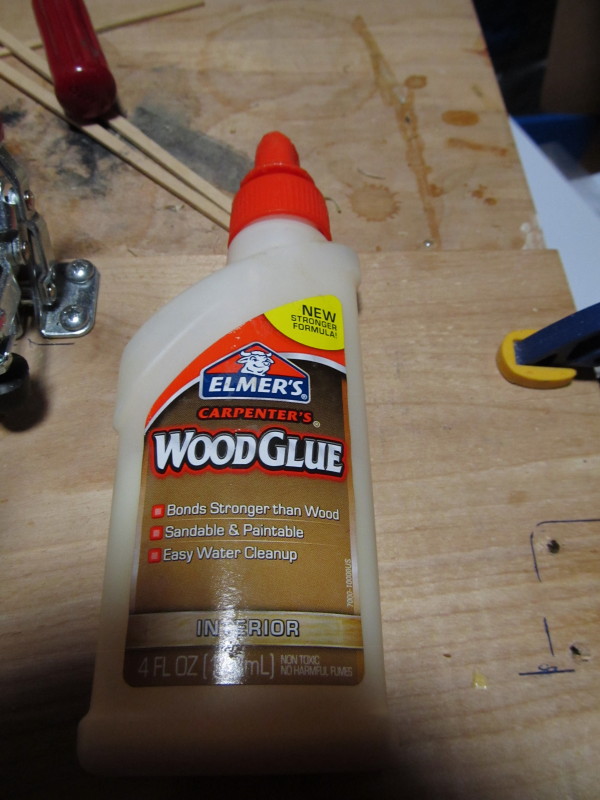
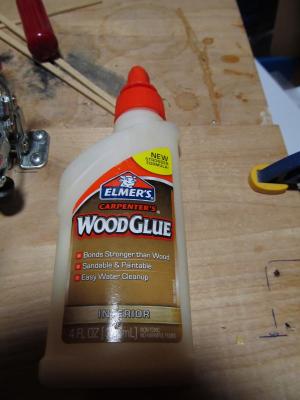
Per, thanks for stopping by. I'm afraid it is more than just the 3rd plank, it's half the hull on both sides. The water bath dissolved the glue and they all popped loose. Then when the planks all dried they became very stiff and unbending. Apparently this particular brand of Elmers is not waterproof and can be unglued with water. I've switched over to their Titebond II brand. I'm now alternating between Slow CA (10-15 sec) and Titebond II to reattach them. I've cut small strips of sponge, soaked them in water, and then lay the sponge along the planks to "soften" them, then putting a small drop of CA on every third bulkhead and Titebond on the others and slowly press the planks back in place, pushing them back into alighnment with my fingers. I'm finding my fingers are a better clamp than any of my mechanical clamps. It's a very slooooow process but it seems to be working. I have to leave the sponges on the planks for hours before the water softens them even to rebend them into place.. I'll post some pictures when I get a little further along with the salvage process.
- 41 replies
-
- 1
-
-
- 18th century longboat
- model shipways
- (and 1 more)
-
Port side then starboard side or starboard side then port side - which ever way you start you want to alternate sides. I generally start with either the stern-most deadeye and work toward the bow alternating port-starboard. Or I start at the bow-most deadeye and work towards the stern, Do this for each mast. I generally start with the foremast and work my way aft. Each shroud overlaps the previous shroud at the trestle-tree. Sorry I don't have a diagram or way to draw it here.
- 1,756 replies
-
- 1
-
-
- constitution
- constructo
- (and 1 more)
-
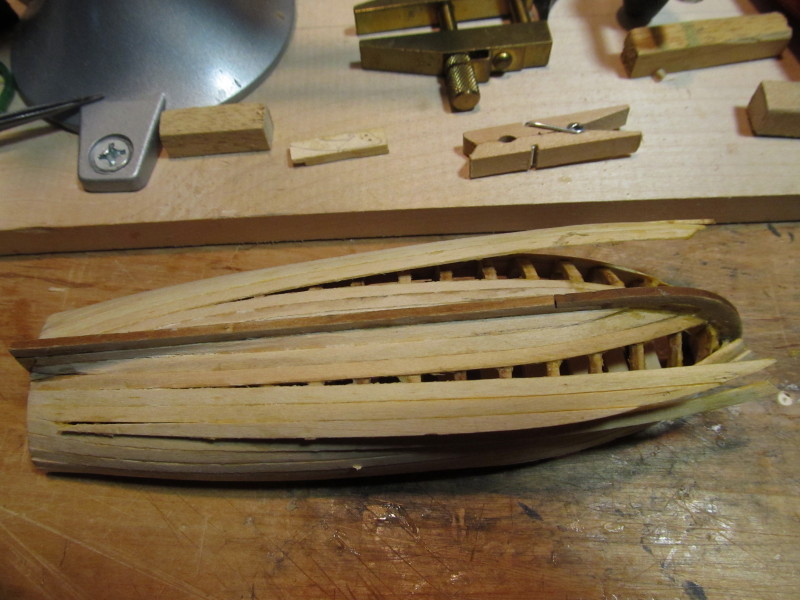
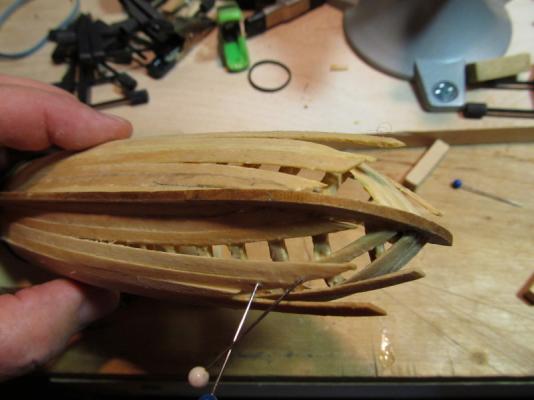
Ryan, thanks for taking the time to post your photos. I'll have to recheck my garboard plank measurements and compare them to your photos.Your planking looks much better than mine. Right now I'm on hold waiting for a response from Model Expo on my email request for parts replacement. While I'm waiting, I am looking at alternative solutions. Trying to disassemble this mess will probably break the false keel and/or frames. I've already had to completely reattach the stern and get all the planks reattached to it. I installed cross-braces between each frame to keep the frames from breaking but in the process broke the tip off the bow stem (the bow filler block delaminated and in reclamping it broke the stem tip). There is a "spare" bow stem included in the kit so I can use that but I'm afraid unglueing the installed one will totally destroy it. I may do a cut/paste splice from the spare to the attached one. One solution I'm going to try is to take some cut up strips of sponge (from wife's make-up kit) and soak them in water and them lay them on the planks to see if I can "soften" the planks and get them reattached. Or maybe I can just detach the planks entirely and install new ones. If not I guess I'll have to start over. I'm trying to use the CA as little as possible and stick with the Carpenters yellow wood glue, which is my preferred glue. Either way I'm going to be in the shipyard for a while figuring out a solution. Here's photos of the "mess": Thanks for your advice, it is much appreciated.
- 41 replies
-
- 3
-
-
- 18th century longboat
- model shipways
- (and 1 more)
-
Yes, it's a mess ! Can't reprint here what I was calling myself for that blunder but you all can imagine I did see BobF's tutorial in his build log and tried to use it (unsuccessfully) as a guide . Couldn't figure out how to use the "diminishing line grid" or more explicitly where to place the first tick strip on the grid for the scale I'm using. I also did like you and tried to eyeball the curve on each modelers build but found that to be somewhat frustrating as the perspective of each photo was off (bad angle) so the true radius was distorted. Oh well ! Now to figure out how to recover the planking and reattach it to the frames without starting a complete rebuilt with a new kit. Slow setting CA might help hold them while the wood glue sets, but I am loath to using CA as it is very unforgiving. I've used CA Debonder to "unglue" misaligned planks but it leaves a mess to clean up. Thanks for following my build and the advice.
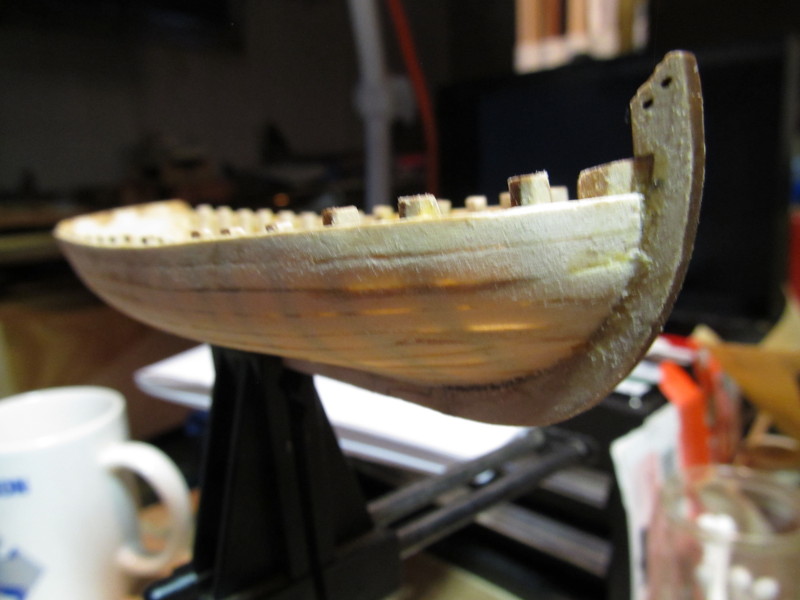
-
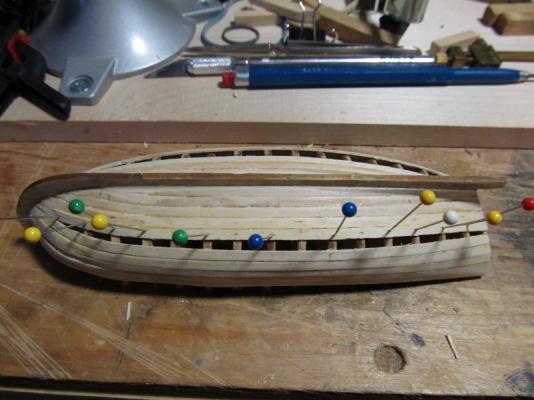
Ryan thanks for the review and advice. Your observations are spot on. I had a lot of trouble figuring out the radius of the curve for the garboard first and second plank. Took 3 tries and 3 un-glues before I got it reasonably right. The real problem tho is the 1st sheer plank at the gunwale It wasn't set high enough at the bow. The last planks (middle) were full width in the center with a very sharp taper at each end. I ended up with 11 planks on each side instead of the 12 that Chuck had specified in the instructions. My solution was to edge glue another sheer plank at the gunwale and get it aligned with the bow then plane it down to super thin at mid-section. It worked! Until I pulled a really dumb move. I tried to soak the whole boat for 5 minutes to see if I could get some of the indents caused by the clamps out of the planks. WRONG IDEA ! Apparently you don't really need isopropyl alcohol to unglue Elmer's Carpenter Glue - just plain old H2O will do the job even quicker. I guess it isn't really a PVA type glue but it's what I've used on all my models without problems. Photos of the disaster in the shipyard follow: So the Build Log will be on hold for a while until I can either repair the damage or start over with new planking. Will update when I figure it out. In the meantime, if anyone has any suggestions/recommendations on how to calculate the radius of the curve on the garboard planks, I would greatly appreciate hearing from you. Edge bending is new for me and I had a lot of trouble getting the curvature on the first to planks set. The sheer plank(s) were less of a problem as I could just clamp them in place wet and let them dry overnight before glueing them in place. I guess I won't be getting my ration of grog for this screw-up

- 41 replies
-
- 3
-
-
- 18th century longboat
- model shipways
- (and 1 more)
-
Nice planking, Mike. Wish mine came out looking as good as yours.
-
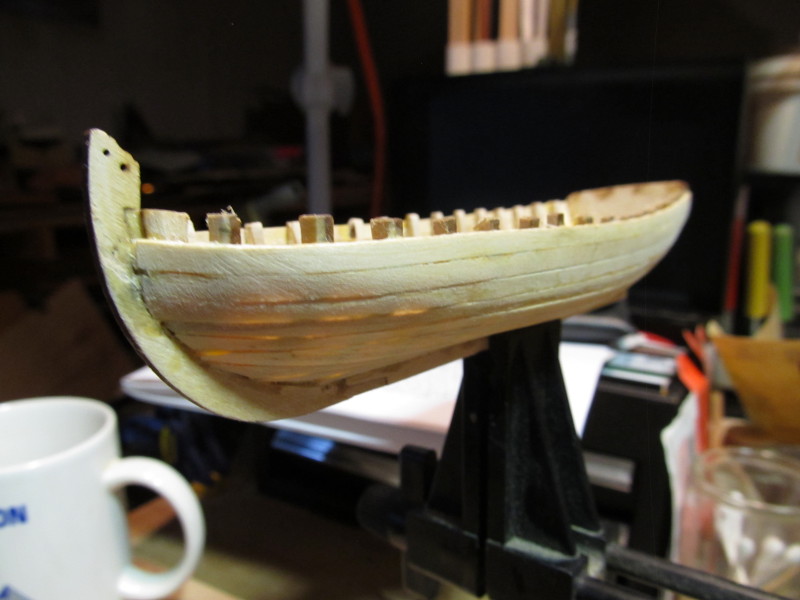
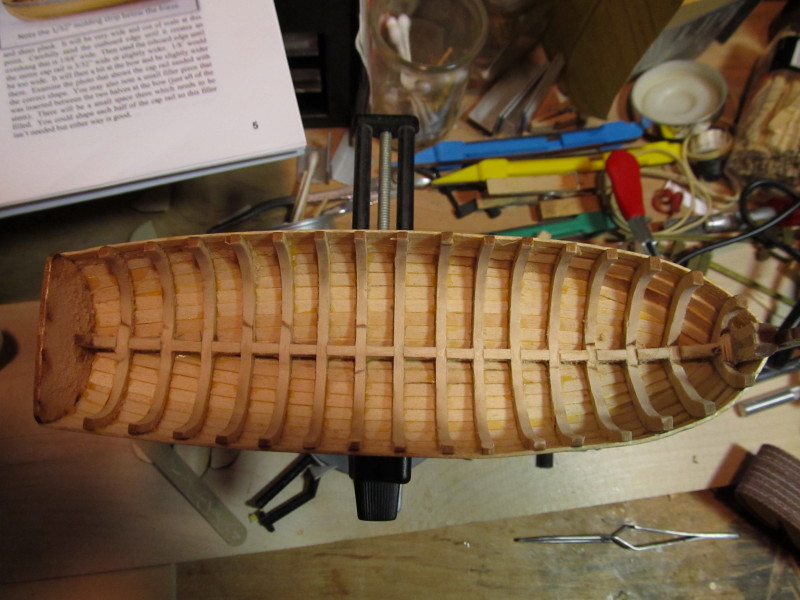
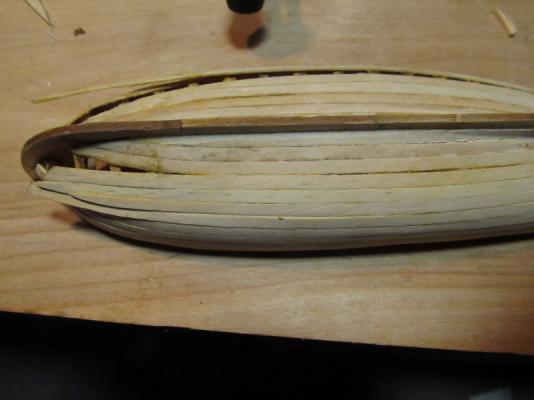
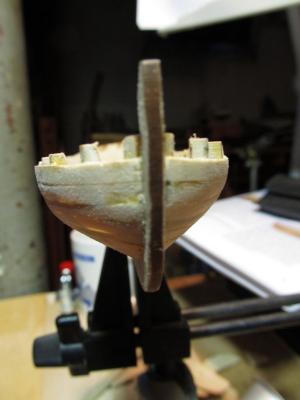
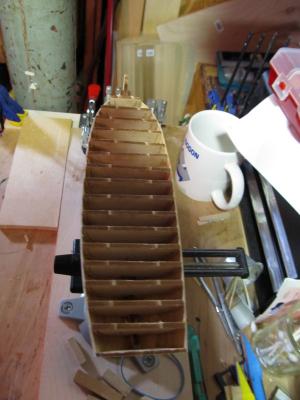
More photos this morning: After looking at the boat again and comparing it to other member's models, I think I made the first plank a little to low at the bow (clamping problem ?). Didn't see it till I was finished. Easy correction I think is to just add an additional plank above and then taper it with my miniature plane down to the stern. Since the friezes will be applied over it I doubt the mistake will be even noticed. Comments anyone, before I move on ????? After removing the centers and sanding them down:


- 41 replies
-
- 7
-
-
- 18th century longboat
- model shipways
- (and 1 more)
-
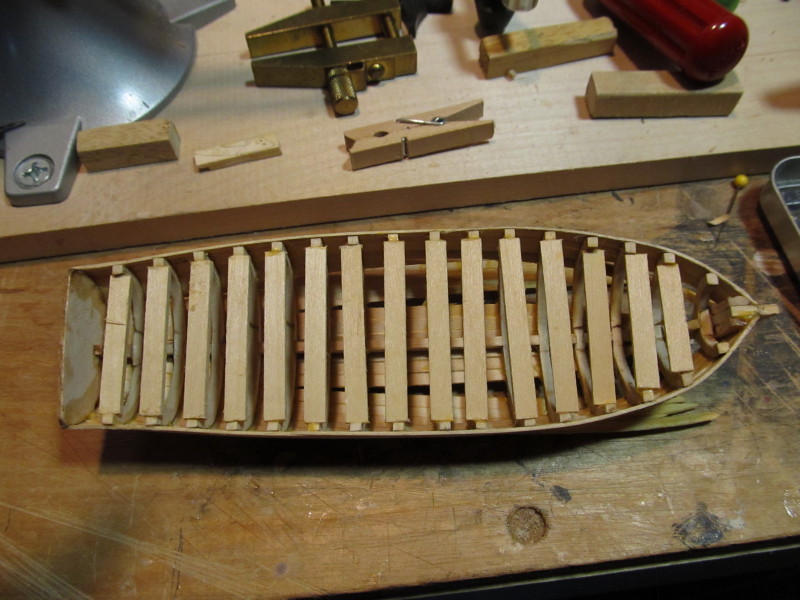
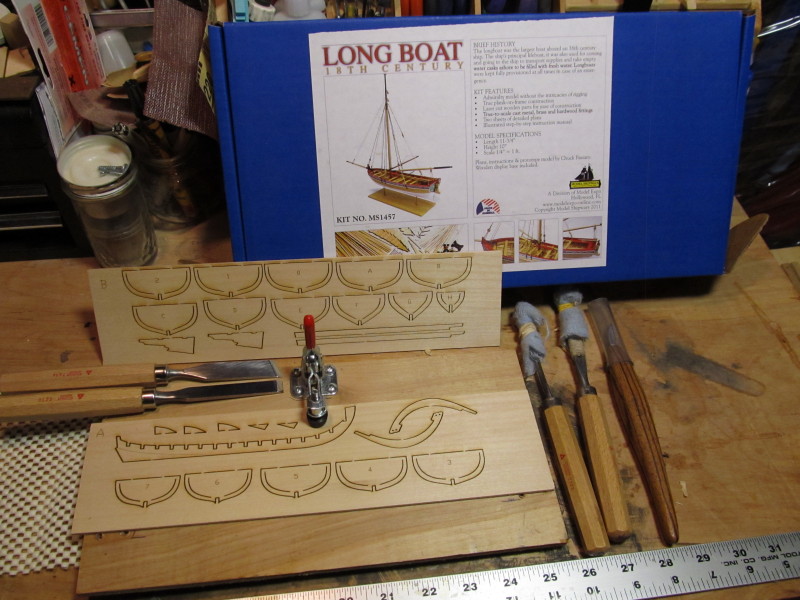
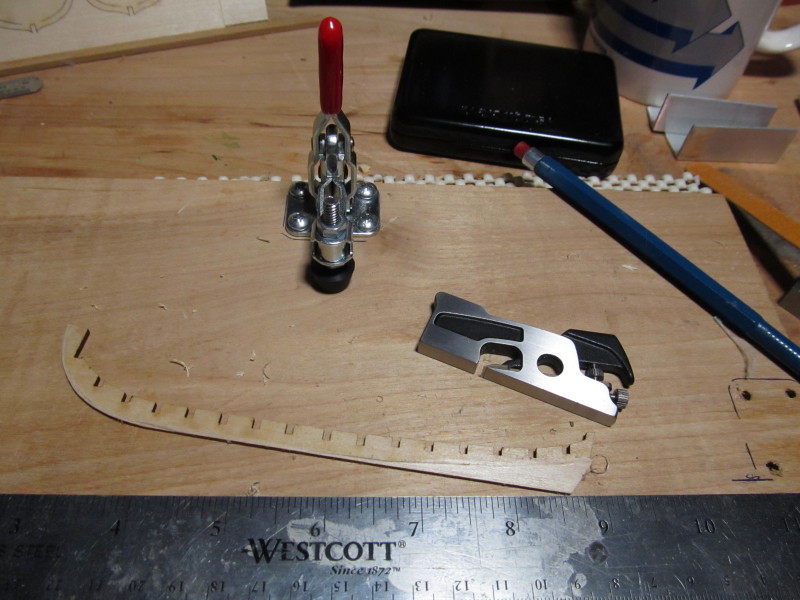
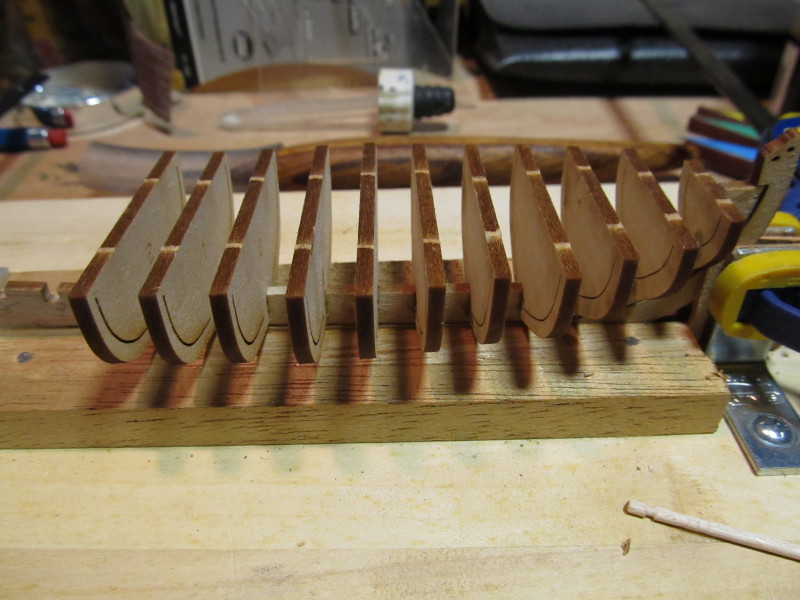
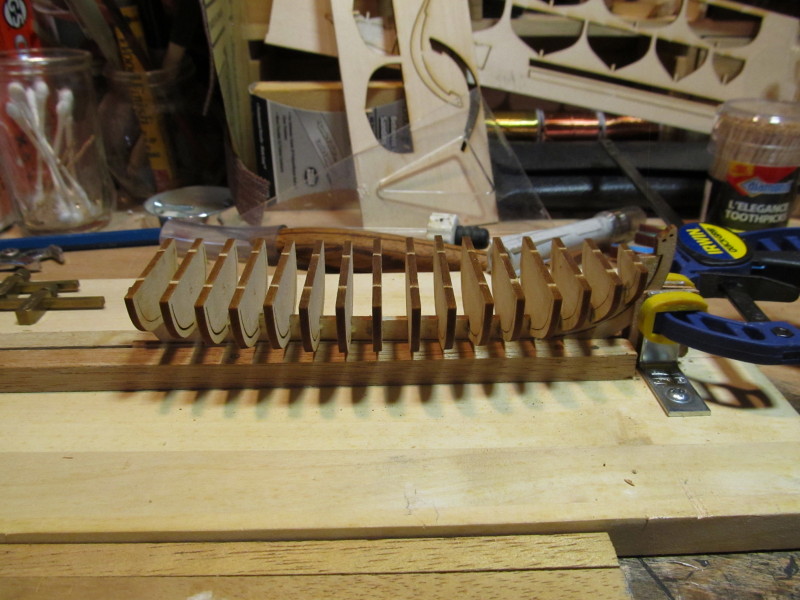
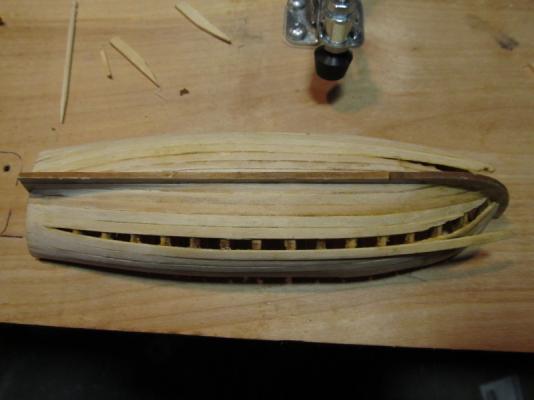
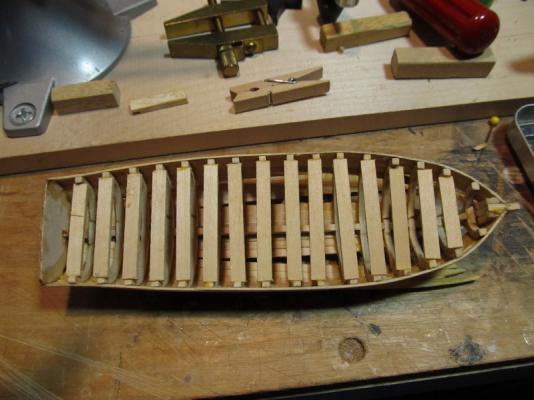
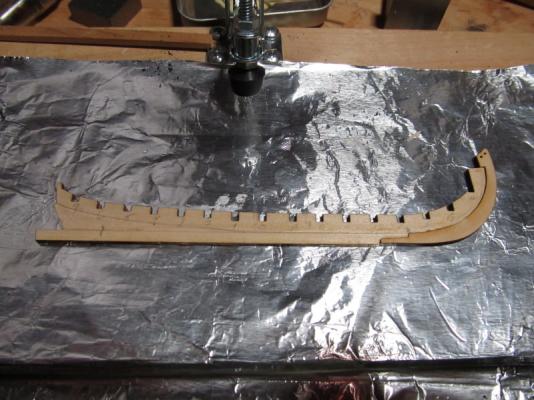
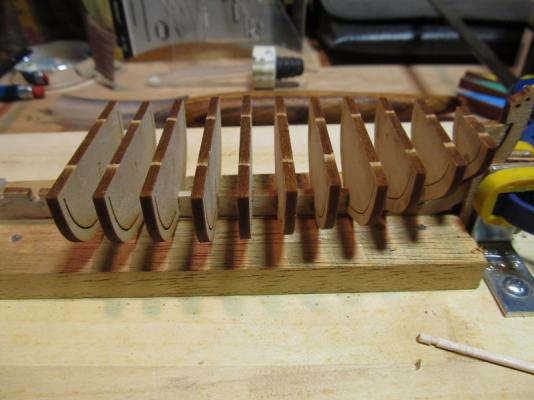
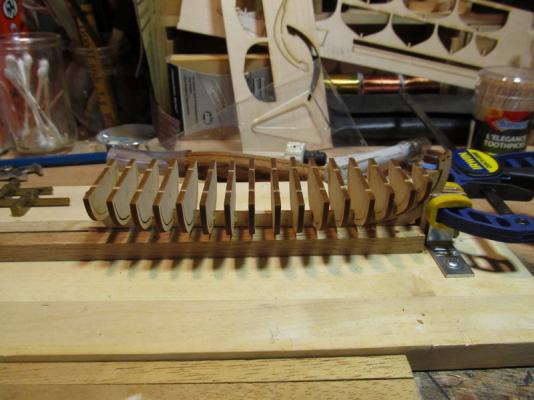
After reading all the build logs of other members, I decided to get this kit and start building it before I start all the other model kits in dry dock. This is my first build log so please bear with me while I become accustomed to this system. First the customary opening photos: Laying the keel. (The miniature shoulder plane really works and is great for small parts) Building the frames: Planking underway: Planking completed: I think the planks are either set too low or the frames need trimming down ? (Always have trouble getting the first plank set at the right level below the bulkhead/frame top edge.)


- 41 replies
-
- 6
-
-
- 18th century longboat
- model shipways
- (and 1 more)
-
Fabulous work Ed. How long is the model? I'm guessing close to 4 feet ?
-
Yep, I use them all the time when I'm doing my woodcarving. They've saved my hand/fingers many times.
-
Ed, have you tried using Mozilla's Firefox? I use it exclusively and have no problems. But them I'm a die-hard and am still on Windows XP. My Admiral has Windows 7 on her laptop with Mozilla Firefox and I had no problems accessing or posting to MSW from her laptop (while my laptop was getting a new fan installed)
- 3,618 replies
-
- 2
-
-
- young america
- clipper
- (and 1 more)
-
Very Impressive machining Michael
-
I see an ad for the Franklin Institute of Rochester NY - an early predecessor to the present day Rochester Institute of Technology.
-
Nice job of machining Mike.
-
Just Wishing ...work benches (edited)
Jack12477 replied to BubbleHead's topic in Modeling tools and Workshop Equipment
This portable vise from Sjoberg is pretty handy also. I think it's around $100 (USD) -
Just Wishing ...work benches (edited)
Jack12477 replied to BubbleHead's topic in Modeling tools and Workshop Equipment
Woodcraft carries that same brand in two smaller sizes - one about 3 foot long and the other about 5 foot long - the smaller one is called Hobby Plus 850 and is priced around $360 (USD) - I picked up the smaller one about a year ago on one of Woodcraft's year end sales. Perfect for model work in a small work area. Has all the features of the larger sized ones. They are made in Sweden by Sjobergs. Am very satisfied with mine. The larger one is the Hobby Bench 1340 and is priced around $412 (USD) Hobby Plus 850 -
I go to Jo-Anns or some other Fabric/Arts & Crafts store and get Beading Needles - the kind use to string beads - they are flexible metal wire with a loop in one end that collapses as you pull the thread (line) through the whole in the deadeye or block. The come in packs of 8-10 and are relatively inexpensive and last for quite a while.
- 1,756 replies
-
- 3
-
-
- constitution
- constructo
- (and 1 more)
-
Mike When we opened the restored 1869 Saugerties Lighthouse back in 1990 we had, on loan from the Elco Electric Launch Co, an Elco electric launch very similar to the one in your photos above that ferried visitors to and from our Lighthouse during that summer/fall season. Elco as you will recall is the company that built the WWII PT boats, amongst other Yachts. The company is still in existence about 25-30 miles north of me in Athens NY. The photo below is one of their electric launches, similar to the one they loaned us. Looking forward to seeing your completed model.
-
Chuck, what thickness of brass do you recommend using to create the shaper ?
-
Cutting Lap joints for Deck Furniture, etc.
Jack12477 replied to Stuntflyer's topic in Modeling tools and Workshop Equipment
Mike Were you able to get the results you wanted with this bit? Jack -
Cutting Lap joints for Deck Furniture, etc.
Jack12477 replied to Stuntflyer's topic in Modeling tools and Workshop Equipment
Mike, That's the one. There's also a narrower version of that bit, 1/8" , depending on how wide you want the lap. Have fun ! Glad I could help. Yes, sometimes the CS folks can be a little clueless. Jack -
Cutting Lap joints for Deck Furniture, etc.
Jack12477 replied to Stuntflyer's topic in Modeling tools and Workshop Equipment
Mike Couldn't view the video - guess it's for subscribers only. To answer your original question about half lap joints - yes, I believe you could use the Dremel Shaper table with either the #650 1/8 " or #654 1/4 " straight bits to achieve a half lap. Dremel's website shows this result for these two bits. So if you move the bit over to the side more it should result in a half lap joint. From my experience just playing with the Shaper table you will definitely need two feather boards - one to as a hold-down and one to hold it against the cutter. But as Mike Mott points out, this is probably a lot of setup for just a couple pieces. If you are doing many pieces it will probably be less time comsuming. Jack Update: I just checked a little further on Dremel's website and found this picture associated with the #654 1/4" straight bit which is, I think, exactly what you want to do.