Bootes
-
Posts
10 -
Joined
-
Last visited
Recent Profile Visitors
544 profile views


-
 CharlieZardoz reacted to a post in a topic:
LED lit/controlled cannons
CharlieZardoz reacted to a post in a topic:
LED lit/controlled cannons
-
 Mmmmm gone a bit quite here are you still building. As Desertwolf said forget the table saw for now. You can rip and cut to width and thickness practically to correct size with a band saw, then a little sanding to finish off, you can also cut the scarf's on the band saw easy enough. A planner /thicknesser is good for squaring timber and getting it down to width and thickness quickly especially with the amount of timber you are going to machine. Trust me I' m a cabinet maker.
 -
Bootes reacted to a post in a topic:
ratlines,tarred or not?
-
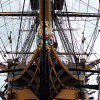
Hi Kevin I too have just found your build log and all I can say is WOW. I've only just started my Contructo Victory build so I haven't done that much yet but if it comes anywhere near the quality of yours I will be very pleased. My workshop is a 15' x 10' shed but her indoors keeps putting her junk in there!!! and I'm only 3/4 of the way through lining it. Anyway keep up the fantastic work and thanks for the inspiration. Bootes
-
Bootes reacted to a post in a topic:
HMS VICTORY by Kevin - FINISHED - Caldercraft - 1/72
-
mtaylor reacted to a post in a topic:
LED lit/controlled cannons
-
Get the beers out I'm also taking a seat. This is going to be a biggy. In the way of tools may I suggest a small band saw, a table top planner/jointer and a table top table saw. I know there is expense there but the amount of wood you have to cut, plane, shape and sand they will certainly get a lot of use.There is always second hand kit out there. Bootes
-
By the time I'm finished I'l have that much cabling coming out of the ship. I didn't know they had towed arrays in the 1700's.
-
Keith, just a thought shouldn't the sound also be to scale. I've knocked up some sounds on the computer.One for the really big and another for the light, the heavies have a really reverberating sound that rumbles on after each shot, still needs a bit of tweaking to get it just right. Unfortunately I can't post the sample for feed back. Bootes
-
Hi Keith just read through your build log. Wow your doing a great job there, I don't think I could work without a really well pictured and informative booklet. I'm only on my second wood build. I hadn't thought of the aluminium foil at the stern, great idea and will use it on my victory. As per my post, you could change out those standard LED's for Flickering ones of the same size as you have plenty of room. Keep up the good work Bootes
-
shoule reacted to a post in a topic:
LED lit/controlled cannons
-
Bootes reacted to a post in a topic:
LED lit/controlled cannons
-
Keith_W reacted to a post in a topic:
LED lit/controlled cannons
-
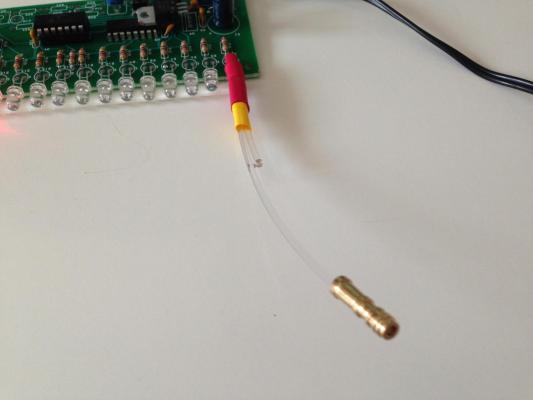
There are several ways to have flickering LED's. Flickering LED's or standard LED's controlled by a flicker unit. I've had a look around for very small 1.3mm flickering LED's but can only find them in 3mm on a well know auction site (not sure if I'm allowed to use the name). I have found two very small flicker controls on the same site, one for a single LED and the other controls four but I should think a couple of extra LED's could be added to each unit. LED range in size from about 1.3mm upwards and most come with a resistor. I have never posted a link before so I hope these work. Murton Scale Miniatures, controll unit: Link Murton Scale Miniatures, 5mm LED: Link Very small LED: Link There are plenty of LED lighting solutions on that site. I have also been playing around with cannon fire sound effects on the computer,and there are a few sound samples on the net which could be loaded into a small cheap mp3 player. Cornwall Model Boats sell an SD card 'Galleon With Cannon sound card' for £9.98: Link I think the smoke might be beyond me. Bootes
-
WackoWolf reacted to a post in a topic:
LED lit/controlled cannons
-
Hi Brian, thanks for the feed back. Yep, I have also thought about flickering LED's (1.8-2mm) for the cabins, any lanterns that might show by stairs, ship's wheel and binnacle and of course the stern lanterns. Now what about sound !!! Hmmmm
-
Aussie048 reacted to a post in a topic:
LED lit/controlled cannons
-
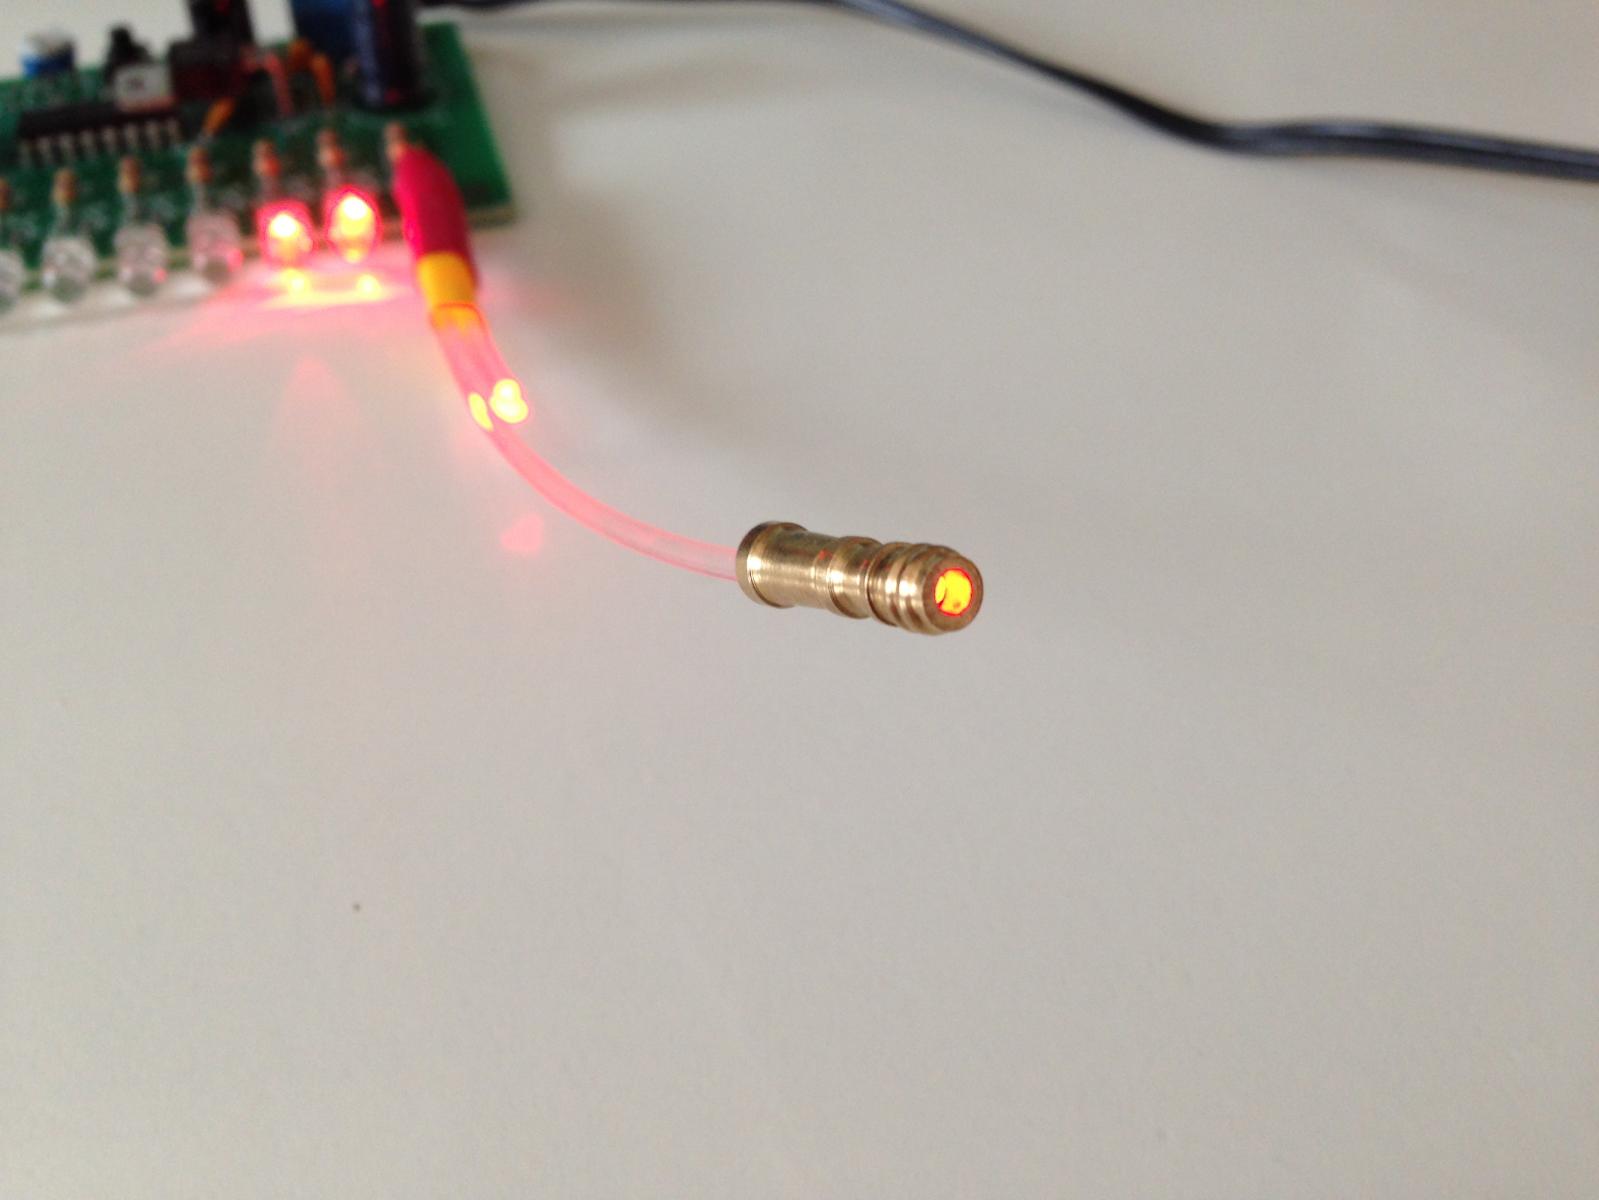
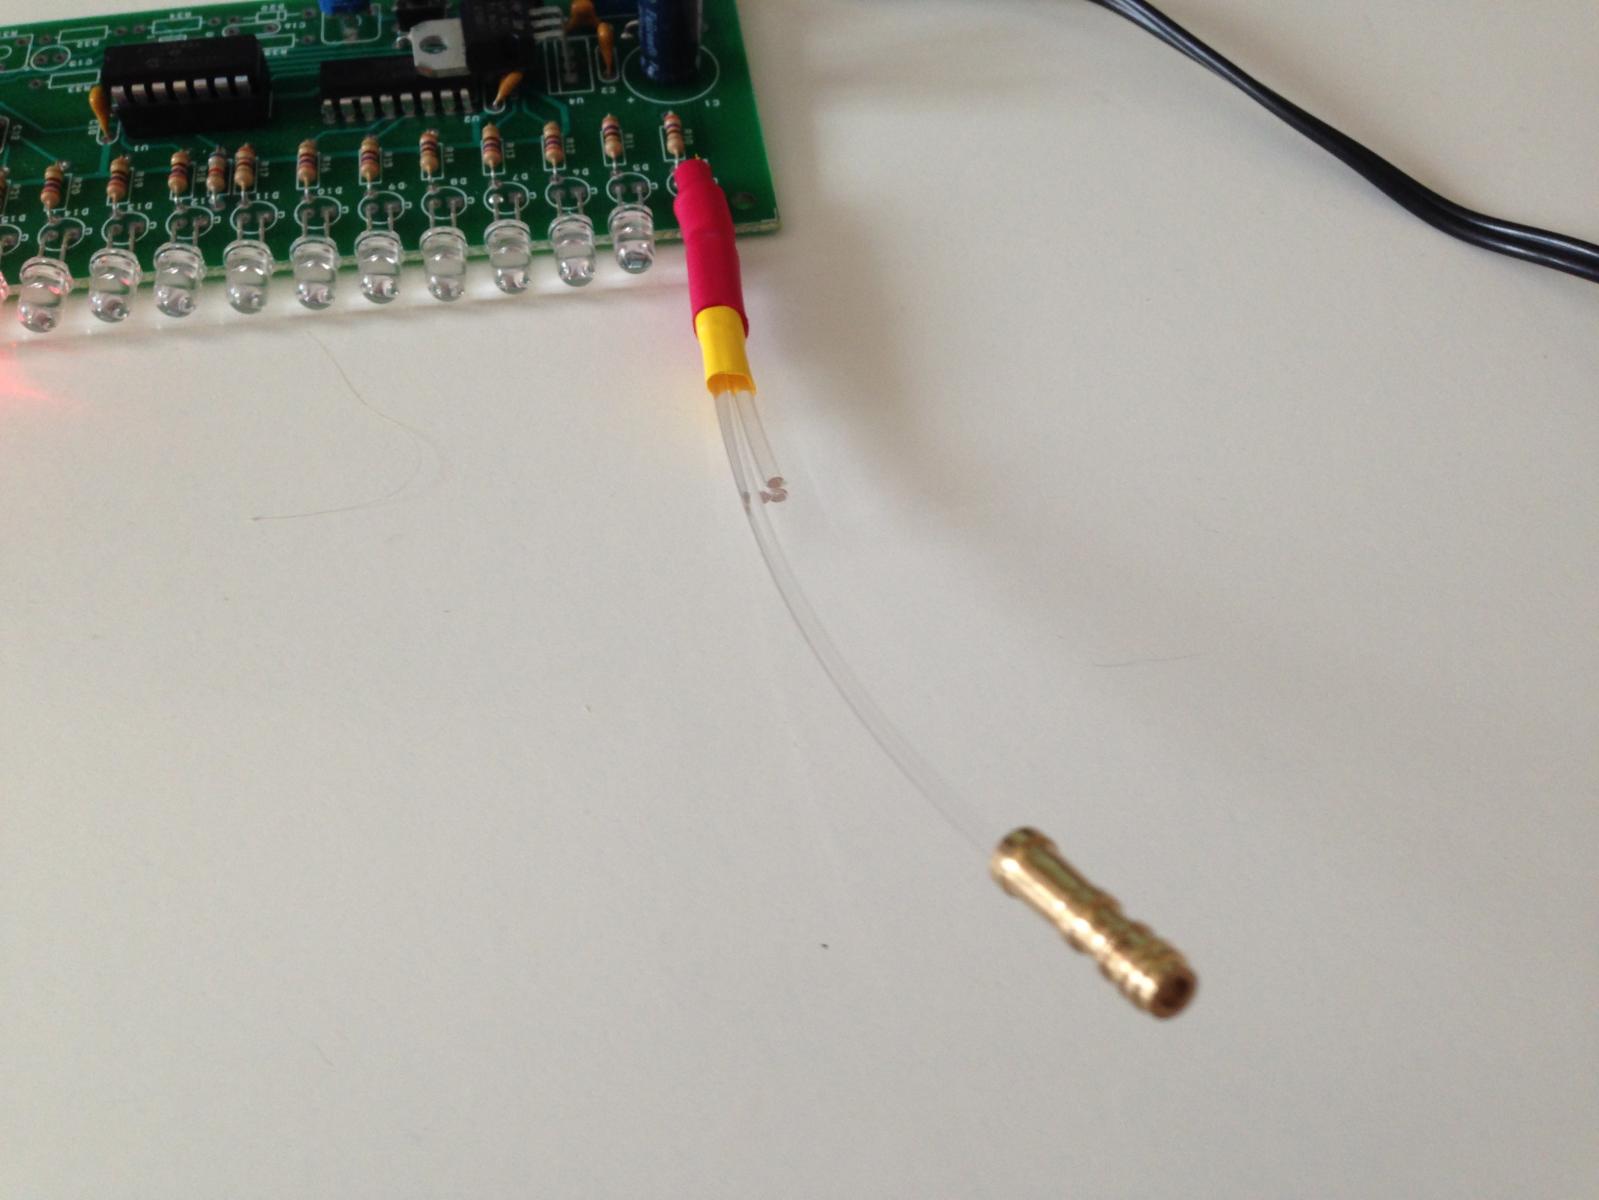
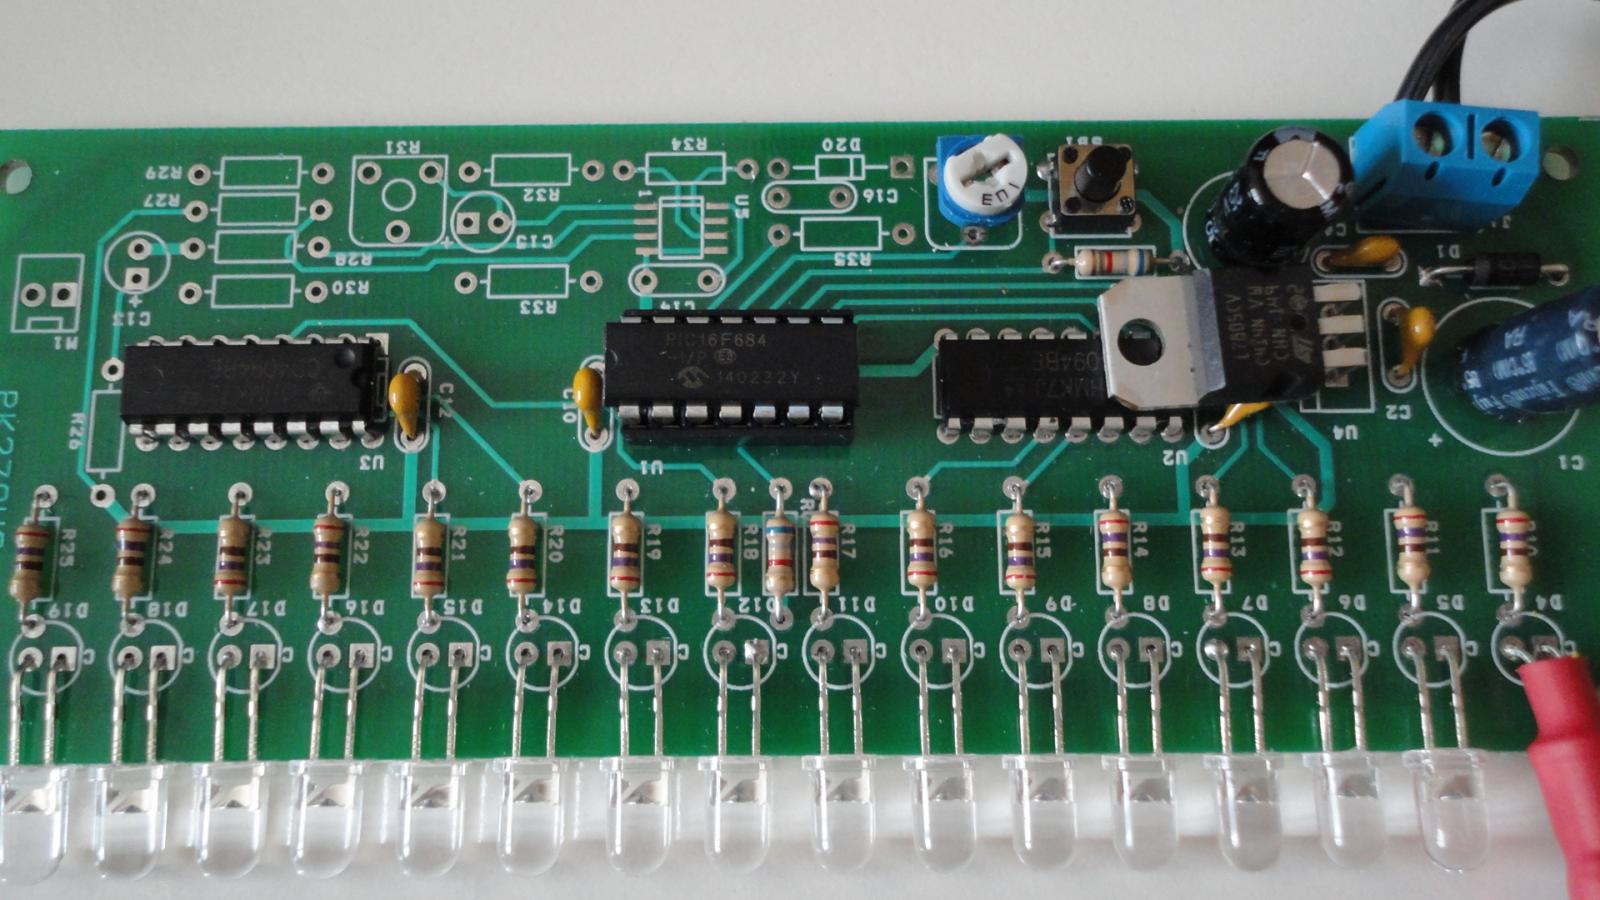
Here is something I have been toying with. LED lit cannons. Controlled by an led flasher unit (from an online auction site) with sixteen led's and eleven programs. Each led has four or five fibre optic cables held in place with heat shrink. The cannon has been drilled through with a two mm drill this also removes the fixing pin on the back of the cannon but will be held in place with the fibre optic. Smaller F/O could also be used. With a bit of playing around with the placement of the cannon end of the F/O broadside firing patterns can be achieved. Is it too cheesy. Please let me know what you think. Bootes


-
Bootes reacted to a post in a topic:
Deck planking - simulation of caulking
-
WOW, I am so jealous, just looking into getting my Constructo Victory. OMG am I going to need to buy a lot of clamps. You've made a really great job of the hull. keep up the good work. Bootes