-
Posts
2,649 -
Joined
-
Last visited
Content Type
Profiles
Forums
Gallery
Events
Everything posted by JSGerson
-
Sport - I thought I mentioned, I used file folder cardboard stock.
- 974 replies
-
- rattlesnake
- mamoli
-
(and 1 more)
Tagged with:
-
According to the Practicum, the next step is the construction of the mast top. I’m putting that on hold while I construct the other two masts. I plan to construct all three masts at approximately the same time.
- 974 replies
-
- rattlesnake
- mamoli
-
(and 1 more)
Tagged with:
-
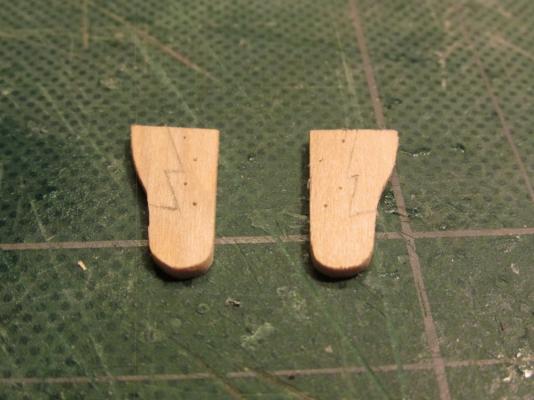
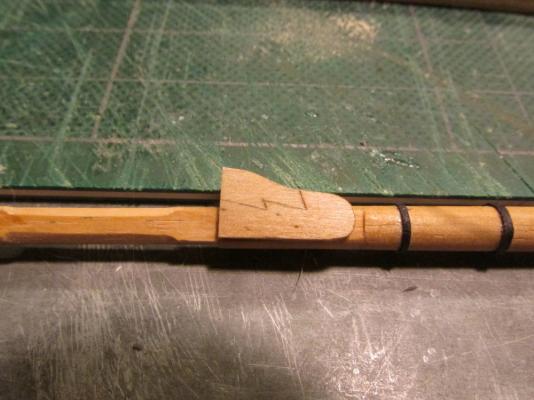
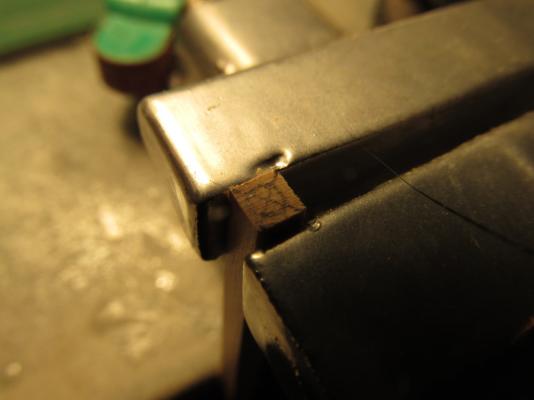
The Practicum stated that if one were to use the cheeks that were supplied by the kit they had to be modified to match the plans. My kit did not have the pre-made wooden cheeks so I had to scratch make mine from 1/16” boxwood which the Practicum did address. However, having read Blue Ensign’s build log, I knew that the Cheek was actually made of two pieces, the Hound and the Bib which the Practicum did not address. Following Blue Ensign, I scribed the Cheeks to make it look like the two pieces complete with tree nails. Additionally the mast has a rake to it which must be taken into account. The Practicum did not address this. A slight bow downward angle was added to the top of the cheek (not obvious in the photo) to accommodate the rake in order to make the top of the cheeks level.
- 974 replies
-
- rattlesnake
- mamoli
-
(and 1 more)
Tagged with:
-
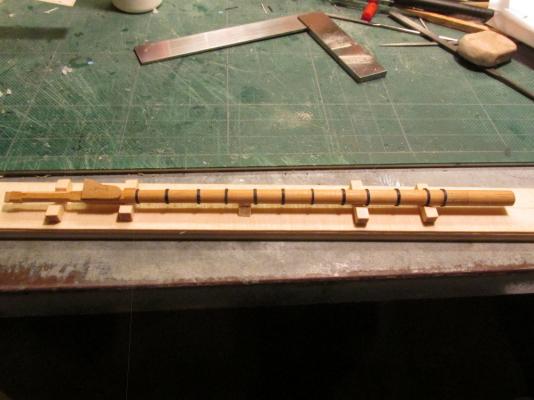
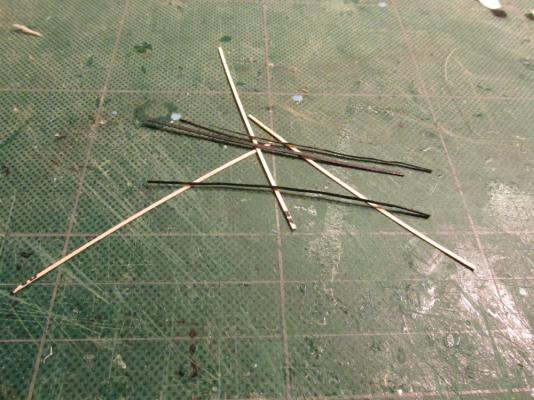
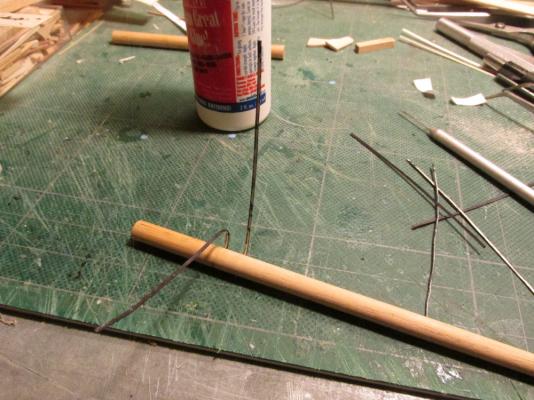
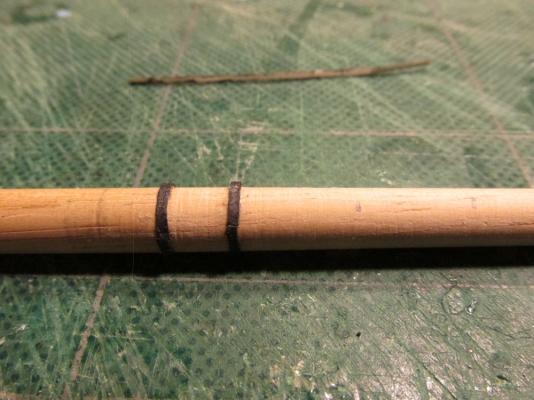
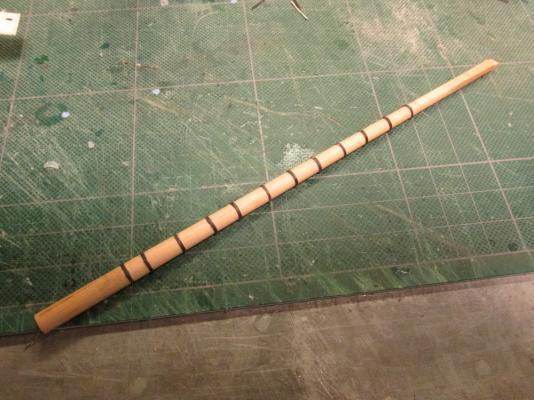
As stated previous, the Hahn Plans provide cross sectional dimensions (provided one recomputed them for the 74% reduction in Plan size). The only dimension that couldn't be used was the total length of the mast since it didn't reach into the bowels of the model. Starting with a ¼” dowel, it had to be inserted into the deck opening and marked where it protruded through the forecastle deck. Now the mast could be measured 7” long above the forecastle deck. With the dowel marked and cut to a working length for the lathe, and armed with course sand paper on rasp like holder, and a micrometer, I proceeded to create the contour of the fore mast taking measurements along the shaft of the dowel as material was removed to match the plans. All fine and good. Now I had to square the top of the mast, not so easy, the mast was now tapered except where it was held by the lathe. I wanted to use the Byrnes saw to provide nice clean and precise cuts. I needed to remove material from the round cross section and end up with a 3/16” square cross section. Not trusting my own measurements, I removed a little at a time, and measuring each time I cut. Also the dowel had to be rotated exactly 90° to make cuts again. What made it so tricky was that I had to hold the dowel at the unmodified ends so it was square against the saw fence. Actually I did try it the other way first, squaring off the mast top and then placing it in the lathe. Whether I set up my lathe wrong or something else, when the lathe began to turn, the dowel broke as it twisted where it was square cut. It wasn’t pretty. Surprisingly (or not) the Practicum did not address the iron rings around the mast. Following Blue Ensign’s lead I made them out of file folder card stock. They were colored black with a Sharpie pen and glued into place with Weld Bond glue first gluing one end of the strip then waiting a bit before wrapping and gluing it around the mast and trimming off the excess.
- 974 replies
-
- rattlesnake
- mamoli
-
(and 1 more)
Tagged with:
-
NOTE: The last item in Modeling the Rattlesnake - Chapter 9 is the Ship’s Boat. I’m going to put that off for a bit. I will explain latter. Rigging the Rattlesnake - Chapter 1 I never thought I’d see the day; it’s been a little over four years to get here. The Masts The Fore Mast The Practicum starts off with the construction of the Fore Mast. The masts do not have a simple shape; they have cross sections that are round, square, octagonal, and rectangular. I did not follow the Practicum exactly. The Practicum would have the builder make the square cross section first and then taper the round cross section area next, but I had a small simple wood lathe I wanted to try.
- 974 replies
-
- rattlesnake
- mamoli
-
(and 1 more)
Tagged with:
-
Great video. I've added it to my "How To" library of modeling techniques.
- 732 replies
-
- constitution
- model shipways
-
(and 1 more)
Tagged with:
-
That's one good looking ship, Igor! I hope mine comes close to that. I go along with Mr. Larkins, more pictures! Make sure you protect it by putting it in a case. It would be a shame if it got dusty or damaged sitting out in the open. For mine, the last few weeks has been going slow for one reason or another but some progress has been made. Hopefully I'll post something new soon.
- 974 replies
-
- rattlesnake
- mamoli
-
(and 1 more)
Tagged with:
-
Thank you for clearing that up. I'm no sailor, but it didn't seem practical to have those perfectly round coils on a working ship. It is for that reason (plus I had no luck in making my own "pretty" coils) that I didn't try too hard to put them own my own model for the cannon rigging. Now whether I still did my correctly for a working ship I really don't know. No doubt I will get constructive criticism for that. Always an education Jon
- 755 replies
-
- finished
- caldercraft
-
(and 1 more)
Tagged with:
-
A pleasure to watch you work! Any tips on how you would model good looking flat rope coils to look like the first picture in response No. 386?
- 755 replies
-
- finished
- caldercraft
-
(and 1 more)
Tagged with:
-
Pardon me for pointing this out as I am not an expert in any stretch of the imagination, but I believe in reply #375, the first two photos are identical yet one is marked "front view" and the other "aft view." Just wanted to say that it is an education just watching you put this model together.
- 755 replies
-
- finished
- caldercraft
-
(and 1 more)
Tagged with:
-
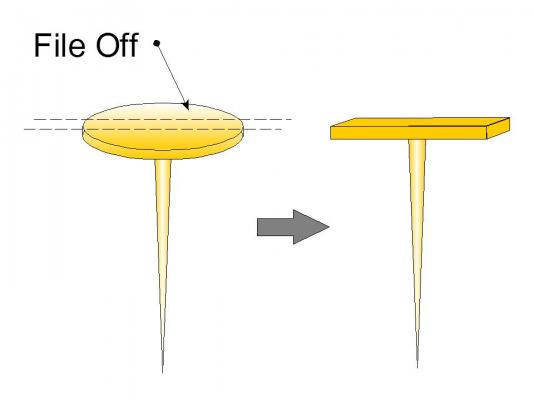
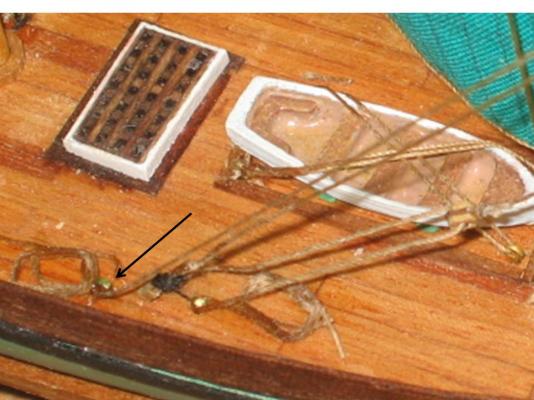
Small Cleats When building my first wooden model in thirty years, the Evergreen I needed to tie lines to the deck. I was winging it because the kit didn't have any detailed plans for any of the rigging and I knew nothing about rigging. I needed tiny cleats. Somehow I got an idea to use the tiny rail nails used by railroad hobbyist. In cross section a nail is the shape of a T, very similar to a cleat - a very short T. I filed the edges of the nail head as shown in the diagram below. This gets you the basic shape. You can file the ends to a more pointed shape and add an upward bend to either side. Just drill a hole and insert to the depth required.
- 396 replies
-
- Idea
- Bright Idea
-
(and 1 more)
Tagged with:
-
Scott - Welcome aboard the Rattlesnake Armada! It's nice to see another "Rattler." There are a number of us building this classic here as you know and probably many of the problems that you may encounter will already have been discussed at length on other builds be they Rattlesnake or others. There are no stupid questions. If you don't know or can't find the info, just ask. Enjoy your build.
- 974 replies
-
- rattlesnake
- mamoli
-
(and 1 more)
Tagged with:
-
Welcome aboard the Rattlesnake Armada! There are a number of us building this classic here as you know and probably many of the problems that you may encounter will already have been discussed at length on other builds be they Rattlesnake or others. There are no stupid questions. If you don't know or can't find the info, just ask. Enjoy your build.
-
- 974 replies
-
- rattlesnake
- mamoli
-
(and 1 more)
Tagged with:
-
- 974 replies
-
- rattlesnake
- mamoli
-
(and 1 more)
Tagged with:
-
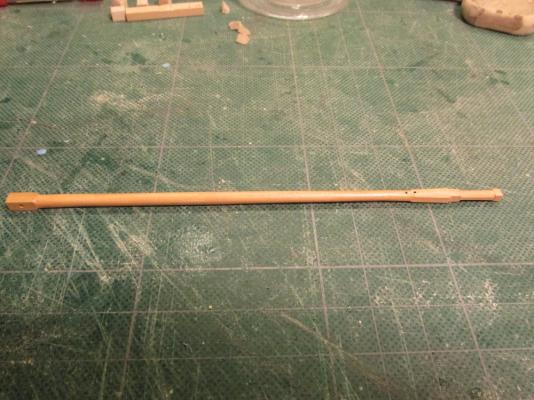
Two holes had to drilled for the sheave at the top and a square hole at the bottom for the fid. The square hole was made by drilling the appropriate size hole with my Dremel drill press and then cutting out the corners. One can’t tell, but the “squareness” of the hole is just near the surface.
- 974 replies
-
- rattlesnake
- mamoli
-
(and 1 more)
Tagged with:
-
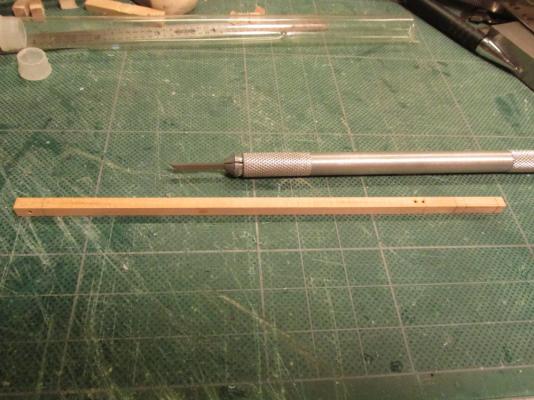
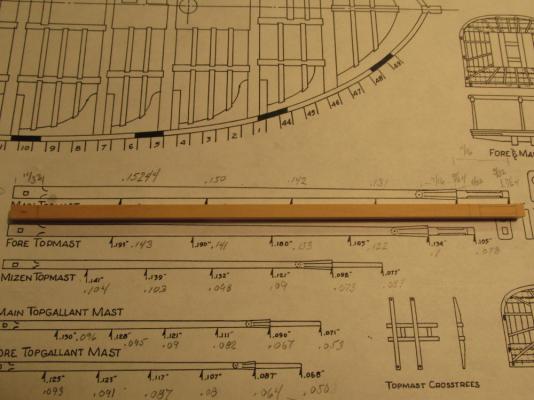
Spare Main Topsail Mast The other spare is the Main Topsail Mast which is a little bit more complicated to make. It starts off as a 6 1/8” piece of 5/32” x 5/32” boxwood. I measured off where all the transitions from square to round to octagon sections were. Hahn’s plans conveniently provide the thicknesses of the mast and yards at multiple key points to get the proper shape. One just has to remember that those numbers are for the original scale of ¼”=1’. Each of the dimensions had to be reduced by 74% to get to the 1:64 scale.
- 974 replies
-
- rattlesnake
- mamoli
-
(and 1 more)
Tagged with:
-
TBlack - Thanks for dropping in. Your tip for putting in the eyebolt holes now is a good idea. I'm so used to drilling holes and immediately filling them with something it just never occurred to me to leave the holes open. It's so obvious, I just didn't think to do it. As for perfection, I never expected it, being relatively new to this aspect of model building. I was just trying to convey to others that although it's not perfect, it's good enough for my purposes and those imperfections will not be noticed by 99% of the people who will actually view the physical model. If anything I want to encourage new builders to try their skills and not be discouraged by errors along the way. For me, the enjoyment is the journey of the build, the model is just the trophy of the journey.
- 974 replies
-
- rattlesnake
- mamoli
-
(and 1 more)
Tagged with:
-
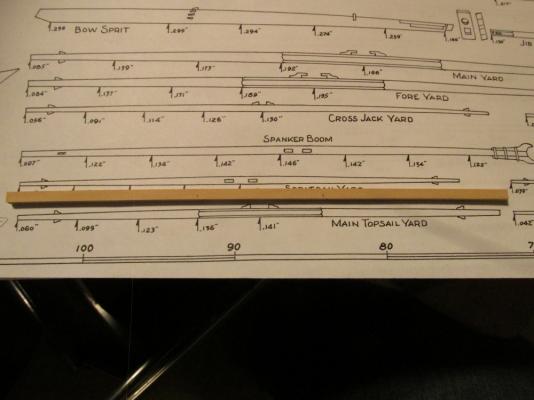
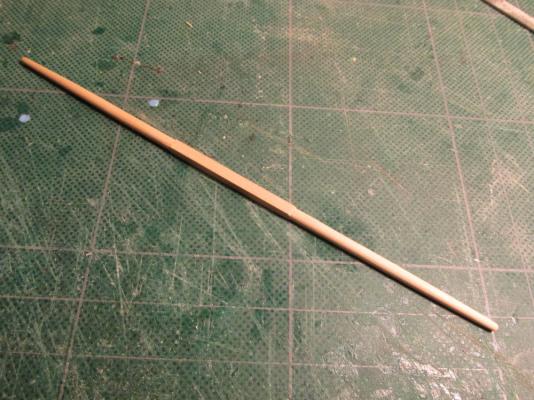
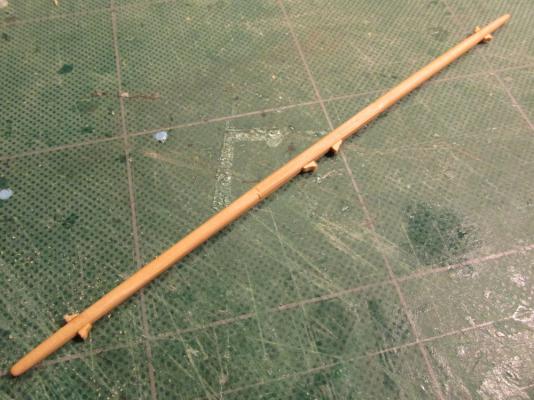
Spare Main Topsail Yard and Main Topsail Mast The Practicum’s next step is the Ship’s boat and then the spare Main Topsail yard and Main Topsail mast. I’m reversing the order and building the spares first. The boat has to be mounted on the spares so I might as well make them first. These are my first ever yard and mast constructions, so bear with me. Luckily any mistakes I make will probably be hidden under the ship’s boat. CAUTION: Because the spares are obviously duplicate pieces that have to be made again for the model, Mr. Hunt copied pasted the instructions from Chapter 1 of Rigging of the Rattlesnake into Chapter 9 of Modeling the Rattlesnake. Also since the steps required to make one mast and its yards are duplicated to make the other two, he states that most everything is the same except for the dimensions. All fine and good except that all of the detailed instructions for the yards and mast are for the Foremast. When he copied those instructions into Chapter 9 he didn’t alter the dimensions for the spares which are for the Main mast. The builder must ignore the dimensions given in Chapter 9 for the spares. They are for the Foremast topsail yard and fore topsail mast. The Builder must take off his own dimensions from Hahn’s plans. It took me a while to figure this out. Luckily I didn't cut much material before I realized something was amiss. Spare Main Topsail Yard Of the two spares, the topsail yard looked easier to create. Staring with a 6” piece of 1/8” x 1/8” boxwood, I rounded and tapered the ends to length as indicated on Hahn’s plans. Interesting enough, neither the Mamoli plans nor the Model Shipways plans provided separate drawings or dimensions for the mast sections or yards. The center of the yard is eight sided. This looked easy enough to do, just trim off the four corners to make eight. Not so, I had a lot of difficultly maintaining an even cut. If anyone knows a simple yet effective way to precisely cut a square cross section into an octagon, I would love to hear about it. I've got a bunch more carving to do soon. The cleats were made from 1/16” boxwood. The Practicum did not state to add them, but because of other Practicum omissions I've documented, I couldn't be certain they weren't supposed to be there or not. I just don’t how complete the spares were built when stored on board ship.
- 974 replies
-
- rattlesnake
- mamoli
-
(and 1 more)
Tagged with:
-
Sr. Old Salt - This model was built using Robert Hunt's Practicum with the expressed intention that it would NOT be painted. That is why different colored woods were used. That being said, some paint was used primarily for the black color. Ideally I would have used Ebony wood in these areas but my supplemental wood package did not come with any. That may have been a blessing as I have read that Ebony is very hard and difficult to work with and the wood dust is slightly toxic. I'm no expert on paints so I can't tell you off the top of my head whether to use diluted paint, stain, or dye acrylic or otherwise. If it were me, I would try out some test strips and see what happens. If anyone out there knows more about this, please jump in.
- 974 replies
-
- rattlesnake
- mamoli
-
(and 1 more)
Tagged with:
-
Thanks Martin, I would not have found this section in a timely manner when working on the bowsprit in the near future. I was wondering why he didn't mention the boomkin, he did only it looks like it was an after thought in the context of things. He states: The boomkin is made from a piece of 1/16" boxwood cut to a length of about 2". It fits at an angle against the stem on each side just under the bowsprit and rests on the headrail. It is angled outward and slightly downward and typically there would have been an iron plat over the boomkin at the head rail to hold it in place. I must assume the "iron plat" is a typo and he meant "iron plate" because I could find a definition for "plat" that made any sense.
- 104 replies
-
- rattlesnake
- mamoli
-
(and 1 more)
Tagged with:
-
I had thought about the eyebolts and elected not to install them at this time because I thought a block or something would be attached to them. I reasoned that it would be easier to seize a line or add a block to the eyebolts off-ship and then install the complete component at once like I did for the cannon rigging. I would install eyebolts that are not used (say for use with the running rigging) now if I only knew which ones they were.
- 974 replies
-
- rattlesnake
- mamoli
-
(and 1 more)
Tagged with:
-
I went back over your log and I found an image where you drilled the bumkin hole. Now I understand what you did. It works for me. Oh, and I will remember to use the...um, colorful language to give some authenticity. Thanks again.
- 104 replies
-
- rattlesnake
- mamoli
-
(and 1 more)
Tagged with:
-
Thanks for the feed back Martin. I have all but two of the sources you quoted and one of those, i just ordered last week (Lee). The other, Antscherl, will have to wait. If I get one of his, I'll want all and they ain't cheap. Of the ones I do have, I had looked at before and if they only show the base of the bumkin where it meets the stem. They don't explain the mechanics of how it is attached. So I guess your method is as good as any and I'll follow suit when the time comes, unless I learn something new by that time.
- 104 replies
-
- rattlesnake
- mamoli
-
(and 1 more)
Tagged with:
-
I've also have been curious about the bumkins when someone told me not to forget them. Forget them, I didn't even know they existed! So I researched them a bit and at least for the Rattlesnake, I still don't know how they are attached to the stem on the actual ship. Is there a notch they slid into? are they tied or bolted somehow? On the model, most likely they are just glued in place. Once I've completed the ship's boat on my model, I will have entered into a new phase of my build, the rigging and the bowsprit will be the first thing I tackle. So any info will greatly be appreciated.
- 104 replies
-
- rattlesnake
- mamoli
-
(and 1 more)
Tagged with:
About us
Modelshipworld - Advancing Ship Modeling through Research
SSL Secured
Your security is important for us so this Website is SSL-Secured
NRG Mailing Address
Nautical Research Guild
237 South Lincoln Street
Westmont IL, 60559-1917
Model Ship World ® and the MSW logo are Registered Trademarks, and belong to the Nautical Research Guild (United States Patent and Trademark Office: No. 6,929,264 & No. 6,929,274, registered Dec. 20, 2022)
Helpful Links
About the NRG
If you enjoy building ship models that are historically accurate as well as beautiful, then The Nautical Research Guild (NRG) is just right for you.
The Guild is a non-profit educational organization whose mission is to “Advance Ship Modeling Through Research”. We provide support to our members in their efforts to raise the quality of their model ships.
The Nautical Research Guild has published our world-renowned quarterly magazine, The Nautical Research Journal, since 1955. The pages of the Journal are full of articles by accomplished ship modelers who show you how they create those exquisite details on their models, and by maritime historians who show you the correct details to build. The Journal is available in both print and digital editions. Go to the NRG web site (www.thenrg.org) to download a complimentary digital copy of the Journal. The NRG also publishes plan sets, books and compilations of back issues of the Journal and the former Ships in Scale and Model Ship Builder magazines.


