HOLIDAY DONATION DRIVE - SUPPORT MSW - DO YOUR PART TO KEEP THIS GREAT FORUM GOING! (Only 13 donations so far - C'mon guys!)
×


rcmdrvr
-
Posts
420 -
Joined
-
Last visited
Content Type
Profiles
Forums
Gallery
Events
Everything posted by rcmdrvr
-
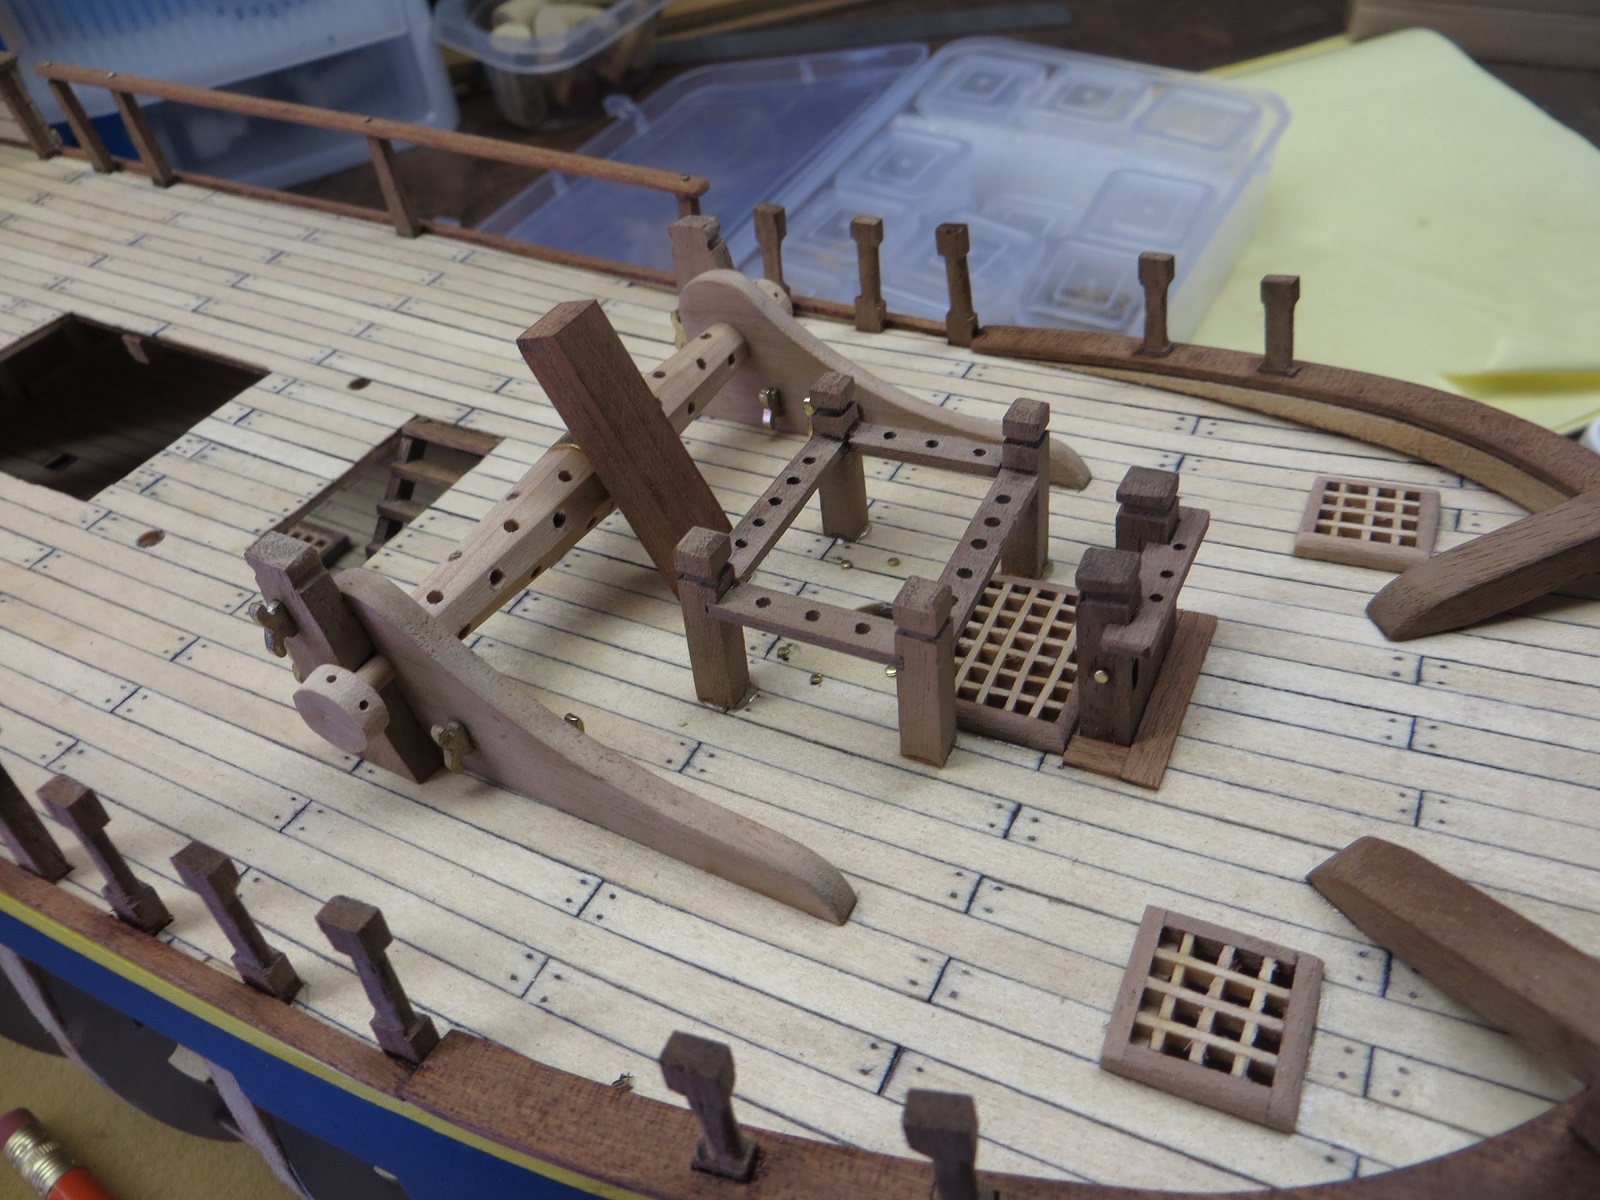
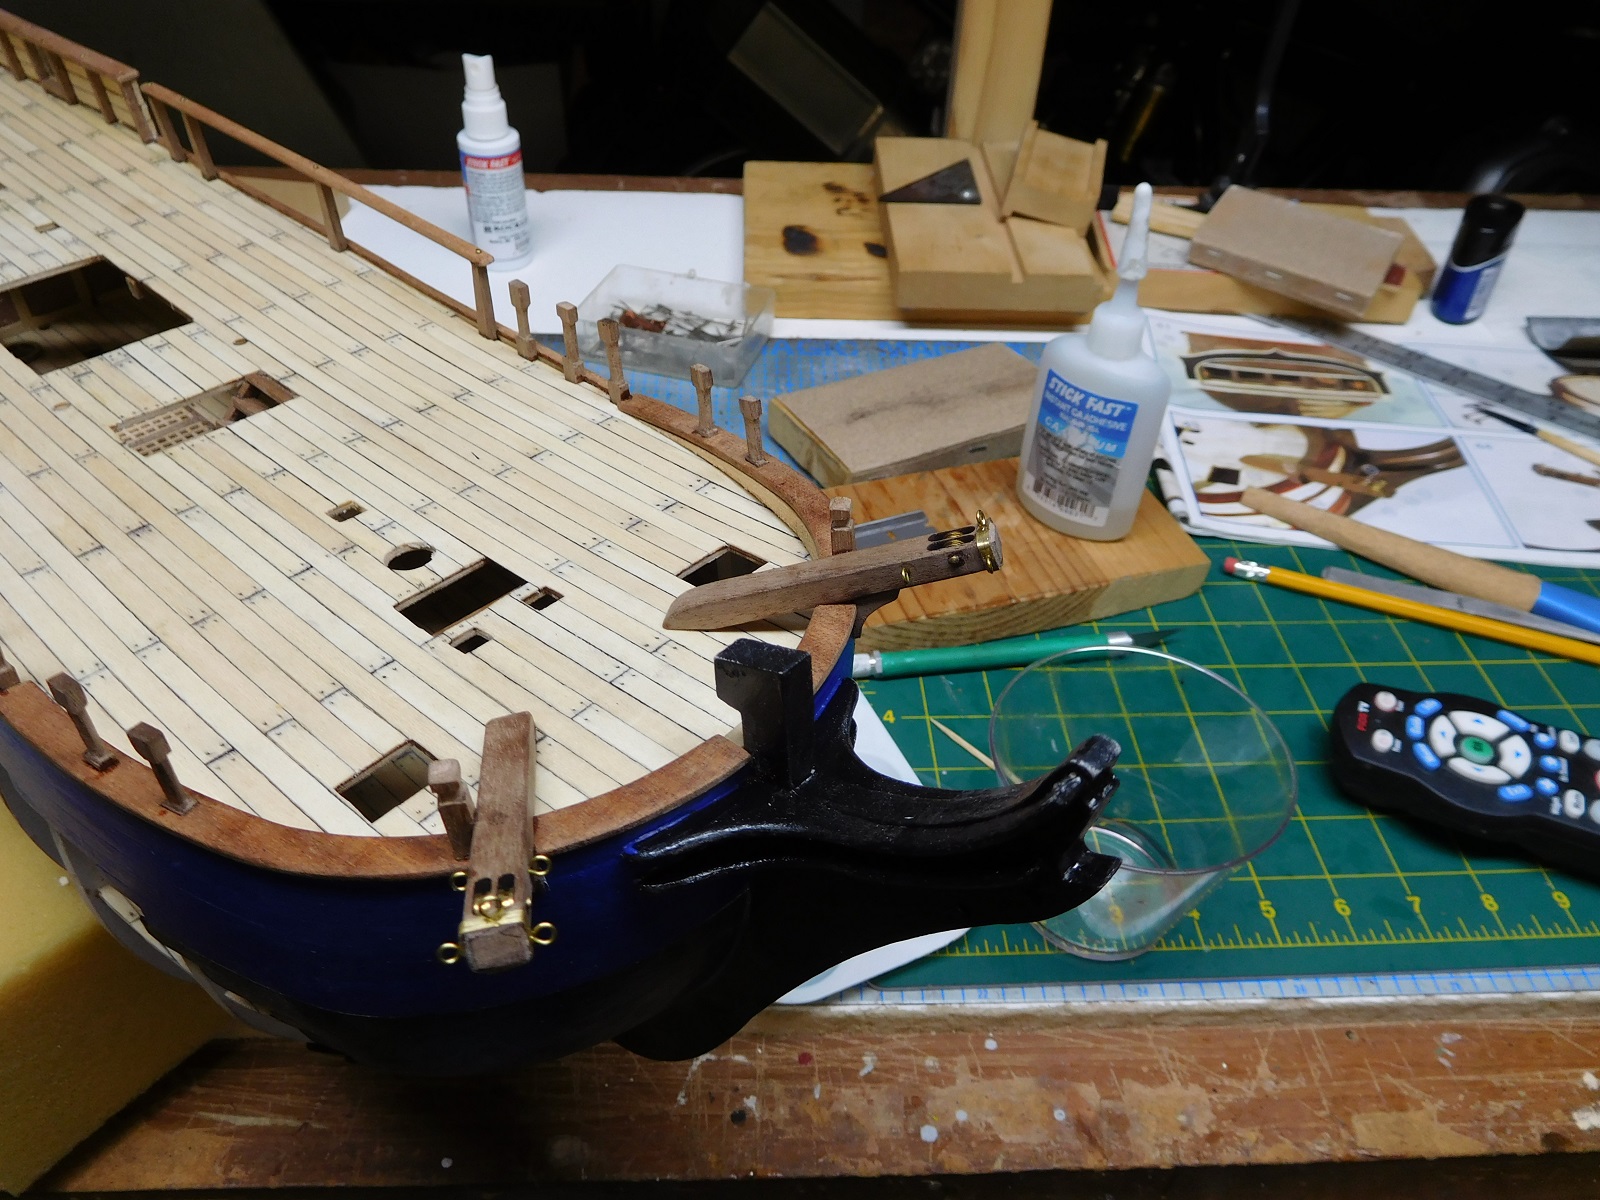
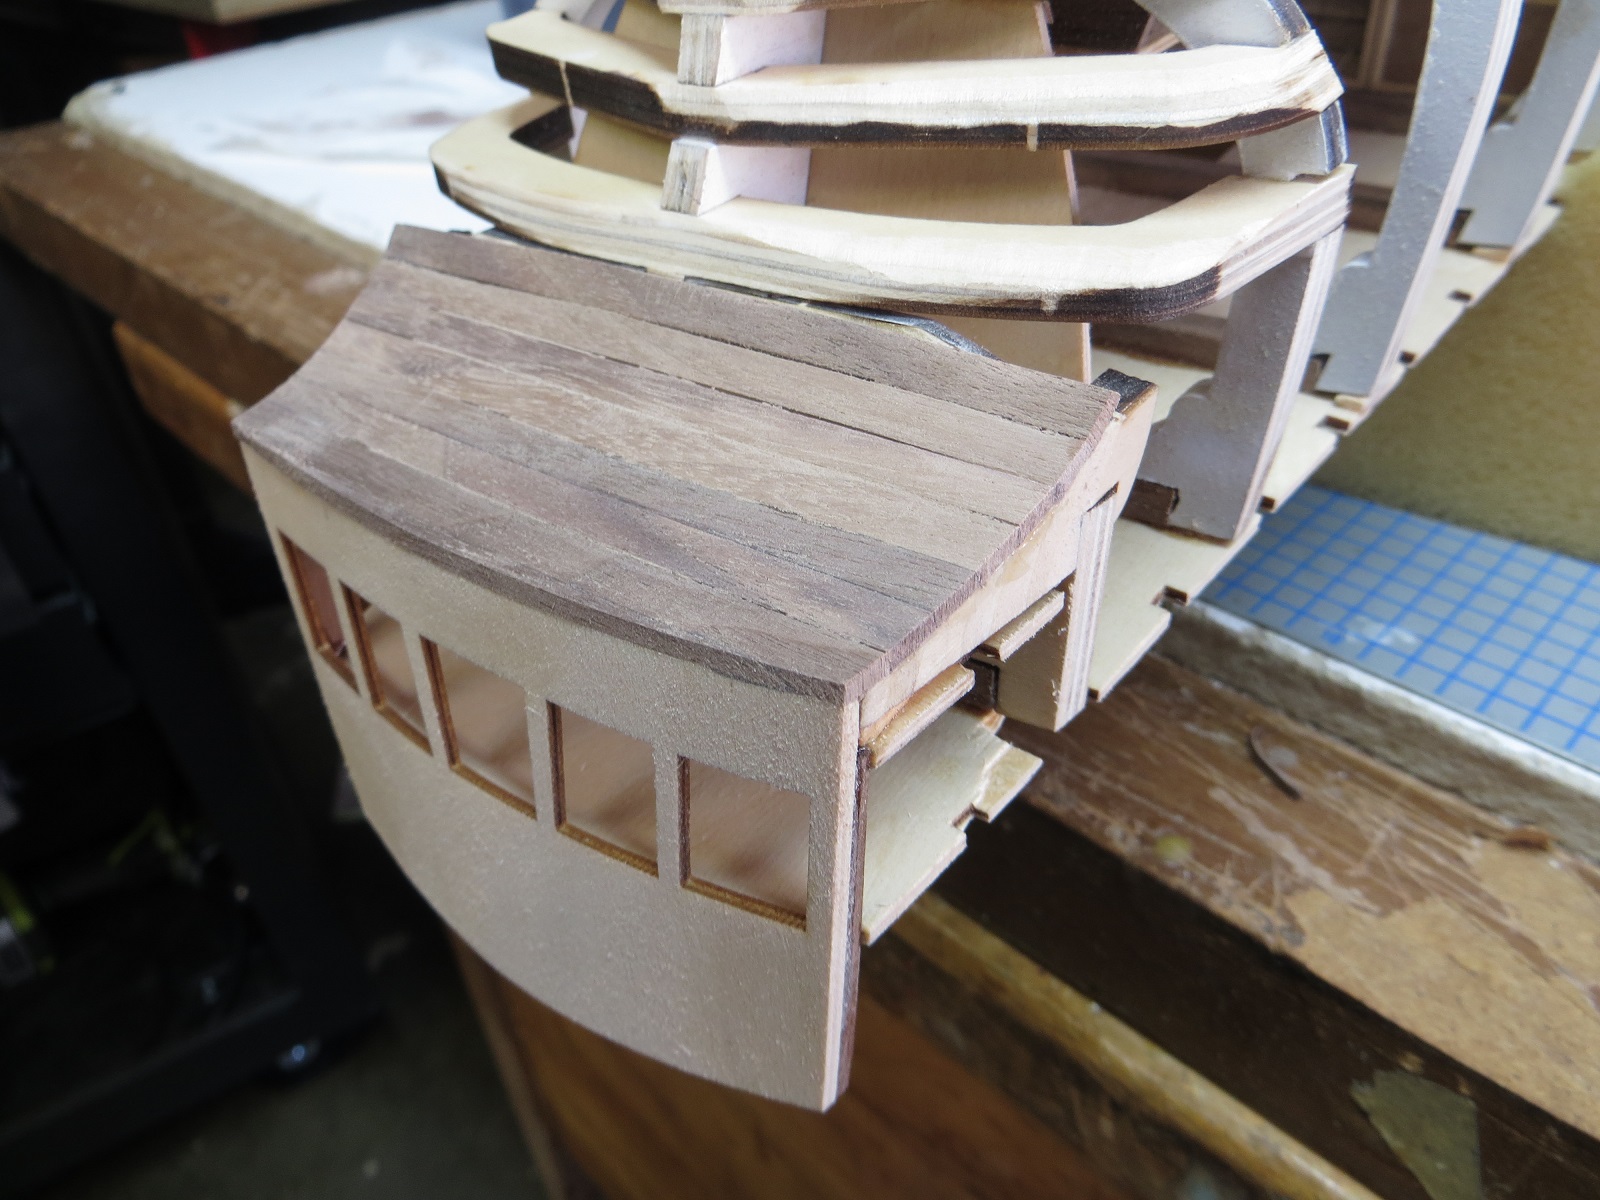
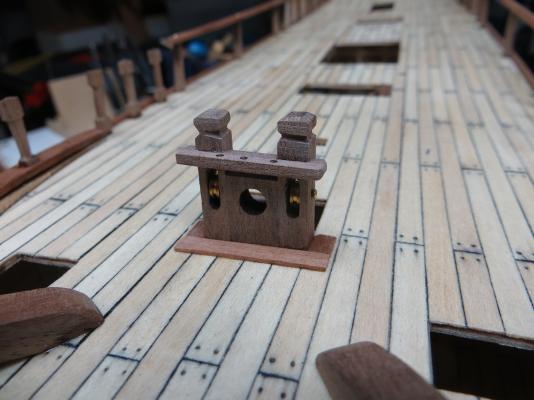
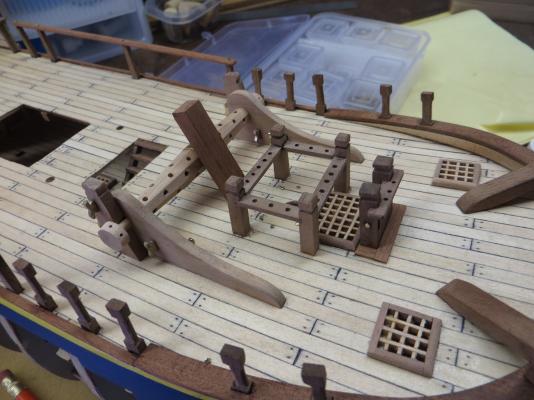
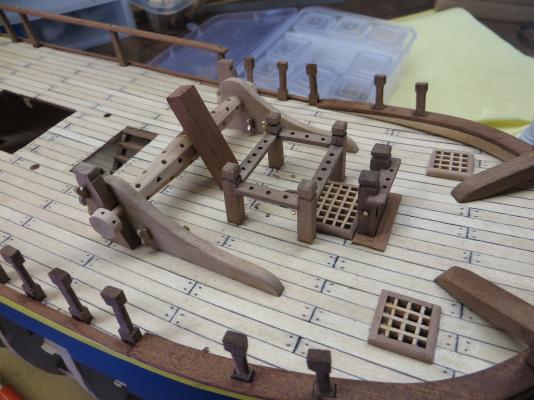
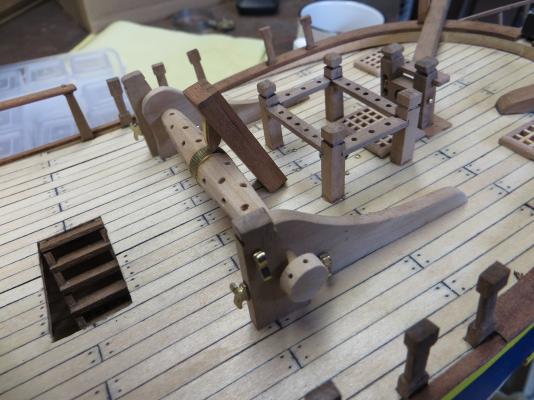
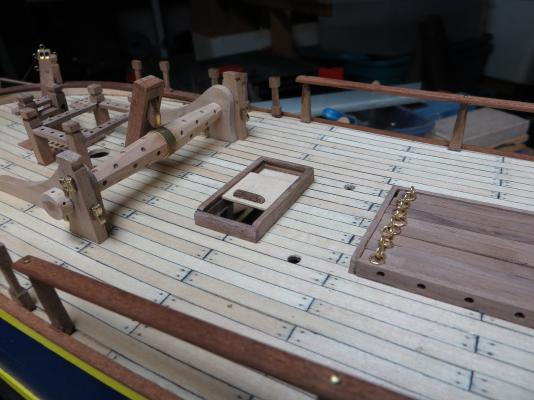
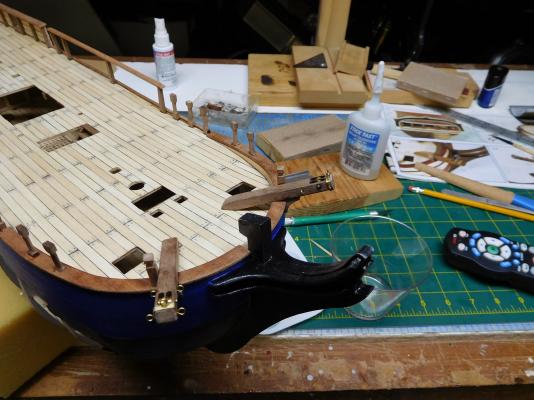
Nice to see that a lot of posts of other models of the Bounty have been posted. I have not had the opportunity to post in a while but I have continued to make progress on the model. I have been building a lot of the deck equipment. I actually like this stage of construction. It is very relaxing to work with the small pieces of wood and to fashion the equipment. While I do not come up to the skill level of some of the other modelers who have posted their work here, I think I am headed in the right direction. Hope you enjoy the photos.
-
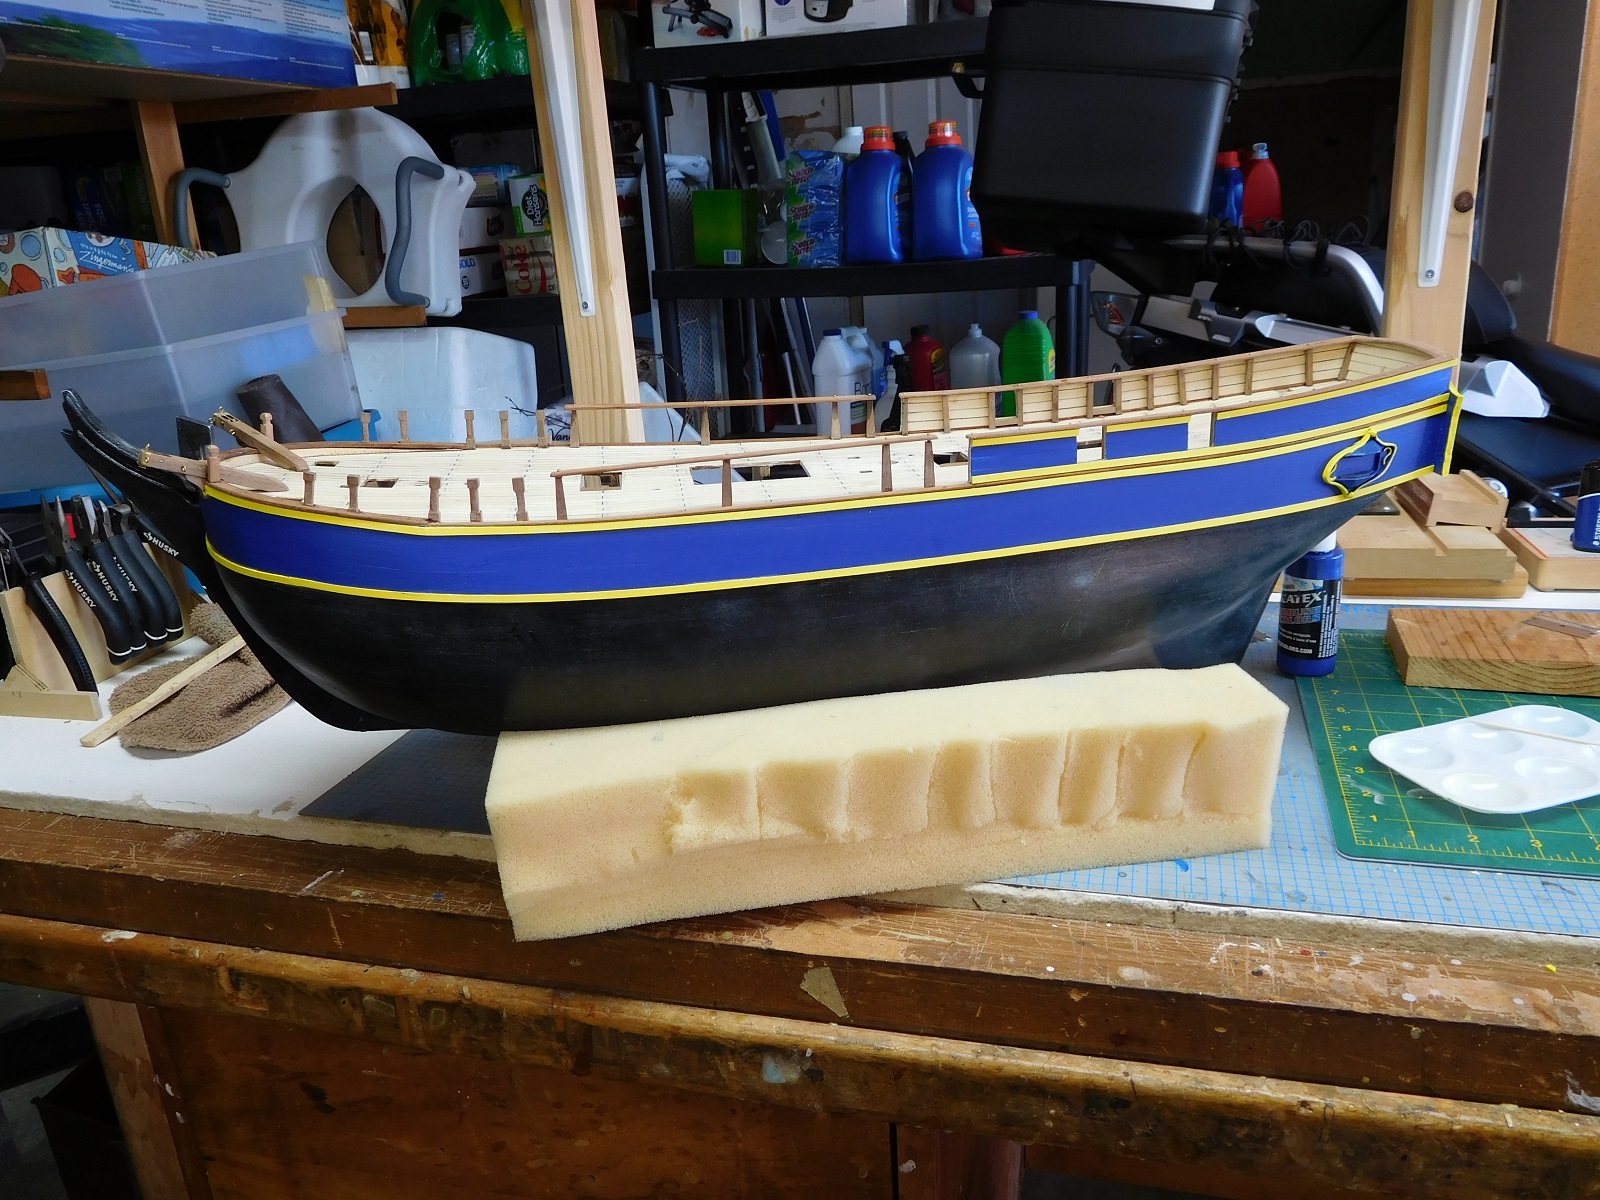
Jerry. I have not done the research you have regarding the Bounty. I did look at some internet available information and decided that I liked the exterior appearance of the Bounty reproduction that unfortunately sank several years back. While the information on this ship is limited I do not see where her hull was plated. I guess there are a million ways to approach this particular model. Desert. Your model is beautiful. I hope that mine comes close. I really like your interior details. While the interiors are somewhat of a fantasy, I think they help make this version of the Bounty a great discussion model.
-
I single planked but used a slightly thicker plank (around 1/8 inch) to stand up to the filling and sanding required.
-
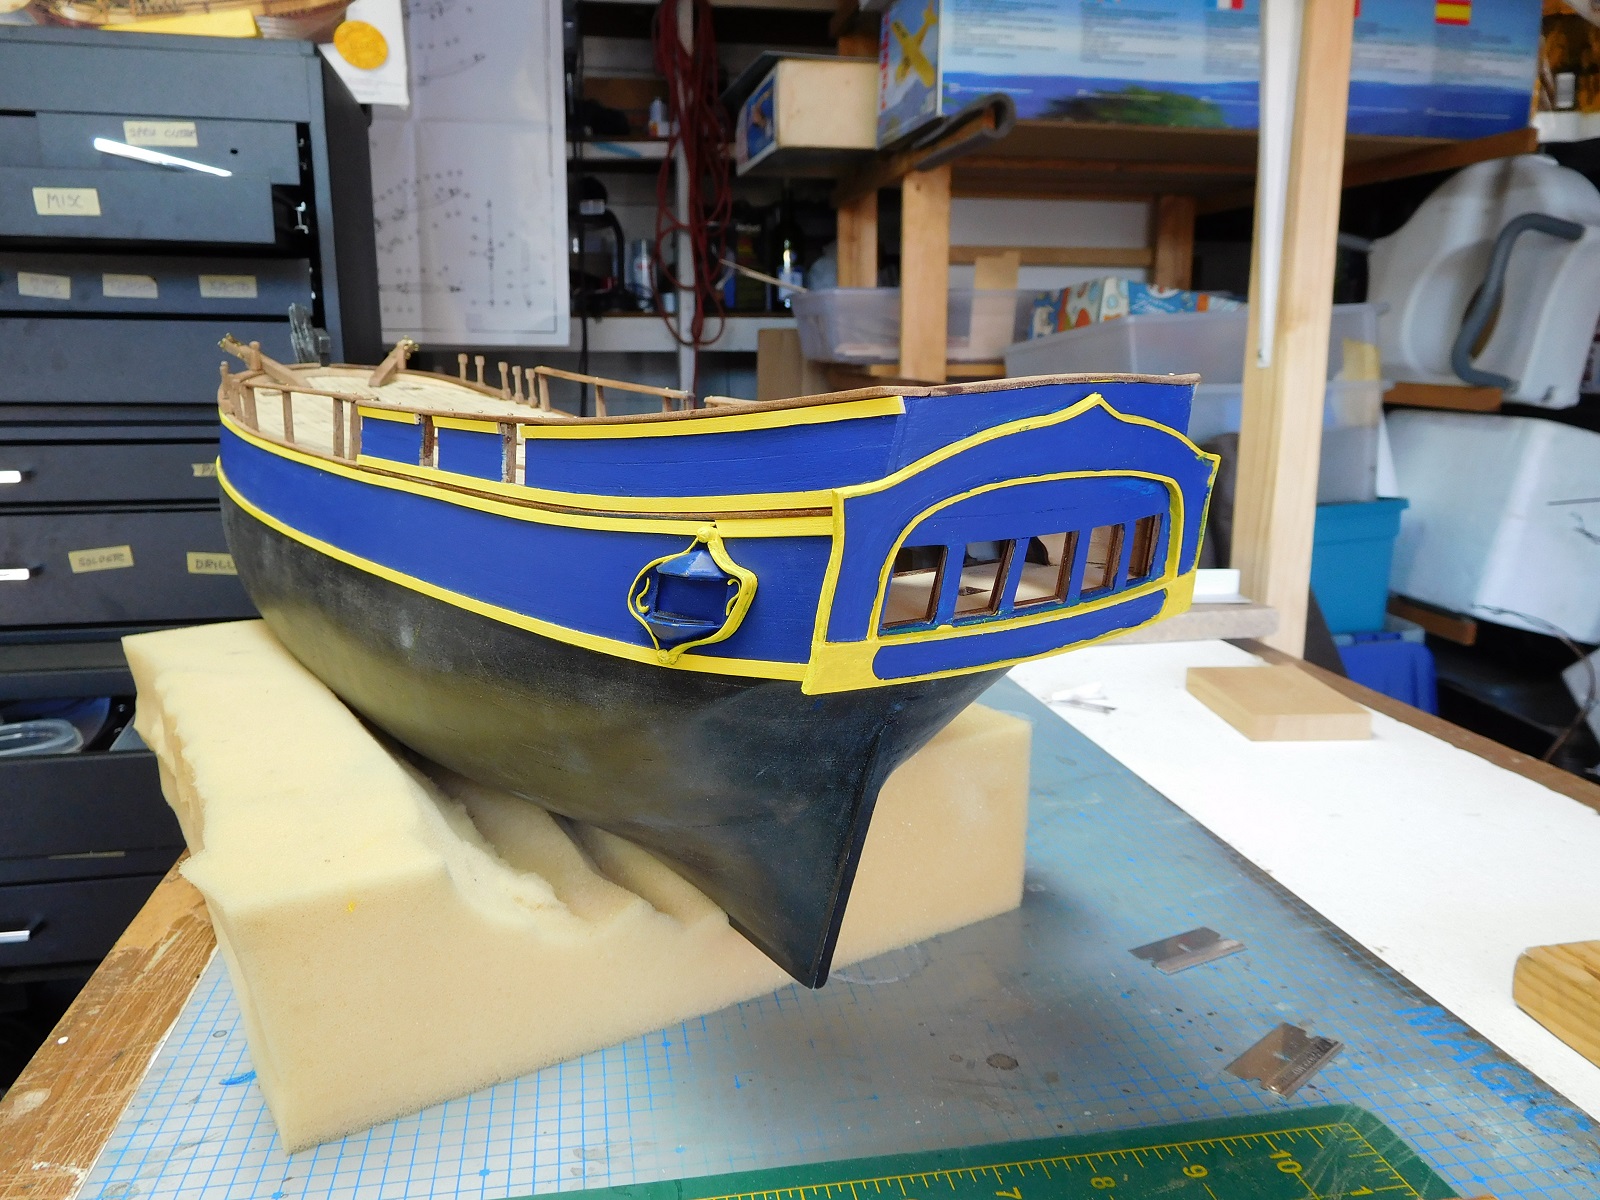
After the above installations I resumed my painting. Painting ended up becoming a much more difficult task than I had assumed. The yellow trim was very difficult to get close. Yellow is a very tranparant color so many coats were required. In the end, I learned a lot about thinking through the painting process and masking. I think I got satisfactory result, but next time will be better.


-
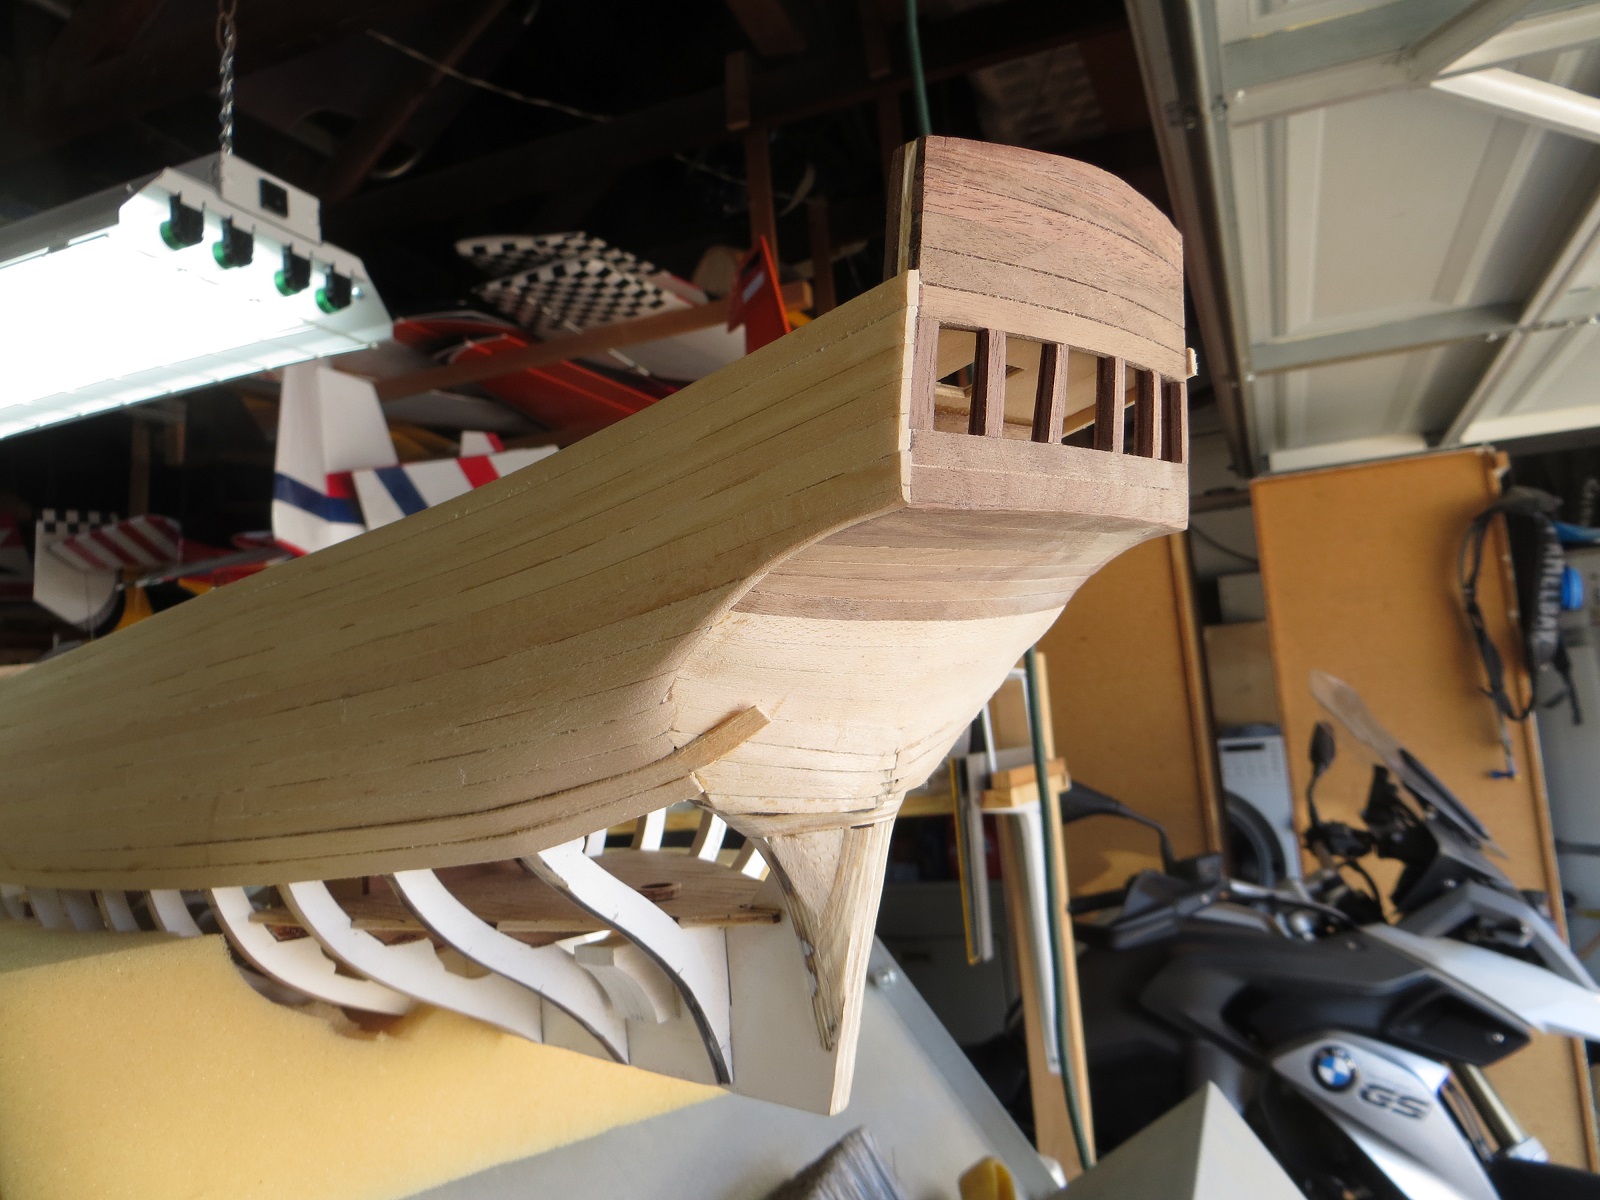
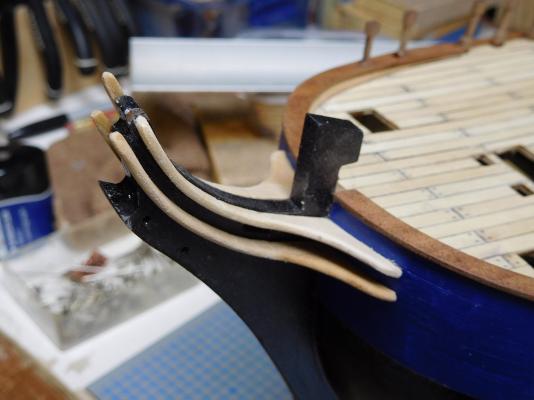
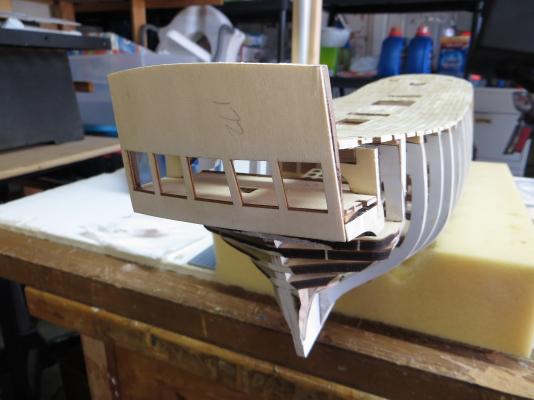
After the head boards came the stern trimming and the anchor davits. A little metal work was required to complete the davits. The die cut parts for the stern trimming did not fit the metal etch parts so I had to cut my own piece. I did use the die cut parts as a pattern.
-
It has been a few weeks since I have posted. I have made a bit of progress. After the first few coats of pait I decided I should install the stem head boards. These took a fair amount of bending. I soaked them in water for twenty minutes and then used a curling iron to make the bends.
-
I am now working on the railings.

-
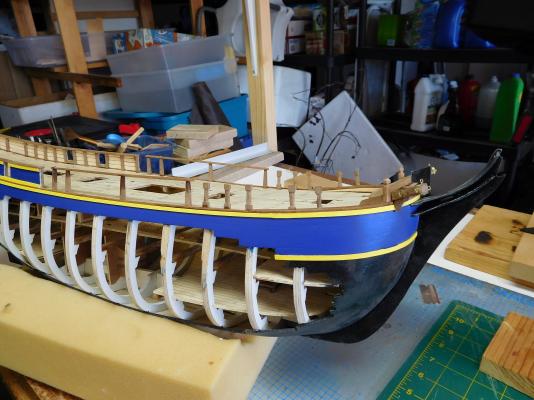
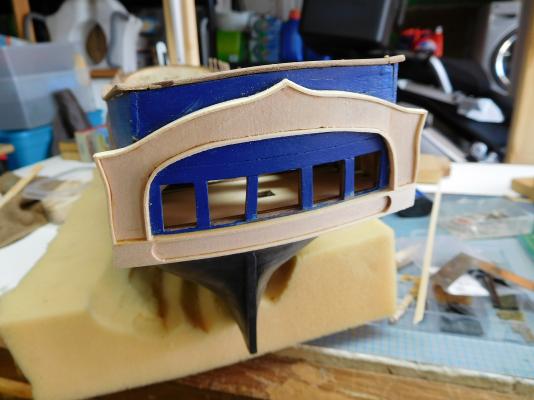
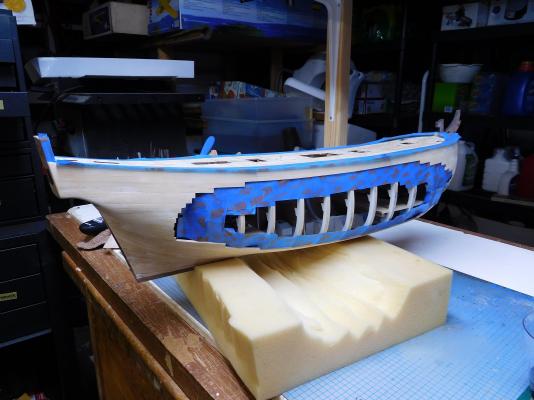
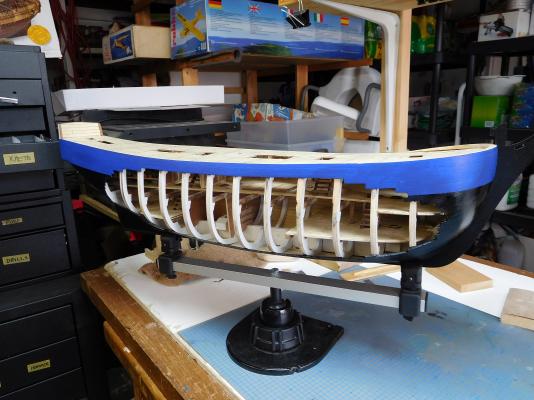
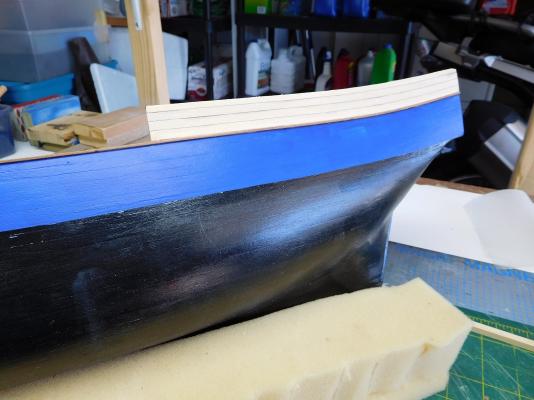
I also made the decision to paint the hull. I am using the photos of the HMS Bounty replica that was built and unfortunately sunk in the 80's. Having made this decision was was faced with alot of work with wood filler and sanding blocks. I did go out an buy a wood scraper from Rockler. It really helped in preparing the hull for painting. I used a Latex Primer before applying paint. I used hardware store masking tape. The color was creative airbrush colors you can get at any art supply or craft store. I brushed my color on.
-
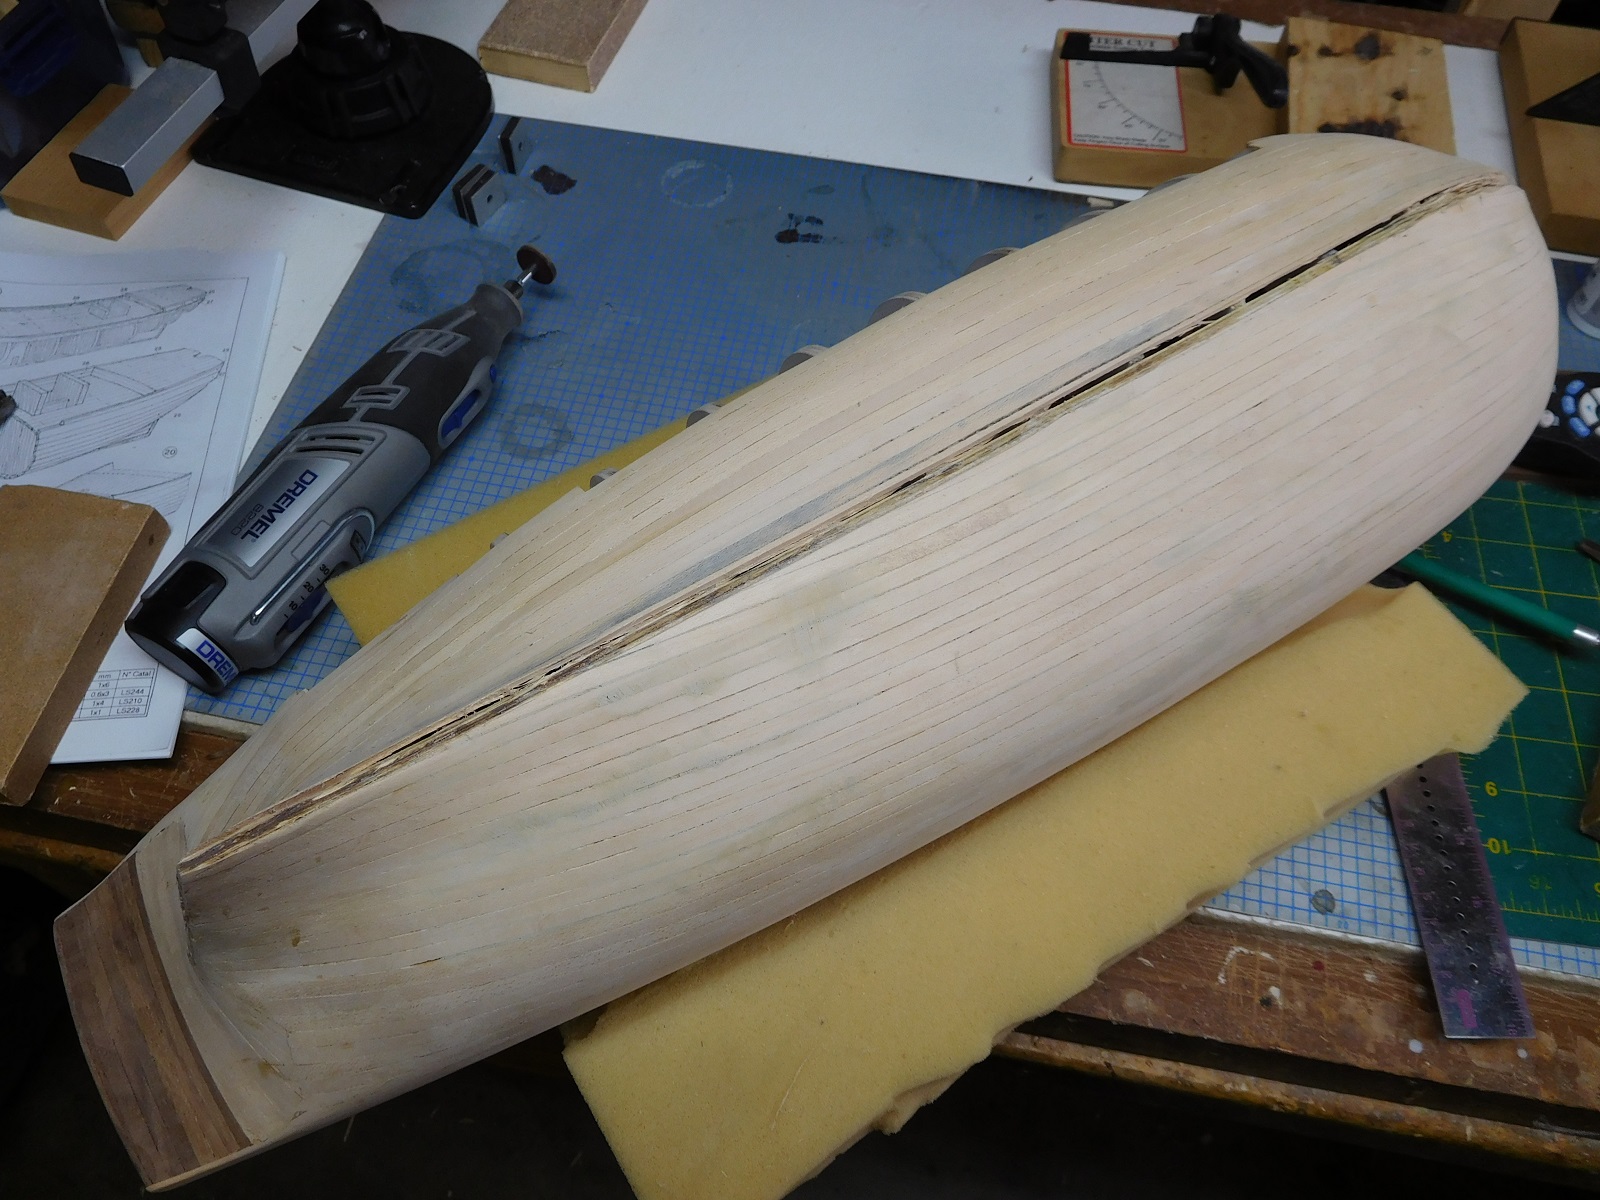
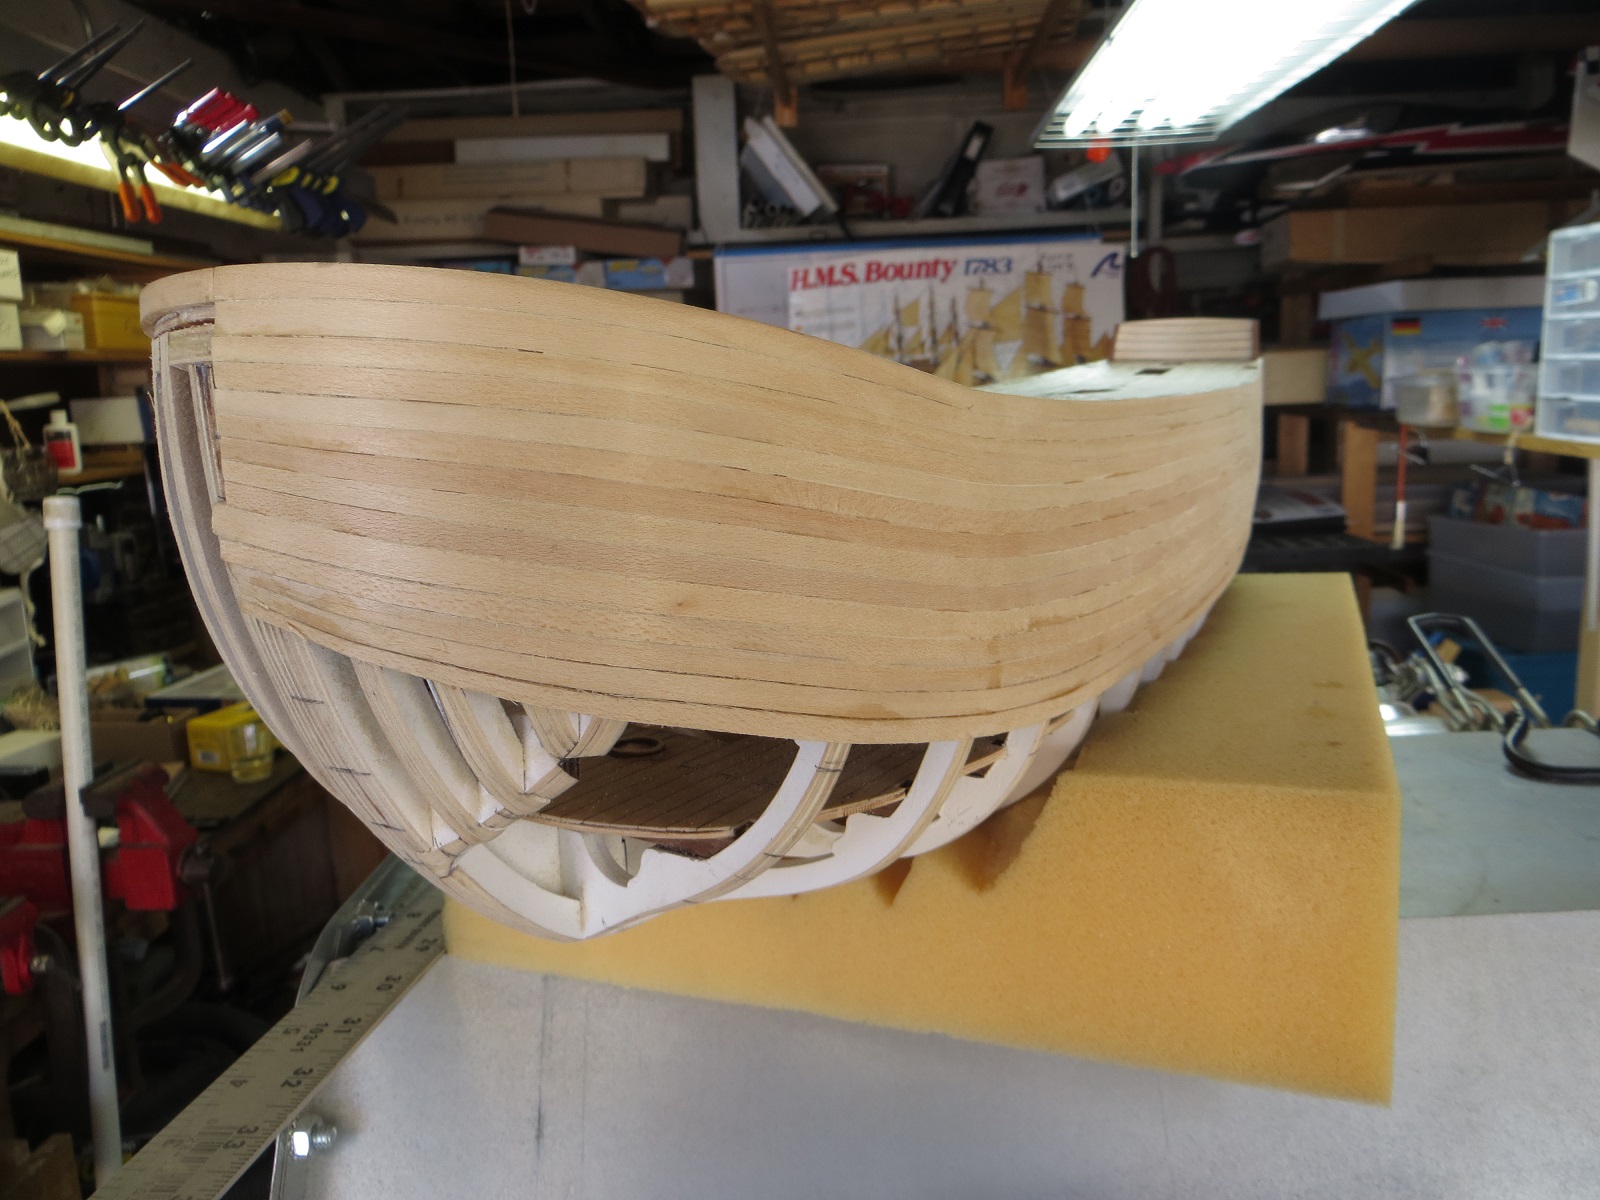
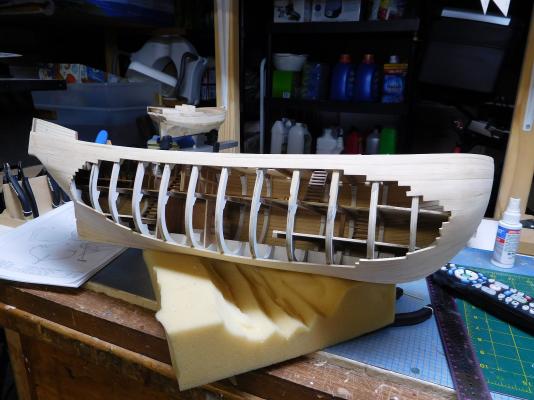
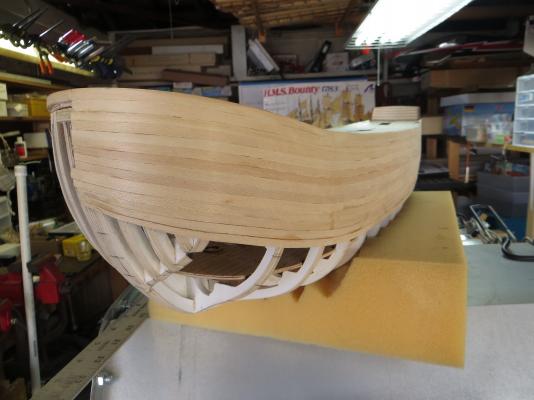
While I have not had the opportunity to post for a couple of weeks I have kept working on the model. The following photos should bring you up to date. The most time consuming task was planking. I took heed of the advice of other MSW members and began tapering the bow more severely. I think that helped but I still ran into some problems.

-
Let me throw out this question. I am about 3/4 of the way through the first planking process. I am seriously considering painting the hull to match the photos of the Bounty replica that are on the internet. I think I will still proceed with the second planking. The thought is that even if I do decide to paint the hull, it will have a painted plank look. I worry that if I were to sand, fill and paint the first planking I would end up with a completely smooth finish. Not really believable. It would appear then, that painting might actually be more work. Any comments on this?
-
Couple of quick answers. AntonyUK. I have decided to double plank the hull. The kit calls for single planking but since this is one of my first attempts, I think I can achieve better results with double planking. The wood is bass so when soaked for thirty minutes it becomes very pliable. I am affixing it to the frames using one of the new wood CAs that I got from the Rockler wood store near home. I work about 6 inches of the hull length at a time carefully gluing and holding the plank in place by hand. In fifteen seconds, or so, it creates a bond and you can move on to the next six inches. I usually apply three or four planks and then let it set overnight to allow the wood to dry. I am using a wood scraper to plane the planks to smooth, followed by sanding. Captain Al. I have been tapering. At the bow the planks are trimed to 3mm wide. They taper back about 15mm to 5mm wide. I agree, however, I think I will have to increase that taper significantly. Thanks for the tip. I know that I will double plank. I still have not decided on painting. The more I look at photos of the replica, the more I like the painted version. Hmmmmm.
-
Well, planking continues at a slow pace. I rough cut each plank to size and then soak in water (I am using a pvc pipe filled with water and capped) for about 30 minutes. If you bend real slow you can be it to bend around almost anything. You can see from the photos that the stern area is getting to be a real pain. Remember, this is the first planking.....it will hopefully be a good base for the second planking. I am still debating the idea of painting. I have now found a few models on the internet that have been painted like the replica and I really like the look. Should I chose this avenue....will I have to second plank? Will sanding, filling and sanding do?

-
After getting it to its final shape and fully sanded I would apply a coat of resin. I would use the same type of resin used for glassing. You can get in most local hobby shops.
-
I have been doing some internet researching on the Bounty. I have come across quite a few photos of the HMS Bounty reproduction that sunk a few years ago during Hurricane Sandy. A sad loss. What struck me, however, is that the hull is painted. The photos show that the reproduction was painted blue, black, white and red. Very little of the hull was natural wood finish. The photo of the model on the cover of the box shows a natural wood hull. Now the big question.....should I go for the natural wood finish like the kit; or should I go for the painted hull depicted in reproduction (which I assume best represents the look of the actual Bounty). Opinions?
-
This is good stuff. Thanks
-
Captain. Your probably right but my attitude is to jump in with both feet and try to deal with the problems as they come up (which I am sure they will). Question.....has anyone used steam in the planking process. Is it helpful or a hinderance. Would love to hear comments as to whether or not it would make sense to use steam rather than soaking.
-
Thanks for all the advice. I figure a plank (strake?) per night. 50 to 60 planks to lay down....Hmmmmm August maybe.
-
How far back from the bow do you recommend I start tapering?
-
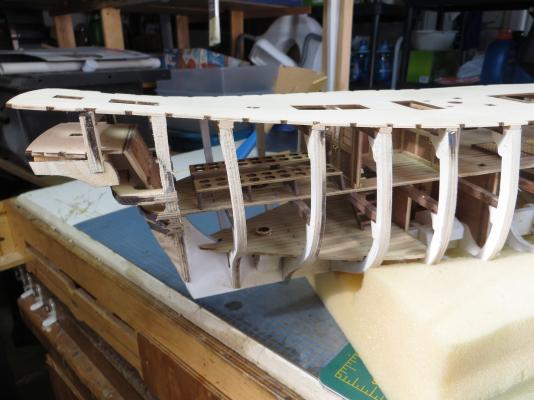
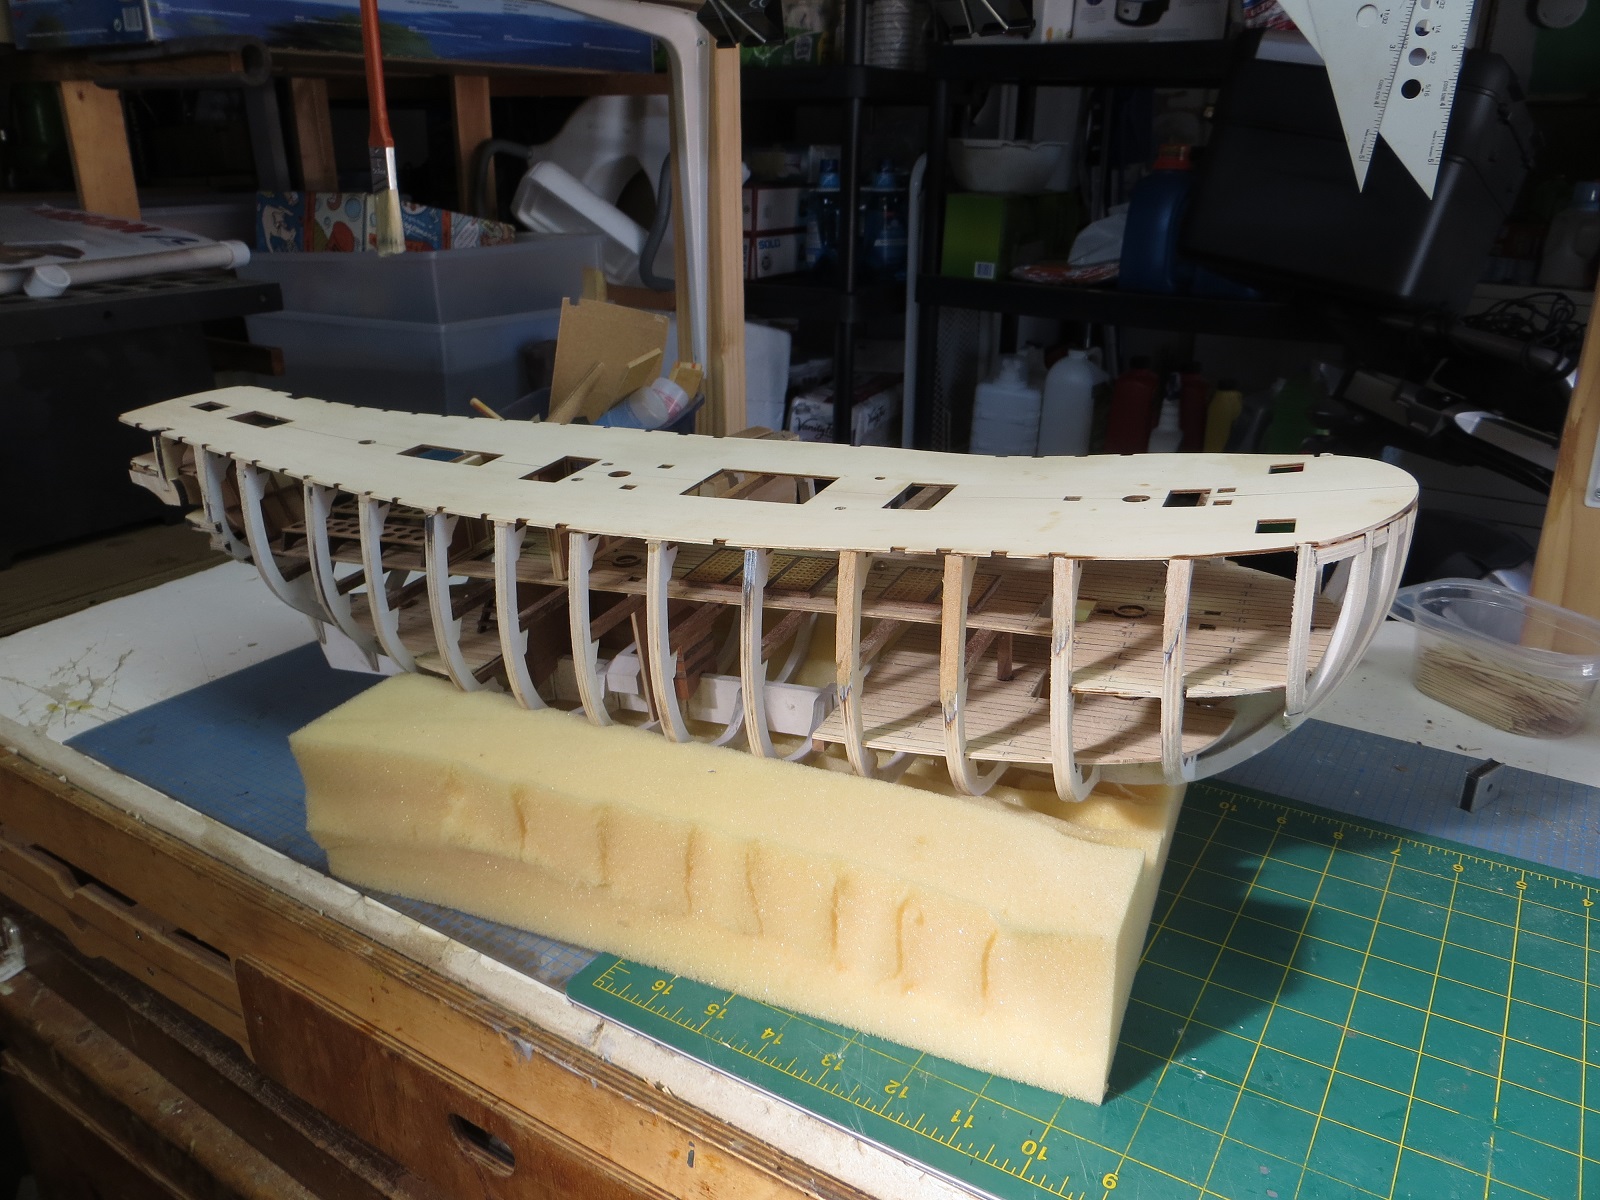
Captain. I have worked on fairing some of the frames. I spend a couple of hours on this after I installed the maindeck (it stabilized the whole model) but before it was planked. I am sure there will be more to do as I proceed with the planking. I think if you look at some of my photos you will notice I have had to add some filler blocks during the fairing process. My guess on planking was I would have to plank over the bow board. You comments prove this. Thanks. Since this is my first planking, I am very nervous to say the lease. I have read the primer on planking on this site and some of it seems appropriate; some one. I guess I will learn as I move along. What, may I ask are "drop planks" I stumbled on the pvc pipe idea. I hadn't thought of the weights. Finally, 12 to 18 hour seems like a huge amount of time. I have thought an hour or so would do it. I will have to do some experimenting in this area. Thanks for reading and your comments.
-
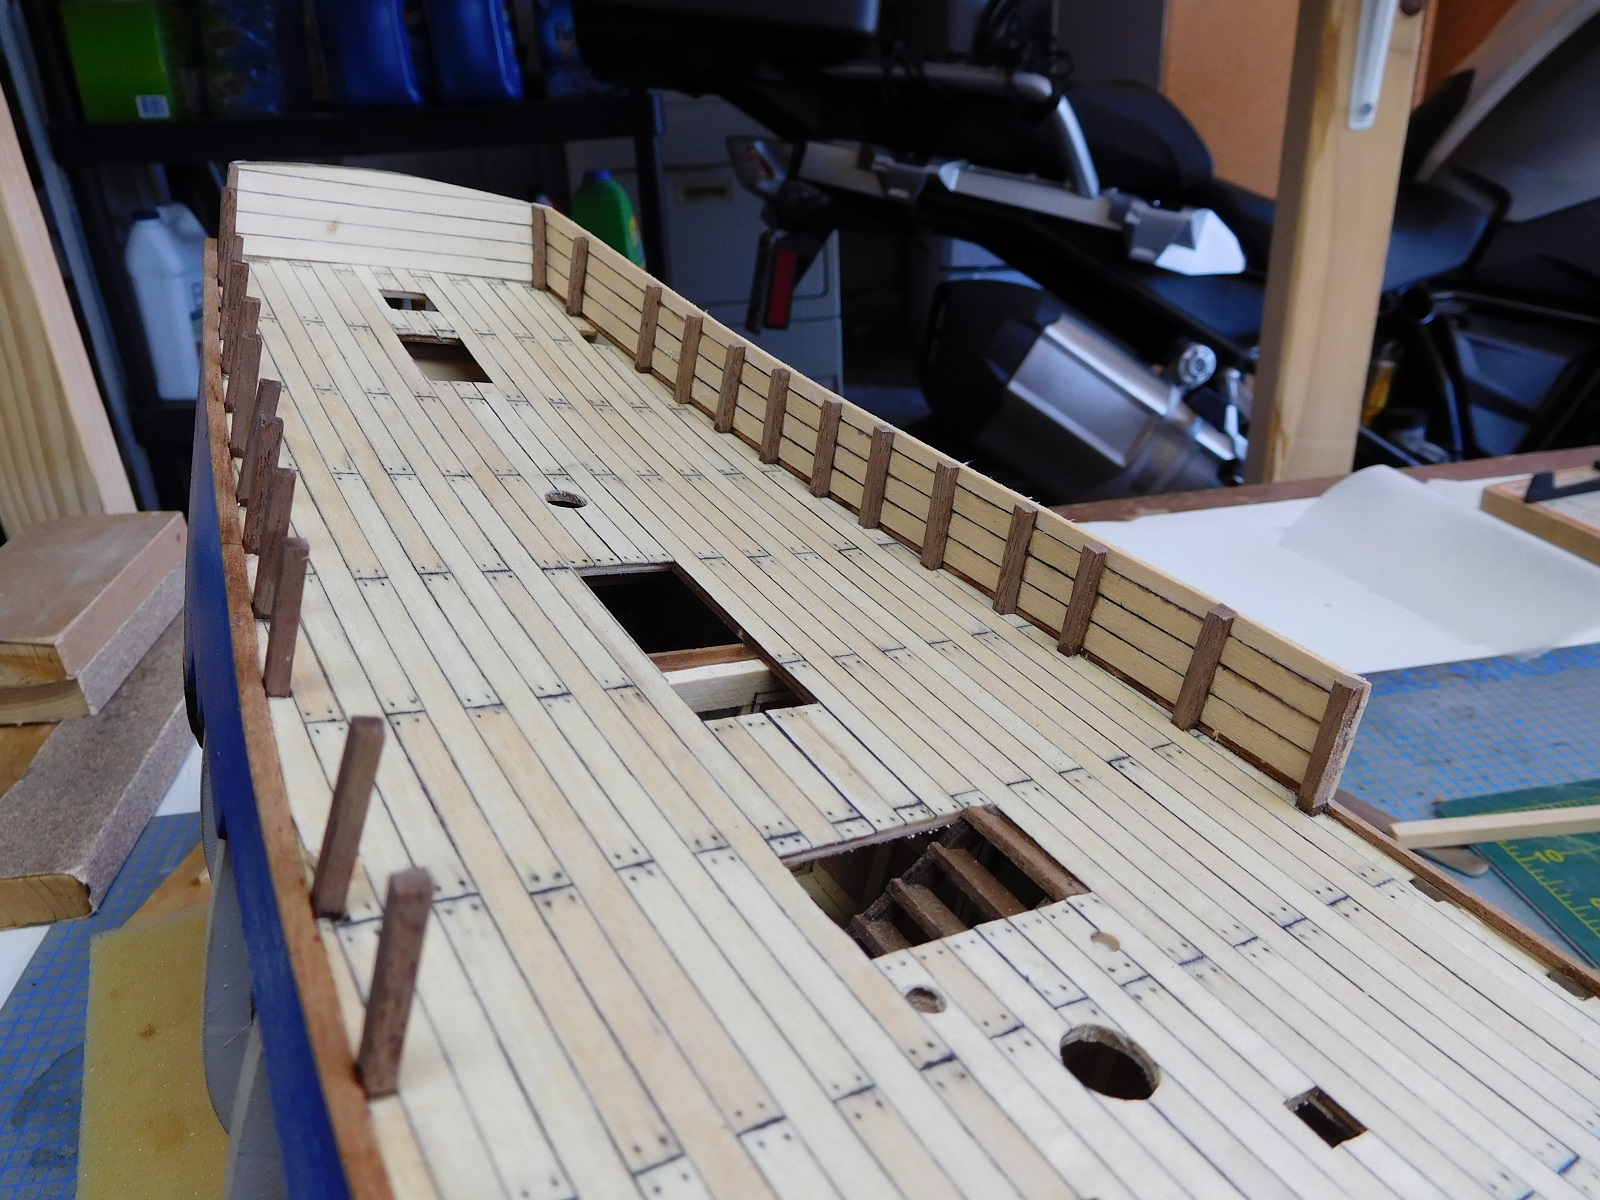
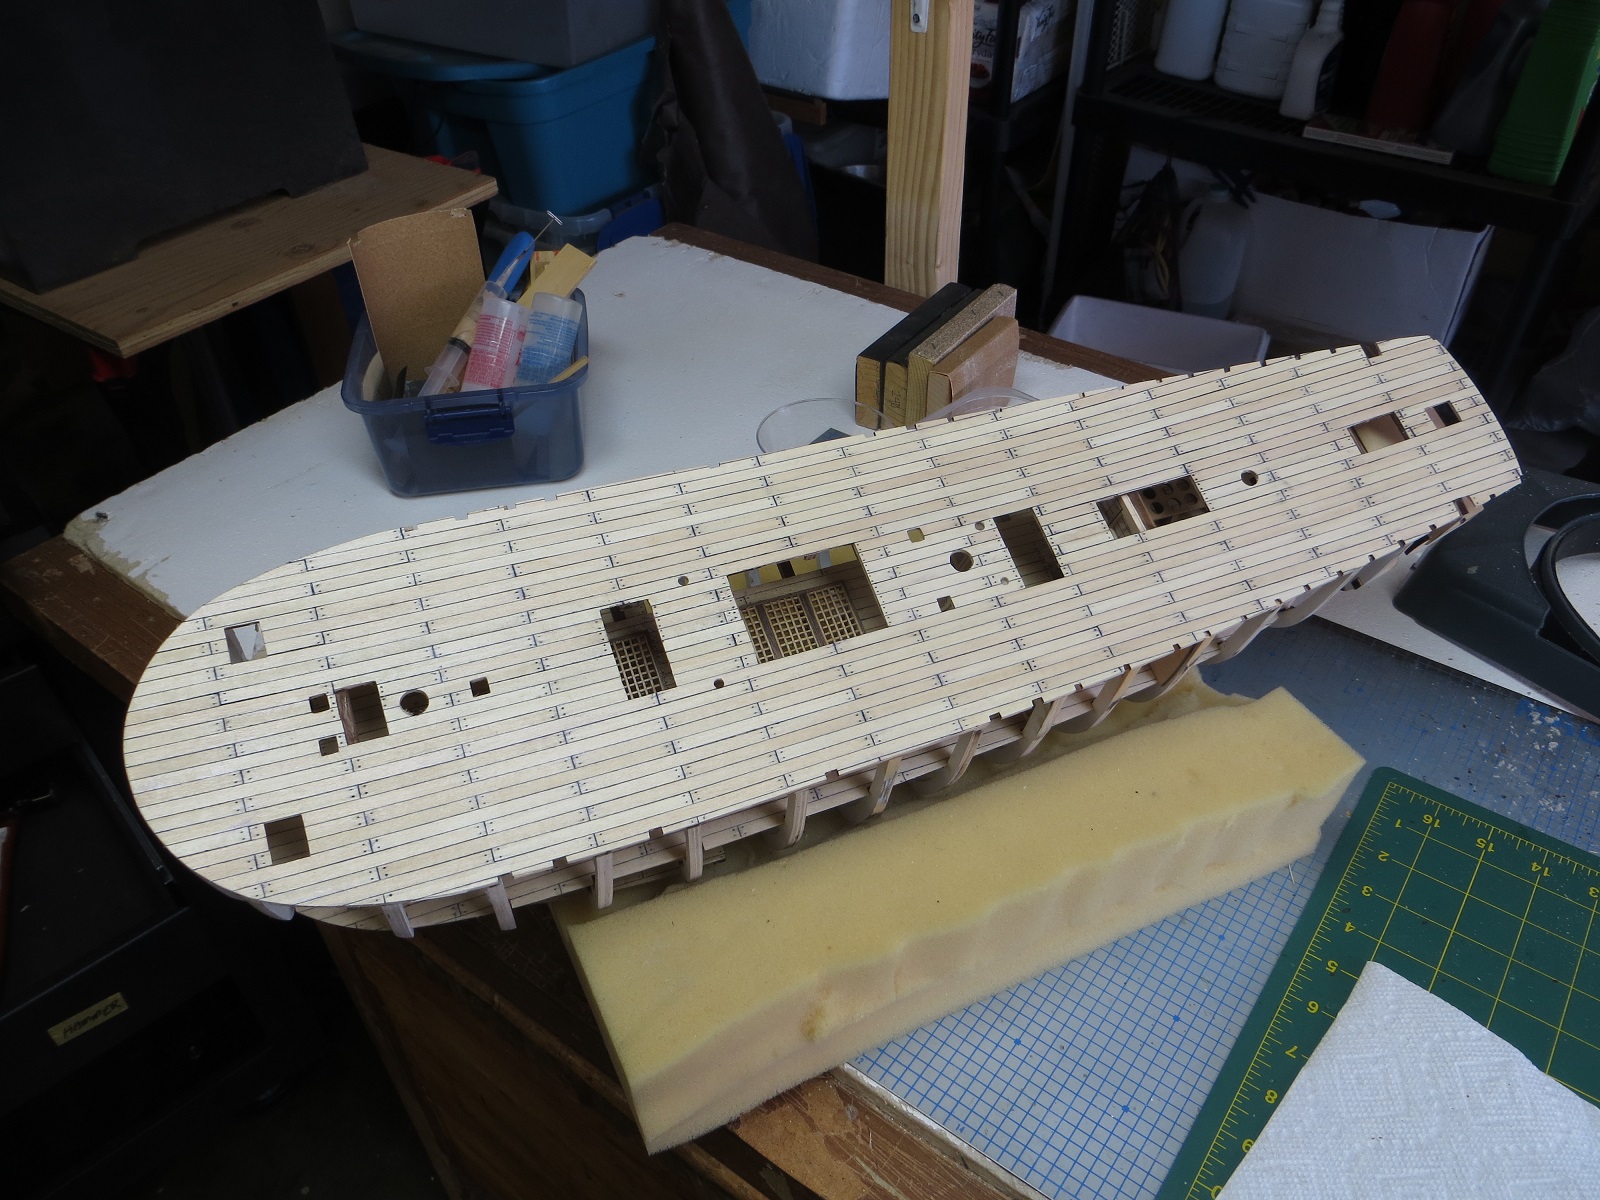
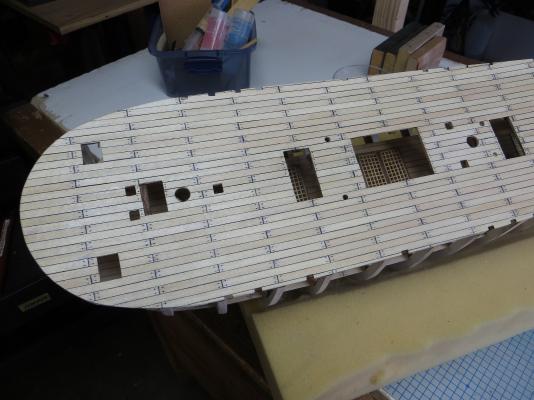
After laying down the planks, I used a single edge razor to scrape the surface of the decking. This really mutes the lines left by the permanent marker. I then applied a single coat of clear polyester. It did not seem to affect the permanent marker lines. I will keep your warning in mind as I progress. The next step in the build is to place the first seven rows of planking, starting from the top of the hull. These seven rows are in basswood. Once the are complete I will be switching to walnut to complete the planking. I am wondering if I should also put in caulking lines in the basswood portion of the planking. I would make each run of the planking really stand out.
-
Next step is to build the stern. This went quite easily. I began the first of the planking with the walnut. I guess I have made the election to single plank the hull.

-
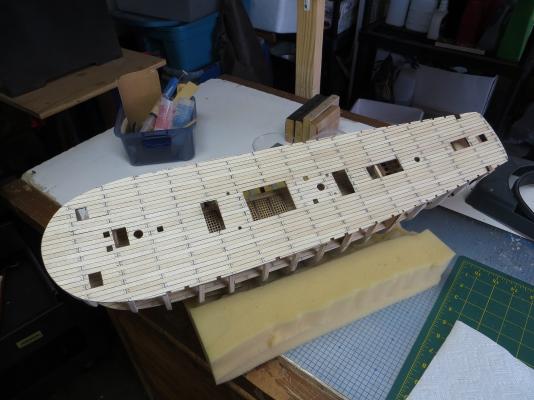
Well, it took longer than I thought but I have complete planking the top deck. I believe I did an acceptable job. I use a miter cut chopper (uses a razor blade) chop the planks to the same length (there are a couple of hundred). I then outline the edge of each plank with permanent marker to simulate the caulking. Finally, I build a jig to punch the nail holes which I marked with a lead pencil. I kind of like the effect. I have also put a coat of clear over the deck.
-
Thanks for the info on the breadfruit pots. I saw the pots in the instructions but had no idea what they were intended to hold. I will also check all the deck hole before planking.
-
I will next spend the next few weeks decing the maindeck and building other deck structures. I still have not decided whether I will single or double plank.
-
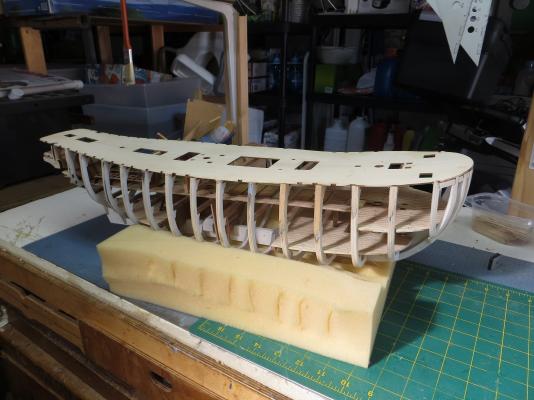
Well the main deck is in place and ready for planking. I also did some of the preliminary sanding in preparation for planking.