HOLIDAY DONATION DRIVE - SUPPORT MSW - DO YOUR PART TO KEEP THIS GREAT FORUM GOING! (Only 13 donations so far - C'mon guys!)
×


rcmdrvr
-
Posts
420 -
Joined
-
Last visited
Content Type
Profiles
Forums
Gallery
Events
Everything posted by rcmdrvr
-
Has anyone ever considered using wood veneers for planking. I would think it would work over solid hulls or as the second planking of a double planked hull. Looks like thin sheets can be purchase relatively cheaply and then cut into strips with band saw or maybe even a razor knife. Then again, I am a newbee so this may not be the best idea in the model shipworld.
-
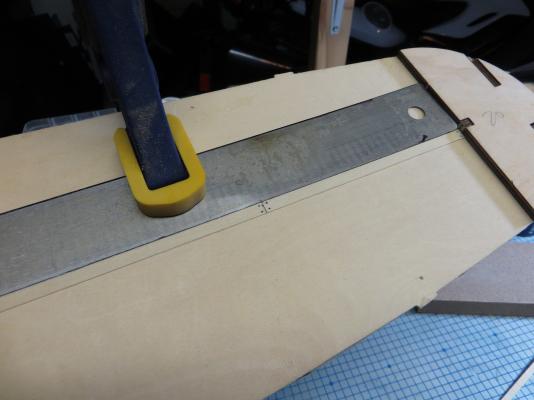
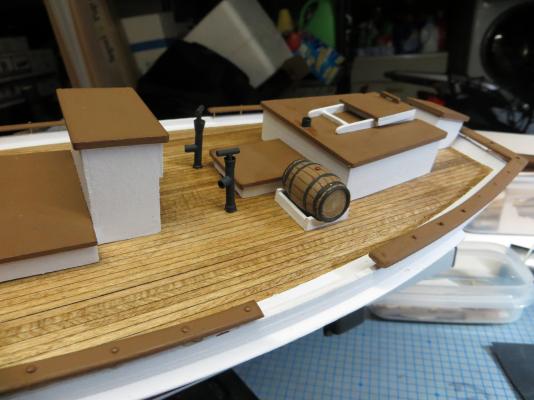
Well time to being laying the deck. I cut a bunch of deck planks and darkened the edges with a black permanent marker. Also used by jig to position the "nail" holes. I then marked the center line of the deck and clamped a metal ruler along the line. I then glued in the first line of planks and I am going to let these dry completely before continuing.
- 47 replies
-
- 3
-

-
- sanson
- artesania latina
- (and 1 more)
-
The next step in the instruction manual is planking the deck. I have built myself a few jigs to assist in the process. The first was to lengthen my cutter to accommodate 100cm deck planks and add a stop so the each deck plank is the same length. I also made a mark on the cutter to position the shorter length planks. I also make a jig to position the holes for the simulated deck nails. I will use a pin to make the two holes at the end of the plank and then use a sharpened lead pencil to darken the holes. I intend to darken the edges of the deck planking by using a permanent black marking pen.


-
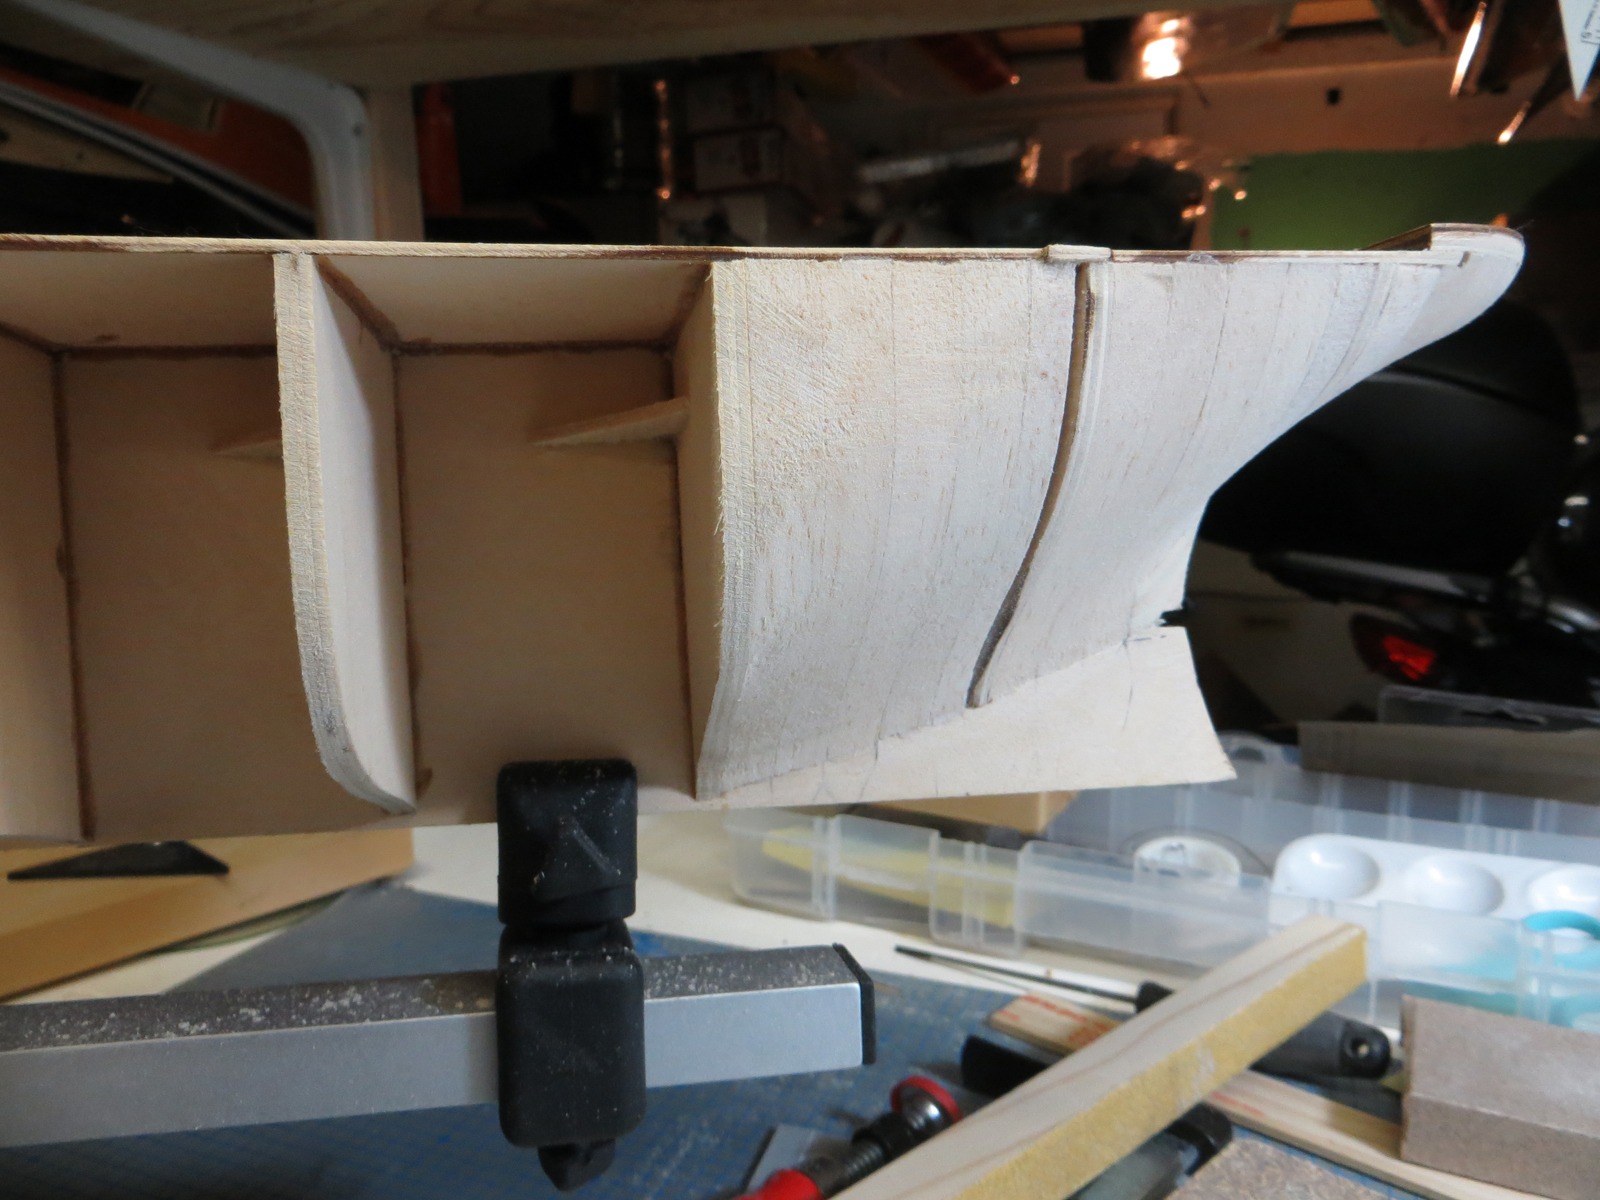
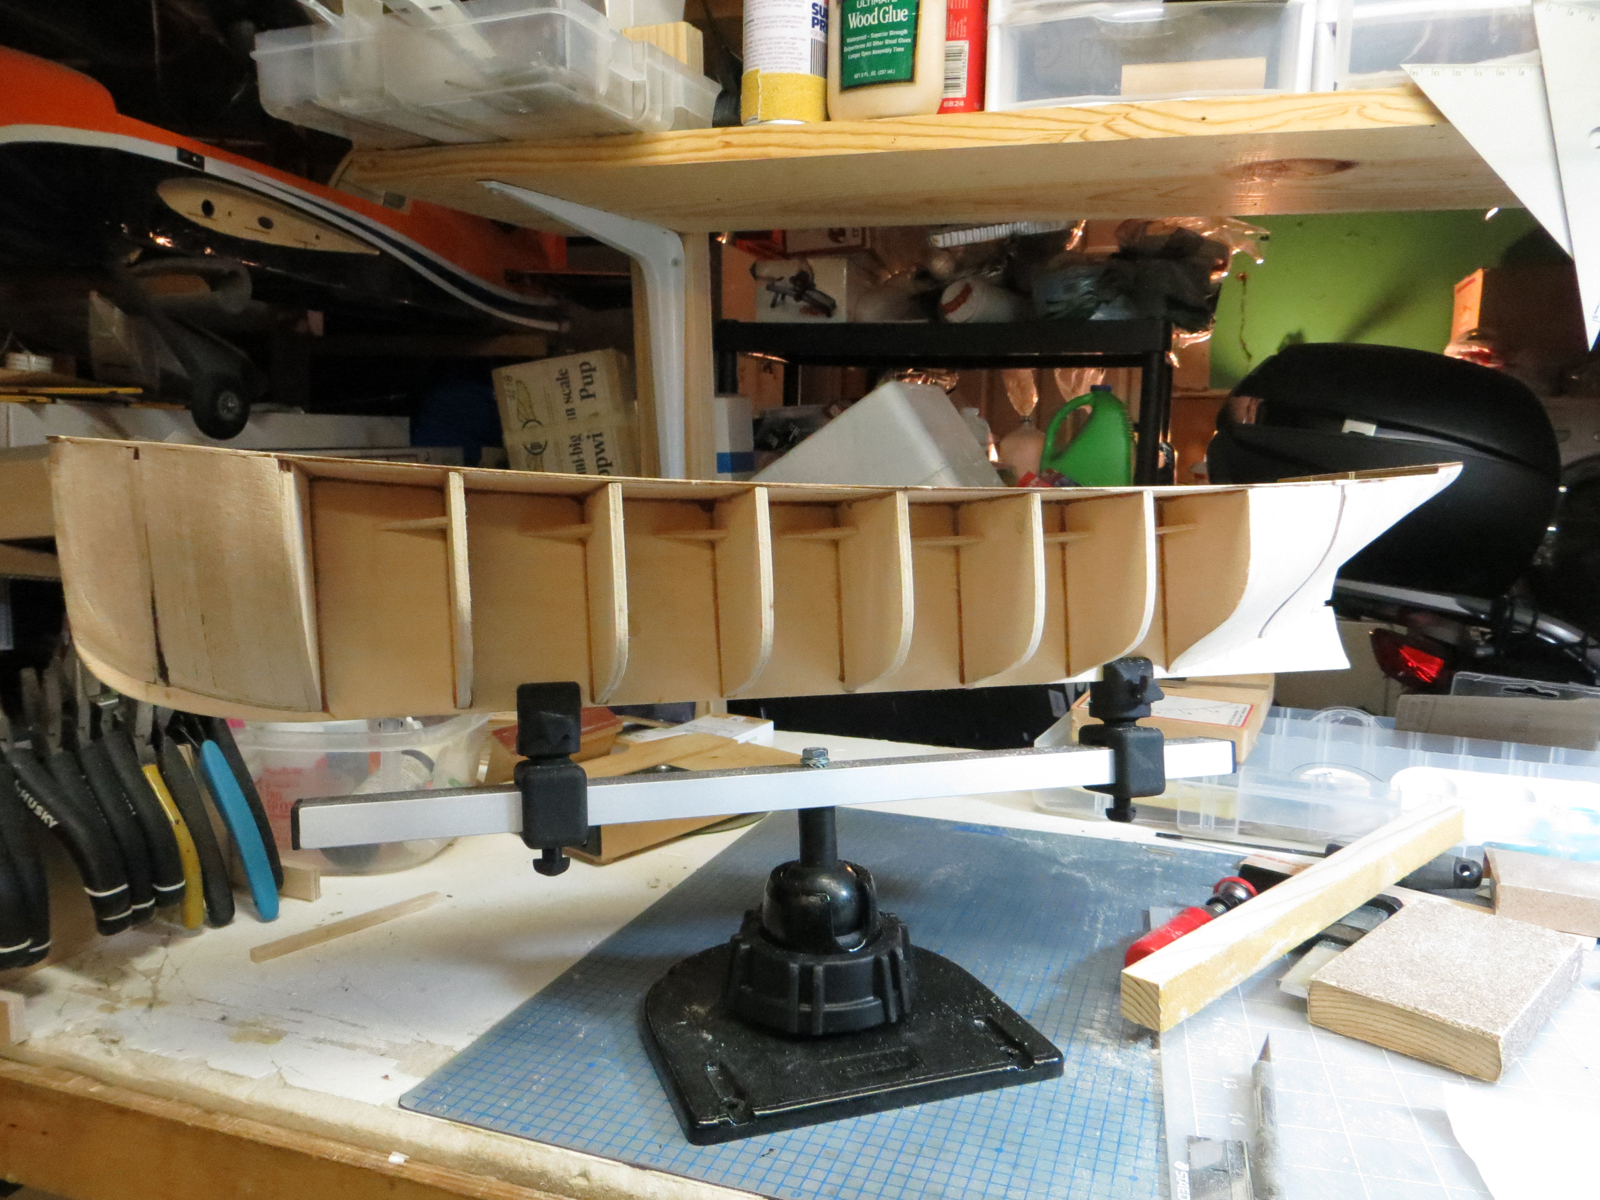
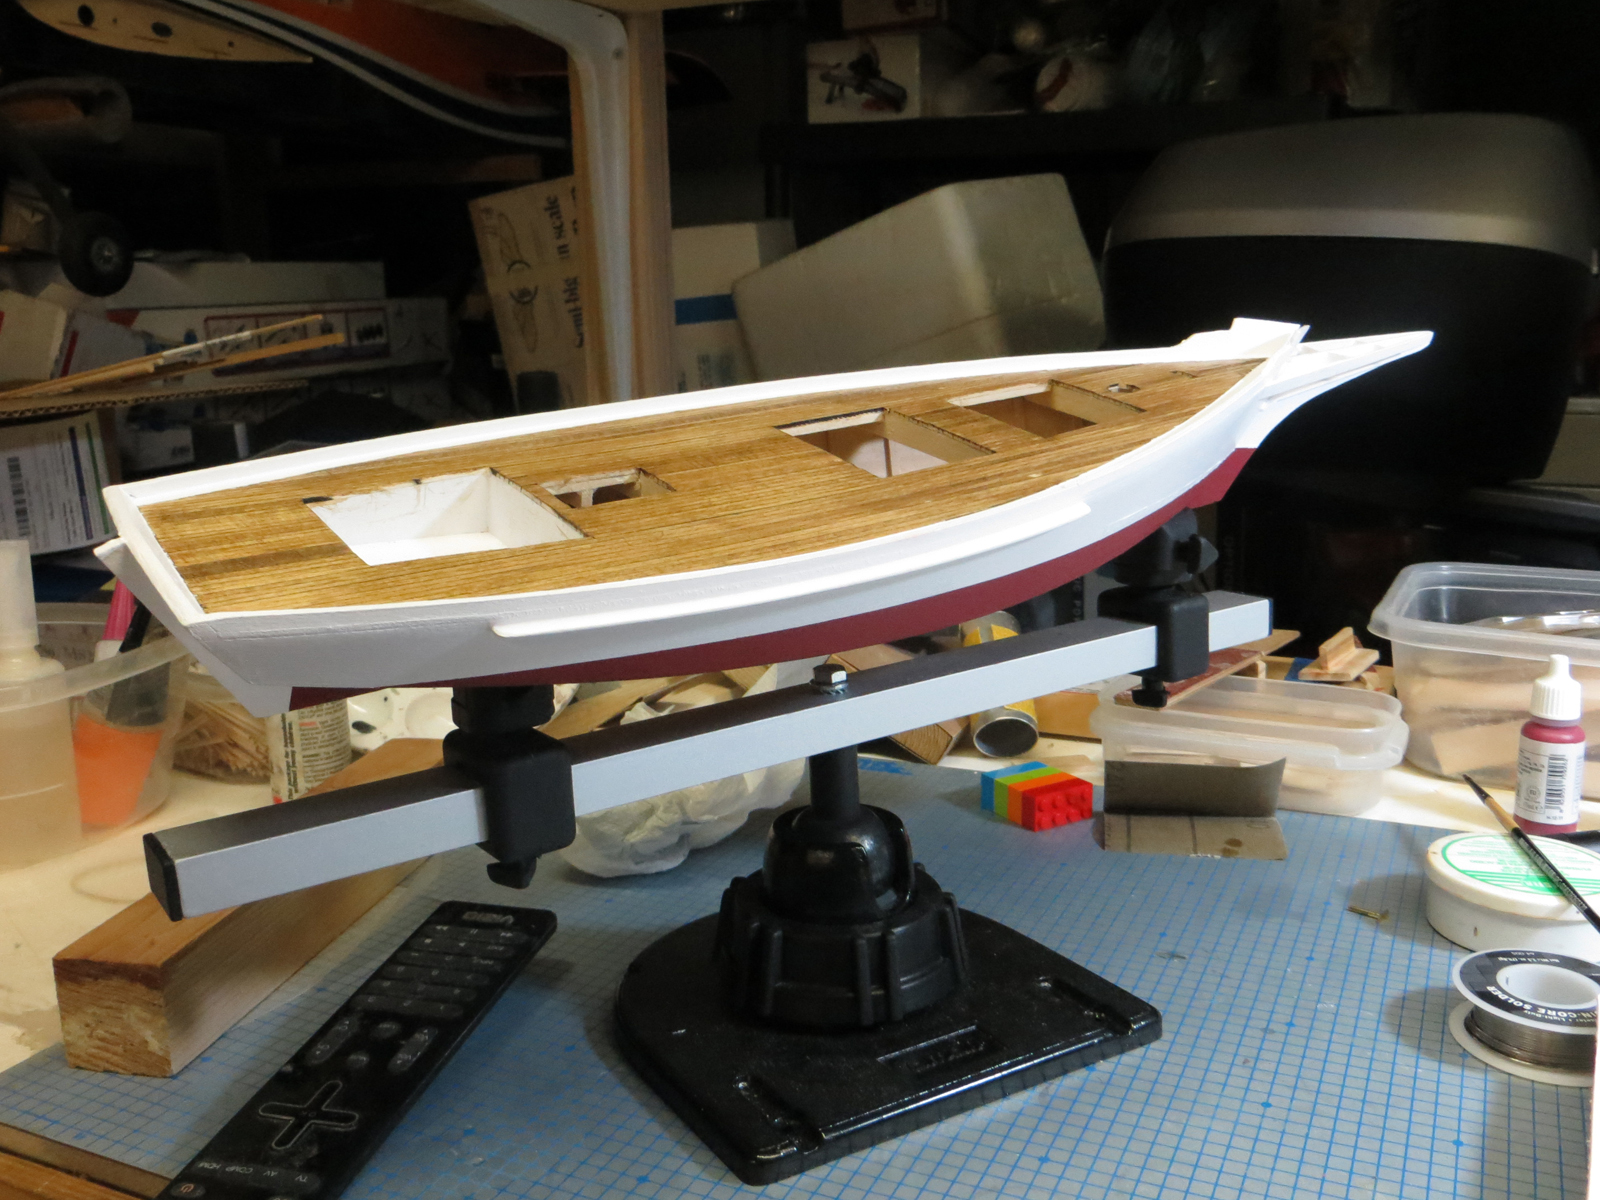
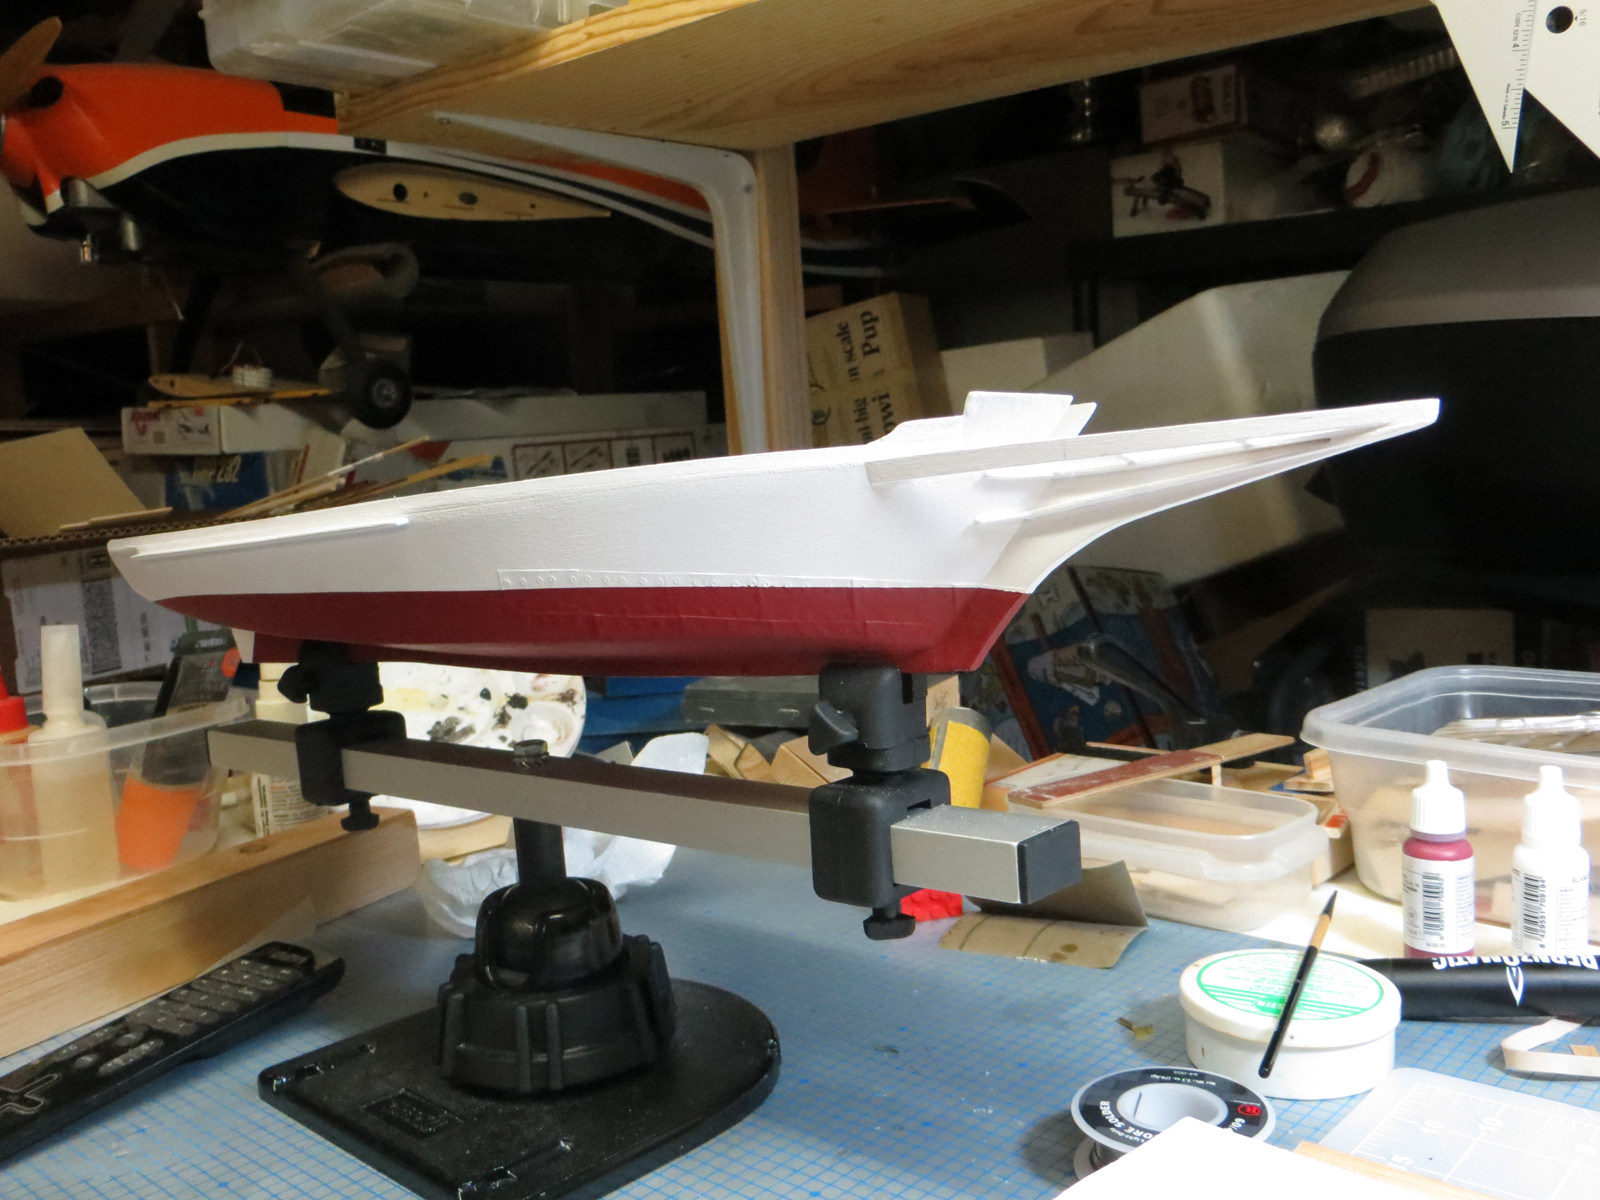
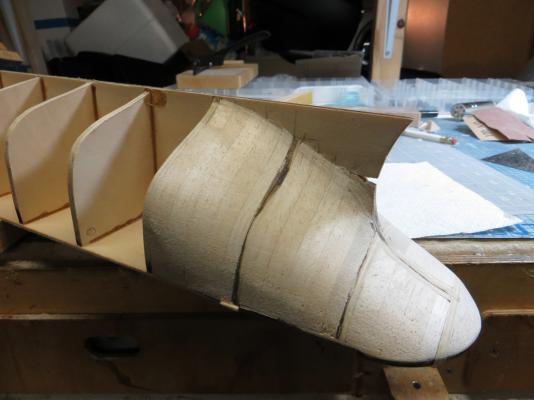
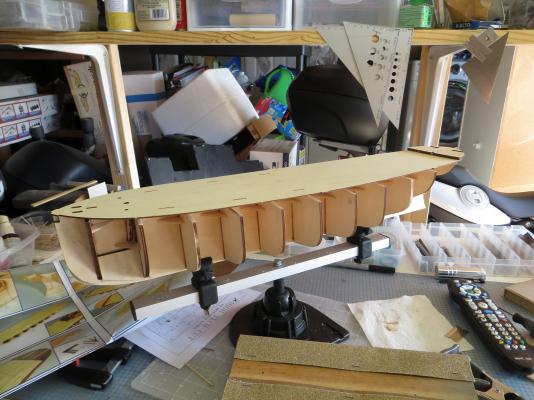
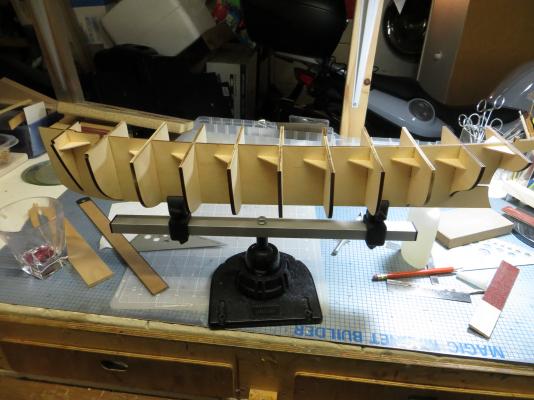
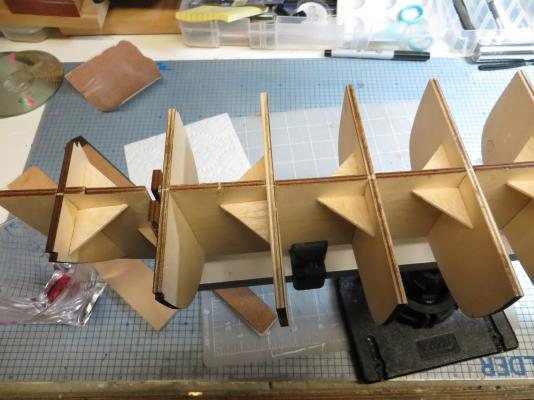
I decided to "fill-in" some of the bow and stern frames forming a semi-sold hull. I looked at the shape of the bow and stern and decided I would have a tough time achieving the shapes by planking alone (as this is my first planking attempt). I am hoping that by forming a solid hull in some areas; I will have more success. I did notice there was a thread about this issue last week. Reading the replies to the question about filling in the frames I guess most of the builders don't believe it to be a great idea. Well........time will tell. I did not use solid blocks. Instead I used 3/8" sheets of soft balsa wood and built up the space between the bulkheads. Took alot of shaping and sanding but I think I was successful. Looking at the build....it is surely in the "ugly" stage.


- 47 replies
-
- 4
-
-
- sanson
- artesania latina
- (and 1 more)
-
What to do about the DUST
rcmdrvr replied to rcmdrvr's topic in Building, Framing, Planking and plating a ships hull and deck
I have looked at a couple of box fan sanding stations. A filter is placed over a 20" box fan which is enclosed in a frame. You do your sanding over the standing station. The fan draws the dust laden air thru the filter and exhausts filtered air below the fan. Most designs call for filters from household cleaning and cooling units. Looks better than nothing but I would still use a mask. Anyone tried this solution. -
I am presently shaping a hull getting it ready for planking. In the process I am covering the floor of my workshop in layers of dust and shavings generated by sanding and sanding and more sanding. While sanding I fill the air with clouds of the fine dust. This dust gets everywhere. Once the task is done, I will break out the shop vac and try to vacuum up the settled clouds. However, because the filter in the vac is not very fine, I will also create a smaller storm of dust. I do wear a particle dust mask while sanding to protect me but is there anything else you guys do to control dust. My shop is a corner of my garage. I work with the door open to admit fresh air (which in December can be a bit brisk). I wonder if I could set up fans to create an exhaust wind. Any suggestions?
-
Well, last night I was able to glue the sub-deck into place. I used this piece to straighten out the few warps in the keel. The limited instructions indicate the next step is to begin deck planking. However, I am thinking I will fill in between the bulkheads in the bow and the stern to make a "semi-solid" hull. I think this will be easier for a first timer to plank (as this kit calls for single planking). I would rather complete this task before I begin installing a deck. How does everyone feel about making a semi-solid hull.
- 47 replies
-
- 3
-
-
- sanson
- artesania latina
- (and 1 more)
-
Wat do you use to prepare the surface for painting? Any primers or other preparations to fill the grain?
-
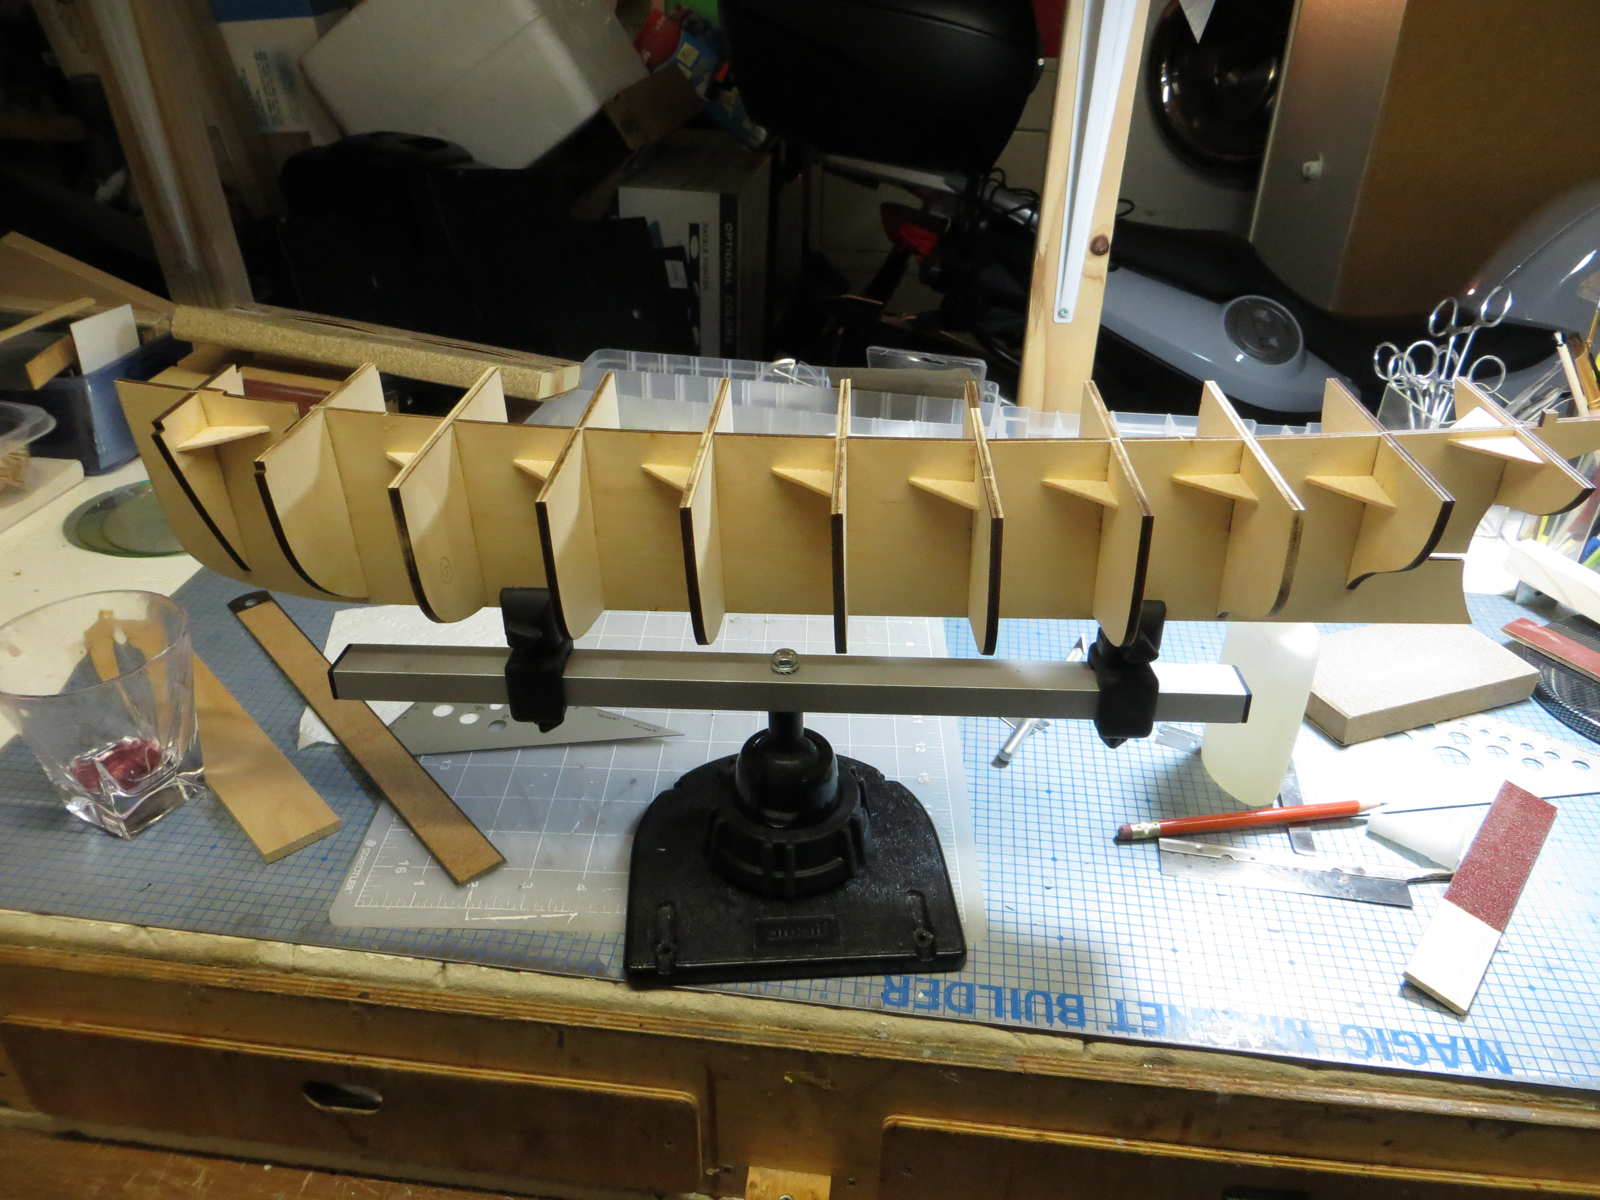
Last night I assembled the basic skelton of the model. A bit of light sanding was necessary to get the bulkheads to fit over the keel. Everything was generally straight; no significant warps. I cut a dozen or so small "right triangles" from 1/4 inch balsa and used these to hold the bulkheads square until the skelton was fully assembled. When I was sure everything was straight, I used tite-bond to glue the assembly together.
- 47 replies
-
- 5
-
-
- sanson
- artesania latina
- (and 1 more)
-
Coming from you that is a huge compliment.
-
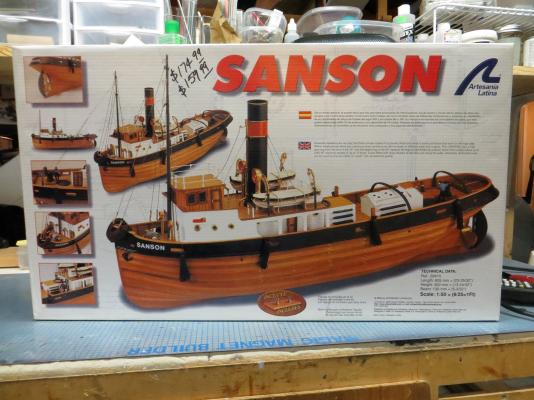
I have always had a fascination with tugs. When I saw this kit at a local hobbyshop I grabbed it off the shelf. This will be my second build. This will be my first attempt at planking a hull so I am a bit apprehensive about that part of the build. This looks to be another learning experience. On first perusal it appears to be pretty complete. The wood looks good and the laser cut parts looks well done. Nothing appears to be warped beyond use. The hardware also looks pretty good.
- 47 replies
-
- 6
-
-
- sanson
- artesania latina
- (and 1 more)
-
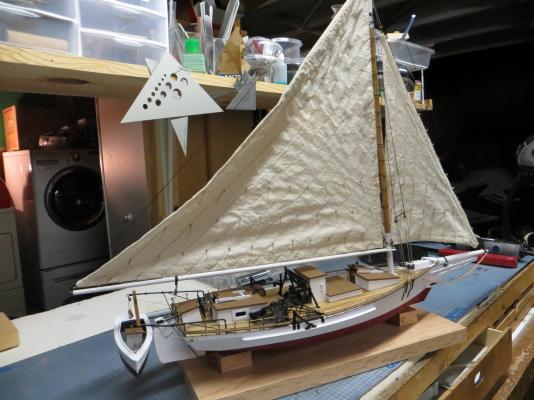
I have been away for a while. Had to have a bit of surgery and that threw me behind at work. I was able to continue working on the Willie, but did not take as many pictures of the progress as I should have. I am enclosing a few pictures of the model which I have moved out of the workshop and into the house. This was one of the most difficult modeling projects I have done. The basic building of the hull, masts, etc. was not too difficult but working with the brass parts and the rigging, etc. I found to be very difficult. While you get a lot of help by looking at the other builder's; you can also find the quality of their work somewhat intimidating. Some of the other builders of the Willie are awesome. Well I hope you find my build adequate. I really enjoyed the Willie and recommend it as a first build......it has a bit of everything. I will be starting a new build soon.....just purchased the Sanson.

- 64 replies
-
- 9
-
-
- willie l bennett
- model shipways
- (and 1 more)
-
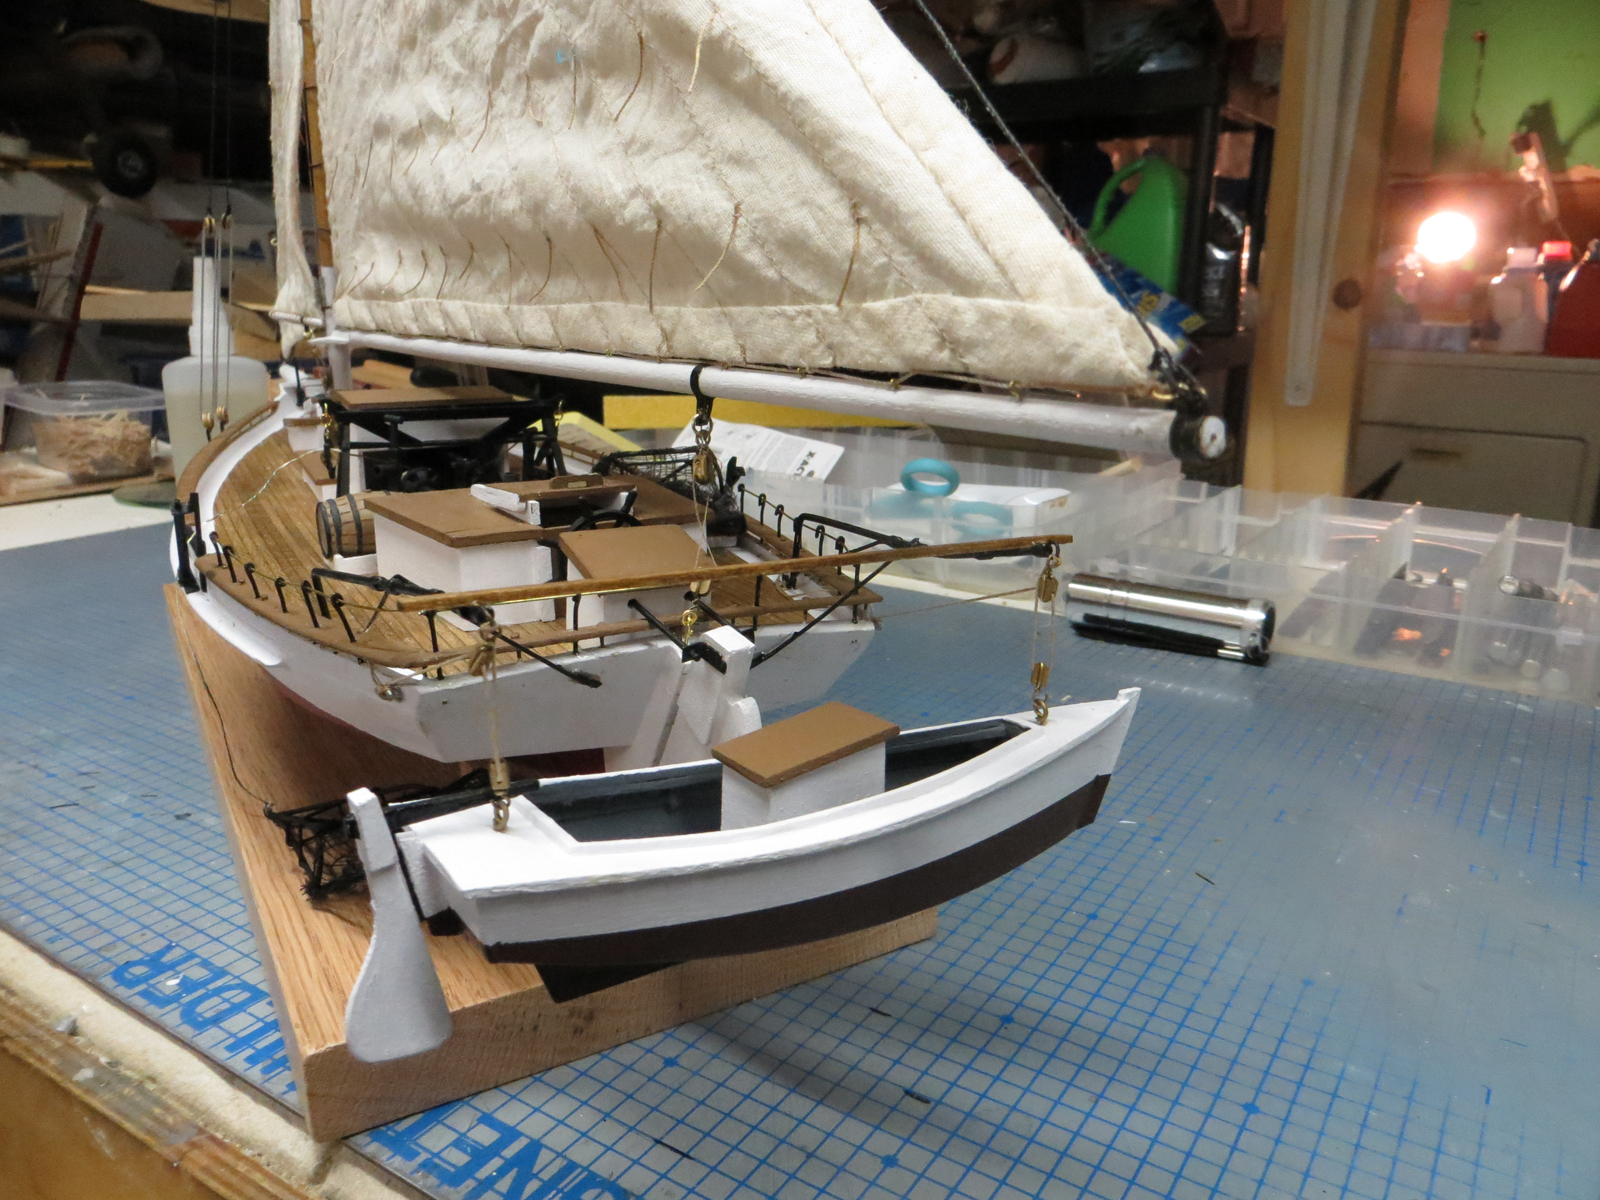
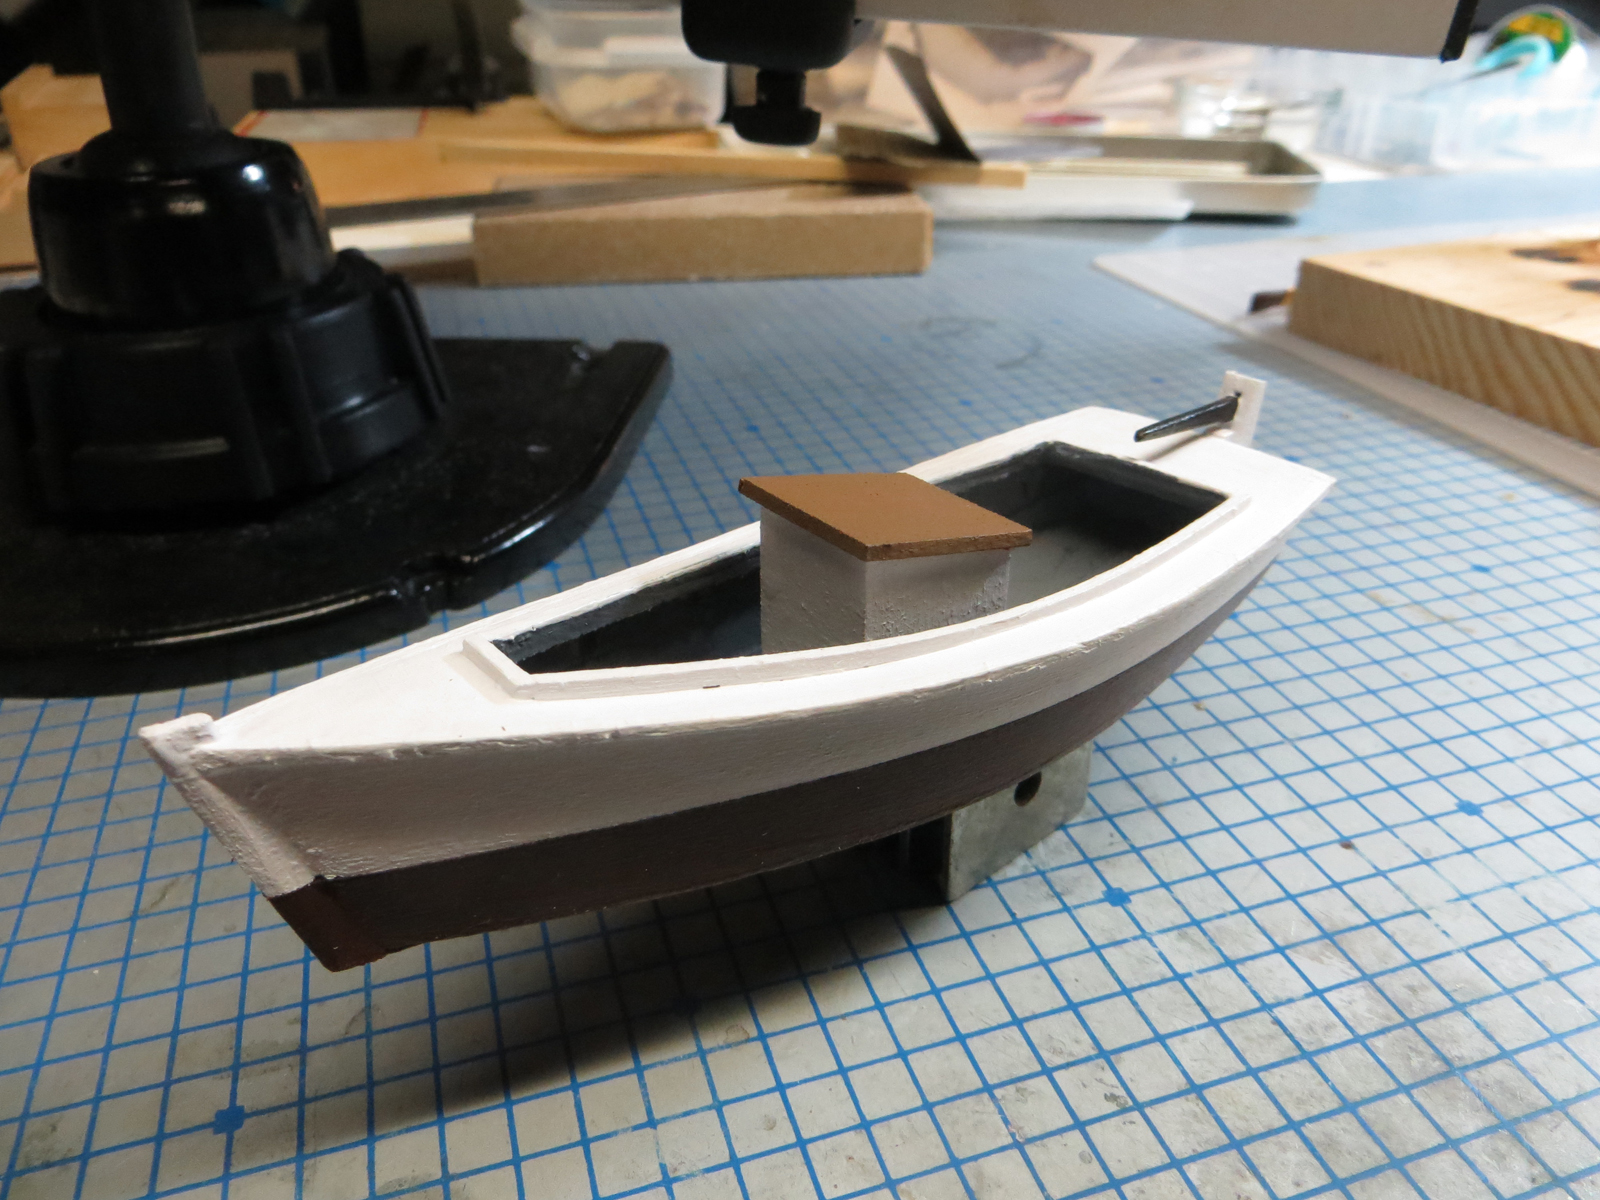
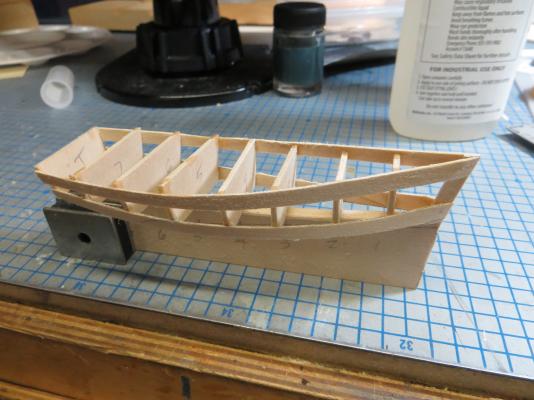
Well just about complete with the push boat. I still have to install the screw. I also worked on the deck equipment used to hoist the push boat but that work is not ready for prime time.


- 64 replies
-
- 3
-
-
- willie l bennett
- model shipways
- (and 1 more)
-
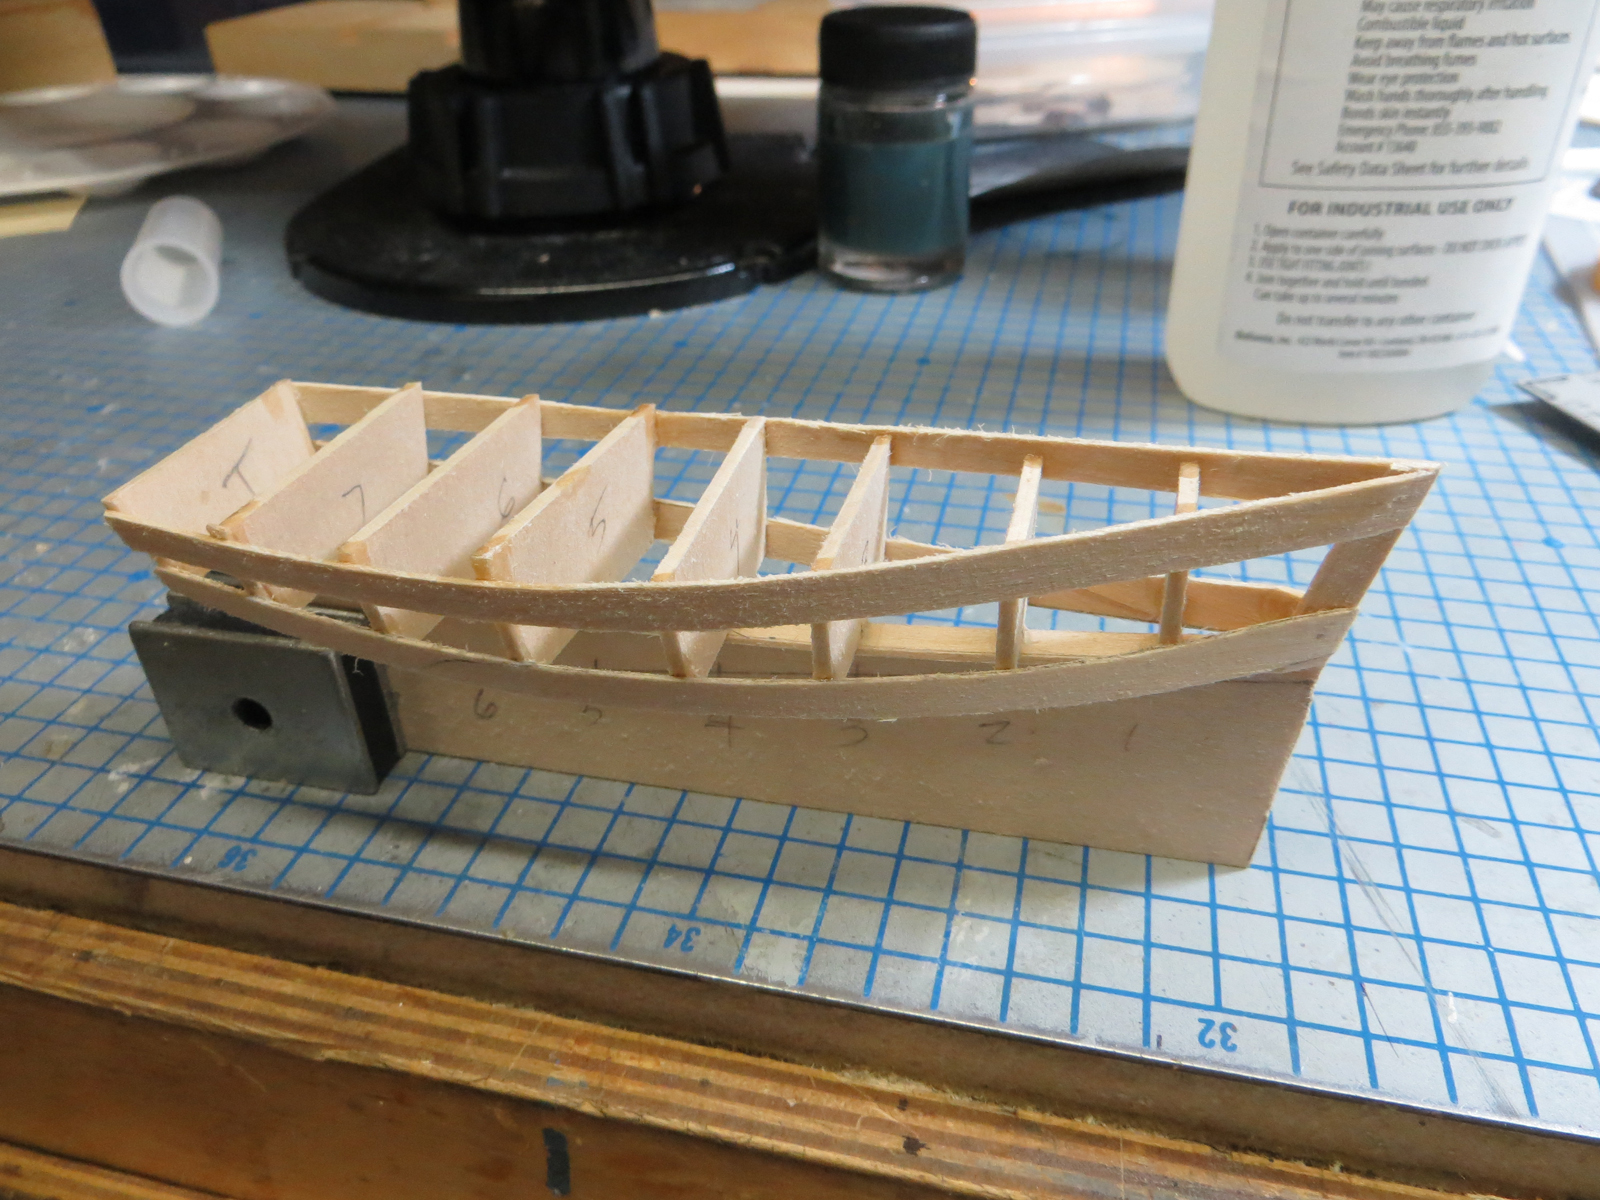
Started work on the push boat. Once again, you have to build this piece by piece. No die cut parts. I think I am headed in the right direction
- 64 replies
-
- 2
-
-
- willie l bennett
- model shipways
- (and 1 more)
-
Thanks for the comments. I appreciate your encouragement.
-
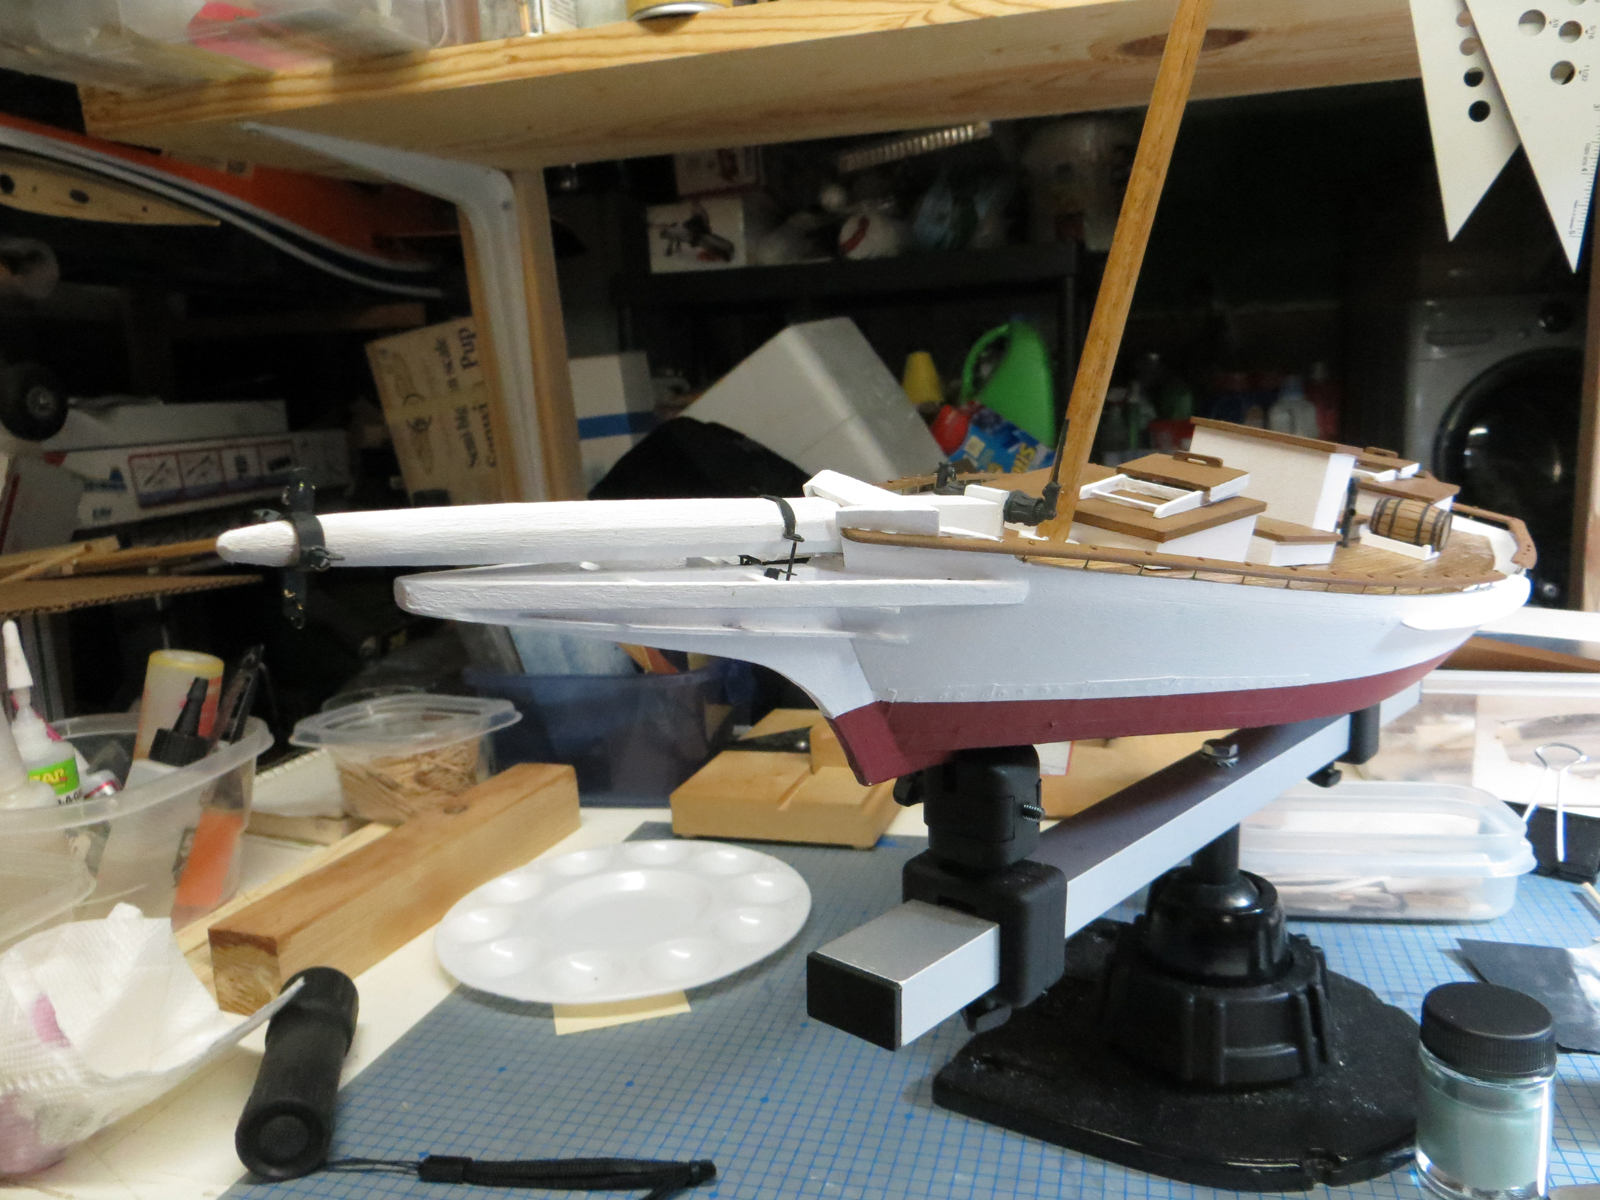
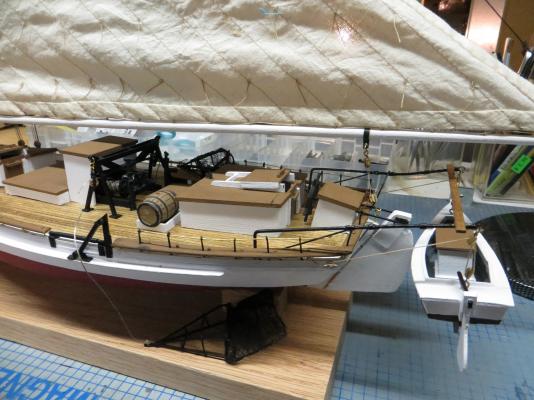
I have not posted for a while but I have been working. I constructed the railing around the hull. That was more of a task that I expected, but I am reasonably satisfied with the results. I also put in time making lots of little fittings. The fittings for the bow spirit a real challenge. Plenty of little tiny pieces of brass hit the workshop floor as I screwed up several versions before I made acceptable pieces. Same can be said for the pumps. I am getting practice on my brass and solder skills.....which did not exist several weeks ago. I kind of like the looks of my fresh water barrel. Finally, I tapered the main mast and have it positioned in the hull. It has not been permanently attached. I guess the next project will be the push boat and fittings.


- 64 replies
-
- 7
-
-
- willie l bennett
- model shipways
- (and 1 more)
-
Reducing the size of a jpg. Most of the photo editing programs have processes to reduce image size. I use photoshop elements and it only takes a few seconds. I am sure other members can suggest other software if you don't have elements.
-
You gentlemen working on the Sanson. Start some build logs. I have the model sitting in a box. Might be my next project.
-
It was great that you made the doors on the motor housing operable. Now we can view all the detail work you did to the motor driving the winder. Someday I hope to come up to your level of work.
-
I will have to admit that when I selected this model I had no idea what I was getting into. I thought it was principally a woodworking project. Now I see it involves so much more. I am happy I made the selection. While sometimes frustrating.....I am really enjoying the process.
- 64 replies
-
- 1
-
-
- willie l bennett
- model shipways
- (and 1 more)
-
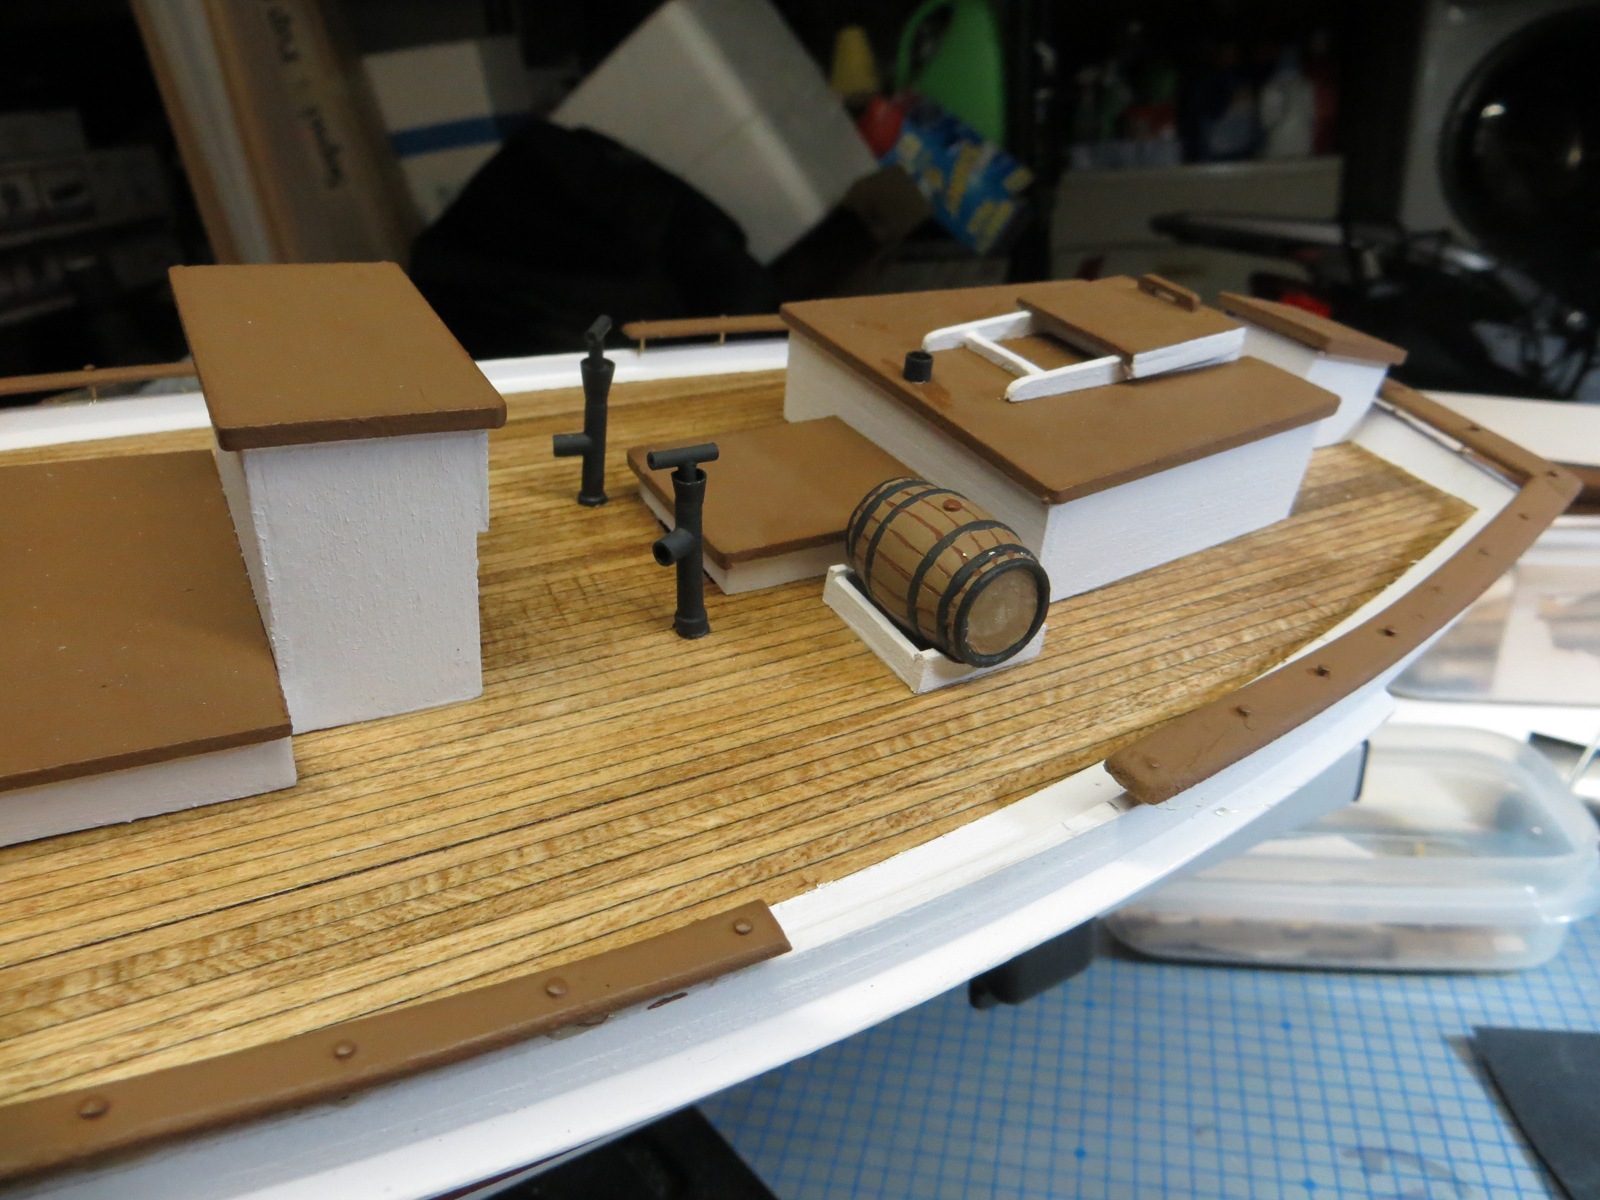
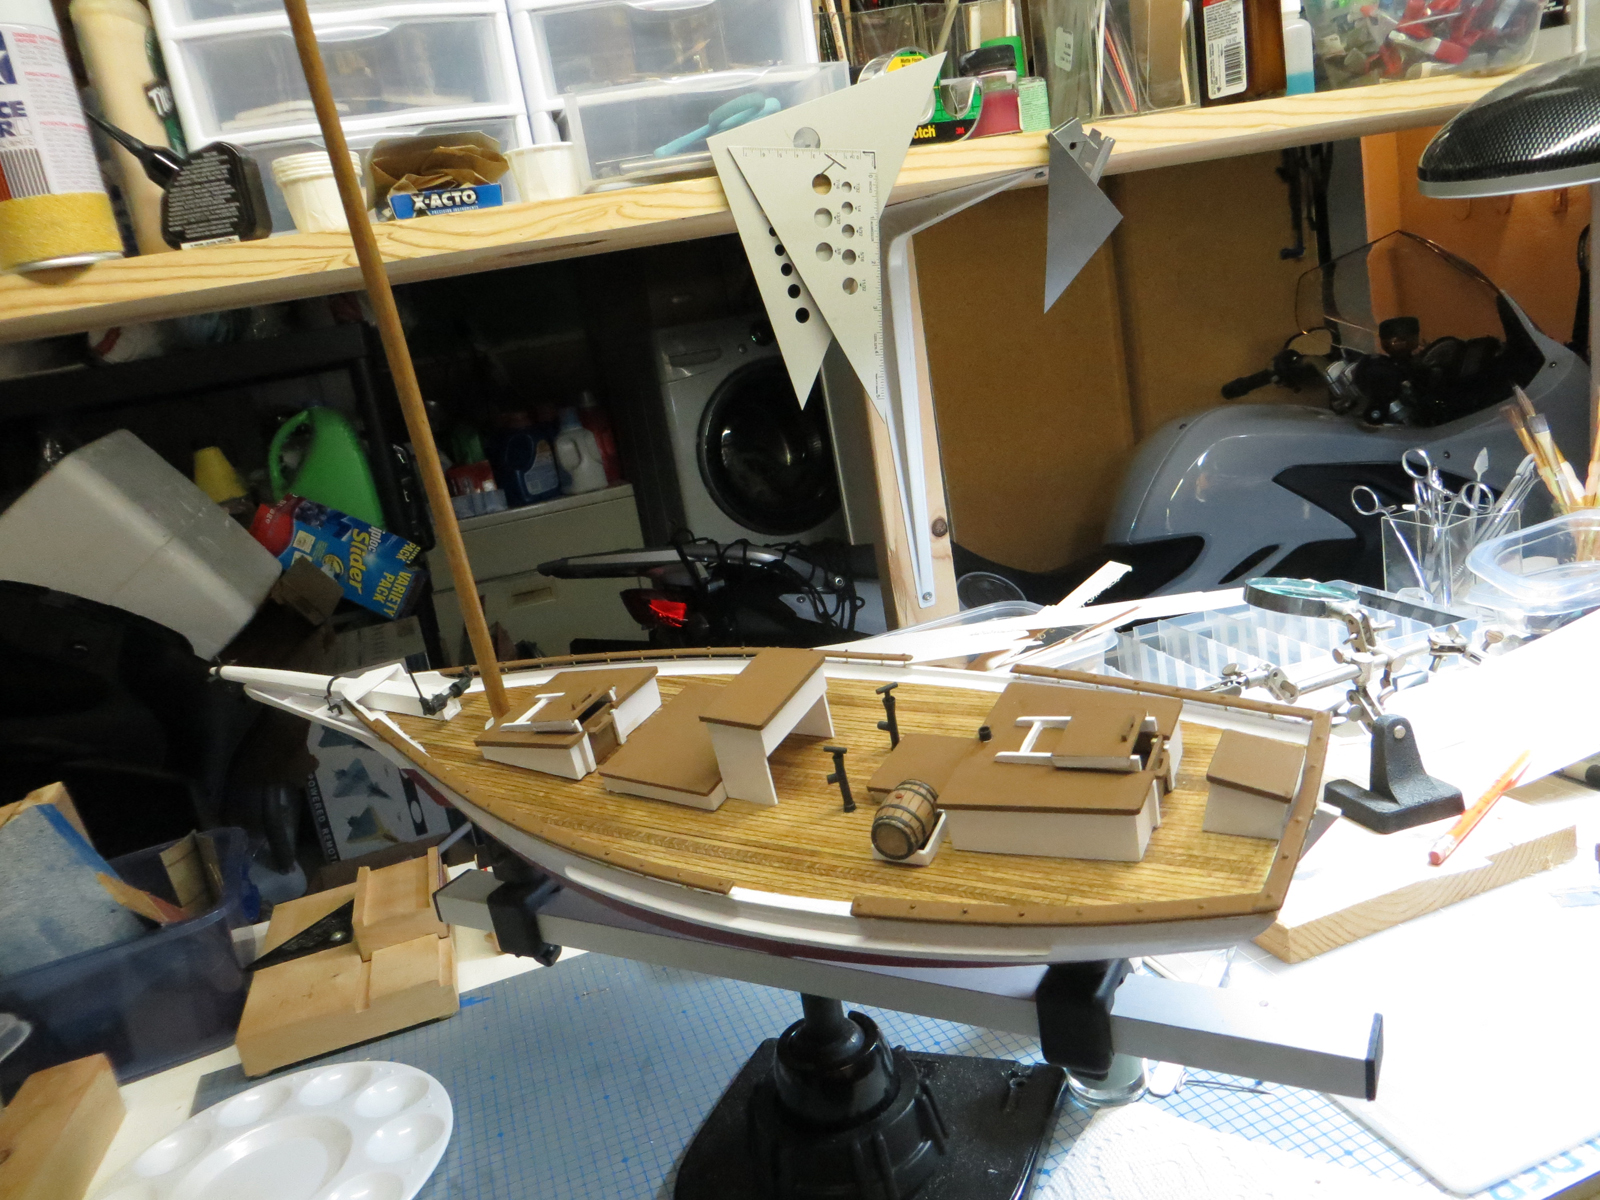
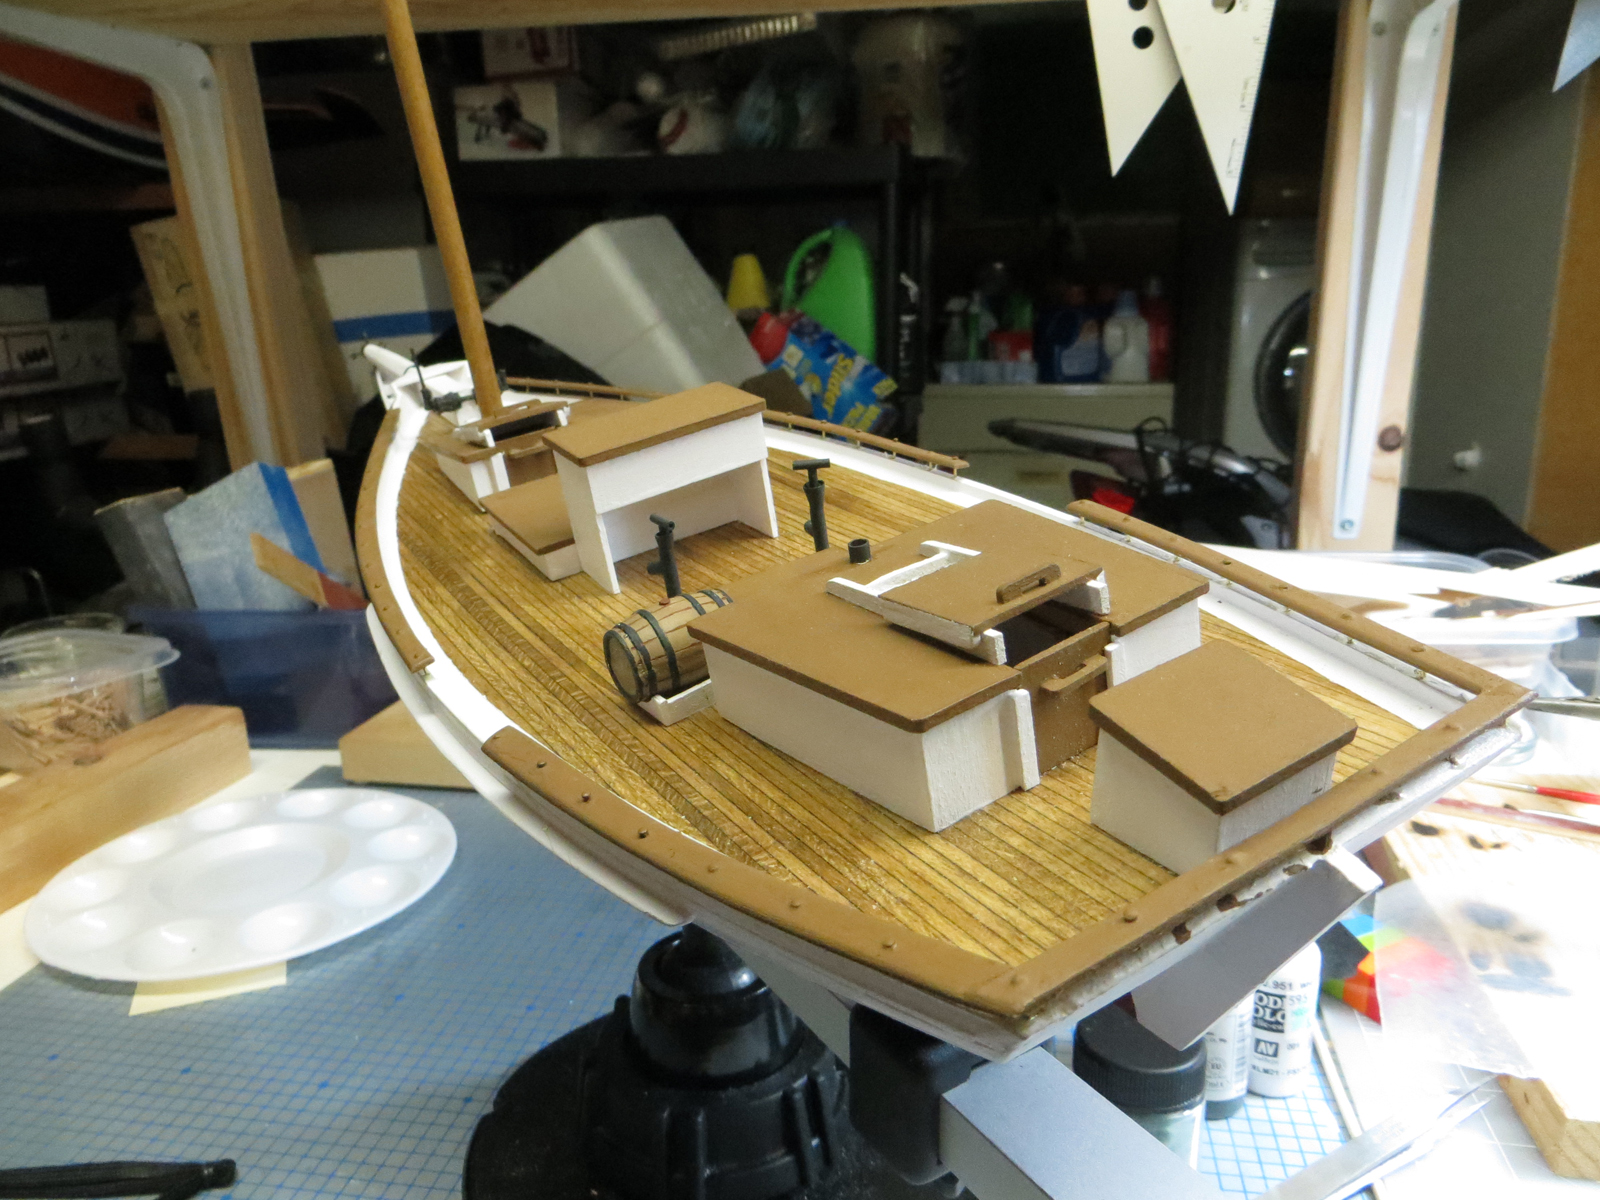
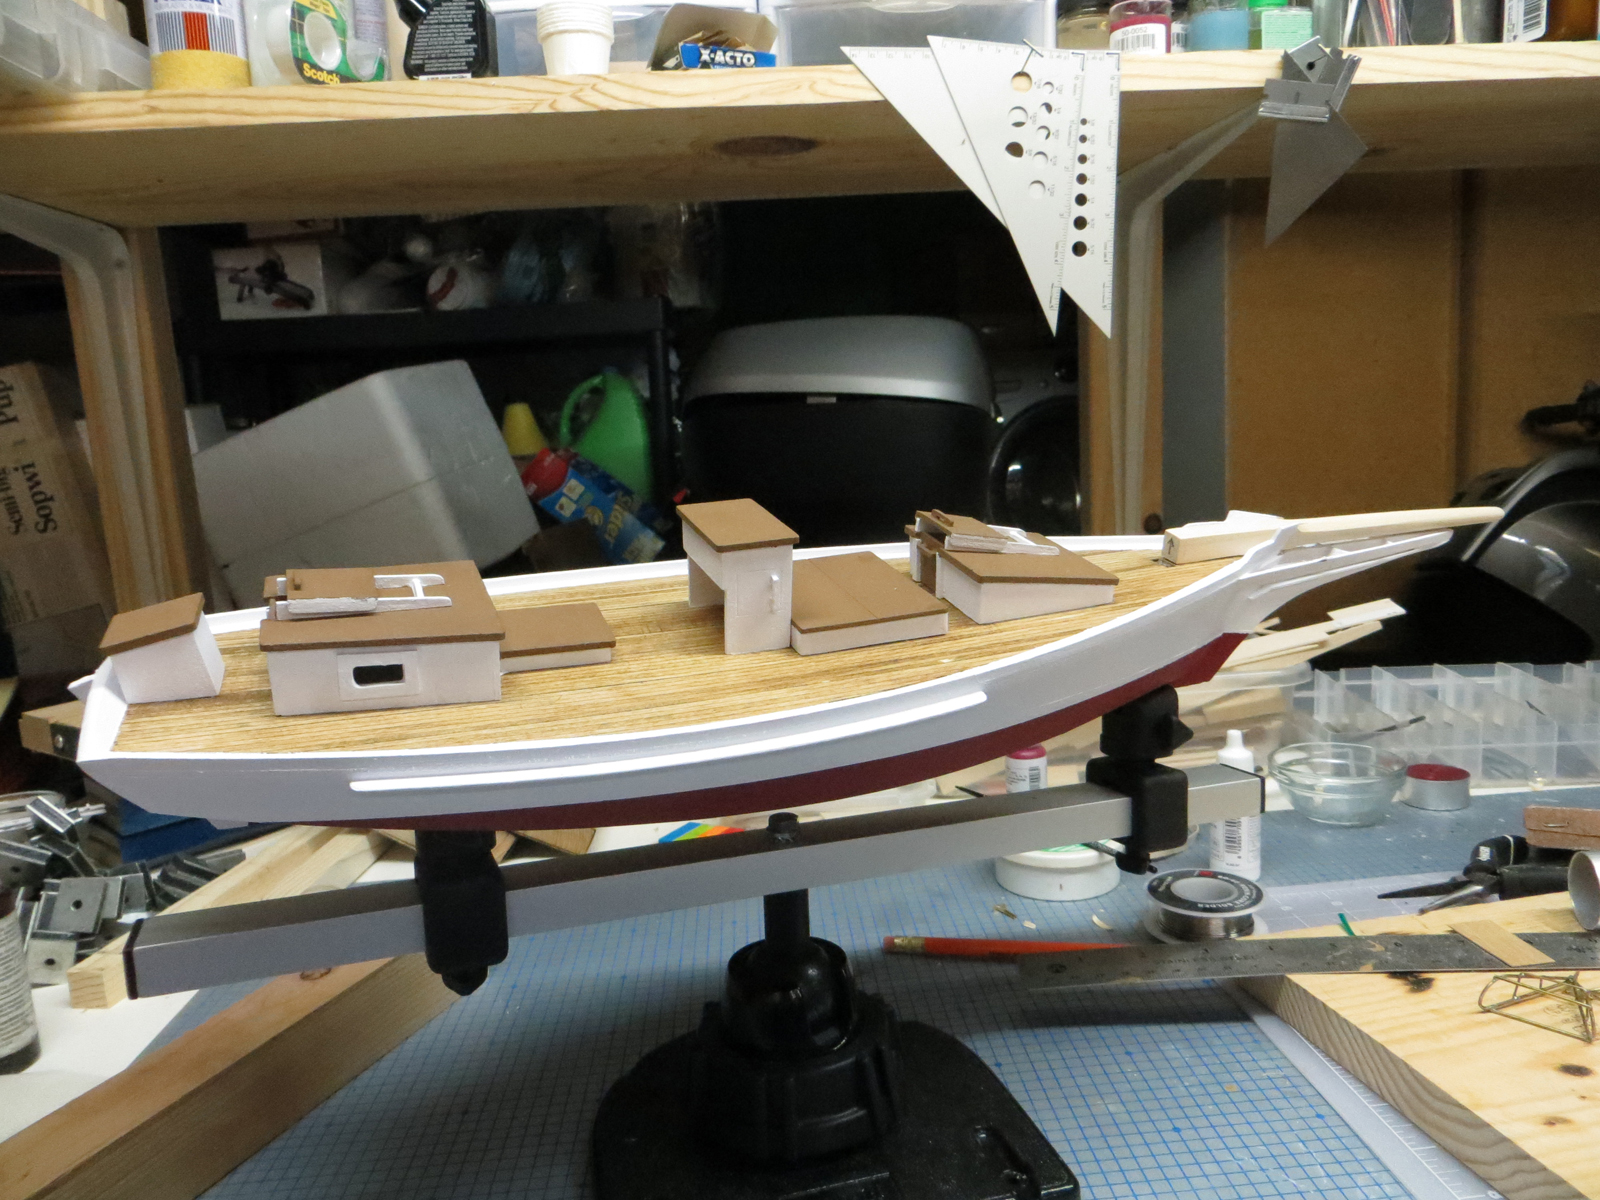
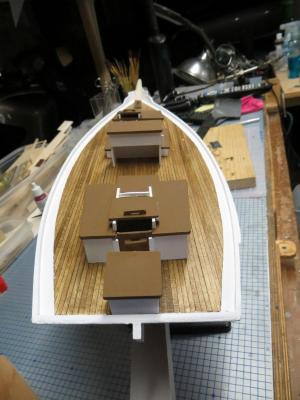
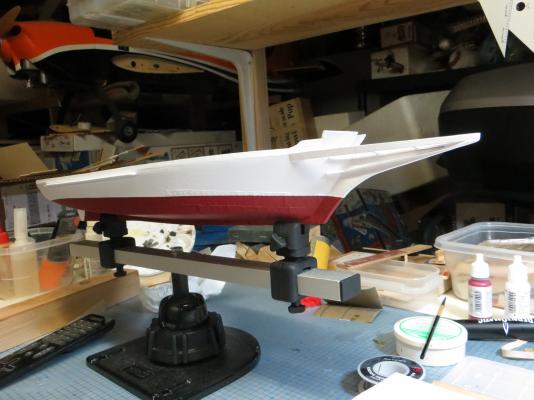
I completed most of the cabin work. I let the paint dry for a couple of days so it could be easily handled. Since the deck is slightly curved, I placed sandpaper on the deck and "sanded" the bottom of each cabin or piece of furniture before gluing to the deck. This worked well. If you look at the first photo you can see that I have carved my bow spirit and I am now working on mounting it. Interesting process to go from square at one end of the bow spirit to round at the other end. Once it is mounted, I have more metal work to perform. You can say one thing about this hobby, you sure get to work with a lot of different materials and learn a lot of new processes.


- 64 replies
-
- 5
-
-
- willie l bennett
- model shipways
- (and 1 more)
-
Thanks for the images. I did manage to get them downloaded and with a little re-sizing I think they will be great for my Willie. I had the same idea but you have done a great job and that will save a lot of work.
-
Very impressive. You do really beautiful work. I don't think that I will add all of the hidden detail but I believe you gear guard is a great idea. It will be seen and adds realism. I will see if I can duplicate it.
-
I was also able to get some painting done on the hull.

- 64 replies
-
- 2
-
-
- willie l bennett
- model shipways
- (and 1 more)
-
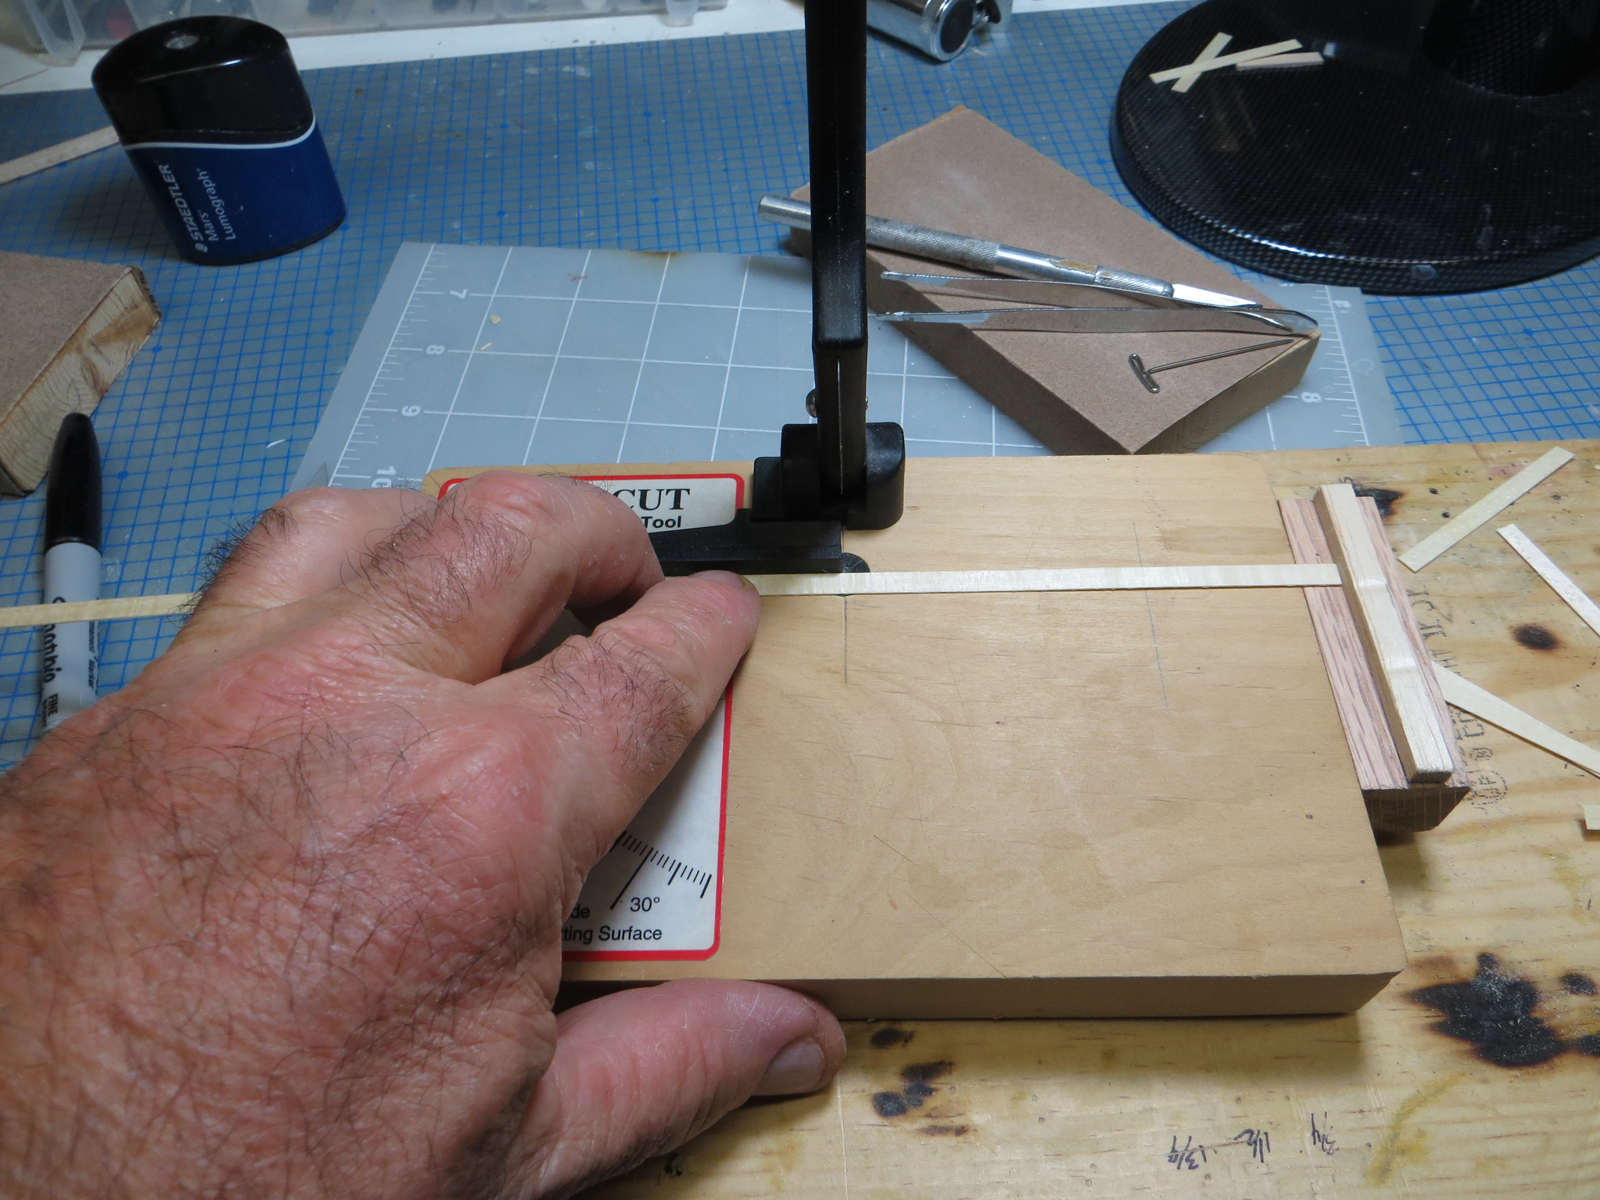
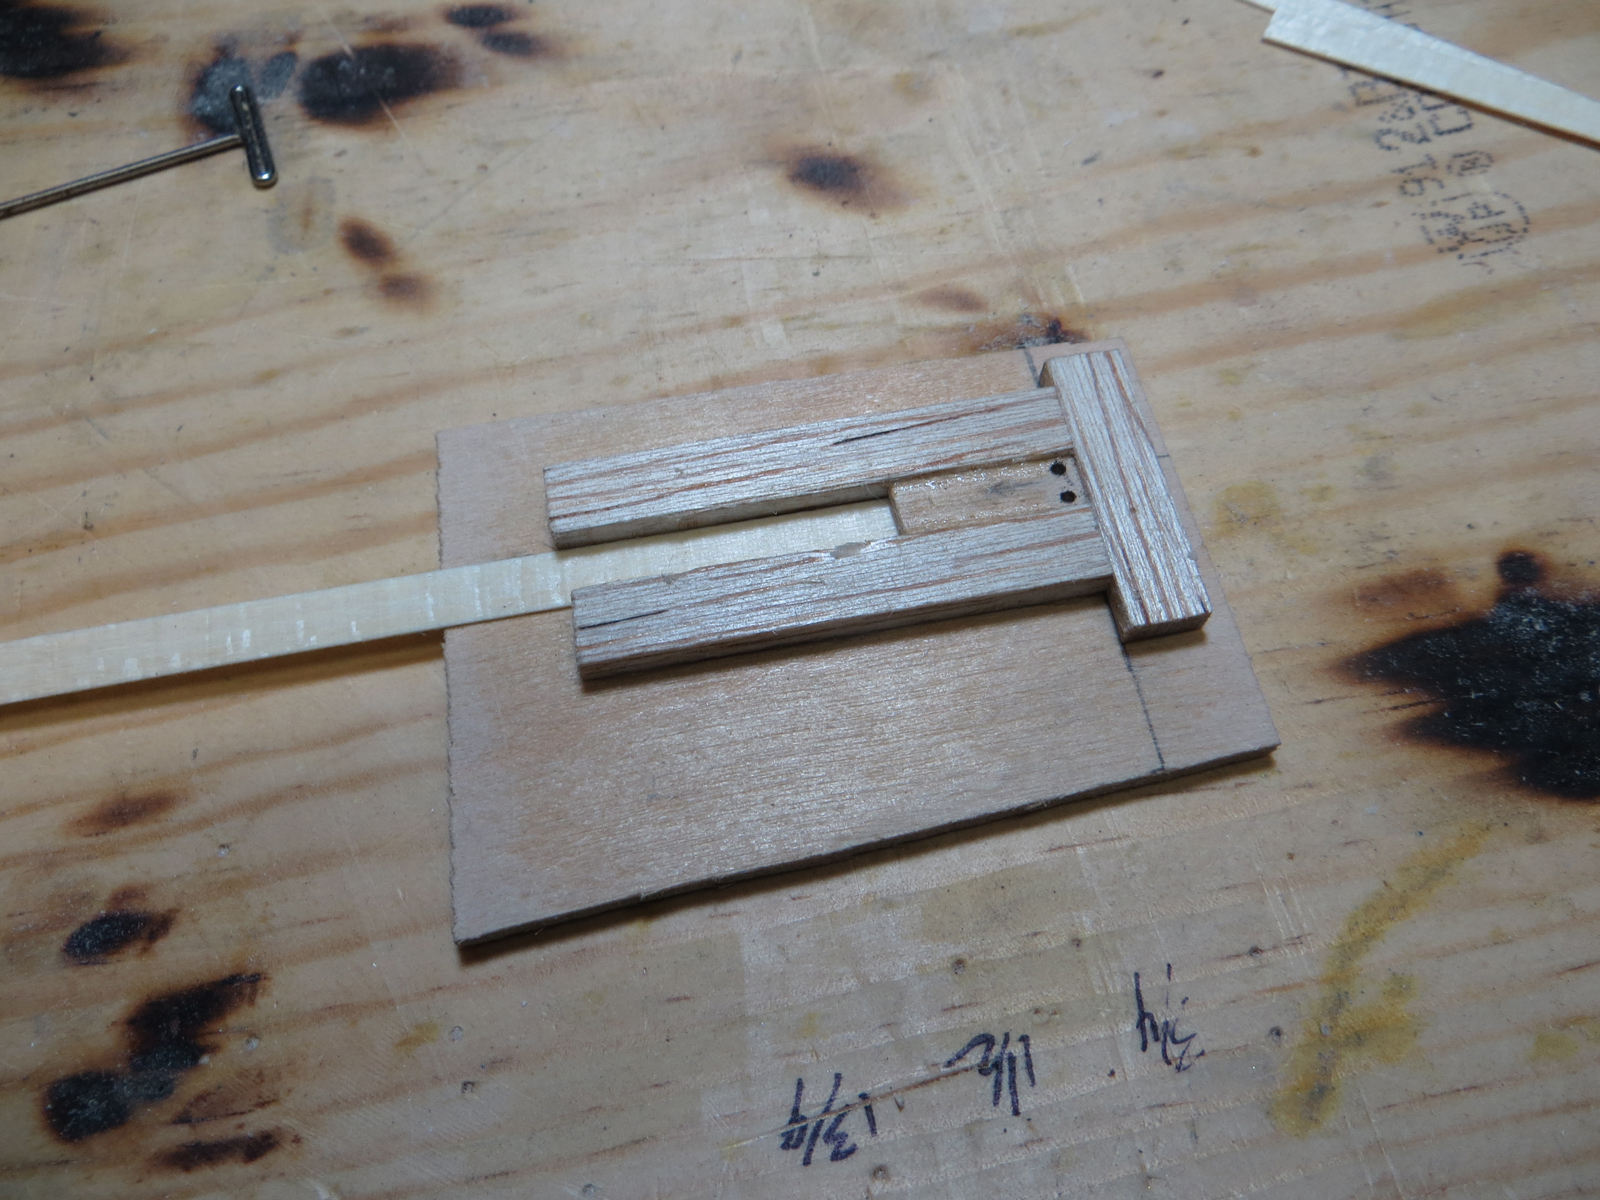
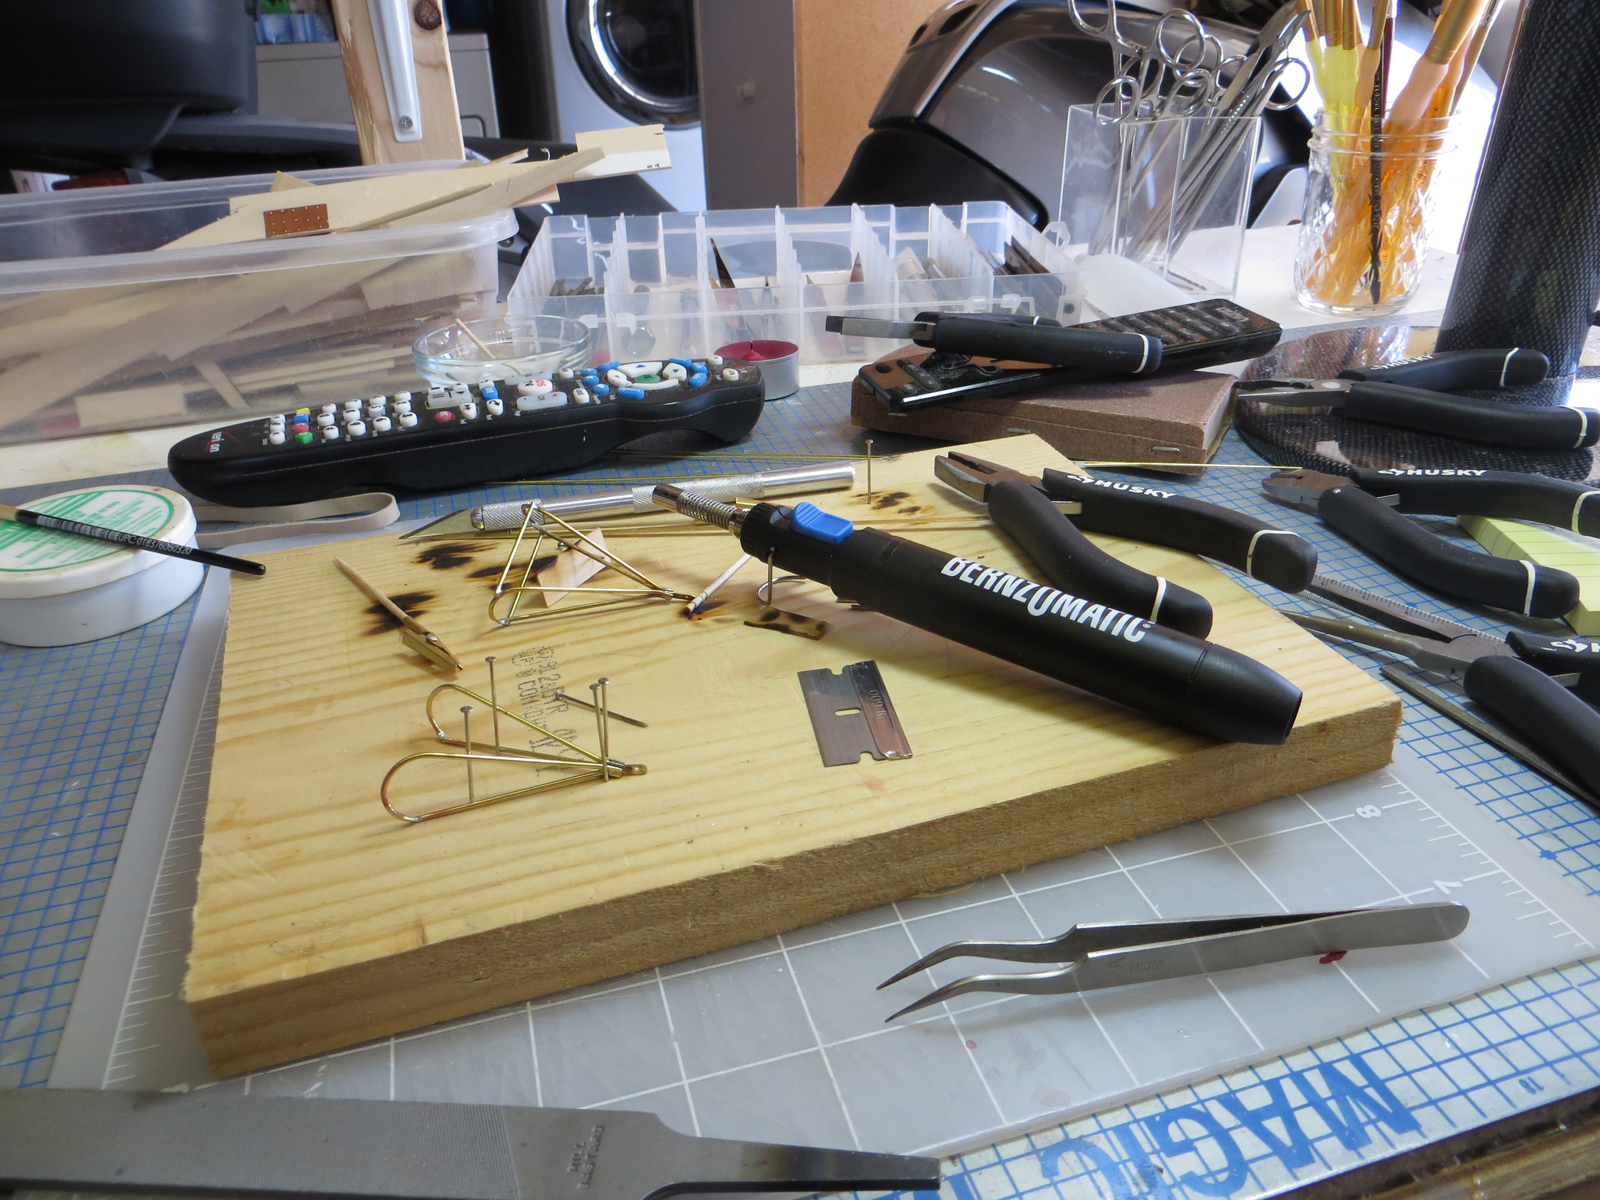
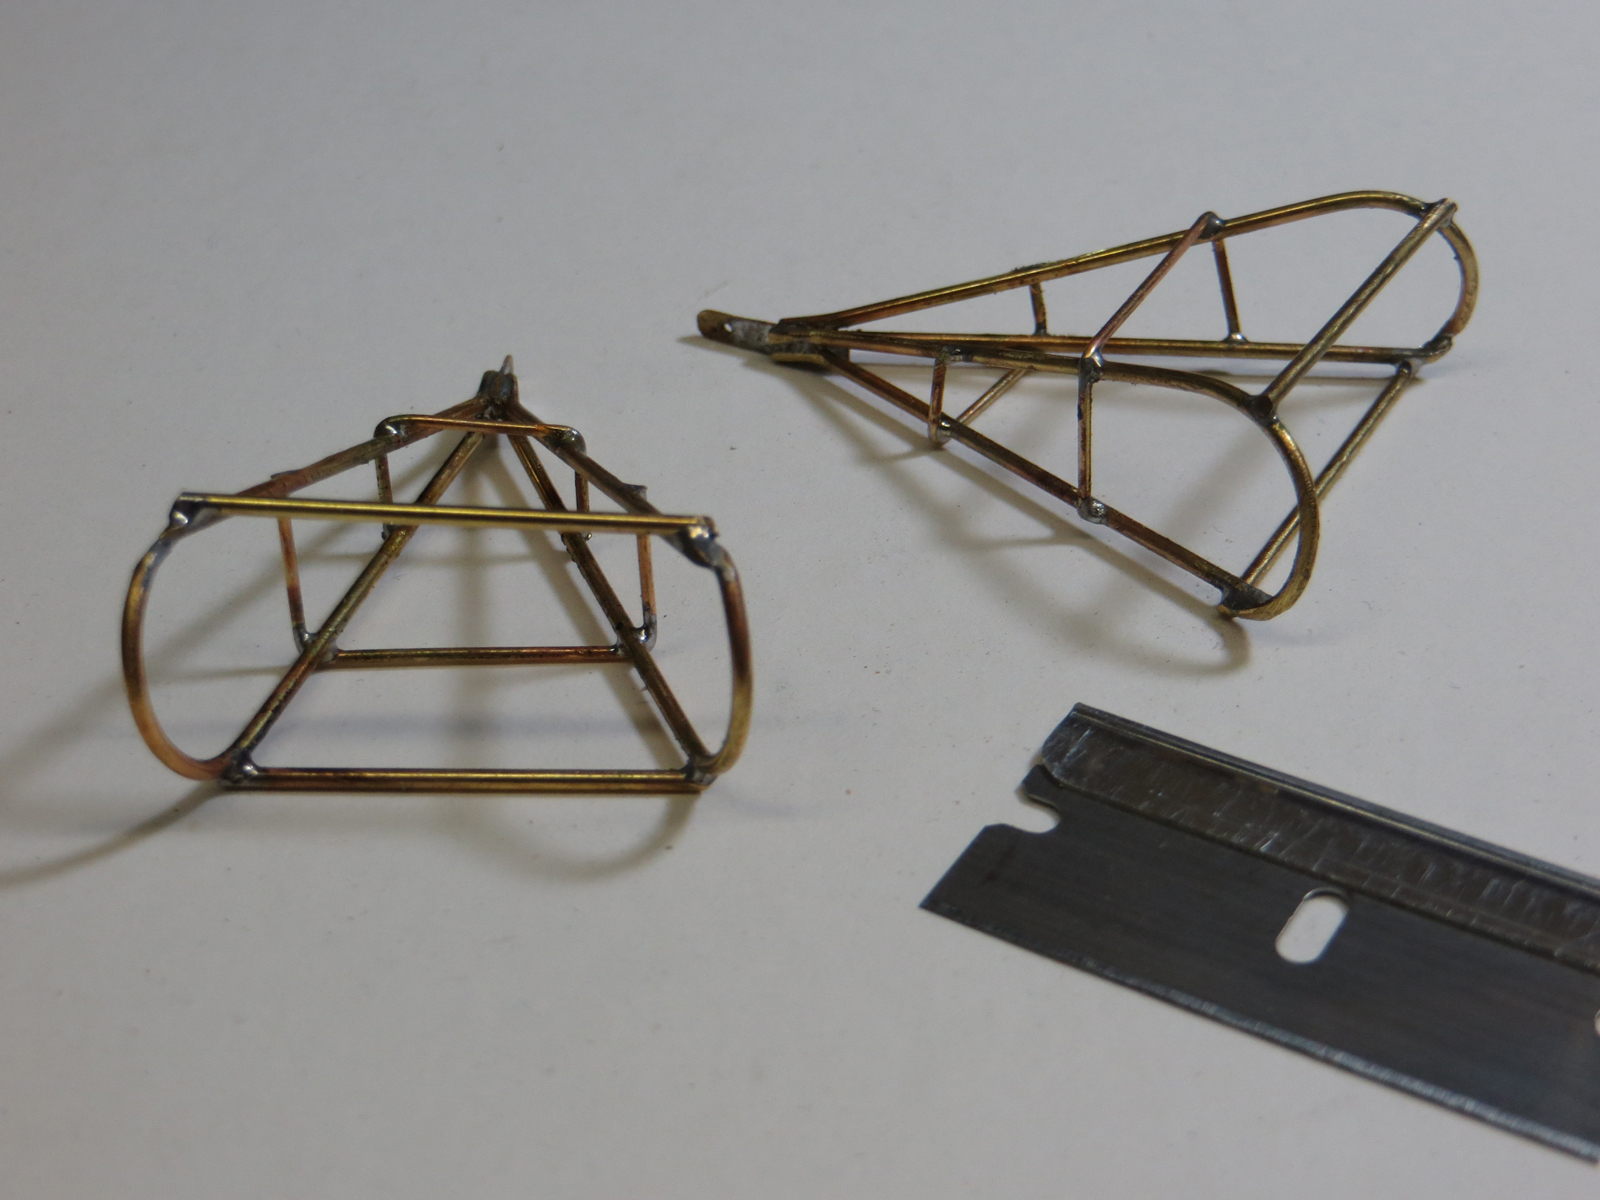
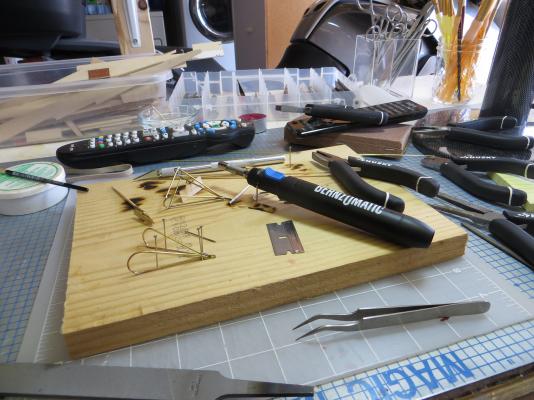
While I ran into a rough section over the past week or so. I began working on some of the brass fixtures which require soldering. Found out I don't solder well. I ruined a lot of brass pieces. Finally found a jewelry making site with lots of learn to solder videos. Found out I was doing it all wrong. Went out and bought a pencil torch and started practicing. I was doing two things wrong. First, I did not "clamp" the pieces being solder together . Solder doesn't fill gaps well. Second, I was using too much solder. I have a long way to go but feel I got over a hump. This is my solder station. You can see how I am using pins to hold pieces together. Finally, the two oyster drags I worked on over the weekend.

- 64 replies
-
- 3
-
-
- willie l bennett
- model shipways
- (and 1 more)