HOLIDAY DONATION DRIVE - SUPPORT MSW - DO YOUR PART TO KEEP THIS GREAT FORUM GOING! (Only 13 donations so far - C'mon guys!)
×


rcmdrvr
-
Posts
420 -
Joined
-
Last visited
Content Type
Profiles
Forums
Gallery
Events
Everything posted by rcmdrvr
-
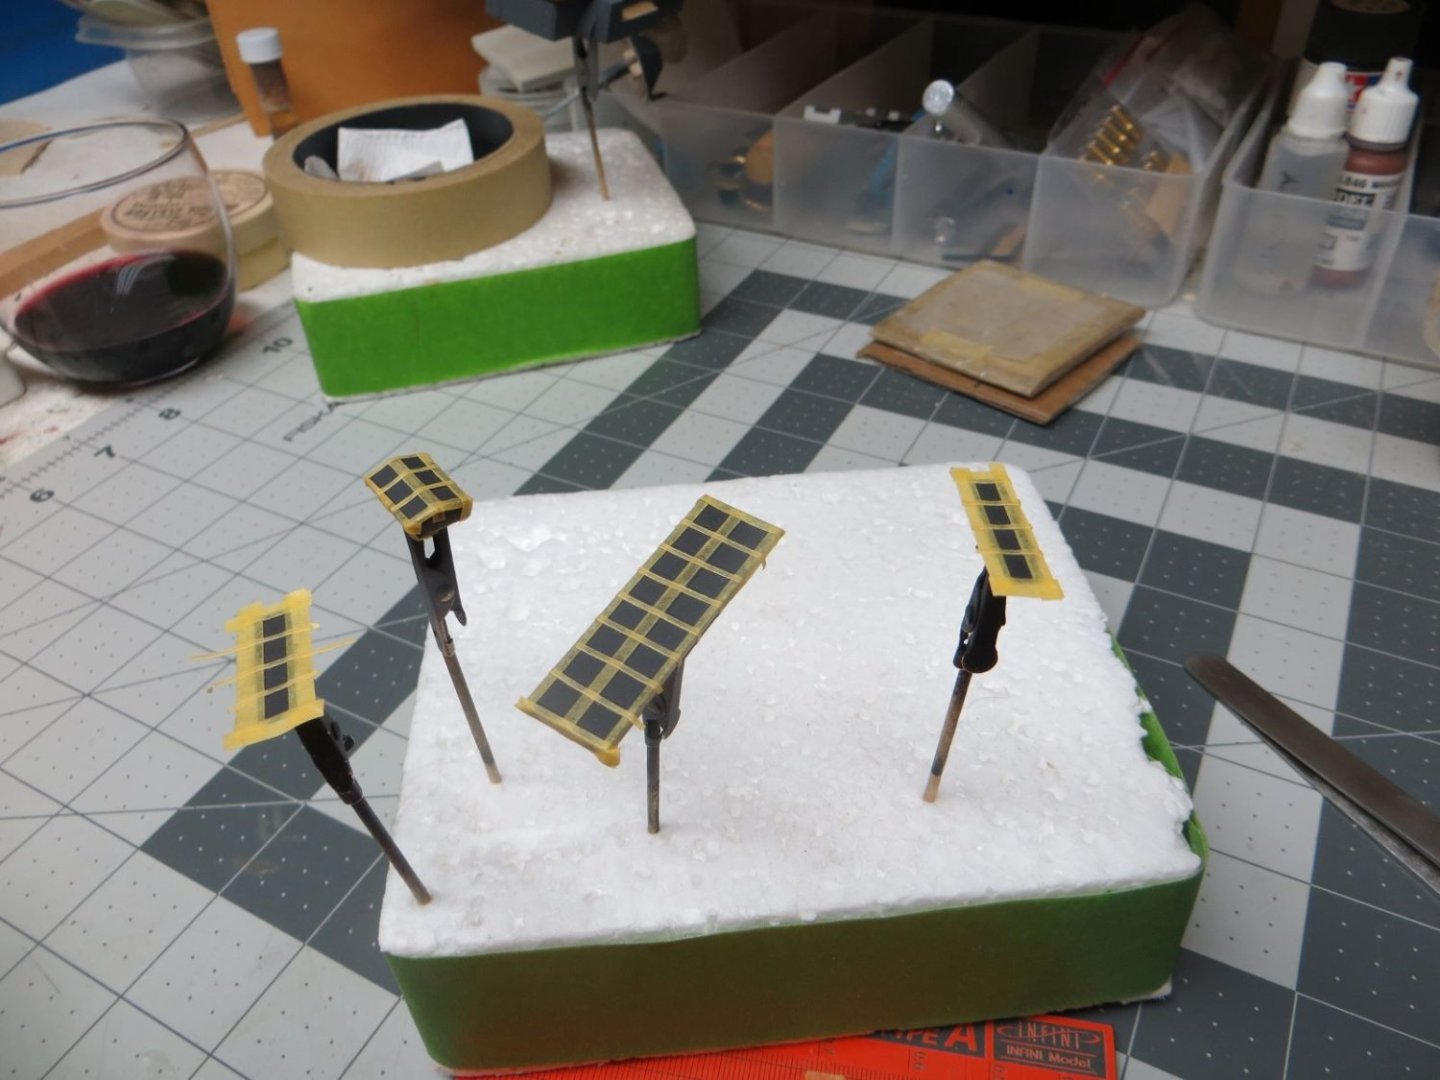
Finally returning to the workbench after spending four weeks in a motorhome touring the national parks and monuments in Southern Utah and Northern Arizona. I can only say spectacular. I did a little work drilling out the holes and mounting the cannons deeper. The next step in the process is the hammock nets. I used sandpaper to roundoff the styrene strips and a modelling knife to cut some irregular gouges. I mixed some white, yellow and brown paint to come up with a color that might mimic that of canvass hammocks. The sides of the hammock net structure are large pieces of photo etch. I glued the styrene strips and photo etch using CA glue. A couple of photos:


-
Thanks for the advice. I have gotten use to plastic model instructions. They then to be very well illustrated and little written instruction. This model is just the opposite; little illustration and mostly written. I also find that the "plans" are not as informative as I would wish. I guess I have to be a bit more careful in the future. I am not going to be able to work on the model for a few weeks. Will return to the workbench in November.
-
Going back and reading the instructions; they recommended drilling 1/4 inch deep holes for cannon. Perhaps my were too shallow. I will contemplate removing the cannons and redrilling so that they sit farther into the hull.
-
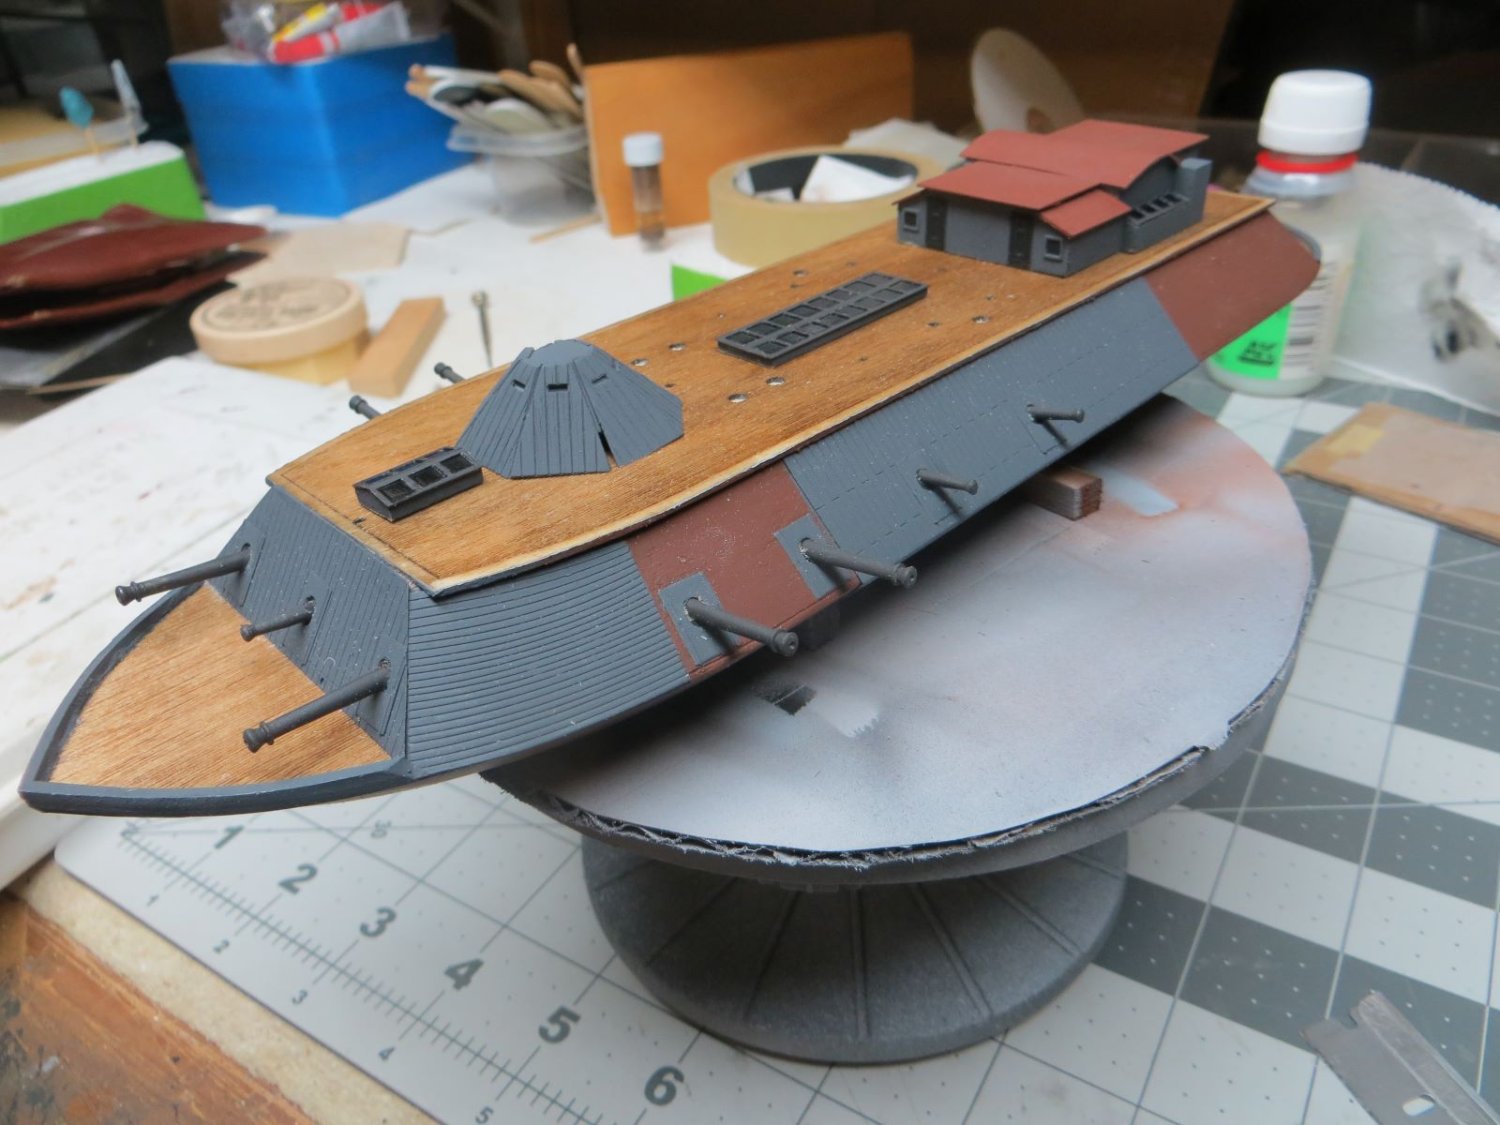
Photo of the painted deck structure ready to be glued in place:

-
Painting the deck structures was completed in a few steps. First I primed everything. I then painted the lower non-photo etch parts grey. I then masked off the grey and painted the photo etch parts dark grey. Finally I masked the skylights and painted the openings black. Lastly I brushed painted the roof of the wheelhouse a brown. I am not sure that all the colors are to "scale" but I think it looks OK. Photo of my masked skylights:
-
I continued building the deck structures. The sky lights were very easy. A little sanding was all that was required. The pilot house took a bit more effort. The kit provides a resin structure that you then cover with wooden panels to simulate the iron panels on the ship. The resin housing requires a bit of carving and sanding to removed the casting edges and I overdid it. Fortunately I left enought to mount the wooden panels and it turned out OK.: Here is the deck structures before painting:

-
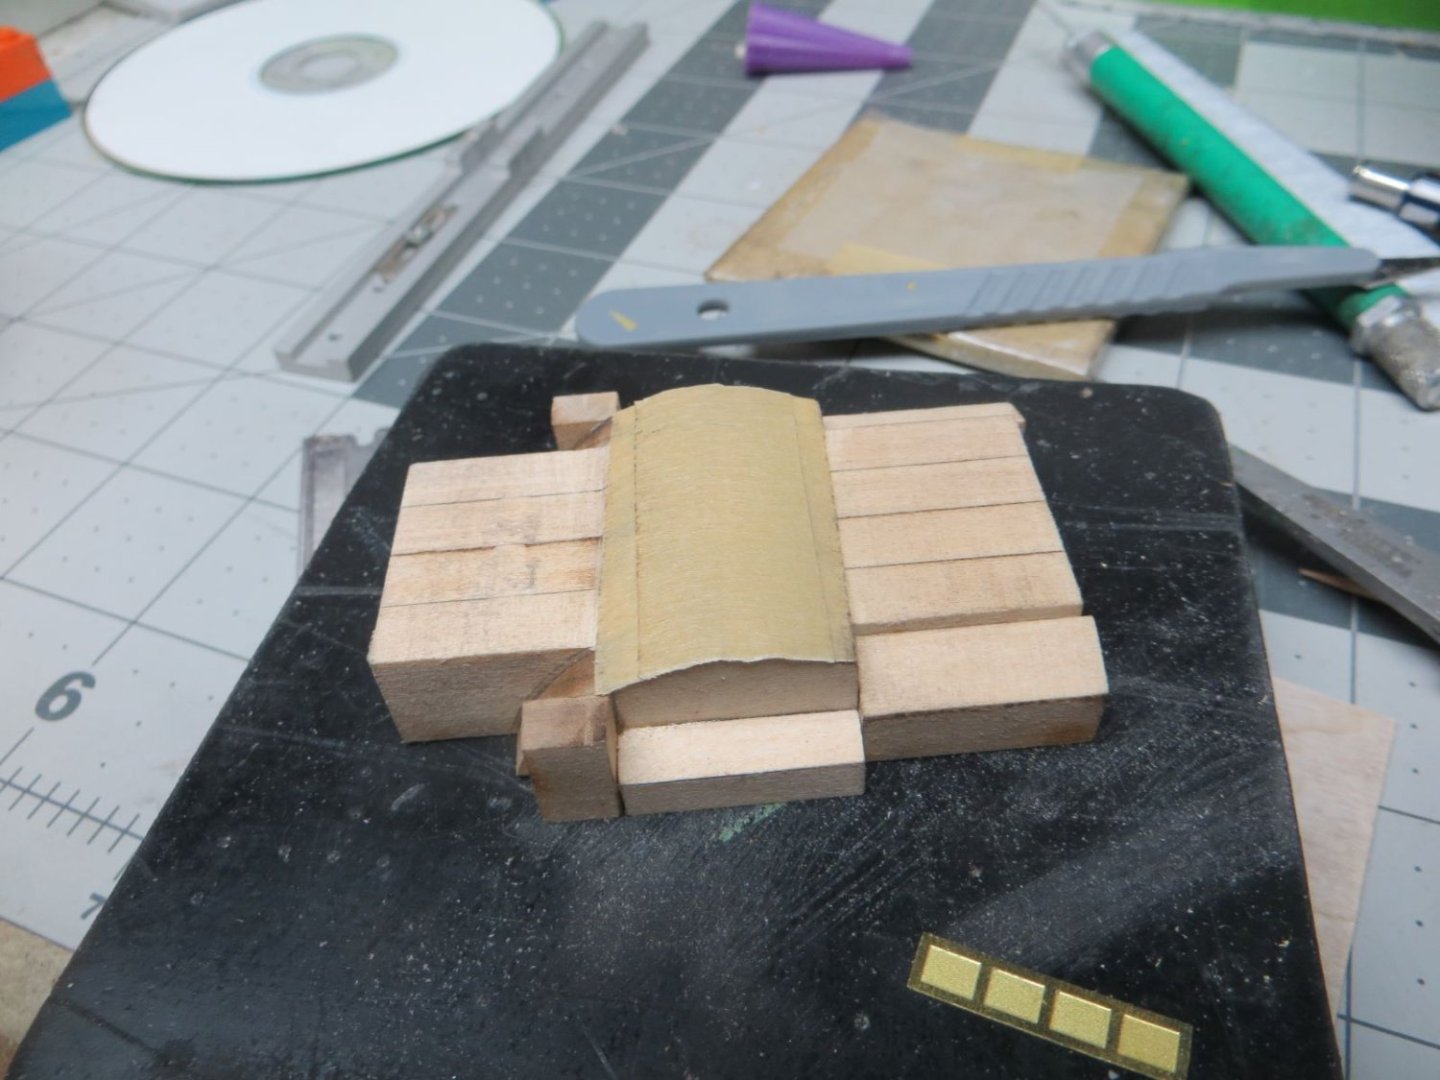
That pretty much completes the main hull. Now on to the structures on the hurricane deck. The first structure (and the largest) was the wheelhouse. It is constructed by laminating a few provided pieces, cutting a few custom pieces and finally gluing some photo etch window frames and doors. I could not find where the plans showed the location of the doors and windows but by looking at a few pictures on the internet and in the instruction booklet; I think I found the proper locations. Following is a photo of the wheelhouse in process:
-
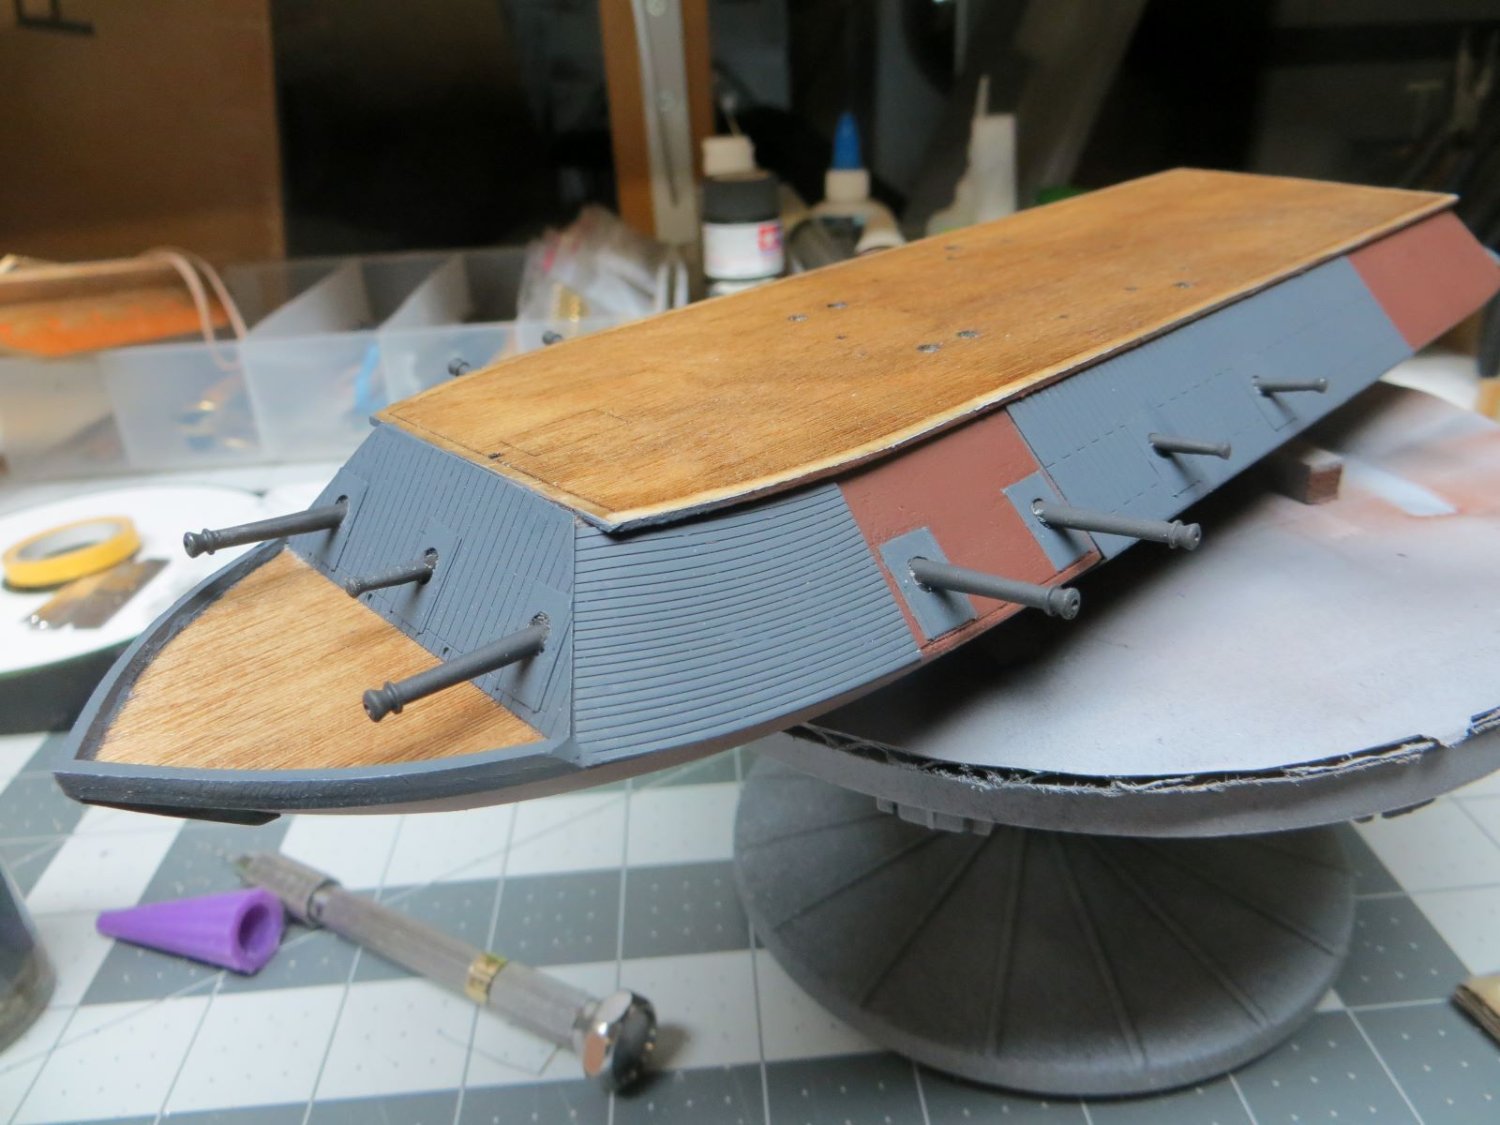
Having completed the painting of the hull and casement; I went ahead with mounting the cannon. Each cannon had to be sanded with 320 and 600 grit sand paper to remove casting marks. I was able to drill out the muzzles of the larger cannon which I believes gives them a more realistic look. Finally I primed and airbrushed a dark grey. Here is are a couple of photos of the installed cannon:


-
I am going to follow your build. I have this kit in line as a soon to be built project.
-
At this point in the build I discovered I had not built the aft bulwark. Life the forward bulwark, it is made from a square styrene strip. Here is a photo before masking and priming again.

-
Now that most of the hull and casement has its photo etch; it is time to paint these parts. I decided that I would prime everything before applying color. As we have two different materials being painted (wood and brass) I thought priming would help with paint adhesion. I gave the entire hull and casement a good sanding with 400 grit in hopes that would help with priming. Next I masked off the main and hurricane decks. I used tamiya grey primer in a rattle can. It has served me well in the plastic model arena. The following photos are the model will all the photo etch attached and then a photo of the model masked and ready for priming. Finally a photo of the primed hull before removing masking.


-
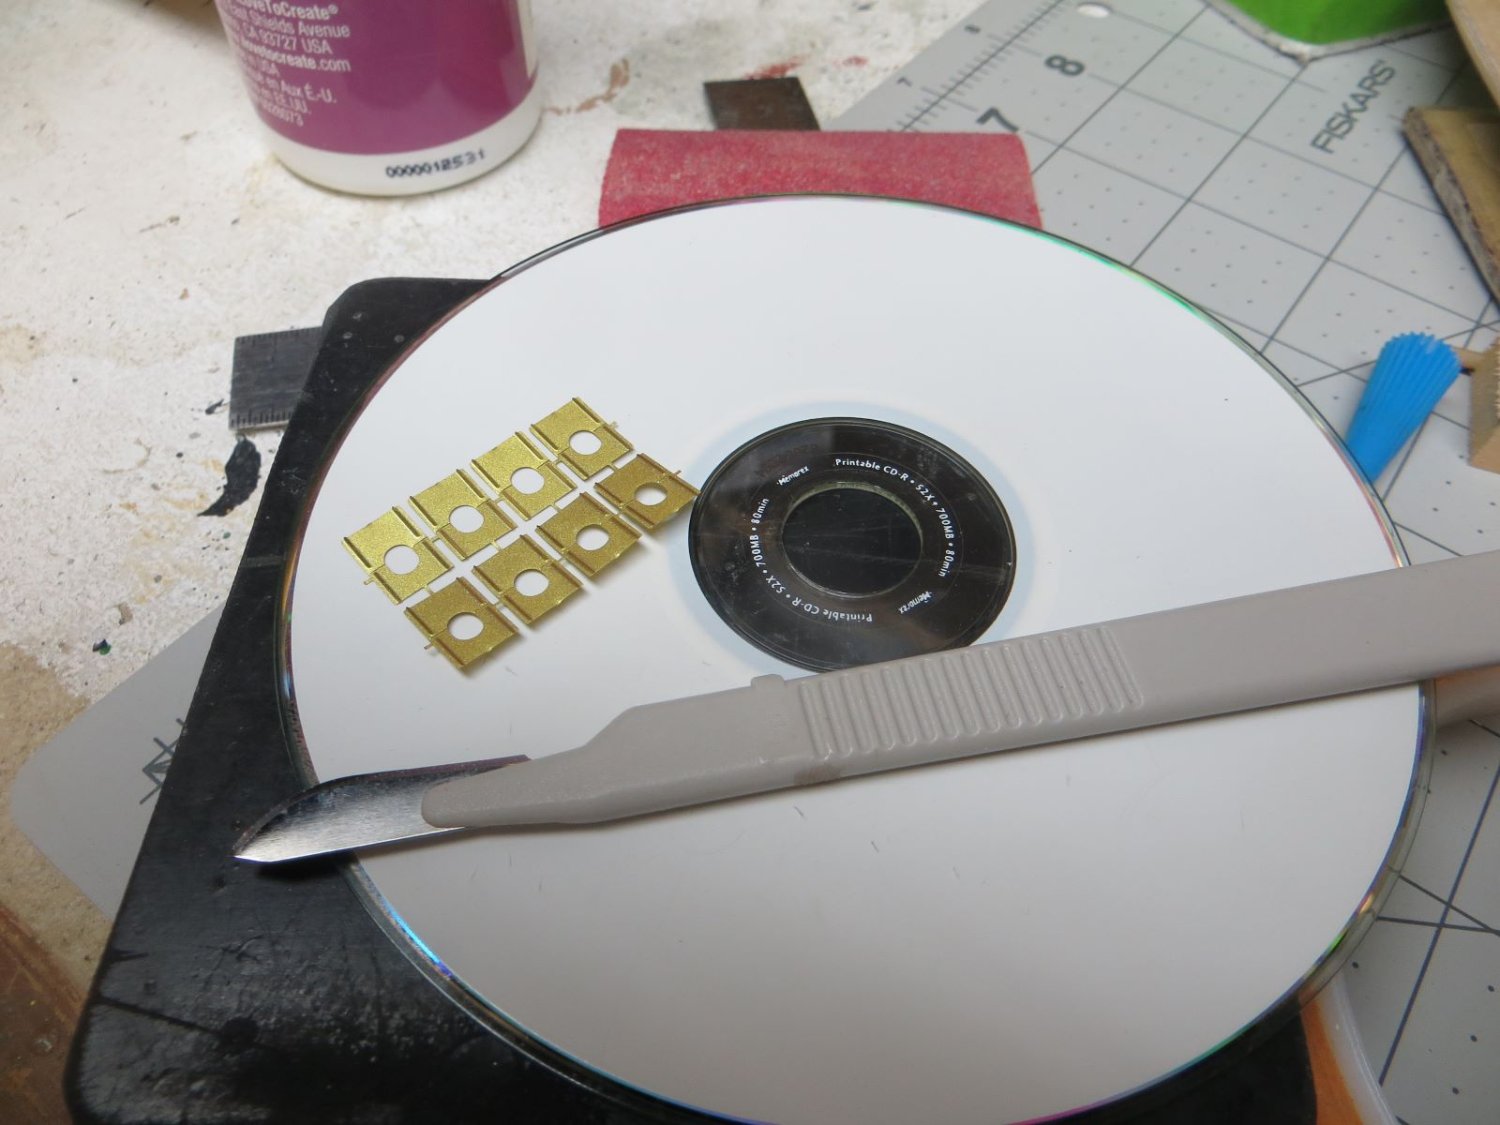
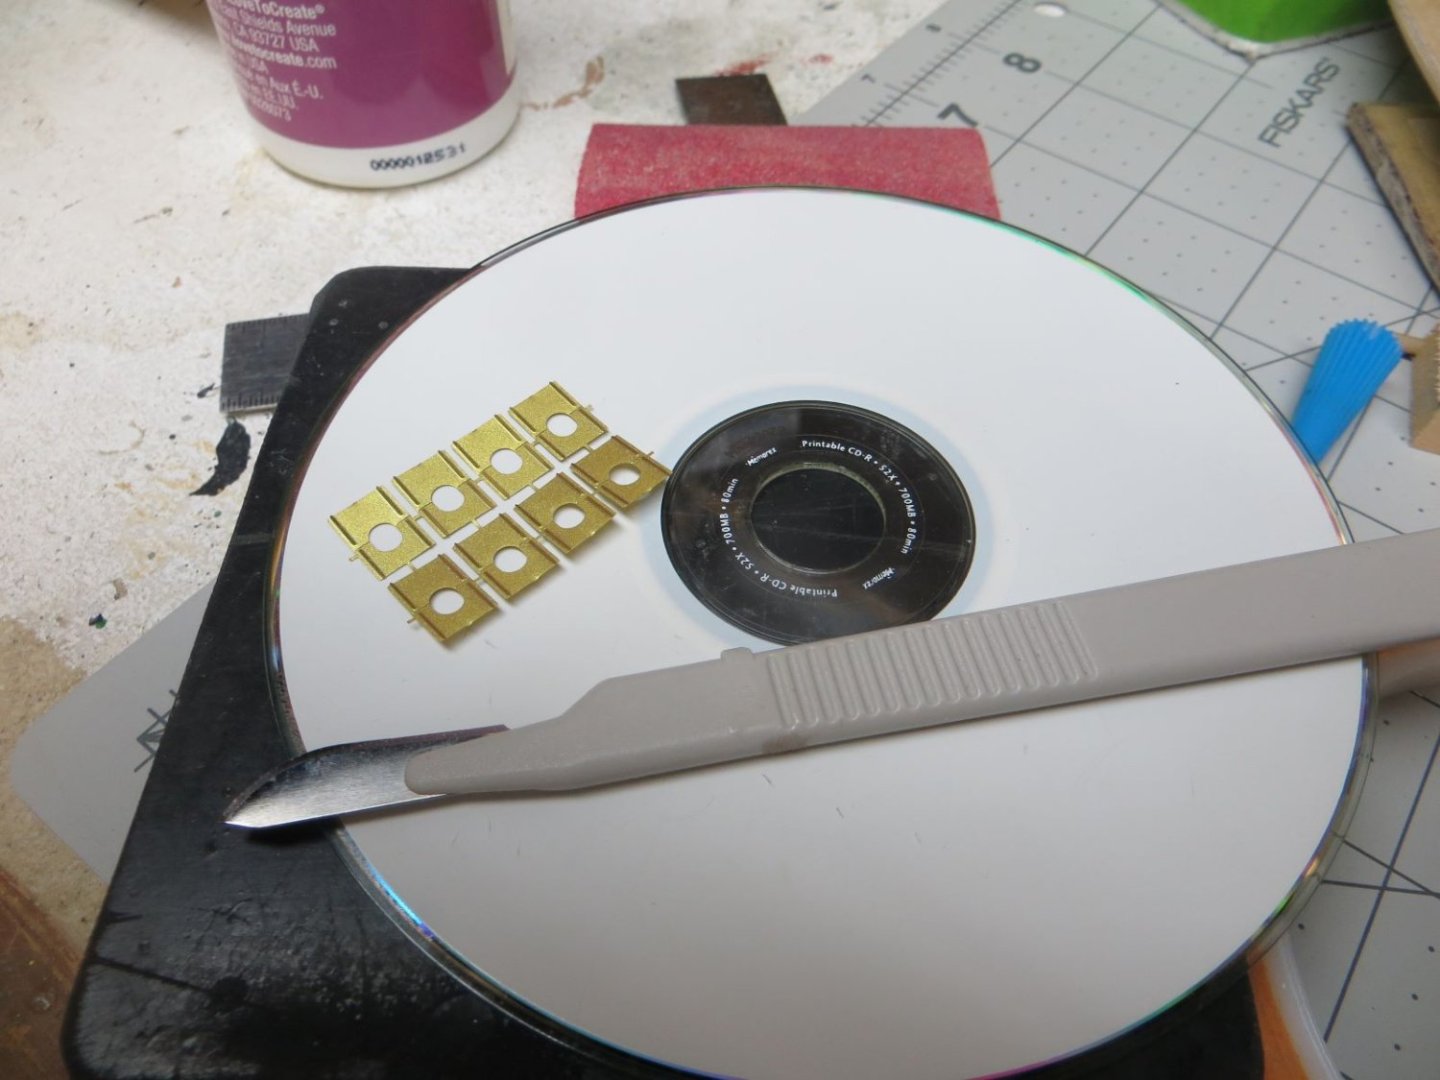
After the large pieces of photo etch have been attached I decided to glue the photo etch cannon hatches in place. I cut these from the fret using a sharp scapel against an old CD. Seemed to work well but I was still left with little "nubs" that have to be filed off. I used a small diamond file for this task.
-
I agree. Her Civil War career was short and came to a violent end. Her second career as a monument to the horror that was the civil war will be long and I hope thoughtful to many.
-
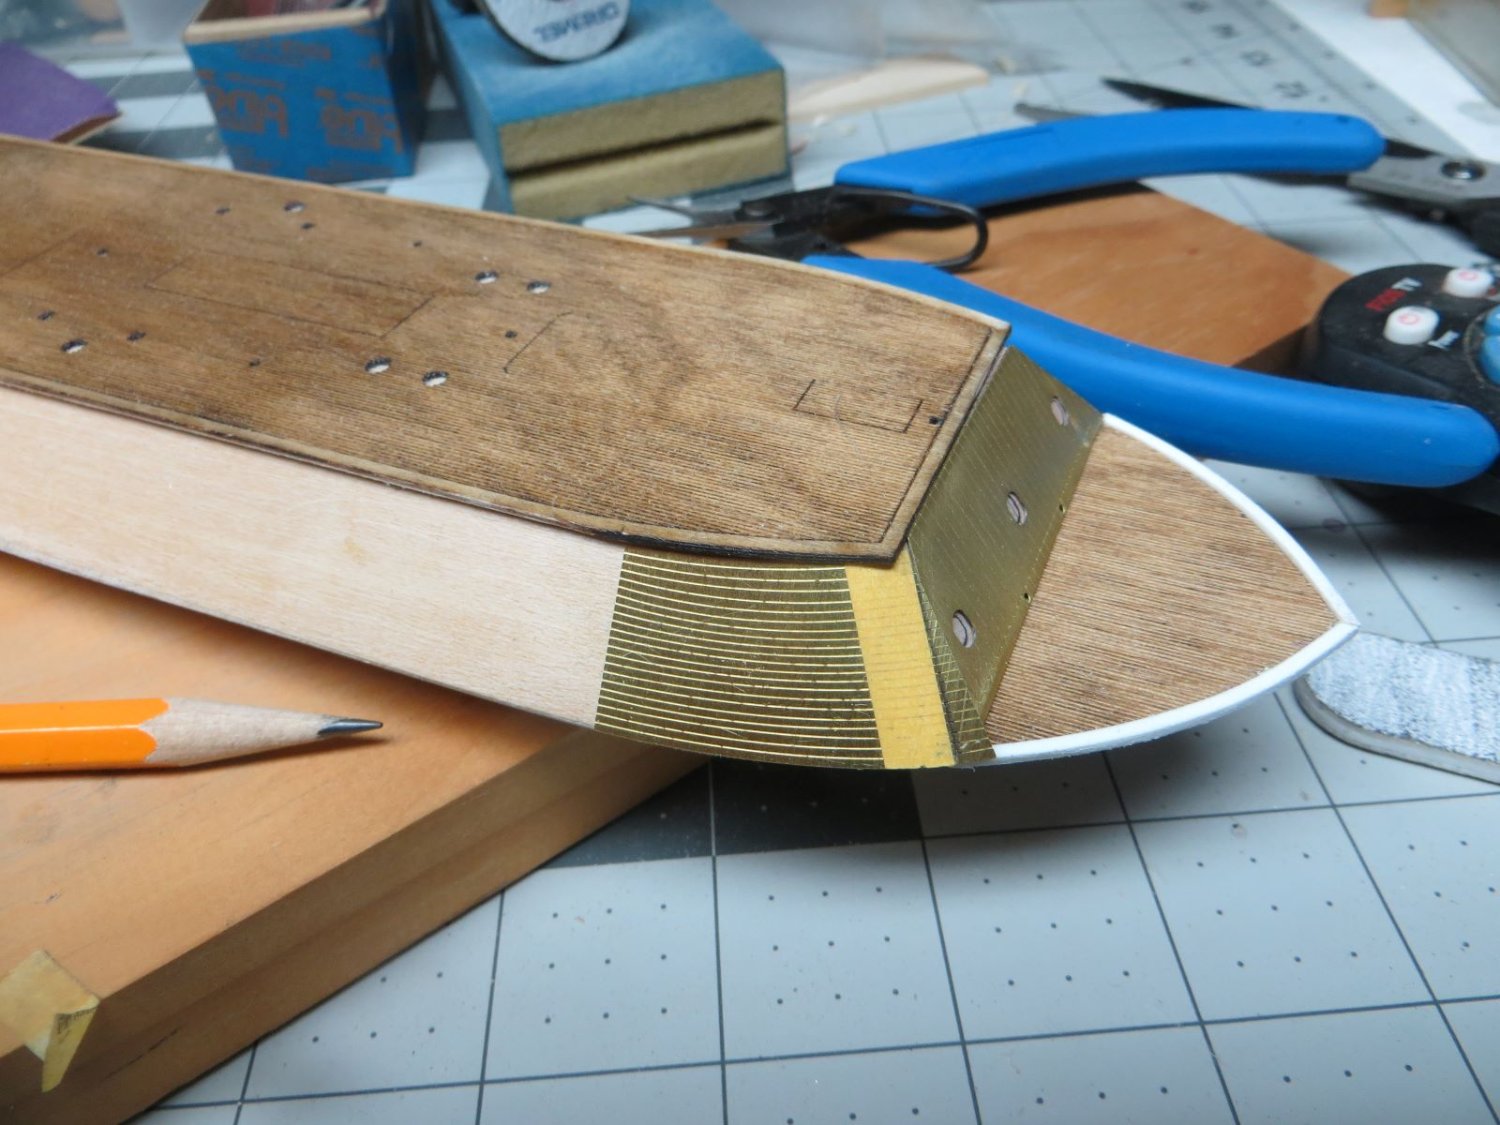
Here is a photo of the all the hull and casement photo etch attached. Now I have to get to the gun port hatches.
-
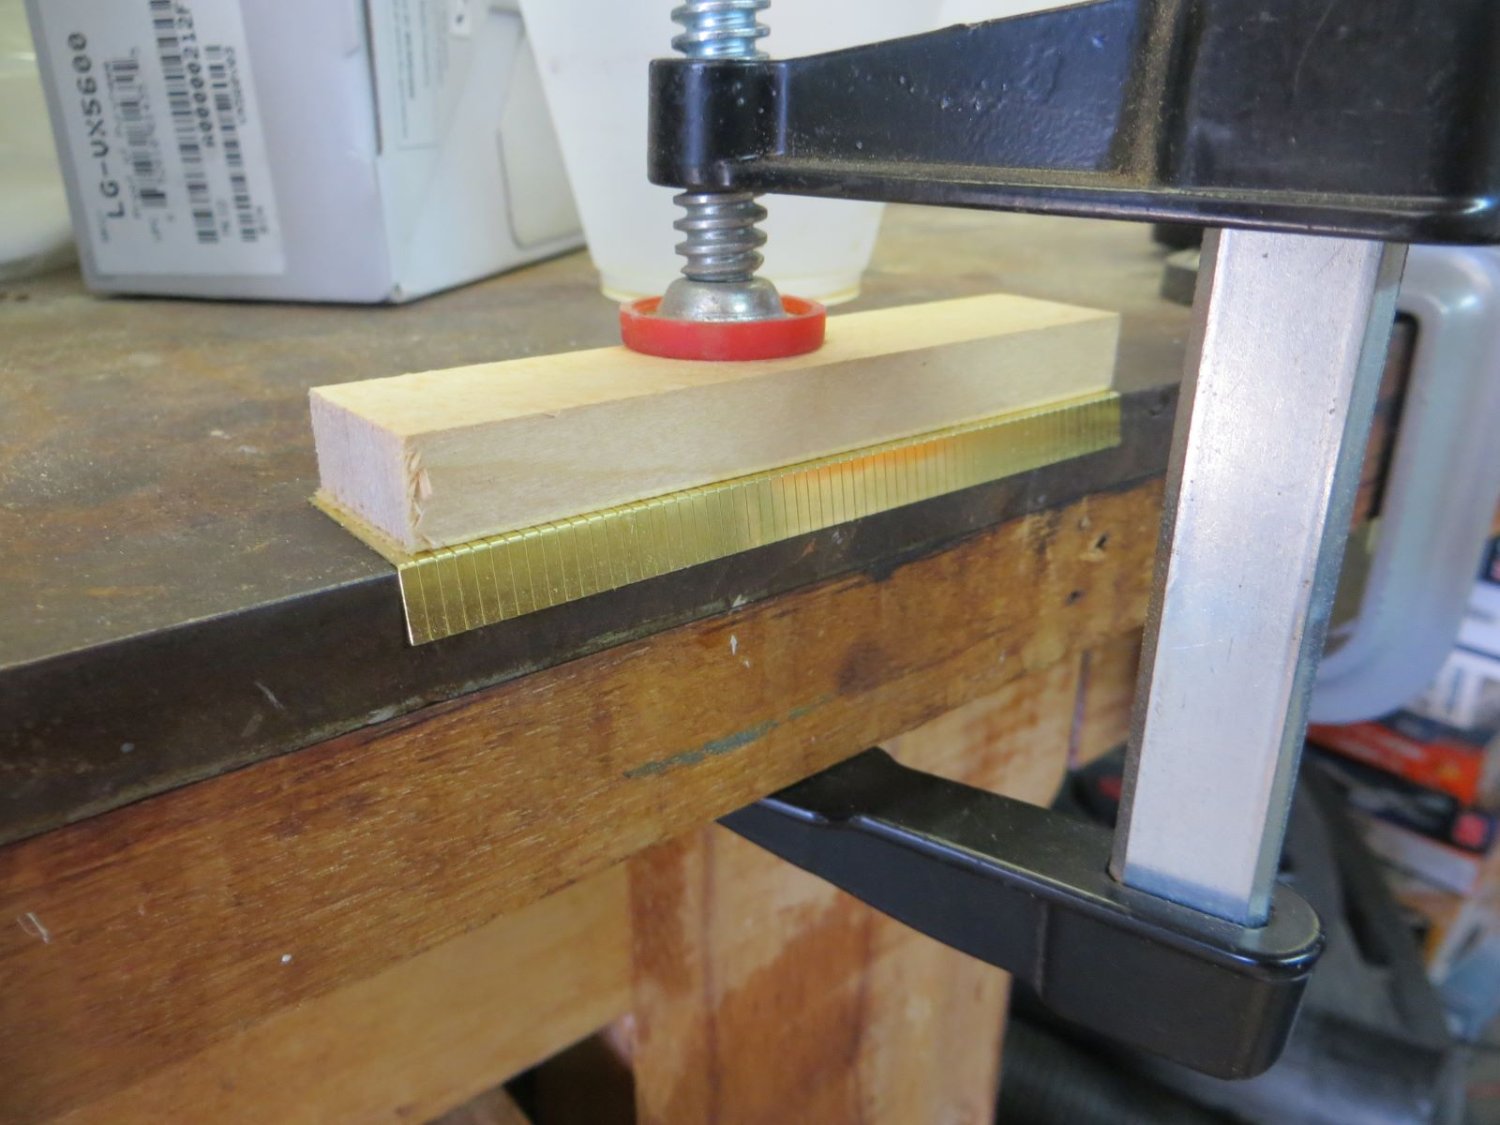
My photo etch bender was too small to bend the side casement armor. Luckily, one of the tables in my garage shop was formally an ammo reloading bench with a steel top. I clamped the photo etch armor between the steel work bench and a straight scrap of wood. It worked well and I was able to put a nice 90 degree bend in the photo etch. The armor sides fit without any further adjustment.

-
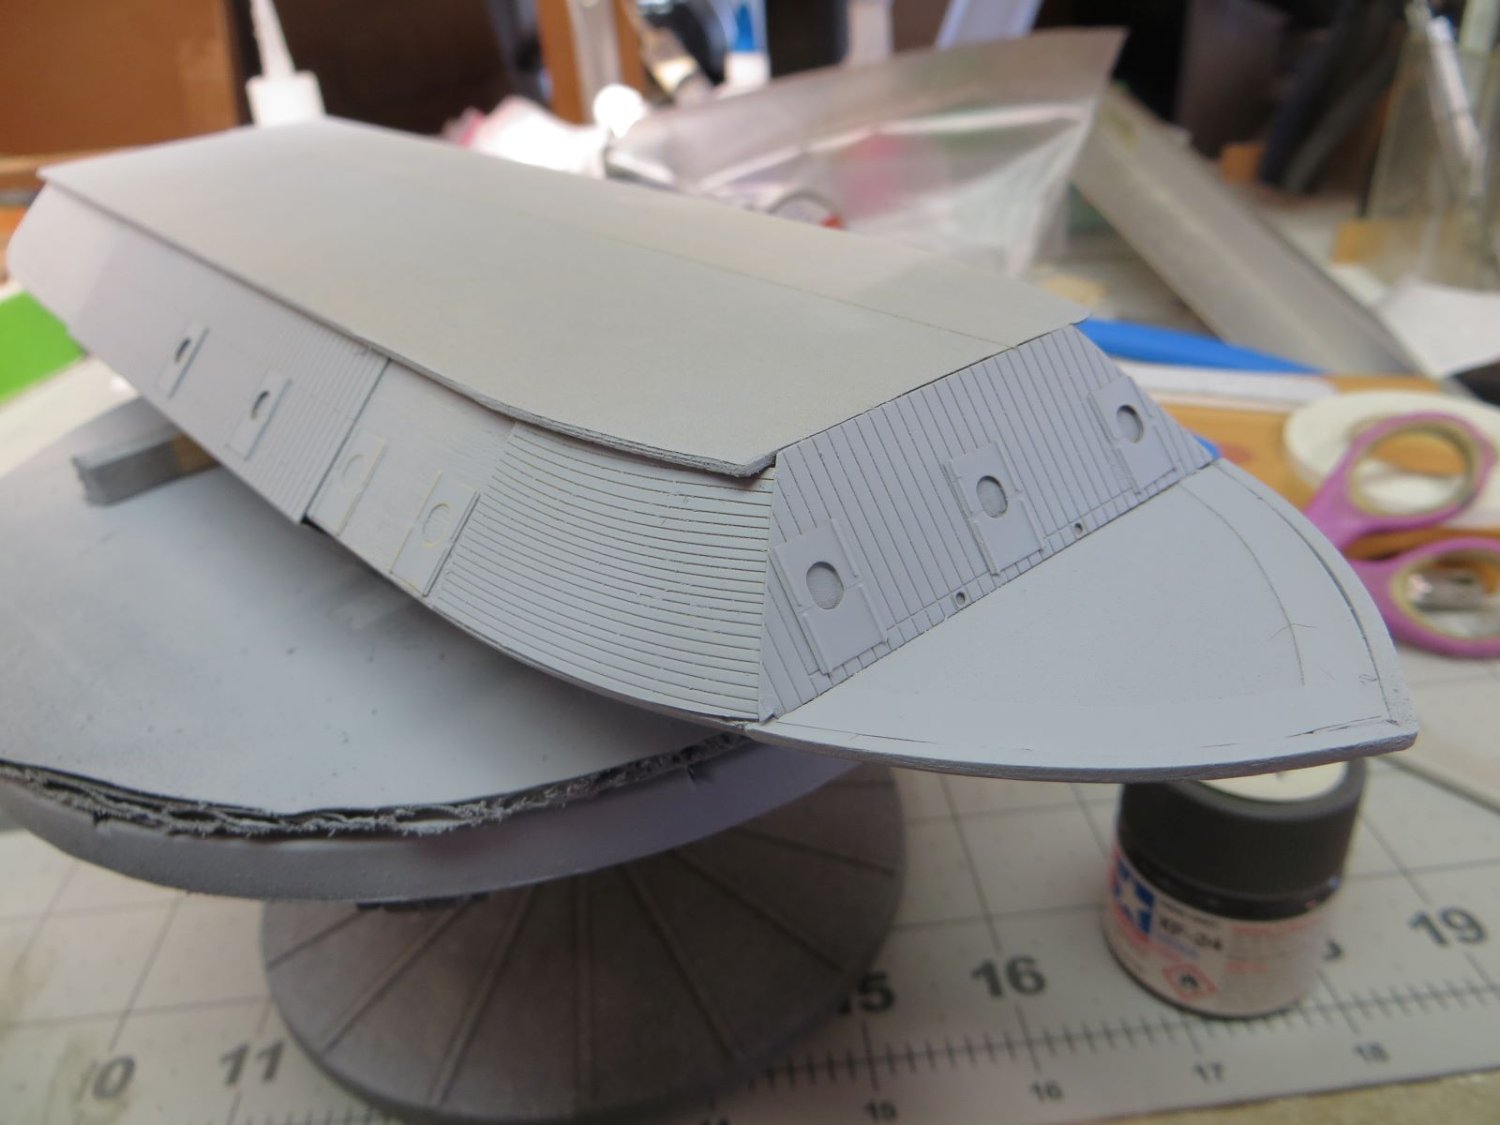
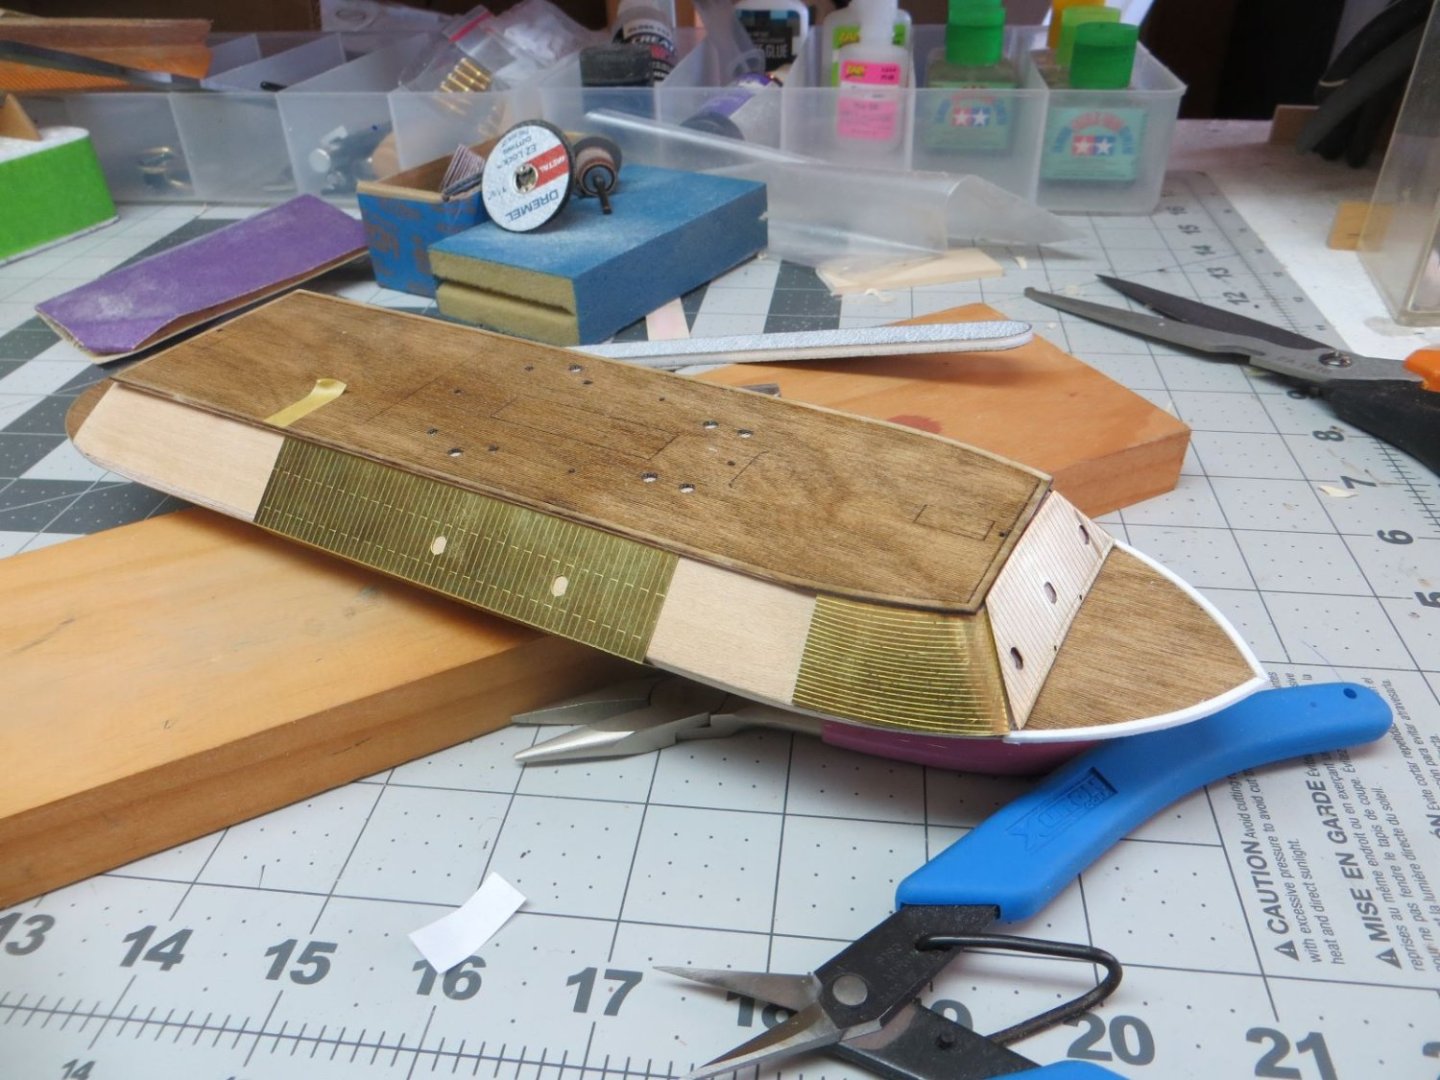
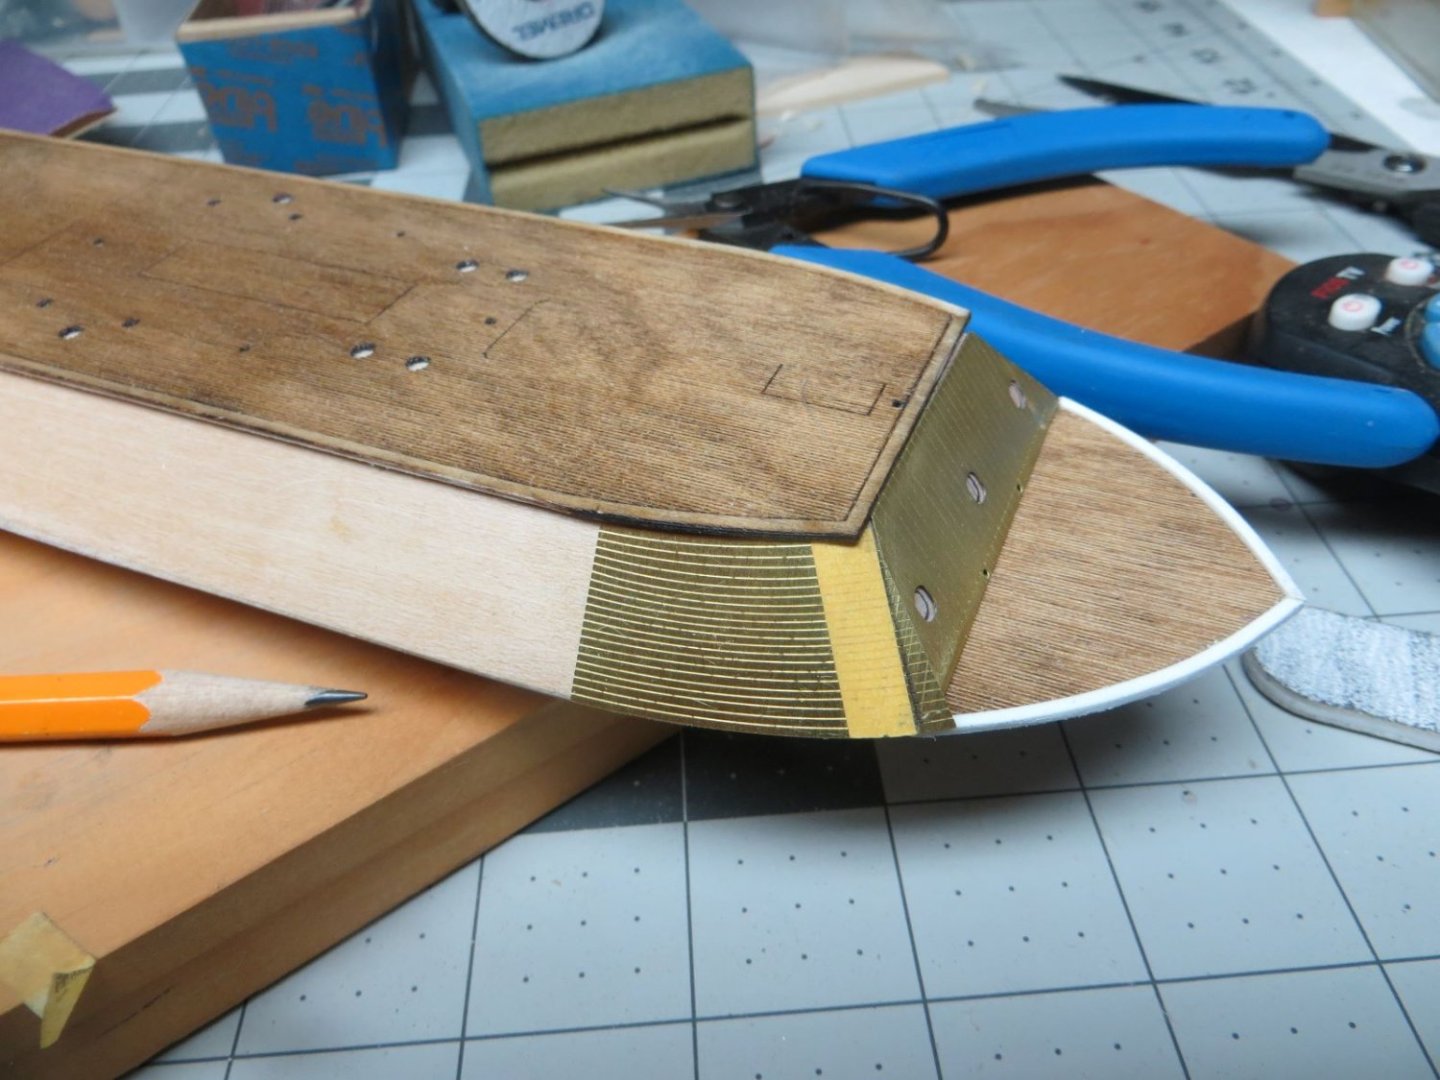
The armored part of the casement consists of photo etched parts. I have a little experience with small photo etched parts as they are used quite a bit in plastic modelling. They, however, are usually small parts formed on relatively thin frets. In comparison, the photo etched armor plates in this mode are quite hefty. Since I had to alter the forward end of the casement, I had to fit and recut the forward photo etch casement armor. I did this by using masking tape to mark the cut and used photo etch shears. I also had to use a small diamond file to smooth edges. As you will see in close up photos later on my fit was only "so-so". Here is a picture fitting the forward hull armor.
-
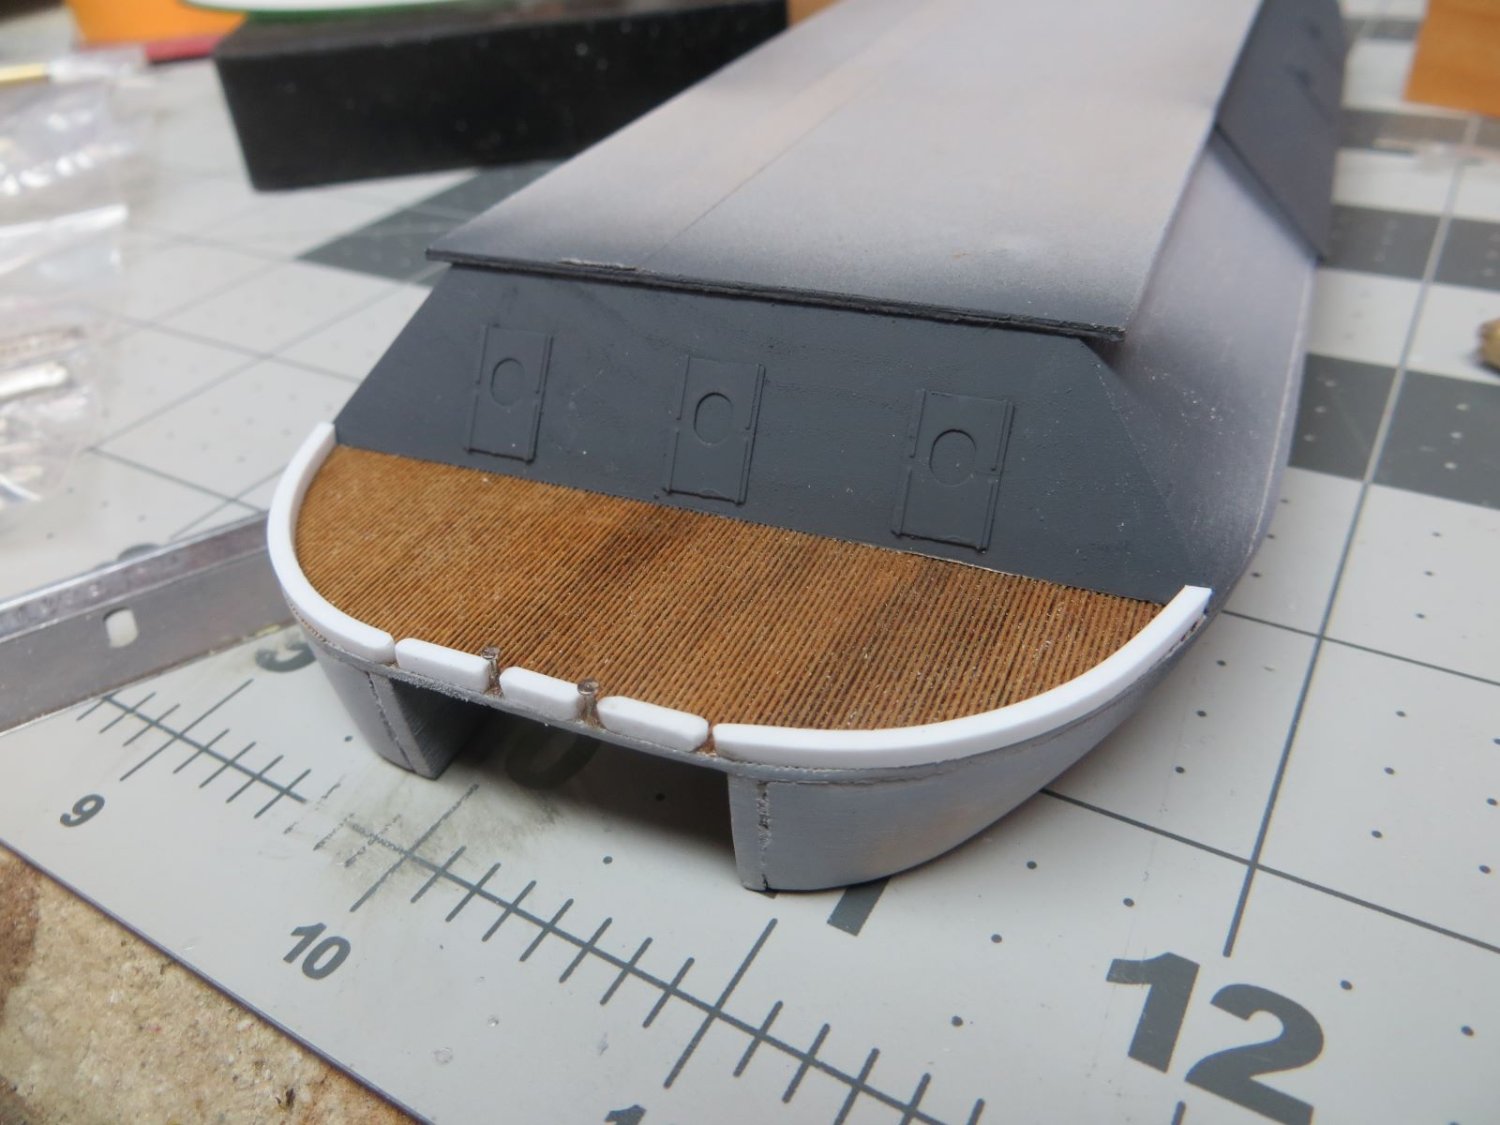
I have been able to get some work done since my last post. After gluing the hull, casement and decking together; the next step was attaching the bulwarks. They are made from square styrene strips. The edge of the fore hull and deck was sanded flat (about 1/32 inch wide) and I attached the bulwark with CA. I found out later that I screwed up and overlooked the aft bulwarks and will have to install later in the process. Here is a photo of the fore bulwarks (I hope I am saying this properly. I not proficient in nautical terms).
-
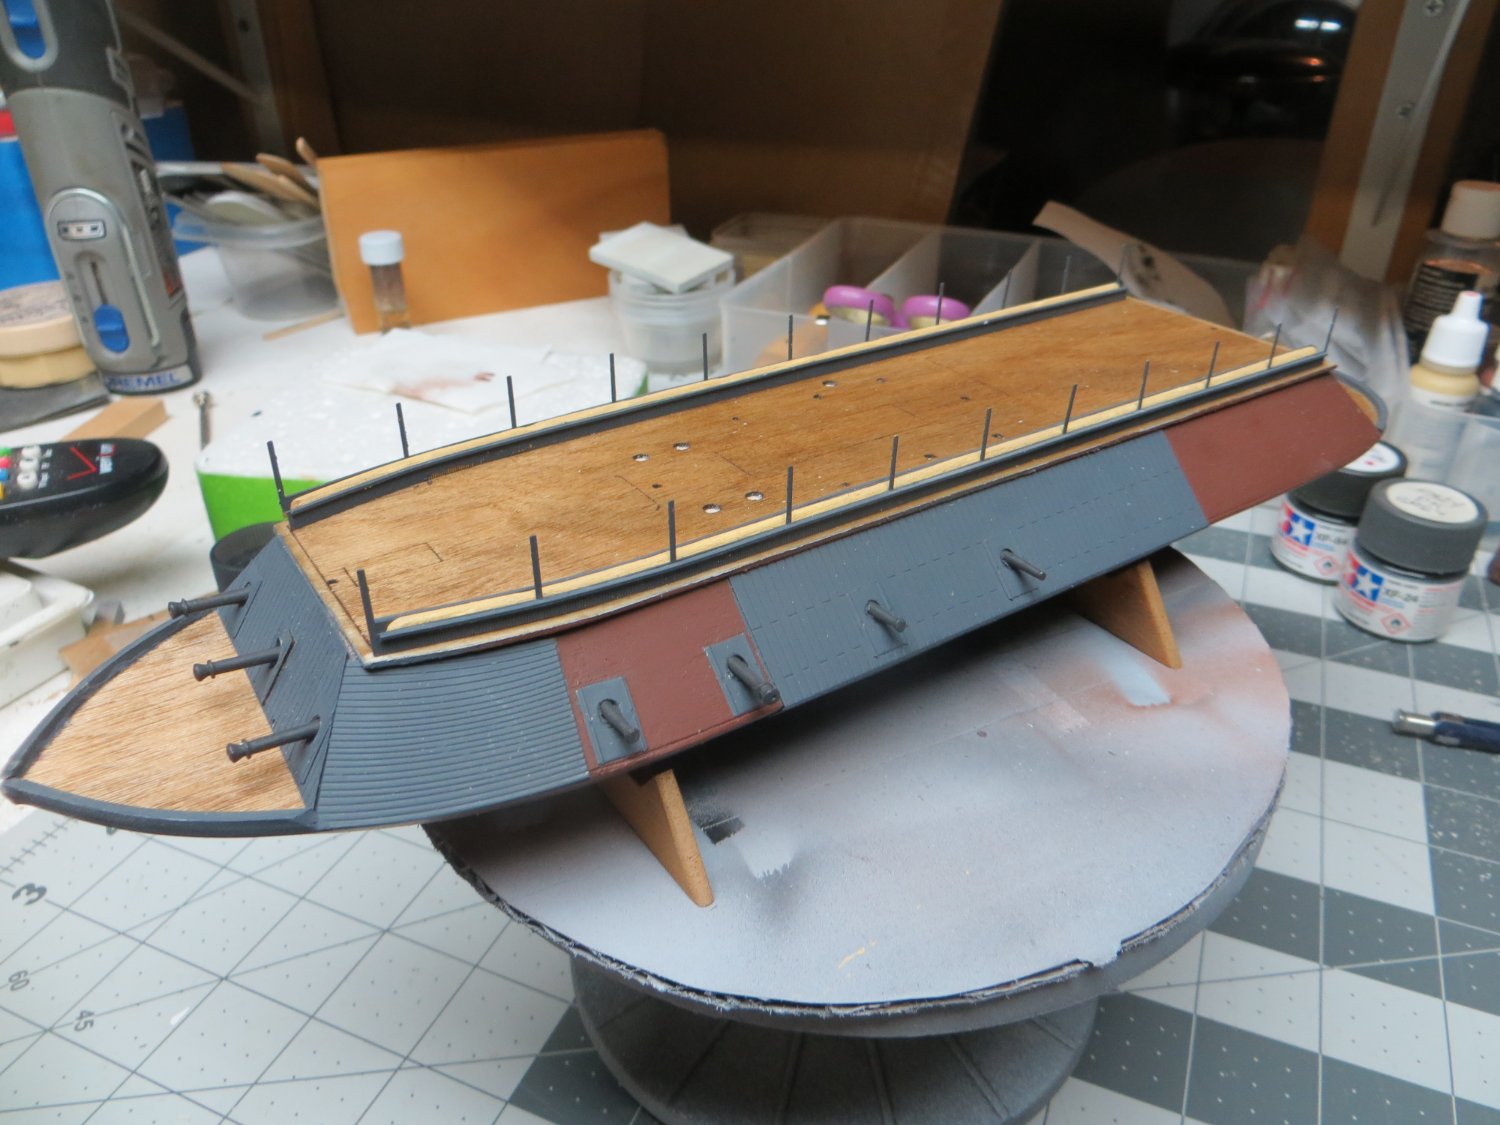
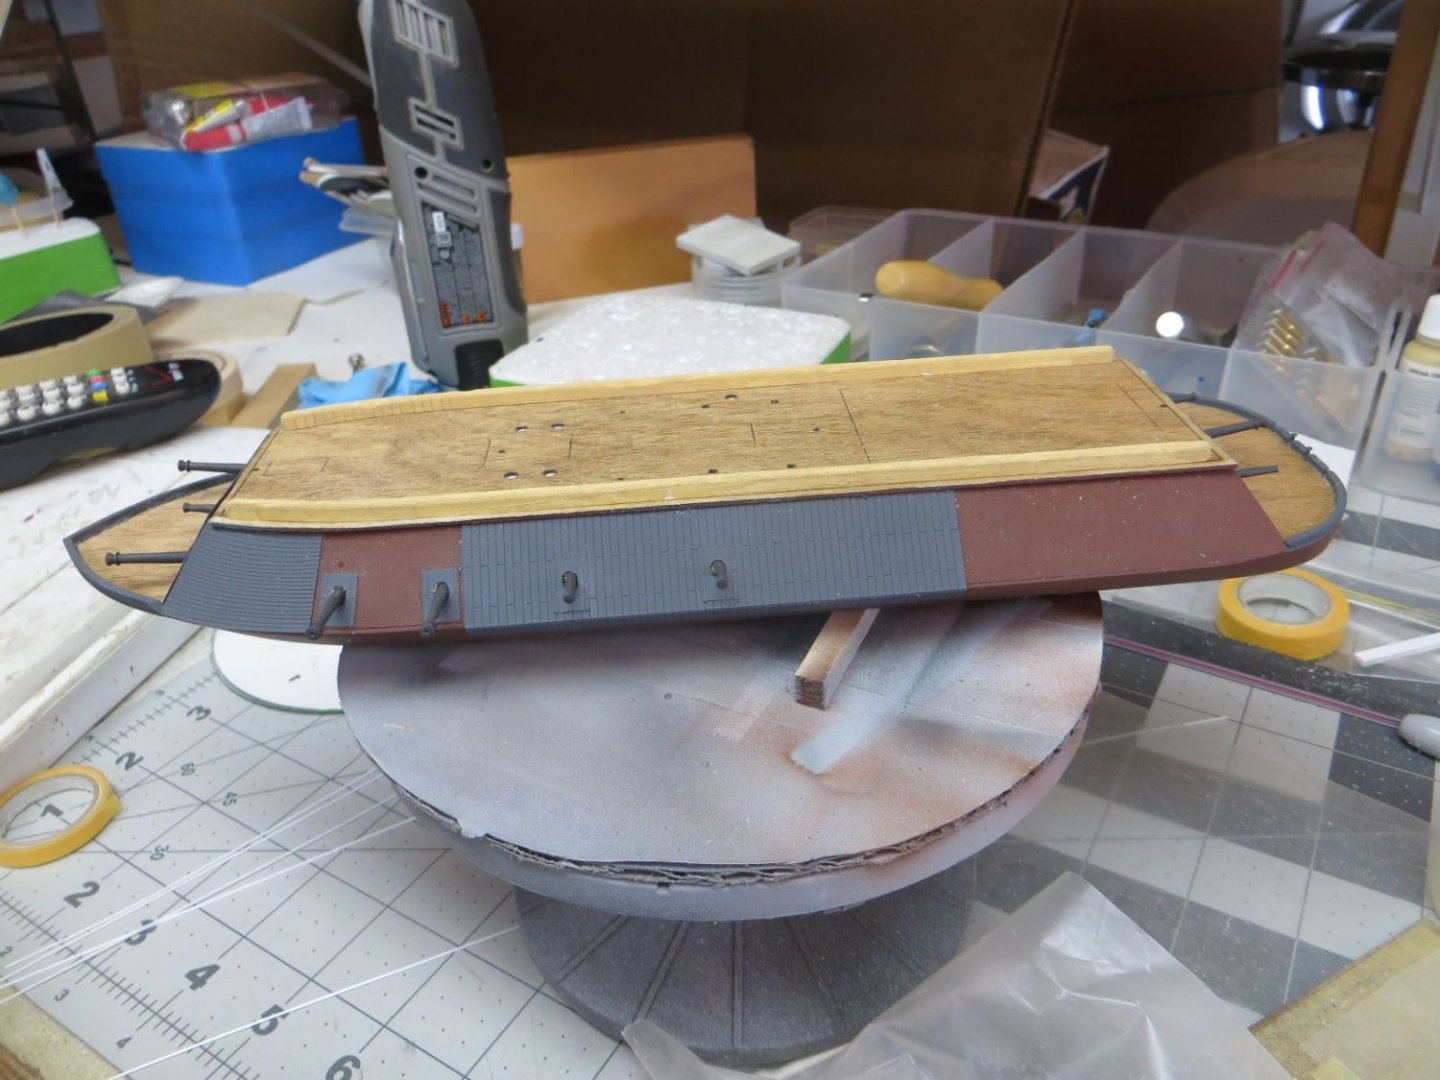
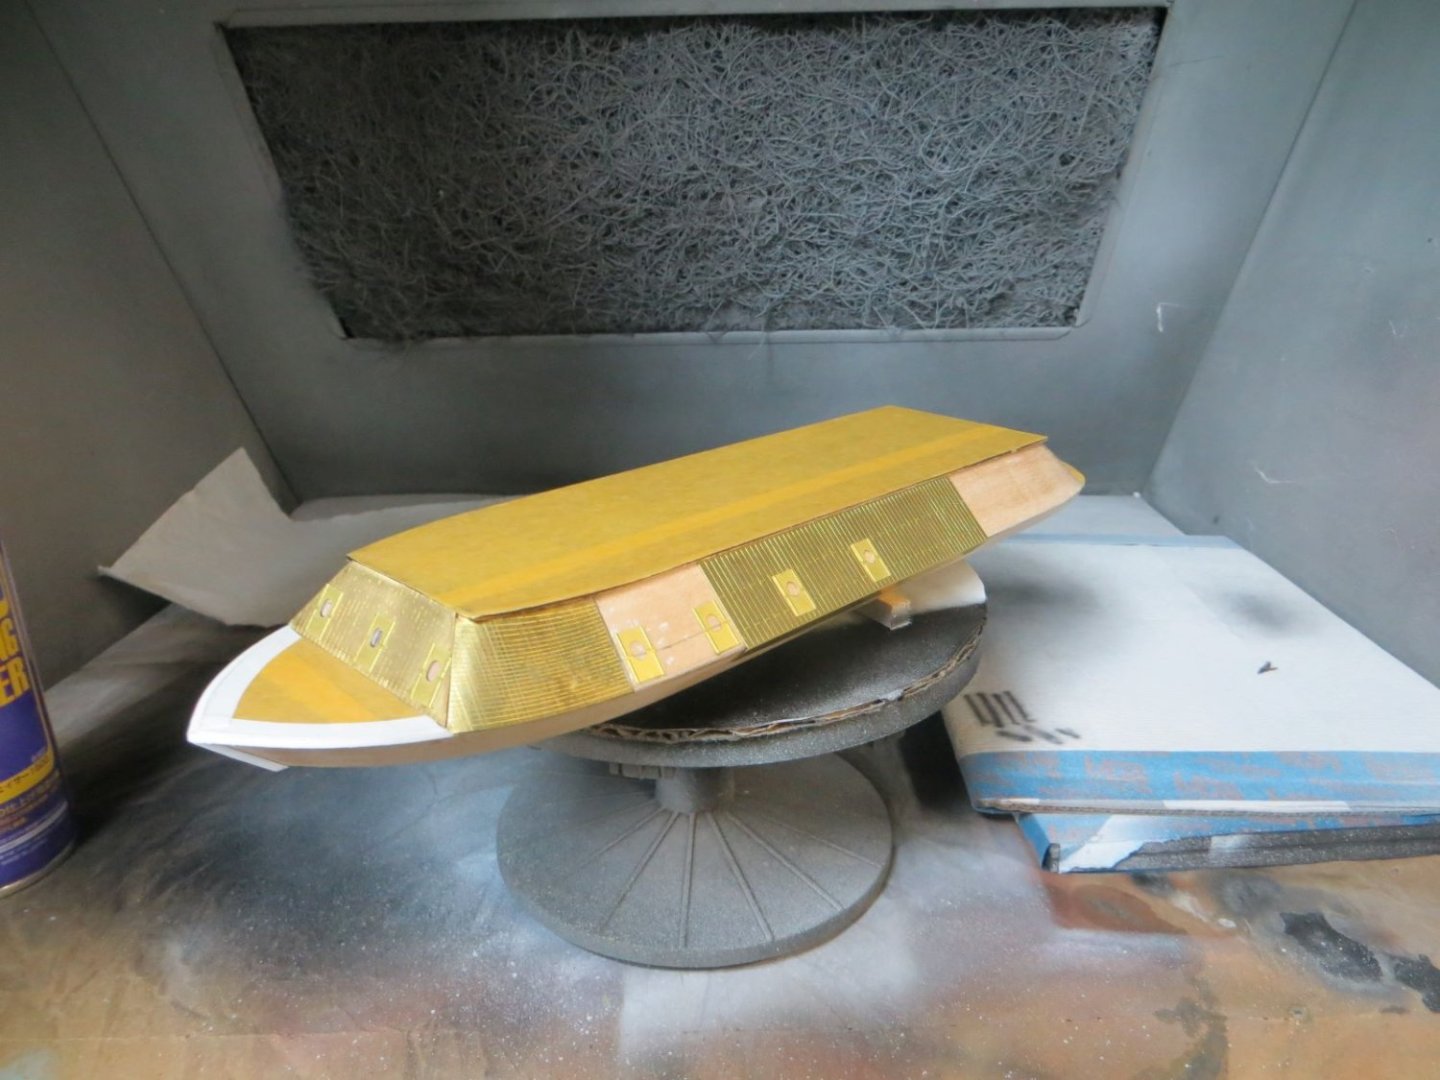
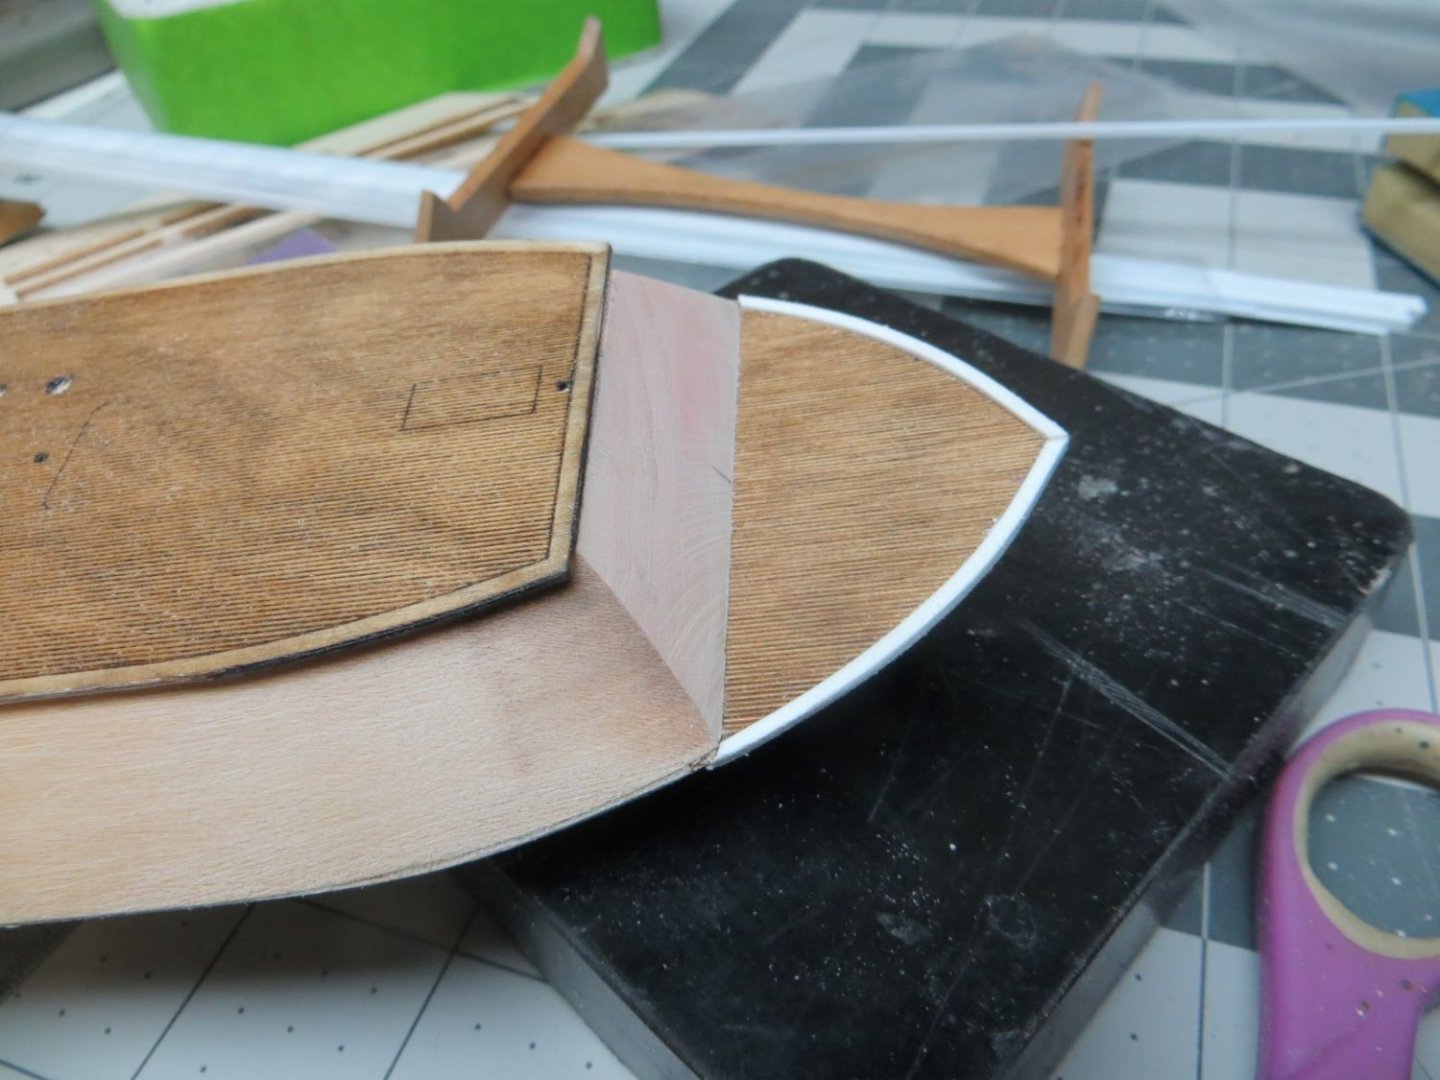
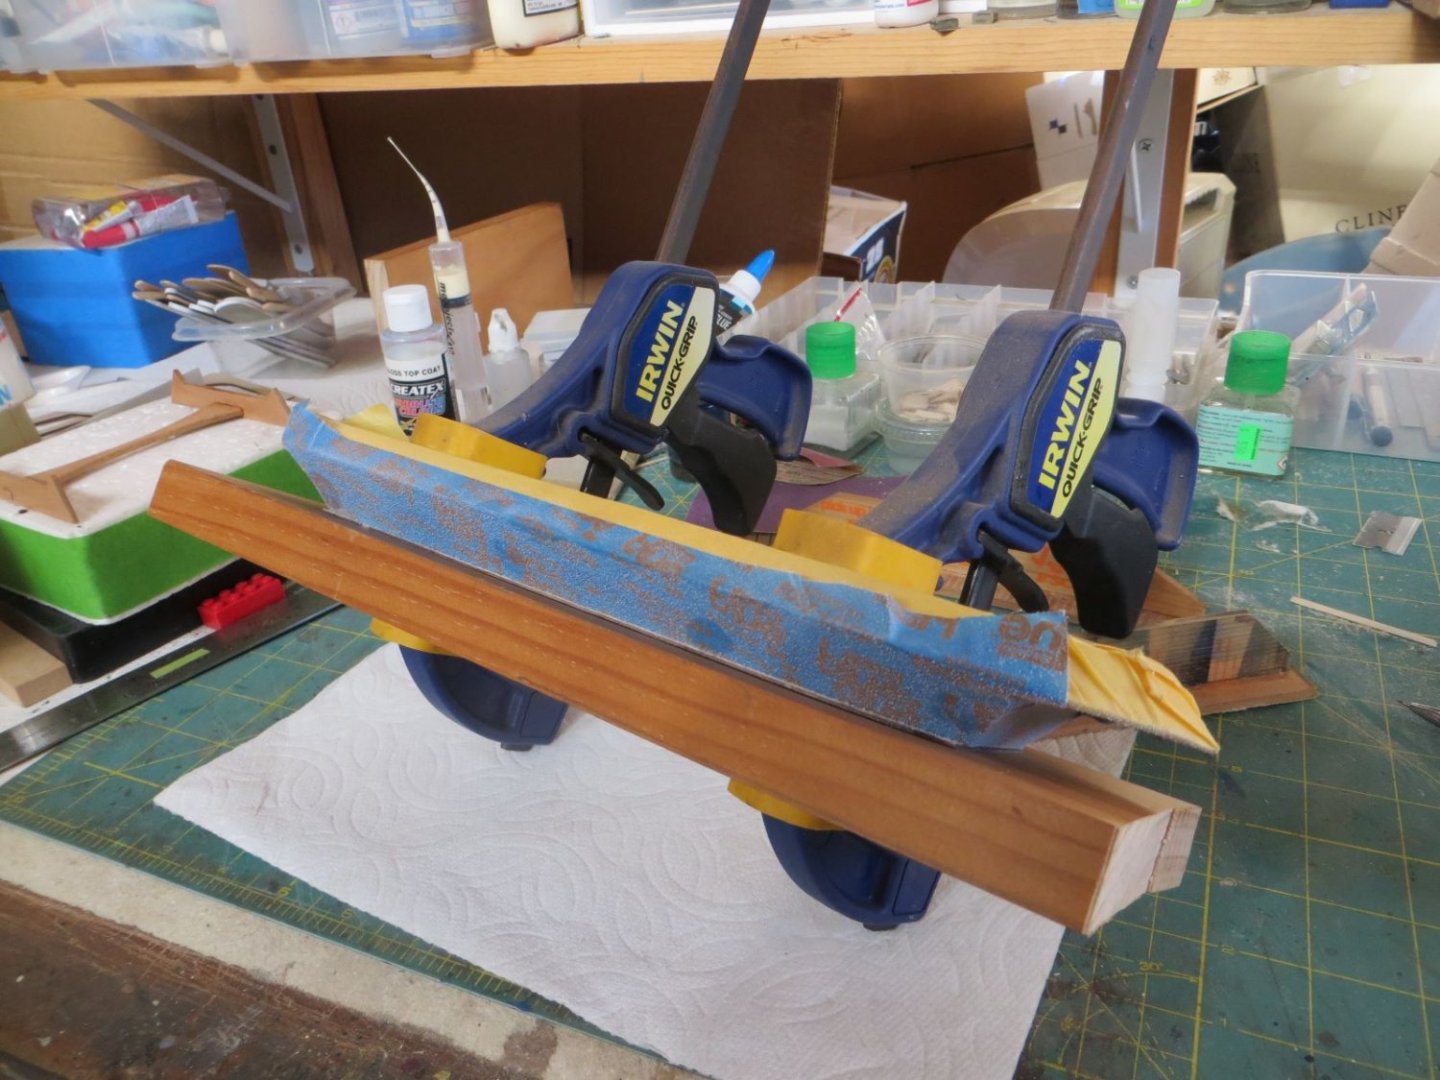
Continuing this hull gluing process I had to glue the upper hull (which is referred to as the casement) to the main deck of the lower (main) hull and then glue the upper decking to the top of the casement. This actually took a bit more effort than I initially thought. I measured the plans to determine the placement of the casement on the main deck and used masking tape to mark where the bottome edges of the casement should be placed and then marked the centerline on the tape fore and aft. Next I checked the placement for the upper deck. The instructions indicate that the upper deck should overhang the top of the casement. Side to side this was no problem but fore and aft the top of the casement was substantially longer than the decking. I had to increase the slope of the fore and aft ends of the casement to shorten the top of the casement without shortening the length of the bottom of the casement. I used a table top disk sander to accomplish this. Took my time to insure that I did not introduce any unwanted curves in to the fore and aft casement sides. As with the previous gluing I masked everything before spraying. Below is a photo of the clamped hull, casement and upper deck. Also a photo of the model as it now sits. This log is now up-to-date. I will continue to post as work continues.

-
I used basic Createx acrylic paints. They worked well but took about 5 coats to get complete coverage. I could find an Ochre so I mixed up some using the Createx. Turned out OK.
-
I just completed this model of few weeks ago. Looking over your build log you are doing a great job and I admire your work. You will soon be at the point where you will have to begin painting. What paints do you plan on using? Will you prime?
-
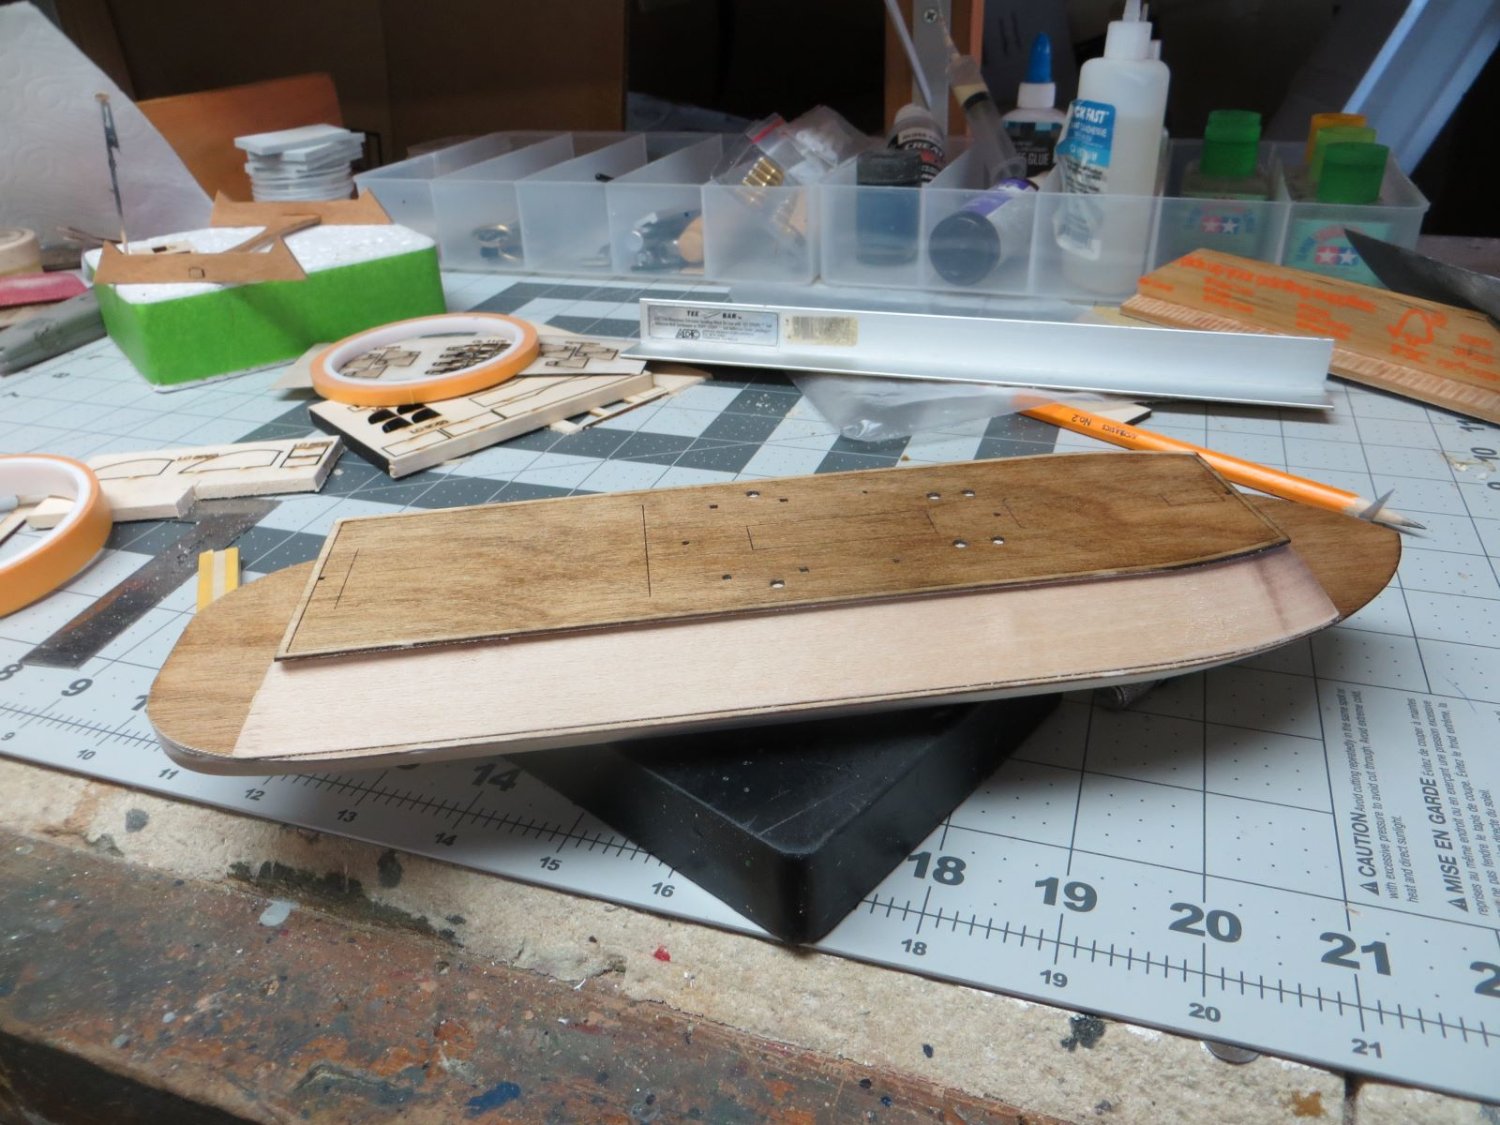
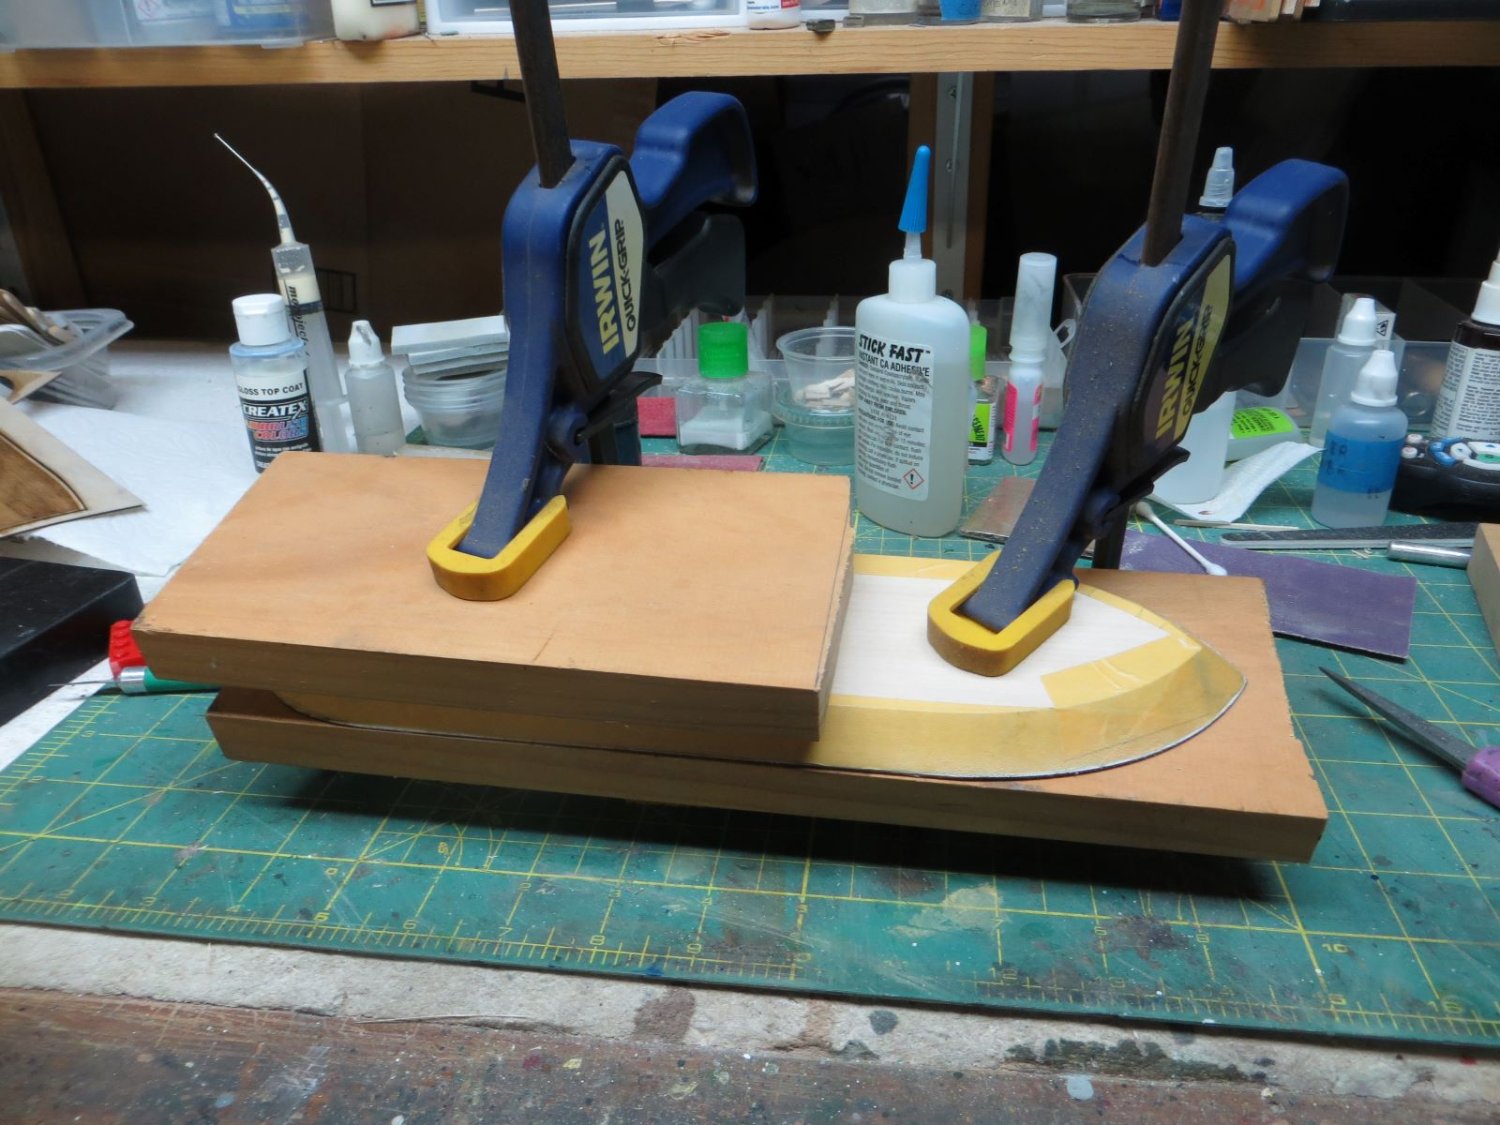
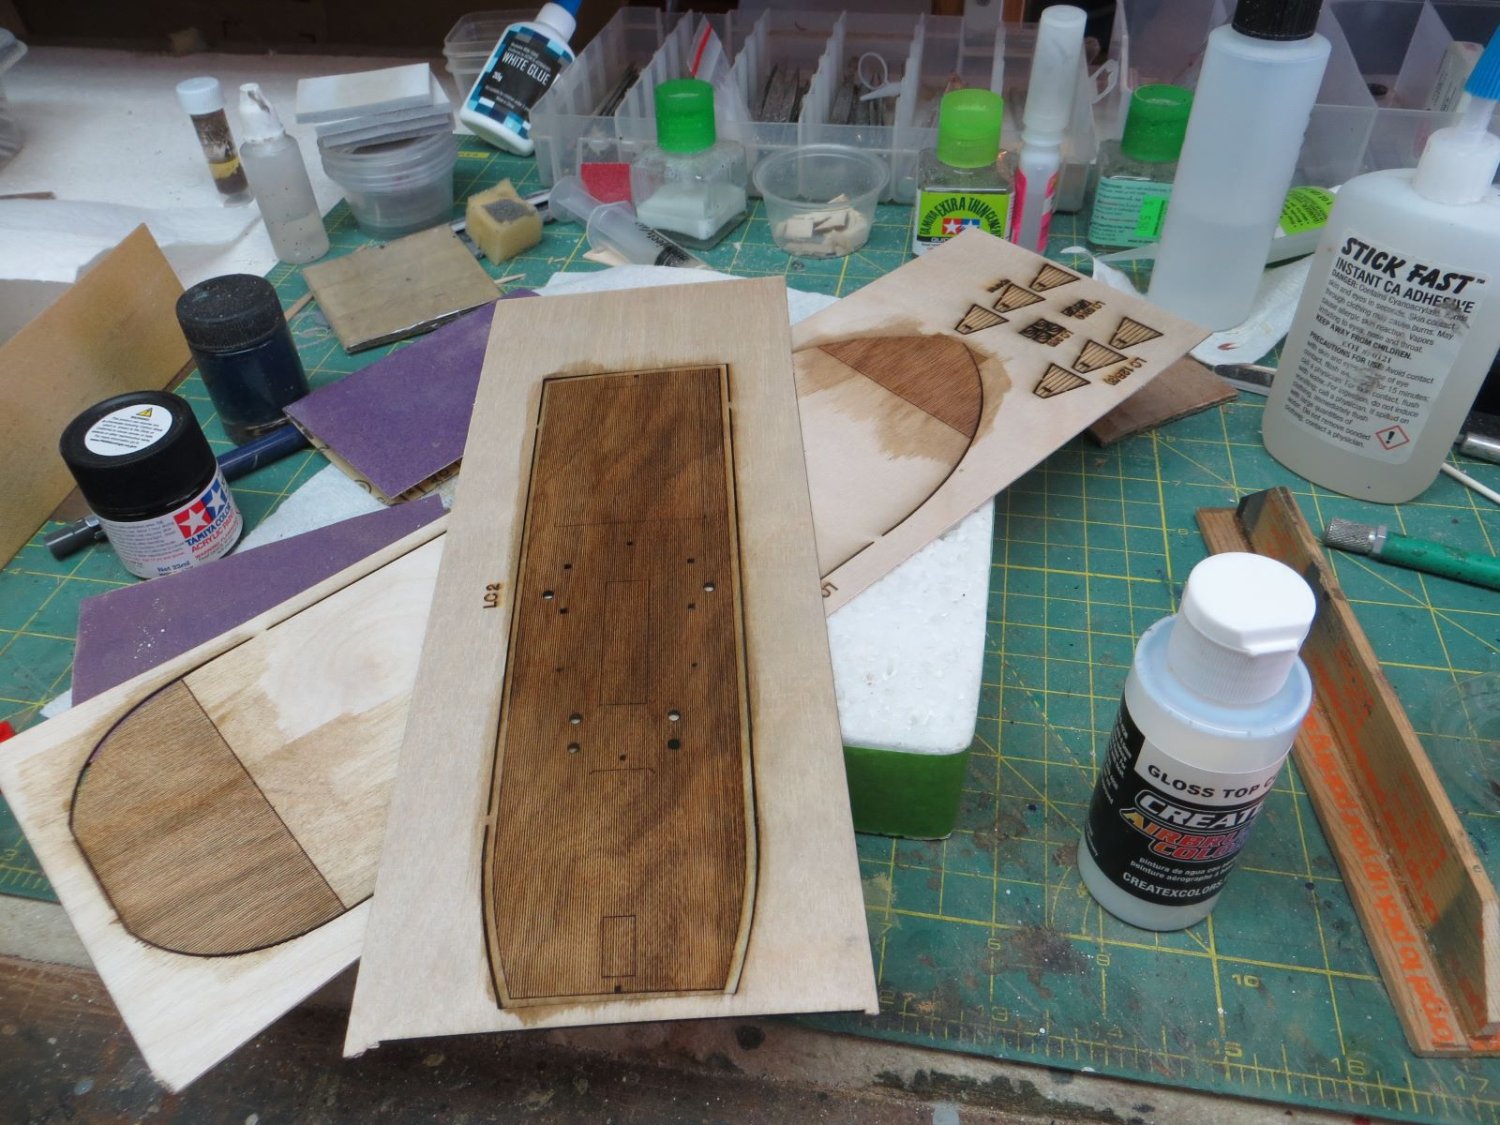
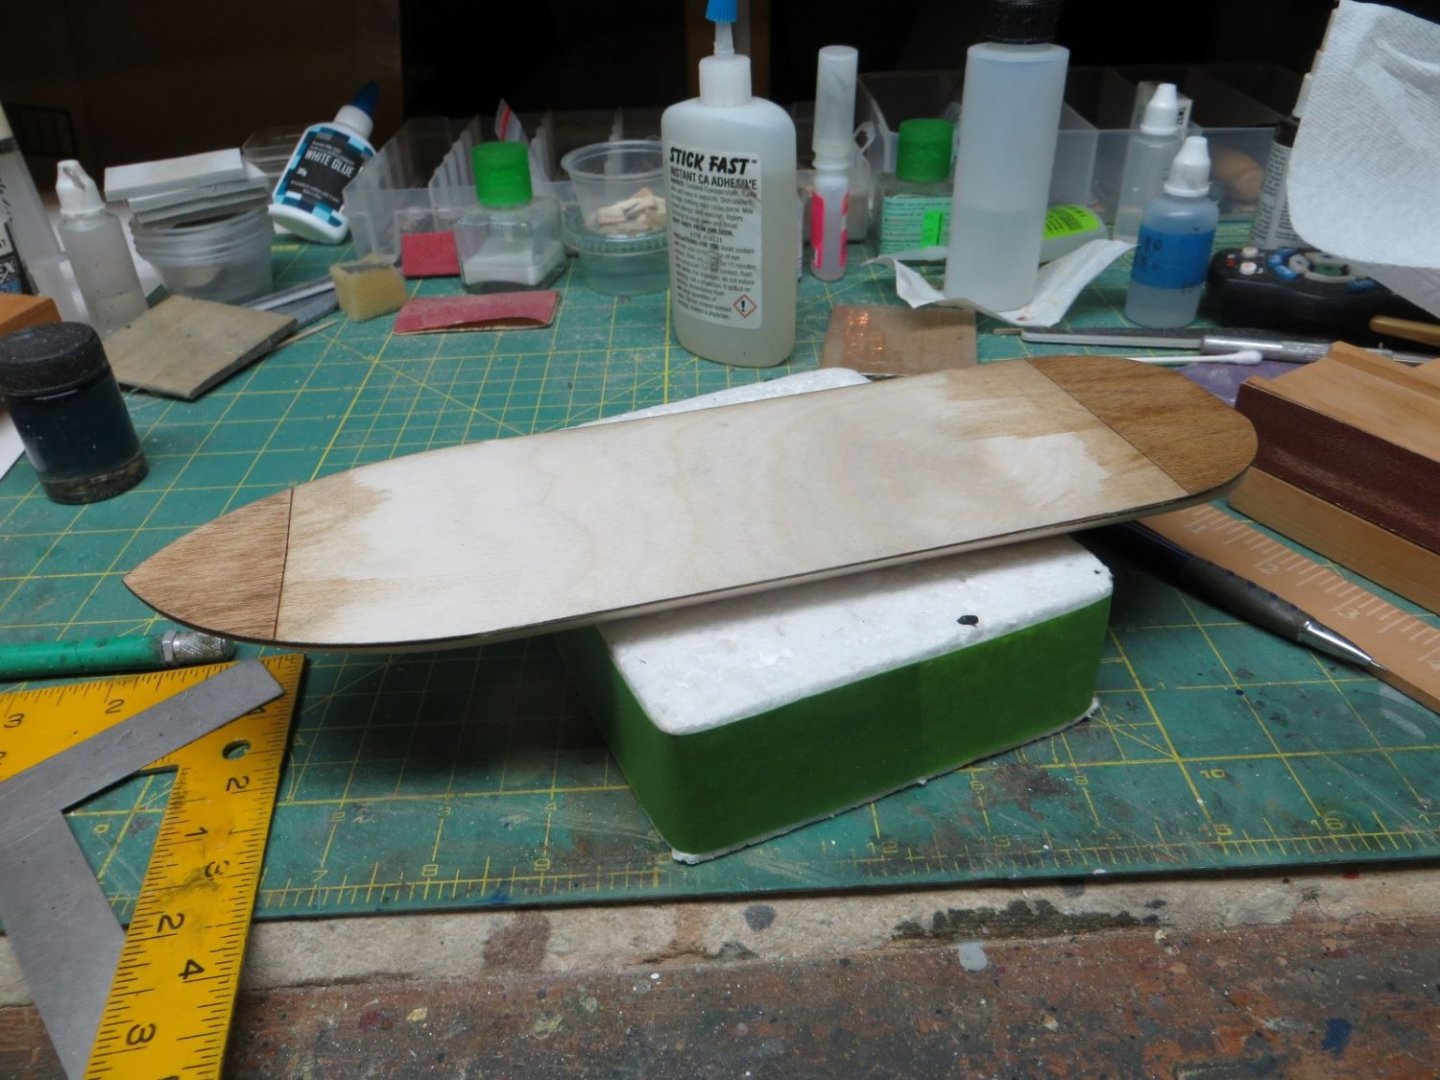
The first major gluing task is to adhere the main deck to the hull. At this point the edges of the main hull have been sanded to a sharp bevel (except for the aft most section (wich is sanded to a 90 degree angle) and the paddle wheel tunnel. During this process I test fitted the main deck to insure that there was some overhang all away around the hull. This is ensure there will be enought material at the edges of the deck to sand to a sharp bevel once the deck has been glued. I had decided to use a spray contact cement to glue the deck down. Because it is sprayed, it tends to get everywhere so I masked all areas of the hull and deck that I did not want to get sprayed. Finally, I clamped the hull and deck and left it to dry overnight. Following are photos of the deck being fitted to the hull before gluing; the masked hull and finally the hull clamped for drying. I used some small wooden boards to ensure that all areas of the decked were sufficiently clamped to the hull.

-
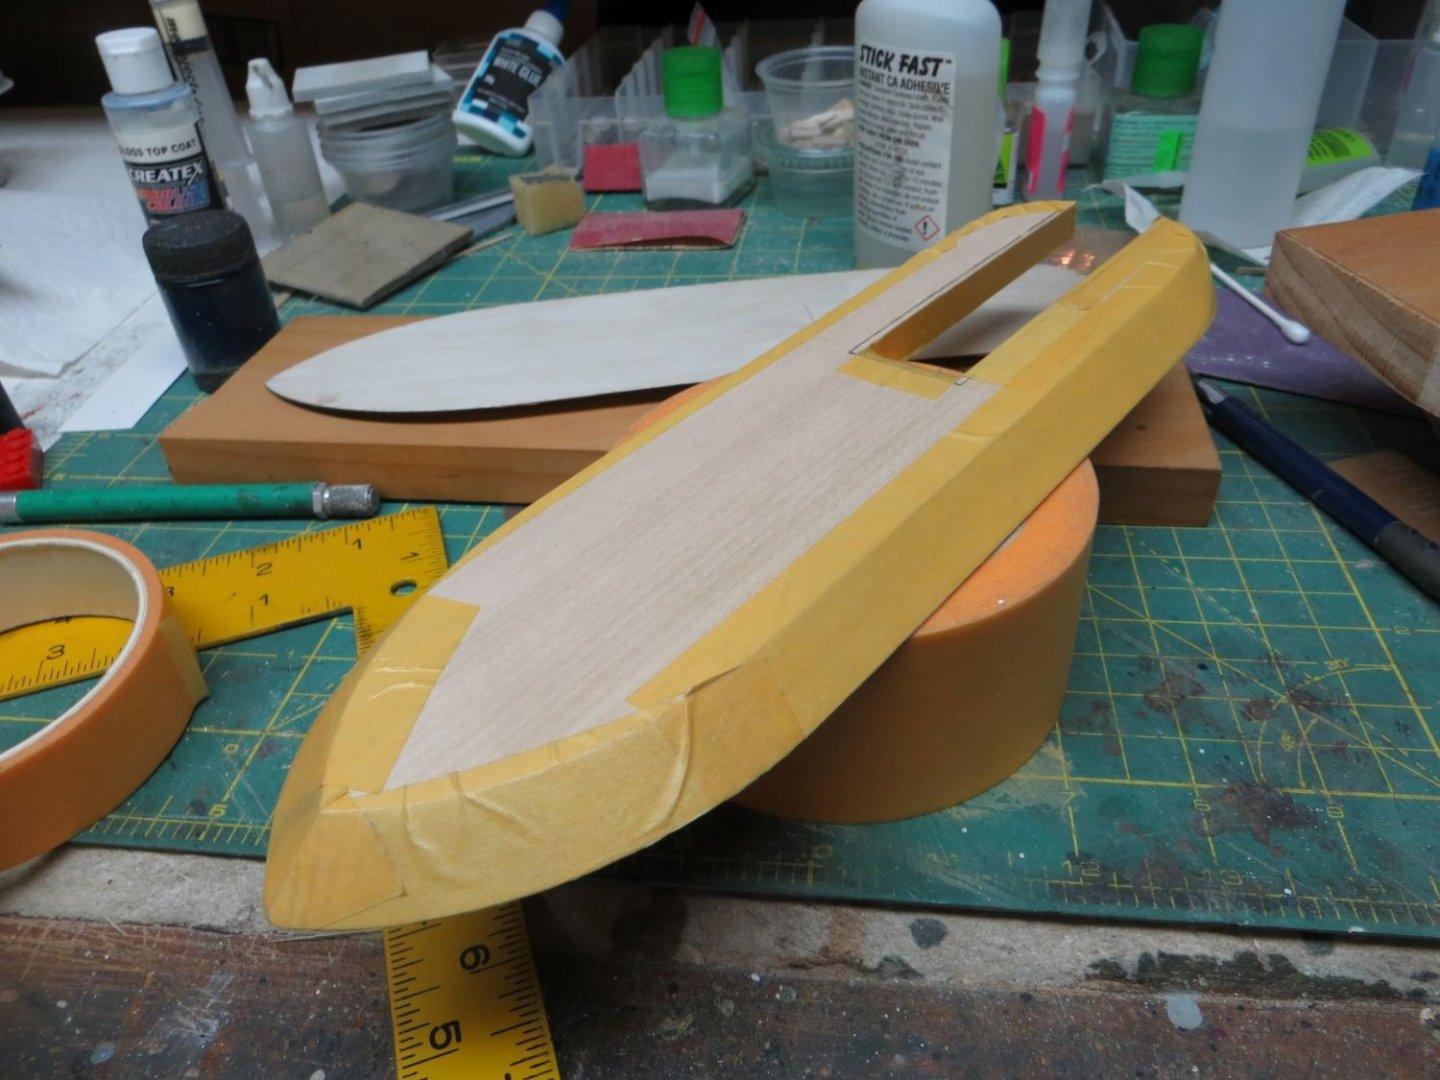
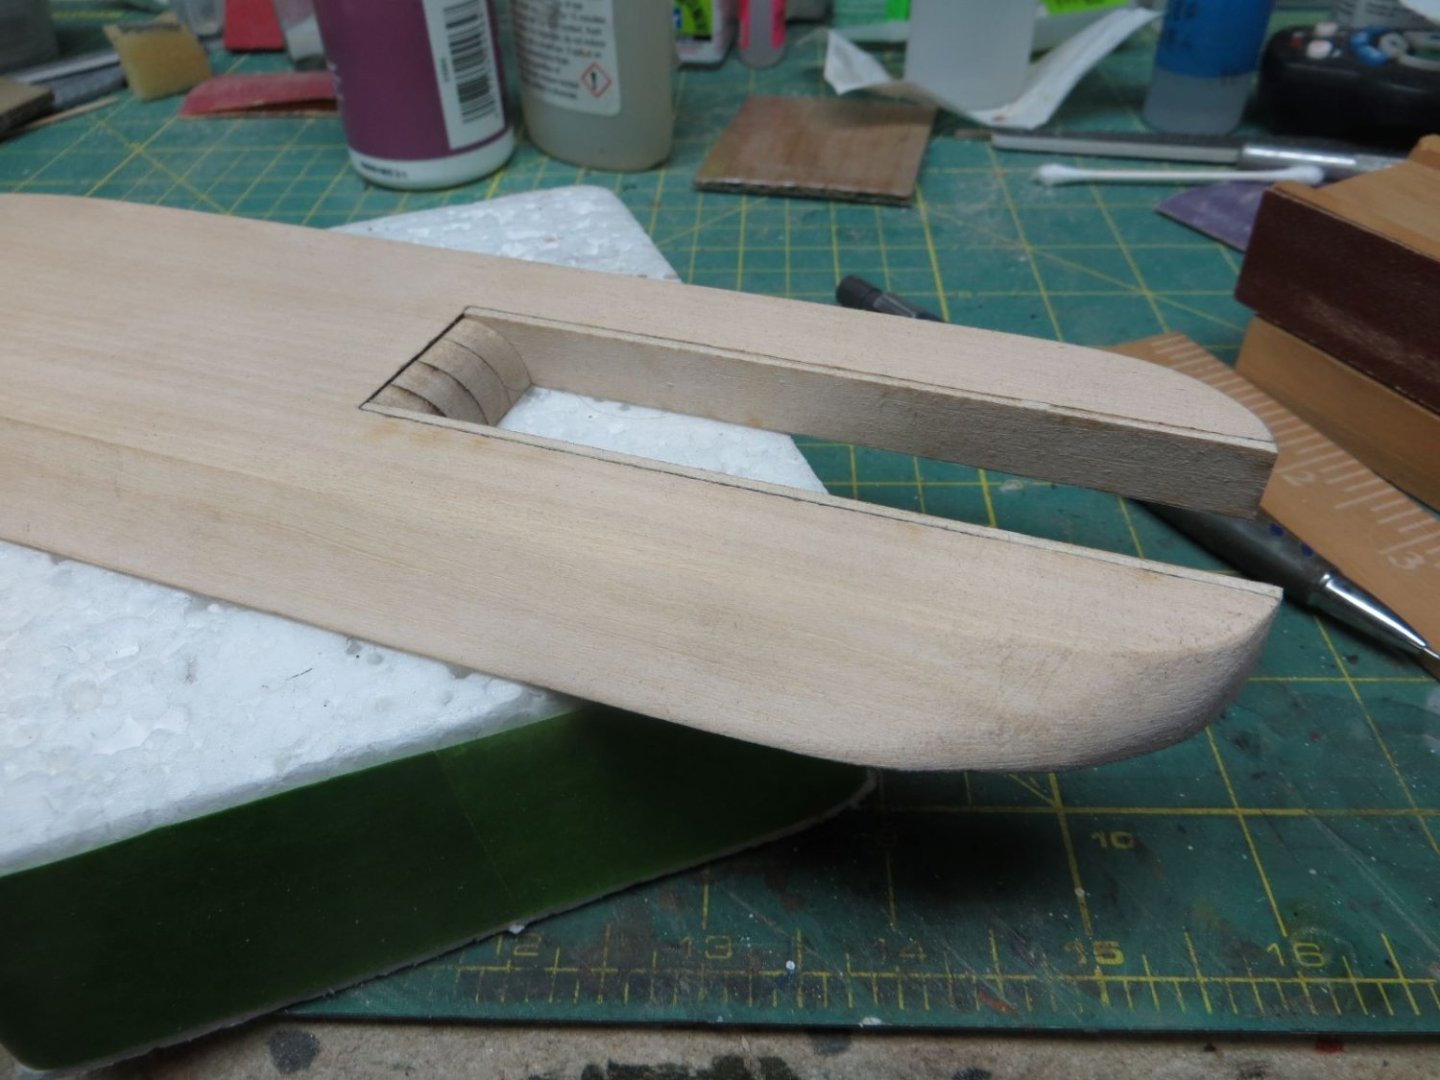
The next task was to do some small shaping of the aft end of the hull and build the paddle wheel tunnel. I then gave the hull a good sanding with 220 grit sand paper. The following is a photo of the paddle wheel tunnel.
-
As mentioned, I have been working on this model for a few evenings so I will make a few posts to bring you up-to-date on my progress. The first step was to clear coat the wooden decks. I used a gloss coating by Createx and brushed it on. I did have some gloss coating by Tamiya in a rattlecan but I was not sure that they would be compatible with wood. I coated the decks while still attached to the "fret" so it was quite simple.

-
I have been away from this forum for a few years. I put my wooden shipbuilding aside and for a few years I have been working on plastic modelling and building some simple dioramas. Lots of fun and you definitely improve your airbrushing and painting skills. I have have had an interest in history for years and have read several books on the Civil War including biographies of Sherman and Grant. Both mention the "naval" battles along the Mississippi. I remembered purchasing a couple of model kits for Civil War ships, the Monitor and the USS Cairo; both from BlueJacket. Sure enough I searched my "stash" and located the USS Cairo kit. I jumped into building this model about a week ago. During this first week of building I discovered that what appeared on the surface to be a simple model (low parts count and no planking required) was actually going to be a bit challenging for me. This brought me back to this site to see if anyone was building the same kit. I came across the log by Cathead who had just started on the kit. His comments lead me to start this log. I want to warn any readers of this build log. I am not an experienced ship builder so as I stumble my way thru the build my solutions to encountered problems may not be the best. As you read, if you know a better way or got better results; please don't hesitate to comment. I also hope that when I do encounter problems, the fact that I have started this log will discourage me from just "setting it aside". Finally, we (my wife and I) own an RV and love to travel; so there may be some breaks in the progress of this log.
-
I have not been actively participating in this forum for quite a while. I retired a few years ago and got involved in building plastic models and dioramas. Decided to get back to wooden ship modelling a short while ago. I rummaged around in my stash and recovered this model of the Cairo that I had purchased several years ago. I am a bit of a Civil War history buff and have read a bit about the "naval" battles on the Mississippi river. I started this model a couple of nights ago and find that while it appears simple (low parts count, solid hull, etc.) it is turning out to be a more challenging project than I thought. I guess I should count myself lucky, however, as I have not run into any "Huh" parts yet. The instructions are not as clear as I would like and photos of steps would be more helpful than sketches. It also looks like fit is also going to be a challenge. Us old plastic modelers expect perfect fit with no seams. Finally, a list of terms would help. I had no idea what a "casement" was until I looked it up on the internet. While I did not expect to open a build log; I will if I can figure out how to do it. Had a few logs a few years back so I should be able to work through it. Cathead, as we move along; perhaps we can help each other and learn from our mistakes. I will also send for those marked up plans.
- 113 replies
-
- 6
-

-
- Cairo
- BlueJacket Shipcrafters
- (and 1 more)