HOLIDAY DONATION DRIVE - SUPPORT MSW - DO YOUR PART TO KEEP THIS GREAT FORUM GOING! (Only 13 donations so far - C'mon guys!)
×


rcmdrvr
-
Posts
420 -
Joined
-
Last visited
Content Type
Profiles
Forums
Gallery
Events
Everything posted by rcmdrvr
-
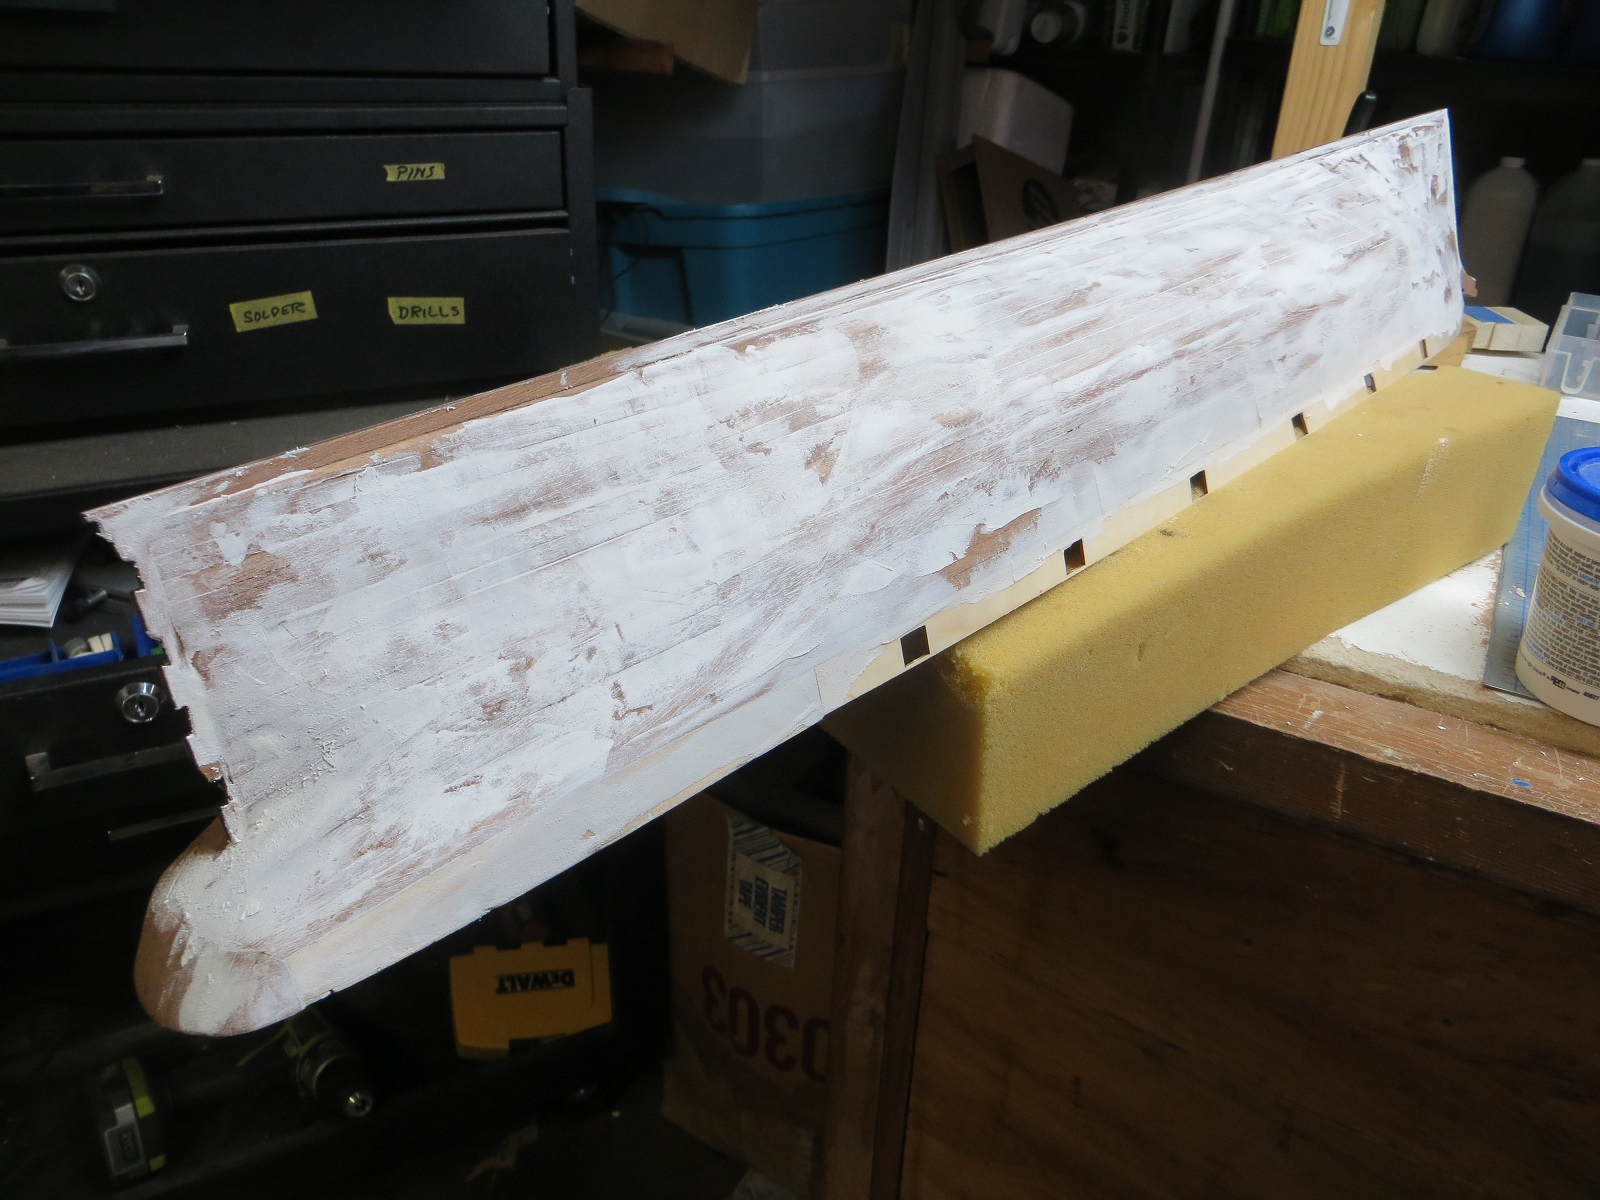
Now comes the time for sanding, putty and more sanding. I am using a palm sander for most of the work. The putty is spackling paste so it sands easy. After I get the finish I want I will seal everything in a polyester varnish.

- 50 replies
-
- 2
-

-
- cutty sark
- artesania latina
- (and 1 more)
-
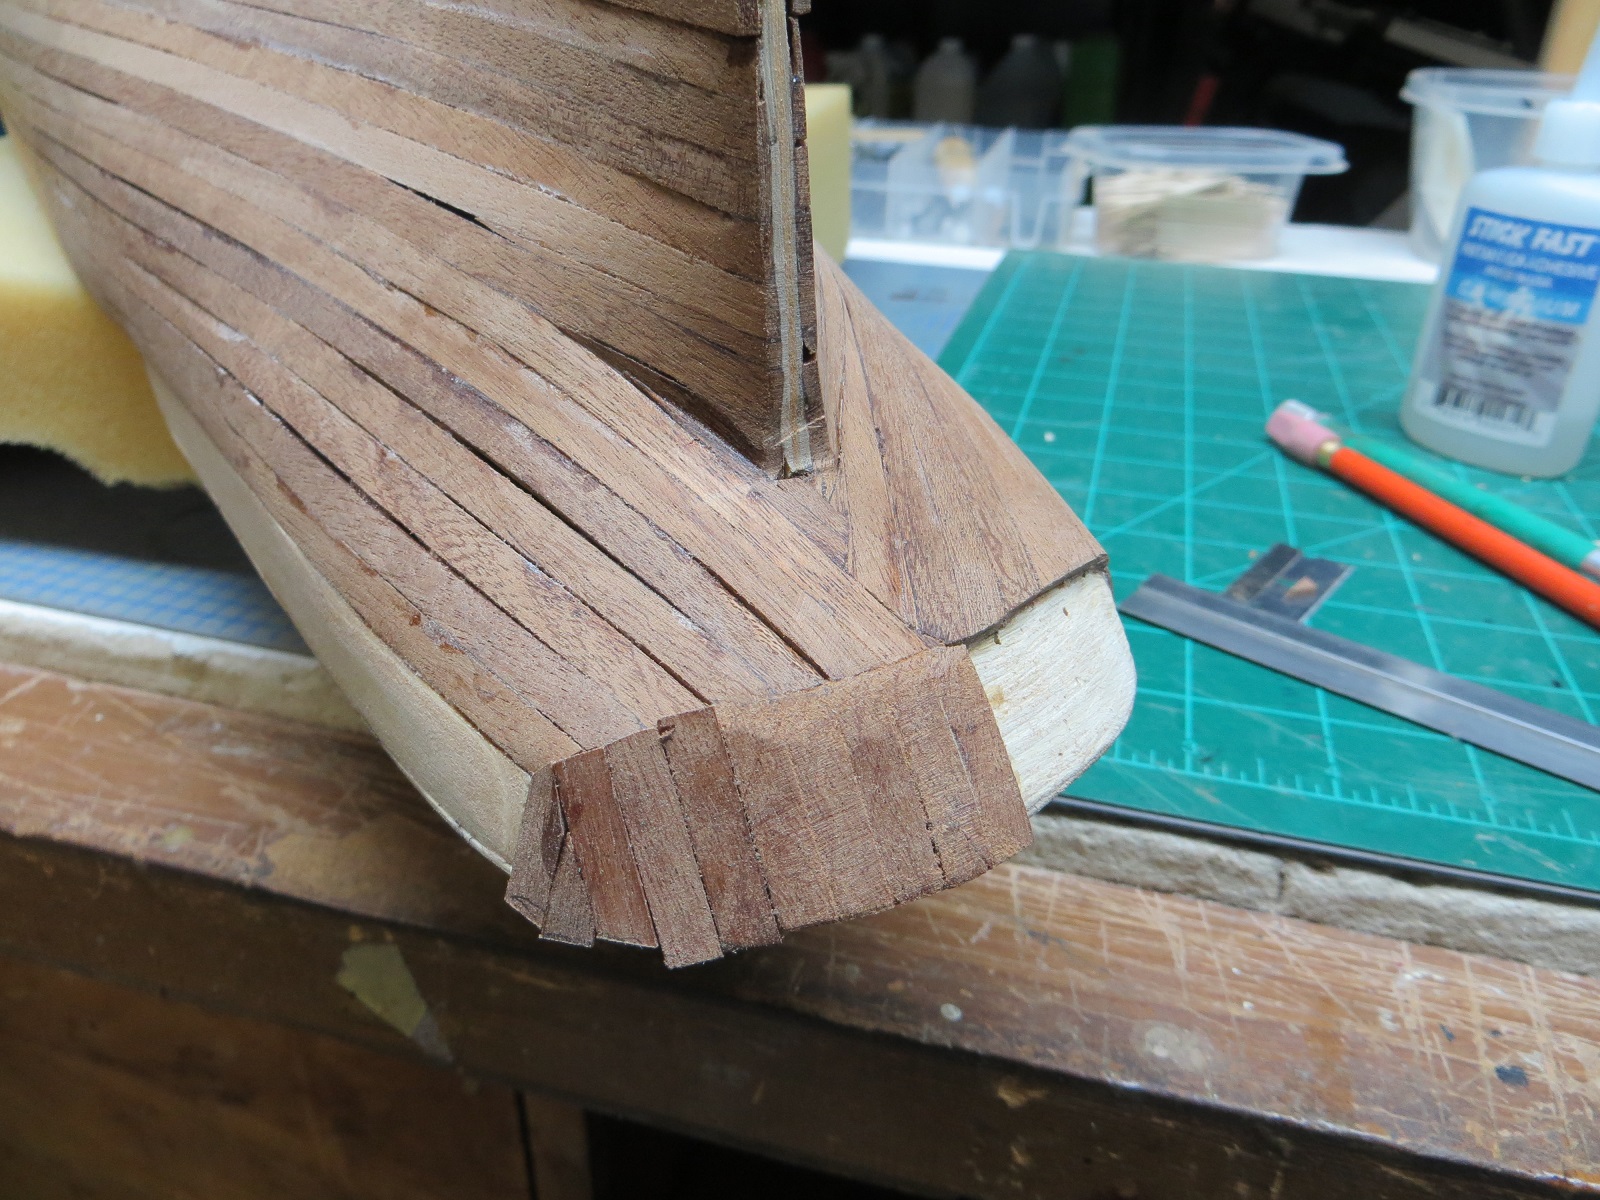
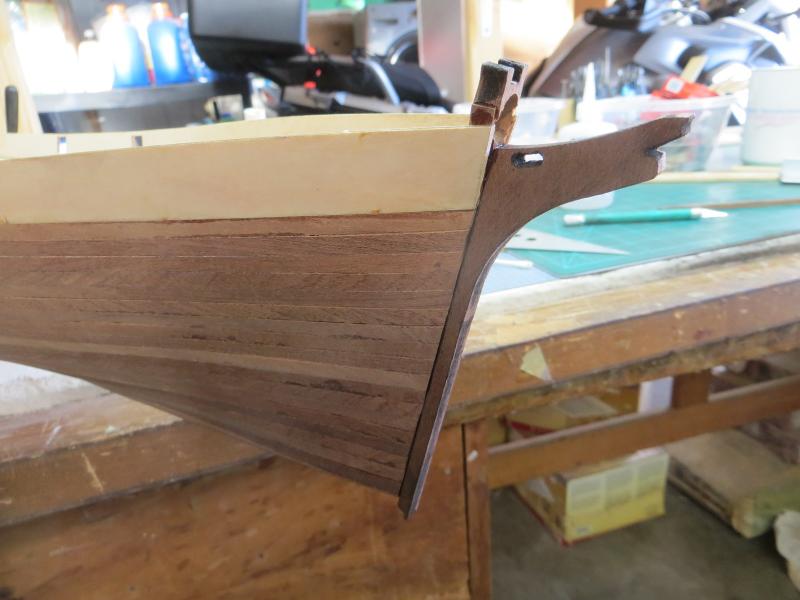
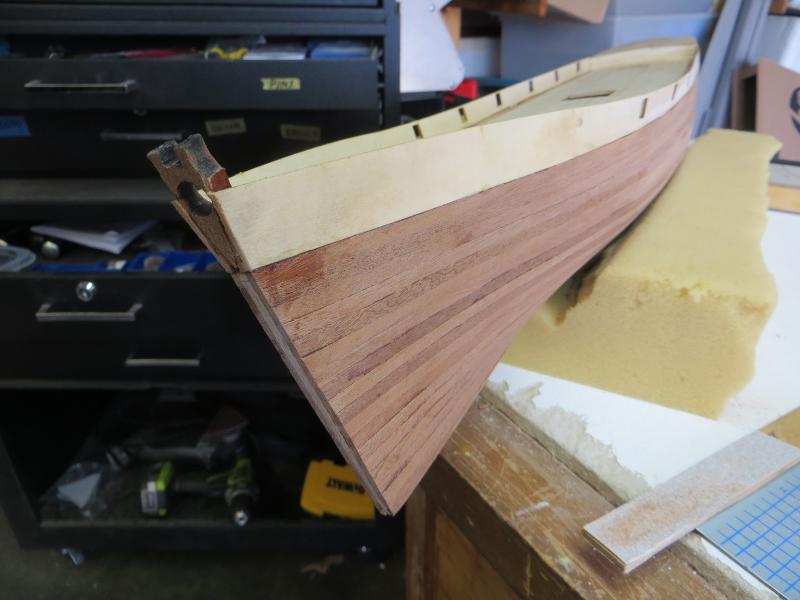
After the bulwarks the keel was added. I was a bit disappointed. AL had used a laser to cut the parts. Since the wook was over 6mm thick, they must have really turned up the power because it was charged. It took a lot of sanding to make it usable.
- 50 replies
-
- 4
-
-
- cutty sark
- artesania latina
- (and 1 more)
-
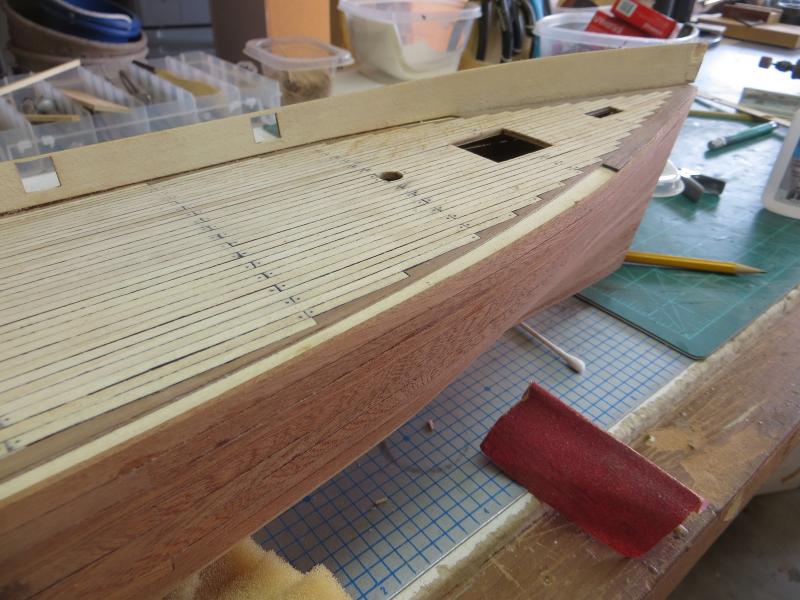
Completed basic planking so now to add bulwarks.
- 50 replies
-
- 6
-
-
- cutty sark
- artesania latina
- (and 1 more)
-
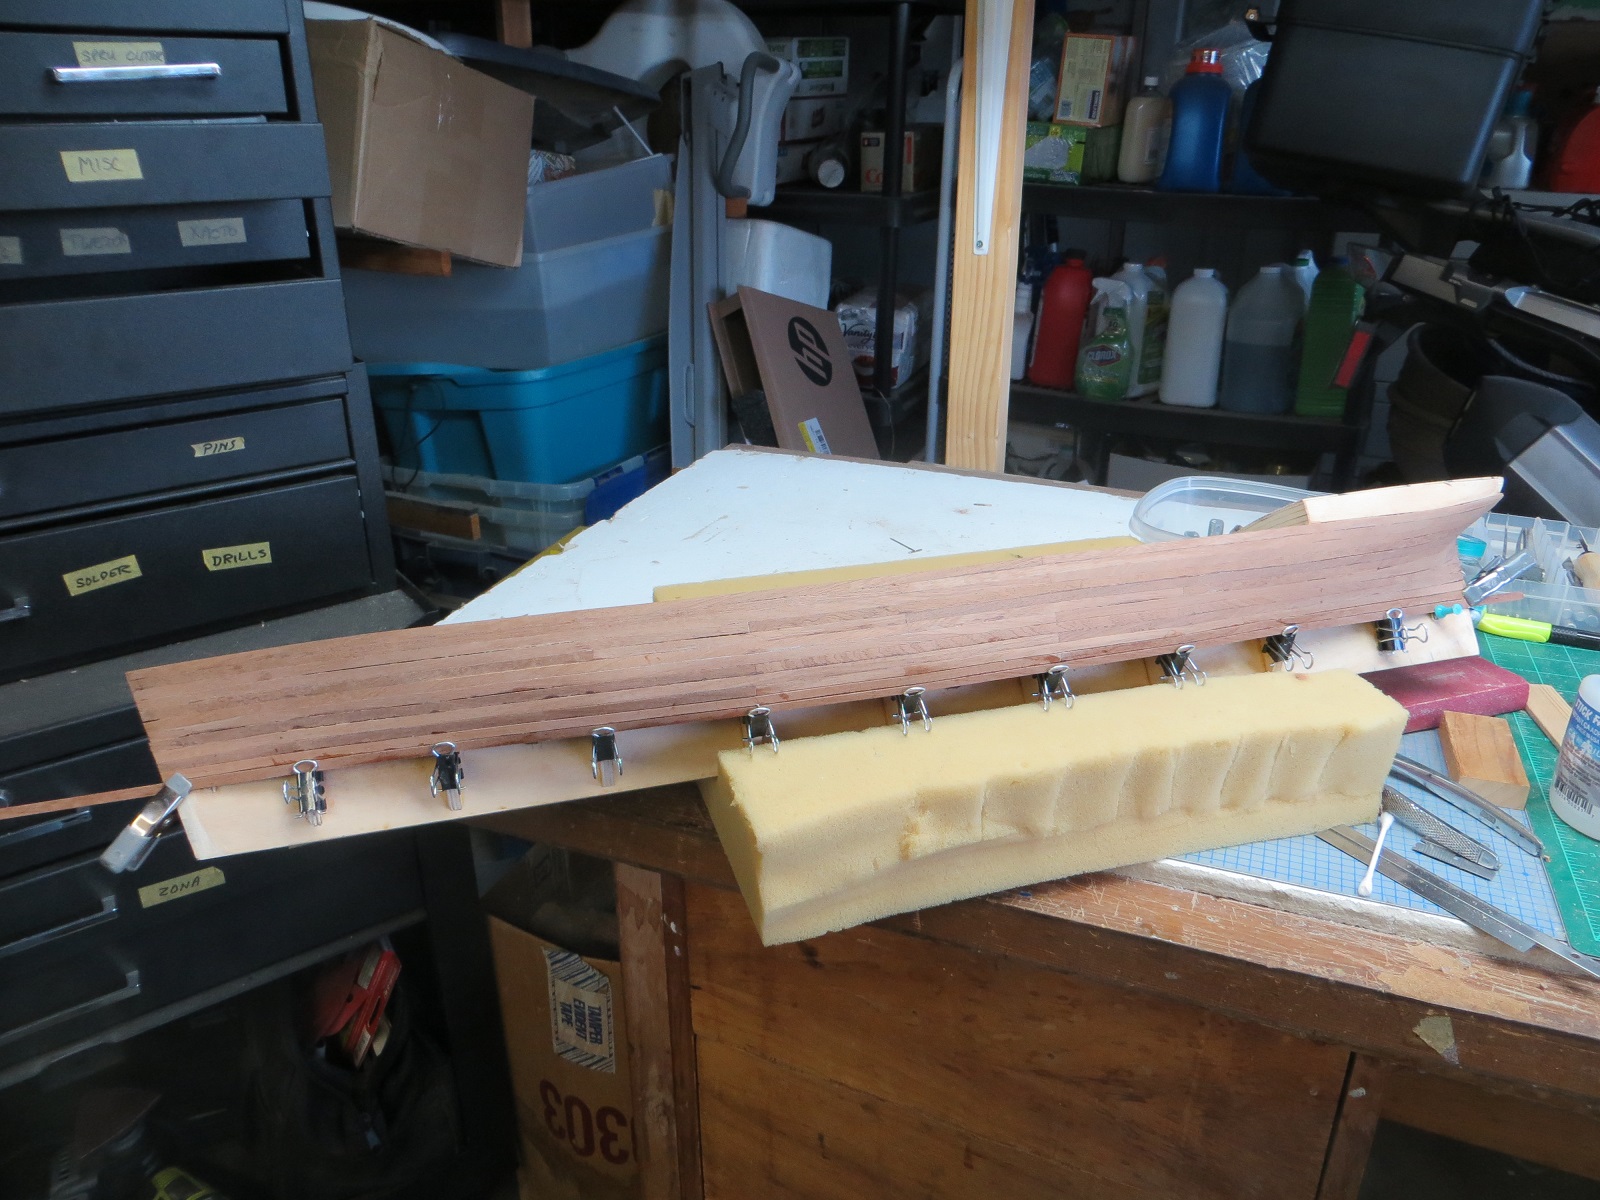
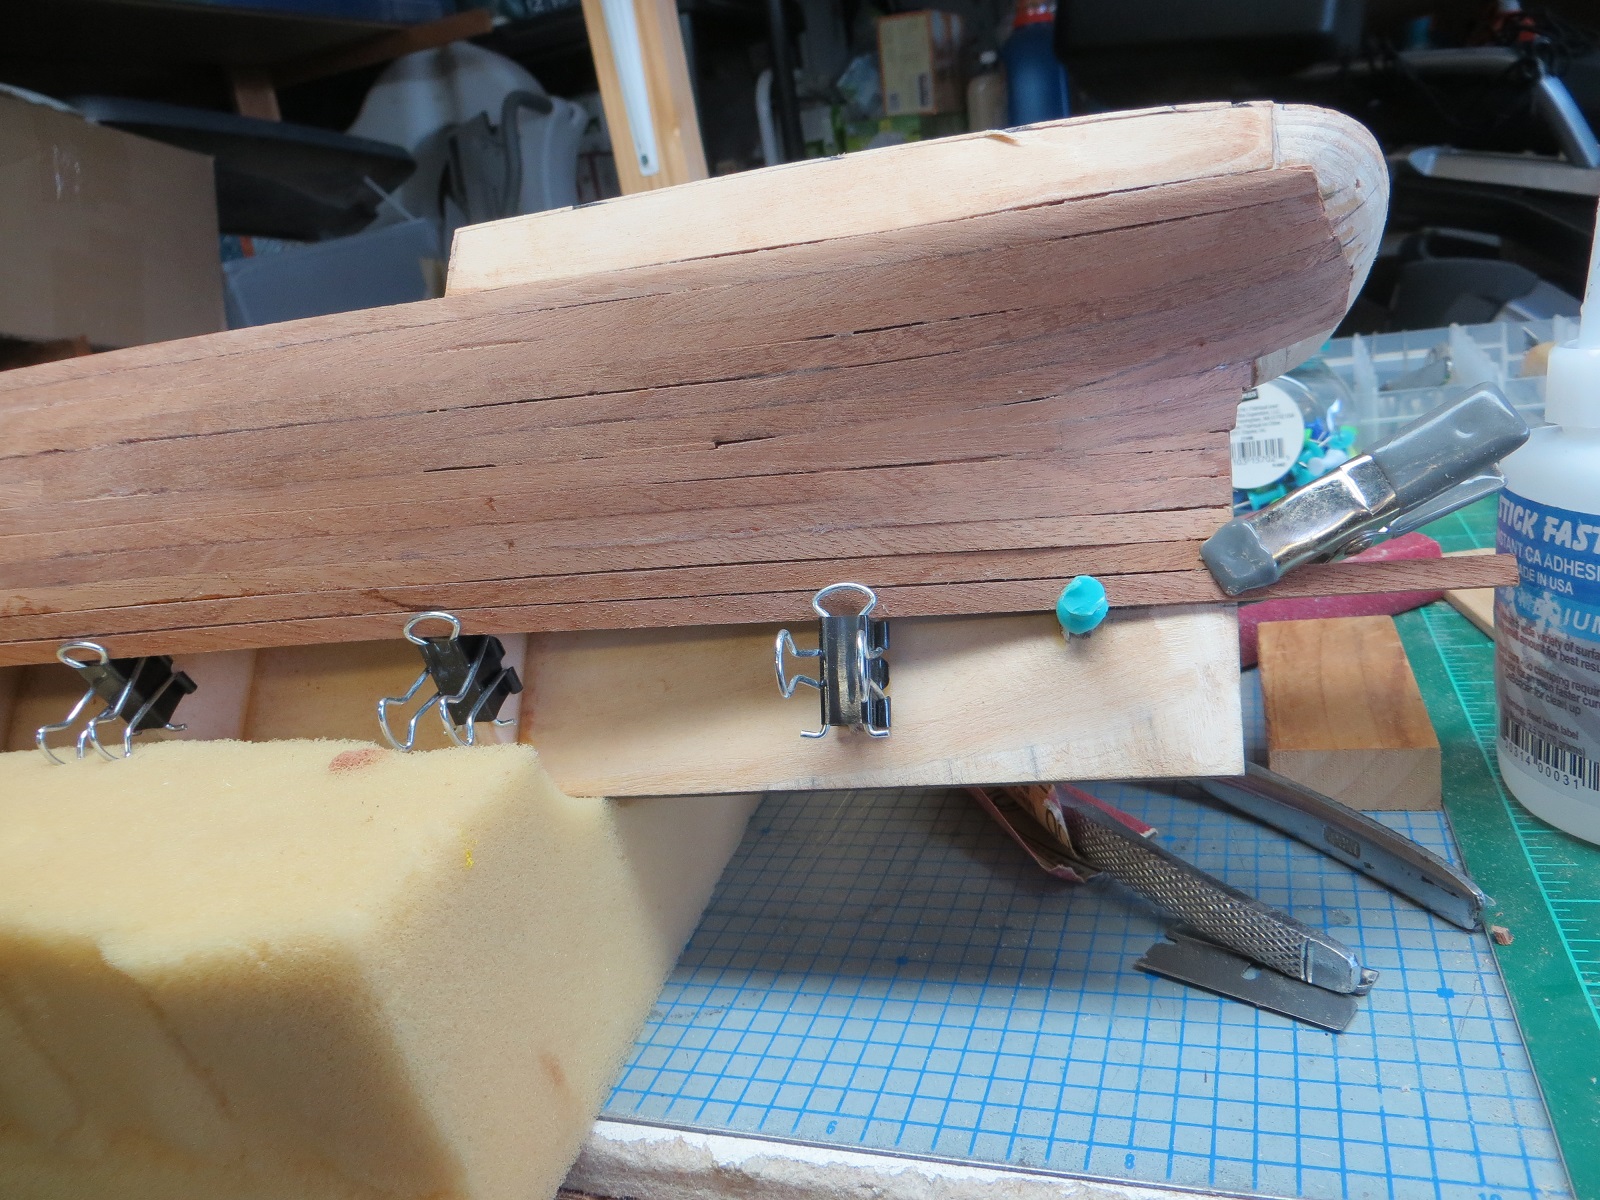
I am continuing to make progress with planking the hull. I am soaking each plank about 2 hours. My "soaker is a capped 1 inch PVC pipe filled with water. I have two so I can soak about 10 to 12 planks at a time. I live in So. California and it has been about 95F lately so I have to work quickly. The planks dry out in about 10 to 15 minutes.

- 50 replies
-
- 4
-
-
- cutty sark
- artesania latina
- (and 1 more)
-
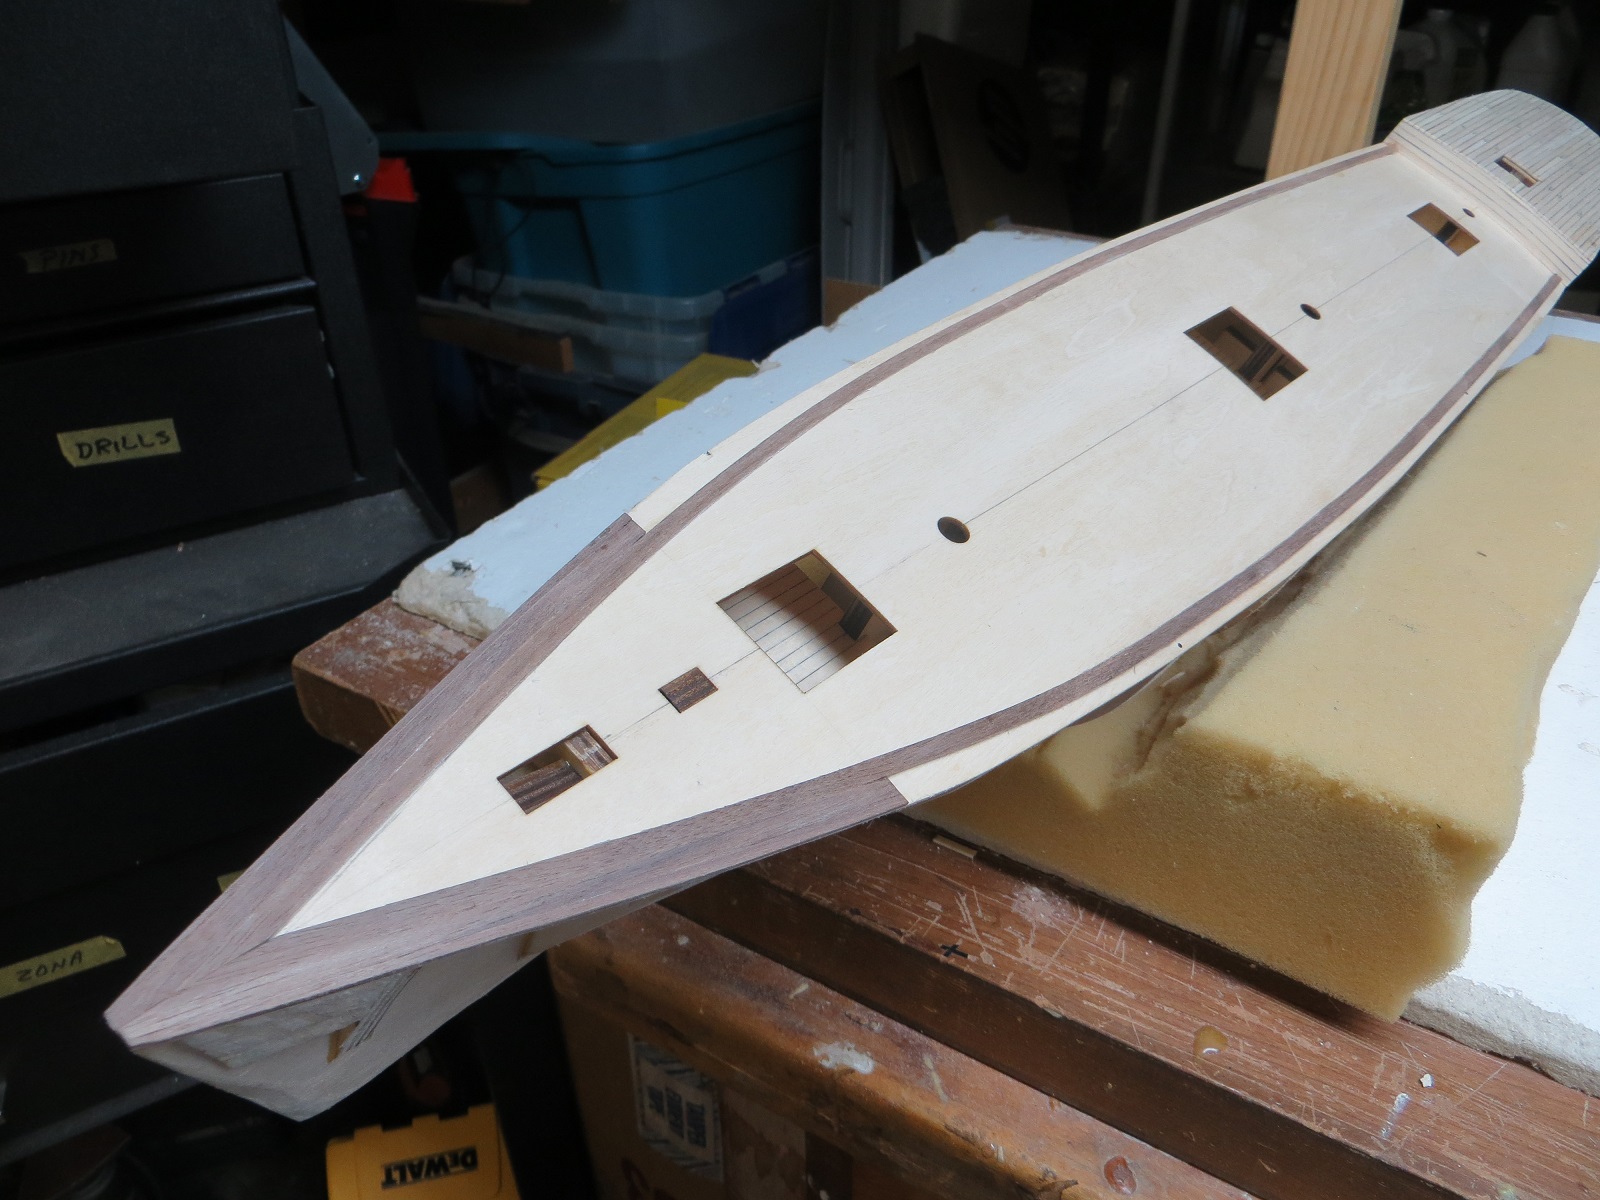
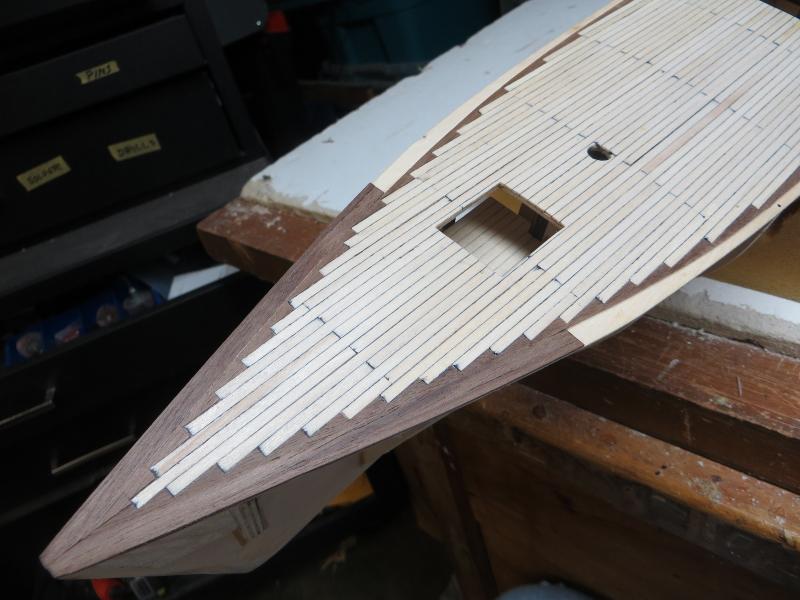
With the deck planking almost completed (I only have to simulate the tree nails); I move on the hull planking. The wood provided has a cross grain at about 30 degrees so it wants to splinter when bent. I am soaking for about an hour which gives me about 20 minutes work time. Since the hull will be painted and coppered; the planking does not have to be pretty.....just shaped correctly and smooth. I am using a CA gel to affix to the bulkheads.


- 50 replies
-
- 5
-
-
- cutty sark
- artesania latina
- (and 1 more)
-
Continued with the planking of the rear and main decks. This is a long model, measuring almost 24" in length and 6" wide. My decking plank are 4 mm wide and 120mm long. This is going to take quite a few evenings work.


- 50 replies
-
- 7
-
-
- cutty sark
- artesania latina
- (and 1 more)
-
I have looked at your log and I think the photos of the Cutty Sark you have provided will be useful. I did order the museum guidebook from Amazon. It is described as having quite a few detail photos.
- 50 replies
-
- 3
-
-
- cutty sark
- artesania latina
- (and 1 more)
-
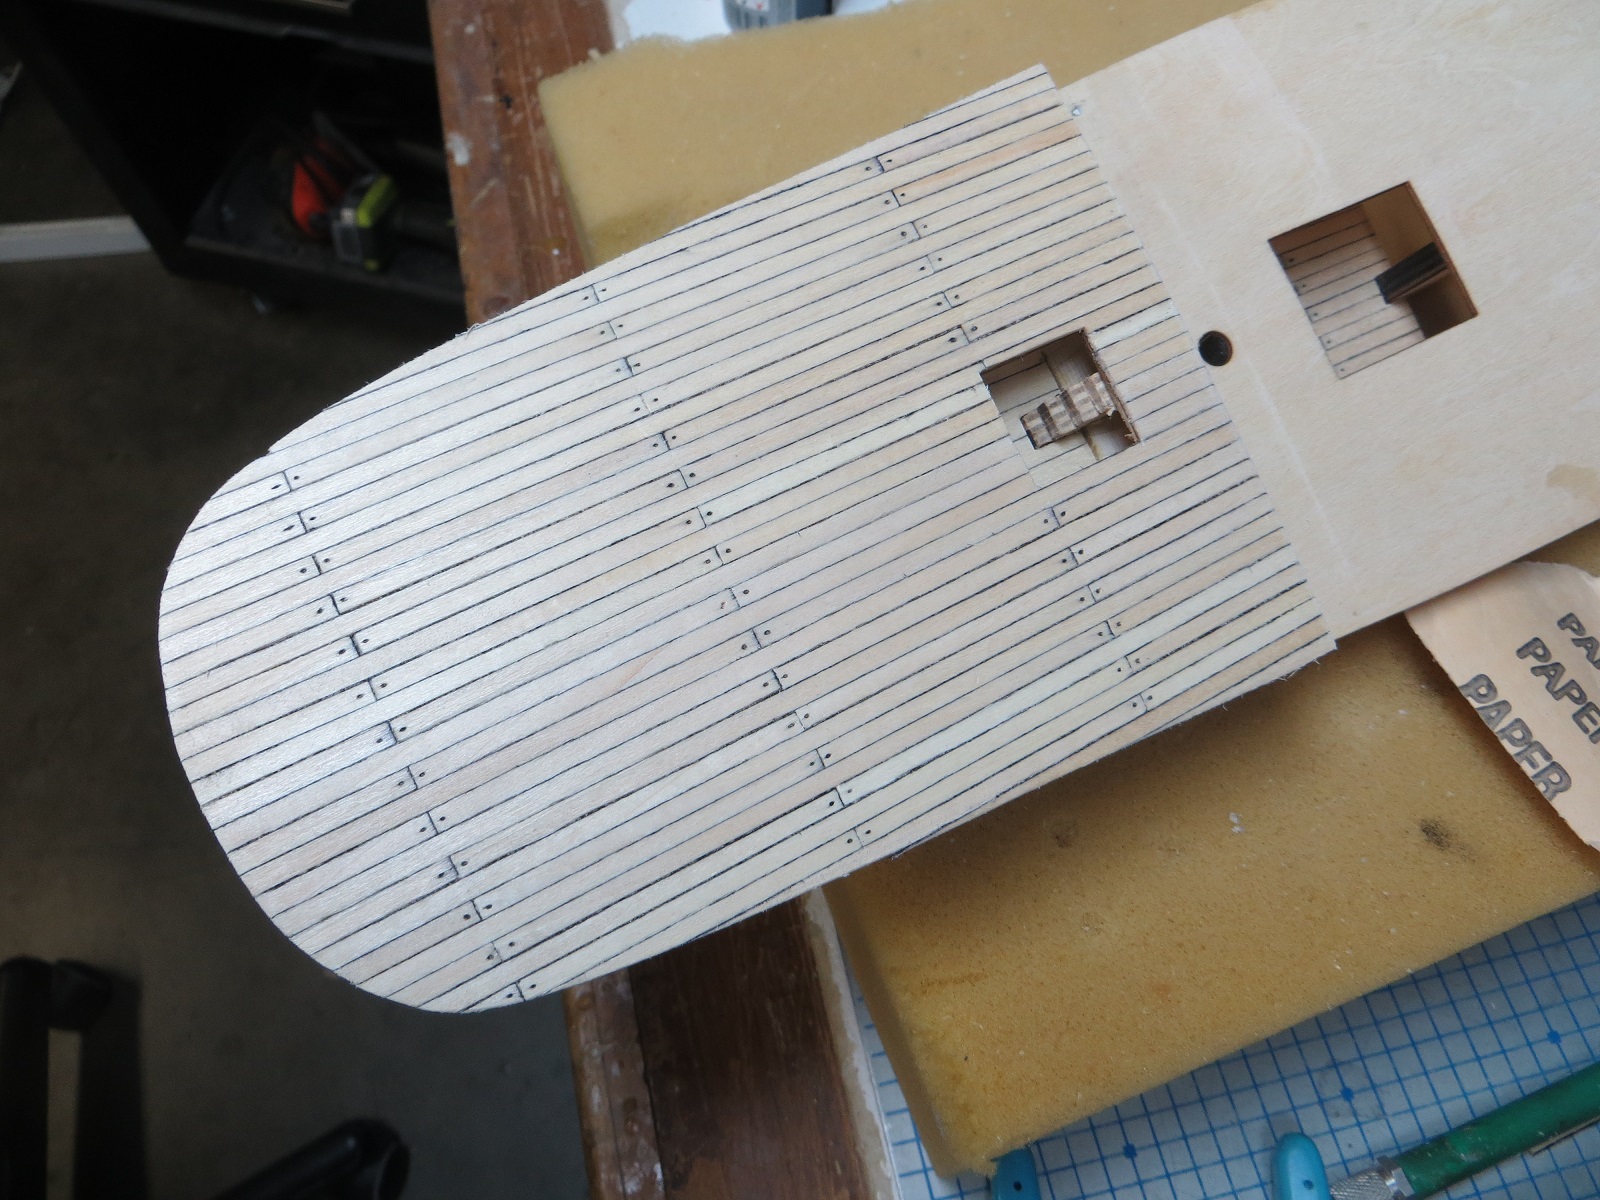
Now I can begin planking. This will take some time. I use a permanent marker along the edge of each plank to simulate caulking. The nails are done with a pin and a very sharp pencil. When I get farther along I will use a single edge razor as a scrapper.
- 50 replies
-
- 6
-
-
- cutty sark
- artesania latina
- (and 1 more)
-
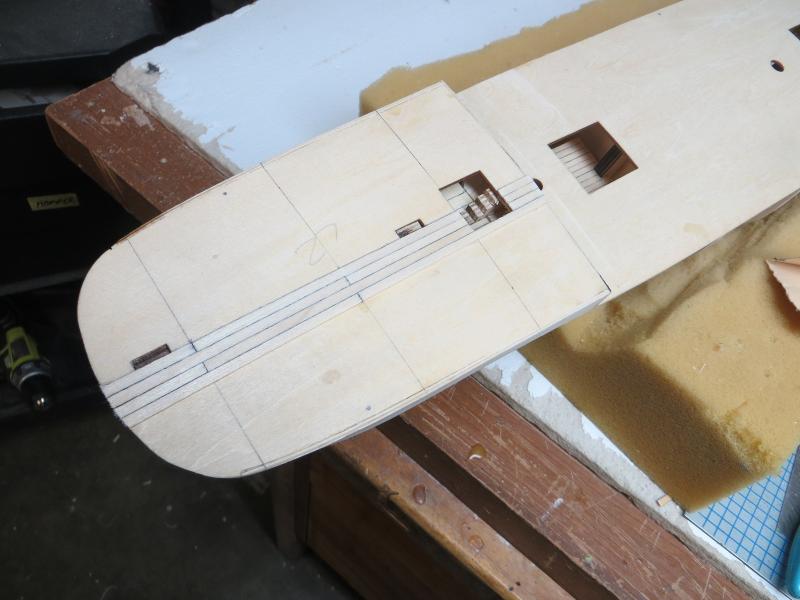
The next step was to glue the main deck to the keel. This is when you can carefully align the keel and straighten any warps. Once that was done, I then sanded the edges of each bulkhead to make sure that the planking will lie smoothly along the sides of the hull.


- 50 replies
-
- 5
-
-
- cutty sark
- artesania latina
- (and 1 more)
-
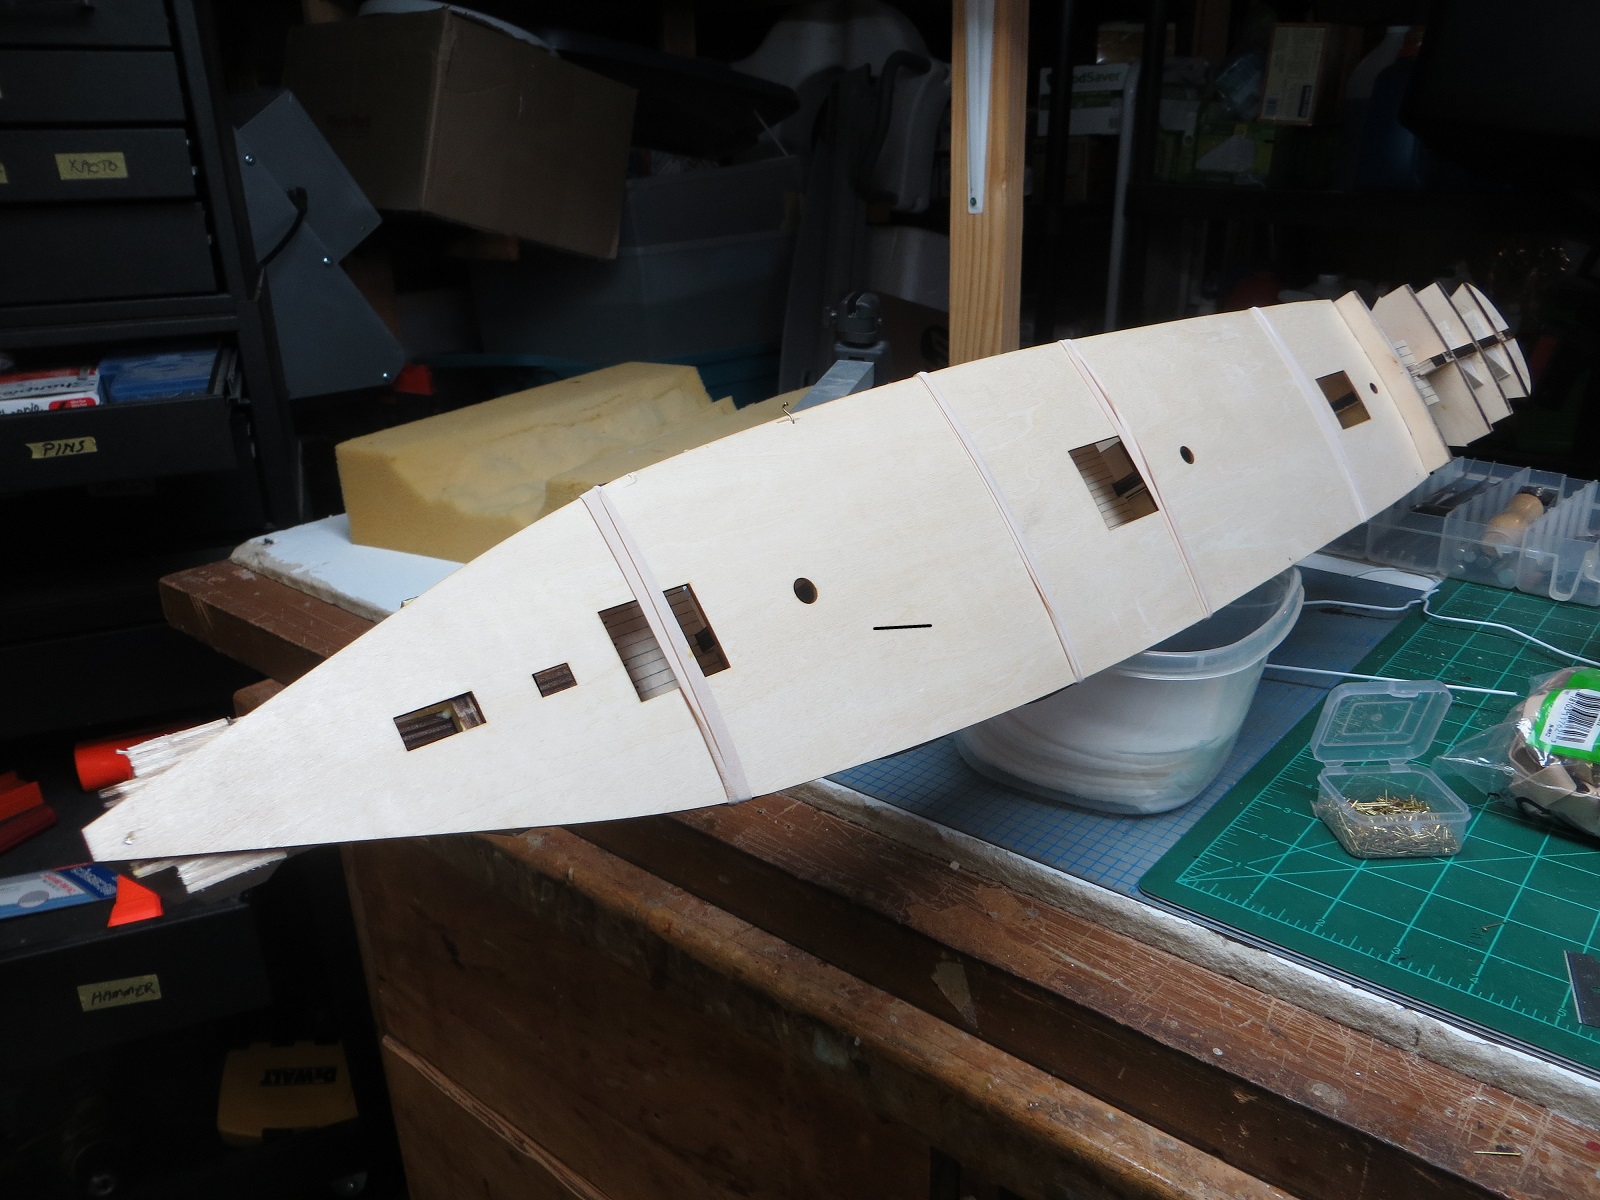
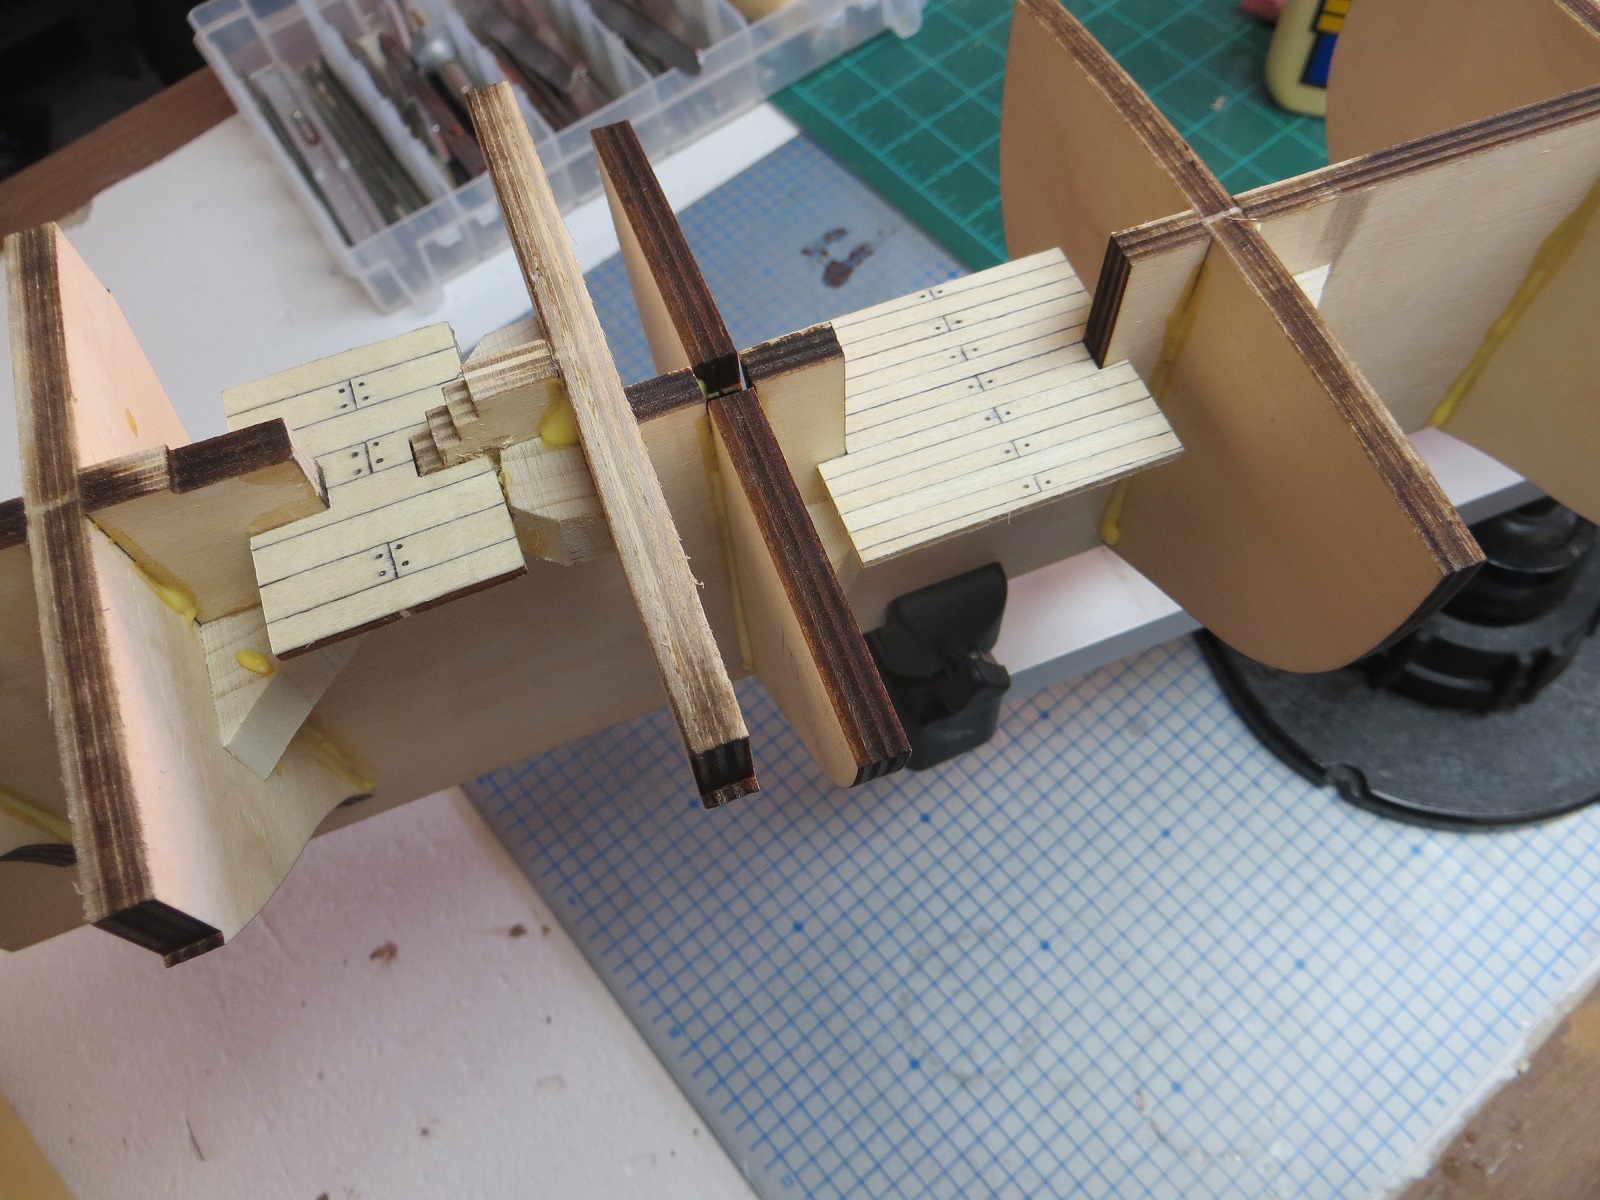
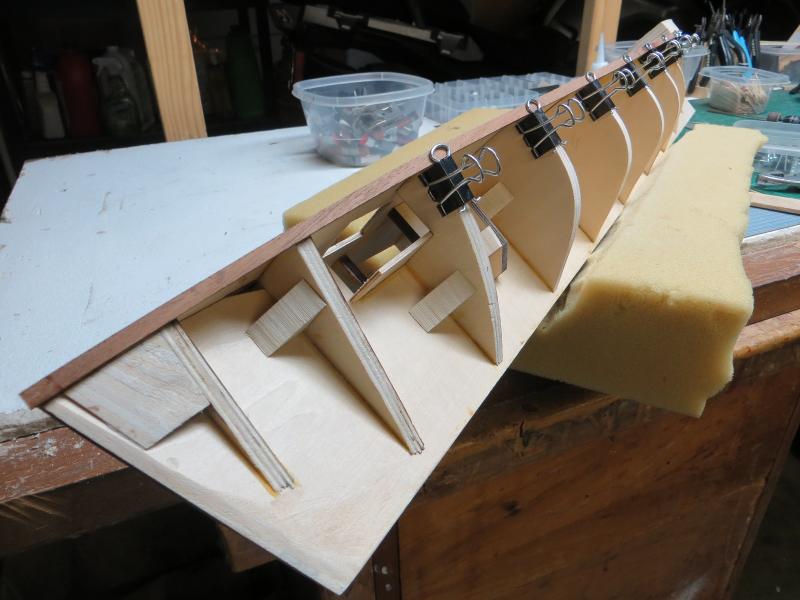
After the bulkheads were glued to the keel, there were four "sub-decks" that I planked and glued into place.

- 50 replies
-
- 4
-
-
- cutty sark
- artesania latina
- (and 1 more)
-
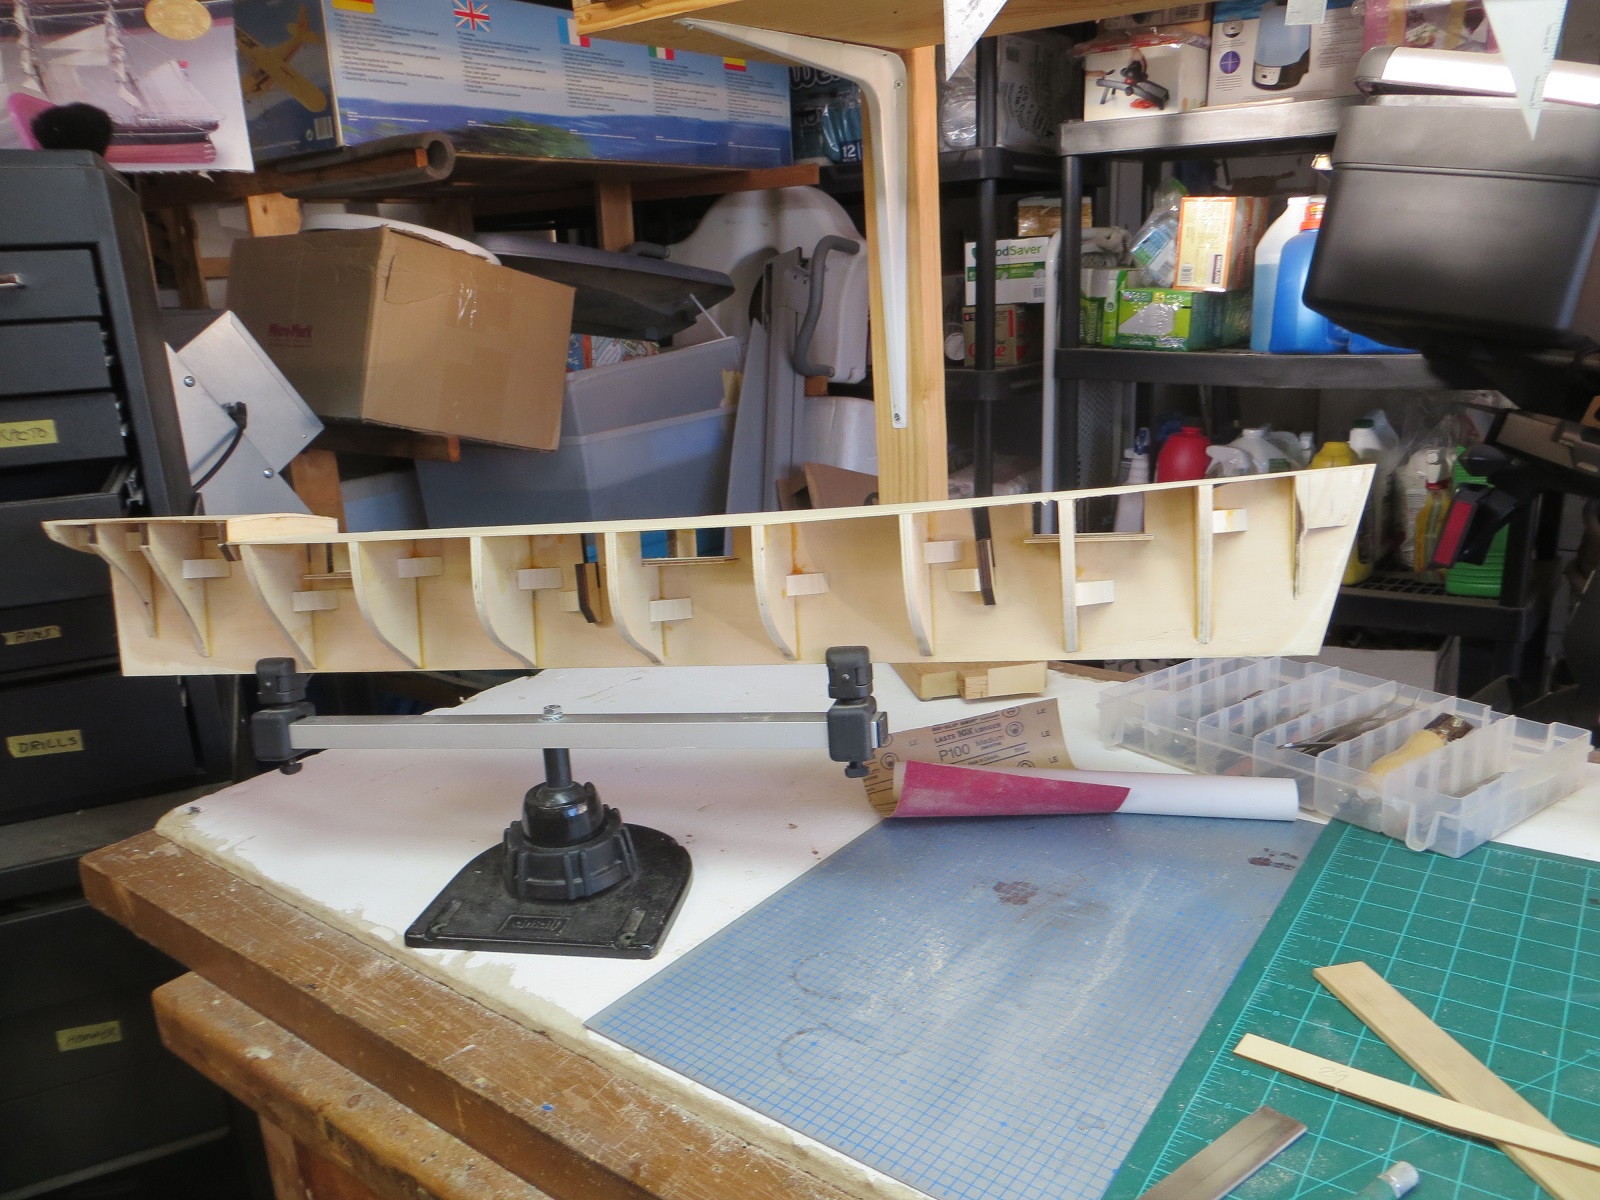
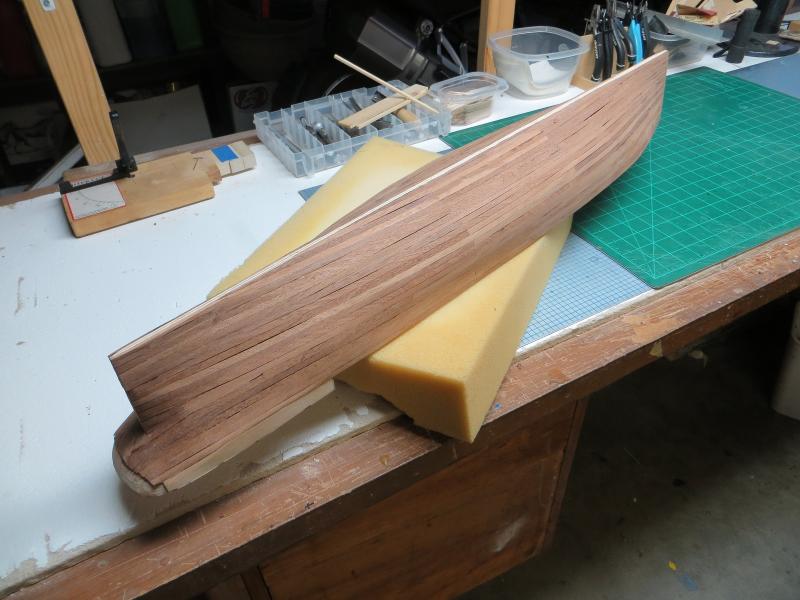
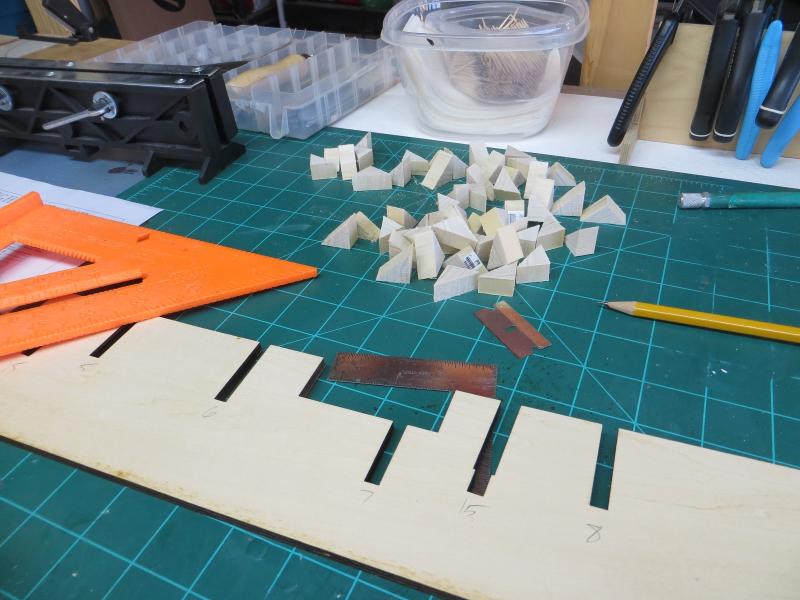
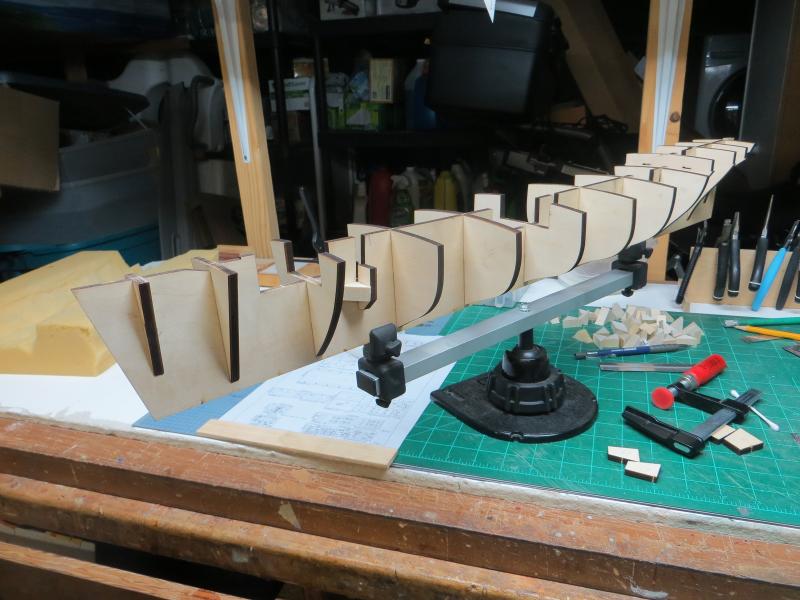
The following photos cover the first week of building. First is attaching all the bulkheads to the keel and getting everything lined up and straight. You notice that I cut a bunch of wood triangles which are into the structure to ensure that the bulkheads stay at 90 degrees to the keel. First I fitted all the bulkheads to the keel and made sure that they would slide into the pre-cut slots.
- 50 replies
-
- 4
-
-
- cutty sark
- artesania latina
- (and 1 more)
-
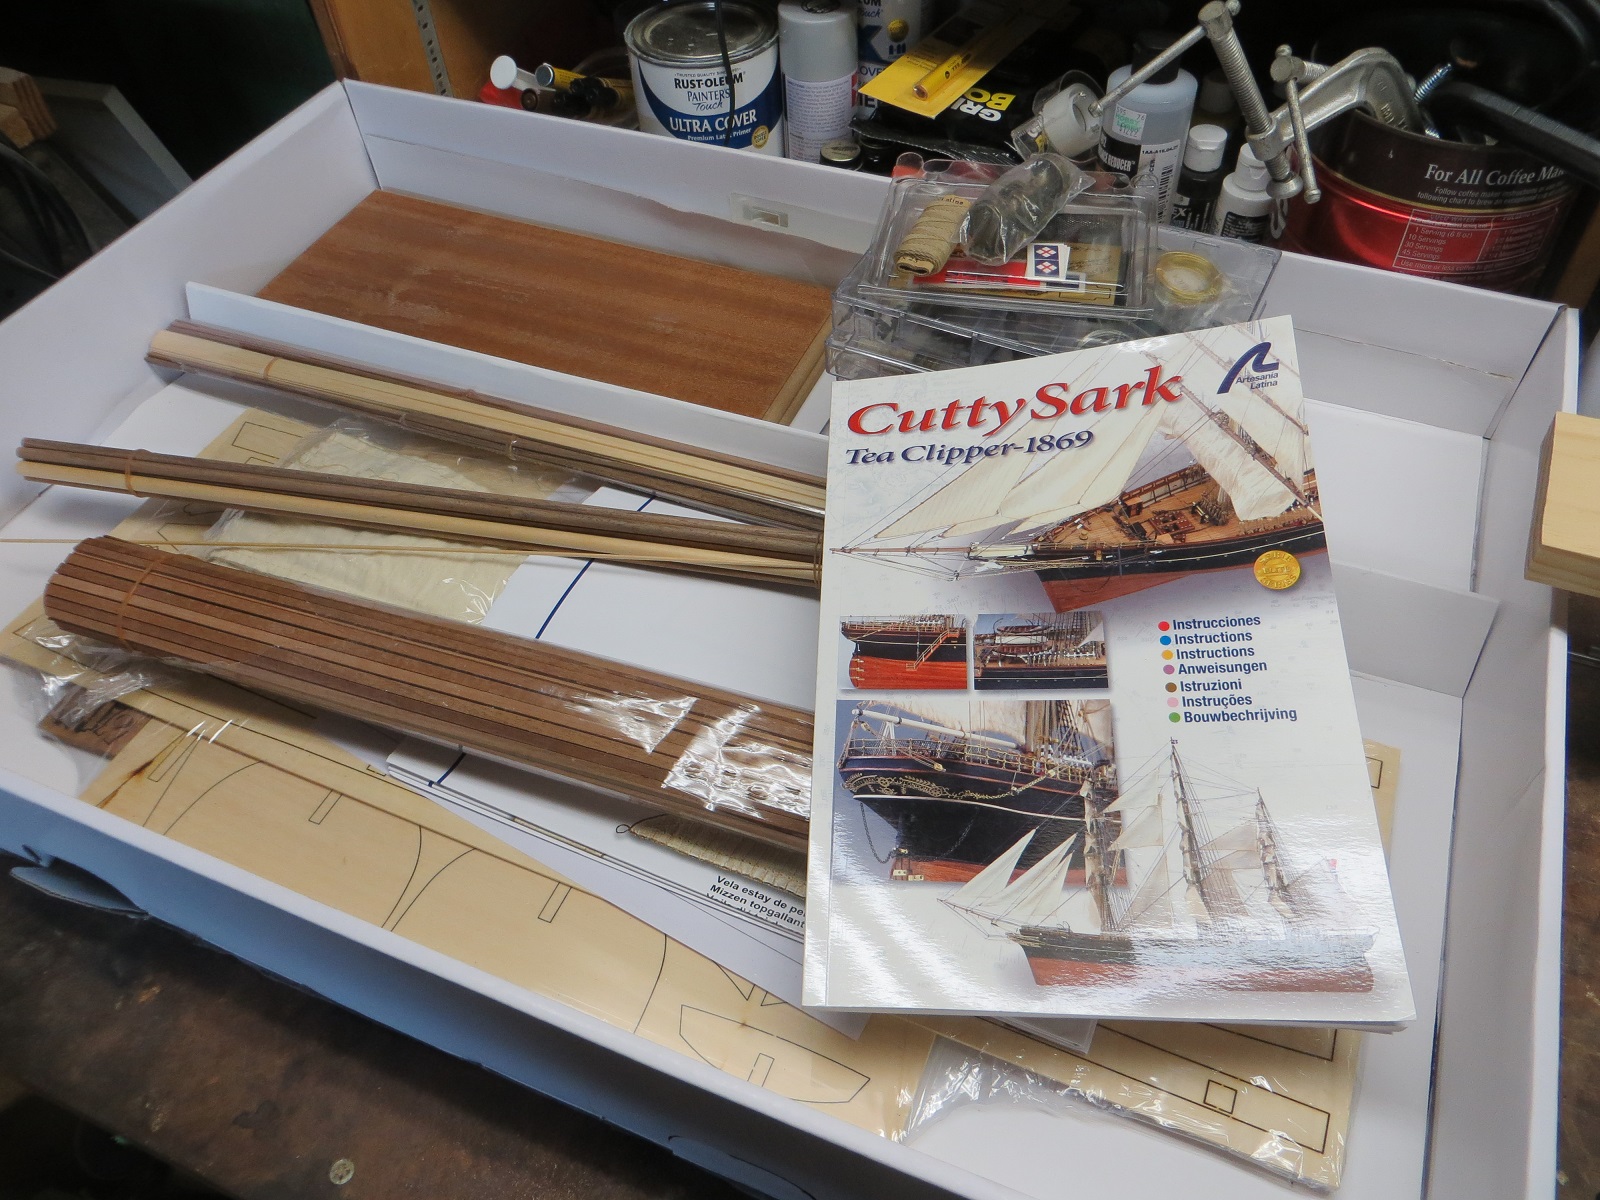
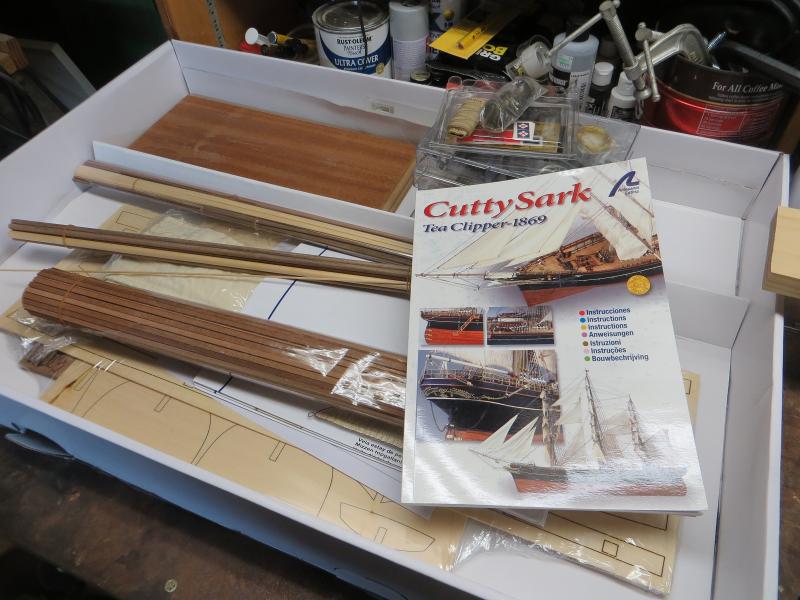
Well I took the plunge and purchased the Cutty Sark by AL. This looks like a very complicated build so I am hoping that I am not getting in over my head. The materials in the kit look very good but I will update everyone further as I go along. I am going to head over to Amazon and see if there are any books about the Cutty Sark with lots of good pictures. I visited the museum website and they offer a book; but it might take a few weeks to reach me from from the UK. I want to put down my "building philosophy" so you can better understand some of the decisions I will make as I move along. First....have fun. I love working with my hands and this looks like a lot of hand work will be involved. Two....I will never reach the skill level to build "museum quality". This model will end up in my house and the quality I look for is enough to make me happy and get my guests oooh and aah. Three....have fun. First photo, the box and its contents.
- 50 replies
-
- 5
-
-
- cutty sark
- artesania latina
- (and 1 more)
-
Just purchased the AL Cutty Sark kit. Hope to start a build log soon. Hope I didn't get in over my head on this one.
- 44 replies
-
- 1
-
-
- king of the mississippi
- artesania latina
- (and 1 more)
-
Thank you for your complements
-
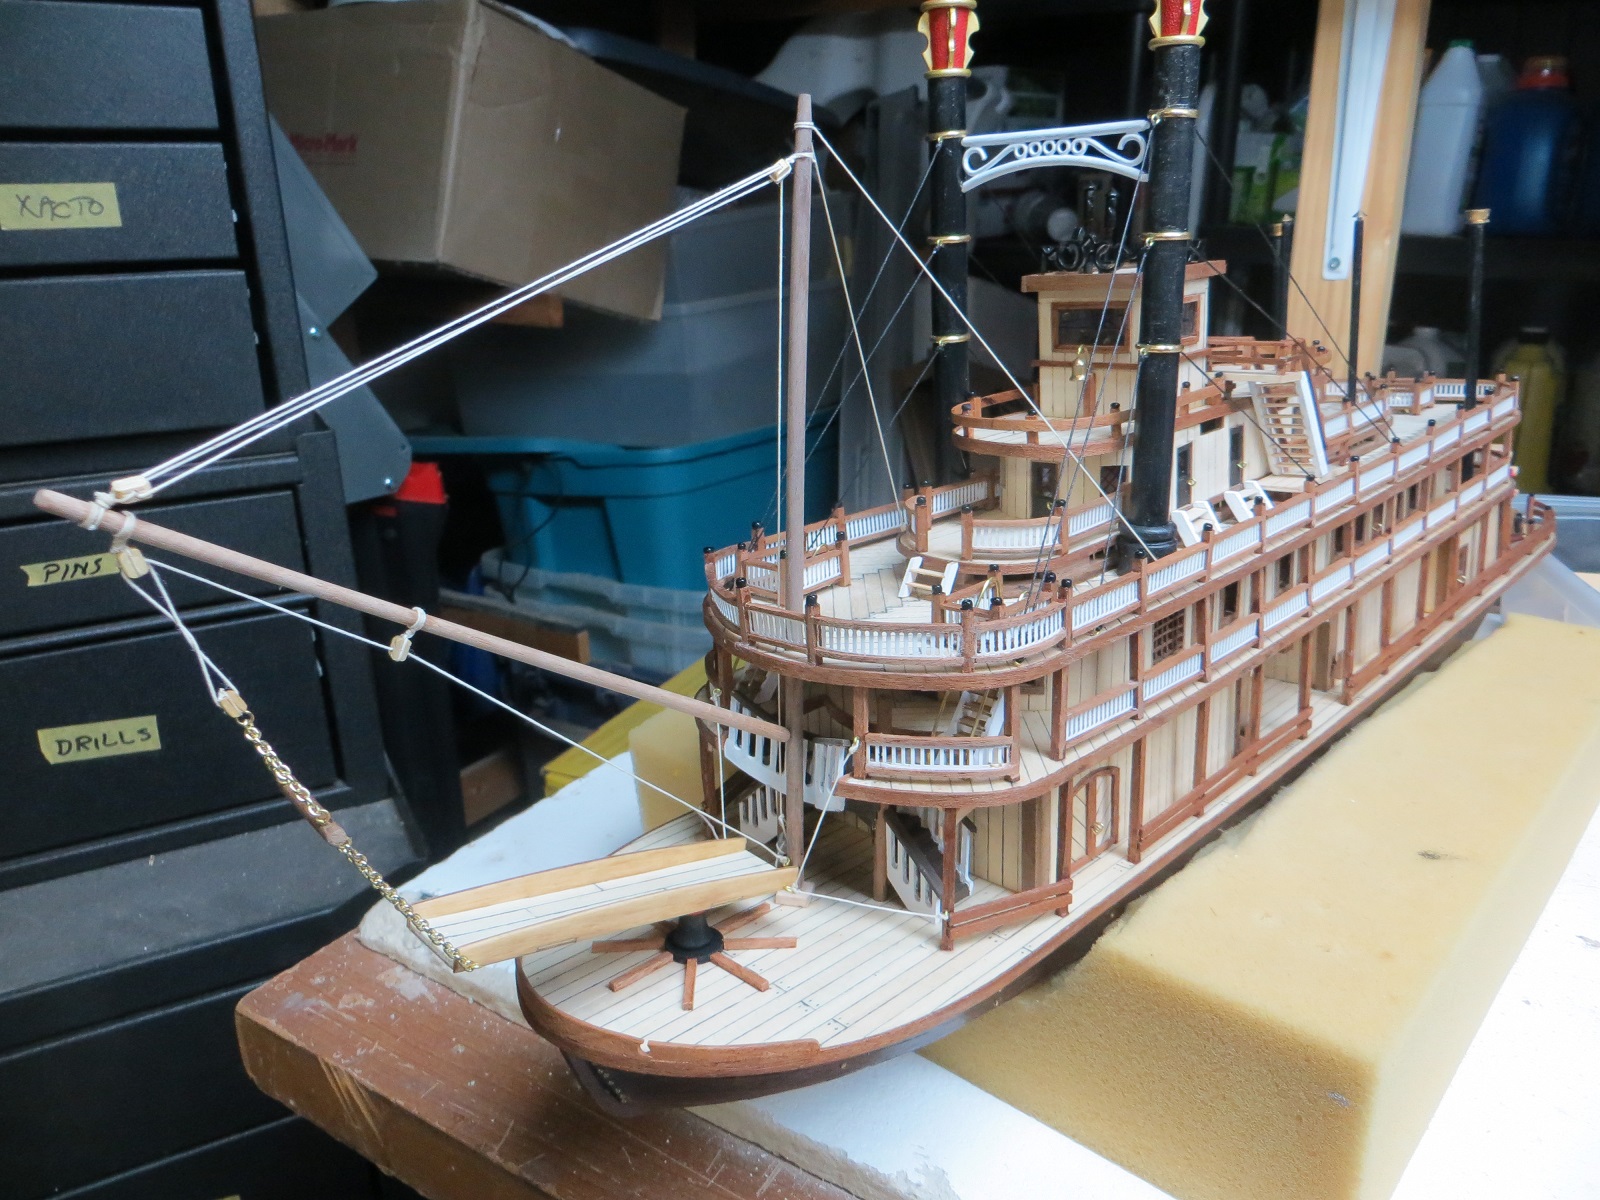
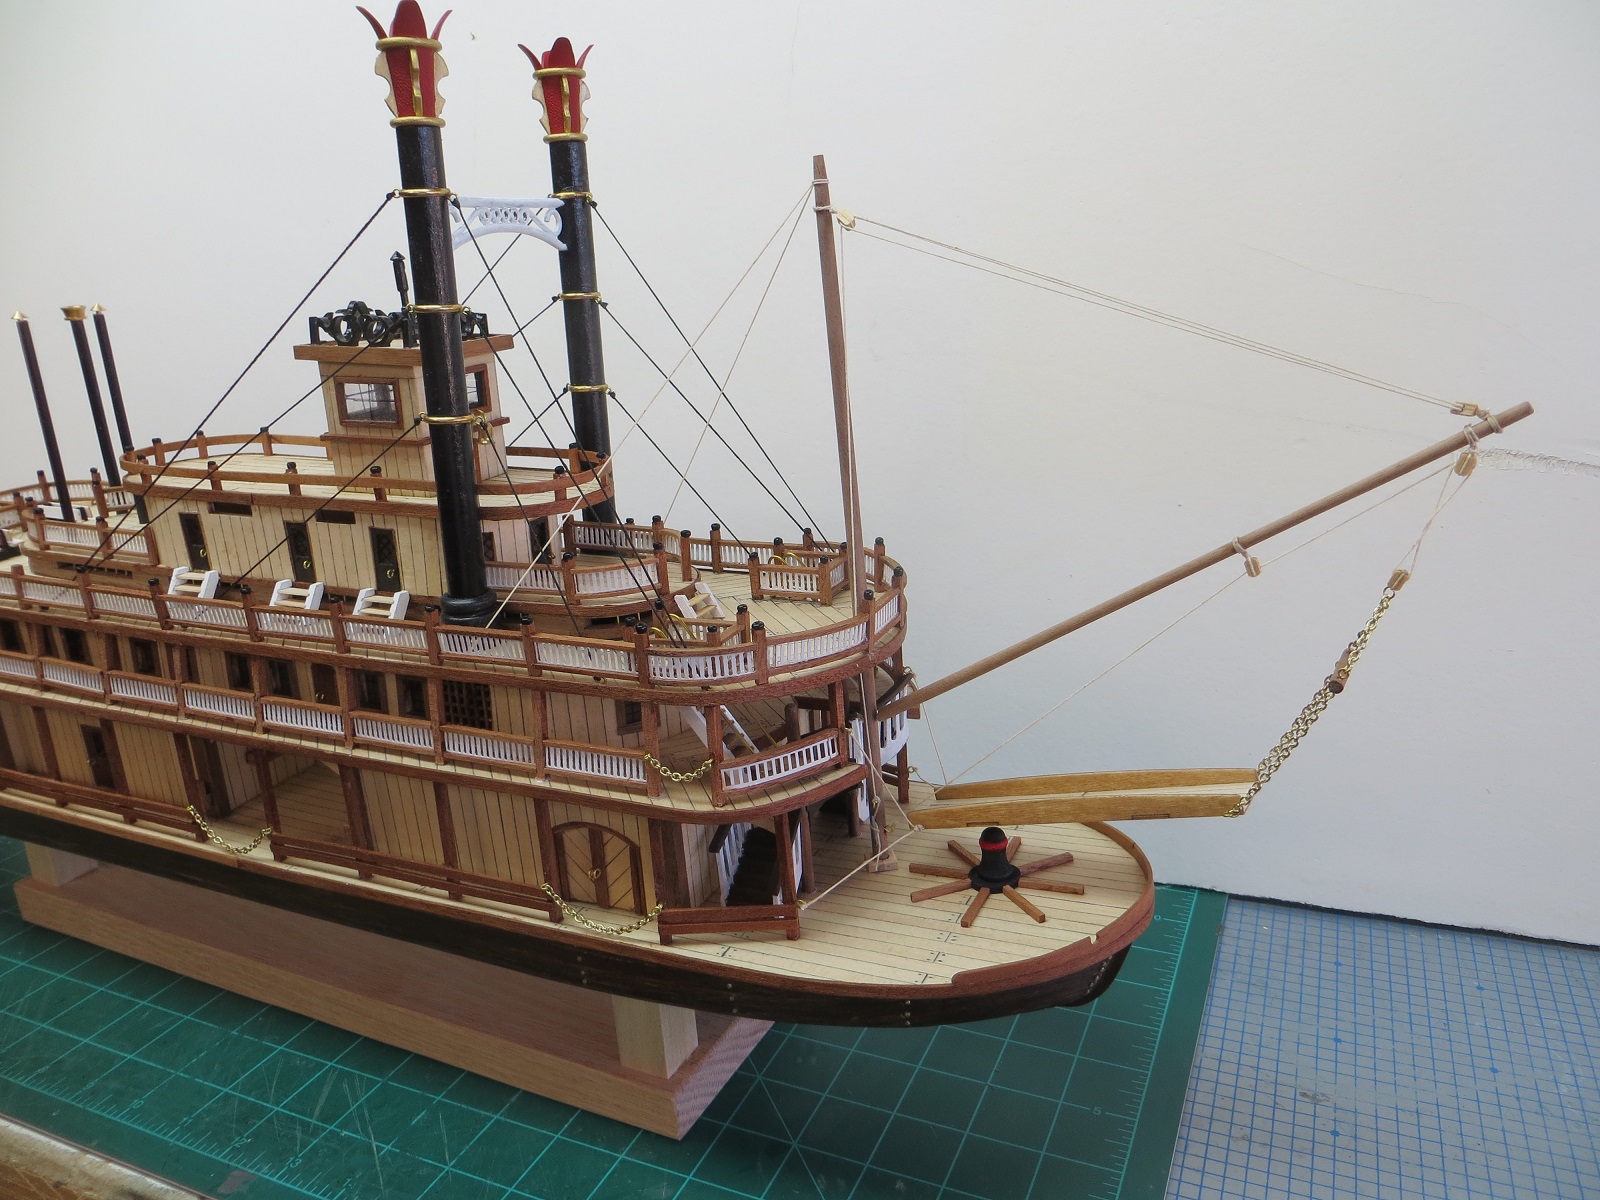
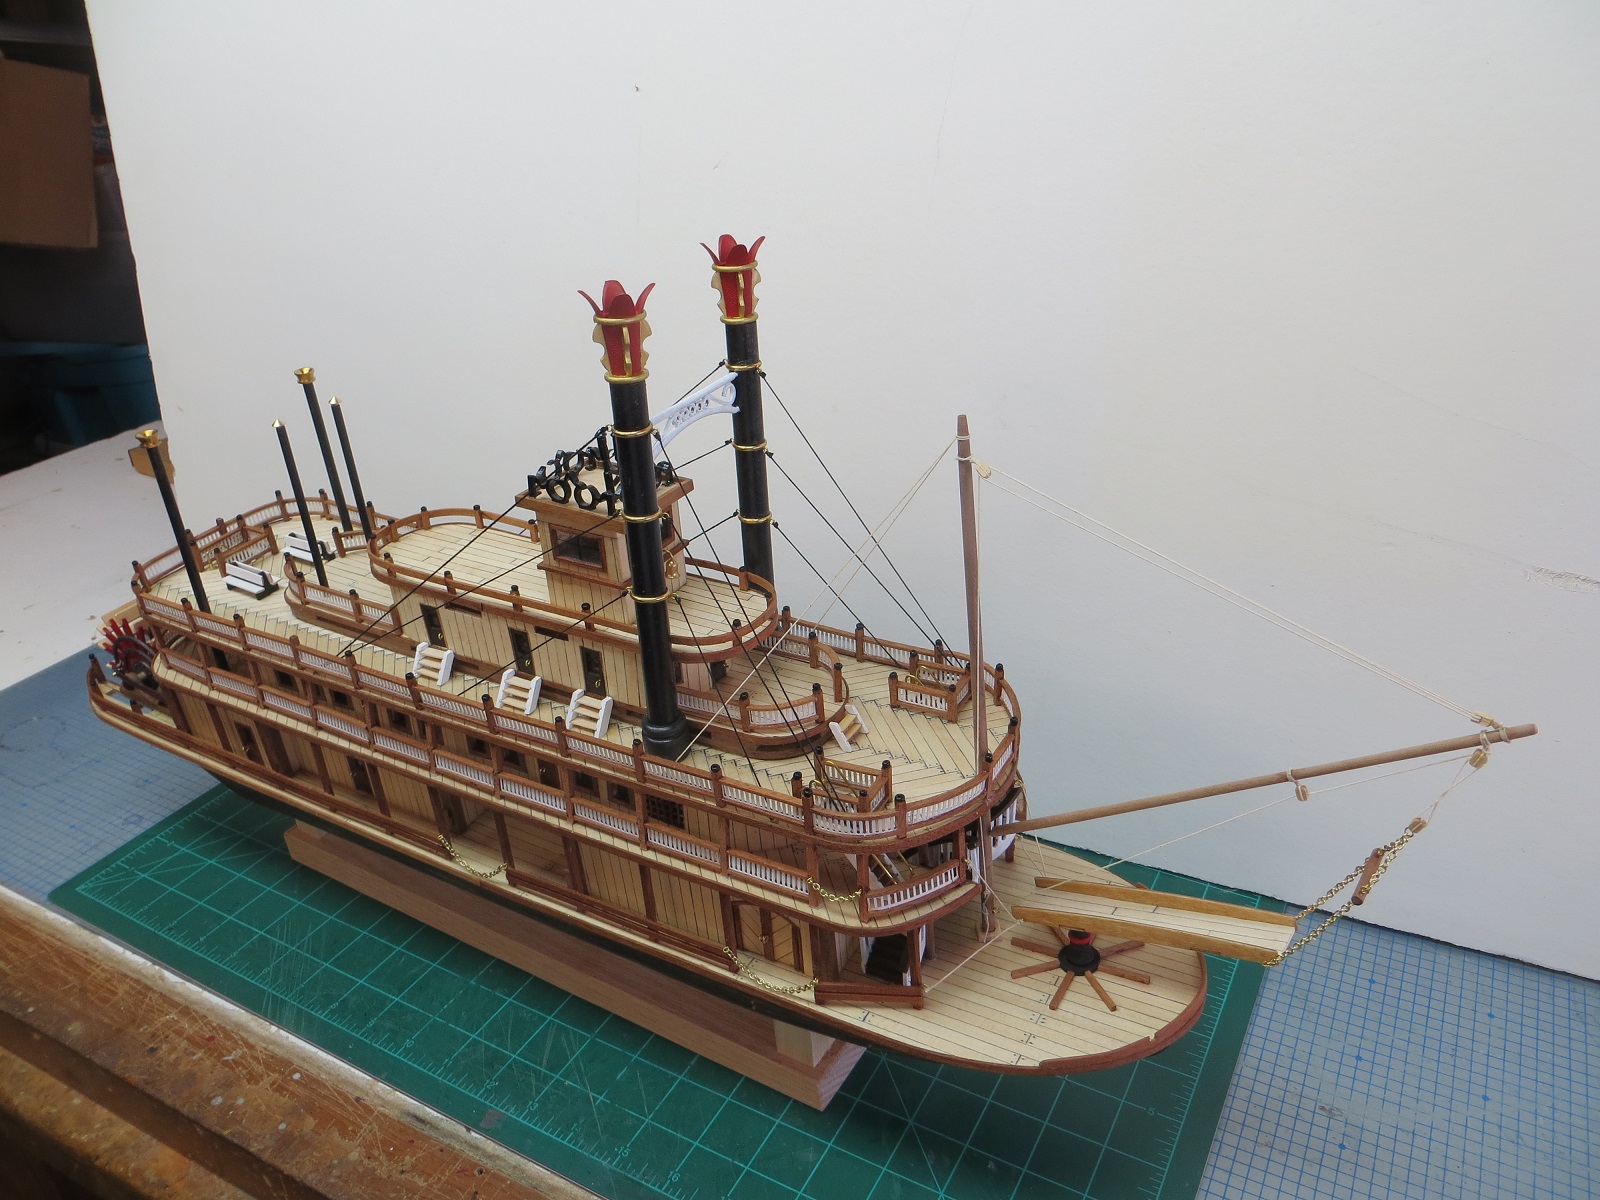
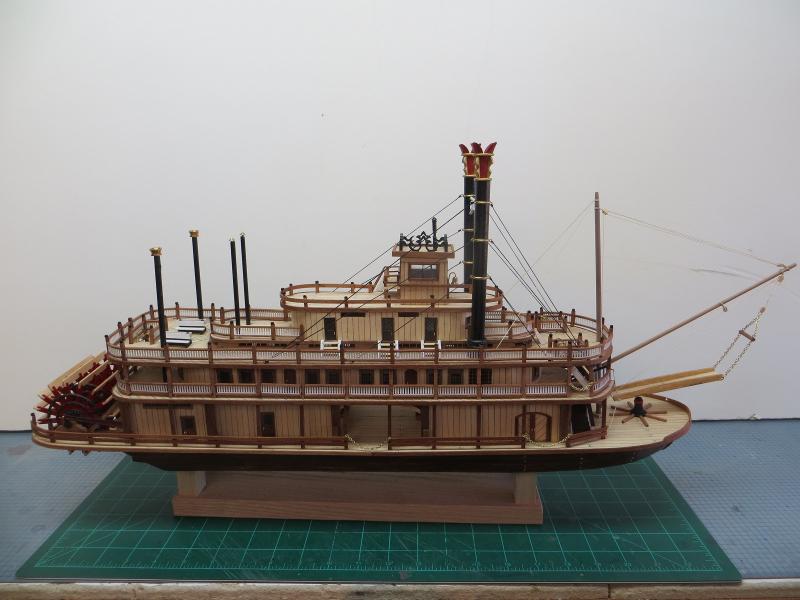
Completed. After three month of work I declared the project completed. I know that this has not been a detailed log of construction steps but I am pround that I brought this log to its completion. If anyone has any questions, please feel free to send me email. To any one thinking of building this kit. The die cut parts fit. The wood is in good shape (but they have it measured down to the last inch so be careful with your cuts). When done it makes a really neat conversation piece.


- 44 replies
-
- 7
-
-
- king of the mississippi
- artesania latina
- (and 1 more)
-
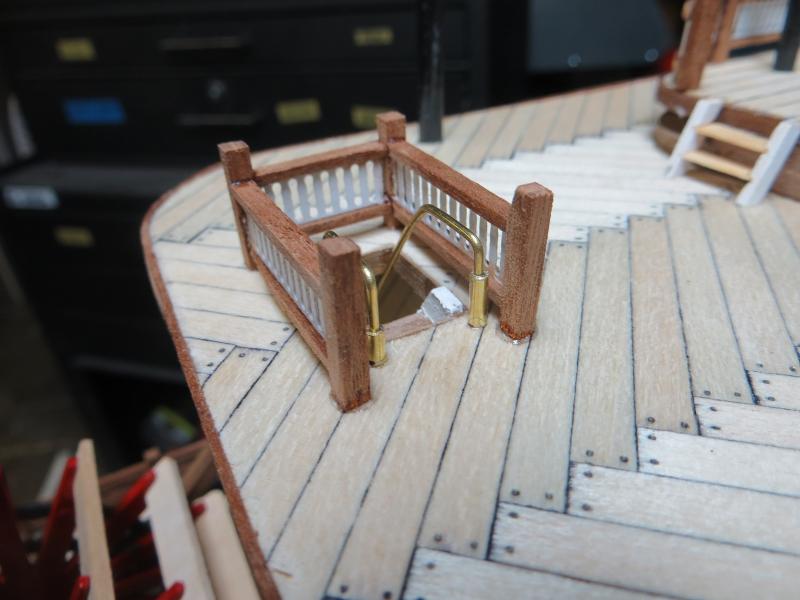
Moved on to building ladders (3) and rails (a bunch). This is a job consisting of cutting lots of little pieces and using sand paper to sand each wooden part to the proper length. There is also a little brass wire bending.

- 44 replies
-
- 3
-
-
- king of the mississippi
- artesania latina
- (and 1 more)
-
This is an interesting thread. I think one of the success resources this site provides is the log. I allows the experts to make their posts and show us beginners how many aspects of the build are accomplished. It also allows us beginners to make our posts and seek advice on the model shipbuilding process. As I research my future subjects on this site I find that some builders attract very little attention to their logs while others become rather lengthy with many builders "pulling up a chair to follow along". How do these logs become so attractive. I guess I am asking is what does a log require in order to attract attention and the resulting comments. Put another way, what constitutes a good log.
-
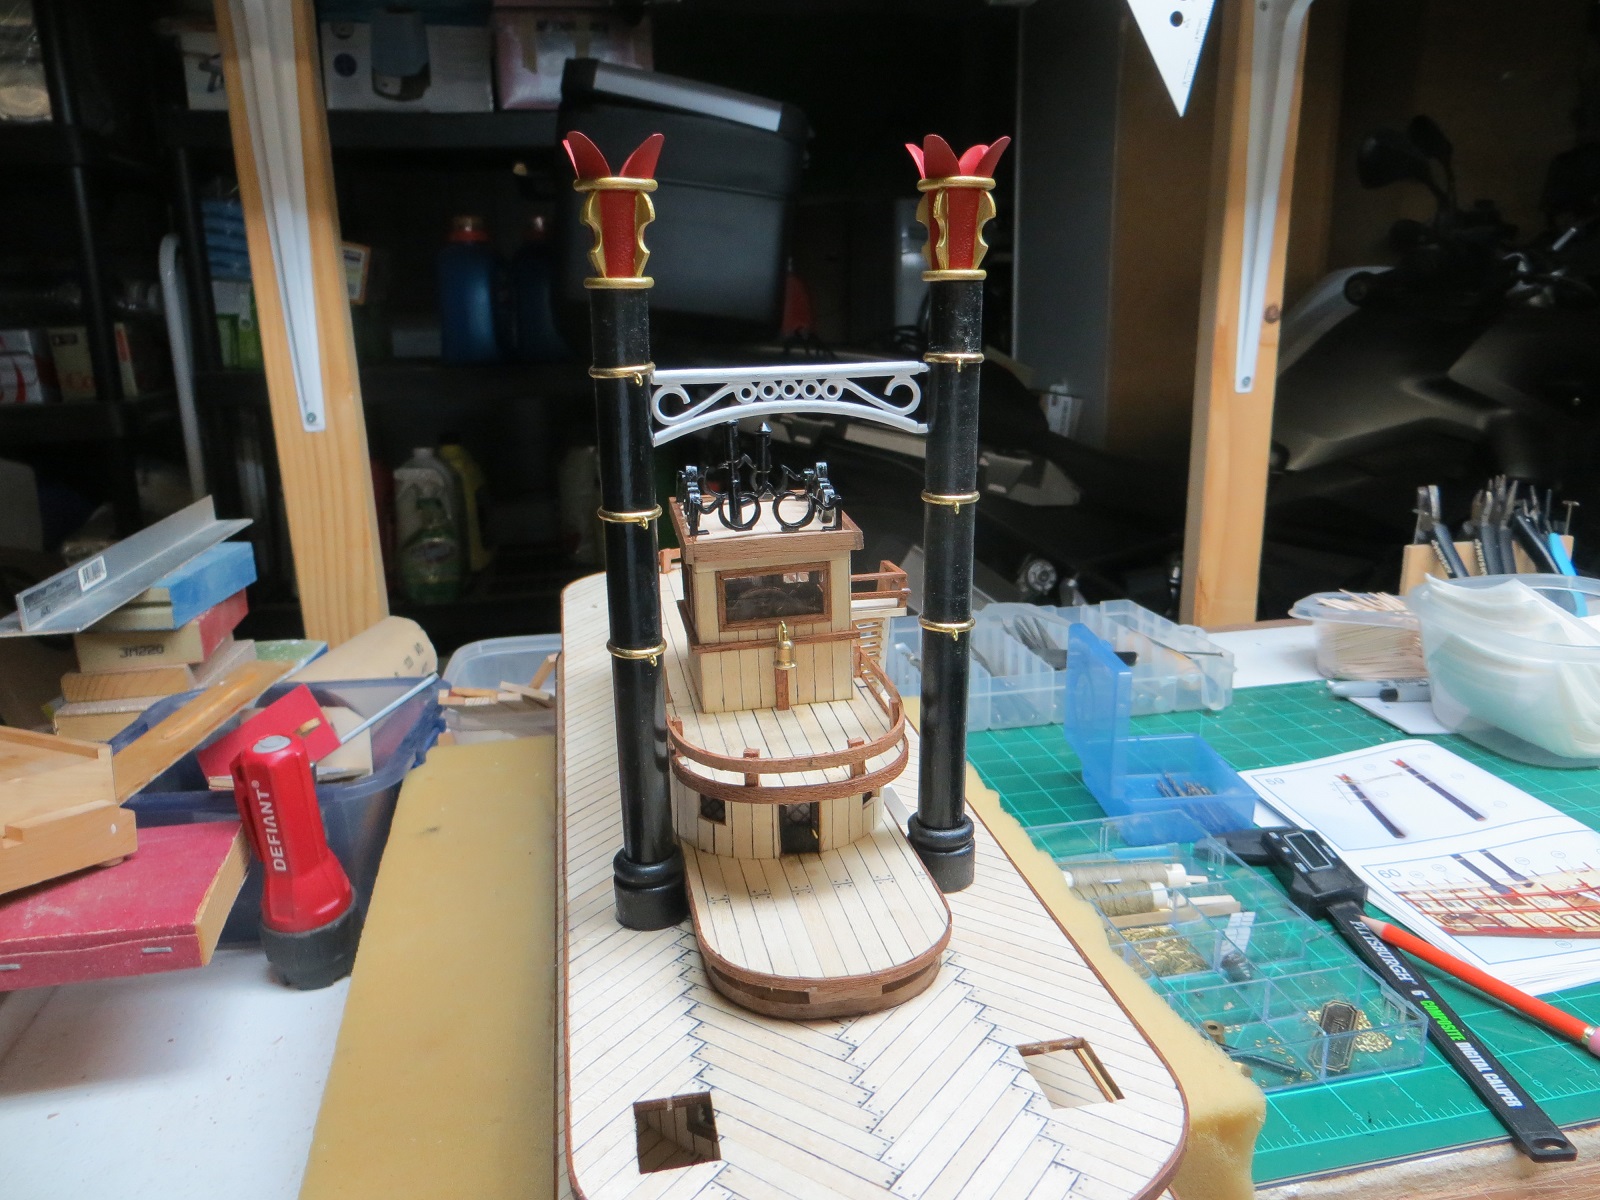
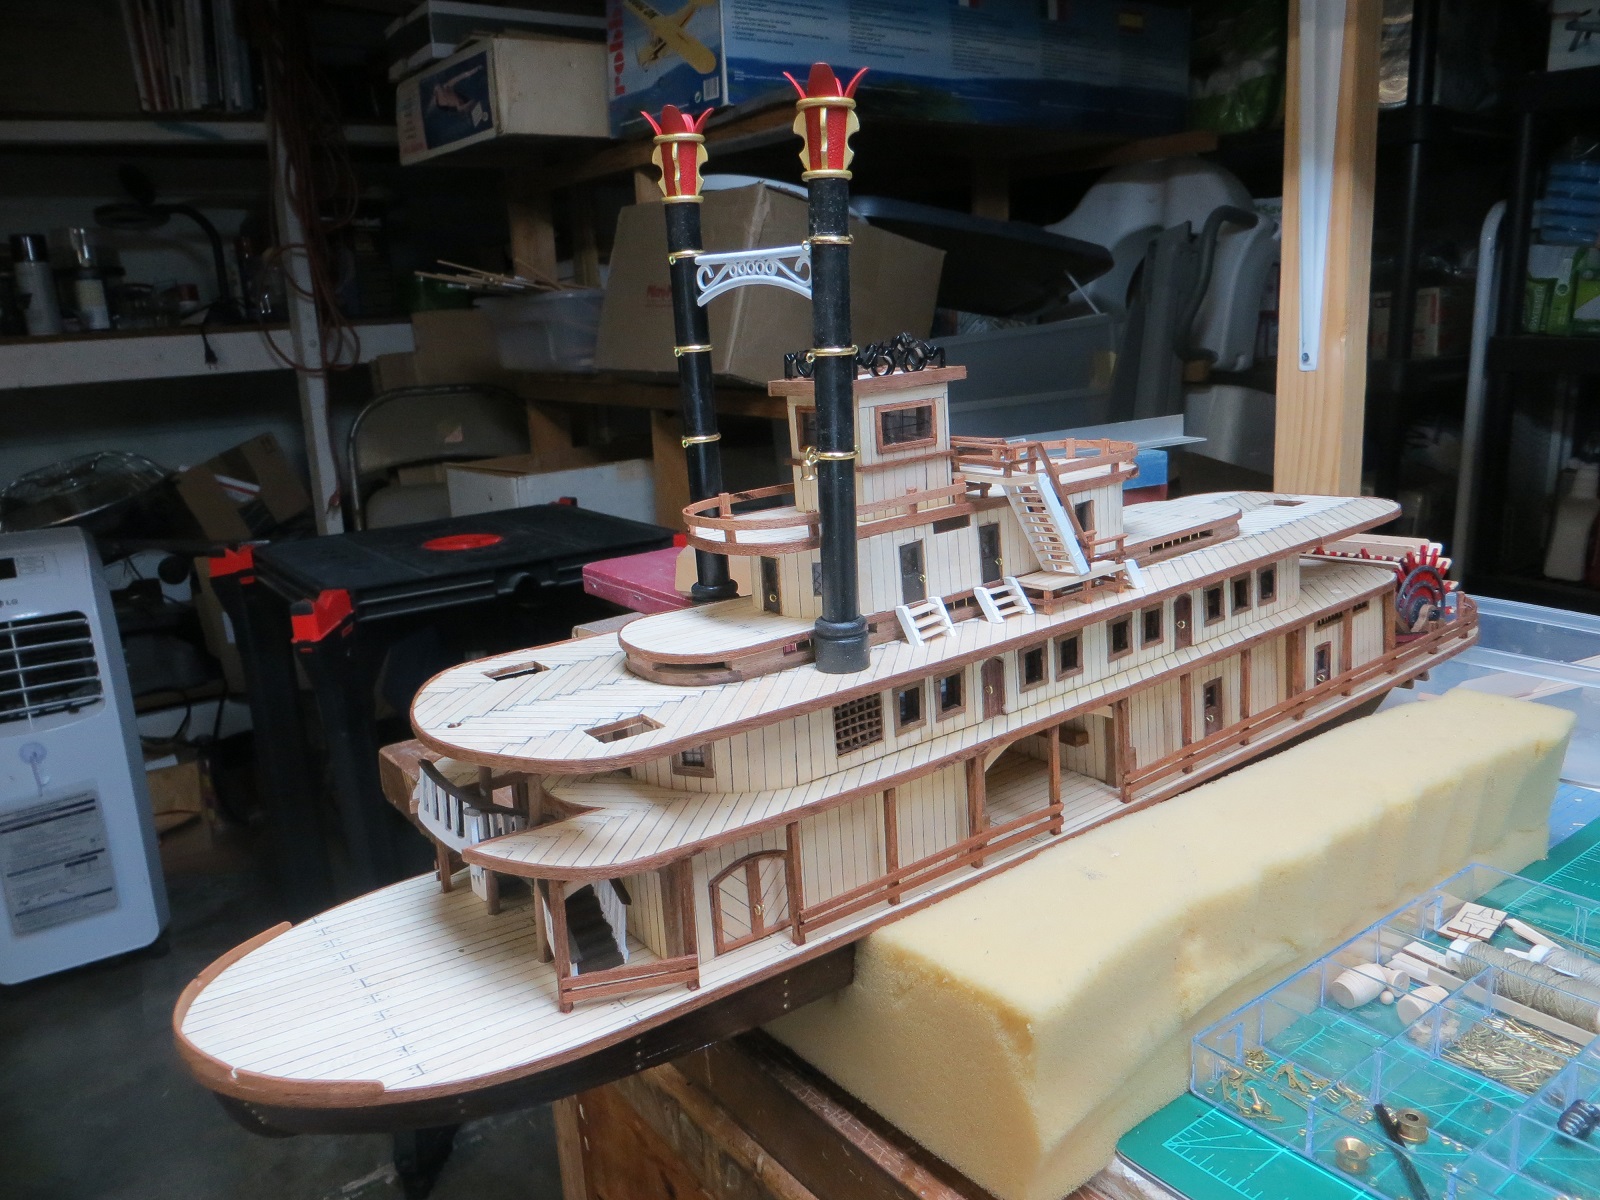
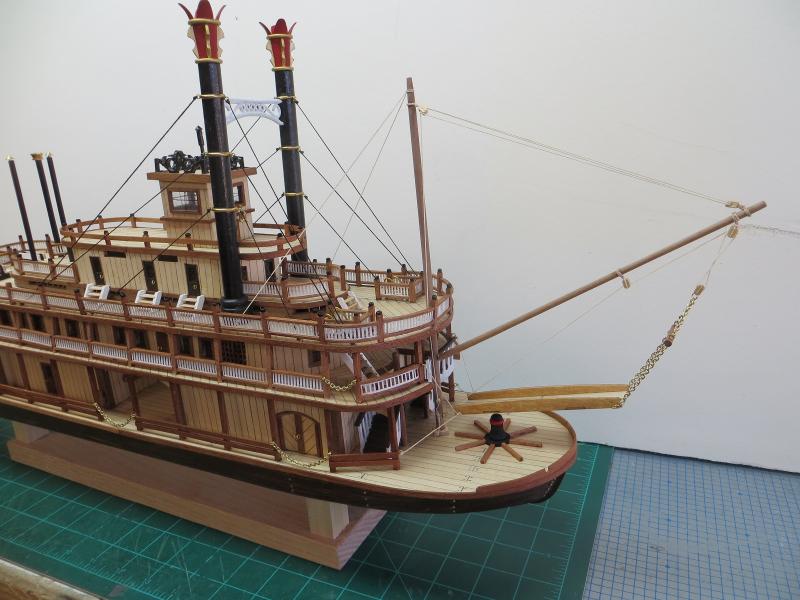
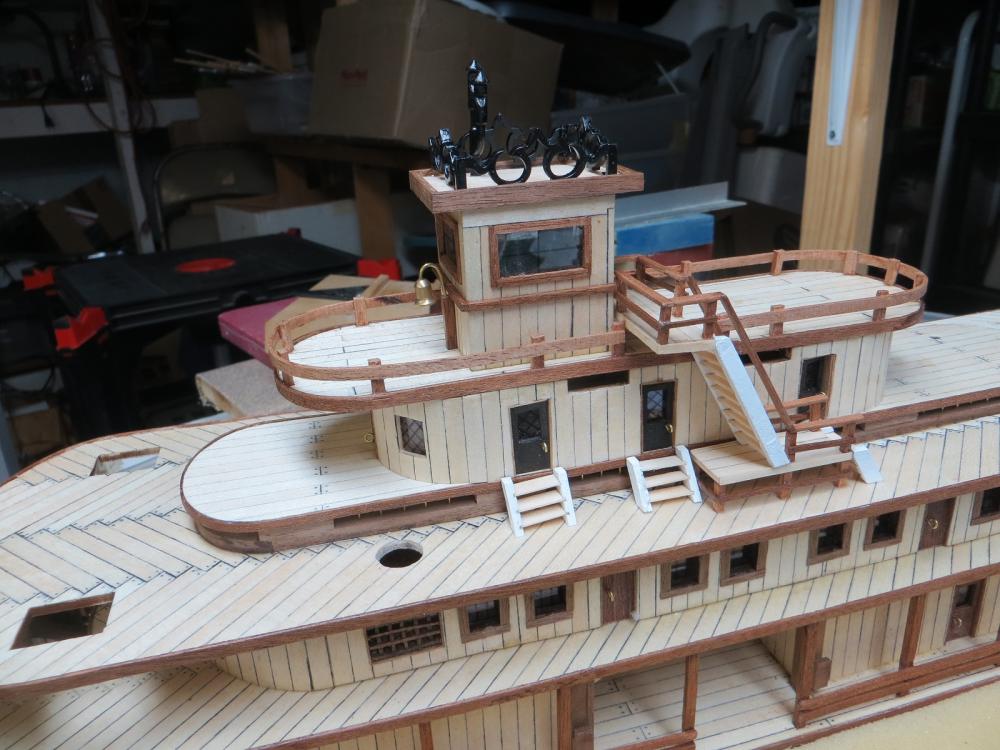
Next came the smoke stacks. These were tougher to build than I though. First the painting. I sanded, prime and sanded again. Then the coat of black paint. Looked pretty good until I went to install the brass rings. The radius of the smoke stack dowel exceed the radius of the brass rings. I had to cut the rings and "slip" them down the dowel. They scratched the black paint. I glued them in position and then repainted. The bracing between the smokestacks and the tops took a little filing and priming before painting. All-in-all, I think this model is beginning to shape up. Now it is on the railing.


- 44 replies
-
- 5
-
-
- king of the mississippi
- artesania latina
- (and 1 more)
-
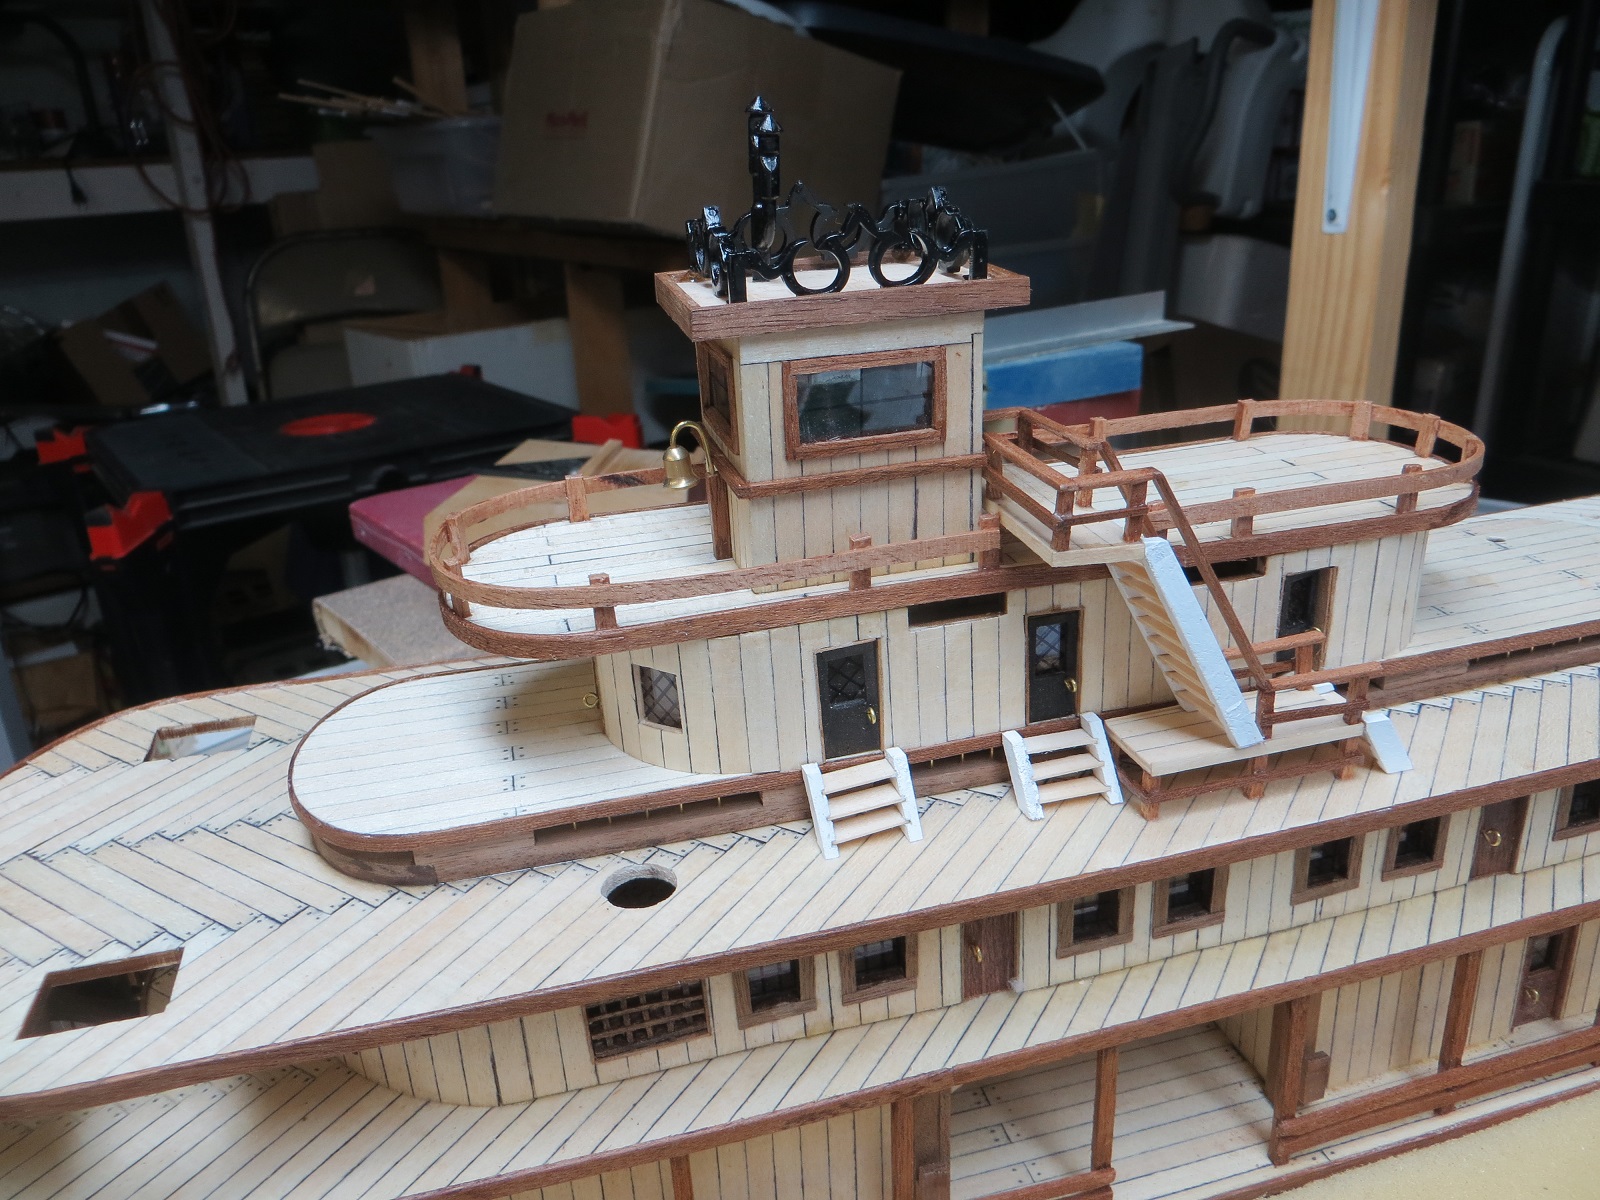
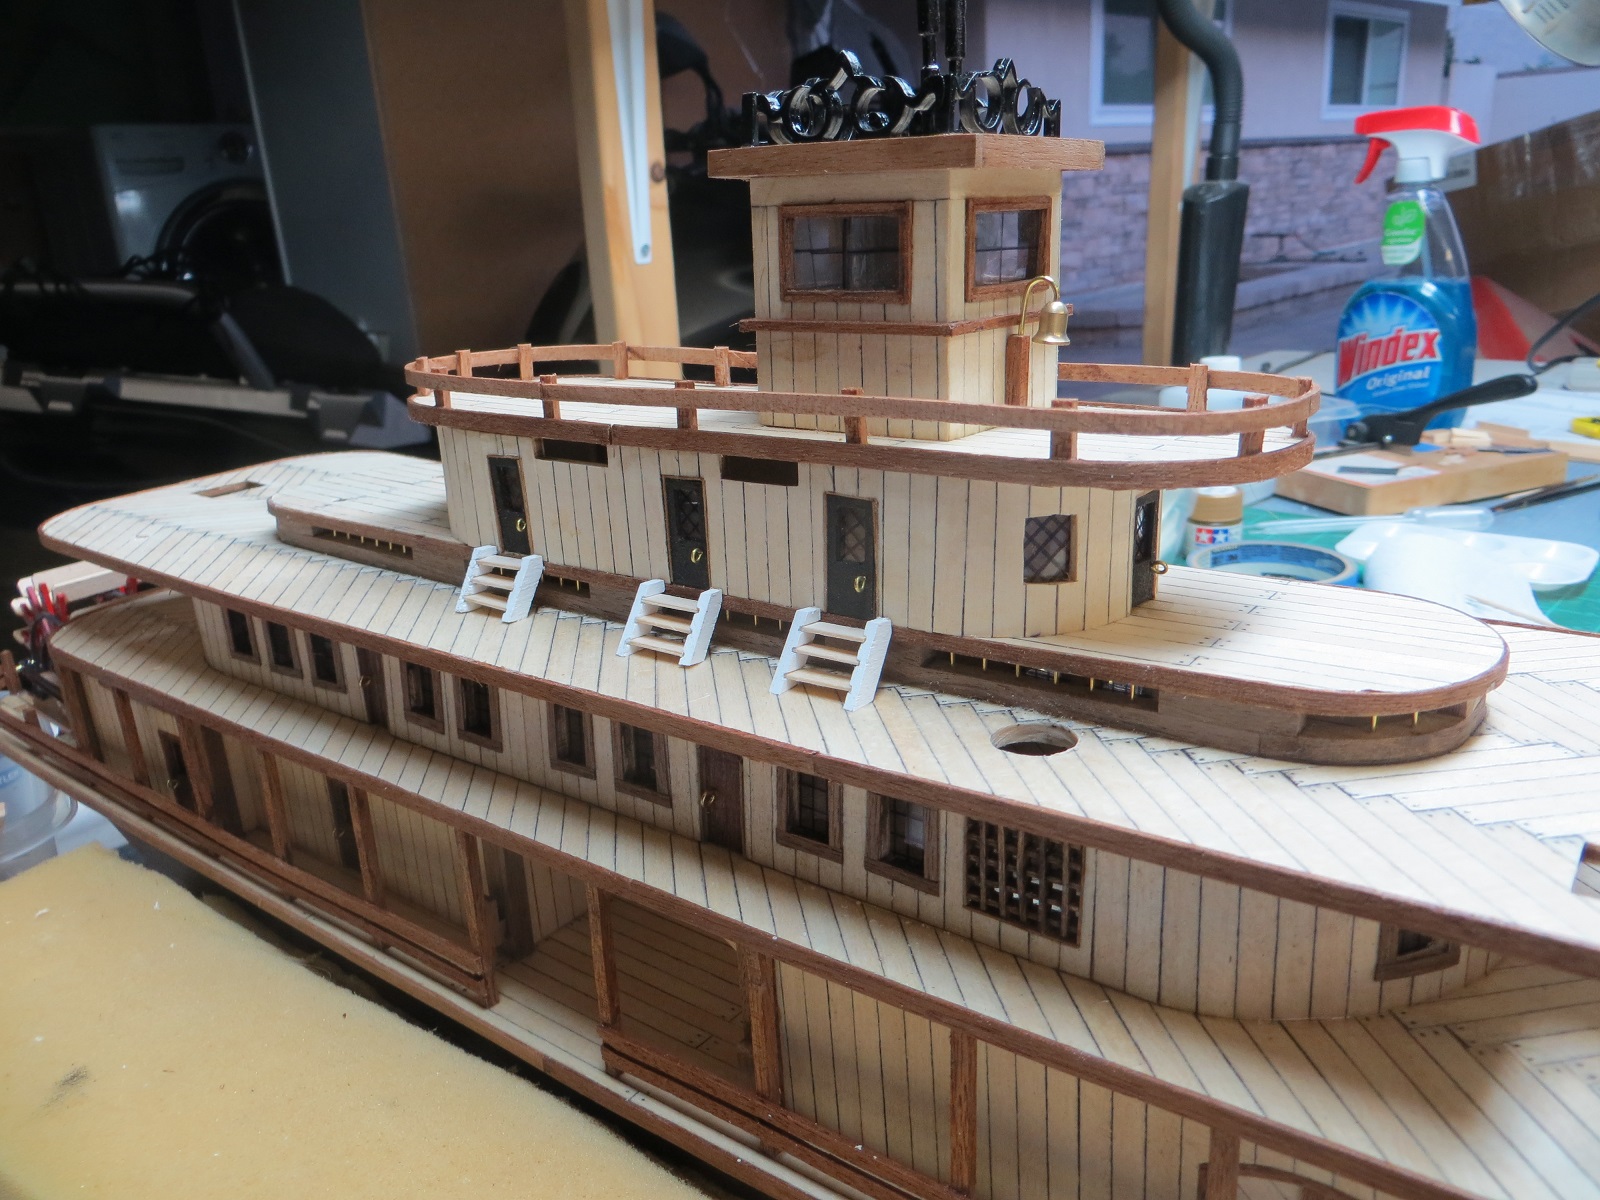
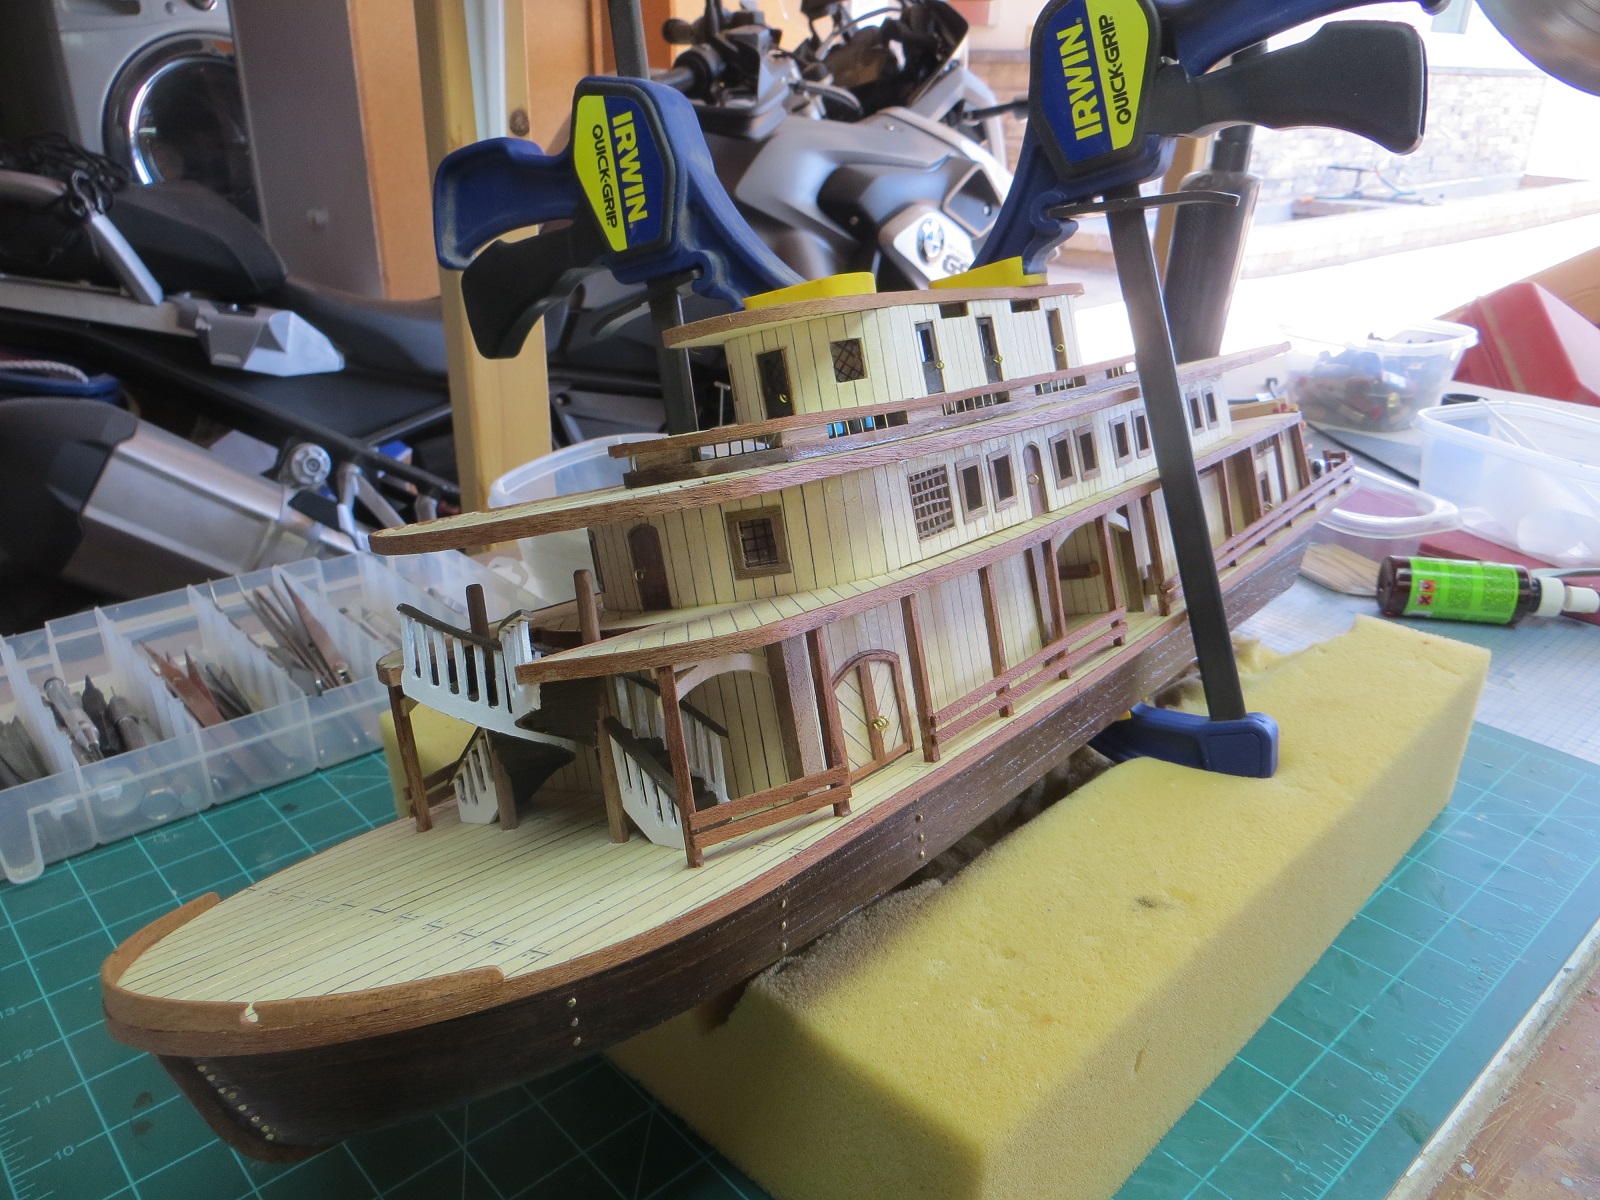
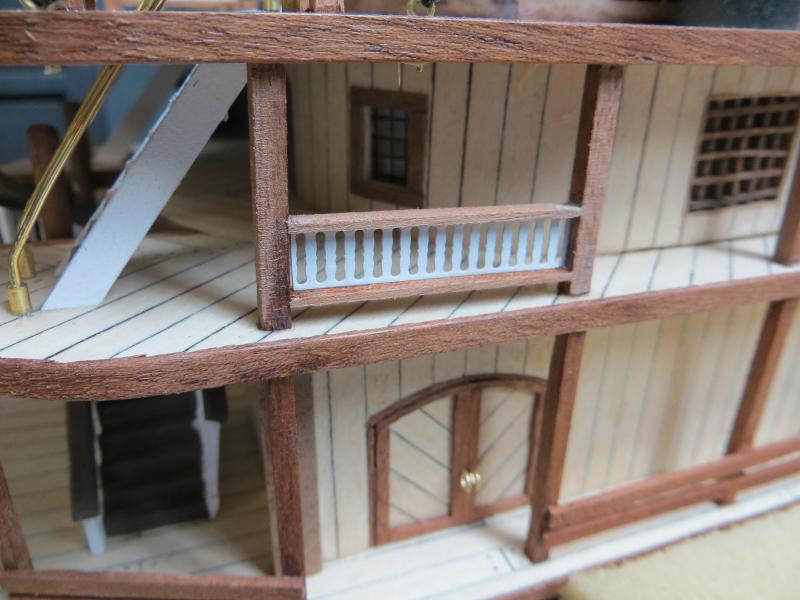
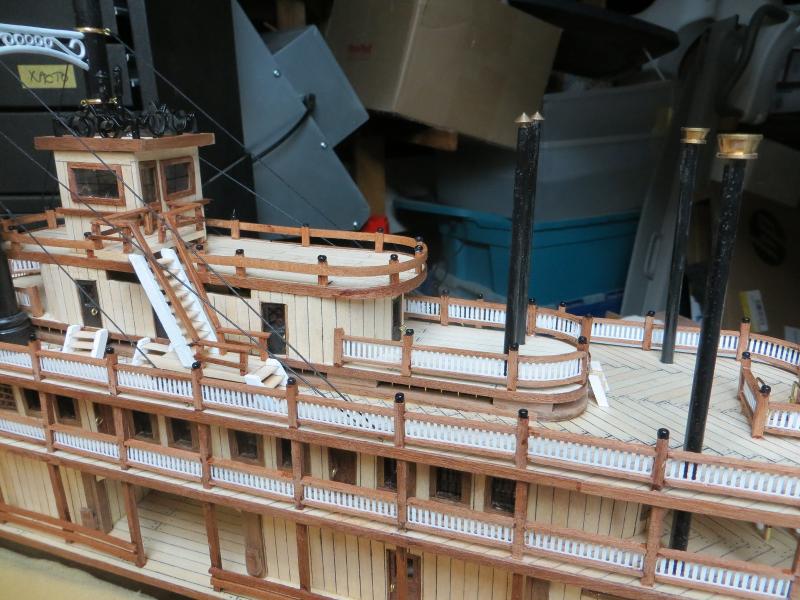
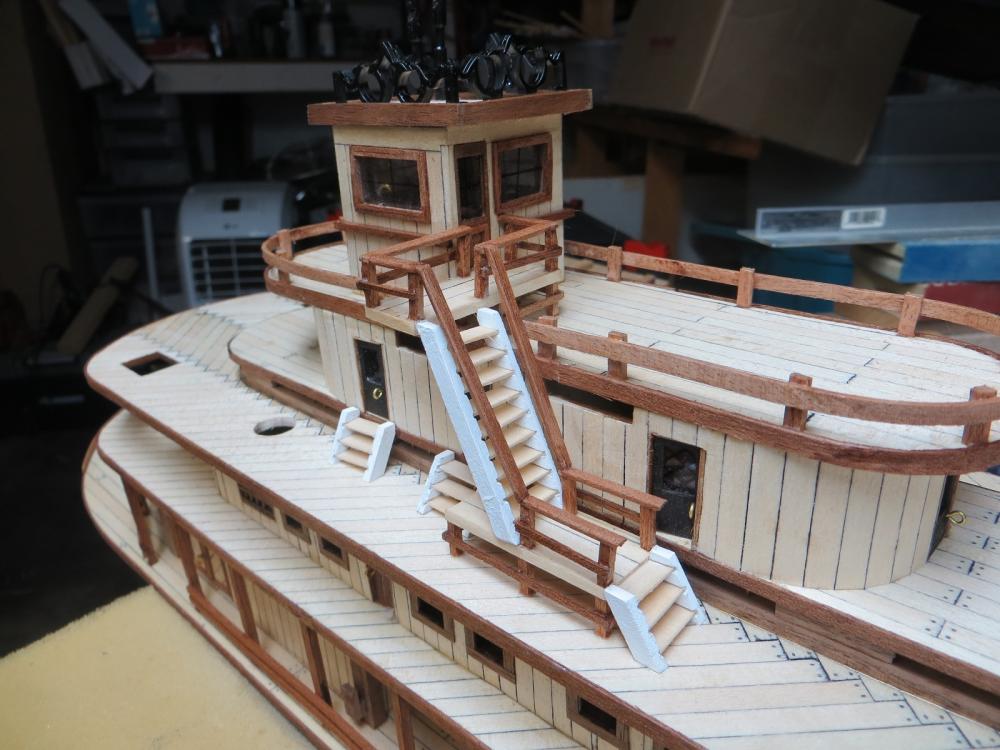
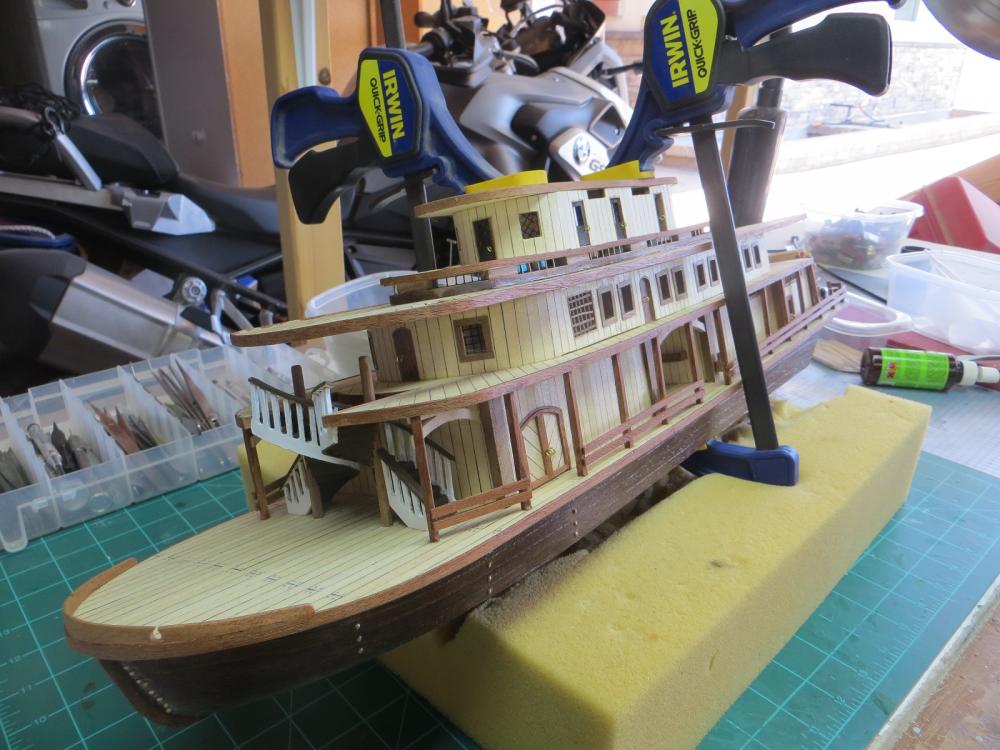
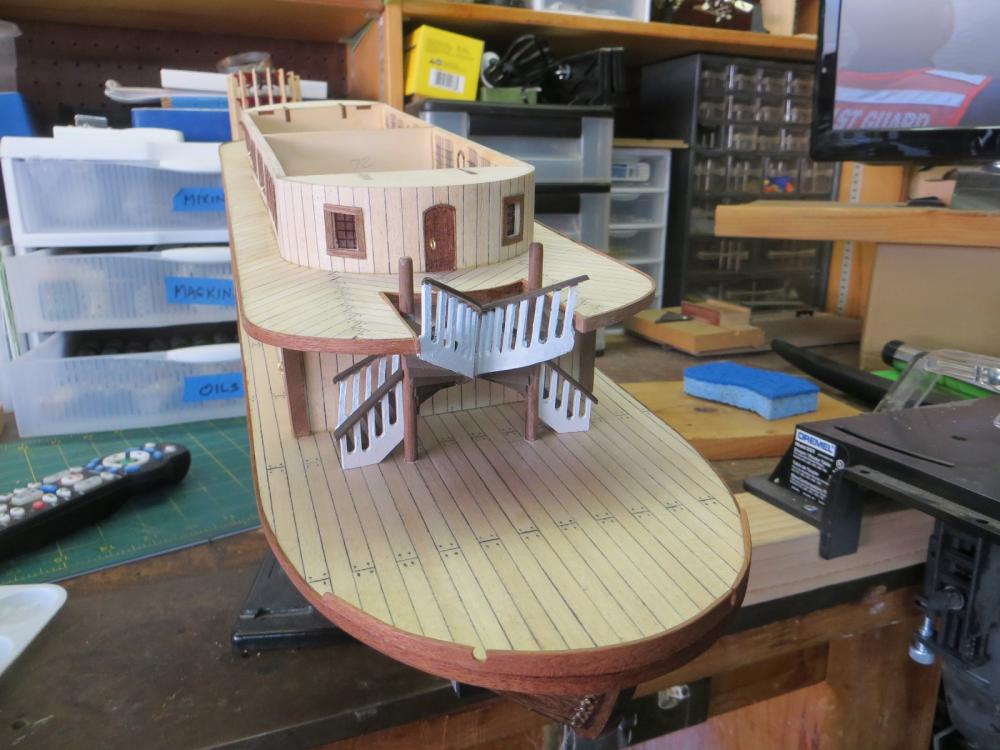
It has been a couple of weeks since I last posted to this build log. I have now added the wheel house to the model. The wheel house itself was quite straight-forward. Build a box, plank and stain. The windows and doors took a little effort; but turned out alright. The ramps leading out of the wheel house to the 3rd deck were a bit of a challenge but I think they turned out OK. The kit supplied 3 scalloped brass strips to form a border around the 3rd deck. For some reason, mine did not reach fully around and left a 3 inch gap which I could not figure out how to hide with the ramps. In frustration I tossed the brass strips and built a wooden railing around the 3rd deck. Not "scale" but I think still adds to the model.

- 44 replies
-
- 4
-
-
- king of the mississippi
- artesania latina
- (and 1 more)
-
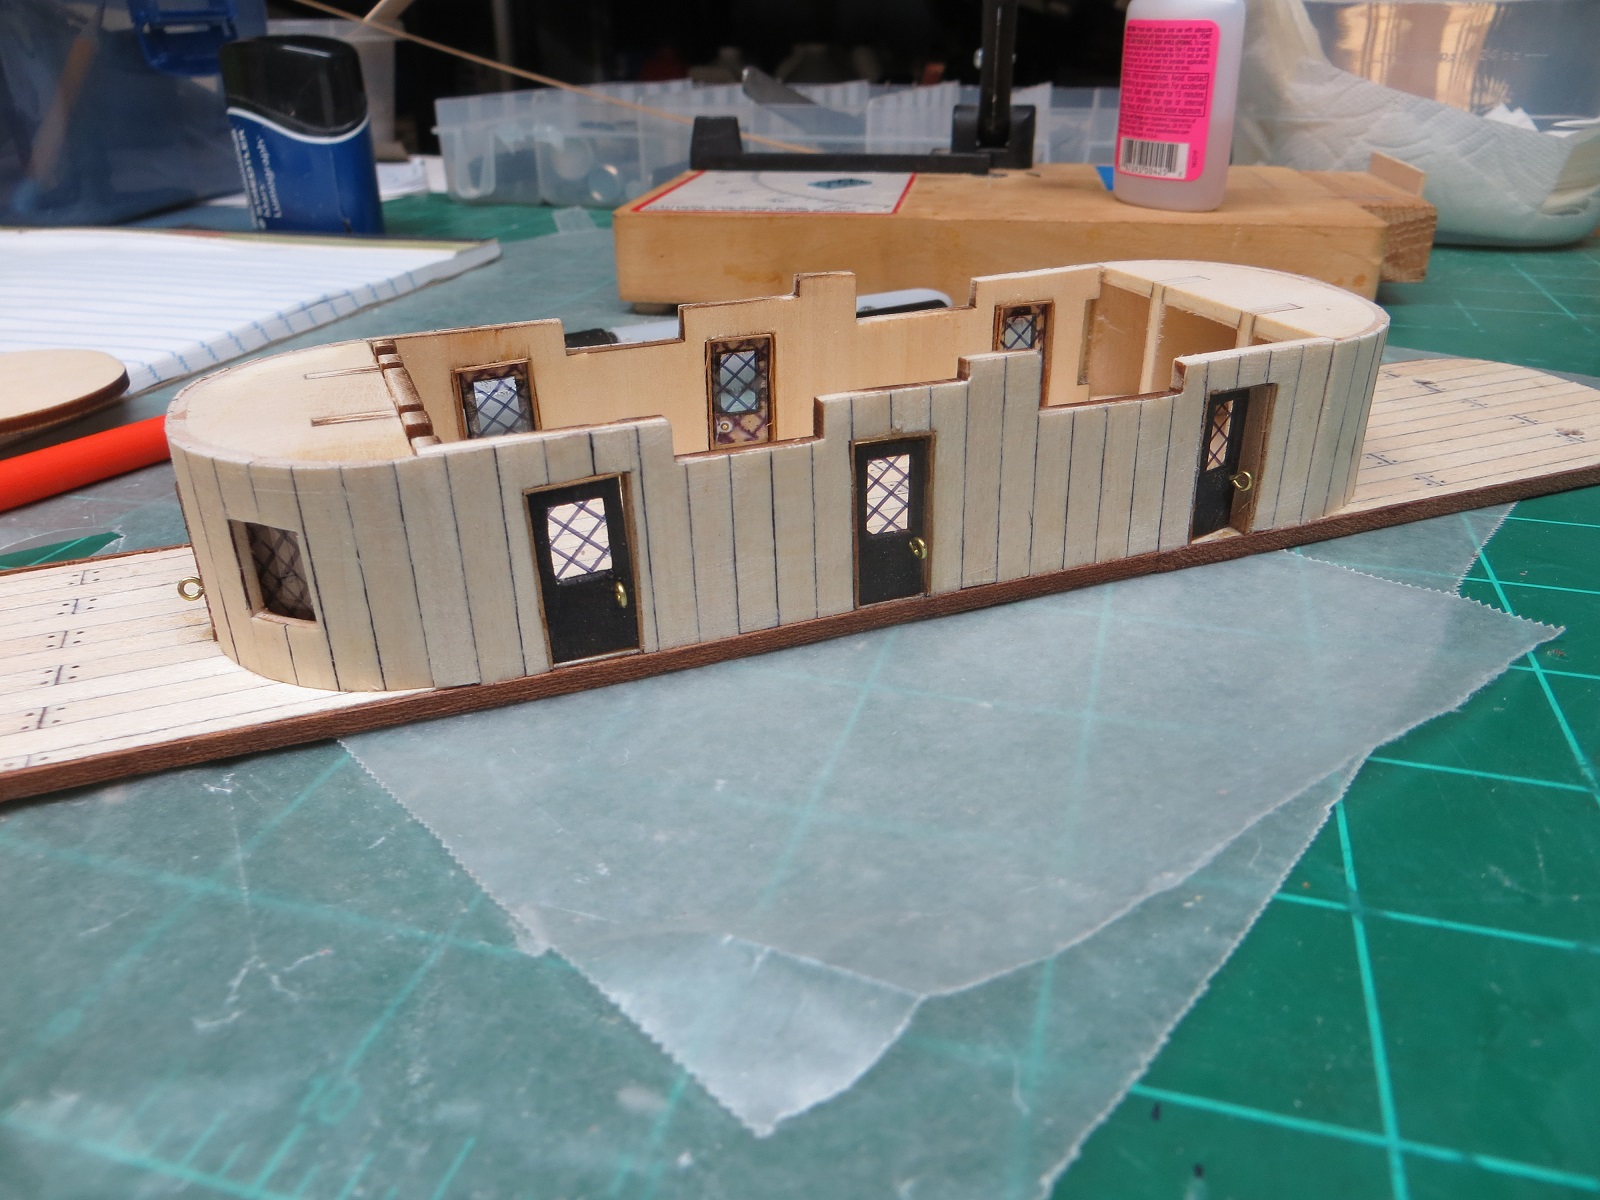
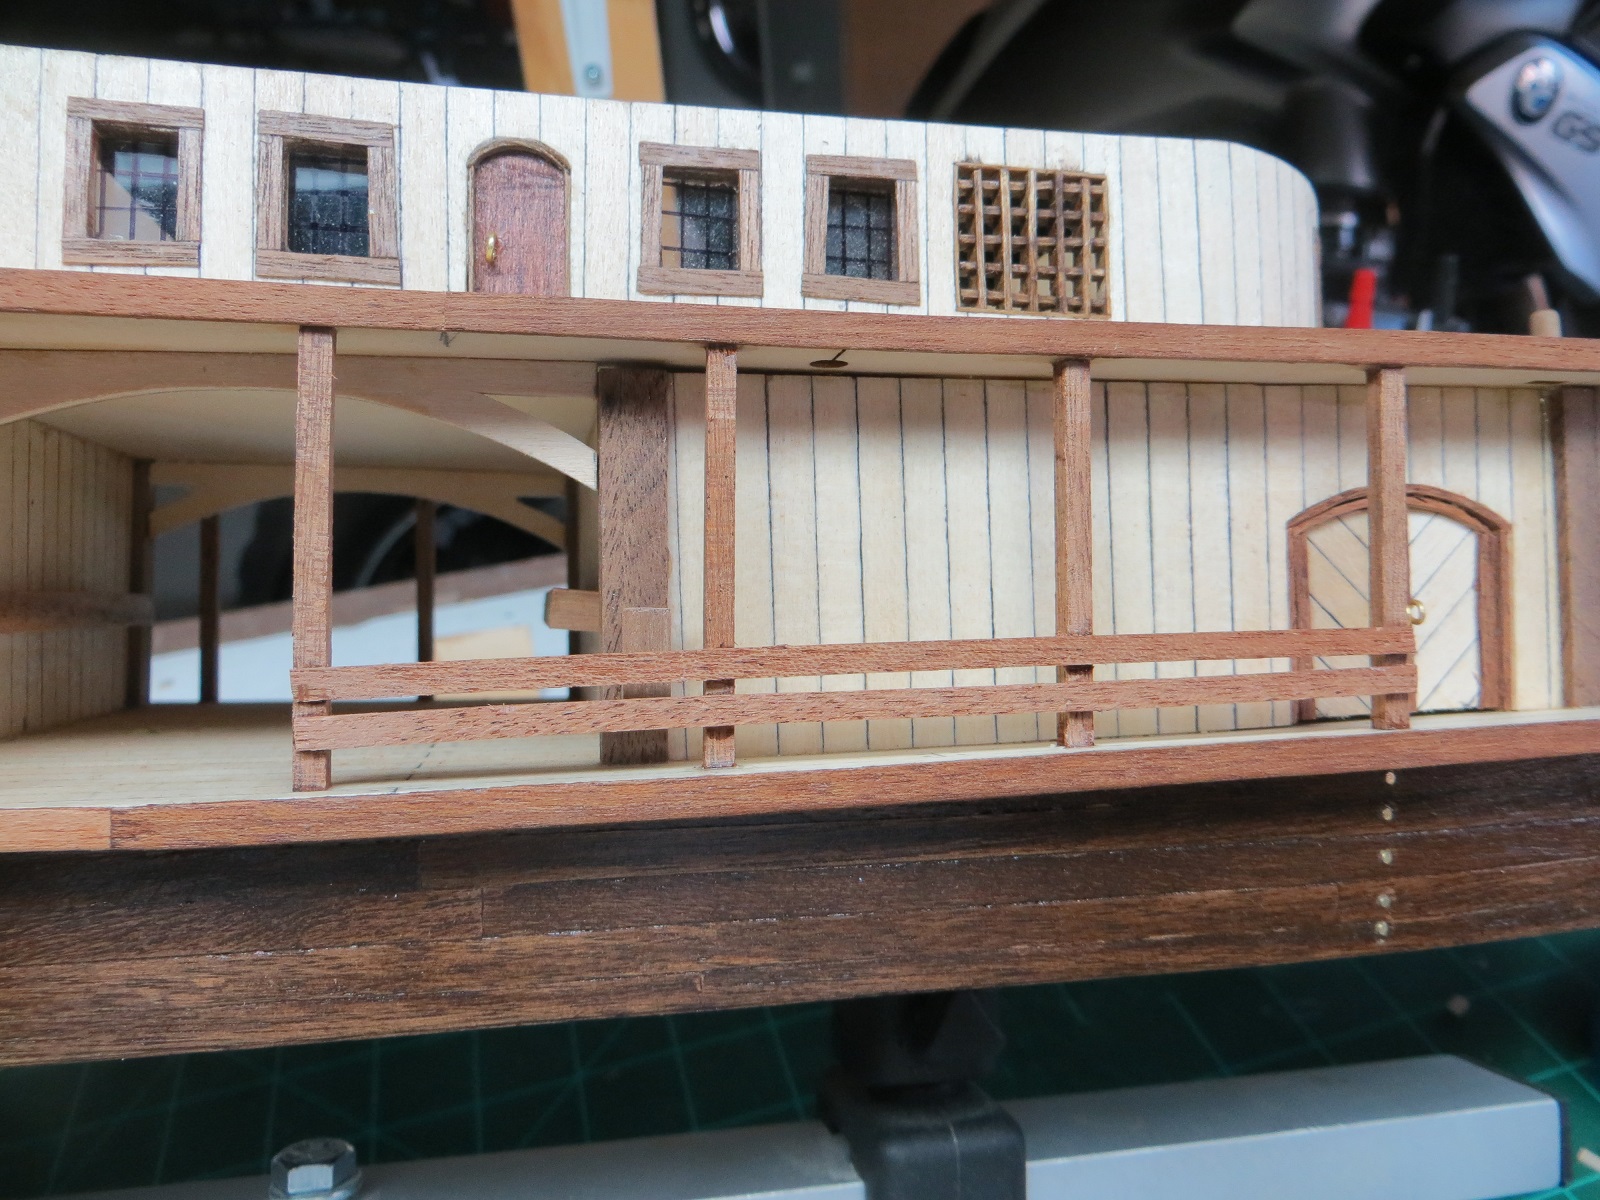
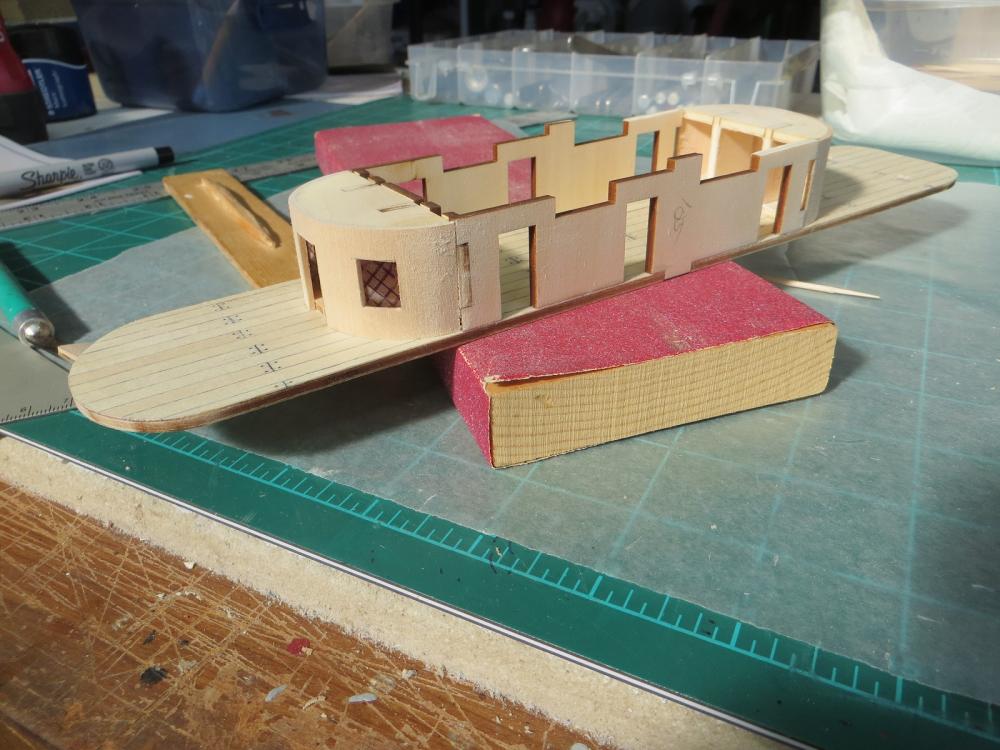
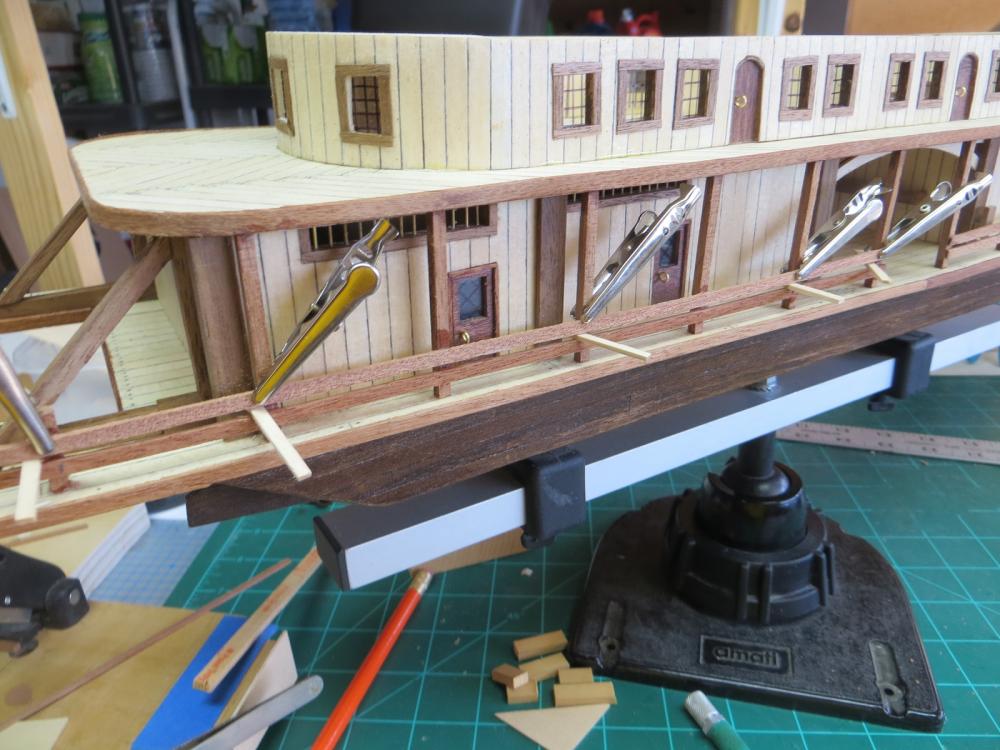
On to the construction of the Deck 3 structures. I made a mistake and grabbed the wrong stain for the doors (dark oak instead of red oak). Decided to live with that mistake. The structure is raised above the decking by a structure that was made to allow ventilation of the 2nd deck structures.


- 44 replies
-
- 5
-
-
- king of the mississippi
- artesania latina
- (and 1 more)
-
Next step in the process was the planking of the third deck and mounting it in place.
- 44 replies
-
- 3
-
-
- king of the mississippi
- artesania latina
- (and 1 more)
-
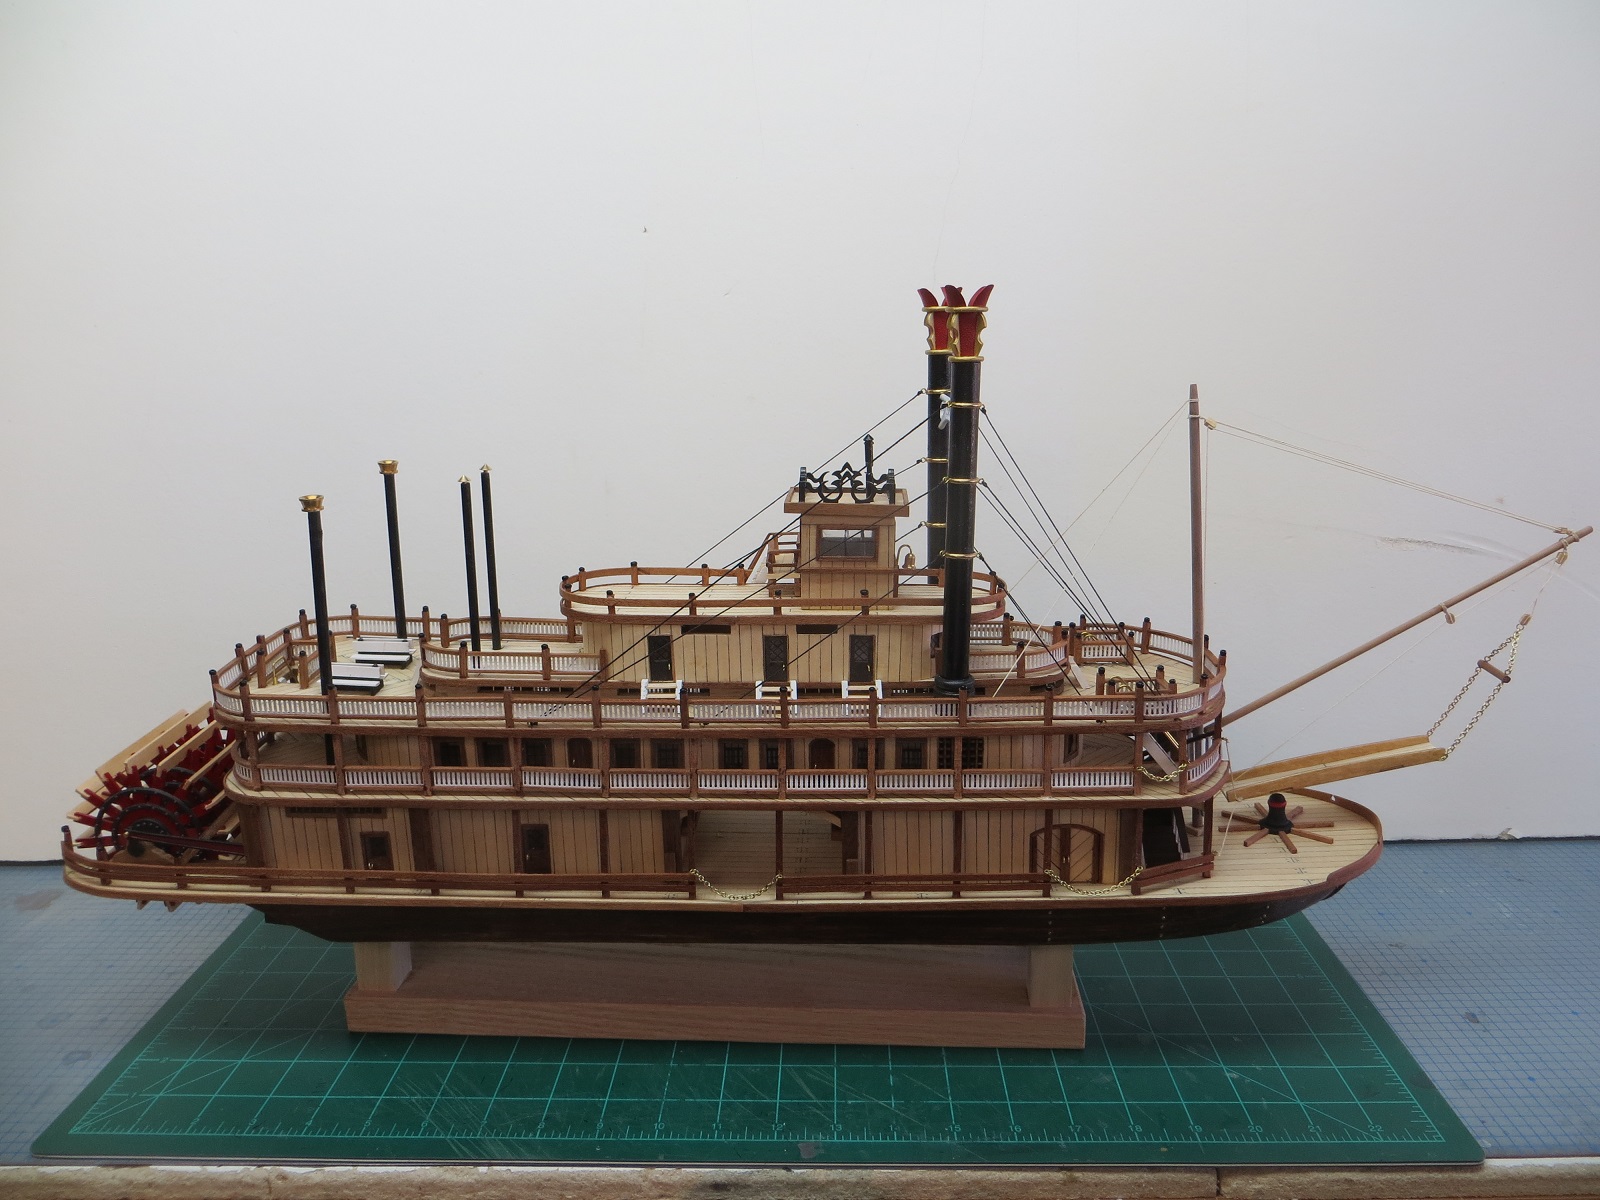
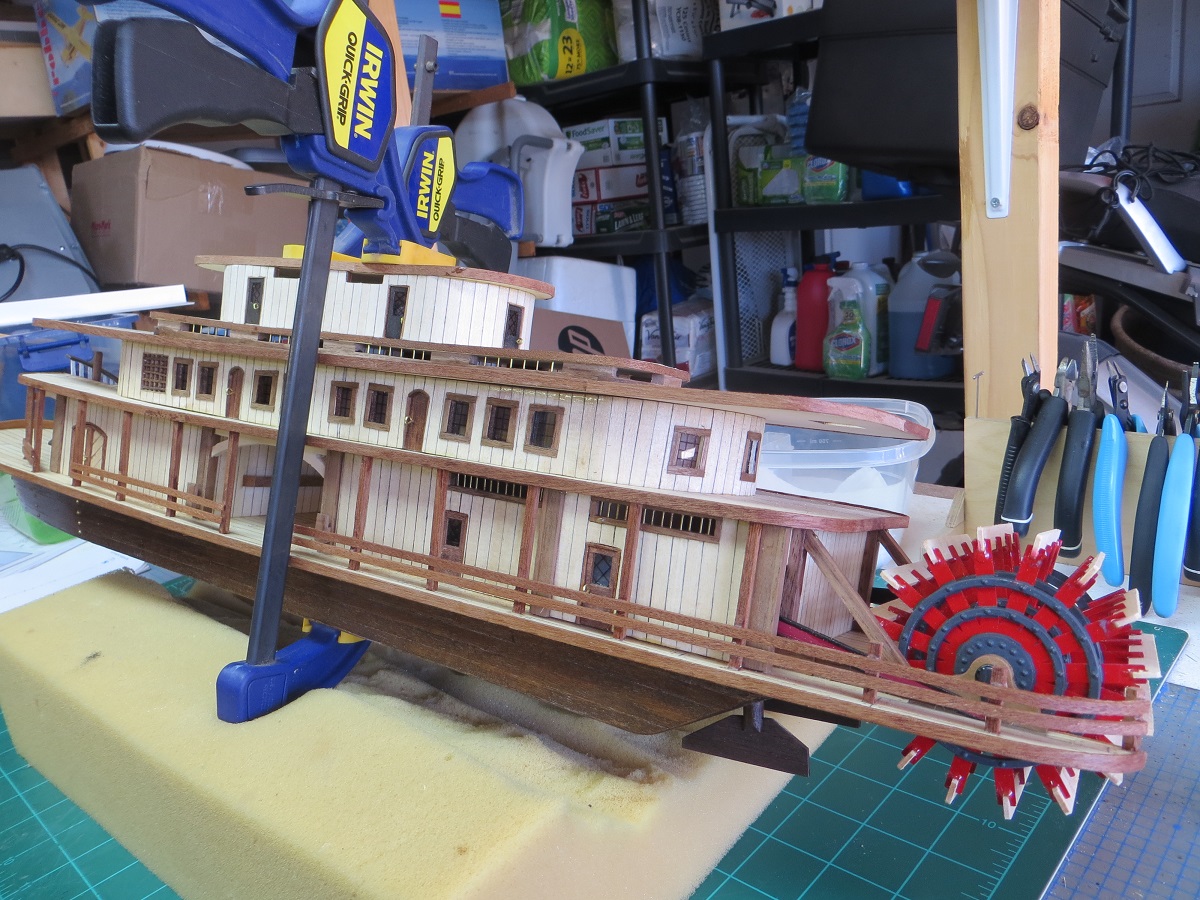
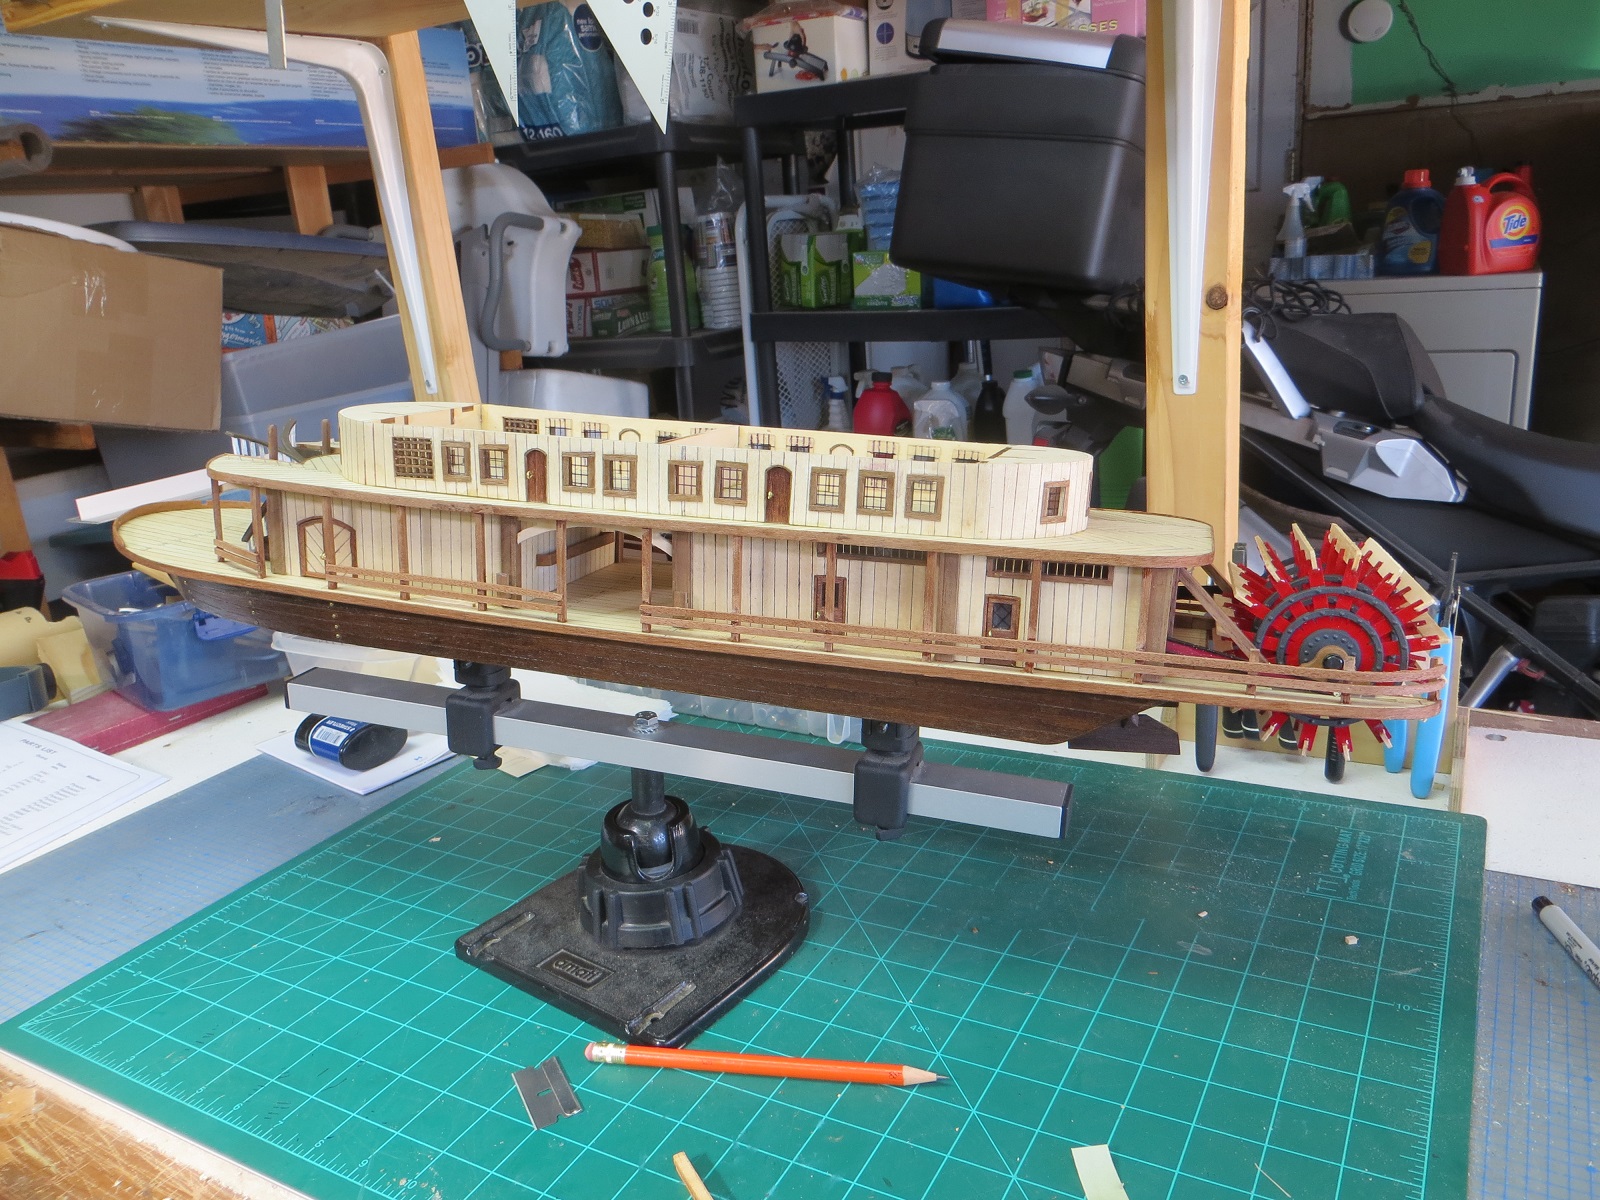
This is how she stands now. Next steps will be the second deck.

- 44 replies
-
- 8
-
-
- king of the mississippi
- artesania latina
- (and 1 more)
-
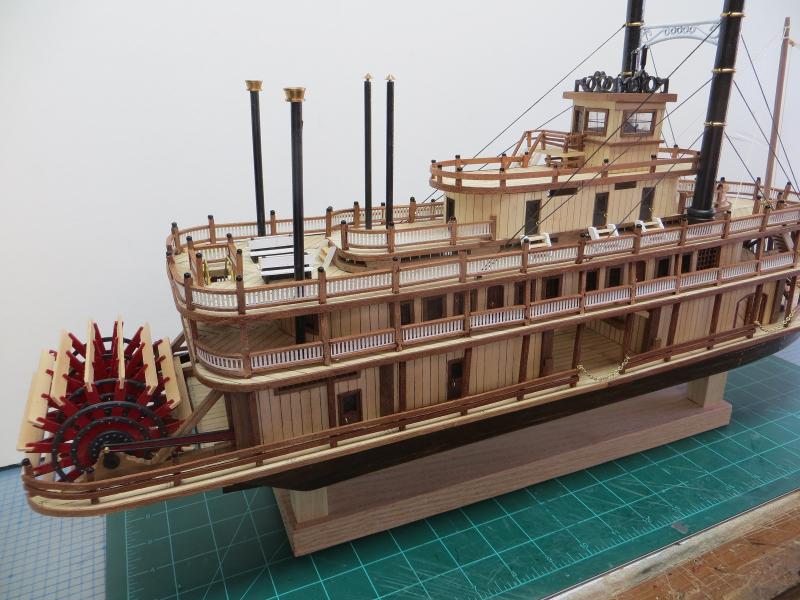
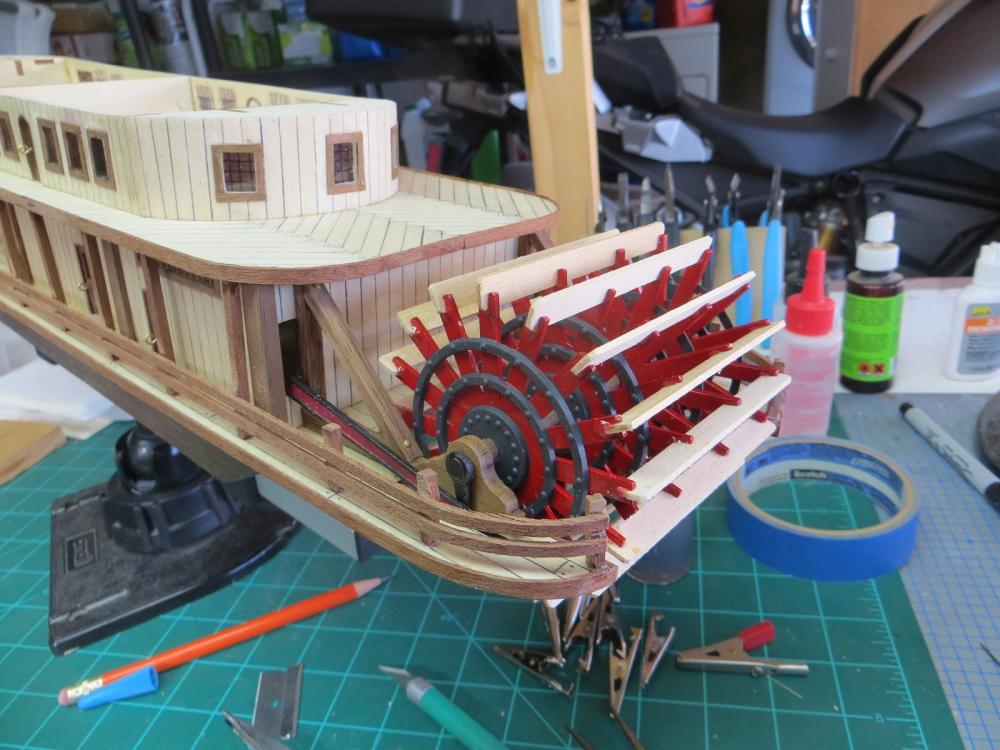
Installed the paddlewheel and the drive arms.
- 44 replies
-
- 5
-
-
- king of the mississippi
- artesania latina
- (and 1 more)
-
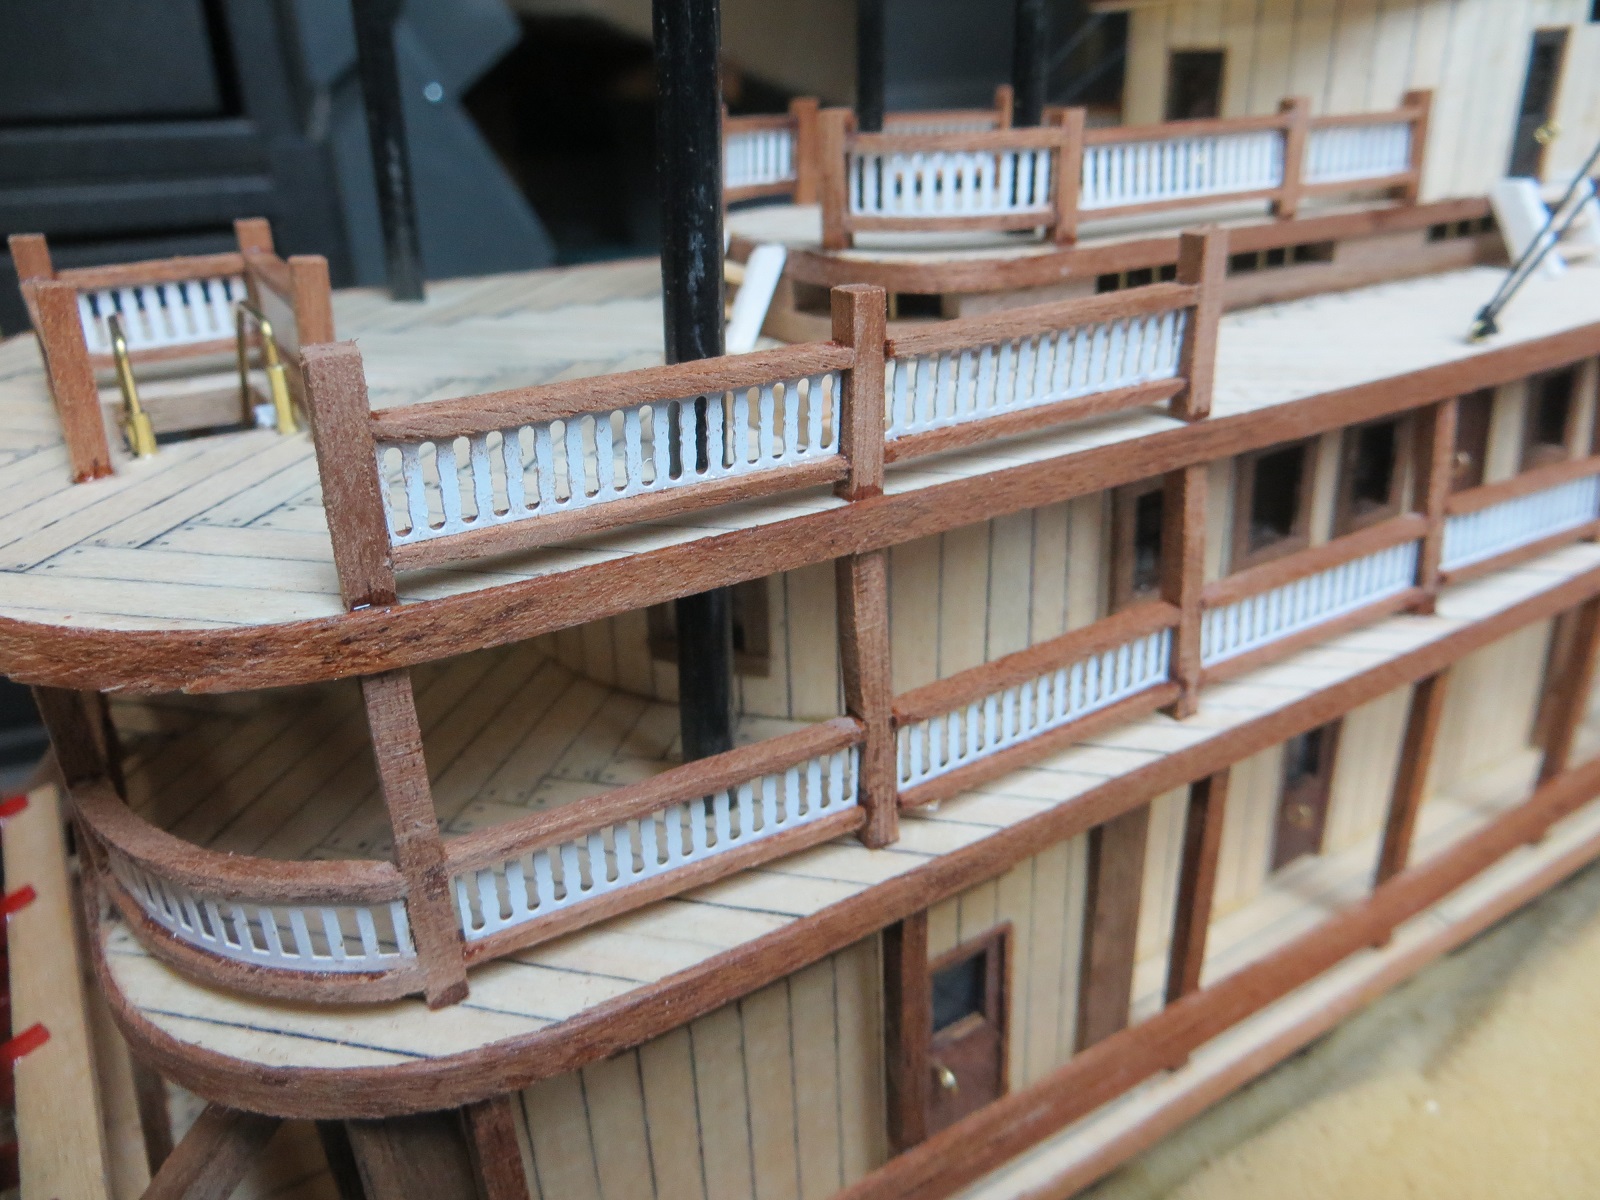
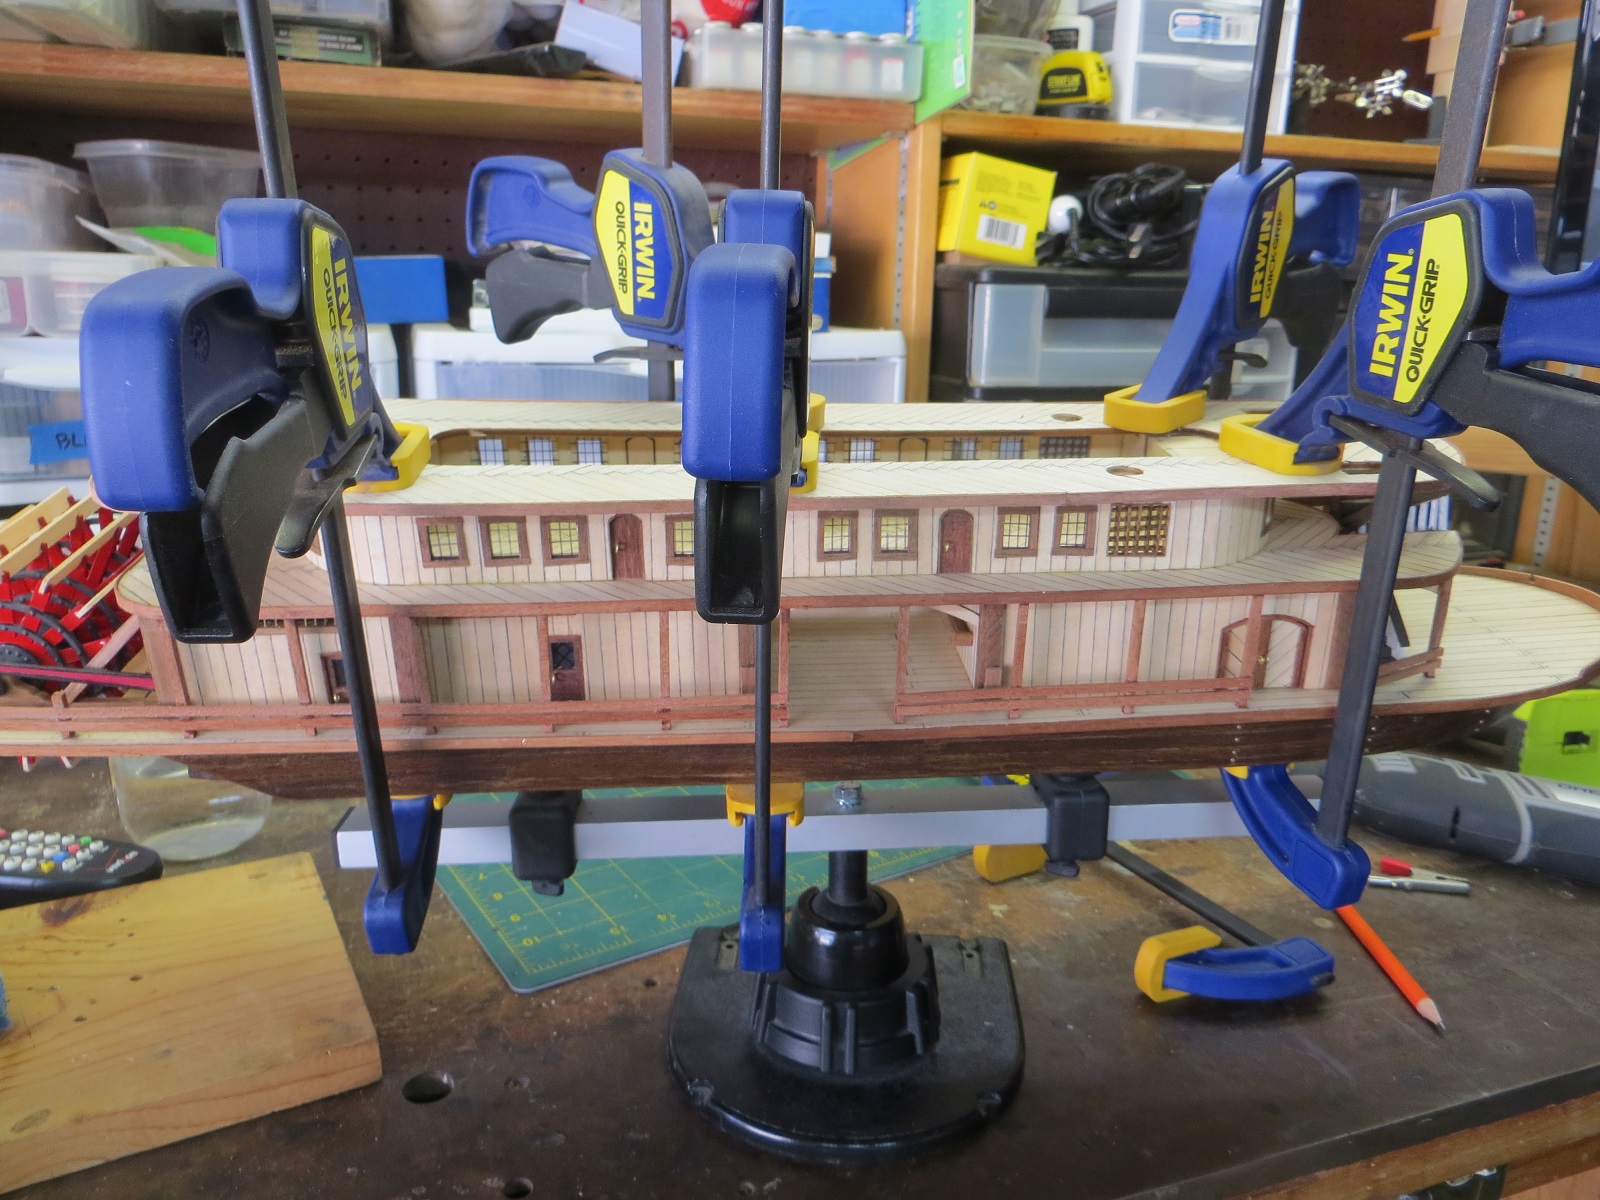
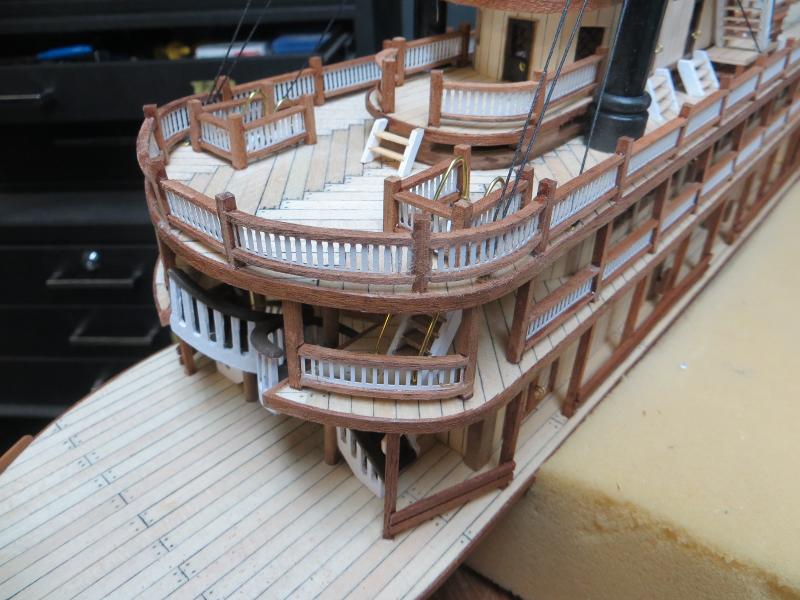
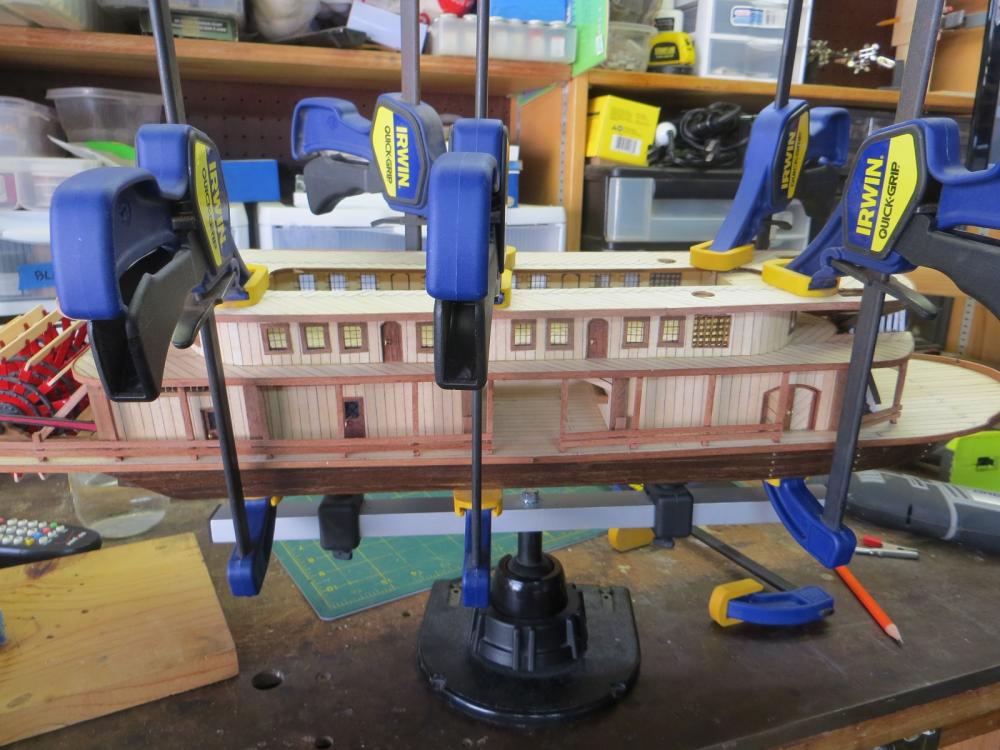
Next I went to work the posts and rails. Each post had to be individually cut and then carefully sanded to achieve a tight fit. Overall I was pleased with the posts and railings.

- 44 replies
-
- 4
-
-
- king of the mississippi
- artesania latina
- (and 1 more)
-
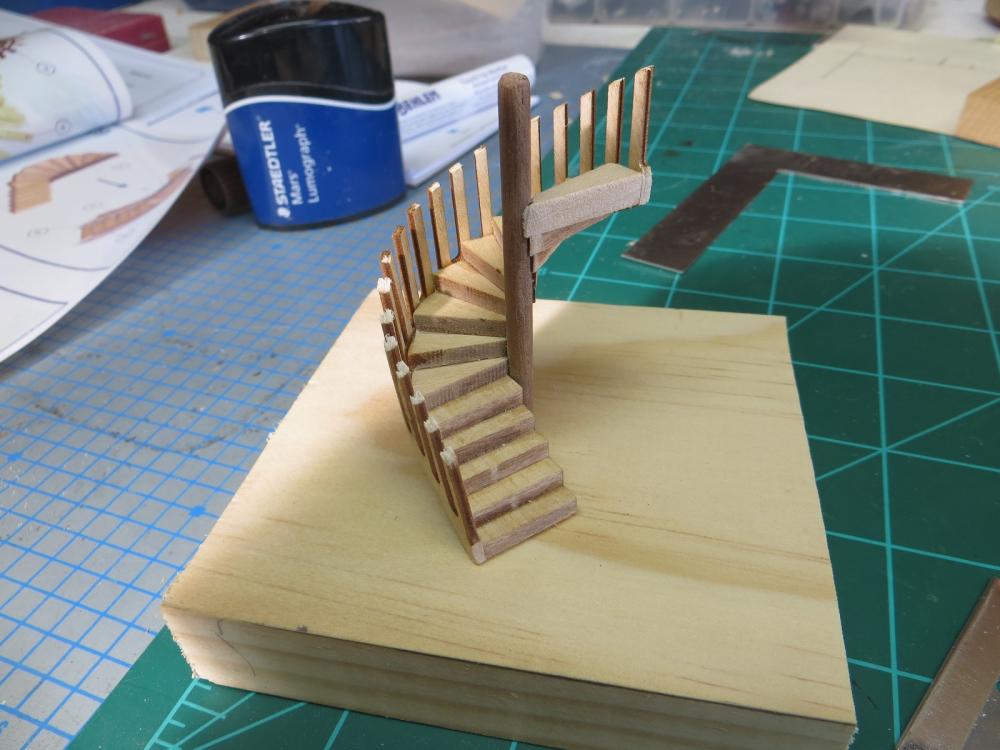
Went to work on the stair cases. Not too happy with the results. The steps were easy to put around the post but the stair railings twisted. If I had to do it again, I think I would have fashioned my own railings. I would have used better would that could have been stained rather than painted.
- 44 replies
-
- 3
-
-
- king of the mississippi
- artesania latina
- (and 1 more)