HOLIDAY DONATION DRIVE - SUPPORT MSW - DO YOUR PART TO KEEP THIS GREAT FORUM GOING! (Only 13 donations so far - C'mon guys!)
×


rcmdrvr
-
Posts
420 -
Joined
-
Last visited
Content Type
Profiles
Forums
Gallery
Events
Everything posted by rcmdrvr
-
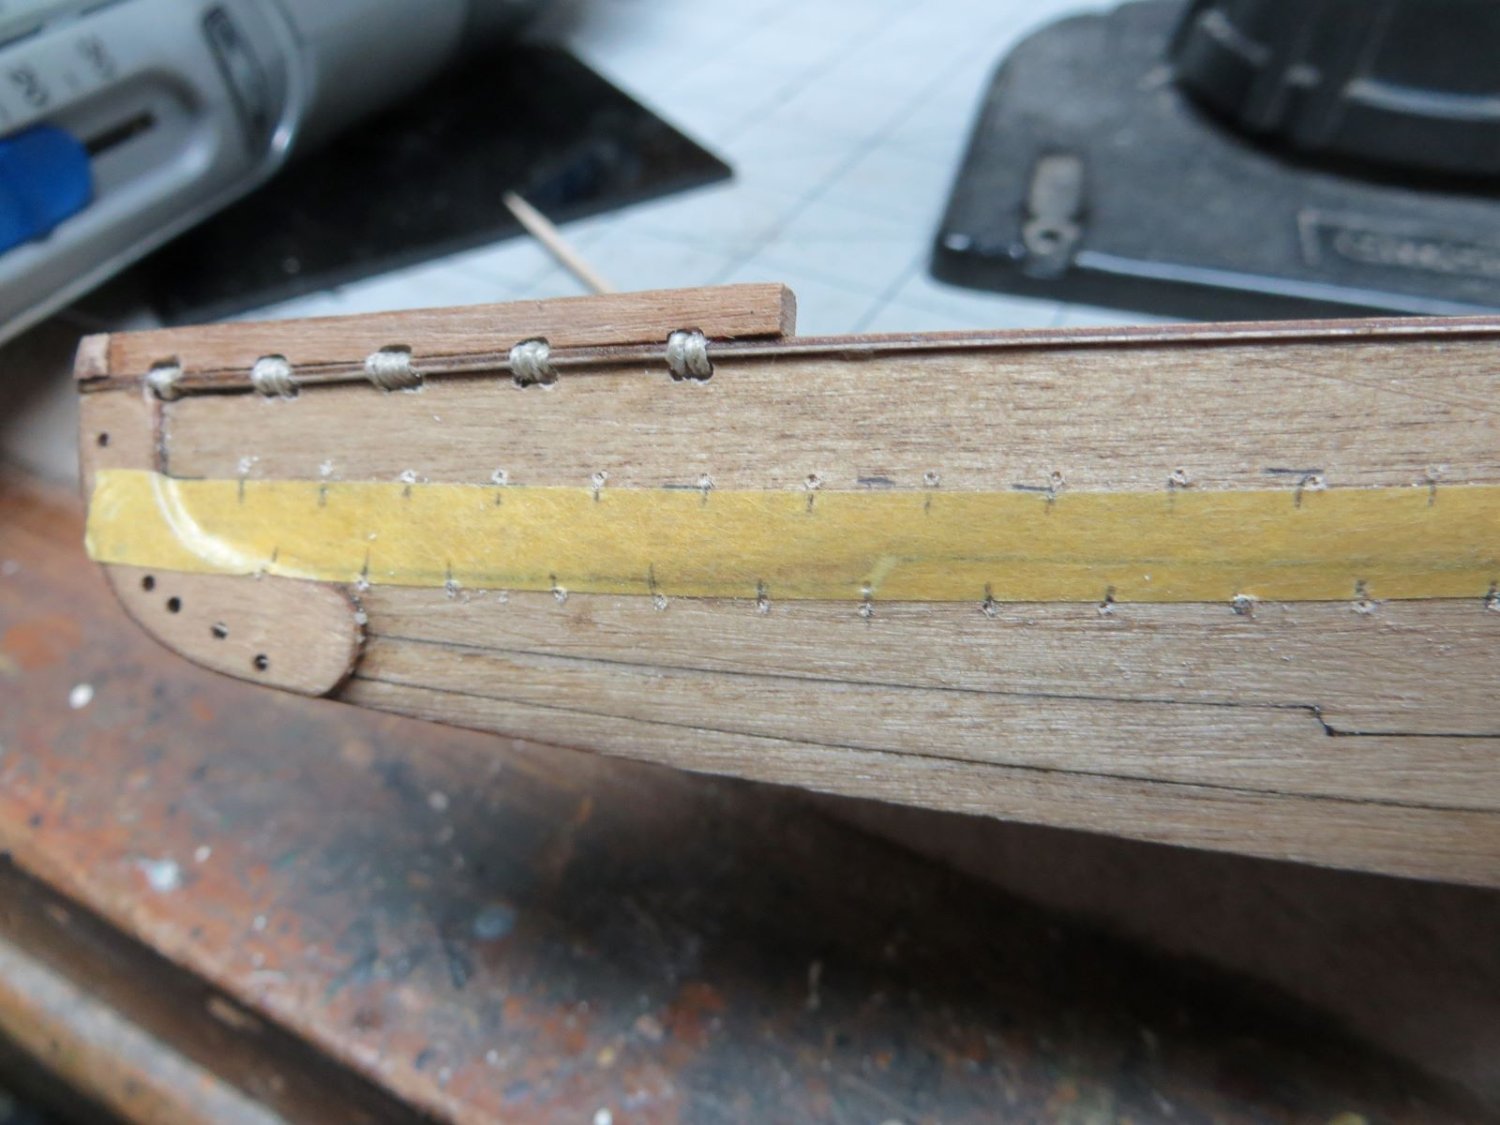
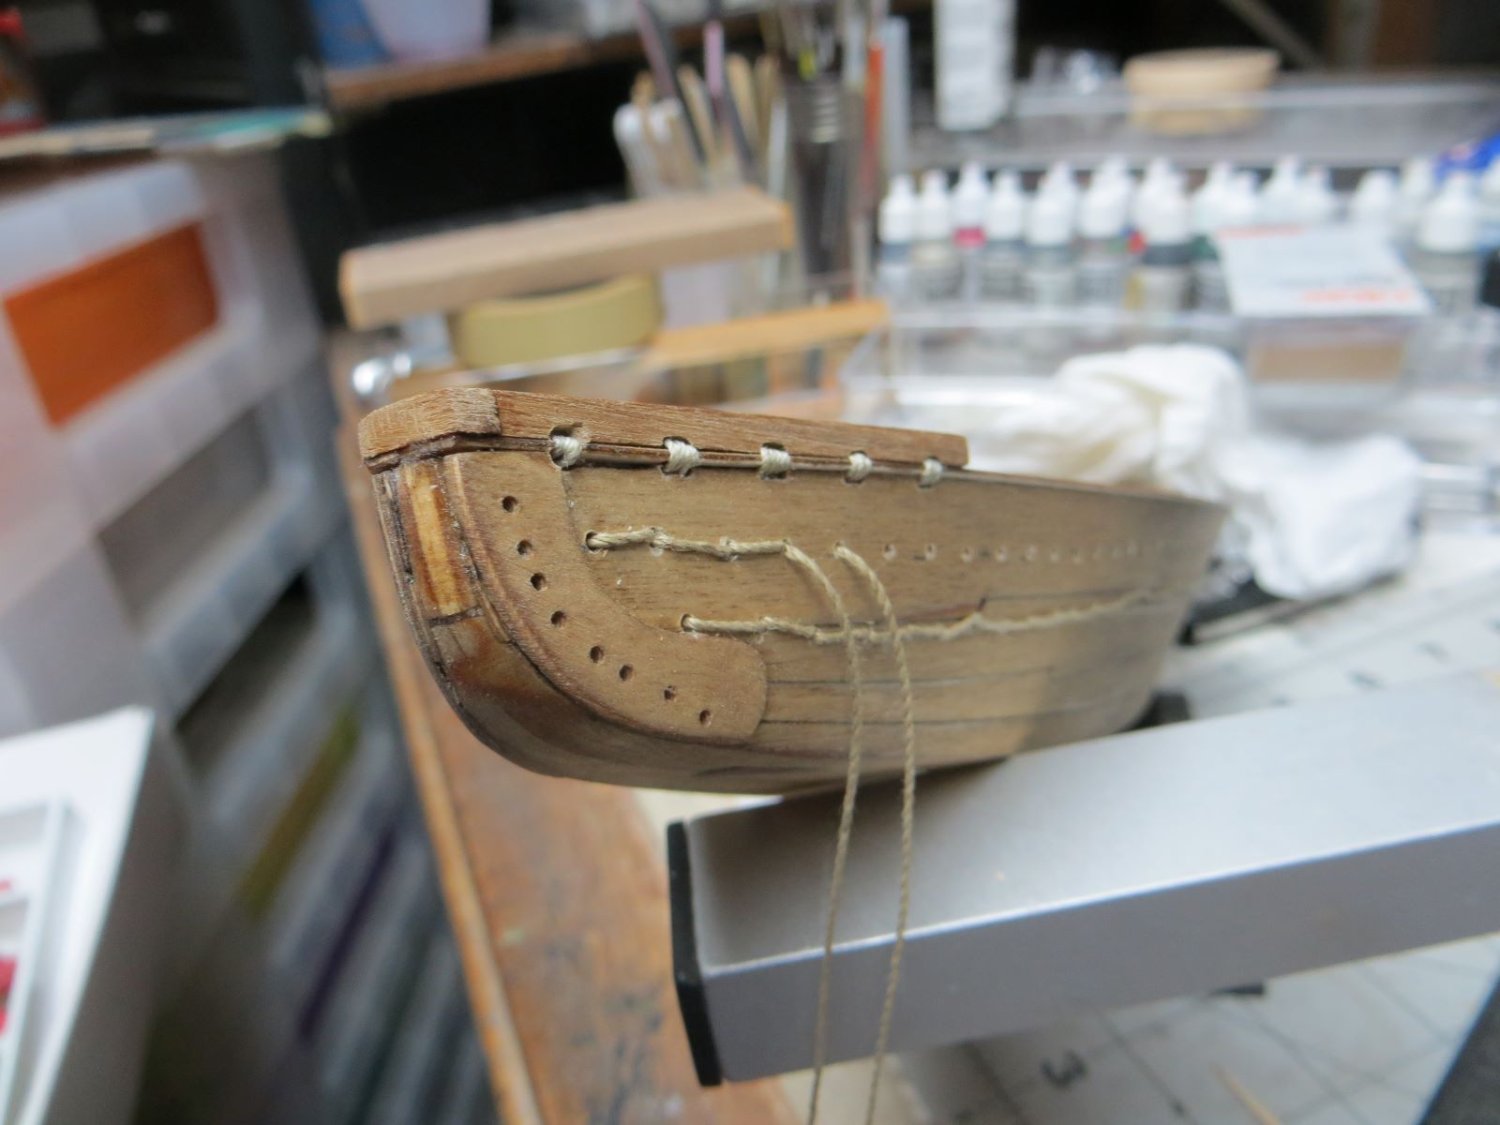
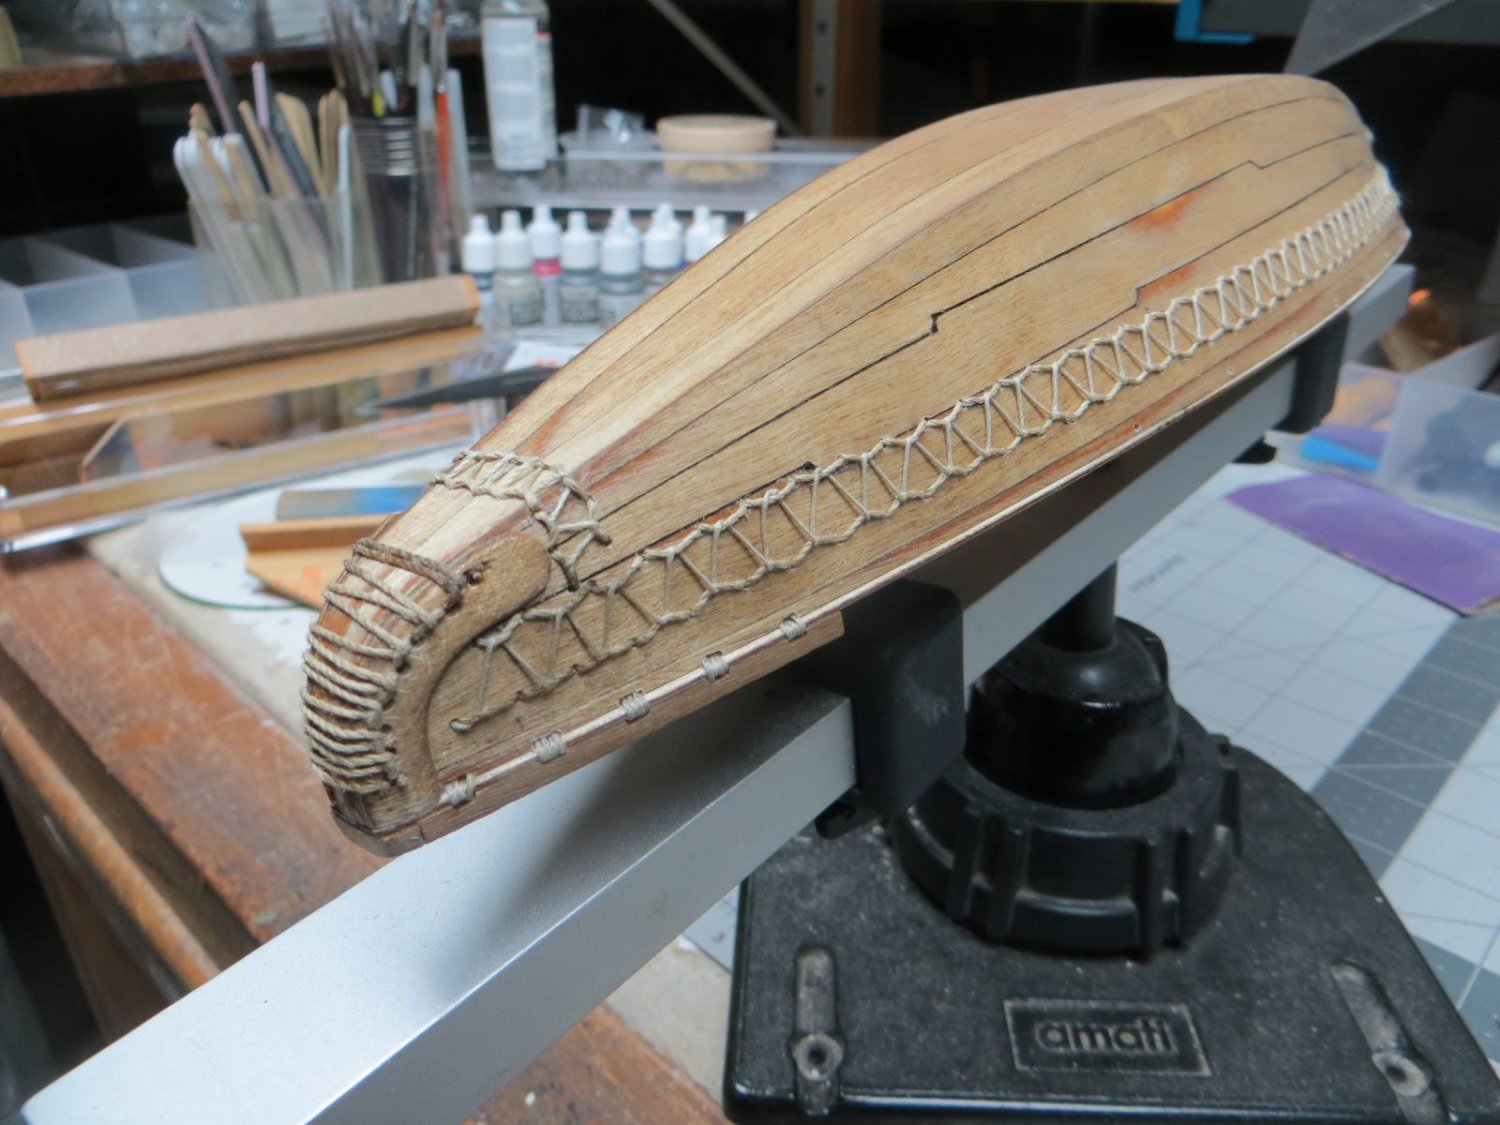
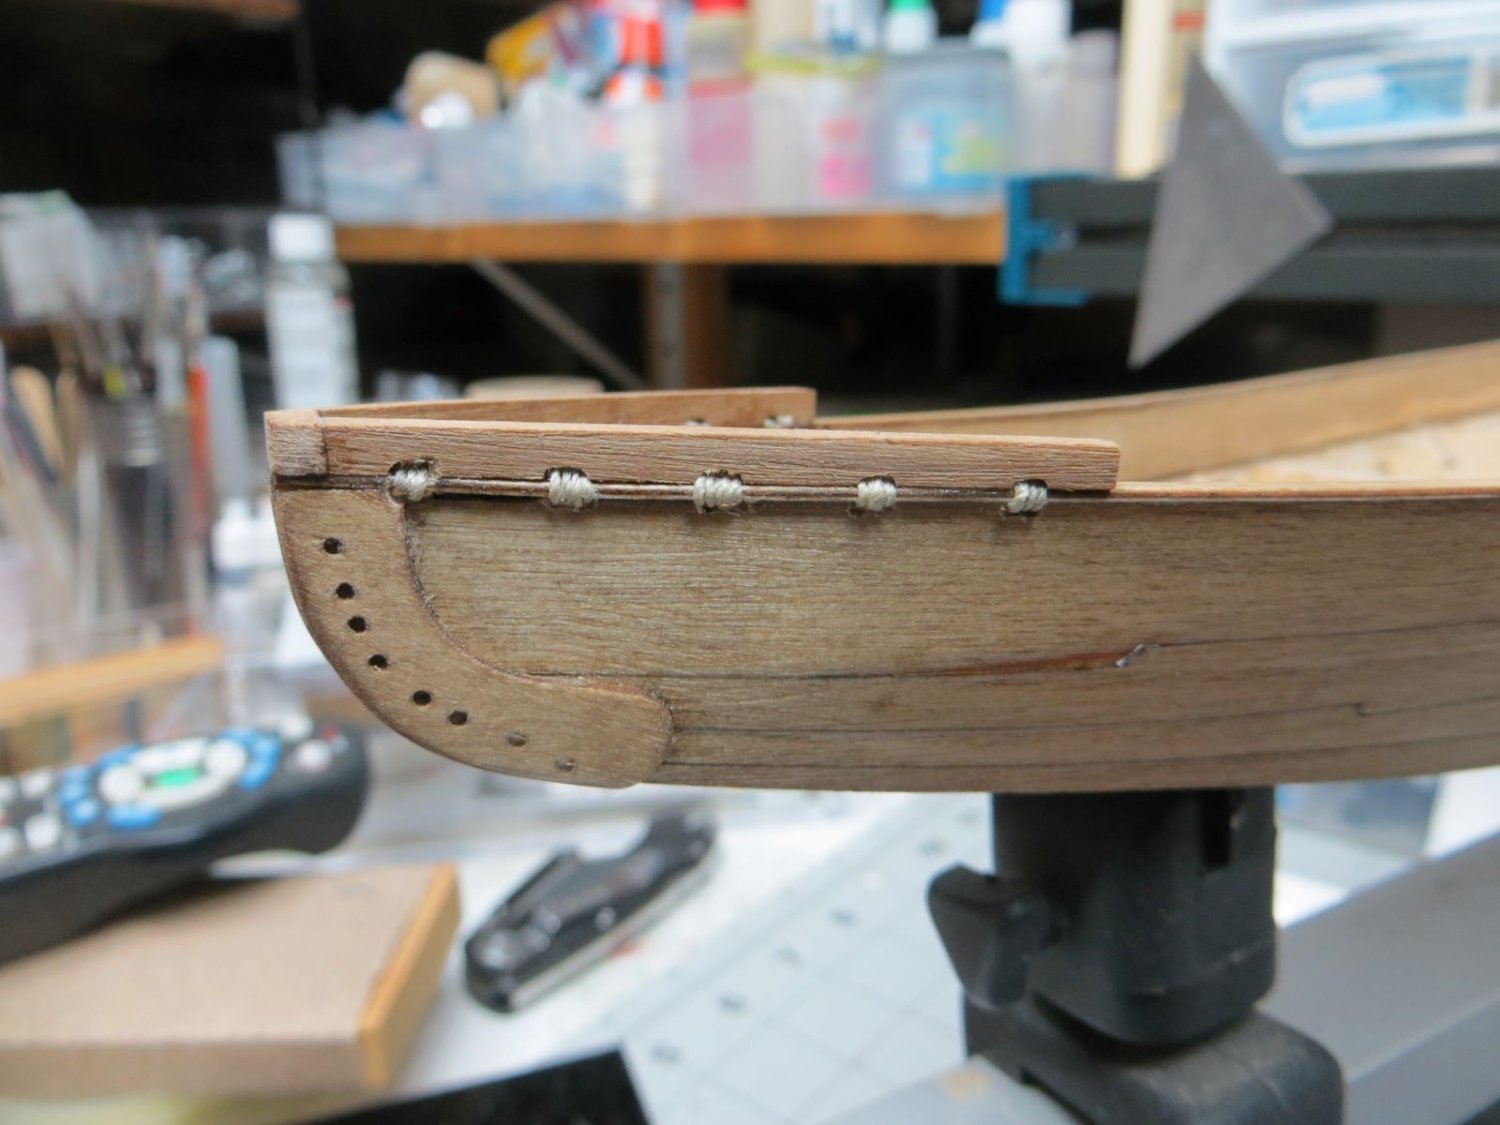
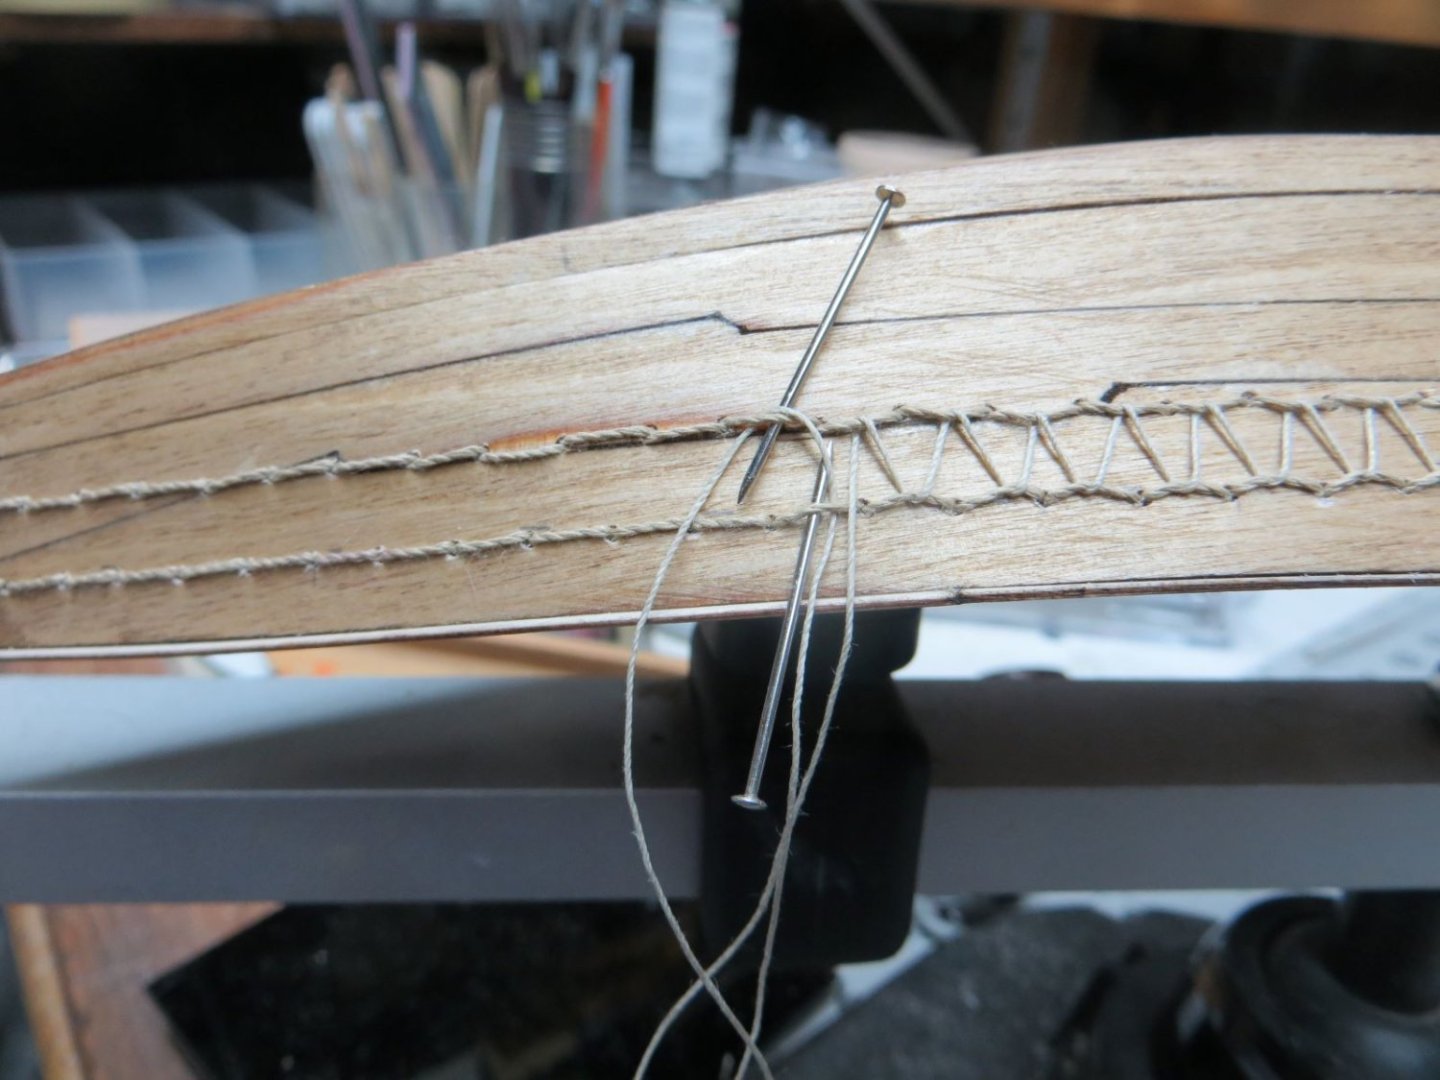
Well, the next step is the simulated rope weaving on the hull. The process began with placing a strip of tape along the hull so that I could mark where the holes would be drilled. There are two rows of holes, each row being offset by 1/2 the distance between the holes. Then came the drilling process. I used a hobby knife with a sharp blade to make a small starter hole at each marked location. I then used a dremel rotary tool to drill the hole. There were a bunch. I next wove the bow and stern with two strands passing through the holes. The instruction booklet did a good job illustrating how this should be done. Next I wove the top and bottom rows along the length of the hull. Again, it was two strands passed throught each of the holes. This was also well illustrated in the booklet. Finally a single, small diameter strand is woven between hull length threads. I used two pins to raise the upper and lower ropes in order to be able to pass the lighter thread. One tip in the process. I dipped the end of each thread in thin CA and waited a few seconds for the ends to become very stiff. This made it much easier to weave thru the holes.


- 28 replies
-
- 7
-

-

-
- Nave Egizia
- Amati
- (and 1 more)
-
Your experience with ship modelling and your skill in working with wood and metal to fashion the details of your models really stands out in the photos. I really like the decking and the details of the deck cabins. I will follow this build to learn more.
- 12 replies
-
- 1
-

-
- Amerigo Vespucci
- Mantua
- (and 1 more)
-
Well, I went ahead and stained the hull using a rust-o-leum light oak polyurethane. While not great, it does look better than the raw wood. I also added the railings and a bow cap. The railings were made from six laser cut pieces. They fit fairly well. The bow cap was fashioned from 3 mm square oak. I cut out the notches for the rope using a dremel tool fitted with a grinding wheel. The hull is now ready for the similuated rope weaving.


- 28 replies
-
- 5
-
-
- Nave Egizia
- Amati
- (and 1 more)
-
I have not used that product. I use jelied flux, silver solder and a small pencil torch that runs on butane for lighters. Works great.
-
Just read your build for the first time. You are doing a great job building and I am very impressed with the quality of your photos. They are sharp and well composed. Makes it very easy to follow. Becoming proficient in soldering is good skill to acquire. There are some good you tube videos you can learn from.
-
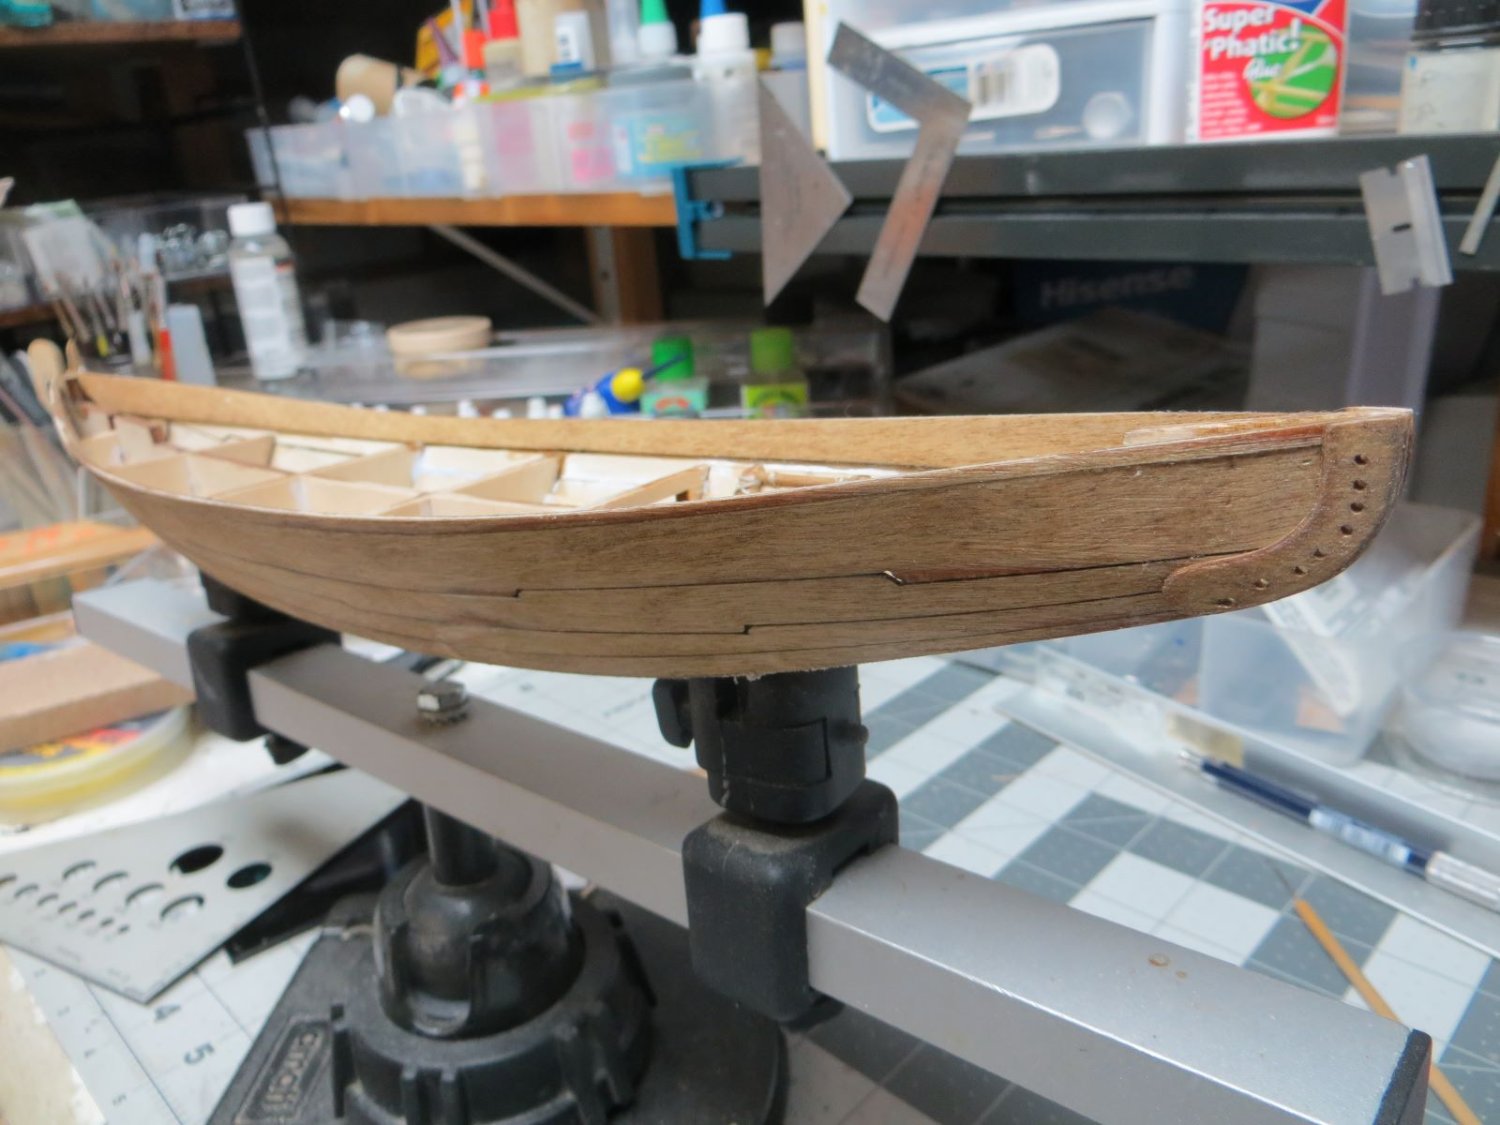
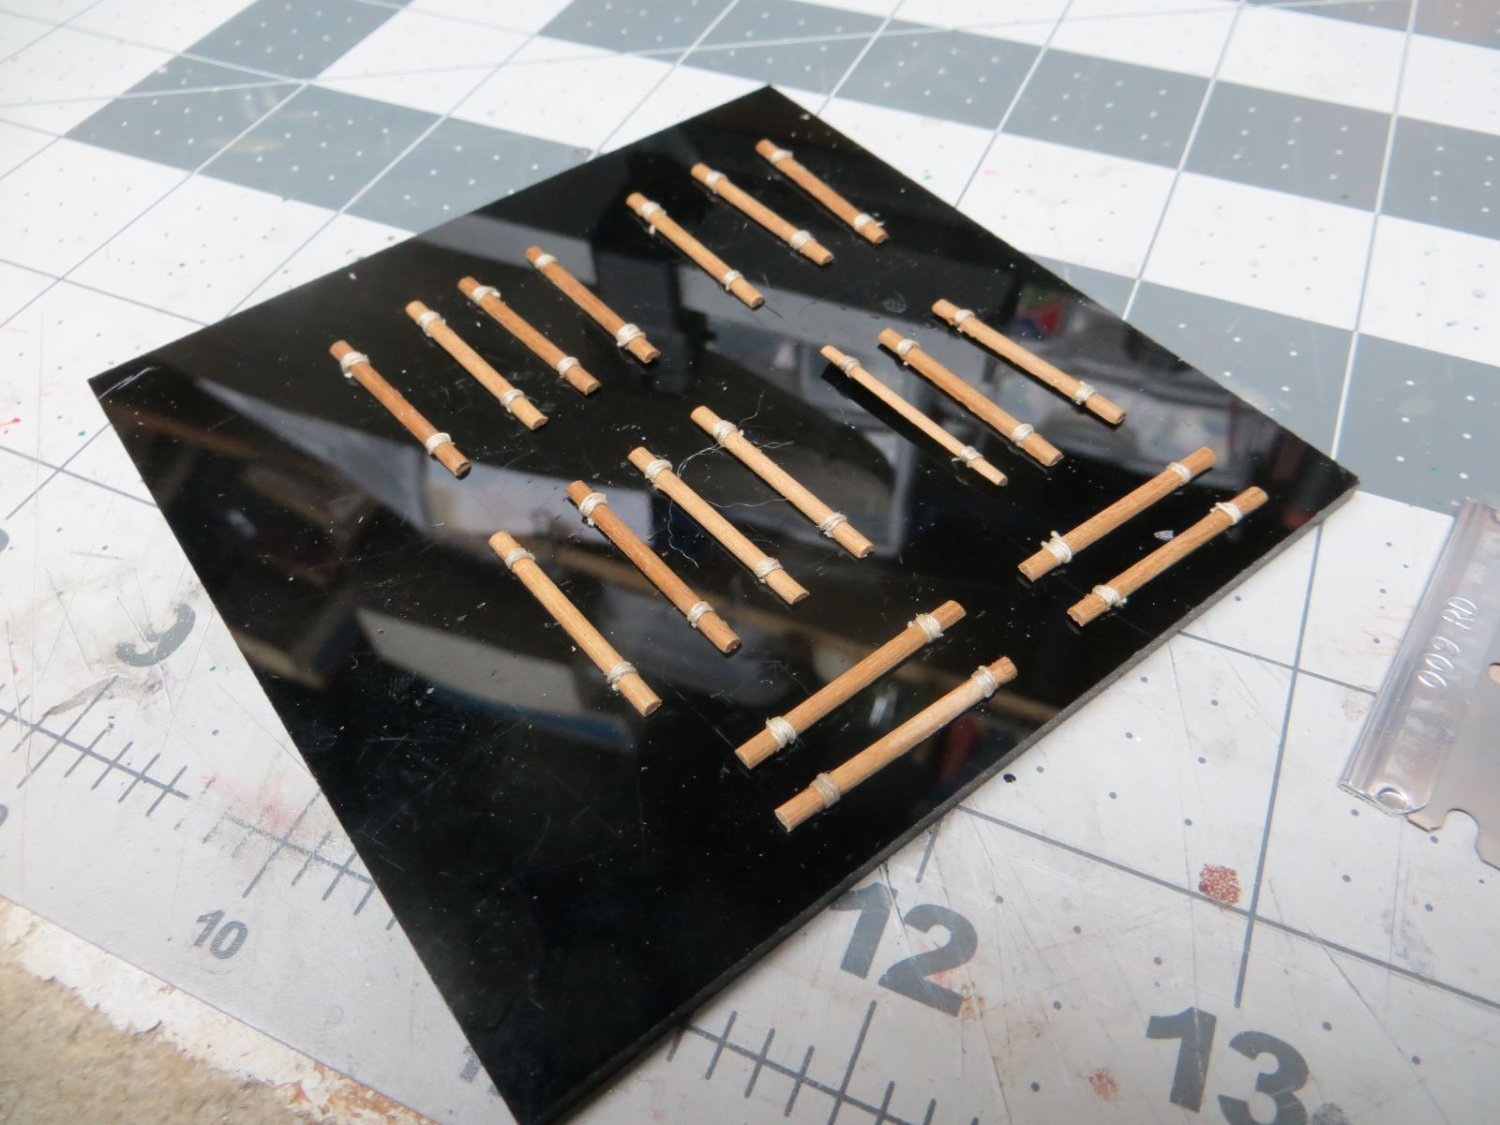
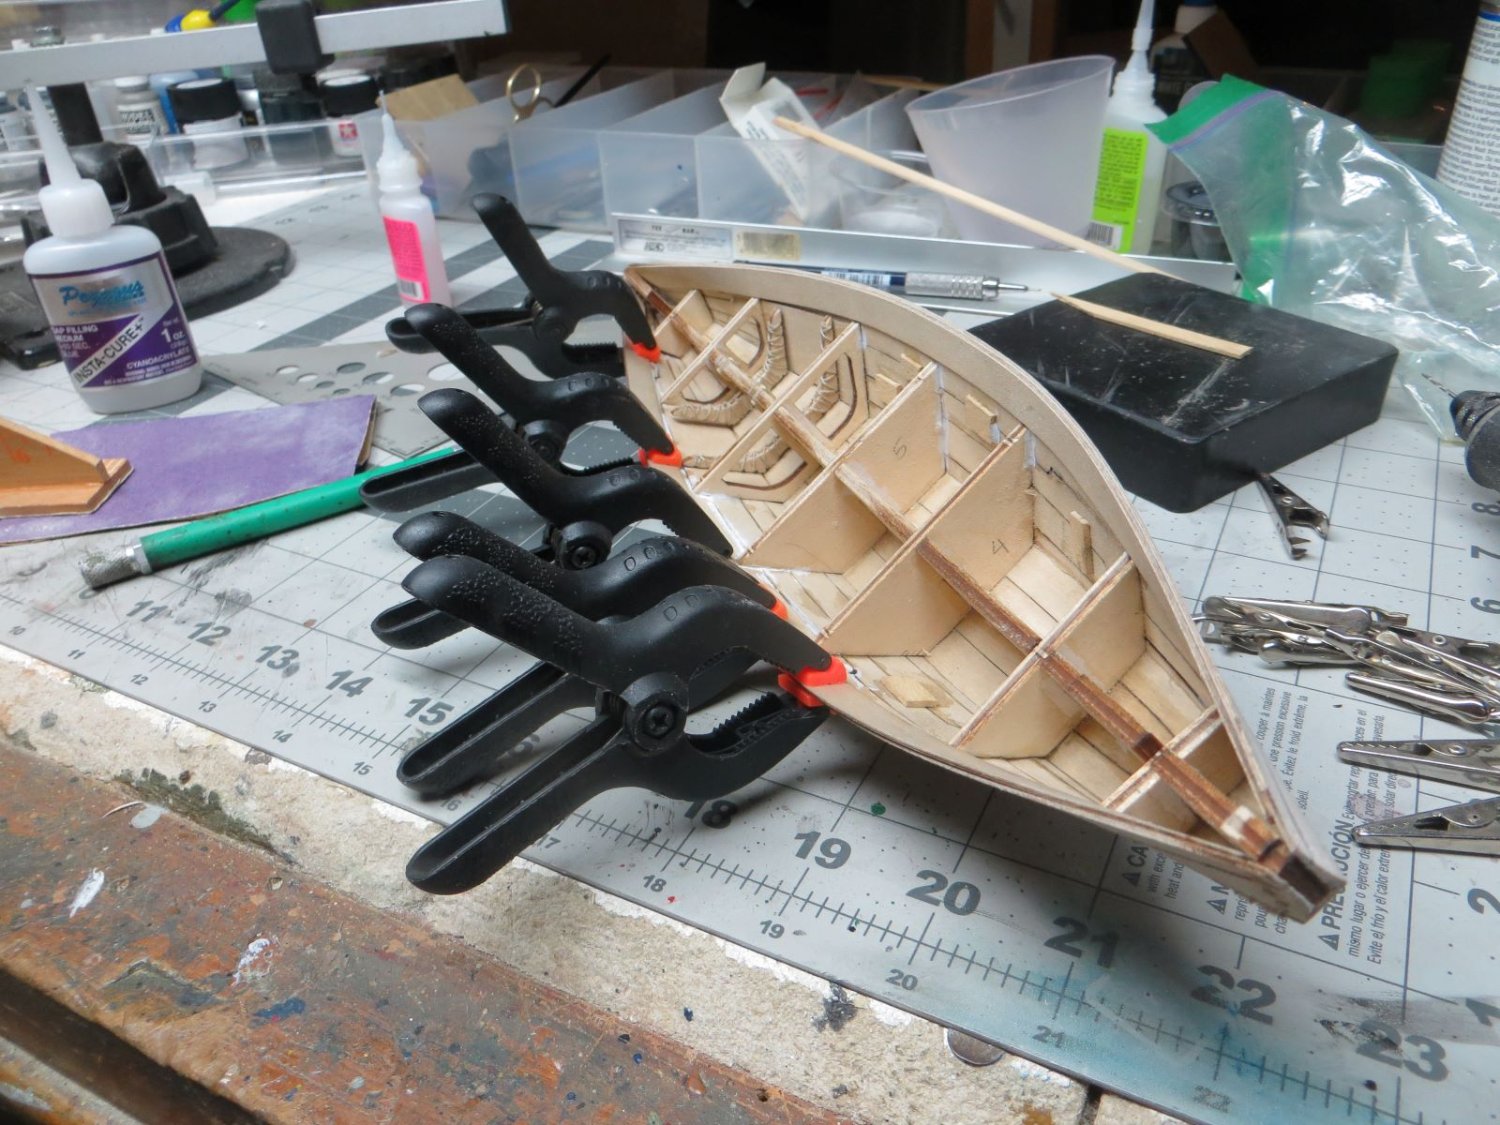
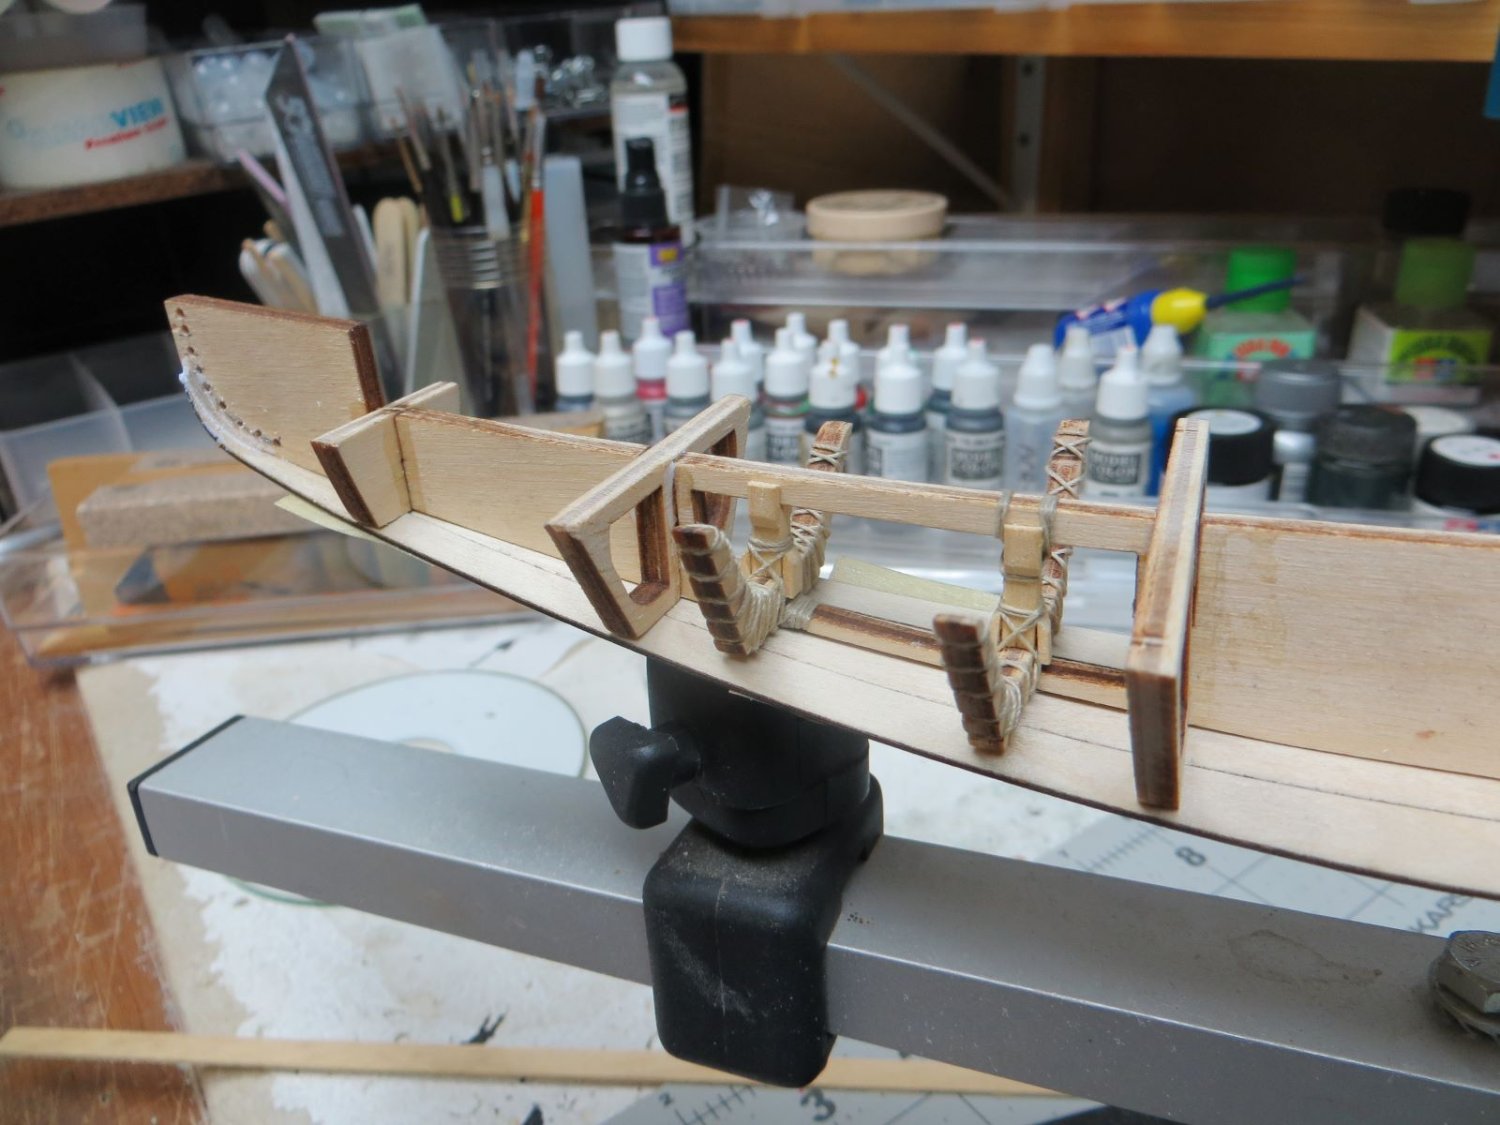
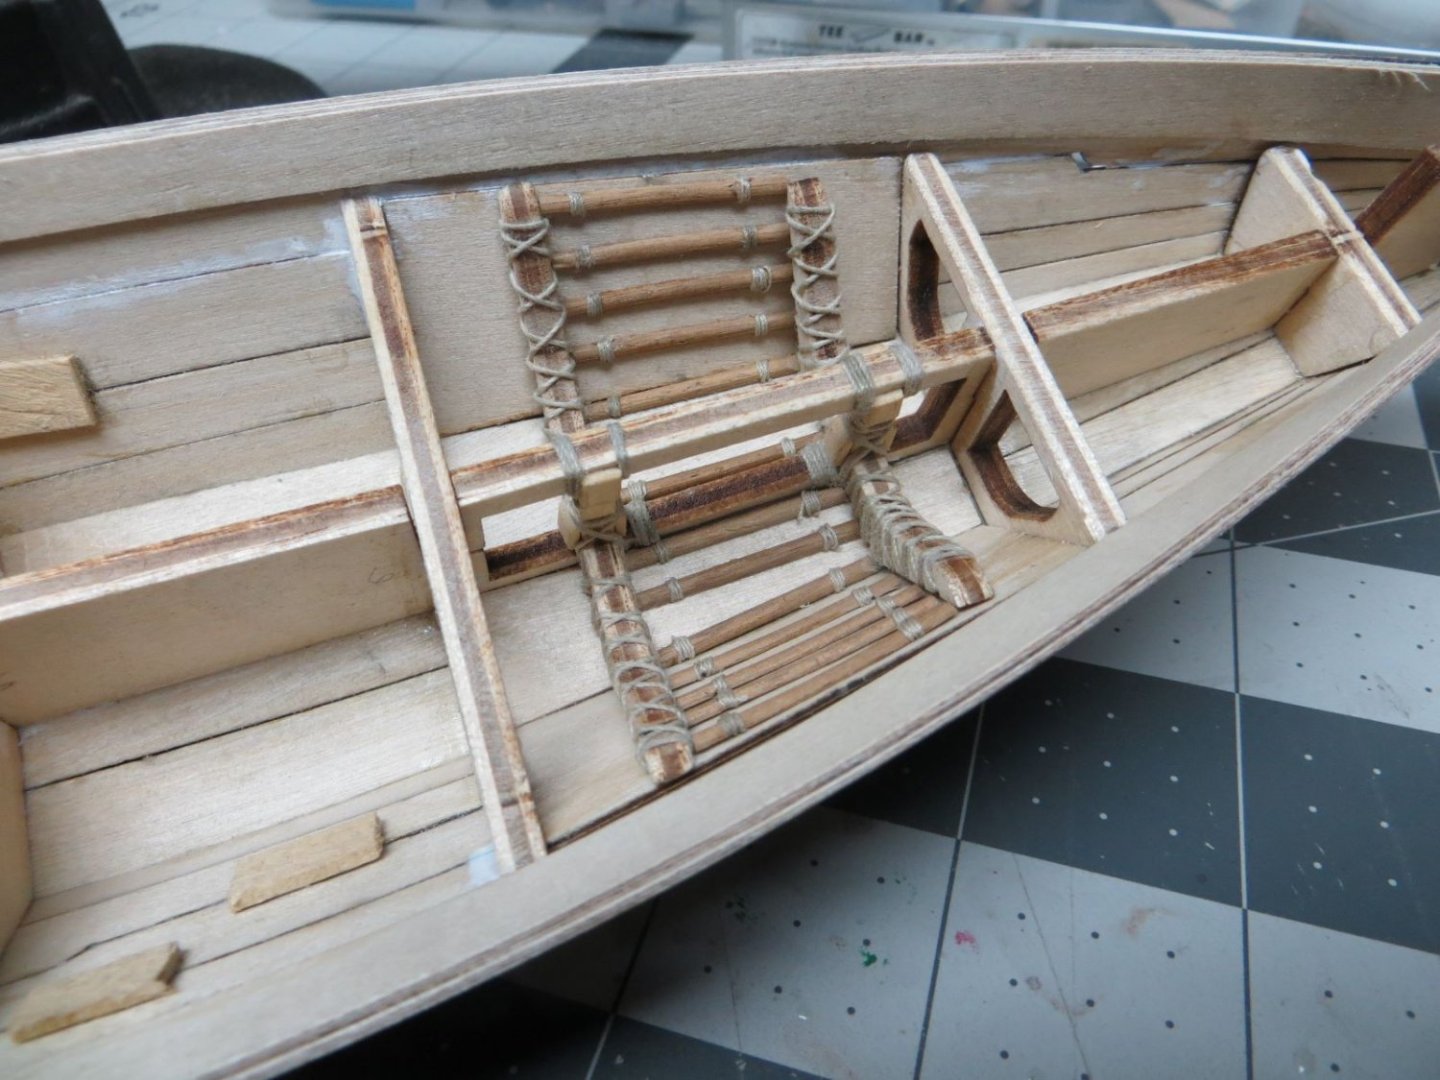
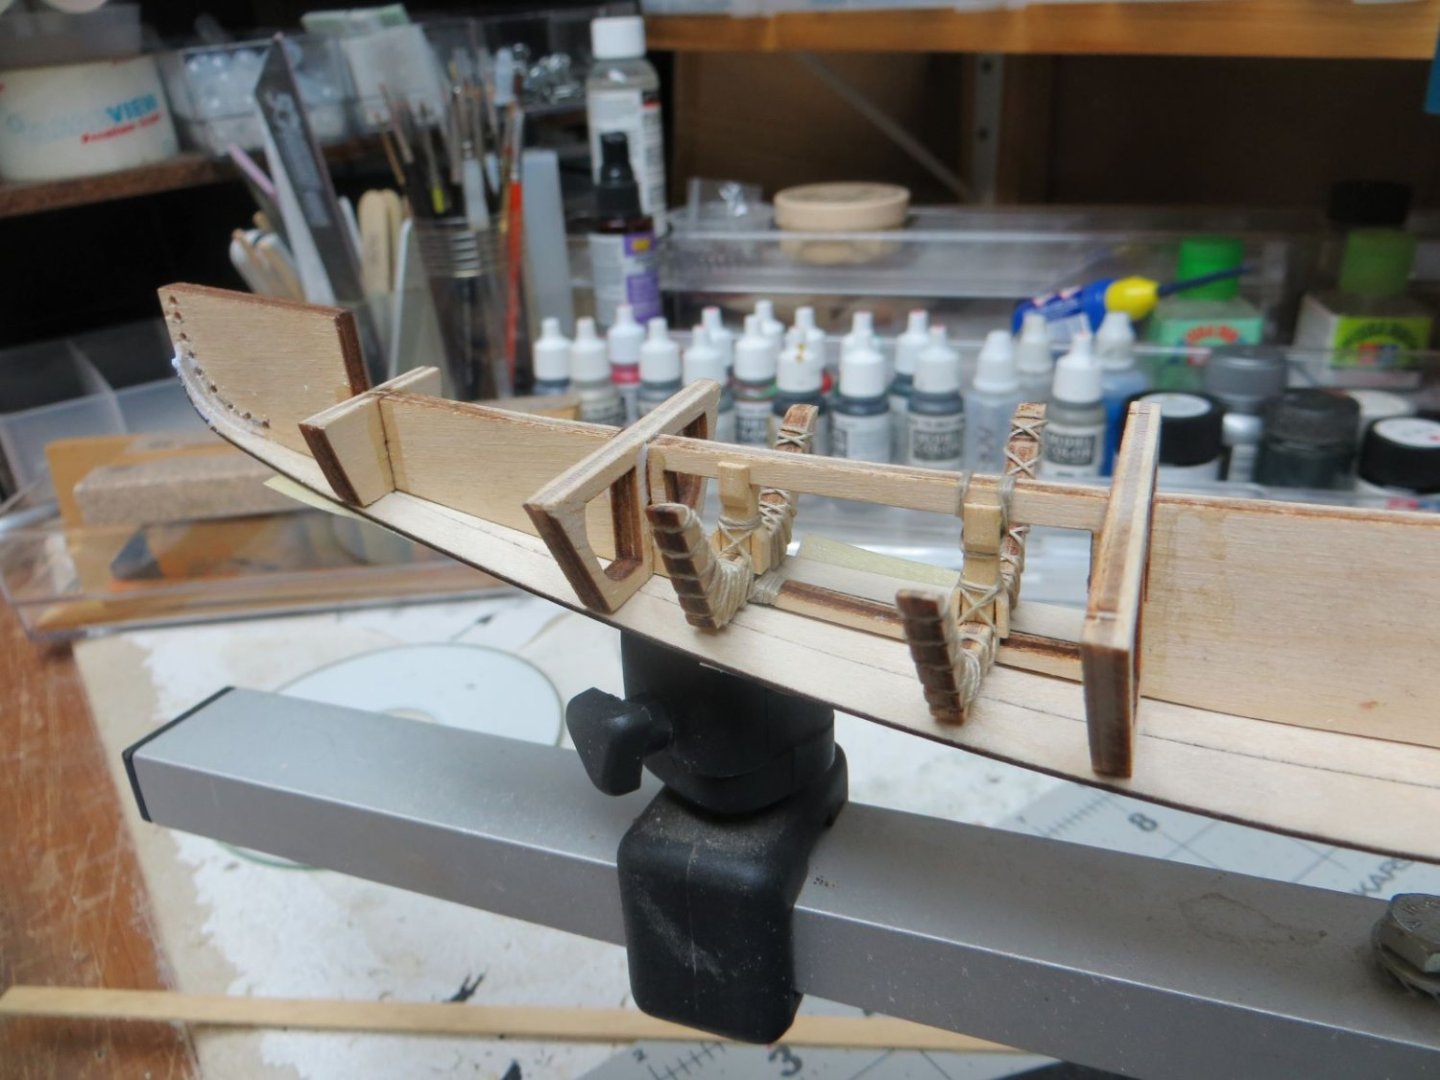
The next step in the build was to construct the inside of the hull that will be viewed when the model is complete. This involved sliding some laser cut plywood pieces between the bound frames and the planks. These pieces will form the simulated decking of the hull interior. Next I fashioned the wood pieces that are used to simulate the wood and rope used to bind the decking. It is half dowels all cut to the same length and then wrapped with thread to simulate the bindings. These are then glued to the plywood decking. I think the attached photos will give you an idea of the process.


- 28 replies
-
- 3
-
-
- Nave Egizia
- Amati
- (and 1 more)
-
I tend to keep various sizes of basswood sticks and sheets. I also use very thin plywood you can find in a hobby shop. The more exotic woods I tend to rely on the kit. I have made many a part from scapes. A box of round toothpicks is great to keep around for all sorts of tasks. I also keep popsicle sticks around. Combine then with adhesive sandpaper of various grits and you can make some great custom tools.
- 43 replies
-
- 1
-
-
- Lowell Grand Banks Dory
- Model Shipways
- (and 2 more)
-
I sure that everyone who has built a wooden ship model has broken a piece, or two, or three. I keep a supply of various types of lumber handy just for those times when I have to fashion a new part or even create a part that the kit did not provide.
- 43 replies
-
- 2
-
-
- Lowell Grand Banks Dory
- Model Shipways
- (and 2 more)
-
First of all, VTHokiEE, thank you for your comments. I was disappointed in the fit of the planking. I really had to wrestle to minimize the gaps between an upper and lower sheet. I am hoping that the rope stitch, which comes later, will hide many of the gaps in the planking. This is my first planking with laser cut parts. I don't like it. I would rather plank the more traditional way. I did some testing on stains and settled a light oak stain by rust-to-leum I had purchased from the local hardware store. I applied it with a cotton stick. I will have some photos soon.
- 28 replies
-
- 1
-
-
- Nave Egizia
- Amati
- (and 1 more)
-
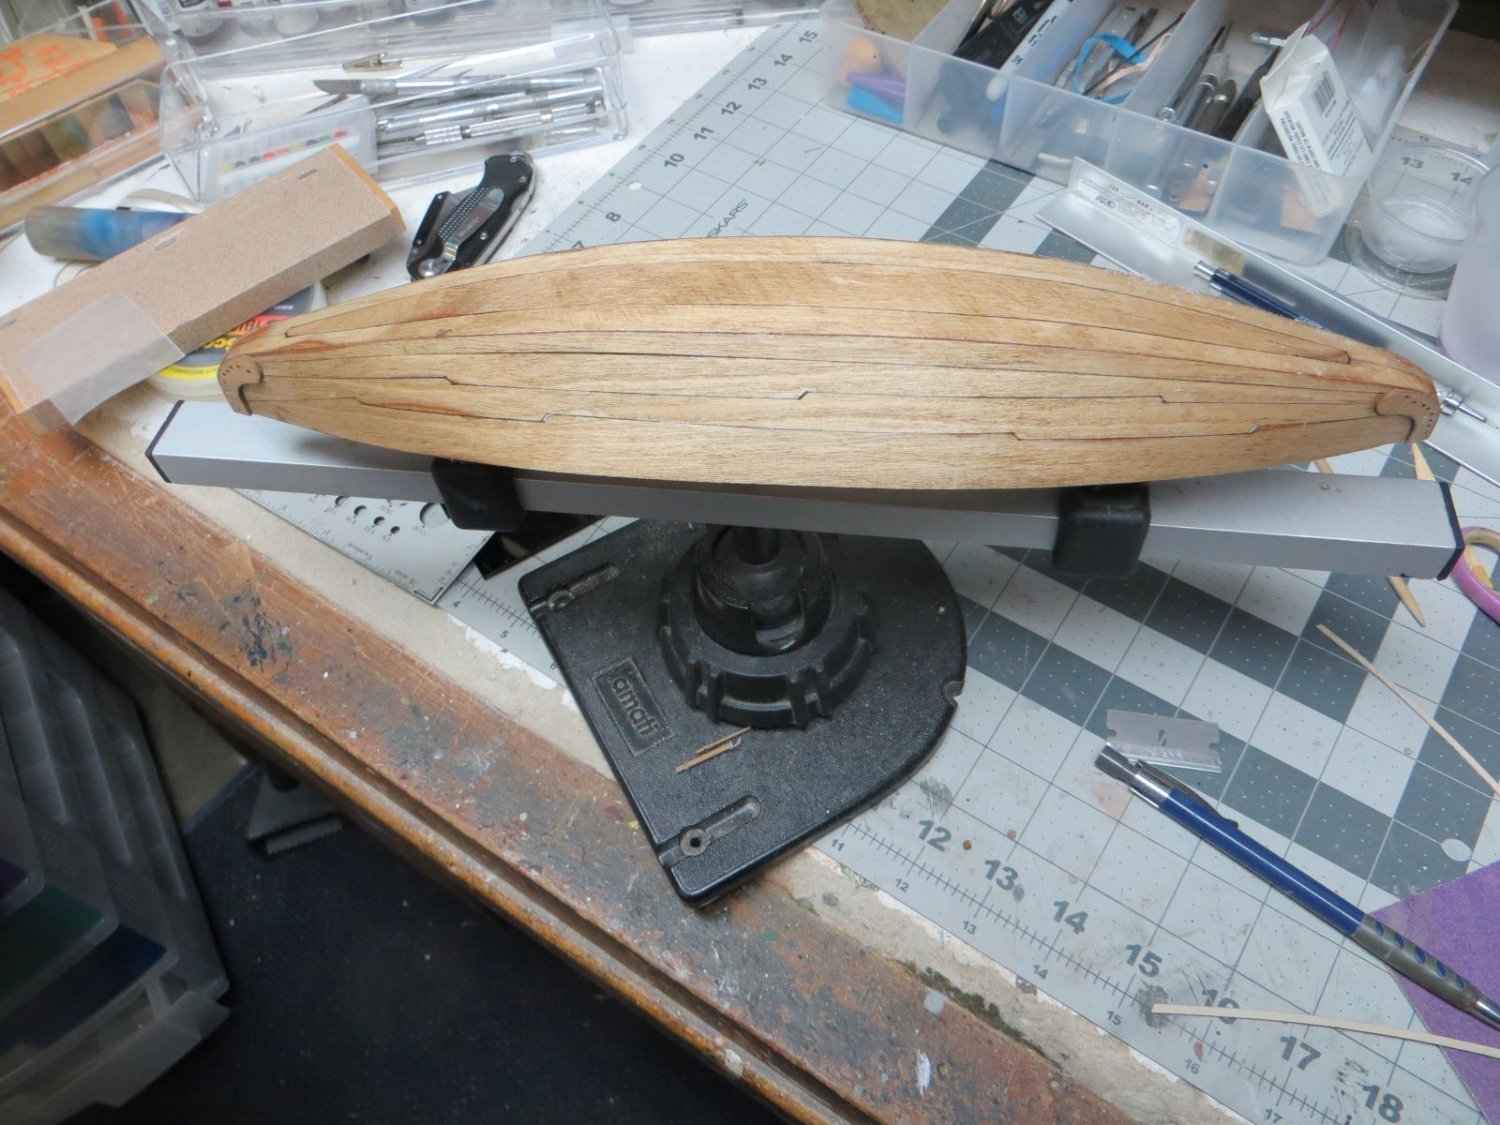
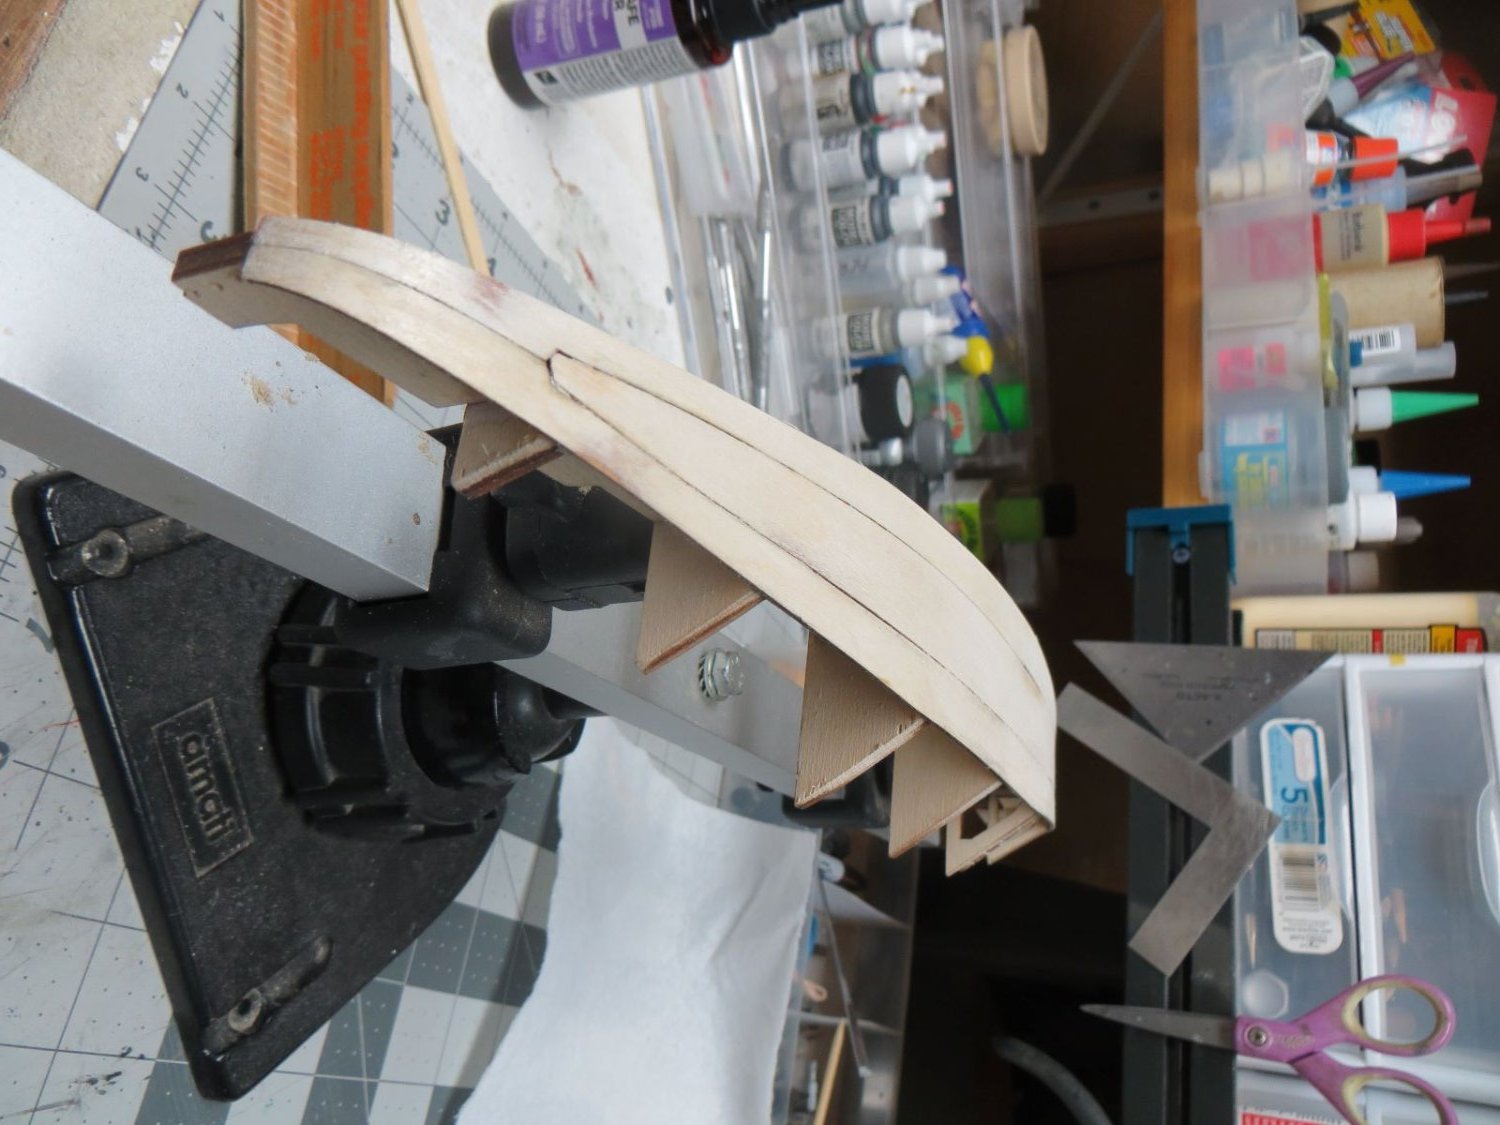
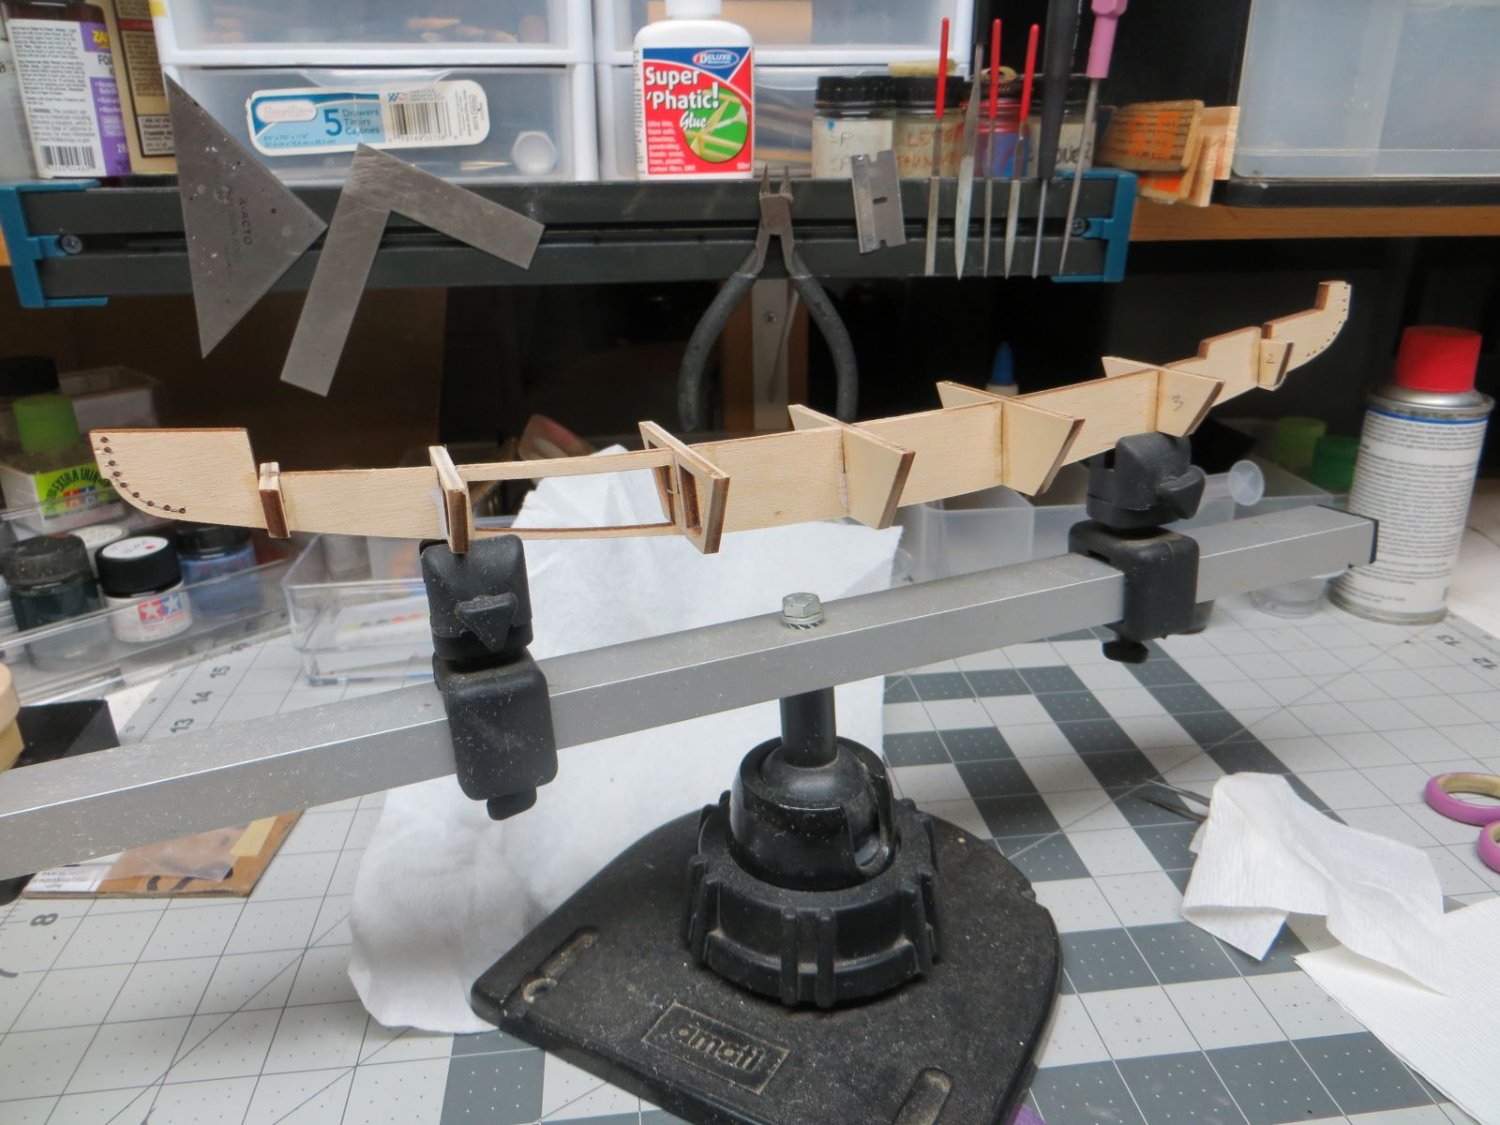
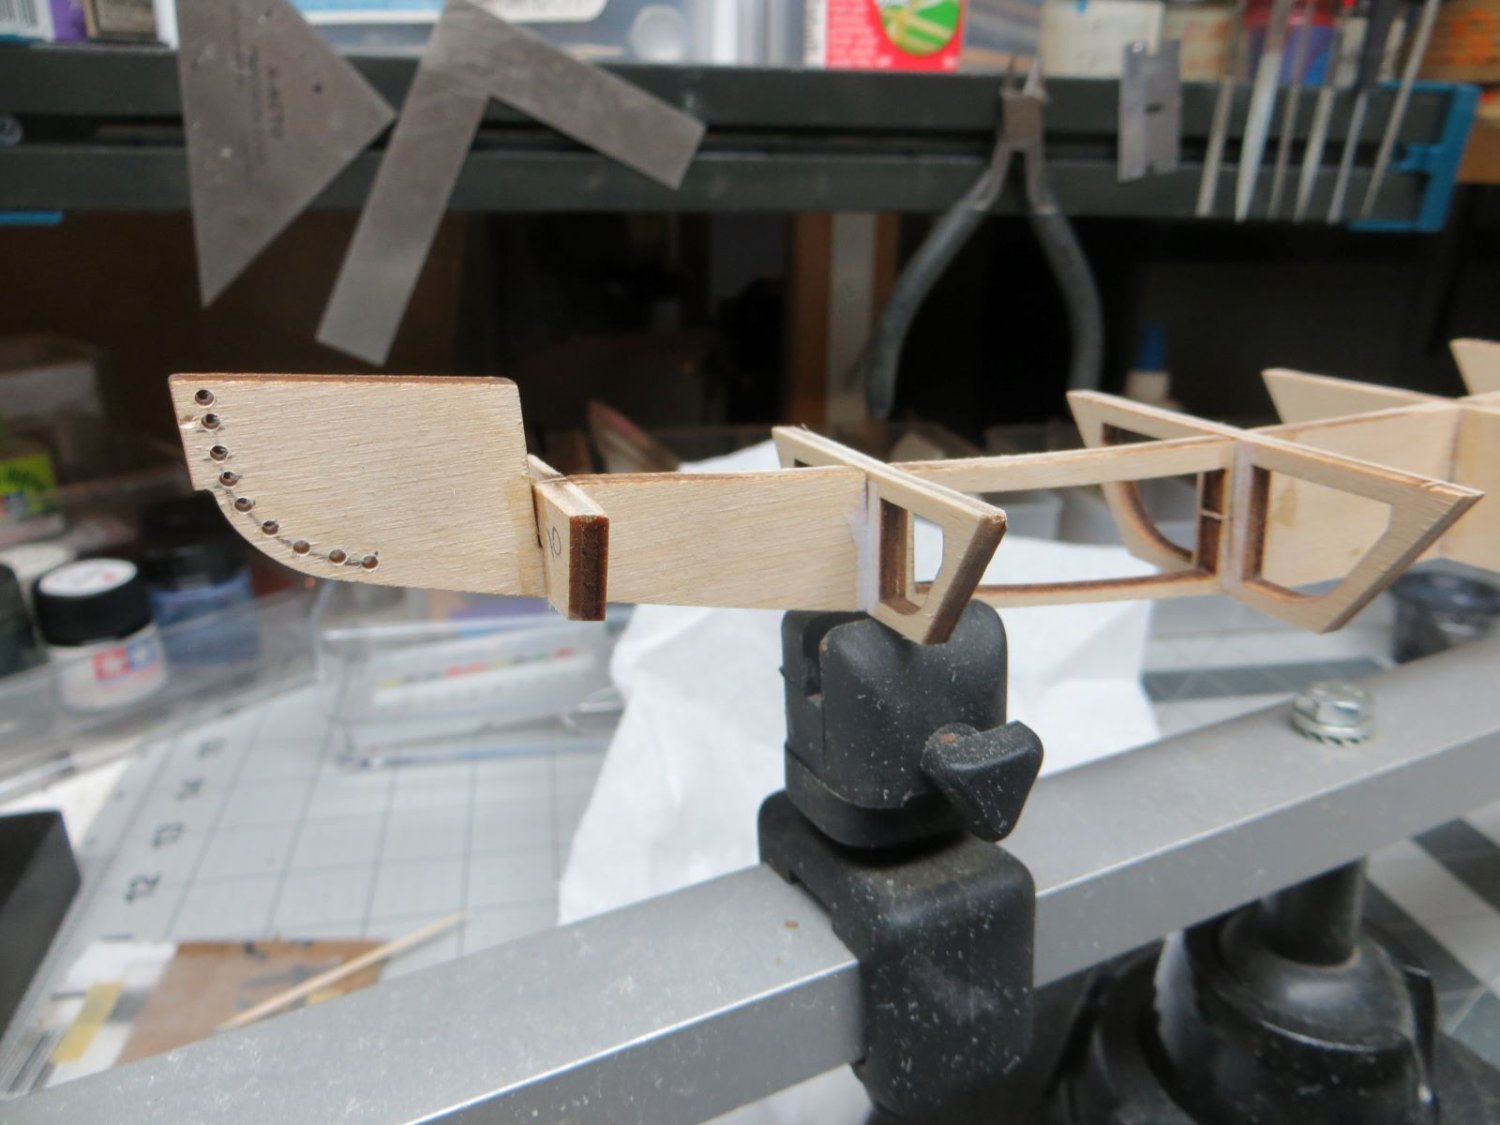
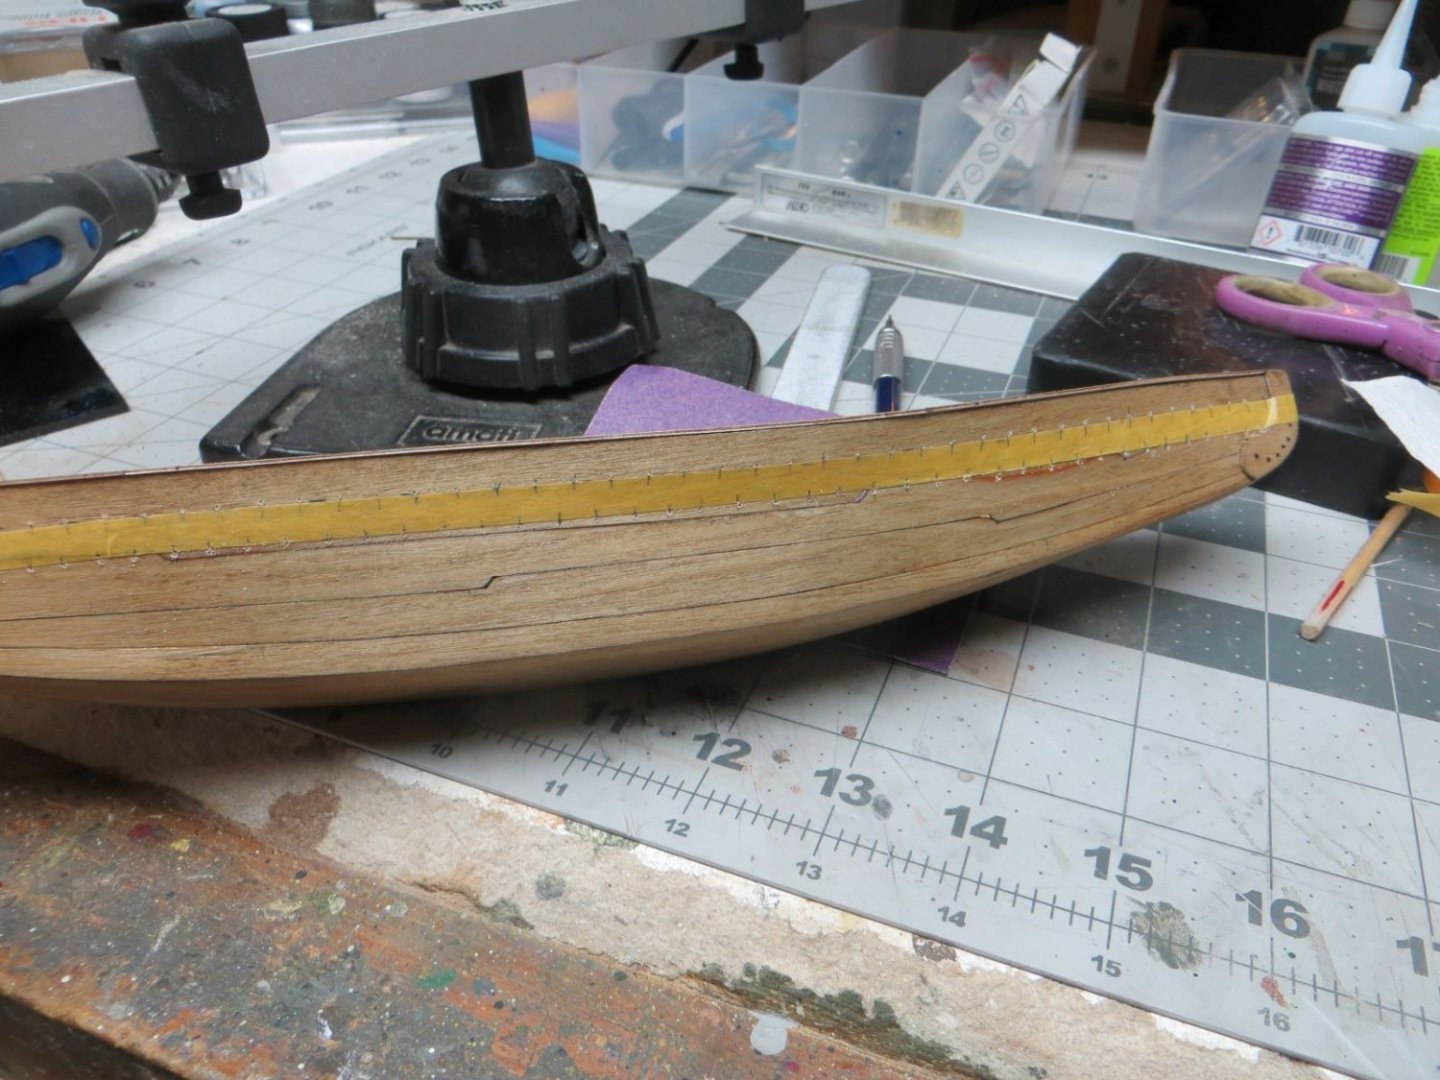
With the framing complete, planking is the next step. Because of the relatively narrow shape of the hull; faring is not difficult. I used a small sander made from a paint stir stick and self adhesive sandpaper (100 grit). In a few minutes I was done. All of the planks are laser cut in sheets of very thin ply wood. They are easily removed and lightly sanded to reduce the char edge. Planking begins with the bottom of the hull. There are some sharp bends at the bow and stern. I soaked the ply in water for a few moments and then bent the ply around a hot curling iron. Worked well (you can see the bends in a previous post). Planking the sides was relatively easy, except the laser cut pieces did not fit as well as I would have hoped. Considerable bending and twisting was required to get the edges reasonably close. I tried to remind myself that this is the model of an ancient boat and the actual pieces would not have fit very well. The planking process left the bow and stern areas very rough. I decided to add "doublers" to hide the crude edges and add strength for the lashing to come. Once I completed the basic planking the instructions showed the addition of a doubler along the top plank of each side. How to install this piece became a bit puzzling. The instruction booklet mentions the piece but does not show its positioning. A photo of the model on the box makes it appear to be on the outside whereas the technical drawings indicate it is inside. I decided to affix it to the inside of the hull. The last photo is of the completed hull. I now have to decide wether or not to stain the hull. I think it needs it. The char lines are just too obvious.


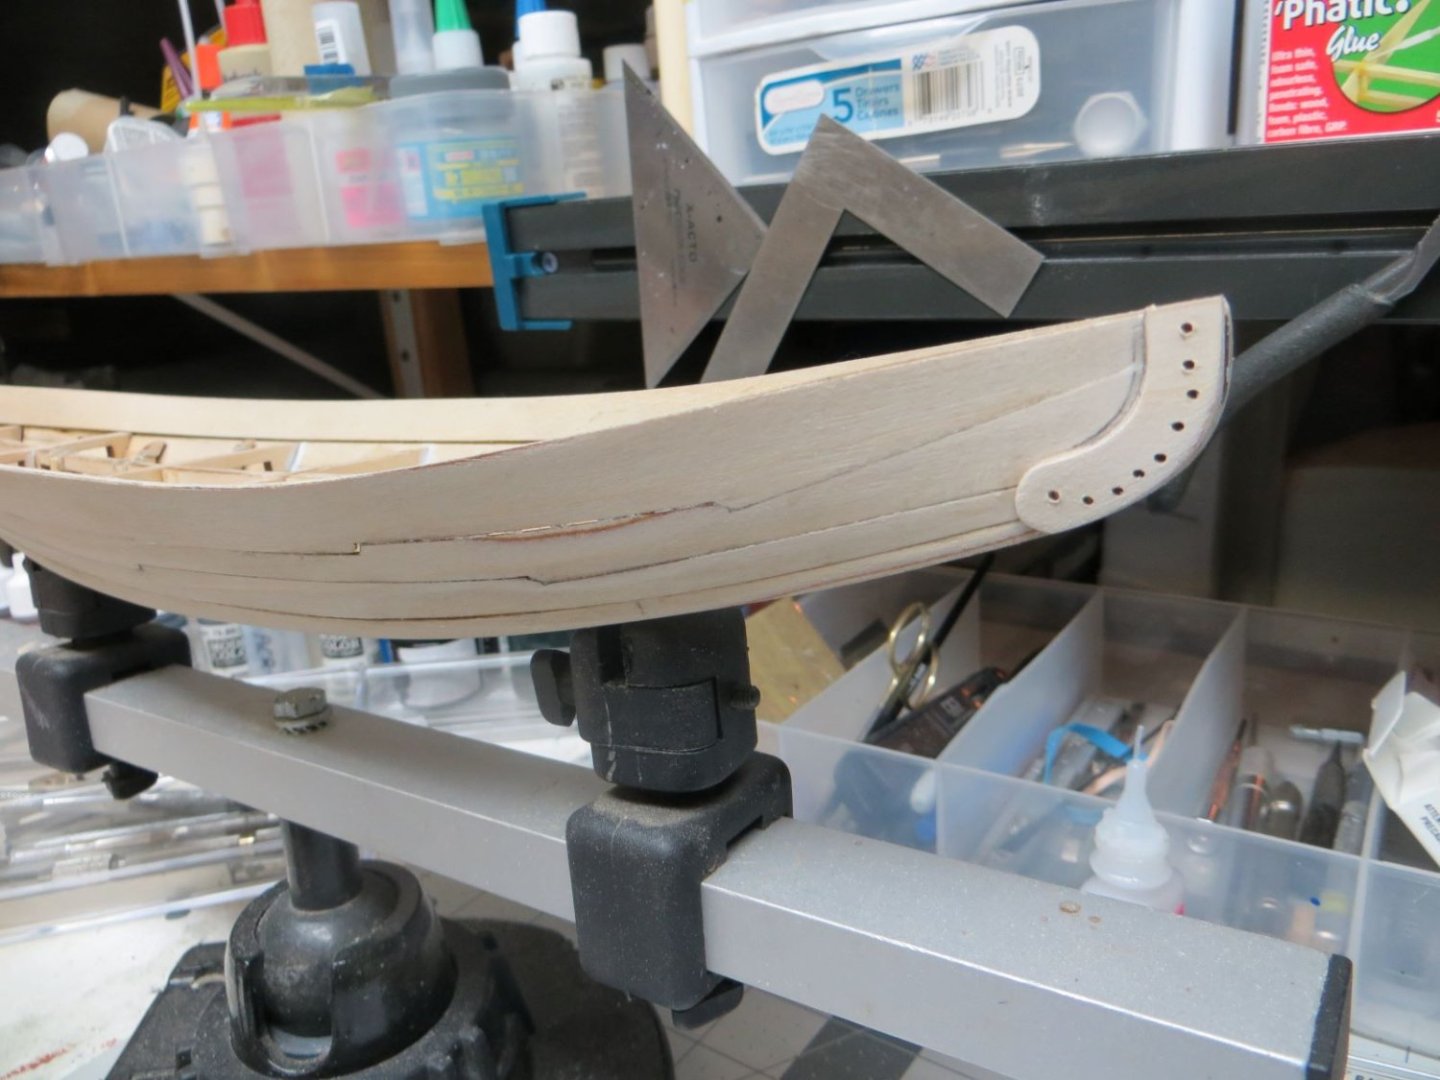

- 28 replies
-
- 4
-
-
- Nave Egizia
- Amati
- (and 1 more)
-
Want to get onboard with everyone else and complement you build and your skills. Someday I would like to try a go at the Cheerful. Such a beautiful little ship.
- 113 replies
-
- 1
-
-
- Cheerful
- Syren Ship Model Company
- (and 1 more)
-
Great job! Are you planning to paint or stain the hull?
-
I kind of agree with Wookie. I have noticed some builds that have extensive comments from readers either making suggestions or admiring great work. Many other builds do not get many comments or suggestions. This can be very disheartening for the build author; especially the more novice of the forum that are looking for guidance and most of all support. I think everyone who is a member of this forum knows that ship model building brings on quite a bit of anxiety and frustration that can lead to a modeller giving up on a project. The encouragement that comes from other modellers commenting and encouraging you along helps many to complete their current project and maybe move onto the next. I do get the occasional comment or suggestion some of which in my Cairo build really helped. Mostly, however, I get likes. Great; but I would really wish that members of this forum, especially you master builders, take a few minutes to offer your advice and encouragement to other builders. Enought editorial. Wookie, from your photos you are doing great. Give us more. I built this model and you will enjoy your final product.
- 43 replies
-
- 1
-
-
- Lowell Grand Banks Dory
- Model Shipways
- (and 2 more)
-
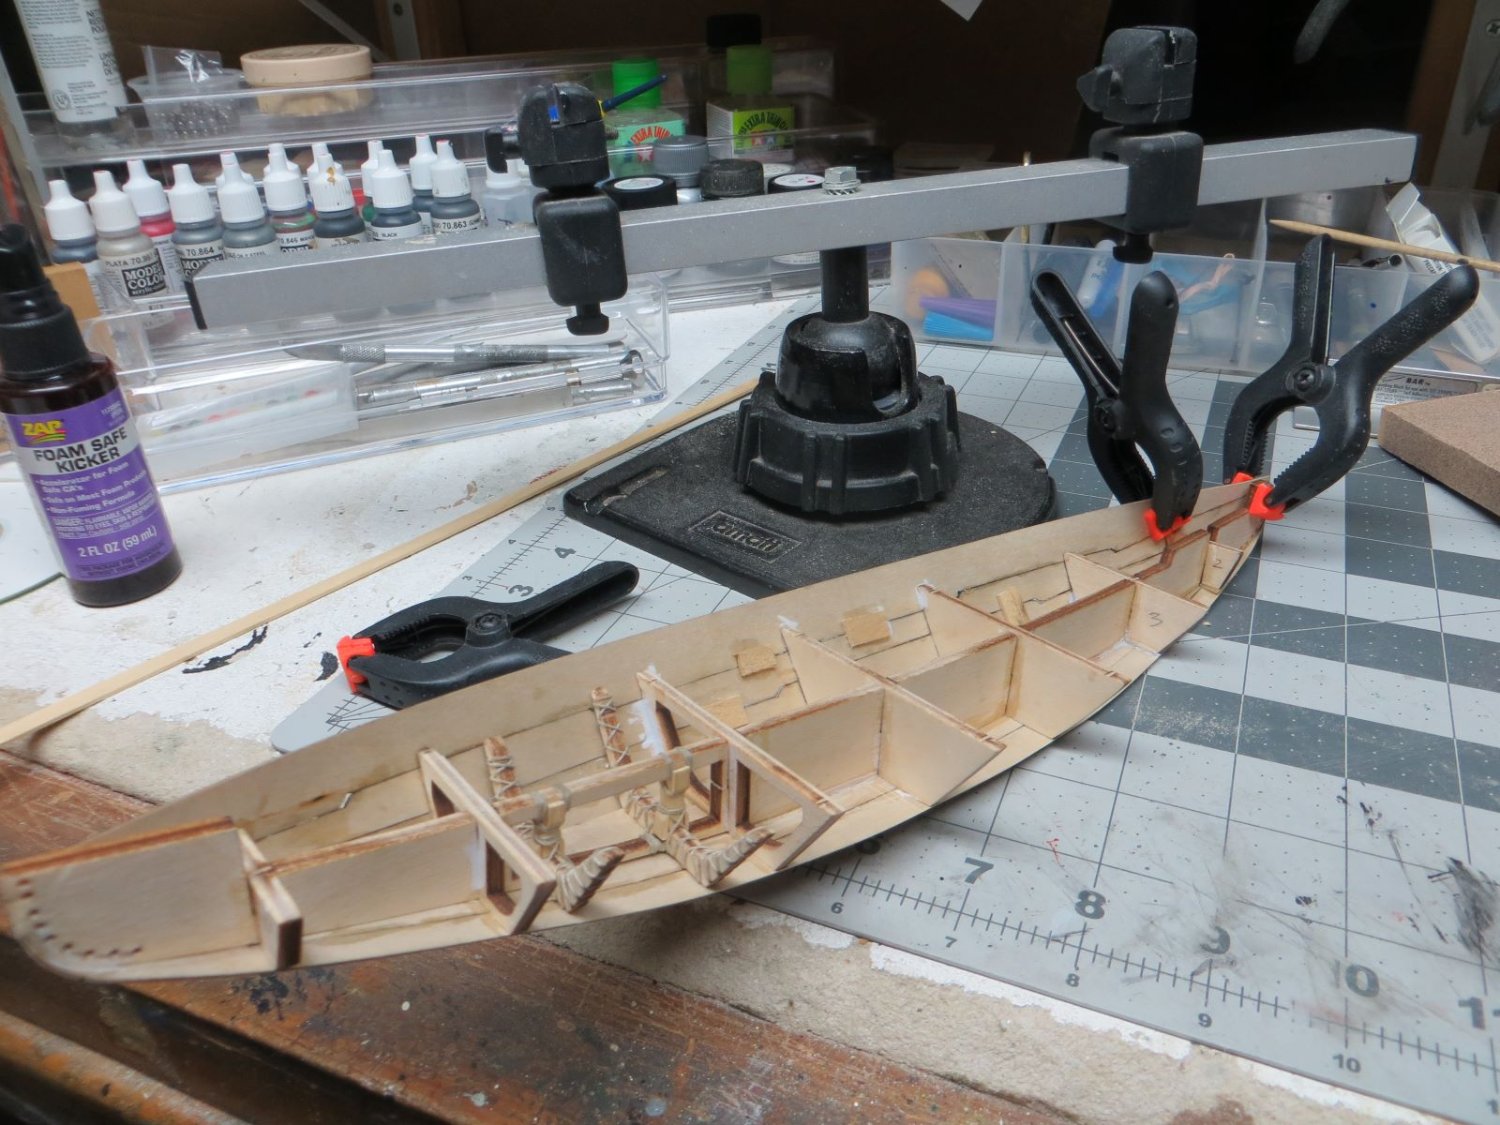
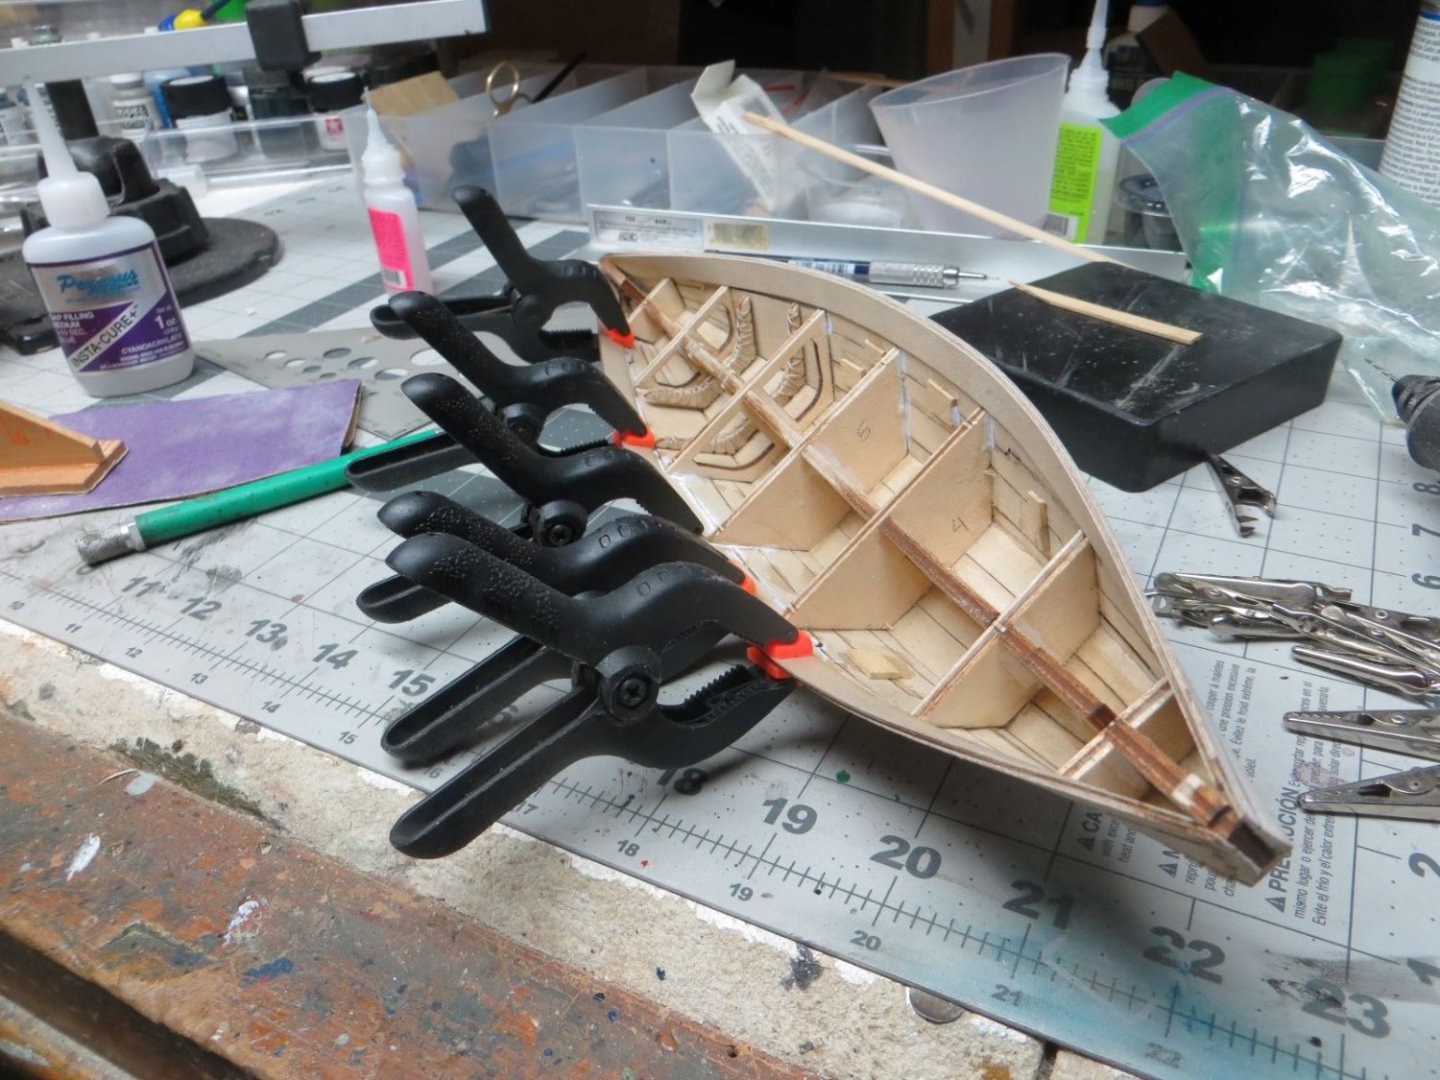
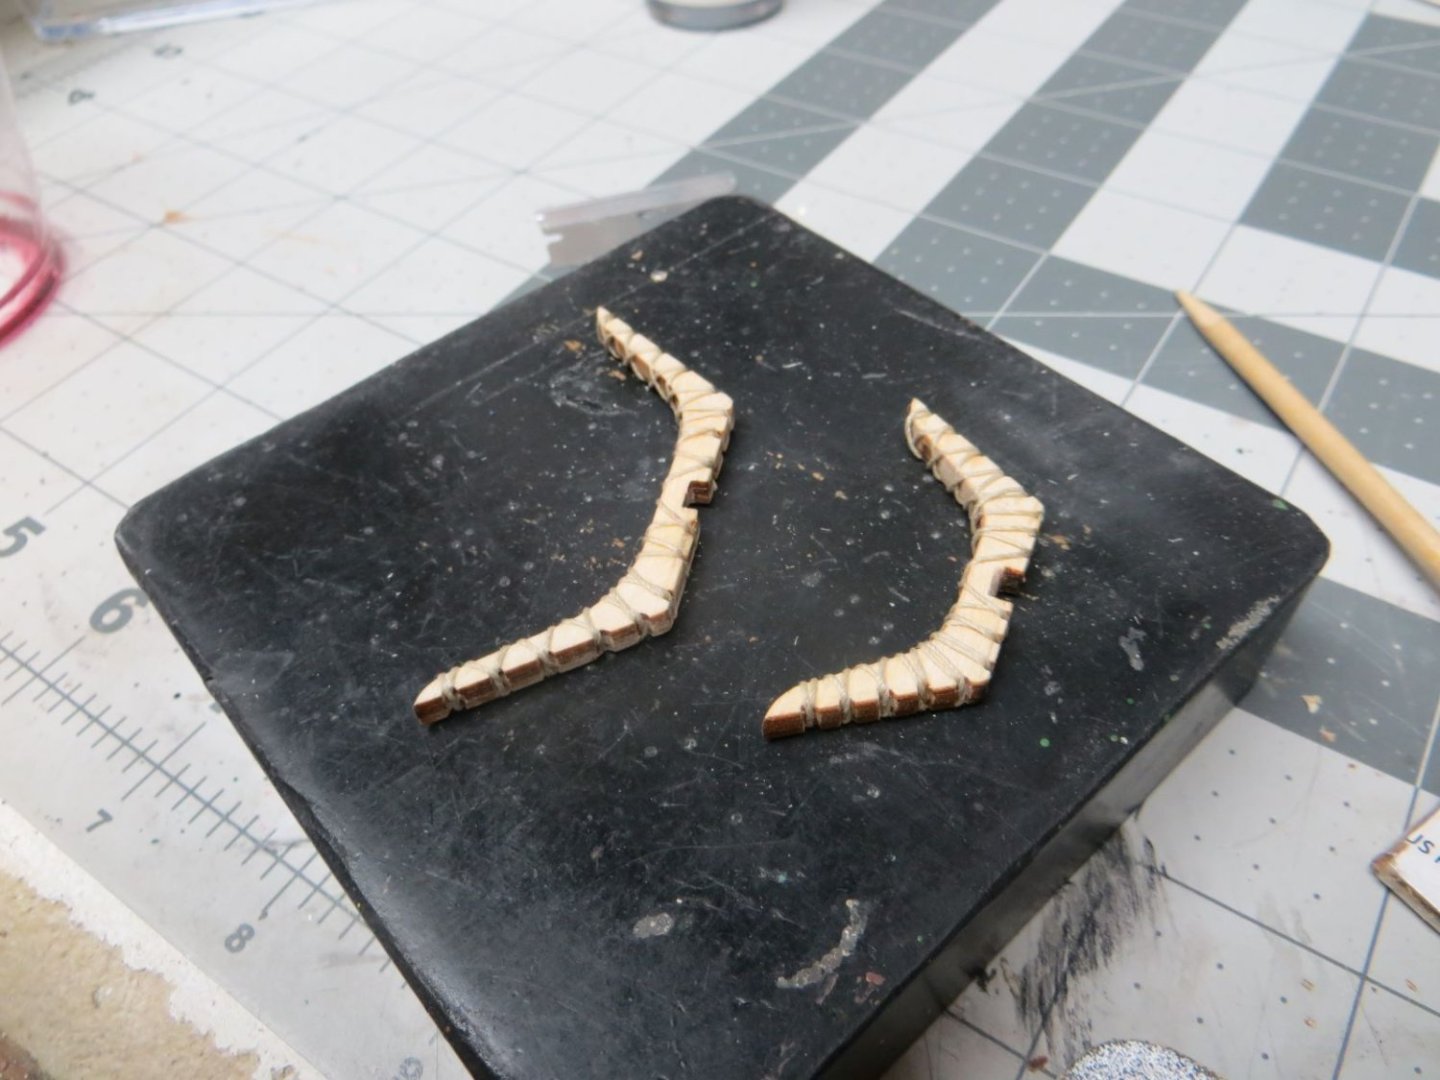
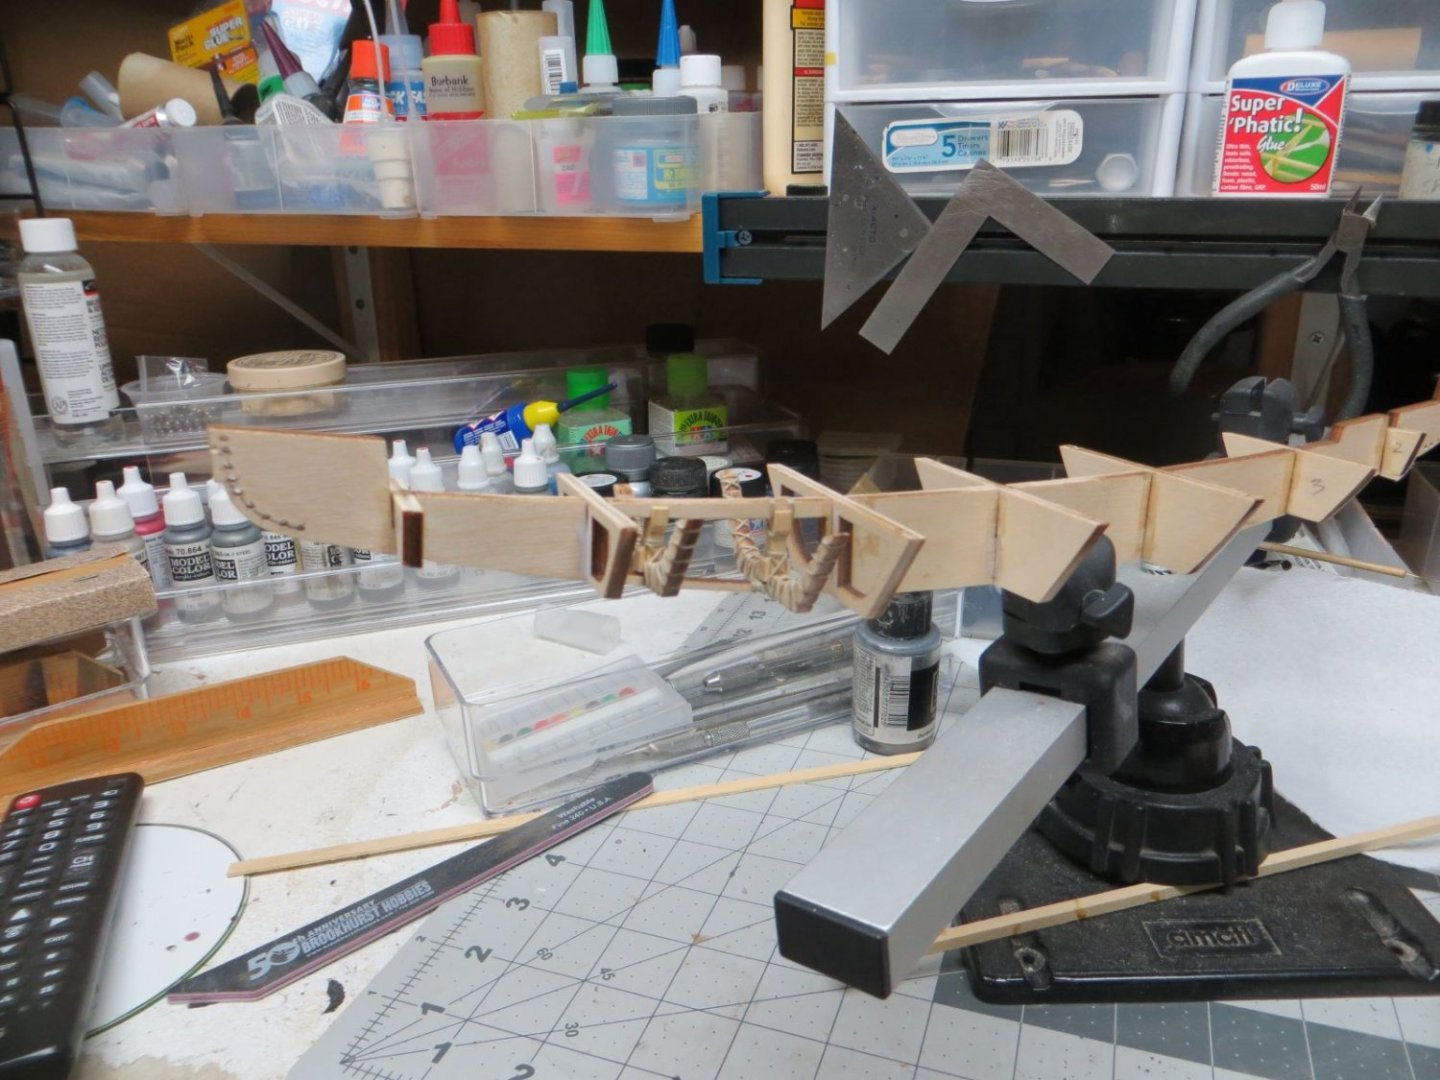
As mentioned before, there will be an open space in the decking where the simulated interior can be viewed. Construction of this interior begins with wrapping two slightly undersized frames with rope. This process requires cutting groves in the botton of the frames so that the roped frames will not prevent the interior decking (installed later) to be positioned close to these frames. After wrapping, the frames are glued to the main keel and a two posts are fashioned, installed and then wrapped. This is the beginning of the process of simulating an ancient interior.
- 28 replies
-
- 5
-
-
- Nave Egizia
- Amati
- (and 1 more)
-
I am absolutely jealous of the quality of your work. It serves as a goal to strive for. Thanks for sharing.
- 155 replies
-
- 1
-
-
- Medway Longboat
- Syren Ship Model Company
- (and 1 more)
-
A great combination of different materials. I have worked in 1/350 scale and found it challenging. The results you are achieving in 1/700 scale are really impressive.
-
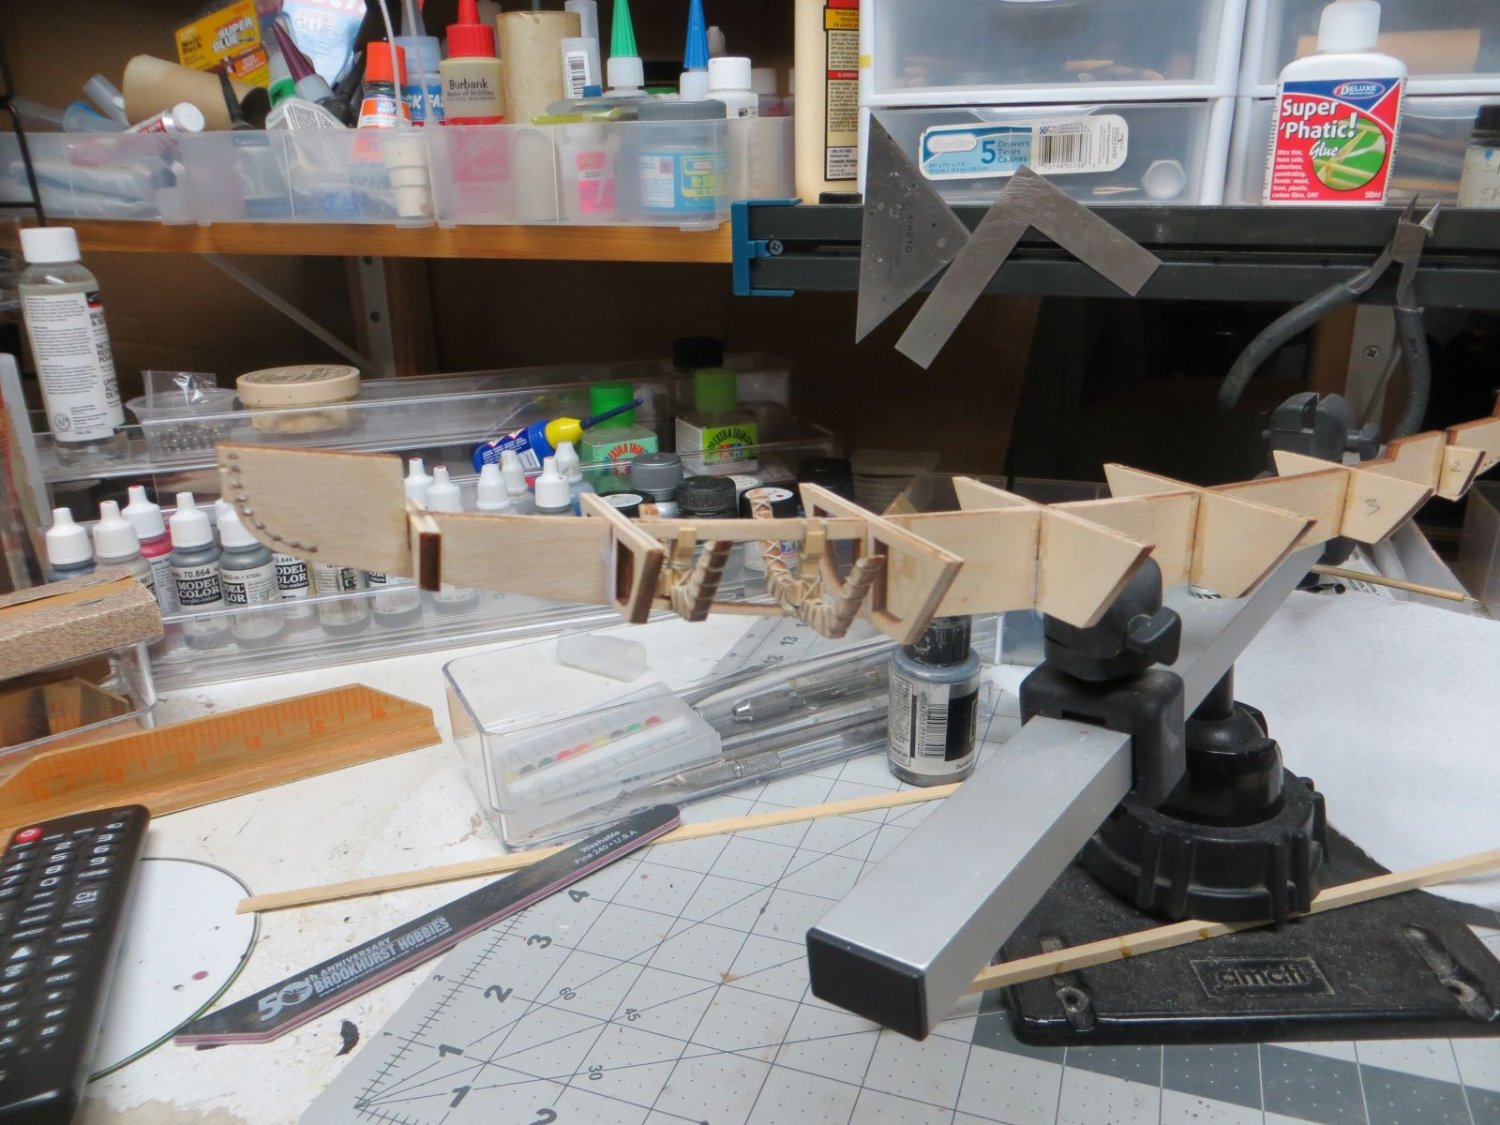
Construction begins pretty much the same as many other ship models. Building the frames. One interesting point is the the main "keel" piece has a one section between two frames cut out while all the others are solid. Reading of the plans indicates that this section of the inner hull will be open for viewing whereas the remaining sections will be covered by decking. The fit for the parts making up the frame was so-so. A little shimming and thick CA was required for assembly. I use Lego blocks to help me keep the frames square. The fore and aft of the main keel piece are drilled so that some of the ropes which hold the planking to the frame can be simulated.


- 28 replies
-
- 4
-
-
- Nave Egizia
- Amati
- (and 1 more)
-
Eight or nine years ago I was fortunate enough to take a river cruise up the Nile and visit some of Egypt's great historical sites. I also had the opportunity to walk thru some great museums many of which contained models of the ships that plied the river in the ancient days. A year of so after the trip I came across this Amati model of an ancient Egyptian ship. The box claims that it is a replica of a ship, the image of which was chiseled into the stone of a tomb or temple. I immediately purchased the model and the kit sat in my "stash" for severl years. It has finally found its way to my workbench. One of the interesting aspects of ancient shipbuilding, there were no drills to make holes for pegs or nails; so the ship was crafted by shaping the wood with crude iron tools and then using ropes of various sizes to lash the wooden pieces together. While I will be using modern cutting tools and adhesives, one of my main objectives is make a model that at least appears to have been built by the same methods as the ancients. There is another build log of this ship that I have reviewed and may refer to at times as I proceed with my build. Before I even begin the construction I have a decision to make. Much of the materials in the kit used to construct the hull are laser cut ply. It is quite light in color and has the typical burnt edges. I will try to sand most of the dark edges away (hopefully without distorting the part). The problem is should I try to stain the hull or just leave it natural. If I decide to stain; it looks like I will have to do this relatively early in the build. Definitely before I begin the rope lashing steps. Second issue, should I decide to stain, what should I use. I have no experience with staining. Perhaps a search thru the forum will give me some insight. Well that is my introduction. I urge you to leave written comments; especially those that might help me through the build. Well, thanks for reading.
.JPG.e08c051ec0679c8d0fdbcc84e068b595.JPG)
- 28 replies
-
- 4
-
-
- Nave Egizia
- Amati
- (and 1 more)
-
Looks like you are off to a great start. One thing you will discover about this hobby is that you will find there is always a new tool that looks like you "need". Collecting tools becomes part of the fun.
-
Just browsed yourbuild log. Probably one of the best for extensive photography. Will certainly help the builders that follow you with a Niagara build of their own.
-
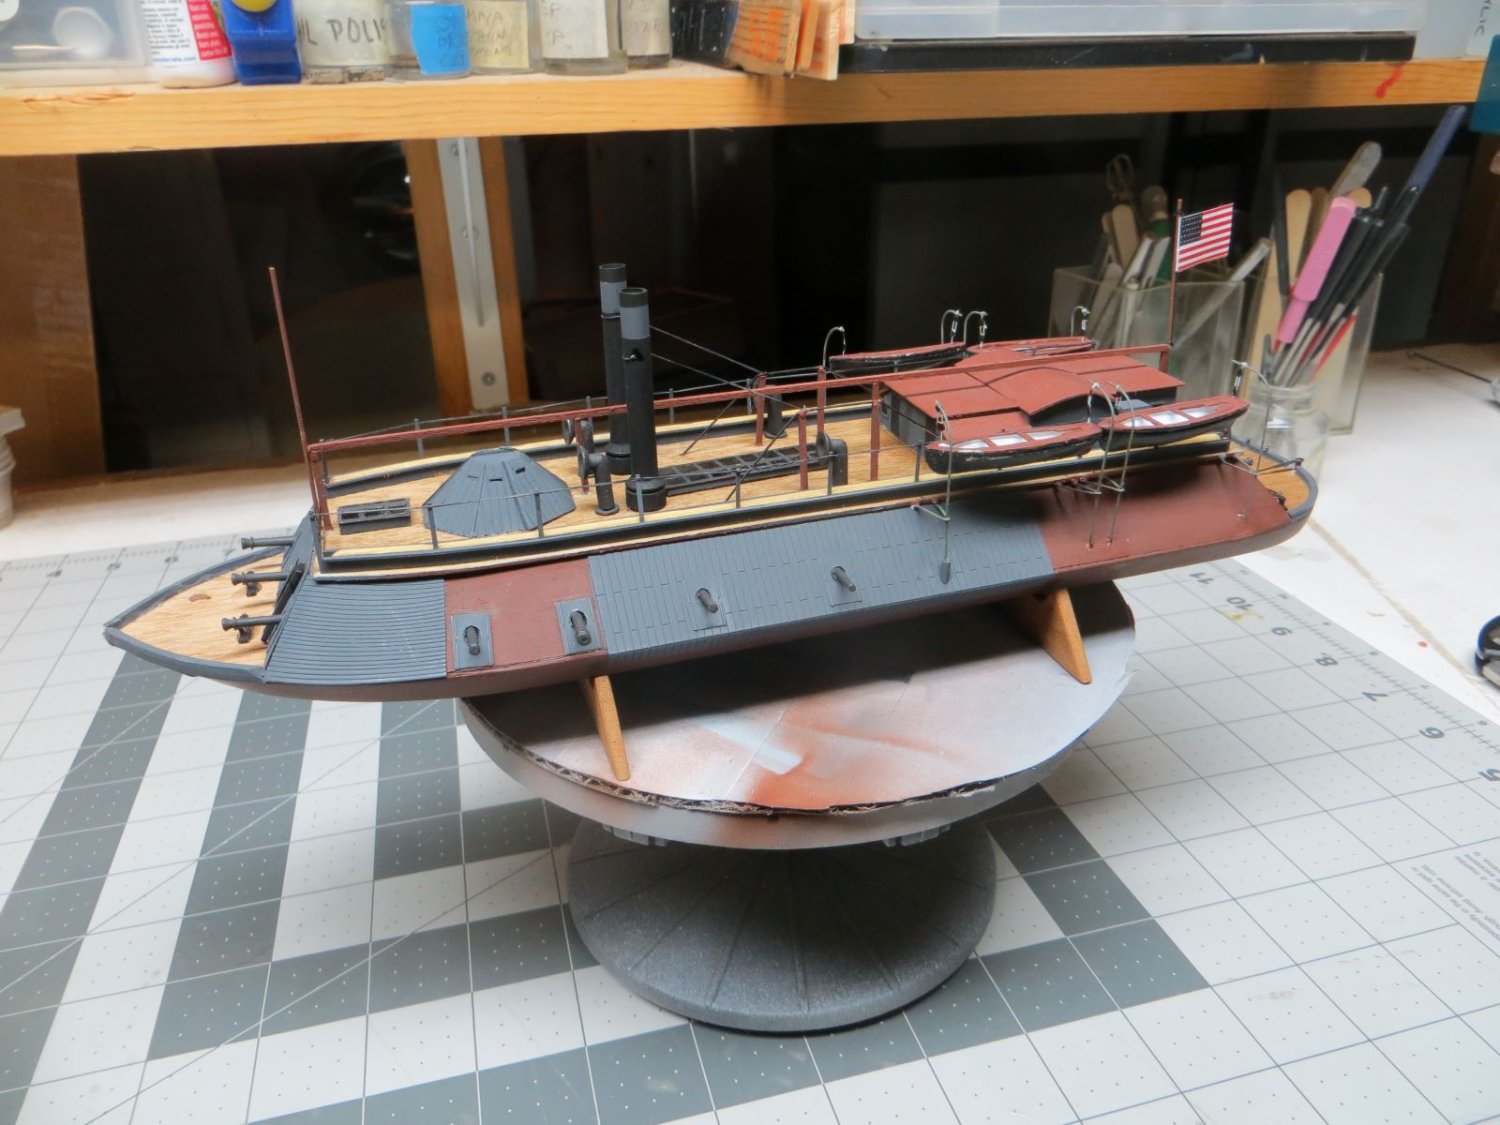
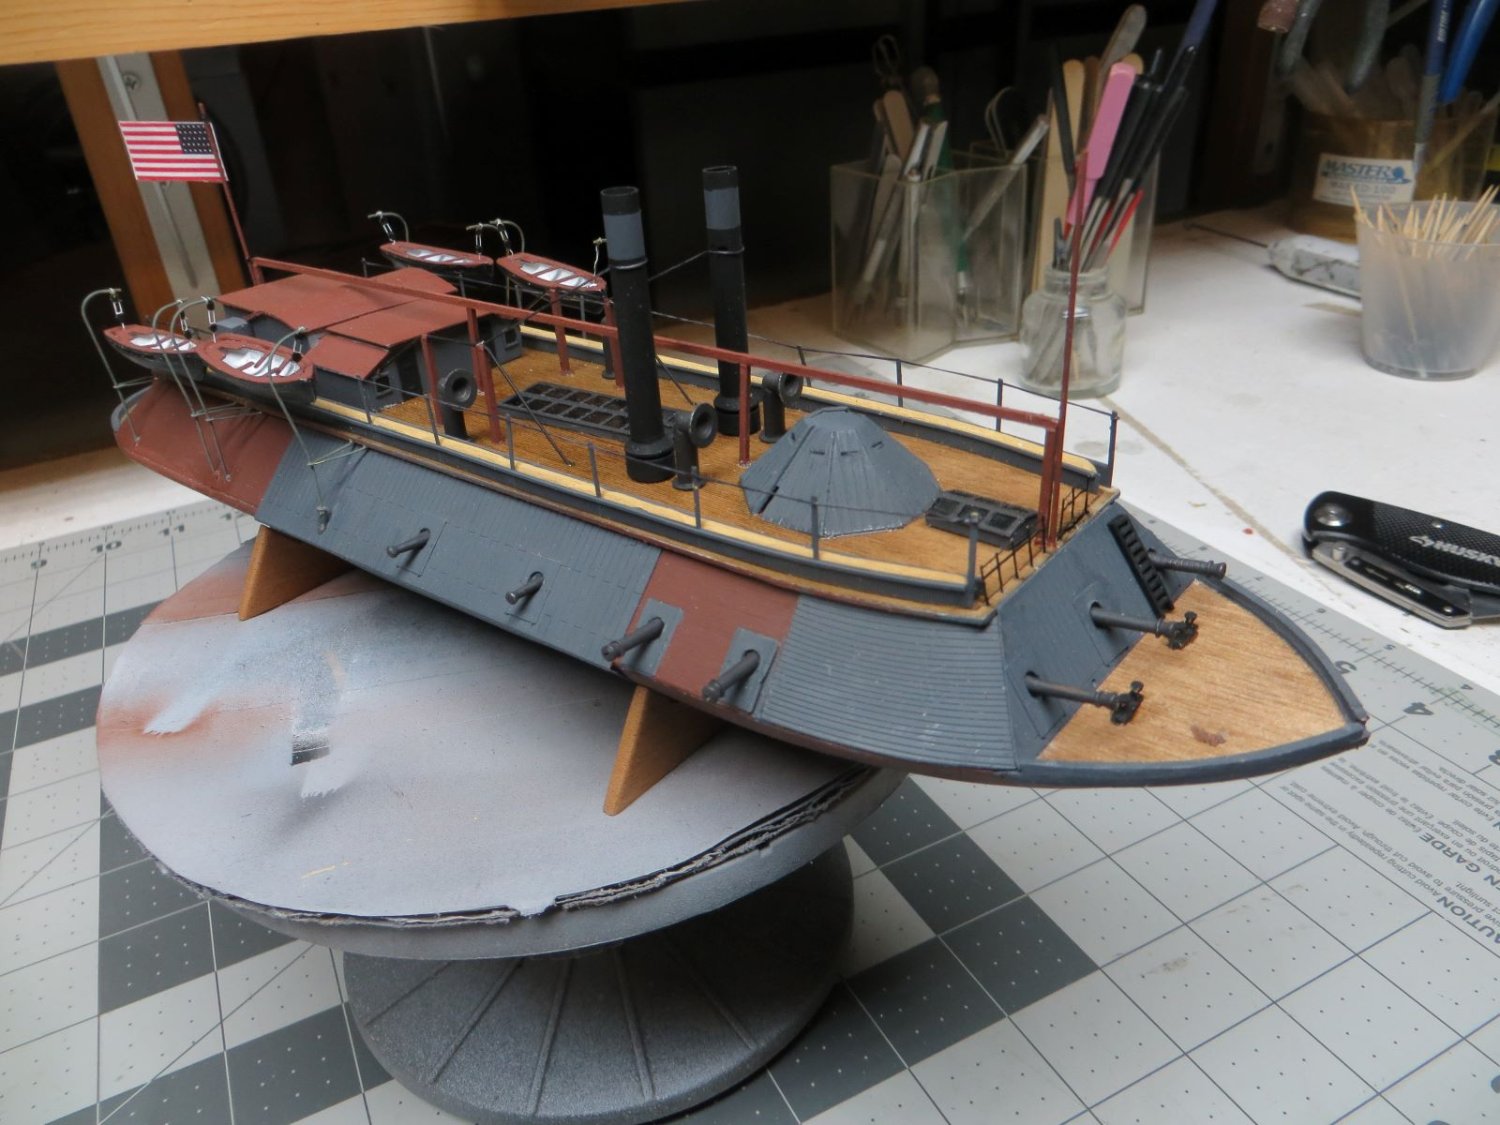
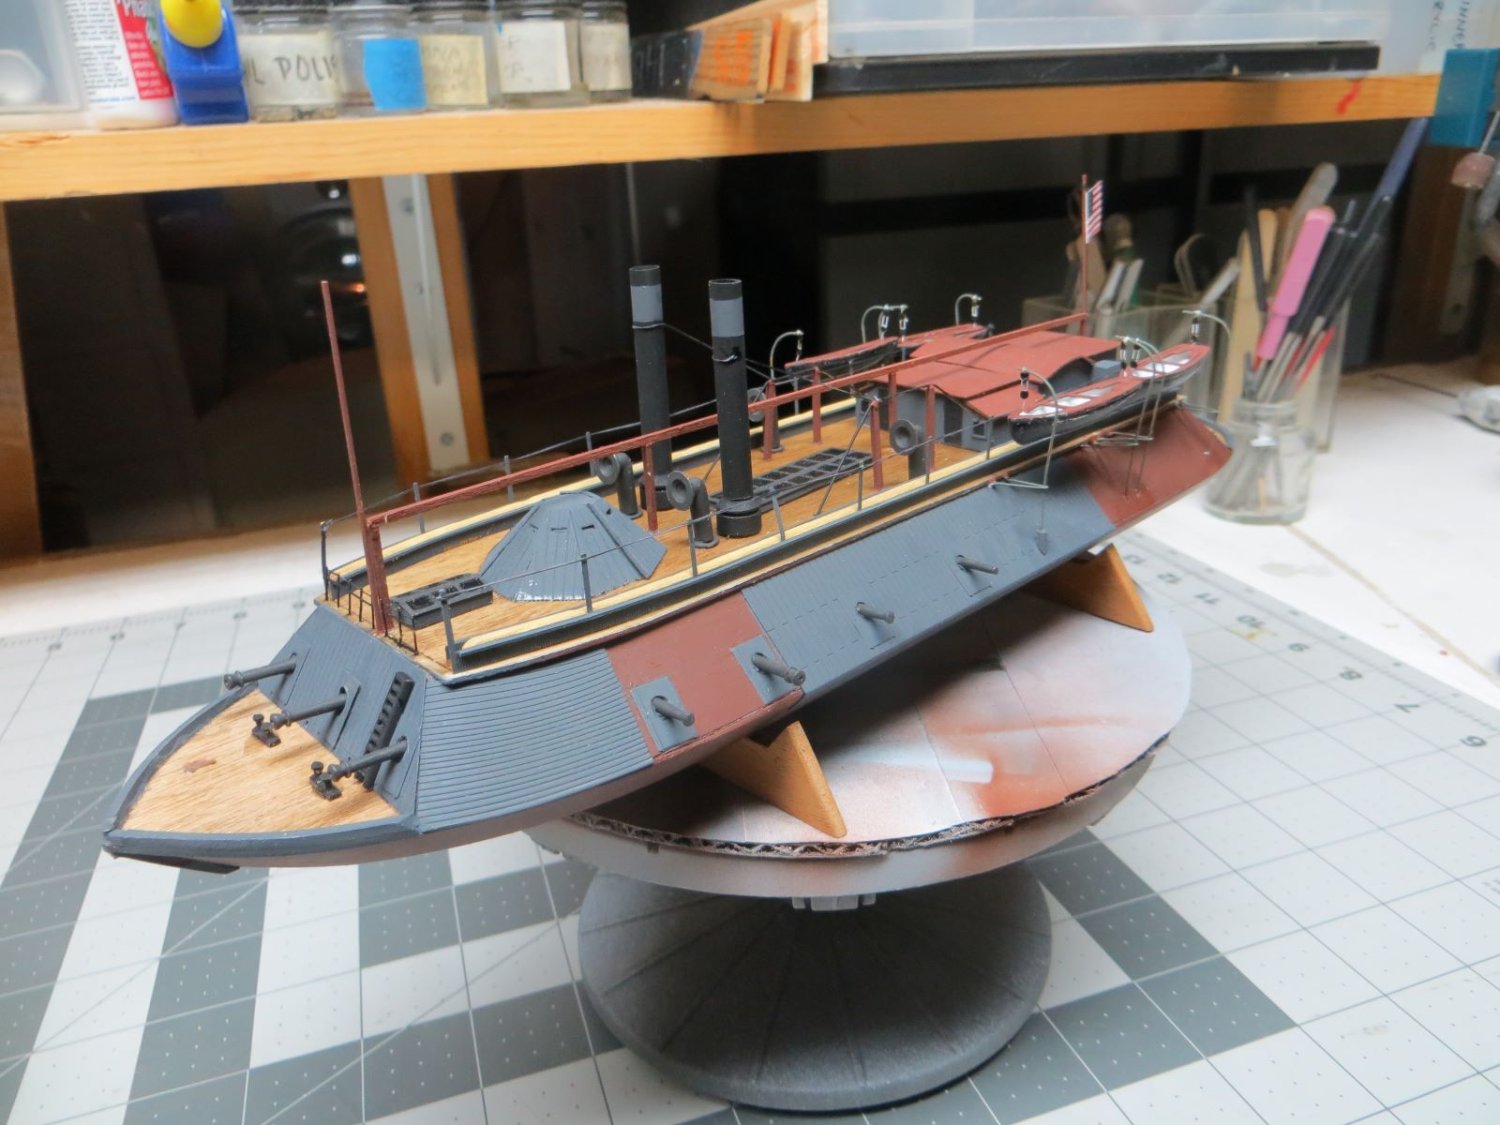
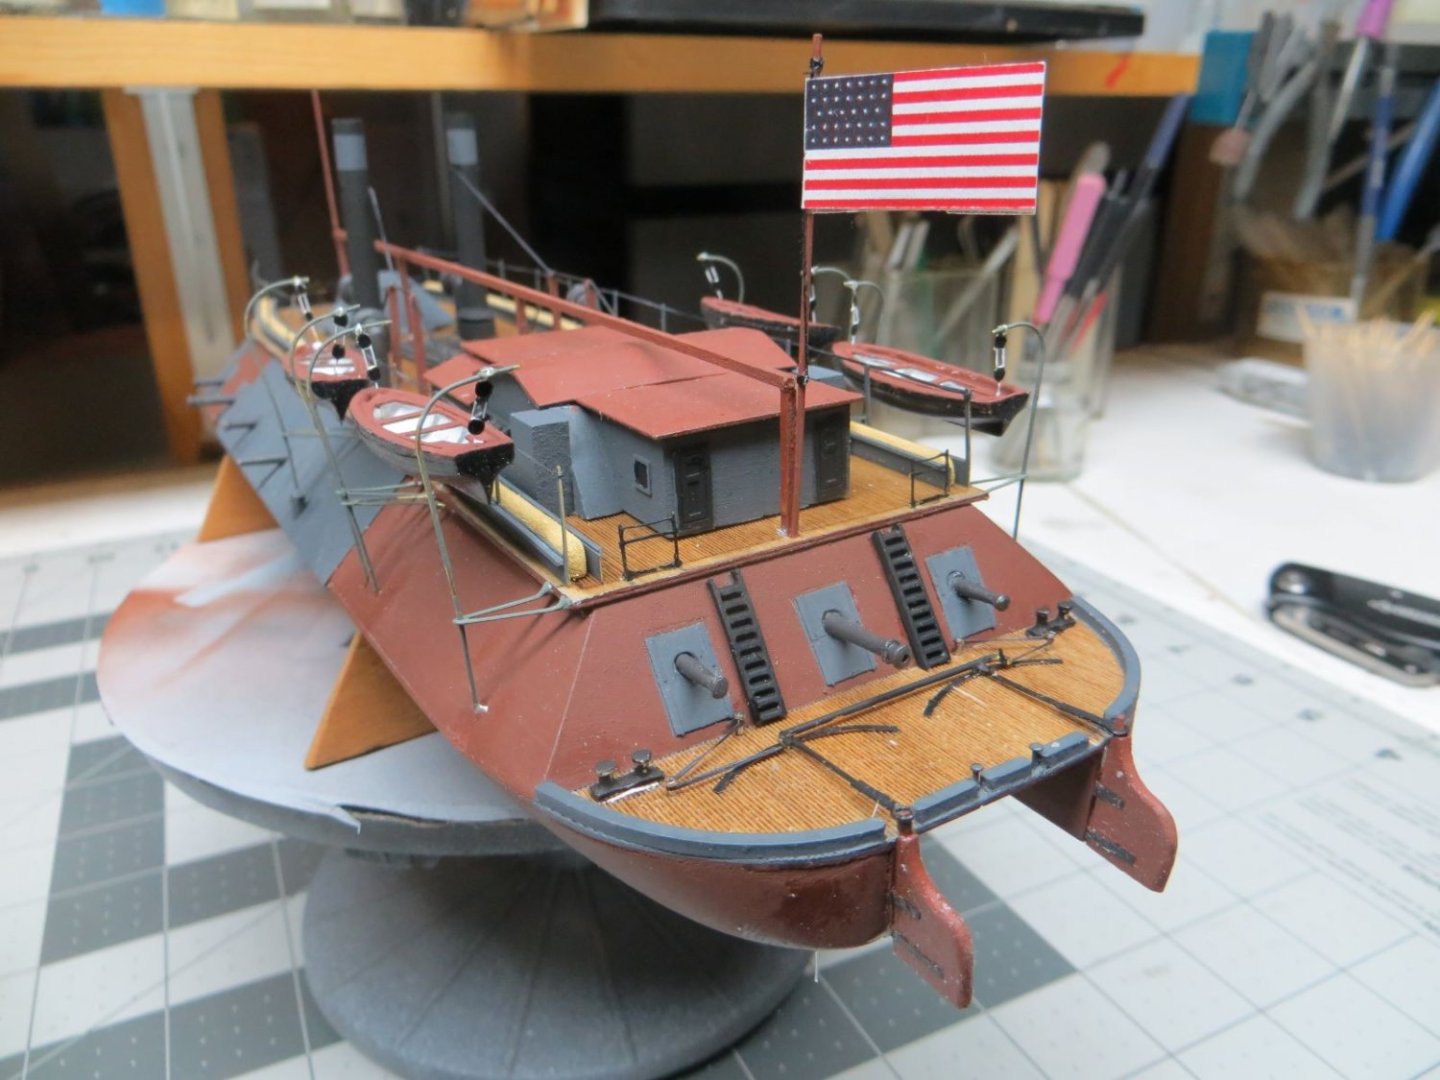
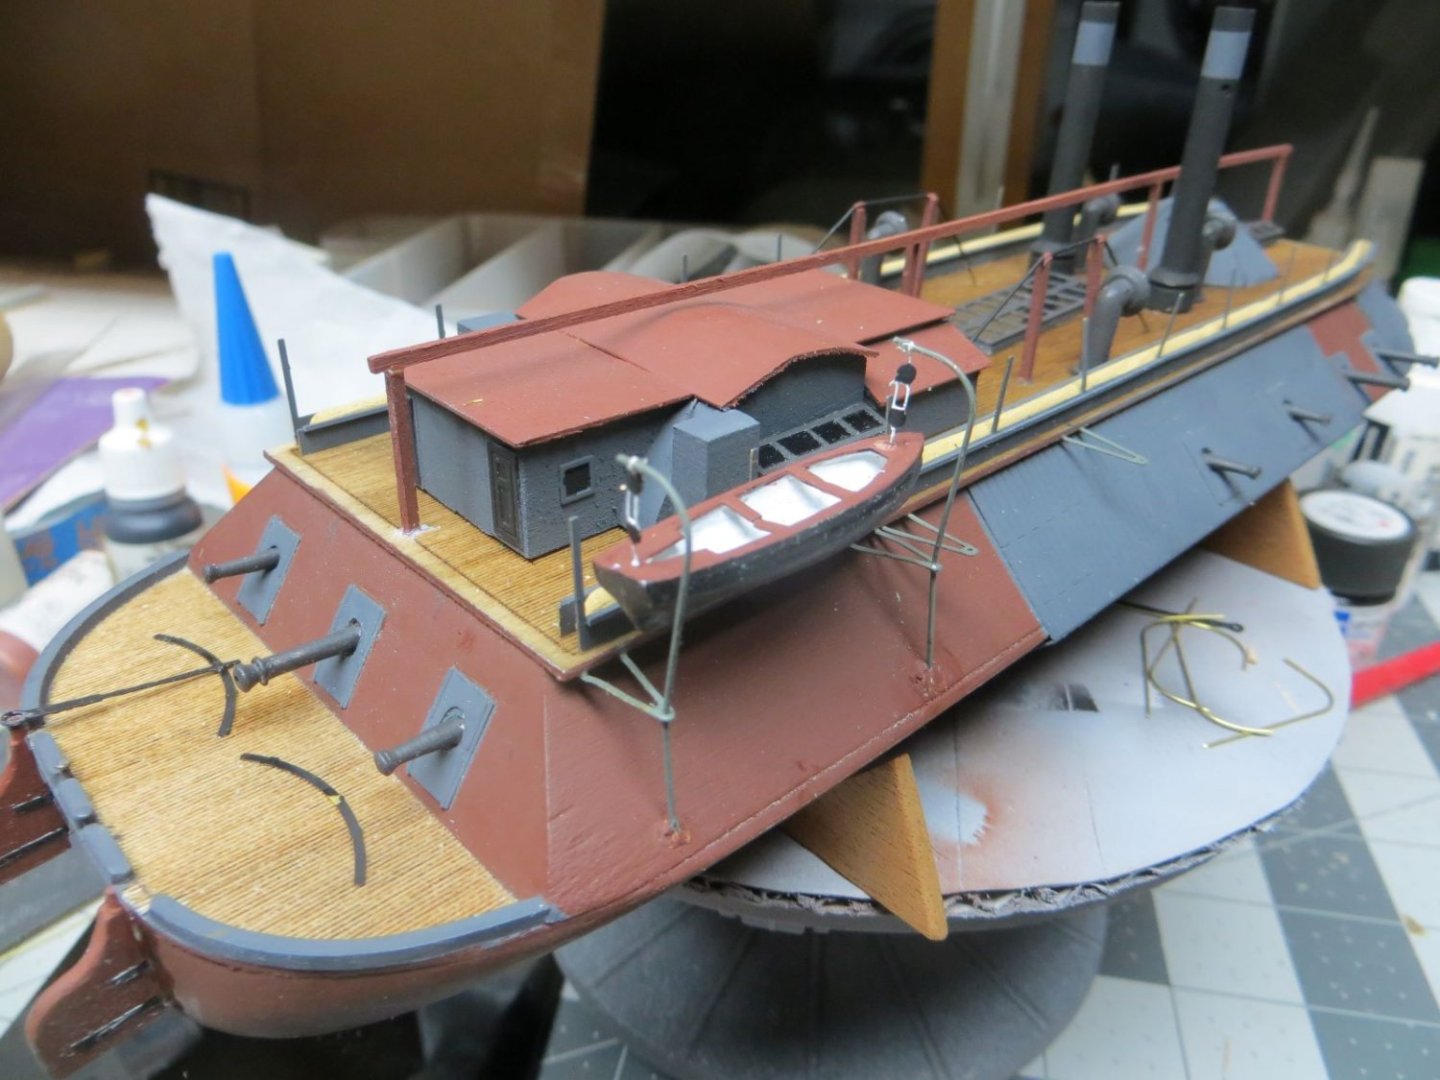
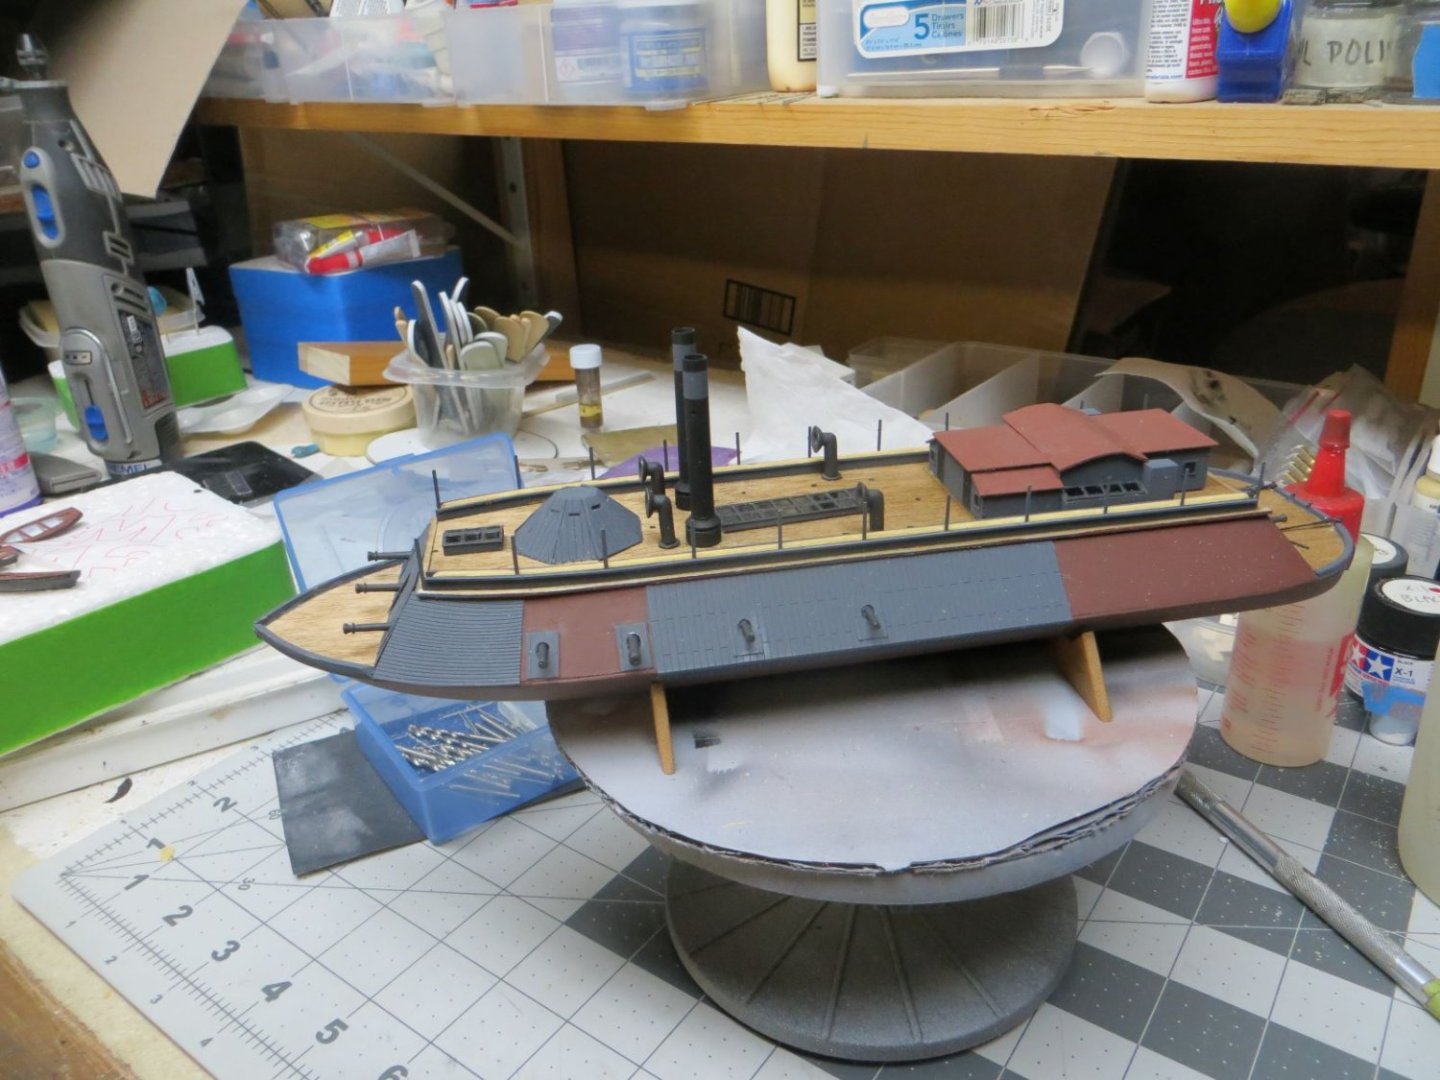
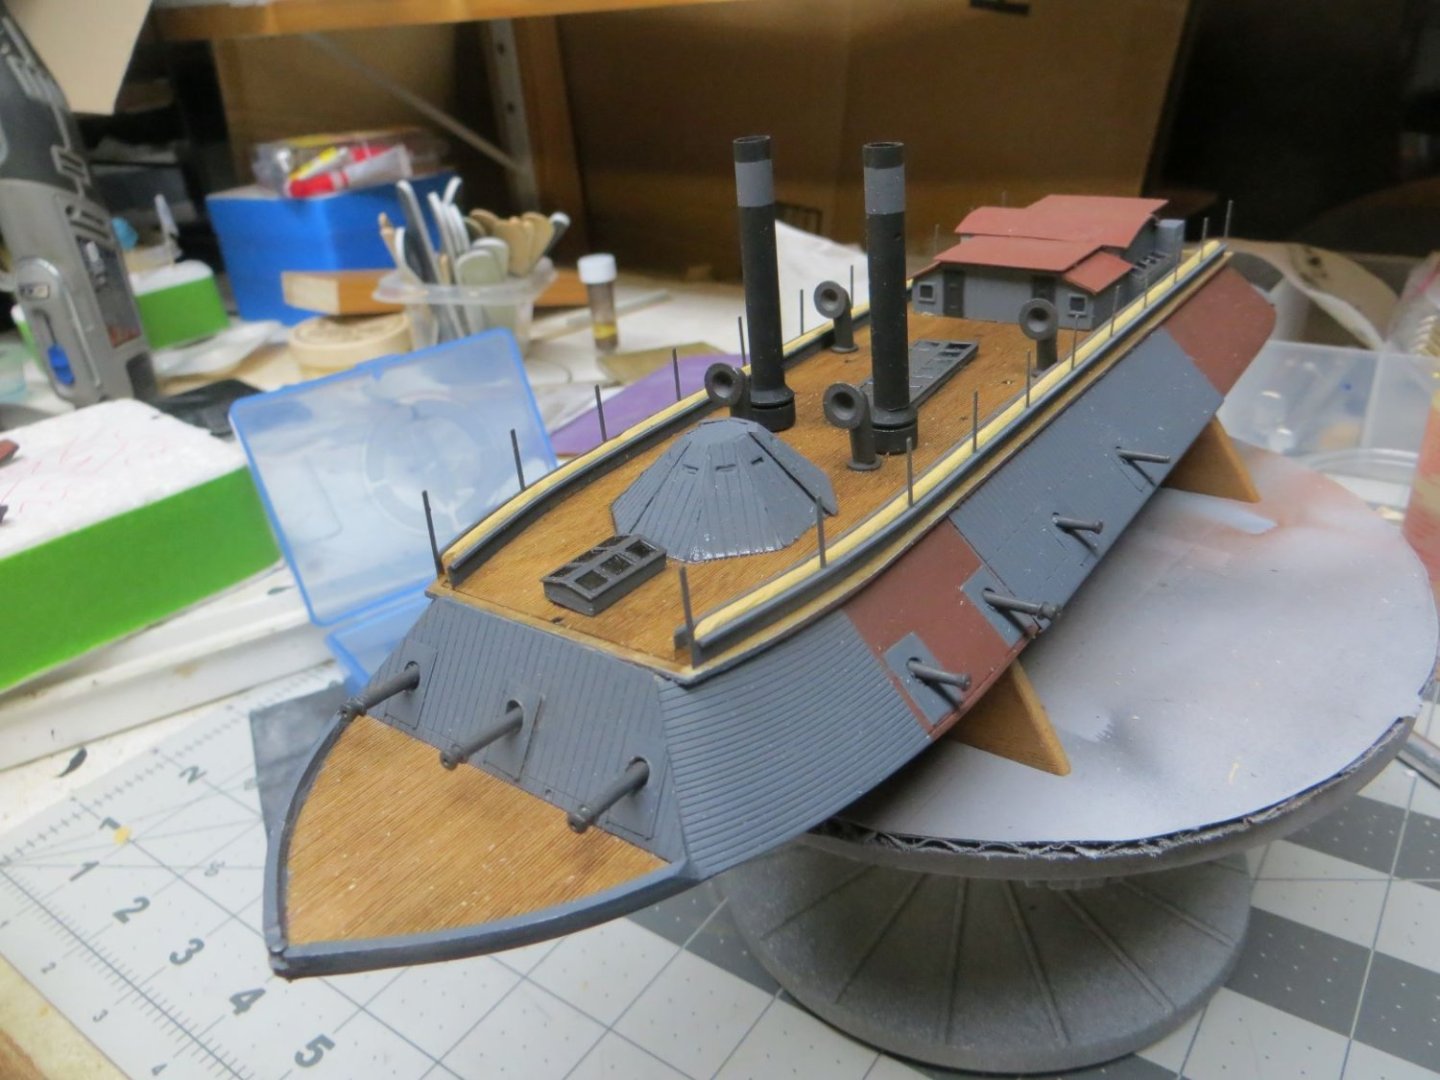
Well, in the last few night I completed my Cairo. I pretty much followed the instructions in the final assembly. I did not use the thread provided to run the lines. Instead I tried a product called EZ Line. It was very easy to work with. Some thoughts on this kit. First; the small scale made this model somewhat more difficult for me. Many of the parts and structures were more "fiddly" than I am used to. The plans were a bit difficult to follow but did contain all the information you need to complete this kit. The written directions were OK......I had some issues but that is not to say everyone would. Overall, I ended up with a model I consider to be "satisfactory". A more experienced modeller would probably get something better. Also, I want to thank everyone who took the time to comment on this project. Here are a few shots of the completed model.


-
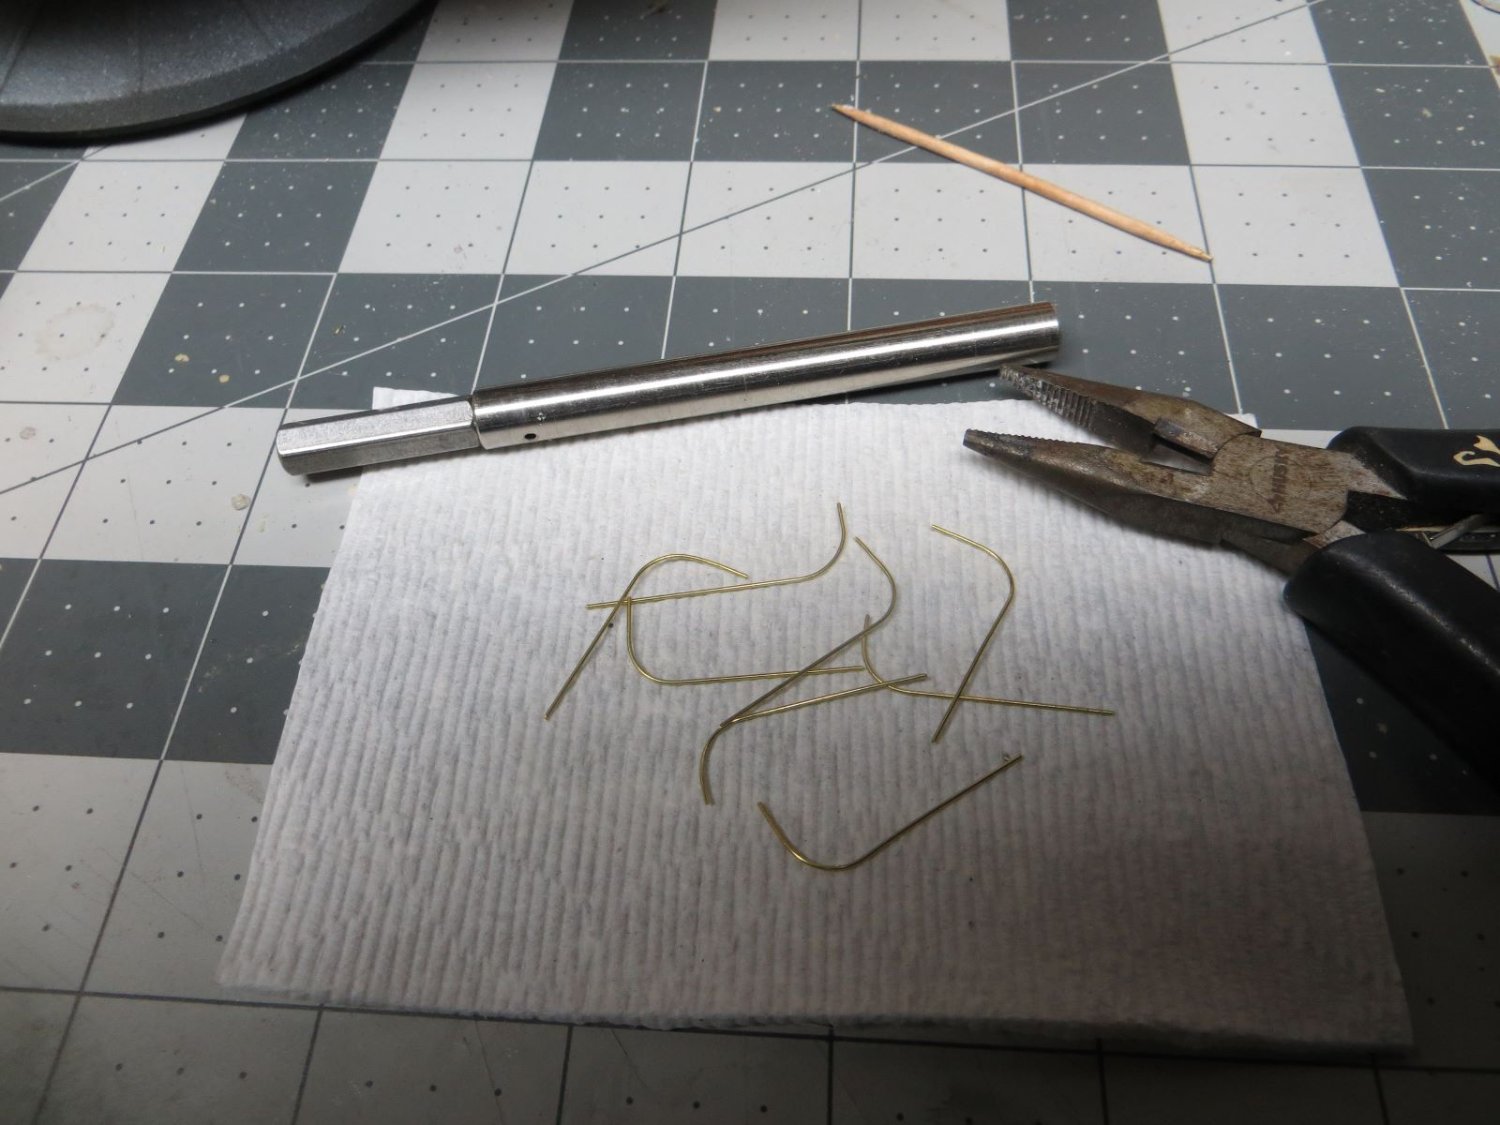
The next components that needed to be created turned out to be much more difficult that I anticipated and came very close to this model taking a trip to the round file.......the component were the life boats. I started by bending the the brass wire for the davits to the shape shown on the plans. I also cut the davit supports from the PE fret and used CA glue to affix then to the underside of the top deck. This was the first problem encountered. The CA did not want to adhere to PE to wood. I finally had to resort to dabbing the wood with accelerator before apply the CA. This worked but left an unsightly white blob of hardened CA. Some paint hid most of this. I then used the davits to locate where holes should be drilled in the hull. Second problem. I could not find a very small diameter drill that would penetrate the PE siding. I finally had to CA a small length of round toothpick to the PE siding and drill thru it. Not scale for sure but the only way I could think of affixing the forward davits. The next problem was the thwarts did not fit the boats very well. Gaps everywhere and I broke some of them trying to position them properly. Next came the boat falls. I guess I must be very clumsy but working with these very small and quite fragile PE pieces was very trying. Then came the almost final straw. The boats provided in the kits are somewhat wider than the boats drawn on the plans. They banged up against the hammock structure when attached to the davits. I ended up having to remove most of what I had just constructed and cut longer davits that placed the boats above the hammock structure and also allowed be to bend them outward at the davit supports. Again not scale but it worked. Fortunately I did do something right. I put together one full boat assembly before I did all four. This means what I learned rebuilding the one that didn't work well I could apply to the other three.

-
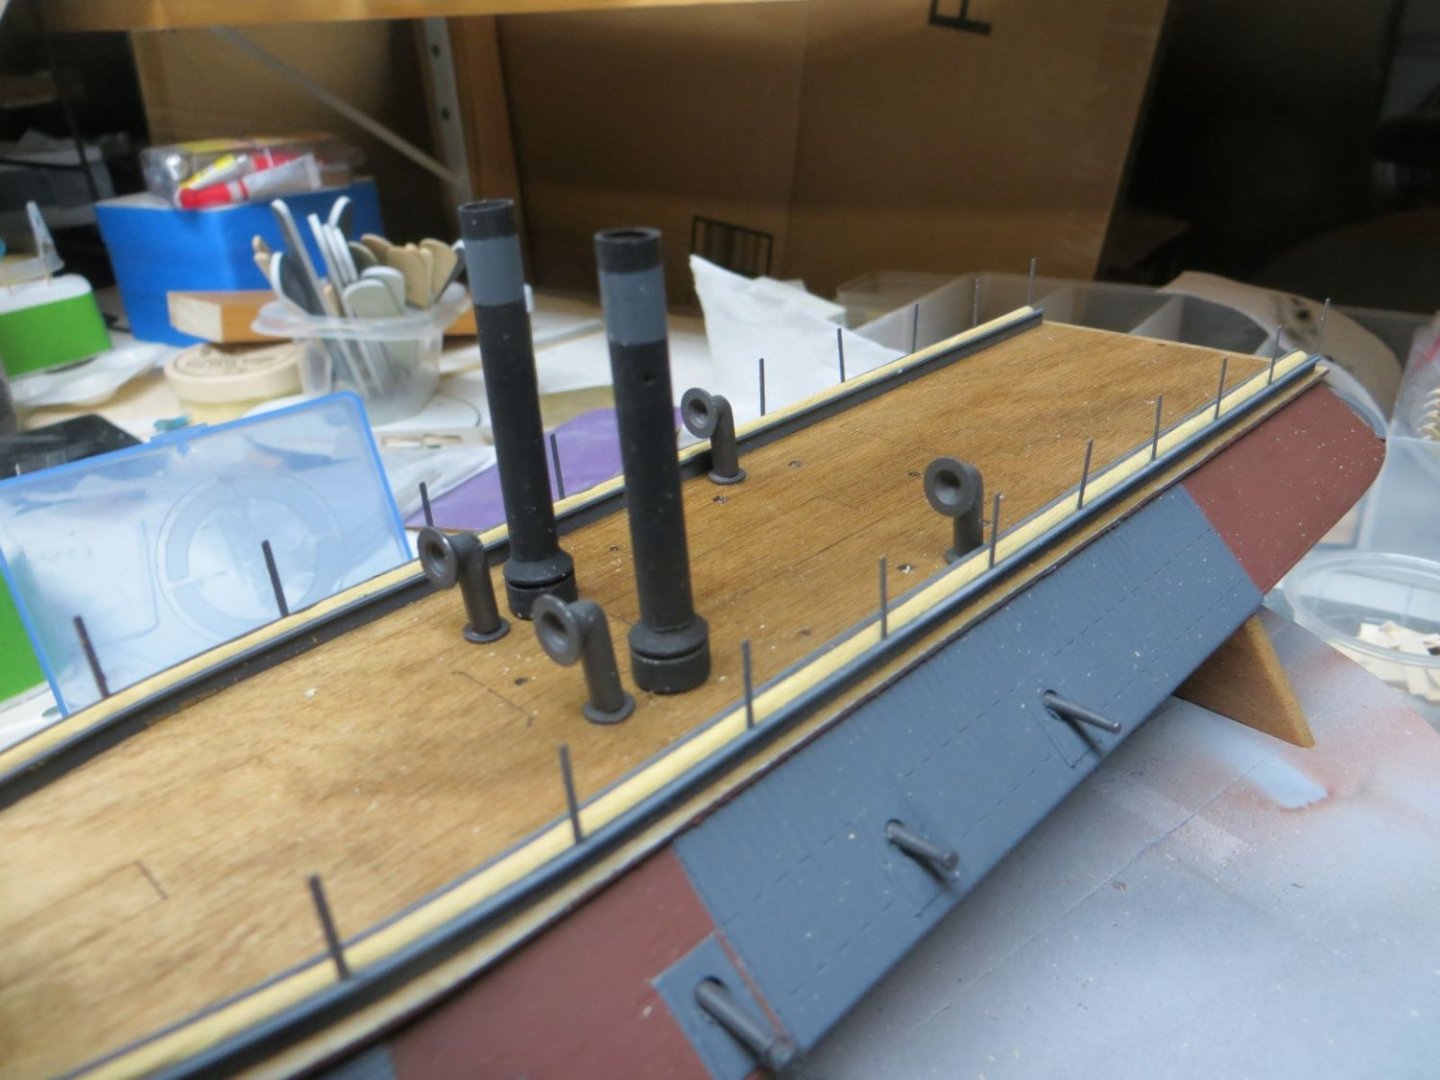
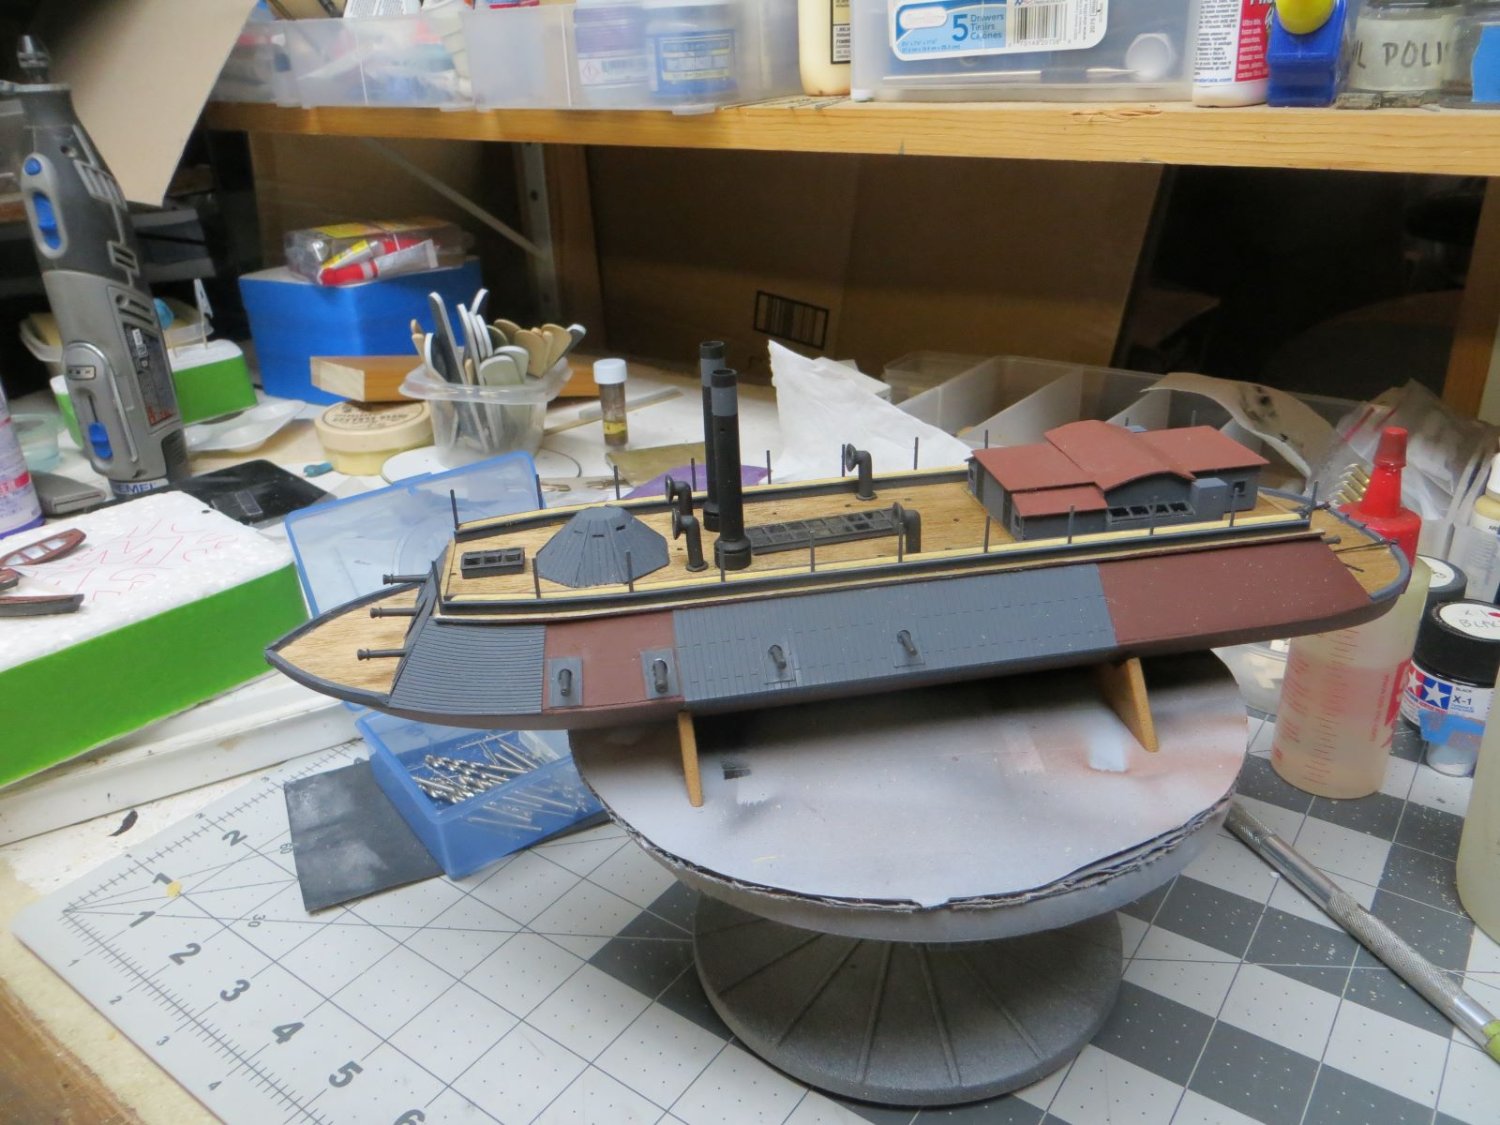
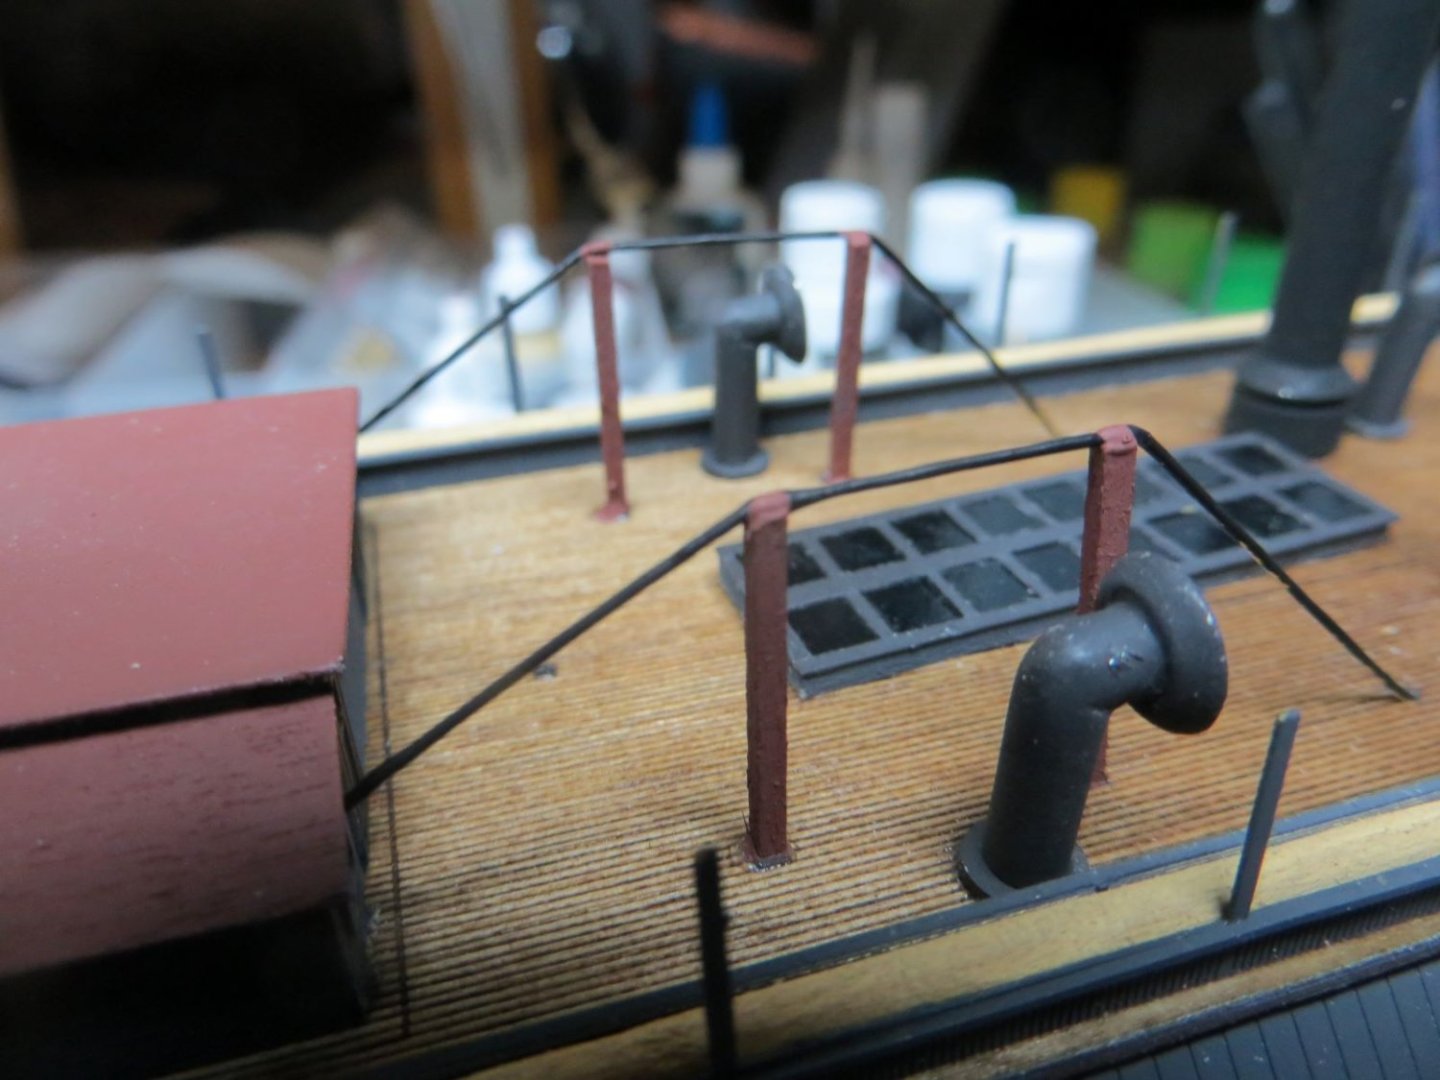
Next steps were to fashion the Torque Rods and Ridge Pole. Pretty straight forward process. I drilled small holes in the side of the wheel house and the deck to facilitate fitting the Torque Rods into place. For the Ridge Pole I cut four 11/16 inch basswood strips and used CA to glue them to the appropriate holes in the deck. I then CA'd the Ridge Pole to the four strips. Fairly easy to accomplish.
-
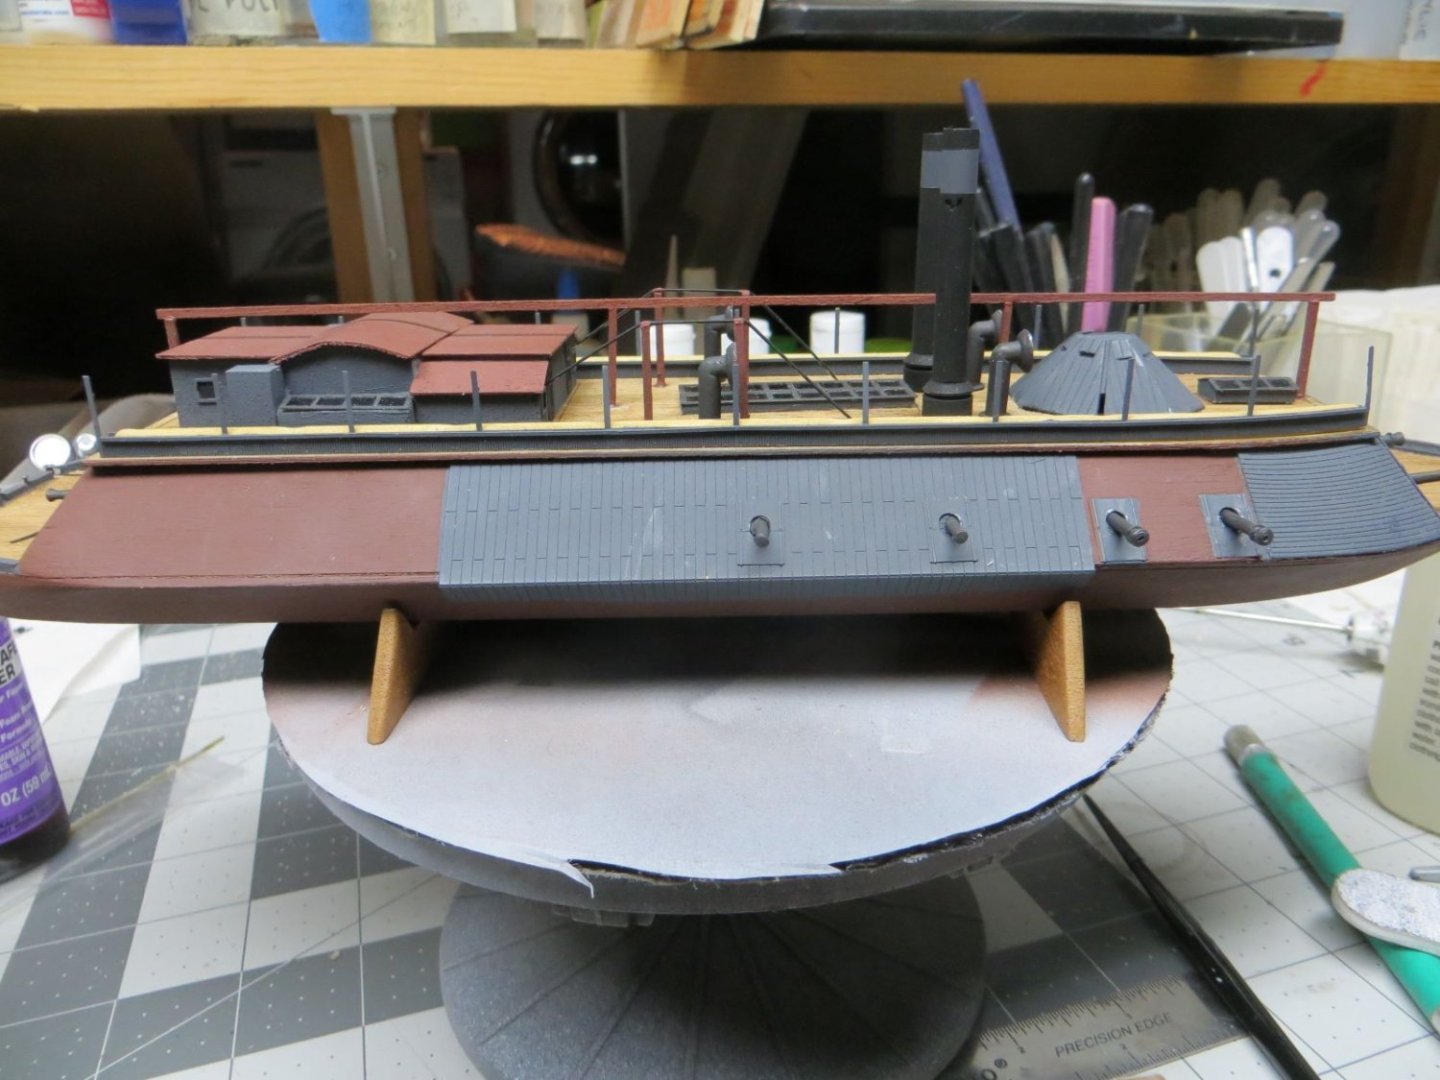
I had previous assembled and painted the pilot and wheel house so it was time to glue these to the deck. I also affixed the sky lights. I like the stage in model building when you can begin to see what the final produce will look like.
-
Next step, begin gluing the deck structures to the top deck. First the stacks which were painted as instructed. I did a final coat with a flat clear to protect the acrylic paint (which, I find, is easily scratched).