HOLIDAY DONATION DRIVE - SUPPORT MSW - DO YOUR PART TO KEEP THIS GREAT FORUM GOING! (Only 13 donations so far - C'mon guys!)
×


rcmdrvr
-
Posts
420 -
Joined
-
Last visited
Content Type
Profiles
Forums
Gallery
Events
Everything posted by rcmdrvr
-
Thanks for the rope advice. This model is one of the first times I have had to do extensive rope rigging, wrapping, etc. I have learned that I have a lot to learn about this art. For example, I am not sure about how to tie off ends, etc. Next time I will look into purchasing rope. This little model would have cost a fortune. There must be eight spools of rope included in the kit. I have been using yards of the stuff.
- 28 replies
-
- 1
-

-
- Nave Egizia
- Amati
- (and 1 more)
-
What is your overall opinion of the kit. With all the deck furniture builds, you have to hope that the kit manufacturer has given you parts that fit.
-
Well, it looks like the hours you spend at the work bench are very productive. I find there are two kinds of mistakes. The "best" are those that you can correct; the "worse" are those that cannot be corrected and must be lived with, worked around or hidden.
-
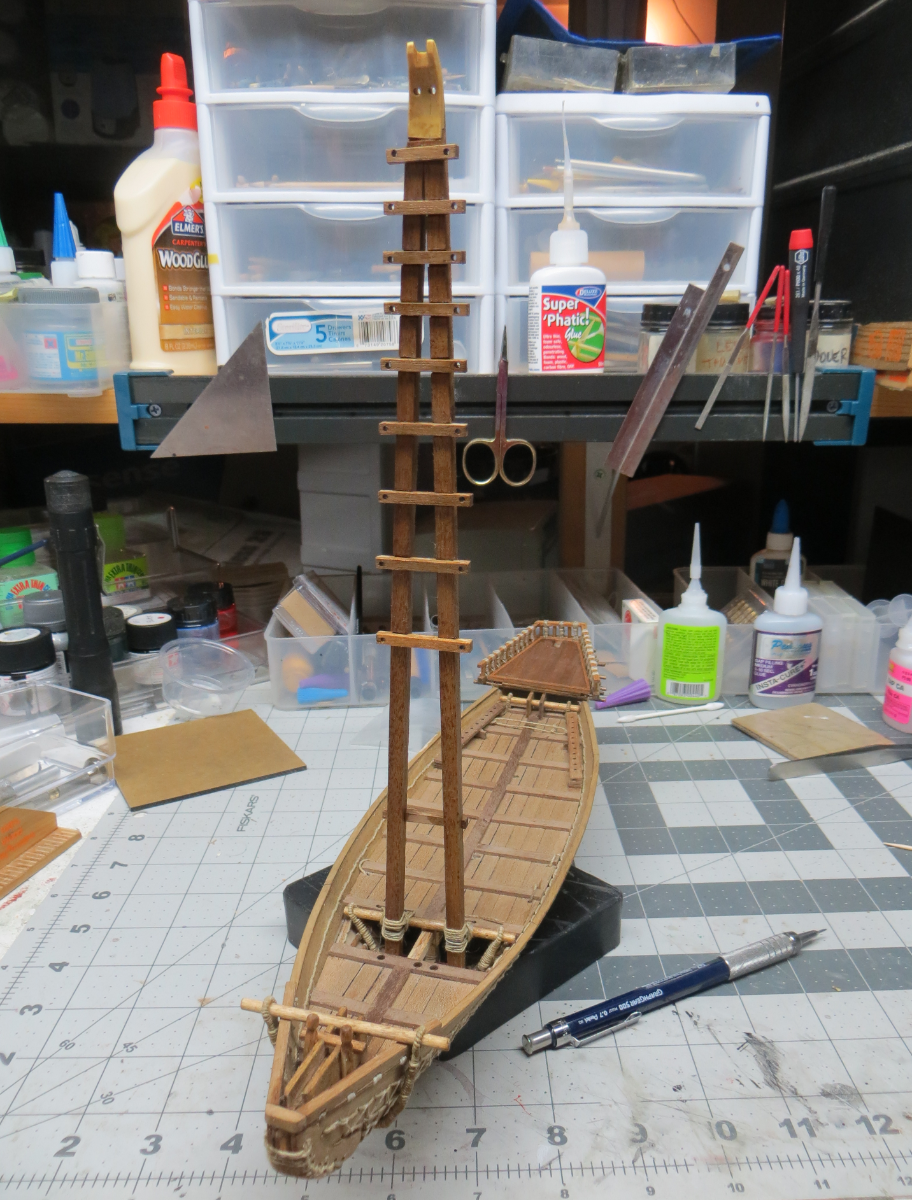
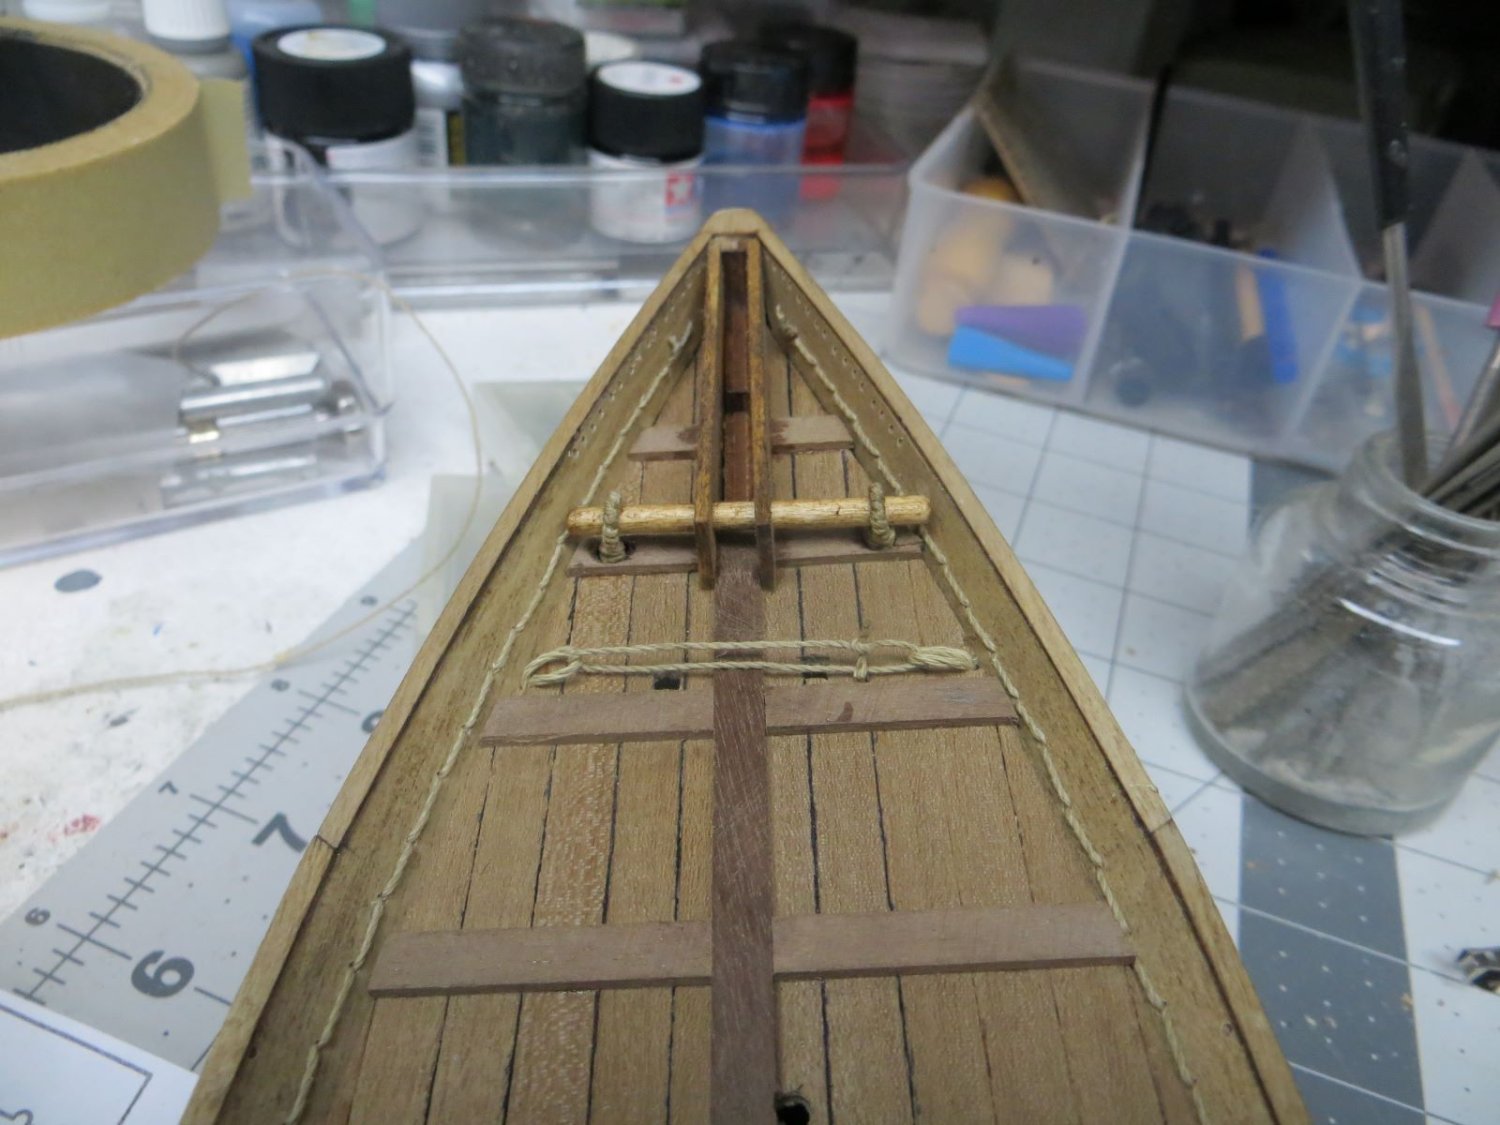
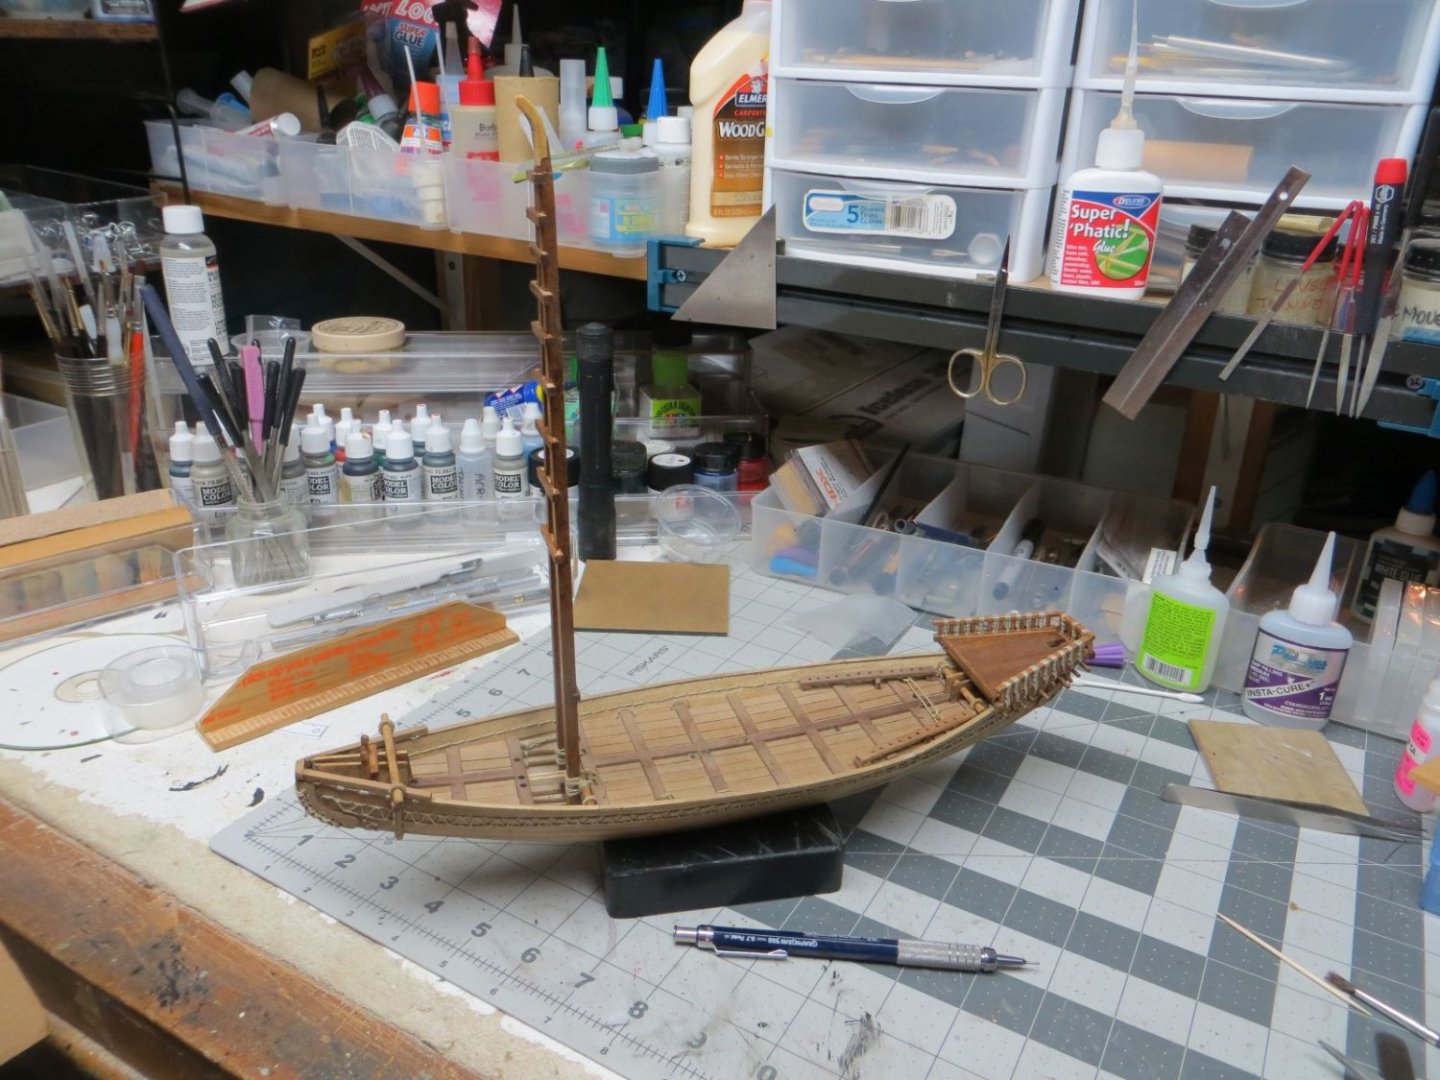
Last night I was able to construct the main mast. The mast is very different than we find on most sailing ships. It is a very elongated triangle with cross pieces to support the rigging. I fashioned the mast over the plans. The cross pieces require some care drilling of holes (I used a dremel drill stand that worked quite well). It seems the main masts on these ships were retractable to a "saddle" which will be constructed near the stern. Because the mast is retractable, the rope wrapping in the interior of the hull was a bit complicated.


- 28 replies
-
- 5
-

-
-
- Nave Egizia
- Amati
- (and 1 more)
-
Wow, you build very rapidly.
-
Wow. Really beautiful. I did not know you could obtain such beautiful result by home printing water slide decals. Did you print on an ink-jet or color laser?
- 84 replies
-
- 1
-

-
- Corsaro II
- Corel
- (and 1 more)
-
If you are going to do a build log on the Sailing Pram, and I hope you do, rename this thread and get started. Oh by the way, WELCOME!
-
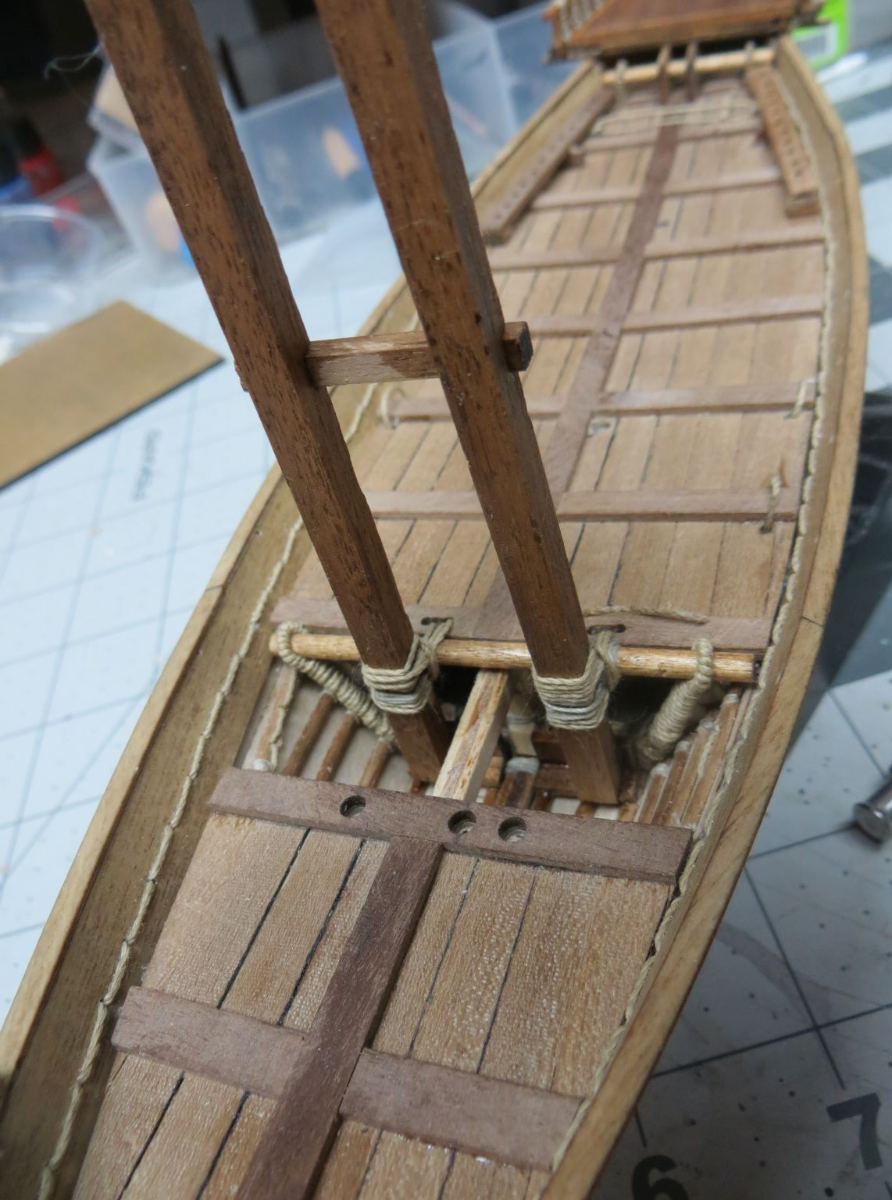
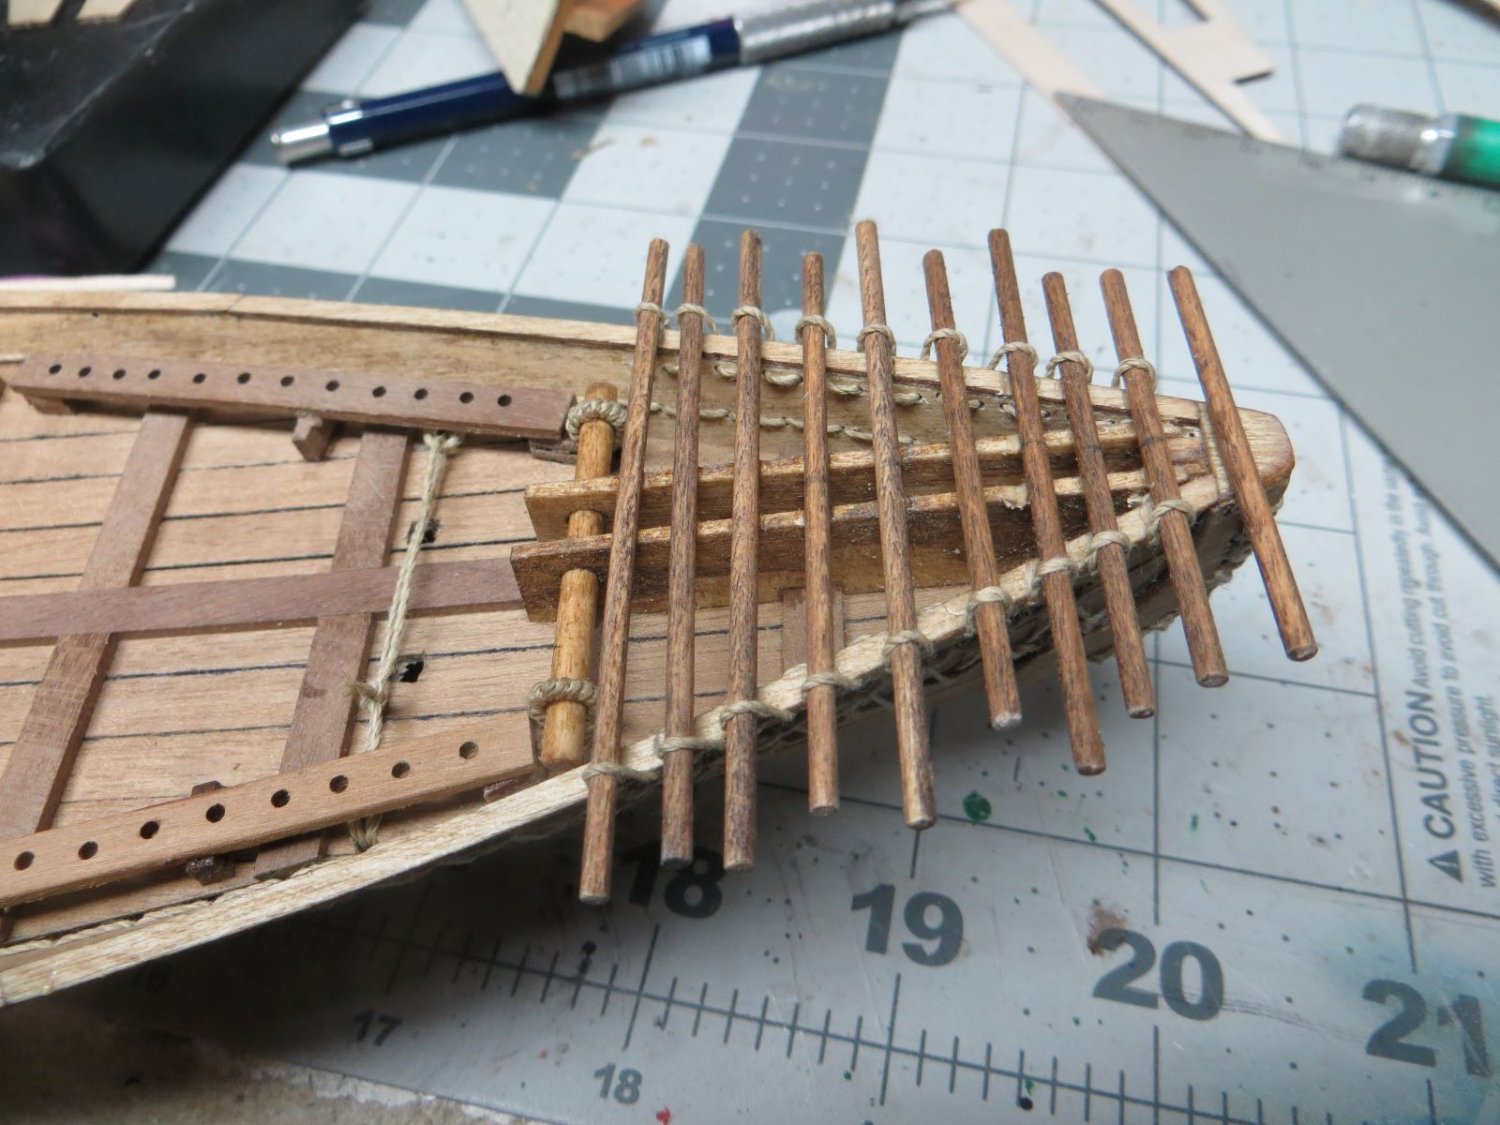
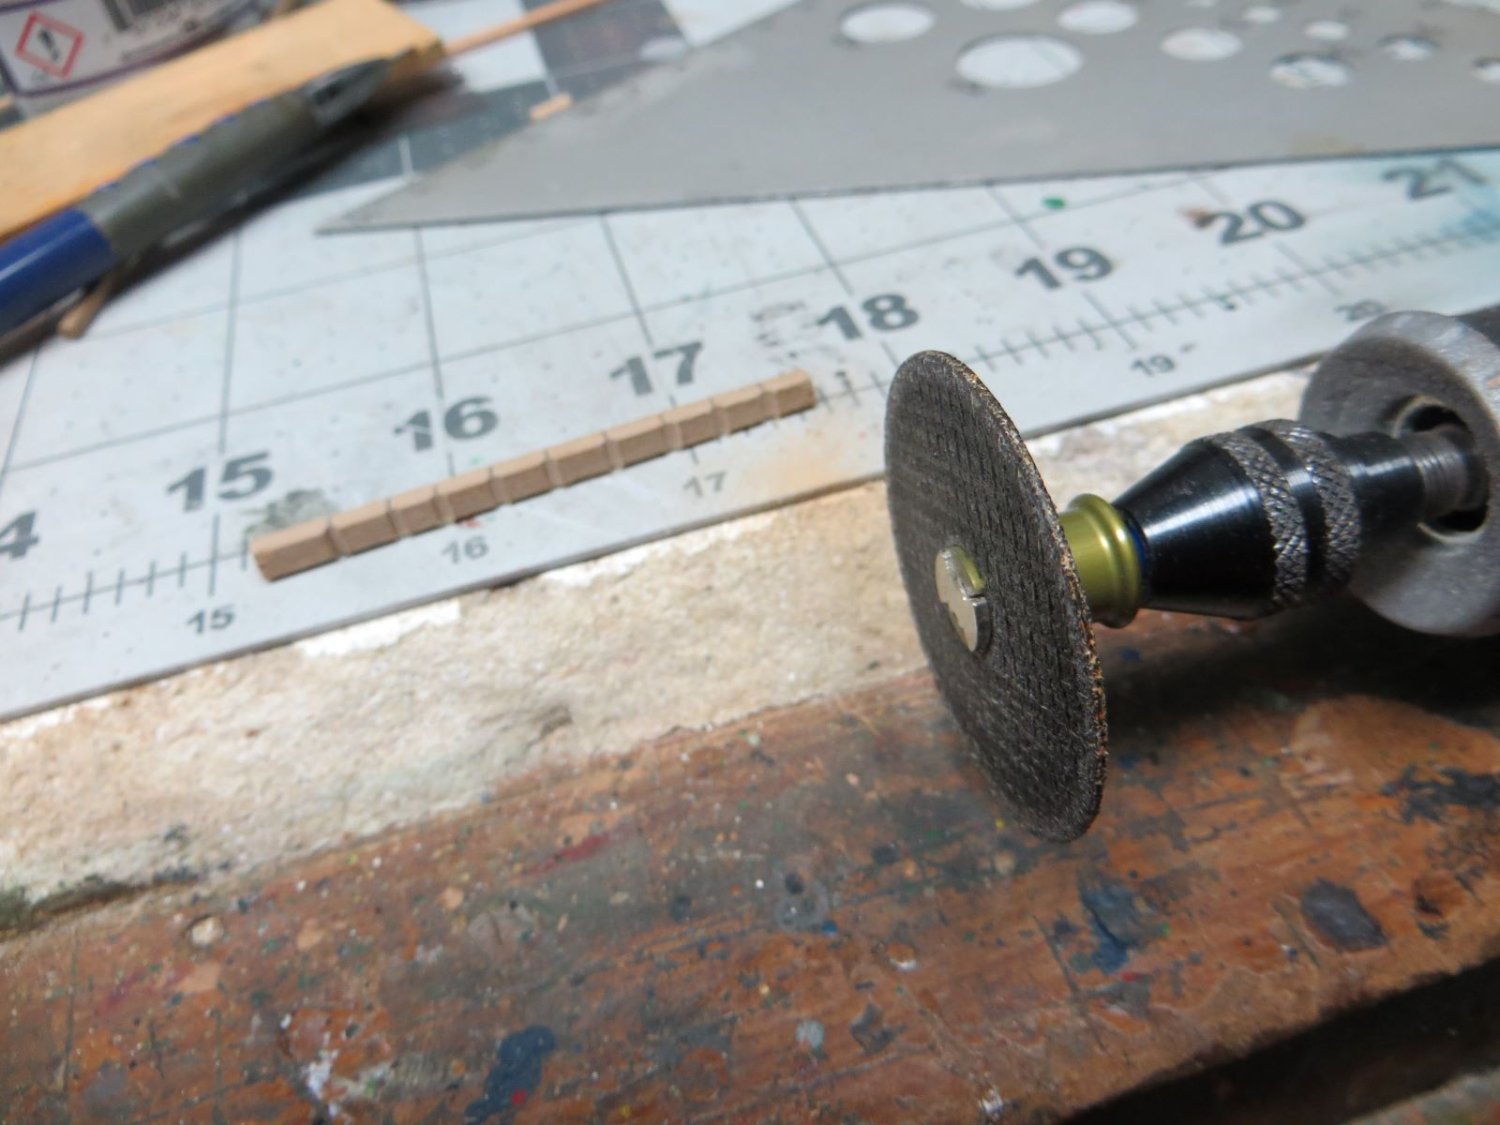
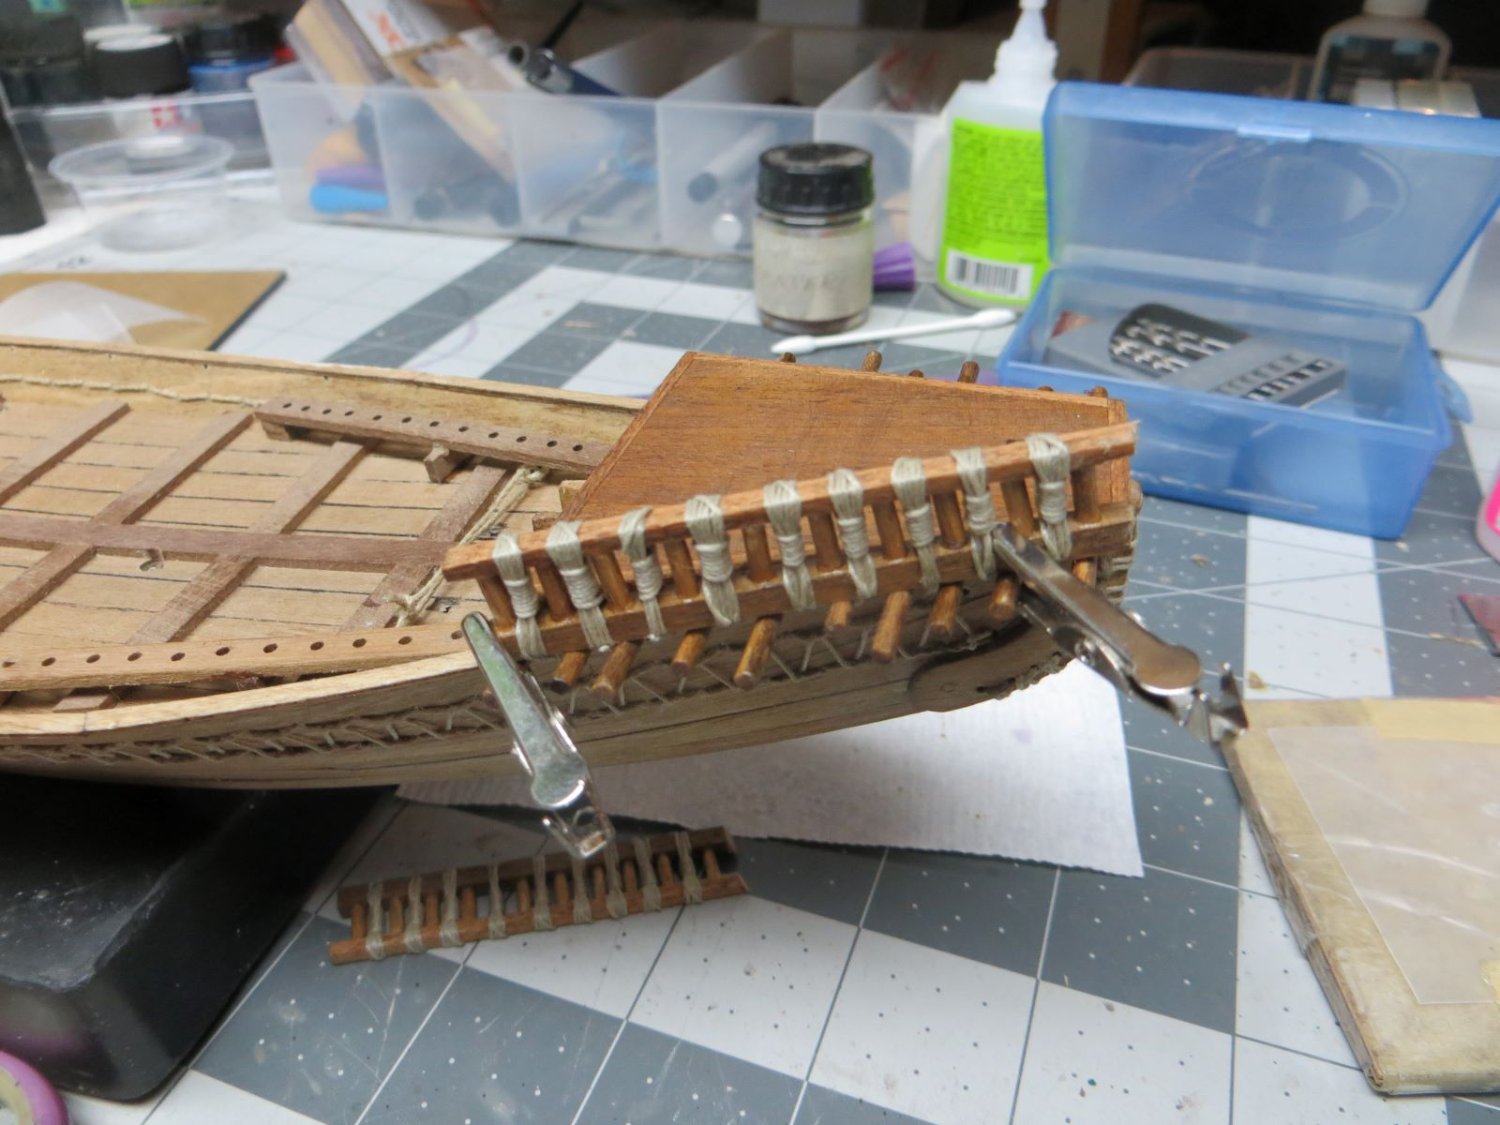
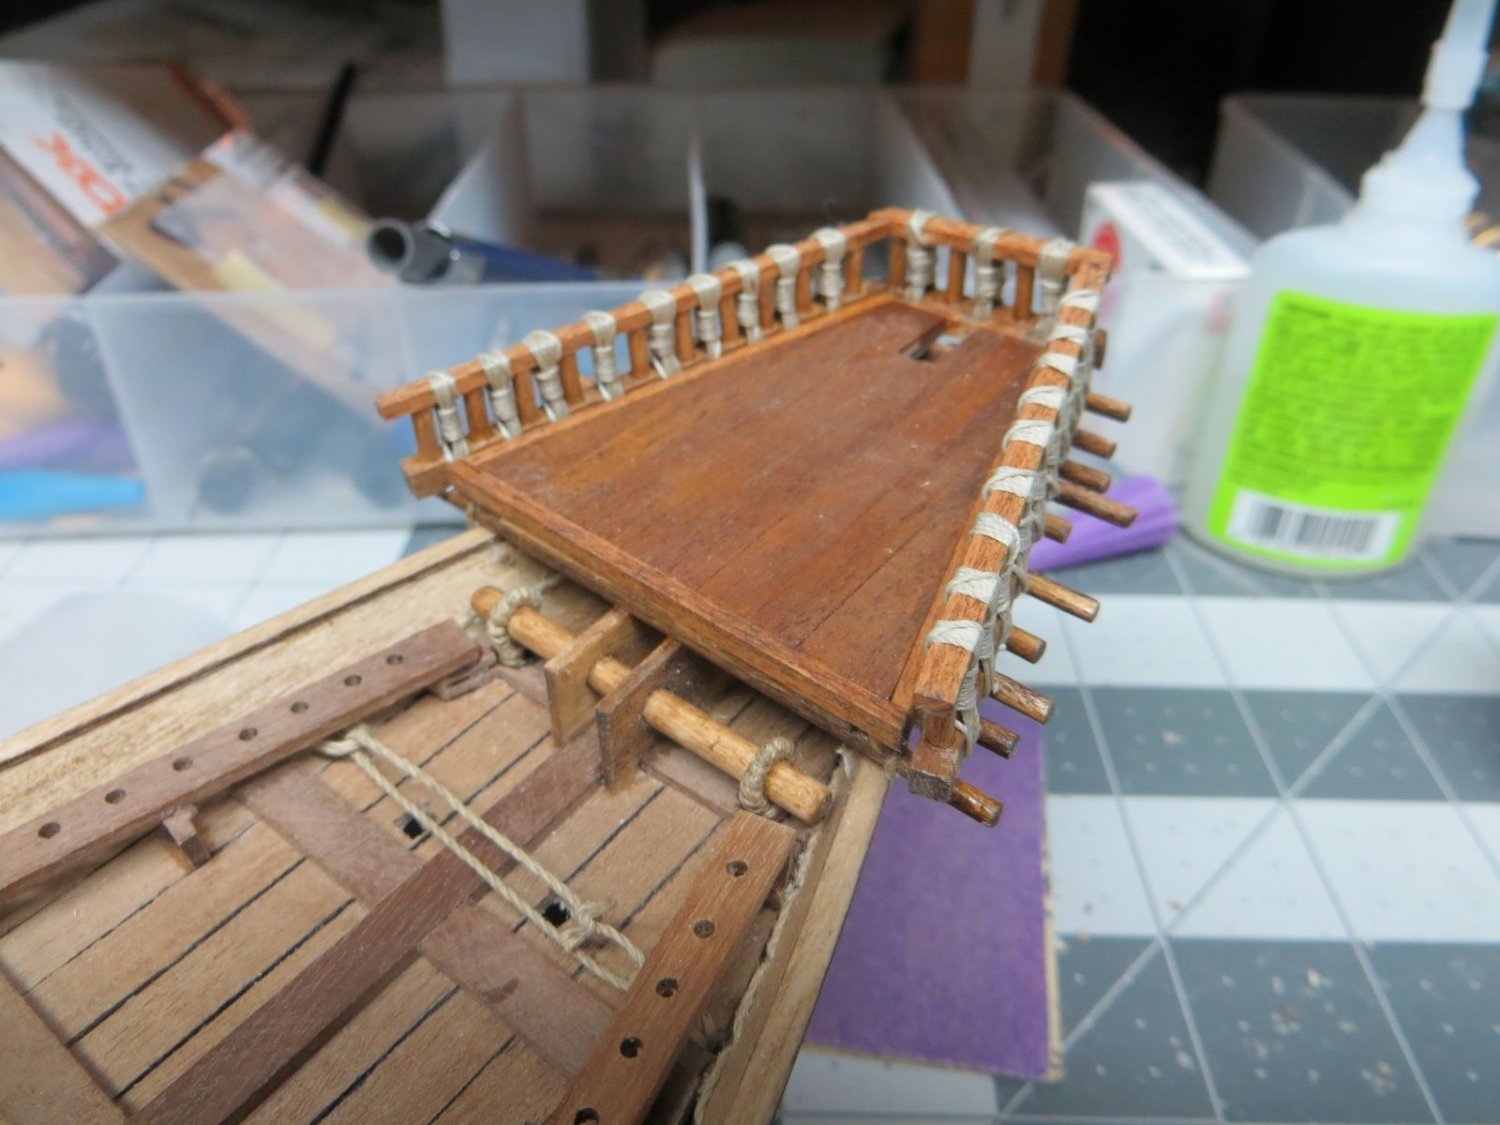
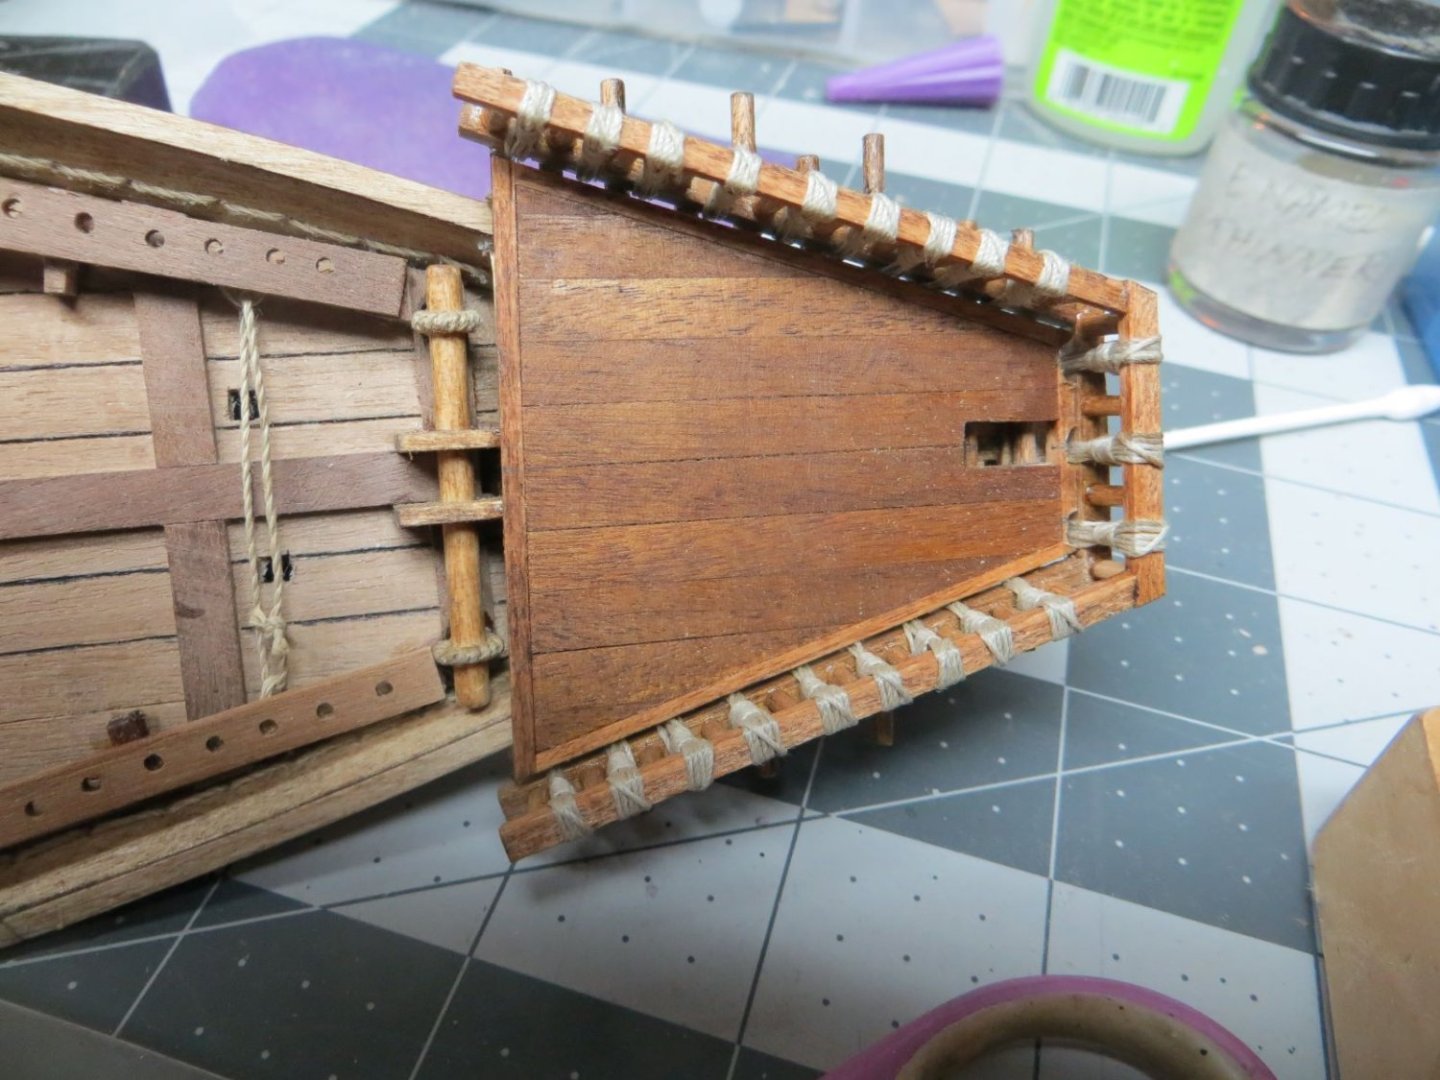
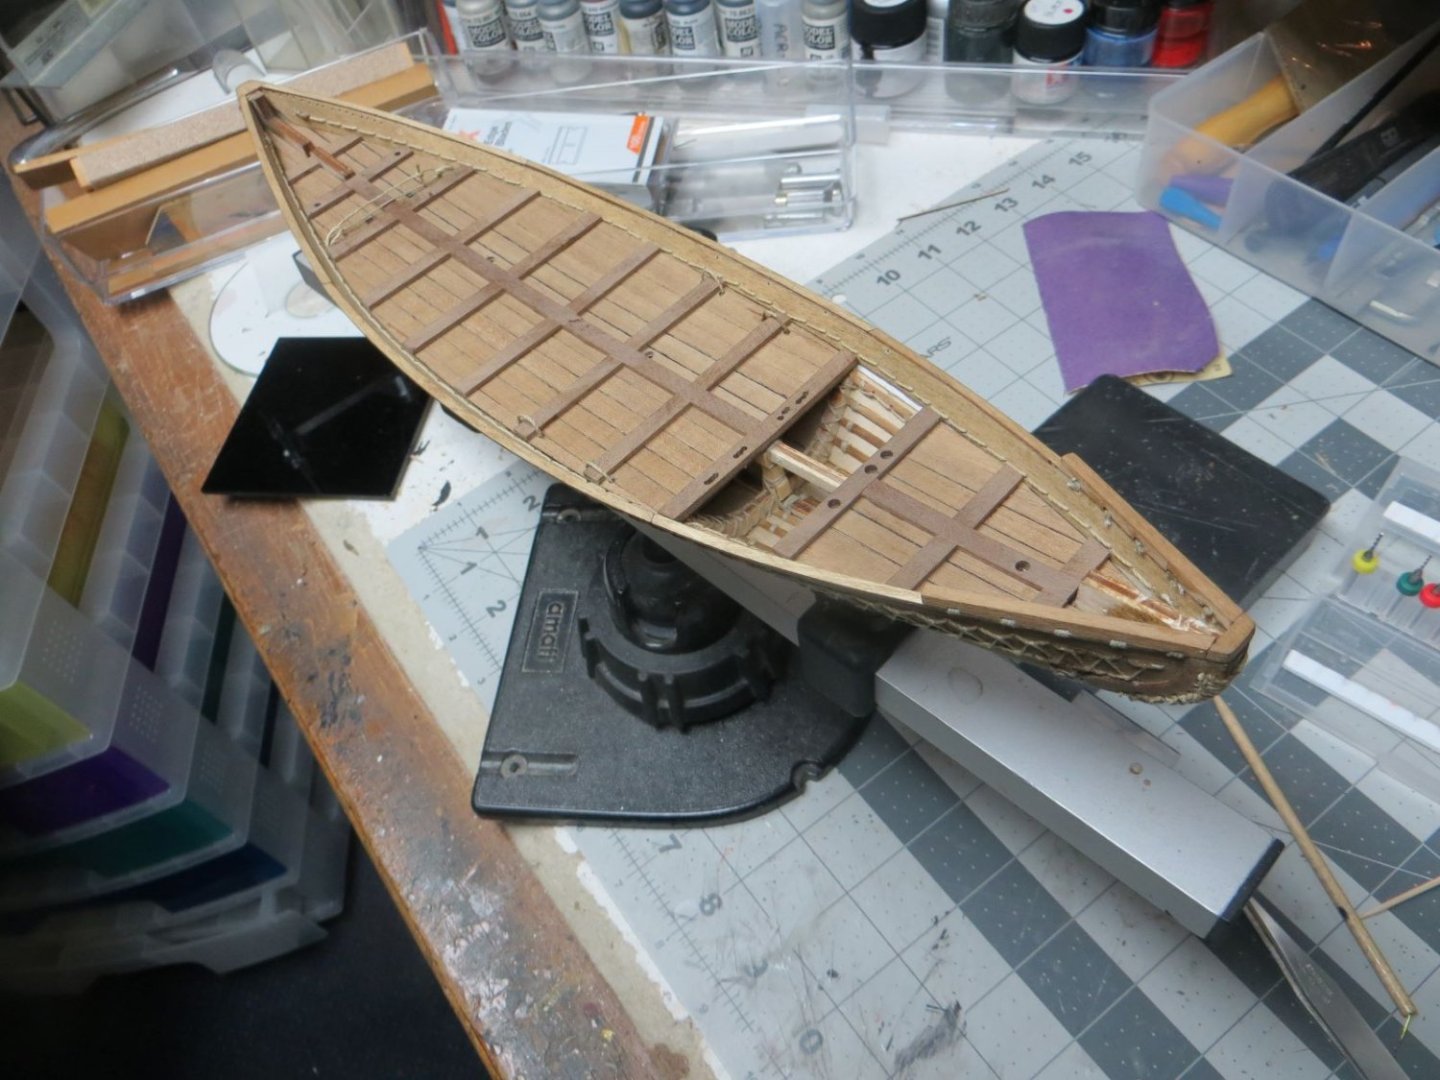
Well, on to the "Command Deck". This is my name for the decking that was fashioned on top of the hull and then surrounded on three sides by railing. On the model you must first make a foundation. This consists of doweling which is then lashed to the sides of the hull. The actual deck is fashioned from a triangular piece of thin ply that is "planked" and then "framed". I also stained this decking with light oak but was not very happy with the results. It is darker and more red that I would have liked. Oh well. The railings were a bit tedious but I like the result. The lower piece of the railings had to be notched for the lashing. I used a dremel rotary tool clamped to my bench to accomplish this. To assist in lashing, I dipped the end of each "rope" in thin CA and let it dry to form a one inch length that was stiff like a needle and could be used to guide the rope.


- 28 replies
-
- 3
-
-
-
- Nave Egizia
- Amati
- (and 1 more)
-
Truely a beautiful model. It will enhance any space you use to display it.
- 23 replies
-
- 1
-
-
- Herreshoff 12 1/2
- BlueJacket Shipcrafters
- (and 1 more)
-
Now you need to build the diorama around the derelic dory to make for a really interesting display!
- 43 replies
-
- 2
-
-
- Lowell Grand Banks Dory
- Model Shipways
- (and 2 more)
-
Hear! Her! on the enjoyment part.
-
I had an interest in this model but your struggles is beginning to scare me a bit! The plastic headed pins you are using look like the metal pin part is threaded. Is that correct? Does it help holding them in place.
-
Welcome to ship modelling. Your ability to work thru problems will be a great asset as you progress through this build and more complicated models in the future. I think problem solving is one aspect of this hobby that makes it so interesting.
- 40 replies
-
- 1
-
-
- Lowell Grand Banks Dory
- Model Shipways
- (and 1 more)
-
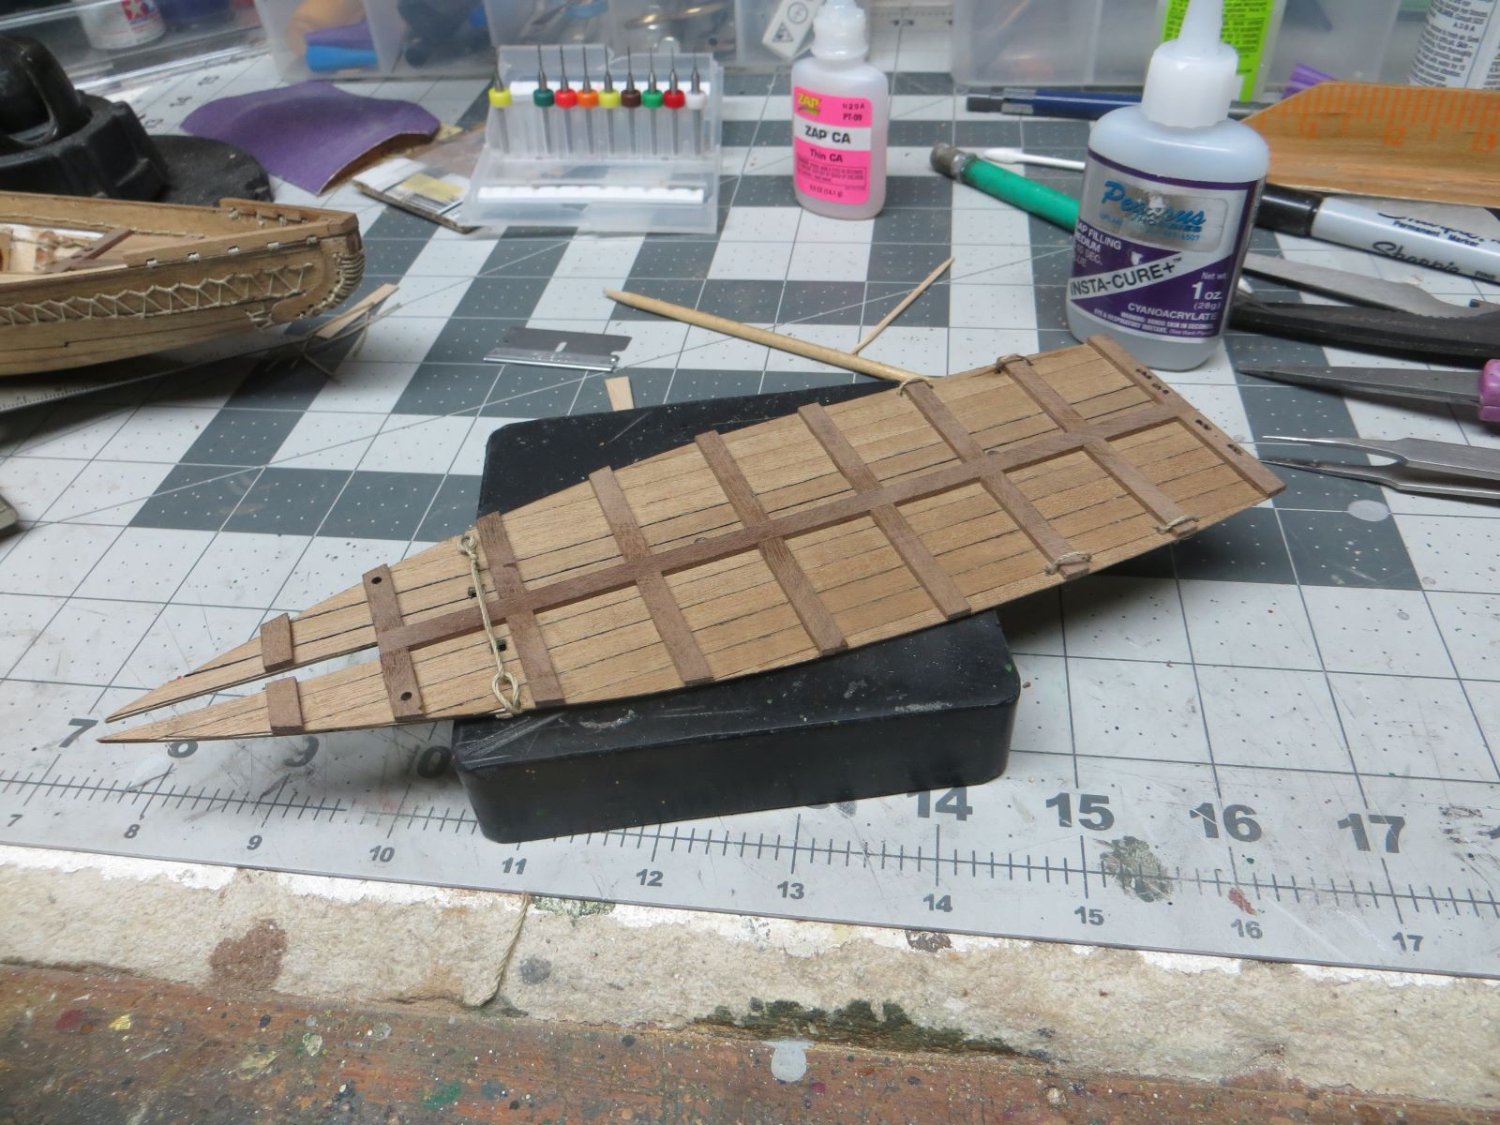
Amateur: Had play around with the math since I think in inches and feet. The model is about 1 foot in length. At a scale of 1:50 I estimate the full scale ship would have been about 50 feet in length; which I believe is close to 15 meters.
- 28 replies
-
- 1
-
-
- Nave Egizia
- Amati
- (and 1 more)
-
Even if the decking below the wheelhouse were slightly curved (maybe to provide more strength to the structure); at the scale of the model it would not make much difference. Your progress on the model has been good. I found that fashioning and attaching the deck furniture was quite "fiddility".
- 113 replies
-
- 5
-
-
- Cairo
- BlueJacket Shipcrafters
- (and 1 more)
-
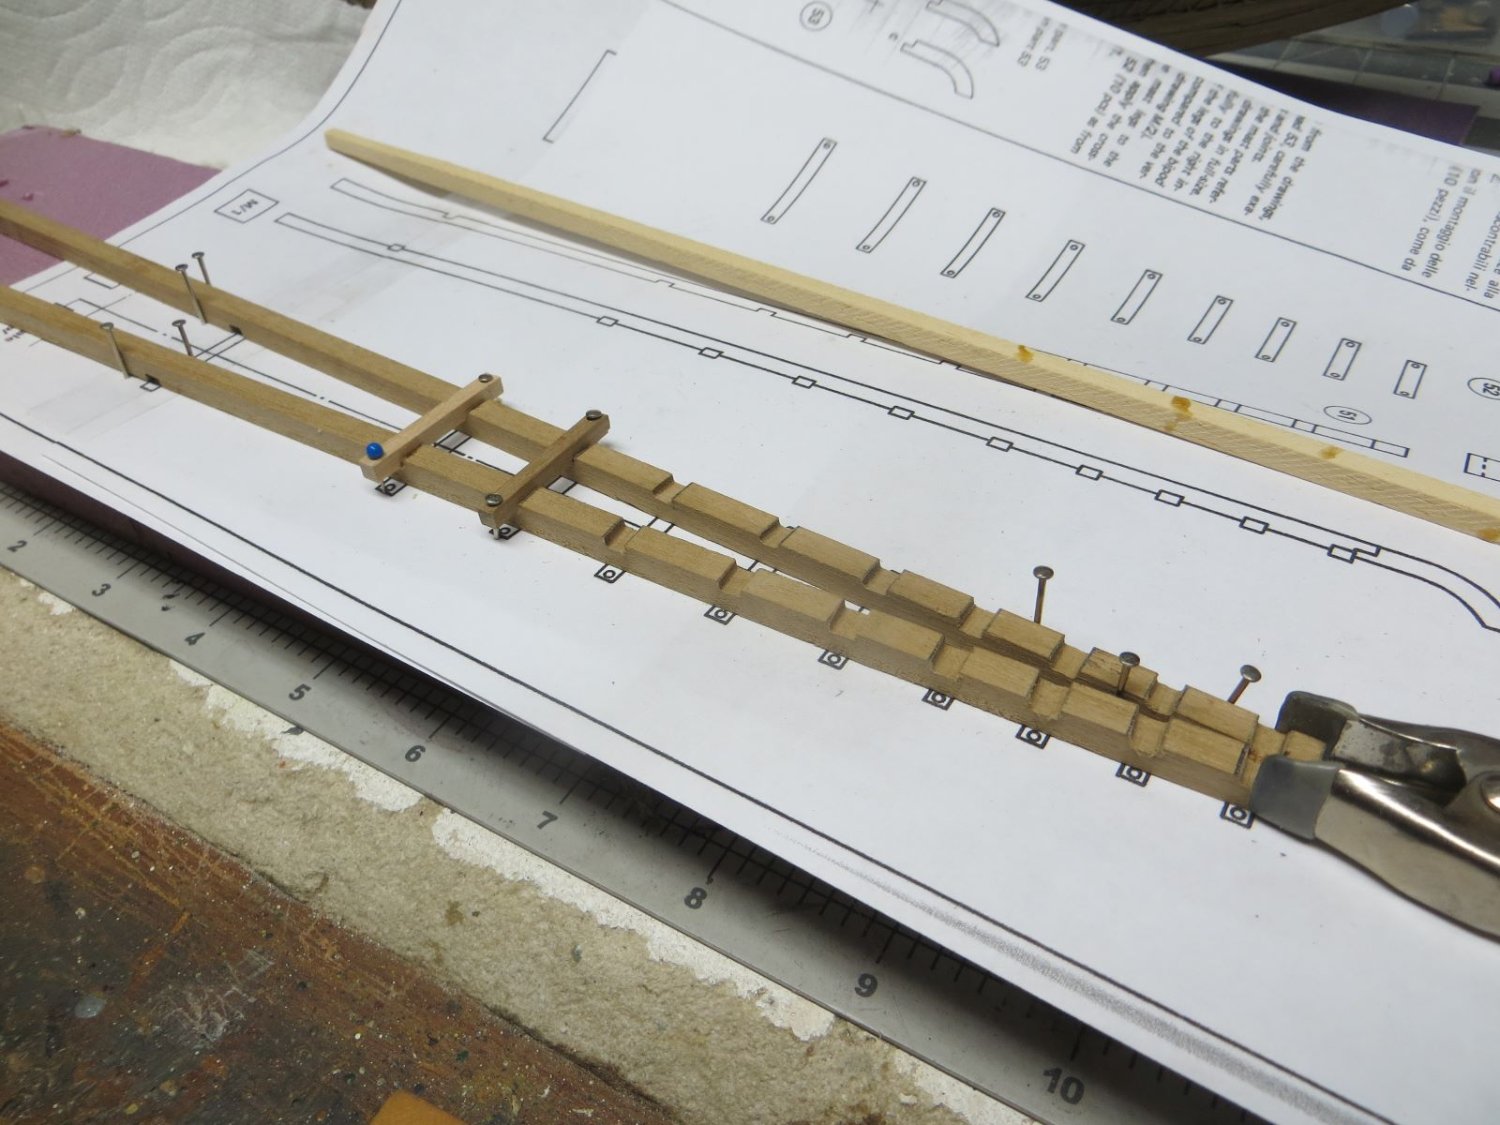
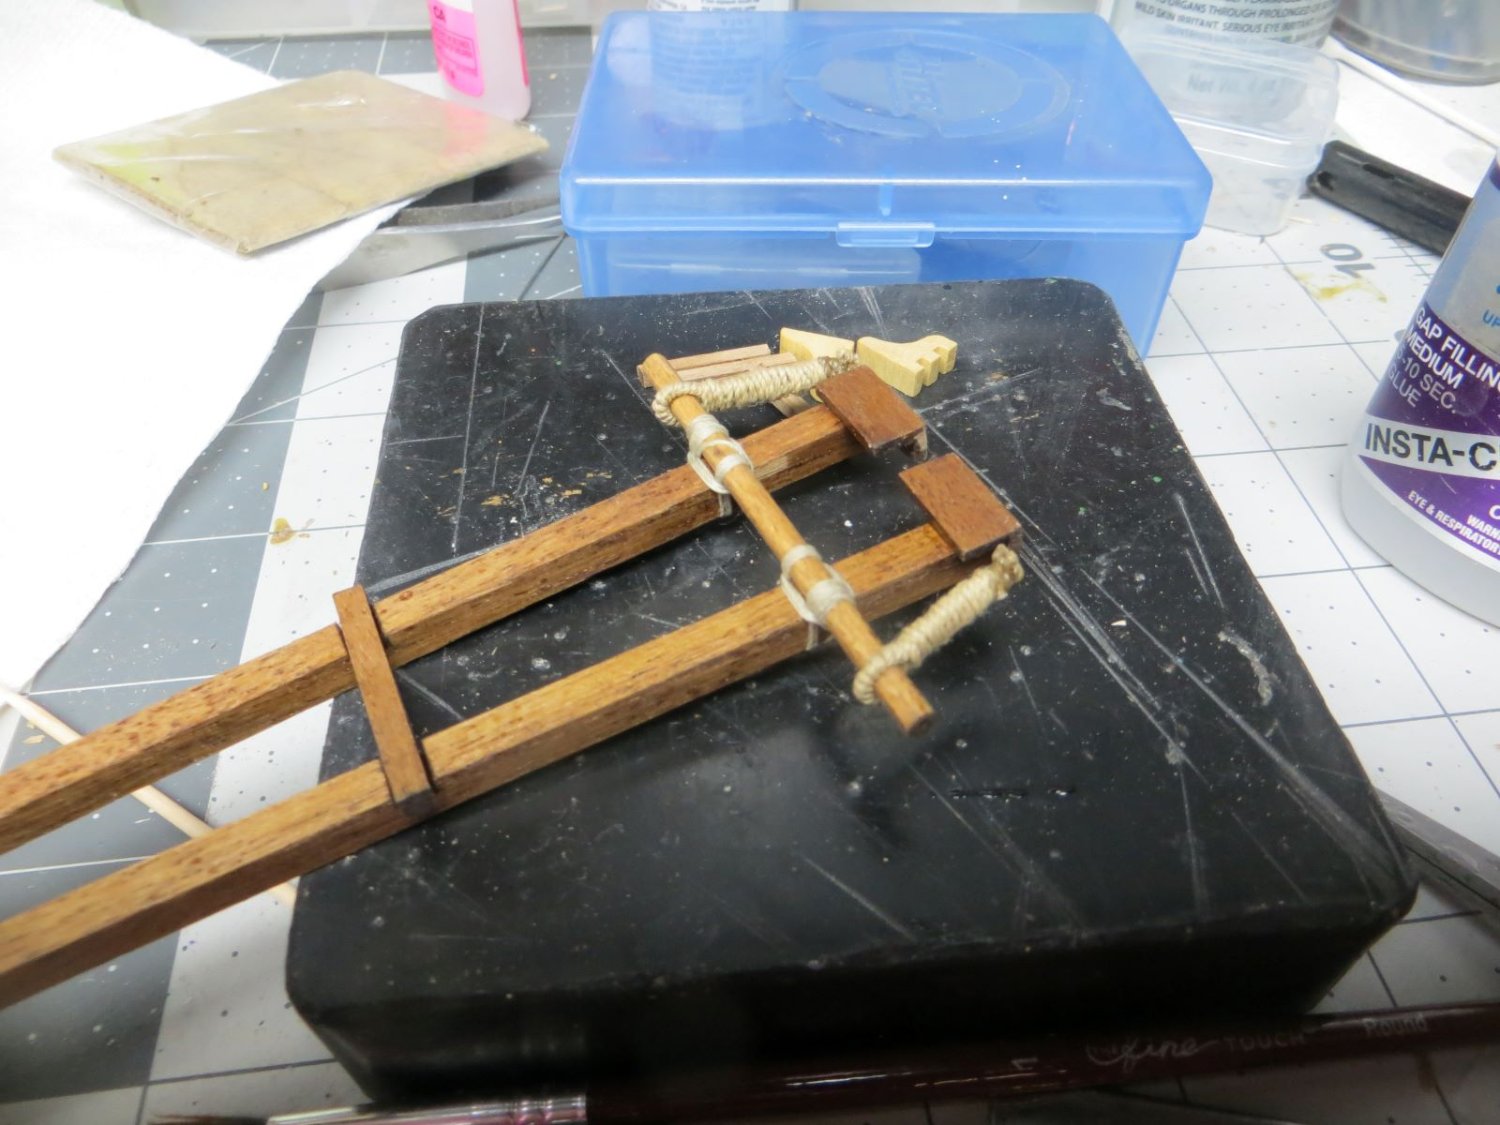
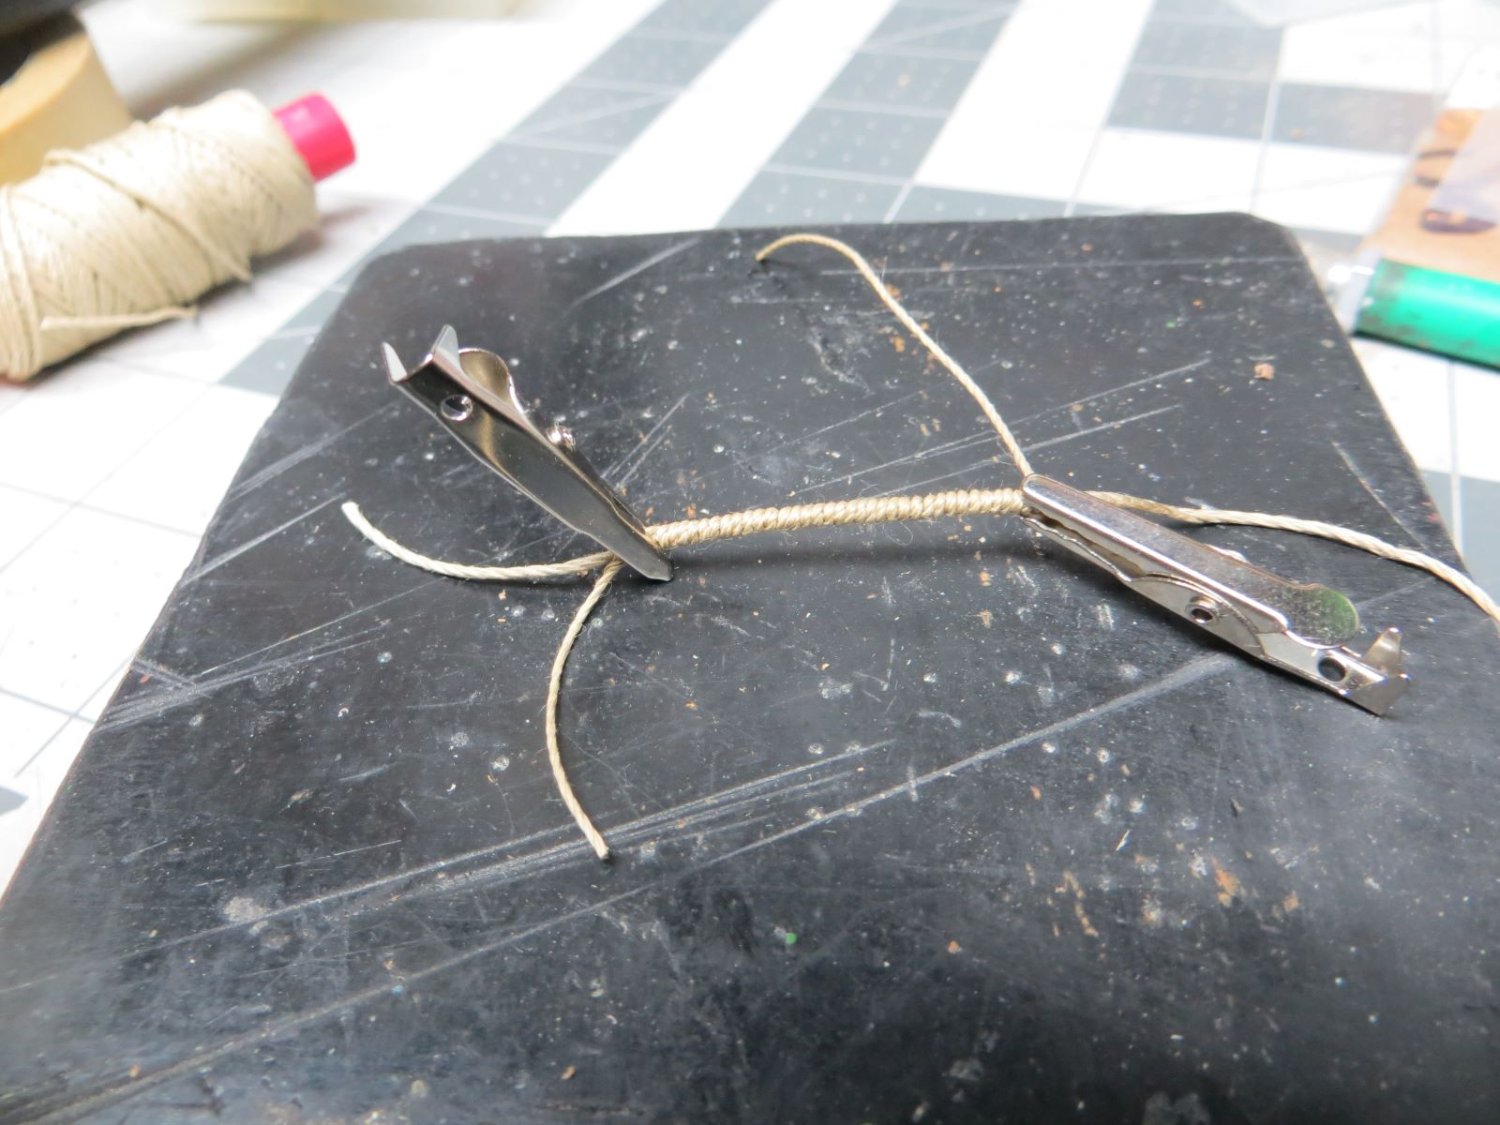
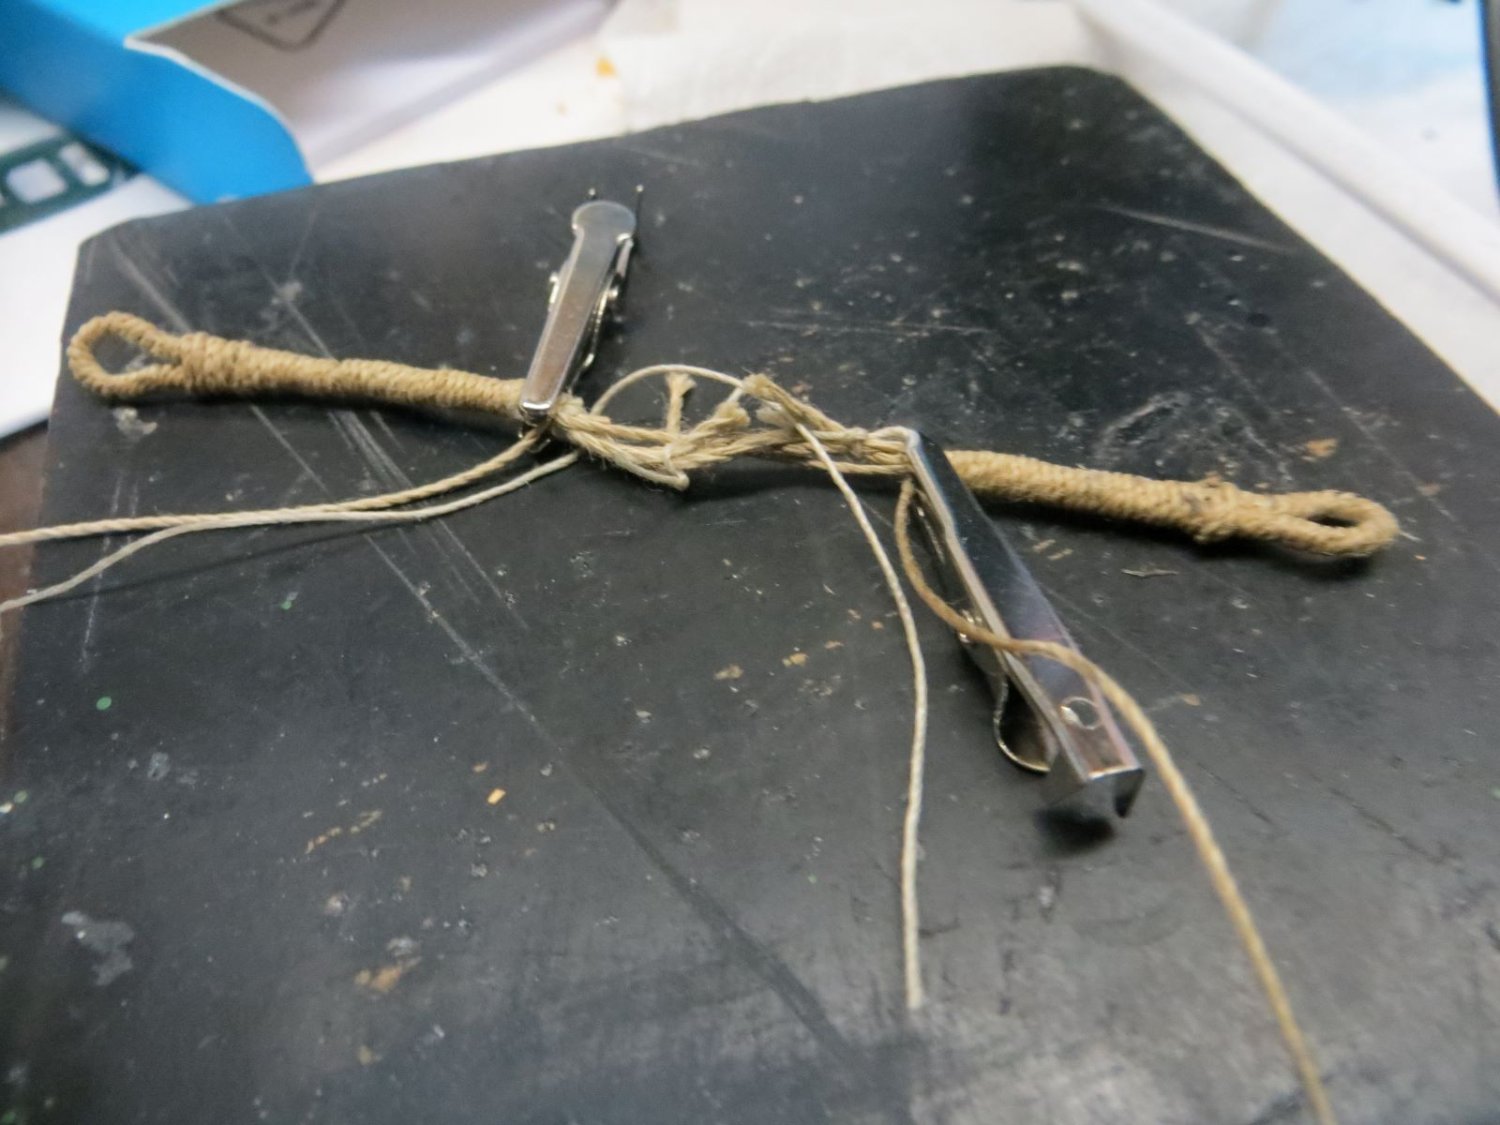
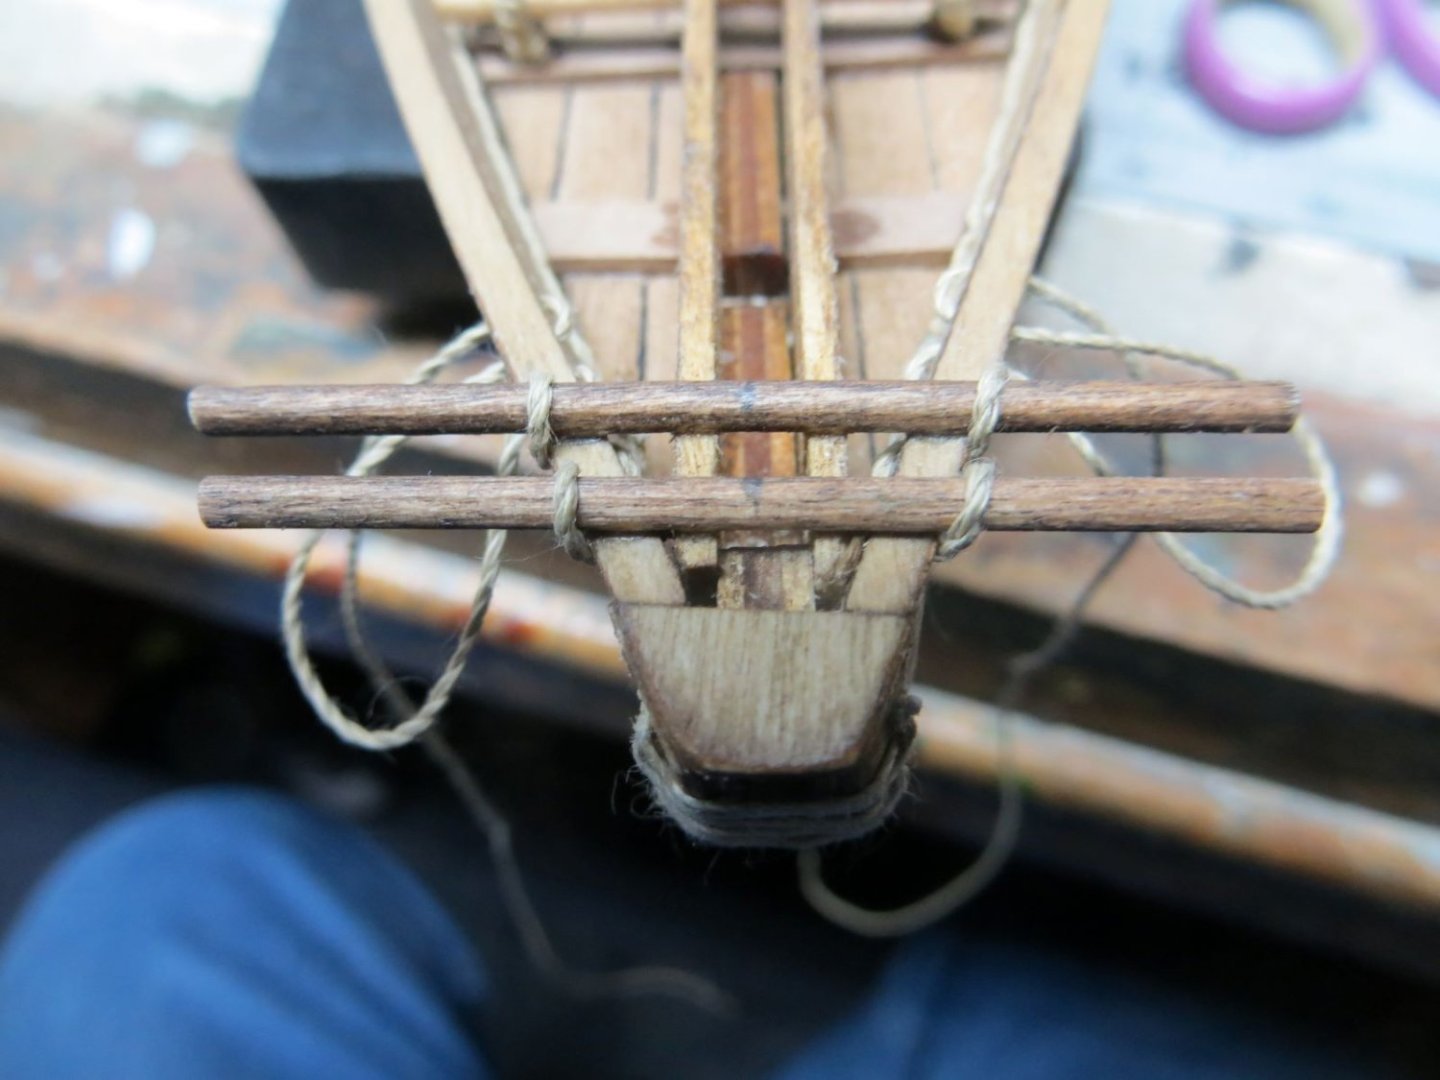
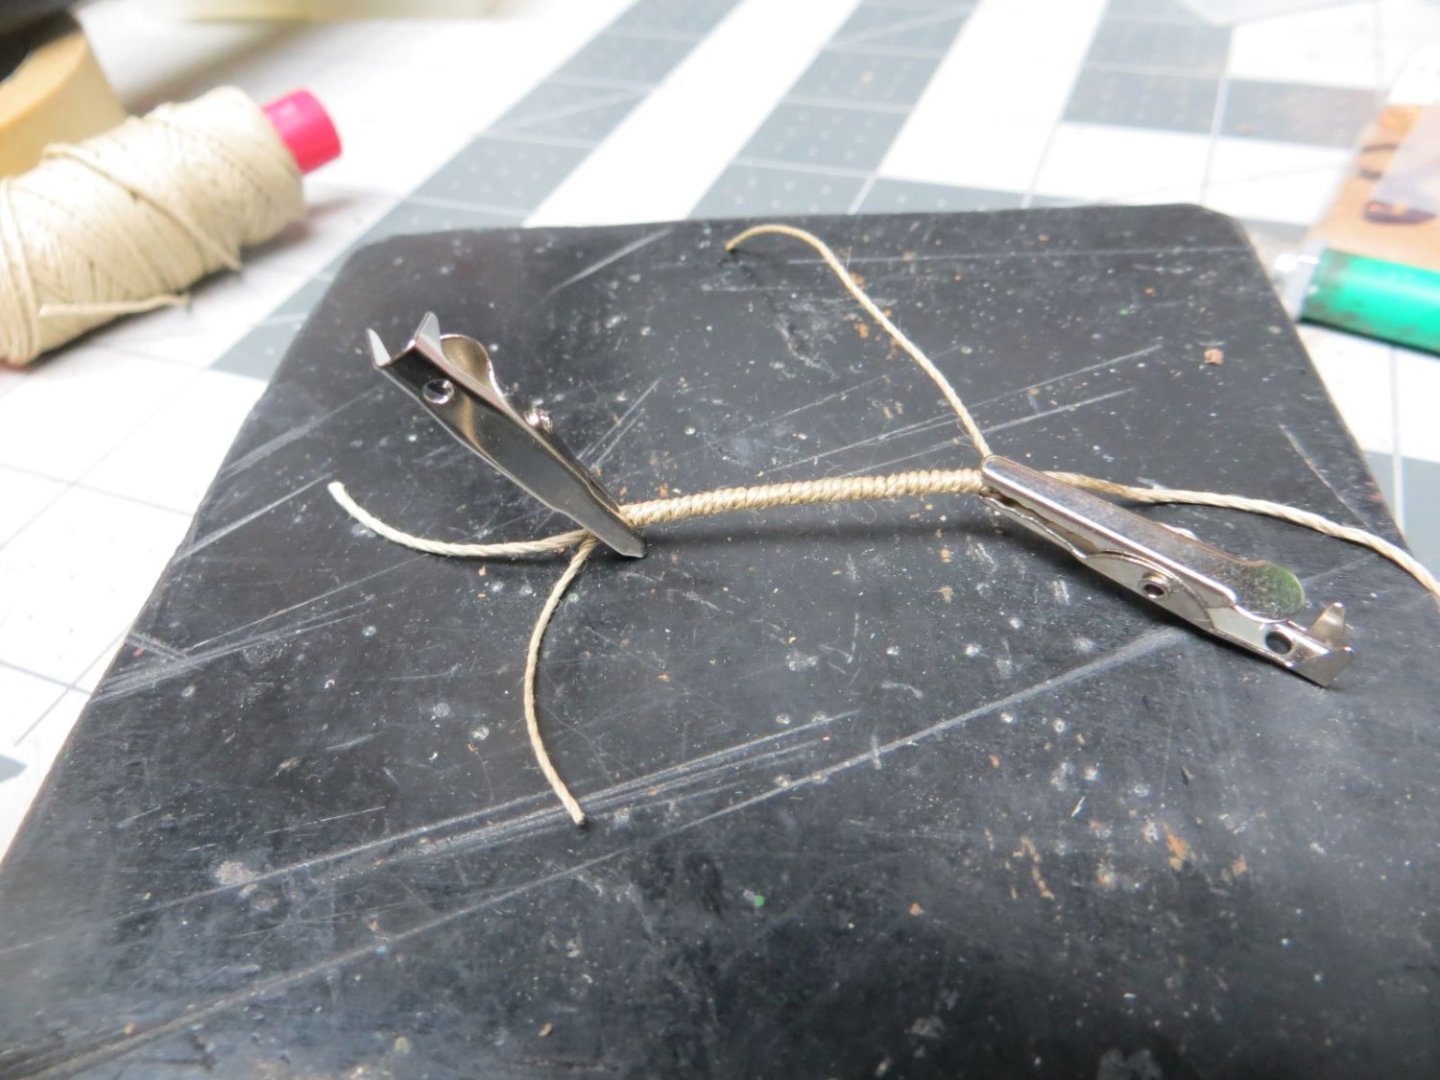
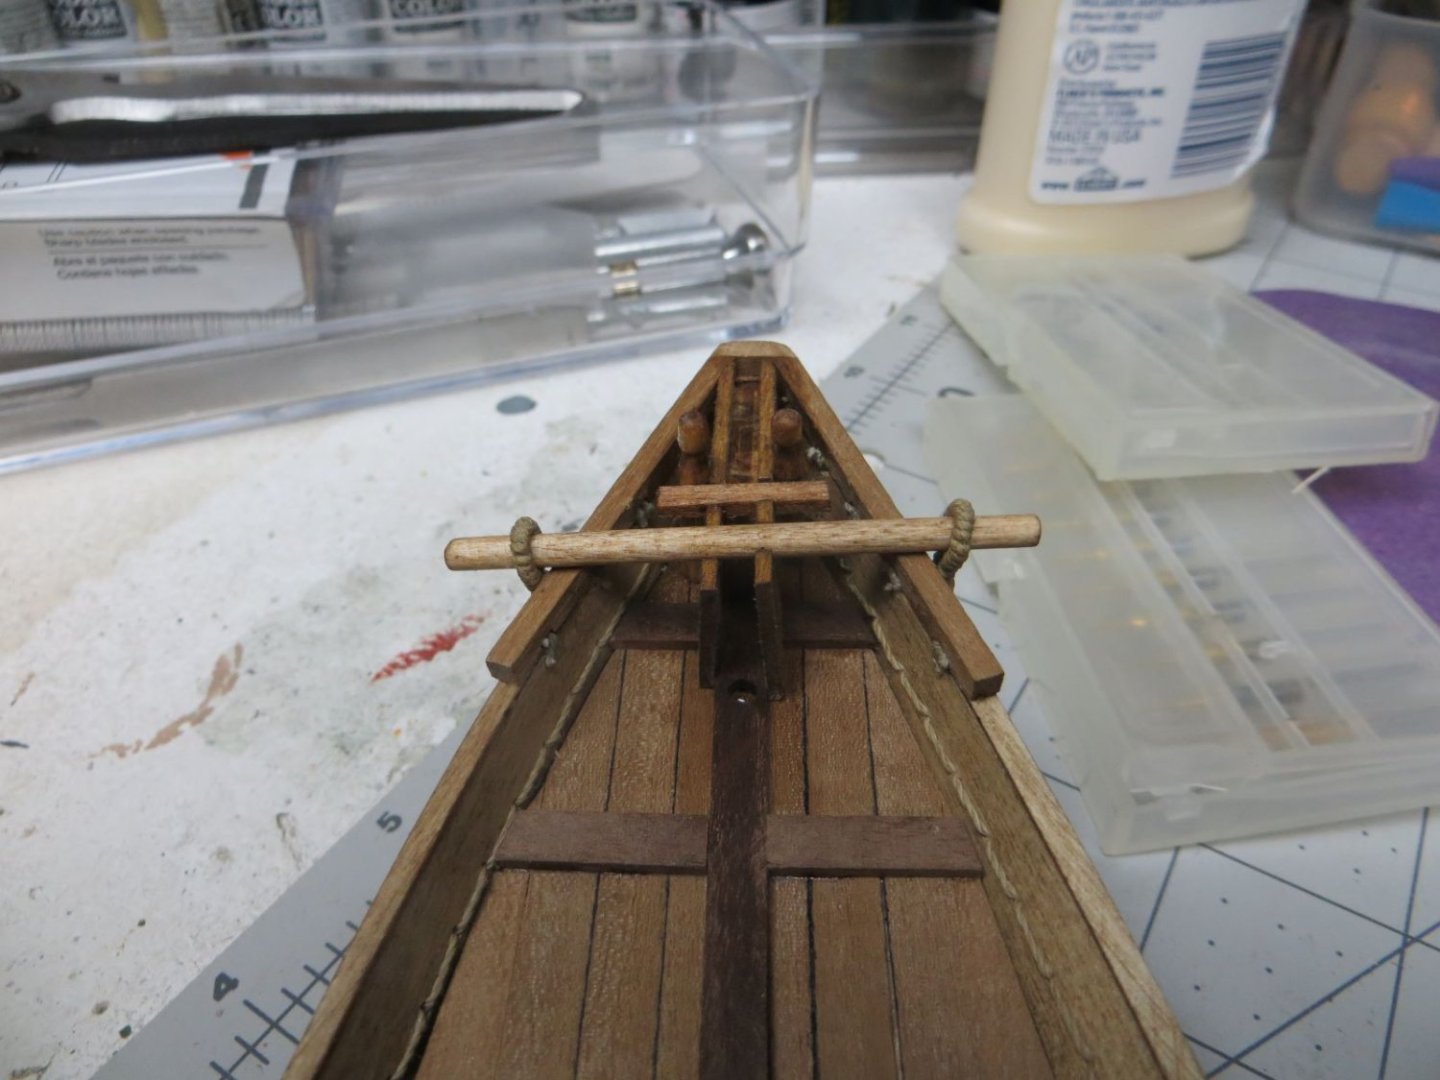
The next step proved to be a bit difficult. Egyptian ships did not have keels. They stablized the hull by stretching a large rope in a arch between the bow and stern. At the bow and stern they crafted "hard points" to attach this rope truss. The hard points had to be quite strong so they used heavily wrapped rope as a strap to hold the hard point to the hull. They would wrap the strap around the hard point structure and then loop under the hull. My final photo will give you an idea of what I am trying to describe. The plans called for making the strap by cutting out a copper strip from thin copper sheet and then wrapping this with rope. I cut out the pattern from the plans and quickly discovered it was not long enought to wrap around the hull. I lengthened the pattern but traced the new pattern on the copper sheet. However, I just managed to destroy the sheet trying to cut out the copper strap. I really have to improve my metal fashioning skills. I instead tried to duplicate the straps I saw in photos, when I researched Egyptian ships on the internet, using rope. I took two lengths of 1.3 mm rope and wrapped them with .7 mm rope to form a thicker straight rope for the strap. I then wrapped these straight ropes around the dowl that would become the hard point and then around the hull. Finally I attached the two straps together in the center to form the final single strap. I hope my photos do a better job of showing what I fashioned than my descriptions. During the wrapping process I would coat the wrapped portion of the straps with thinned wood glue and then dry it in a fruit dehydrator. This worked great. The wrappings stayed put but the strap remained flexible so I could work with it. Anyhow, I think I was able to achieve an acceptable result. The last two photos show first the bow and then the stern hard points for the truss rope; which will be installed later.


- 28 replies
-
- 7
-
-
- Nave Egizia
- Amati
- (and 1 more)
-
Looks like a great little build. Will follow your progress.
-
Paint looks beautiful. Would like to know how you achieved your results. Whose paint did you use? Brush or sprayed? Thinned? Will you put any clearcoat on the model? Sorry to ask so many questions but we are here to learn.
- 38 replies
-
- 2
-
-
- Lady Eleanor
- Vanguard Models
- (and 1 more)
-
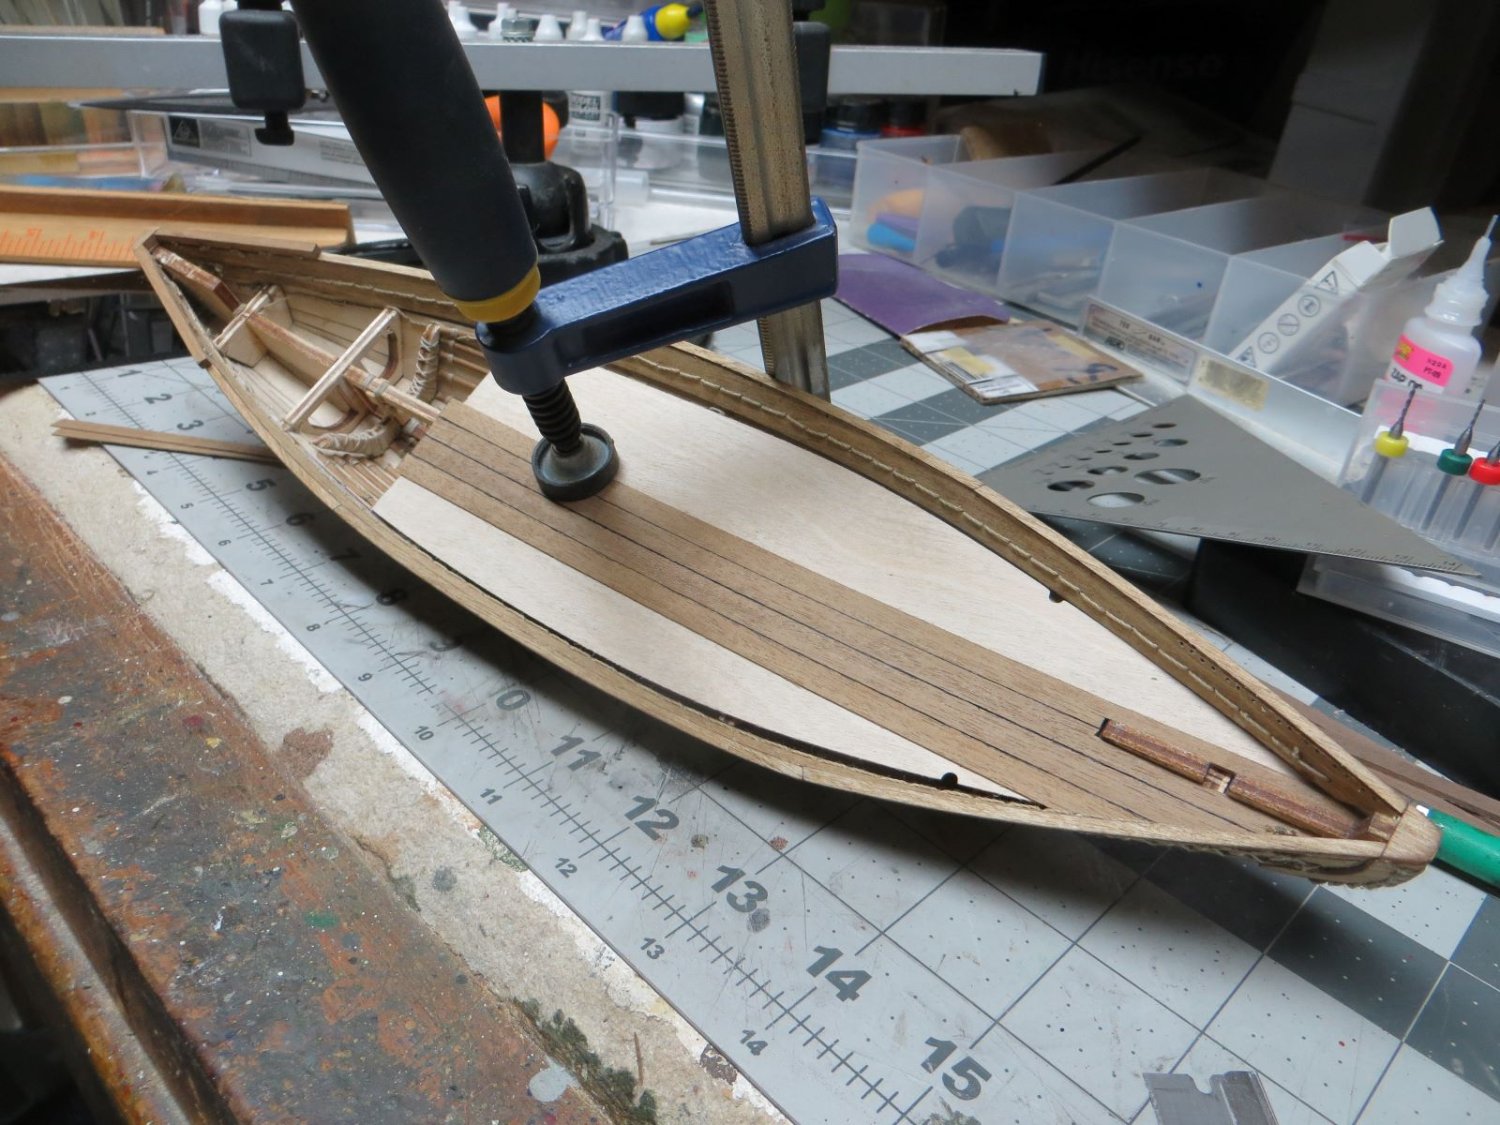
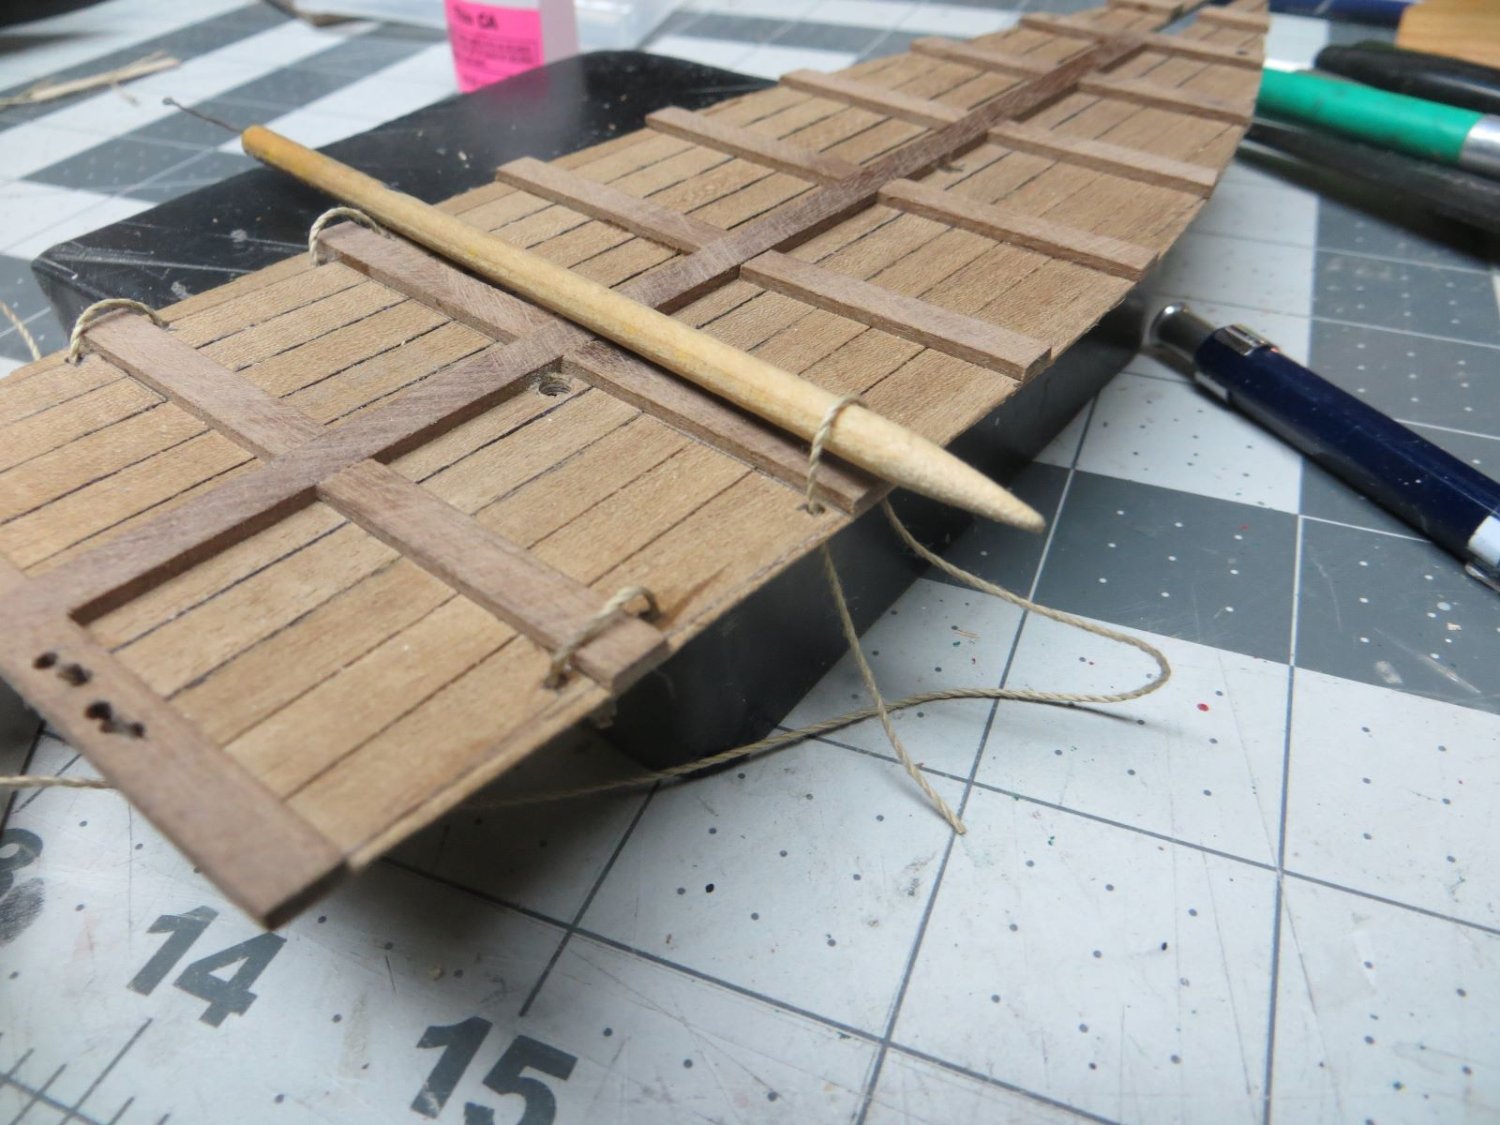
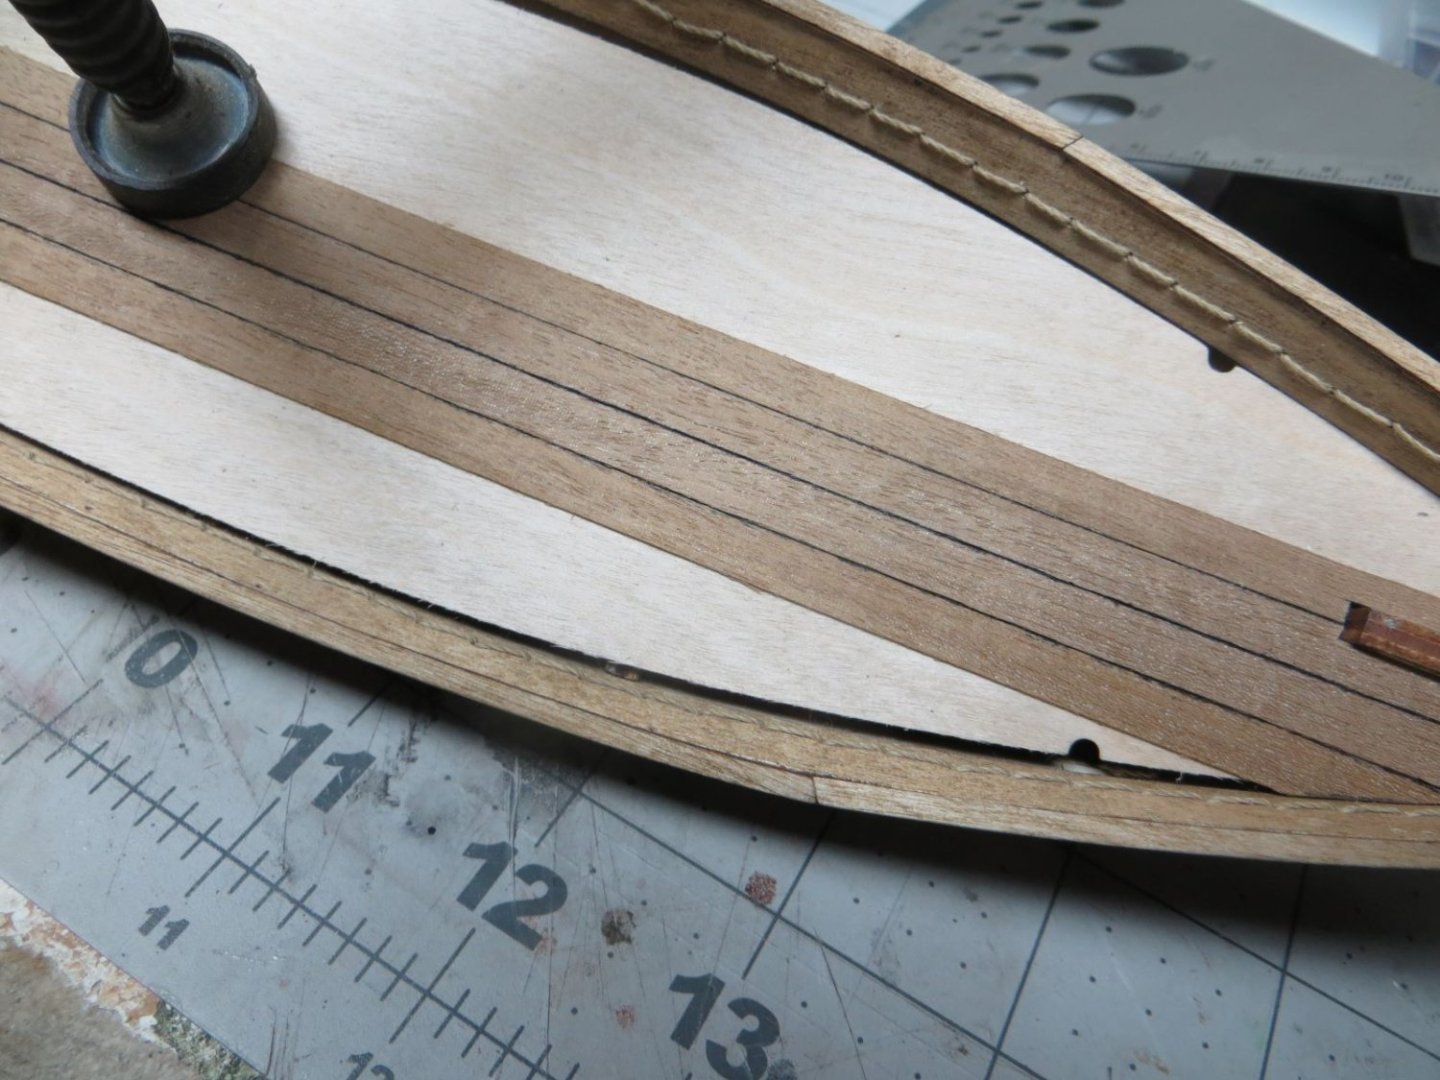
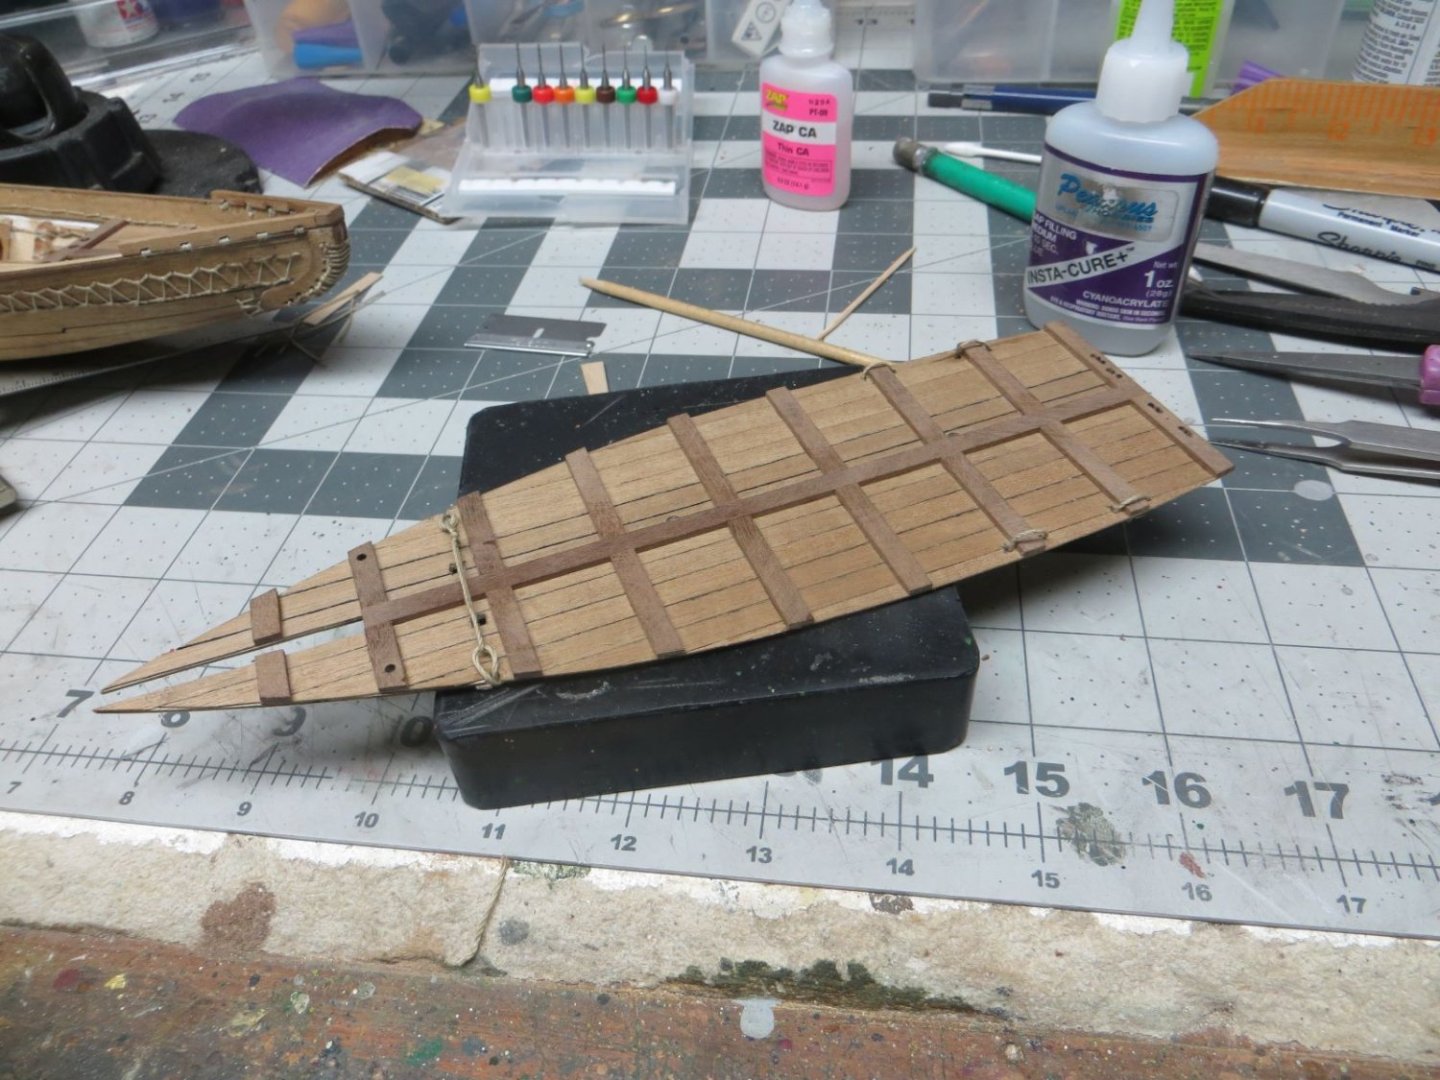
Decking is next. The kit provided a laser cut plywood deck that you plank with wooden strips. Unfortunately the plywood deck was a bit small. I held the plywood deck in place with a clamp so that I could cut the planking to cover the gap between the plywood deck and the sides of the ship. This worked well. After planking there is some hole drilling and adding rope loops before the deck is glued into place. With the decking in place; I think the model is beginning to take shape.


- 28 replies
-
- 6
-
-
- Nave Egizia
- Amati
- (and 1 more)
-
Welcome to the forum. Without proper tools, both projects you mention will be difficult if impossible. You might look into acquiring some basic tools such as a hobby knife, a few clamps, tweezers, etc. I sure there is a thread on this forum which discusses a "basic" tool list.
-
How durable is the stripping tape?
-
I use Tamiya acrylics a lot when building plastic. Their flats are the best, their gloss paints not so much. The flats are easy to airbrush (when properly thinned) and for an acrylic they are reasonably tough. While excellent for airbrush, their paints do not brush well. I have tried using retarder but still have trouble brushing. If I need to brush I usually go to Vallejo Model Color. If you are going to brush alot, purchase a wet palette. They are great.
-
Hey, your results look good to me.
-
What a beautiful boad. Will follow this.
-
What a shock to scroll thru so many photos of great work and then find you are starting over. May I ask how you fashion each rib. Bandsaw? Drum sander?