Bobstrake
-
Posts
198 -
Joined
-
Last visited
Content Type
Profiles
Forums
Gallery
Events
Everything posted by Bobstrake
-
 Philo426, Thanks for the encouragement. I've just gone off my rocker and planked the captain's cabin.
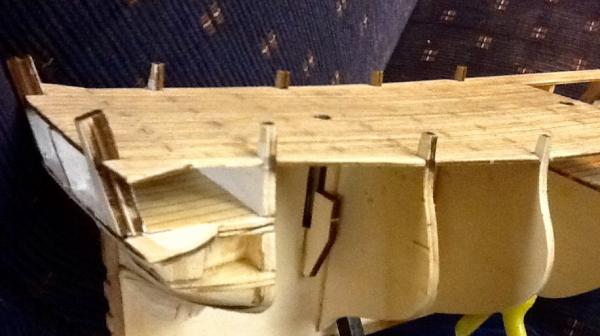
-
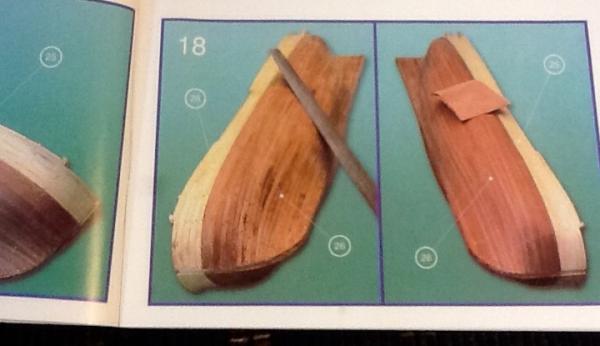
I'm afraid I skipped taking some photos of blunders with this next post. After gluing the rail to the edge of the deck planks, I noticed that one side had an overhang, so filed it down. This made the rail narrower on one side, but it doesn't really show. My first hull planks took a full day apiece. I bent them using a steam iron, then filed them slightly. Now comes the BIG BLUNDER. Notice the notch in the bow, where the planks come together? This notch is made to accept the cutwater or stem piece. I decided that the notch was too frustrating, so I filed it off! This was recommended in a very old, and very bad, ship modeling magazine I found. This was a bad idea. I took this picture when I had laid in my last hull strake. It also shows the missing notch. When fitting the stem, the missing notch caused me to file the planks down to the false keel on the bow, as you can see in this picture. It left ugly white blotches instead of the beautiful Sapelly wood. As a fix, I was able to glue some of the beautiful Sapelly wood sawdust over the blemishes. It worked! Nobody seems to notice the blunder now. Being such nice people, I know you won't tell anyone. I tried several recipes before discovering what I liked. The main ingredient was Sapelly wood filed down into a nice pile of sawdust. I tried mixing it with wood glue and it came out way too dark when it dried. I tried mixing it with thick cyano glue, and it dried white and was very hard to work with. When I tried applying wood glue first, then covering the glue with Sapelly saw dust, it came out just right. (Kind of sounds like the story of the Three Bears, doesn't it?) In the above picture, I broke the nose (stem) off three times before adding the side supports. The timbers under the cap rail caused some frustration. Even after measuring the spacing three times, I couldn't get them to end up looking even. I ended up just "eyeballing" the spacing, and was happier with the results.

- 47 replies
-
- 3
-

-
- carmen
- constructo
- (and 2 more)
-
I'm going to follow NickvN's lead by adding the stem, keel and sternpost before planking. The plans call for adding these pieces later. You are supposed to leave a notch for these pieces to be fitted into. My first build also called for this technique and I found it to be INFINITELY frustrating. Now I am firmly stuck on the horns of a dilemma. Where do I attach the first strake? The plans show very mysterious pencil marks on the bulkheads, but no explanations or measurements, just hints. Will the planks run straight, or follow the curve of the top deck? I know I simply will have to decide. Based on my own ignorant judgments, I will either enjoy the accomplishments, or the consequences. This is a most fascinating situation.

-
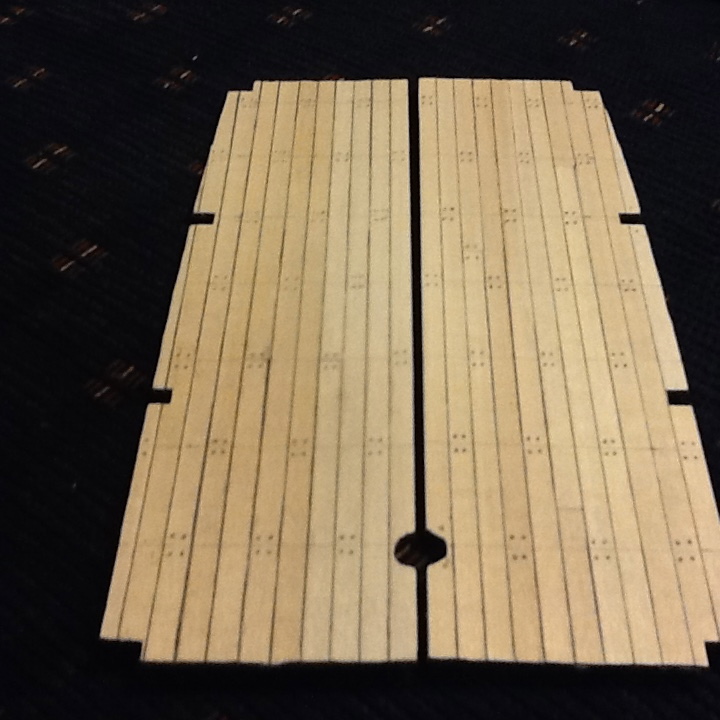
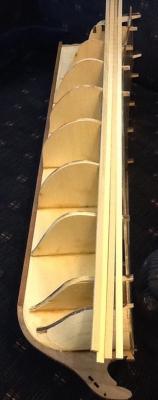
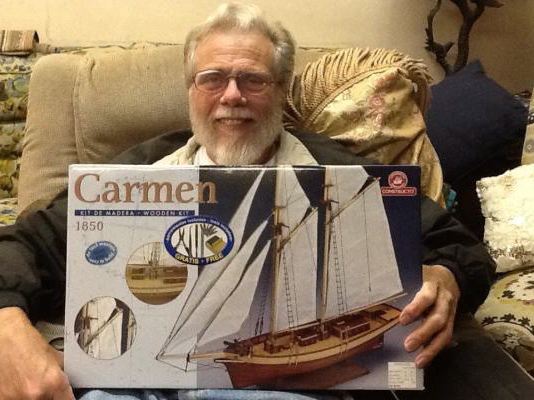
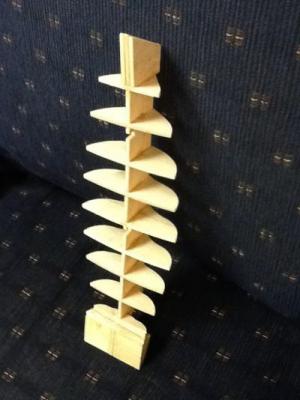
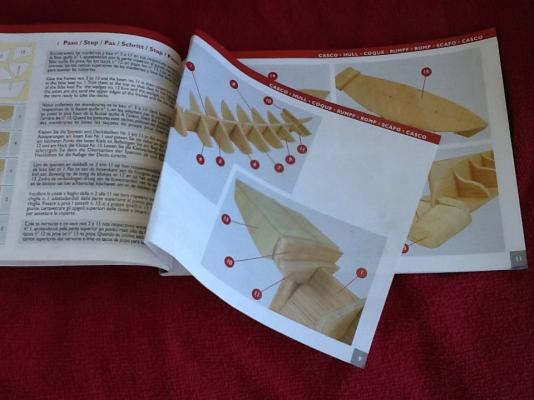
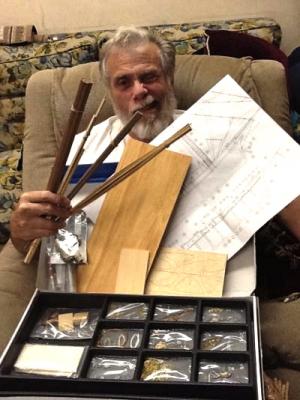
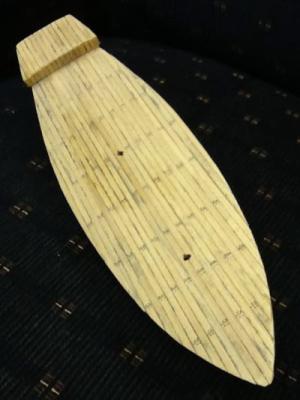
Here is my very first ship build, the Carmen 1850, from Constructo, scale 1:80. It is described as a small freight schooner, of 250 tons capacity, that was able to survive in an age of steam ships due to lower freight charges. I retired on May 1st, and received the kit on May 23rd. I chose the kit because of the simplified rigging, fine looking lines, and reasonable cost. It also came with some tools, which turned out to be of much higher quality than I expected. I still use them. Aaaaarrrrrrr! Here be the unpacking. I must admit to being intimidated with the contents: flat boards, bundles of sticks, and what looked like millions of teeny, tiny parts. Although it also comes with a fine color-illustrated assembly booklet, it doesn't give detail instructions of how to get to the beautifully pictured build points. In my ignorance , I frantically scoured the internet for pointers. I wish I had discovered MSW before plunging ahead. Beginning in June, I commenced building. Here's what I called my "fish bones". As a first attempt at framing, I "eyeballed" the alignment of the parts. I was pleased with the results at first, but payed for my lack of precision several times later. I glued down the deck and planked it. Well, actually it didn't go that smoothly. I marked one side of the deck planks with a black marker pen, and was alarmed to see how much the ink bled through. But after lining up the planks, I was relieved to see how the deck had an aged look to it. I glued down the planks with contact glue. The instructions said to glue each surface, wait a couple minutes, then press together. The planks only stuck to my fingers. So finally, after a liberal addition of sailor language, I persuaded the planks to stick. Unfortunately, a few have some space between them. I made cuts across the planks and punched two holes on each side of the cuts with a mechanical pencil to represent nails.
- 47 replies
-
- 4
-
-
- carmen
- constructo
- (and 2 more)
-
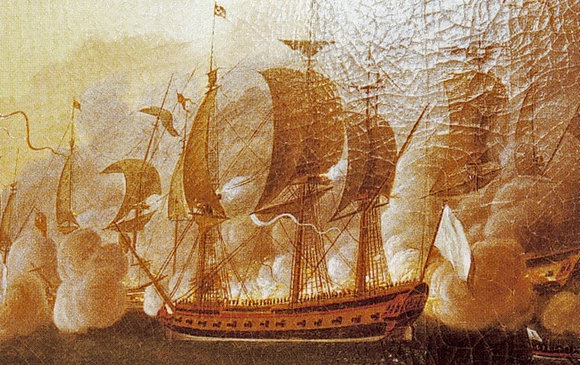
I don't think I will paint the waterline or hull. I love the look of the wood. The old paintings don't show much color, but I do plan to add some of the blue and a subdued red. Of course, I may change my mind when I see how yours comes out.
-
I decided to reinforce the bow and stern before adding the strakes. I found some basswood leftovers from a previous model and glued them all over the place. After hours of filing, they turned into these. I'm afraid the commodora was displeased with the massive amount of sawdust in my workshop but eventually I vacuumed it up. Here's my workshop. So now, it's off to bigger and better messes, and maybe even some progress.


-
Good to hear from you, Ship Shape. I'm experimenting with weathering to see if I can make the build a little more realistic. Of course, some of my choices may end up being more stylistic than realistic, but it's fun.
-
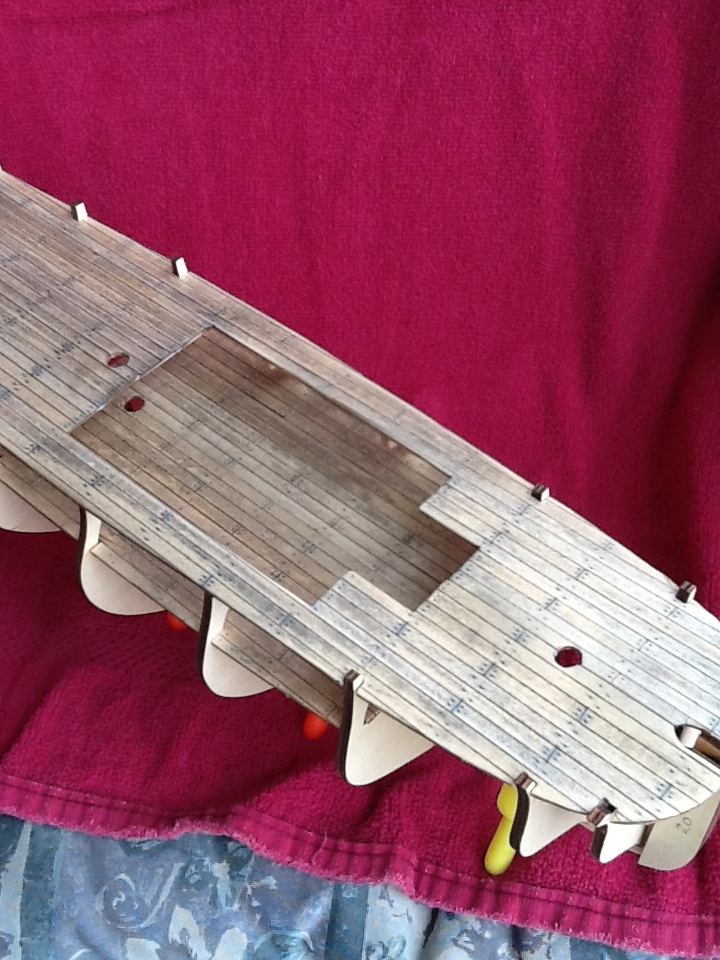
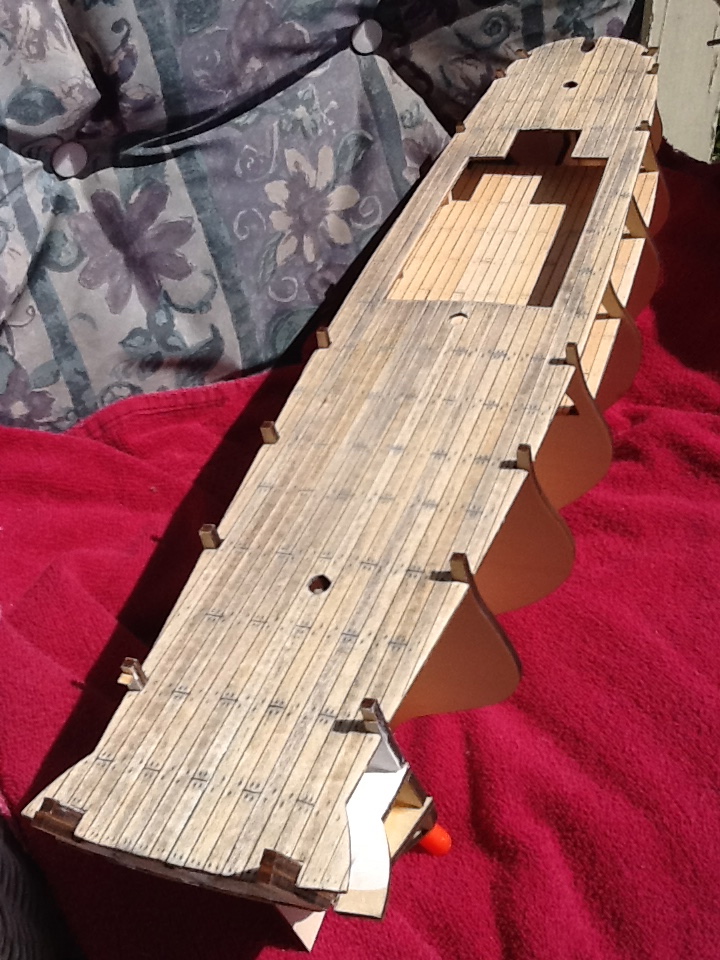
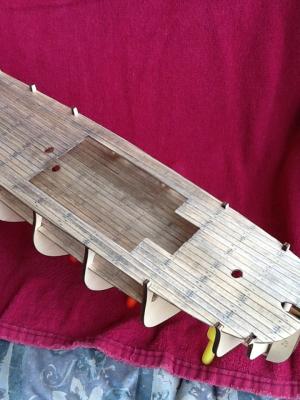
After weathering the top deck, I thought the gun deck looked too fresh. I had already put a satin finish on the gun deck, so the aging liquid wouldn't work. I tried rubbing the surface with pencil lead, and lucked out. It's now sealed under another satin coat.
-
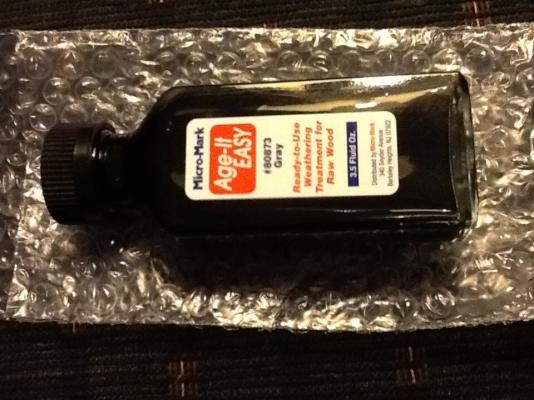
Tim, From you, that is high praise, indeed. I thank you. I think I applied Age-it Easy too lavishly, because I was initially horrified by the deepness of the wood's grayness. After a good session of sanding, I felt better about it.
-
Nick, With your build, I can see a ship emerging that you will always enjoy and be proud of. I'm building L'Hermione, too. I really like some of your innovations. In fact, I am already planning on using some of them. Thanks for sharing,
-
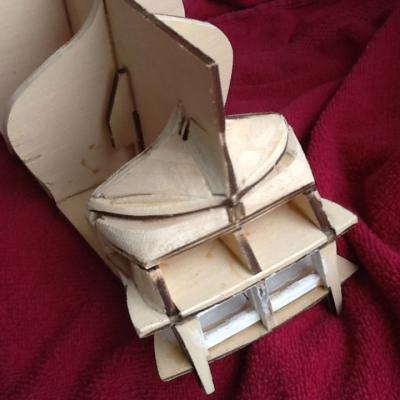
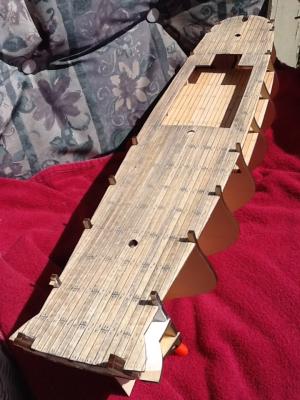
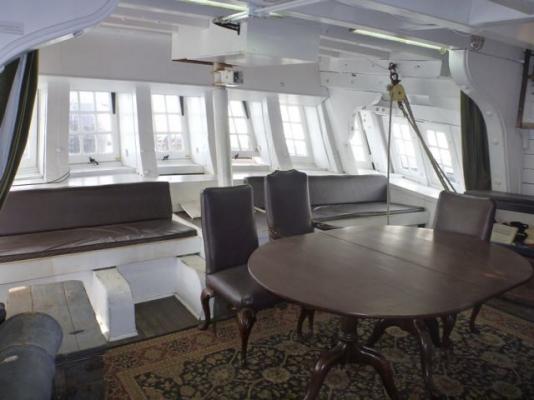
The upper deck is now planked. I decided to give it some weathering, but may have overdone it a bit. You can see white in the captain's cabin. This photo of Hermione"s deck was my inspiration for weathering.

-
Tim, I very well may take up your generous offer. Thanks again. Nothing new to show. Just a- plankin' and a-ponderin'.
-
The photos are very much appreciated. I'm finding that the kit's photos, instructions, and drawings are surprisingly lacking in details and measurements. While planking the top deck, I'm pondering what to do next. It's an interesting problem of continuing the build without blocking access to the captain's cabin.
-
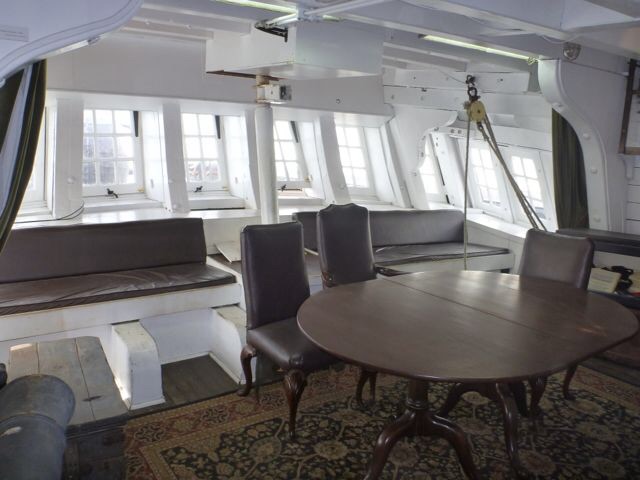
Tres bien, Jim, Thanks for the assist. I've just gotten some help from your build log. I will be taking some liberties with the actual cabin interior. I want to let a little light shine through. It looks liked I roped myself into making some basic furniture, a bench under the stern windows and a table. I don't think very much detail will show, once the windows go up. Maybe something like this in the Surprise:
-
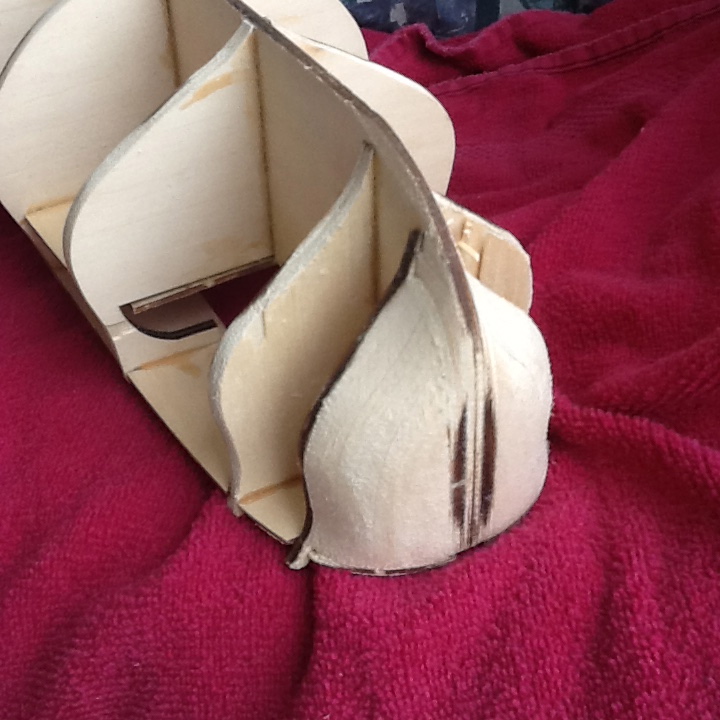
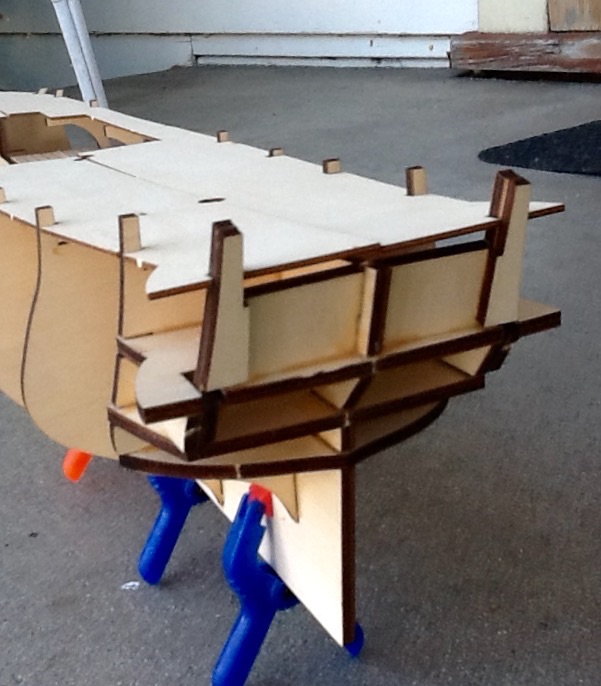
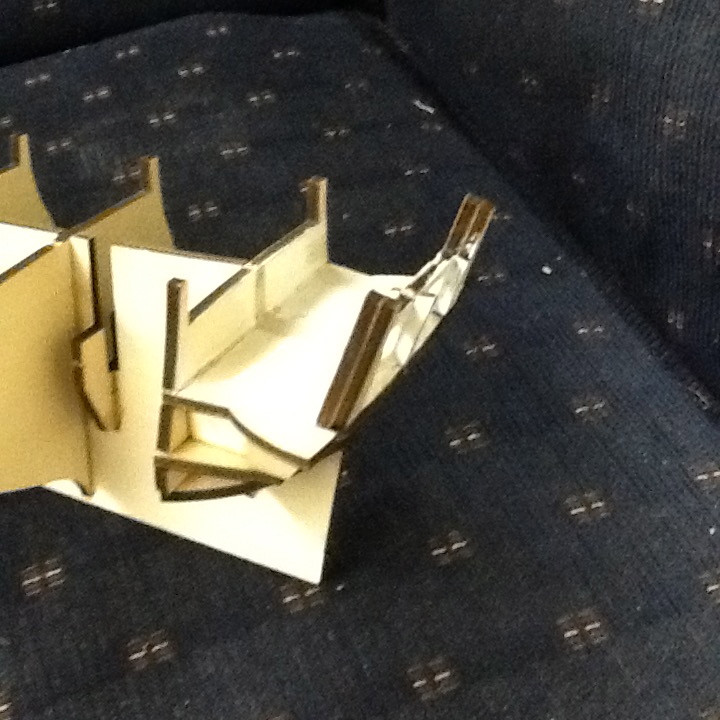
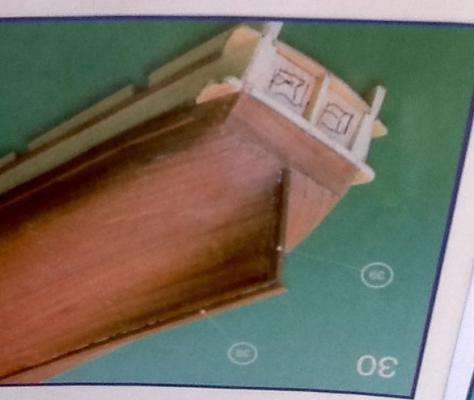
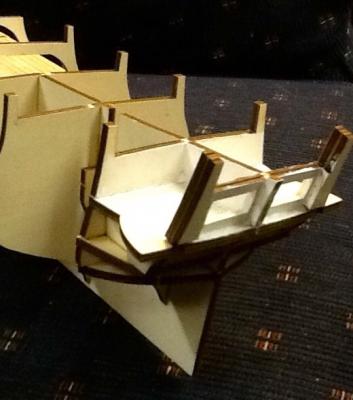
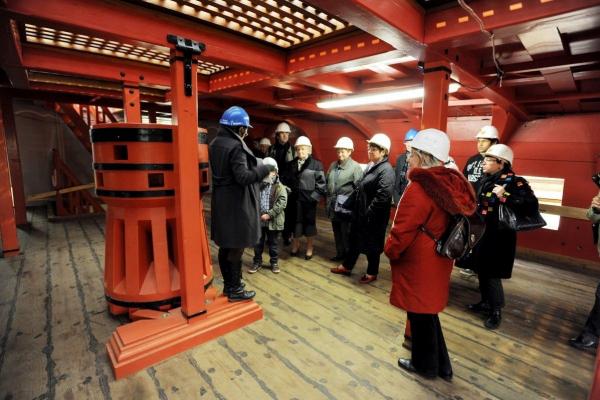
Thanks, Larry. I was lucky to find a picture of a tour on the Hermione gun deck during construction. You can see the plank nailed across the gun port. I held my gun deck down with a piece of scrap wood and rubber bands for gluing. Not too pretty, but it worked. Here's where I lost my mind. I decided to cut holes in the stern to look into the captain's cabin. First drilling holes in a rectangular pattern, then cutting between the holes, the stern looked liked it had been chewed by a crazed rat. Fortunately, it cleaned up with a file. Then I noticed that the false keel cut the captain's cabin in half, so I removed it. I hope I don't regret this.


-
I blackened the edges of the deck planks with a felt tip marker, and glued some down on the gun deck. They came out neater than I had hoped. I was actually going for a rougher edge, like the actual ship"s deck.

-
I finally fixed the pictures on a Mac. Couldn"t do it on the iPad.
-
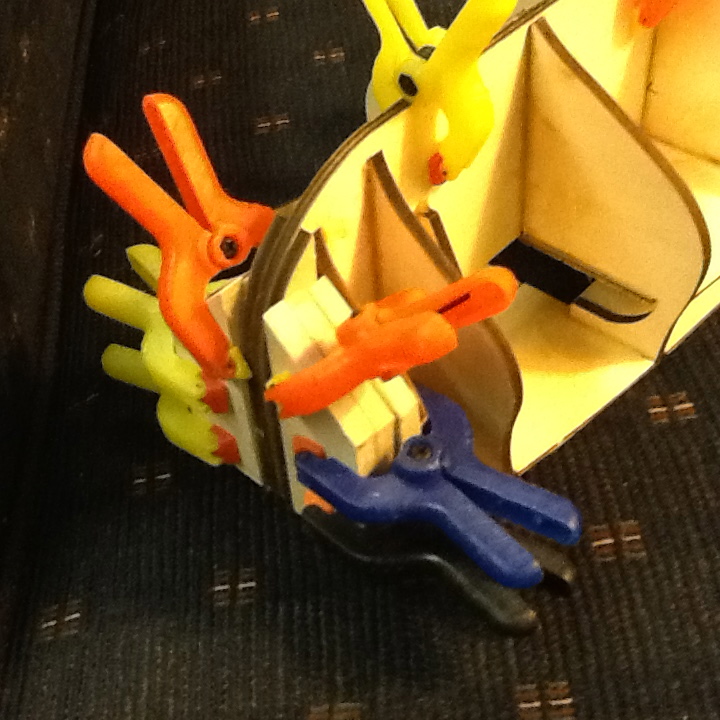
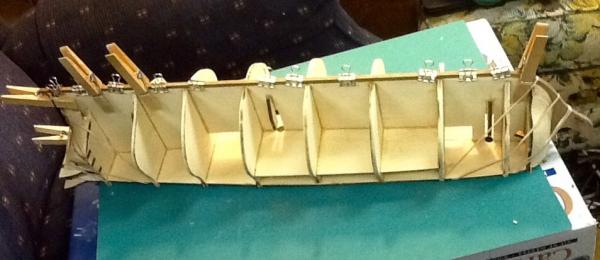
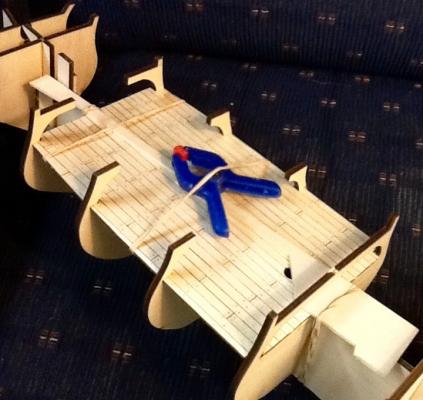
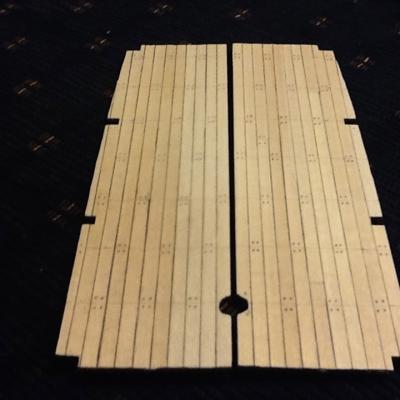
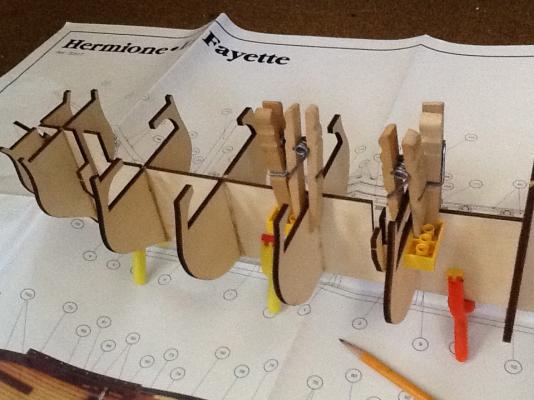
The build begins. I found that the knightheads had a very loose fit, so I shimmed them with deck planking and got a snug fit. The bulkheads did not need the shims. This part seemed so much easier than my first build, thanks to the great ideas I discovered on this site. Using Legos to clamp on the bulkheads was great! I double checked with a right angle square and found the Legos correct. Holding them on with modified clothes pins, was perfect. With the bulkheads being held at right angles, I was able to concentrate on lining up the top edges. I even stole the idea of using clamps for model stands.
-
Philo426, Thanks for the response. I'll contiue posting, even if it's upside down.
-
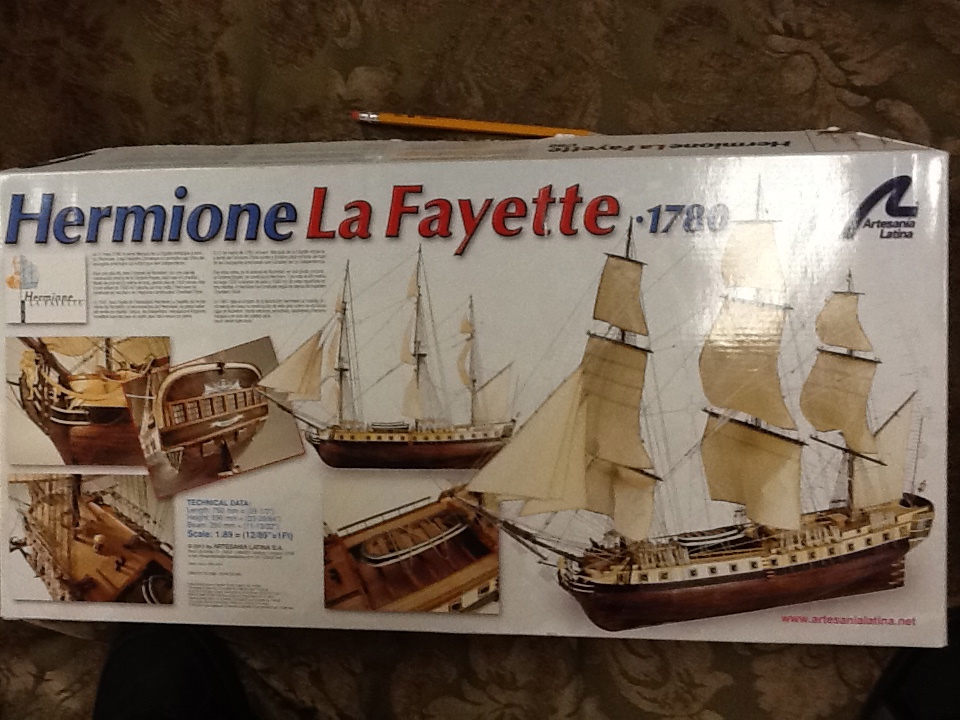
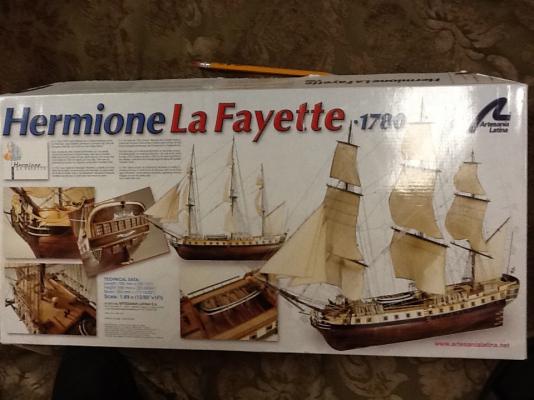
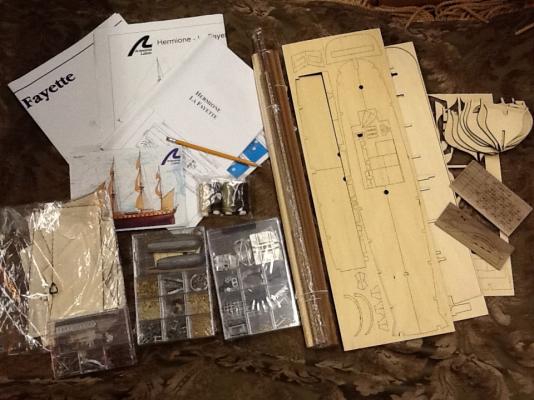
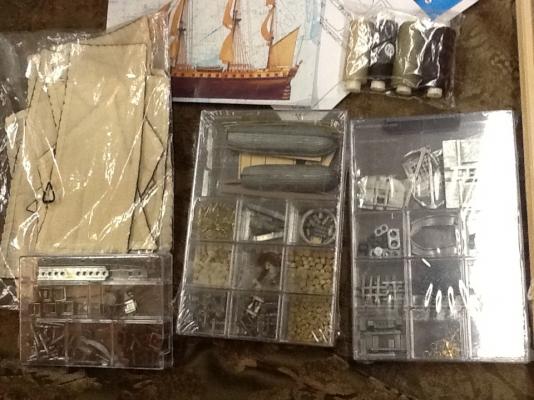
The Hermione was built expressly for La Fayette to help with the American Revolution, and she departed France on March 21, 1780. A reconstruction of this ship has recently been completed and will set sail from France to the United States on April 18, 2015. I will be making some modifications to the kit as I go along. Since there are nice windows for the captain's cabin, I will cut openigs in the stern to look in. The solid brass side windows will have to be replaced to let in light. I hope I can pull this off. This is my second ship build, although I haven't completed the first, the Carmen, because I've gotten snagged on making the sails. Thankfully, this kit has the sails already made. Here's the box and contents: No matter what I try, the pictures come out upside down. I don't know if this because of the old iPad, or the old man. Sorry.
-
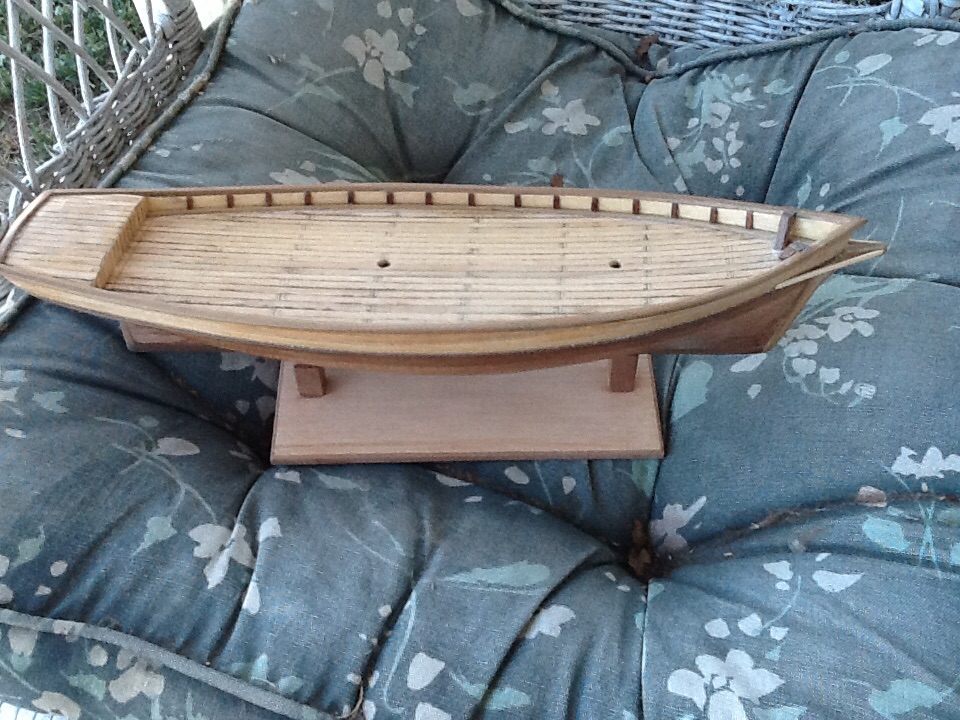
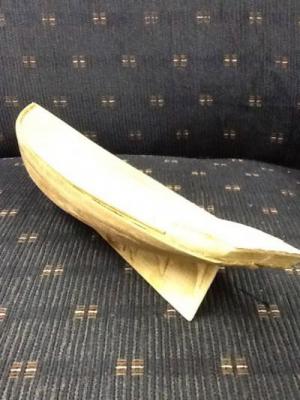
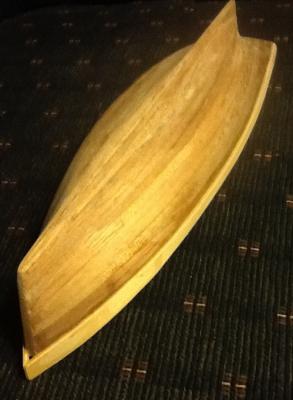
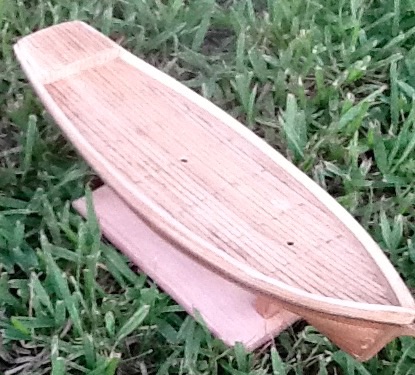
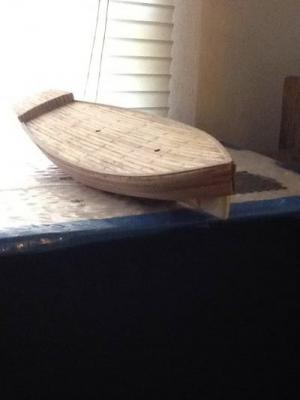
No signs of splits or warts anywhere. It came out quite nice.
-
Larry, I appreciate your honesty and humor. I'm sure this longboat is much better than the original one would have been. Now I feel better about my own clutzy blunders.
-
Frank, Even using a lot of CA glue, your boat is looking very clean. I found that I had to dry the side being glued, after wetting, or only my fingers would stick. Also, I found the glue accelerator spray to be a Godsend. Beatiful work.
-
Welcome Frank, I built the Midwest Skiff. I broke some frames and an inwale, as well as splitting a side plank. I also glued a finger to the transom and left some blood when the skin was torn off, but the finished boat came out nice. I'm sure you will do better. I'm looking forward to your build. Bob