cmann
-
Posts
52 -
Joined
-
Last visited
1 Follower

Recent Profile Visitors
606 profile views


-
 ccoyle reacted to a post in a topic:
Virginia 1819 by cmann - FINISHED - Artesania Latina
ccoyle reacted to a post in a topic:
Virginia 1819 by cmann - FINISHED - Artesania Latina
-
GrandpaPhil reacted to a post in a topic:
Virginia 1819 by cmann - FINISHED - Artesania Latina
-
Matt D reacted to a post in a topic:
Virginia 1819 by cmann - FINISHED - Artesania Latina
-
Matt D reacted to a post in a topic:
Virginia 1819 by cmann - FINISHED - Artesania Latina
-
dgbot reacted to a post in a topic:
Virginia 1819 by cmann - FINISHED - Artesania Latina
-
dgbot reacted to a post in a topic:
Virginia 1819 by cmann - FINISHED - Artesania Latina
-
Altduck reacted to a post in a topic:
Virginia 1819 by cmann - FINISHED - Artesania Latina
-
BLACK VIKING reacted to a post in a topic:
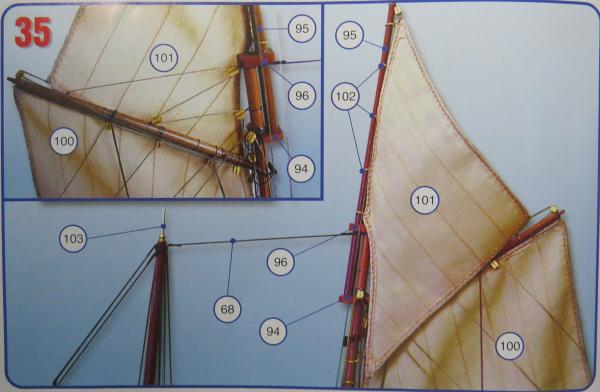
Virginia 1819 by cmann - FINISHED - Artesania Latina
-
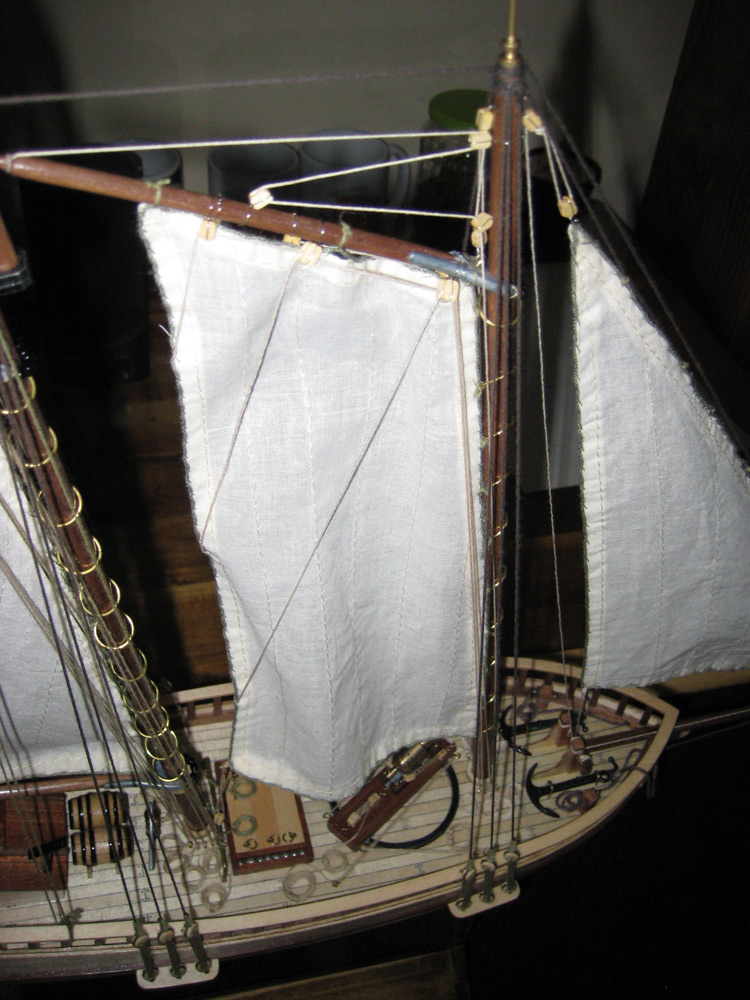
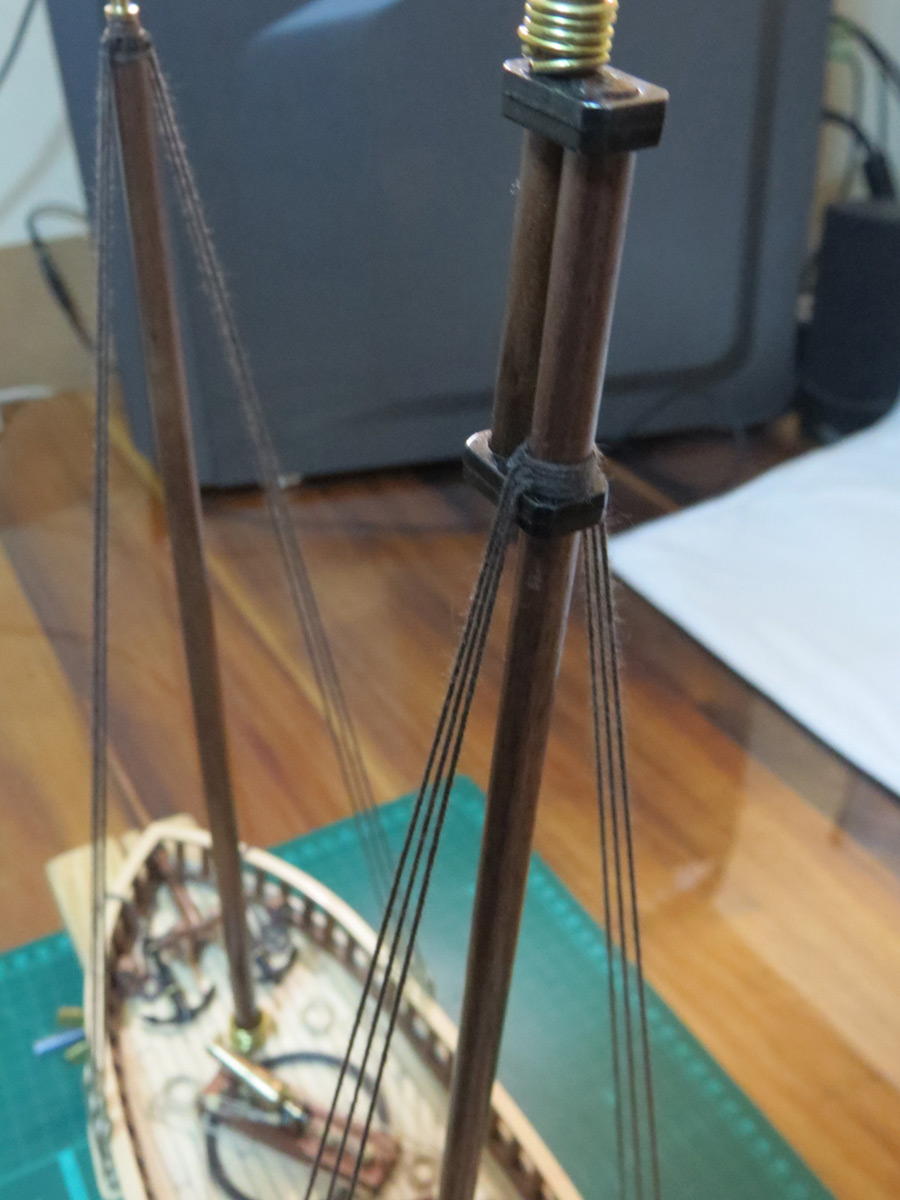
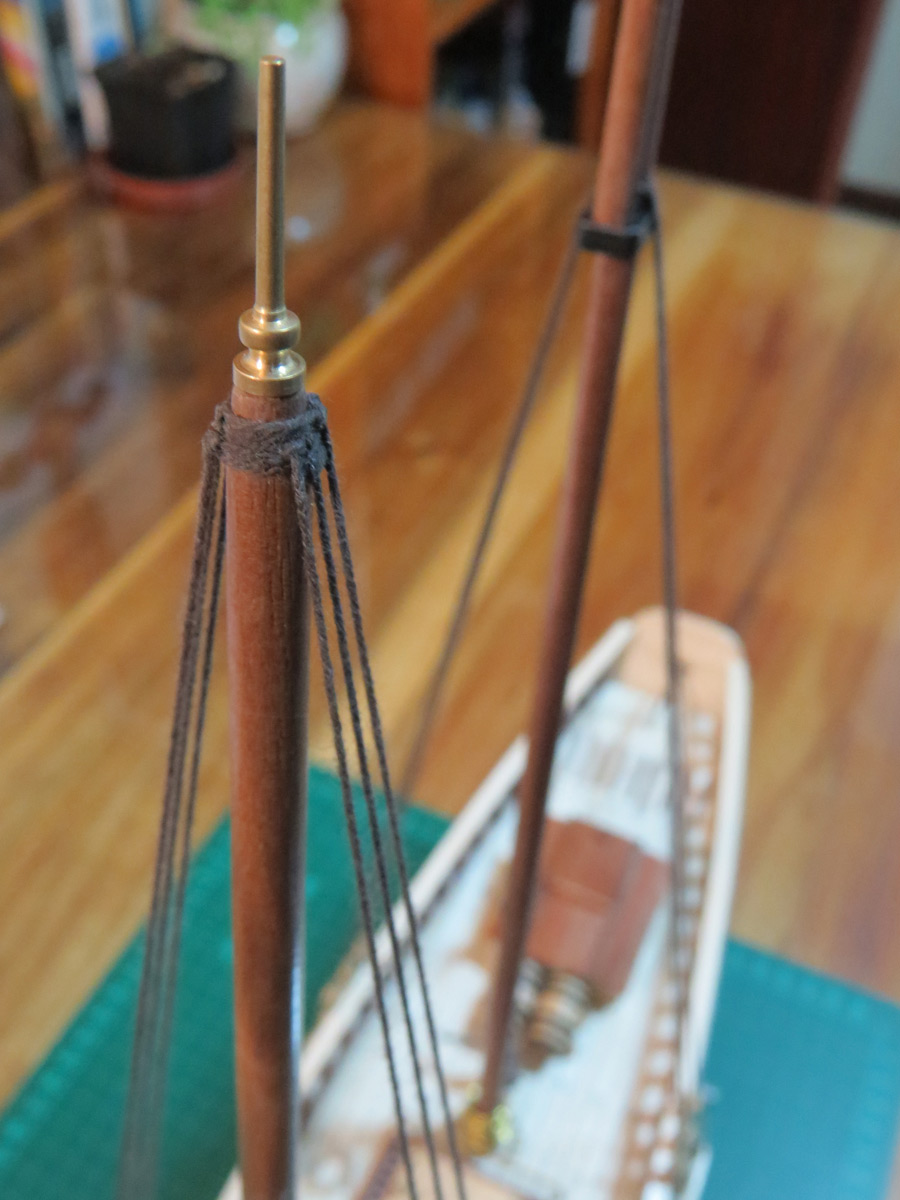
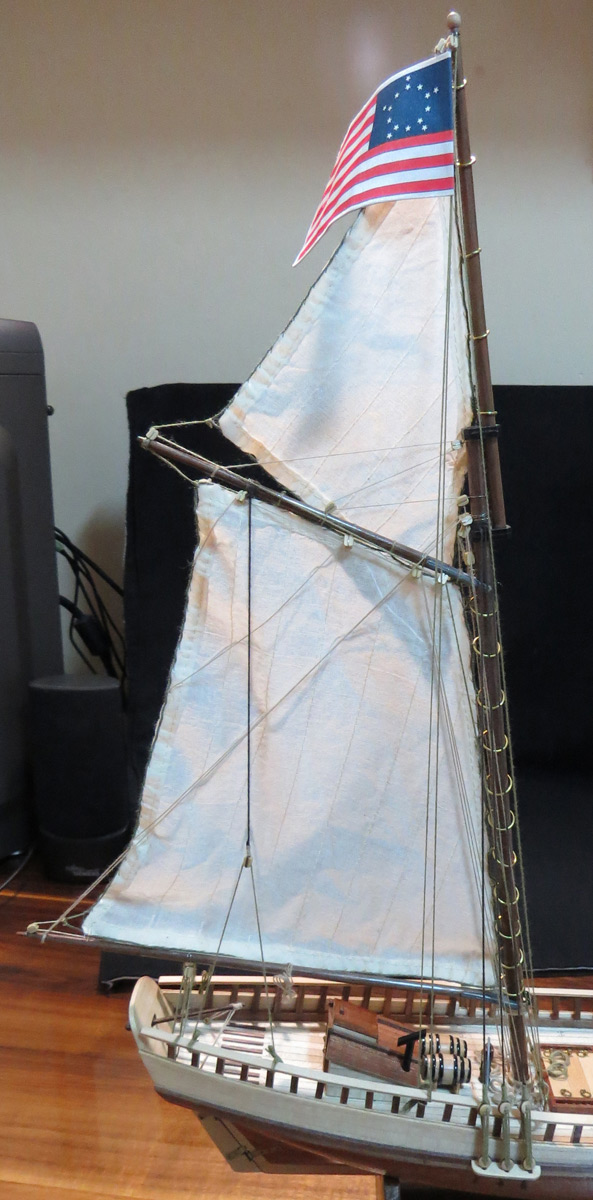
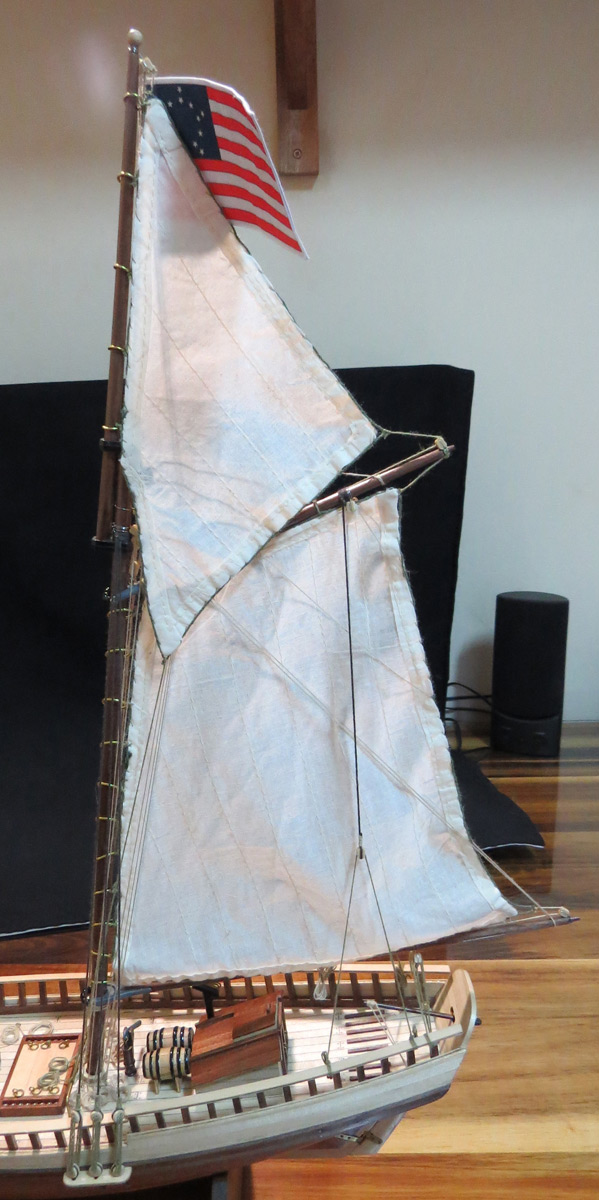
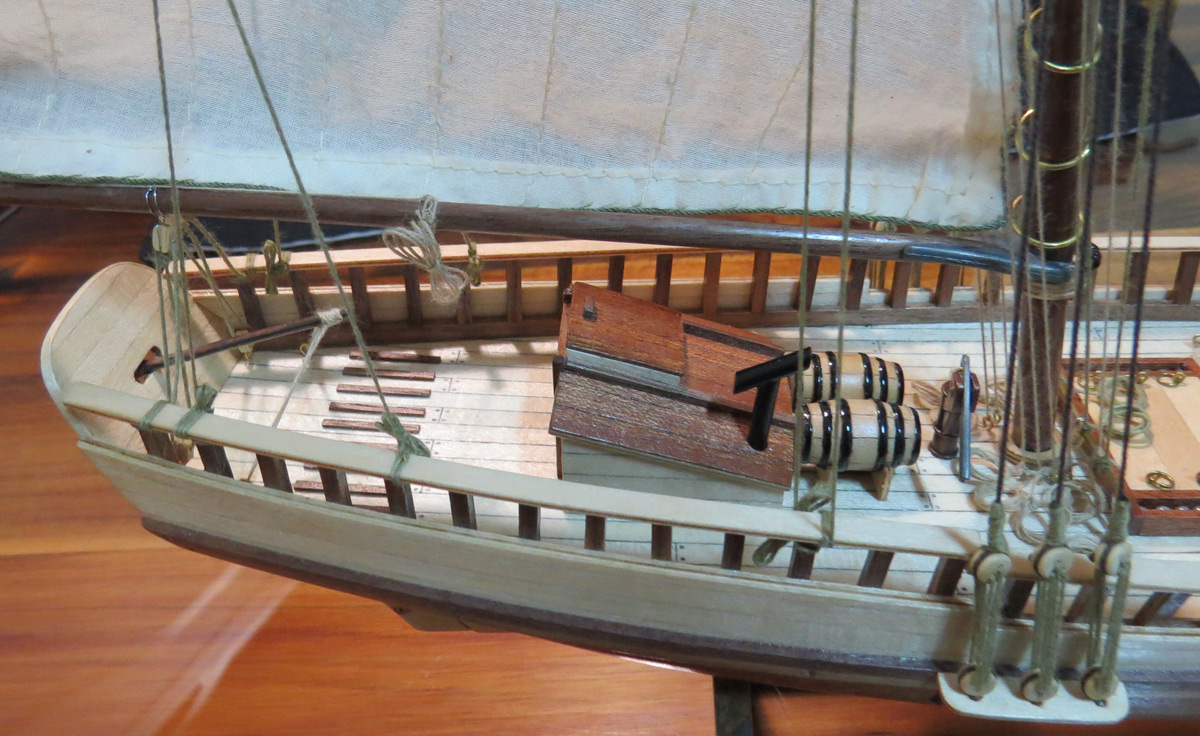
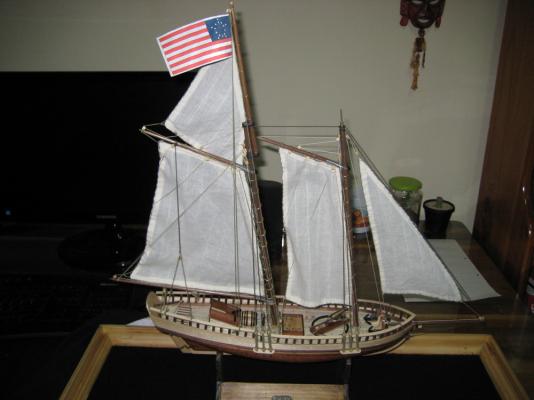
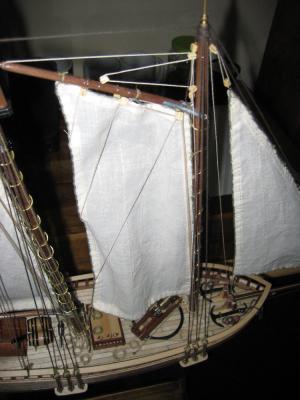
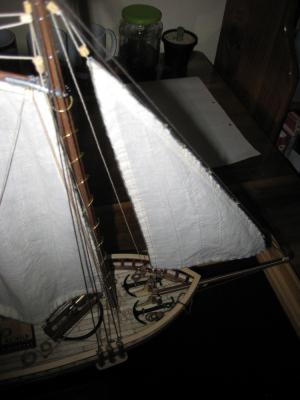
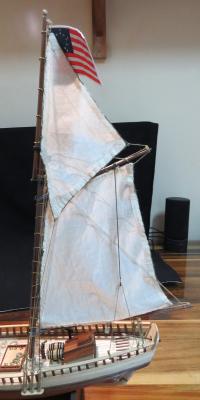
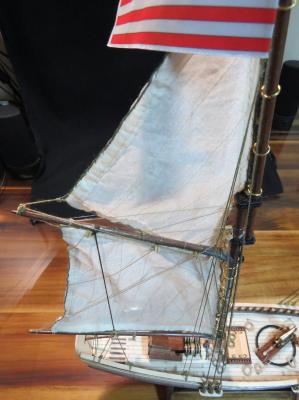
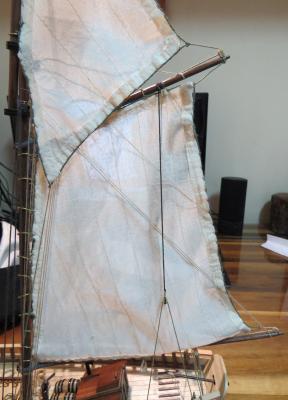
A few weeks ago I finally received the thread. Unfortunately it was basically white and not nearly as brown as it looked in the picture - I've decided to use some thread I found locally that is a closer match. Some of the photos aren't great but here is the completed model and some close-ups of the sails:

- 98 replies
-
- 6
-
-
- artesania latina
- finished
- (and 1 more)
-
NJQUACK reacted to a post in a topic:
Virginia 1819 by cmann - FINISHED - Artesania Latina
-
GuntherMT reacted to a post in a topic:
Virginia 1819 by cmann - FINISHED - Artesania Latina
-
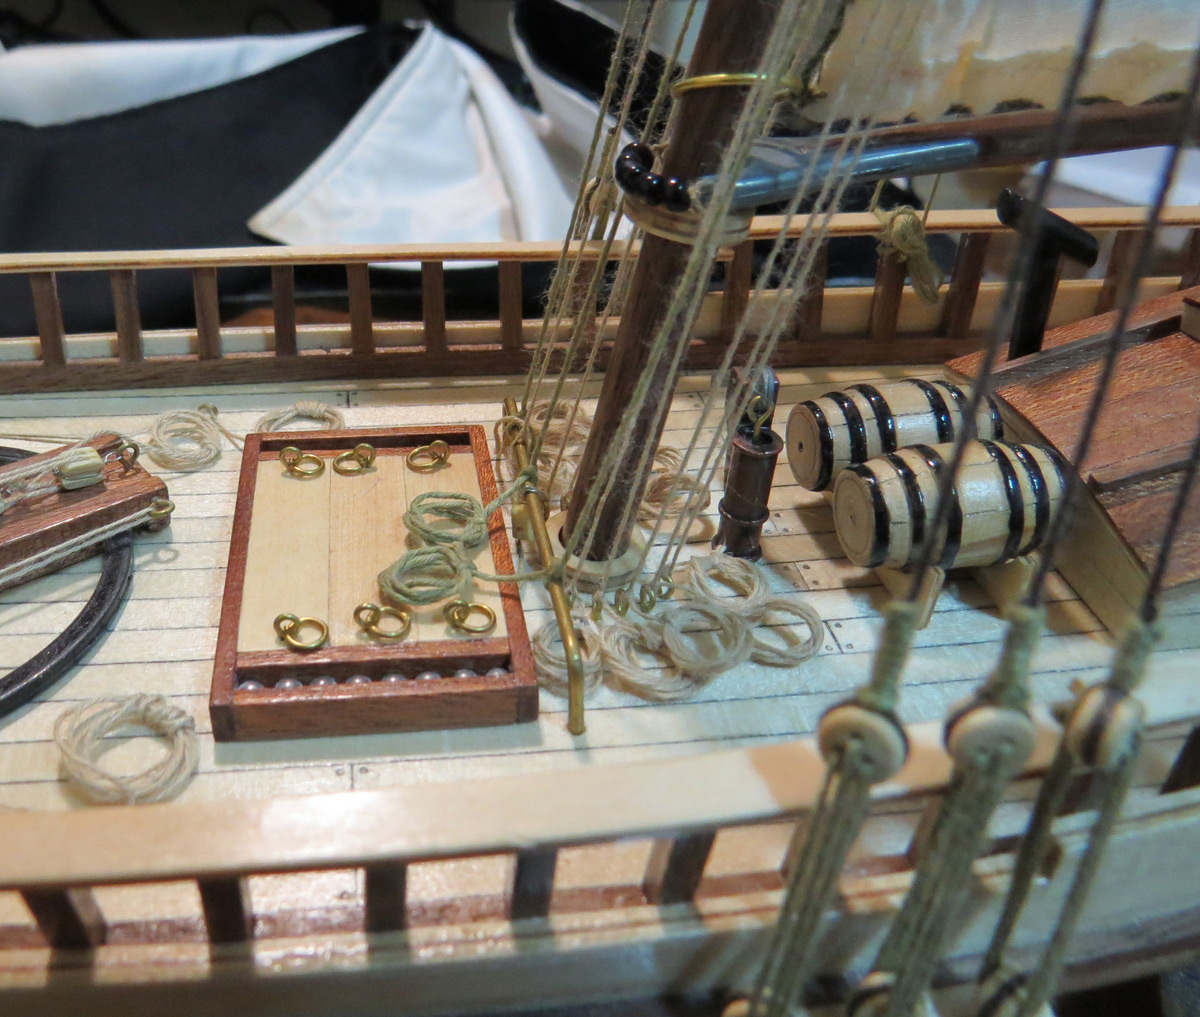
I've slowly been working on the ship and have now completed the main sails, unfortunately I have run out of thread (I'm not sure if they just didn't provide enough or maybe I used it in the wrong place when I should have used the other greenish thread they provided). I found a few online shops that stock it and ship internationally at a reasonable price but unfortunately they will only have stock in mid October so I will have to wait until then to continue. Here are some photos of the progress:


- 98 replies
-
- 3
-
-
- artesania latina
- finished
- (and 1 more)
-
Thanks, I'm not completely familiar with all of the terminology but thanks to Google I think I got everything you said. Makes sense; I have started already but I will remember to do this from now on. Thanks. Also, I only left out the braces because I thought that they were obvious enough.
-
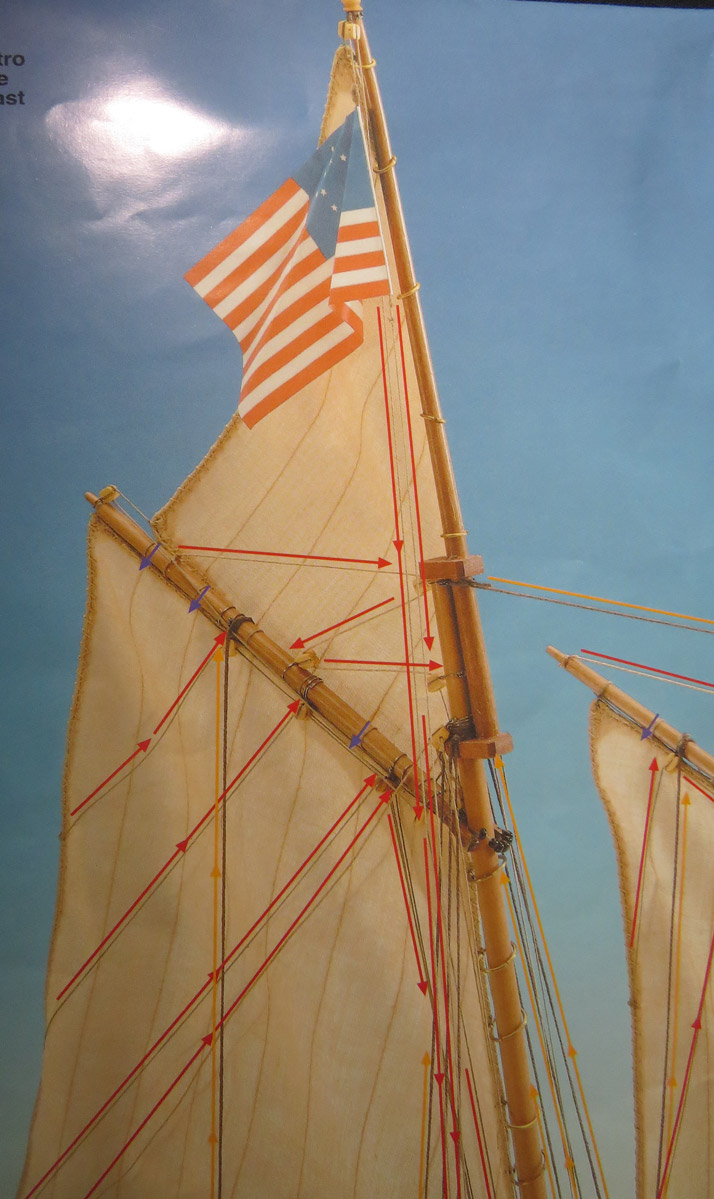
Unfortunately it didn't come with anything like that, the picture above is all it had. This could help though, so the standing rigging is any fixed line that would not move? If so then the thicker thread (in the picture from the instructions the thicker thread looks lighter to me, but in my kit the thicker thread is a dark brown) could be attached to the bottom left corner of the top sail, since as far as I can see that is the only fixed line.
-
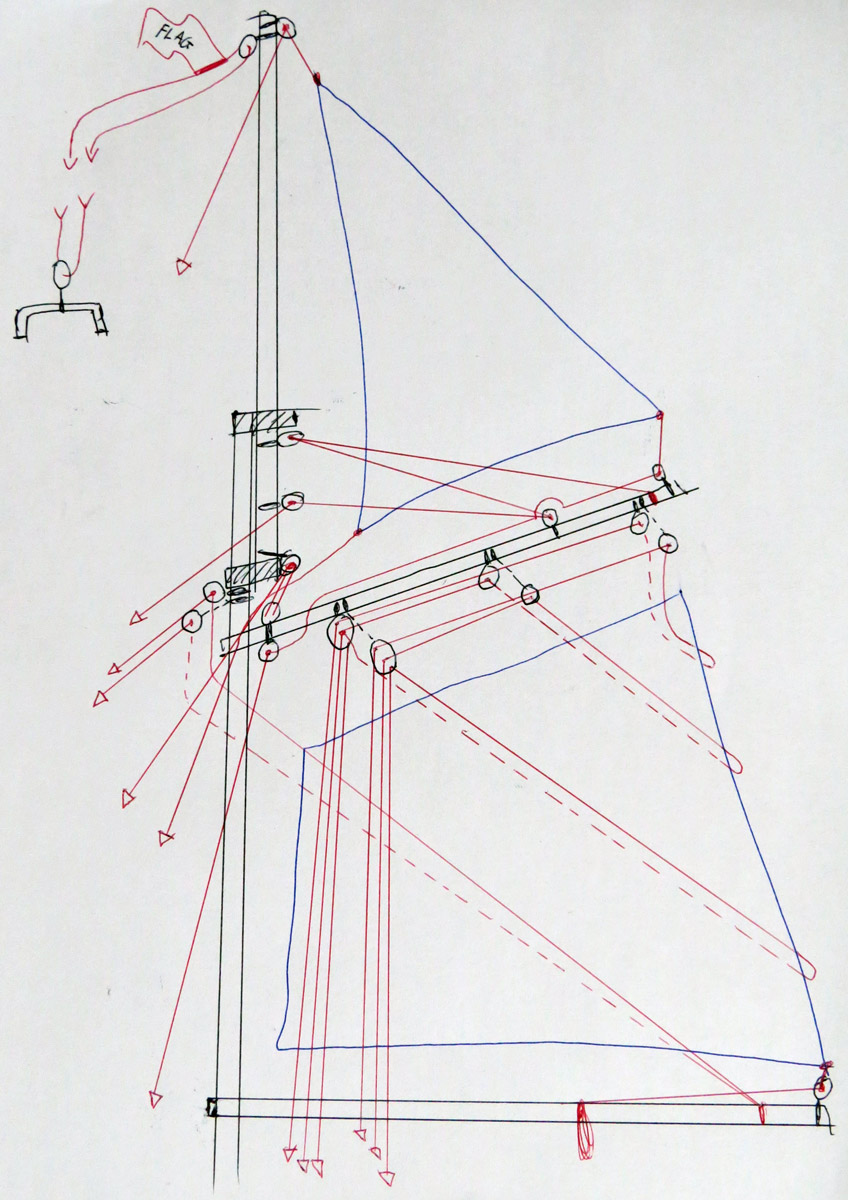
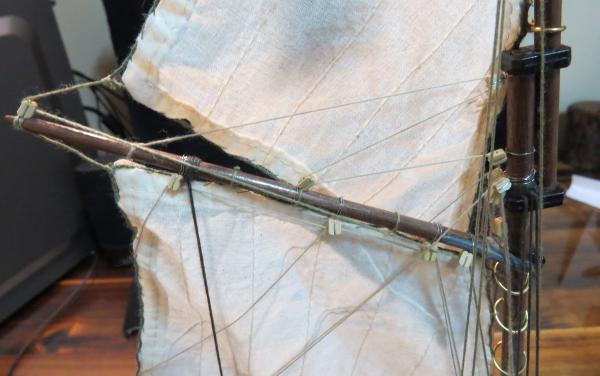
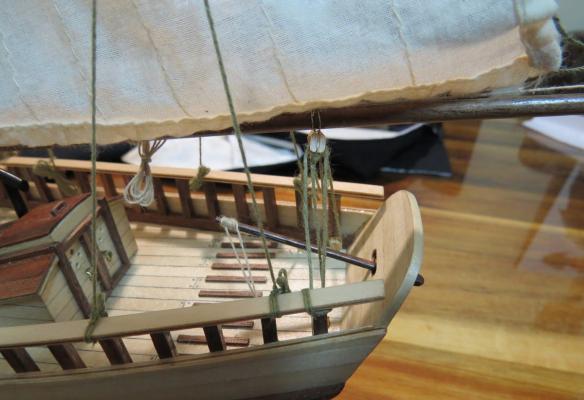
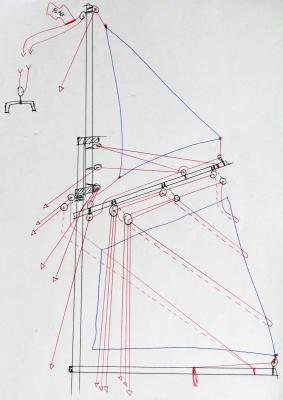
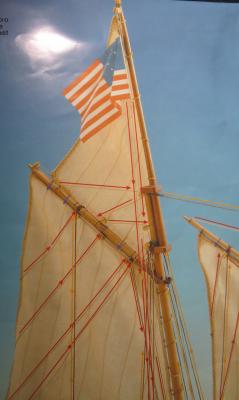
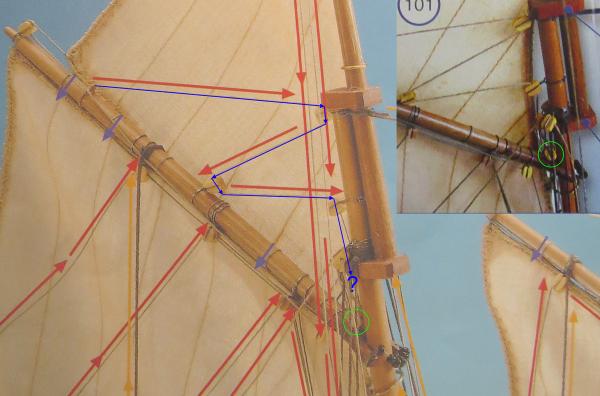
So now I think I have the rigging for the main-mast figured out, but if possible I would appreciate it if someone could check to see if everything seems fine or that I haven't done anything obviously stupid. I have drawn up a diagram and attached it below, hopefully you can make out what is happening (make sure to click on it for the full sized version). So in total there are going to be a total of 13 lines that need to be attached, or belayed?, to the deck, plus the one line and pulley used for the flag. I also have a question about the thread, the instructions aren't very consistent and the colours in the pictures don't always match what I have. If you look at the photos of the instructions I posted previously you will see that they have marked three different threads: blue - 0.15mm, red - 0.25mm, and yellow - 0.5mm. All of these are red (0.25) but if you look at the picture below you will see that there are two thicker, different coloured lines attached to the pins and the upside down u-shaped bar. Where could this thicker line possibly be attached to? I am also assuming that the pulley attached to the bar is used for the flag.

-
Thanks, that clears everything up. So you would recommend buying Lennarth Petersson's books? Someone has already bought me another model as a gift: the San Juan, also by Artesanía Latina, and the rigging is a bit more complex, maybe a book would be helpful. I see he has two books, Rigging Period Ship Models, and Rigging Period Fore-and-Aft Craft, what's the difference? Thanks, any help is appreciated but I don't quite understand what you're saying. What do you mean by Knize anchor biting need to deploy 180 degrees and there are no scuppers, there is no radius on the deck; and I am not sure why it would be rude.
-
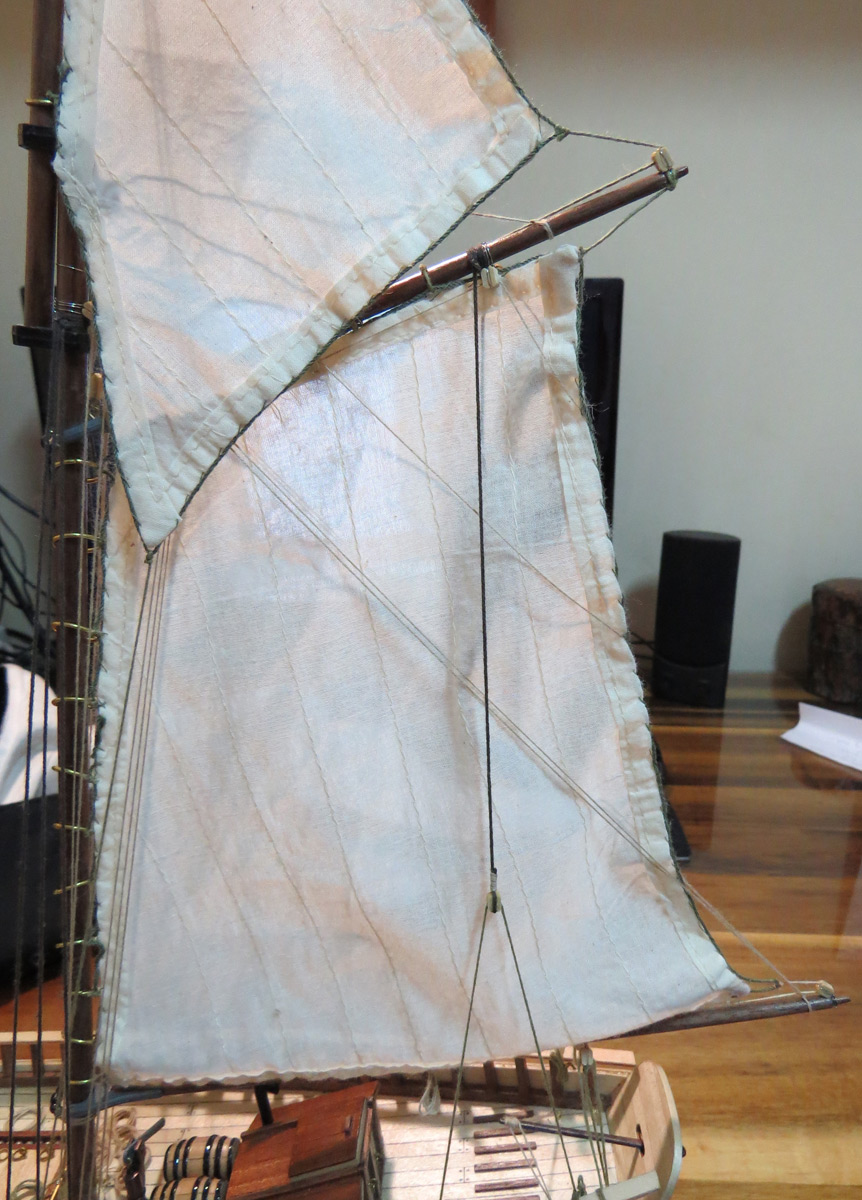
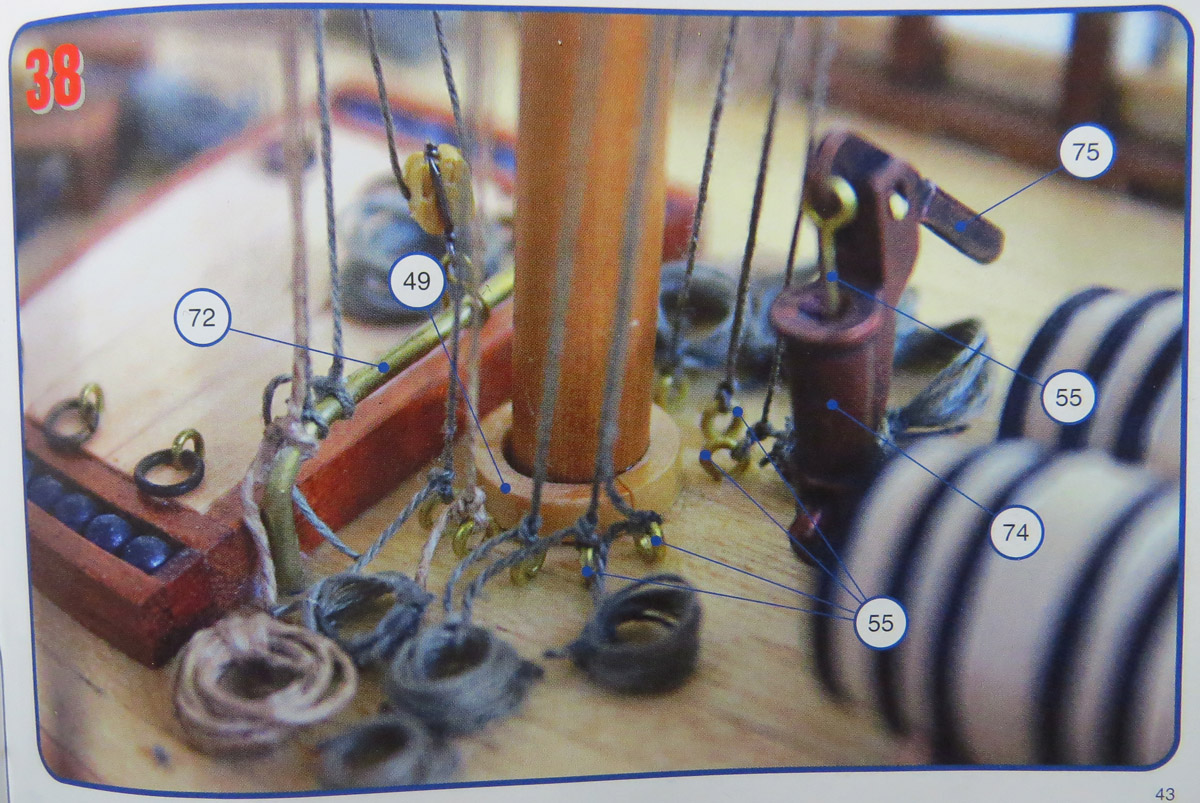
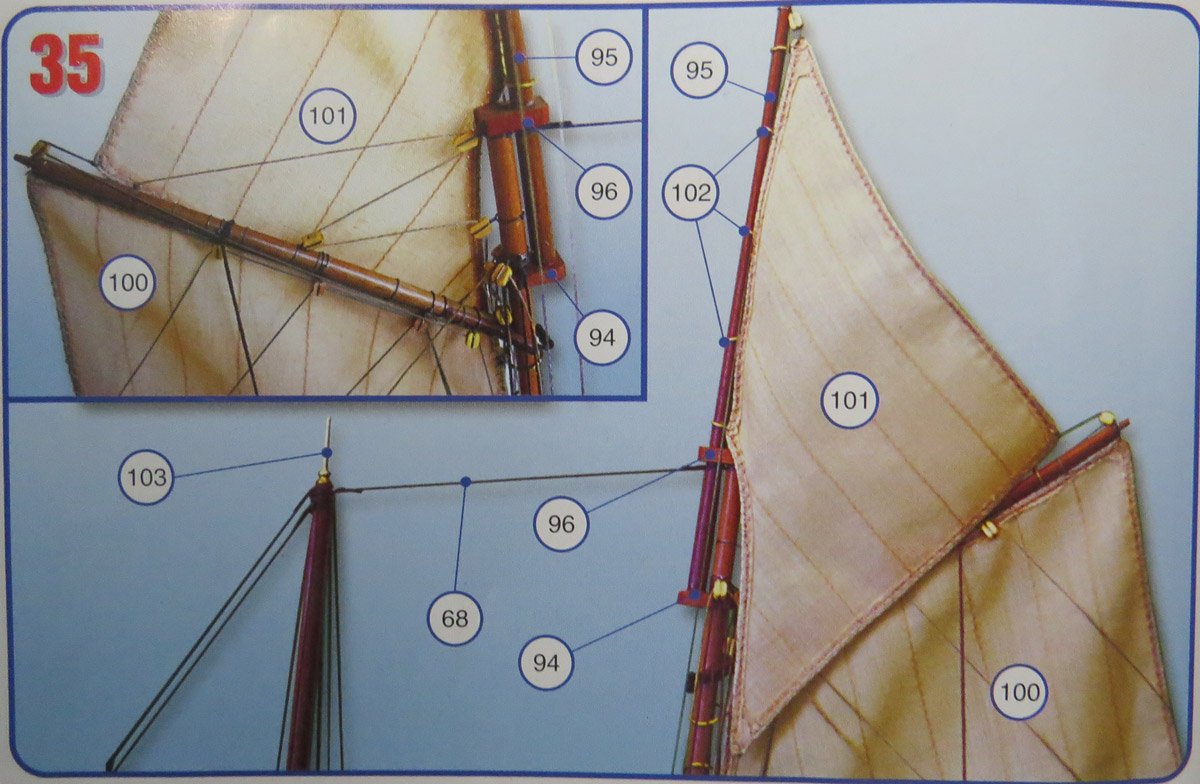
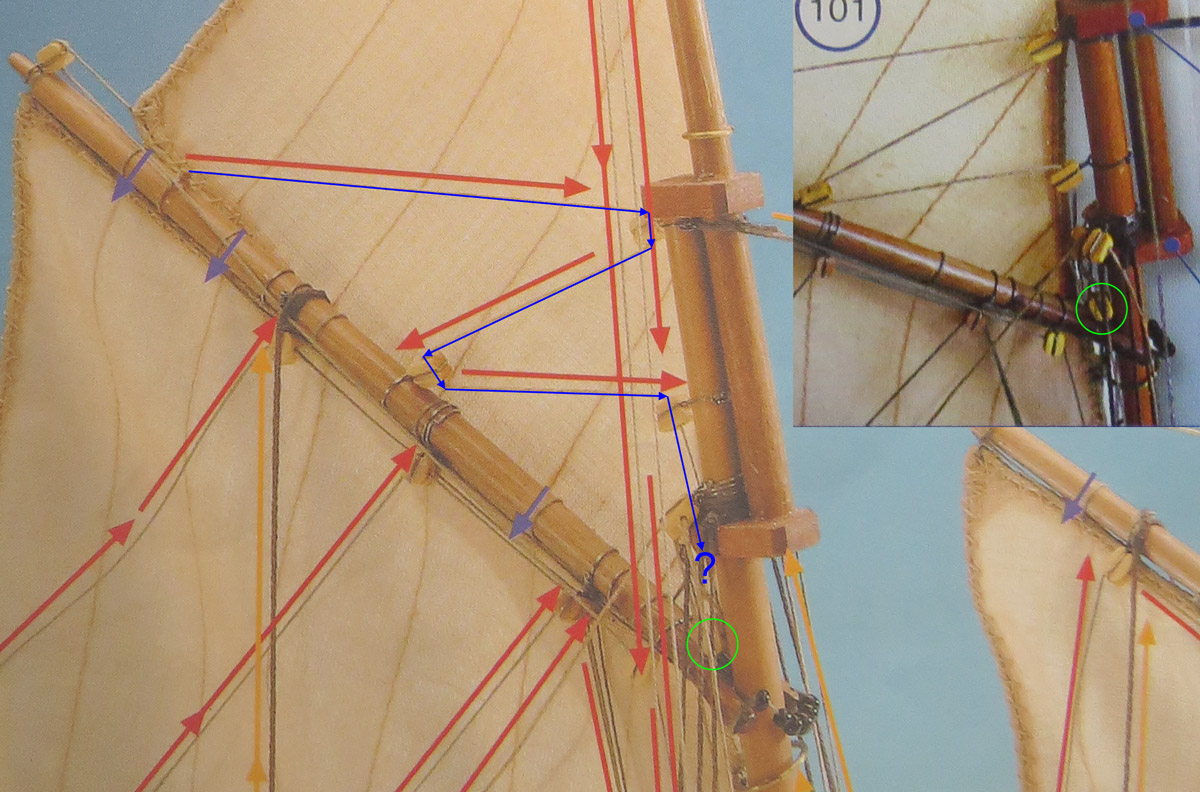
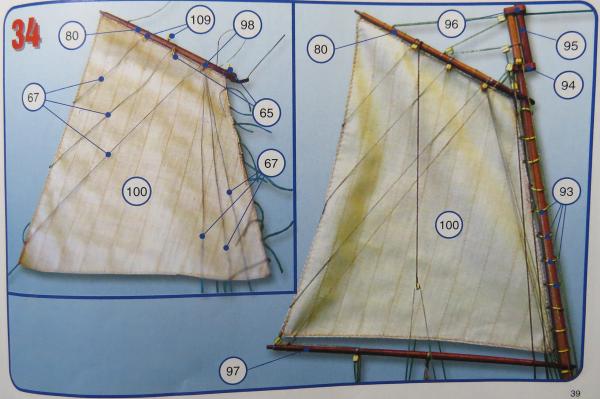
I have started looking at the sails but the manual doesn't show a lot of detail so I am having trouble figuring out exactly where everything goes; maybe someone here could help me. Here are some photos of the instructions: The manual list the following parts: 65: Two-hole blocks 98: Three-hole pulleys 109: Pulleys Below I have a picture showing my problem, it is obvious enough at the top but I cannot tell what is happening in the corner. It seems like the line highlighted in blue goes through the two-hole block (65) circled in green but I am not sure. Is the line attached to it and from there where should it go?
-
Thanks. I think you're right, after holding the sails up against the ship I think they look fine as is. I will keep your advice in mind though if I ever do want to dye sales in the future.
-
Next I will be working in the sails; the manual suggests dying them in tea to give them a more realistic look but I don't know what this will end up looking like, should I do this this?
-
Thanks, that site might be useful if I want replacement parts; I'm assuming that you have ordered from them, but are they trustworthy? and do you have any idea what the international shipping rates might be like? I don't have much experience with these kits as this is my first one, but I am happy with this one; besides for one or two small parts that I didn't like I haven't had any problems.
-
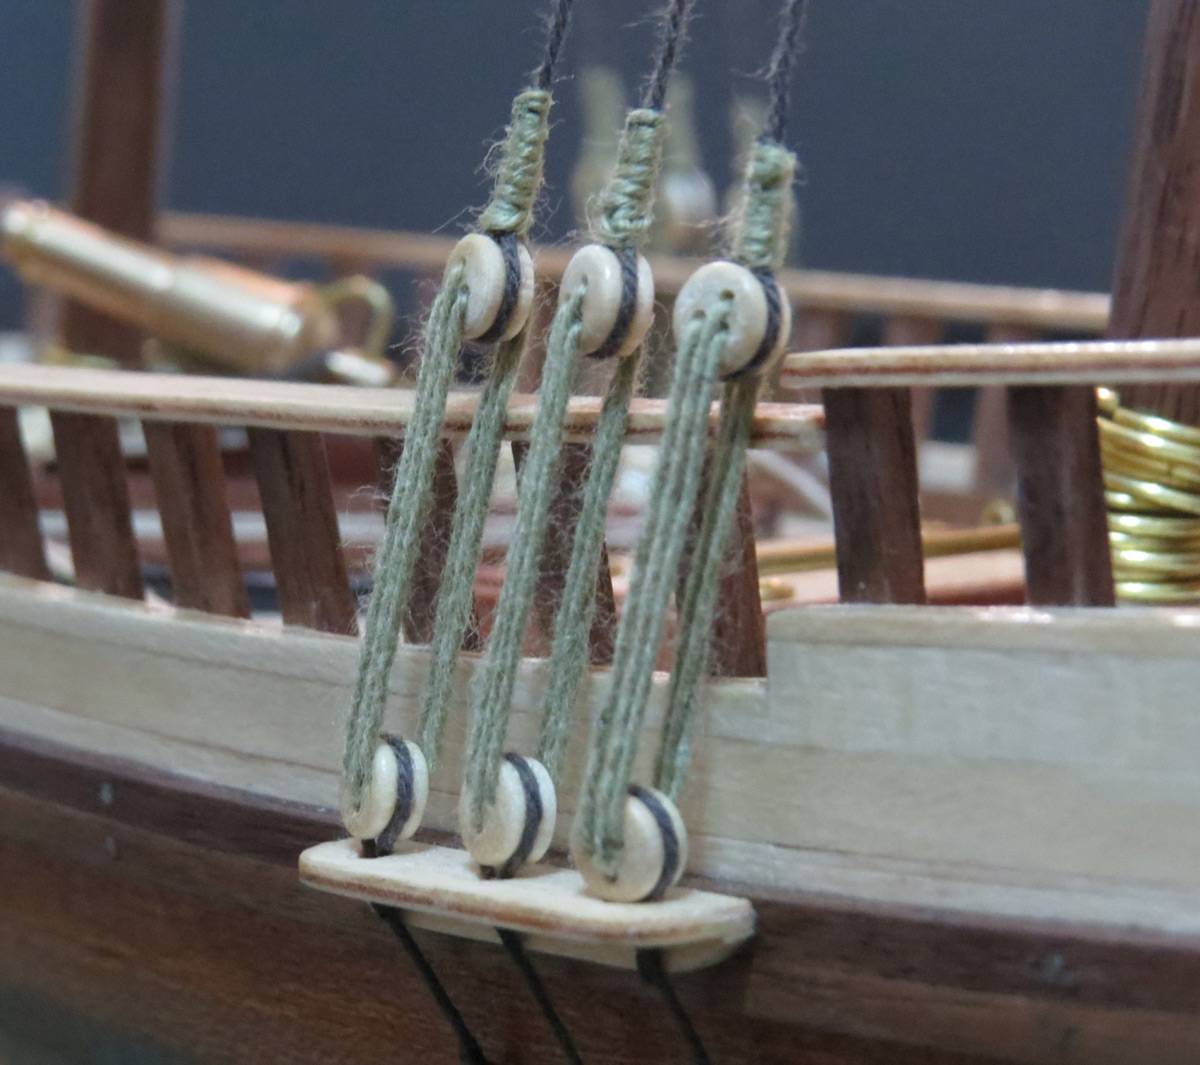
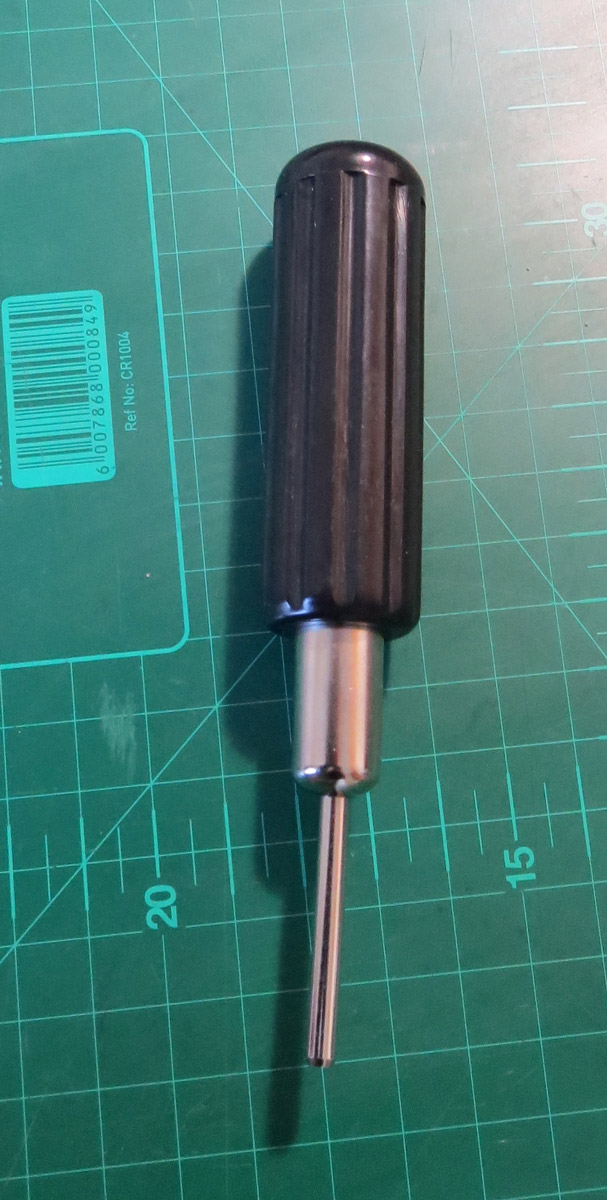
No problem. Thanks, that's good to know, didn't know that they were actually meant to be metal and in the manual they just refer to them as "clump blocks".
-
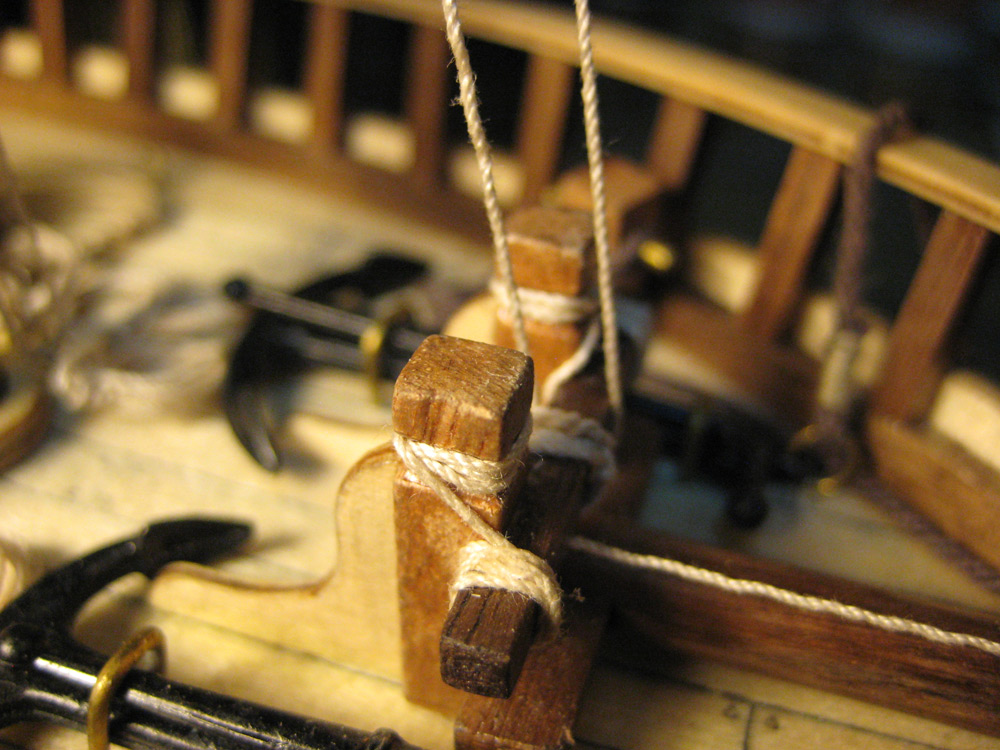
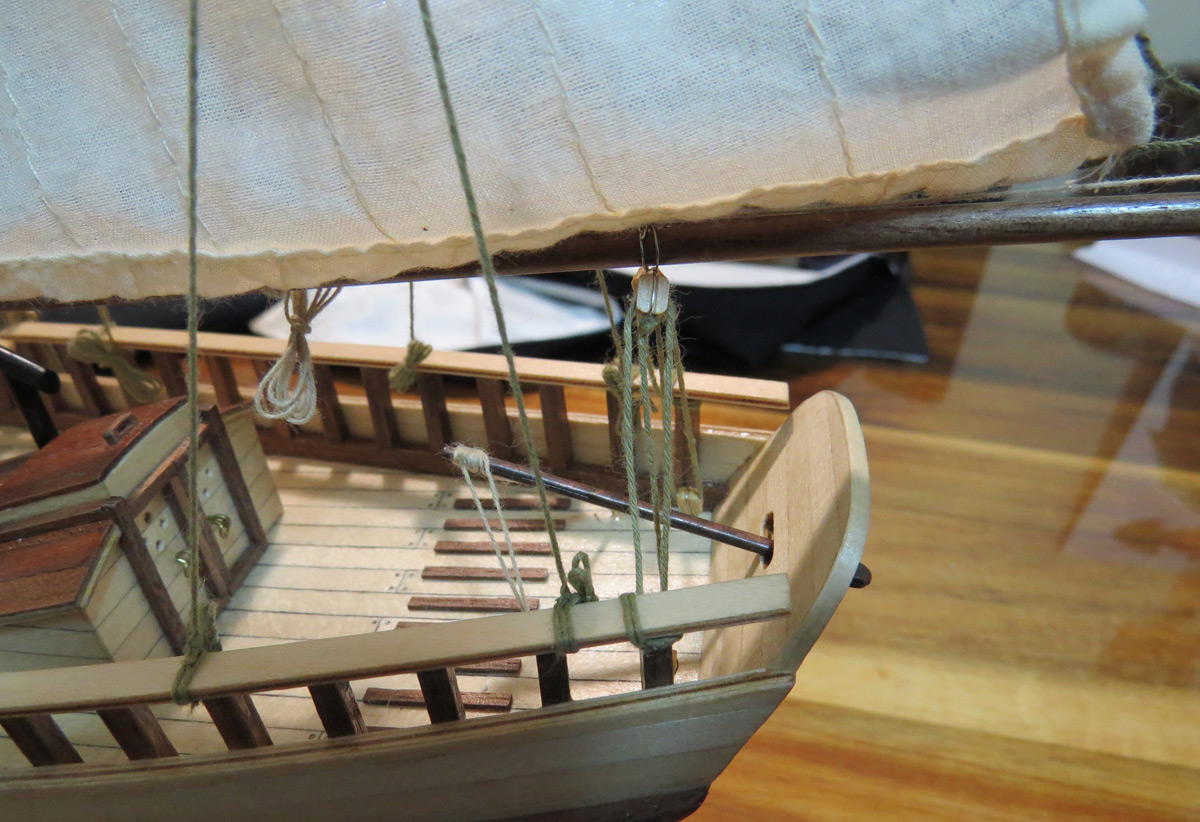
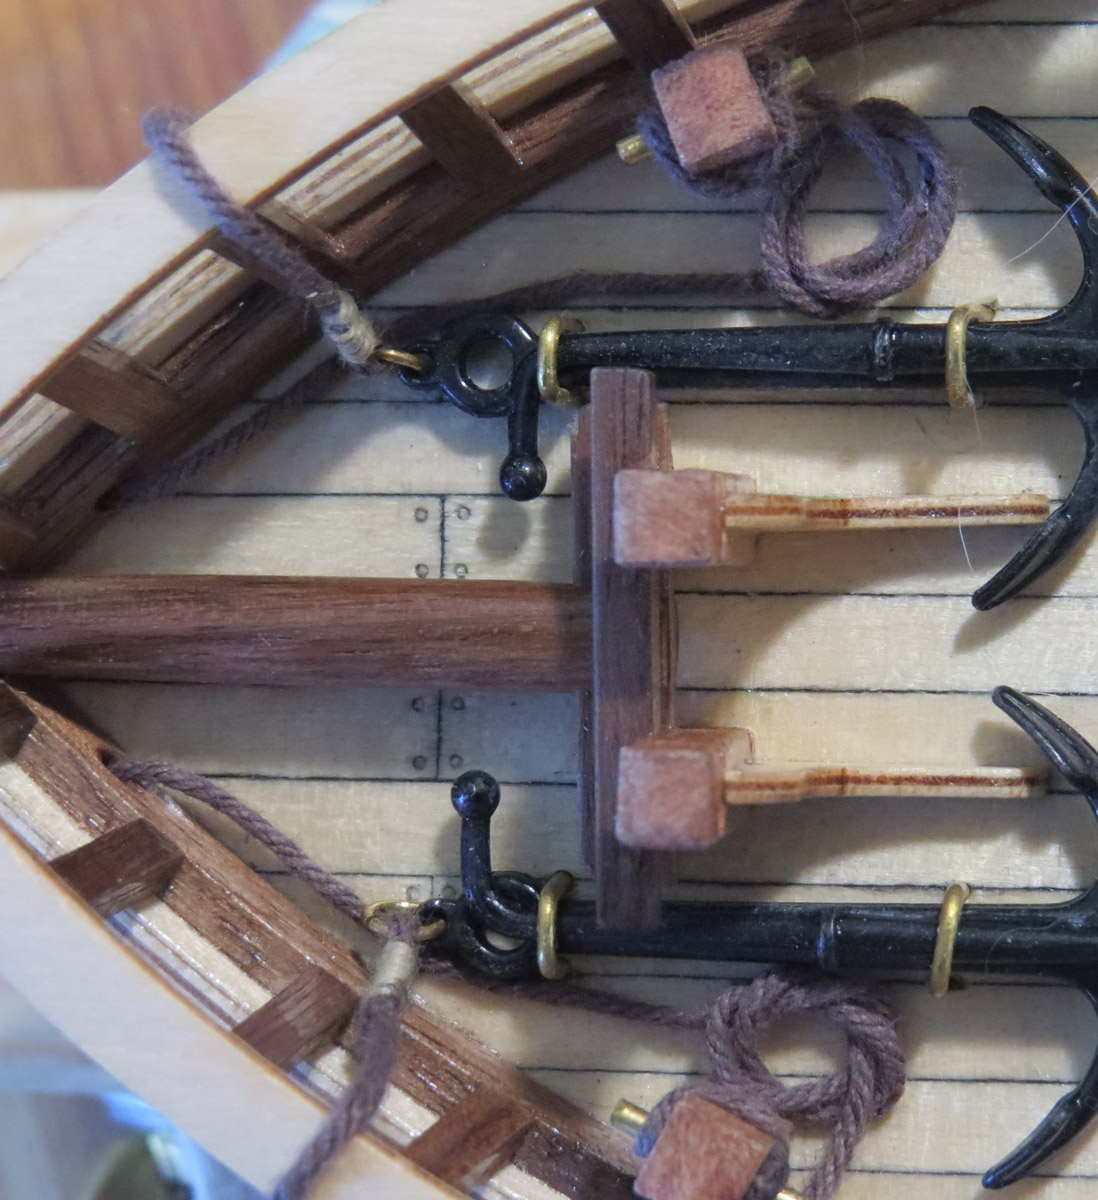
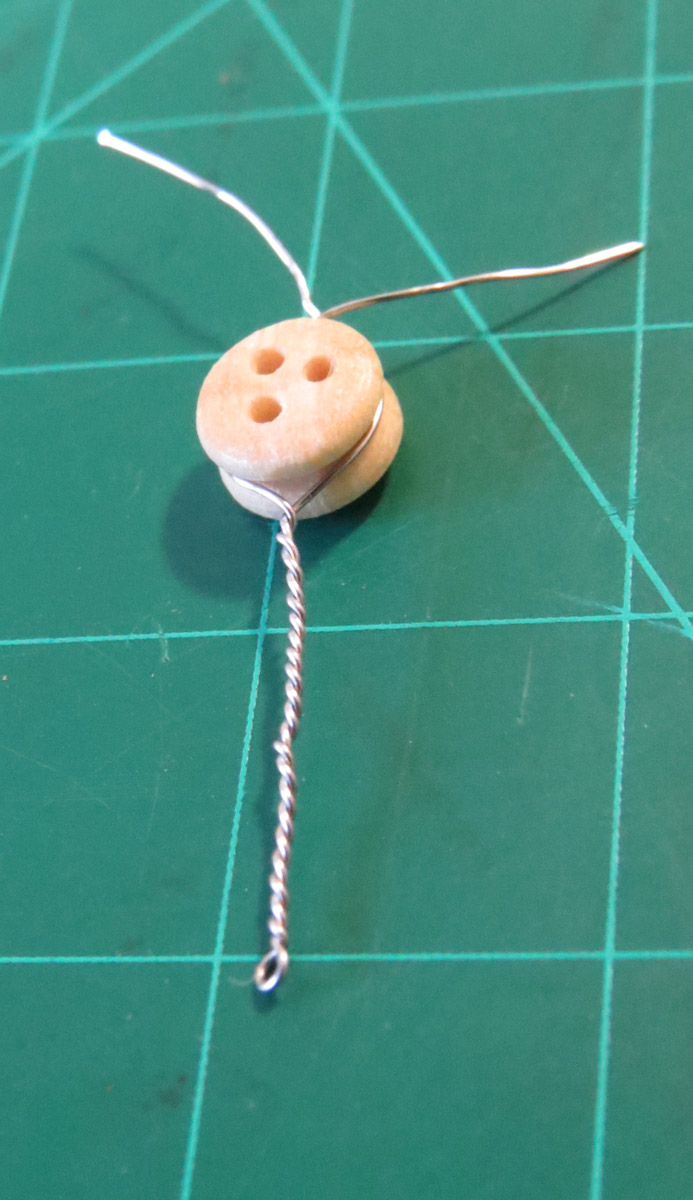
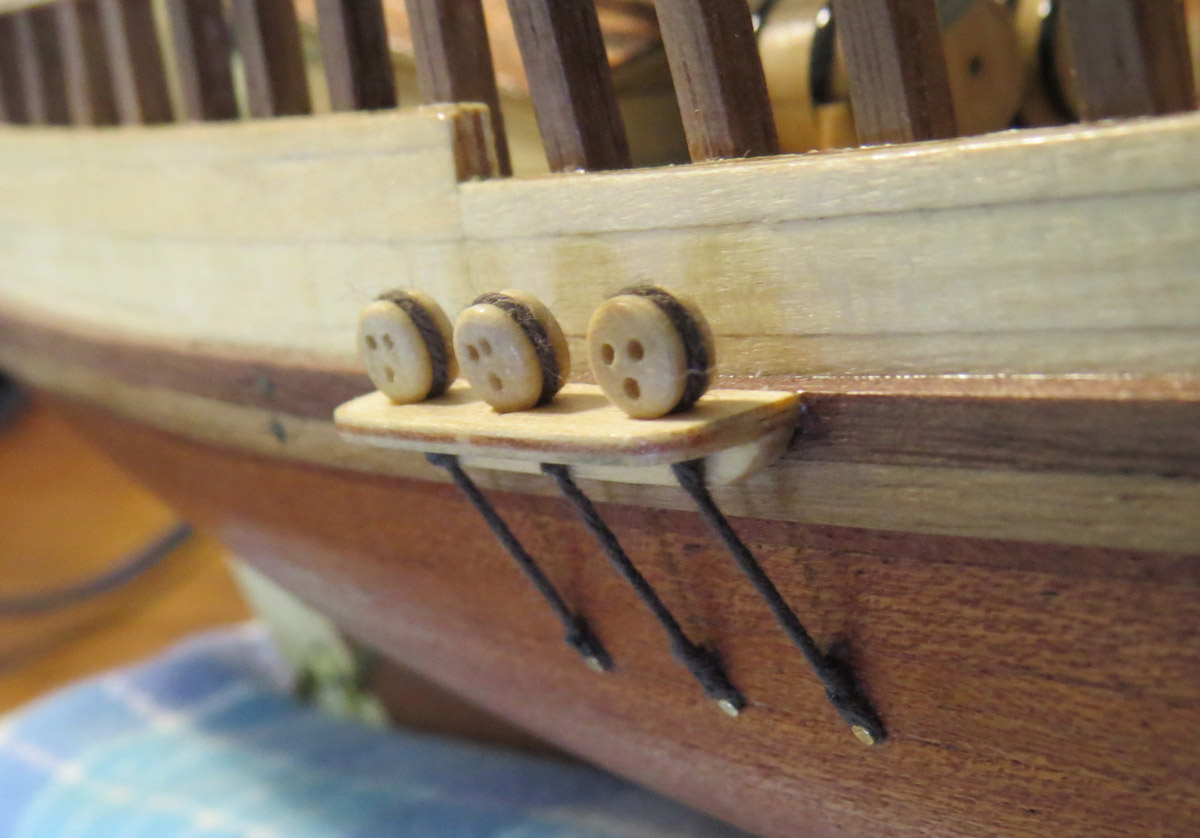
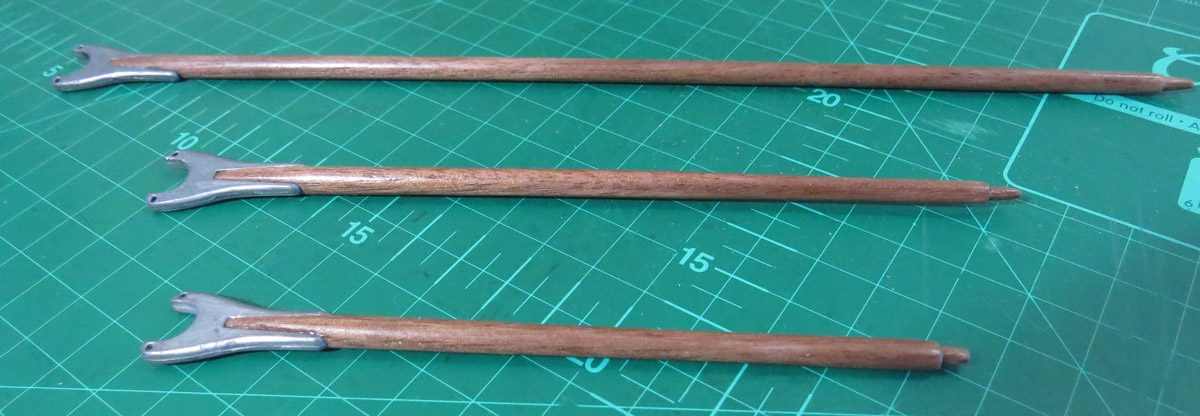
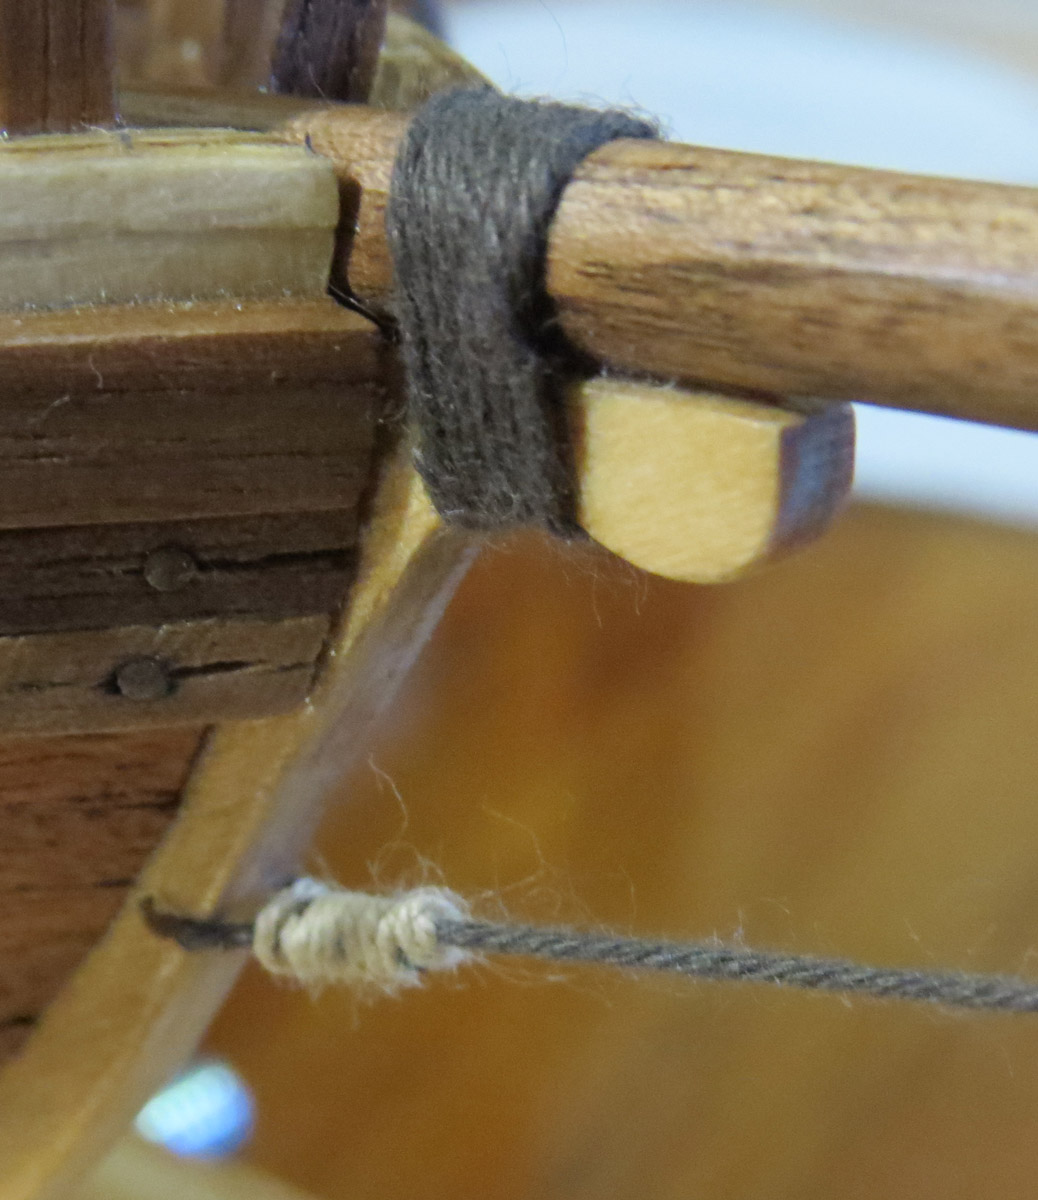
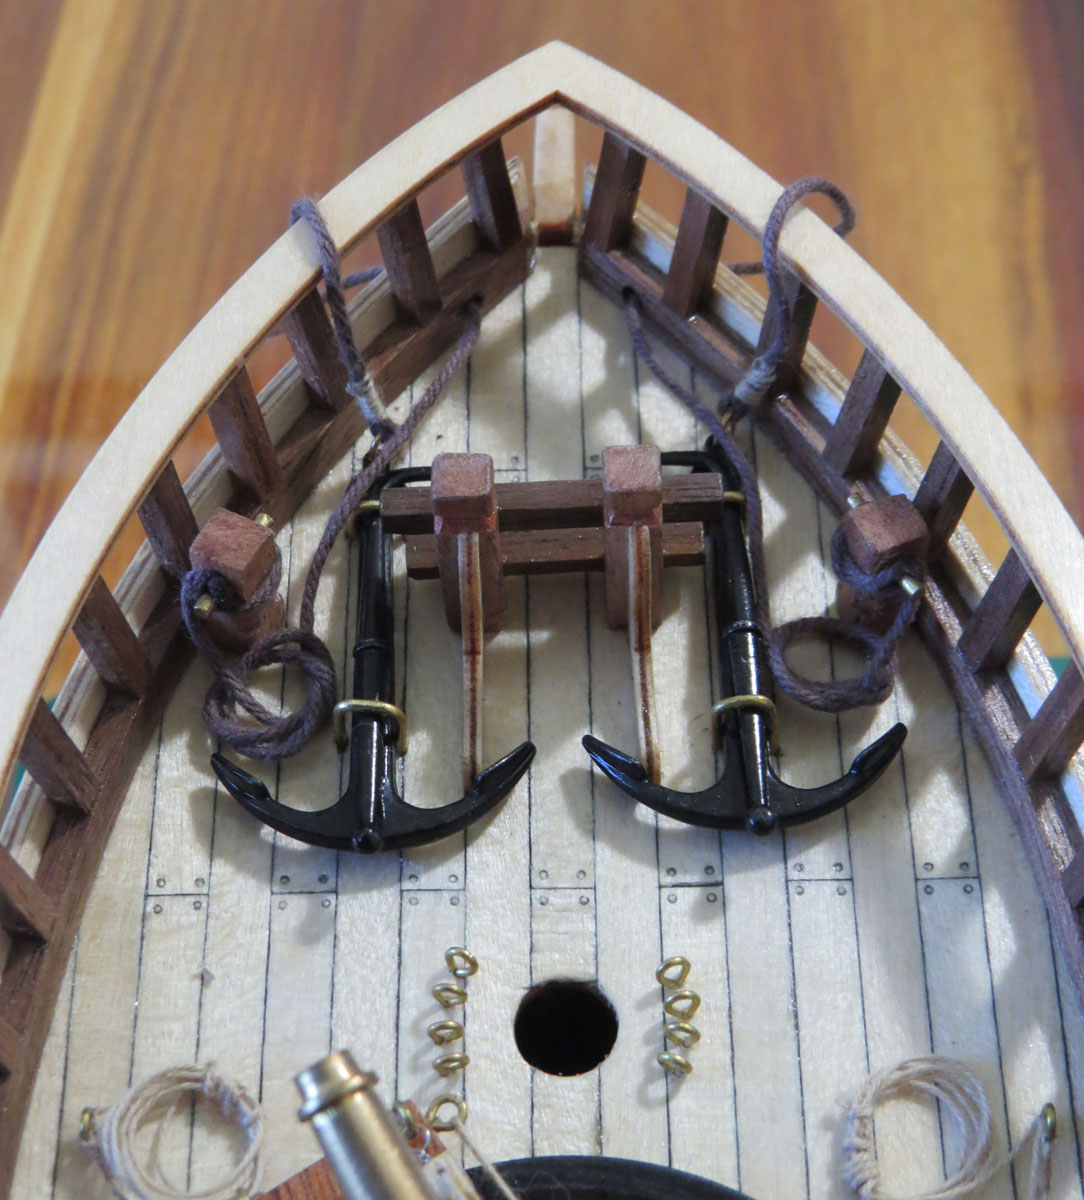
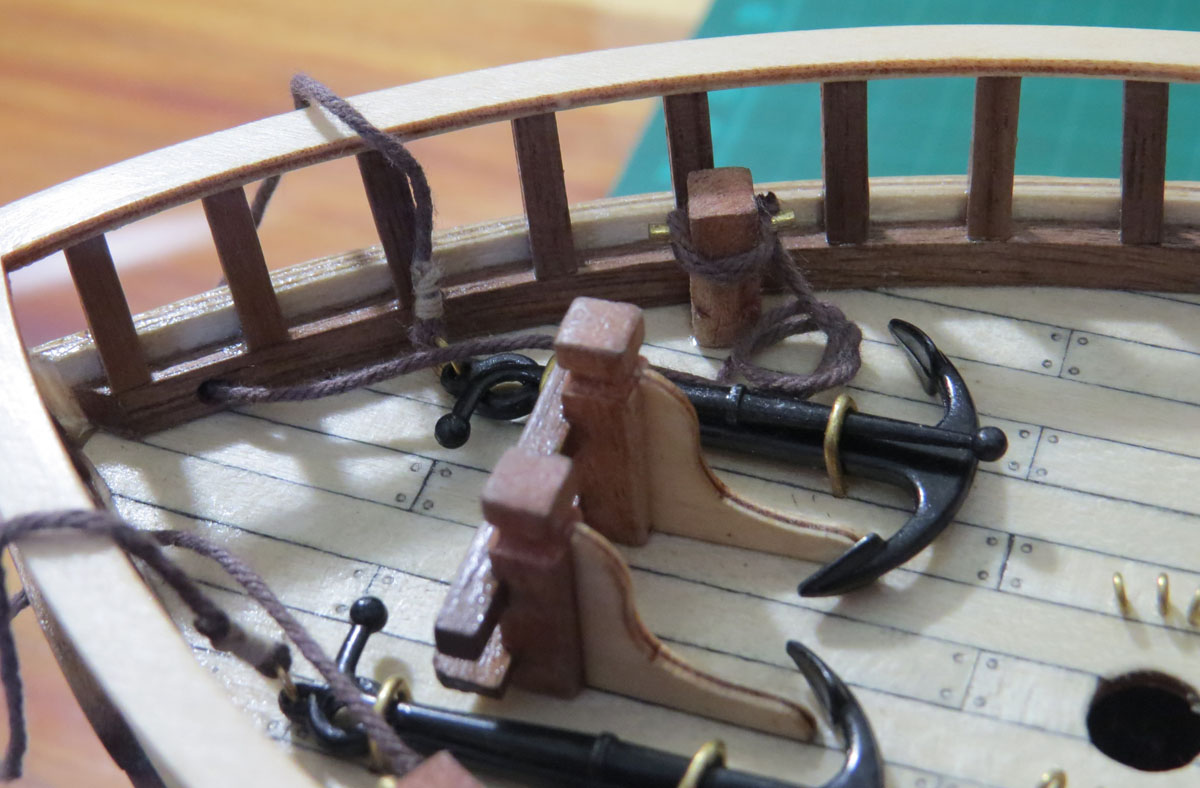
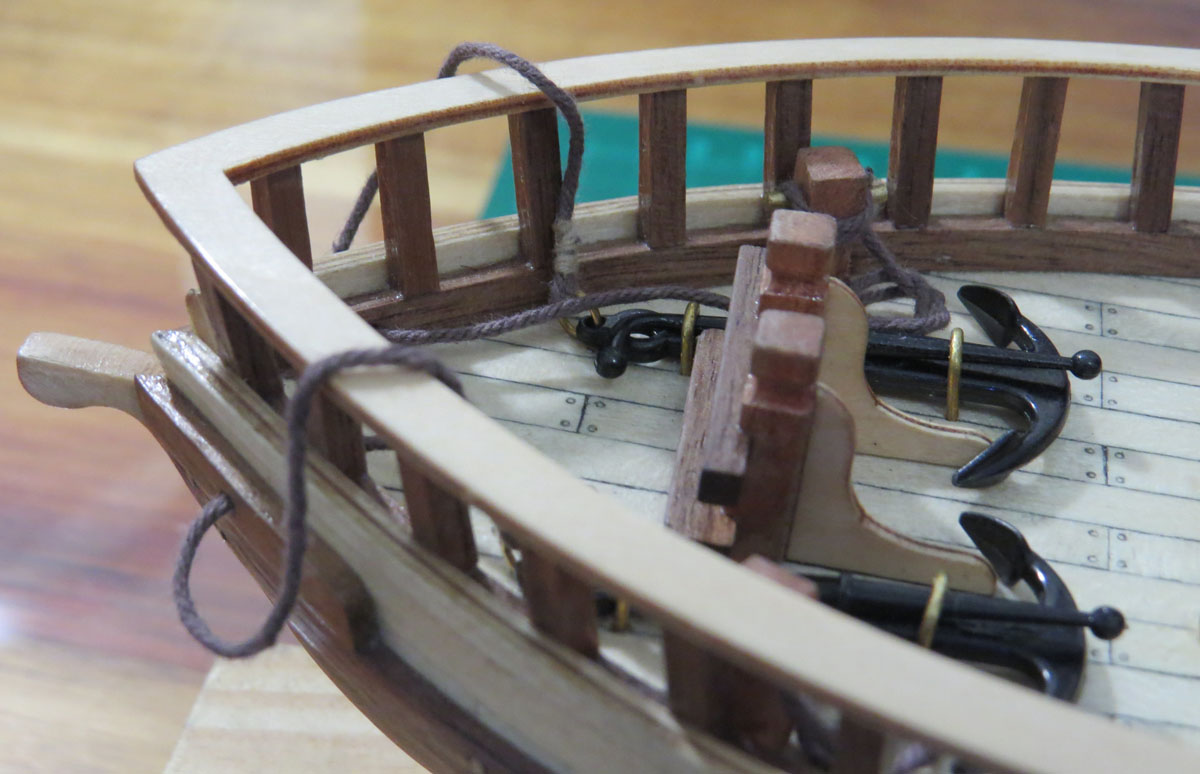
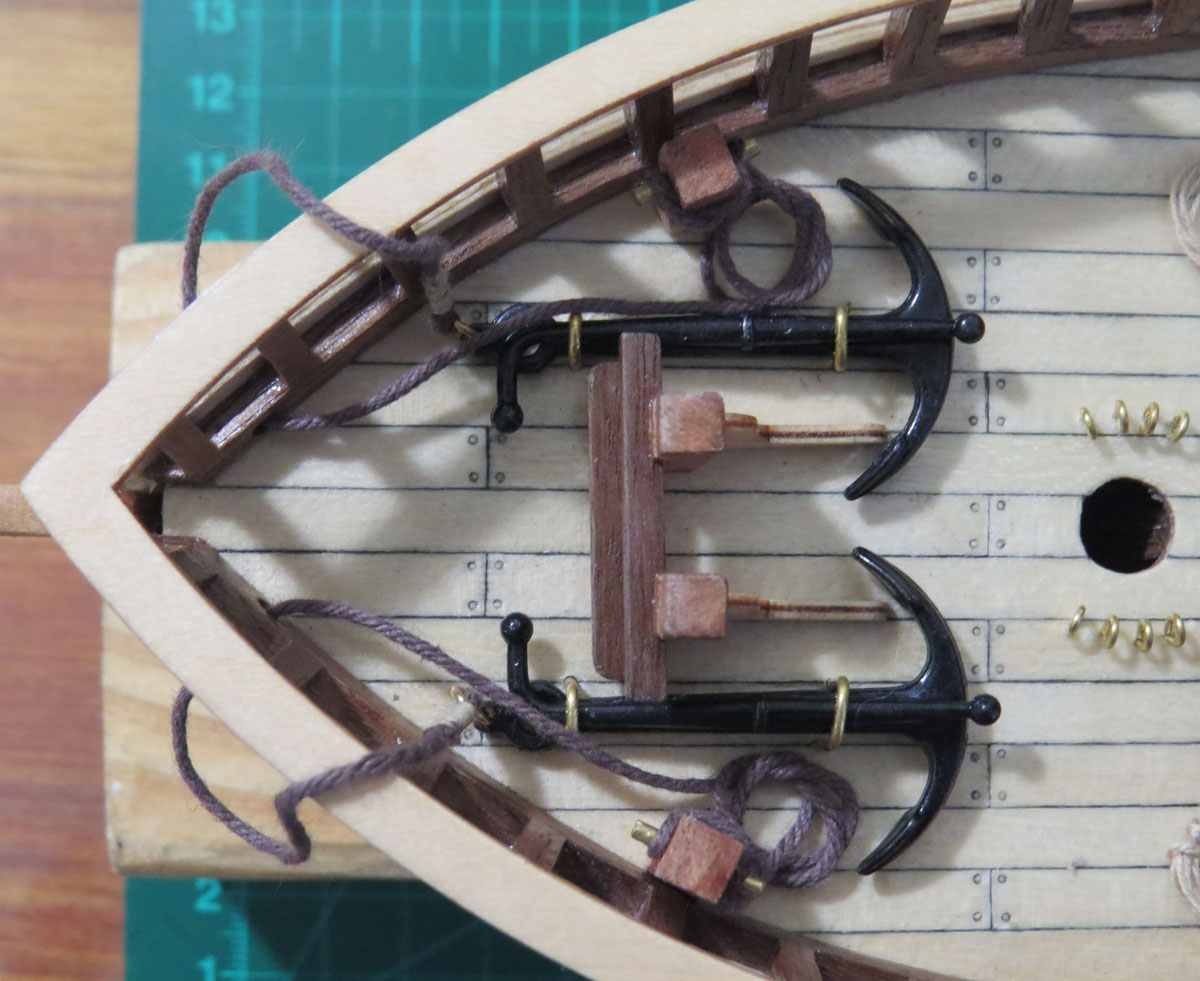
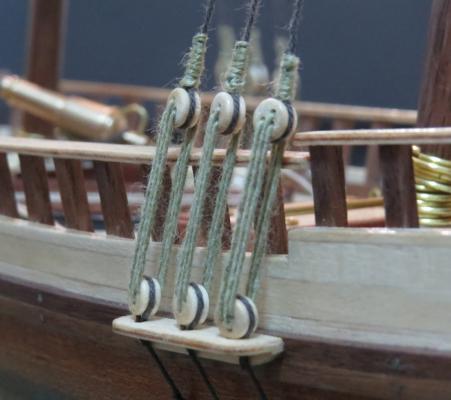
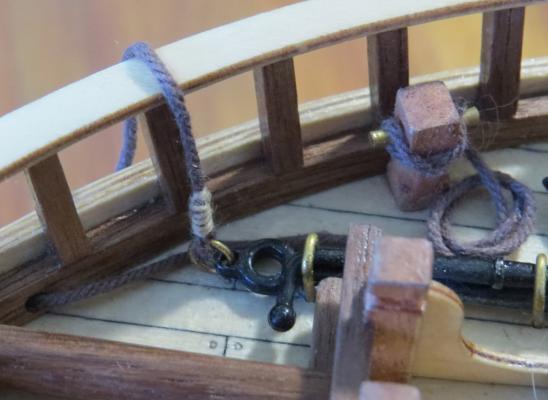
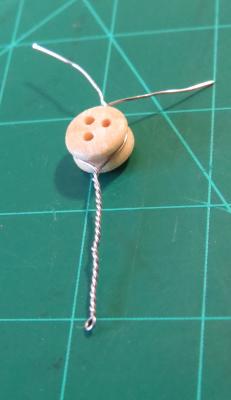
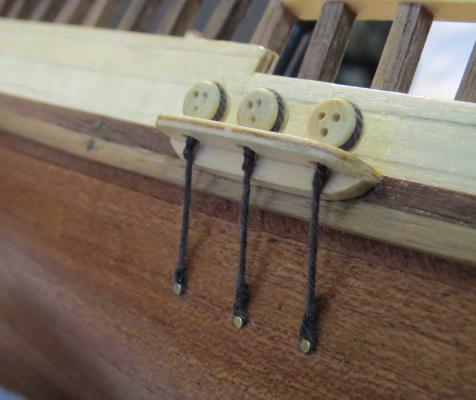
Next I have shaped and varnished the masts: My brother also found a problem with the way the anchors were attached, originally the thread attached to the anchor ran underneath the thread attach to the cleats; if you were to throw the anchor over the side the rope would wrap around itself. I fixed it by opening and removing the brass rings attached to the anchors and the reattaching them again after I fixed it. Before: After: Next was the clump blocks. The manual said to use the wire for this but I didn't like the way it looked so I instead used brown thread: To attach the thread I just twisted it around the pin and the block and carefully applied a small amount of super glue to the back, then trimmed the extra thread. The manual never specified how they should be attached to the hull so I used the brass nails. I also got a nail tool which made attaching the nails extremely quick and easy.


- 98 replies
-
- 1
-
-
- artesania latina
- finished
- (and 1 more)
-
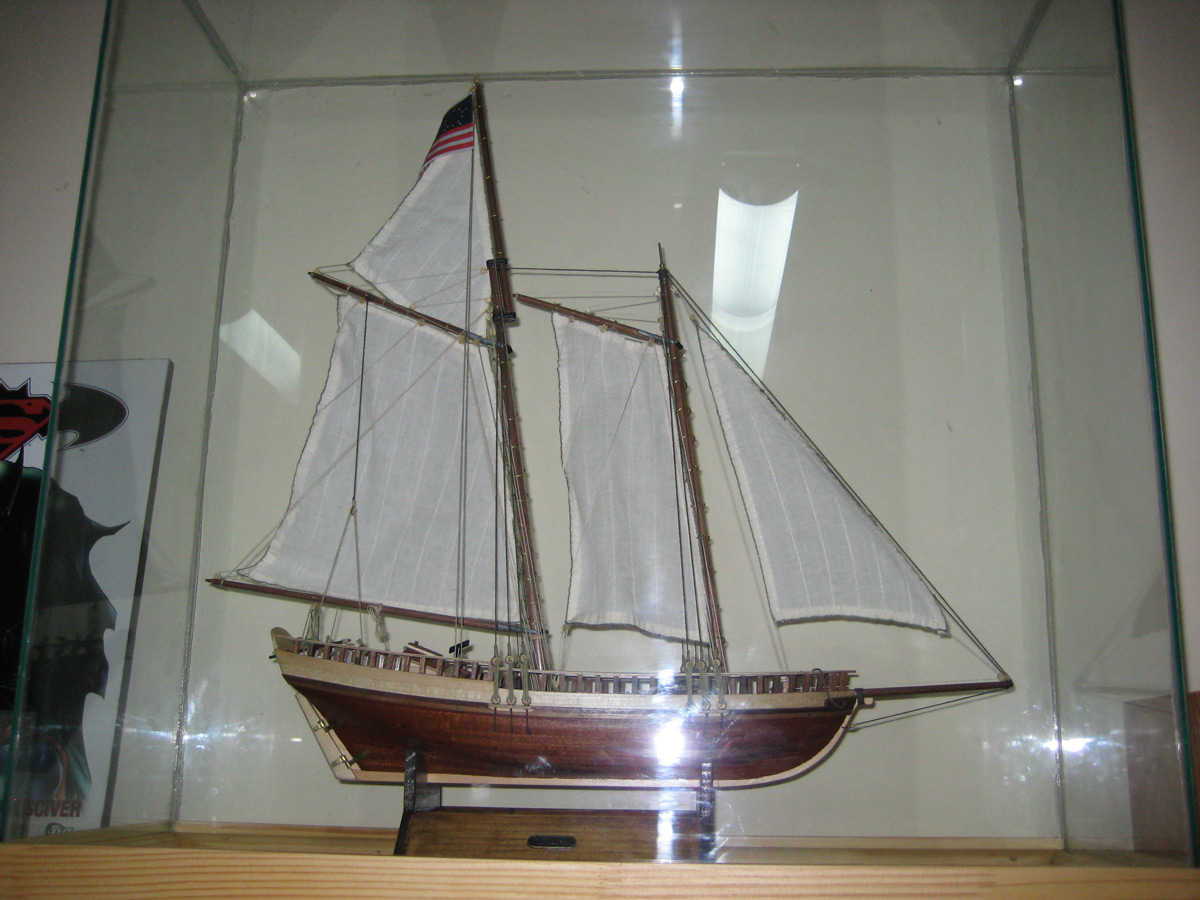
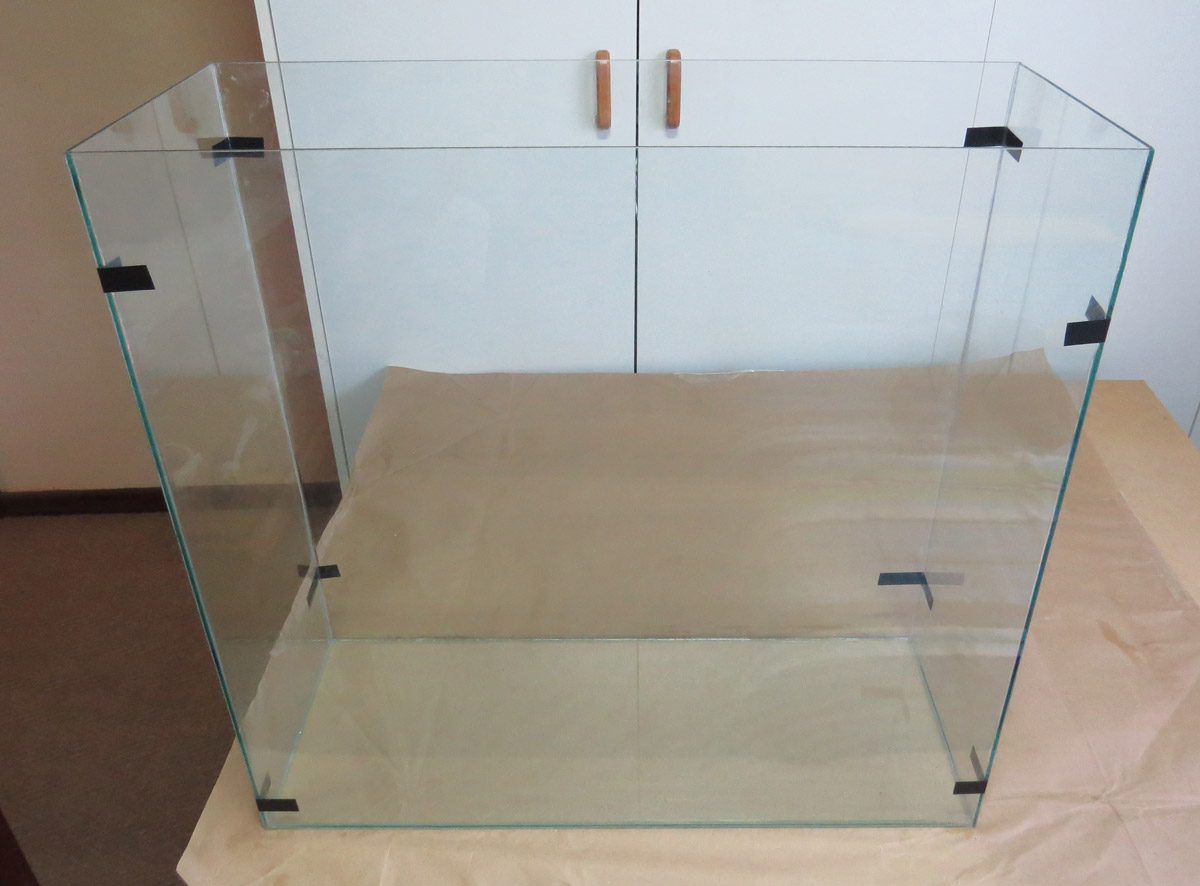
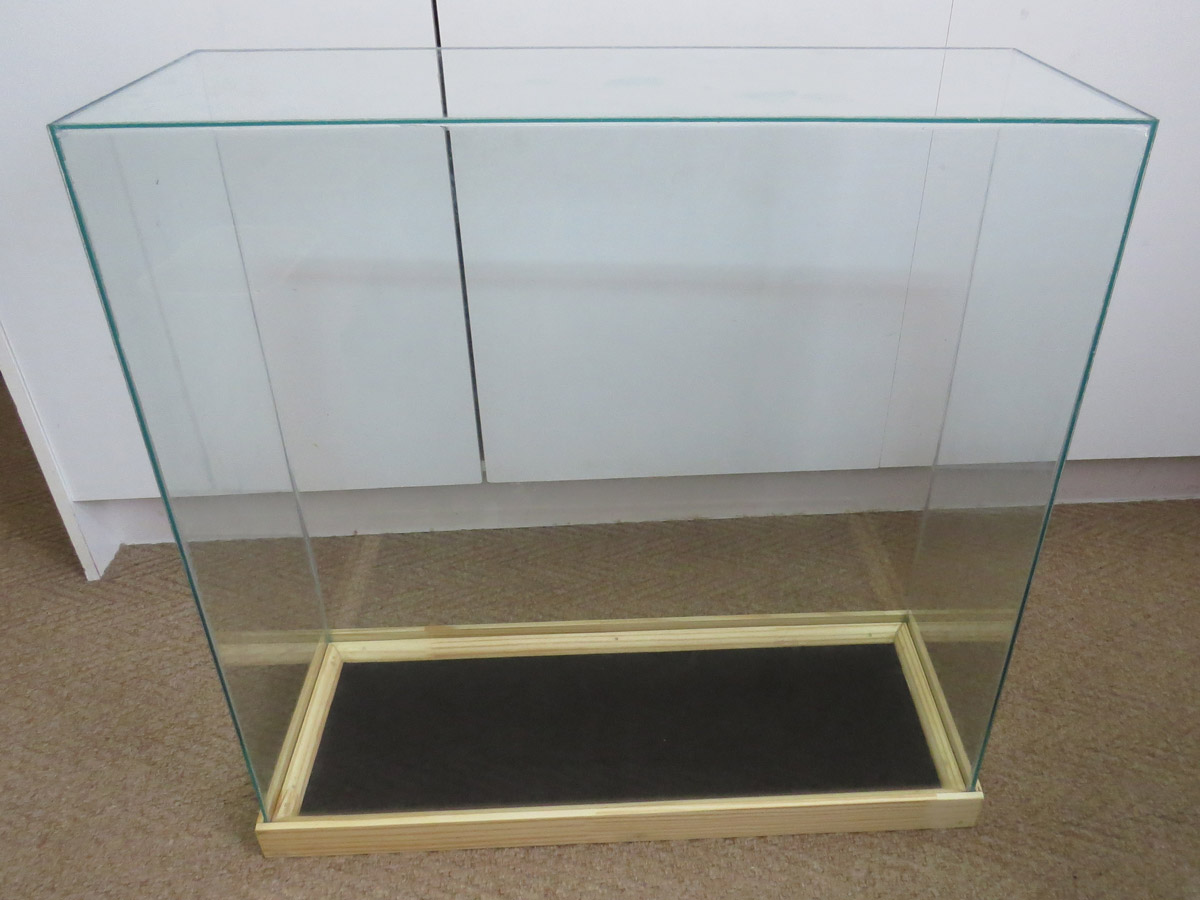
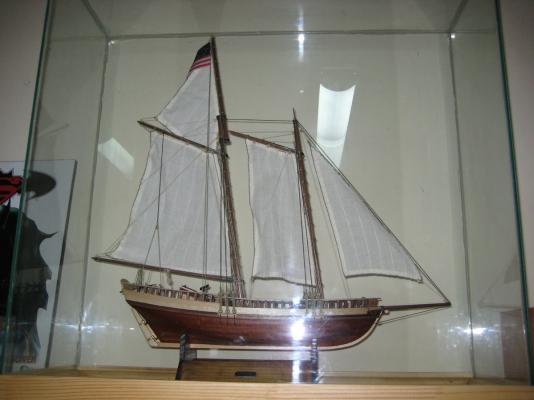
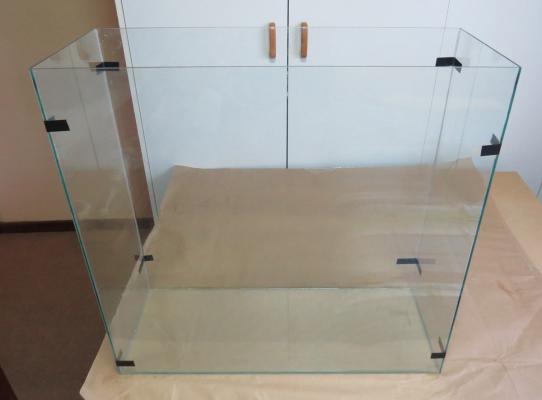
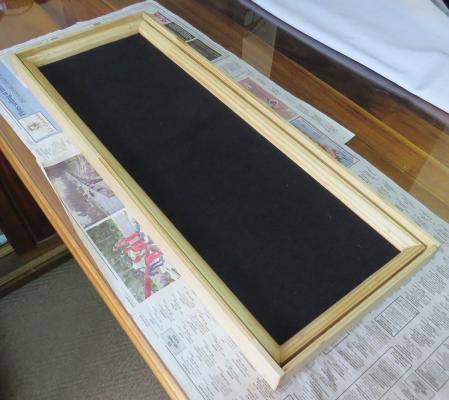
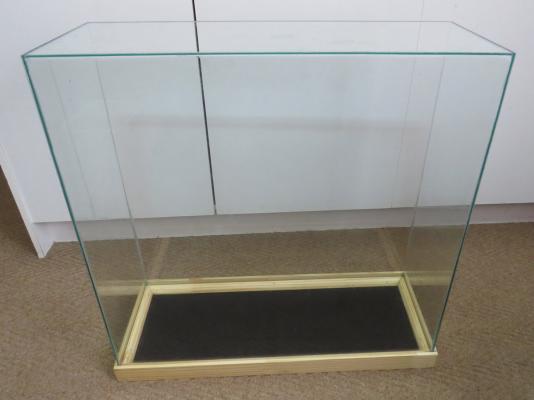
Thanks Since the ship is close to finished, I decided to build a case for it next. I used 3mm glass and silicone for the case; after some searching it seems that people recommend 4mm glass but the 3mm seemed sturdy enough to me at that size. After watching this video ( ), glueing the sides together was extremely quick and easy.Originally I was going to attach wooden edges around the glass similar to this guide: http://modelshipworldforum.com/resources/furniture/Building_a_Display_Case.pdf but I found that I preferred the plain glass so I left it as is. The base was made with spare wood that I already had, the base was a piece of plywood and I used strips on the outside and quarter rounds on top to create a lip for the glass to sit in, these were attached with wood glue and panel nails. The top is covered in black felt that was attached with a thin layer of wood glue. The finished case:
- 98 replies
-
- 1
-
-
- artesania latina
- finished
- (and 1 more)
-
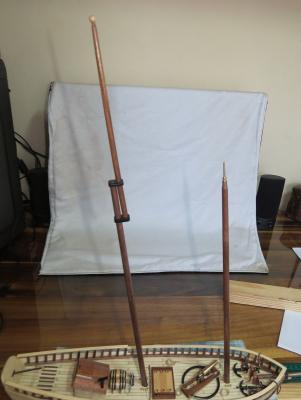
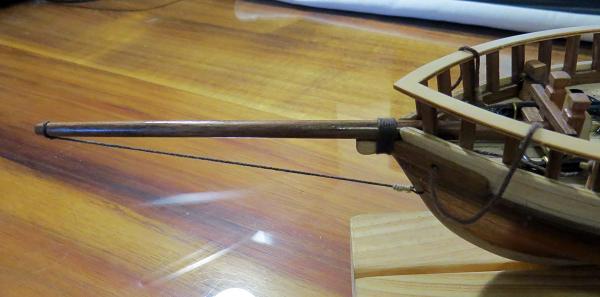
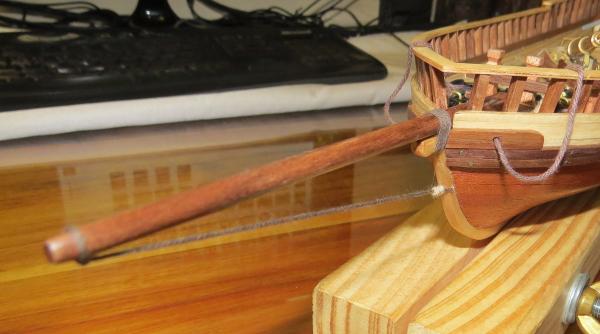
Part of the masts sanded and varnished: The bowsprit attached:

- 98 replies
-
- 4
-
-
- artesania latina
- finished
- (and 1 more)