HOLIDAY DONATION DRIVE - SUPPORT MSW - DO YOUR PART TO KEEP THIS GREAT FORUM GOING! (89 donations so far out of 49,000 members - C'mon guys!)
×


chborgm
-
Posts
232 -
Joined
-
Last visited
Content Type
Profiles
Forums
Gallery
Events
Everything posted by chborgm
-
 I think using the tubes is a idea. I am now thinking of using that concept in some fashion. I am planning a Plexiglas base and cass. Since that make a lot of the support visible I decided not to hid the external hook up. Using you concept I may switch to a wood base and brass supports.
 -
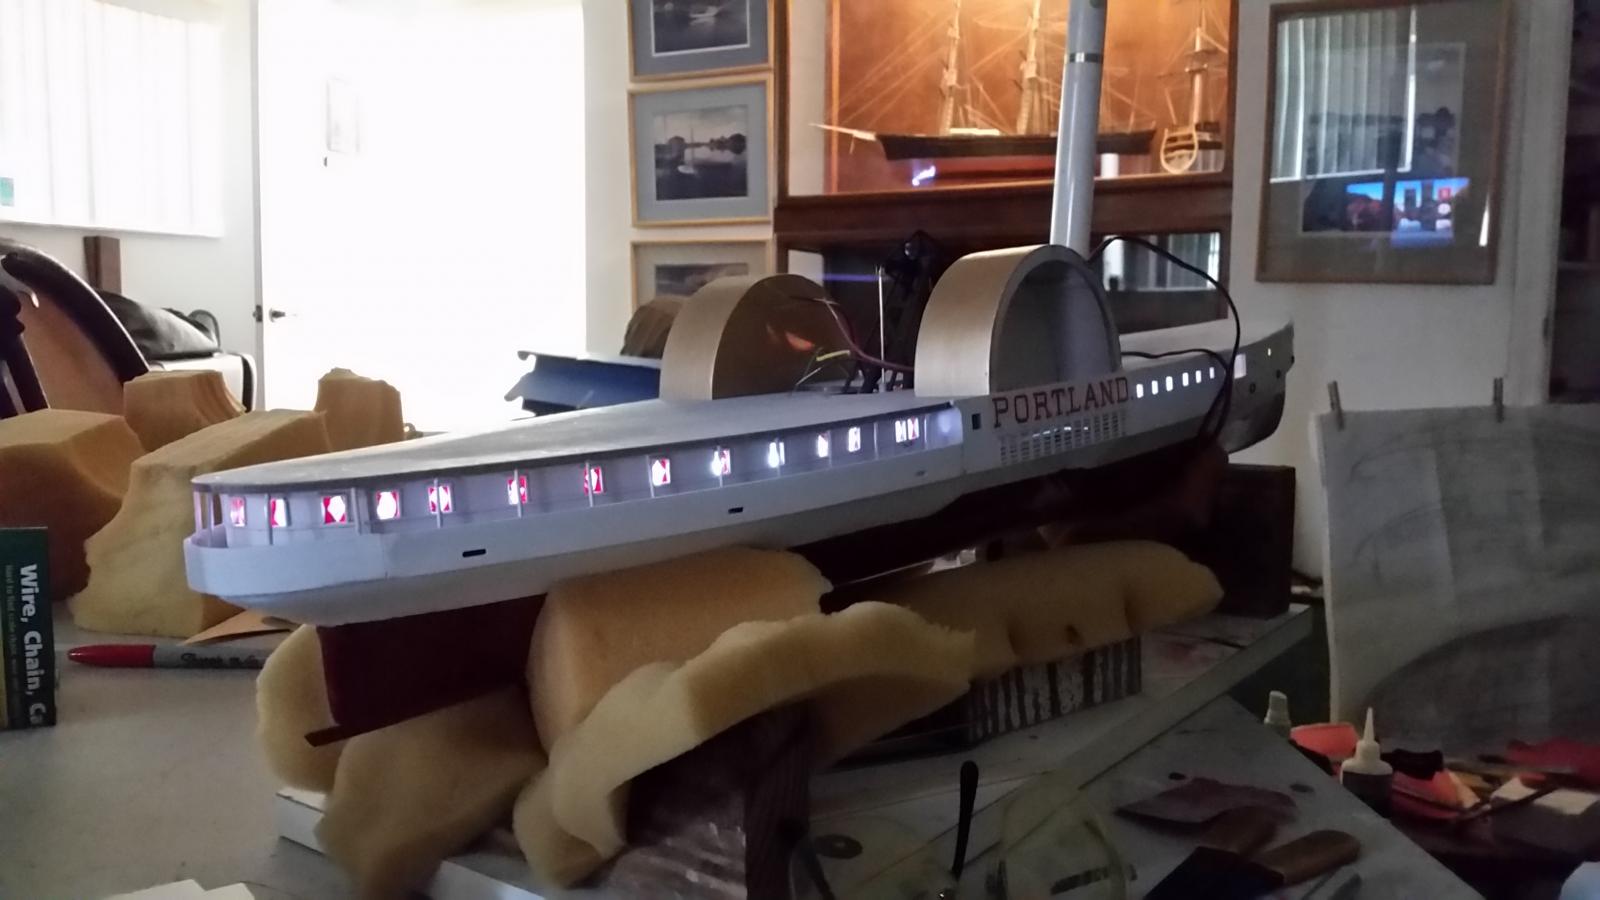
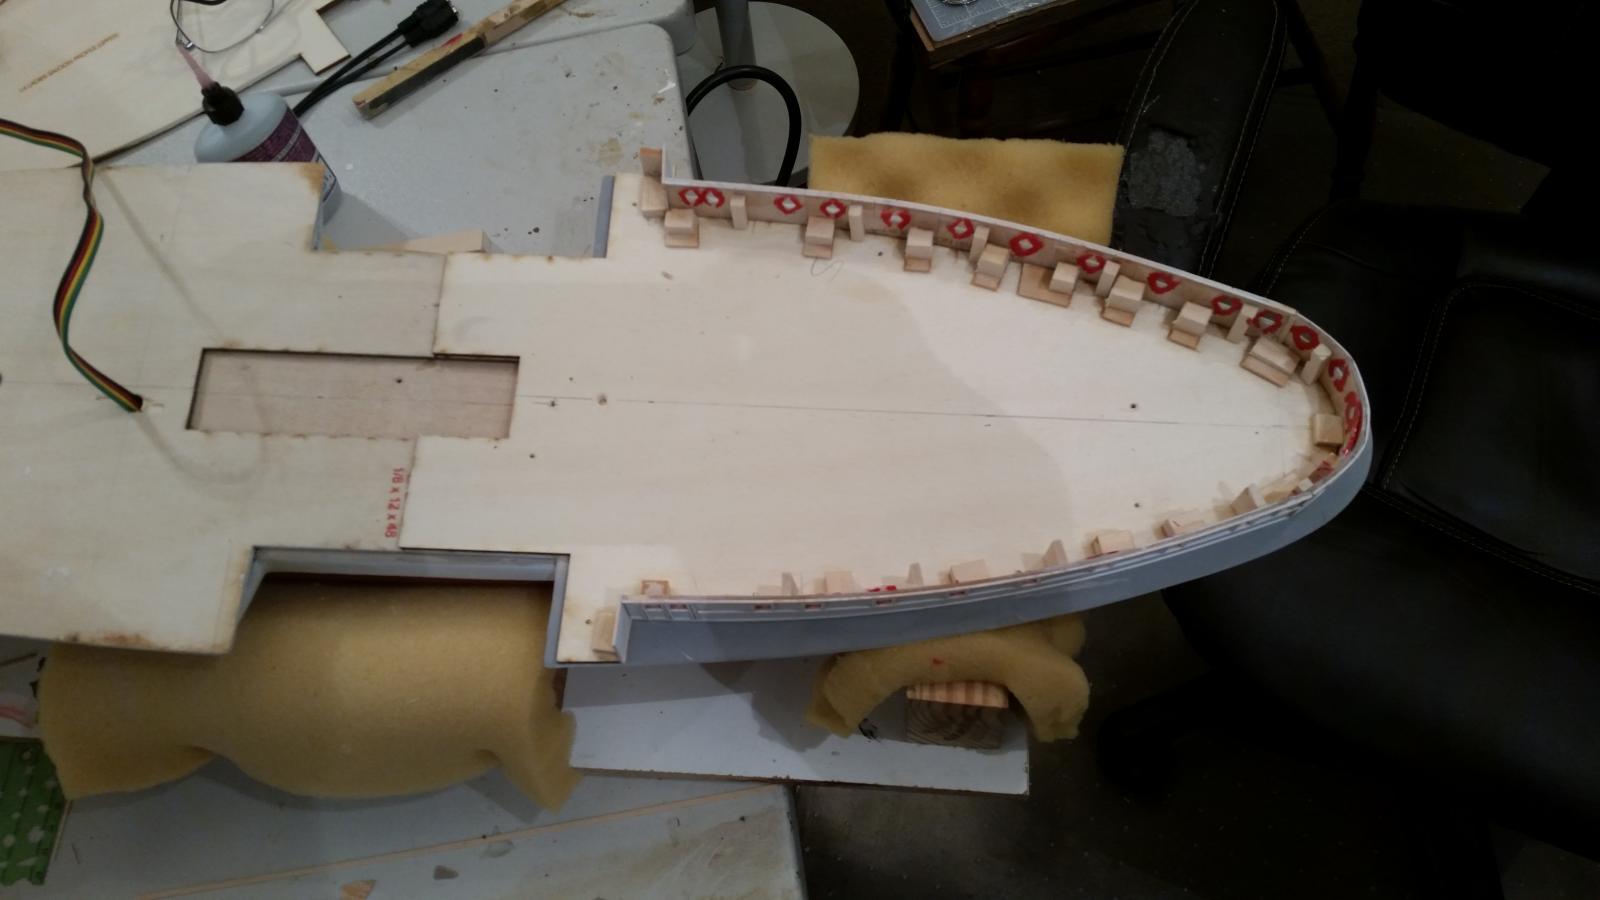
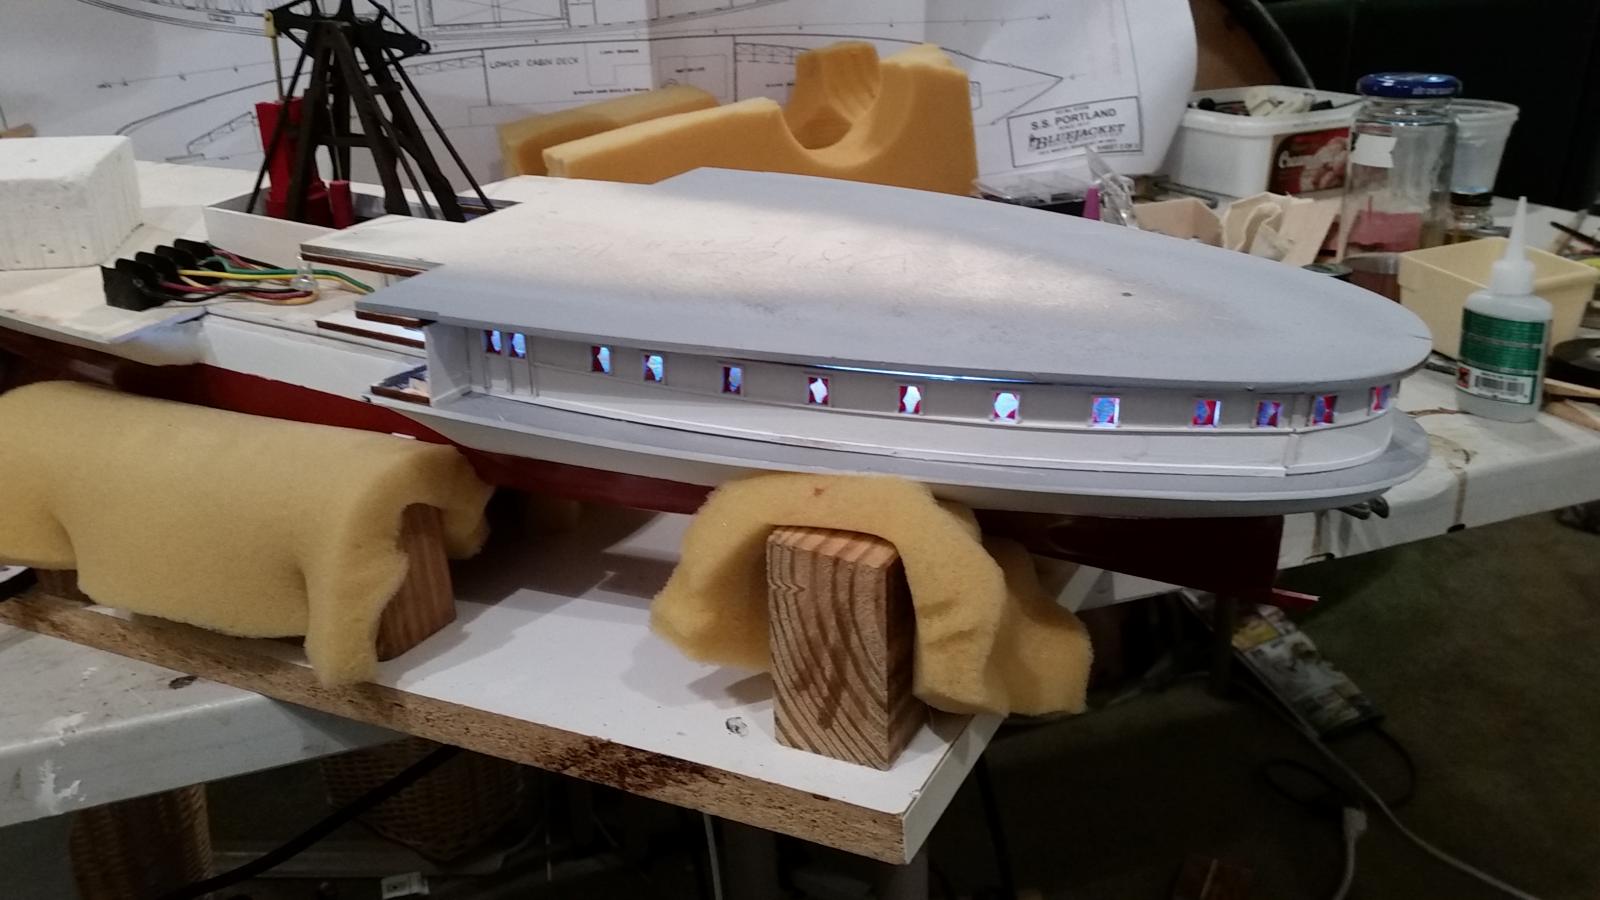
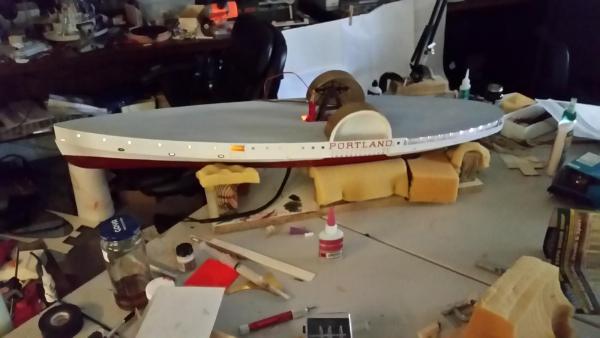
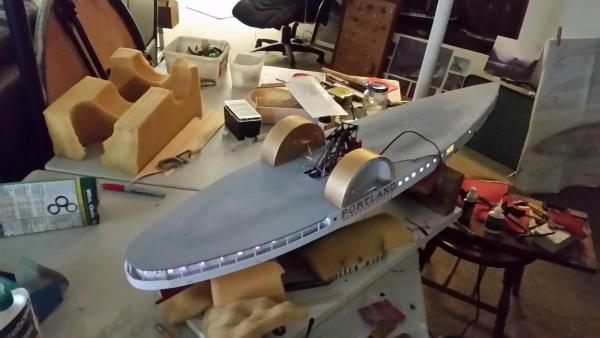
As you know I am lighting my Portland model. I have been using 12v 3mm and 5mm leds. They are low cost, and only need very thin wire. There is a remote available so that i can adjust the brightness. I have two circuts one with the remote for inside lights and a fixed output line for the navigation lights.
-
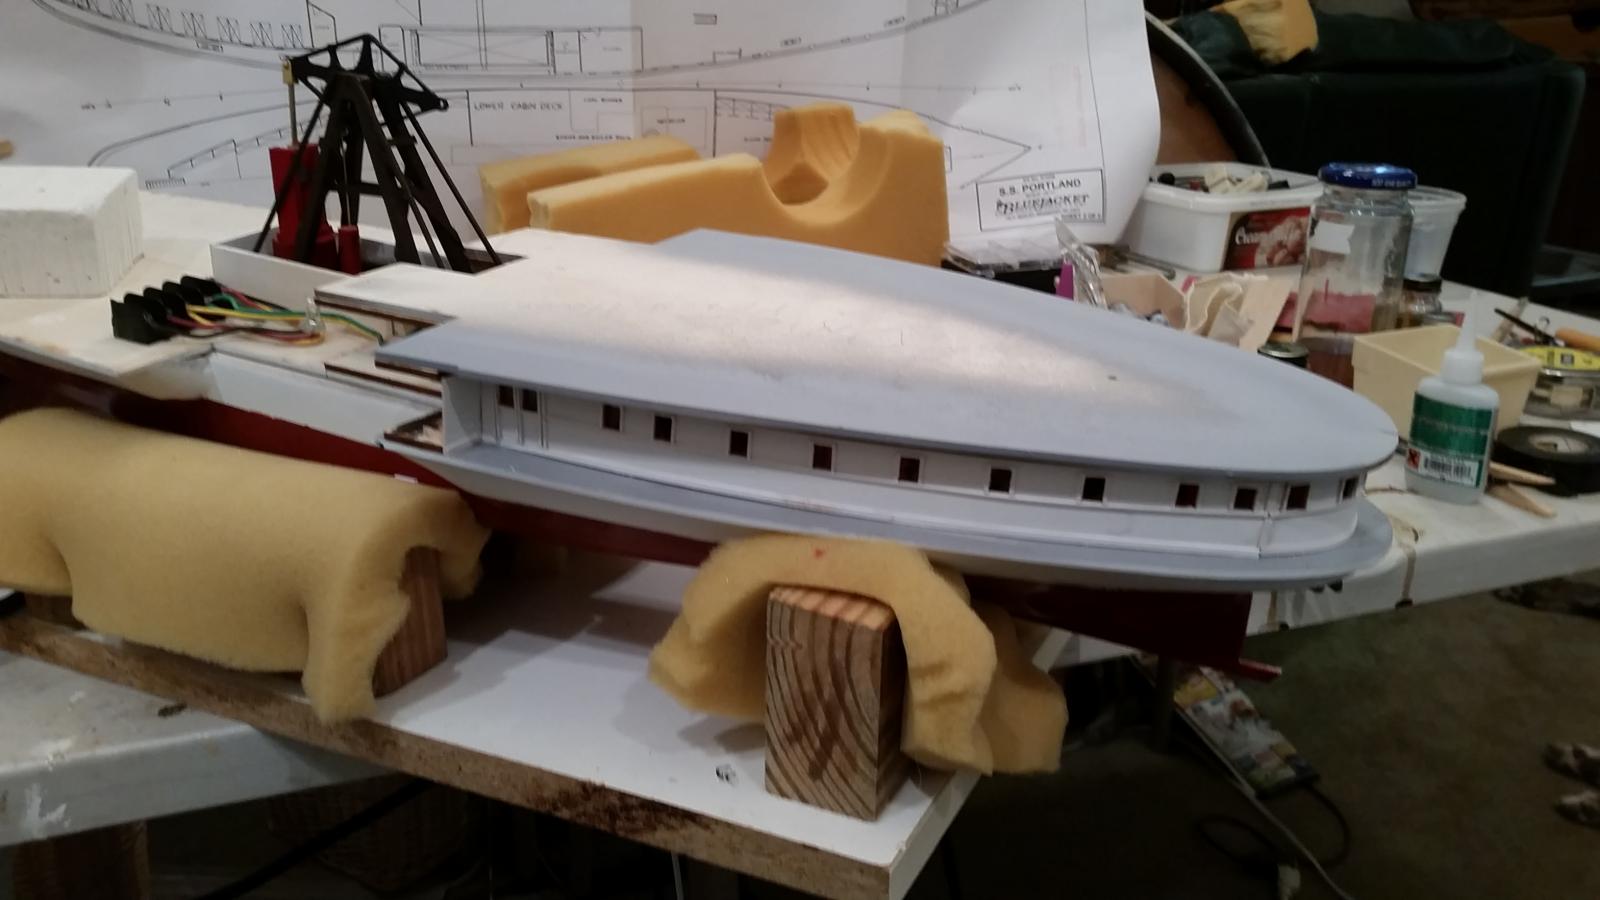
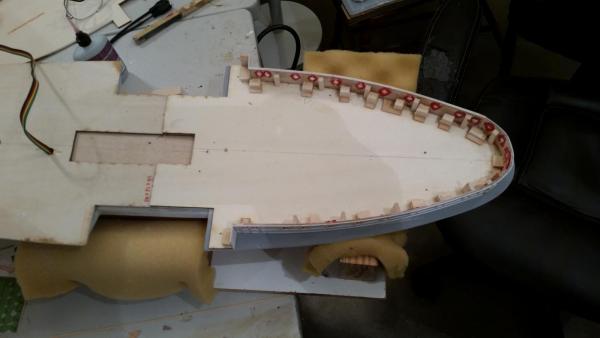
Still have a few details and touch up to do,but basically have the main deck completed. The lights don't look to bad. I was trying to get a different glow to the freight deck from the passenger area. It didn't come out like I wanted, but it's to late to change. And if one of the leds give out it can't be serviced.

-
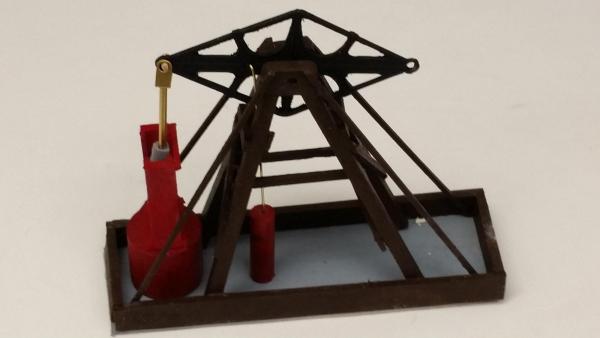
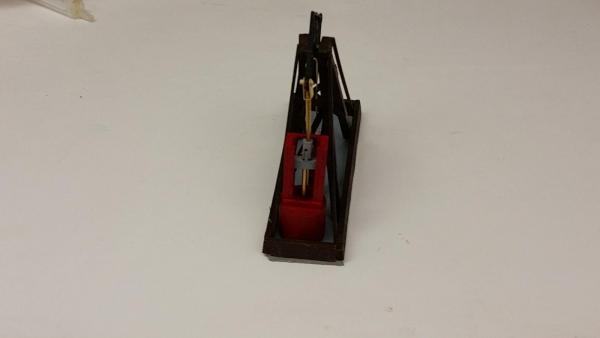
Here is are some pictures that I had in hi res two of the walking beam in work and the ladies saloon
-
Thanks I haven't used paint in several years, and hadn't thought about going that route. I give it a whirl.
-
have almost completed the ladies saloon and the lights have been added. I have taken several pictures of the construction up to this point, but forgot to set my camera to a low file size and the pictures came out to big to include in the post. So all I have are pictures of the assembly together. It has not been glued yet because a lot of last minute touch up and final fit. The lights a 12v 5mm clear leds.


-
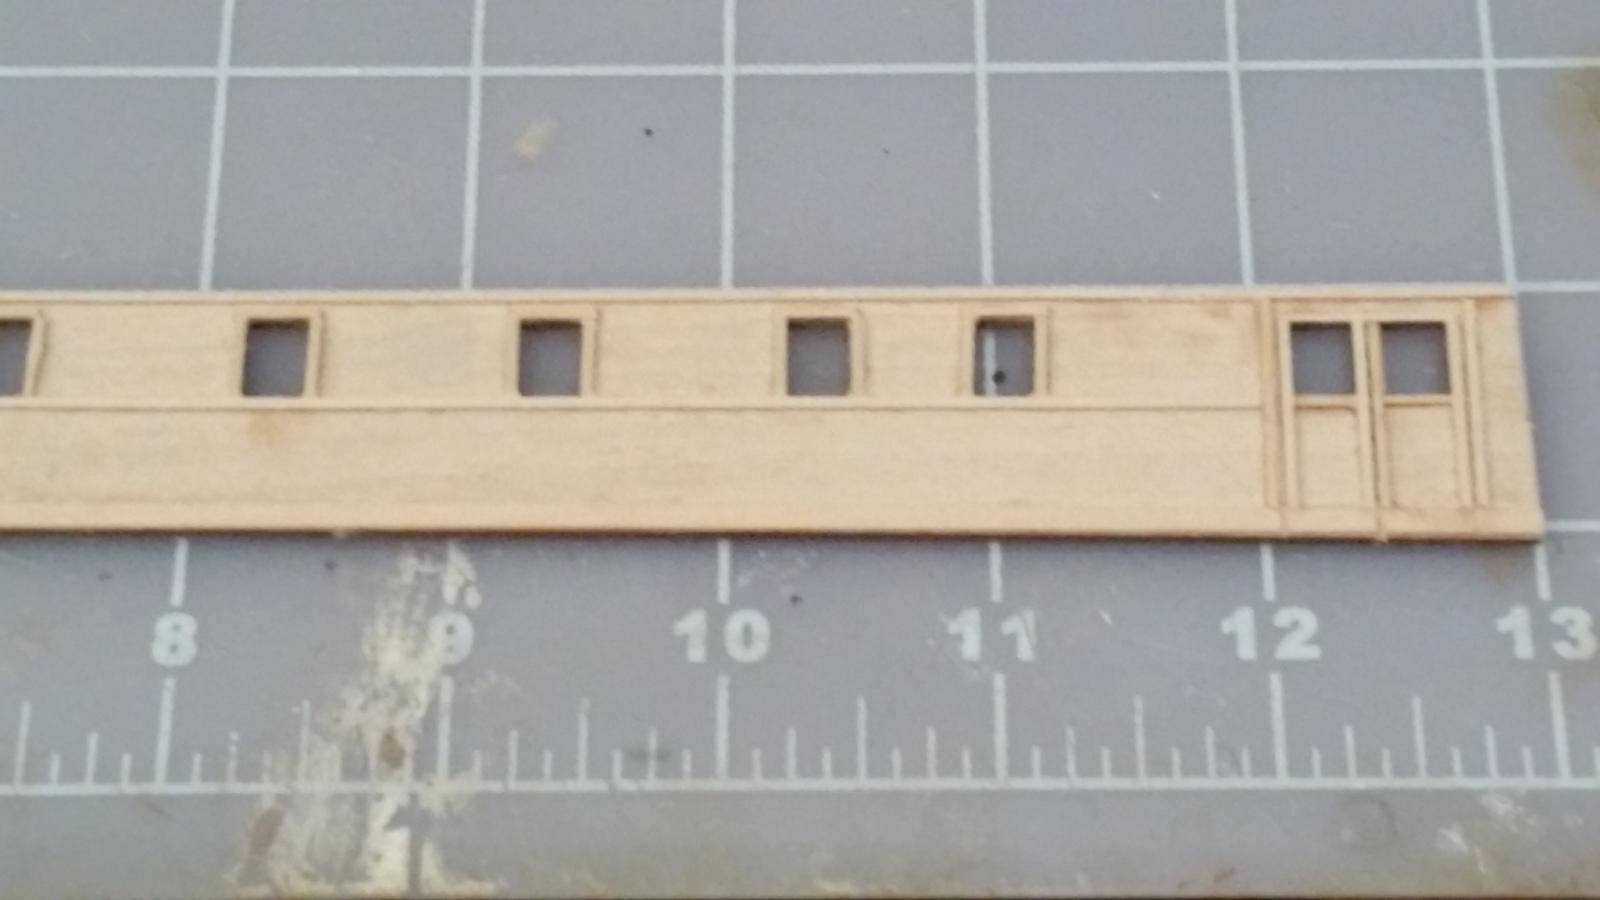
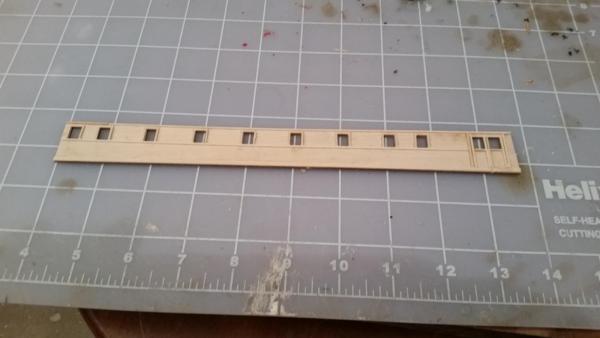
I have started paneling the starbord bulkhead for the ladies salon. The plan calls for much more trim and molding than I am going to do. The main reason is the scale. At 1/8" to 1' a strip 1/32"x 1/16" is a 2 x4 in real life and the plan calls for a real life 2 x 12 in some areas . So I decided to not be historically correct, and use 1/32" x 1/32" strips and then after they are glued sand them to reduce thickness.

-
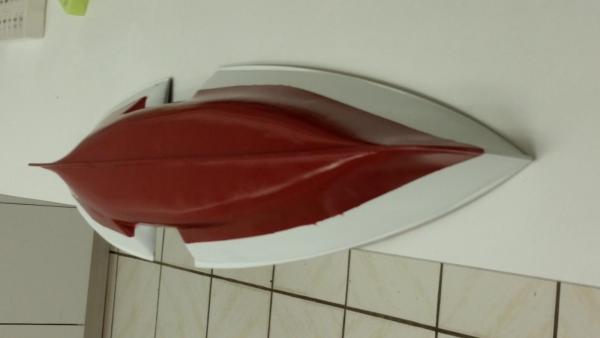
I have the hull painted and have a little touch up to do where the paint leaked past the tape. ( my fault)
-
Thanks I can see the problem of taking a picture in the dark. I am still working on the Portland hull. It is an interesting model. at 1/8" to 1' things get fairly small. The decks are only 1" tall. I am planning to light it with "wheat grain" size 12v leds.
-
lights look great. Can't wait for a night shot.
-
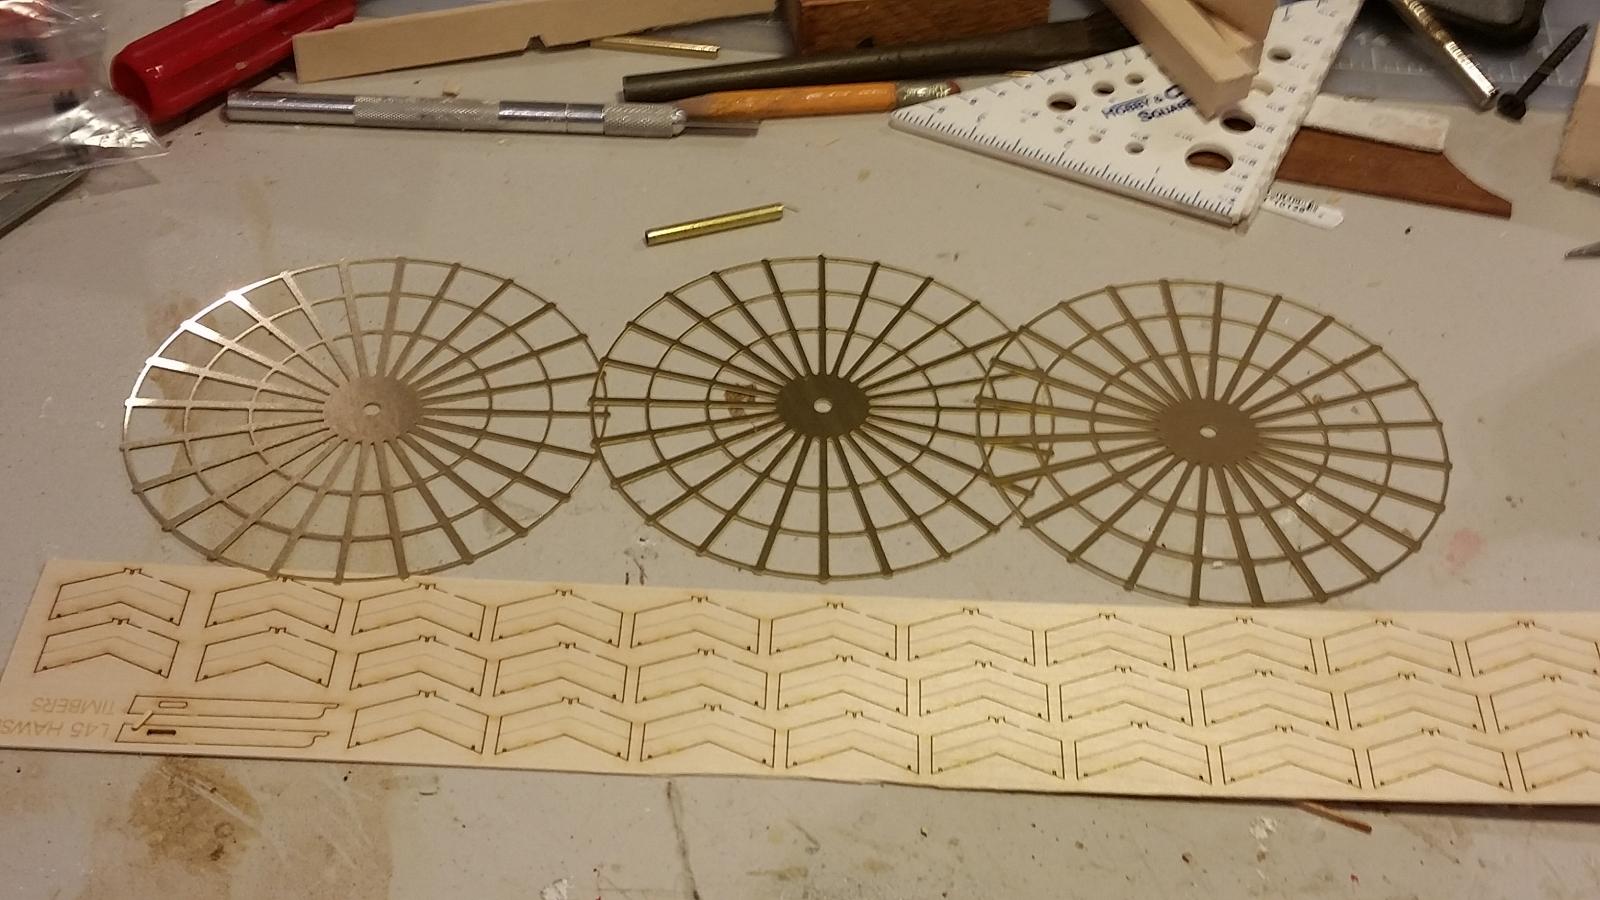
I can't master getting the pictures and the text together. Trying to hold the three wheels on the axle and add the 24 paddles. is tough so I built the fixture a both that maintain the correct alignment of the whells while you added the paddles. It worked fairly well.
-
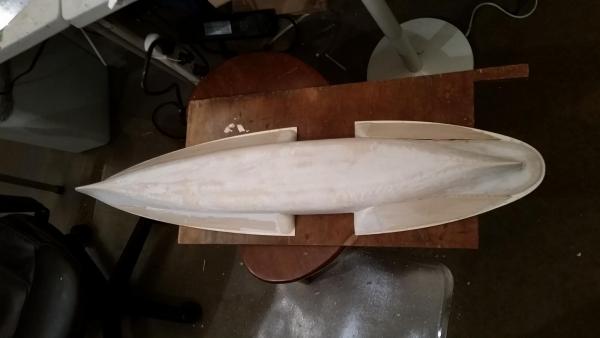
I have the sponsons roughed in, and am now ready for a lot of sanding and filling, and sanding a filling
-
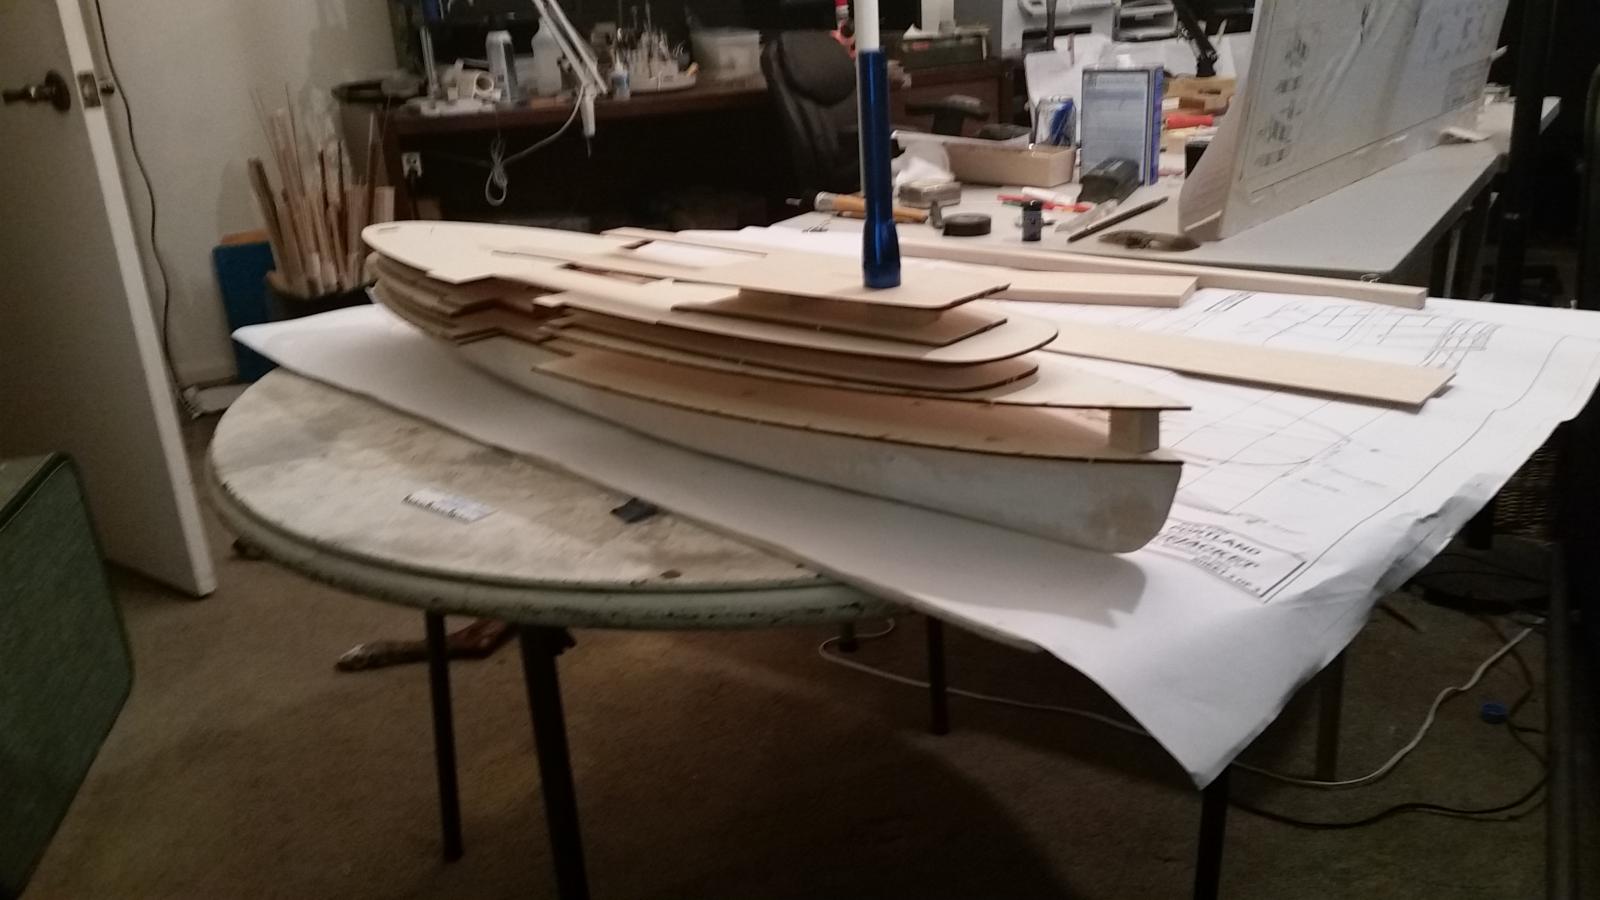
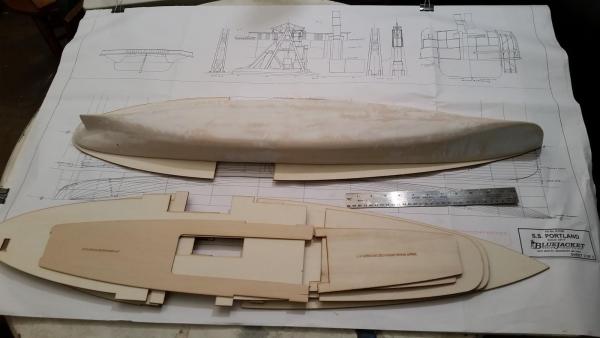
I put the mock up together. It really has helped me get a feeling for how the ship will look, and the work ahead. I'll now get back to finishing the hull, and work on some of the sub assembles

-
I have the hull in fairly good shape. I want to add the sponsons before I do the final shaping. Before that I am going to do the "deck mock up". This puts all the decks temporarily together with wood screws, so that you get a real feel for how things line up and how they should be assembled. This is a highly recommended step in the instructions.
-
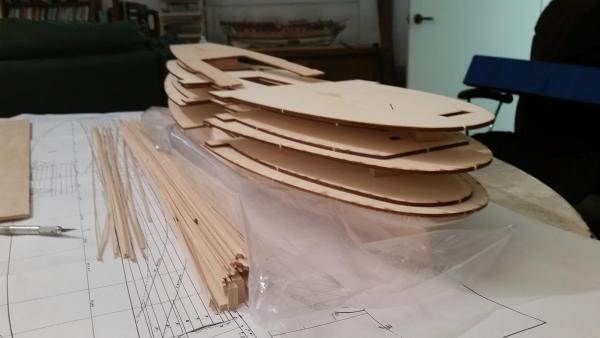
The UPS man brought my kit yesterday and I have just opened it. This is certainly going to be different than my previous kits which all but one were large sailing ships, and all were Plank on bulkhead. The YouTube video will be a big help. I will take most of to day reading the instructions, and reviewing the plans. I know I want to put lights on it, and think I have that figured out. I start adding picture when I have something to show. Clarence
-
Are you going to light it? I should get my "Portland" kit today, and I have been wondering about the pilot house. If the boat was underway the light would be off. If it was at the dock it would be on. Clarence
-
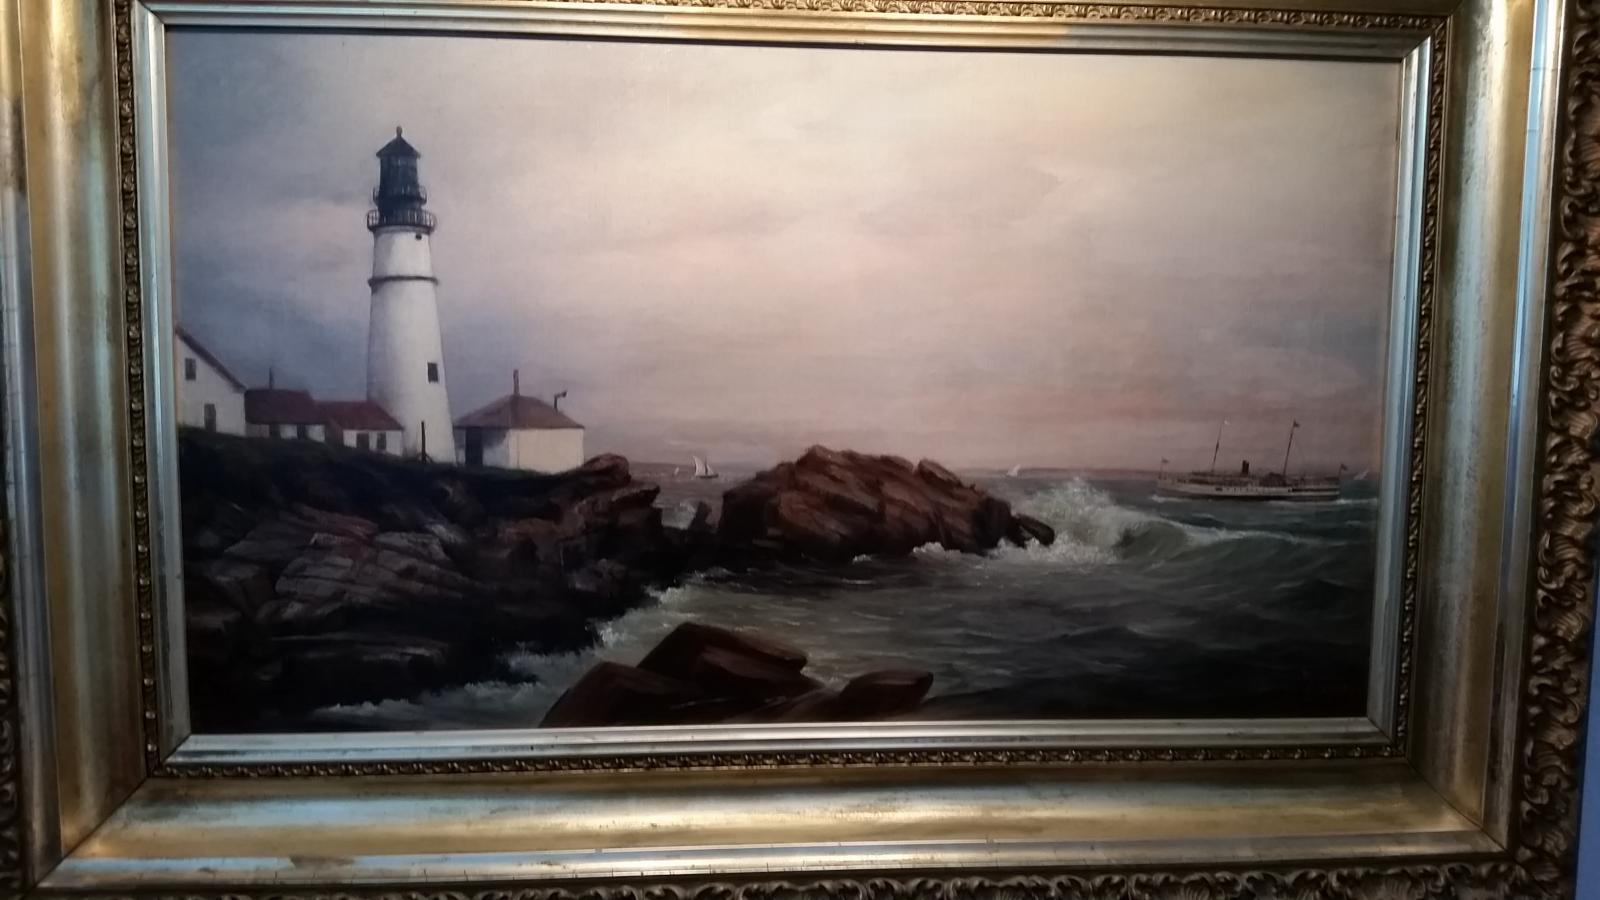
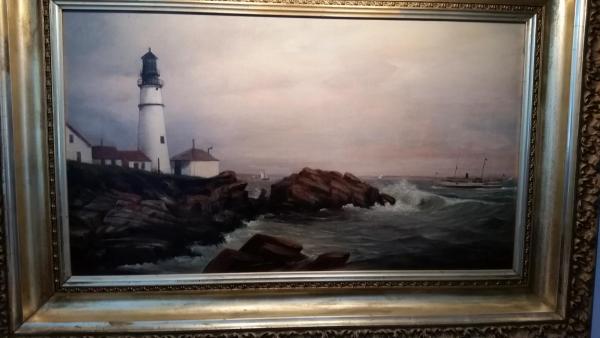
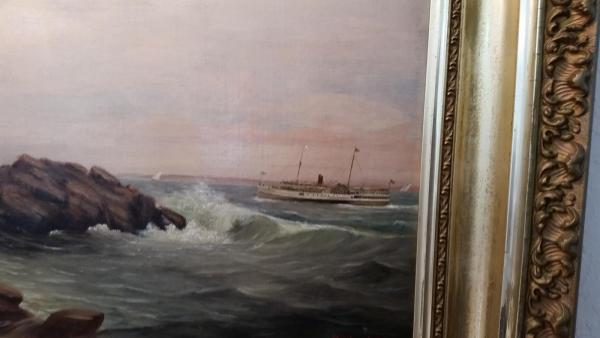
While waiting for my kit to arrive I was looking for pictures of the Portland. I found that my friend has a painting that has been in his family for over 100 years. I have included some photos of the Portland lighthouse with the Portland in the background
-
I thought that did, there was just an extra cost. If they don't you ought to think about Model Shipways Chaperon. I really enjoyed building it. I did not do a build log on it though.

-
I am planning to build the Portland (Bluejacket) and am going to light it, but with a 12V and 5V system with external power so that I can keep it on all the time. I am waiting for the kit to arrive, so I might change my approach when I get it. I built the Chaperon(MSW) and wished that I had put lights in it. I plan to use 3mm lights to keep the intensity down. I did a mock up with bigger lights and they seemed to bright. I have a build log started so keep in touch. Clarence
-
Thanks!! This will be a great help. I just finished the Confederacy, and I see this represents a whole new set of problems.After I finished the Chaperon I am sorry that I didn't light it, so I am definitively going to put lights in all sections so these pictures will really help. Clarence
-
Growing up in Pittsburgh I feel in love with the steam driven paddel-wheelers, (that gives away my age). I have built the Chaperon, and have decided to take on the Portland. I just ordered the kit, and will keep you posted.
-
correct the previous the hull rail opening is 3/8 aft of top rail