ggrieco
-
Posts
276 -
Joined
-
Last visited
2 Followers


Recent Profile Visitors
1,681 profile views


-
 KORTES reacted to a post in a topic:
Brig Mercury rigging by Igor Capinos
KORTES reacted to a post in a topic:
Brig Mercury rigging by Igor Capinos
-
PeteB reacted to a post in a topic:
Dunbrody by Mahuna - FINISHED - 1:48 - Cross-Section - Irish Famine Ship
-
ggrieco reacted to a post in a topic:
USRC Ranger 1819 by Cathead – FINISHED – Corel – Scale 1:64
-
 She's looking beautiful. Nice job with the topsail, very authentic look!
- 96 replies
-
- 4
-
-
- topsail schooner
- revenue cutter
- (and 3 more)
-
ggrieco reacted to a post in a topic:
USRC Ranger 1819 by Cathead – FINISHED – Corel – Scale 1:64
-
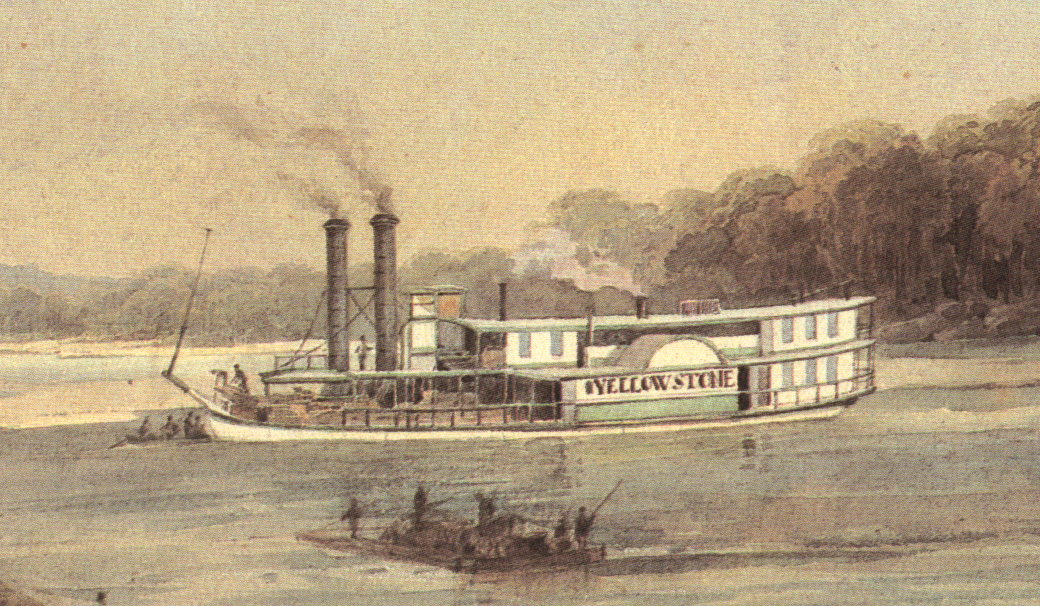
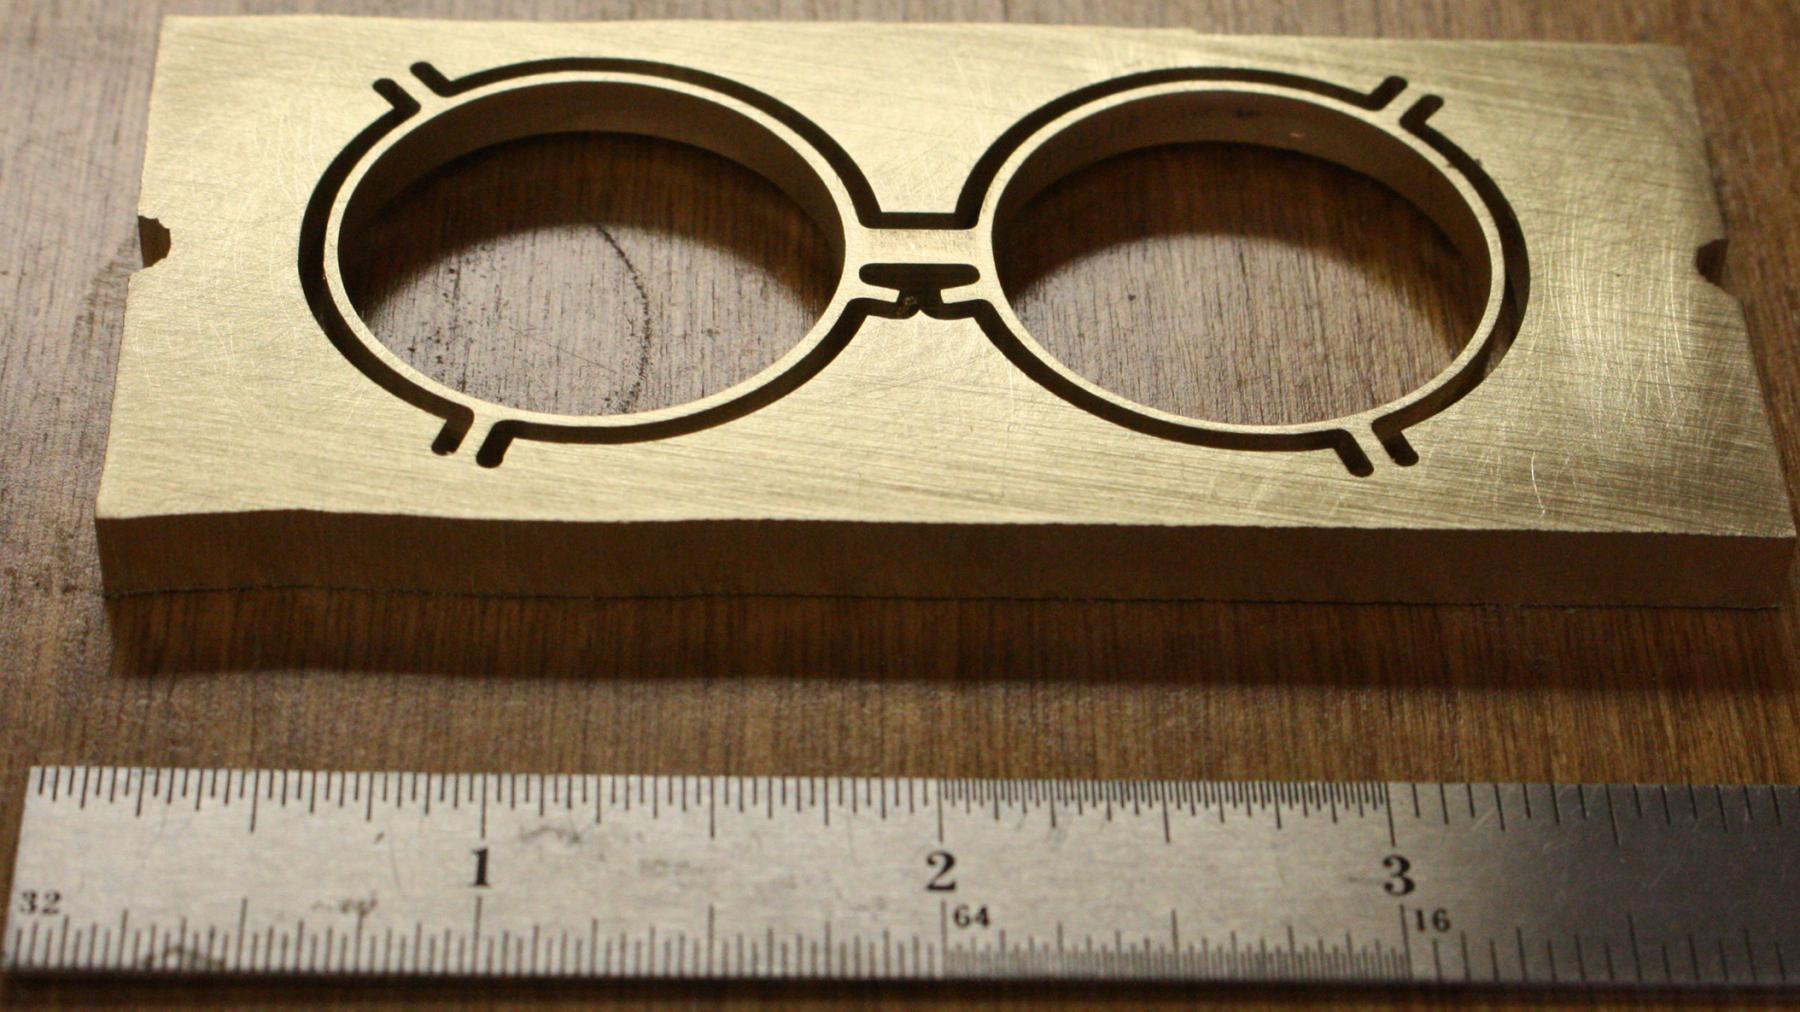
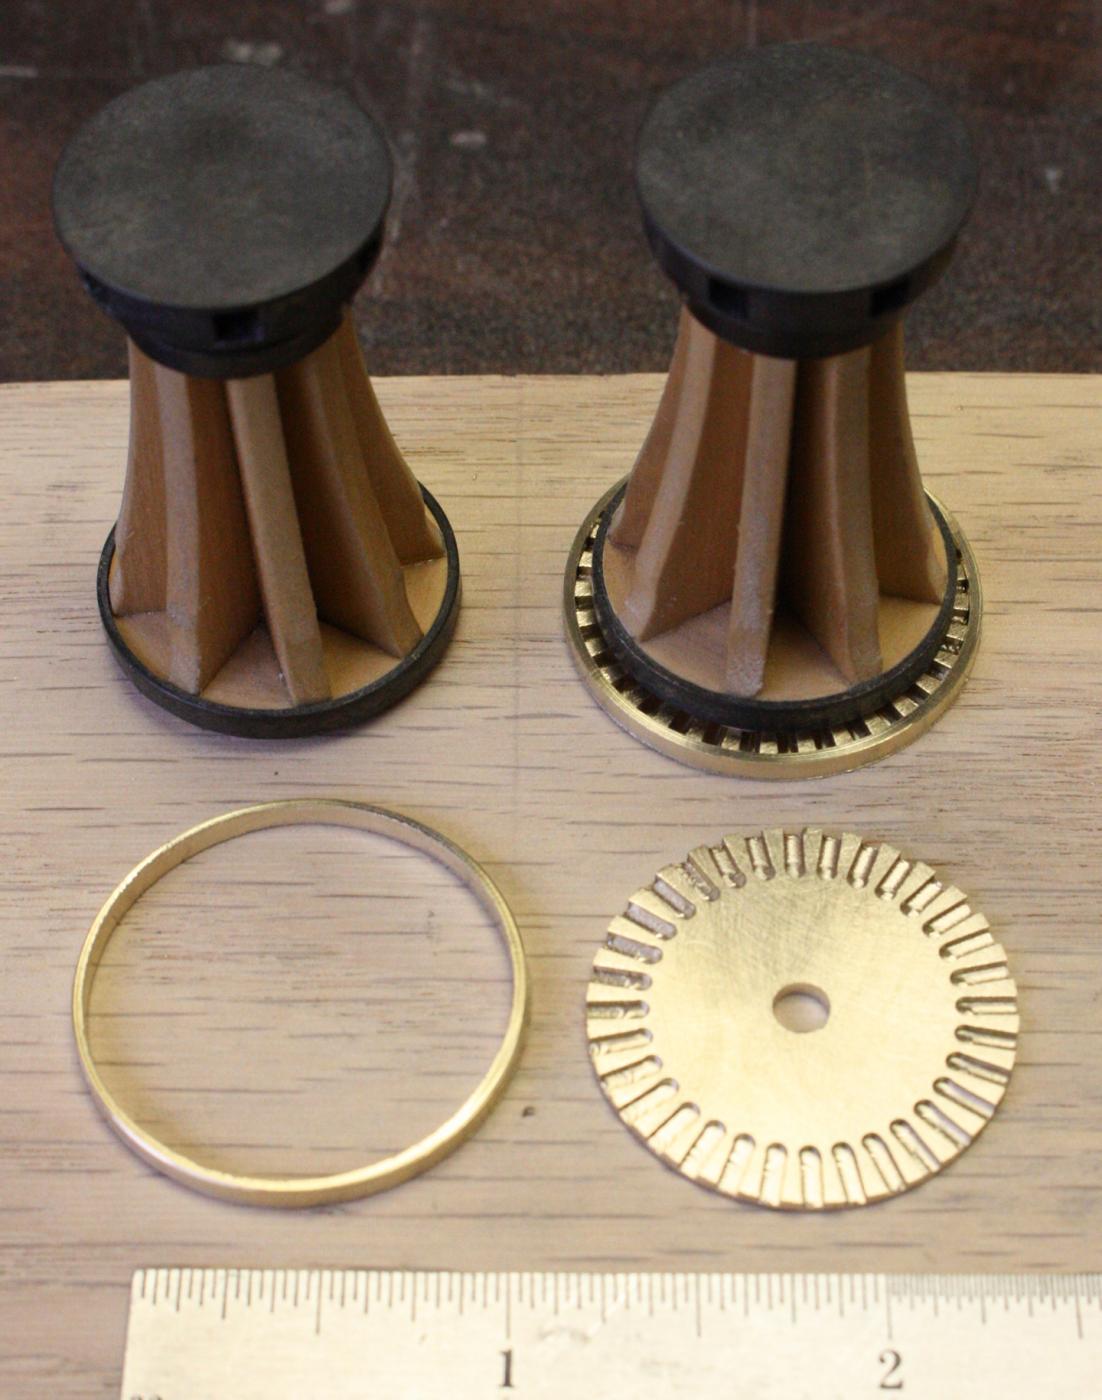
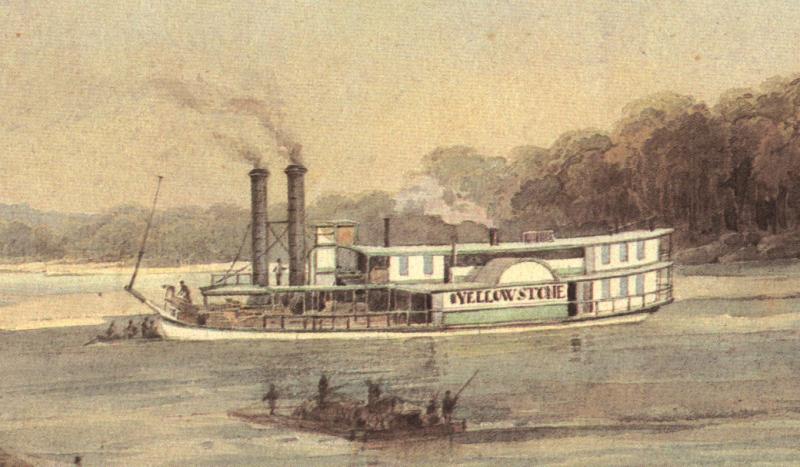
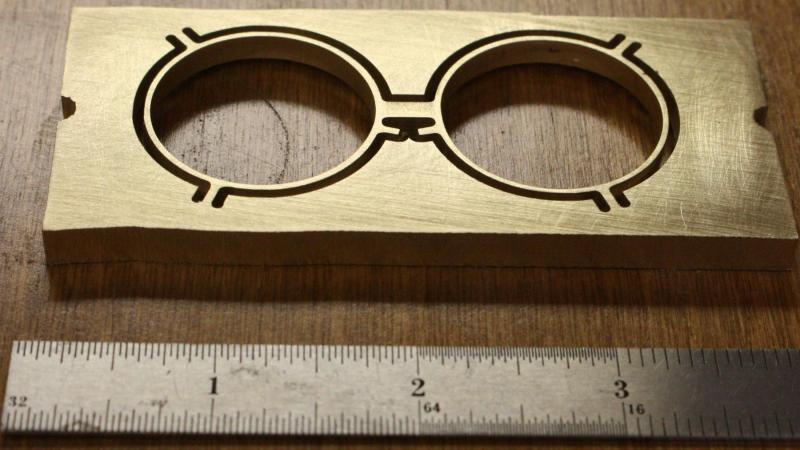
Thanks everyone, Thanks Jack, druxey, Landrotten Highlander, Pat and John for your kind comments. Thanks Cathead. Kevin went with the angled arrangement as on the Yellowstone for his reconstruction so I will be using it. I wondered about the reason as well. Recently, a visitor asked the same question and I thought about asking Kevin but then forgot about it. I'll try to remember to ask Kevin why he went with it on Tuesday. As for the silk, I had no idea that it would work as well as it did. The silk was very wrinkled and I was sure that I would need to stretch it or at least weight the edges to make it smooth. The wetted fabric seem to have some affinity for the shellacked surface and sucked itself up to it. I used no weights or stretching of any kind and the fabric held itself in place instantaneously. I used one piece and cut the openings as soon as it dried. Not a wrinkle in sight and securely attached to every surface it touched. I love working with shellac and have always been impressed with its qualities but had no idea that this would work so well. Thanks Greg, We tried to get the webcam up and running but we're still having some troubles with it. After fiddling with it, it will work for a short while and then it will just stop for no apparent reason. If we ever get it to work consistently, l'll mention it in a post. Thanks Michael, yes, I found it painful to waste so much brass to make the bands. To make the situation even worse, the bands could have been cut from 1/4 inch brass but I was out of 1/4 stock and had to cut it from 3/8 inch instead. I had to face the back side to get the proper thickness I needed - a real waste of expensive brass. CNC was an expedient for me but, the band could have easily been made from a strip of brass and drilled for eyebolts. Actually, in hindsight, it might have been easier (and more authentic)! I'm afraid I might have gotten a bit lazy and took the easy and wasteful way out. The archaeologist in me just took a backseat to the engineer. I was trying to show-off what the mill can do and compromised the artifact! I appreciate and totally agree with your comments, I will definitely try to be truer to the original techniques as I proceed.
- 701 replies
-
- 11
-
-
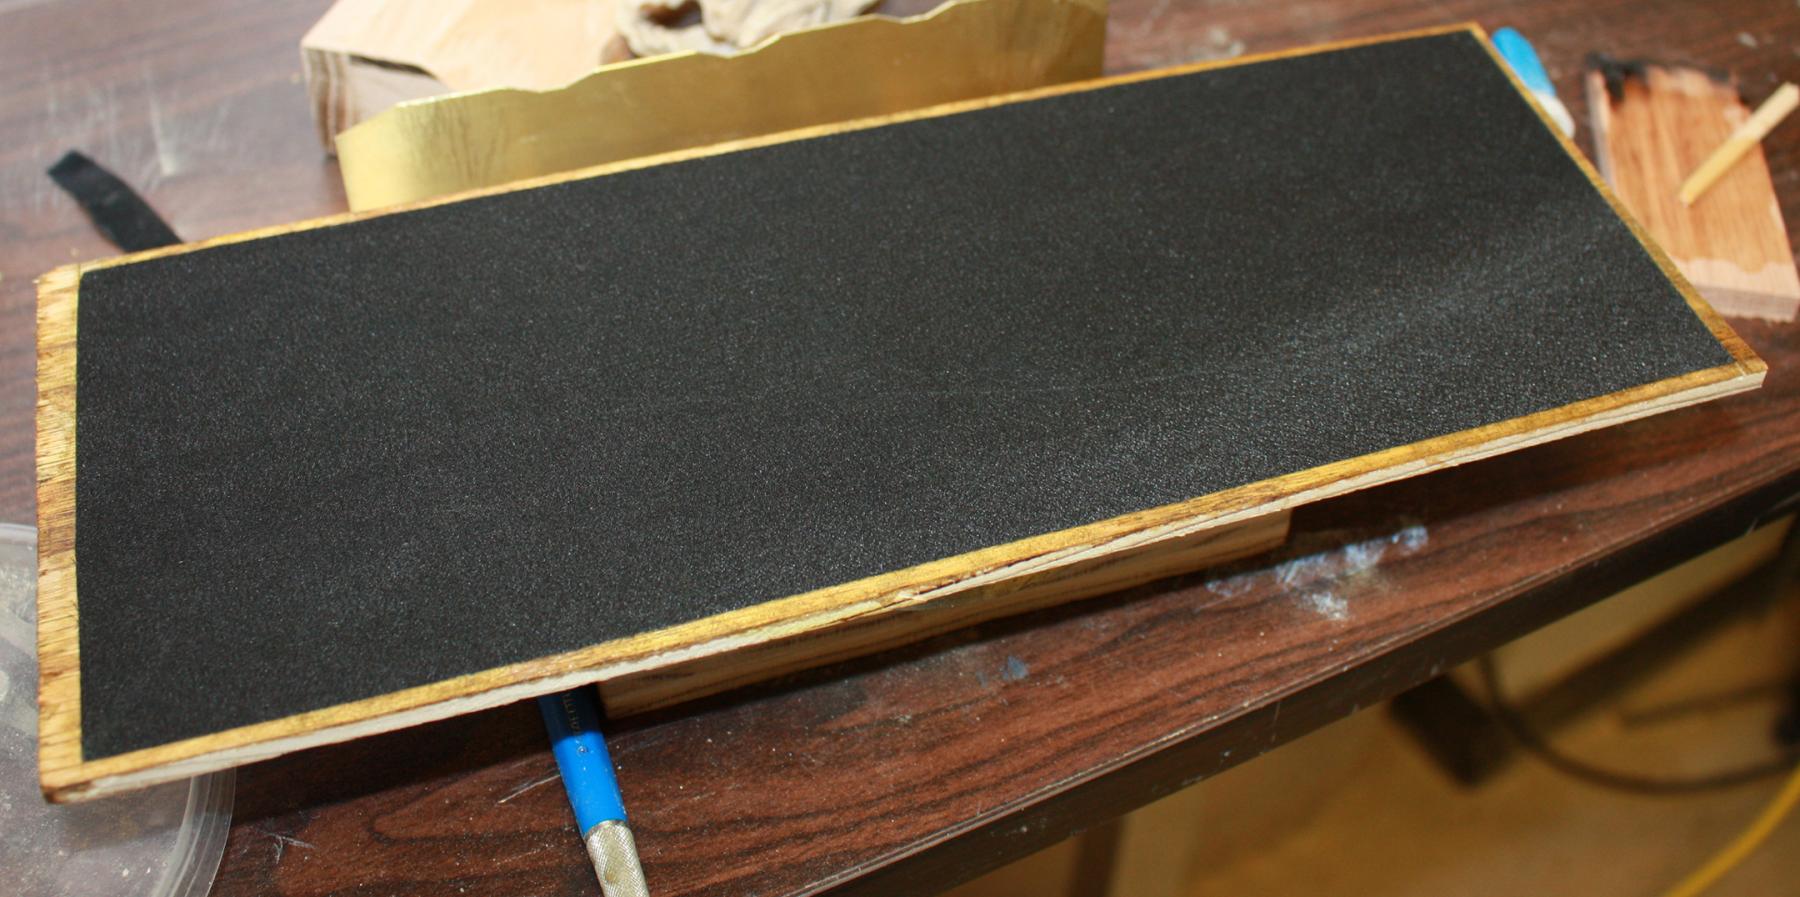
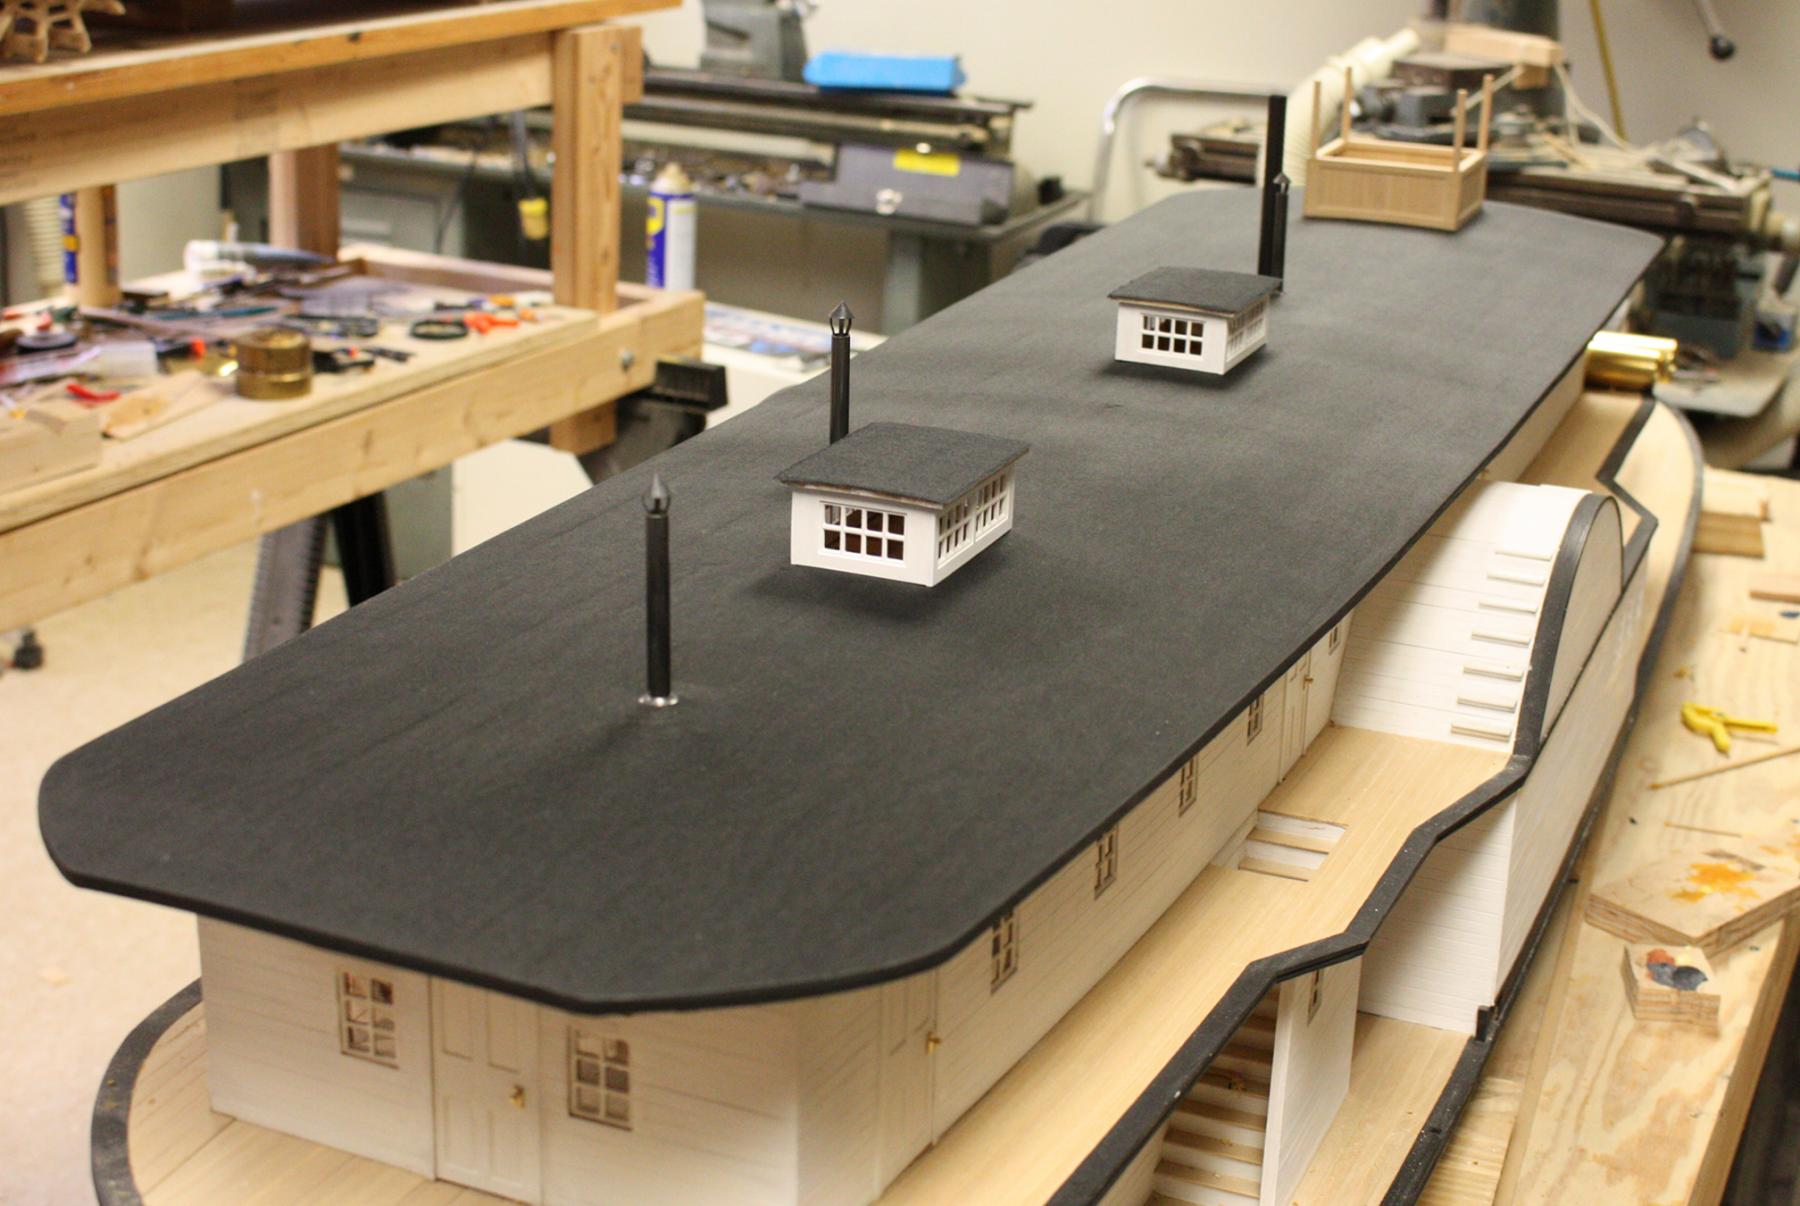
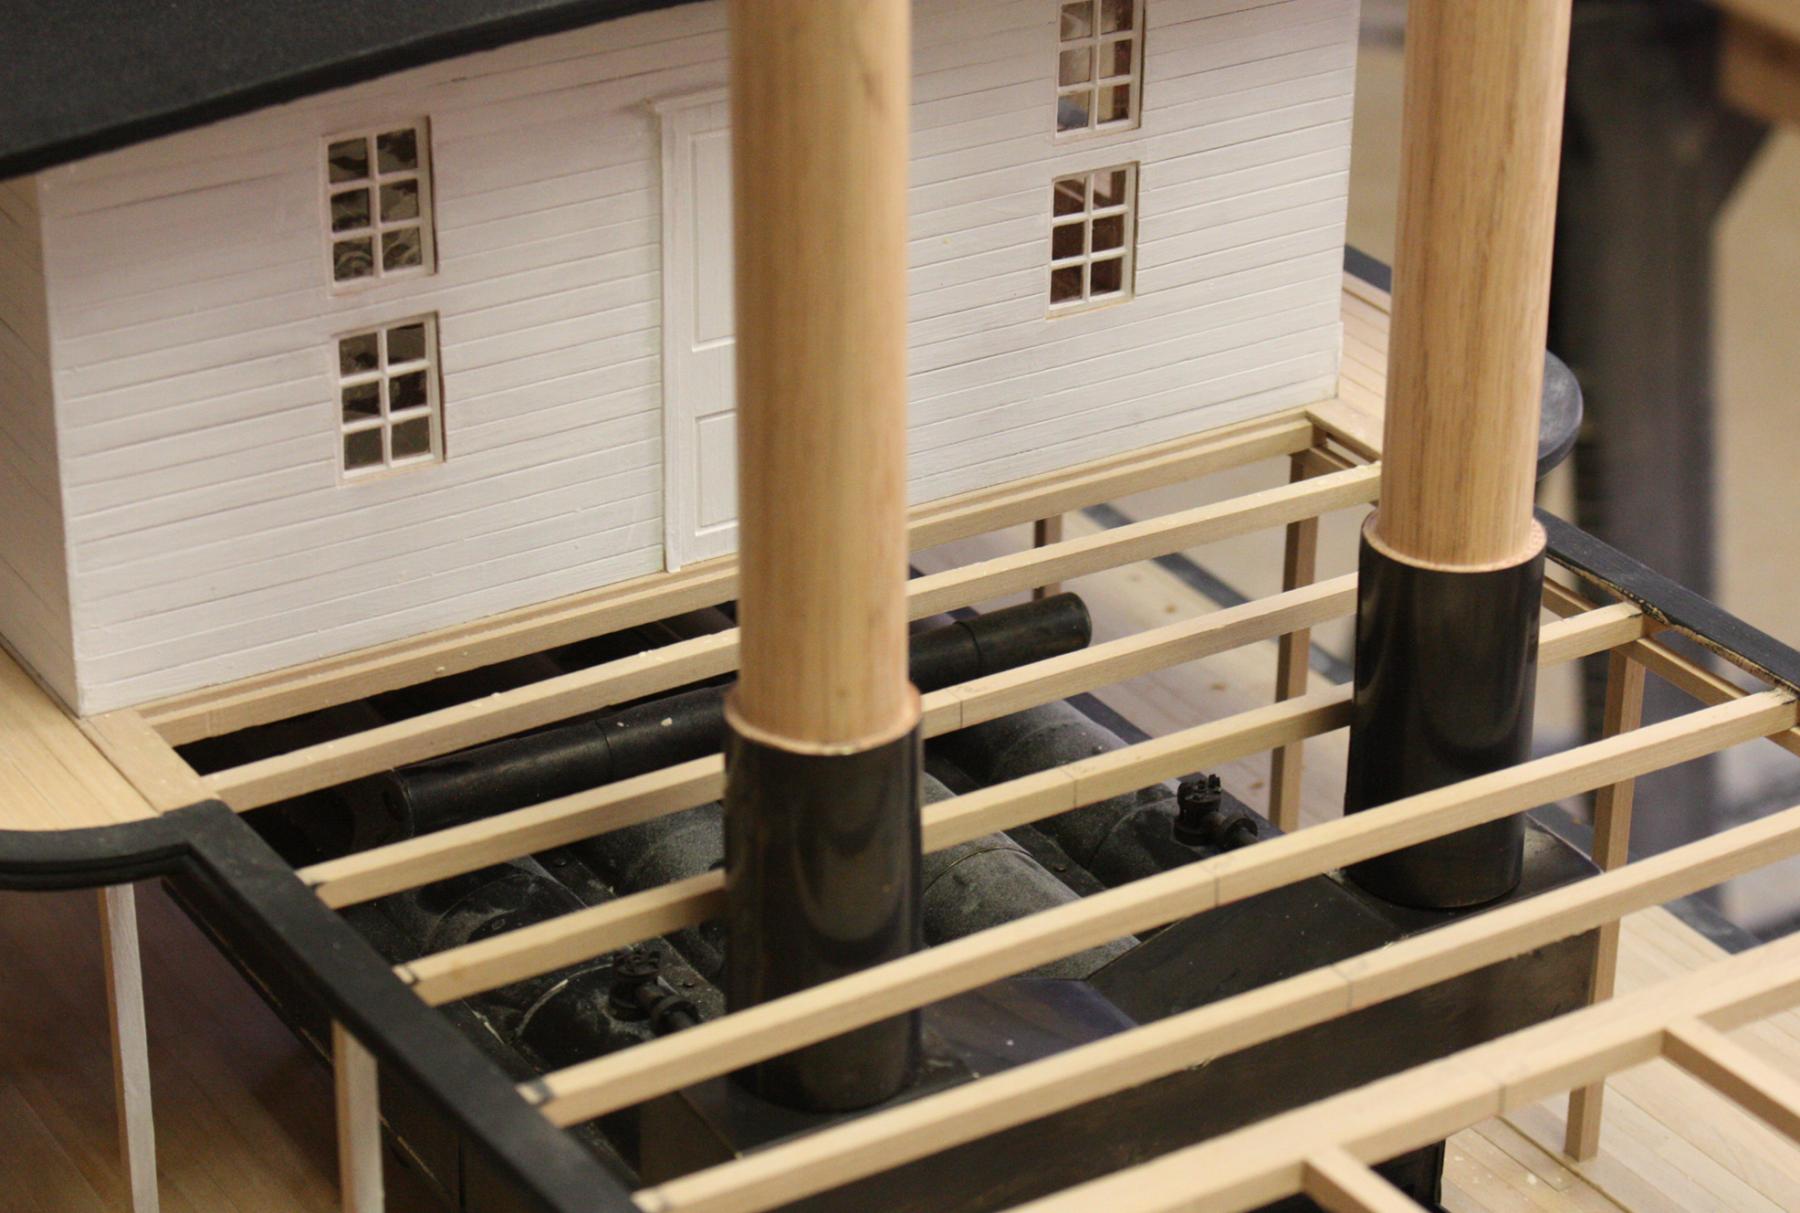
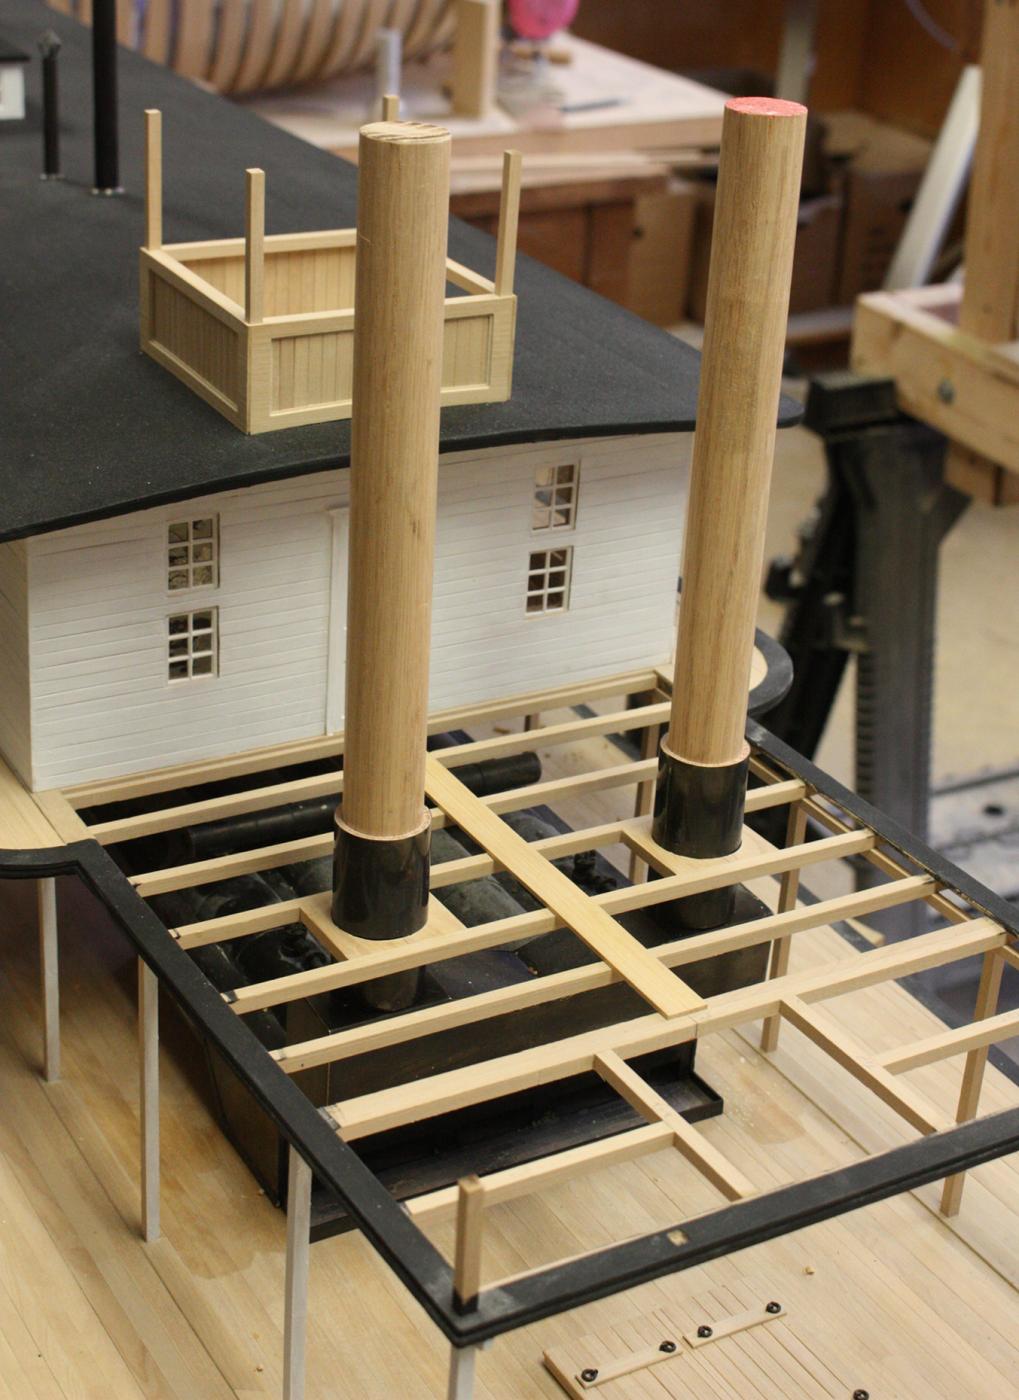
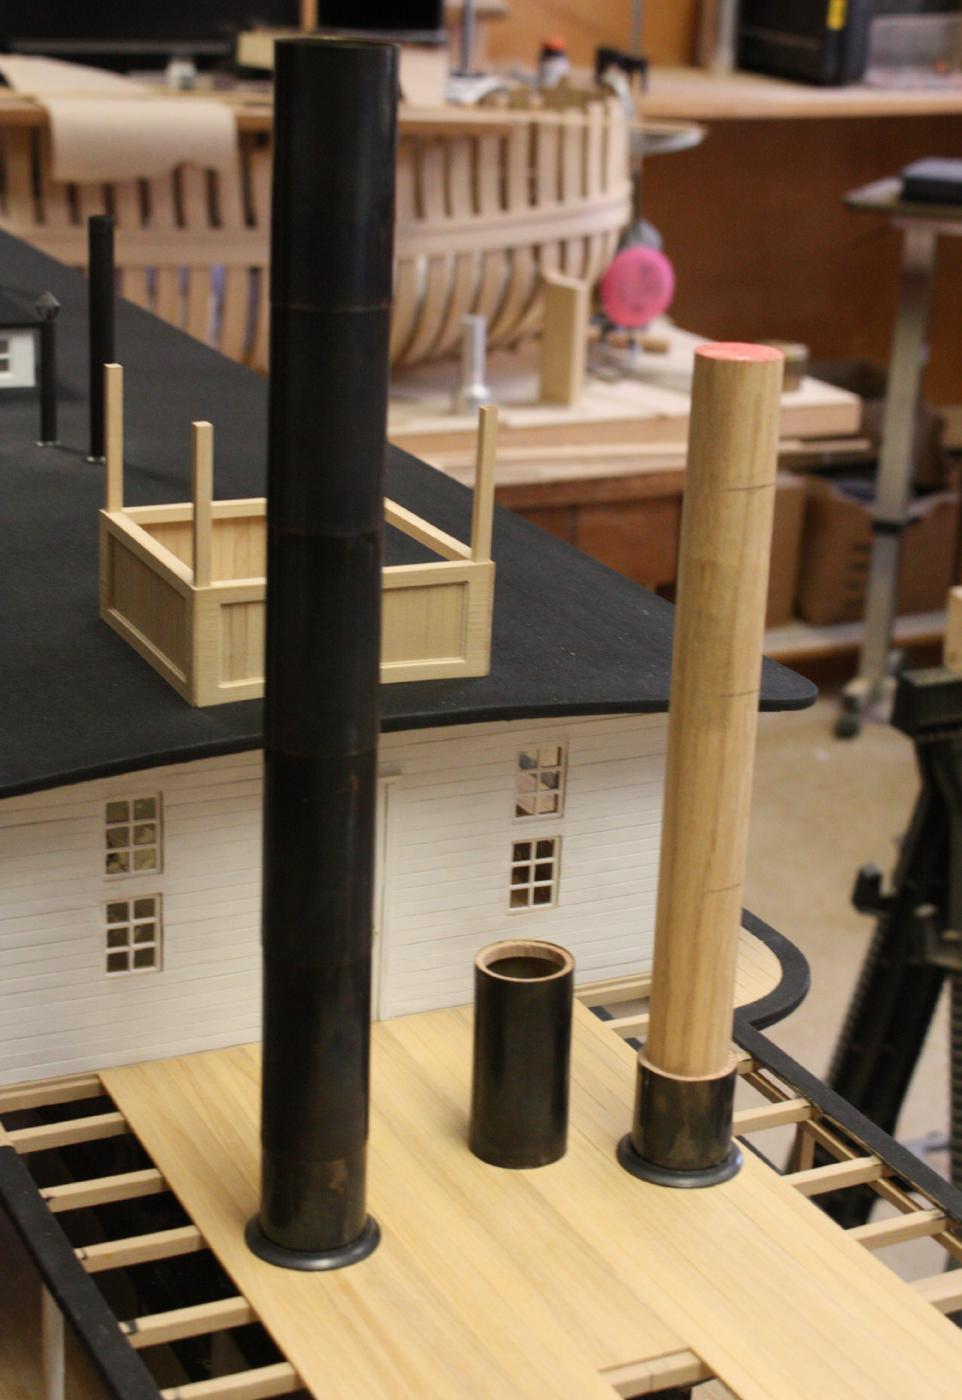
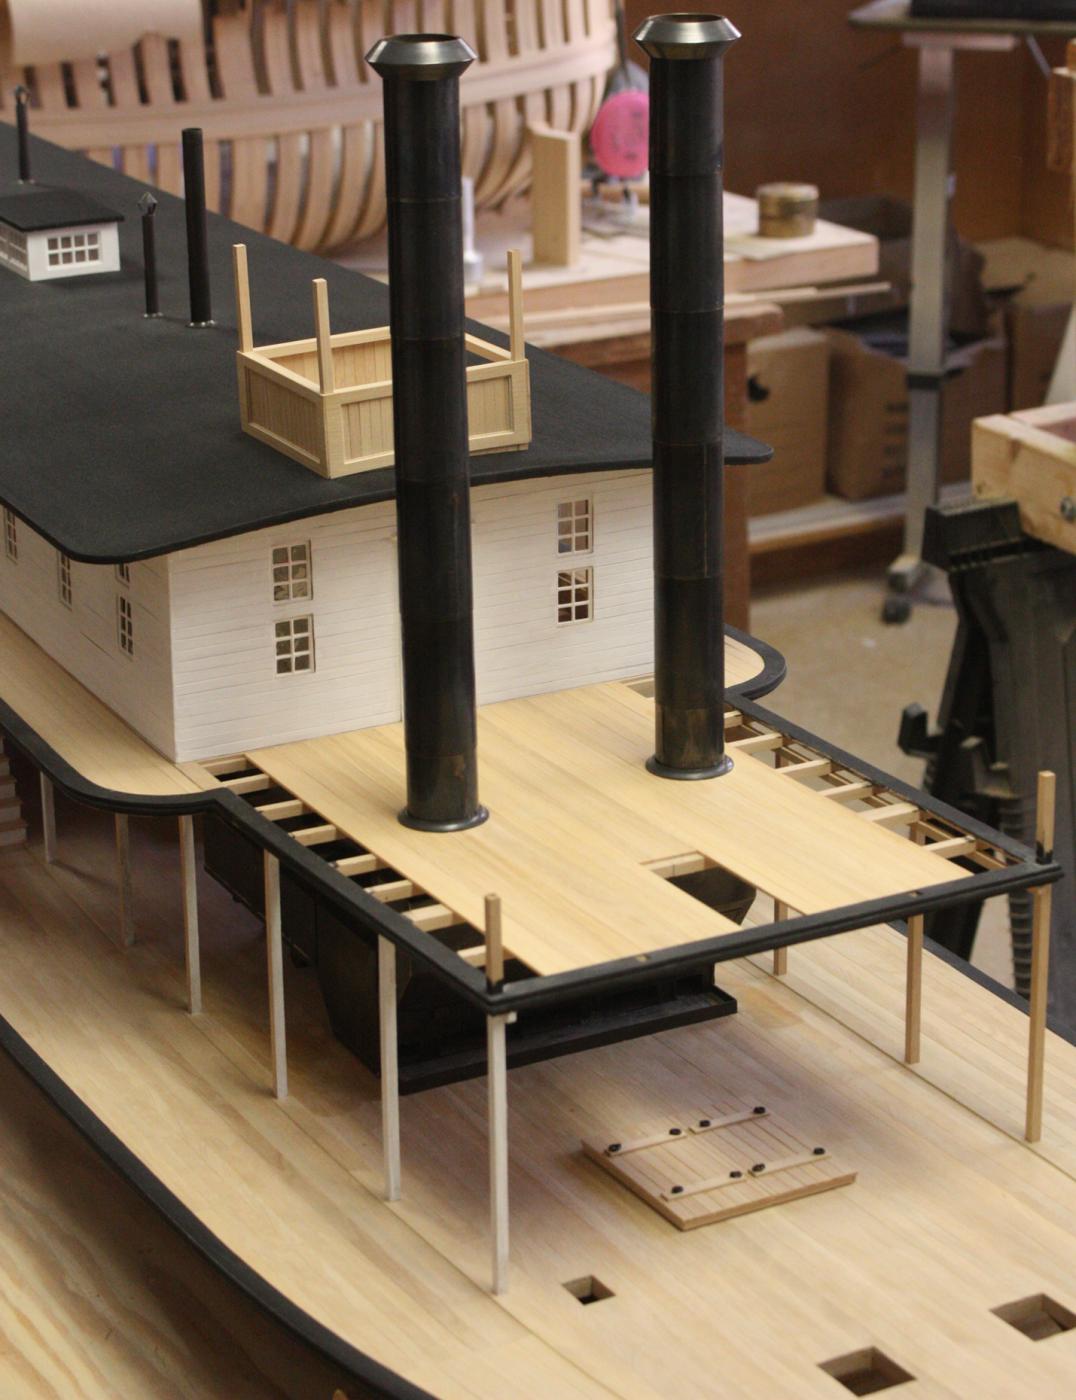
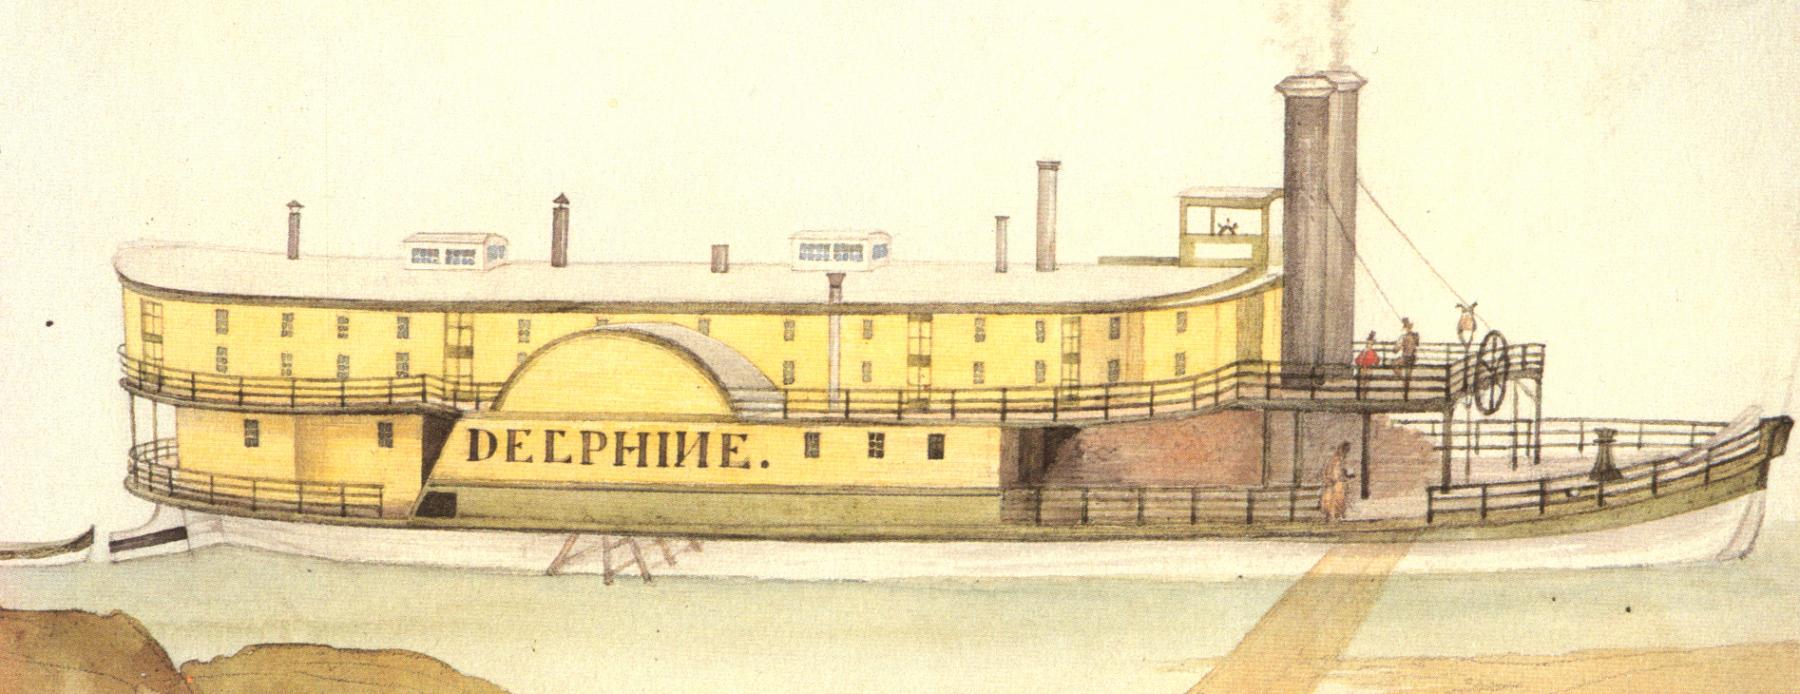
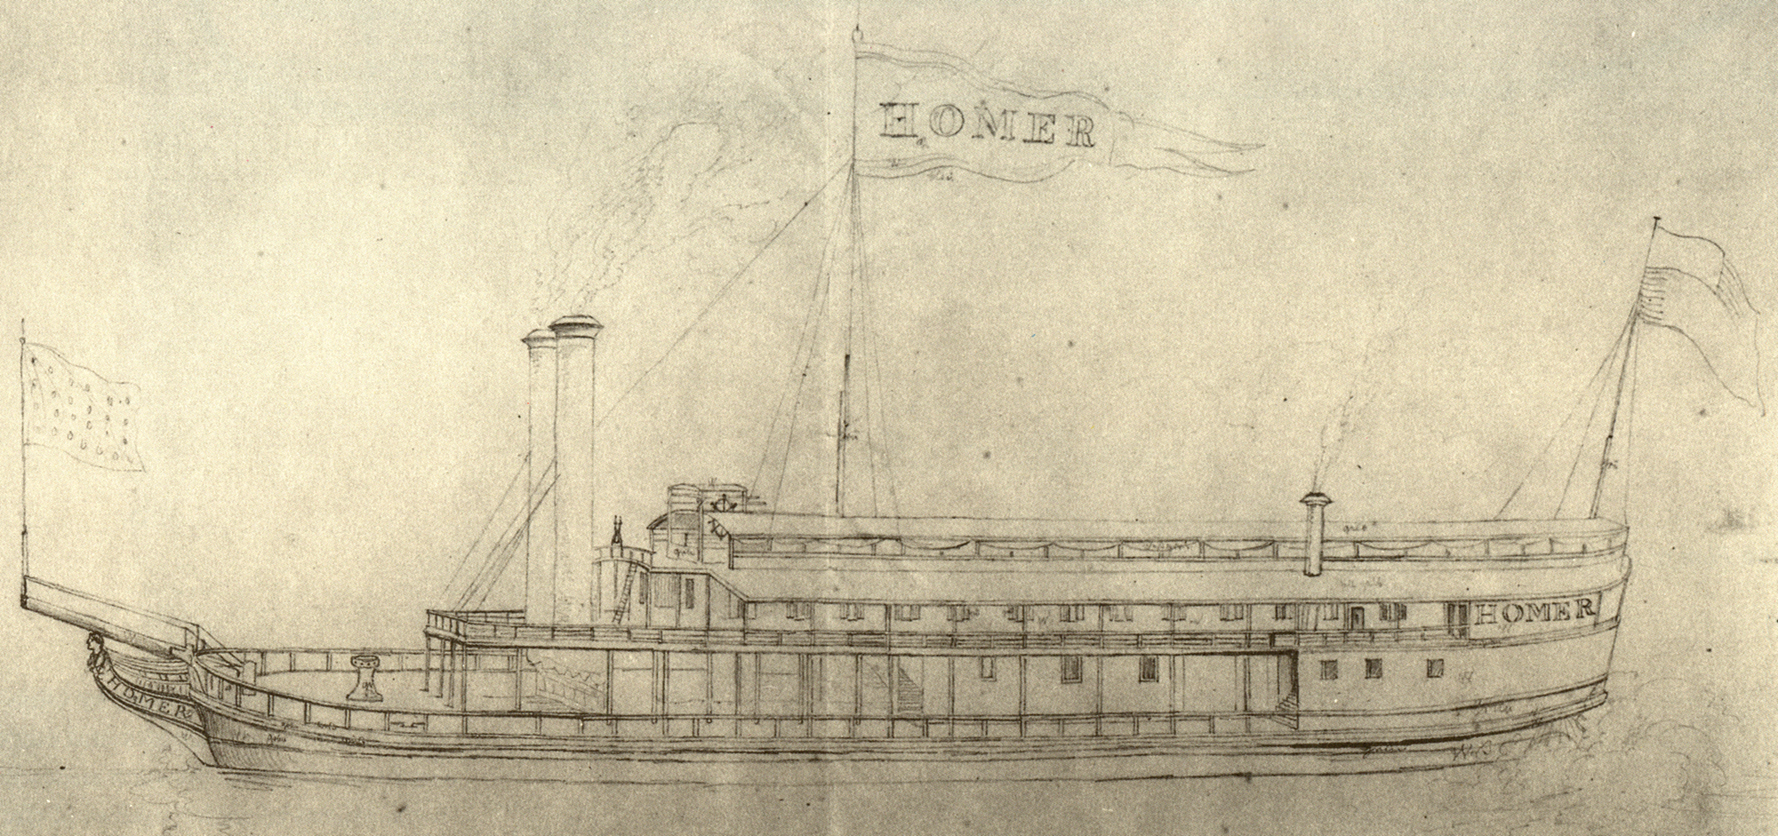
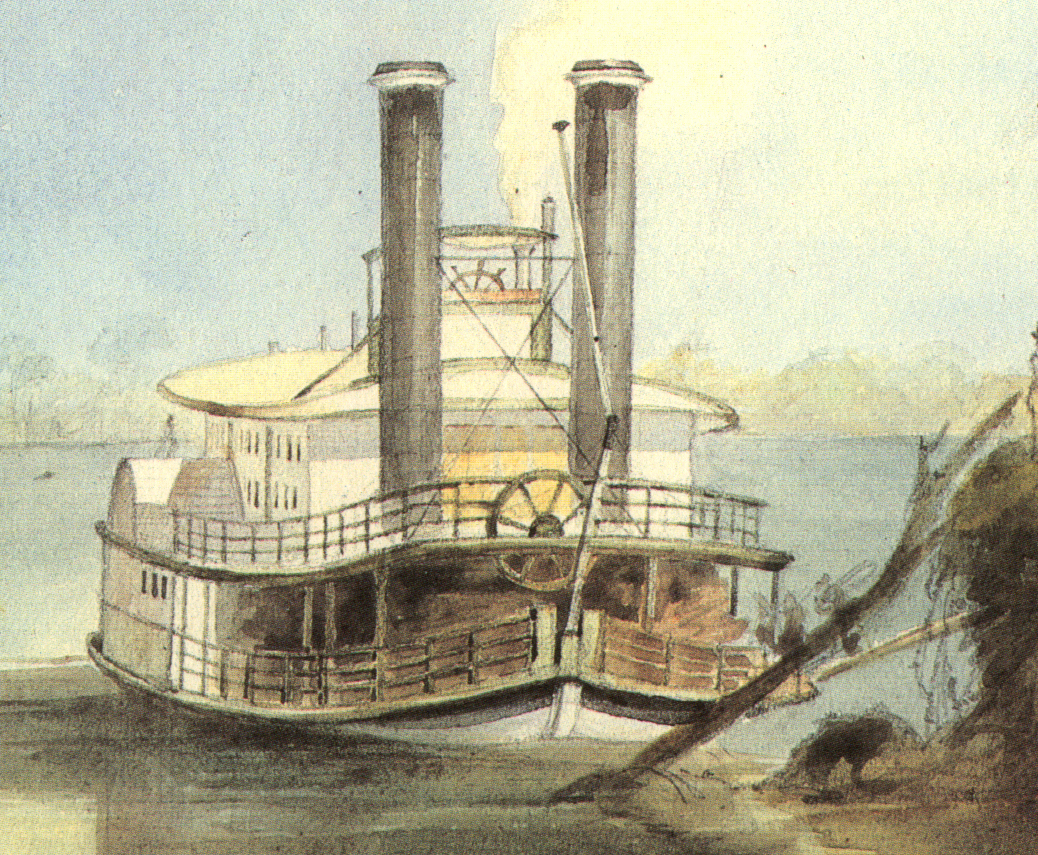
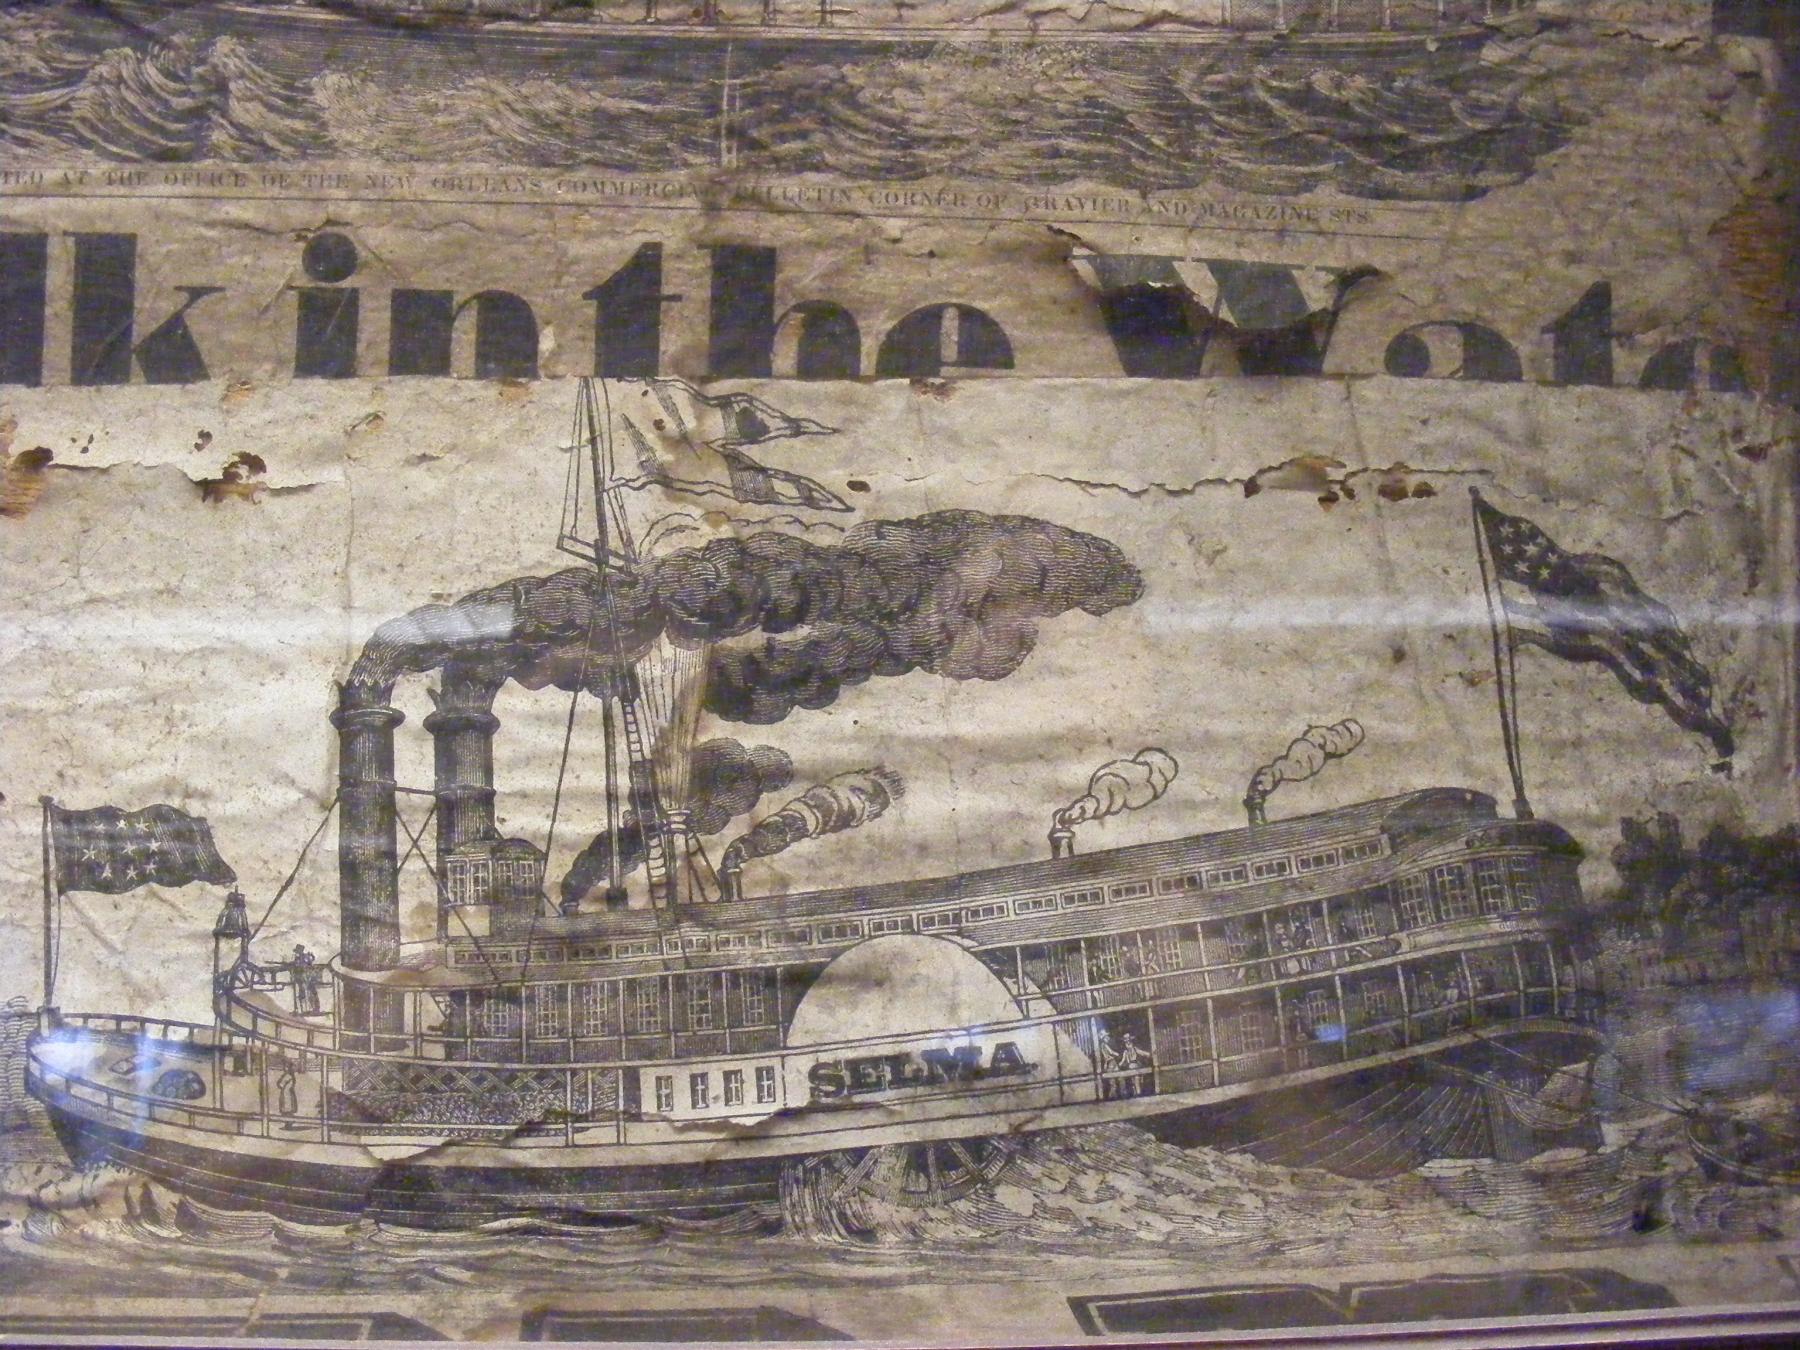
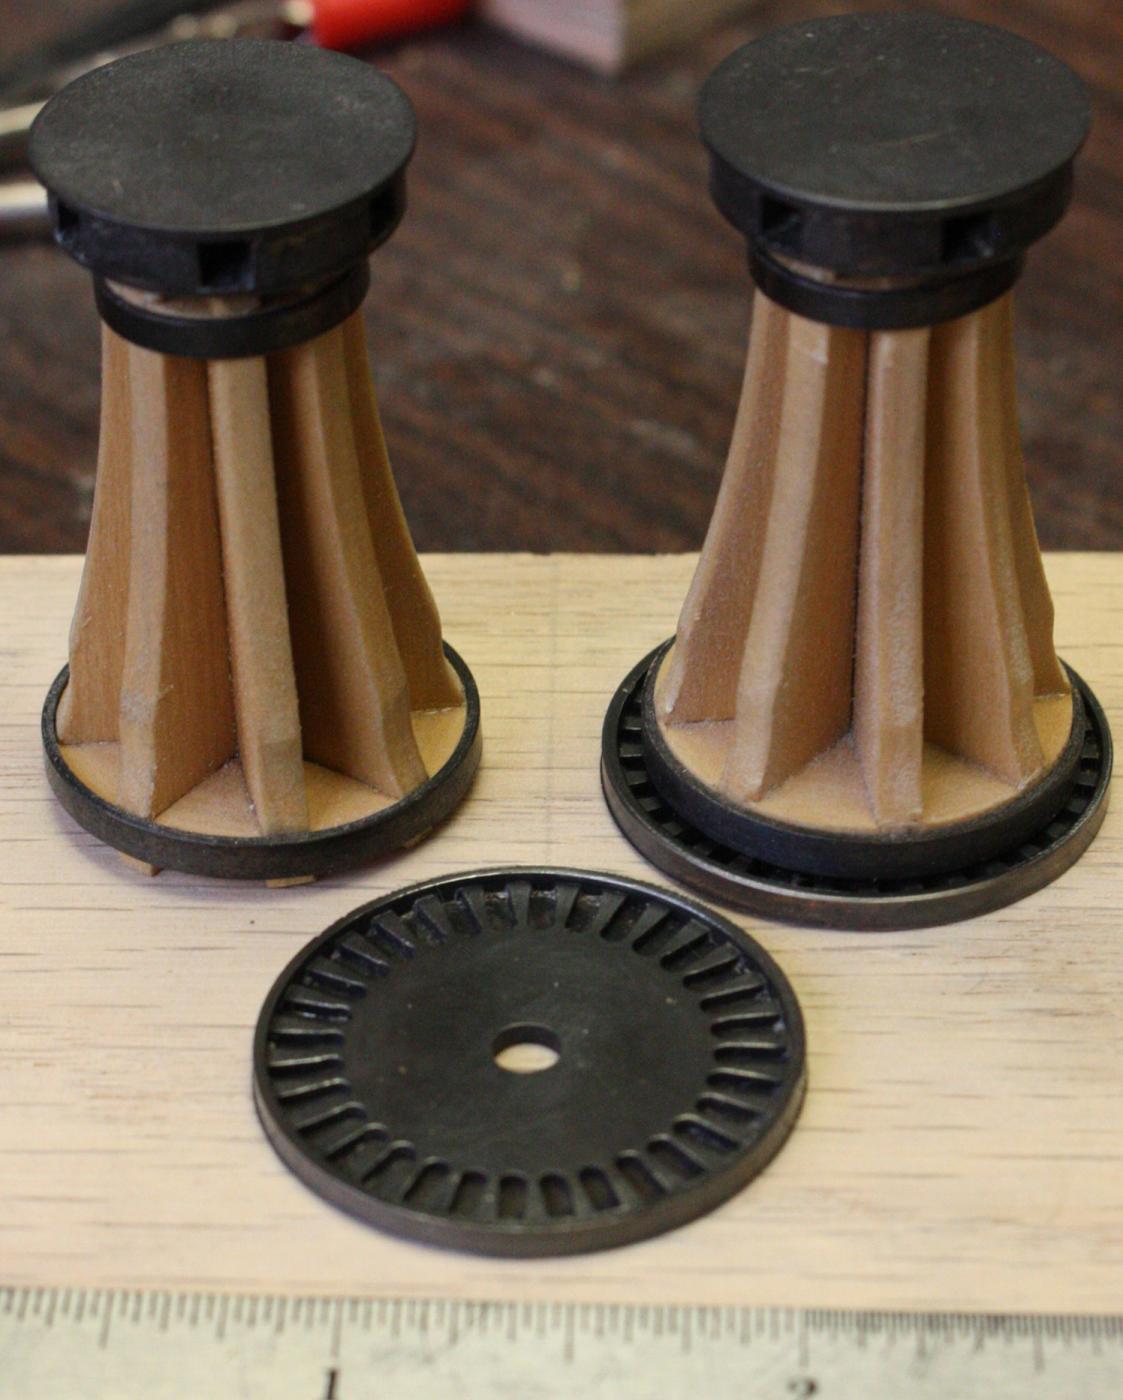
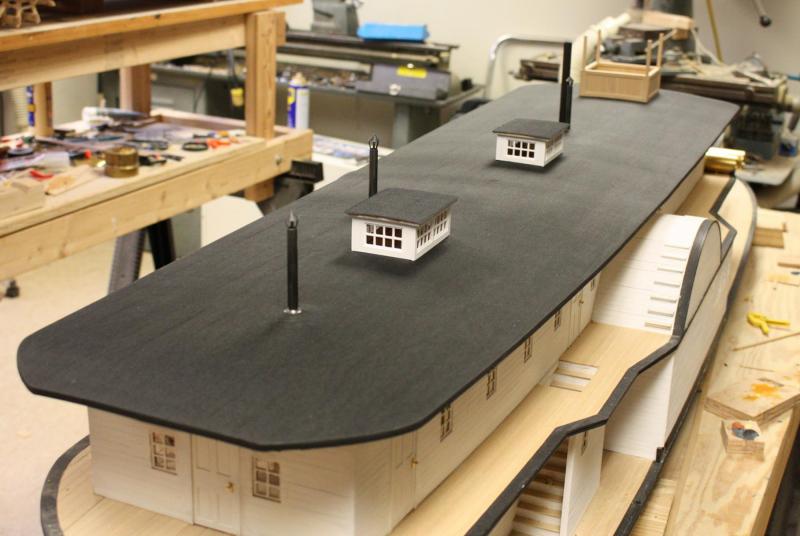
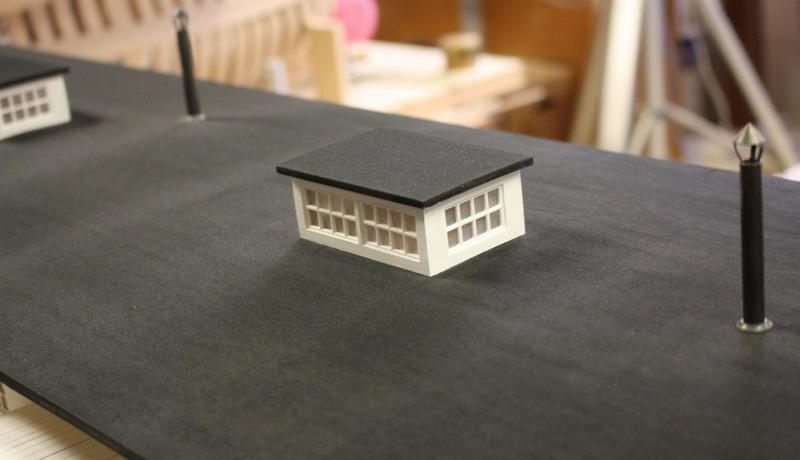
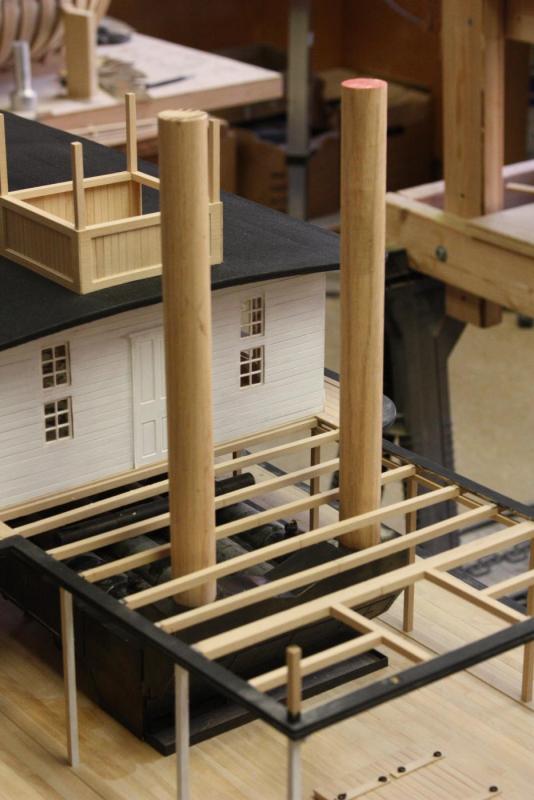
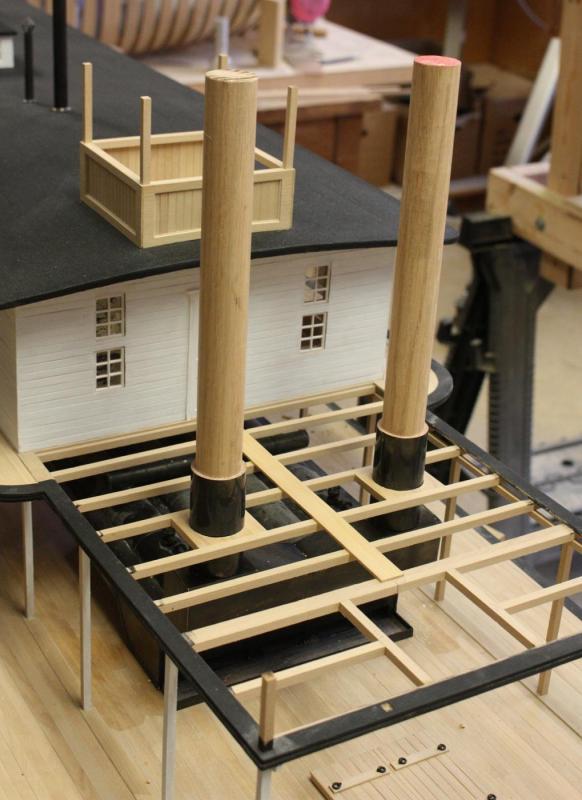
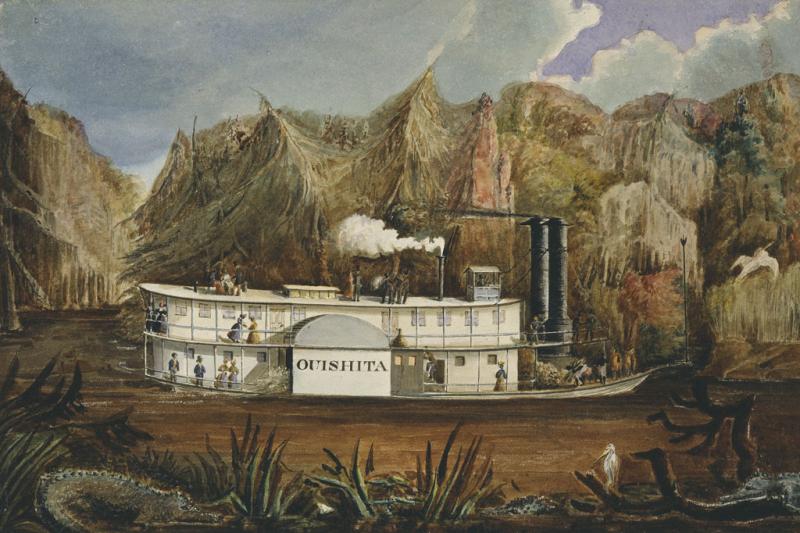
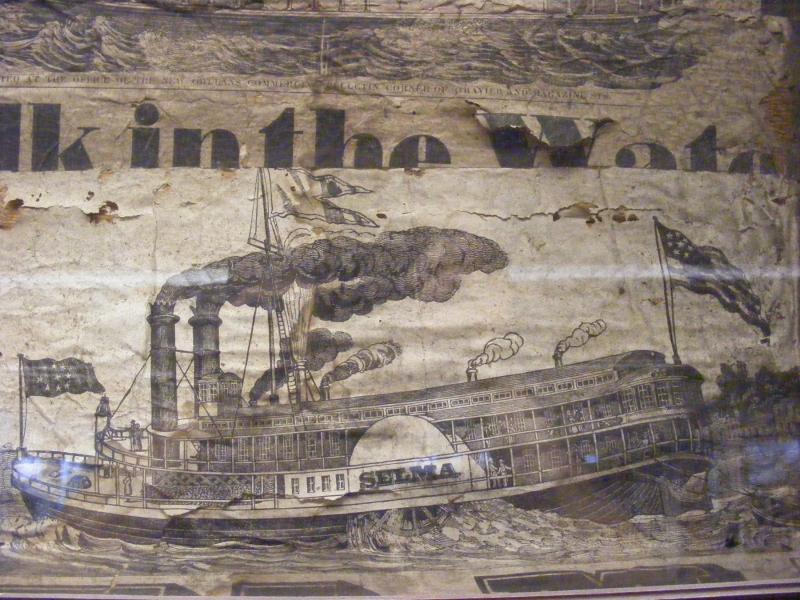
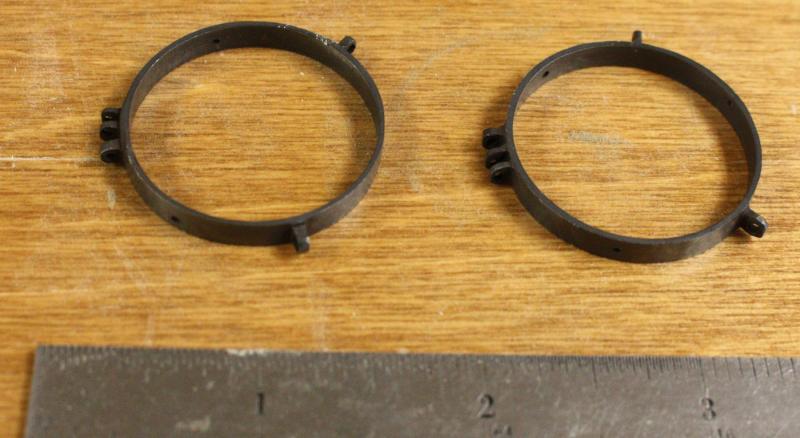
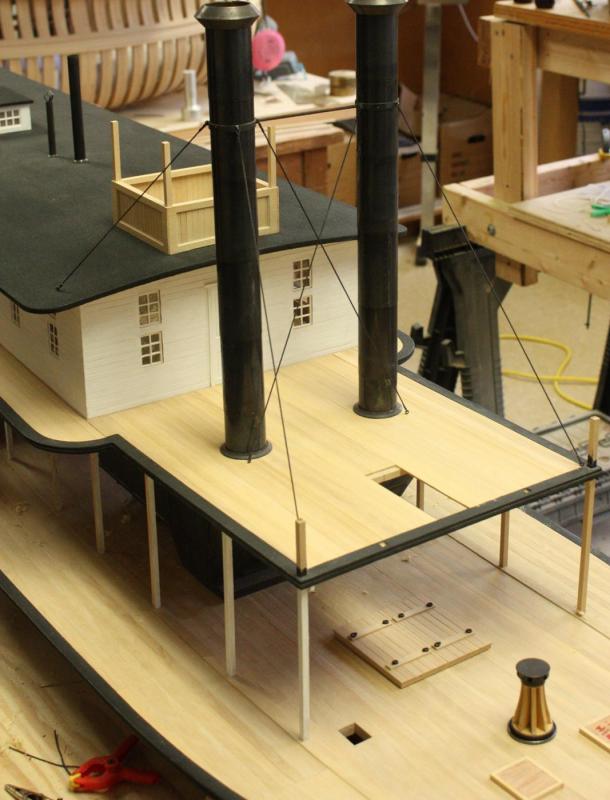
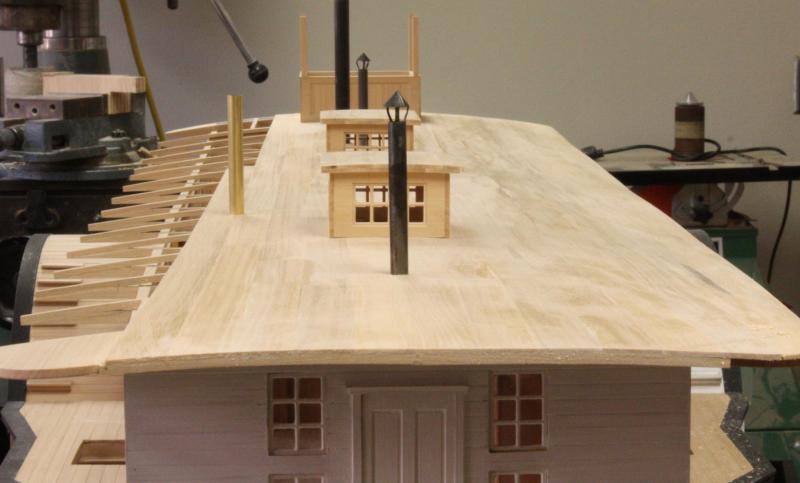
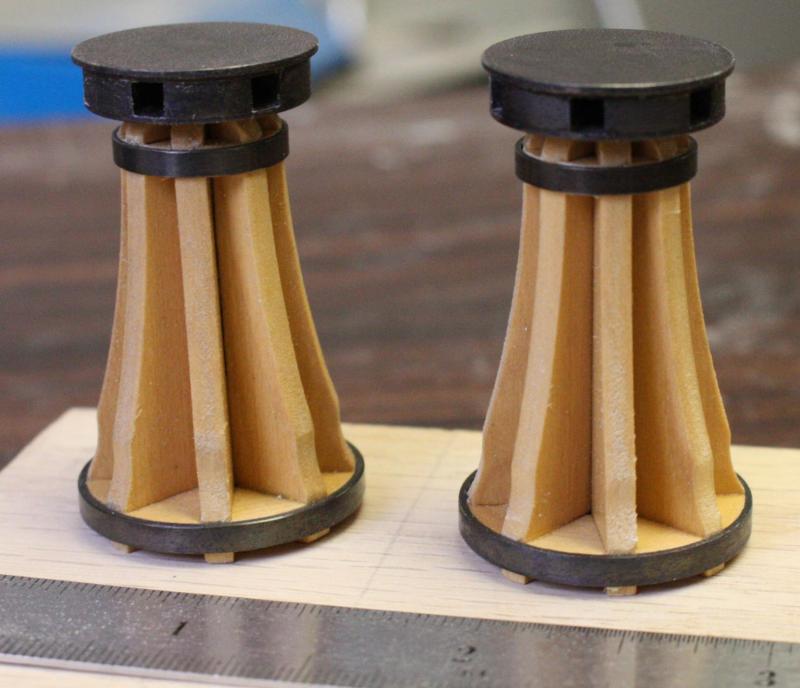
Hello everybody, I was was starting to feel a little burnt out trying to catch up with model two so I had to take a little break for the Holidays. I was able to get the tarred roof on and the chimneys completed but, never got a chance to post. Sorry for leaving many steps out trying to catch up. For the tarred roof I used silk. I experimented with several adhesives but finally settled on shellac. One very thin application to penetrate the wood. Then a second heavier coat to provide a layer to bond to. I was a little concerned that I would never be able to get the wrinkles out but, after laying the silk on the roof and brushing with shellac, the silk pulled itself to the prepared surface like a magnet. I was able to apply the entire roof in about 30 minutes. The shellac dries to an almost glass hard surface and bonds quite well. Test piece wood with silk applied. The silk was originally blue but, somehow changed to dark black the moment the shellac made contact. I have no idea about the physics of it but it saved me from having to paint the entire surface. Completed tarred roof on the model. Ground glazing installed on the skylights. To make the chimneys as rigid as possible, I used an oak dowel as a core. wooden rings were used as spacers between the top ends of the chimney segments and the dowels. The lower edge of the segment fit tightly over the segment just below it. The chimneys required three guy wires each for support. We had plenty of illustrations but only a couple showed the location of all three. Information was combined from several illustrations. The Ouachita Delphine Homer Napoleon Yellow Stone Selma Bands for the guy wires. [ Blackened bands Guy wires in place. Machined pieces of the pawl rims. Completed pawl rims waiting for their pawls.


- 701 replies
-
- 37
-
-
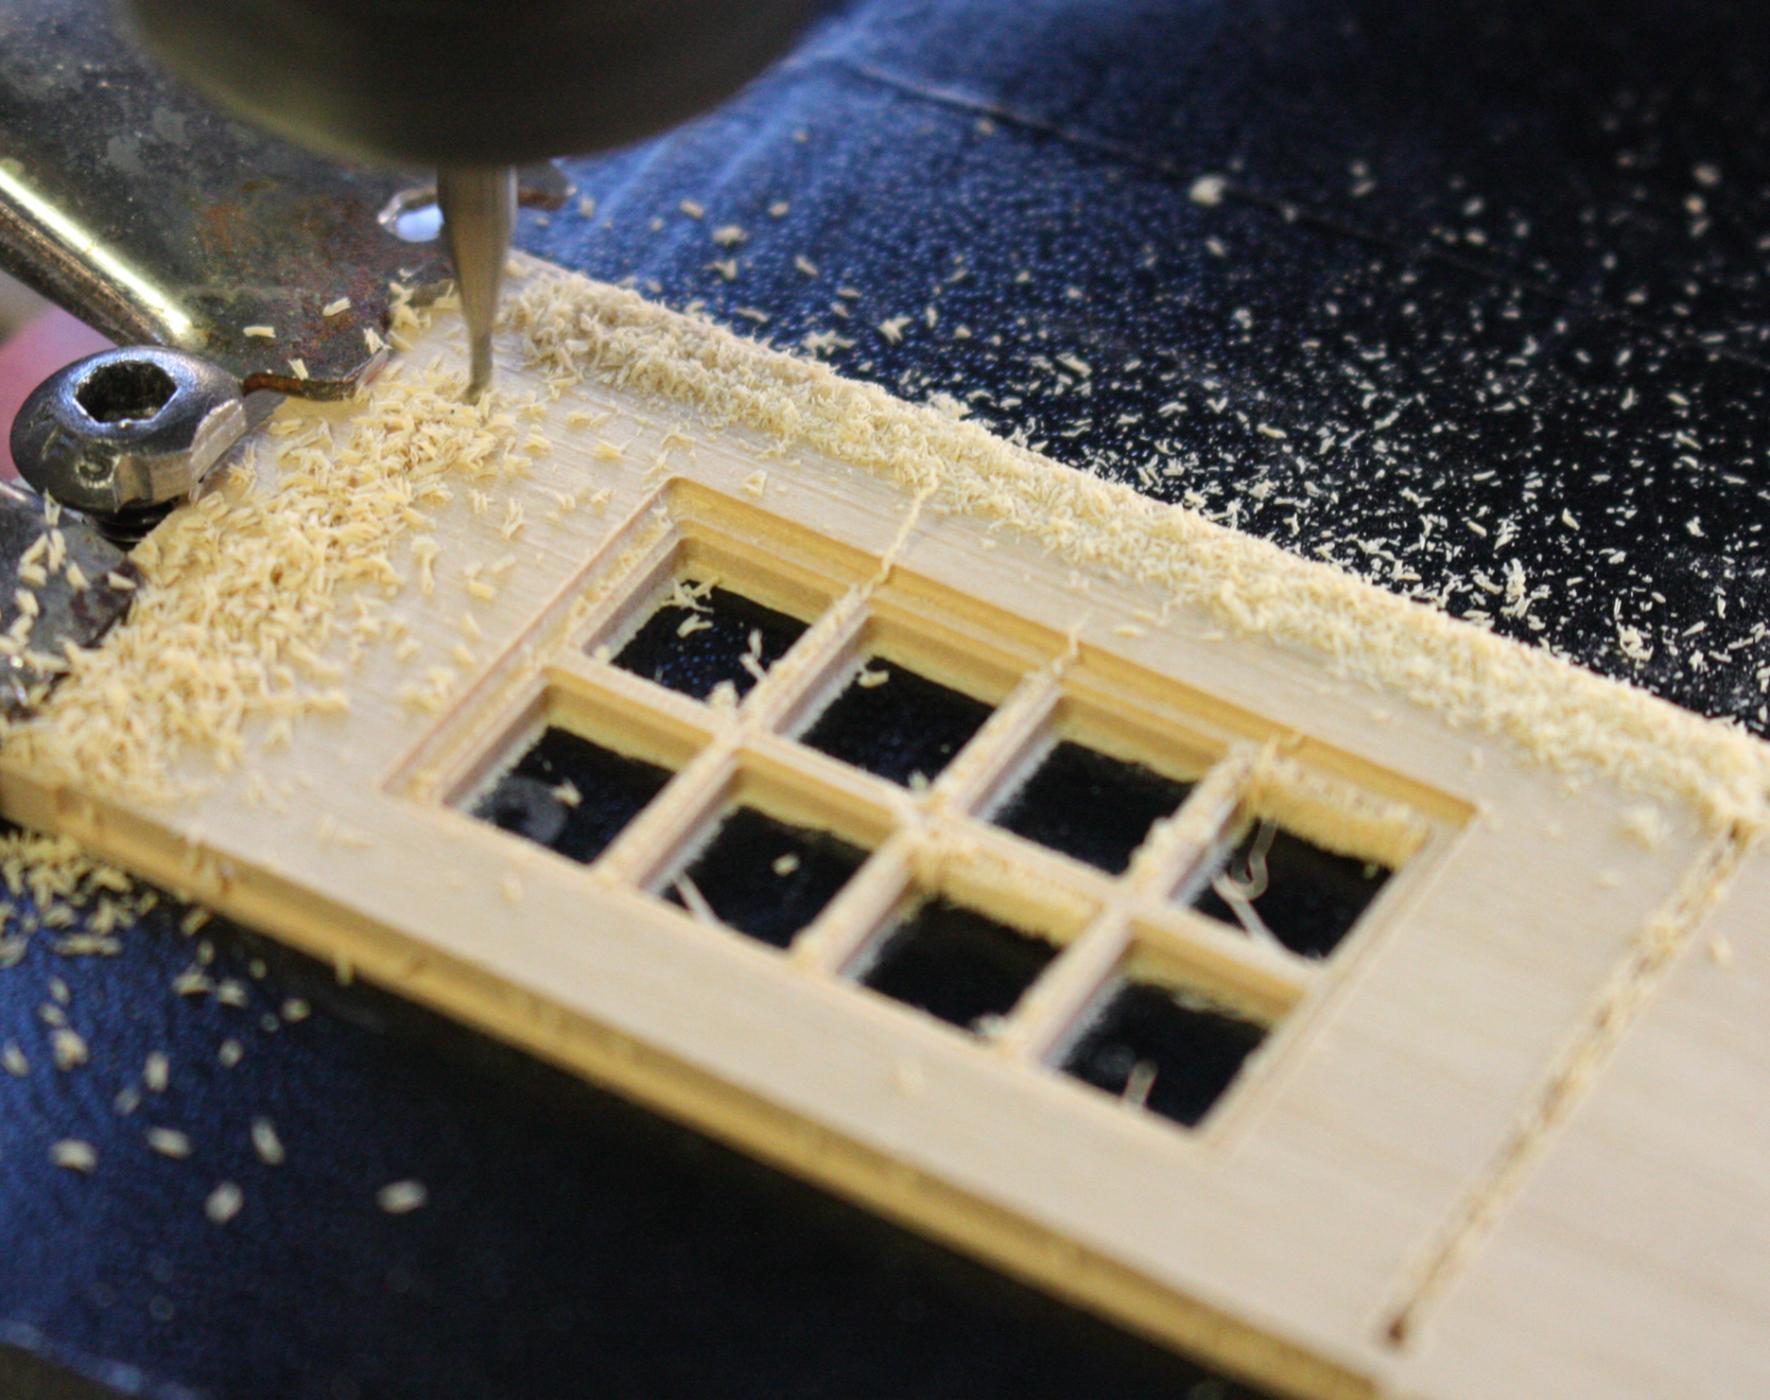
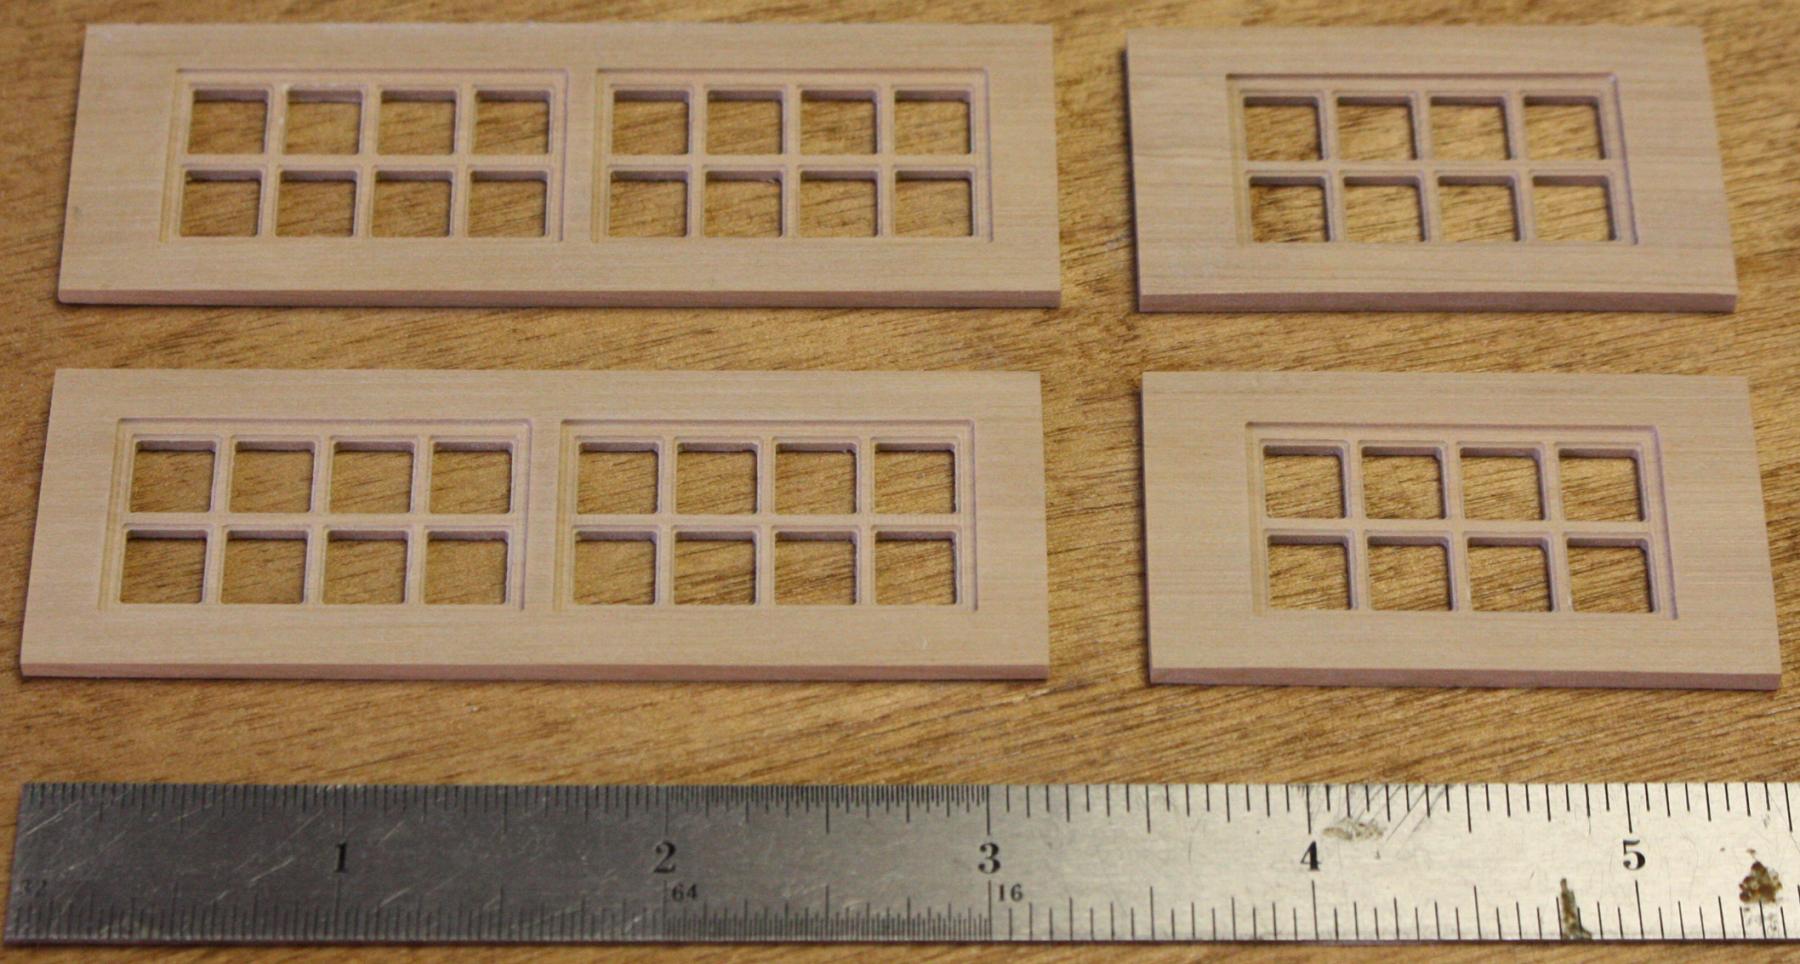
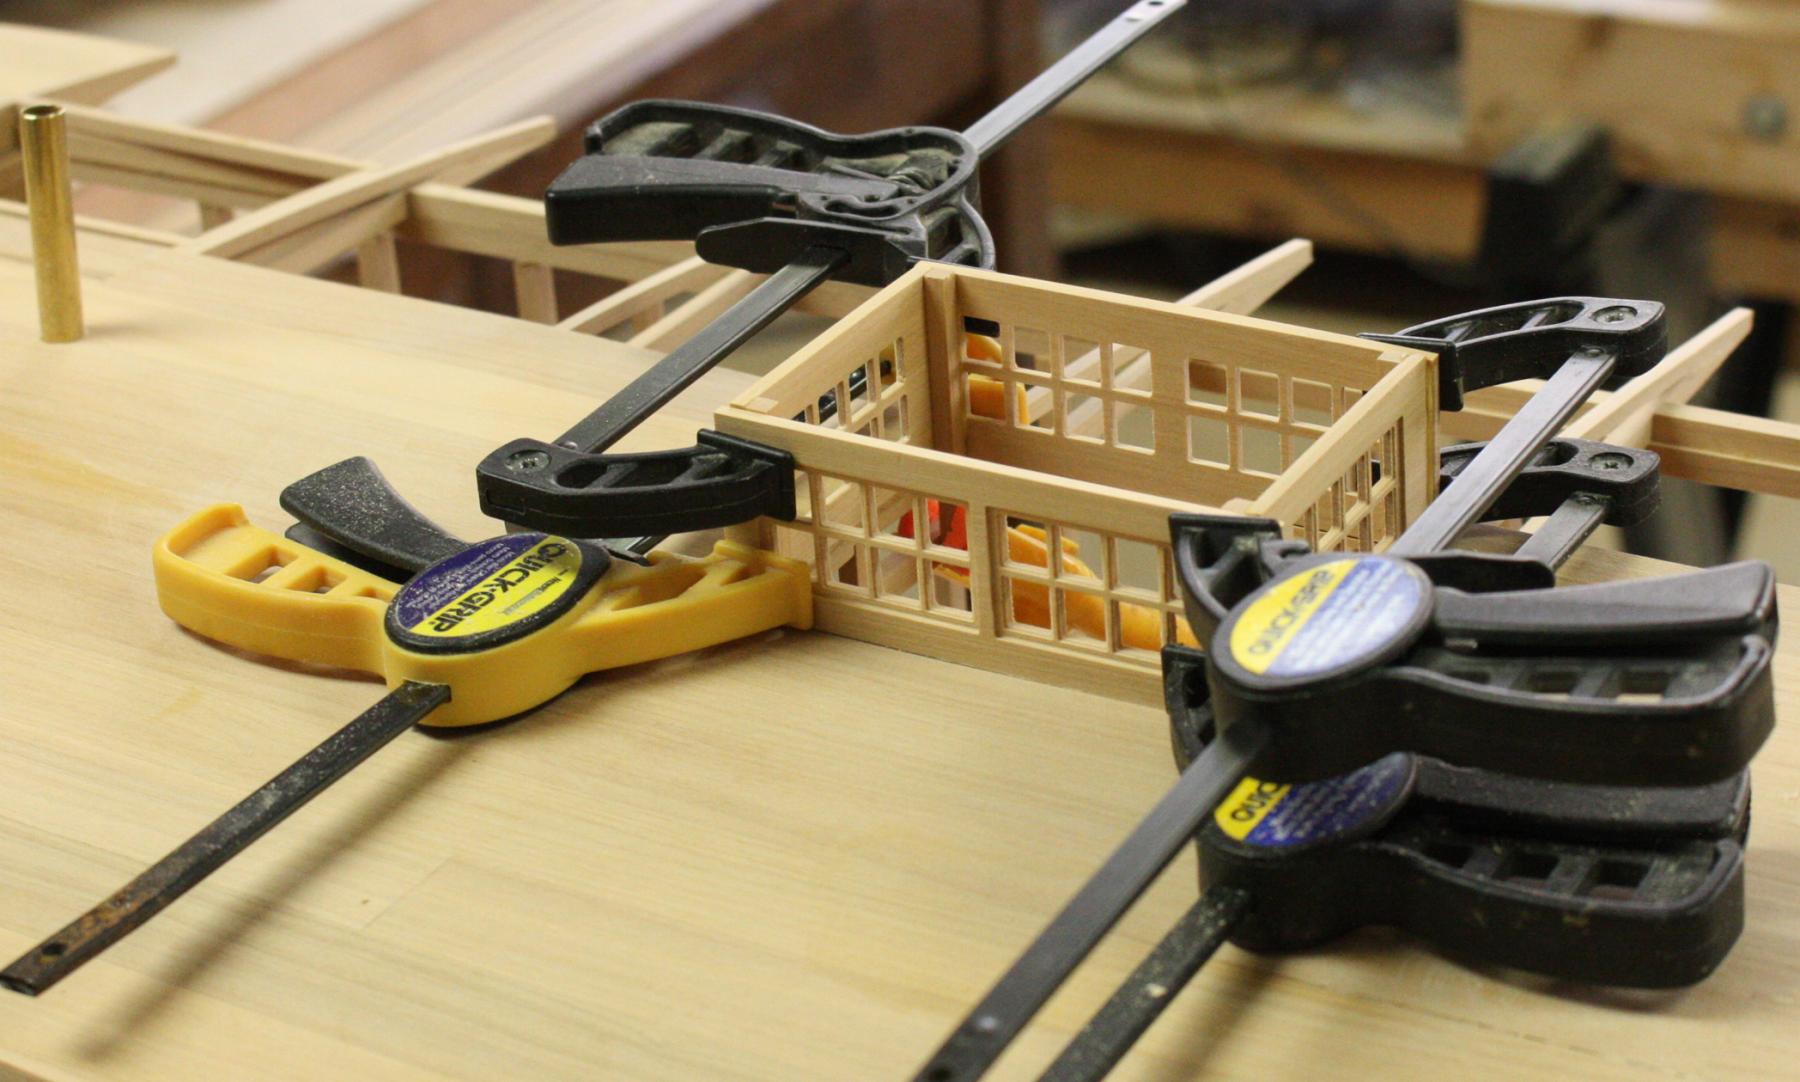
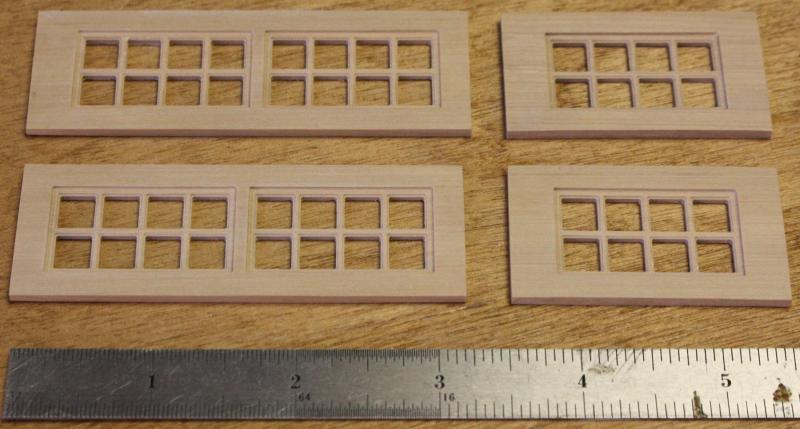
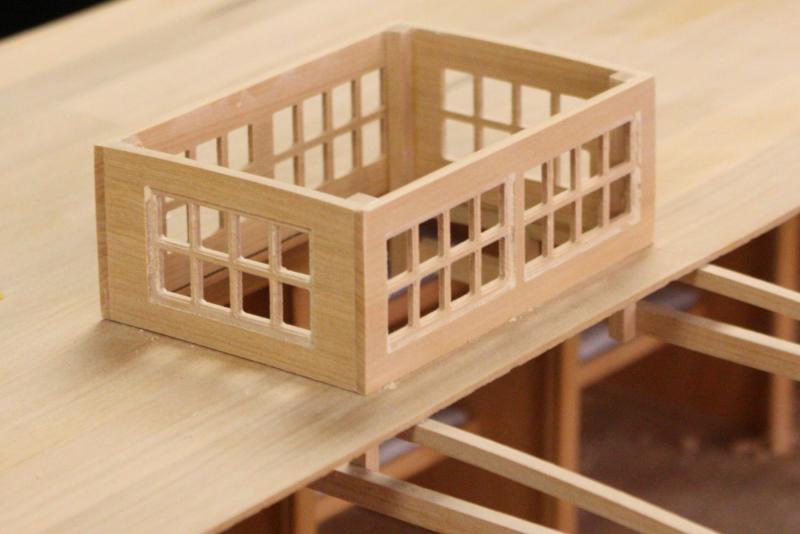
Hello Roger, I was a little cautious before I machined the lower window frames. I wasn't sure they would hold together. I used a 1mm four flute endmill and took light passes and it cut pretty cleanly. I was surprised at how rigid the final product turned out. Thank you daddyrabbit1954. I really appreciate your kind comment!
-
Beautiful companion ways Frank. And the capstan and bollards are perfect!! I enjoyed your step by step description of how you made them.
- 649 replies
-
- 7
-
-
- dunbrody
- famine ship
- (and 2 more)
-
Wow! I have been away too long and it will take me a while to figure out where I left off. What I've returned to is magnificent! You have been busy, I will try not to overload your inbox with likes!!
- 2,625 replies
-
- 3
-
-
- kaiser wilhelm der grosse
- passenger steamer
- (and 1 more)
-
HMCSS Victoria 1855 by BANYAN - 1:72
ggrieco replied to BANYAN's topic in - Build logs for subjects built 1851 - 1900
I love these screw sloops. Beautiful marriage of sail and steam. I look forward to seeing her come together!- 993 replies
-
- 6
-
-
- gun dispatch vessel
- victoria
- (and 2 more)
-
Thanks everybody, I've missed being in touch. I'm happy to finally have a free weekend to explore n MSW. Thanks Jack, yes, I use a Blazer micro torch and love it. The fine flame works great for these small parts. Thanks Frank. The two uprights on the front of the stove are 1/8 square tubing with two sides filed off. For the rest of the upright bends, I score the back side of the sheet and then used a fine square file to file a 90 degree notch half way through the sheet. Makes for a clean straight bend but you can only bend it once or twice before it breaks in this thin metal. Thanks druxey, I still having a lot of fun learning what the mill can do. I've never used it so extensively for one model before. I'd hate to think of how long this model would have taken if I didn't use the mill. Thanks Albert, Michael, Cathead, nils and John. It's good to hear from you again. Thanks Pat. I look forward to following your Victoria build. I have a feeling that you'd have no problem getting value for the money out of CNC. Although, I still feel like I'm cheating when I see modelers doing higher quality work by hand.
- 701 replies
-
- 10
-
-
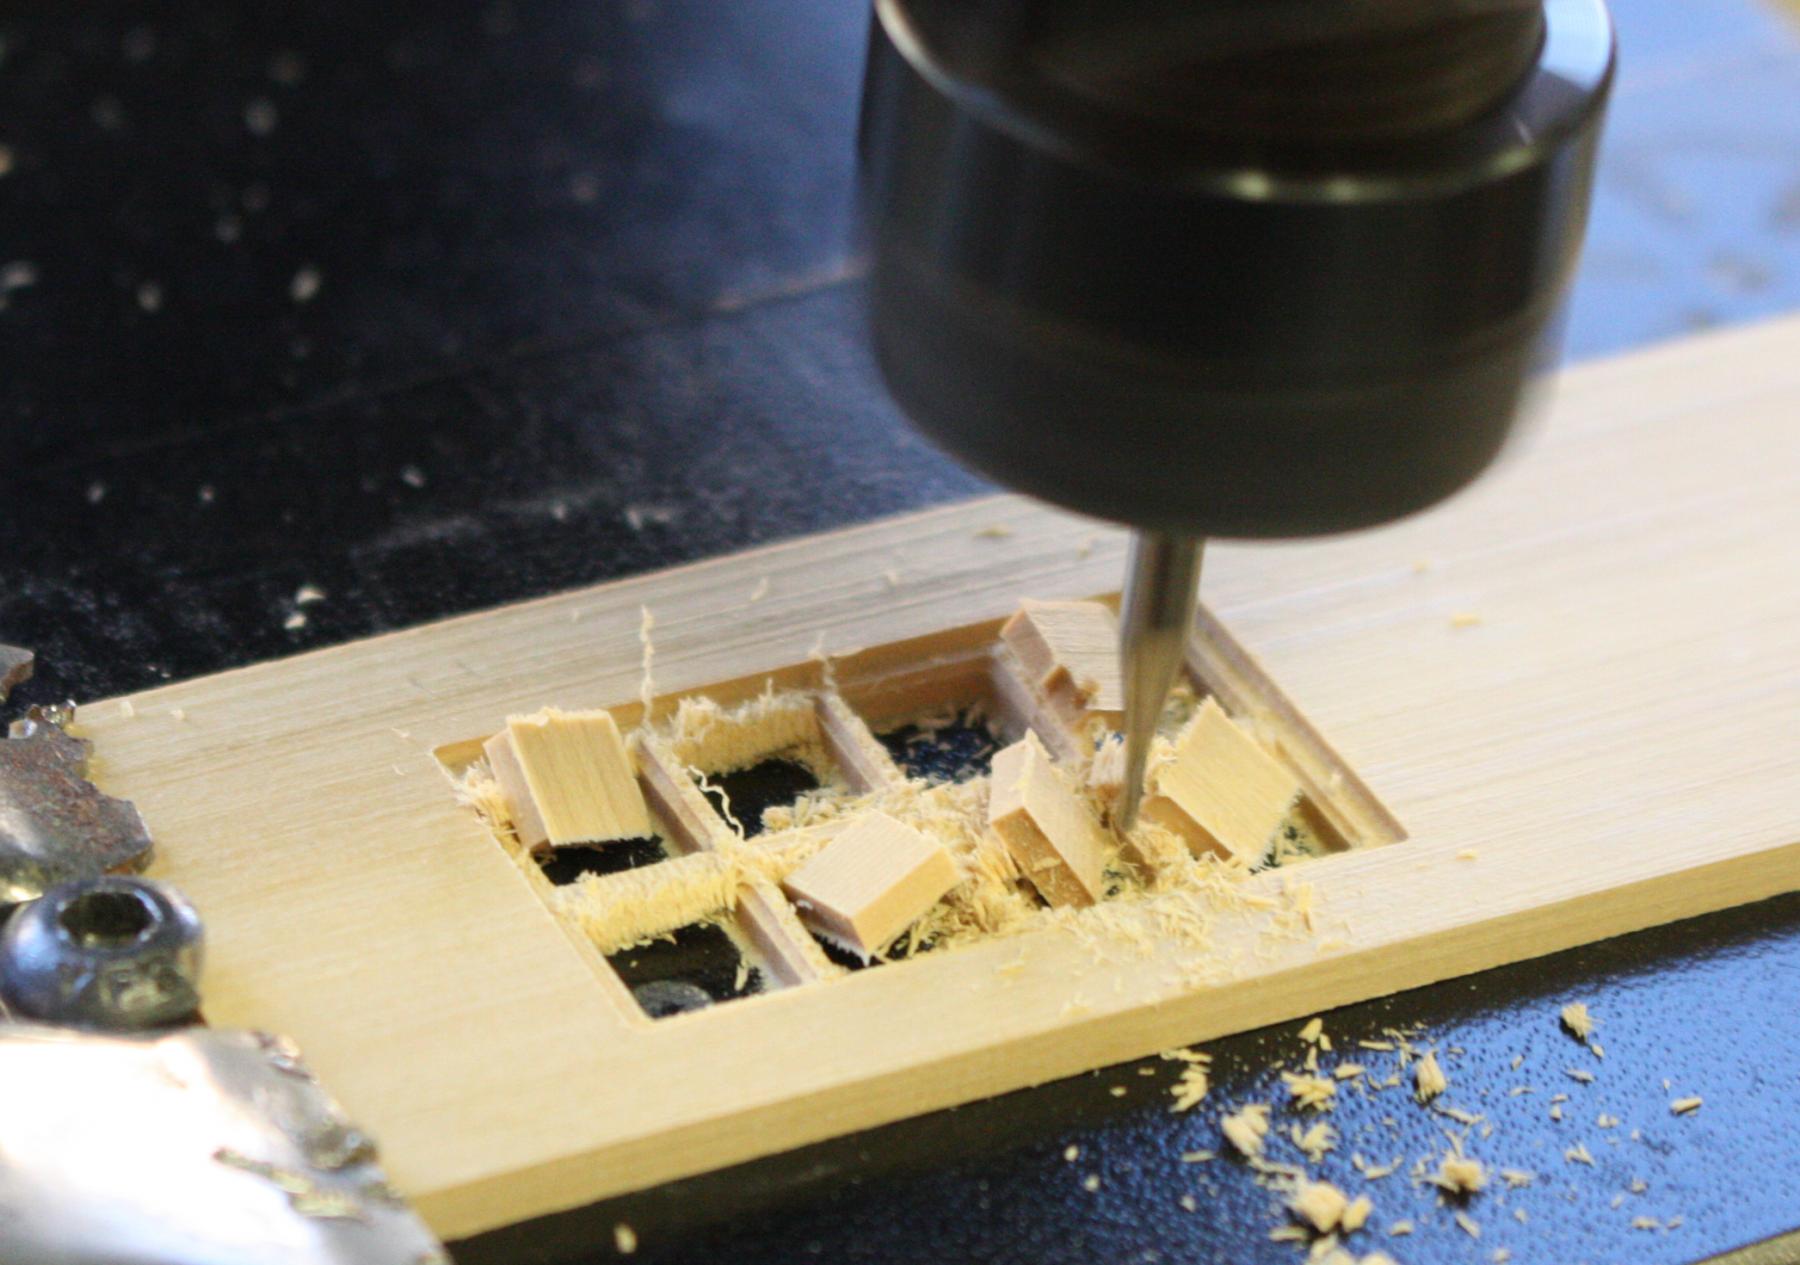
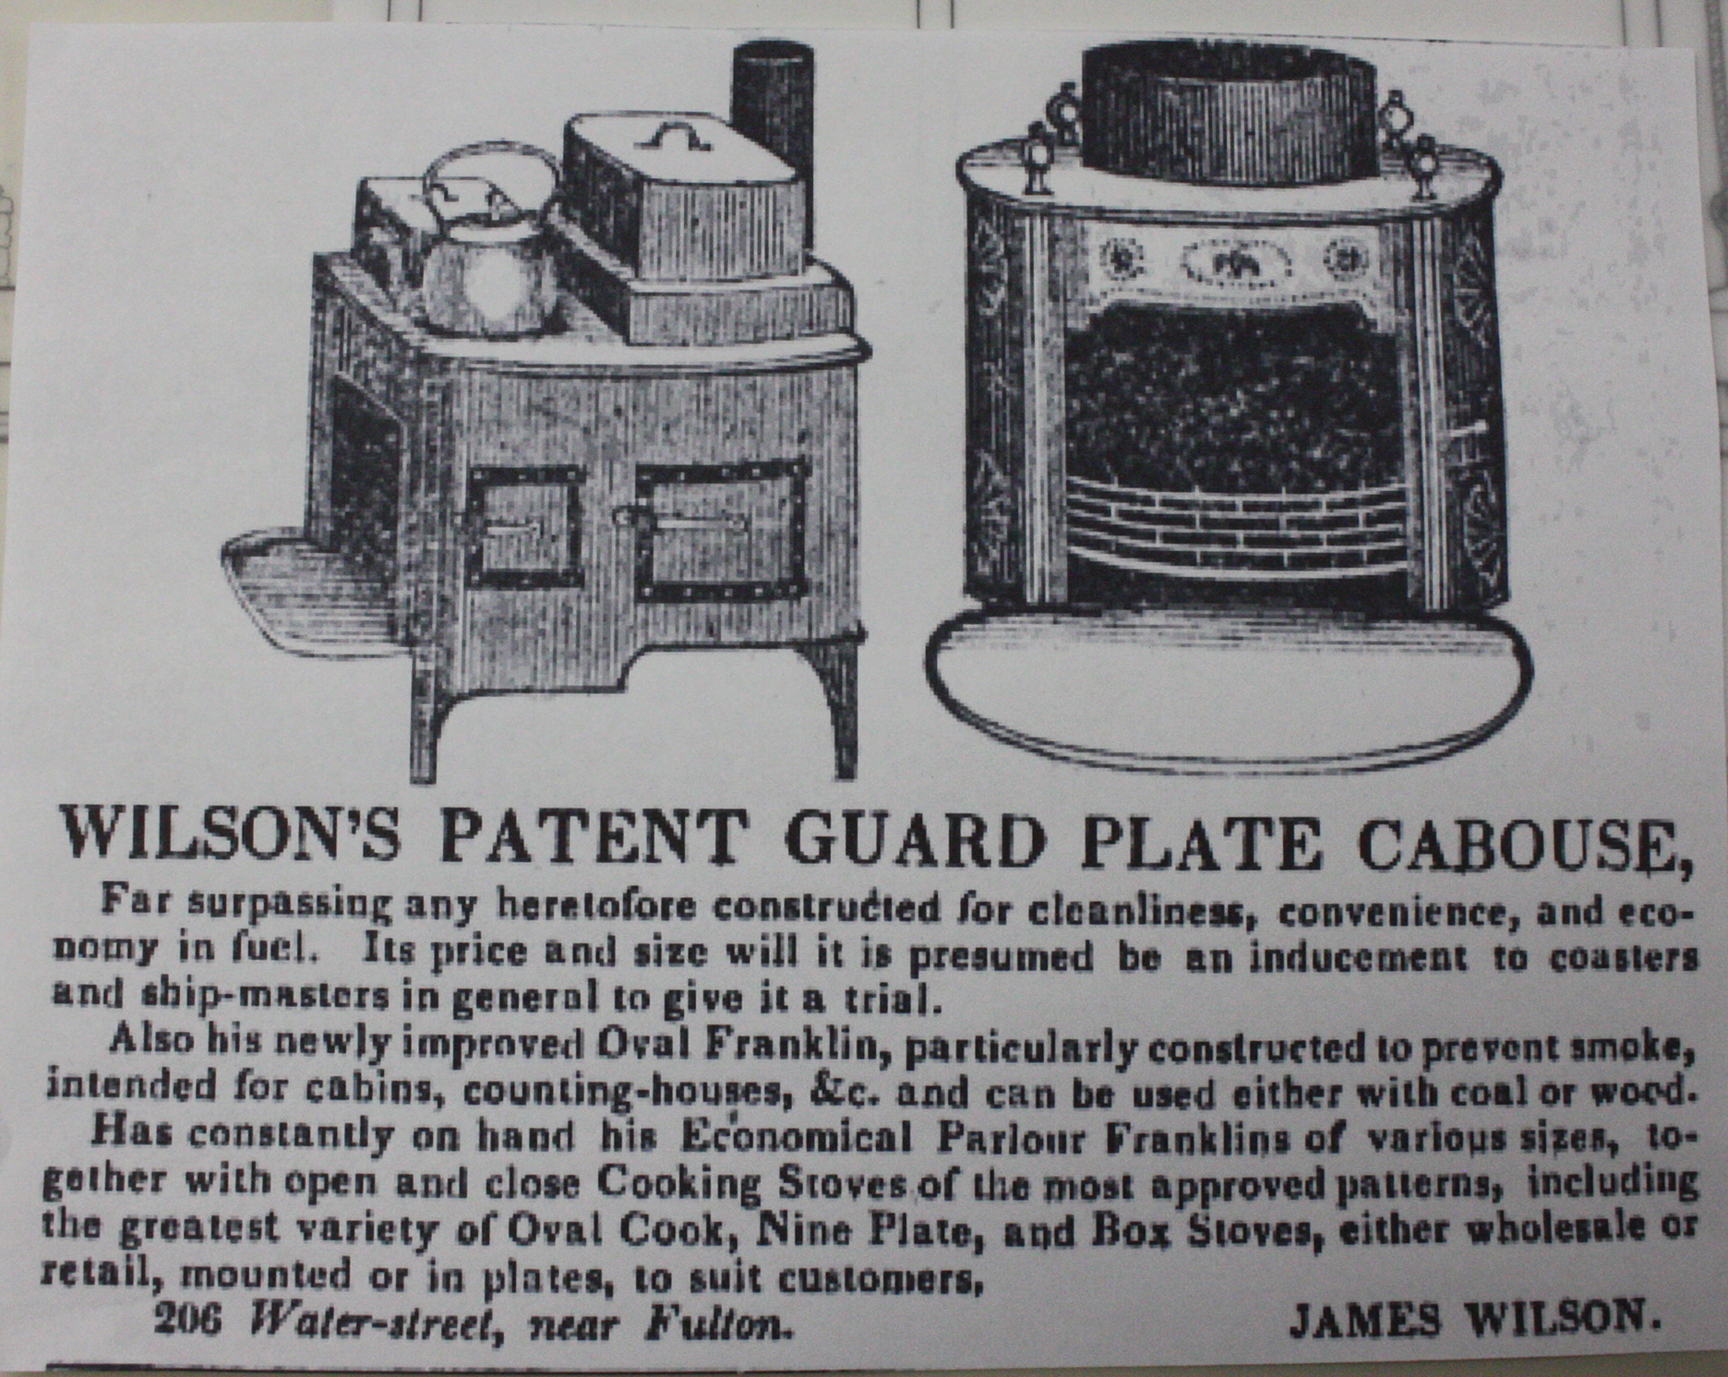
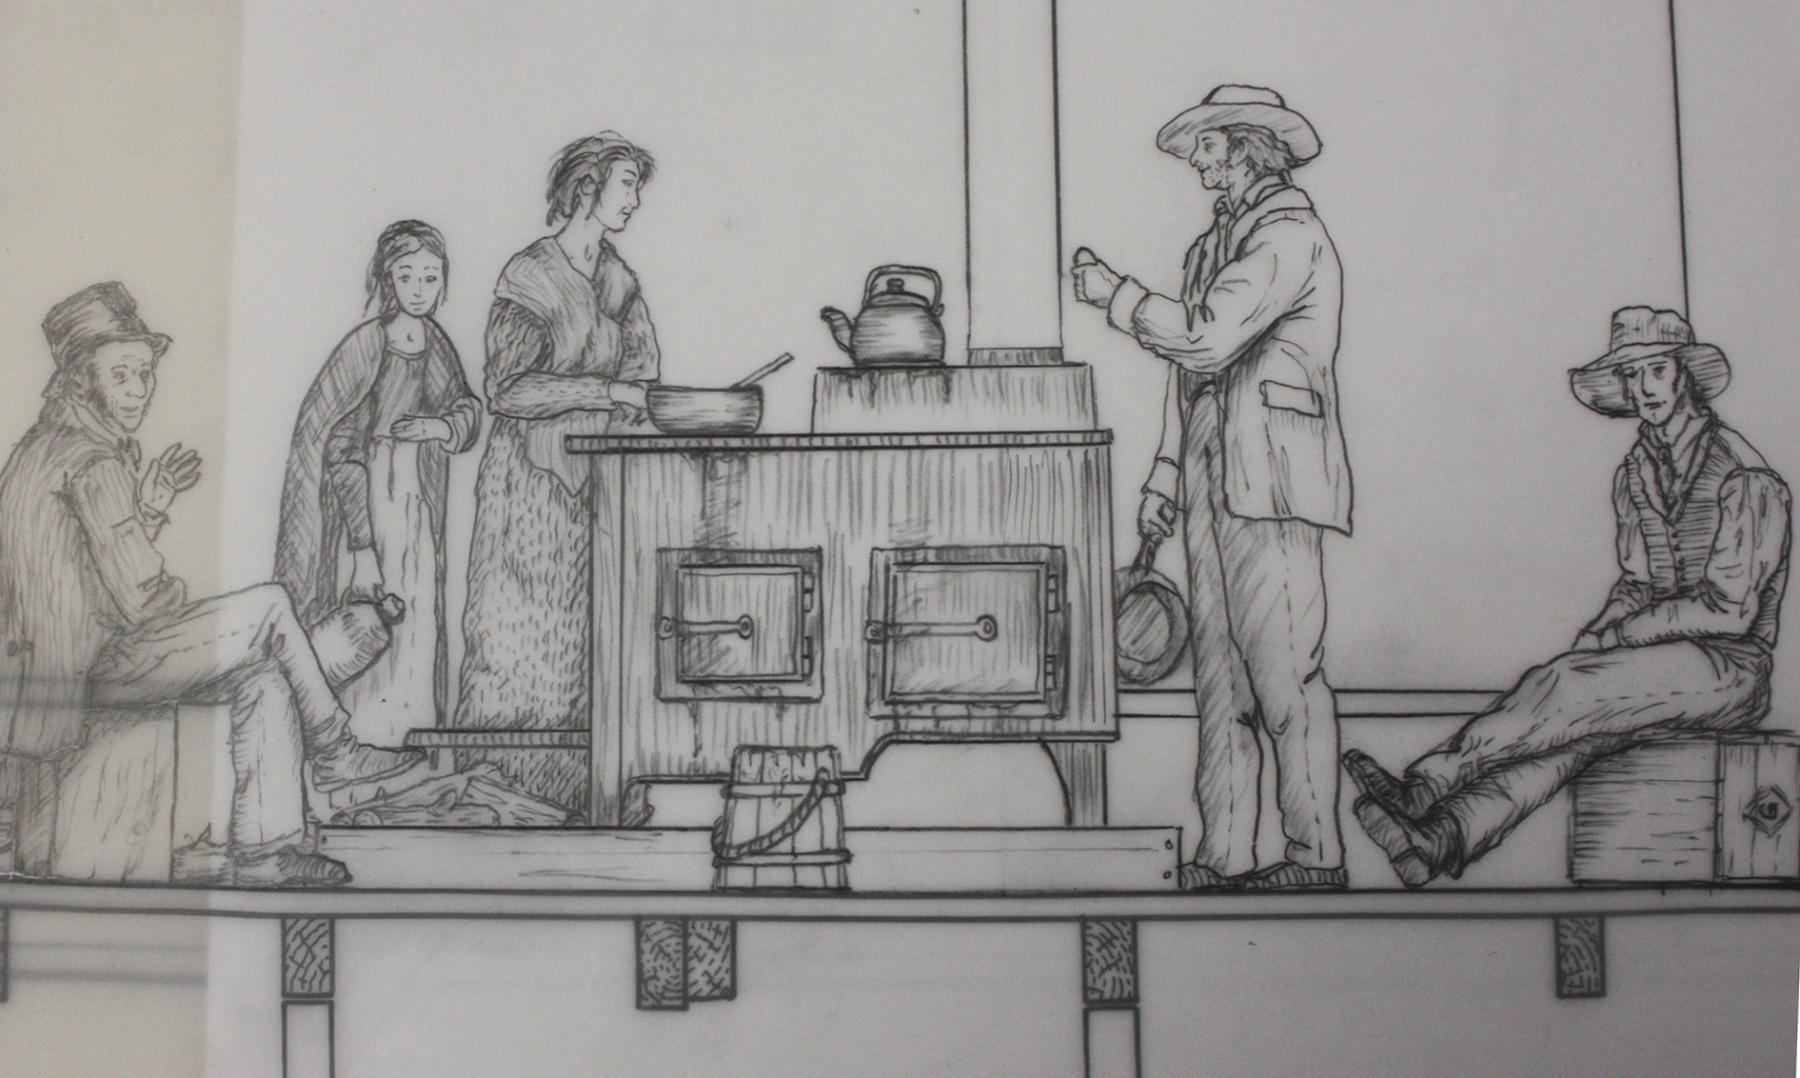
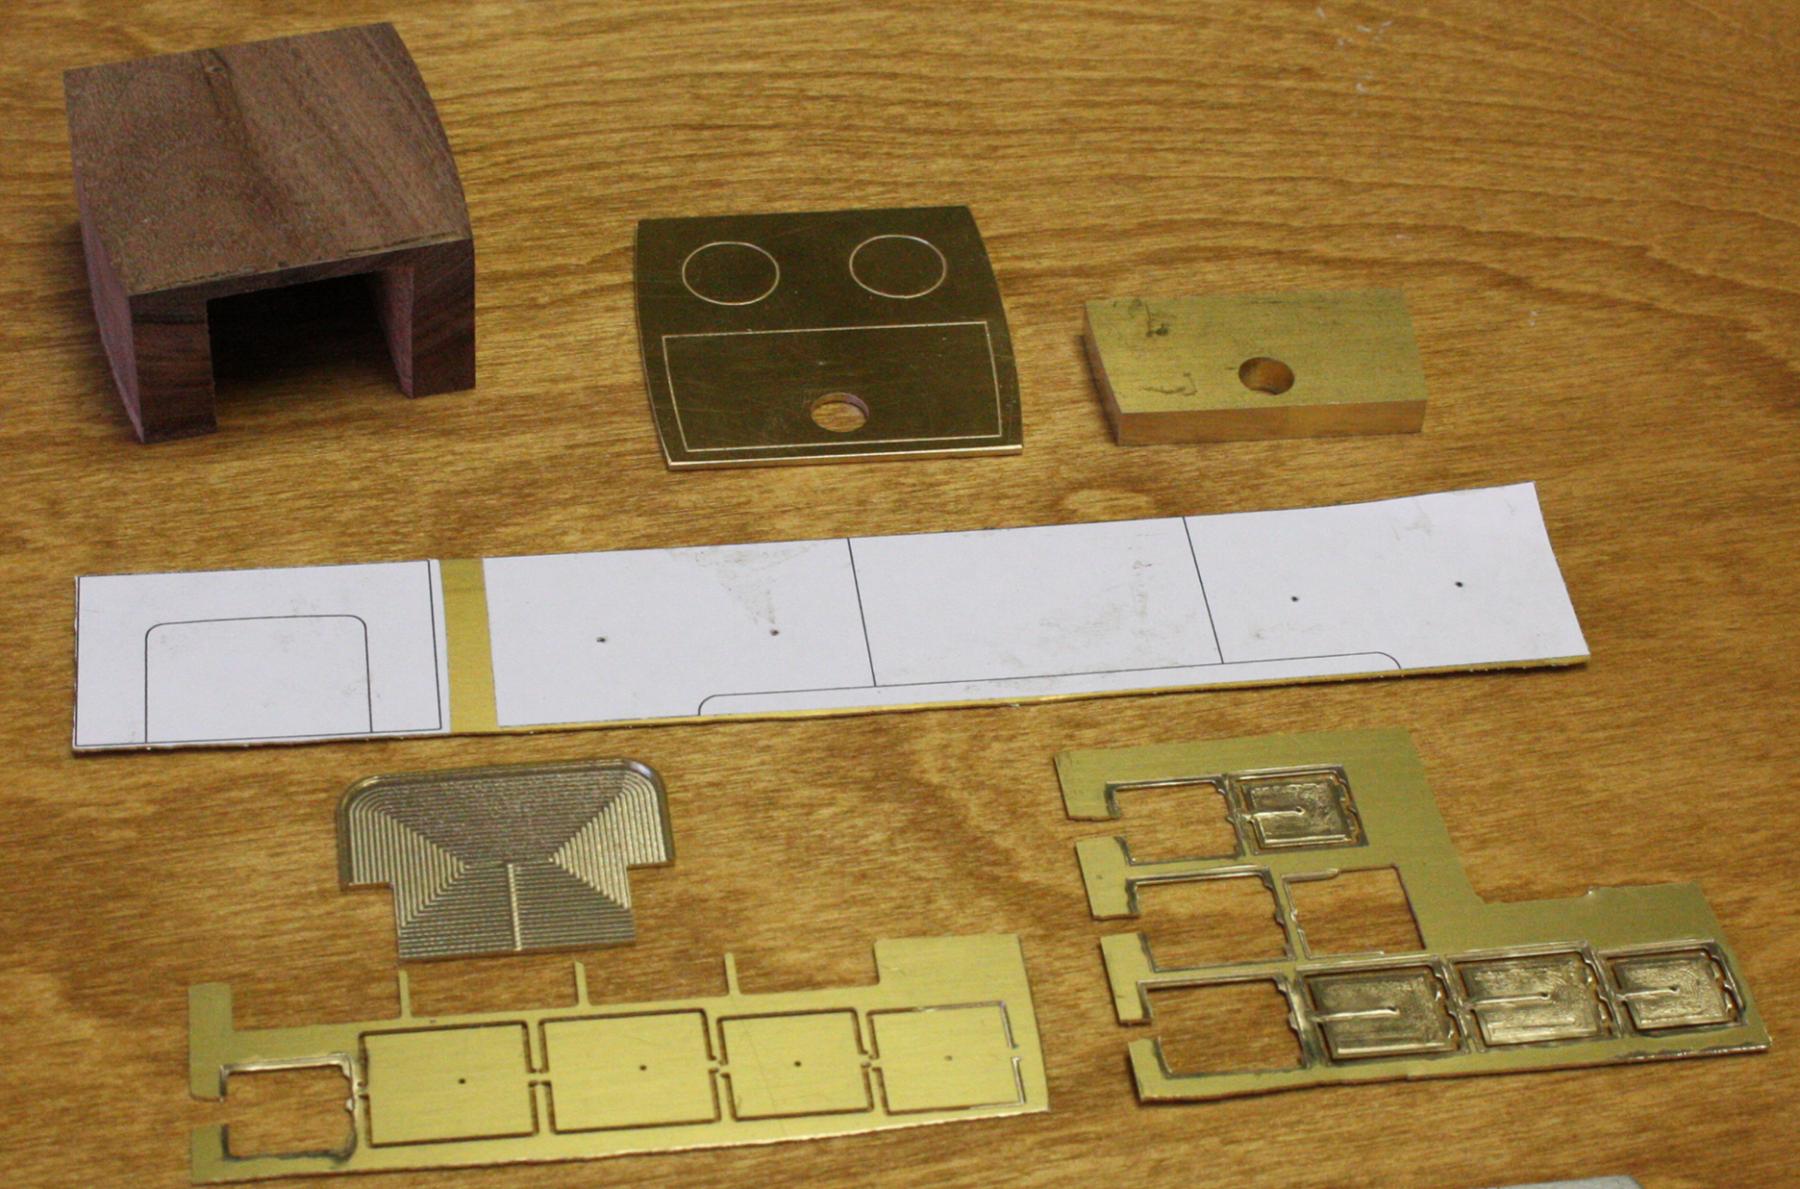
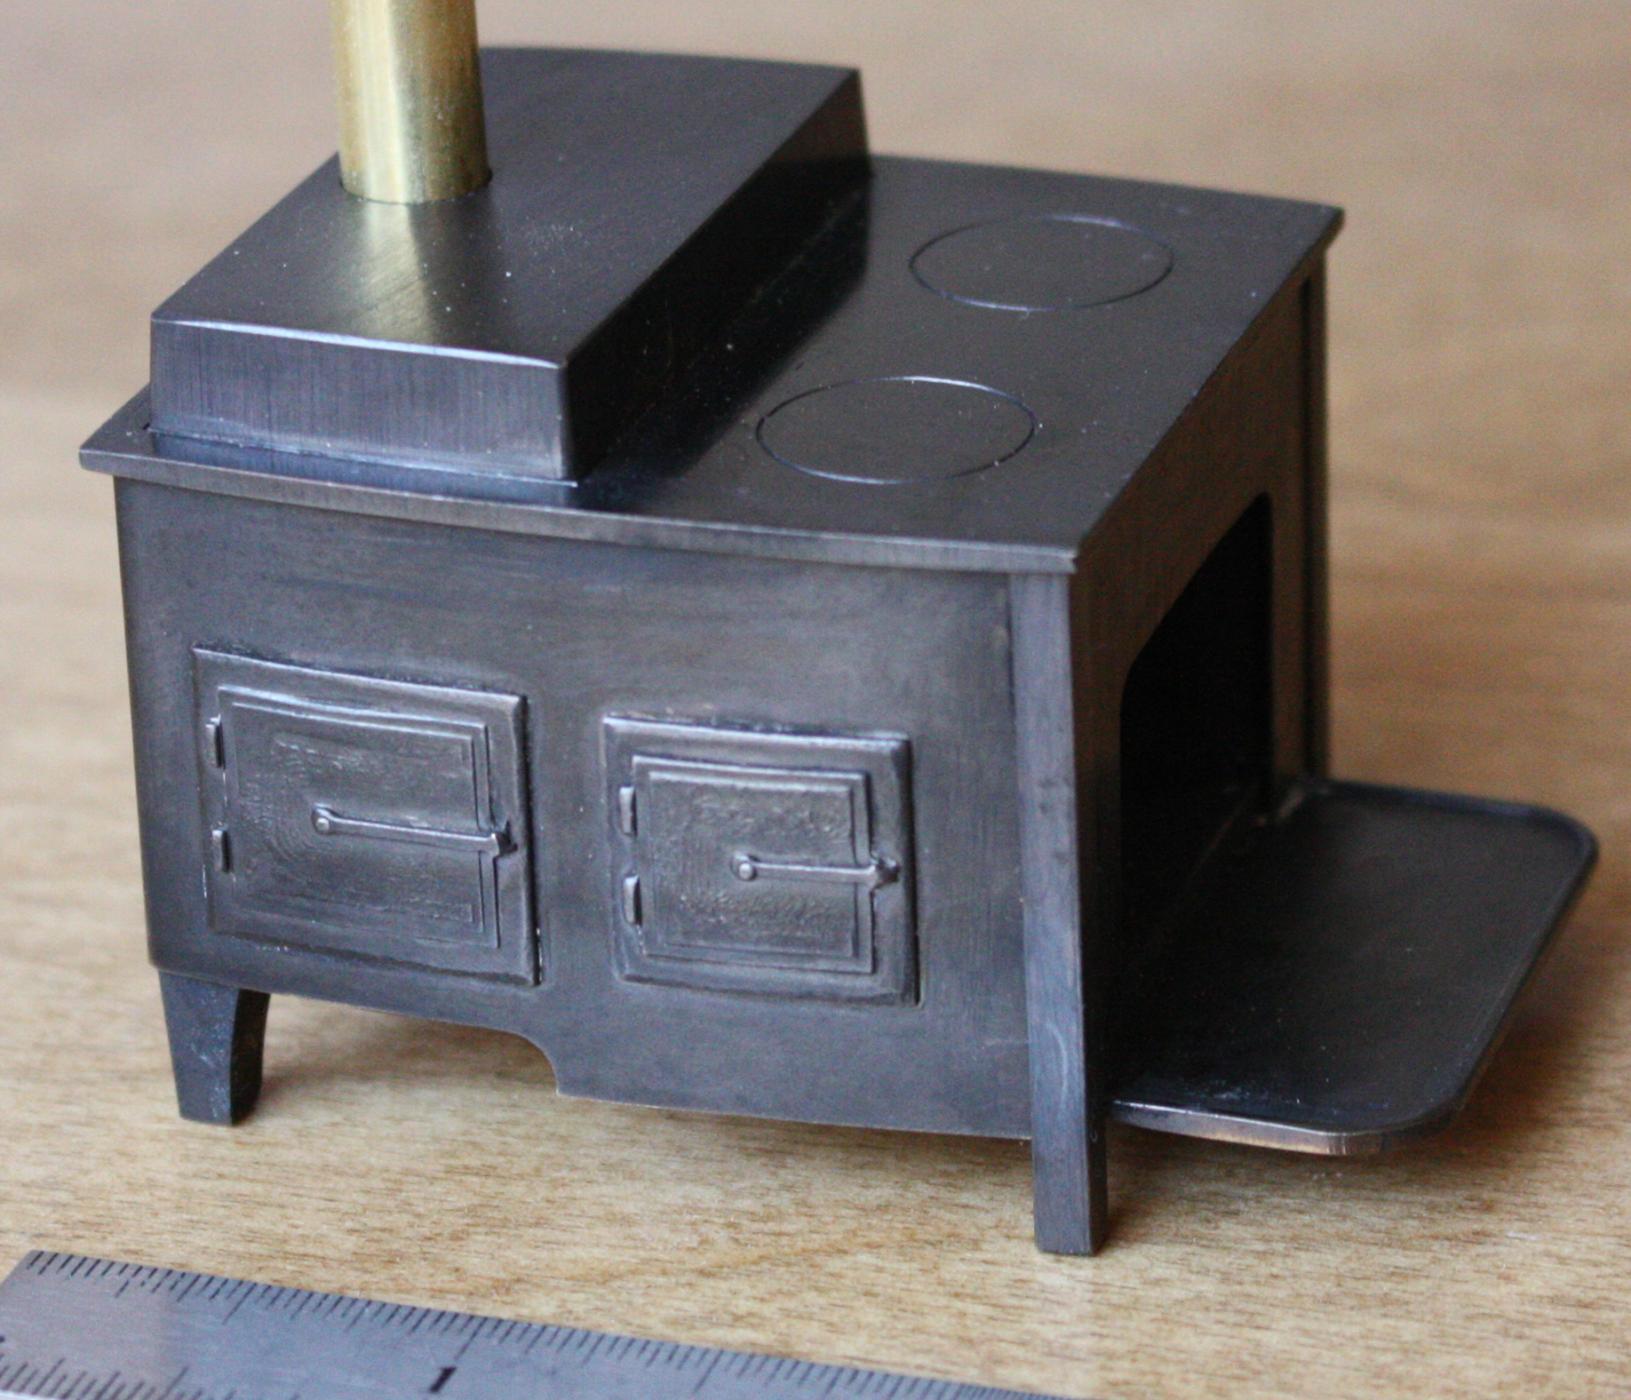
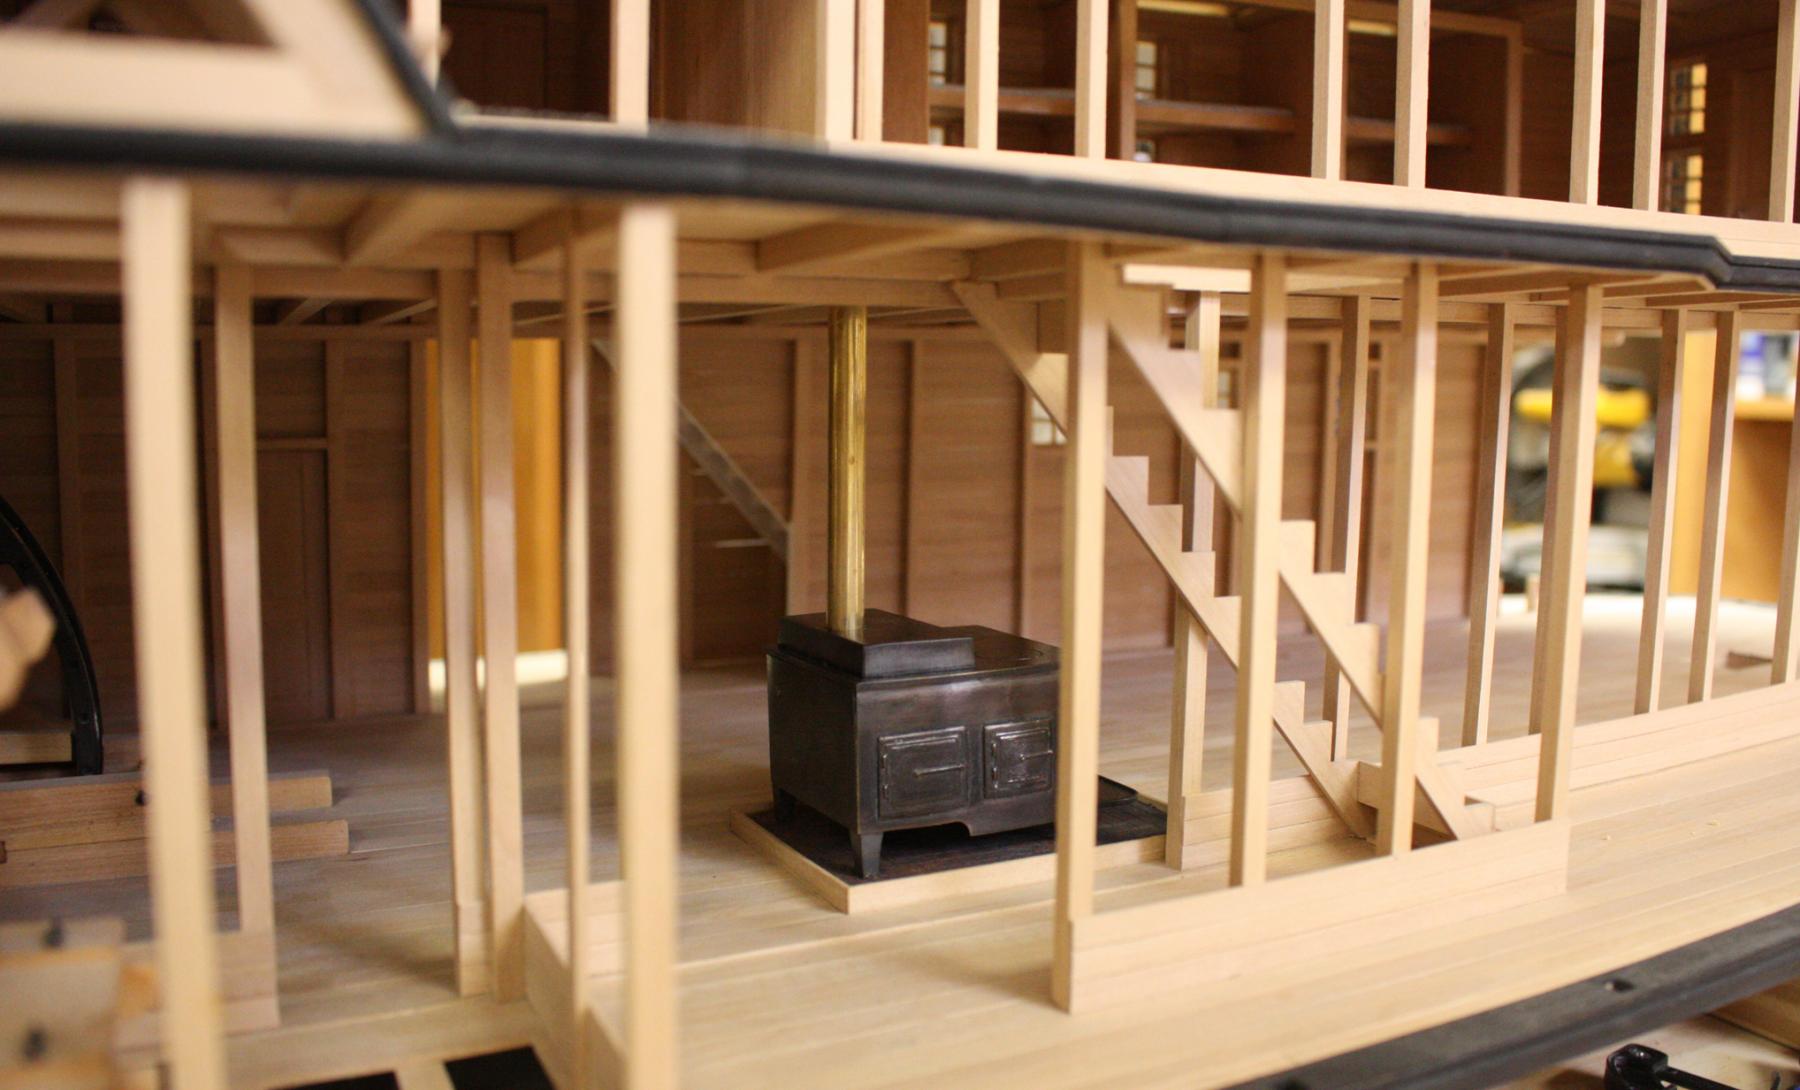
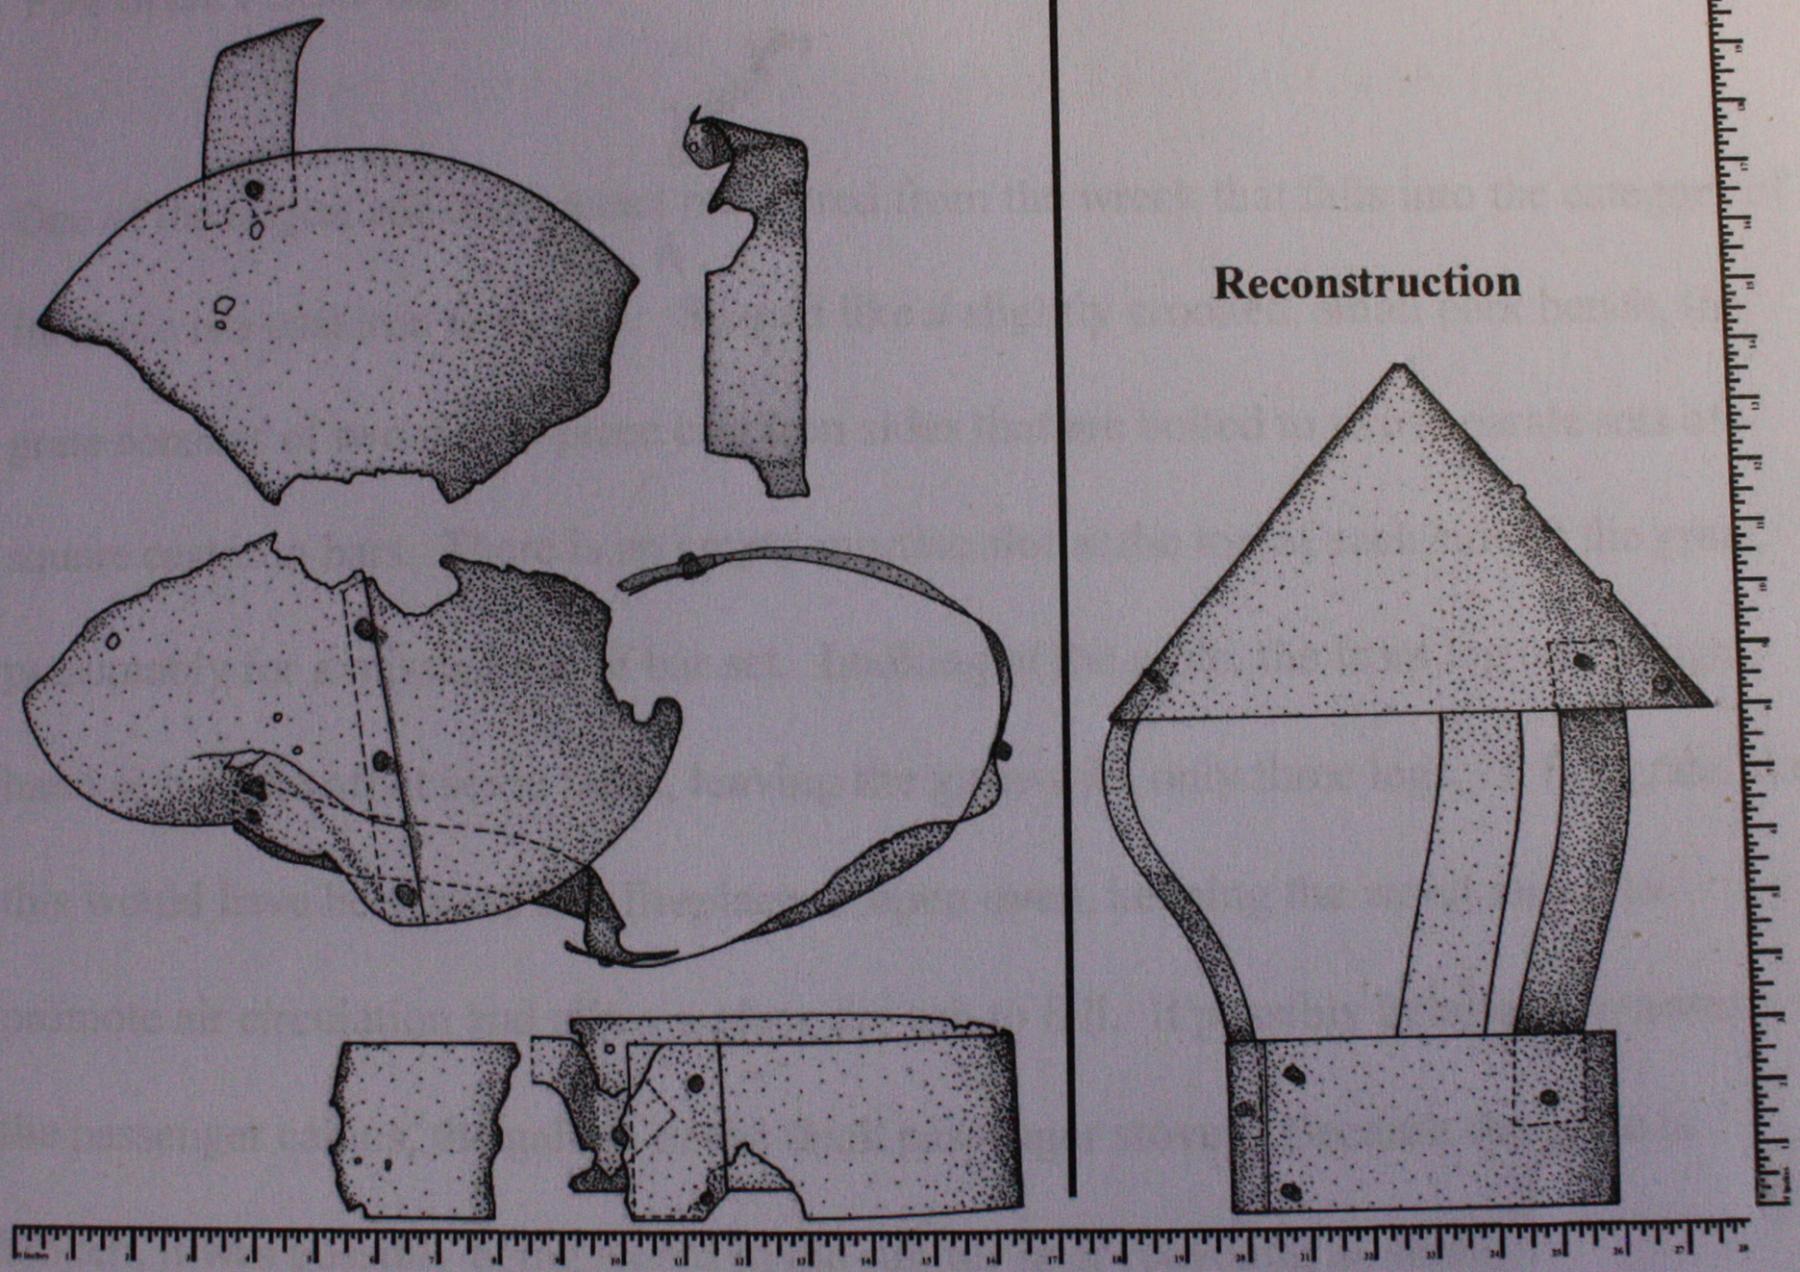
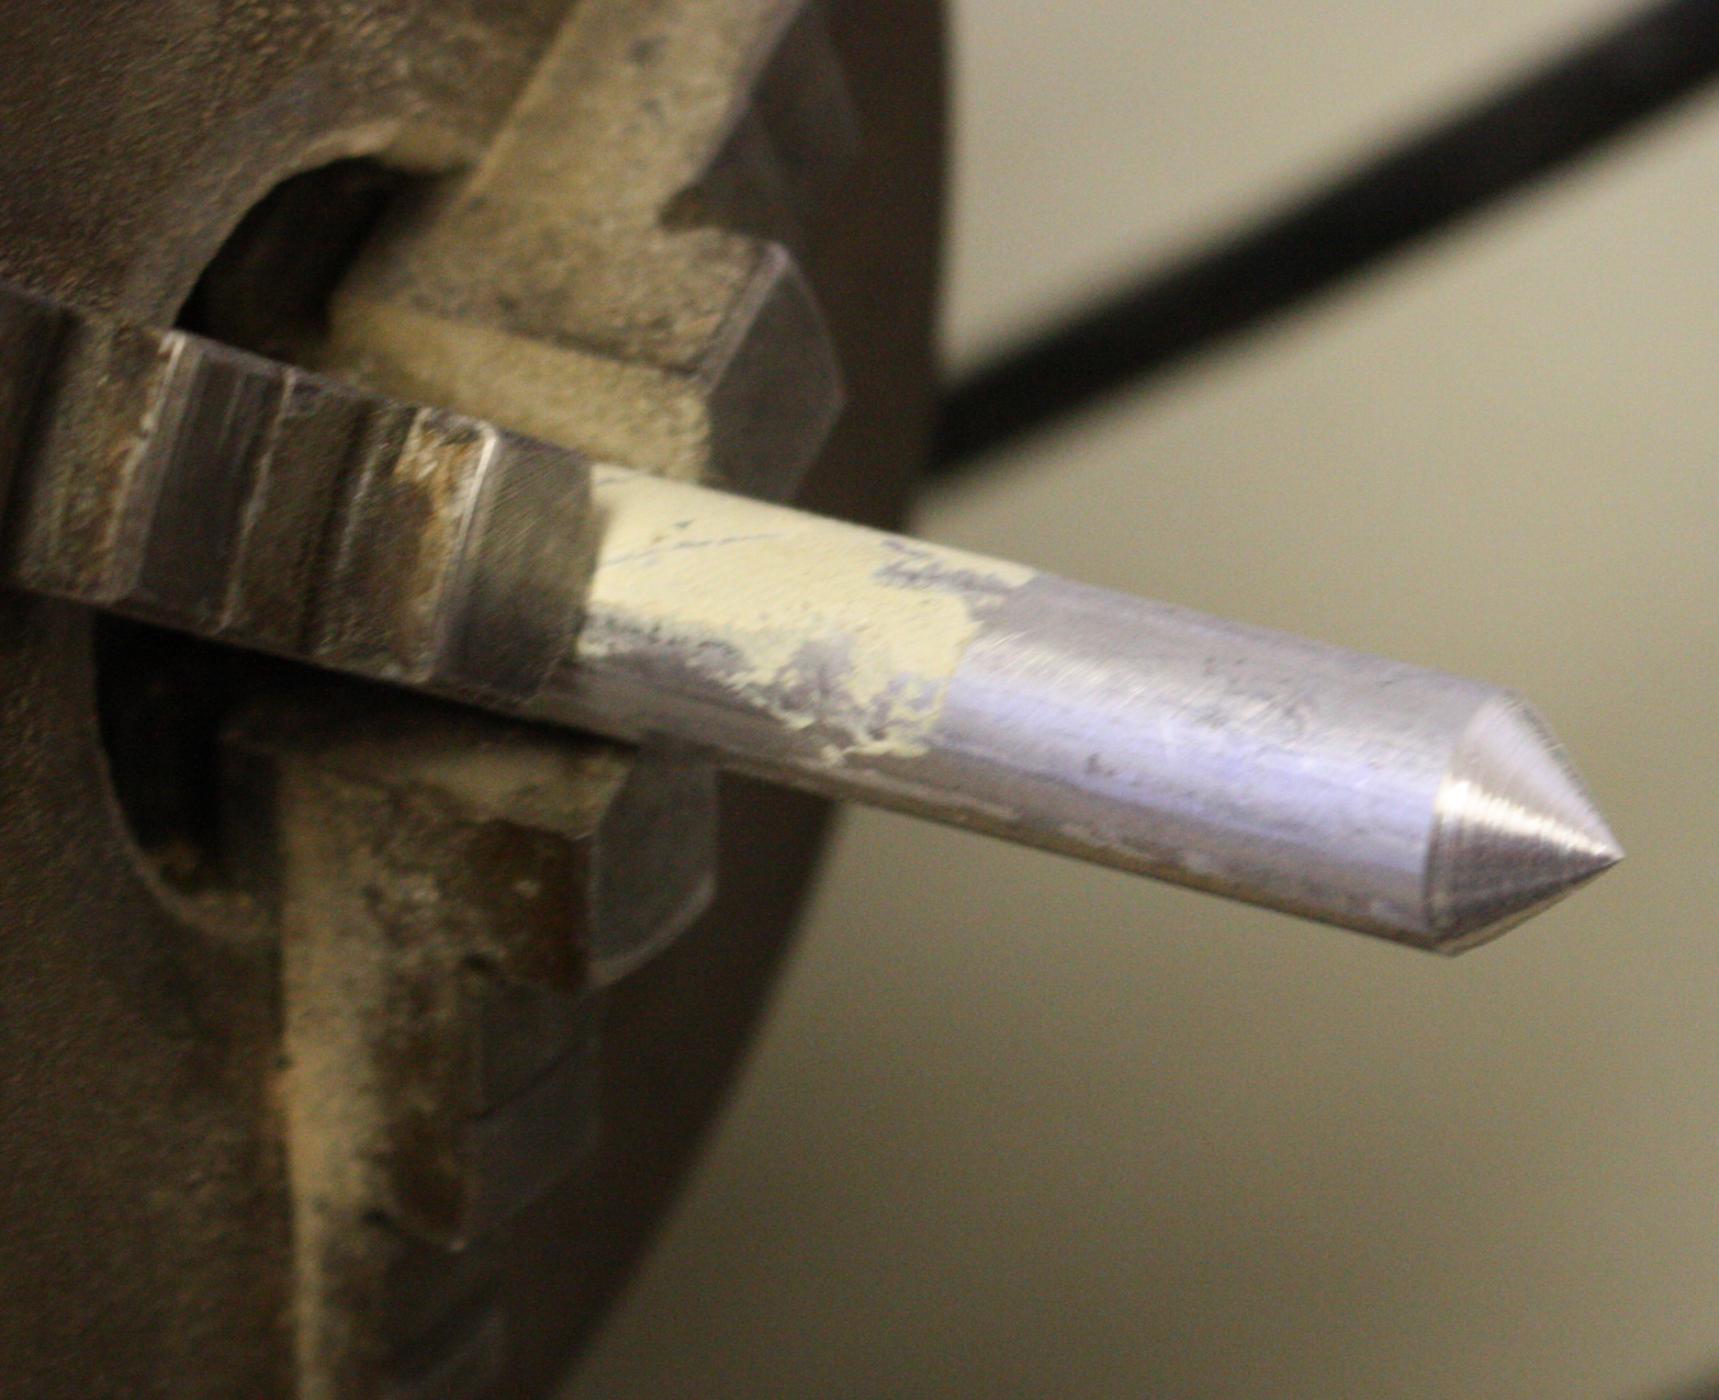
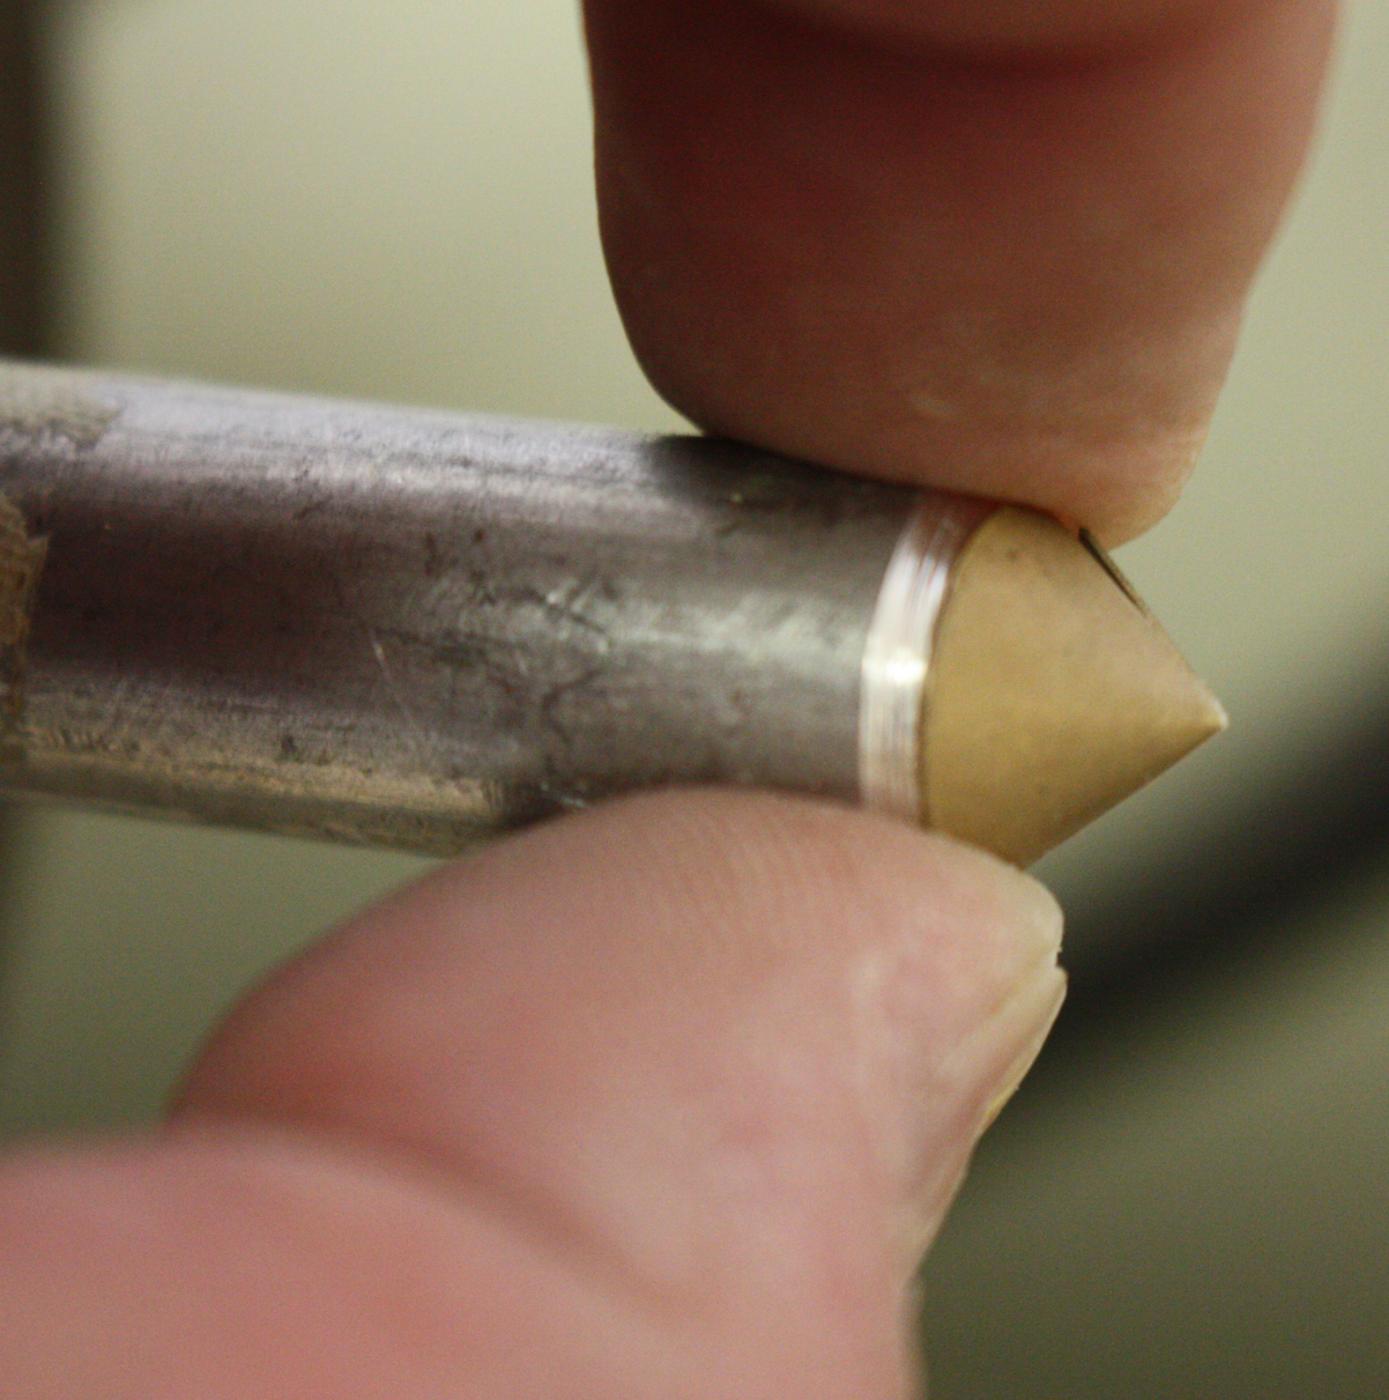
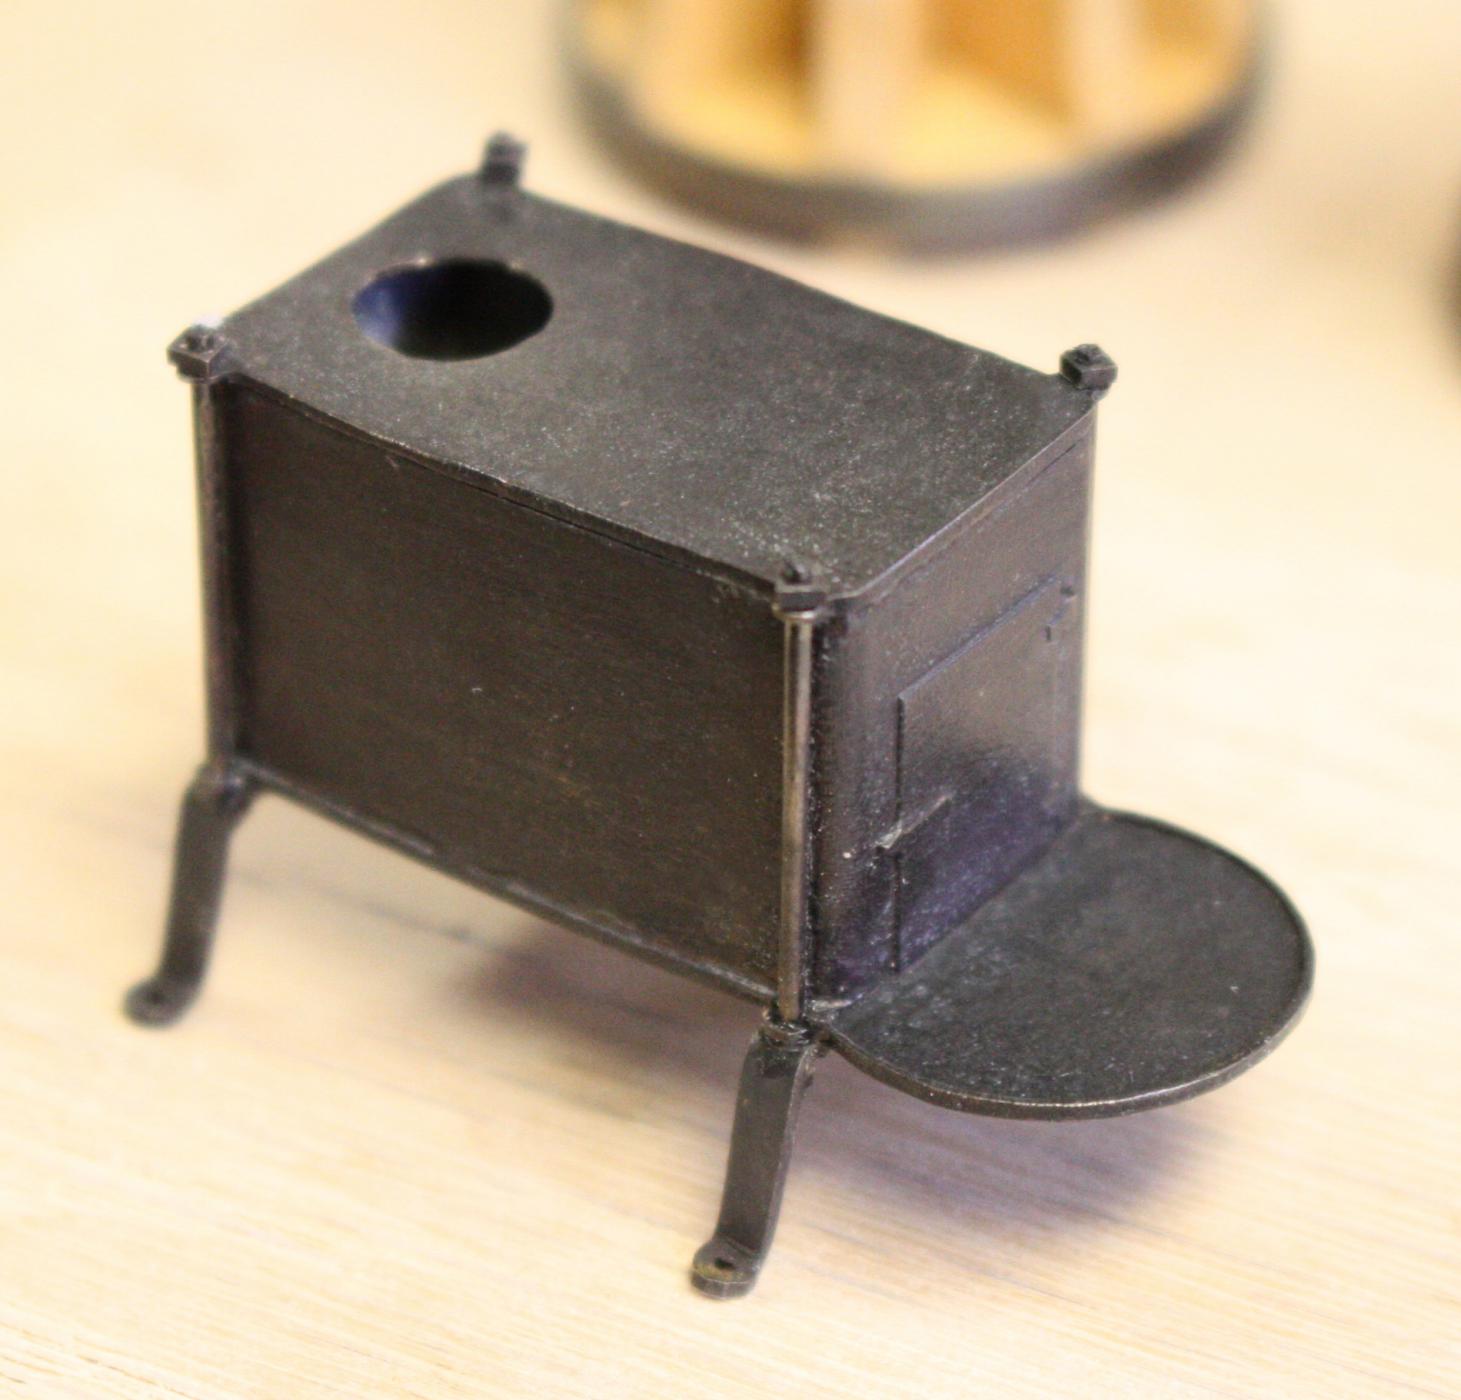
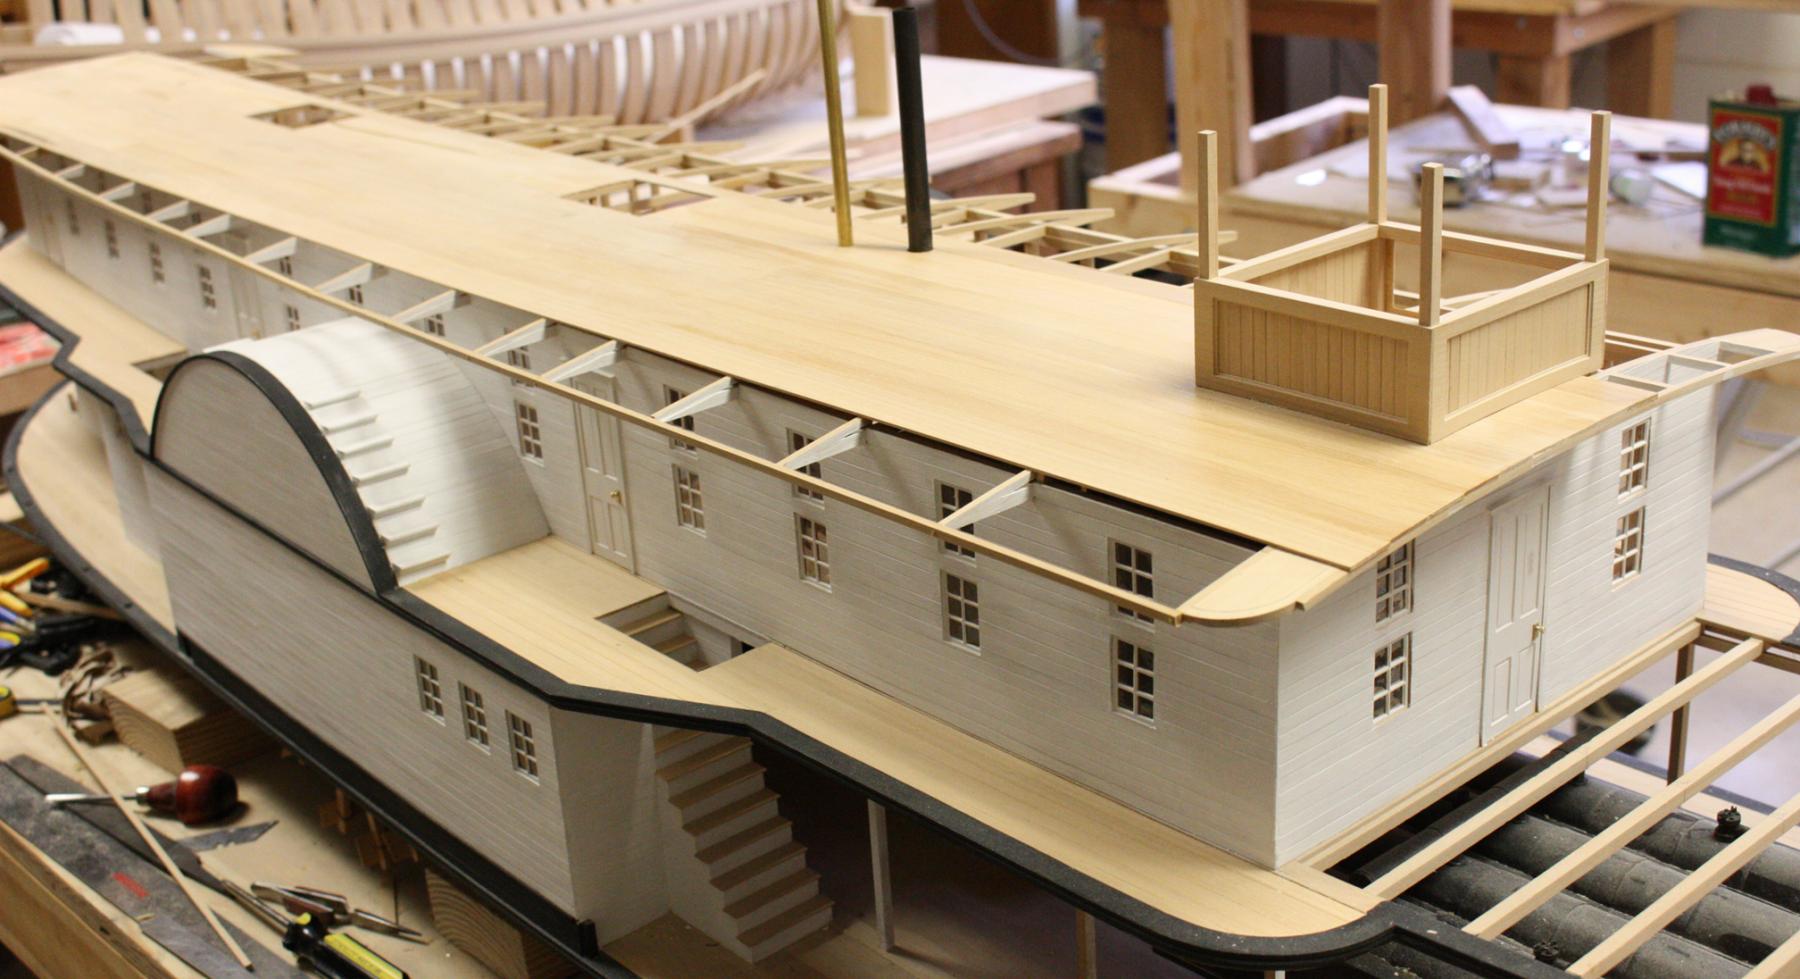
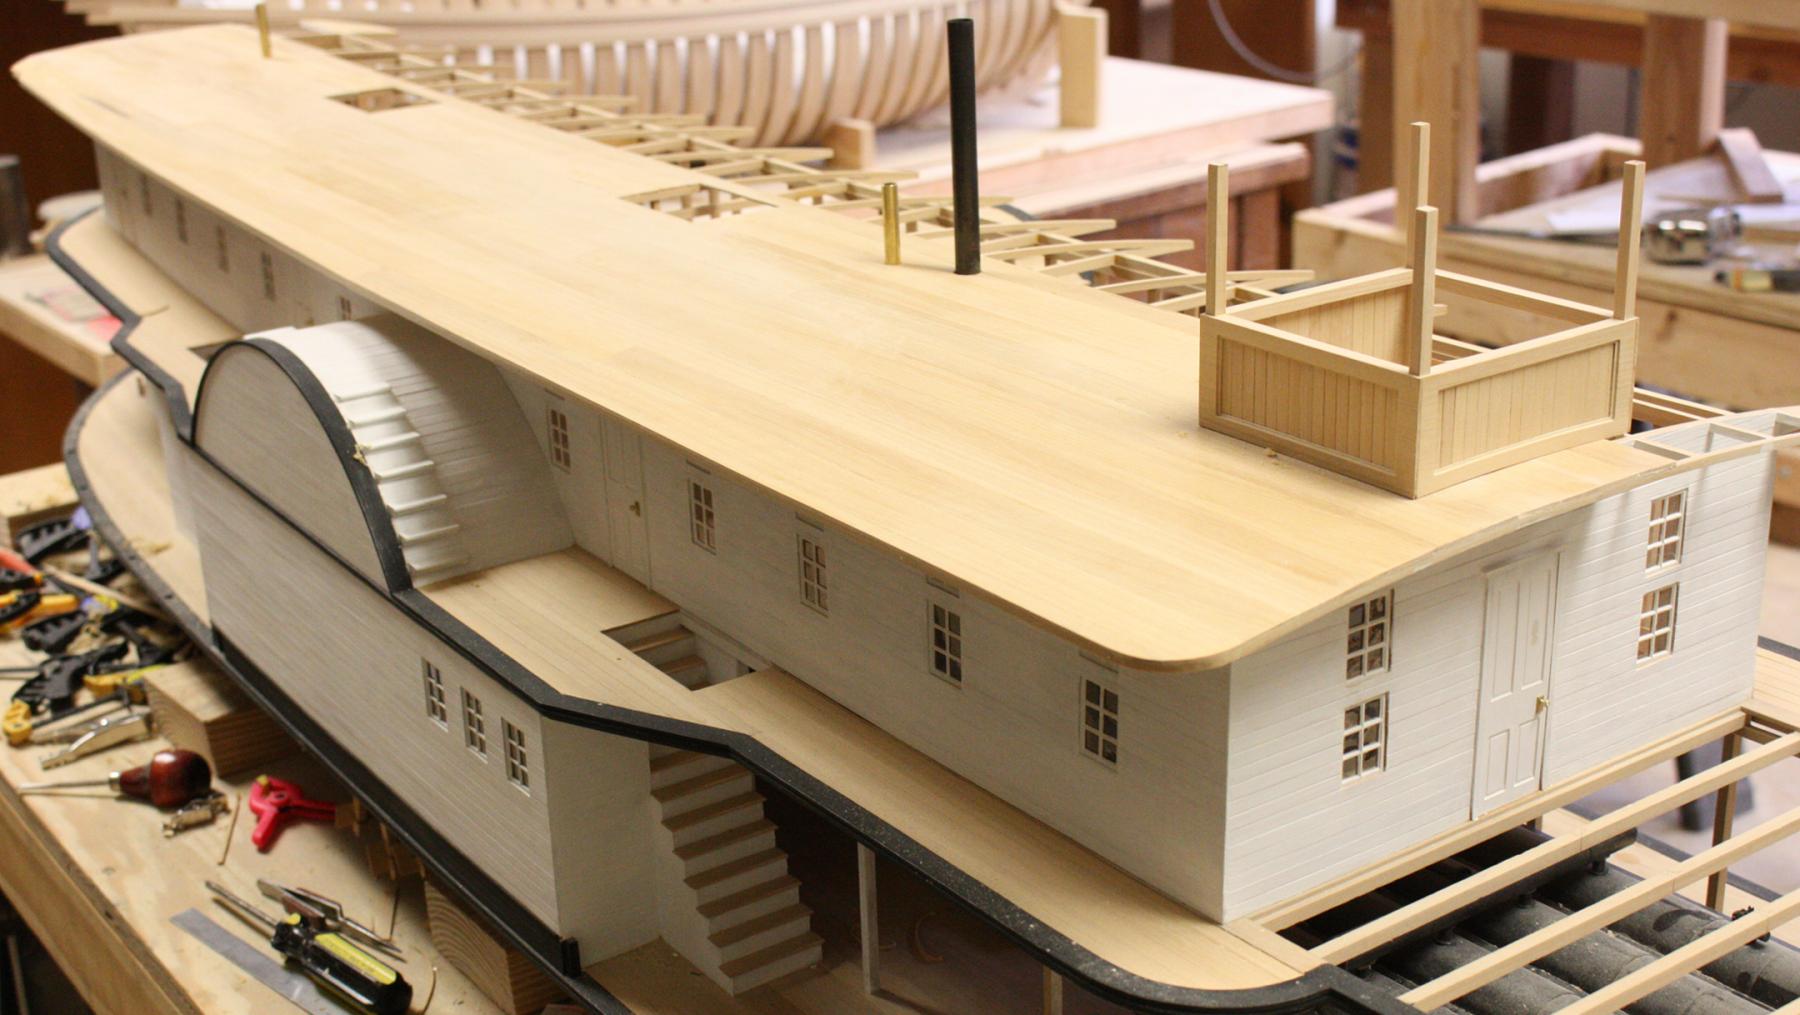
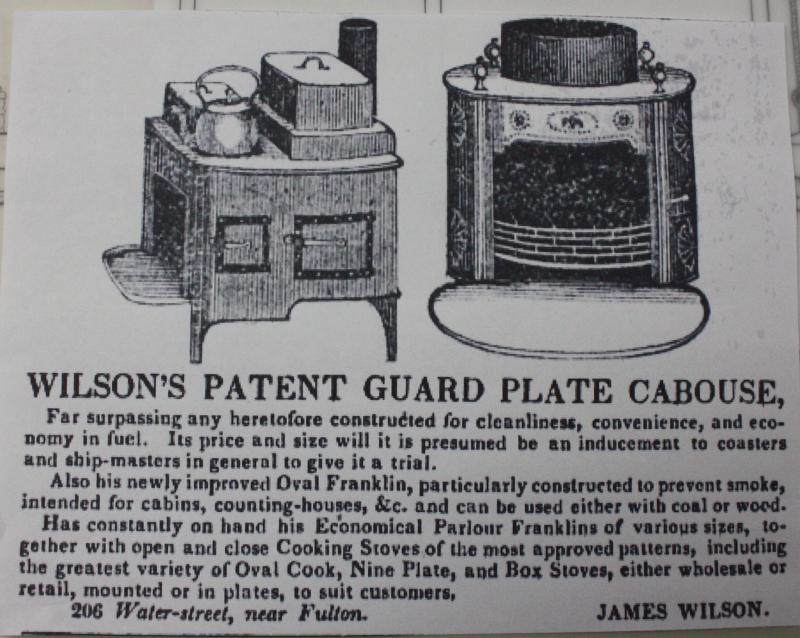
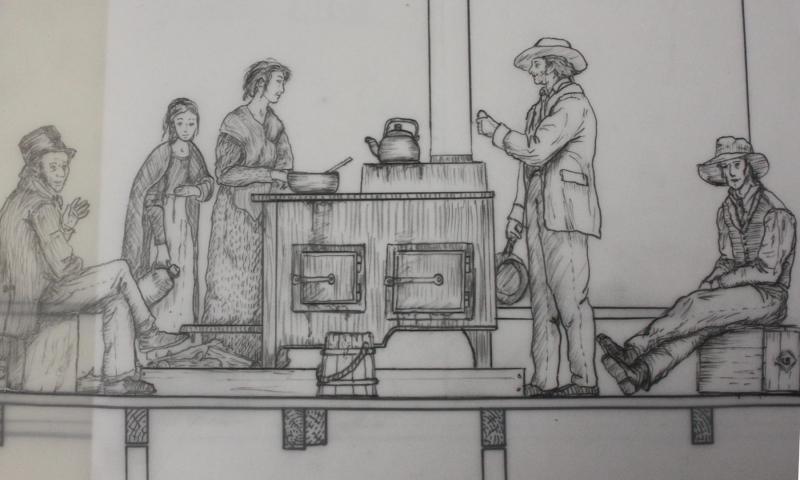
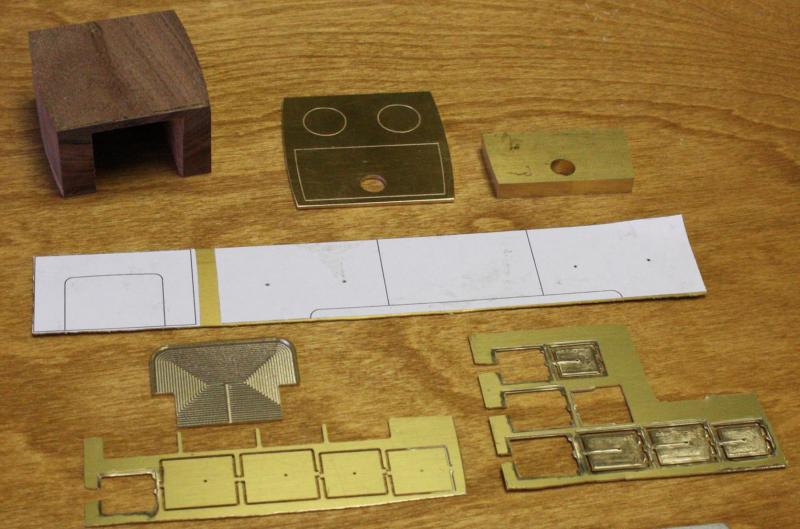
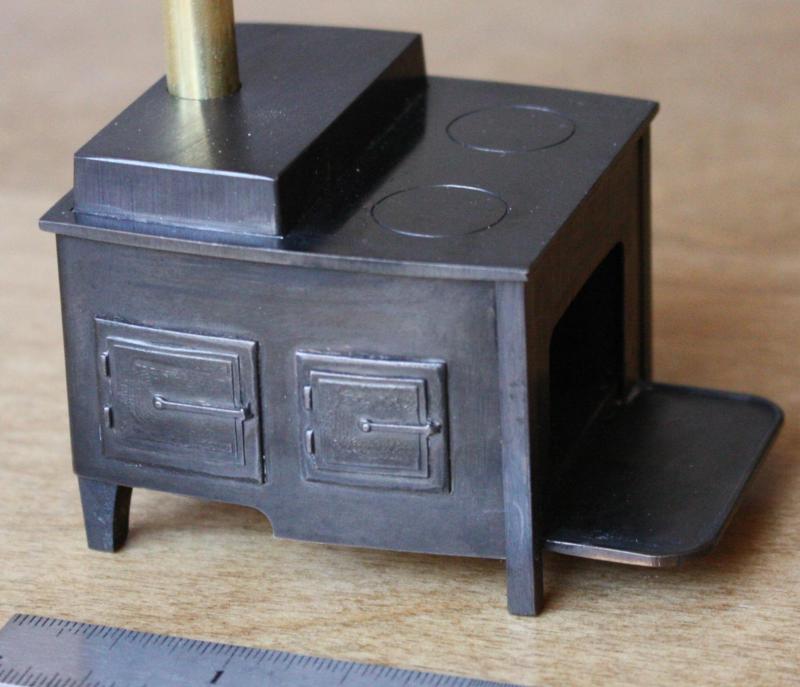
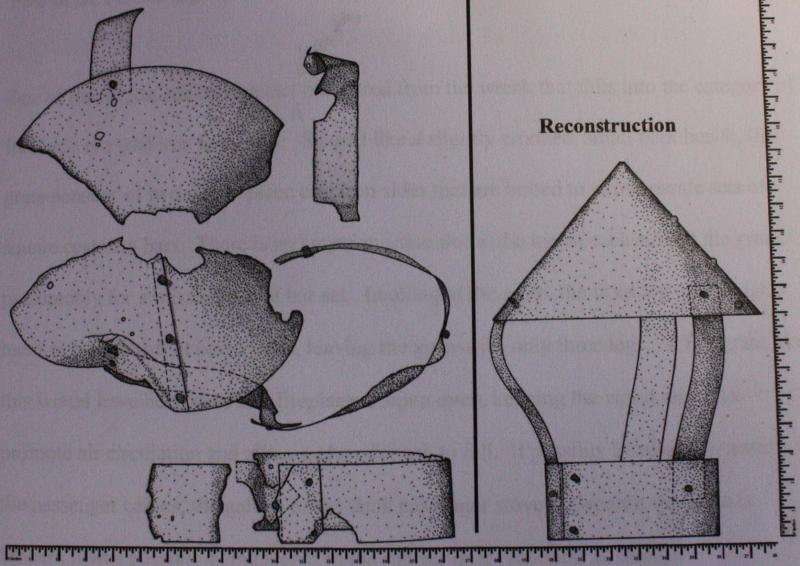
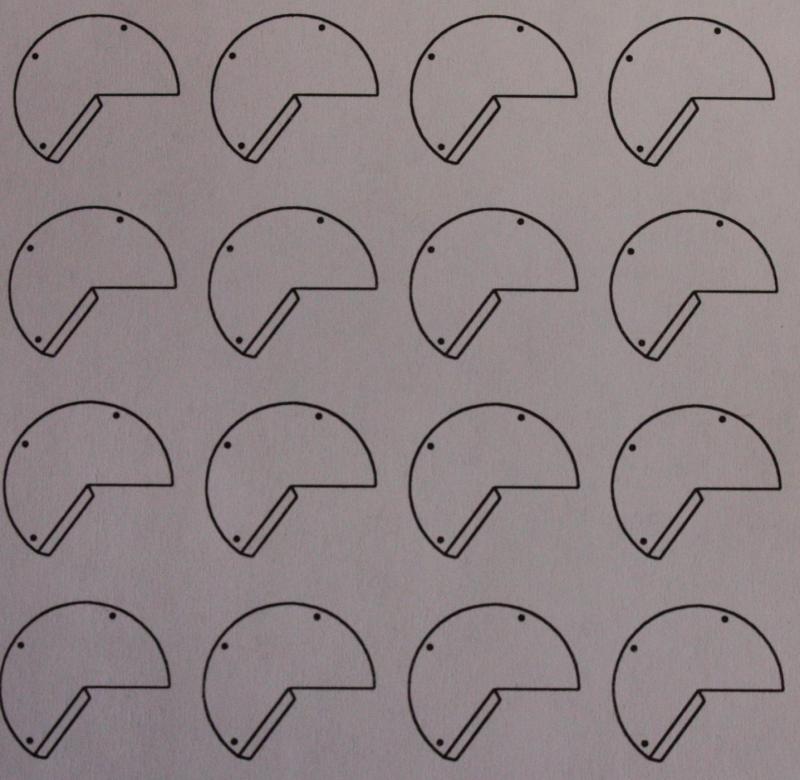
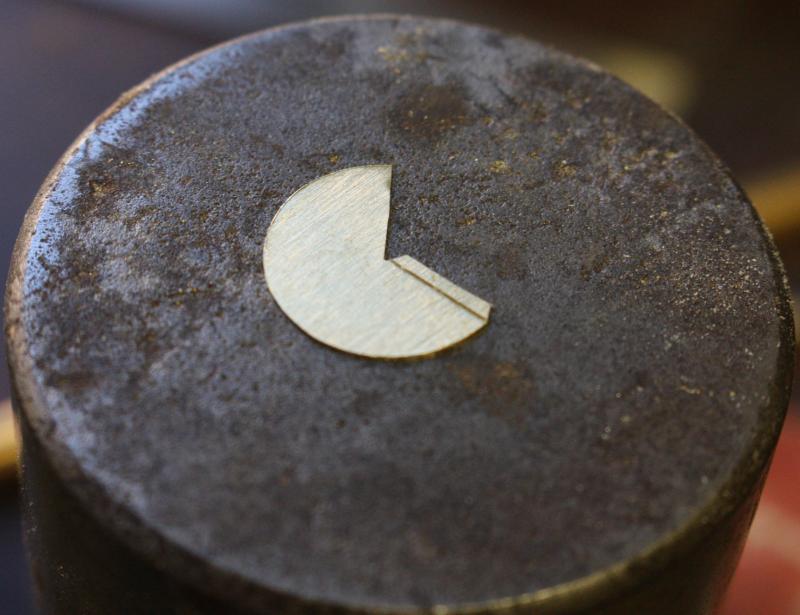
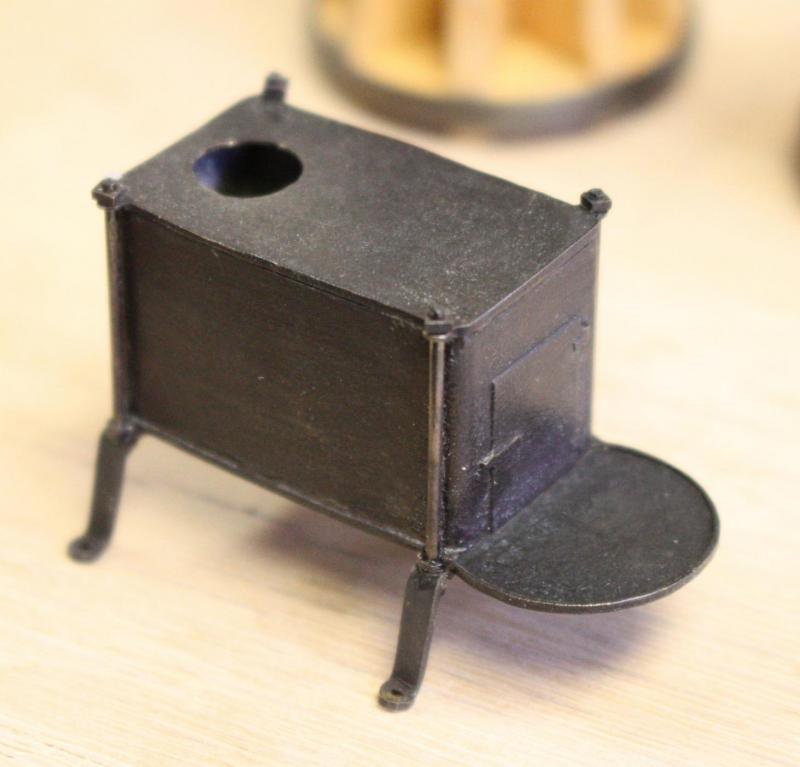
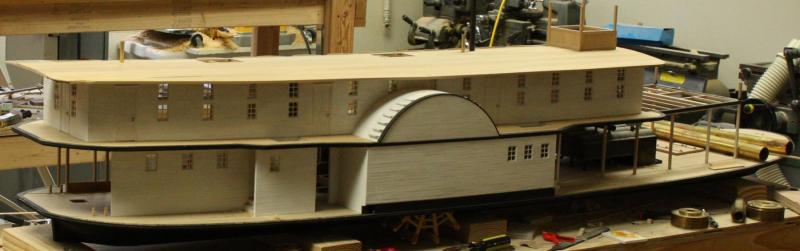
Hello everyone, Sorry for not being in touch for a while. I've had a string of very busy weekends for the Holidays and haven't had the chance to post anything. The last couple of weeks I've completed the last details that I needed to finish the Hurricane deck. Hopefully, I'll be able to apply the canvas to the deck this next week. Originally, I was going to try to frame up the skylights with individual timbers but then I wondered if it could be milled from four solid panels. They turned out ok and it saved me a lot of time. The skylights on some of the early steamers were glazed with ground glass for privacy. I will be using sanded mica. Front panel of the skylight in the mill. Finished panels Sorry, once again I should have dusted the parts before taking the photo. There was probably a large galley stove on the main deck. Kevin chose this Wilson's patent stove to represent Heroine's. Kevin's drawing of Heroine's galley stove. Freshly milled parts. I used a block of walnut as a core for the stove. Ceaned parts ready for soldering. Finished galley stove. Stove installed on main deck with firebrick lining and stovepipe. One crushed stovepipe cap was recovered from the wreck. Scale patterns for the stovepipe cap. The top piece was cut from .01 inch brass sheet. To shape the cap I turned a piece of aluminum with the proper angle. Before shaping I heated the part to anneal it then I was able to easily shape it to the form without creases. The uprights were filed from an appropriately sized brass tube. Finished cap. Cabin stove stovepipes blackened and capped. The larger galley stove pipe still needs to be blackened and capped.


- 701 replies
-
- 42
-
-
Hello Mark, I really enjoyed catching up on your build tonight. She's coming along beautifully. I can't wait to see how you tackle the rigging!!
-
Outstanding model Pat! I've been away too long and come back to see her finished. Sorry I couldn't congratulate you sooner. I'll be looking forward to your next build!
- 517 replies
-
- 2
-
-
- Endeavour
- Artesania Latina
- (and 1 more)
-
Looking good Cathead! I really like the lines of this vessel and the planking looks great! Looks like a lot of fun to build!
- 96 replies
-
- 5
-
-
- topsail schooner
- revenue cutter
- (and 3 more)
-
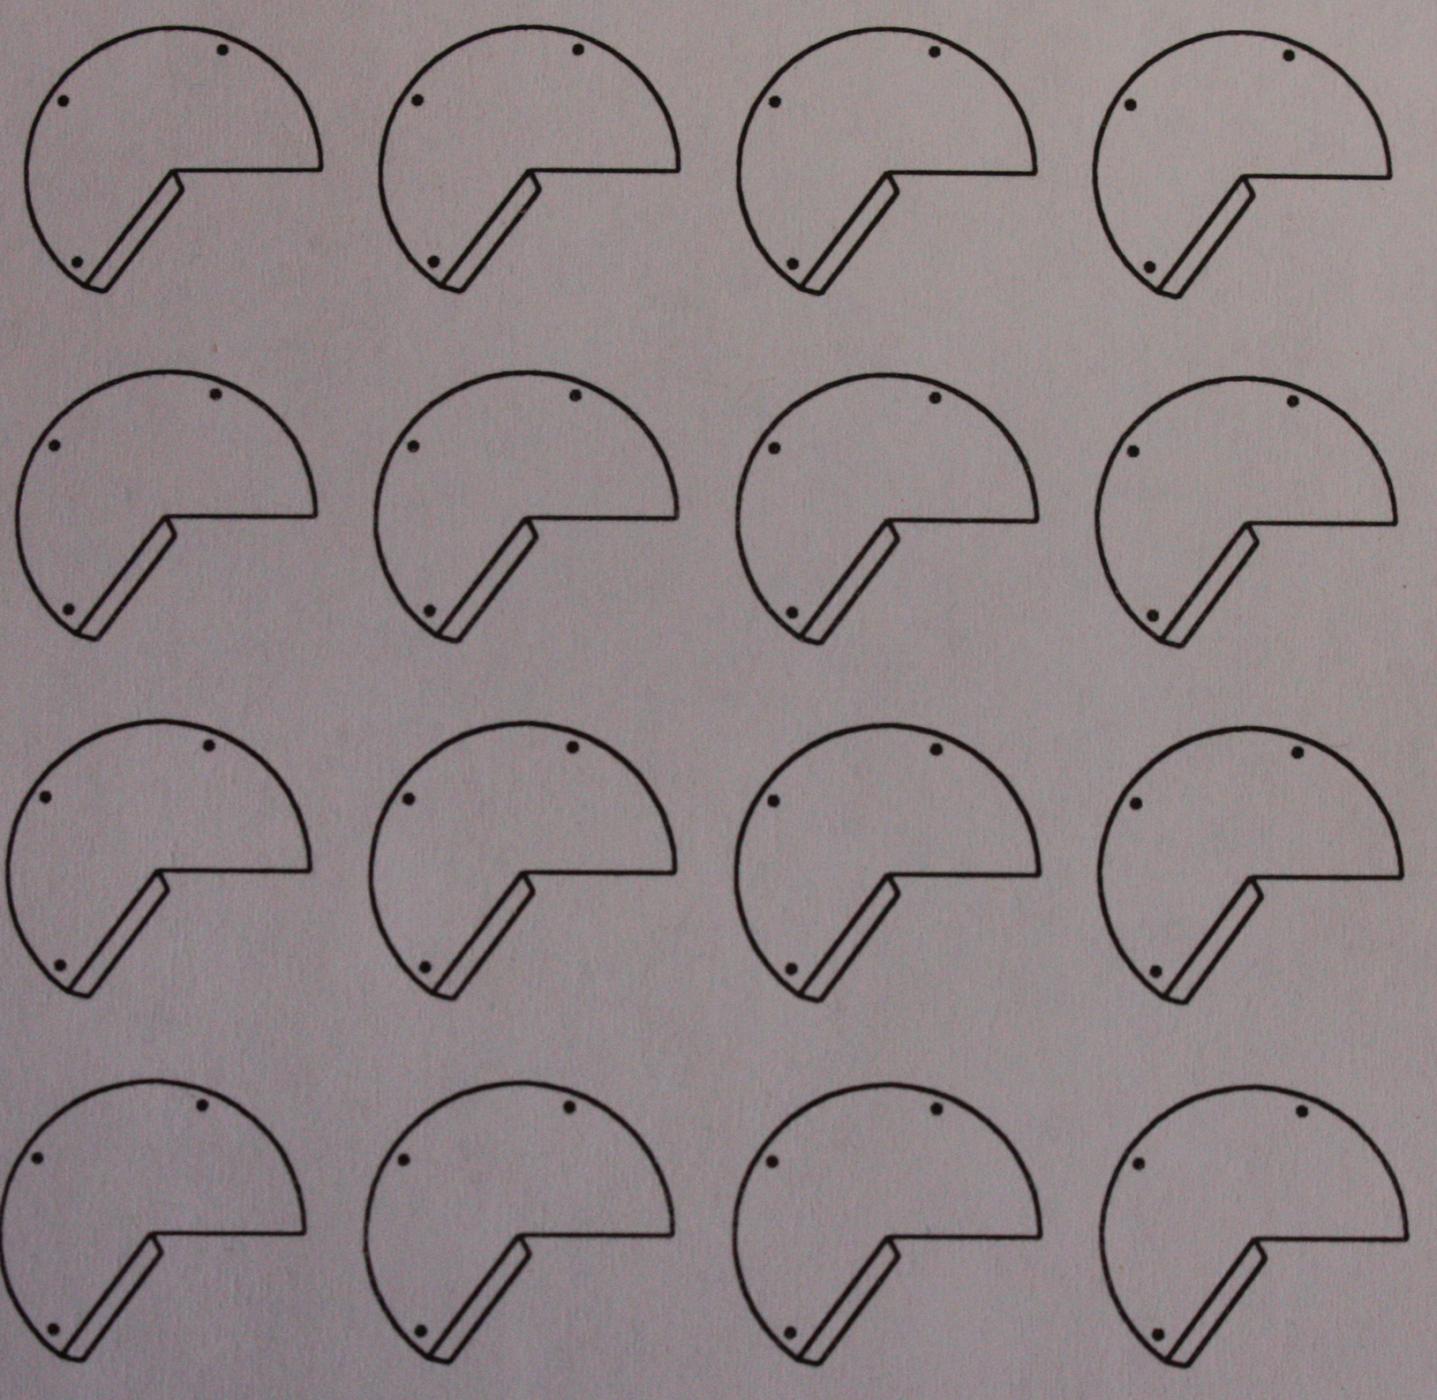
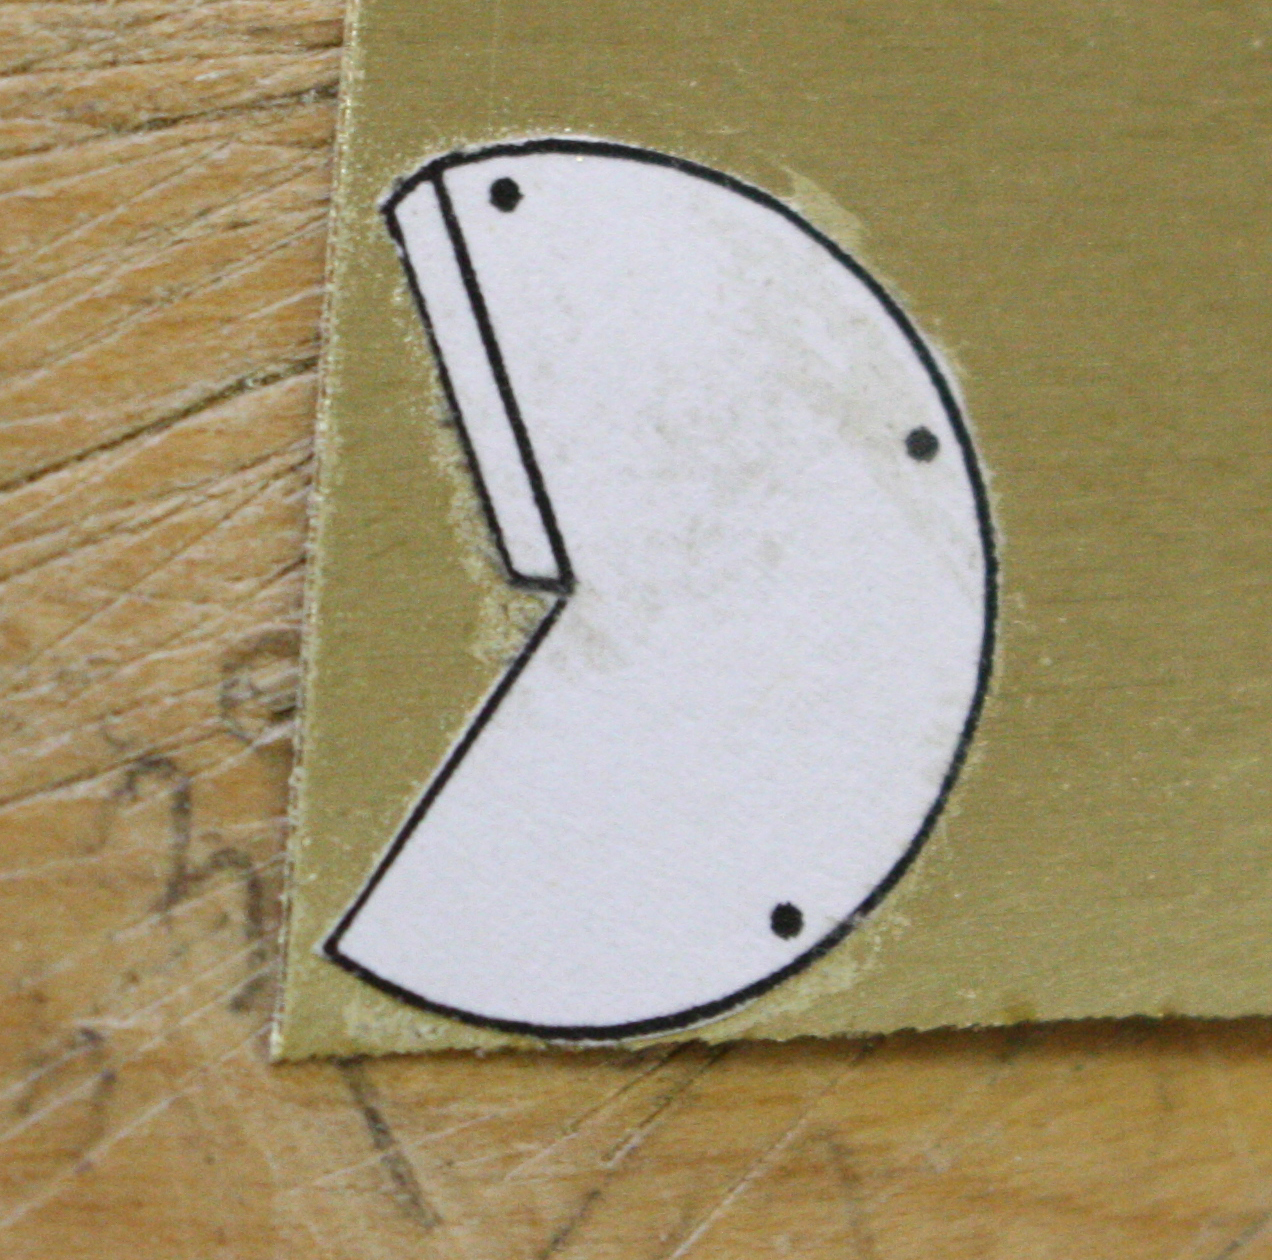
Thanks everybody, it's good to finally get back to MSW. This will be my first weekend at home for the last four. Thanks Frank, I've been looking forward to checking in on Dunbrody. That will be my next stop. Cathead, yes it does seem quite gloomy. And the overhang of the Hurricane deck doesn't seem to let much light through the windows. Very little ventilation as well. I wonder how much heat from below made it into the cabins. Greg, it does seem ironic. Actually though, I think we got ours from a turkey leg at the Texas Renaissance Festival. I can imagine something like this could have been life threatening on a steamboat. Good catch on the notches in the whelps. I knew they would be covered and I only needed the one side so I took the shortcut. For two sided milling I'll use the mill to drill two reference points and insert short pins to position the stock. Using the reference points to draw the toolpaths, I can get two sides to line up quite accurately. I use this method a lot to make things like flanges that have a bolt head on one side and a nut on the other. Druxey, as another shortcut, I made the Hurricame deck planking out of wider strips 3/4 inch wide. Knowing that it would not be visible, i didn't mind saving the time and material. As much as I'll hate to cover it, there was as least two advantages to it. Thanks Pat, i just hope the detailing would measure up in real life. Sometime I wonder how much I edit my build with my photography. Anyway, if you ever get a chance to make it to Texas, I'd be happy to show you around.
-
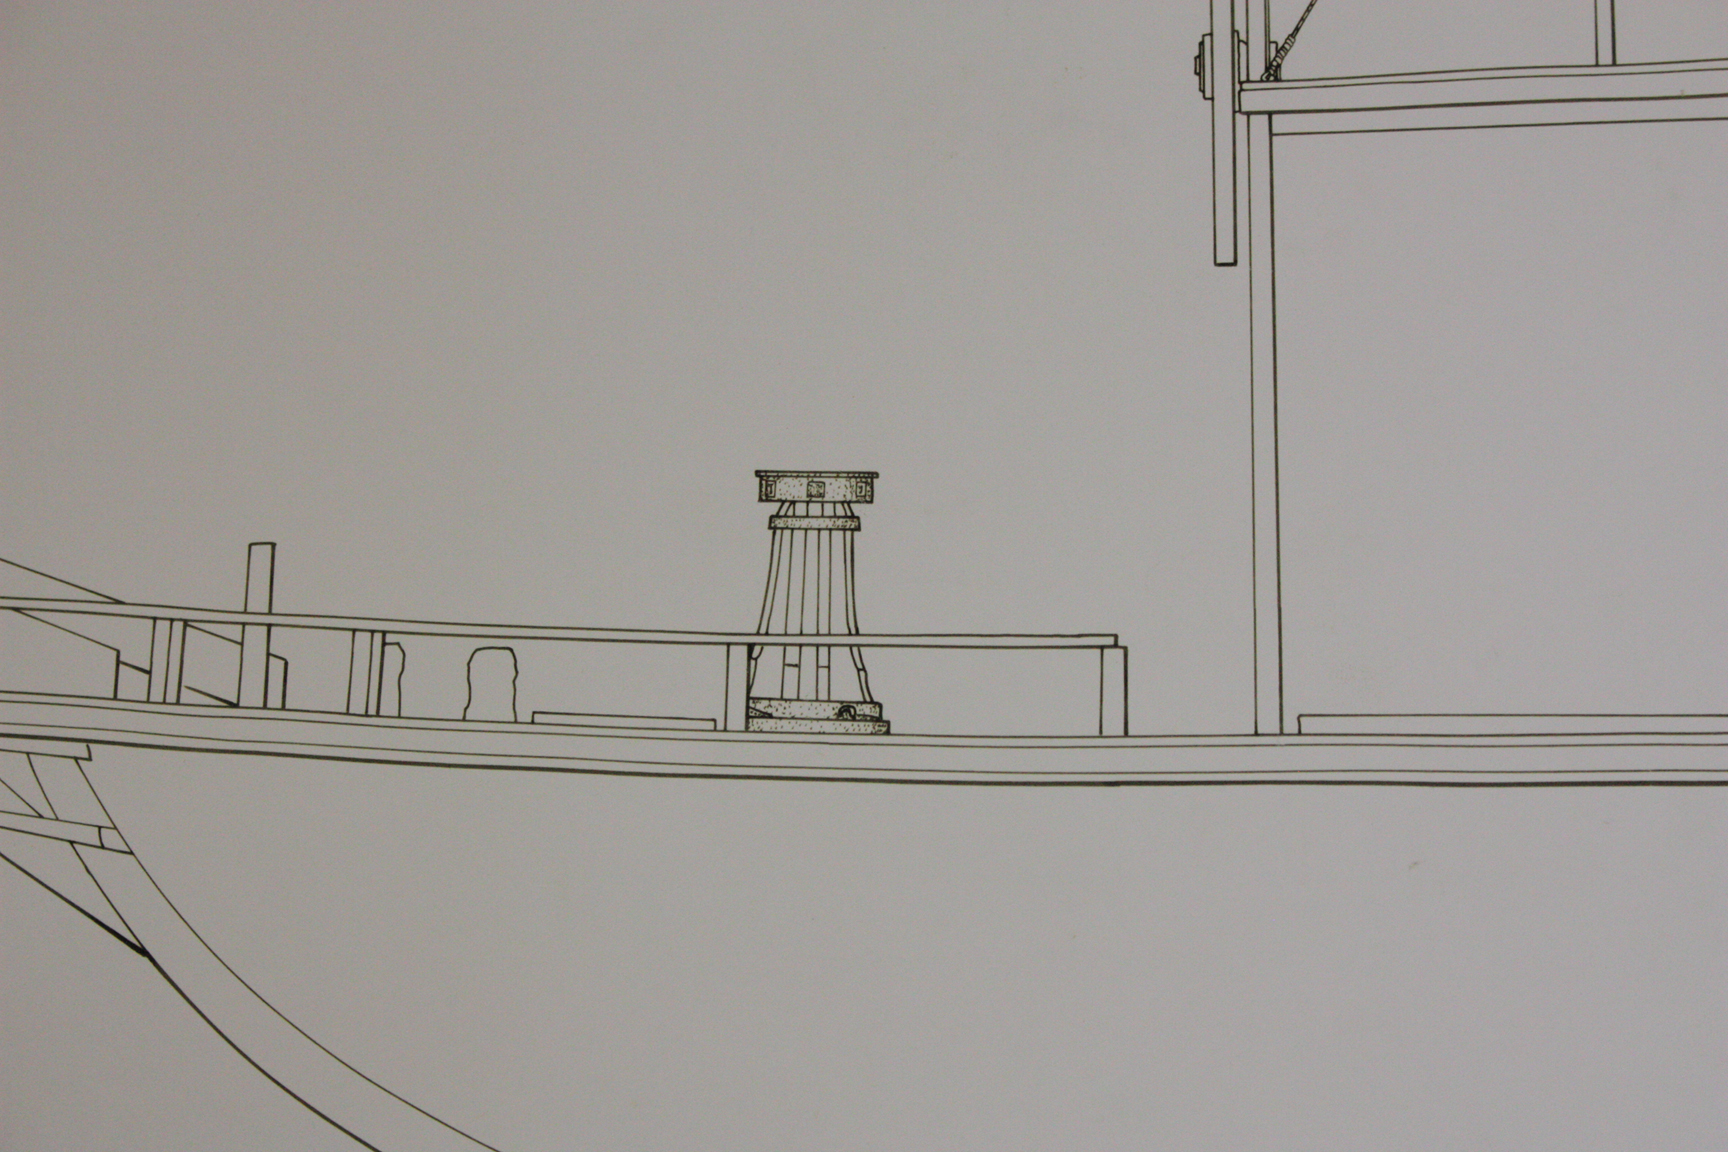
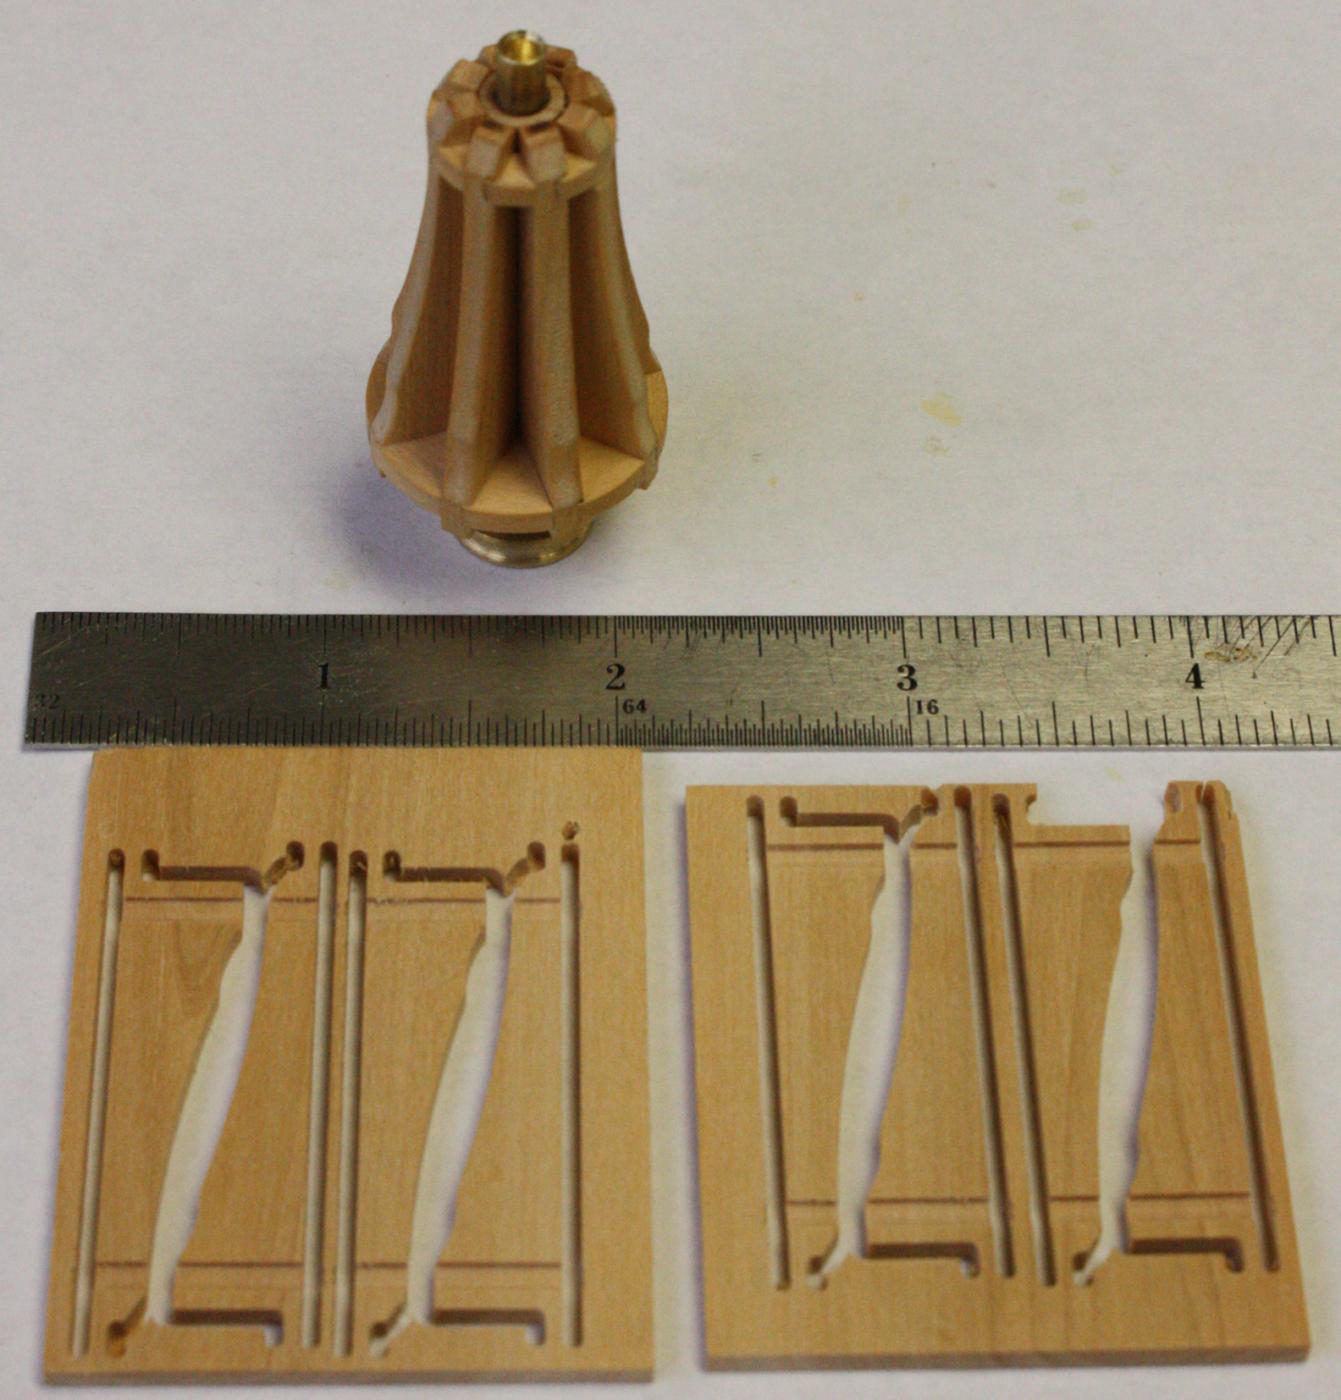
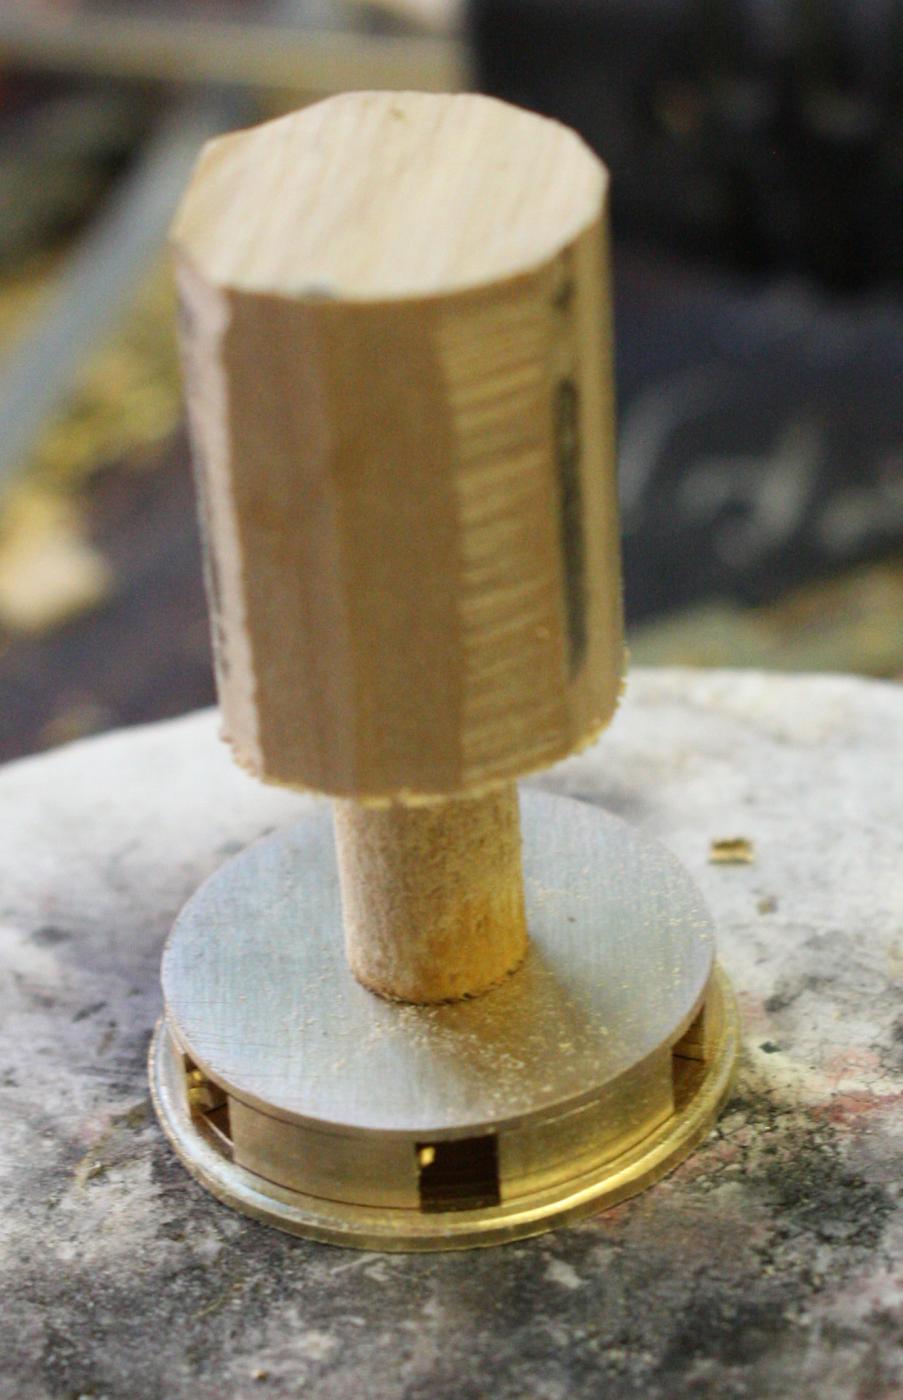
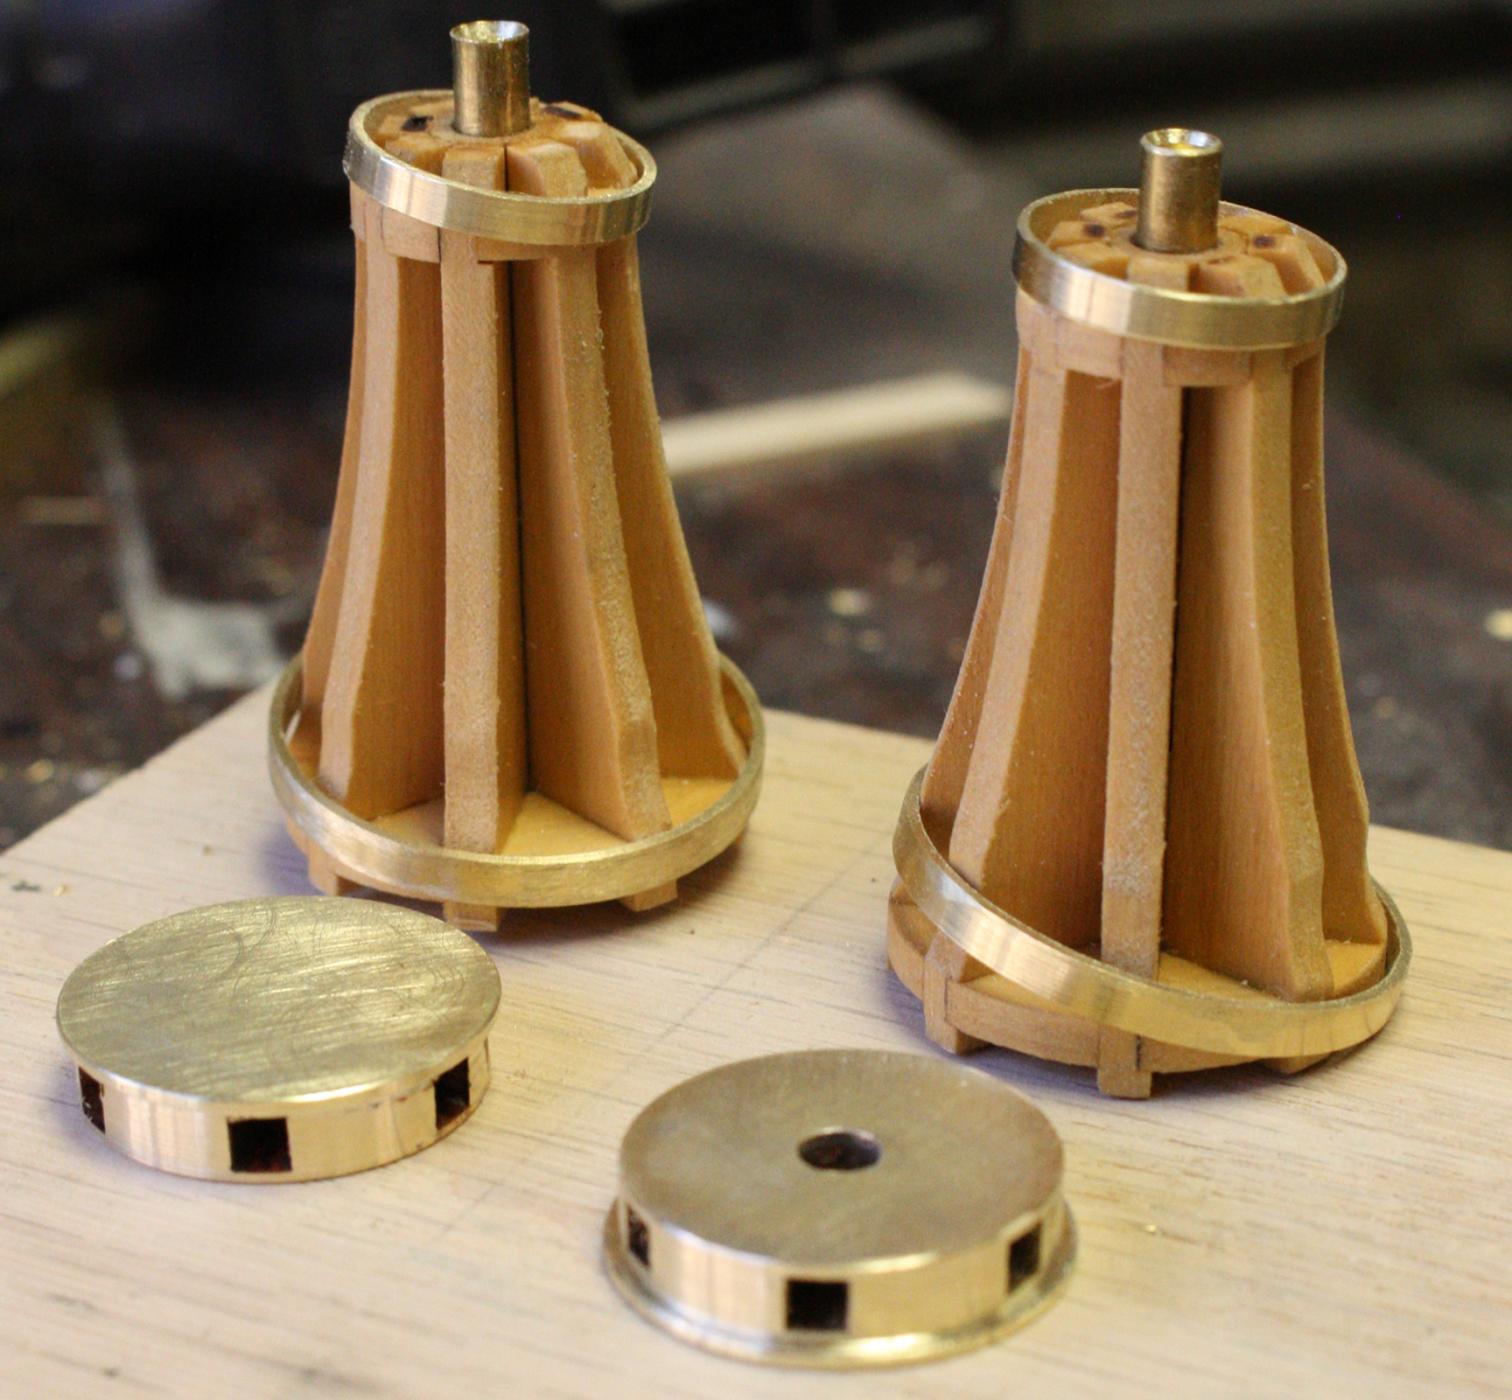
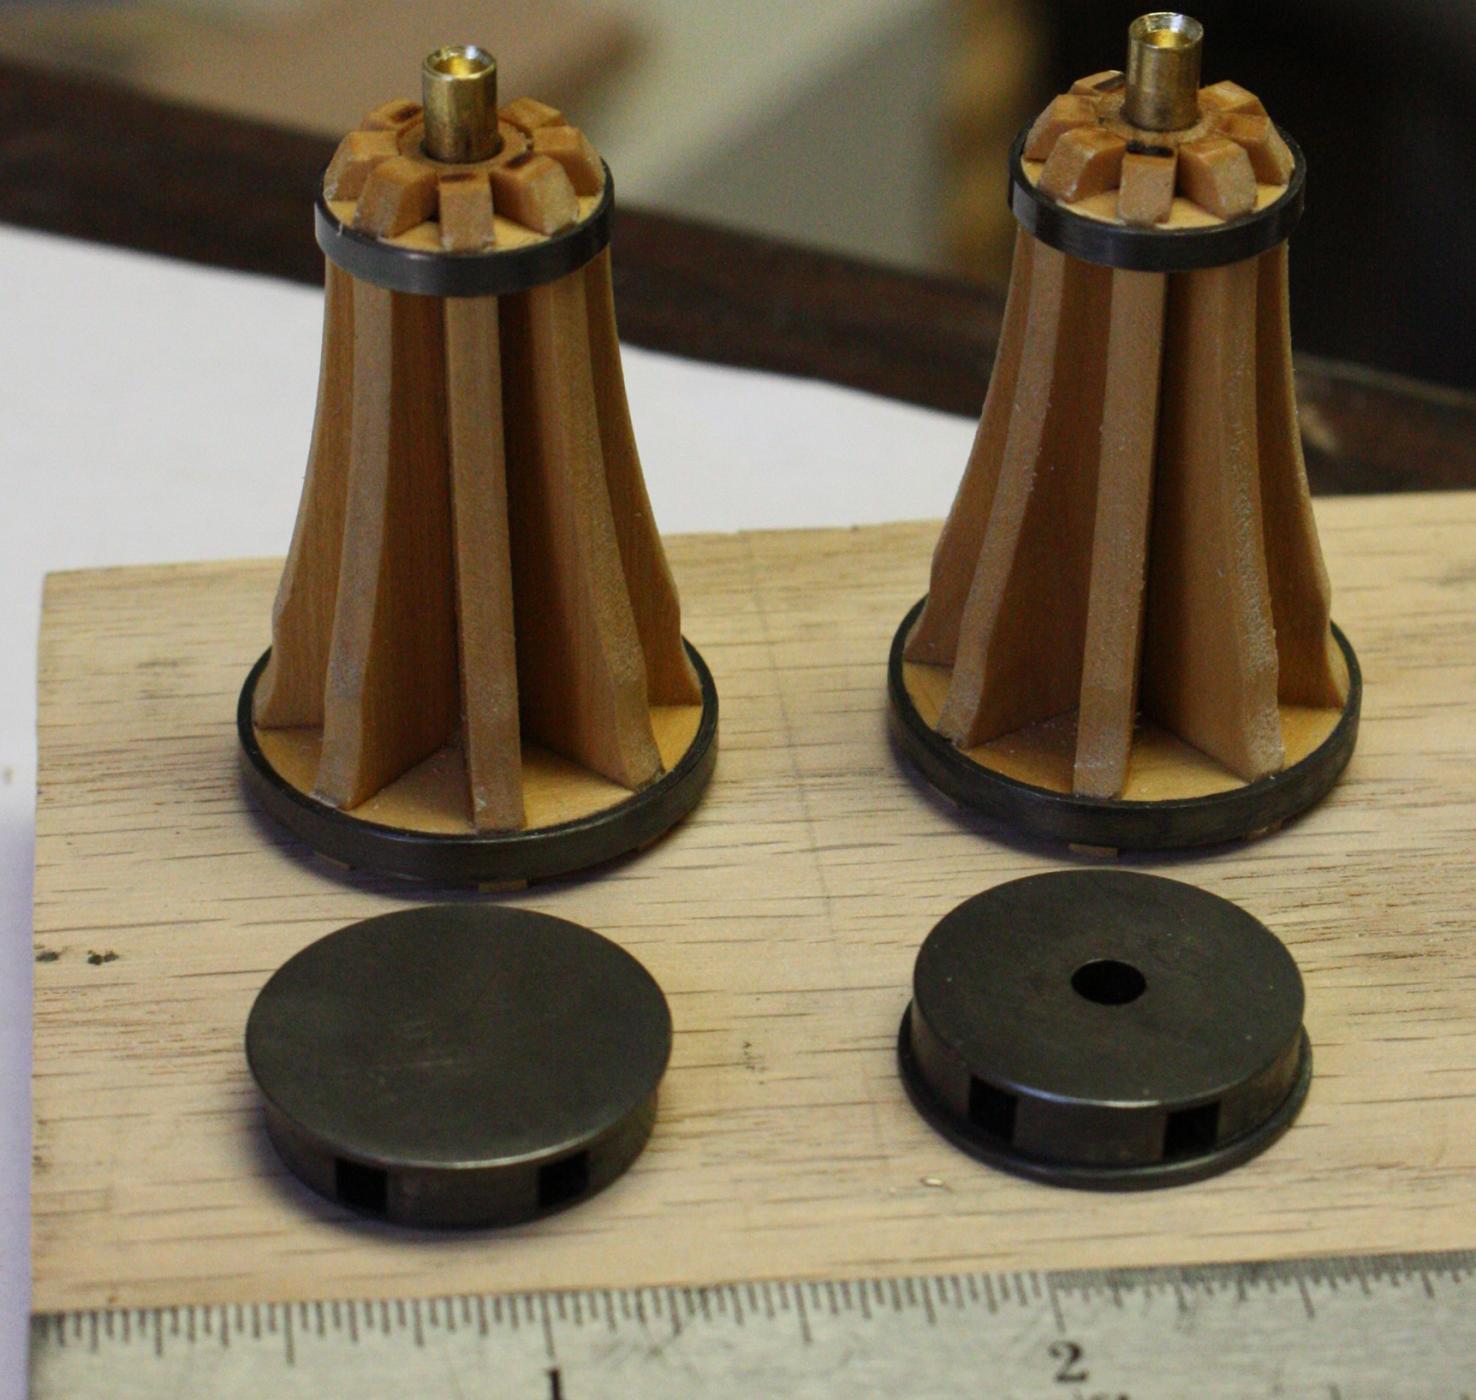
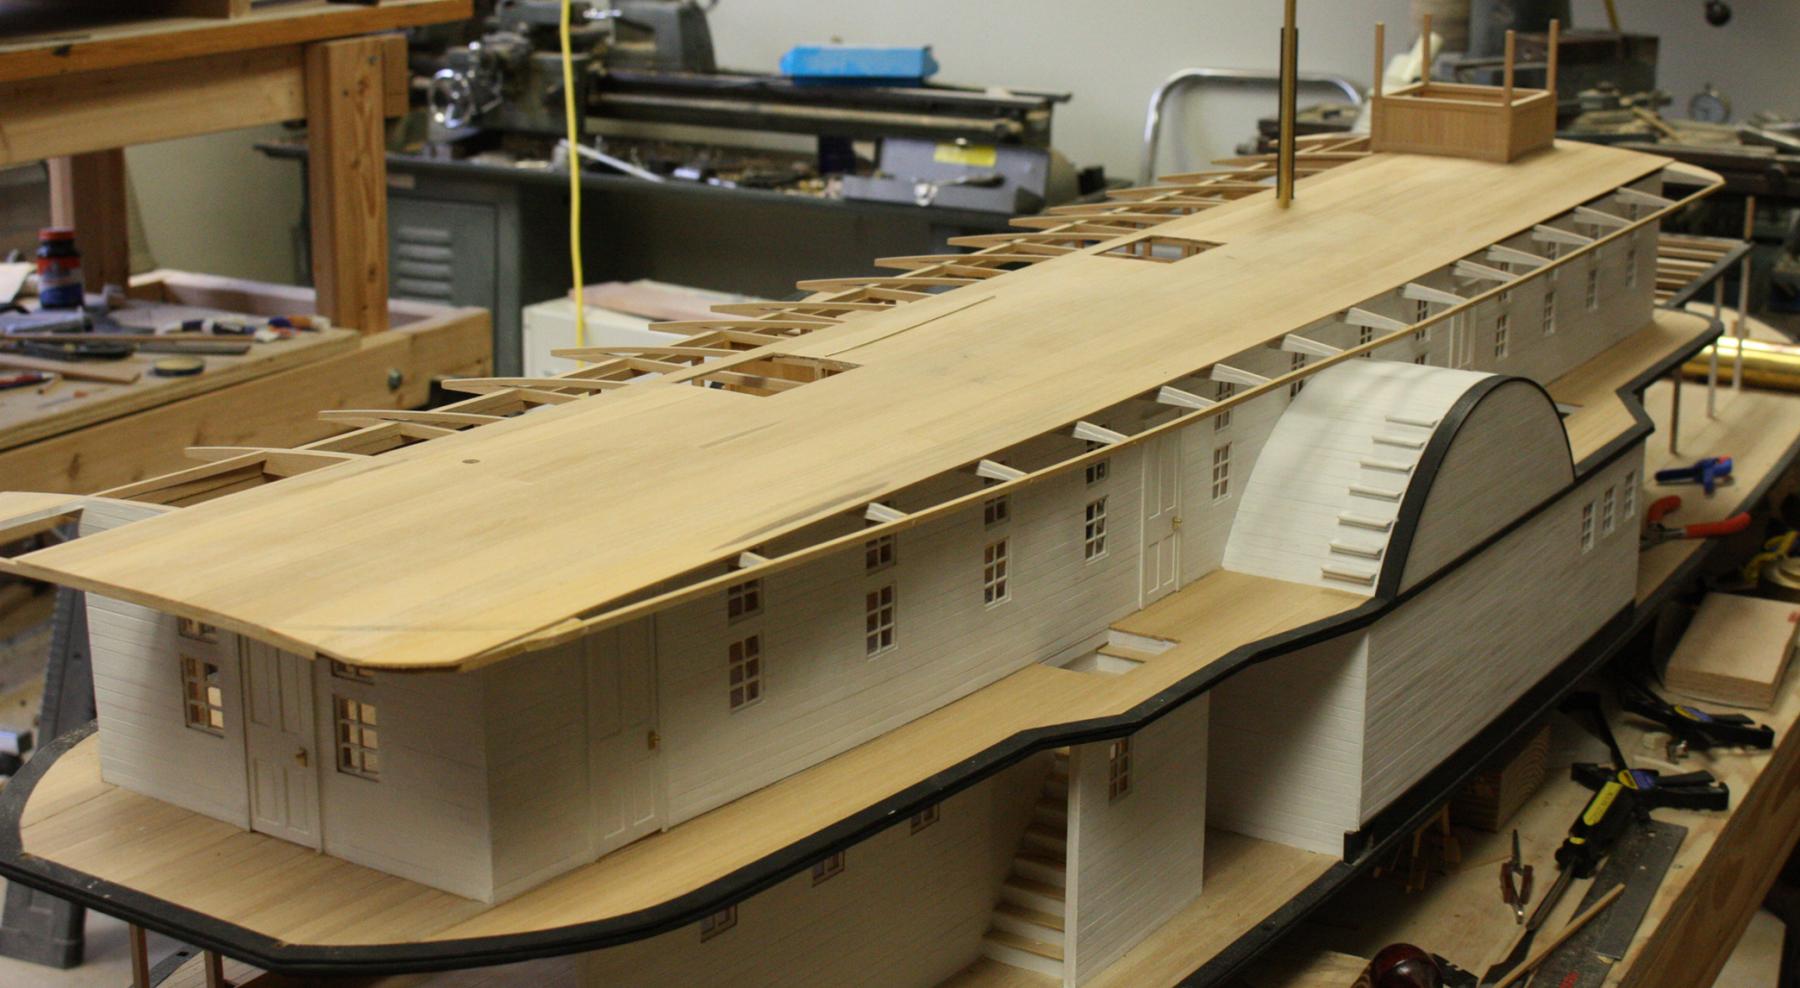
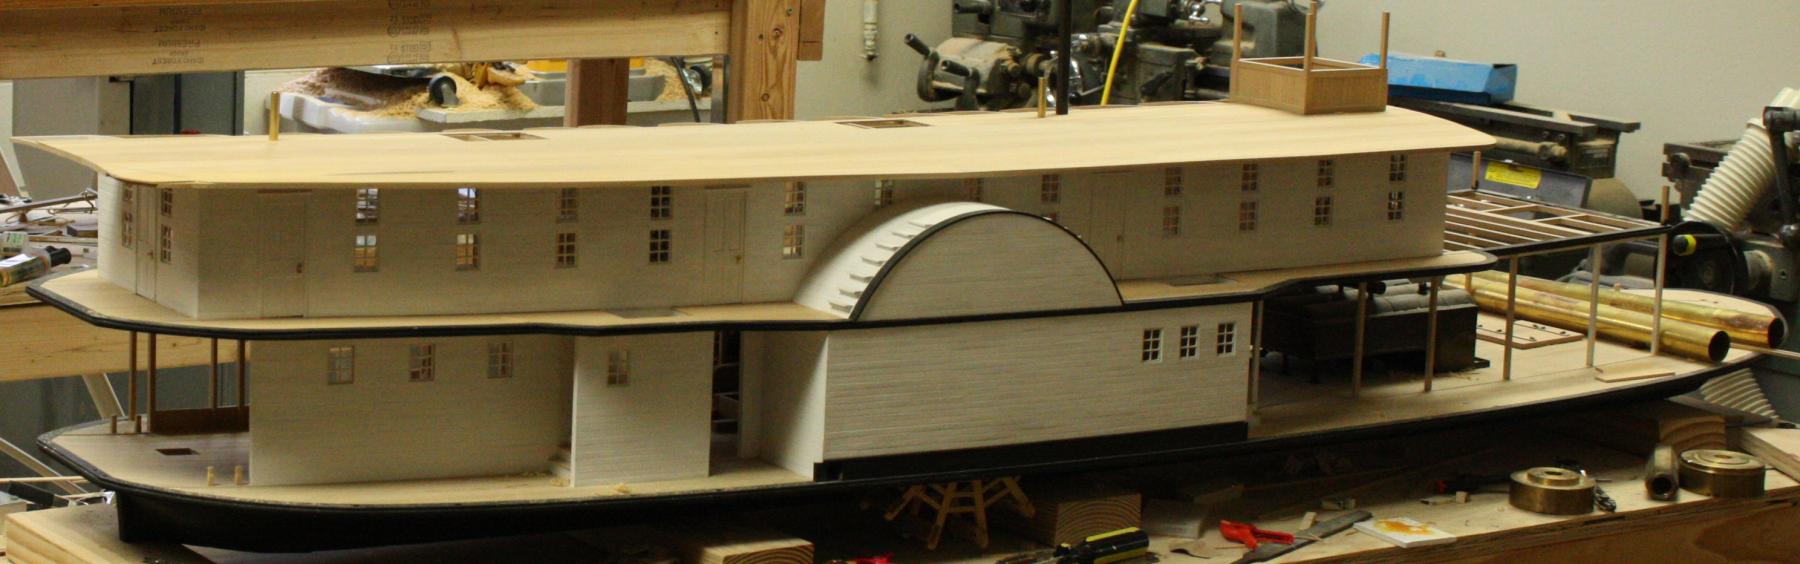
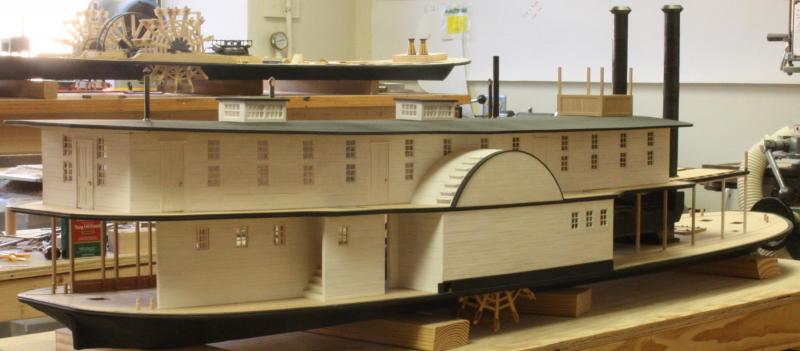
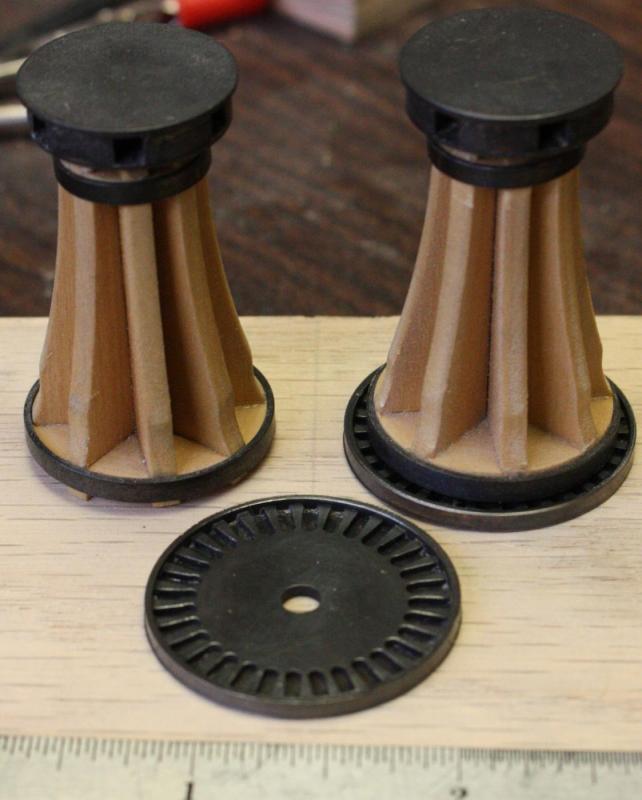
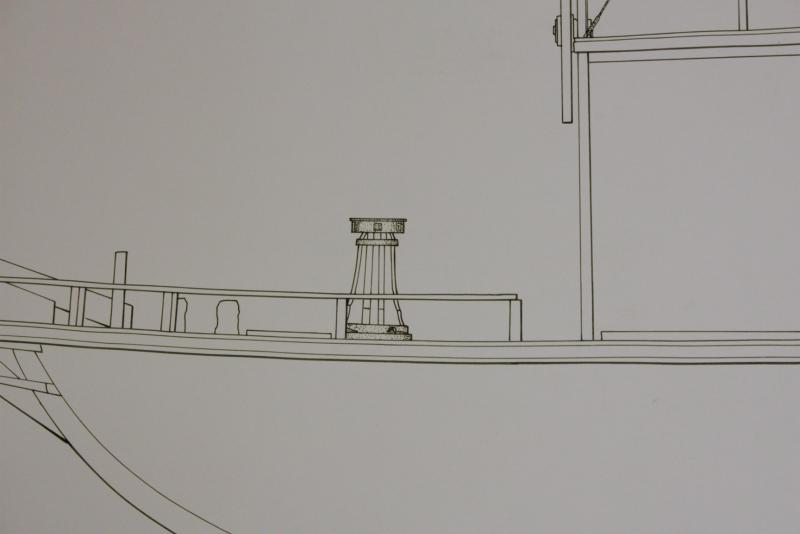
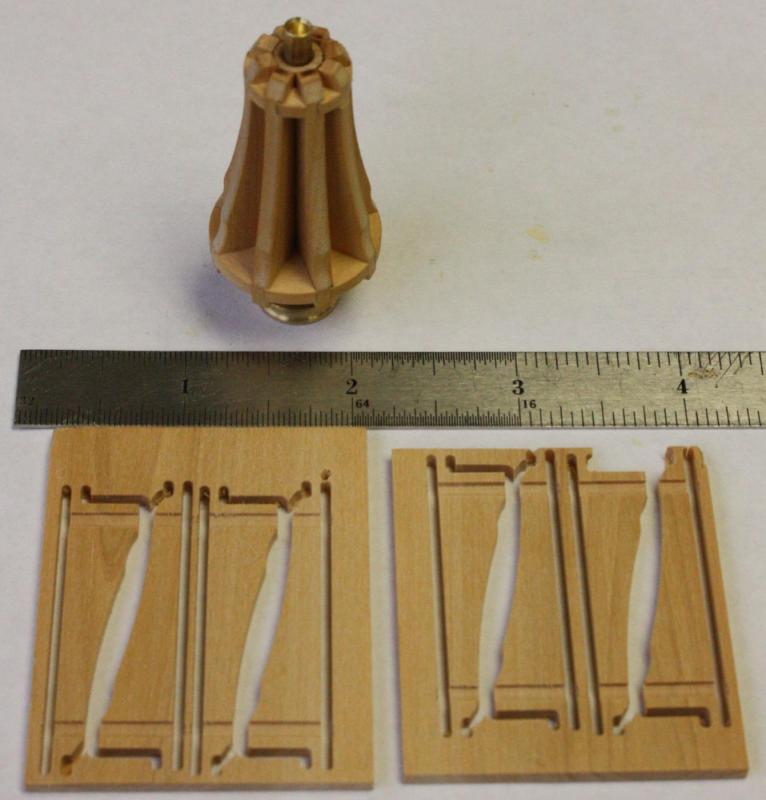
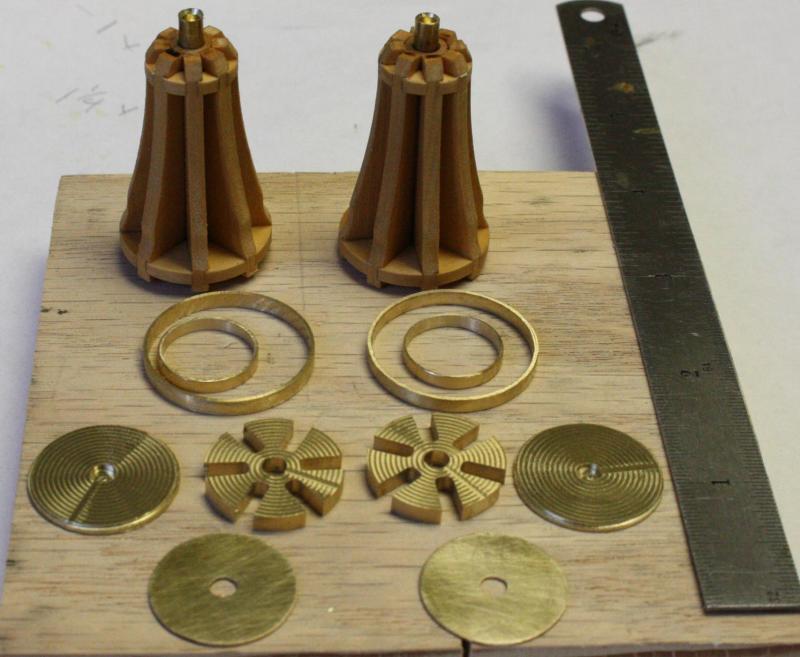
Sorry to be out of touch for the last few weeks. A couple family events, a defensive driving course and a run-in with the norovirus has kept me from posting. I'm still dragging along with the second model as well. This week I did manage to plank most of the boiler deck and half of the hurricane deck. Just for fun I decided to jump ahead to the capstans. A capstan was not found on the wreck but the hole in the deck for one was found. Heroine's capstan must have been removed some time before wrecking because a small plank was nailed over the hole. Below is Kevin's idea of what her capstan might have looked like. Whelps fresh off the mill. Parts of the trundelhead. I used a boxwood plug to hold the three parts of the trundelhead together for soldering. Brass parts ready for blackening. Completed capstan minus the pawls and pawl rims. Completed cabin stove. Sorry - a little dusty. I never see the dust until after I take the photos. Boiler deck partially planked. Starting on the Hurricane deck. Starboard side of Hurricane deck planked. Heroines hurricane deck was covered with tarred canvas. Once planked I with cover the deck with silk and paint it black.


- 701 replies
-
- 33
-