HOLIDAY DONATION DRIVE - SUPPORT MSW - DO YOUR PART TO KEEP THIS GREAT FORUM GOING! (Only 20 donations so far - C'mon guys!)
×


CharlieZardoz
-
Posts
969 -
Joined
-
Last visited
Content Type
Profiles
Forums
Gallery
Events
Everything posted by CharlieZardoz
-
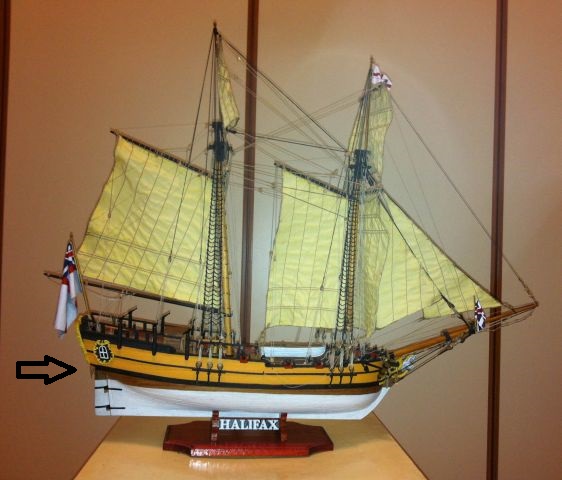
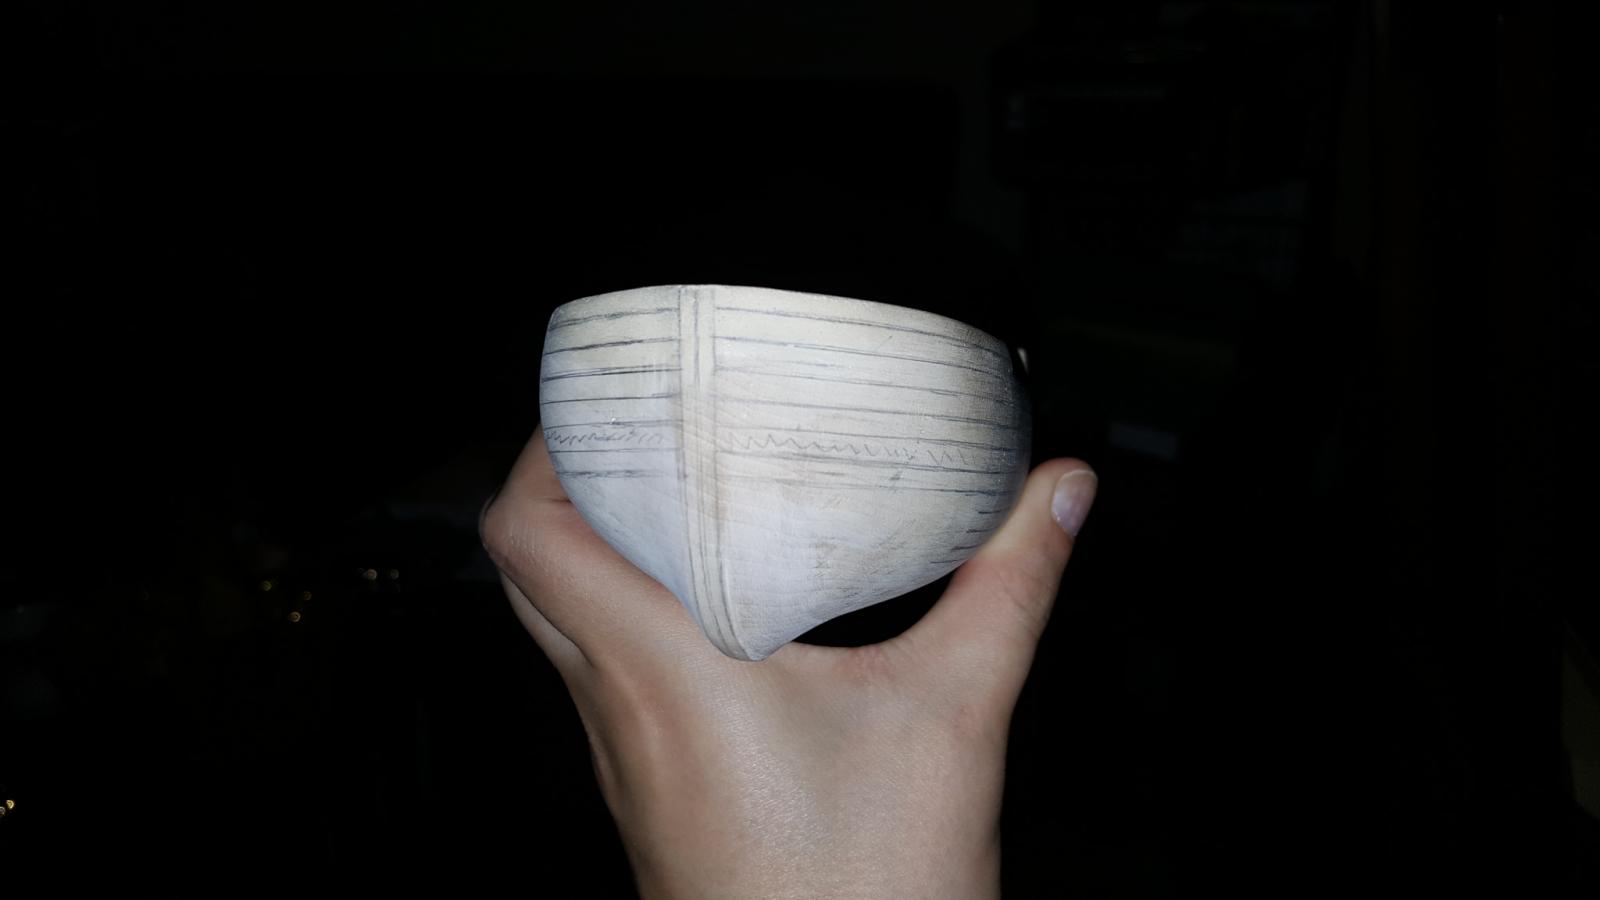
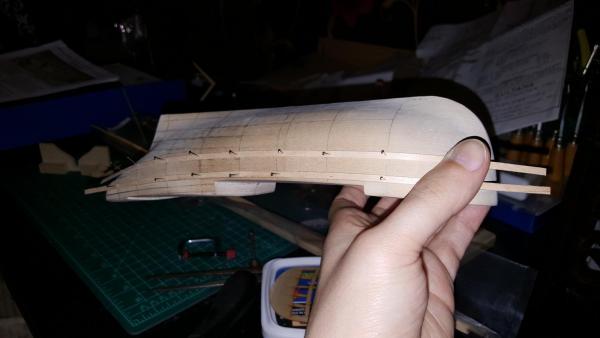
 So that's about it for now hope you all enjoyed the update. Next I am hoping to show the keel area properly thinned, the plank lines fully finished and then the transom area with it's pieces lasered and the inner area hallowed out since I can't handle fake windows lol. Also a note to the Sultana color scheme my plan is to follow a similar pattern to this Halifax model a slightly larger similar type of American built ship. The orcre will be done in boxwood, while the darker portion will be pear or cherry (where I pointed) with the deck in holly. Below the waterline will be white and the railings painted black. Mixing the woods and working with varnish/staining will mean a bit of experimenting but that's all part of the fun! Stay tuned ;D
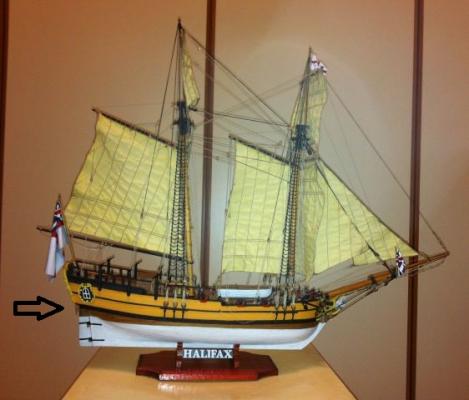
-
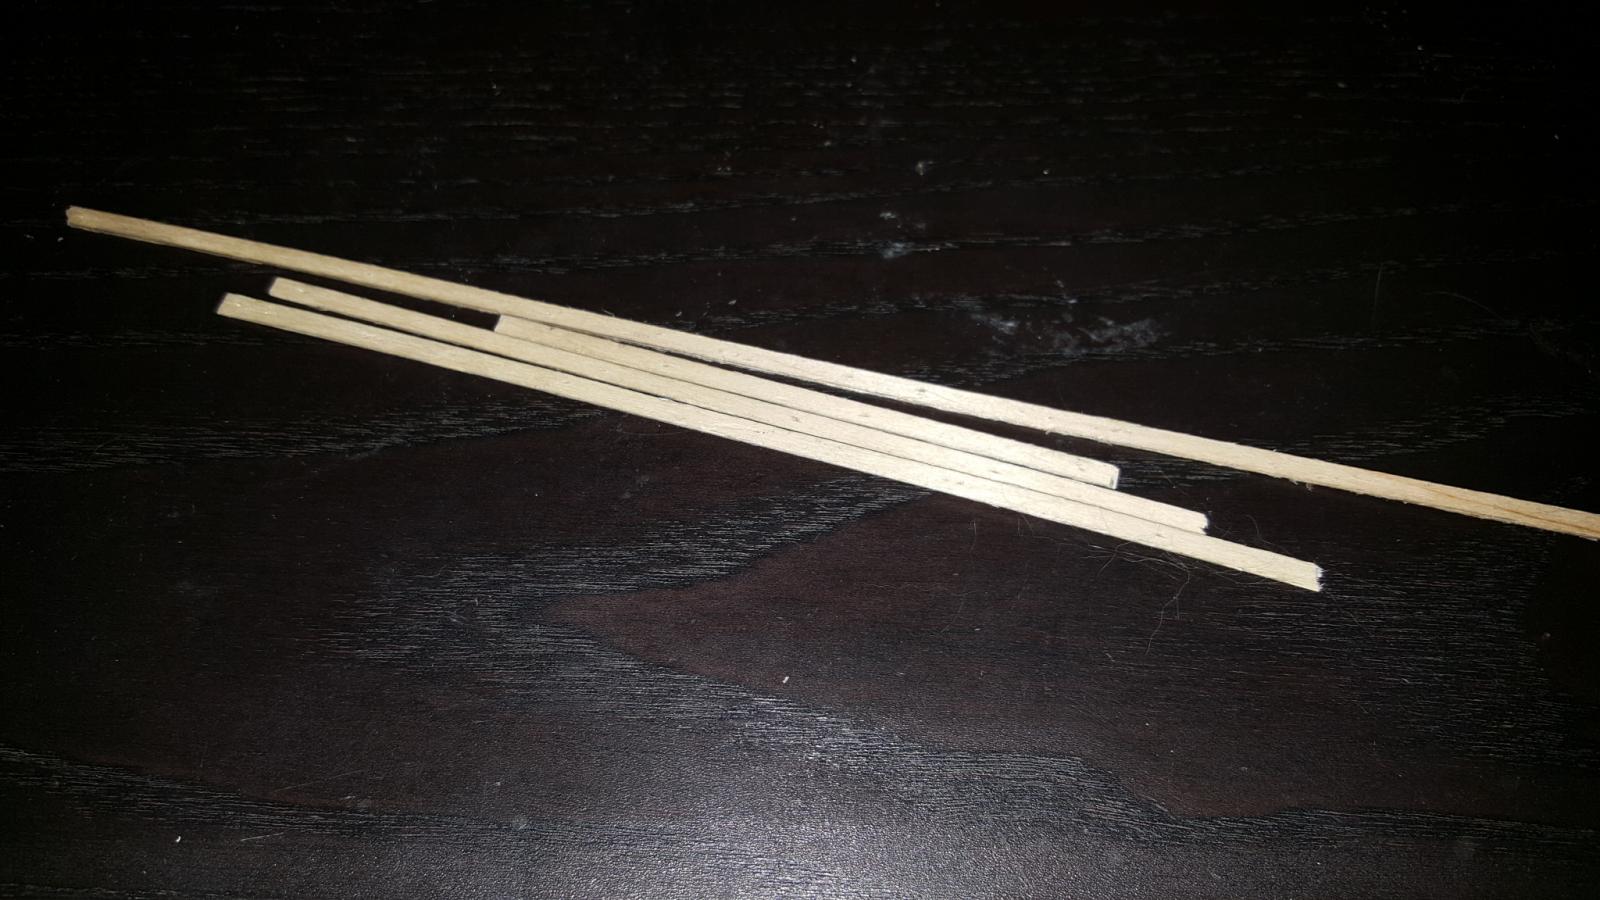
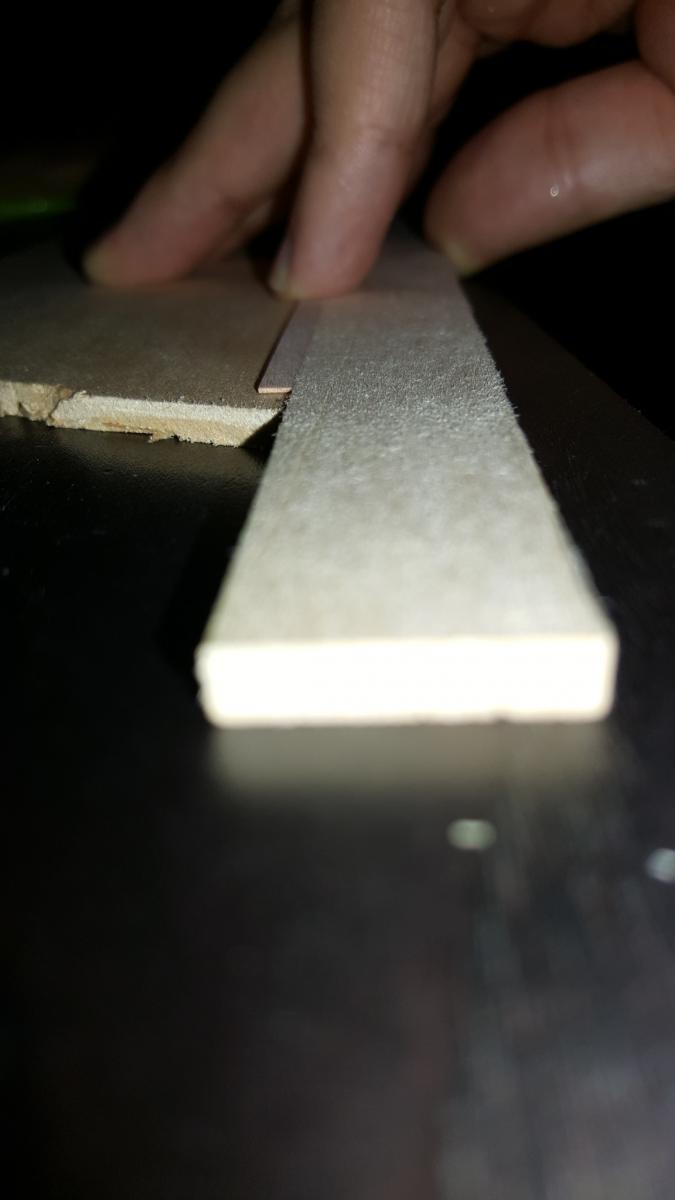
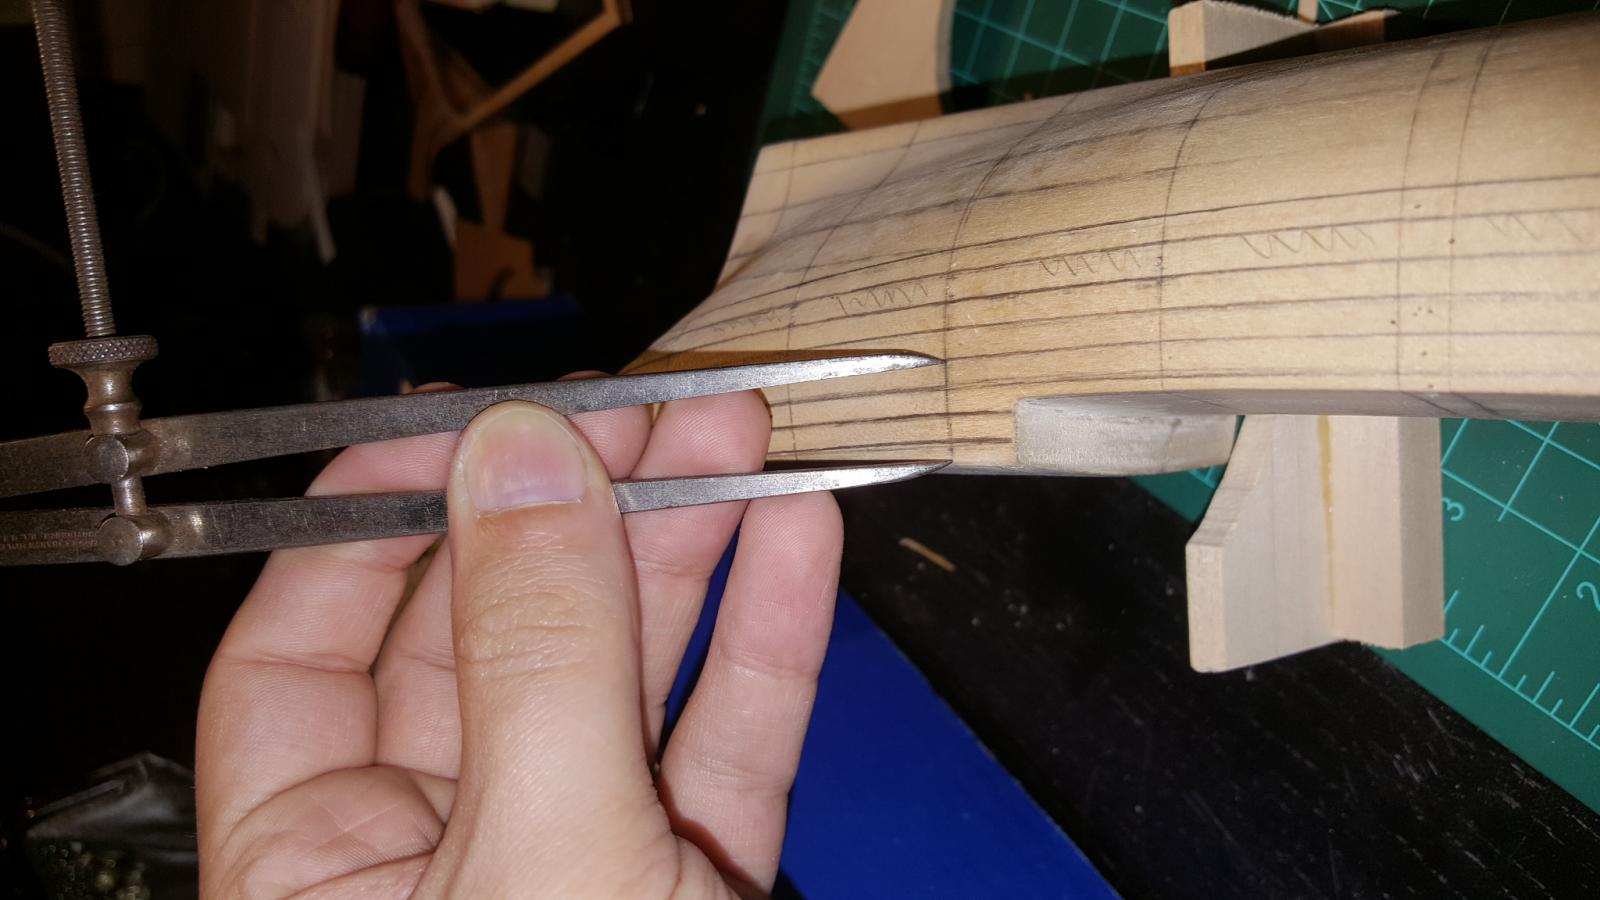
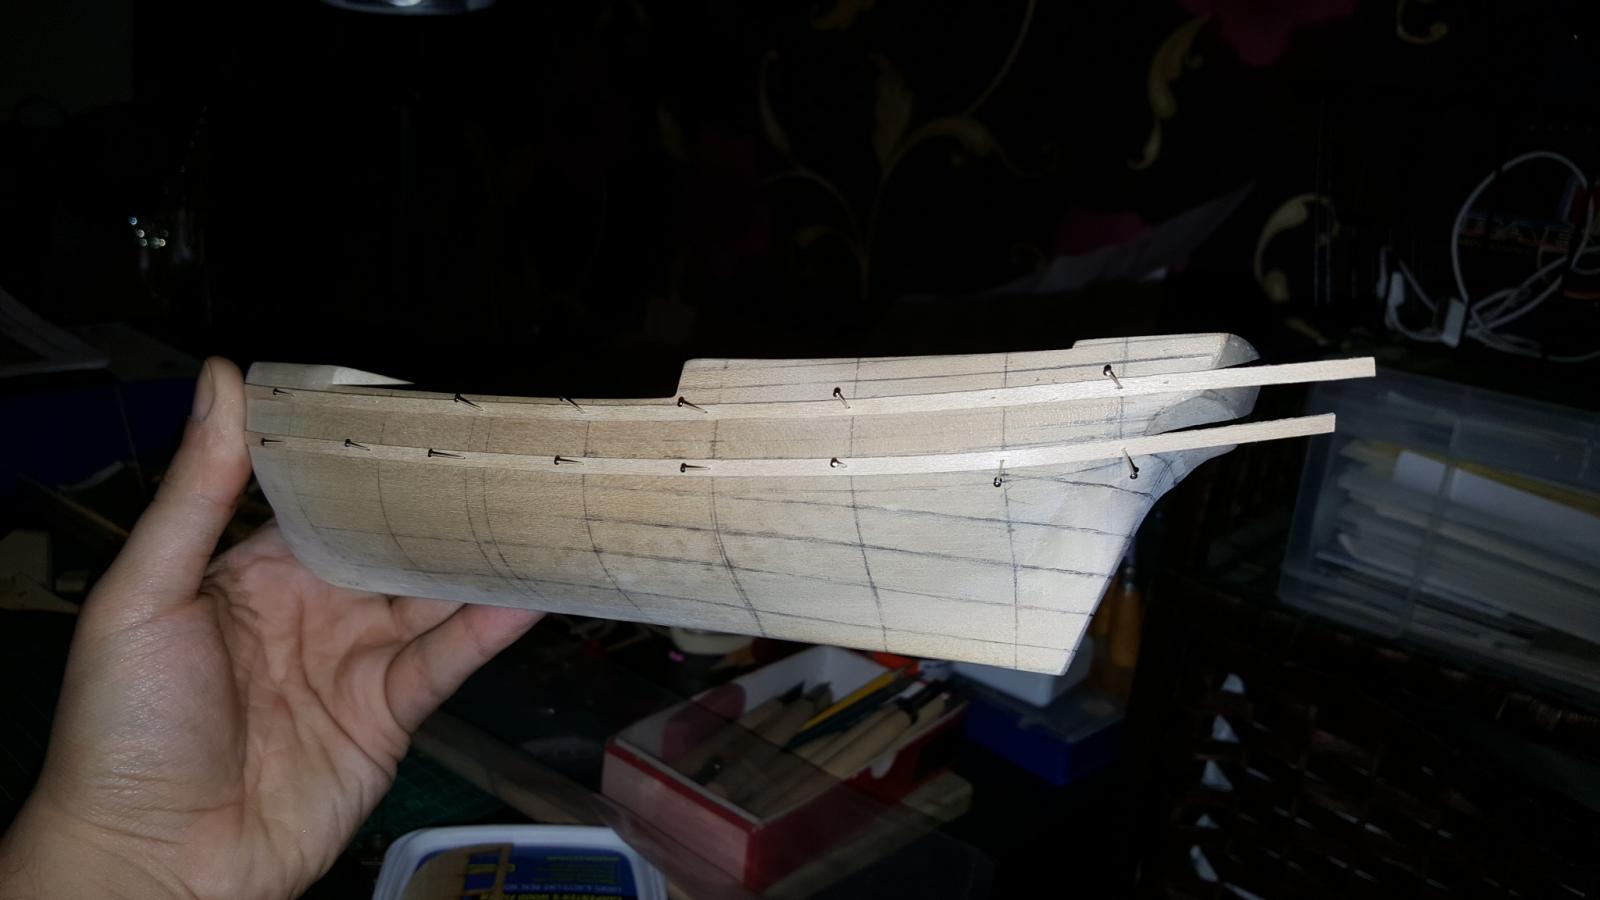
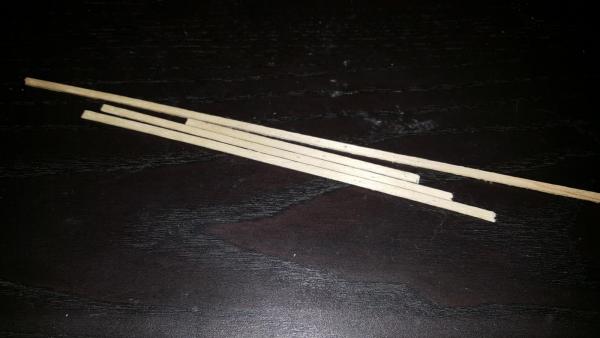
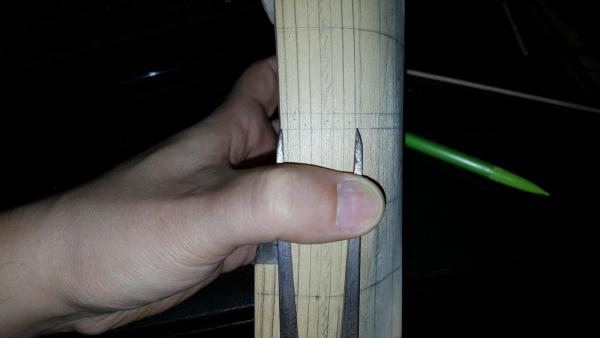
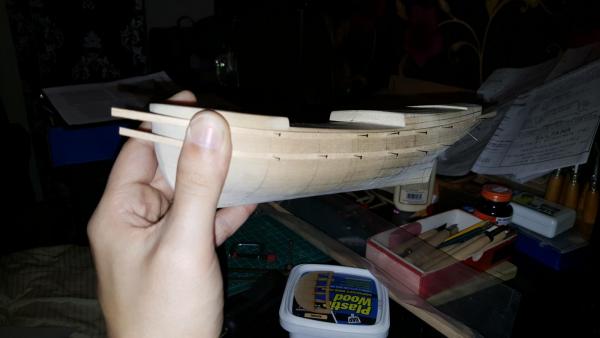
Having lots of little scrap planks is very helpful. A. they get into the small spaces (the model is only 9-10" long) and b. lining them up together you want to make sure the spacing stays consistent for the planks.

-
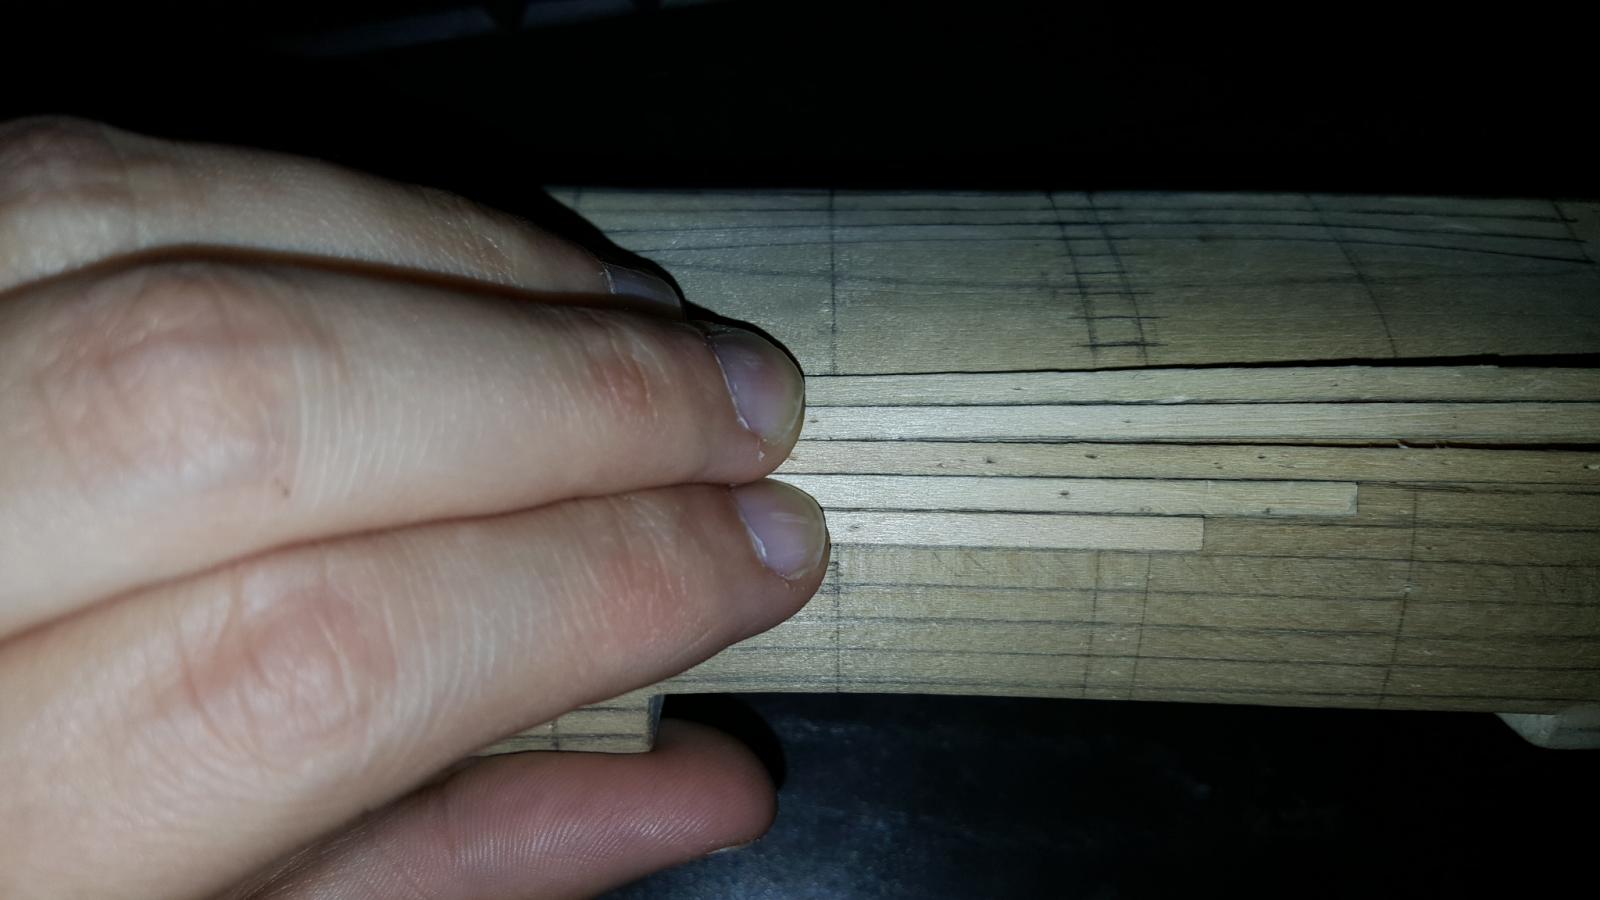
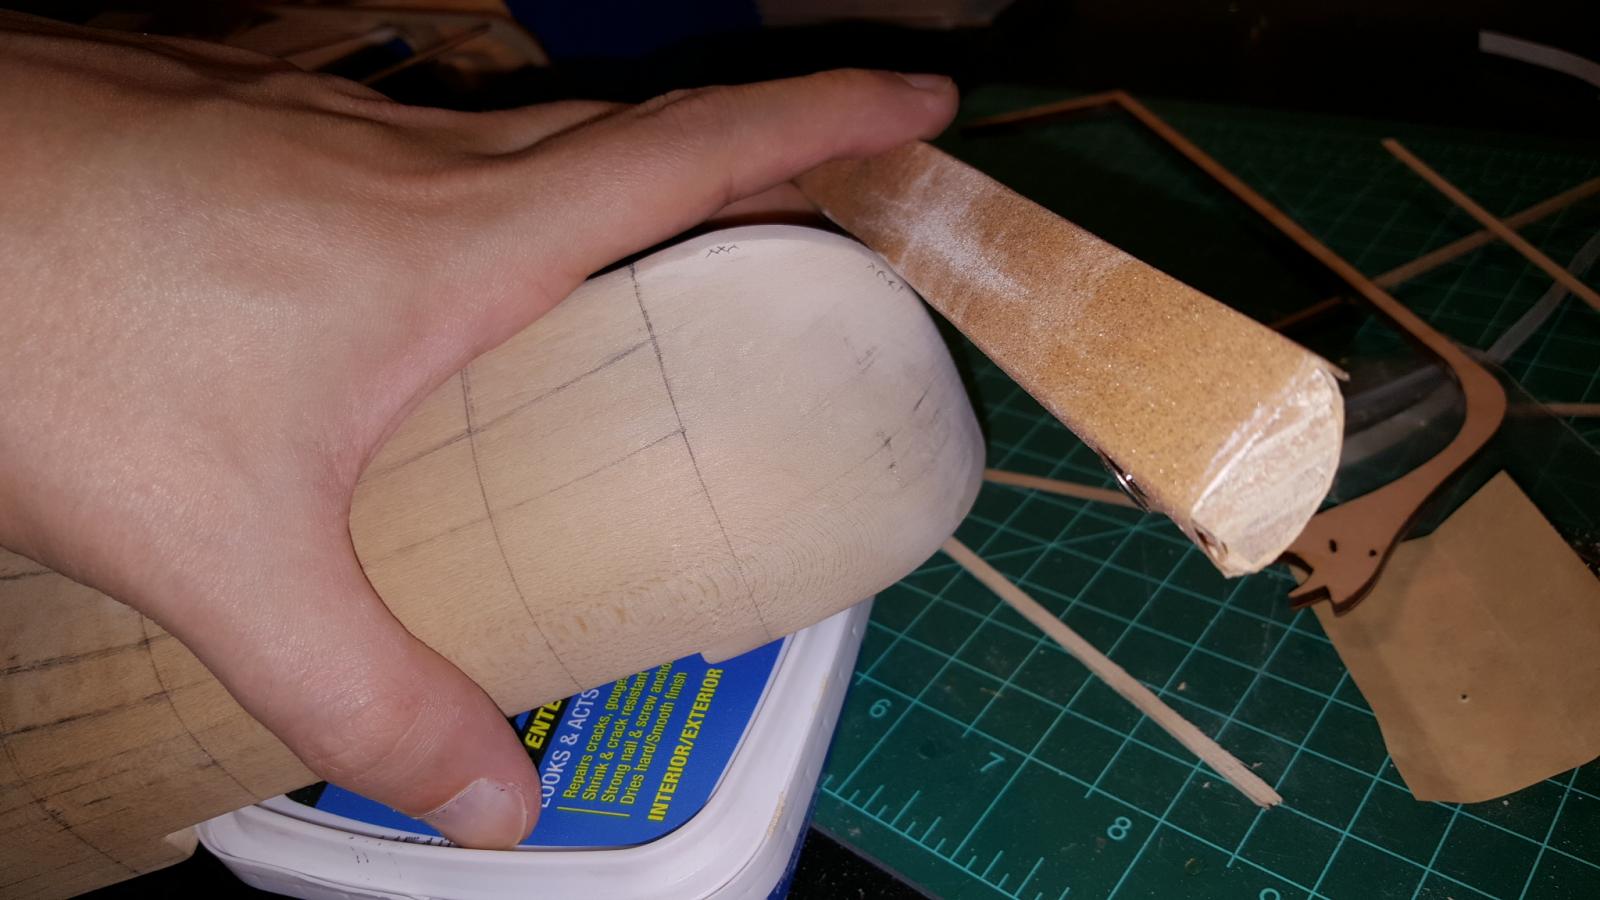
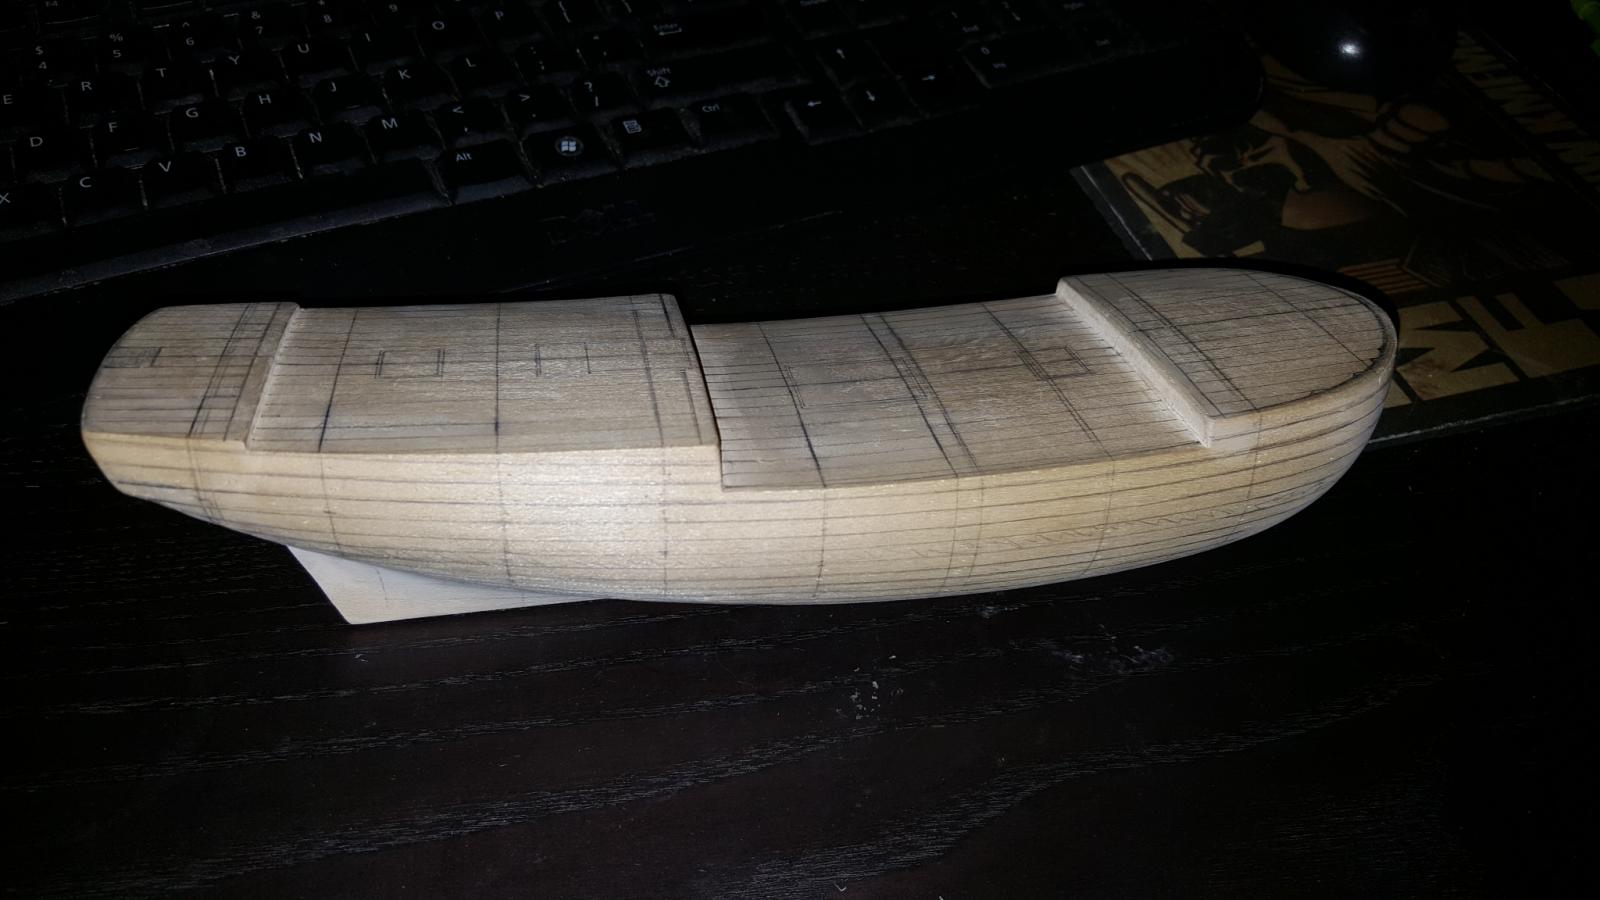
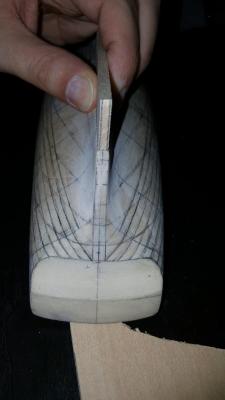
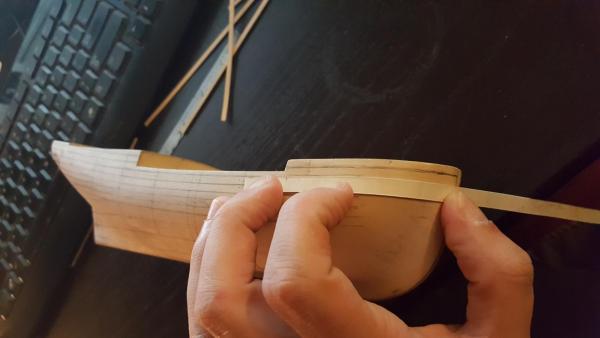
For now I've stopped here since I need to thin the keel deadwood areas. The keel will not be planked and is 4 mm thick. The veneer is 3/128" per plank so that's about .6mm off on each side. So using a 4 mm plank of wood I drew more or less the area thickness which should be left after sanding and will whittle down the edges until they fit. When the keel is added to the hull the veneer planks will flow smoothly right into it.


-
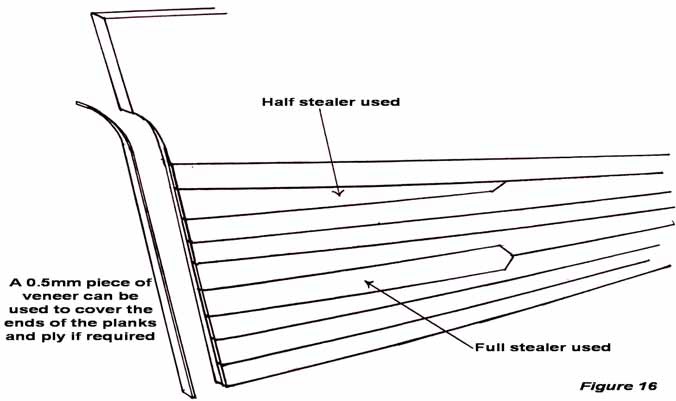
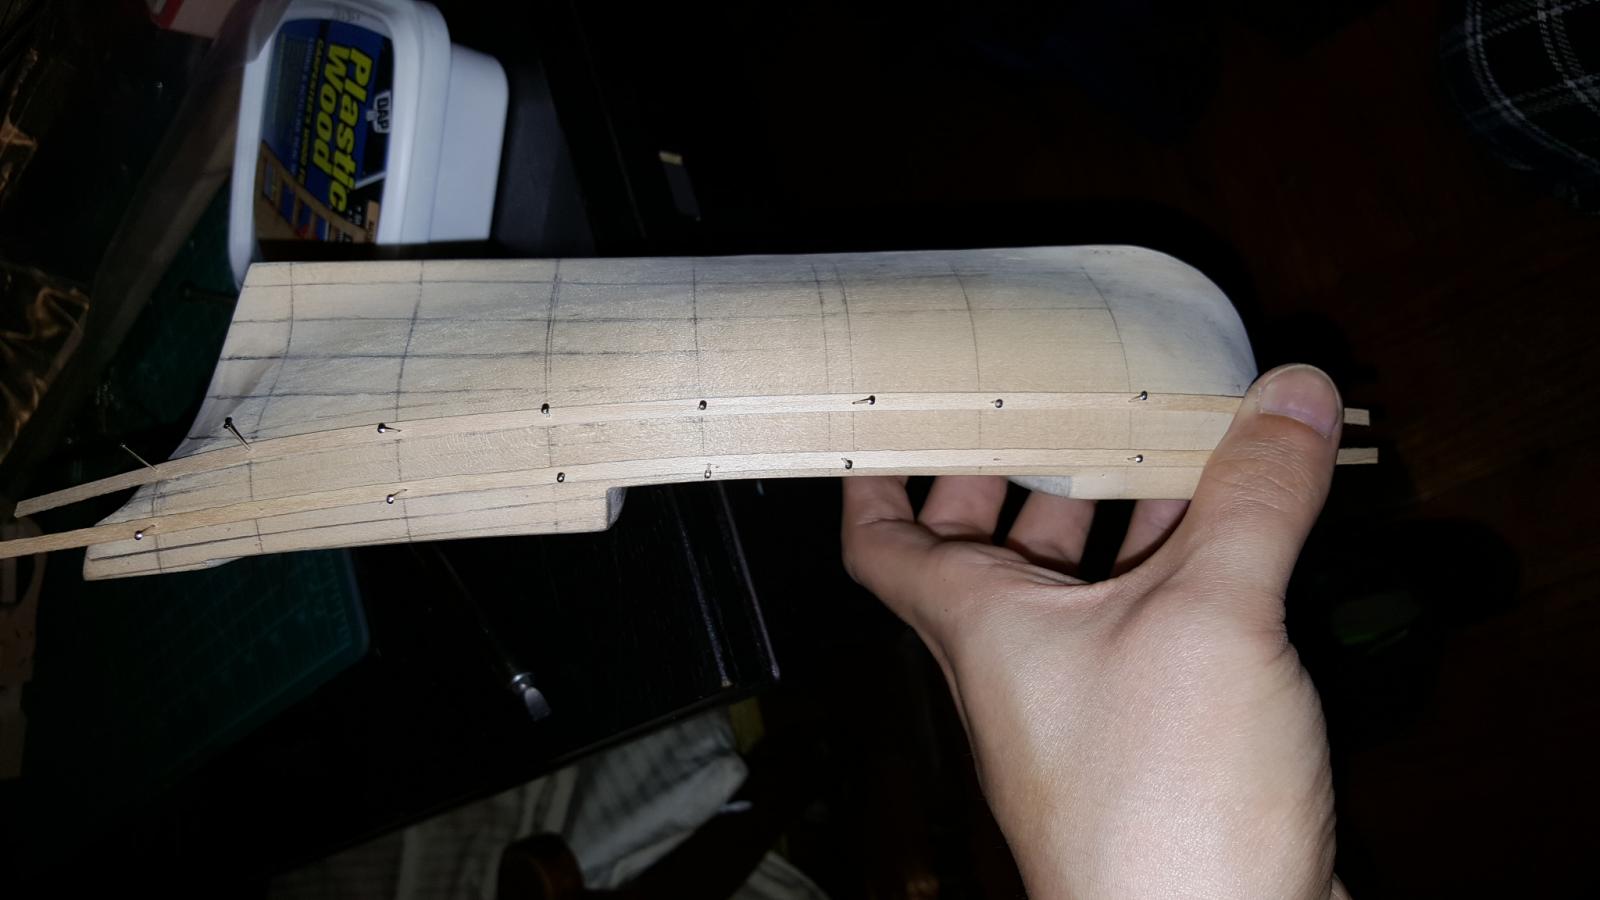
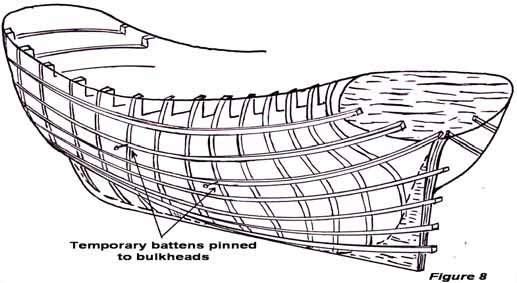
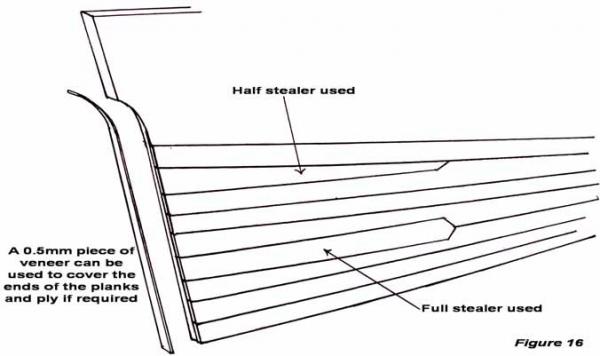
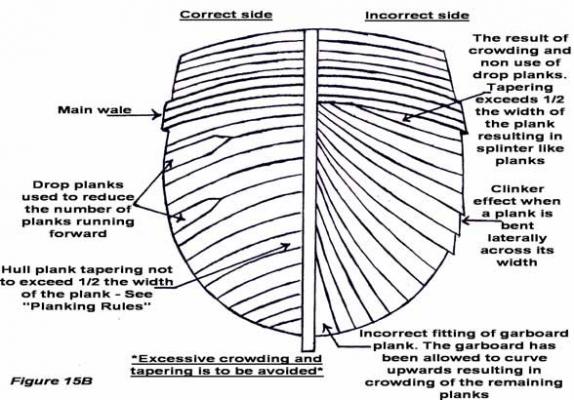
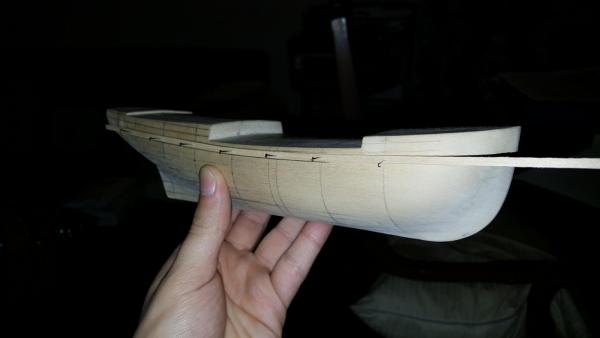
The last part is the lower part of the hull which can be tricky and may require a few drop planks and steelers. Using imagery from the how to plank tutorial pdf one can get a sense of how to use battens to maintain the right curvature down to the keel. So with Sultana when I am all done it should look something as so.
-
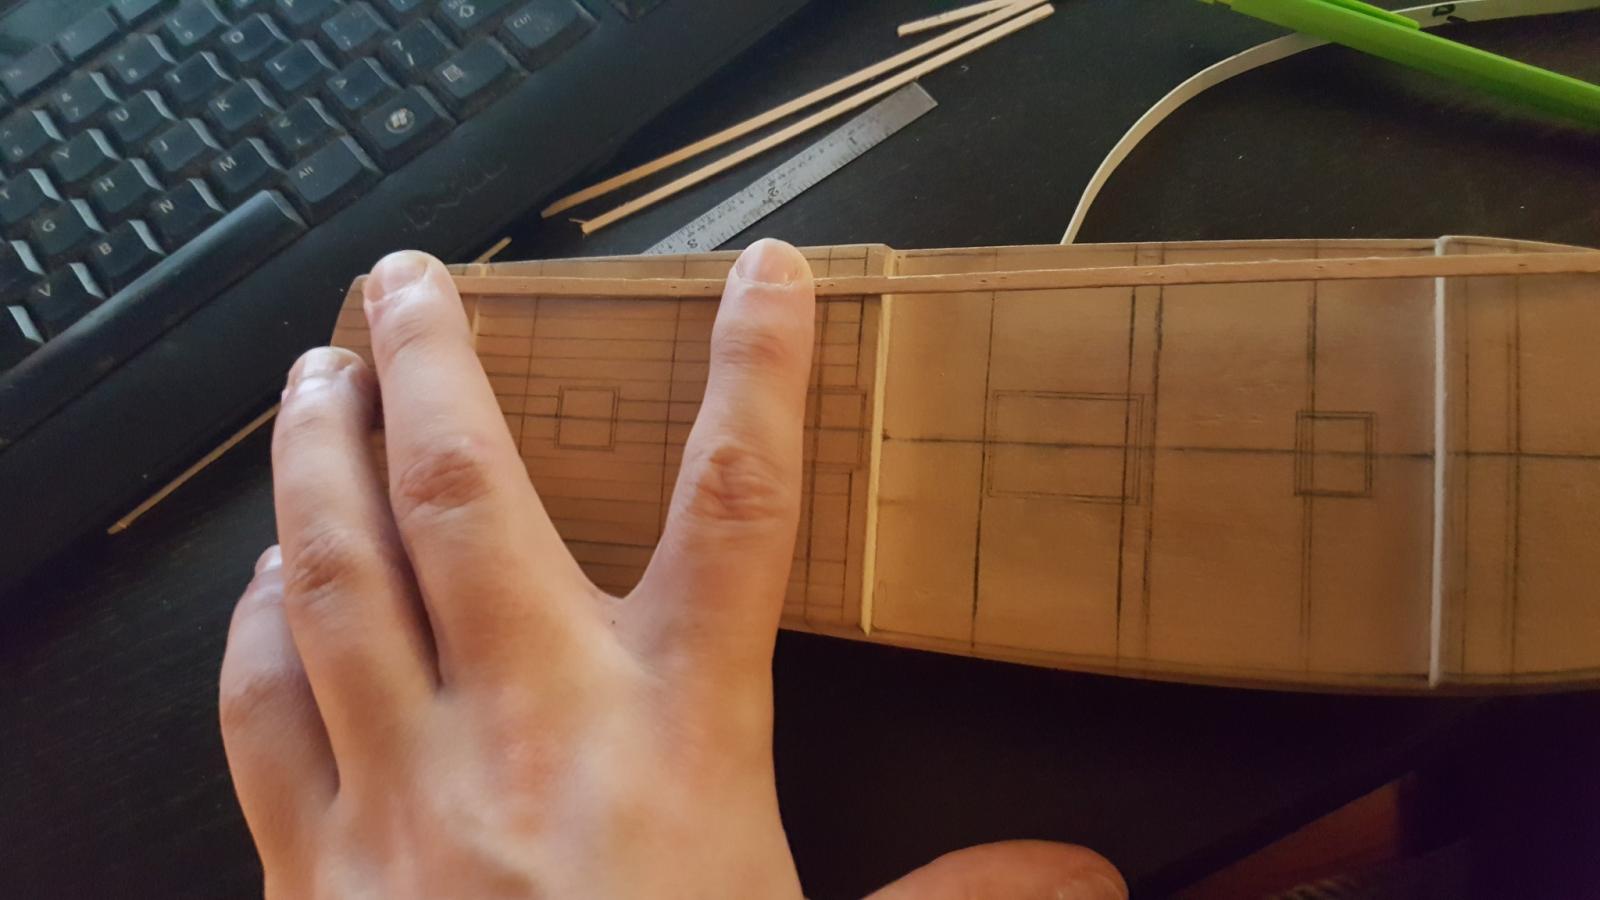
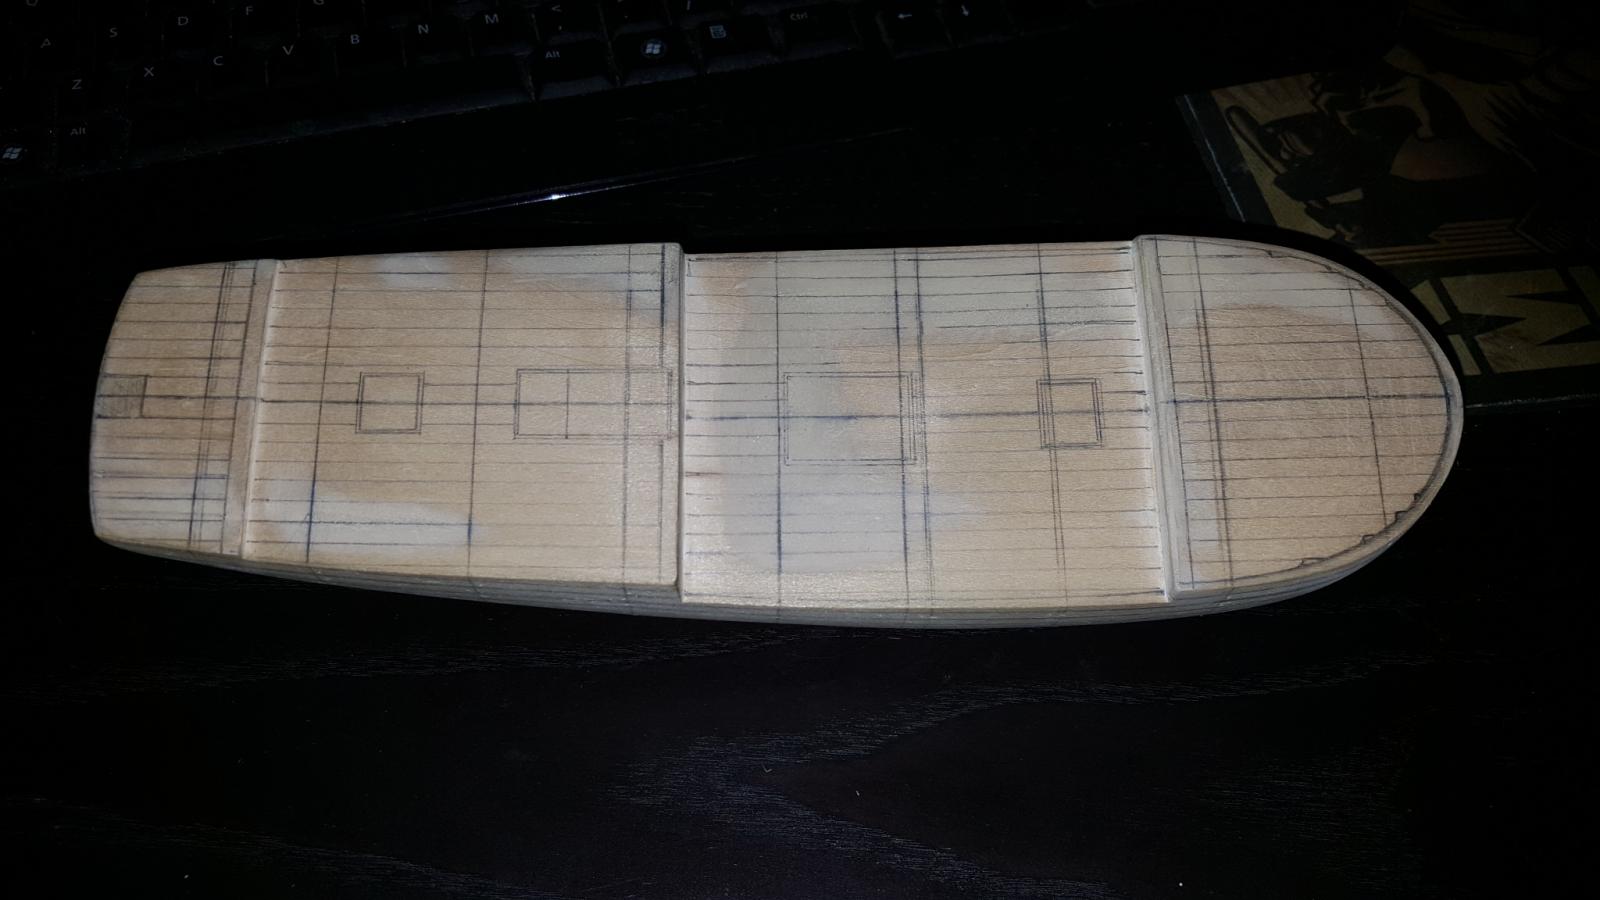
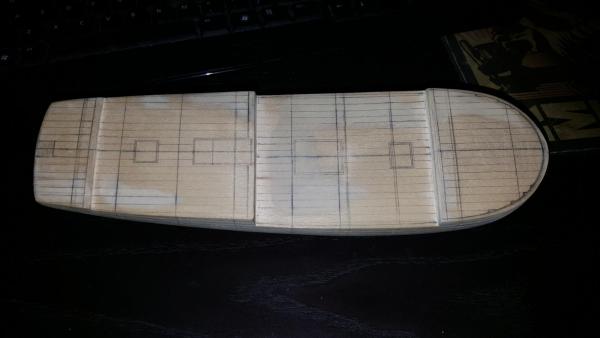
I also did the upper deck planks as well.

-
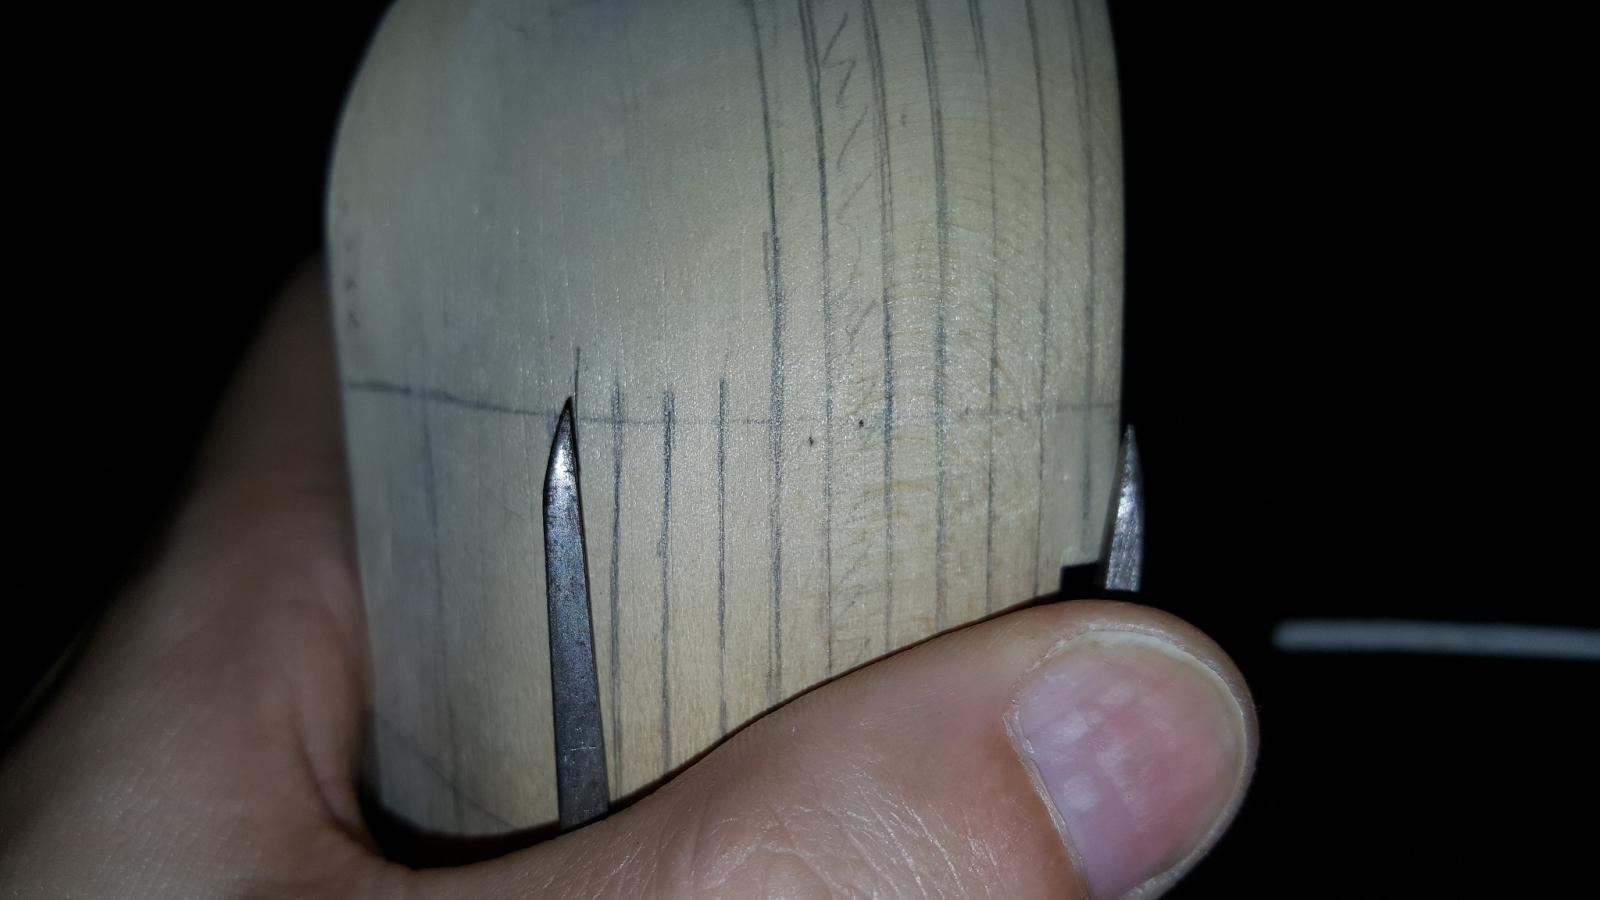
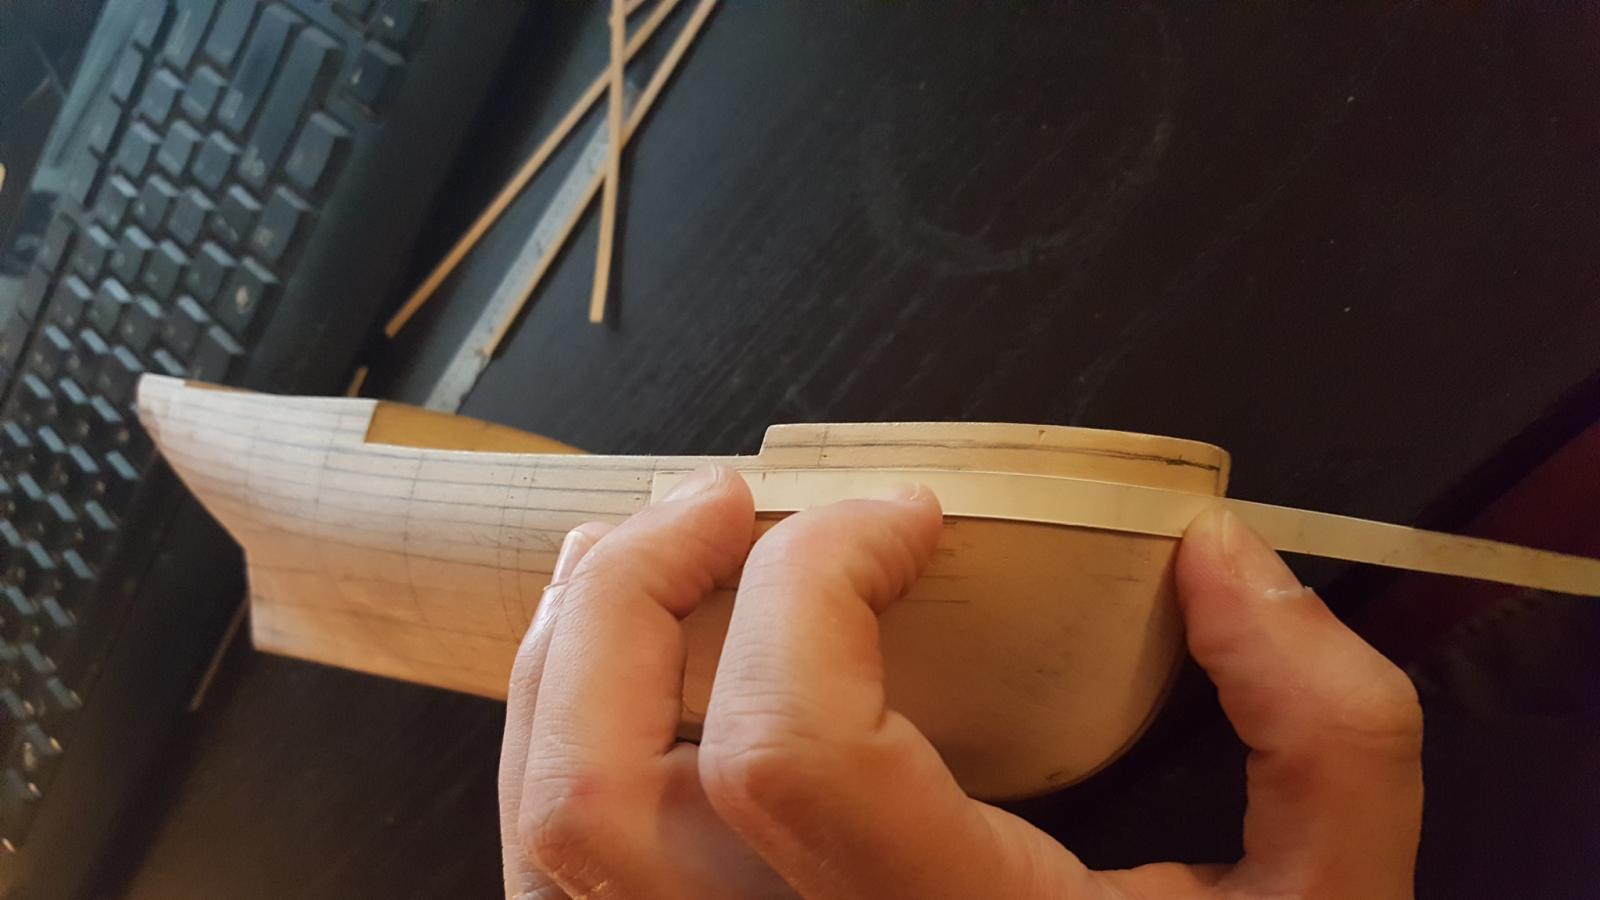
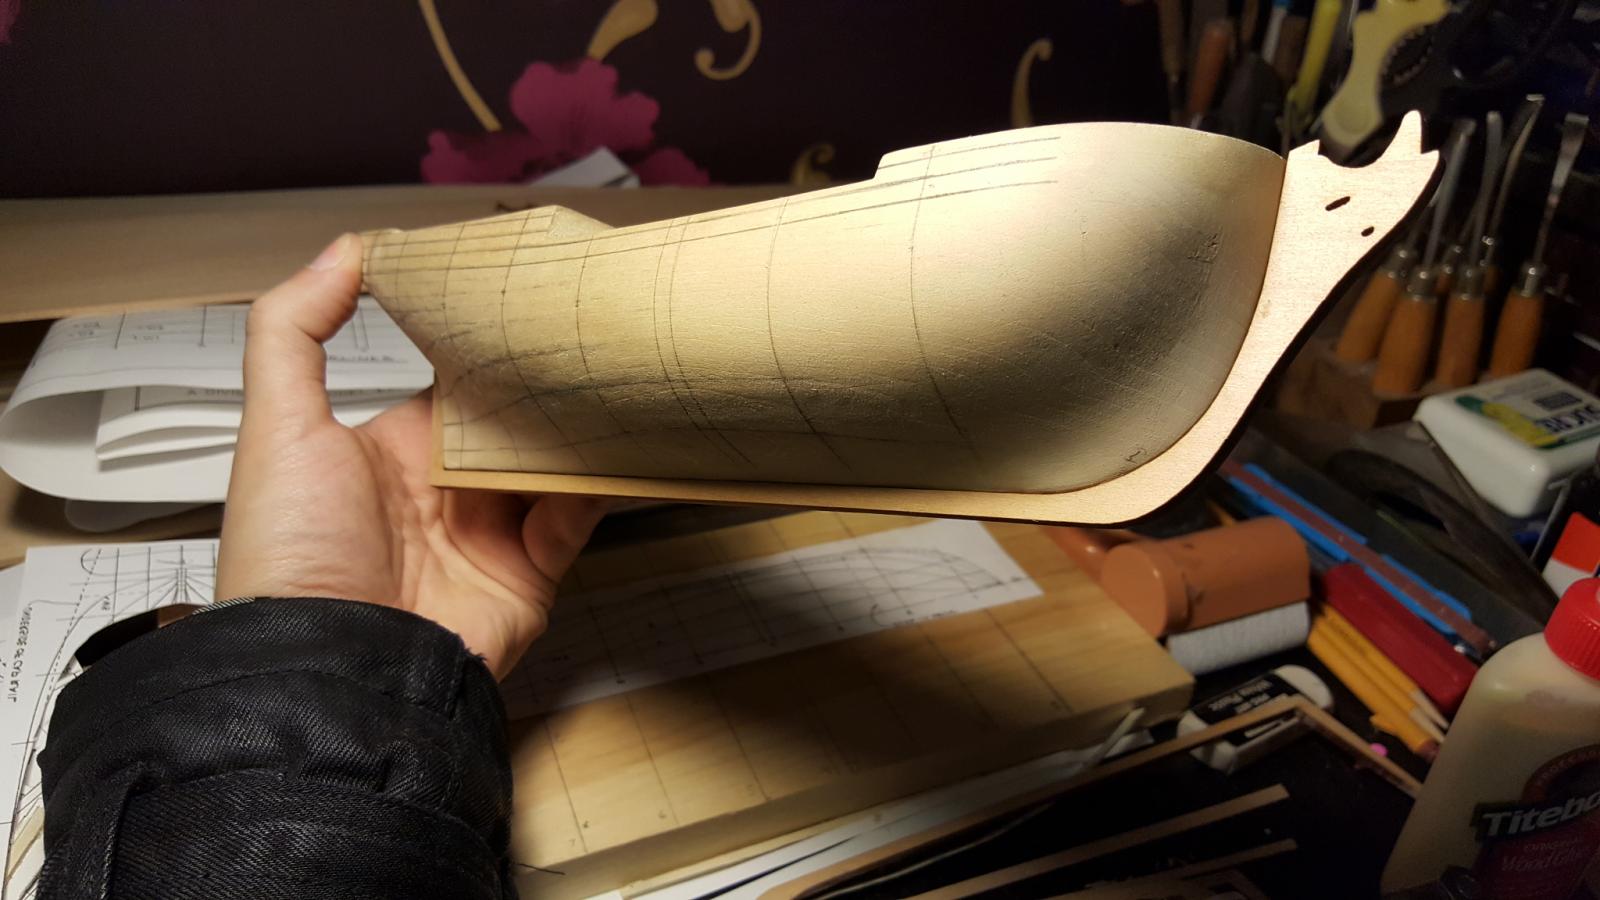
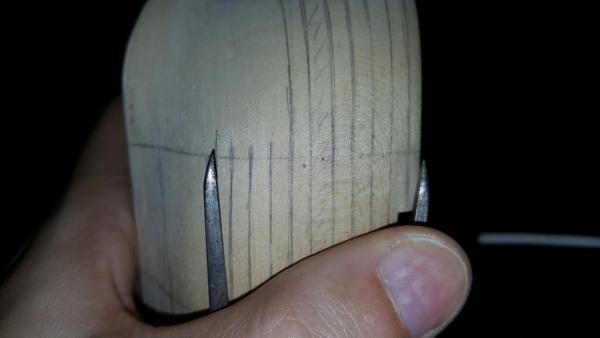
Then making sure the lines are relatively symmetrical on both sides


-
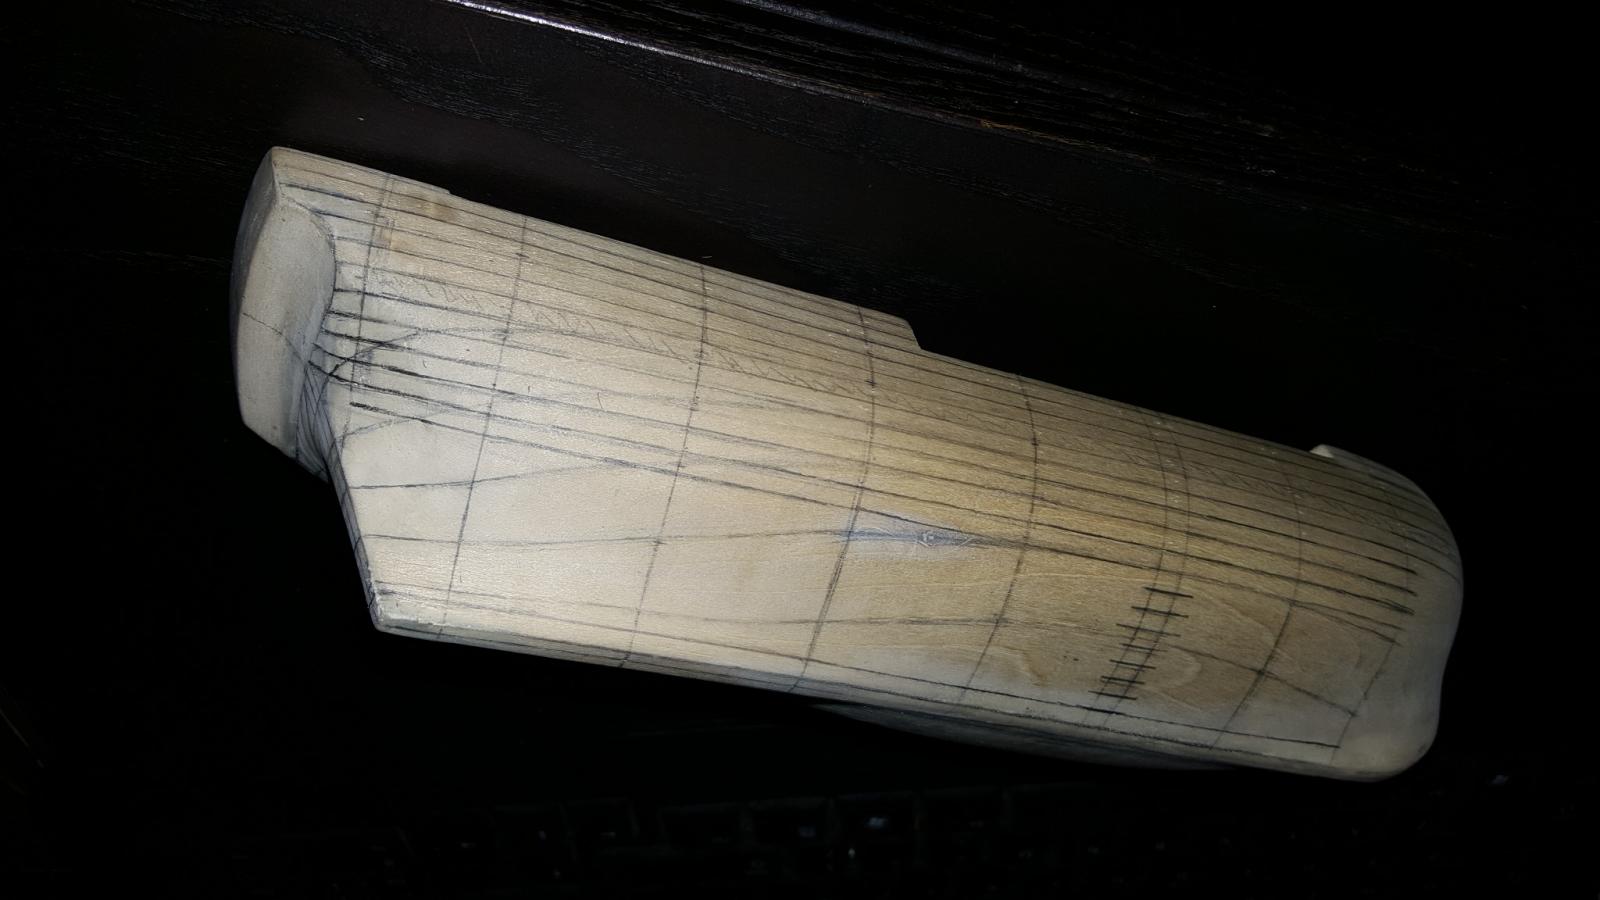
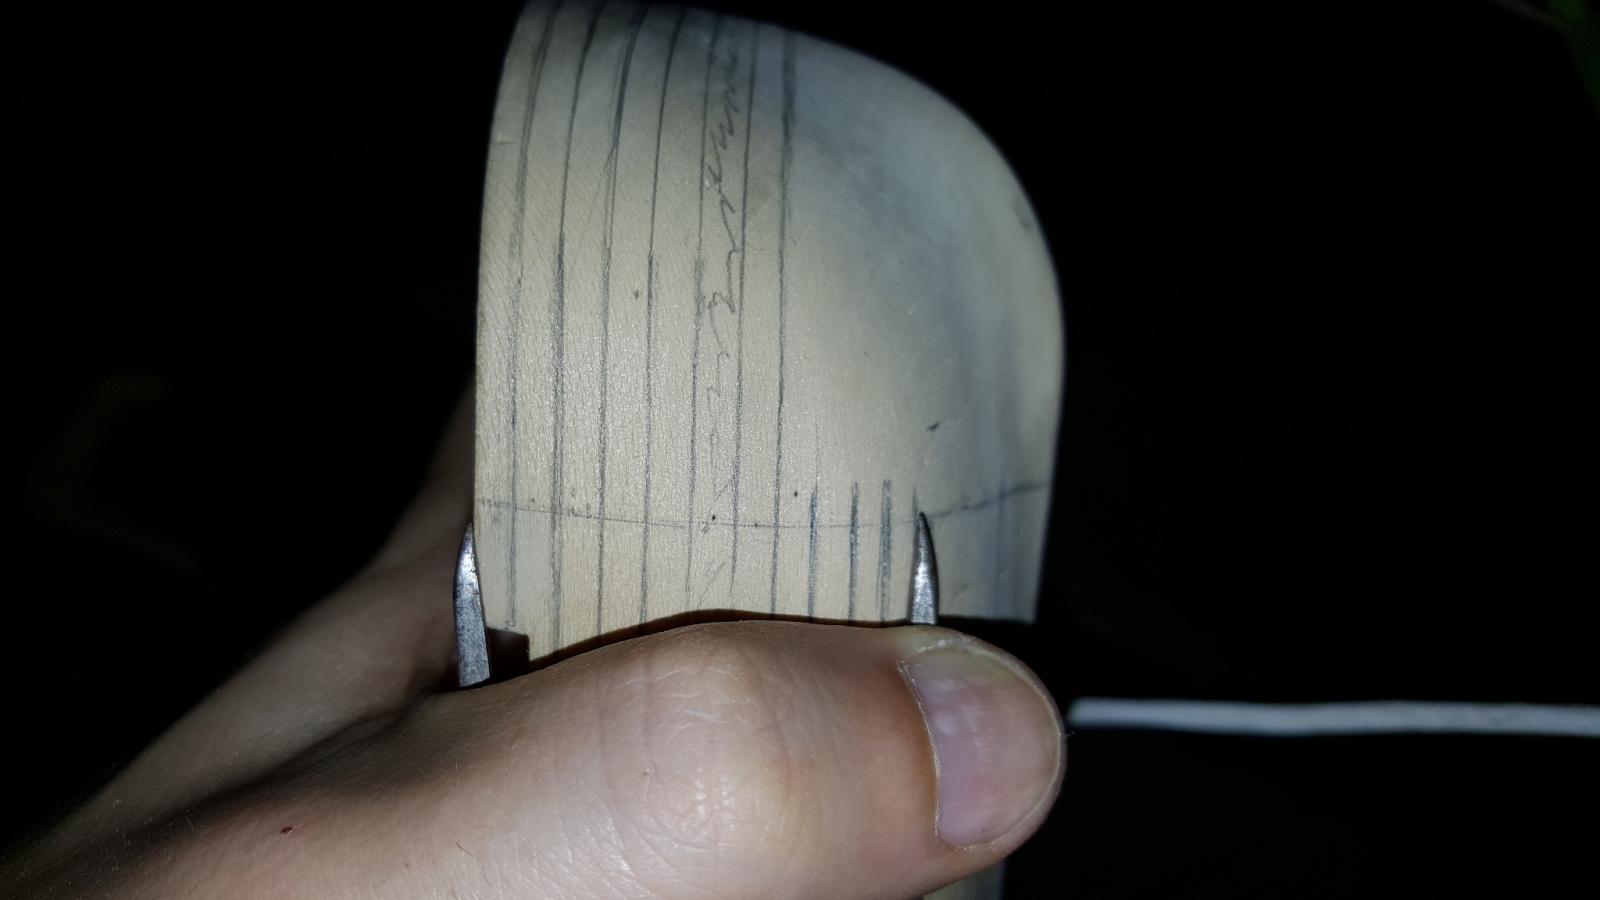
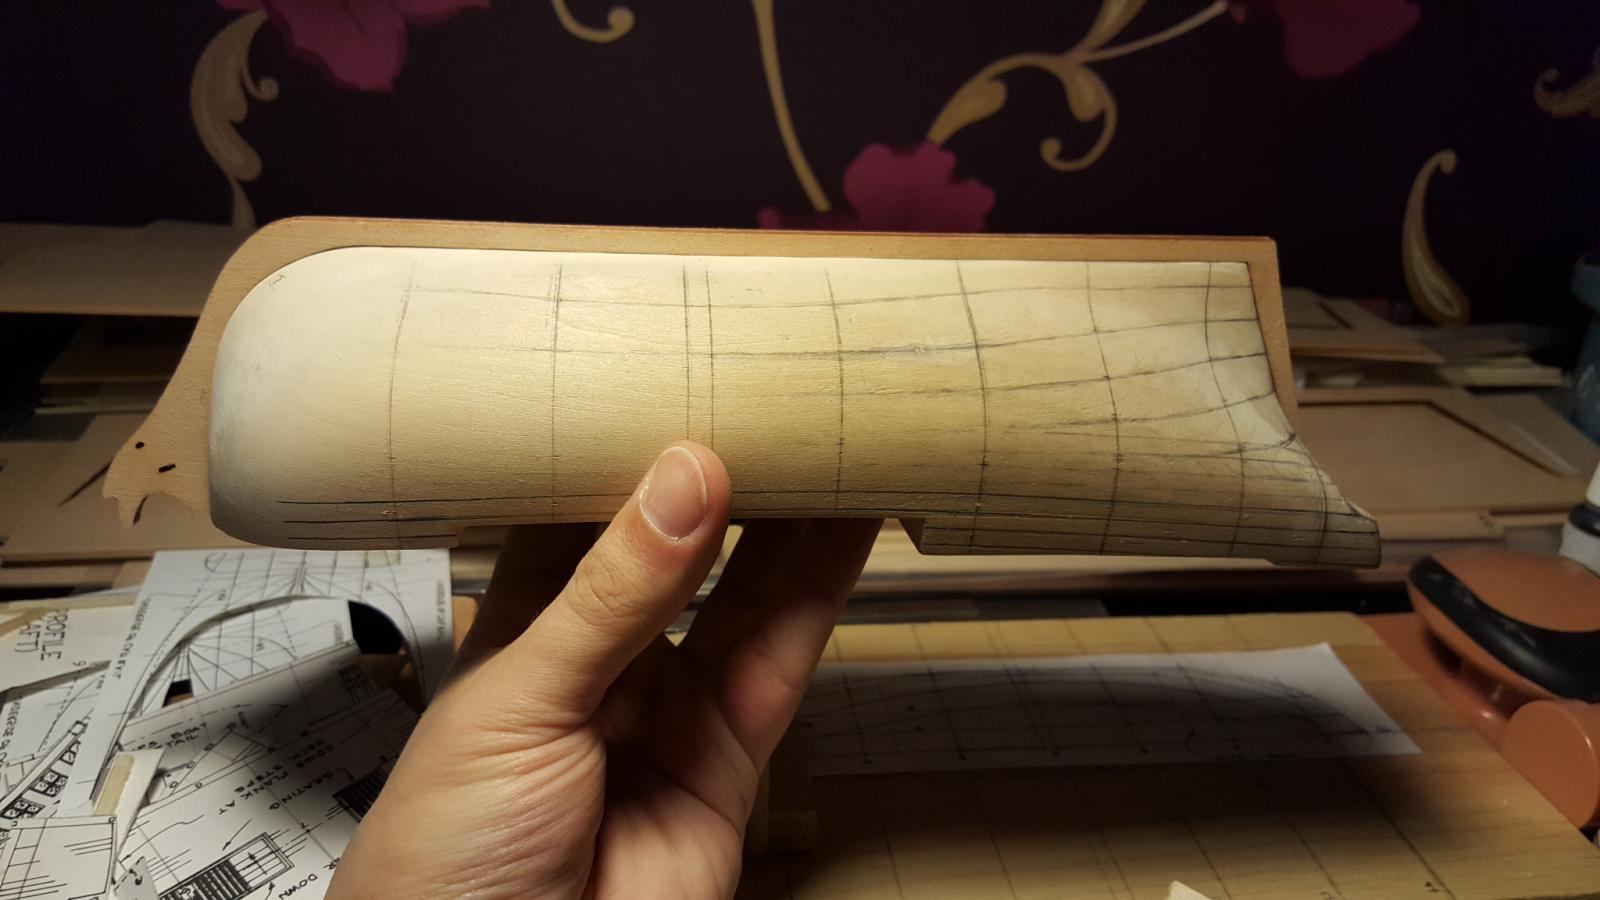
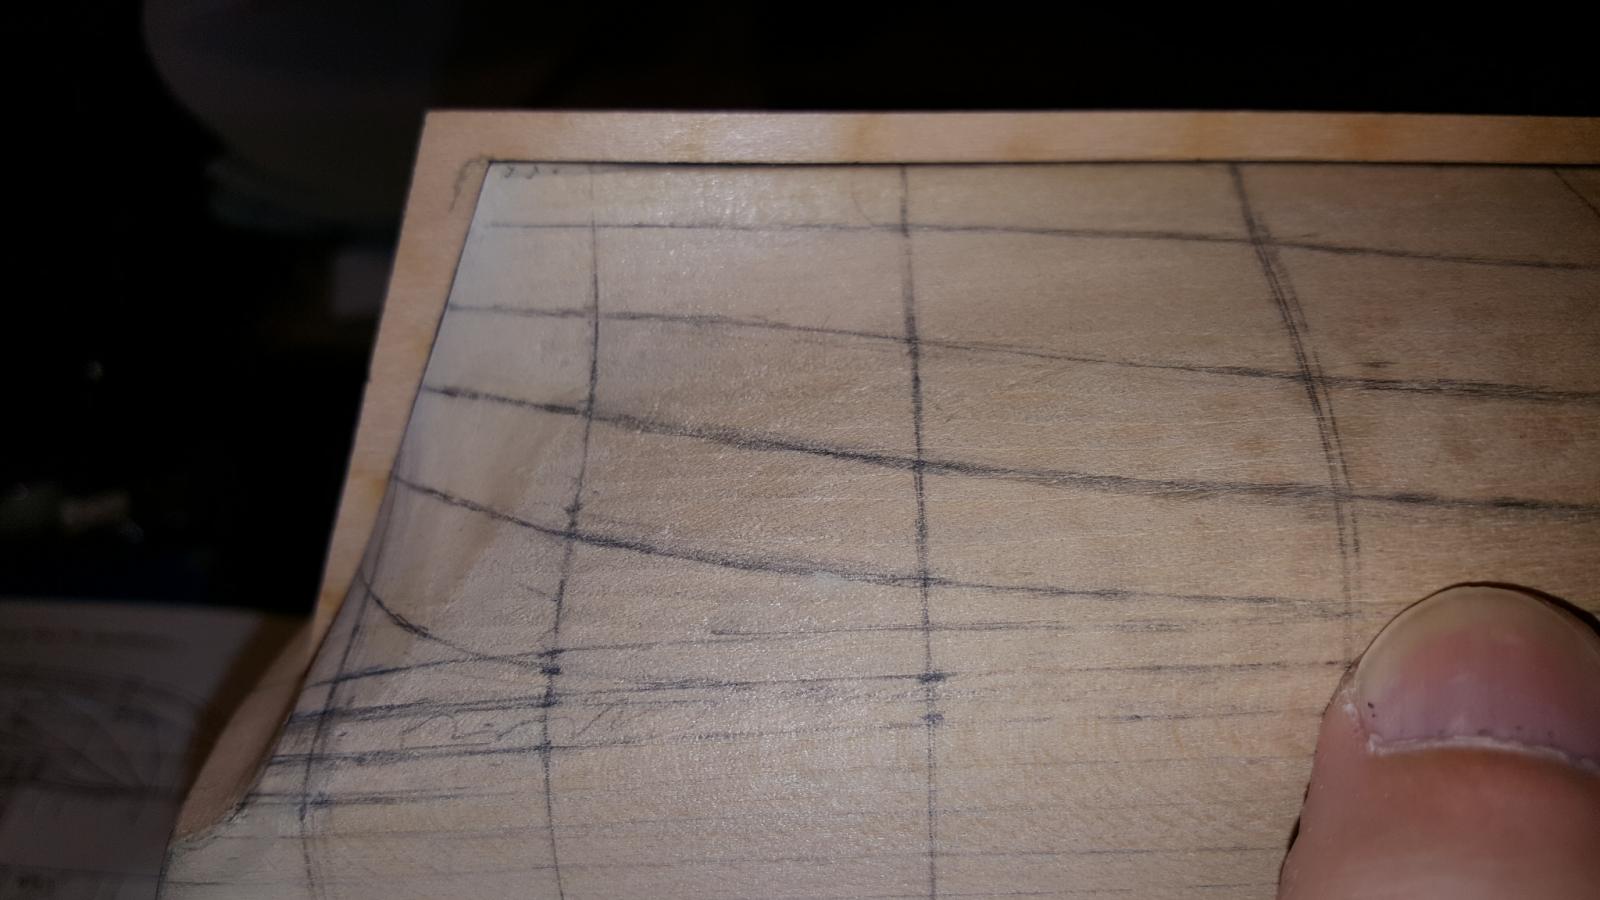
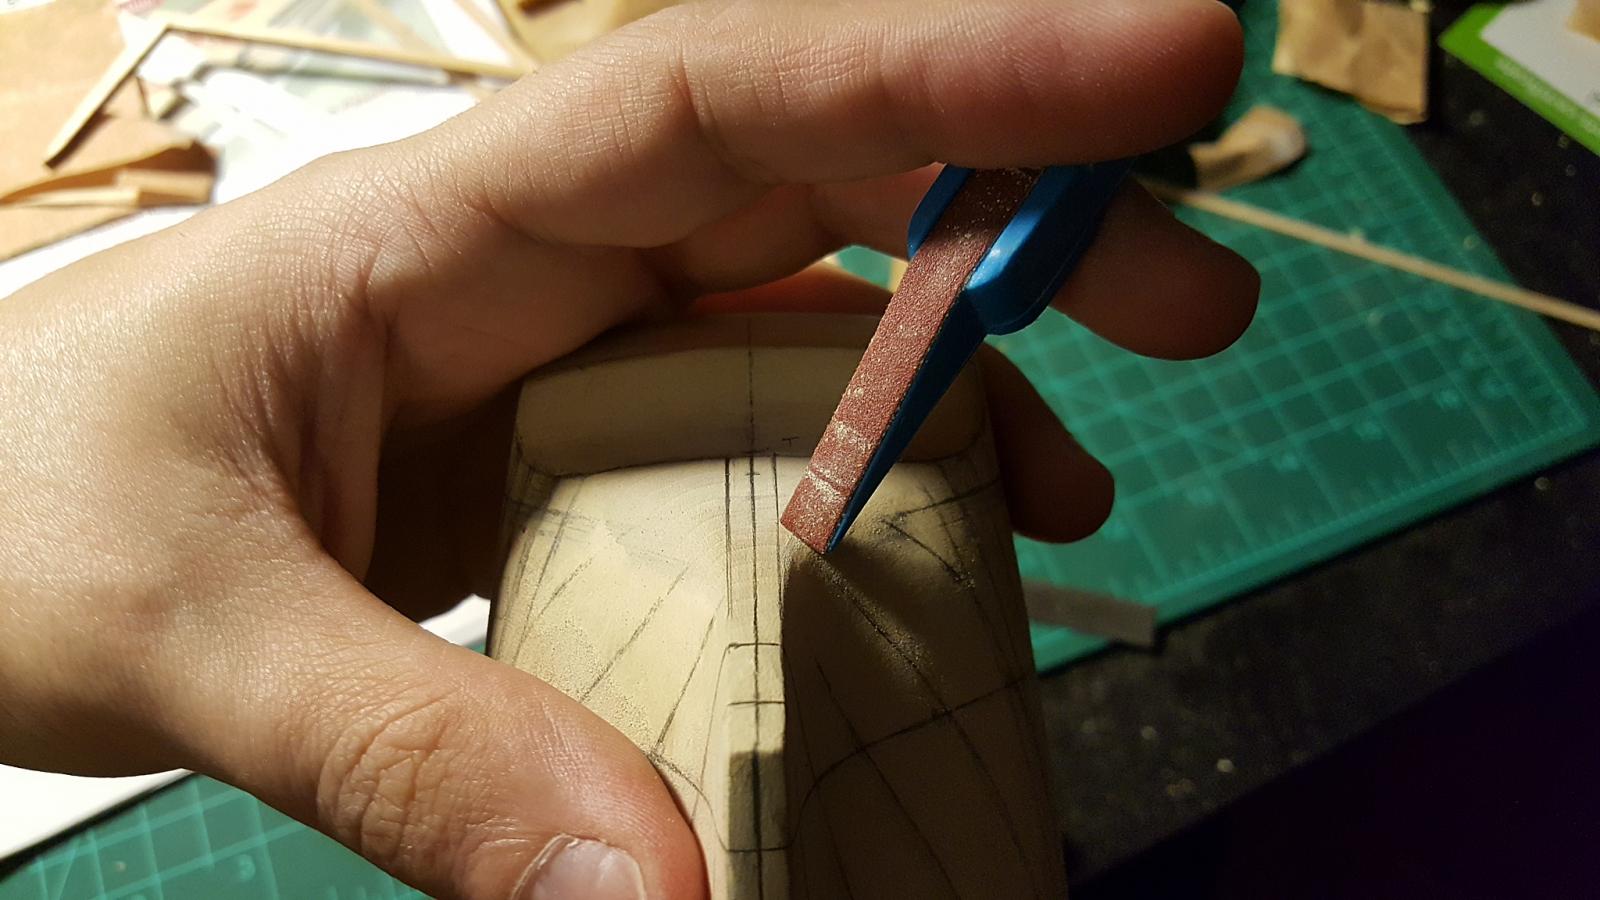
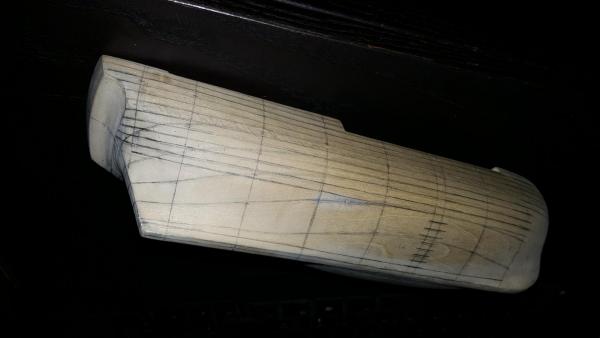
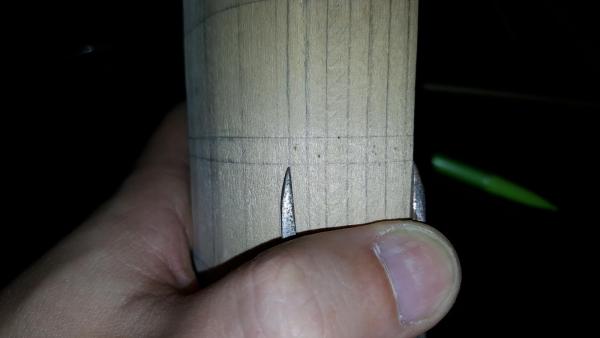
So plank line drawing for me has been happening in 3 stages and is still not 100% finished. First you have the upper bulwarks lengthwise which I drew the lines using scrap planks and small nails to maintain the curvature I needed. Also for the bow area used a piece of acrylic which is easier to bend without breaking. Finding the right curve is something best done by eye.


-
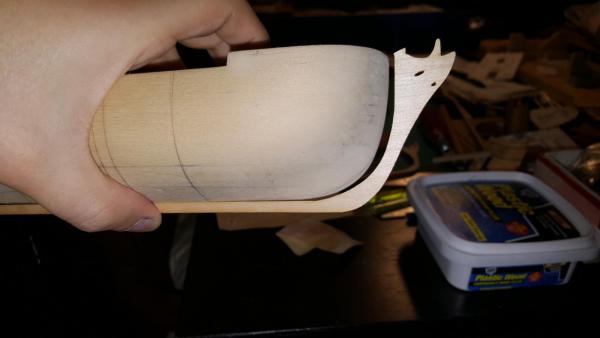
Putting the transom aside for a bit now that the hull is mostly shaped (the deadwood area close to the keel is still too wide), I added all the plank lines which again helps with shaping. This is the benefit of solid hull you can add and erase ad infinitum. My poor eraser has gotten quite a workout lol.
-
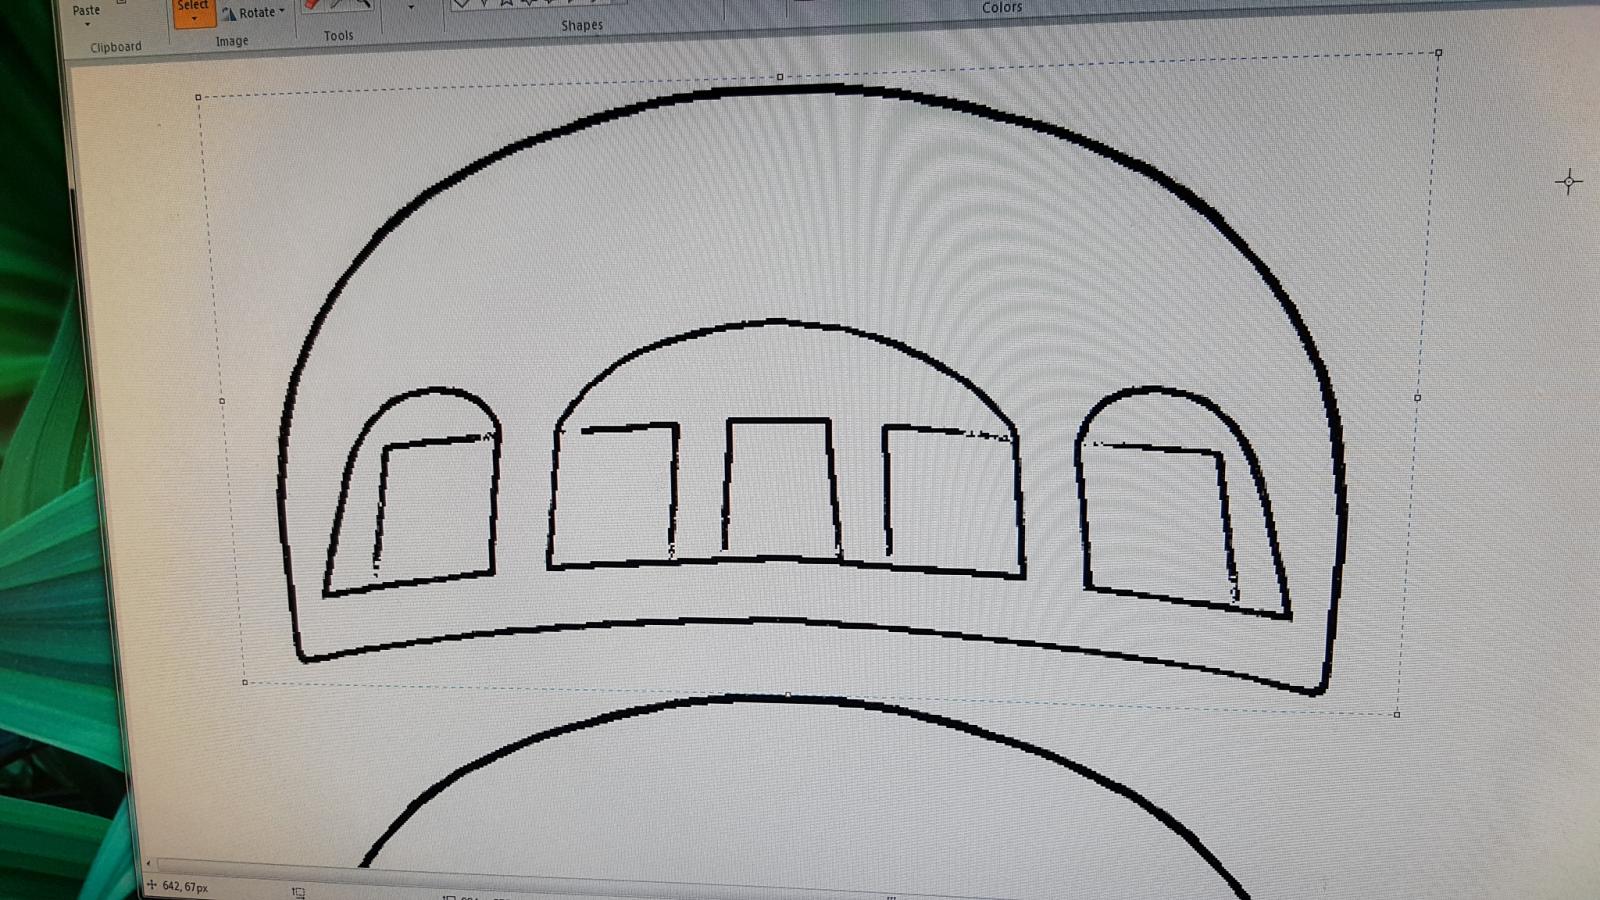
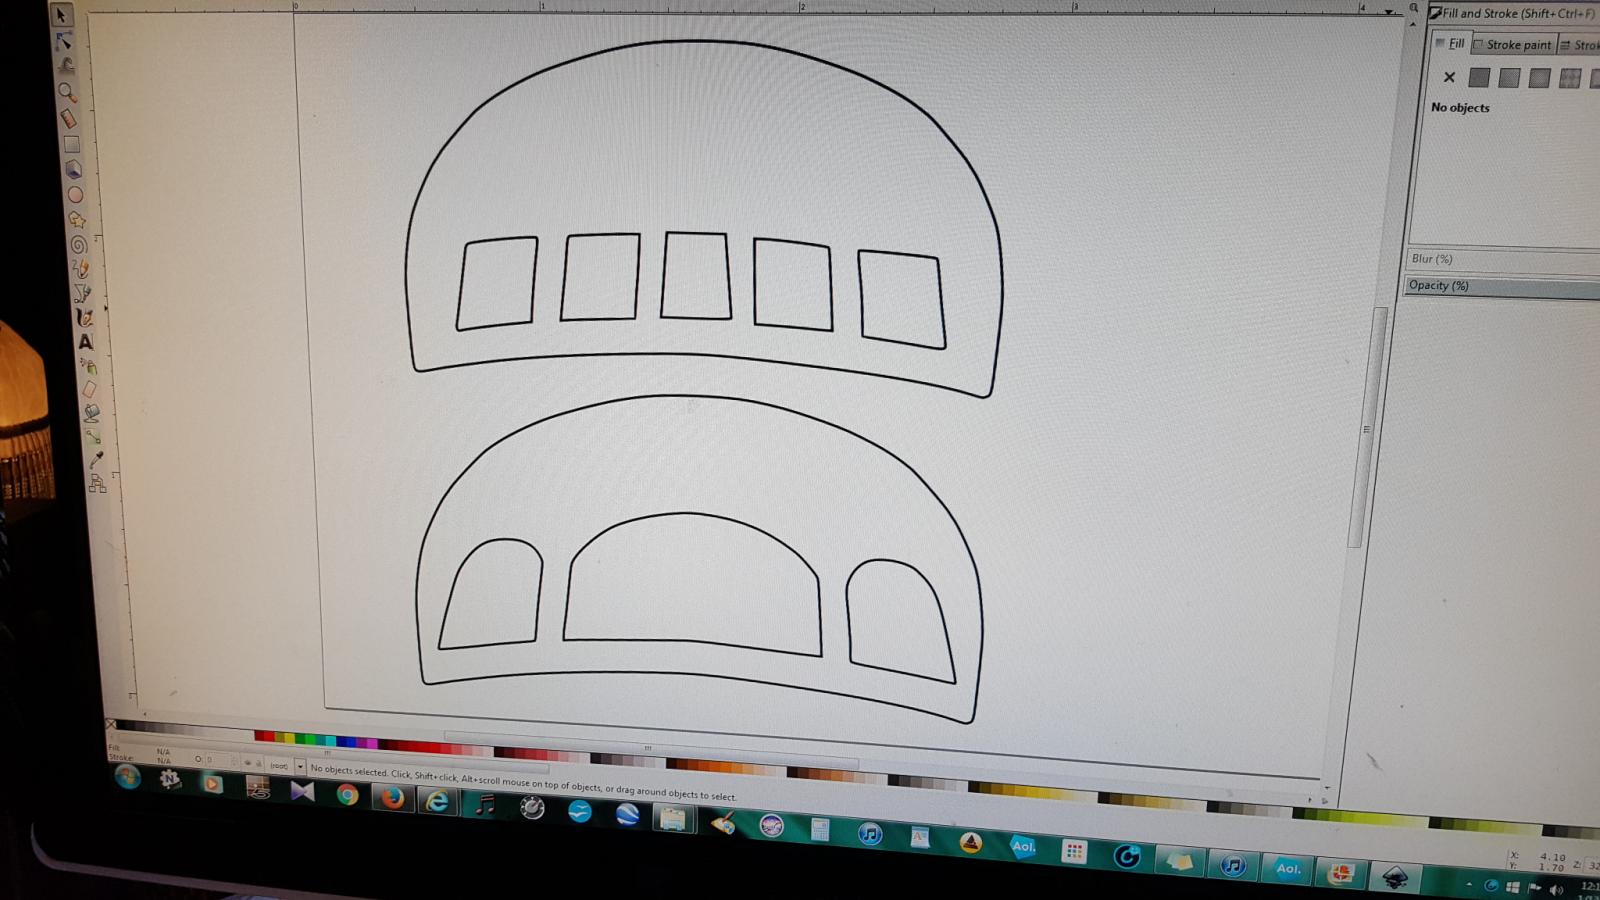
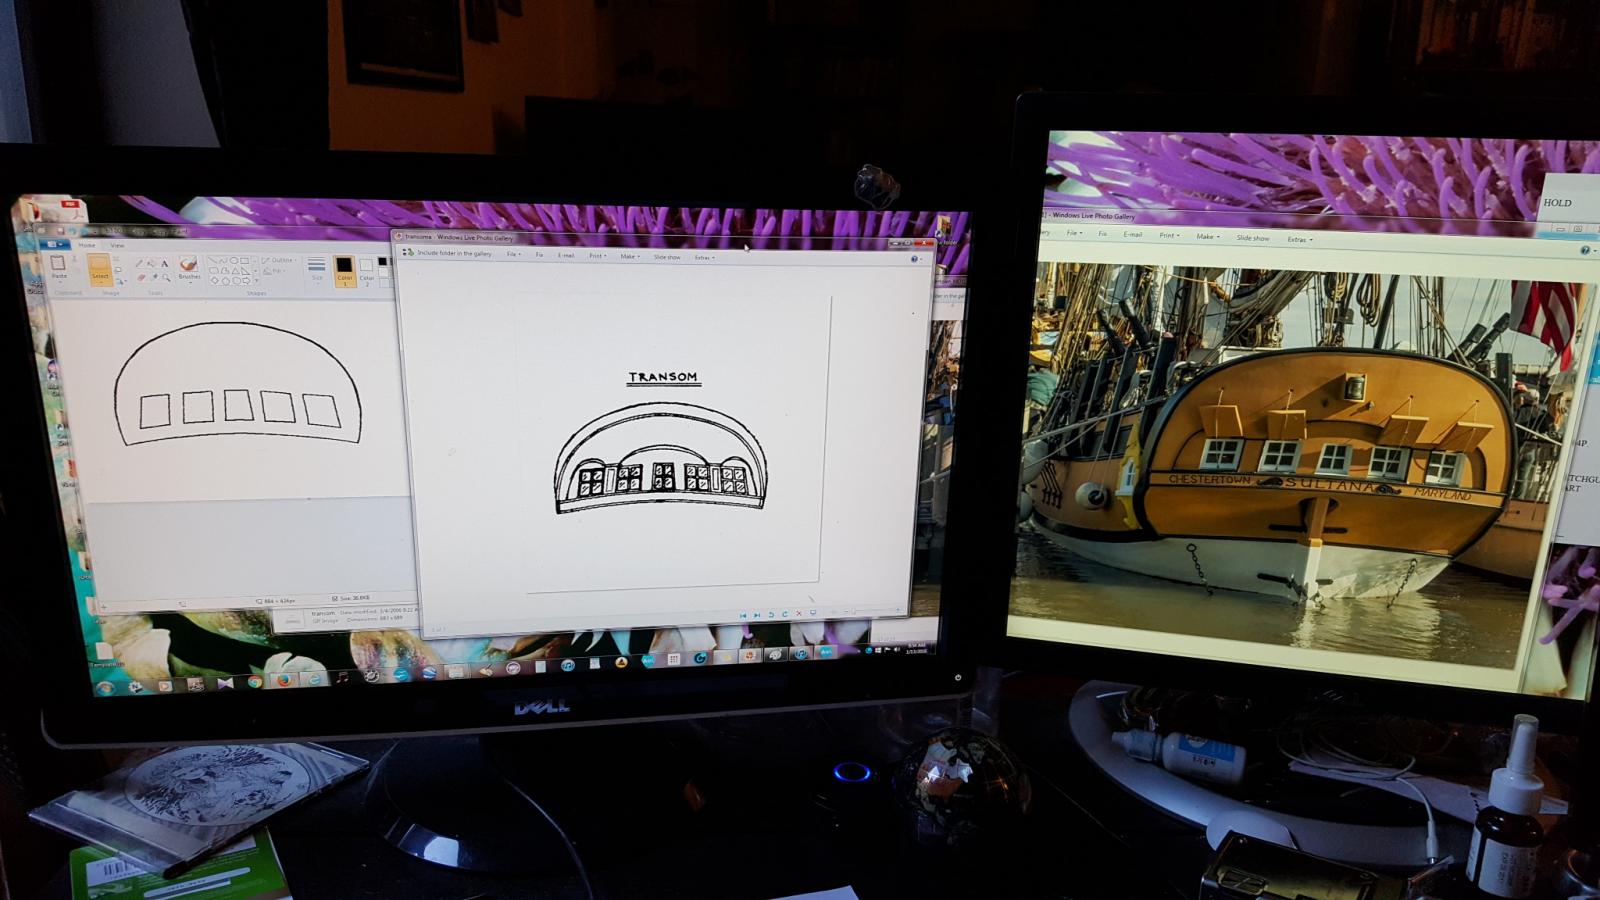
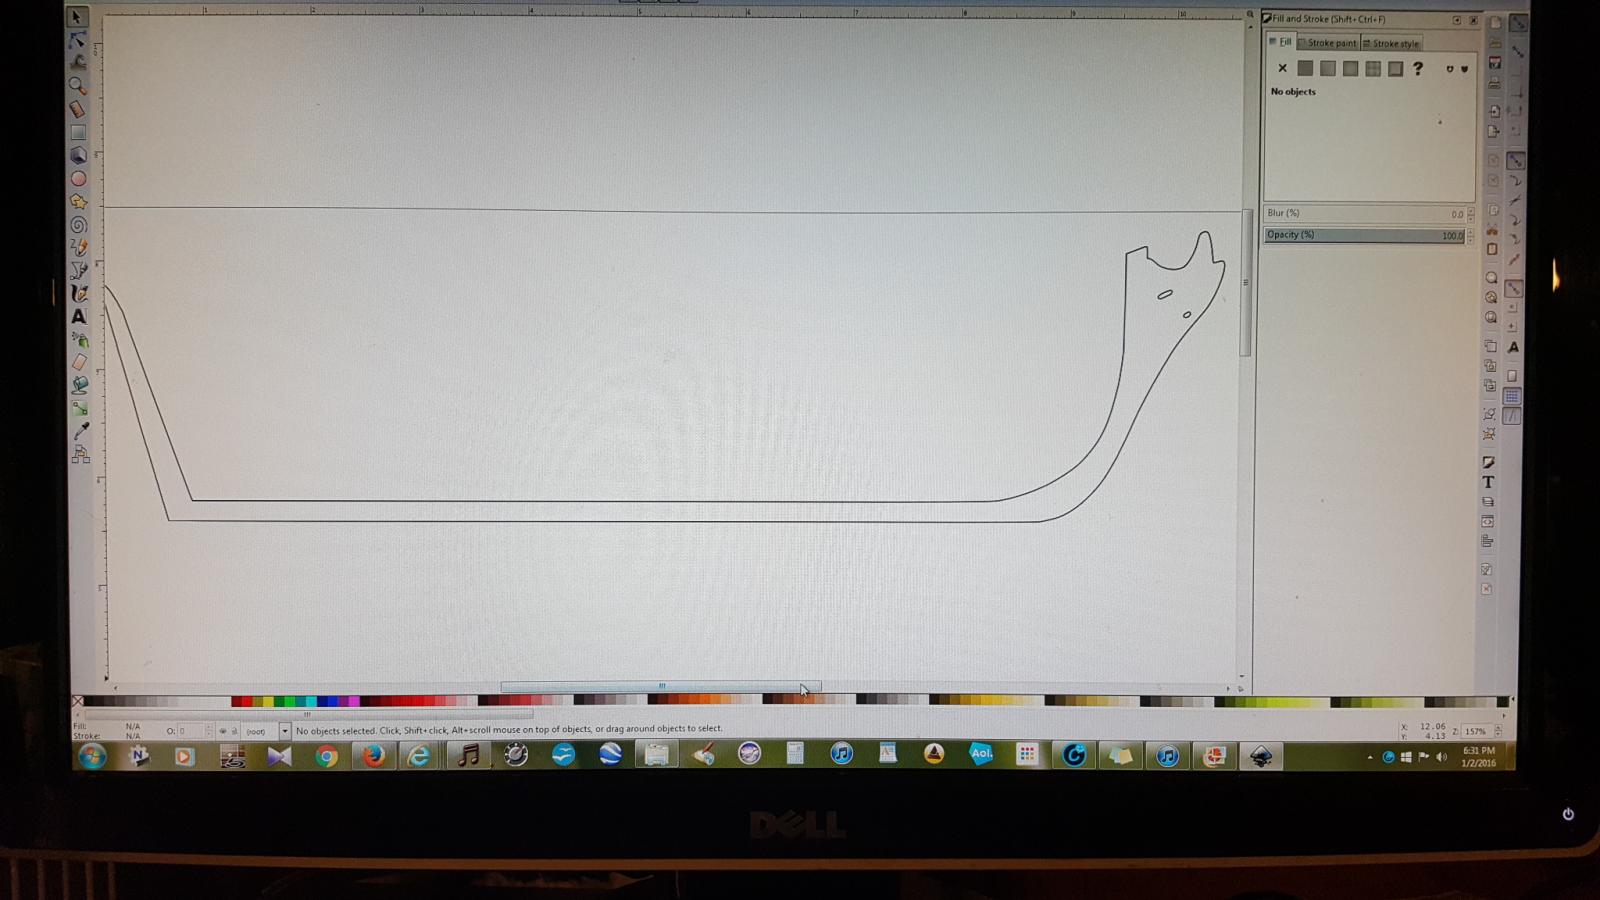
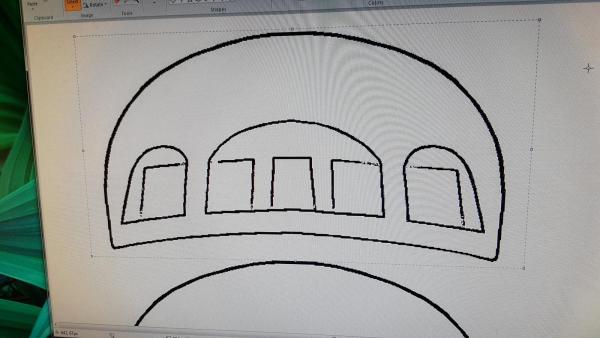
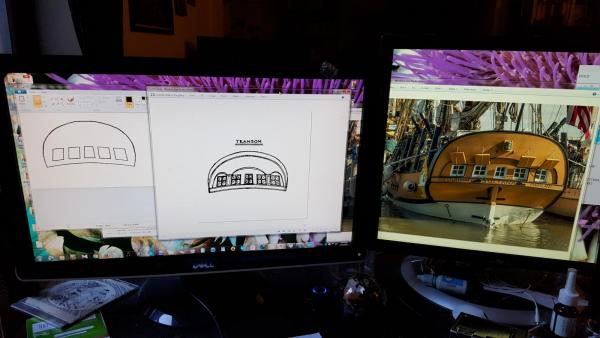
I took the two pieces and added them to the same scan sheet then edited the image so that each side was symmetrical (more or less). Then I overlapped the two pics making them transparent to be certain the windows overlapped with no issues.

-
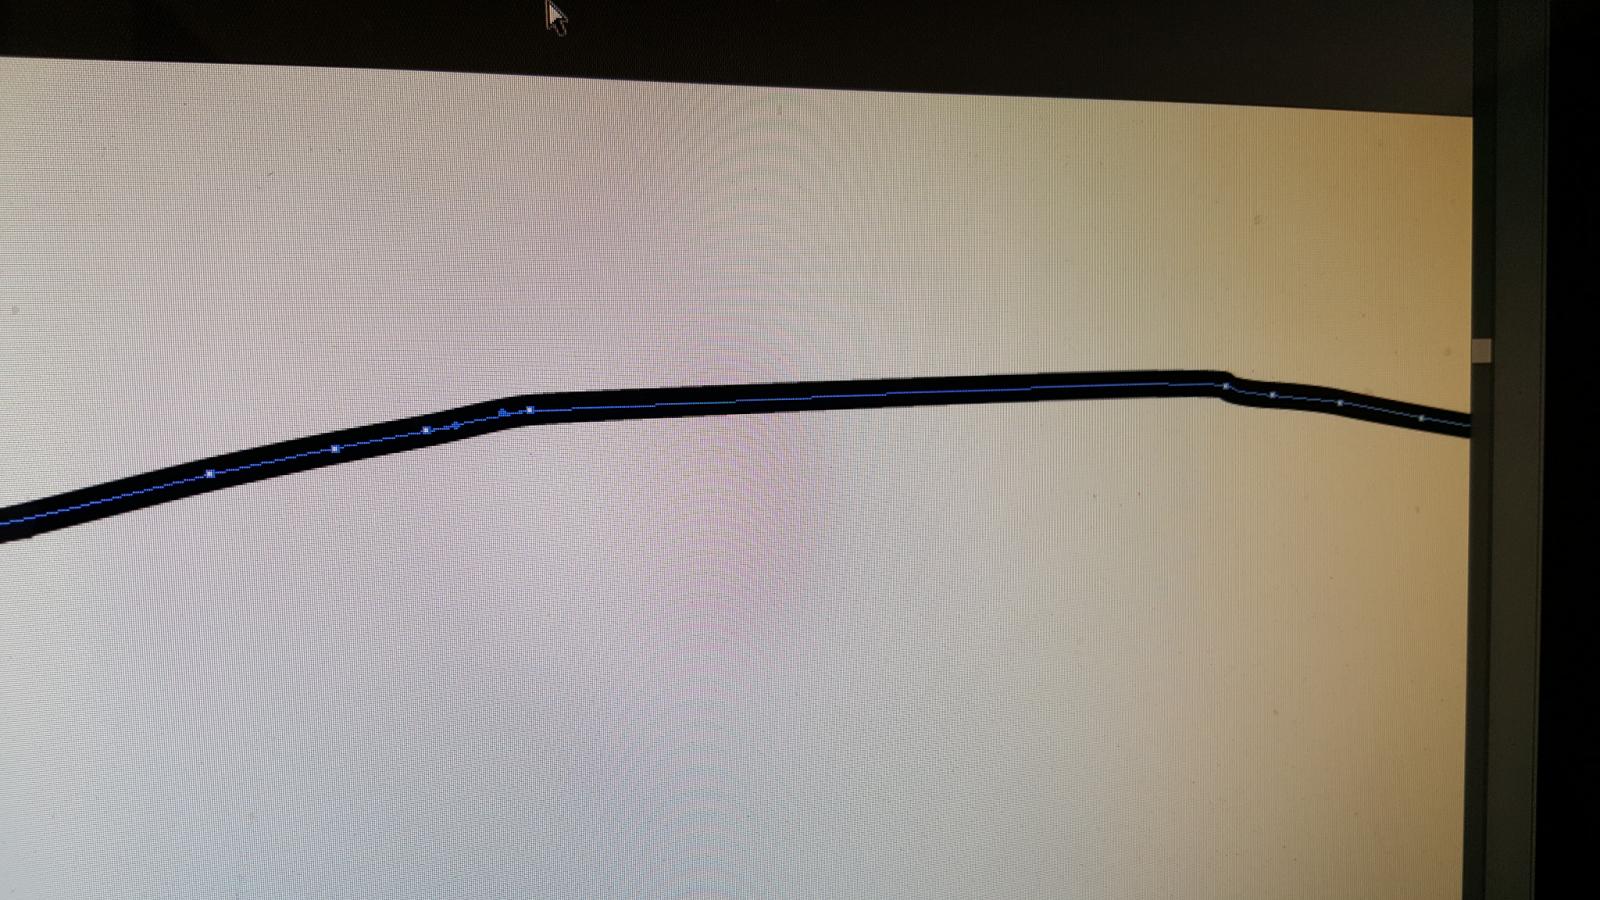
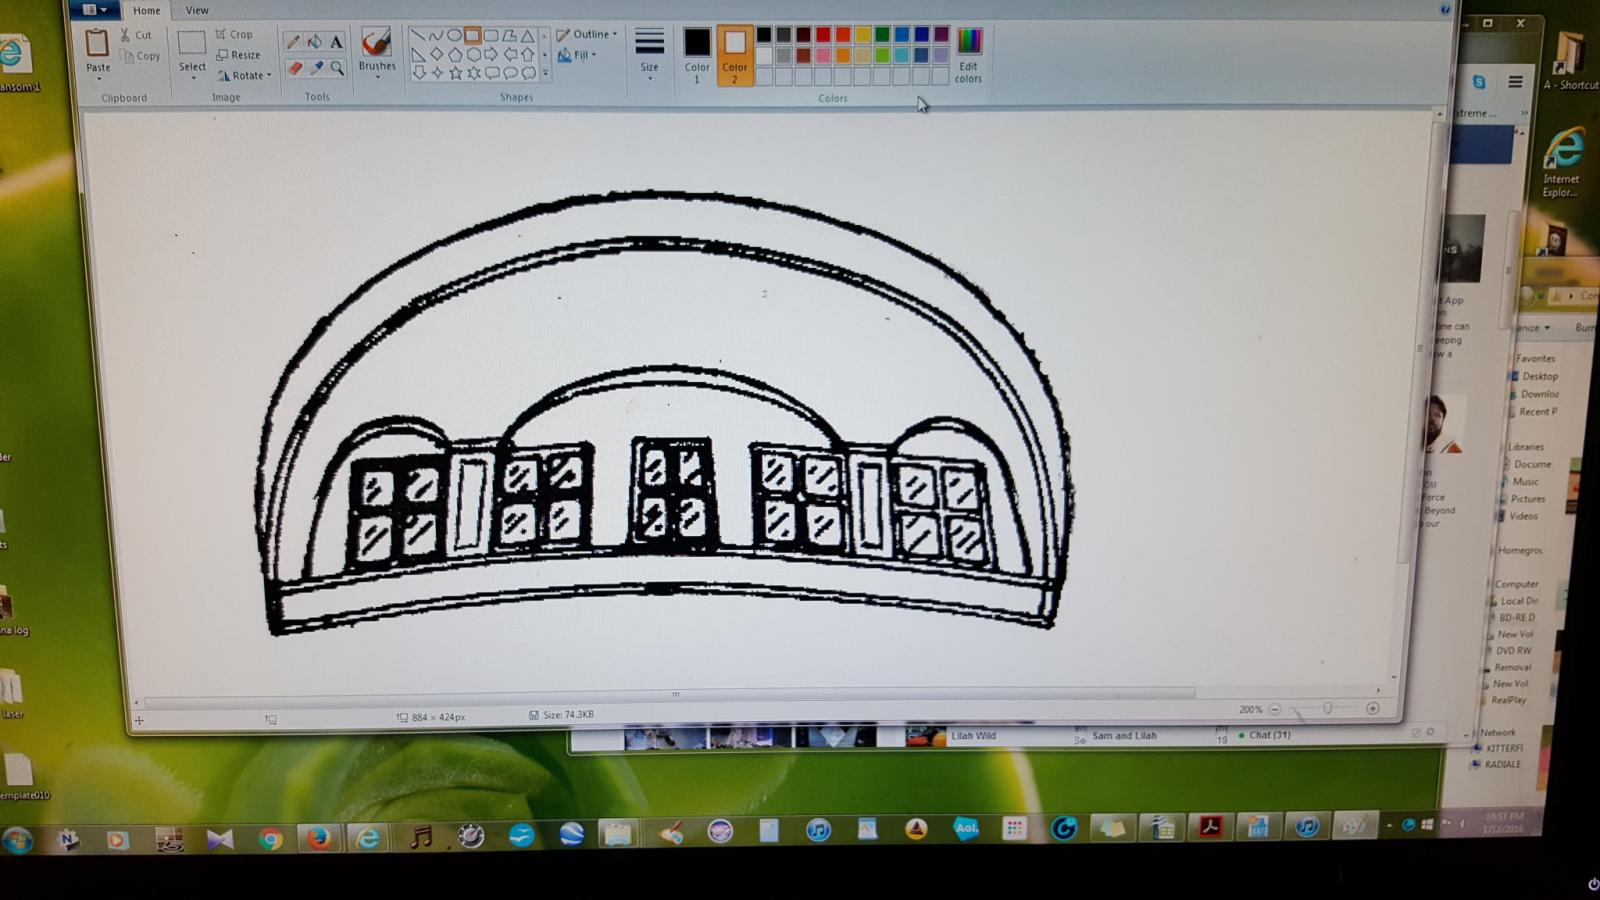
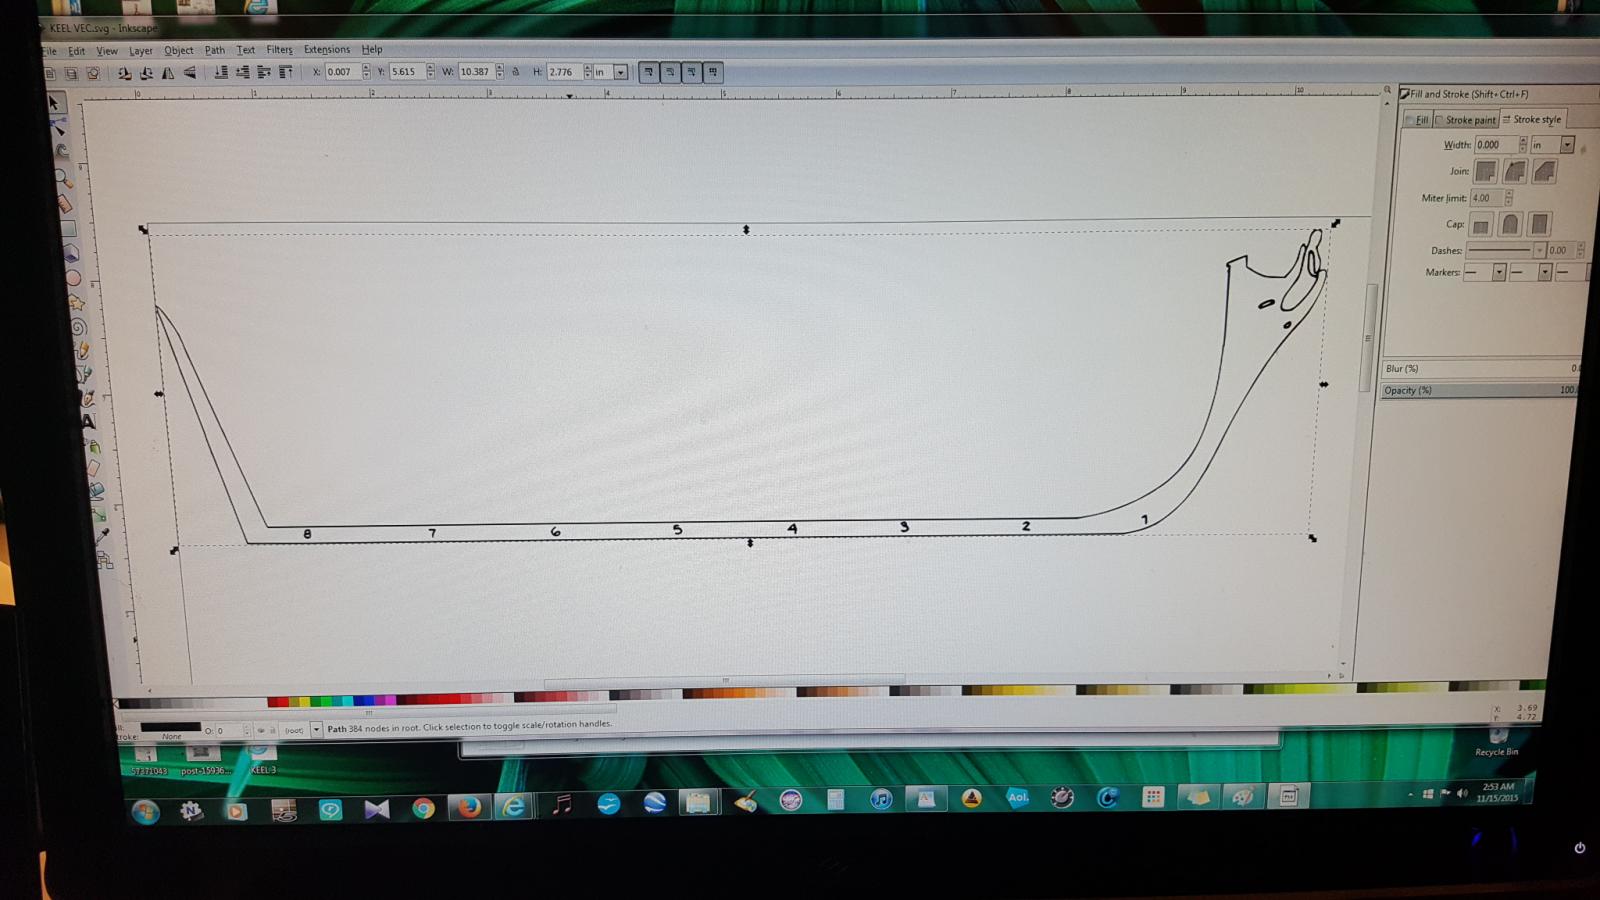
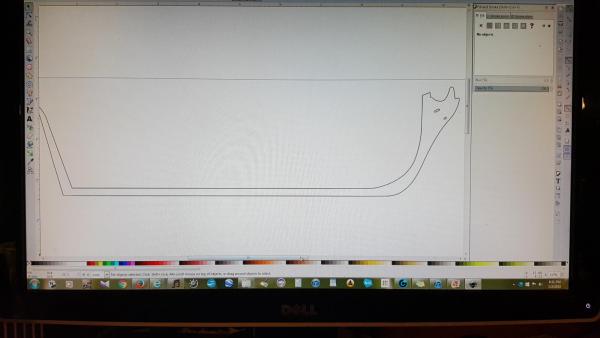
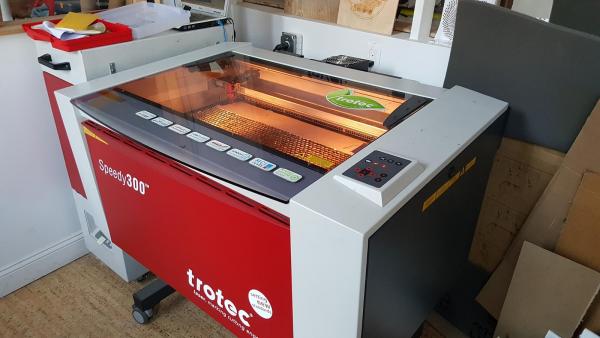
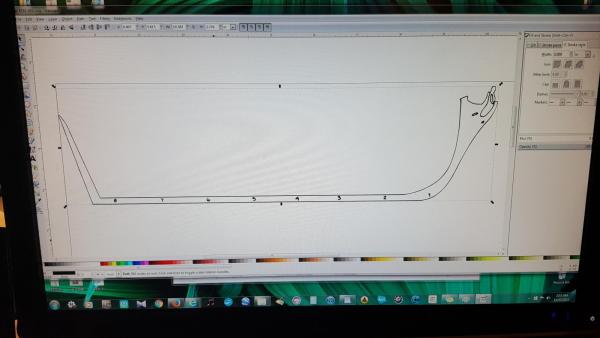
The program allows for you to correct unevenness's in the drawing. Remember if you use a laser the vector lines need to be converted very thin before cutting about 0.001 pixels. Here they are enlarged so you can see them

-
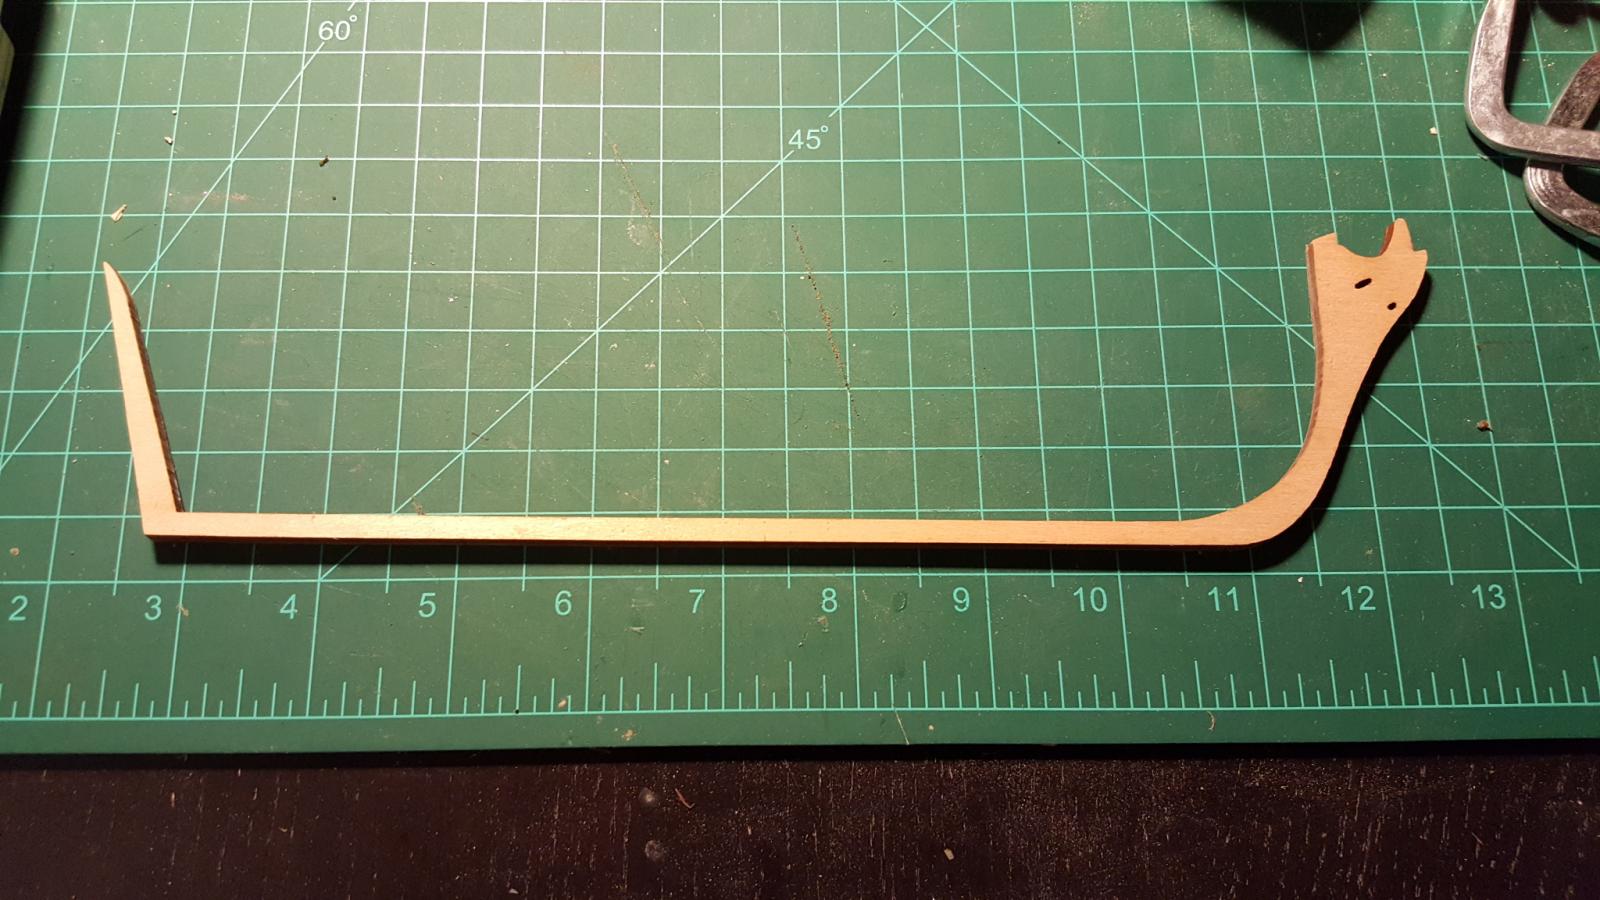
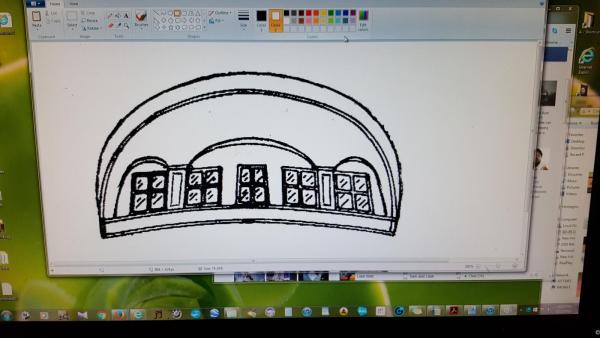
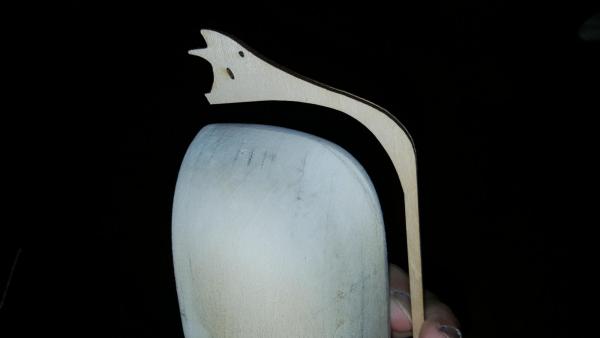
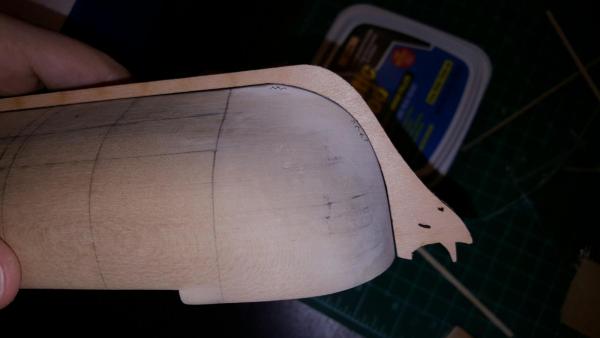
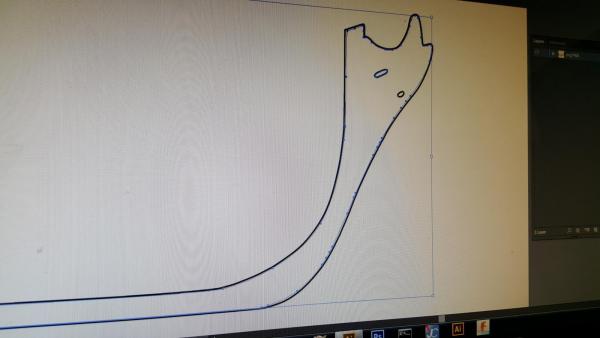
In the meanwhile using inkscape and adobe I have also made a template for the transom, which I will use the determine where to hallow out space for the windows. I haven't taken this to the shop yet but will do when I have cut away the piece for the tiller to run though. For the transom I took the image modified via Chuck's practicum (which has a higher cap as seen) and then scanned it then separated the two overlapping pieces which will both be laser cut separately in 1/32 boxwood.

-
Now she fits and is the right size and shape!


-
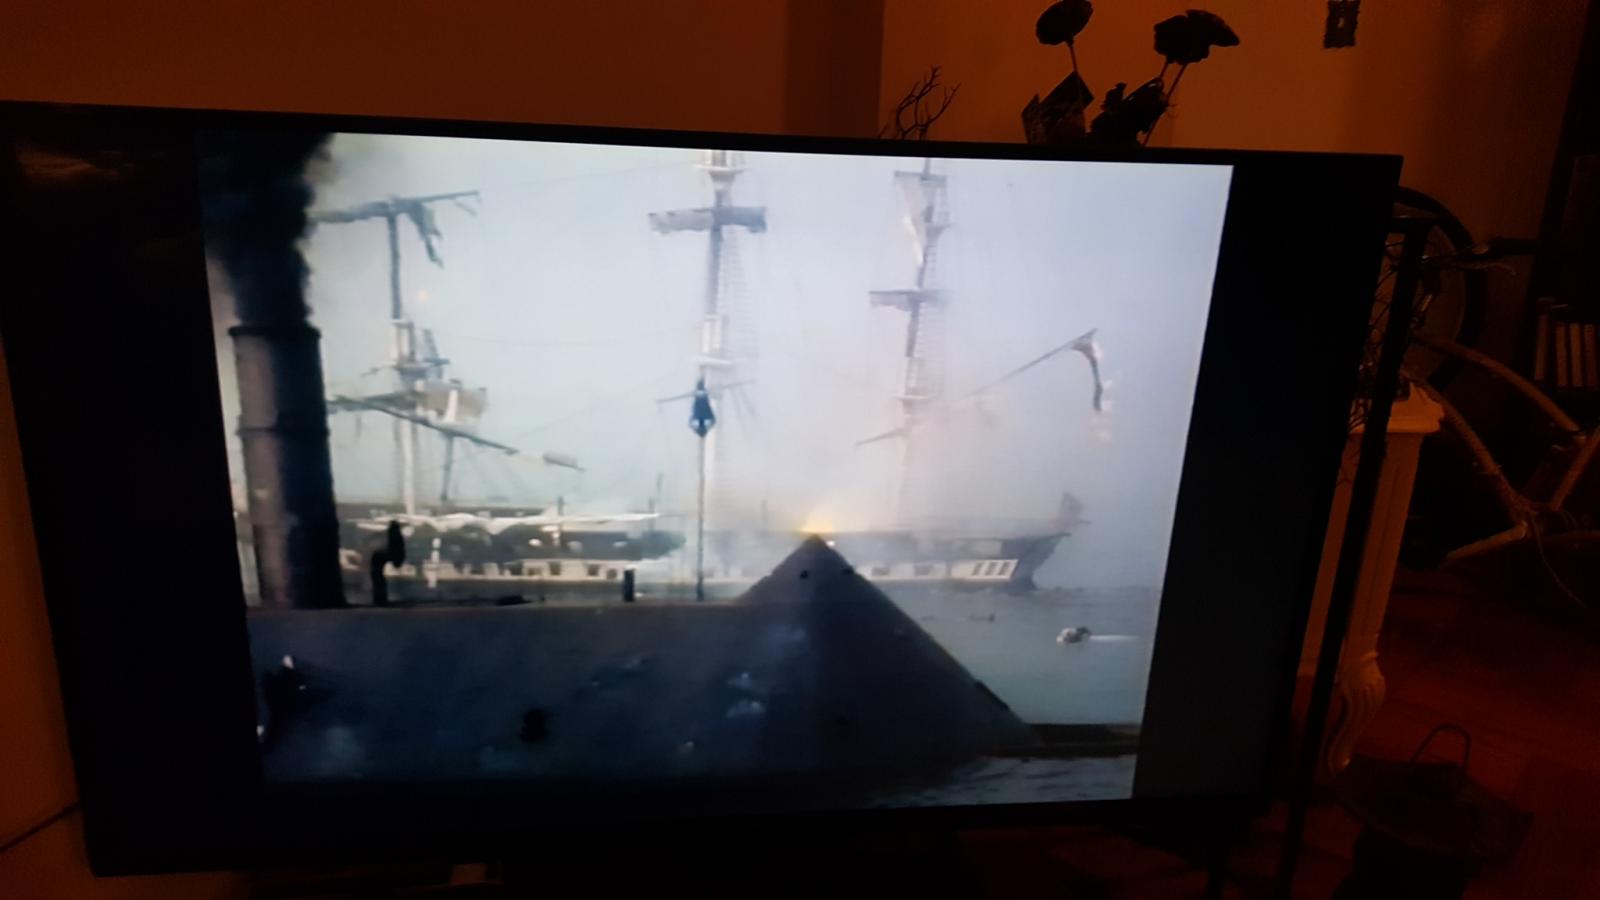
Had a chance to catch up on an old favorite during the meanwhile. Here is where the USS Congress gets blown to pieces by the Virginia. One day I will build her and she shall rise again!

-
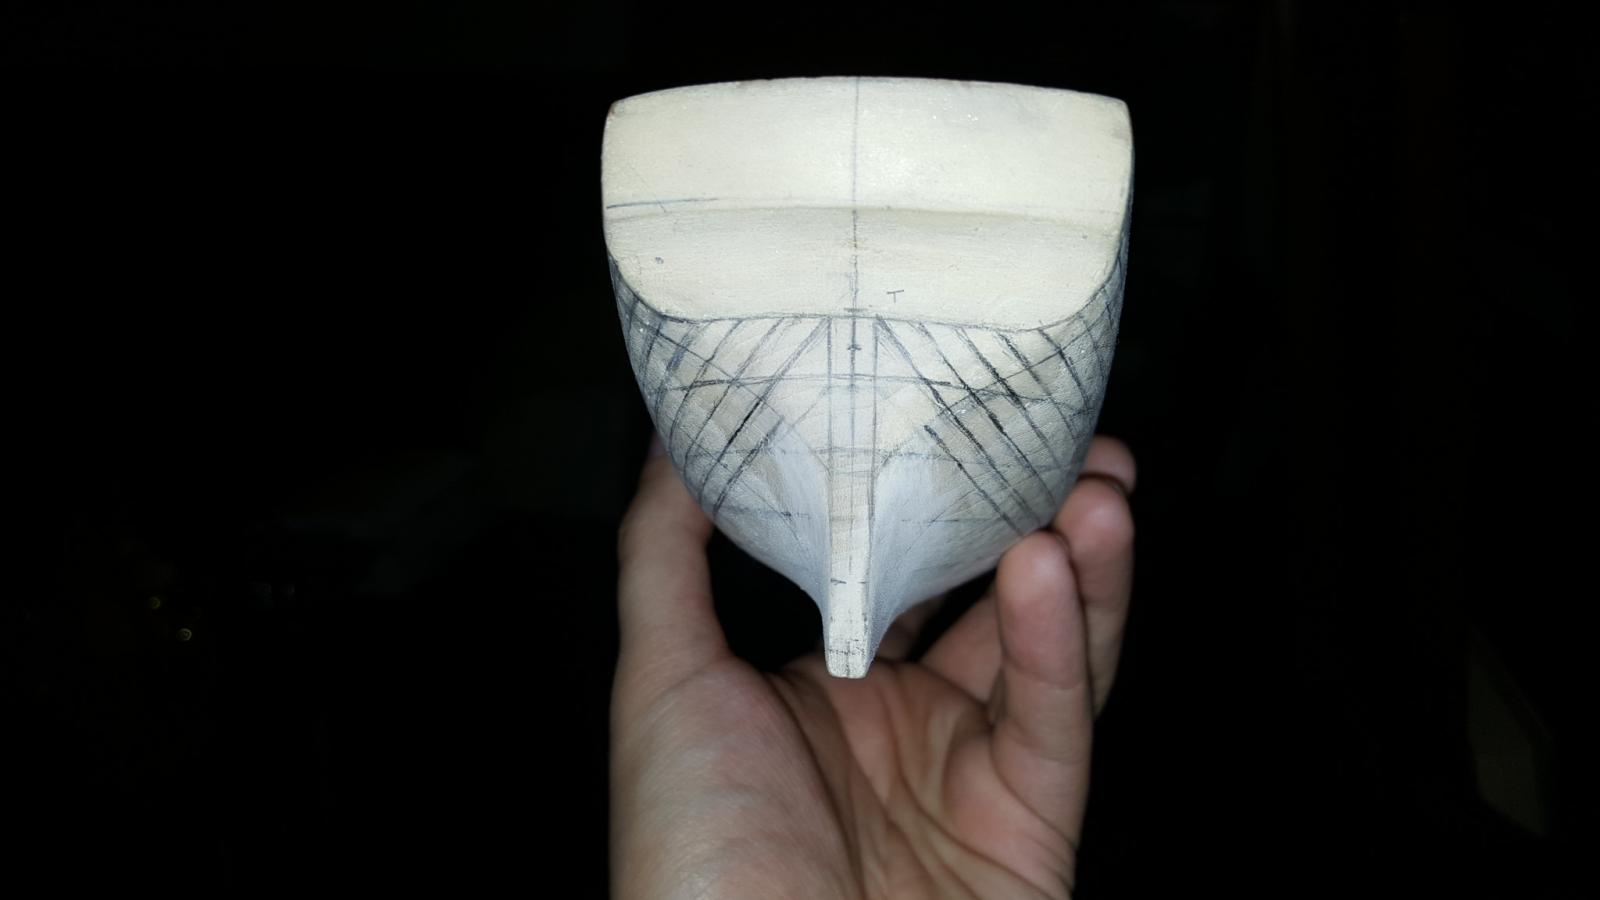
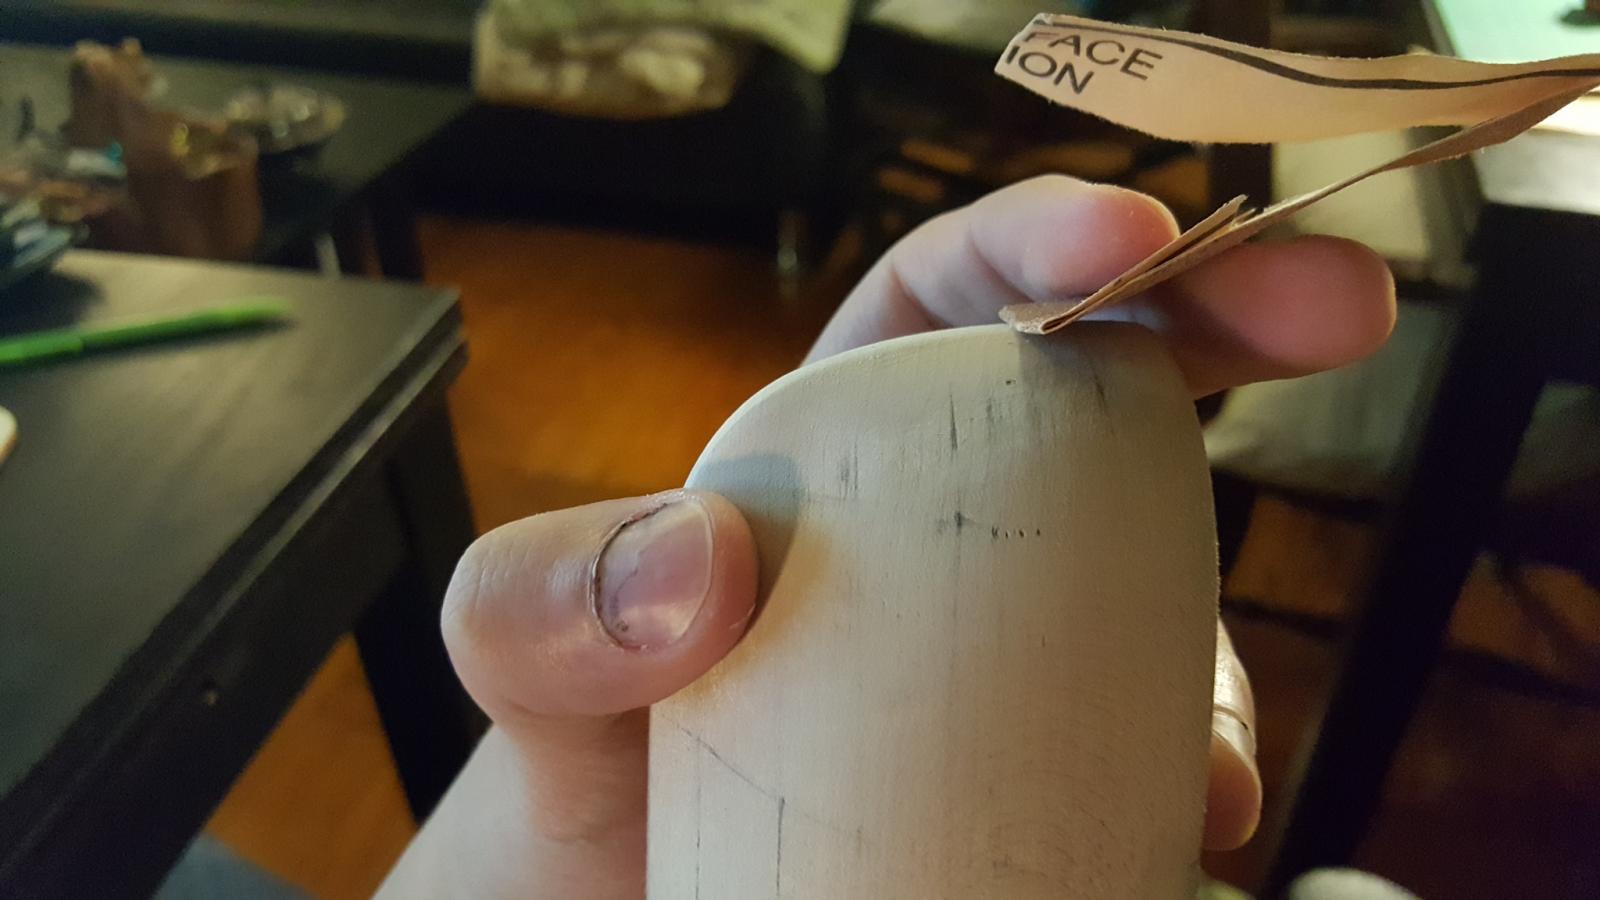
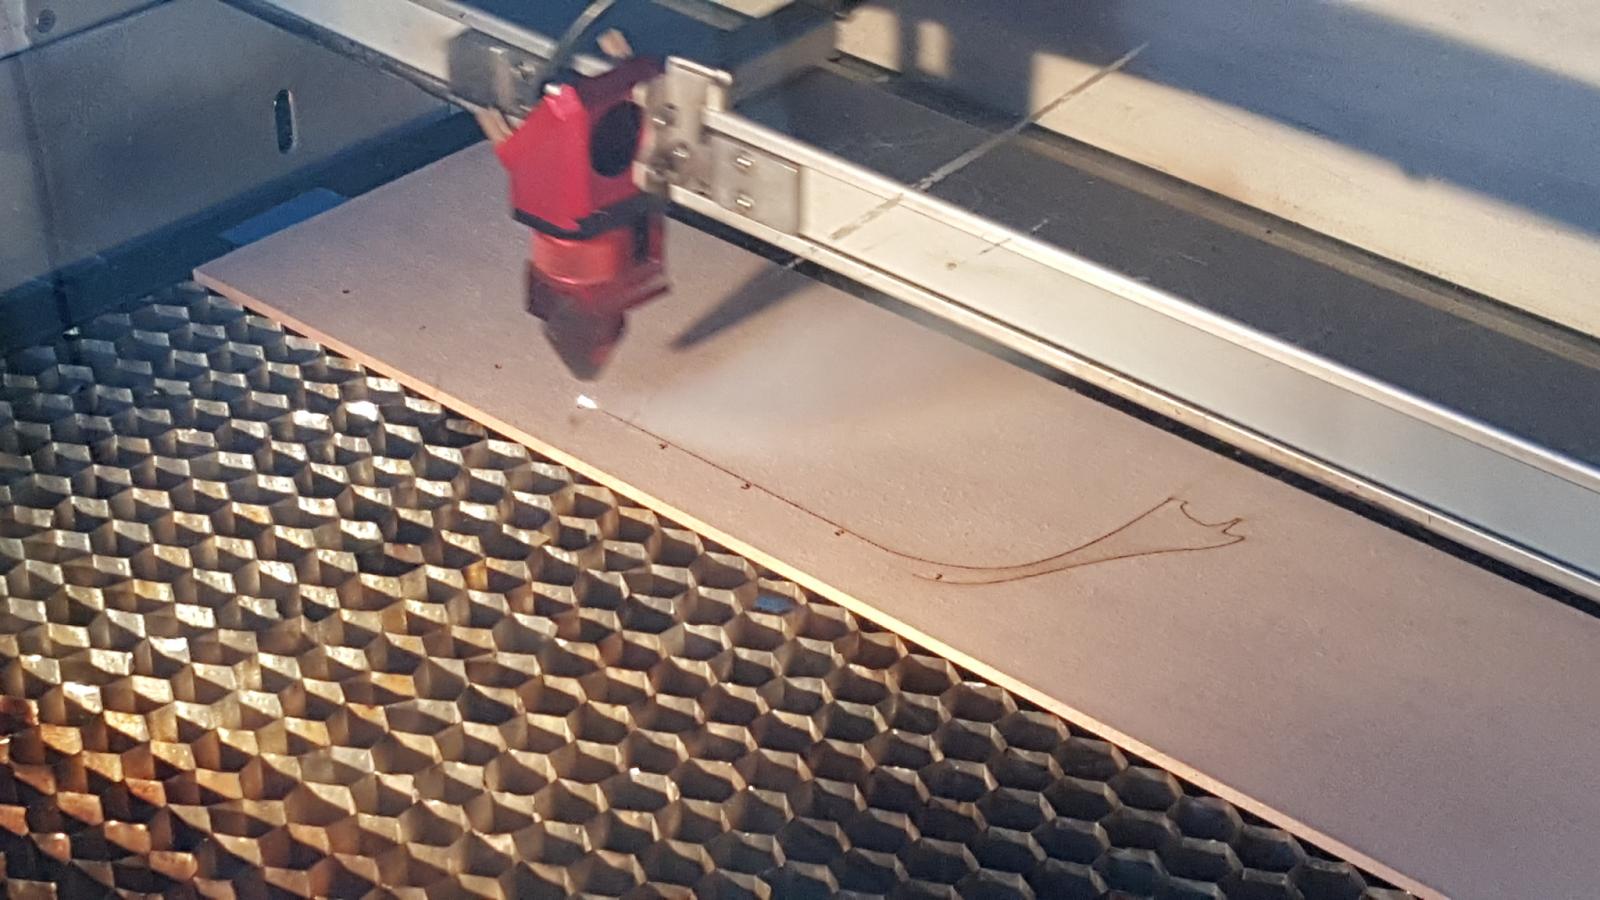
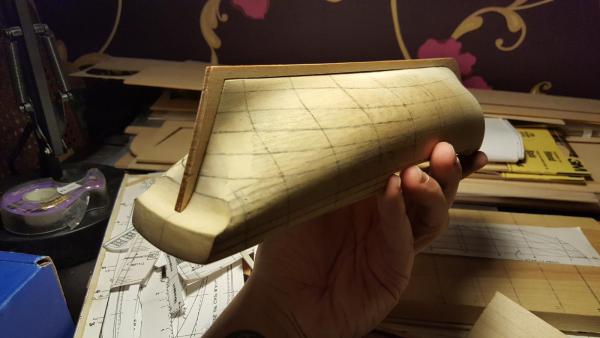
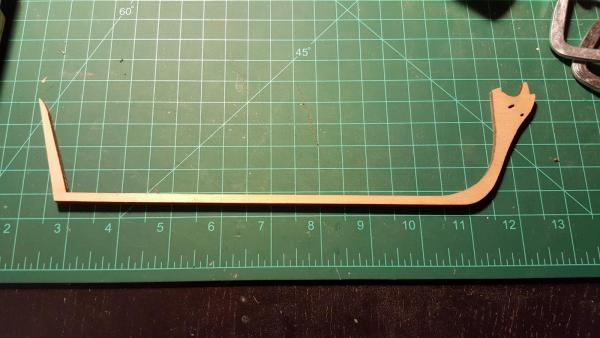
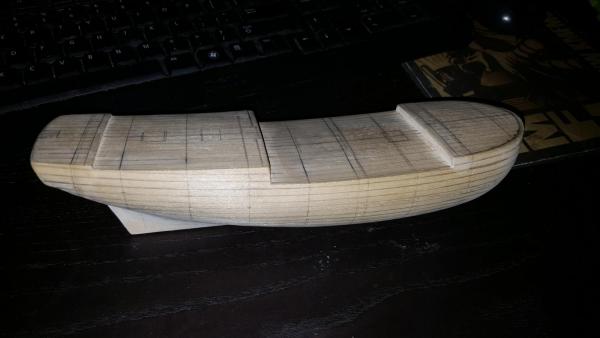
Then it's just a matter of shape shape shaping! Also pic 3 is one of the first keels. See how much thinner it is! As I was told by a wise individual you can measure from plans and itll still not be right. Use your eyes and judgement in this case the laser burns the pen line making the keel too thin so i made the adobe template a lines length wider. The keel should be 4mm by 4mm.


-
As you can see we also did some furniture rearranging and I now have a proper work section in the room. She is so understanding. ;D
-
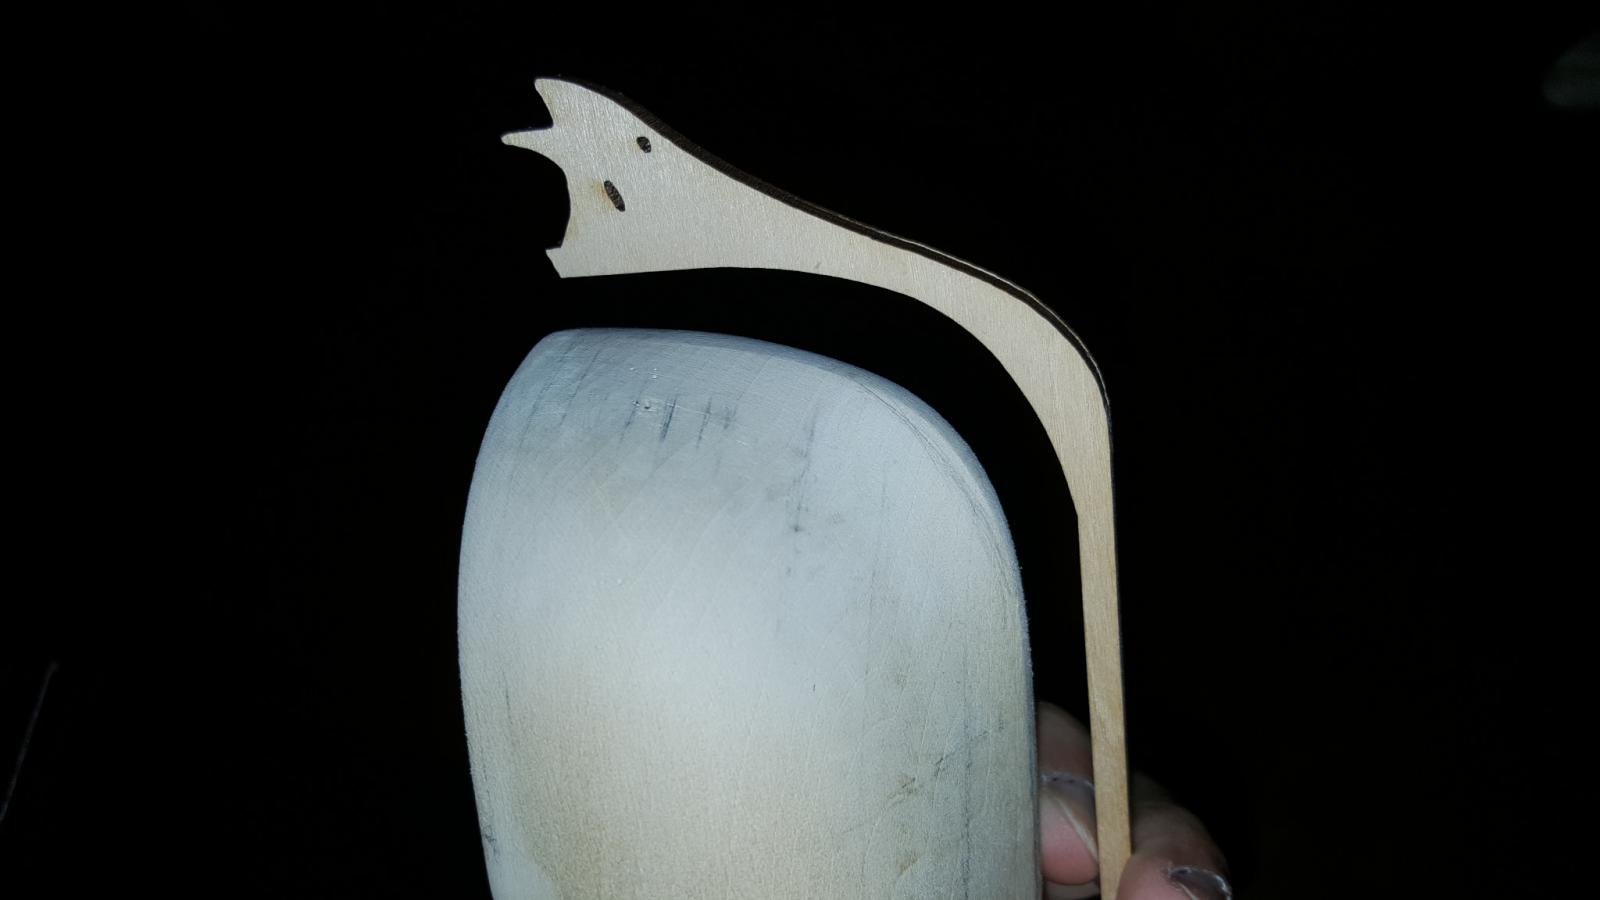
This was the finished test keel (probably my 4th?). I say test because the final keel will not be basswood but pear or cherry. It's purpose is for shaping so cheap wood from the hobby shop is satisfactory
-
I realized that the best way to get the overall length of the model correct was to make a keel piece and then sand the model until it fit. So using Adobe illustrator and inkscape I scanned the keel off the plans into the computer and took it to a local workshop where I could cut it out with a laser. It took a few attempts to make it look just right. What I realized is that even a pen line thickness can be too much taken off when using a laser.
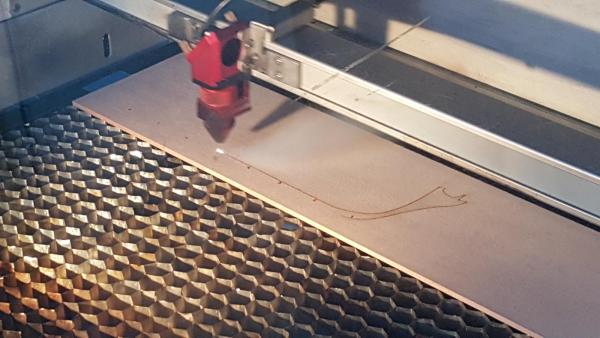
-
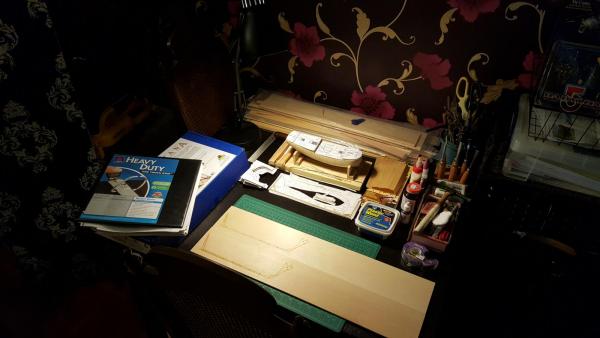
Greetings my friends! I apologize for the long delay in updating this log, between holiday season and personal matters attending to an ill cat I've been a bit behind. I like getting to a certain point before I update and I am almost there but figured I'd add what I've done so far. At first it doesn't look like much but the devil is in the details. I decided to listen to the advice of my better once again and plank the whole ship in veneer rather than just below the water line. This meant shaping the hull differently. So let me show you how I did this.
-
Hey juhu just out of curiosity is the mamoli alert and corel ranger kit in your opinion supposed to represent the same ship type? Just wondering if there was any differences in them at all other than asthetic.
- 83 replies
-
- 1
-

-
- revenue cutter
- BlueJacket Shipcrafters
- (and 2 more)
-
I wonder if this is true of the Jotika version as well. The 1/24 scale looked pretty decent though I'd like to try a 1/64 scale version of the ship probably scaling out to about 14"
- 83 replies
-
- 3
-
-
- revenue cutter
- BlueJacket Shipcrafters
- (and 2 more)
-
Have you considered the Pontos version of the decking material? I have both and they are a bit different from each other.
-
Great work! I have this kit so when the time comes where I want to build it this log will be extremely useful thank you! Charlie
-
I am curious what the size of the hull is if I may ask. Revenue cutter models look like they are based off the Chapelle drawings that are available in History of the American sailing ships though as mentioned seem to have inacuracies. Most from what I can tell are based off the 31 ton drawing, exception being Dallas which is the 80 ton. The Alabama/Louisiana is the 51 ton ship which from what I can tell doesn't have a kit though check the link below they mention Corel's Ranger but I don't agree. Good luck with the build! https://www.coastguardmodeling.com/index.php/models/cutters/revenue-cutters/
- 83 replies
-
- 4
-
-
- revenue cutter
- BlueJacket Shipcrafters
- (and 2 more)
-
The subsciption frigate New York and other details
CharlieZardoz replied to CharlieZardoz's topic in Nautical/Naval History
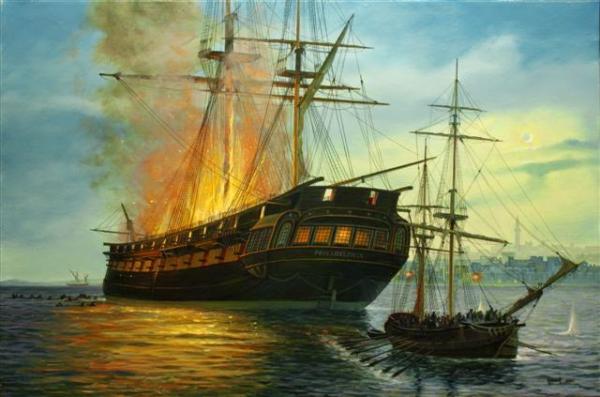
So first is what I believe to be the bone model of Chesapeake. Not sure why the stern differs a bit from the admiralty drawing though will assume it is meant to represent an earlier time nice detailing. The second is a Paul Garnett rendition of Philadelphia burning. I know there are a few models built of Philadelphia though haven't seen them in person but I assume the stern probably looks similar to this. You can see the false windows by the quarter galleries since she was destroyed before the fleet was modernized by 1812.
- 51 replies
-
- 6
-
-
- frigate
- subscription
- (and 1 more)