HOLIDAY DONATION DRIVE - SUPPORT MSW - DO YOUR PART TO KEEP THIS GREAT FORUM GOING! (Only 13 donations so far - C'mon guys!)
×


CharlieZardoz
-
Posts
969 -
Joined
-
Last visited
Content Type
Profiles
Forums
Gallery
Events
Everything posted by CharlieZardoz
-
 Truly the best Supply ive seen yet. I love the modifications to the stern windows.
- 92 replies
-
- 1
-

-
- finished
- caldercraft
- (and 1 more)
-
Considering that list posted (nice one Richard) then I'd say go with Active, since it's the only cutter mentioned from the 1810-1820 period with a tonnage in the 30's. If you want to name her after a state then maybe South Carolina since there is no record of her tonnage.
- 83 replies
-
- 3
-
-
- revenue cutter
- BlueJacket Shipcrafters
- (and 2 more)
-
https://www.coastguardmodeling.com/index.php/cutters/by-class/revenue-cutters-2/ Here is the list of ship names and types for the revenue cutter service. As you can see a lot of names get reused. Another option would be to use the name South Carolina or Hornet since out of the collection of names given in Chapelle's book those two have no record of what class they were assigned to.
- 83 replies
-
- 2
-
-
- revenue cutter
- BlueJacket Shipcrafters
- (and 2 more)
-
Yeah and most likely the model "companies" out there used that information to make their kits way back when. Dallas is mentioned as one of the larger vessels in Chapelle's book and the old model kit was based on the 75 ton design however Ive also heard evidence that Dallas was in fact a 52 ton ship as well. I would say it depends on how important it is for you in accurately naming the ship. There are many revenue ship names recorded on roster so if it isn't a big deal to you pick one out of the hat and you have a 33% chance of being right
- 83 replies
-
- 2
-
-
- revenue cutter
- BlueJacket Shipcrafters
- (and 2 more)
-
On page 194 of Chapelle's book "History of the American Sailing Navy" he mentions that there was an official tonnage given of Alert as 38 tons. This information was probably the only source of naming regarding the small 31 ton ships and while he says it's by no means reliable it is likely this ship was of the smallest design. If I were in your situation I would probably use Alert as a name though I've seen others use Search, Detector or Active even though those ships were likely not the 31 ton design.
- 83 replies
-
- 2
-
-
- revenue cutter
- BlueJacket Shipcrafters
- (and 2 more)
-
Is the Caldercraft HMS Victory still the best?
CharlieZardoz replied to yangliyuan's topic in Wood ship model kits
Perhaps you mean more historically accurate or easy to construct which for Victory is very relative? I would say that caldercraft has alot of fine kits many made by Chris Watton whose work is amazing. In general newer kits often have the benefit of modern tools and tech like lasers. Older kits can sometimes be a bit off on details and problematic with construction however as Rick said the same is true with many newer kits as well if anything ive read on this forum some of them (not saying which) are bit of a mess. That said I am looking forward to if Chris will one day find a home for that 1/64 scale Victory 8) -
Thank you Bob! I am deeply honored your work on Cheerful (and Essex, Syren, etc) is simply amazing! I am just happy to offer my approaches here to those who come after me, it's a journal of sorts so I am patient to watch it all come together. I will always remember these little steps it took to get me to the goal of a finished work.
-
And that's that. I just needed to do this today like a bit of therapy. Now that that's over back to real estate lol

-
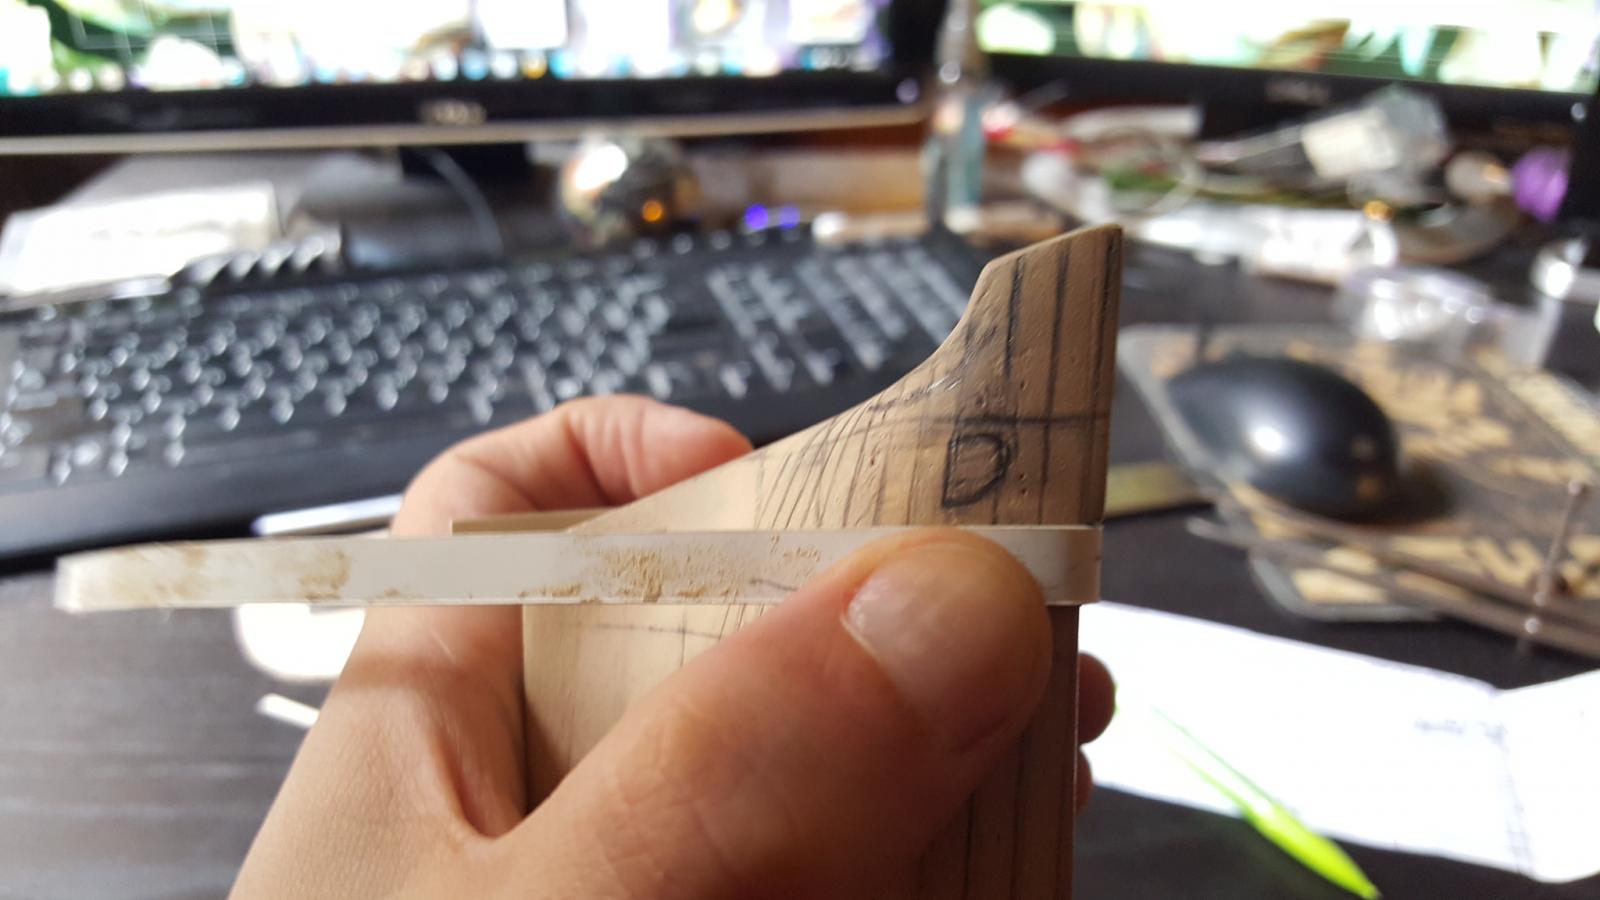
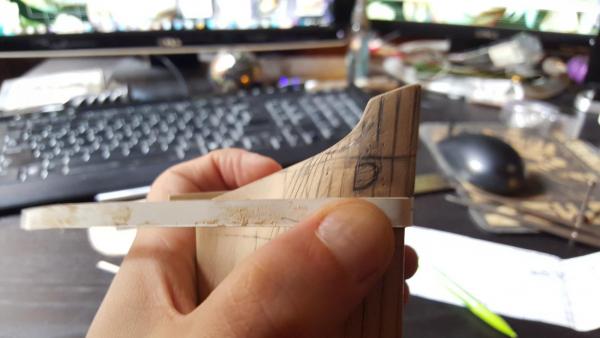
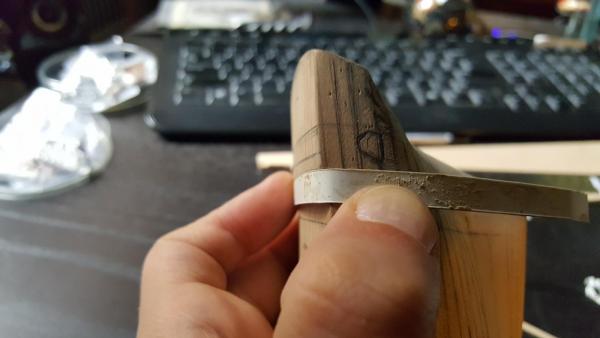
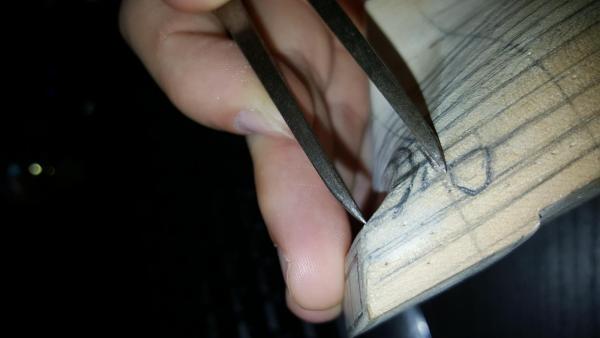
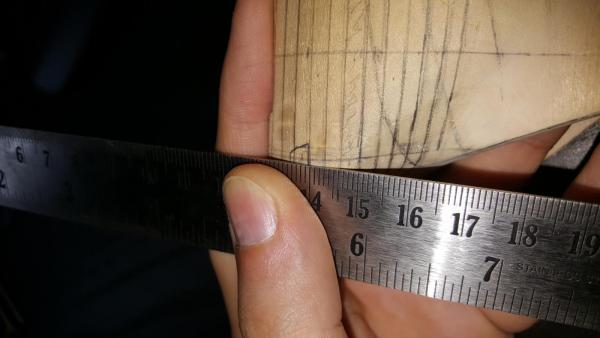
I used a piece of acrylic to make the two sides symmetrical. While my lines are more or less in the spot they need to be it's not exact and again doesn't have to be just serves as a guide, however the measuring tool works out the details. The badge window is actually the same amount down as it is inward so so flipping it got me where I needed it. And don't go off the plans or your badges might be too far to the edge.

-
Move it around until it looks right. There it is.

-
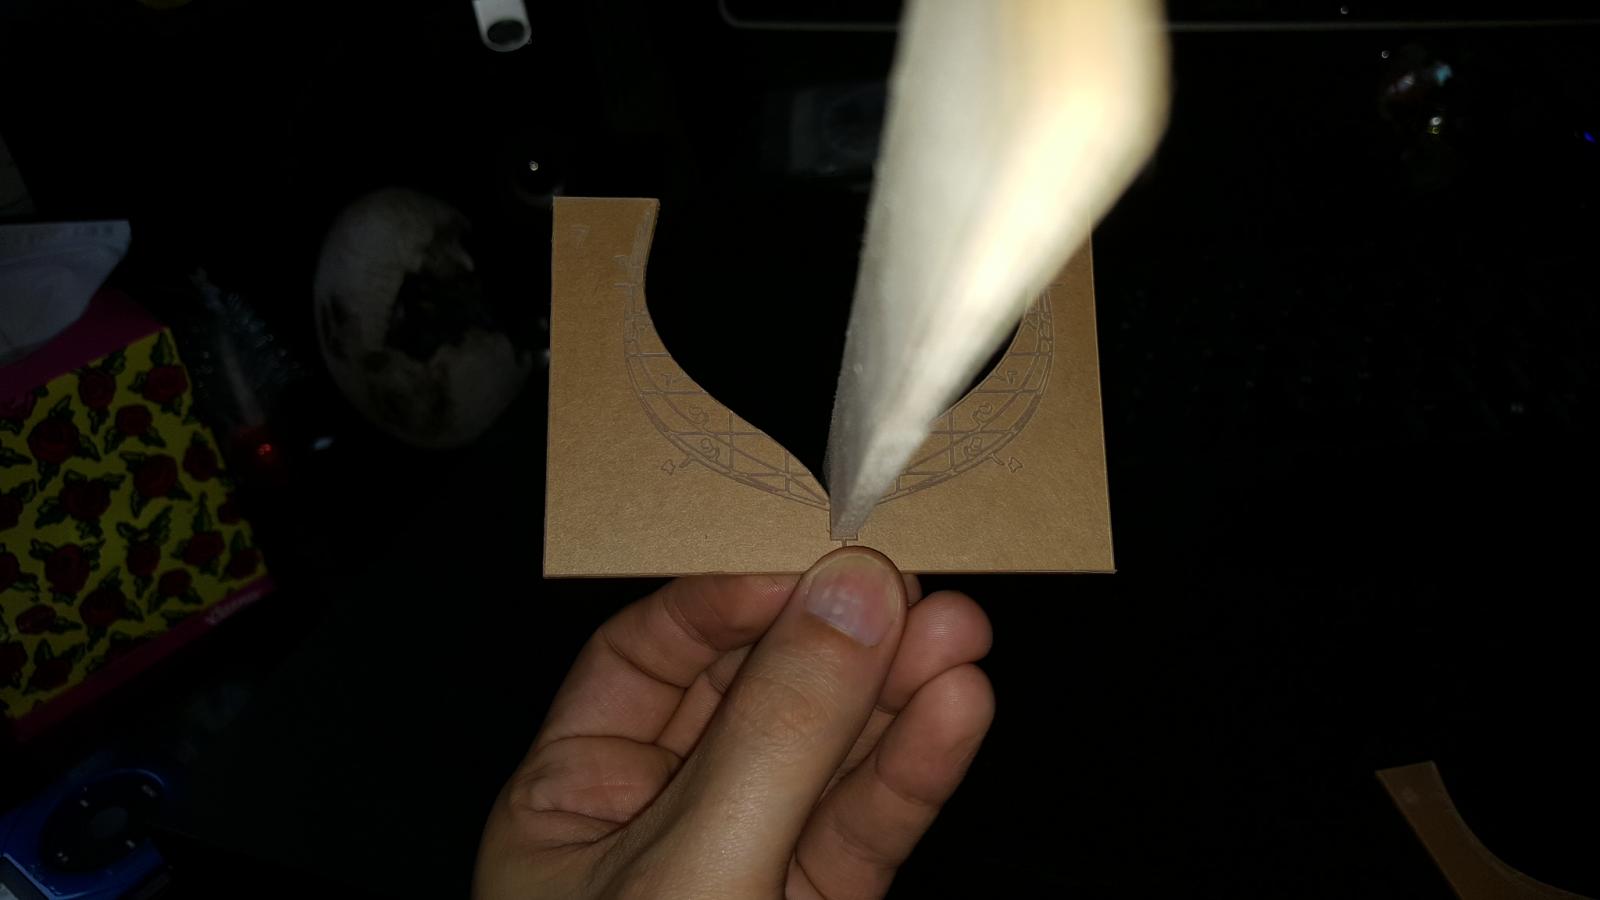
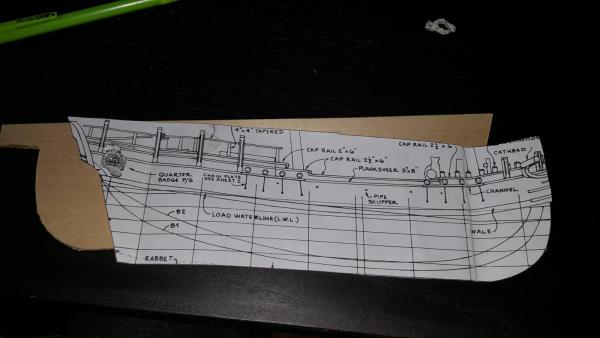
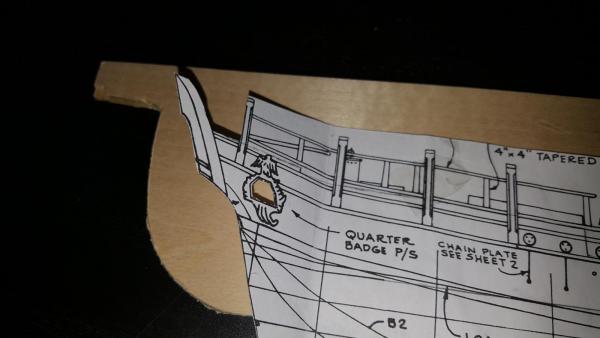
I took a piece of the plans that I cut up and cut out the window. The badge window is about 6mm from the main wale. Finding where the window should be is a matter of eyework as well as following the plans. It's not an exact science and also you can see in the last picture I made room for the wale which is about 3-4mm (I seems to narrow a bit at the bottom) however since that area will be planked with veneer as well I took a bit off that number.

-
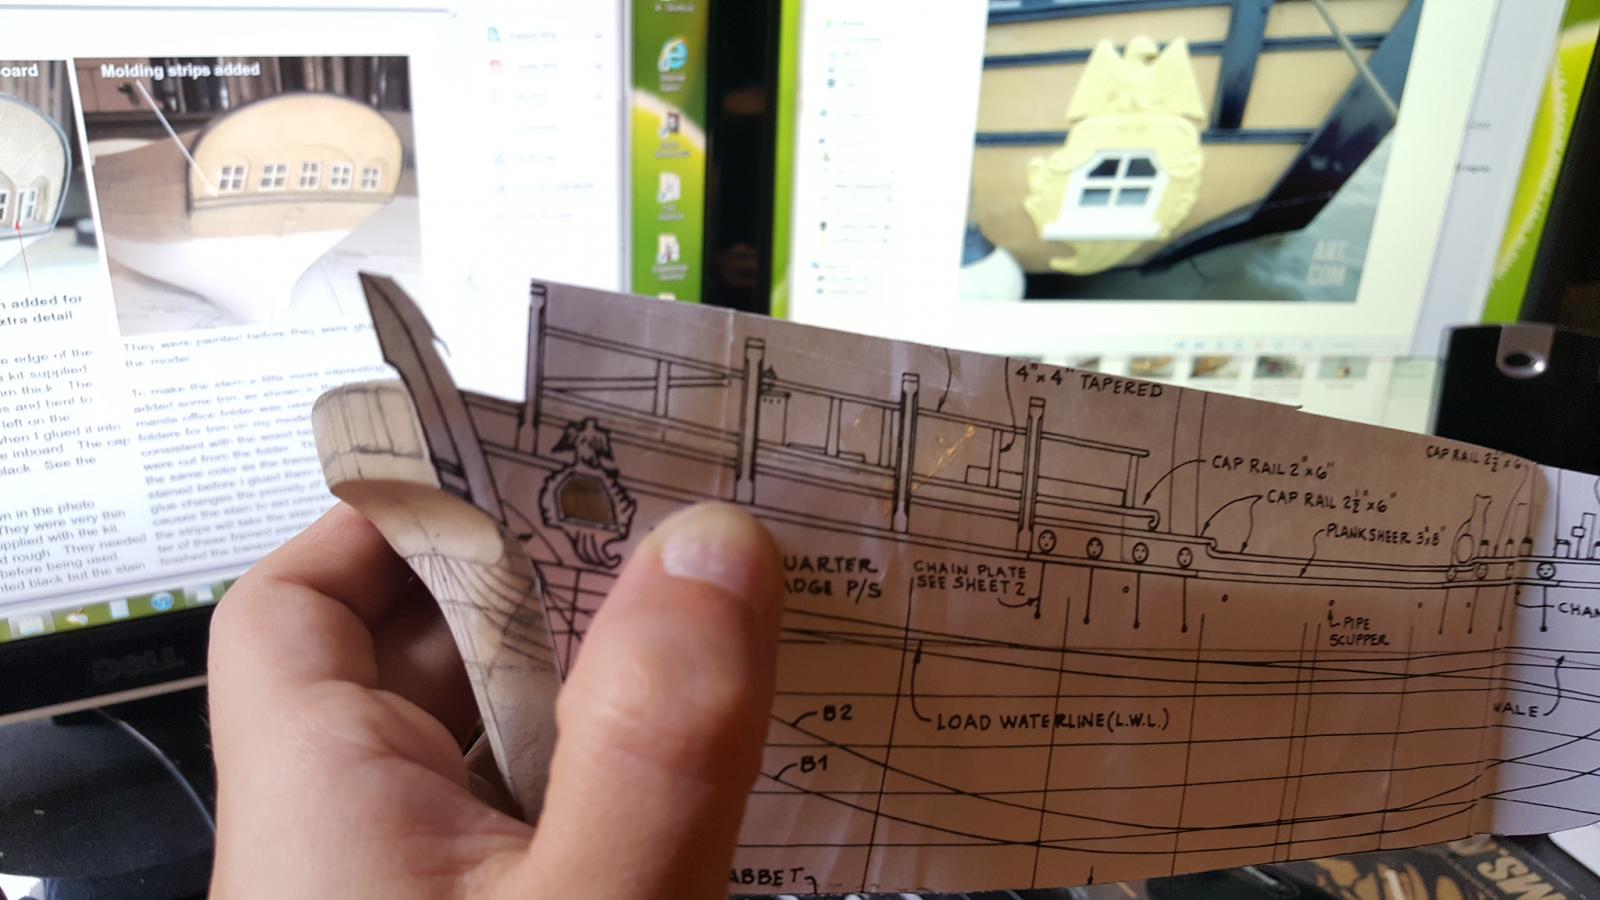
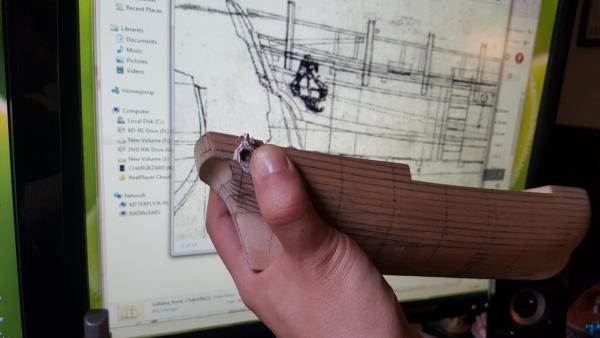
Now for the quarterbadges again not too shabby though I'll probably make mine from scratch however they serve to determine where the cutout window will go.
-
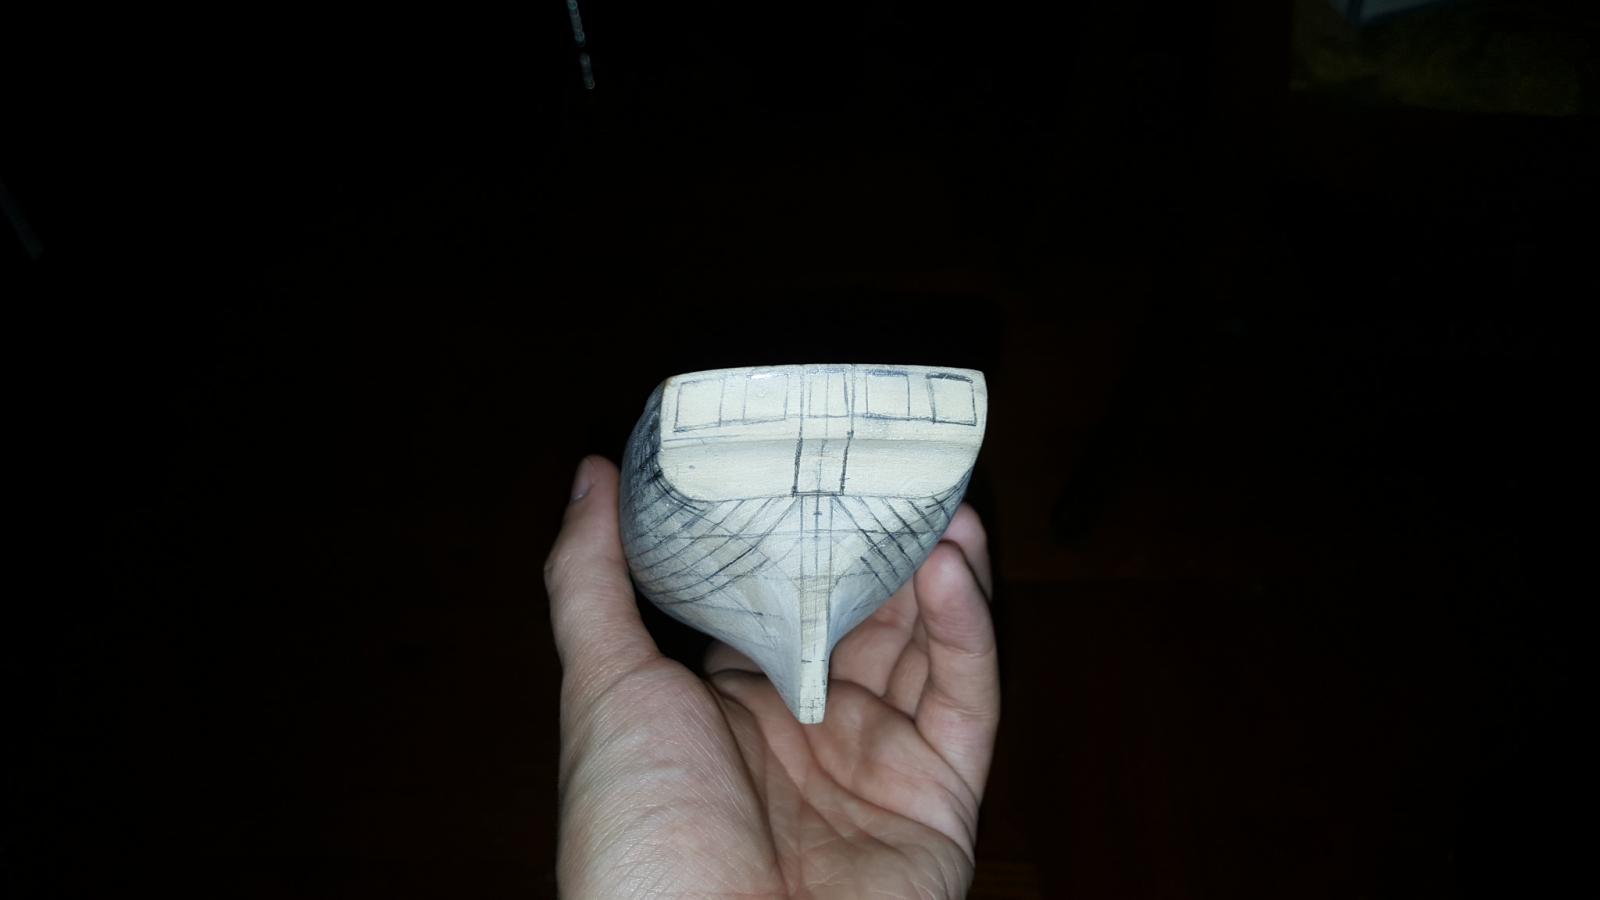
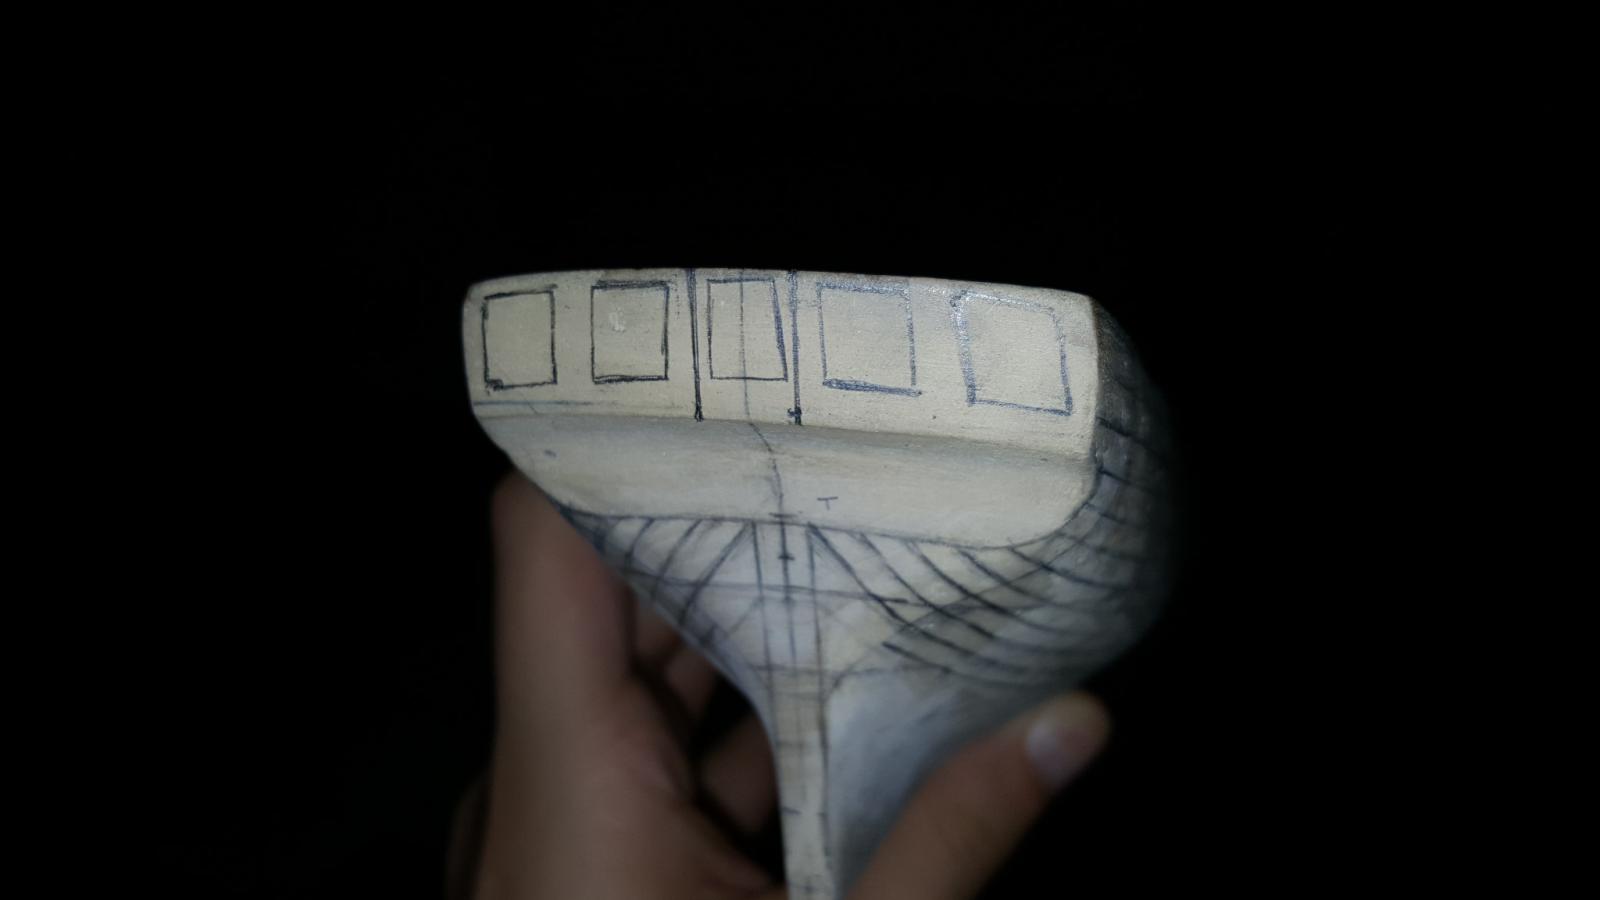
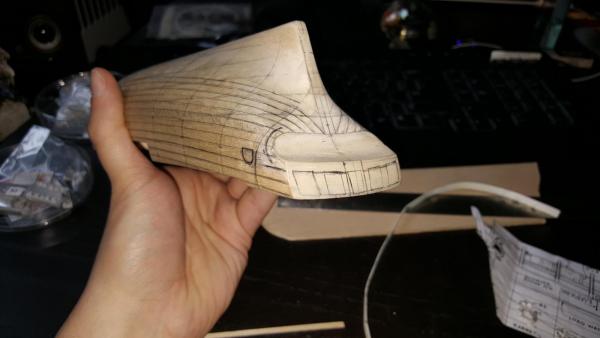
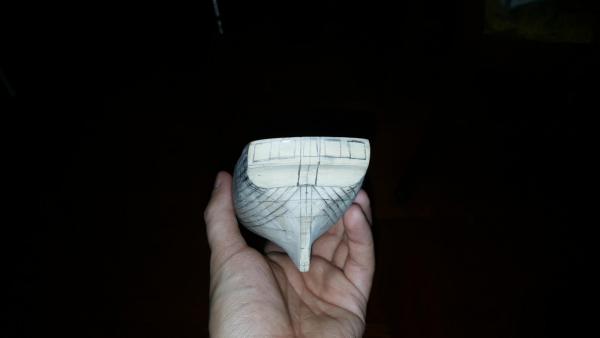
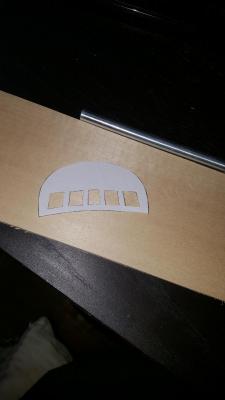
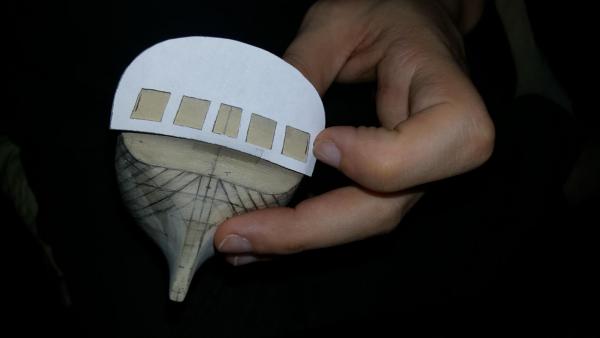
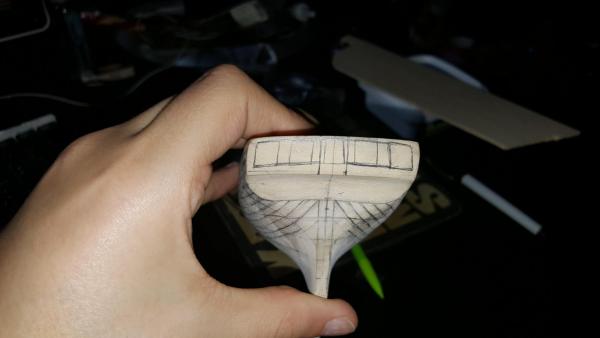
It's pretty cheap too Elijah $20 + a few extra bucks for the day. Anywhoo I printed out my transom template on paper and cut out the windows, then added it to the model and drew where the windows will ultimately be. The two lines in the center is where the rudder will go that window is a fake and will be cut out. The lines aren't perfect right now but don't have to be.

-
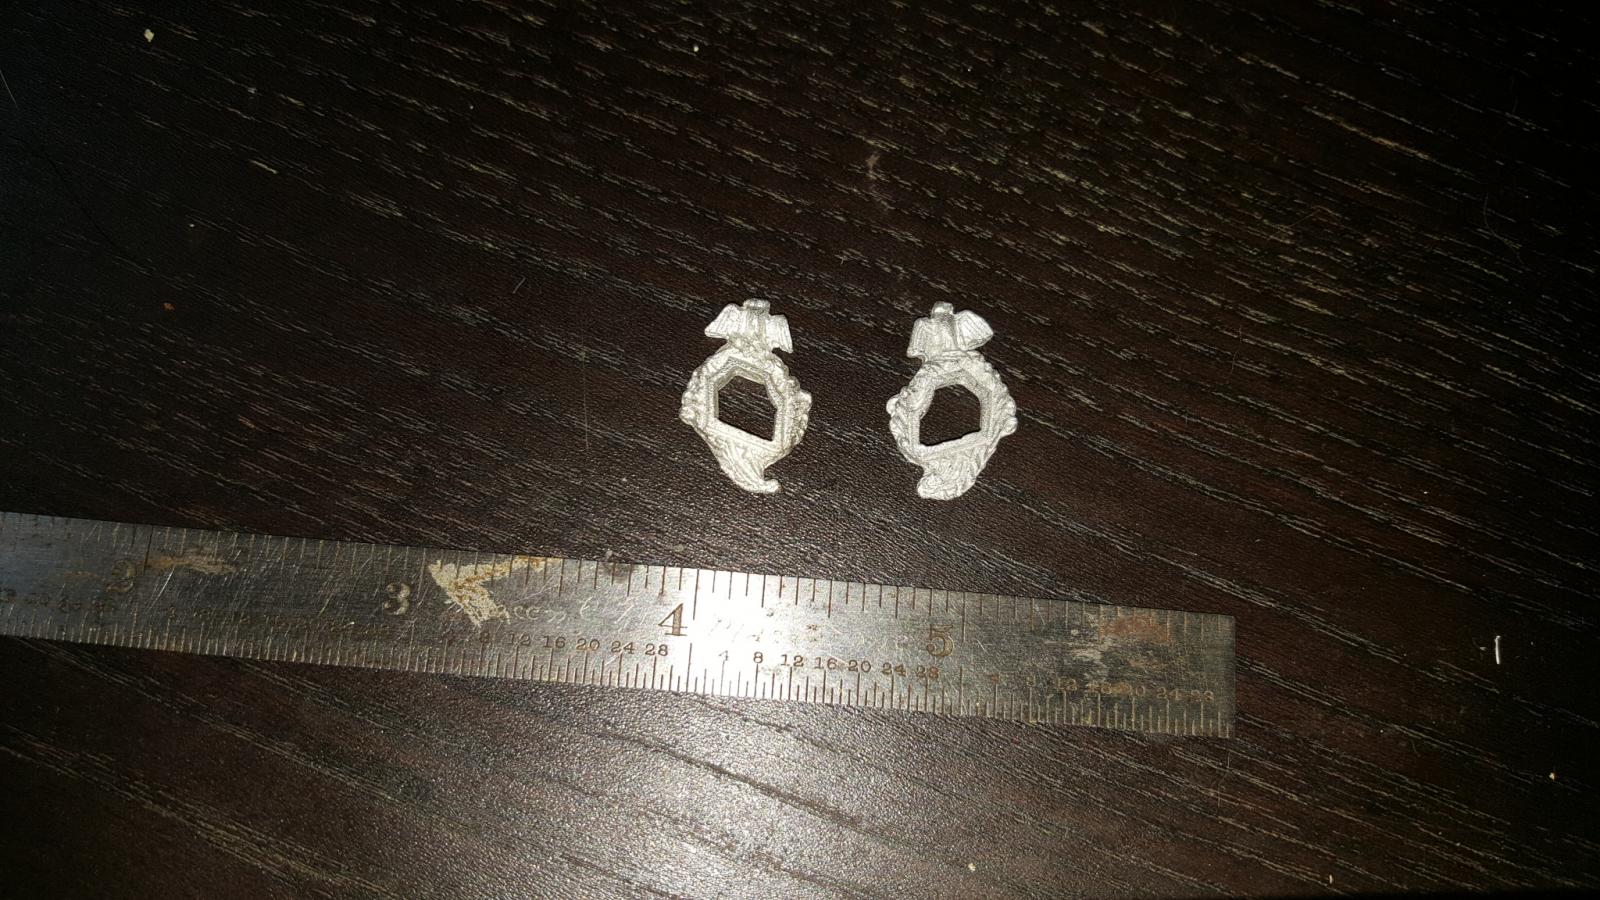
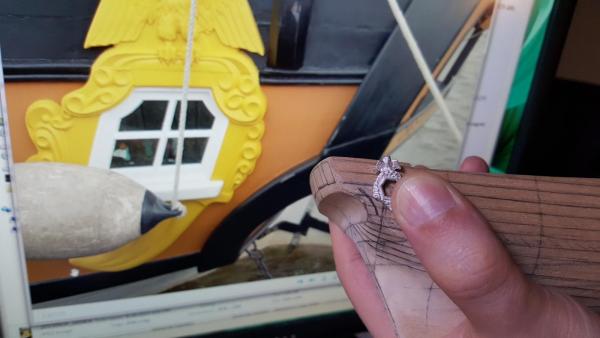
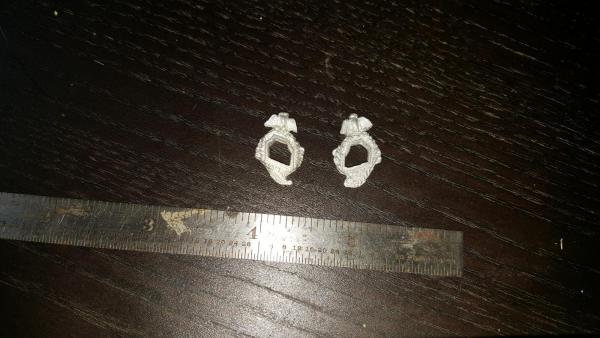
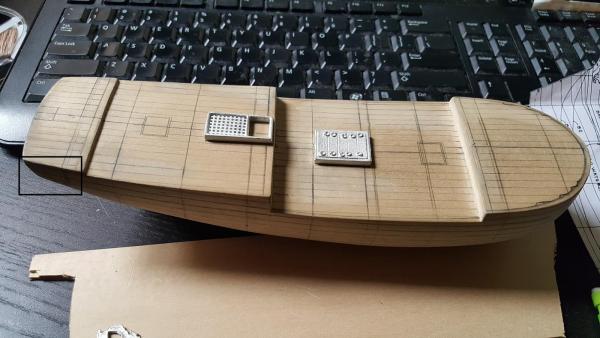
And for a small mini update I couldn't resist getting the stern windows placed on the model. I just can't accept windows being drawn on solid wood so I've decided to amend my prior intention of making the whole cabin area since I feel I simply don't possess those skills yet, however it will suit me fine to hollow out the most rear section of the hull using a dremel and drill since the windows are so small any detailing would be hard to make out. However I do have a surprise which I will keep quiet about until I decide to show it. As you can see I've opened up the box of metal fittings just to see how they look. They are overall decent though I plan on making most of them from scratch.
-
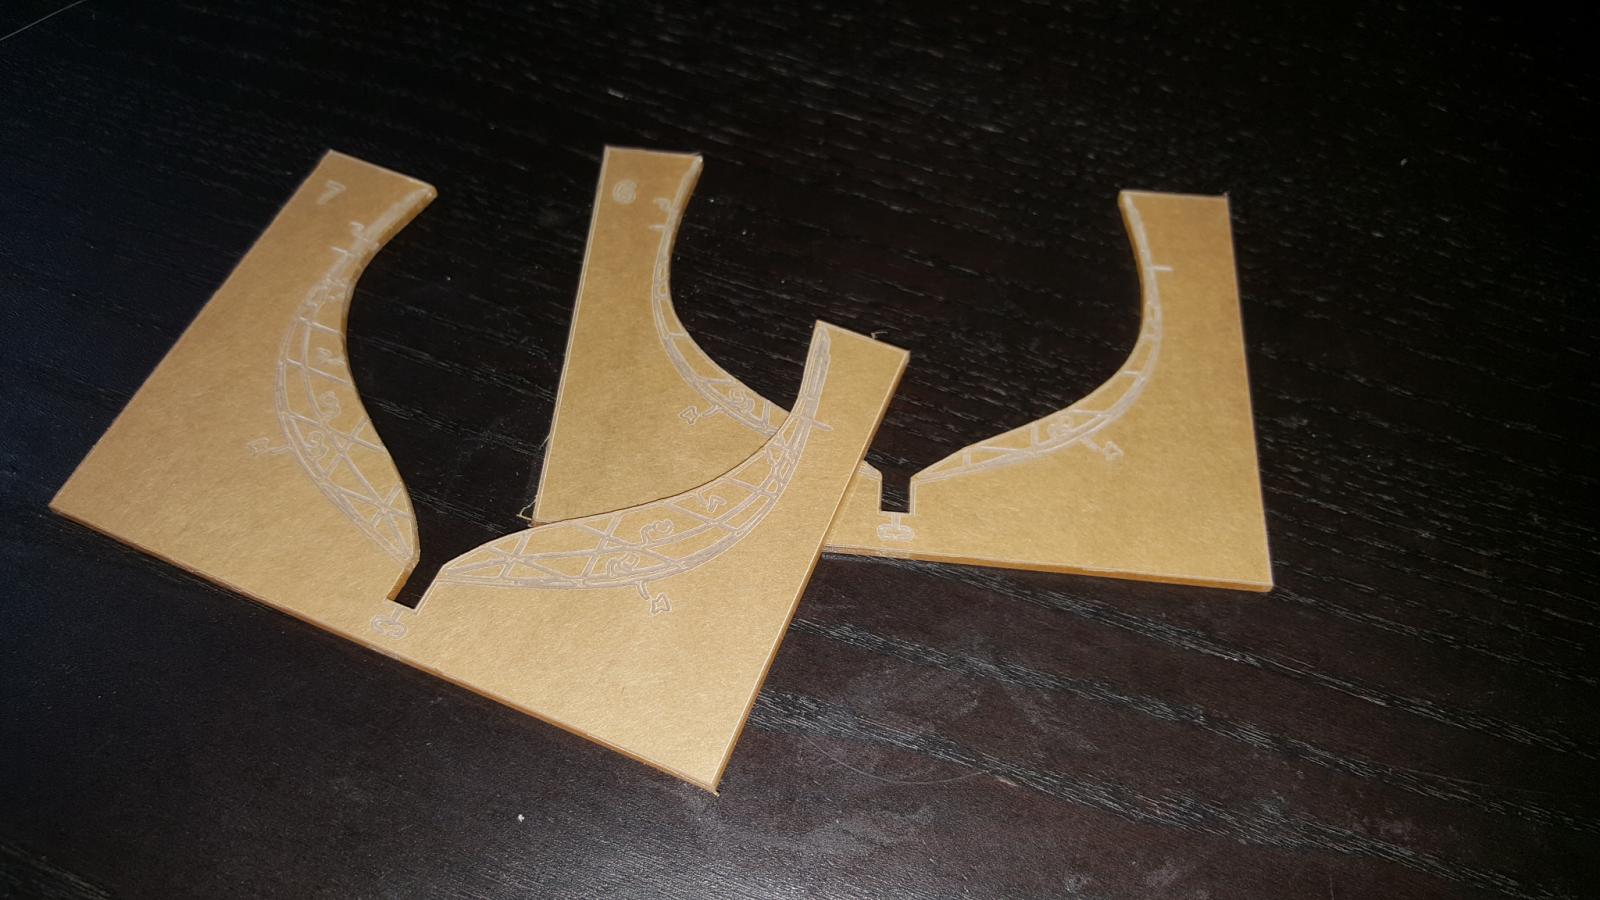
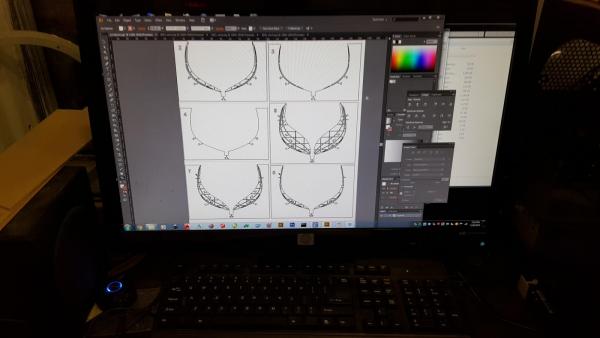
Thank you Mark! That is a very good point and should be interesting to see how each wood takes to the laser differently. The laser I work with is relatively easy to change settings though I definitely want to avoid ruining the good wood when possible. I wanted to add another set of pics I also took the templates and made laser cut versions of them which are much more precise than the ones I cut out. I'll use them as finishing pieces to refine the deadwood by the keel. What these also showed me is that in the future if I wish to scratch build, making my own laser cut bulkheads should be relatively the same process.


-
Thanks Dan I might just buy the mamoli plans on their own and scale them to what I need them to be 1/64 however if thats the route I go then next kit I do will probably be Ballahoo to get the feel of pob construction. The halifax by aeropiccola was a rare kit i think it was only produced in 1993 for the anniversary (I would have been 15 at the time lol). One may pop up in the next few years who knows
-
There is a xebec on ebay right now actually only 120
-
Yeah I remember them from the old model expo books. I really just want the frames and plans maybe a few knicknacks then will modify with lumberyard plans and do the rest by scratch. Perhaps it's because I haven't done a scratch ship before that I am nervous and want some element of a kit to go by. It's in the scale I want so I can sail her alongside Sultana but if I don't get the kit it's not the end of the world. But I wouldn't attempt scratch until I do a few POB kits with decent plans first
-
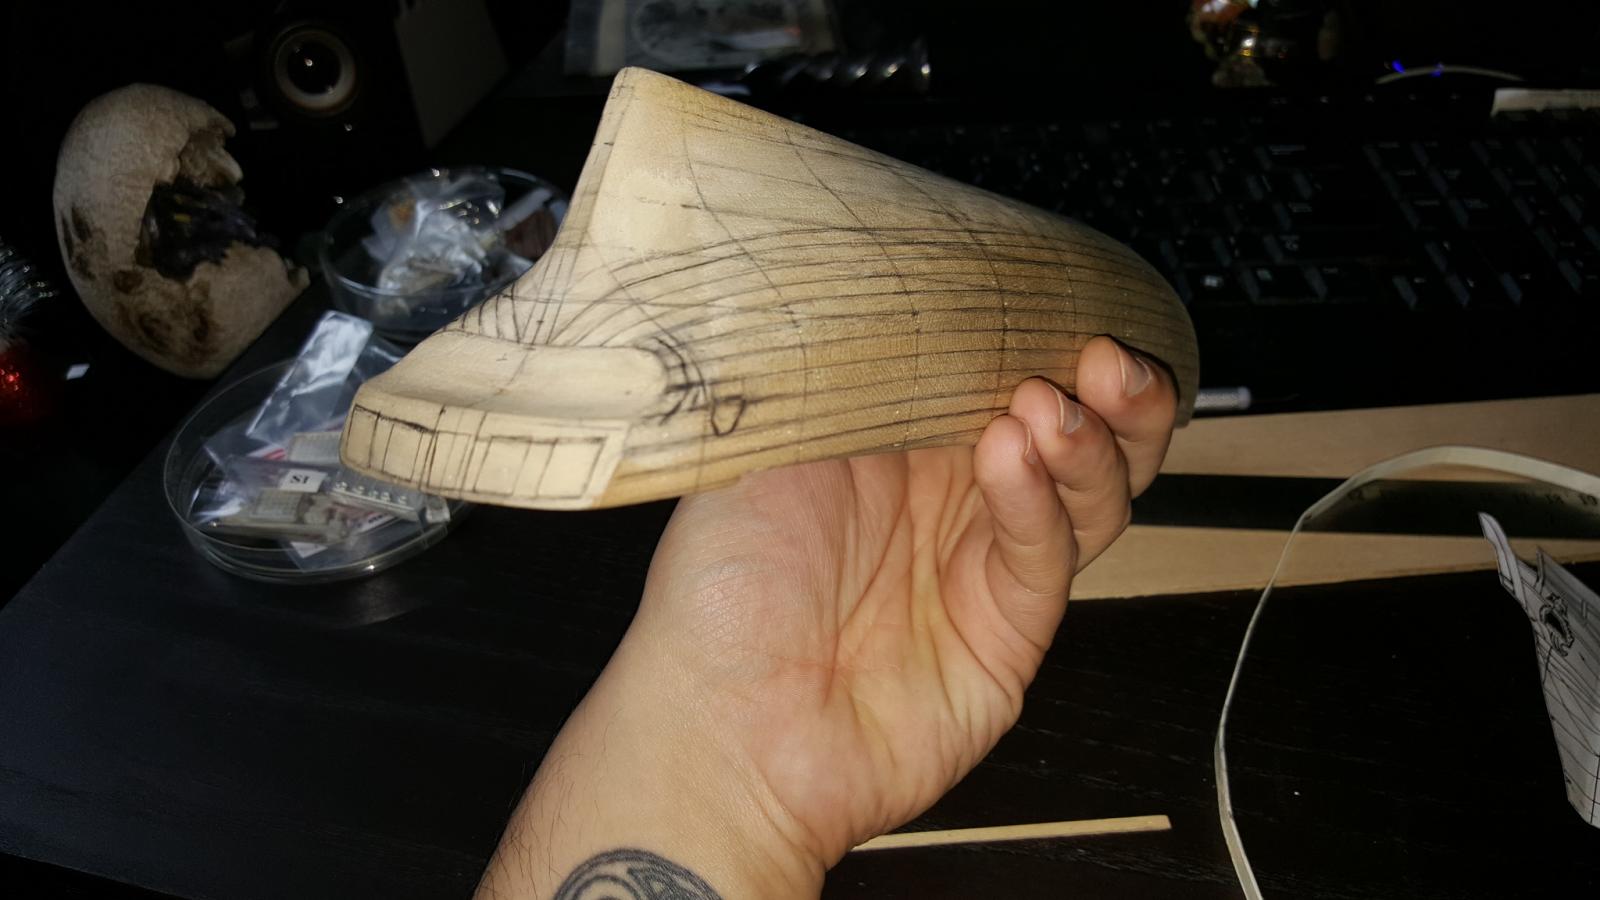
Yes to a point I agree. Frames from what I can see seem a bit more precise with regards to shaping while a solid hull is more freeform, however it does have the added benefit of being able to draw all over it also sand and putty ad infinitum. For this being my first wood kit it's giving me an understanding of what a ship model should look and feel like how to work with wood with a platform which allows for many mistakes and corrections, trial and error etc. Also I can't help but feel a bit of a connection to this block of wood, like I'm putting all this energy into it as I'm holding it, the wood it speaks and tells me... "get off your butt and plank me already!"
-
http://www.anibis.ch/de/modellbau-modellbaus%C3%A4tze-,-standmodelle-schiffe--2228/go%C3%ABlette-coloniale-halifax-de-1768--11302640.aspx So might anyone on here be from Europe (France or Germany) or perhaps have a European email to possibly contact this seller? I've tried to no avail and can't imagine there are many of these left in the world
-
Thank you so very much! I know it's a bit slow but I keep getting to her whenever possible, the benefit of the winter is more home time
-
Hi guys just wanted to add a thought to this topic since I am also thinking of using cherry in Sultana below the wale for a darker contrast. However I am also considering pear which is also nice as well (with less figure). What I am wondering is how does pear look next to cherry if anyone has done that? I might do a pear keel with cherry planking or perhaps a cherry keel with pear planking or maybe have both pear or both cherry. Tons of possibilities wondered if anyone has tried similar contrasting.
-
Thank you Ian, Elijah and Jason (and anyone else if I missed ya) for the kind words I can feel the love lol. Can't wait to get some planks on her but still a few steps left and happy to share my approaches and thoughts. And Jason I'm really looking forward to that HMS Jason you're doing. I really enjoy watching kits get modified and curious to see the differences in stern detailings, figureheads etc. If it's anything like your HMS Snake it should work out splendidly!