HOLIDAY DONATION DRIVE - SUPPORT MSW - DO YOUR PART TO KEEP THIS GREAT FORUM GOING! (Only 13 donations so far - C'mon guys!)
×


NMBROOK
-
Posts
2,305 -
Joined
-
Last visited
Content Type
Profiles
Forums
Gallery
Events
Everything posted by NMBROOK
-
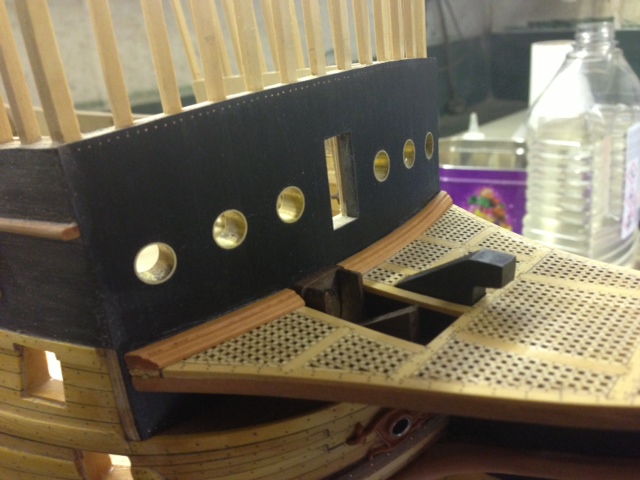
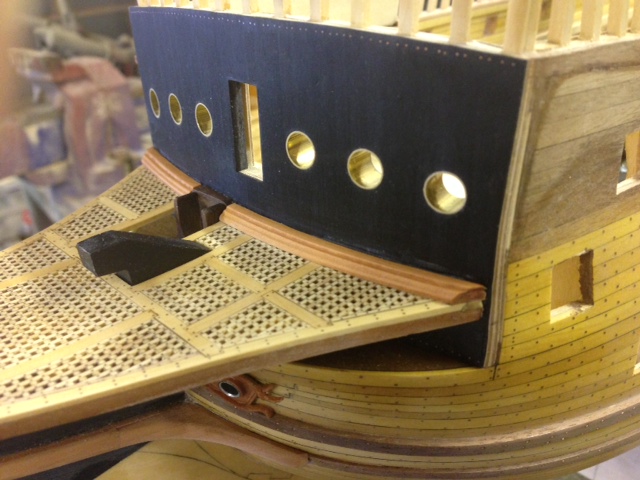
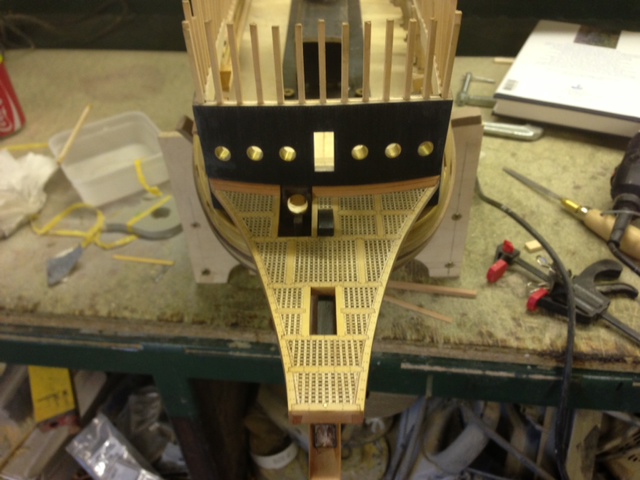
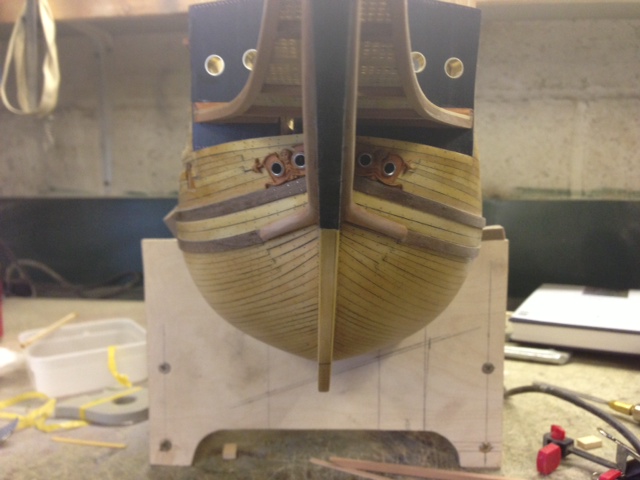
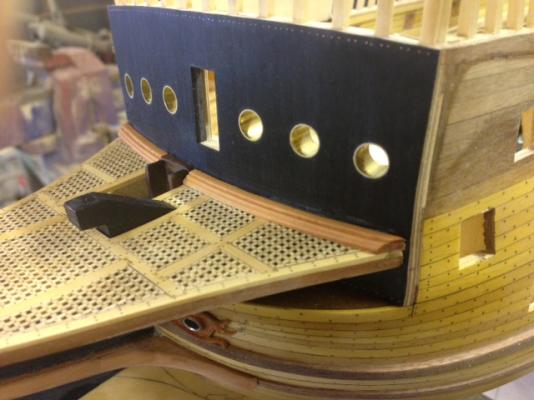
 I have fitted the grated deck to the prow with epoxy and a few brass dowels in key positions. Kind Regards Nigel
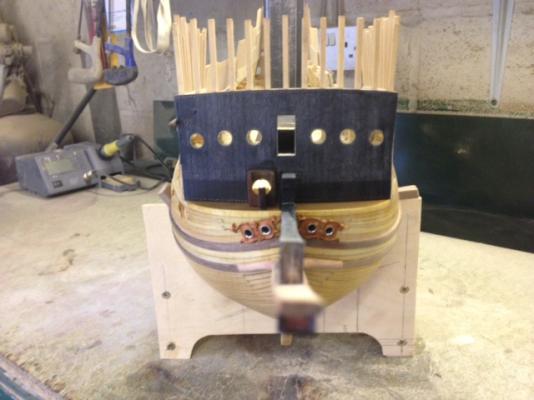


-
Thank you very much for your kind words Eddie More pics to come tonight when glue has dried Kind Regards Nigel
-
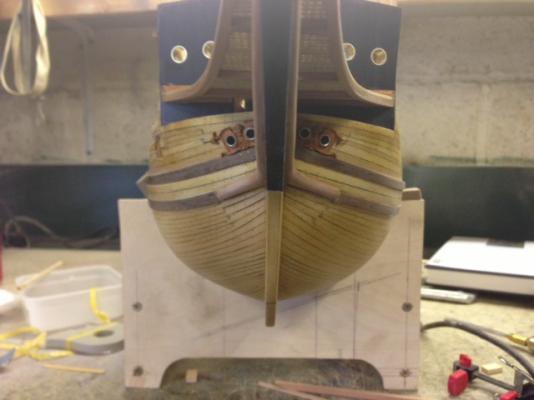
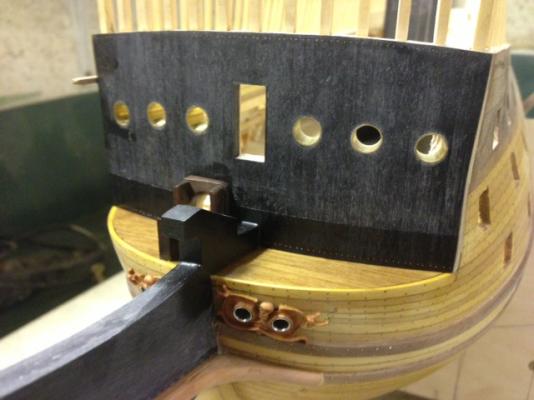
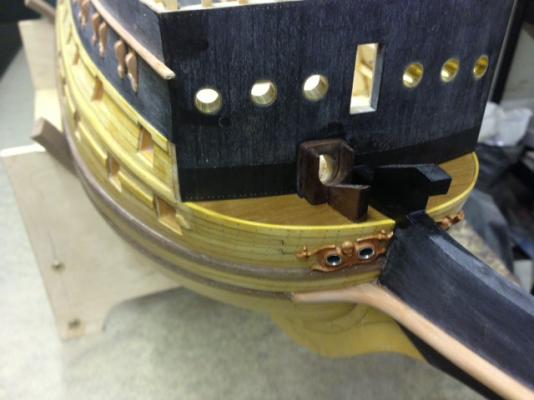
A small update.Both carvings/hawse holes are now sorted.I masked off and varnished the area below where the grated deck sits in preparation for fitting the deck tomorrow night. Kind Regards Nigel
-
The finials look great Matti.I believe that's the correct name. Kind Regards Nigel
-
Col Seth Warner Rgds Nigel
-
Thank you very much indeed Mark Kind Regards Nigel
-
Cheers Danny,I shall investigate Kind Regards Nigel
-
Hi Danny Any chance of another clue,nobody is having a stab at this one.I know if I put tug in google images there will be 100trillion results I know you say it's easy,but you know the answer Kind Regards Nigel
-
Thank you very much indeed Ferit I wanted it to appear similar but not be a exact copy,the end details are slightly different.You never will never know unless you give it a try,like I said I think you are more than capable. Kind Regards Nigel
-
Thank you very much for you kind words Matti Kind Regards Nigel
-
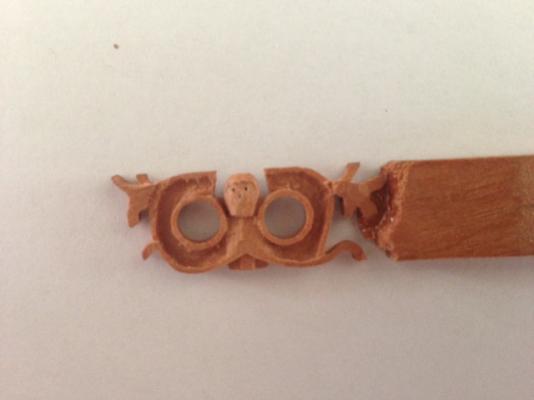
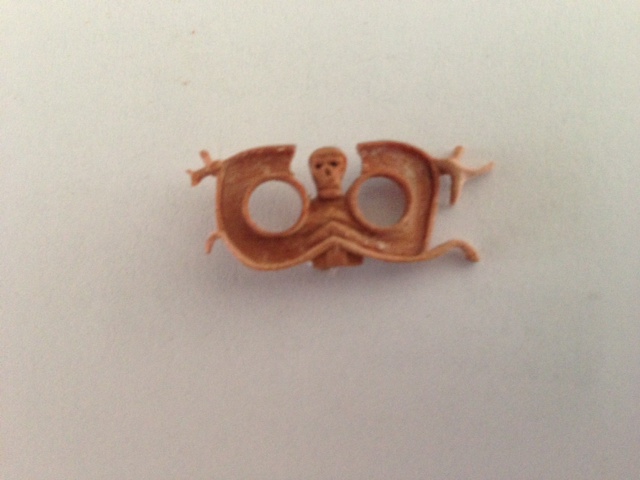
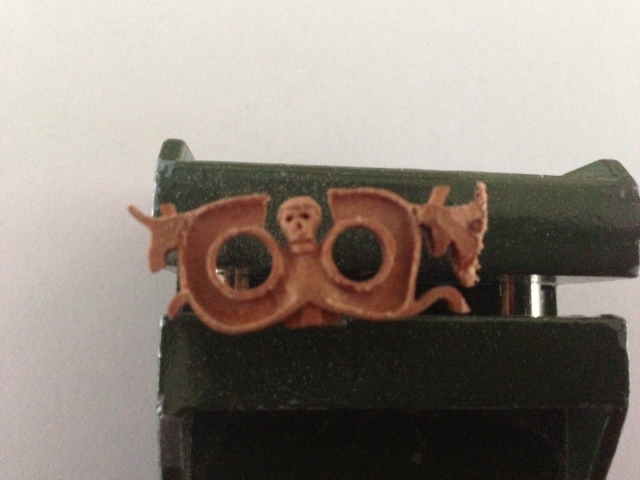
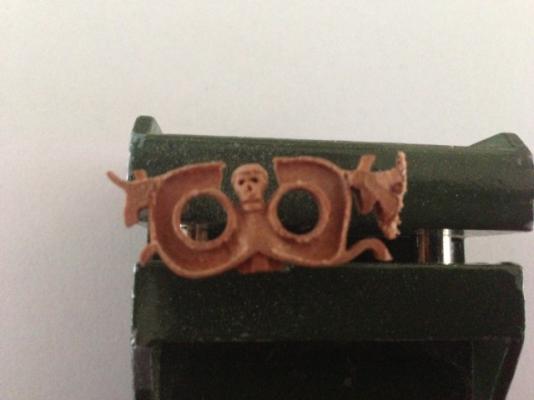
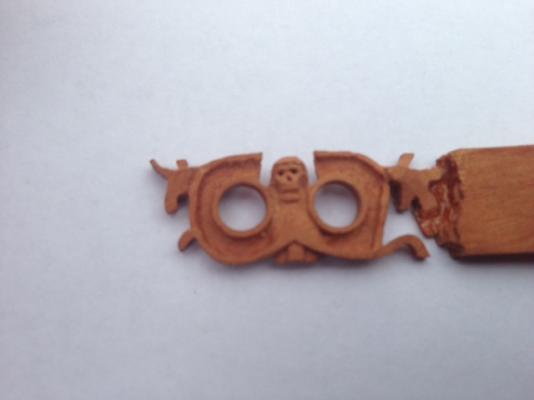
The final instalment.The rib detail was added using the scalpel and dental probe.The end detail were shaped using the scalpel.Then finally a dress up of the edges with p320 silicon carbide paper. Kind Regards Nigel
-
Thank you very much Anja Kind Regards Nigel
-
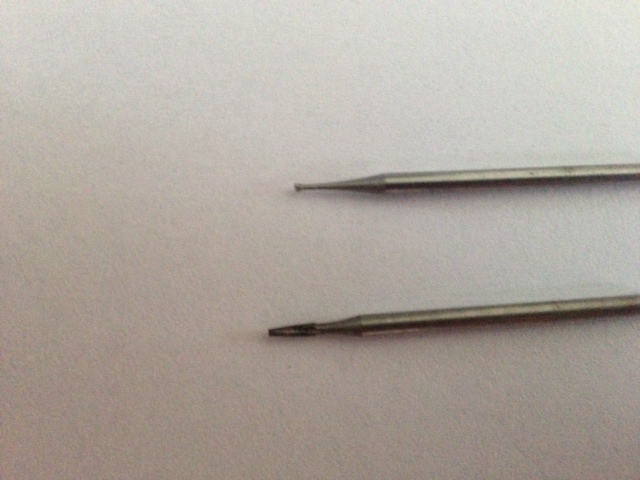
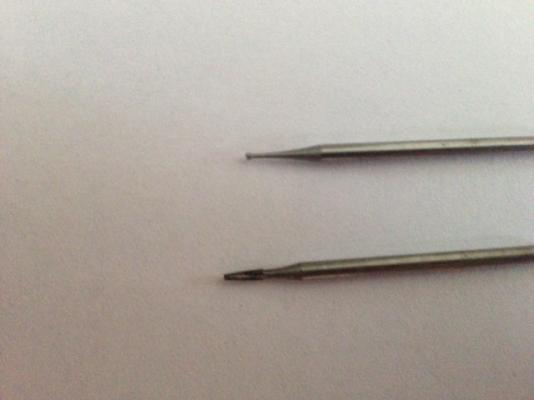
Before proceeding any further,the carving was 'parted off'from the end of the strip and a section of stripwood was glued to the back end on so I could clamp the piece in my small proxxon machine vice.I used a dab of thick cyano for the job. In Pic one is the two burrs I will use for the next step. Pic two; I first cleaned up the background of the carving using the burr in the top of pic one.You will notice that the end is flat,cutting edges only on the side.By working round and slowly dabbing the surface keeping the tool square to the face(not so easy as the carving is curved to suit the bow)I was able to reduce to final thickness and achieve a better surface finish.The sounding edges were then thinned using the burr at the bottom of pic1.These edges were lightly dabbed again with the cutter,working along the edge to thin it out Kind Regards Nigel
-
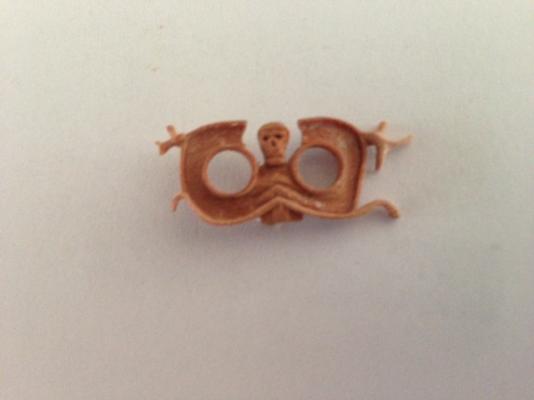
First job today was to further refine the shape of the jaw and shoulder/neck area.This was carried out with the tip of the scalpel.Only removing minimal material has changed the head from 'planet of the apes'to a definate skull. Kind Regards Nigel

-
Thank you Matti,hopefully post the conclusion of this piece today. Kind Regards Nigel
-
Thank you very much for your kind words Sid Yes this is my first bash at carving.Bill's build is excellent and that was his first attempt at carving when he started that.I am working the opposite way round leaving the complex carvings on the stern till last.Hats off to Bill,he set himself an immense learning curve starting at the stern first. Kind Regards Nigel
-
Fabulous,just fabulous Matti You have managed to catch the errors in uniformaty of the originals perfectly!I bet it was harder to make them slightly wonky that it would have been to do them perfectly. Kind Regards Nigel
-
Love the ladders Michael Excellent work and clever thinking gluing several stringers together.It may be a small detail,but it is a massive improvement over the kit parts. Kind Regards Nigel
-
Excellent work so far on your rigging Ferit If the rigging on my build ends up as clean and precise as yours i will be very happy Kind Regards Nigel
-
Thanks again Ferit for your kind words As regards the time,you may be right which is why I am trying to do some as the build goes along.The thought of completing the hull and then starting the carvings from scratch would terrify me.I have seen the high standard of your work and I think producing carvings is not beyond your ability.I suggest you find a piece of pear or boxwood and give it a try,you never know you might surprise yourself! Kind Regards Nigel
-
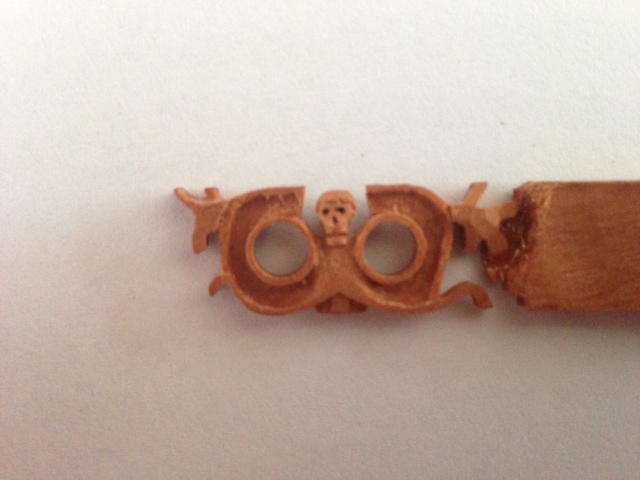
As I have a guide now with eye and nasal holes in place,I proceeded to add contour to the skull using a scalpel blade and shaving extremely small chips away,slowly slowly is very much the name of the game.I also added a little shape to the eye sockets and nasal cavity using the tip of a new blade in the scalpel and a pointed dental probe.The spine detail has been added at the bottom with the scalpel. Kind Regards Nigel
-
Excellent,well done Dan.You were so close with Oleg Strashnov muggebigge,Both operated by Seaways heaving lifting. Over to you then Dan
-
It was the only one I could find that wasn't either massive or showed the name,sorry
-
Very close,but no.Nice try though muggebigge
-
The next step was to increase the definition around the sides of the skull.I have drilled 0.4mm holes as a start point for the eye sockets and nasal cavity.The crutial point is the nasal cavity is central top to bottom in the skull otherwise the proportions will be incorrect.I have also started chipping away at the hairline and I am introducing some rounding to the head.The next step is the cheekbone area which is the main difference between a skull and a face Kind Regards Nigel