HOLIDAY DONATION DRIVE - SUPPORT MSW - DO YOUR PART TO KEEP THIS GREAT FORUM GOING! (Only 13 donations so far - C'mon guys!)
×


NMBROOK
-
Posts
2,305 -
Joined
-
Last visited
Content Type
Profiles
Forums
Gallery
Events
Everything posted by NMBROOK
-
 Hello Anja Thank you very much for your kind comments.It may be a little while before I get to the carving stage,but I am very much looking forward to that stage myself. Kind Regards Nigel
 -
Hi Nat It's my fault really,I should have mentioned this,yes the bowsprit will be offset to starboard,the central slot is for the stem extension I am going to fit.This has a hook to take the mainmast stay and will have a carving of cupid sat on a lion.If you offset the bowsprit on the standard kit,it will not interfere with the castings,but you may have issues when fitting the gammoning.If you look at my new deck you can just make out that the gammoning slot is offcenter to starboard.If you offset the bowsprit you would have to make a new deck piece anyway,so you could move the gammoning slots as well as the bowsprit hole.The reason its a common mod is that research suggests that it must have been offset.It was common practice at the time when the foremast is as far forward on the Sovereign,this was to allow the bowsprit to run past the foremast base inside the hull and be anchored properly.If you look closely at the Van de Velde artwork,you can see the bowsprit run past the stem on the starboard side.Hope this helps with your decision. Kind Regards Nigel
-
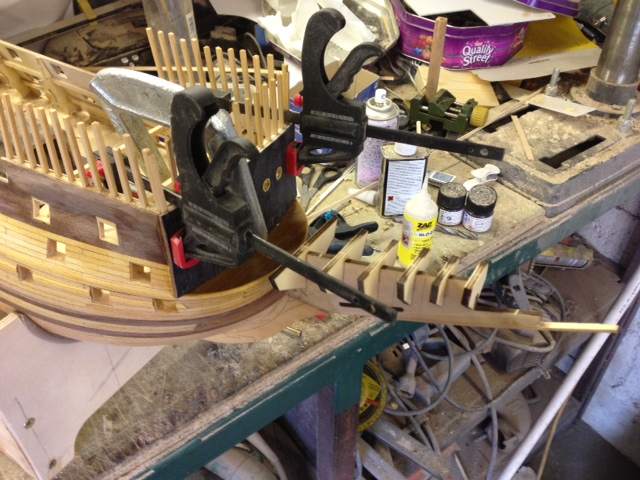
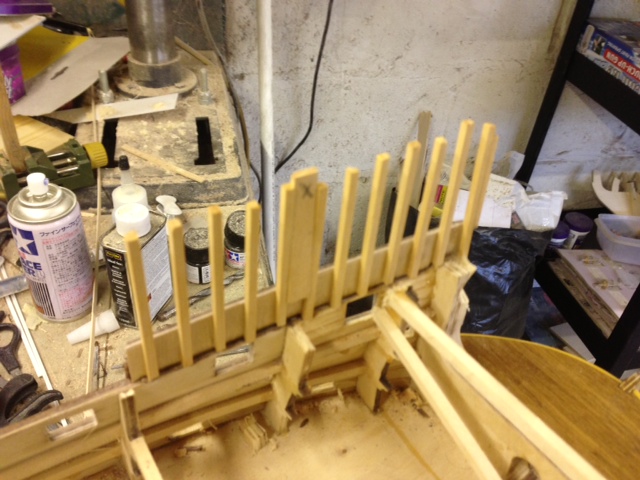
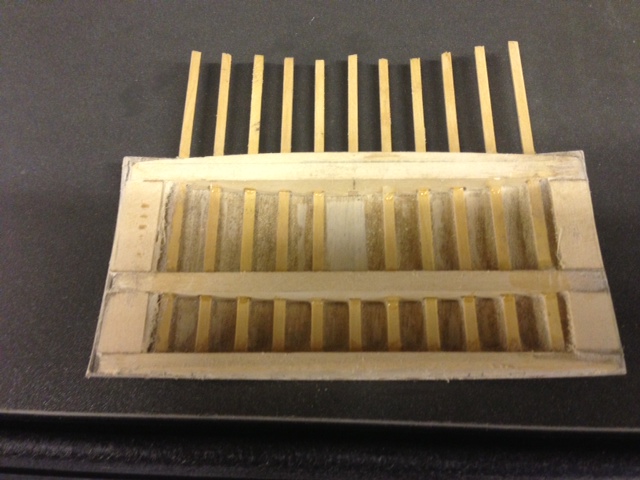
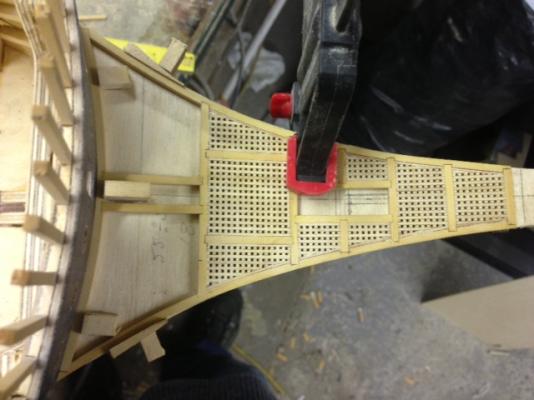
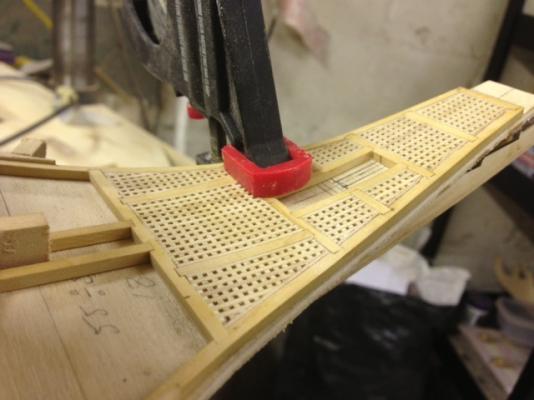
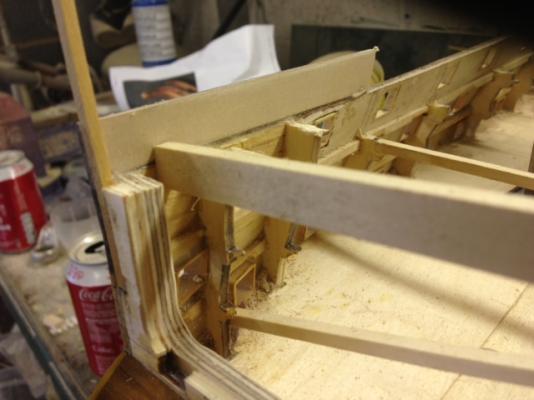
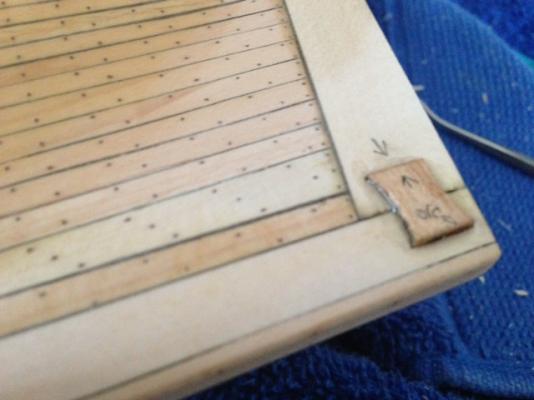
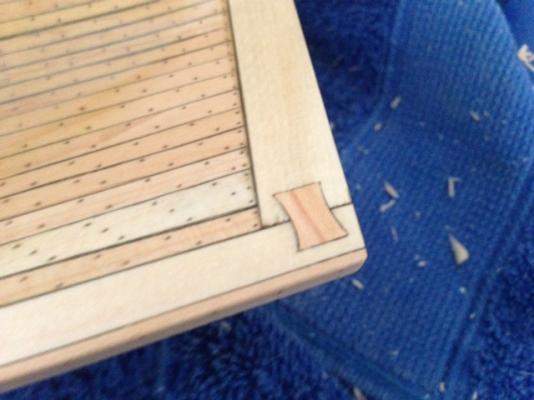
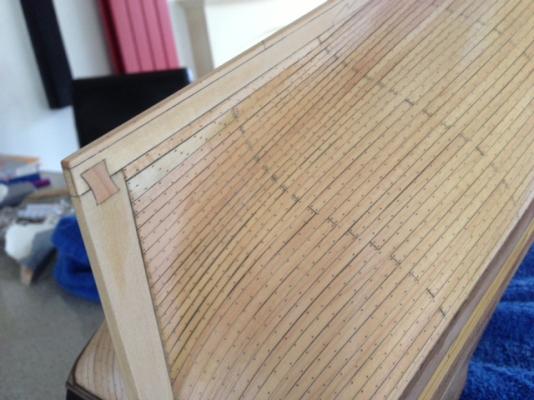
I have to admit my patience has been stretched several times working on the prow deck.I have had numerous pieces filed in the 'recycling section' and have had to remake them.I feel I am on the home straight now,but I can't believe how long it is taking.I include some pics of as it is today.The gratings are caldercraft 1mm ones as small children could fall through the ones supplied. Kind Regards Nigel

-
You would of thought it would of been easier for the designers of the original kit to start with the correct plans rather than start from a blank sheet of paper.It would interesting to know what has become of the science museum model,since the ship display has gone and alot of the models have been returned to their owners. Kind Regards Nigel
-
Go on Chris,you know you want to,Prince next,please please please.Just out of curiosity,how accurate are the original Amati plans I have?I know the decoration along the rails is inaccurate,but how about the overall hull lines? Kind Regards Nigel
-
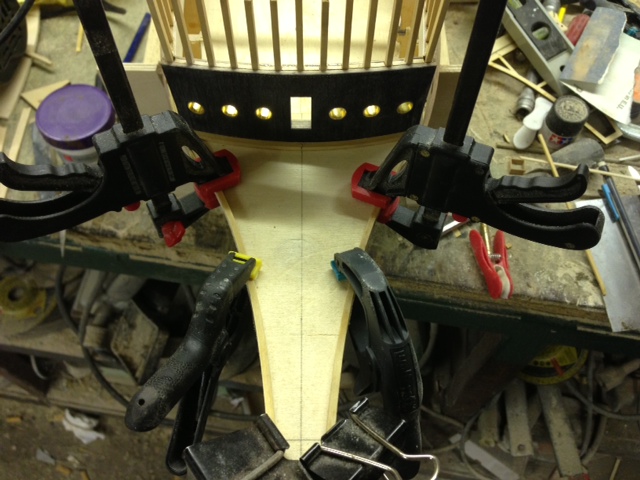
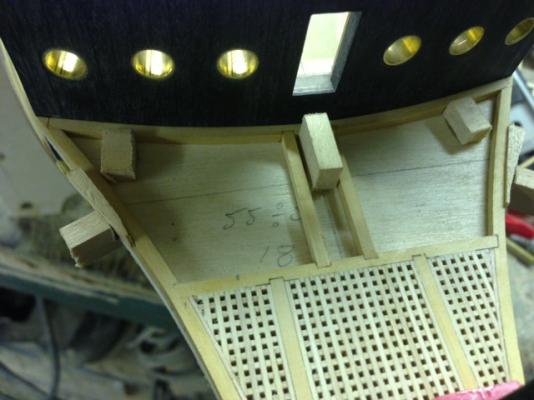
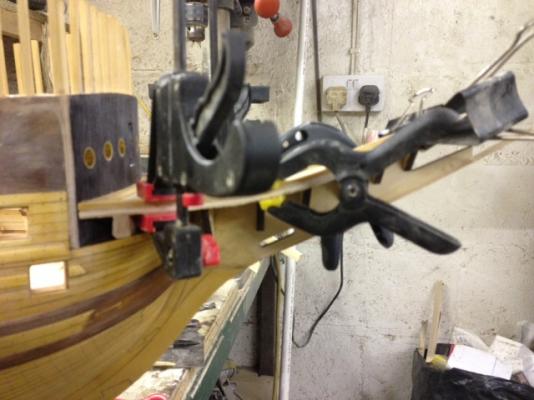
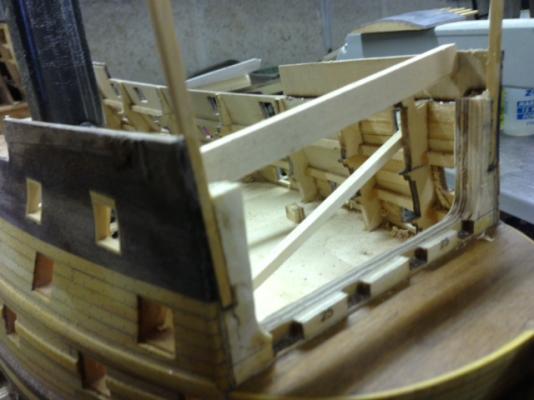
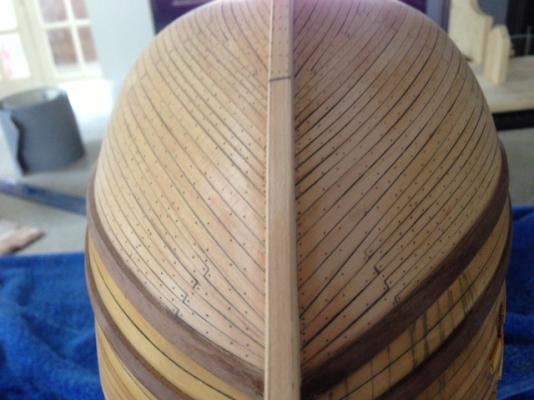
I have fitted the bulkhead in place and faired the sides to match the hull.Now on to the prow.The kit prow,to be honest bears little resemblance to that of the artwork.The sides are far to deep and the grated deck is depicted as flat.To be honest this 3D nightmare has caused me a bit of headscratching,as to the best way to proceed.To remain faithful to the Van De Velde atwork the deck sits much higher at the beakhead and does not coincide with the mouldings on the outside.I figured the best way to start my jig was to glue in the supplied bulkheads for the stem.I only glued the top half of the slot allowing the ears to be sawn off later.I then profiled the top of the bulkheads and false keel to provide an acceptable curve.On top of this I glued(to the bulkhead ears only)a piece of 3mm ply which was cut out to match the supplied deck frame.The top of this ply is the bottom face of the deck.Today's work was concluded by clamping some steamed boxwood section in place and leaving overnight to dry. Kind Regards Nigel


-
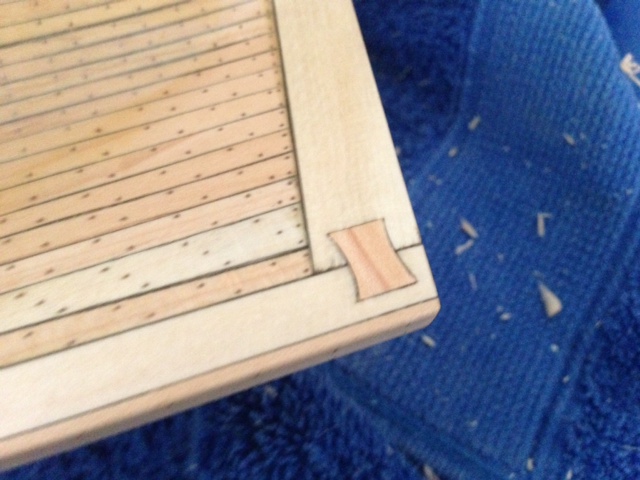
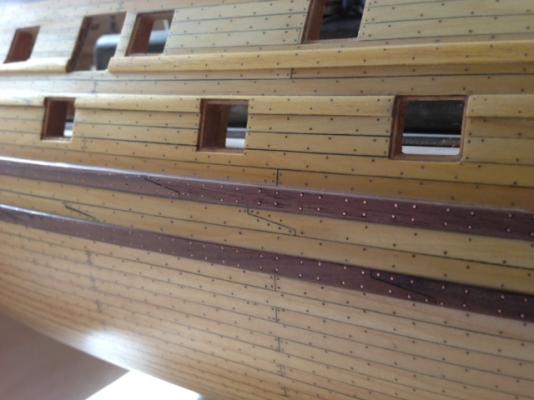
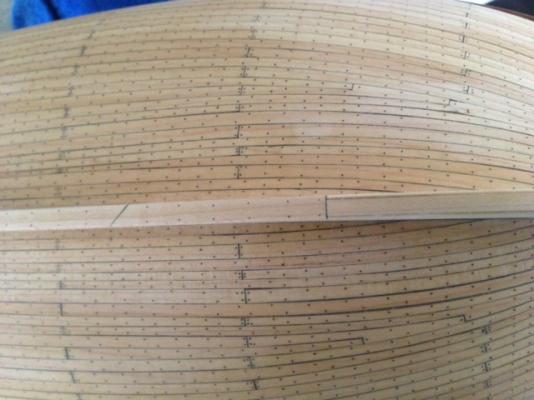
Thanks David.No so far the only parts of the kit used are the bulkheads and the false keel.The hull is planked in maple below the wales and boxwood above.The caulking is plain hb pencil on one side of each plank.The treenailing was carried out after sealing the hull with heavily thinned ZAP epoxy finishing resin.I marked and drilled 0.4mm holes then covered the hull with a thin skim of dark woodfiller.This was then flated with p320 silicon carbide paper, leaving the filler in just the holes and then sprayed with polyurethane.This varnish will probably be sanded and overcoated again a few times during the build,but at the moment the hull is protected from glue drops scratches etc.On the main wales I drilled 0.6mm holes and cyanoed in 0.5mm copper wire. Kind Regards Nigel
-
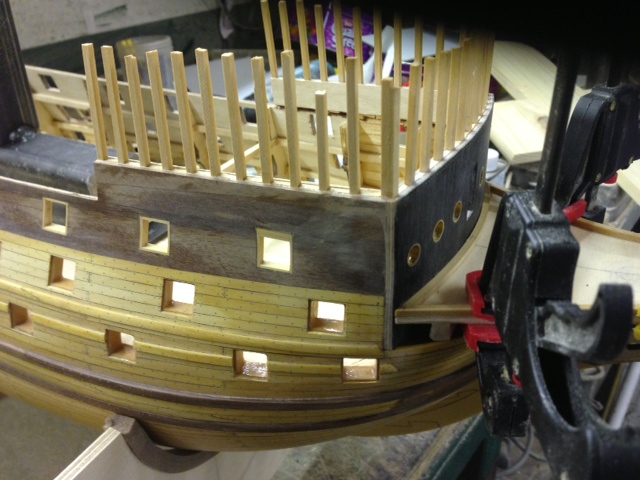
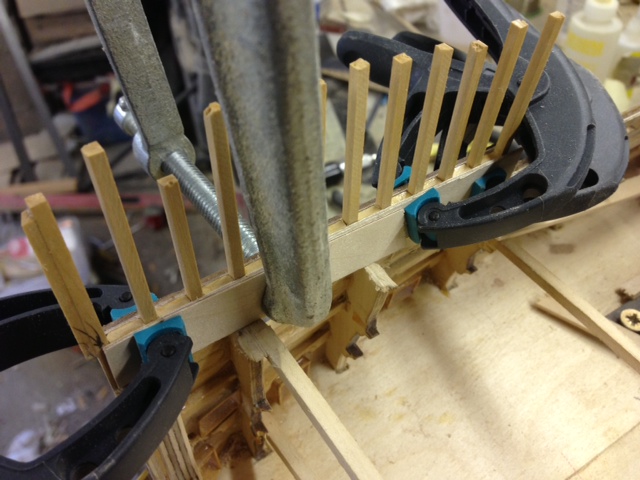
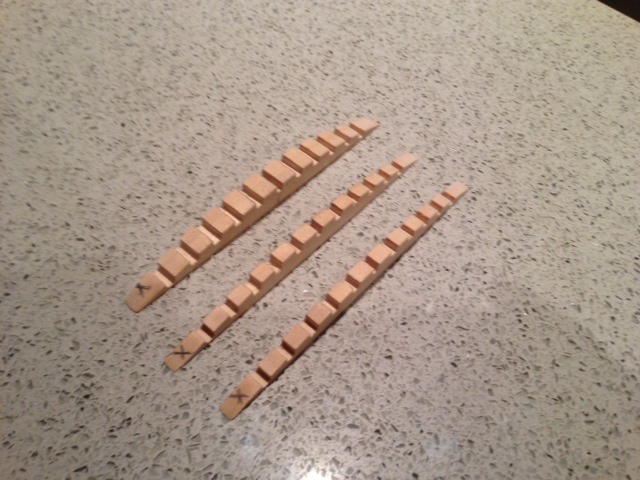
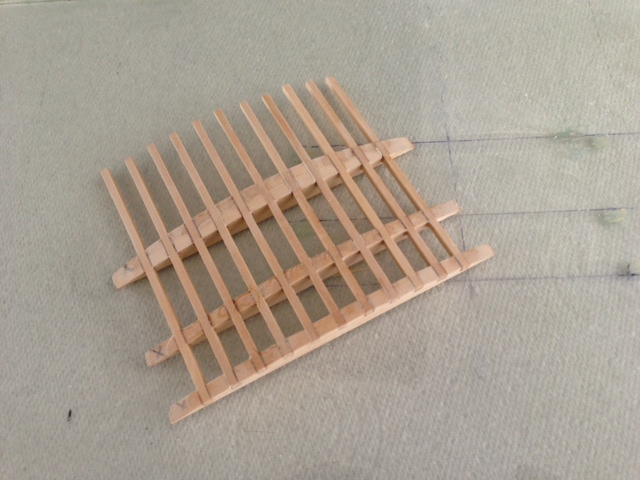
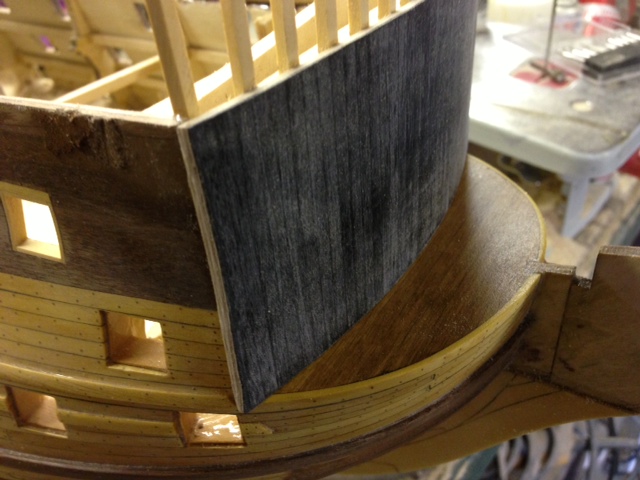
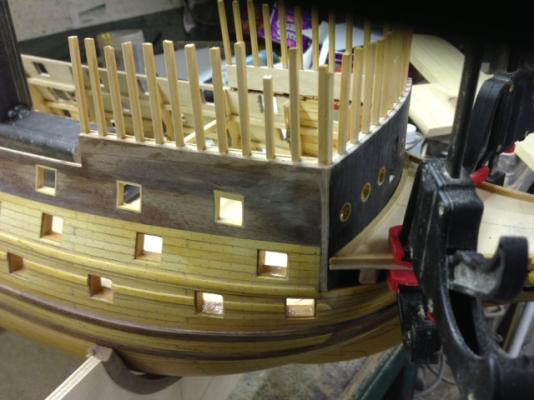
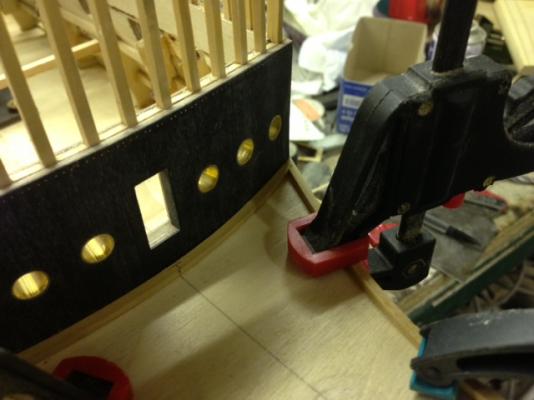
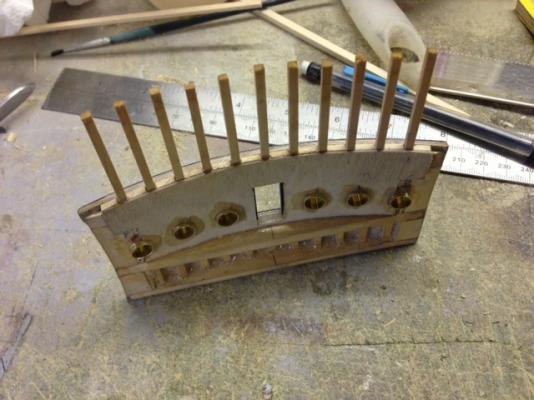
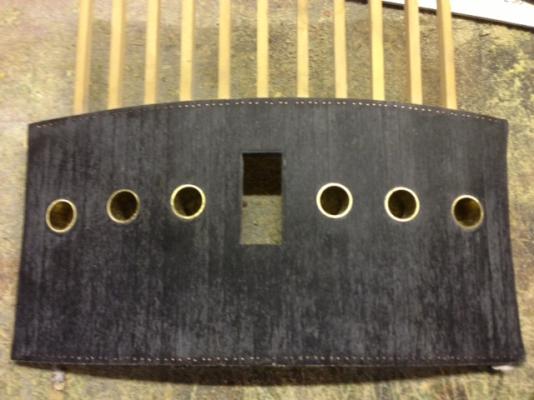
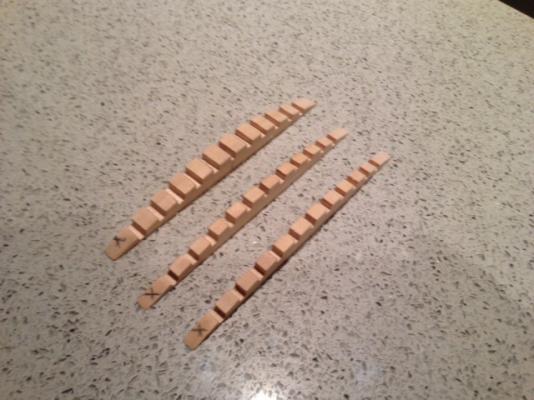
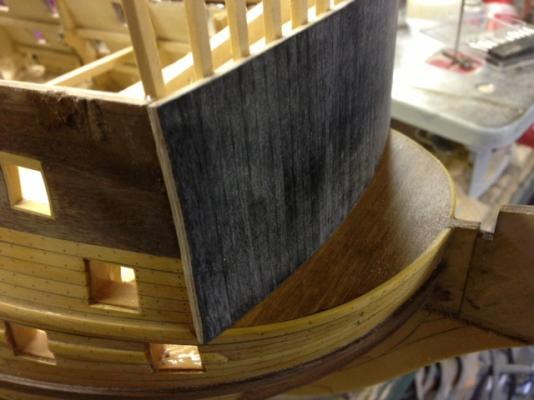
A small update.Having a eureka moment in bed the other night made me realise I have a small amendment to make to my new bulkhead.Van de Velde depicts the first three decks protected by a grated overdeck.I had been trying to work out the deck levels form his artwork.It came to me that deck one and three(its easier to refer to them like this)must sit slightly below the top of the hull.I therefore trimmed back the top former and lined the inside at the top with 0.8mm ply.This will later be planked with boxwood.I then cut the door and lined the top and sides,the bottom I plan to incorporate into the ladder leading up.I drilled the six gunports as indicated by the V de V artwork.these were lined with brass tube for a clean finish and will be painted black(I know I said no paint but can't avoid it this time).I treenailed top and bottom edges with 0.3mm copper but have left the rest till I sort out the prow deck height. Working back on the hull I have fitted the uprights to the forecastle.In the photo you will see a spacer I made,one end is marked with a cross.By alternating which way up the spacer went as glued the uprights on,I prevented any vertical creep due to spacer inaccuracy.I then lined the insides again with 0.8mm ply. Kind Regards Nigel


-
Thank you very much for your kind comments.No,I am not painting the hull,infact,I am not going to paint anything.The kit supplied ornamentation is far too simplified and inaccurate for my liking,so I am going to reproduce all this in carved Pear wood.All the black areas will be covered in the same black boxwood strip I have used for the beakhead bulkhead. Kind Regards Nigel
-
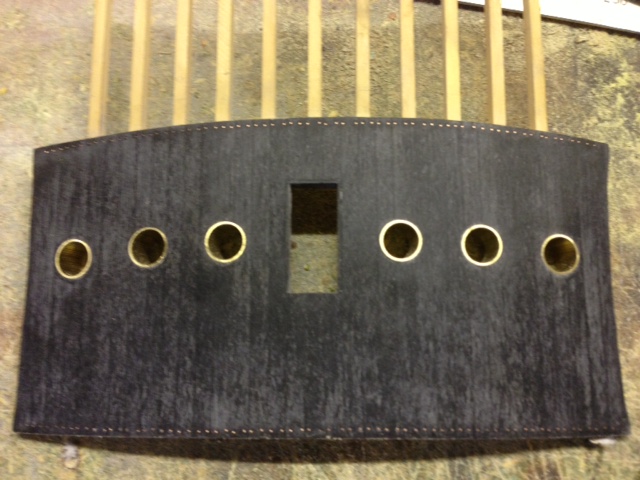
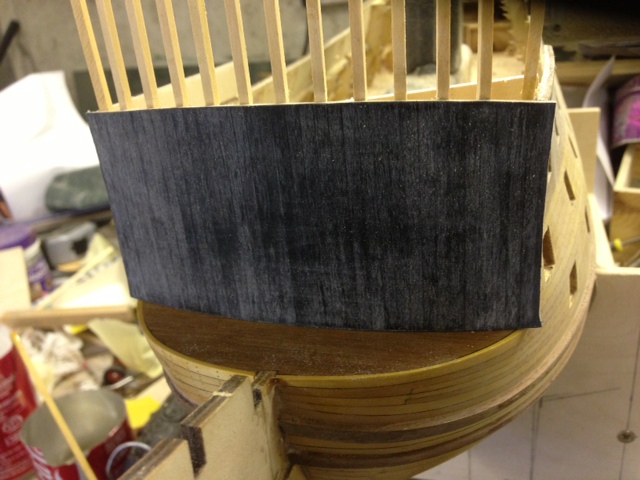
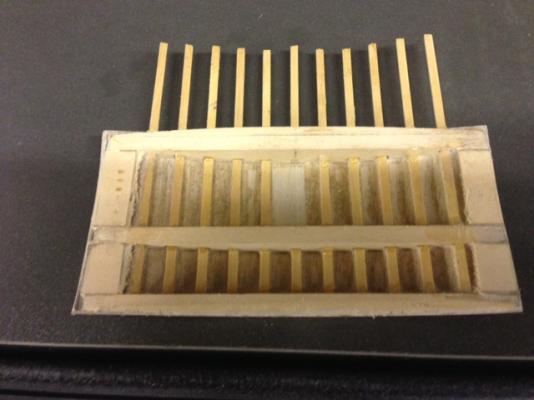
I have nearly finished all the treenailing on the starboard side.I decided to use 0.5mm copper for the mainwales.Now as a break I decided to start work on the beakhead bulkhead.In the deagostini partwork,this is almost identical to Sergals offering.As I am modifying this model to represent the Vandevelde artworks, I decided this was best scratchbuilt.I came up with a design that incorparates the uprights for the railings for strength,as the majority of the rigging is tied off to these railings.I made three limewood formers and notched these to take the boxwood uprights.This was then glued together on a sheet of glass to ensure flatness.The front face was skinned in two laminations of 0.8mm ply and then planked with black boxwood strips I have obtained from a marqeuetry supplier.After gluing braces into the forecastle area,I removed the majority of the original bulkhead.The planking at the forecastle was slimmed down to 1mm thick from the inside.To the inside of this I laminated some more 0.8mm ply.This strengthens this area and forms a base for the uprights at the sides of the forecastle.I then mortised the remains of the old bulkhead and epoxied in the corner uprights.At the moment all the uprights are left way overlength and the new bulkhead's sides will be trimmed flush to the hull when this is bonded in place.I am going to detail this bulkhead before I actually bond it in place. Kind Regards Nigel


-
Hi Sherry I agree with Steve,I would go for the great cabin,being the one with the upper balcony.If nothing else,judging by the windows,this is the one with the most headroom. Kind Regards Nigel
-
Hi Nat, Thank you again for your kind comments.I am sorry to hear you think modelspace is unfriendly.I suppose there is alot of 'nice work' comments,but that is just builders helping each other along.Most my indepth chats on there have been by private message as not to clog each others build logs.I have certainly made one or two friends. Some of the build logs go into each individual step and whilst I try my best to explain what I am doing,I feel that if I did this from the start I would be up to page 200 by now.I am glad that what I do write you find informative,but if you want to know something don't be afraid to ask,I will do my best to help.Are you planning on doing a build log of your own? Kind Regards Nigel
-
I will be following this build closely Jack as I considering subscribing if it comes to the UK.At the moment I am in the early stages of Sovereign of the Seas by Deagostini Kind Regards Nigel
-
polyurethane
NMBROOK replied to hamilton's topic in Painting, finishing and weathering products and techniques
I have never had a problem,however I always spray another coat of polyurethane over the lot, colour included,far more durable than acrylic on its own. Regards Nigel -
polyurethane
NMBROOK replied to hamilton's topic in Painting, finishing and weathering products and techniques
Hi Hamilton, Oil based polyurethane.This goes over the stain, and the acrylic paint will go over the poly.The Oil based poly acts as a barrier coat between stain and paint.In the UK they are labelled either acrylic or polyurethane varnish.The acrylic based Isn't a true polyurethane. Kind Regards Nigel. -
Hi Hamilton I would stain the upper hull first without masking,no matter if you go a bit below the waterline.Allow to dry thoroughly then apply two or three coats of polyurethane over the whole hull.Allow to harden off for 48 hours.Mask above the waterline and rub the bottom down lightly with 320 grit silicon carbide paper.Replace the masking if necessary(I would have used cheap masking tape for the first step as its only to protect from scratching the upper hull and tamiya masking for the second) and then paint the bottom. Hope this helps Kind Regards Nigel
-
Hi Vince Lovely work,and I must say your rigging is very impressive.I think it may be a year or so before I get to that stage. Kind Regards Nigel
-
I have had a lovely long holiday weekend treenailing I have completed both sides under the wales and intend to give this area a few coats of polyurethane for protection.I have also inlaid some small pieces of maple to represent the bowtie piece that joins keel to sternpost. Kind Regards Nigel
-
A very big thank you for you kind comments Nat I have to admit I haven't built that many,mainly because life tends to get in the way.I think the last year or so is the first time since being a teenager I have been able to devote serious time to this hobby.If you build to the instructions,you will end up with a lovely model,the quality is up there or beyond that of the main Italian manufacturers.It is only because I am aiming for a more historically accurate representation that I am using so little of the partwork.It may have been easier to kit bash Sergals kit,but that has been done before,and as I am hoping to compete in modified kit class with this model,the extra work will hopefully mean a few more points. I don't know where you are based,but I do recommend joining modelspaces gb forum as there are alot of builds on there,including mine,that discuss all the stages involved in construction.You are quite welcome to borrow any ideas you like,I will be happy if they help your build along. Kind Regards Nigel
-
Sherry my apologies,I didn't notice this as I was too wrapped up in looking at the pictures.I totally agree with you,some models you build with historic research and others you build for sheer enjoyment.It is nice to let your imagination run wild a bit,and nobody can say 'that wasn't like that etc'.And as I said the San Felipe is beautiful. Kind Regards Nigel
-
Hi Sherry I have to say what a lovely job you have made so far on the San Felipe.I too have the Panart Plans and also the Amati plans.The Panart plans build into a much nicer model than the Amati ones.To be honest I bought both and was quite disappointed by the Amati ones.They were a let down compared to the Amati ones I have for HMS Prince.I also intend to do a scratchbuild to the Panart Plans to 1/75 when I have finished my Sovereign of the Seas. I hate to be the bearer of bad news,but after alot of research on the internet,it does appear that this vessel never actually existed.There was a ship of the same name from a much later period but this was completely different.This model is believed to have been derived from plans drawn by an Italian modelmaker named Vincenzo Lusci in the 1960's.It is thought he based his design on the ship Real Felipe of the eighteenth century.A model of this ship is on display in the naval museum of Madrid.Fact or fiction,at the end of the day,she is a beautiful model when complete. Kind Regards Nigel
-
I used to go out of my way to get them ,now I'll pick up a copy if its under my nose. I have to agree with you Chris,Keith Julier is instrumental to introducing so many of us to the 'black' art of building period ship models in the days before the internet.Euromodels Royal William,beautiful model,unfortunately if you are in the UK you have to get it direct from Italy.Kicking myself now because I passed up on the last one Westbourne Model Centre had. Kind Regards Nigel
-
Several projects.The one in the spotlight at the moment is Sovereign of the Seas.This is a partwork by Deagostini,but to be honest i think 99% will be scratchbuilt.The advertising literature for the kit seemed to address all the errors in Sergals kit.Unfortunately now I am well into the hull,the model we are building differs greatly from the advertising.Not one to be defeated,I am trying to build as accurate replica as is possible from this partwork and the research material that is available today.In hindsight a scratchbuild would have been better but I have several hundred hours already in the build. Kind Regards Nigel
-
Again, a lovely model Chris.It seems a shame that the two main UK magazines don't seem to focus as much on period ships as they used to.I know keith Julier has done a few articles,but when you have all his books,these are only covering what has been mentioned before. Kind Regards Nigel
-
Hi Jimbob,glad to see another UK builder on the forum.I have only just started a log on here for the first time as well.You seem to got off to a great start on what is a very impressive ship. Kind Regards Nigel