HOLIDAY DONATION DRIVE - SUPPORT MSW - DO YOUR PART TO KEEP THIS GREAT FORUM GOING! (Only 36 donations so far out of 49,000 members - C'mon guys!)
×


maturin52
-
Posts
128 -
Joined
-
Last visited
Content Type
Profiles
Forums
Gallery
Events
Everything posted by maturin52
-
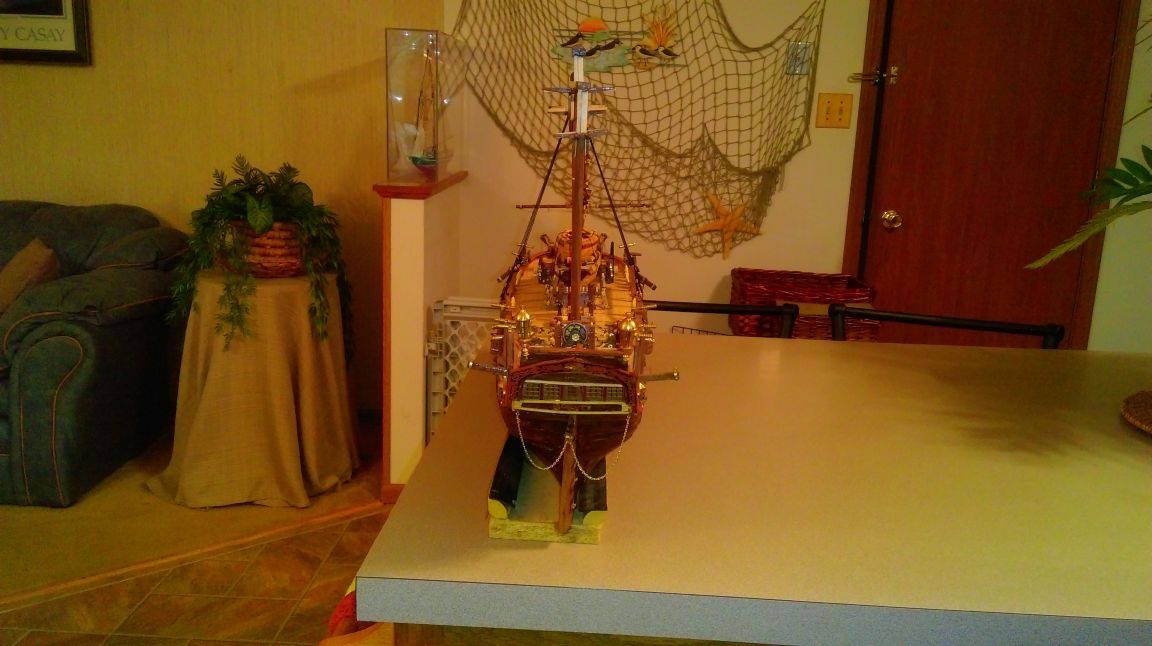
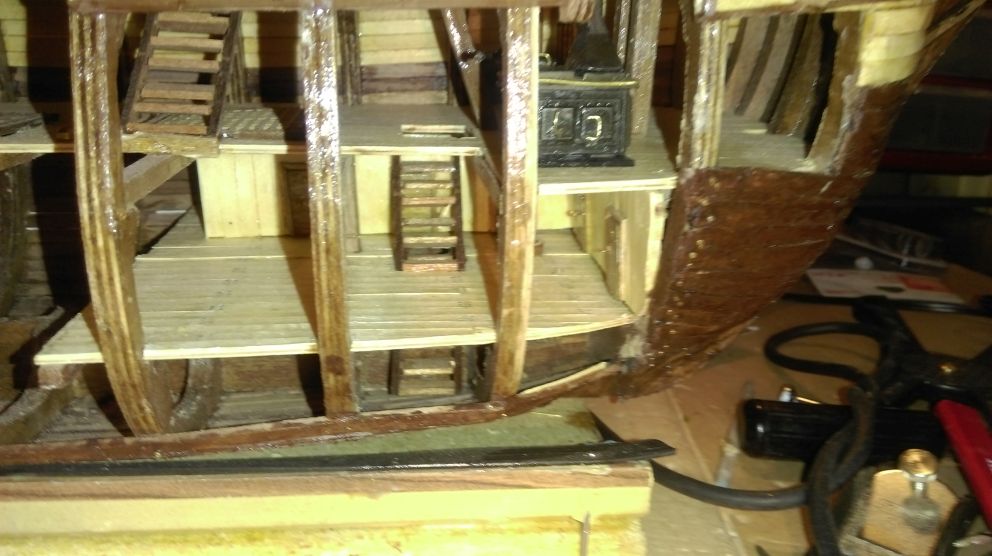
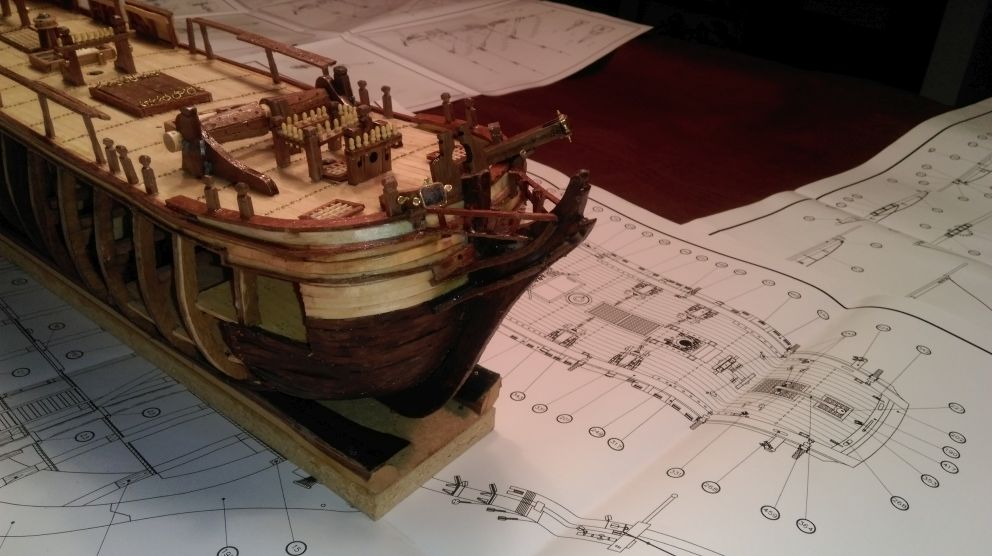
 Here's a shot from the stern, showing the stern windows, and, more importantly to me, demonstrating that the masts are, indeed, aligned! PS That ship you can see in the background in the (homemade) plexiglass case, is a model of the Bluenose (Billings kit), that I built several years ago.
-
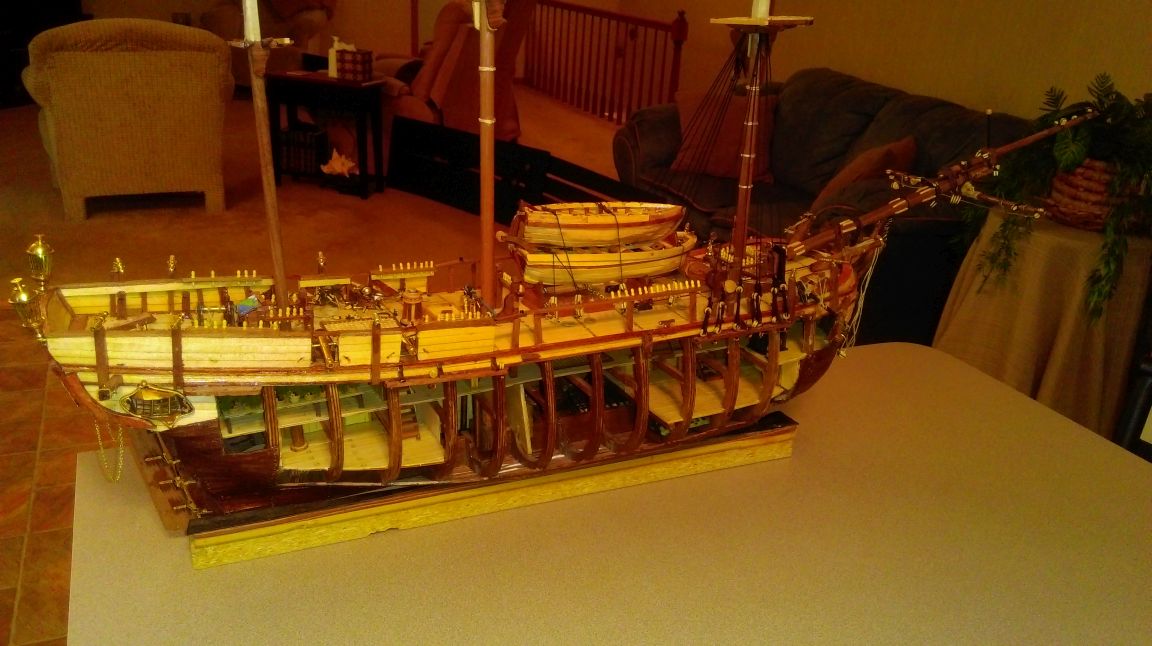
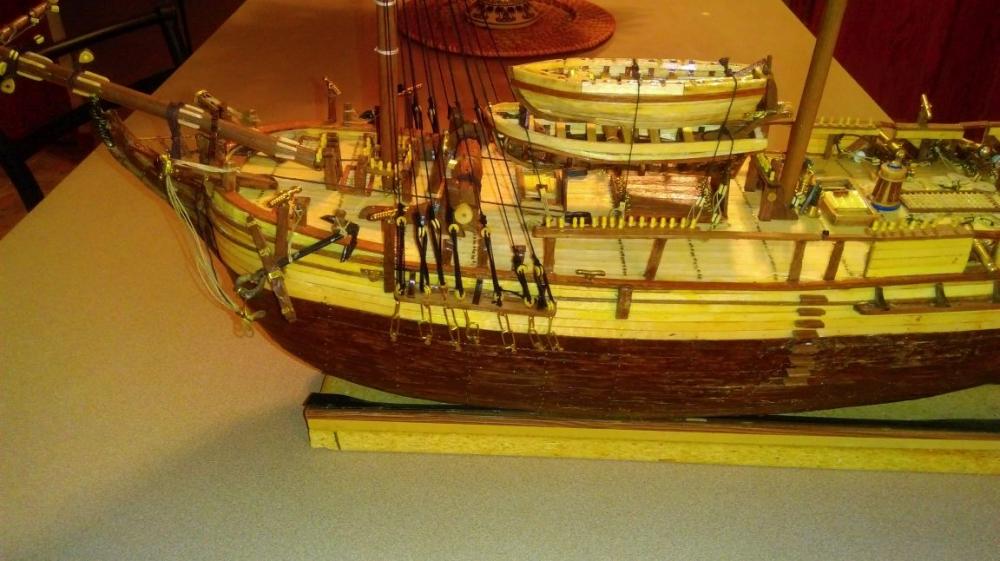
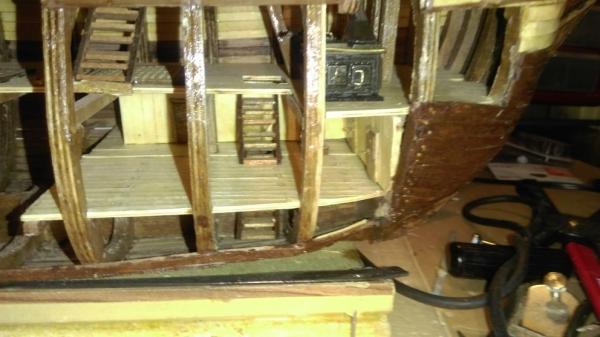
Here is view from the port side, showing the interior, lower masts, etc.

-
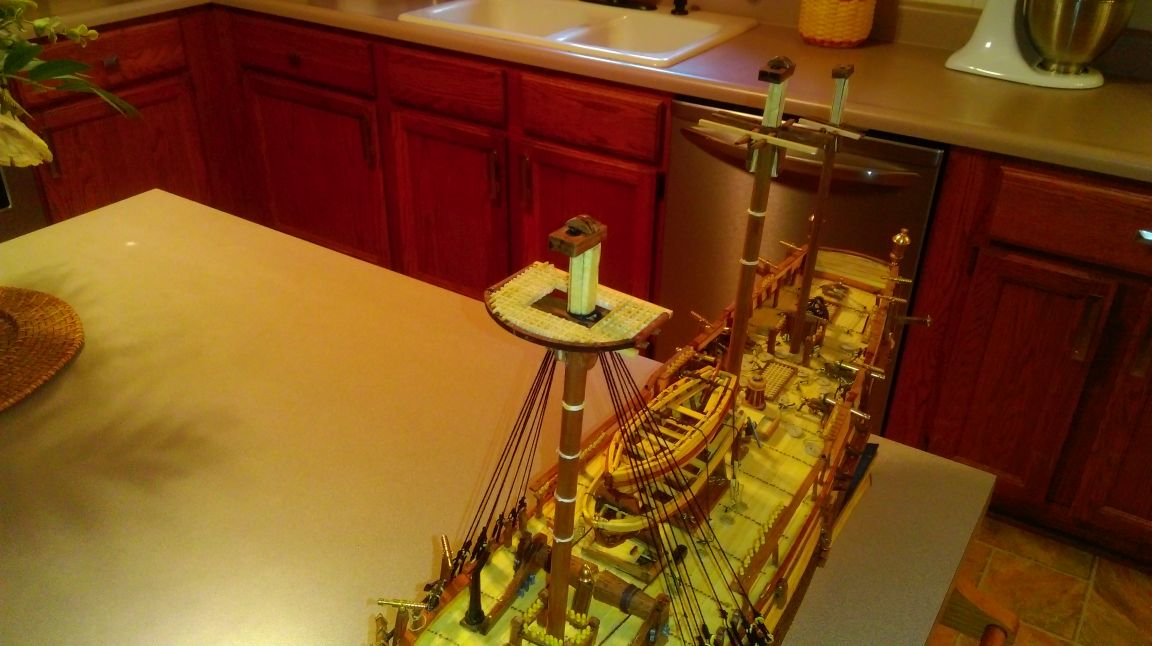
Now a view of the Fore Top. This I am pleased with, and the other tops, as well.

-
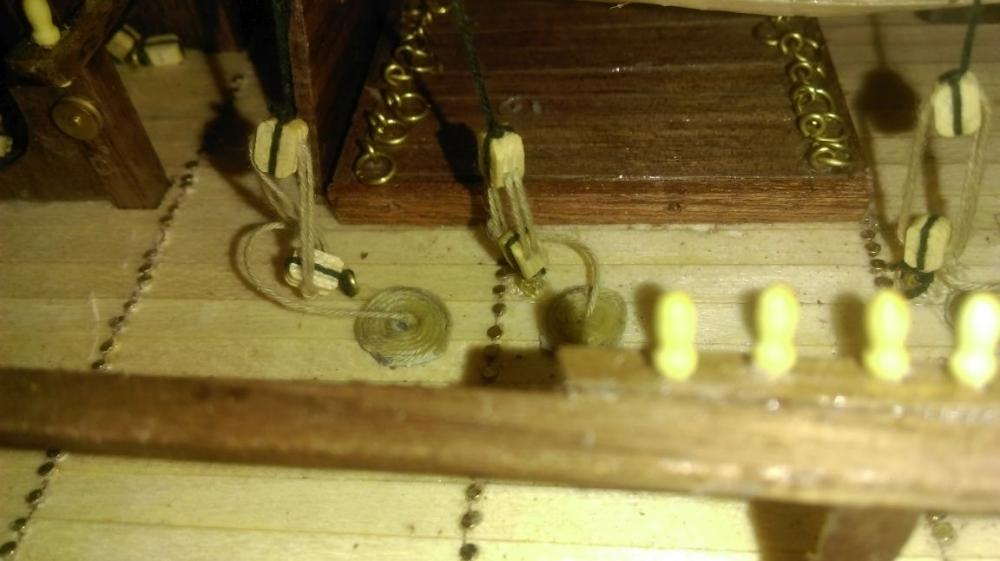
This next picture is a little closer view of the foremast shrouds and deadeyes, with the chainplates. I am not completely happy with the chains, but will hopefully improve as I progress.
-
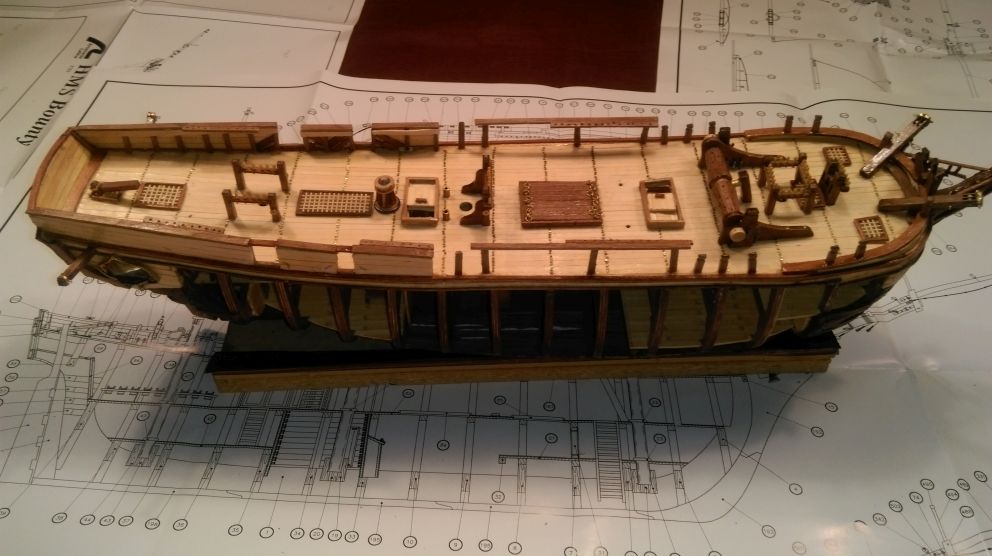
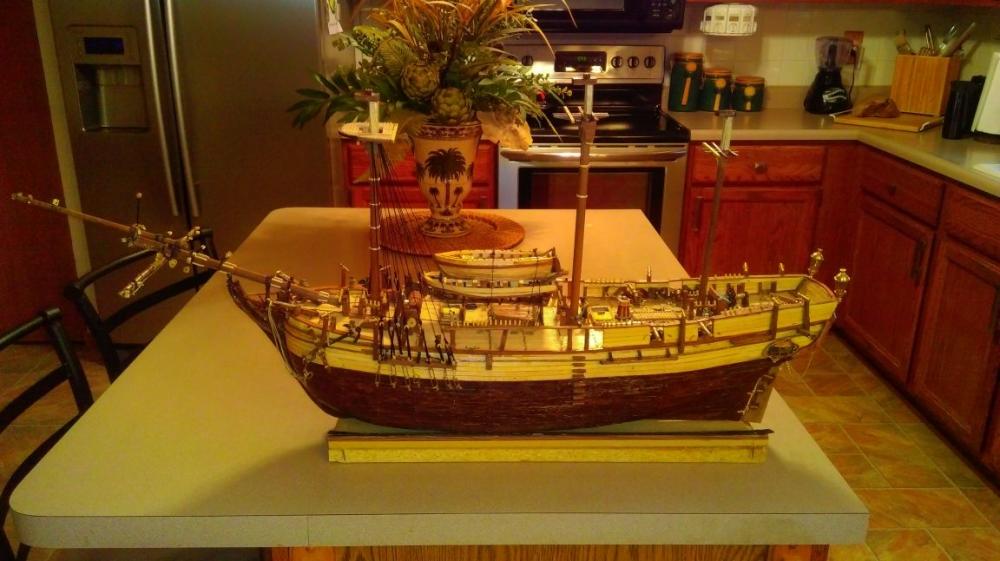
Well, my intentions when I started this log were to be disciplined in keeping it up to date, and to post as I went along. Intentions aren't always the end result however. I used to come to this site all the time, following a couple of ongoing builds, but I fell out of the habit for a couple of reasons. One, I got a decent book on ship models that has answered some questions. Two, I have progressed beyond the logs I was following. Three, I have gotten past the point where Artesania Latina's instructions are of much use, except for the well drawn, detailed plan sheets which are all I really have to rely on at this point. In any case, I have been plugging away at the build, trying to work about an hour so a day on it. This first image is a general shot of my Bounty as she existed about a month ago.
-
I did this same model last year, and enjoyed it thoroughly. I had no problems with the upper pieces fitting in their slots... what I dd discover, however, that it is incredibly east to turn the middle and upper decks around, causing no end of fun and confusion. 'nuff said!
- 44 replies
-
- 1
-

-
- king of the mississippi
- artesania latina
- (and 1 more)
-
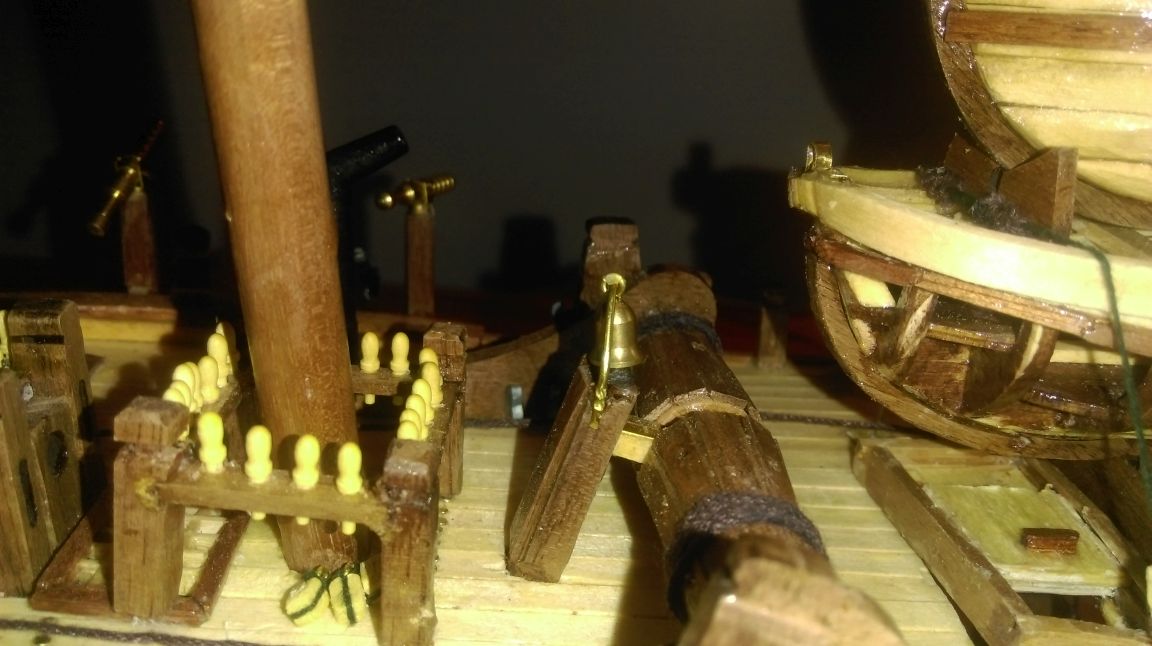
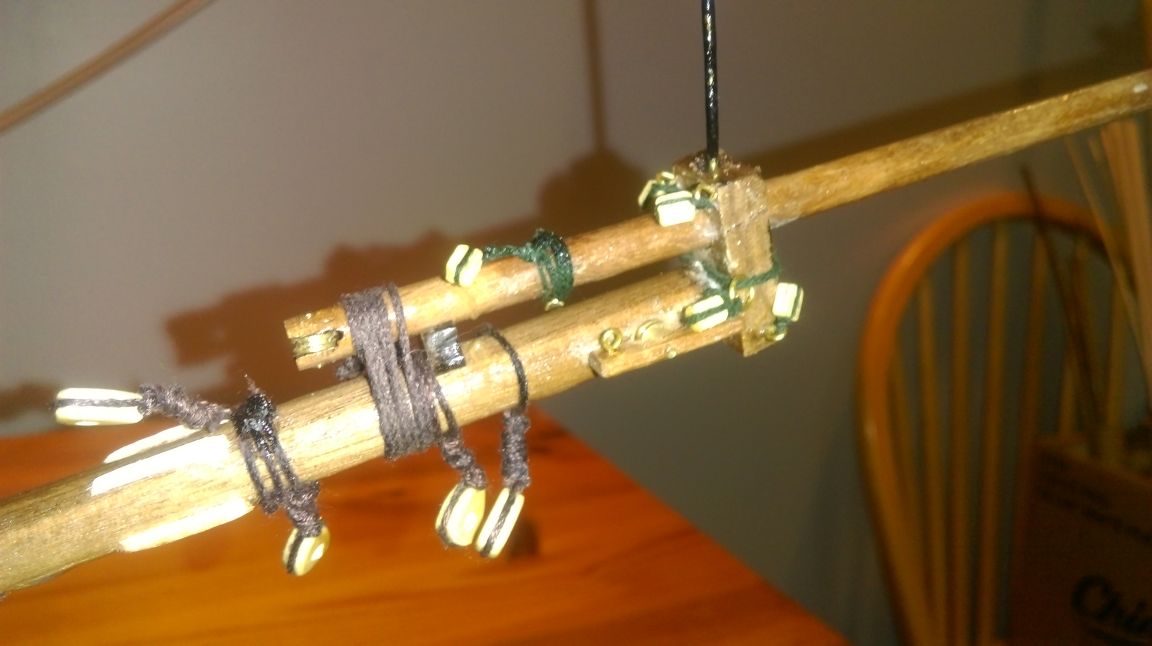
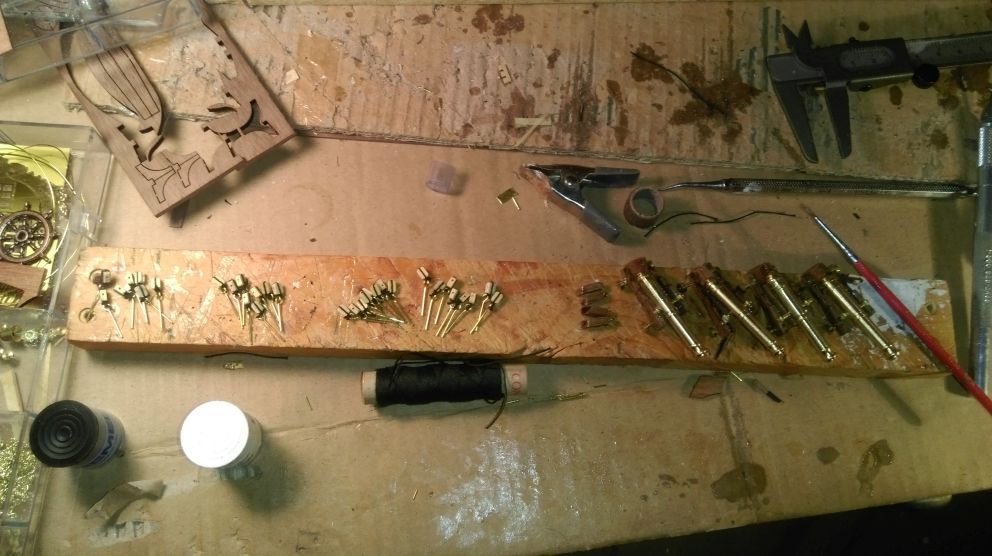
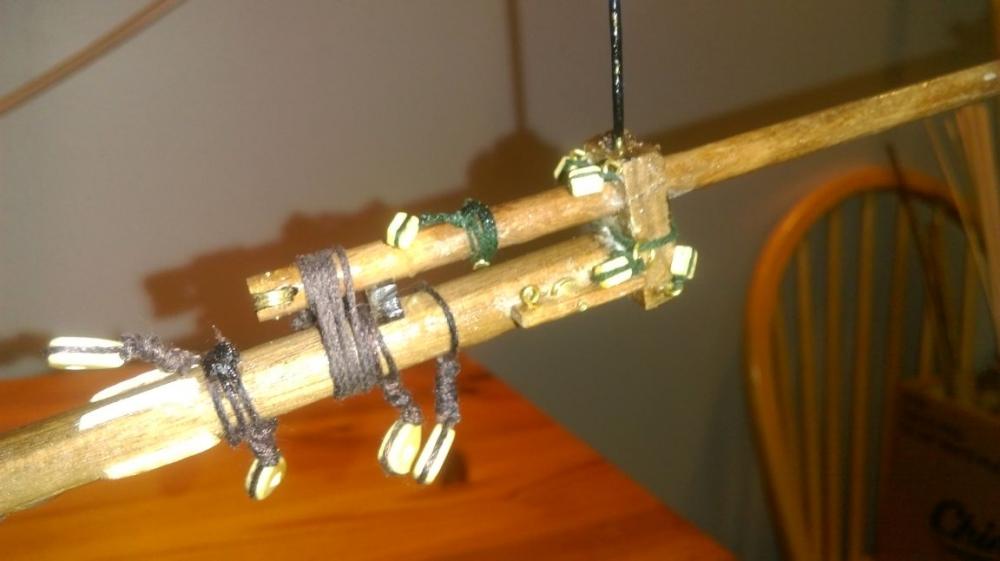
Here is another series of close-ups of my ongoing work on the Bounty. I try and get at least a little bit done each day, and I'm rapidly coming to the end of the deck work. As you will see, the ships launch and jolly boat are done, as are the small 'pop-guns', ship's bell, and so on. I've begun work on the bowsprit and have started working (off-model) on the ratlines and their hardware. I'll include a shot of the little jig I'm using for tying the many, many deadeyes that will be required. Unfortunately, I seem to be catching up to the builds I've been following, so I may have to cast about for some new ones to help me over the spots where the instructions are a little thin... which is everything now!


-
Looks good. It's one of the nice things about working with wood... if you know what you want to do, and have the tools, you can usually get there.
- 60 replies
-
- 4
-
-
- king of the mississippi
- artesania latina
- (and 1 more)
-
If I am remembering correctly, you were supposed to leave a gap at the bow between the two sides of planking, fitting the bow and keel pieces between the to runs of planking. In my case, I dry fitted the keel piece, marked where the planking should end, then ran my planks to that point with a slight overlap. This allowed to sand down the opening, making for a nice, tight fit for the pre-cut keel and bow. I wish I had taken and posted a lot more pictures, but my build log is on this site. I was pleased with overall result, despite my rudimentary modelling skills.
- 60 replies
-
- 4
-
-
- king of the mississippi
- artesania latina
- (and 1 more)
-
When I built this kit, I did plank the main deck before the hull, but I did not glue the planked assembly on to the hull until both were planked. A word of warning - be careful with the extensions at the rear of the deck, where the paddle wheel will be... they can snap off quite easily.
- 60 replies
-
- 5
-
-
- king of the mississippi
- artesania latina
- (and 1 more)
-
PLEASE HELP ME I've lost my instructions
maturin52 replied to Cindyp's topic in Wood ship model kits
OK, Cindy, the instruction manual - 40 image files - should be in your inbox. Have fun! Mischief Managed! -
PLEASE HELP ME I've lost my instructions
maturin52 replied to Cindyp's topic in Wood ship model kits
That's it exactly. And it's a good idea to purchase several drill bits. They're hair thin and break easily. -
PLEASE HELP ME I've lost my instructions
maturin52 replied to Cindyp's topic in Wood ship model kits
OK... btw, you'll probably find that nailer doesn't help a whole lot unless you predrill holes for the nails first. I found a pin drill to be far better investment than a nailer, though I do use both. -
PLEASE HELP ME I've lost my instructions
maturin52 replied to Cindyp's topic in Wood ship model kits
Sent you a private message. I've built this kit and still have the instruction booklet. You learn early in this hobby to never throw away anything! -
Good luck with your build! I made this kit last year, and had a great time with it. It is a great addition to my shelves, especially since I live just a few miles from both the Mississippi and Missouri rivers! I have a build log on this site for the King, and there are at least one other detailing the addition of wiring for lights. I was not that ambitious. I'll be watching your progress with interest.
- 60 replies
-
- 4
-
-
- king of the mississippi
- artesania latina
- (and 1 more)
-
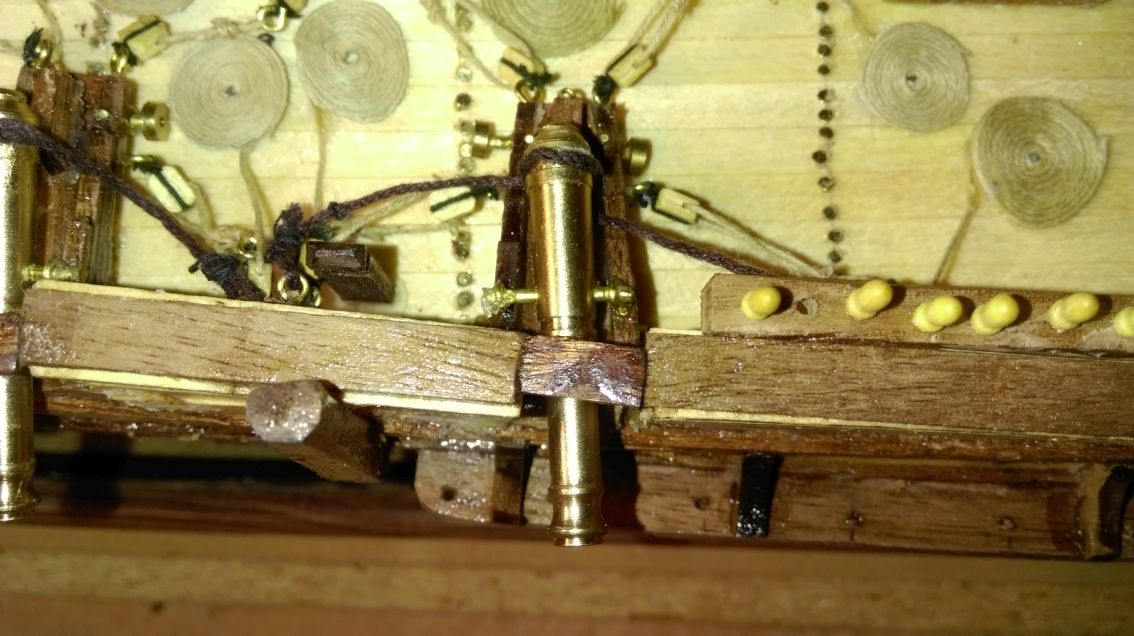
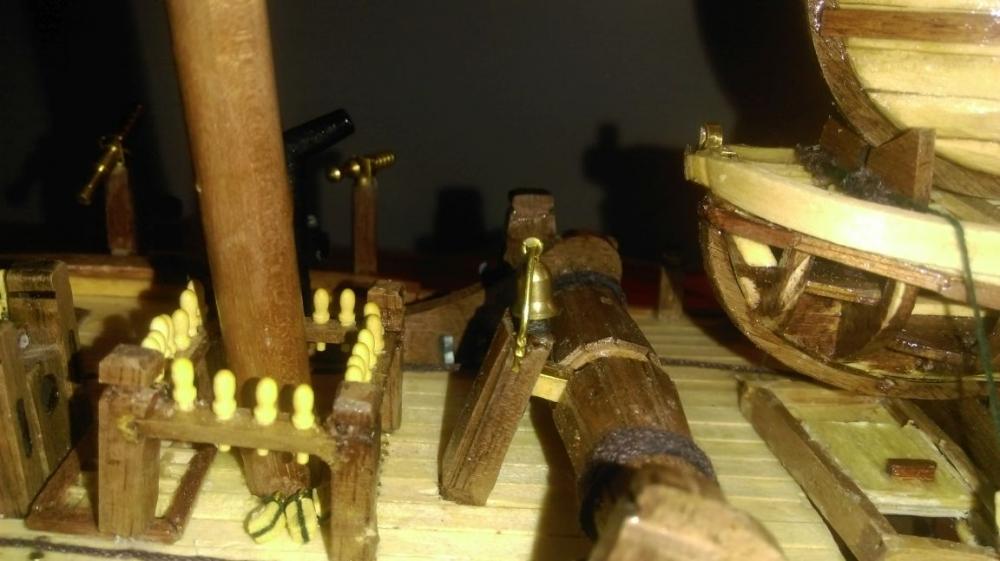
Breeching Rope! That's the term I was looking for!
-
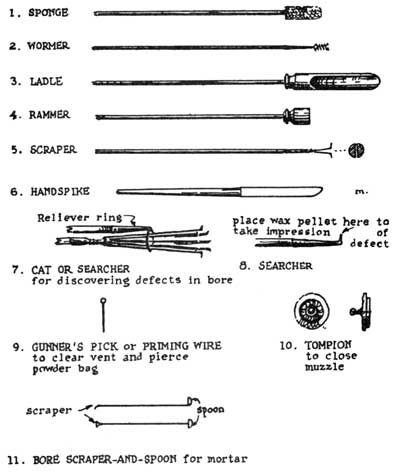
Another item conspicuously missing from the AL build is the tools sailors would need to actually load and fire these weapons. I'll attach a nice image I've found showing a variety of tools that were used. In actual use, however, it seems that each stations was equipped with a combination rammer/sponger. Perhaps the other items - screws, etc. - would be available in a central location for common use. I'll ignore those, but I am going to construct a double-headed pole with a rammer on one end, and a sponger on the other end.

-
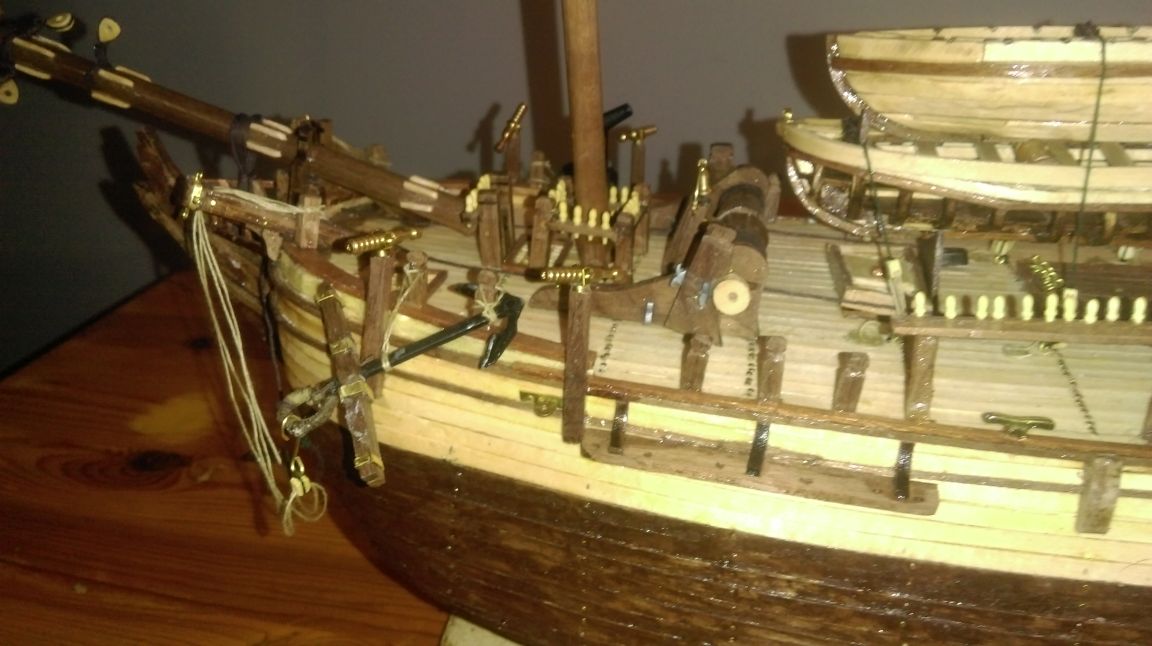
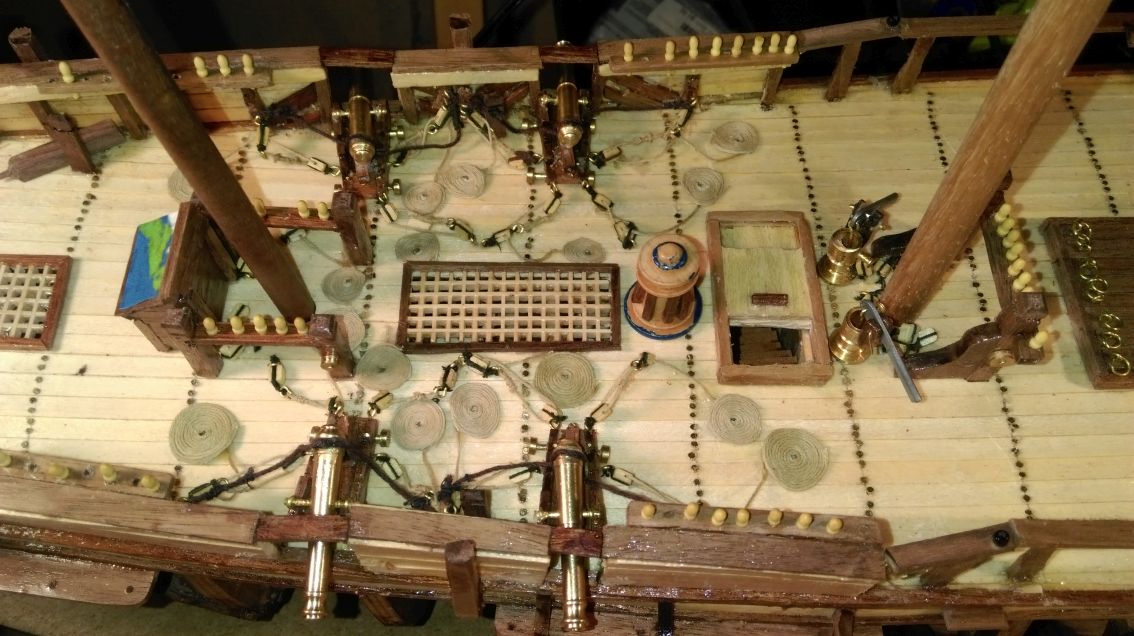
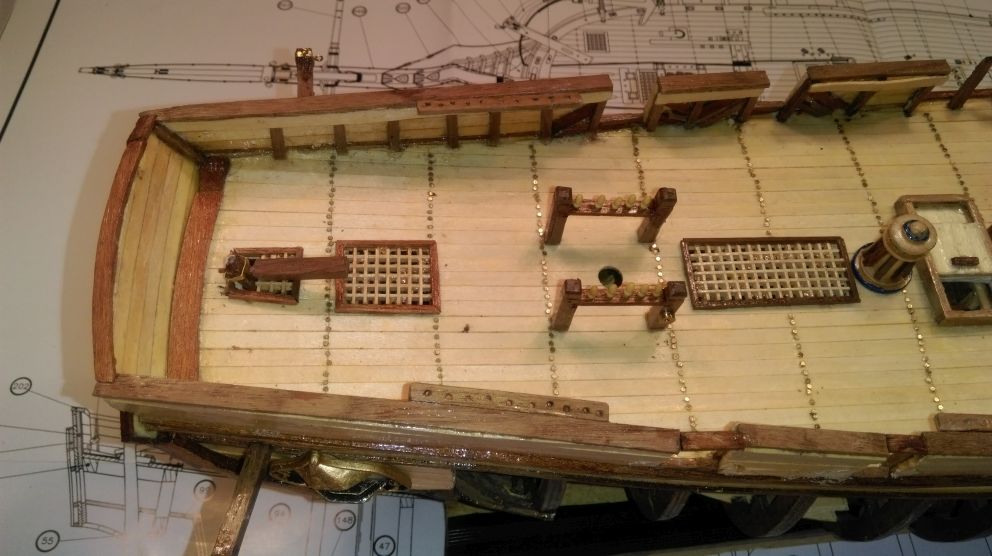
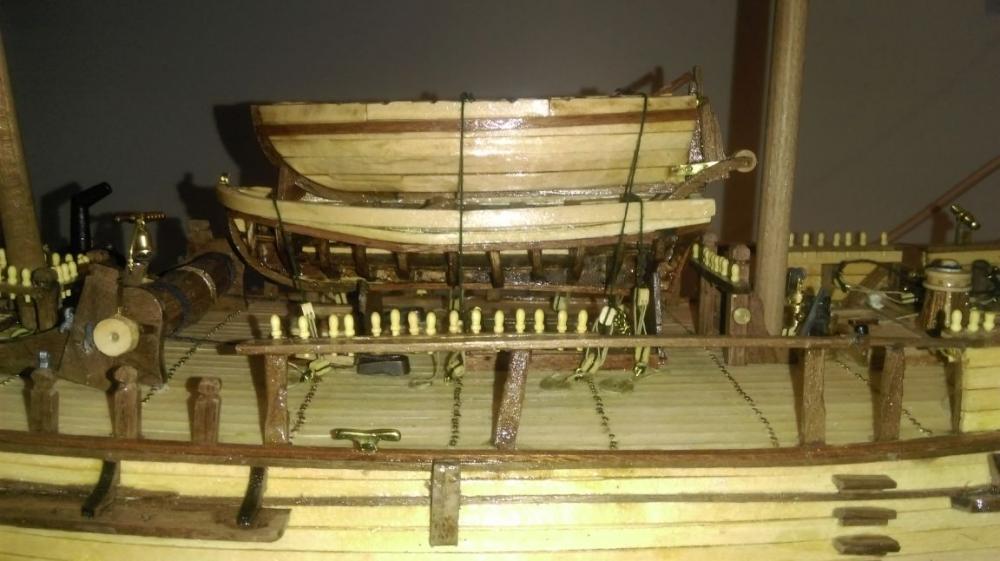
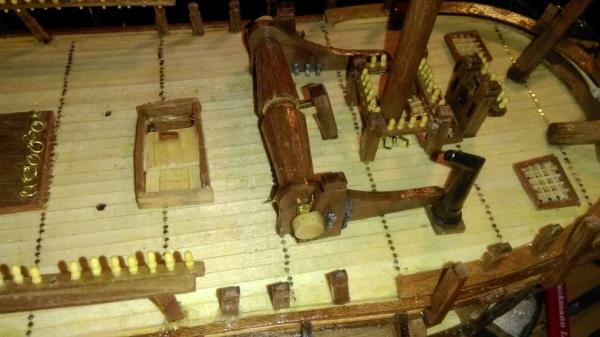
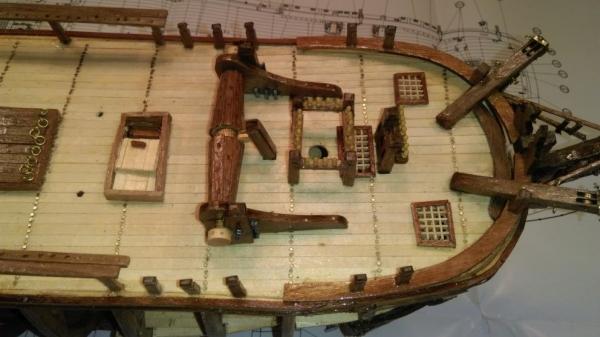
The cannons are constructed and installed, along with their trains and restraining ropes. I've purposely left the coils of rope laying rather randomly around the guns, since Bounty was not a warship, but rather a hired and armed merchant ship. Each line does have its coil, however, and each would run free in use. The AL instructions say (and show) nothing about recoil restraint, but a little research shows the large ropes anchored to the bulkhead to be essential, so I've added them.

-
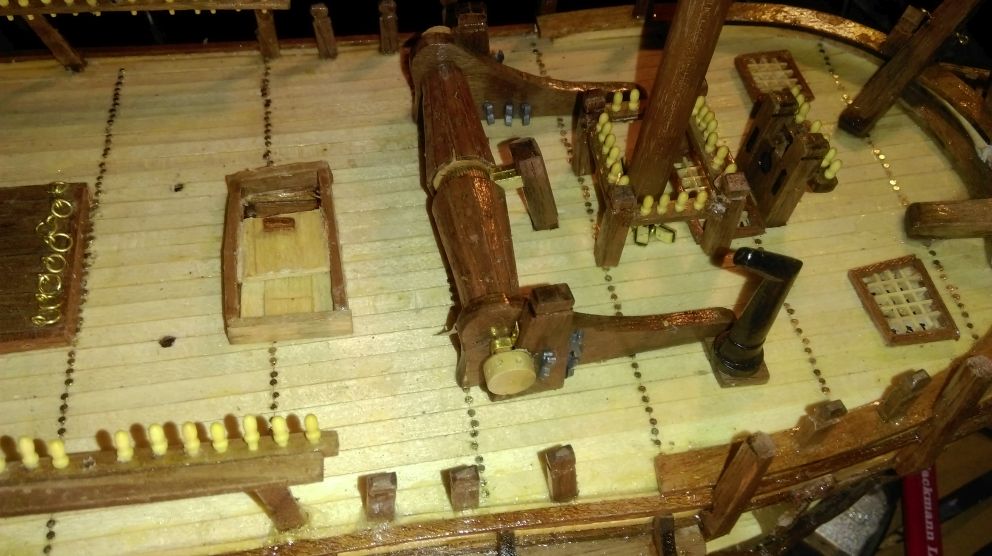
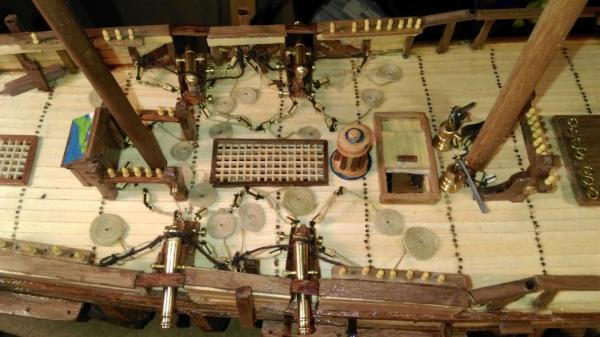
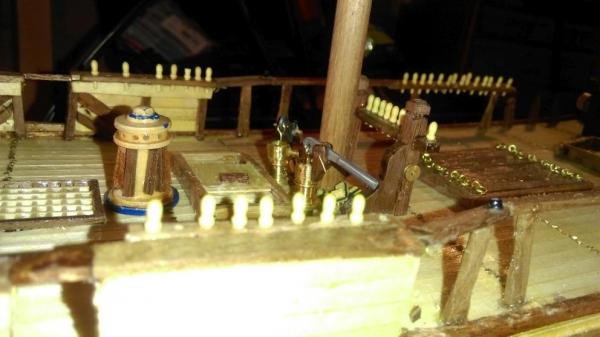
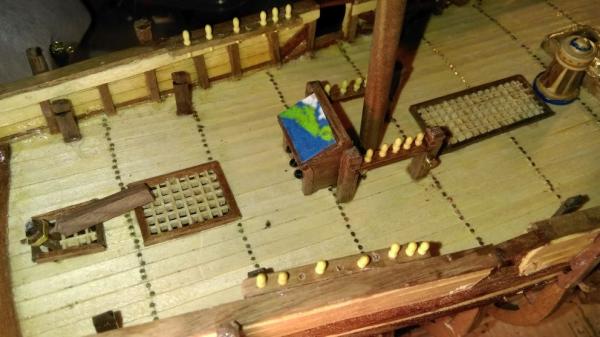
Well, the process of constructing and installing deck furniture continues! Here are a few photos showing what I've been working on the past few weeks: the winch, the galley stove, the capstan and bilge pumps, assembling the cannons and their tackle, and the chart table. The very observant may notice that the chart table is displaying an unrolled chart of Nova Scotia, Canada. Inresearching materials, I've found the AL plans for the cannon reigging to be incomplete, so I'll be doing them differently. In addition, each cannon should have an assortment of tools nearby: rammers, sponges, screws, etc. Hopefully I'll be able to fabricate some sort of reasonable facsimile of these essential tools.

-
I can sympathize, Bob. I had a Billings model of the Bluenose that was trashed by an angry kitty. I put it aside, and 10 years later came back, stripped it to the hull and rebuilt it. That's what got me restarted on the hobby. I must say your acceptance of the situation is better than mine was! Hi Baily! Good boy!
-
Thank you, Cobr@! I did find that piece and I thought it WAS a cannon ... the picture in the instructions is not good! I think the cannons are next after the stove. I've just finished going back to step 1, checking all the parts, and making sure everything was done. I did this after reading what a few guys ran into with the knightheads(?). I, too, had missed them in the picture, and it was far easier to backtrack now and correct those omissions than it would be later on when rigging and masts are getting in the way!
-
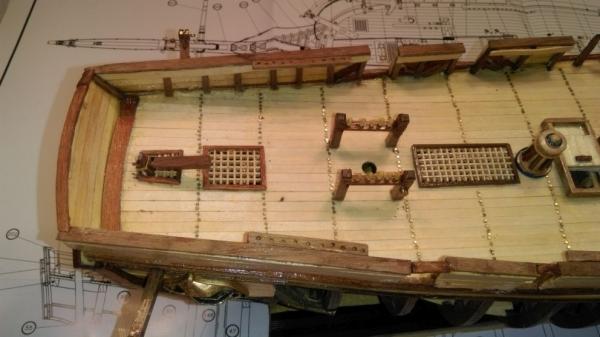
Now it's time to get up to date on my build. As is evident, I'm well past the area of detailed instructions and into the no-man's land of examining photos, parts list, and plans sheets to figure what to do next, and in what order. As has often been the case in the past, the build logs on this site have been a godsend. I had a few issues with the cannon ports, getting them in the wrong place first attempt, and even now, I'm really not too sure about the sizes. If they're incorrect, however, it won't be a big project to correct them when it come time to mount the cannons. I've included some details oif various bits of 'deck furniture', as well as an overview of where I stand at the moment. I'm currently working on the galley stove, but can't for the life of me identify Part 300, the 'condenser"! Time for a little close perusal of some of the other logs!


-
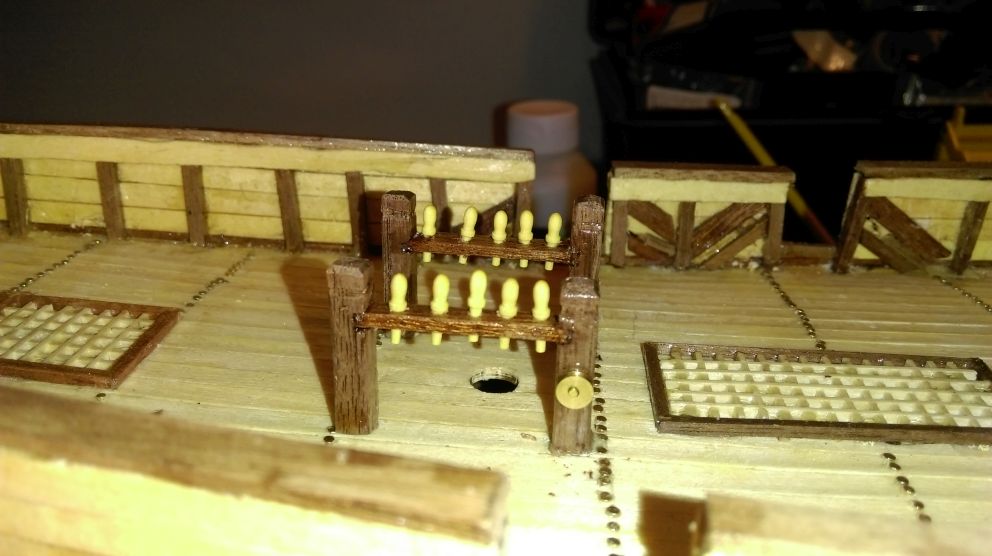
Well, I've been quite diligent in working on my Bounty, but not so good at uploading progress reports. I've reached that point that everyone has commented on, where the written instructions suddenly stop, and all you have to work with is the book of photographs and the plan sheets. And Model Ship World, of course! Thank God for these build logs and the pictures and discussions available here. They have been a great source of ideas, inspiration, and solutions! Here is a picture of the mizzen pinrails I've built and installed. I will get a few more detail shots up here over the next few days!

-
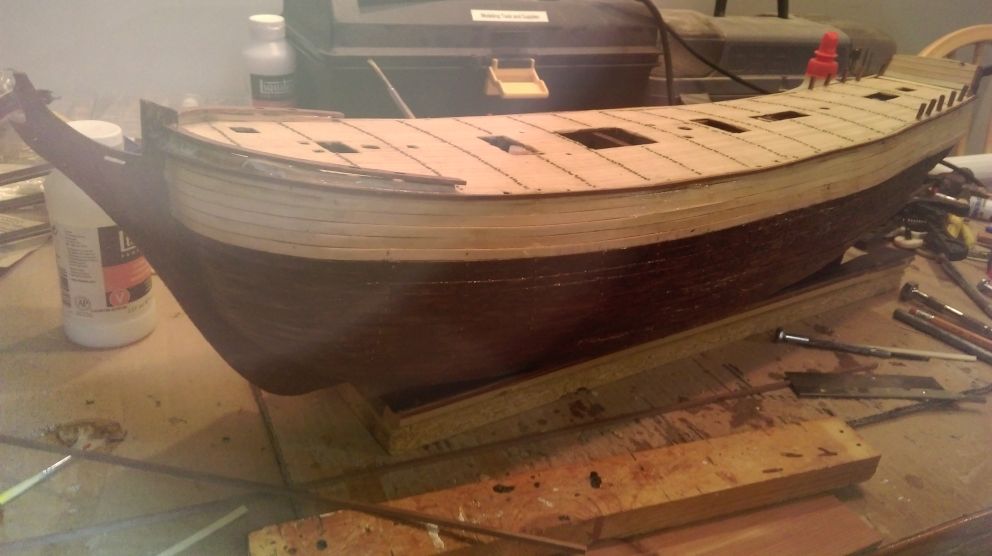
This image is about a week or two old. I've finished the hull planking, as I said above, and am not completely satisfied with the result. However, I learned a great deal in the process, and it is an improvement over my last plank on frame effort, and I am confident that the next model I tackle will be even better. That's what it's all about, isn't it... developing skills and improving the results with each new project. Since this picture was taken, I've been working on the deck railings, and am now working on the stern decoration. I'll get a couple of pics up here within a couple of days.