HOLIDAY DONATION DRIVE - SUPPORT MSW - DO YOUR PART TO KEEP THIS GREAT FORUM GOING! (Only 36 donations so far out of 49,000 members - C'mon guys!)
×


maturin52
-
Posts
128 -
Joined
-
Last visited
Content Type
Profiles
Forums
Gallery
Events
Everything posted by maturin52
-
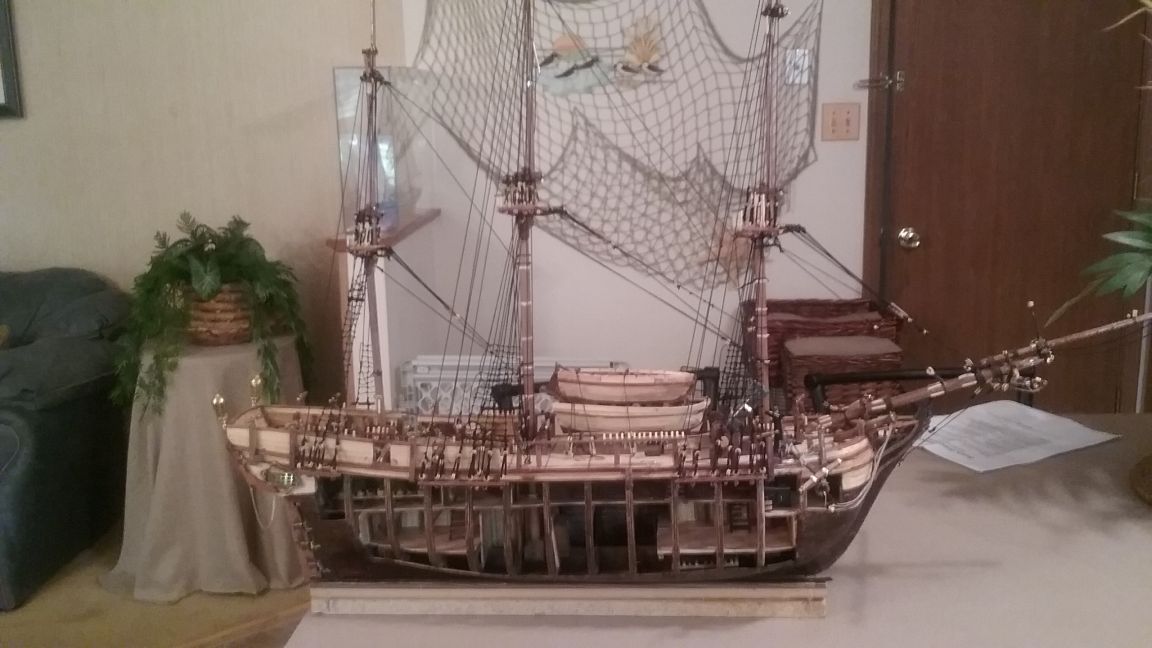
 I am approaching the end of my Bounty build. Lately, I've been working on the sails.Specifically, I've been adding reef points to the main and top sails - not a very photogenic activity, and that is why I've not been adding pictures to this log. As a side note, however, I've also been thinking ahead to the time when my Bounty is no longer a project, but a finished work. To that end, I decided I would build a display case to allow the ship to have her own space in our home. She's a big ship, so the case is necessarily large. Previous display cases I've constructed have been made with 1/2" acrylic, cut to size, usually badly at source and glued together with CA. This time, I've opted for a wooden frame to hold .1" acrylic, which I can cut myself, and which will result in a much lighter, more manageable piece. I've used pine and poplar, and simply applied several coats of Urethane to protect and finish the wood. Here is the finished case, ready for the installation of the (still to be cut) plastic sheets.....
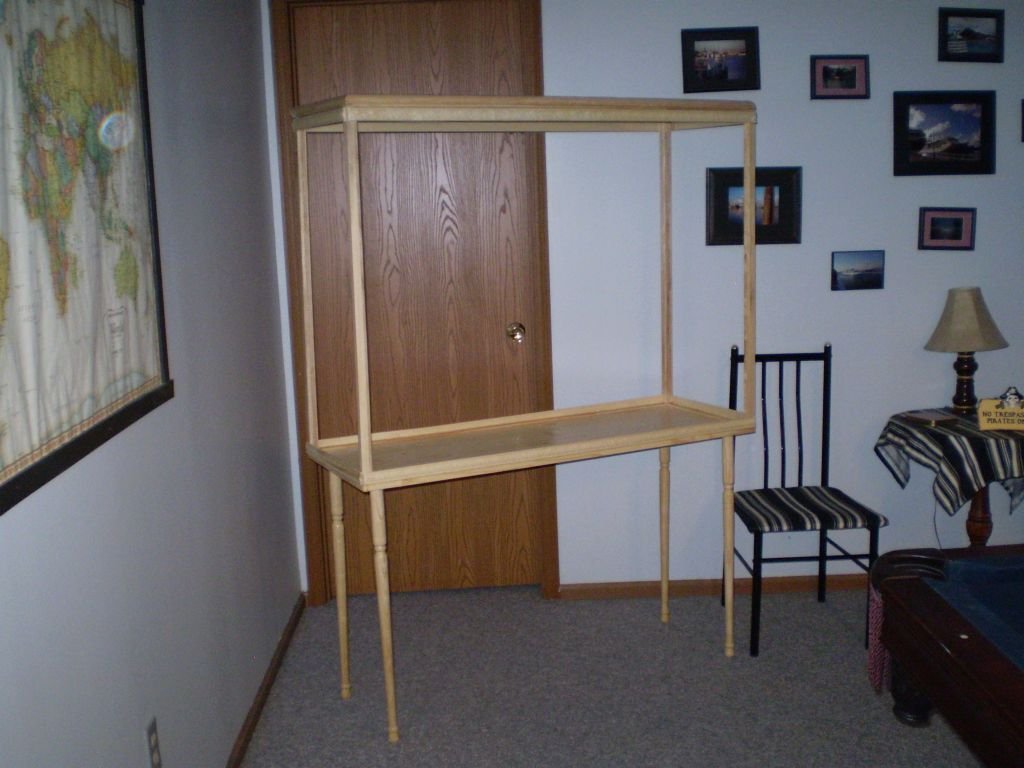
-
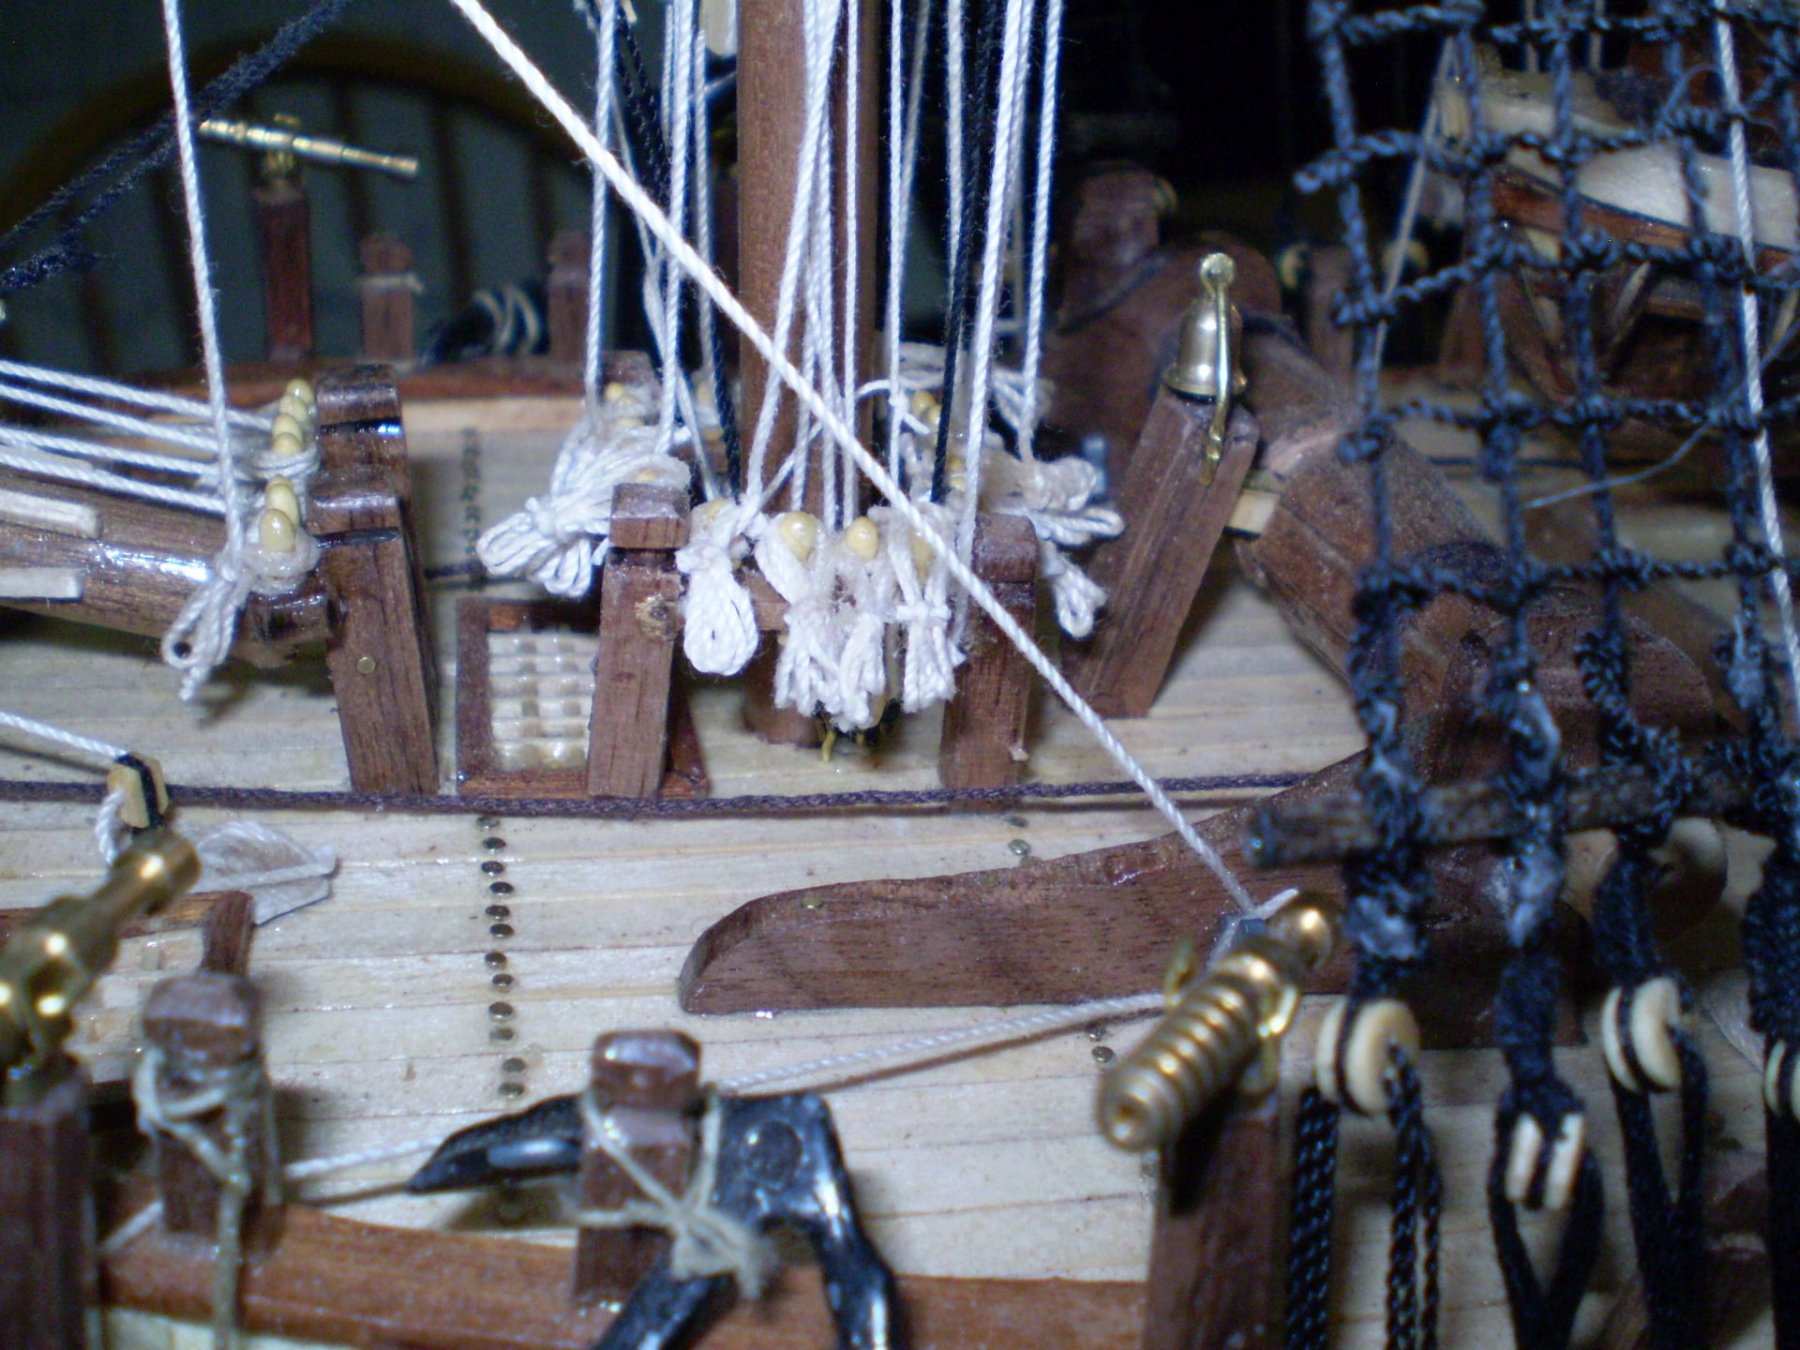
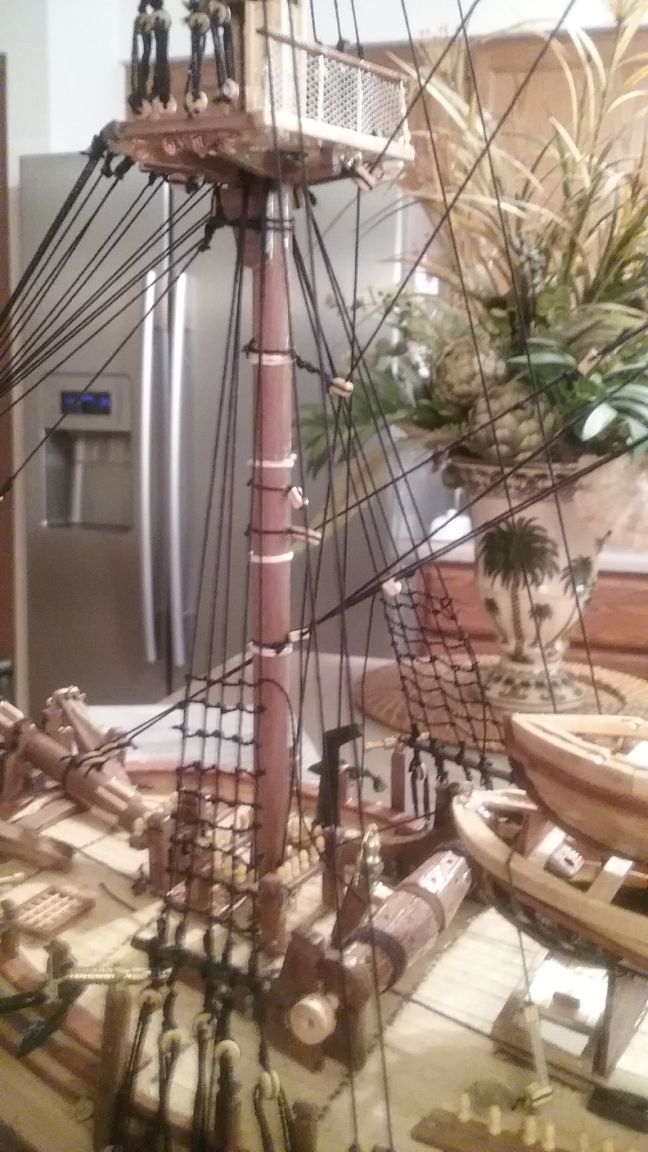
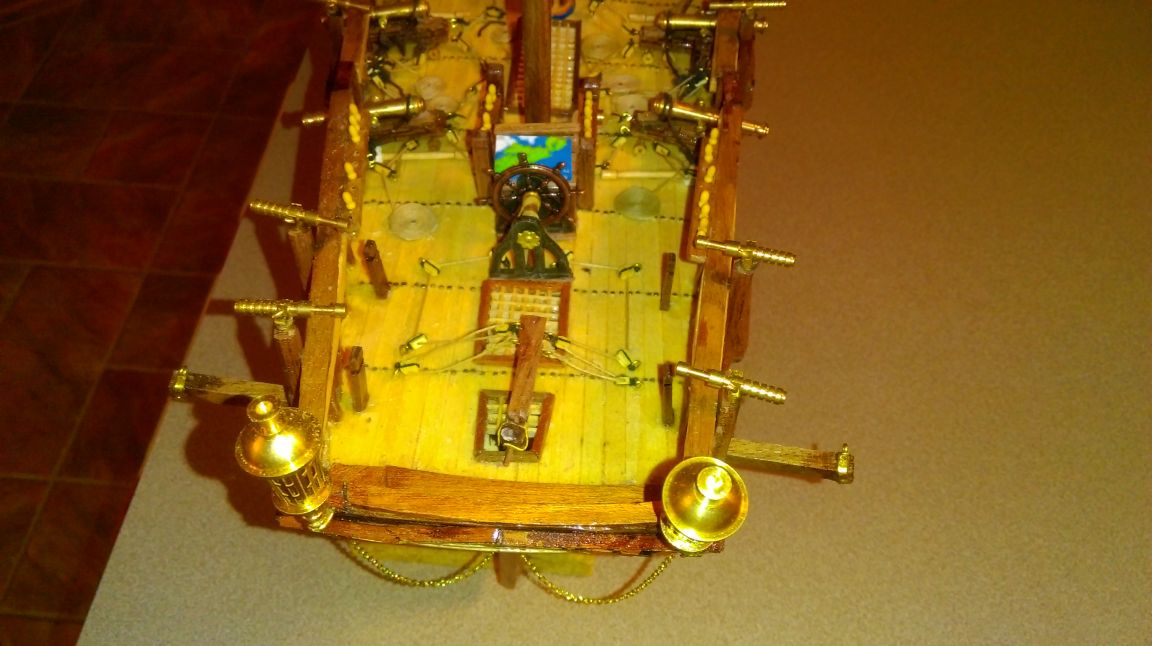
I absolutely love the new look and feel of this forum. It seems easier to edit, upload and edit postings and pictures, and the site looks fresh, modern, and nautical. Great job! Here is another macro shot showing my mainmast pin rails. Each sheet that is belayed to a pin has a coil of rope associated with it. I've always though it looked silly to see a rope running from a yard or sail and being tied off to a belaying pin with no excess coil. Does the crew cut off the remainder when they raise a sail? And finally, here is current state of the overall build. All the stay sails are in, and I'm working on the remainder of the sails. Most of the yard-mounted sails require reef points to made, so it's pretty time-consuming. I'm also working on a display case for her, which is also coming along nicely. It seems strange to be approaching the end of this project; I've been working on the Bounty forever, itseems!

-
Well, I've been working away on my Bounty, but I've not been taking many pictures, mostly because I am very unhappy with the camera on my phone (Galaxy J3) which I've been using for a while now. That dissatisfaction led me to conduct a major search of the house, finally turning my Olympus digital camera which has been stashed for several years. It's a 7 megapixel camera, and initial experiments look like it will be more than adequate for my needs. As before, I am using Infranview to cut the shots down to a size that can be uploaded to this site. Here is a macro shot of port-side midships chains and shrouds, as an example....

-
Je m'attends, aussi!
-
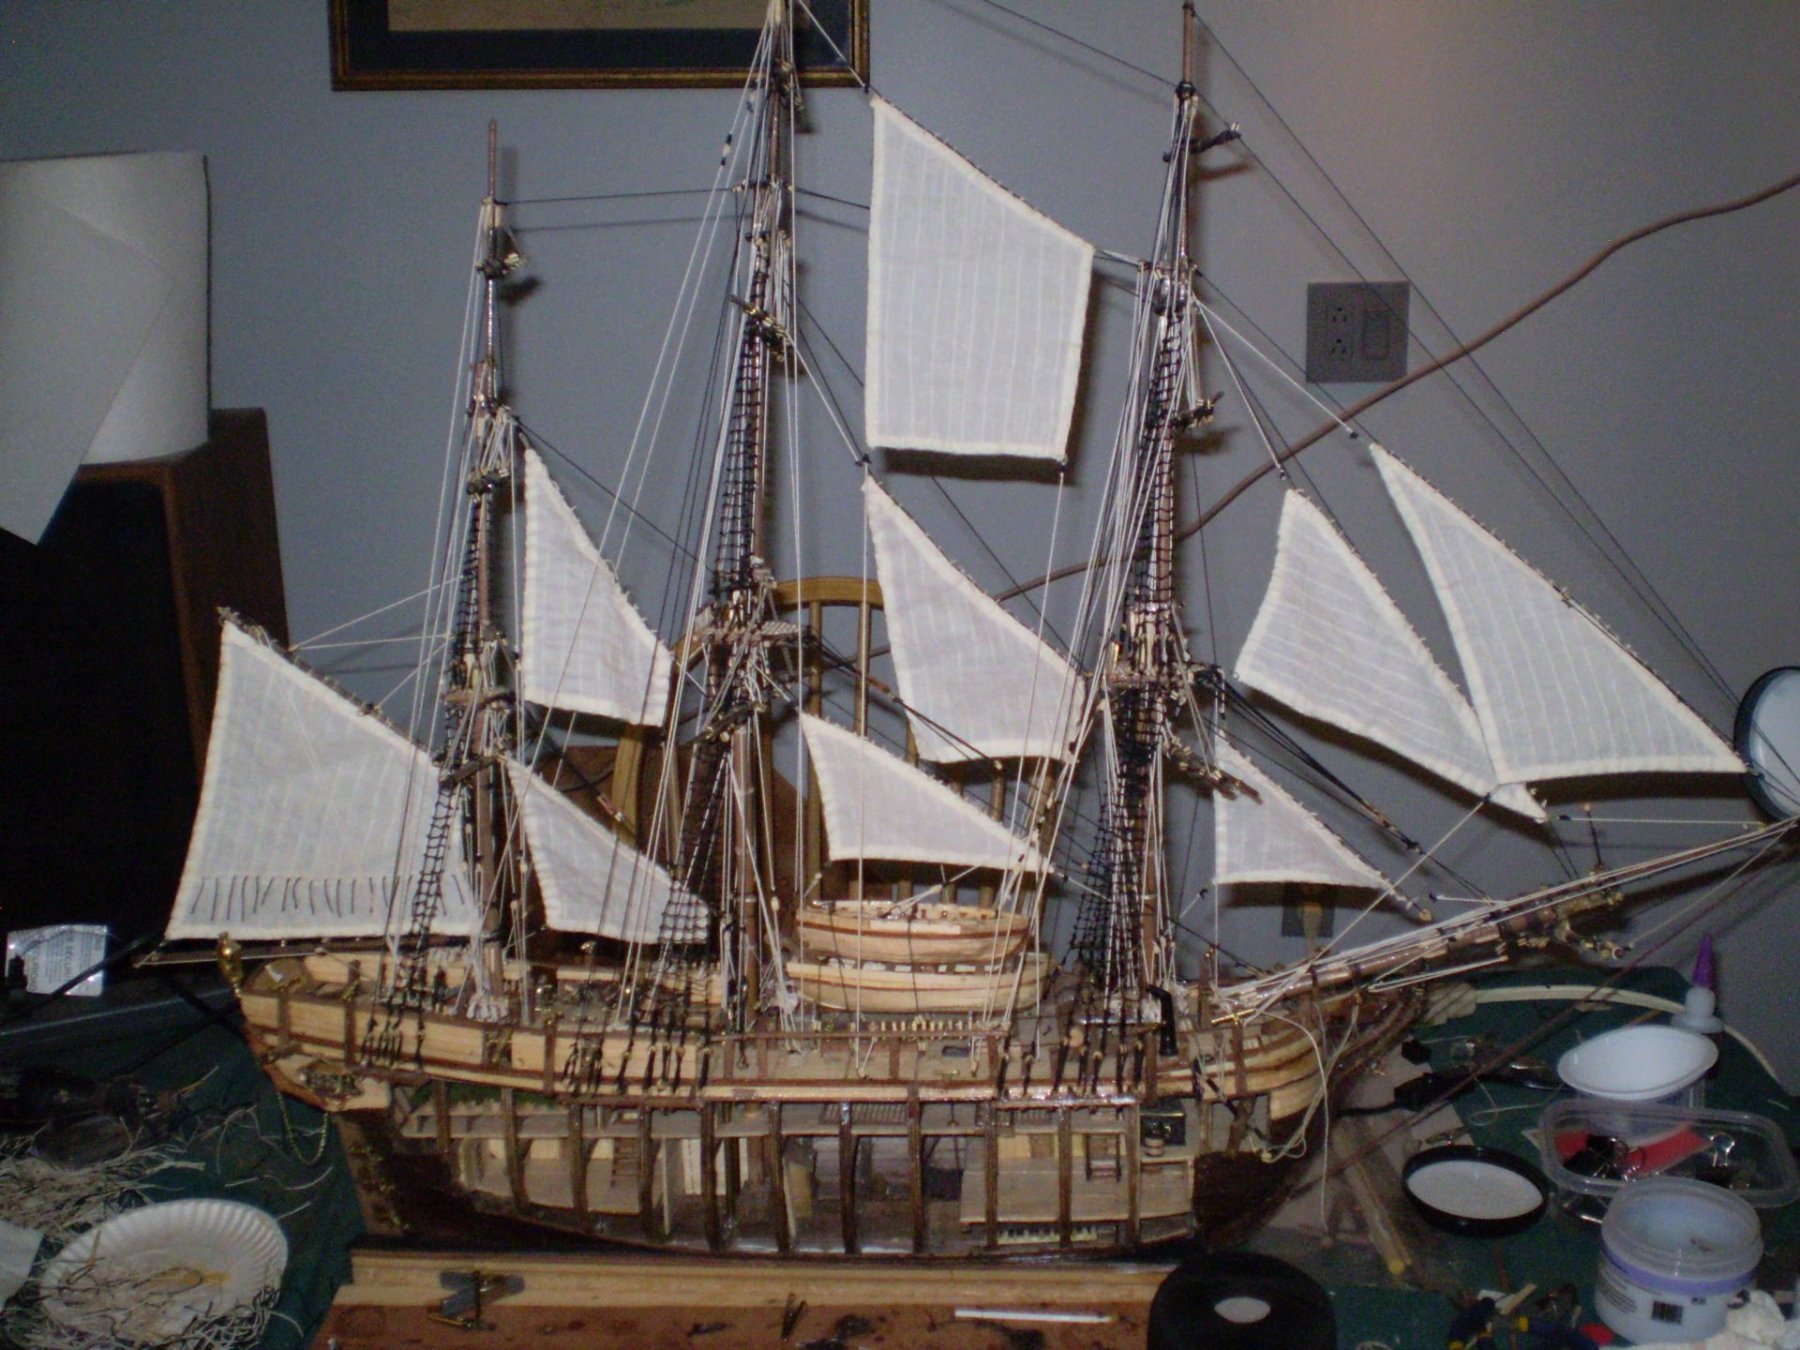
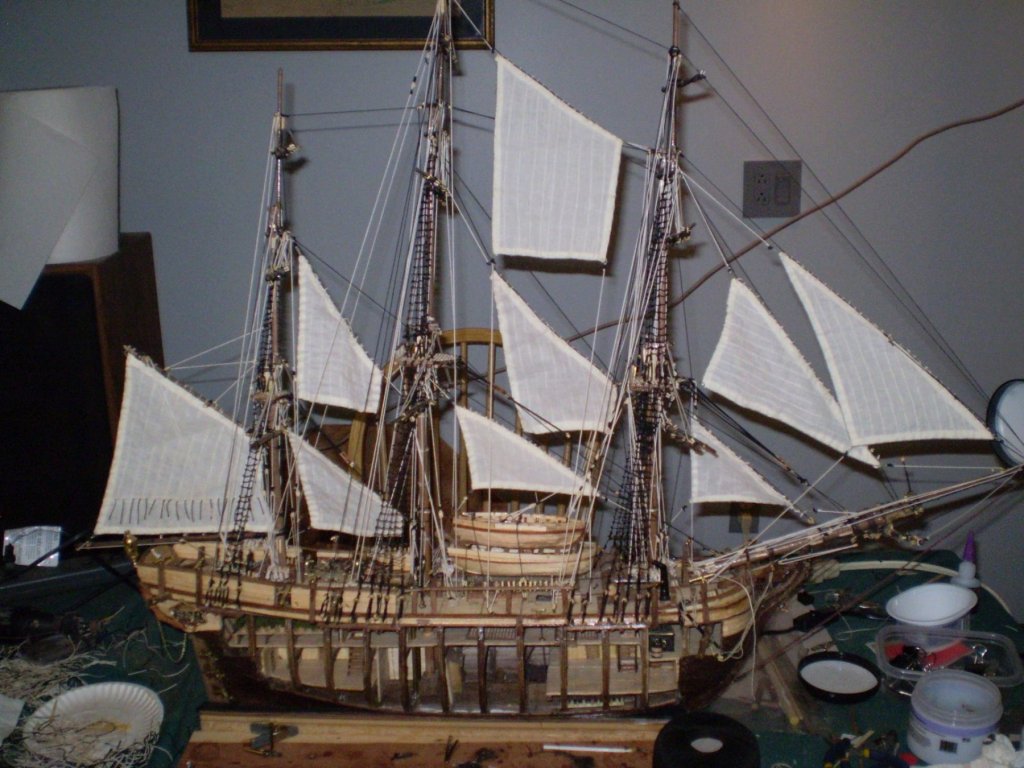
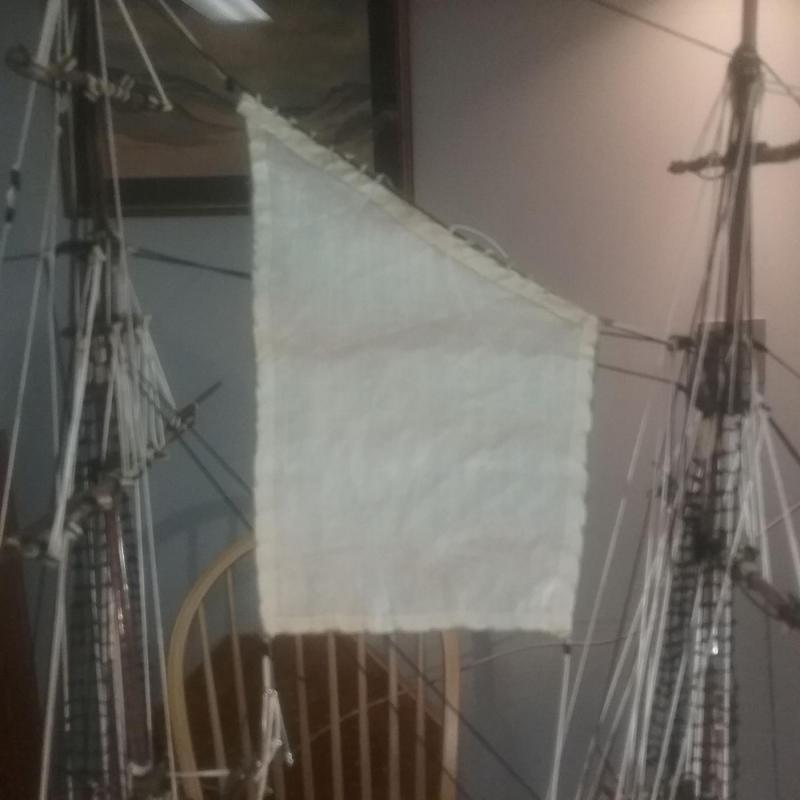
Although there is still a lot of work to be done, when you get to the point of actually installing the sails, I feel it's getting near the end. I know that many modellers think that rigging a full set of sails is unnecessary and unrealistic. I can't argue with them, they're right. No sailing ship would ever have her full set sails on at the same time. However, I think from an aesthetic point of view, it looks good on a model ship. As Patrick O'Brian said on a caption showing the HMS Surprise with all sails rigged, "HMS Surprise with all her sails hung to dry on a calm day." Here are close ups of the Spanker and the staysails rigged so far.

-
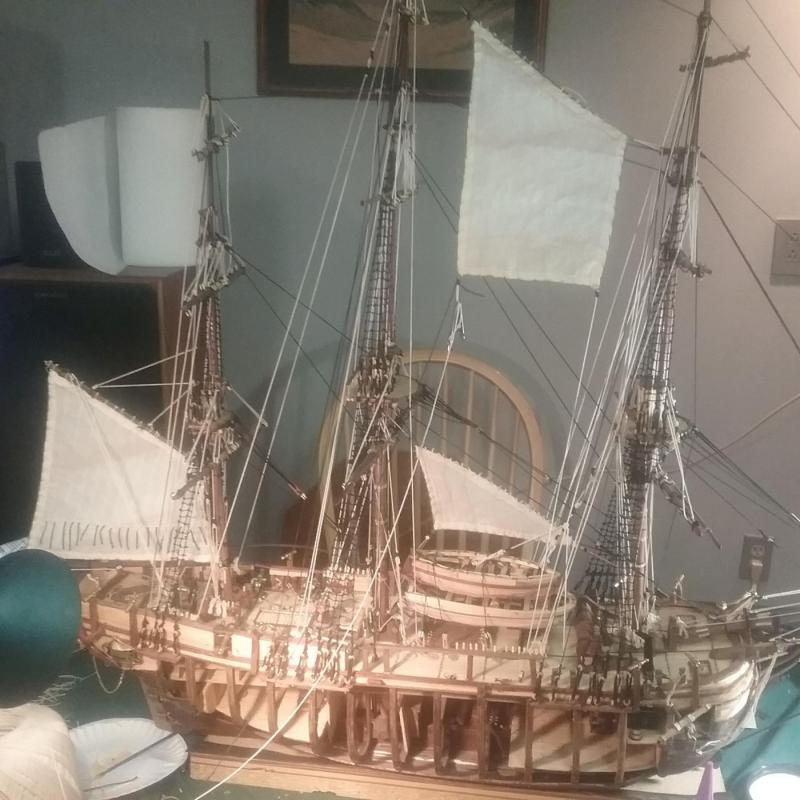
Well, I guess the end must be in sight. I've been a year and a half working on the Bounty, and I've enjoyed all of it. Atesania Latina's instructions quickly become useless, and a lot has followed... almost all of the rigging... has been the result of research on this forum, broad interpretation of the drawings provided, and, honestly, making stuff up as I go along. Here is a shot of her with the first three sails installed. (That's a roll of paper towels in the background near the mizzen mast )
-
The kids are right!! There is absolutely a need for an "AARRRGGGGGHHHH!!" right after the first seagull squawk!
-
I have never tried tapering a mast using a drill to spin the mast (dowel). I've always just used a sanding disk on my Dremel (thank God for the Dremel), and doe it by hand, eyeballing the result till I was happy. Howdy skifflake, you old herring-choker. I'm a former Bluenose from Halifax, family in St. Andrews, NB, and now residing in the USA.
-
The Admiral (my lovely wife) just got me a plank-bender for Christmas. I love it, it's my new best friend - or wil be when I start my next build. HMS Bounty is almost finished - a year and a half in!. Knowing I am considering USS Constitution next, she also got me the Anatomy of the Ship Series edition of the USS Constitution. I guess she's either supportive, or an enabler, depending on your point of view.
-
I have found it is easier to work with shorter pieces of wood, rather than trying to get one piece to work for the entire length. If you think about scale, the full-size ship would never use one plank for the entire width. At 1/50 scale, a ten-inch plank from your kit would equal about 42 feet in the real world. Shorter pieces are easier to fit, and far more forgiving. I have used the long boards in the past and had the same problems. Just a thought.
-
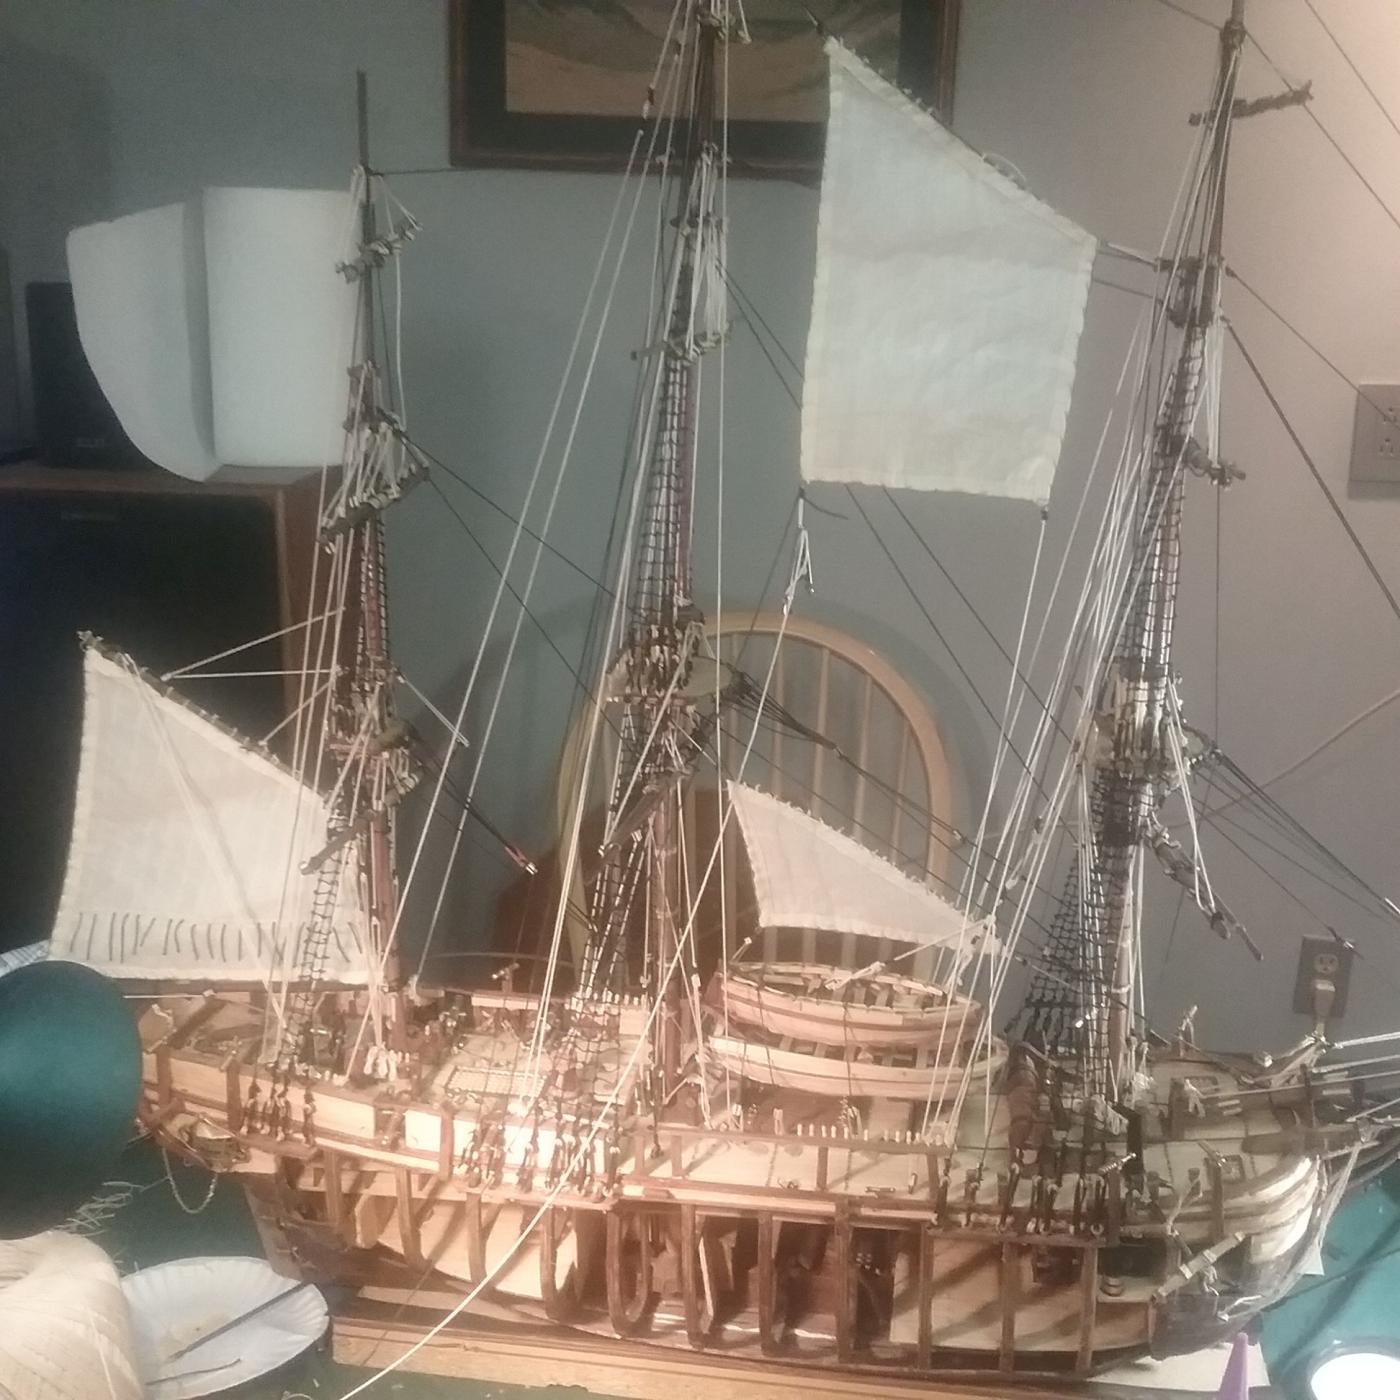
Had a few issues editing photos, which I'll put down to my new (semi-crappy) phone. Here are a few more images of my progress to date.

-
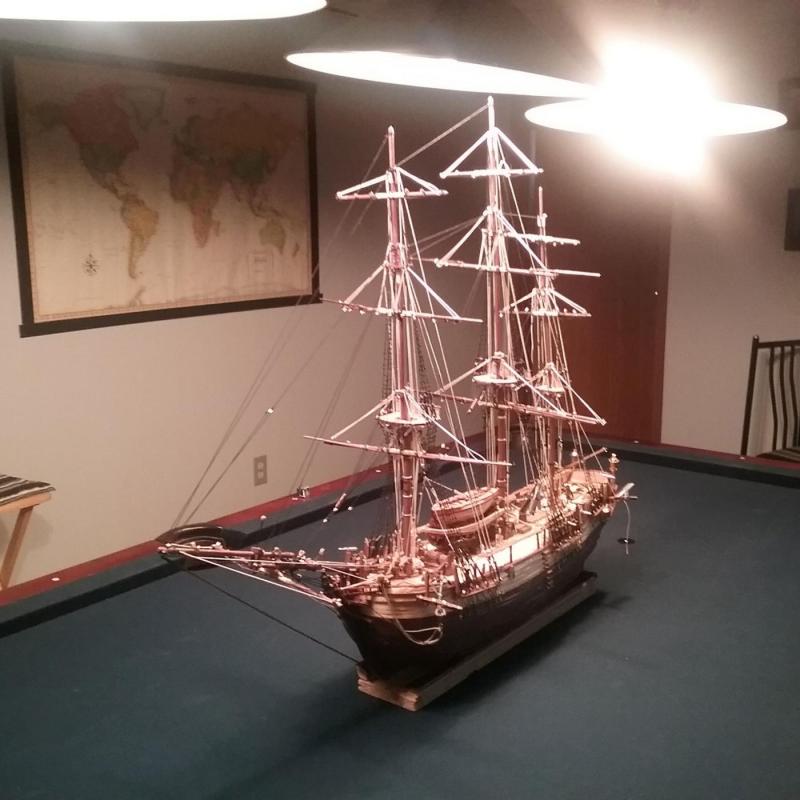
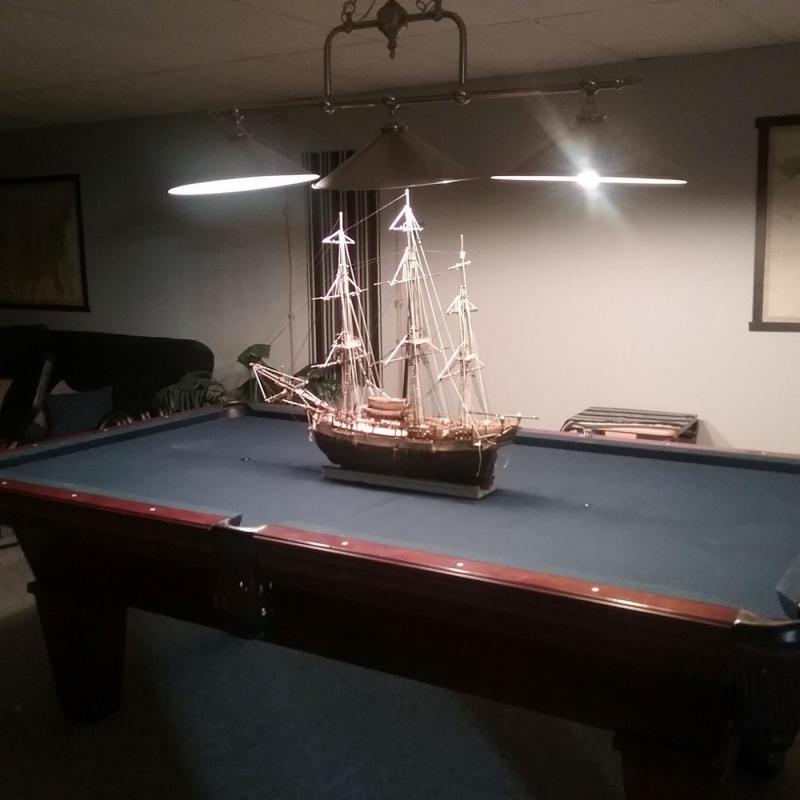
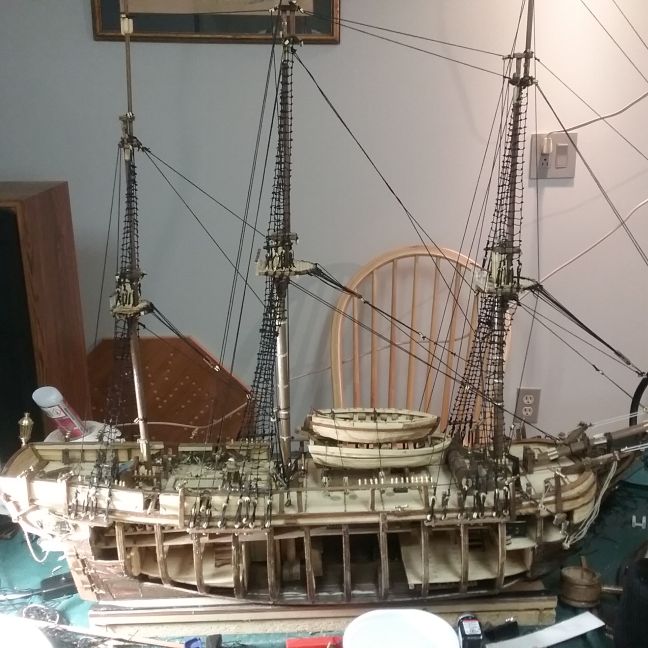
Thank you, Heronguy. We all like to hear comments from our fellow nautical modellers. I've been inspired by this site since I've found it, especially by the work of guys like Thomaslambo and CaptBob. Unfortunately, my work on this particular ship has moved past where my fellow Bounty-builders are, and WAY past Atesania Latina's instructions, so I'm pretty well flying by the seat of my pants now. I've picked up a couple of modelling books, and have learned that a good-looking fake will work much of the time. Anyway, all the yards are installed, almost all of the lifts and jeers, and one of the booms has been fitted. Here a few pictures of the ship to date, set on my pool table only because it is convenient and has good lighting.

-
MY attempt at planking the Bluenose (also my first build, some years ago) resulted in sanding down a lot of filler putty and painting the whole thing. It worked out well. JPAM, as a Canadian exPatriot living in the US, I too had Poutine withdrawal. In the St Louis area, there's a local cheese called Provel that substitutes very nicely, and large curd cottage cheese works well, too. Bon Apetit!
- 93 replies
-
- 1
-

-
- billing boats
- bluenose ii
- (and 1 more)
-
Interesting kit, Heronguy. I built a Billing Bluenose years ago; it was my first wooden model effort to. I lived in Halifax for many years, have been on Bluenose II many times, and have recently stripped down and restored my Bluenose. I'm now working on an Artesania Latina BOUNTY. Log on this site. I look forward to following your bulid. Good luck, and above all, have fun!
- 93 replies
-
- 1
-
-
- billing boats
- bluenose ii
- (and 1 more)
-
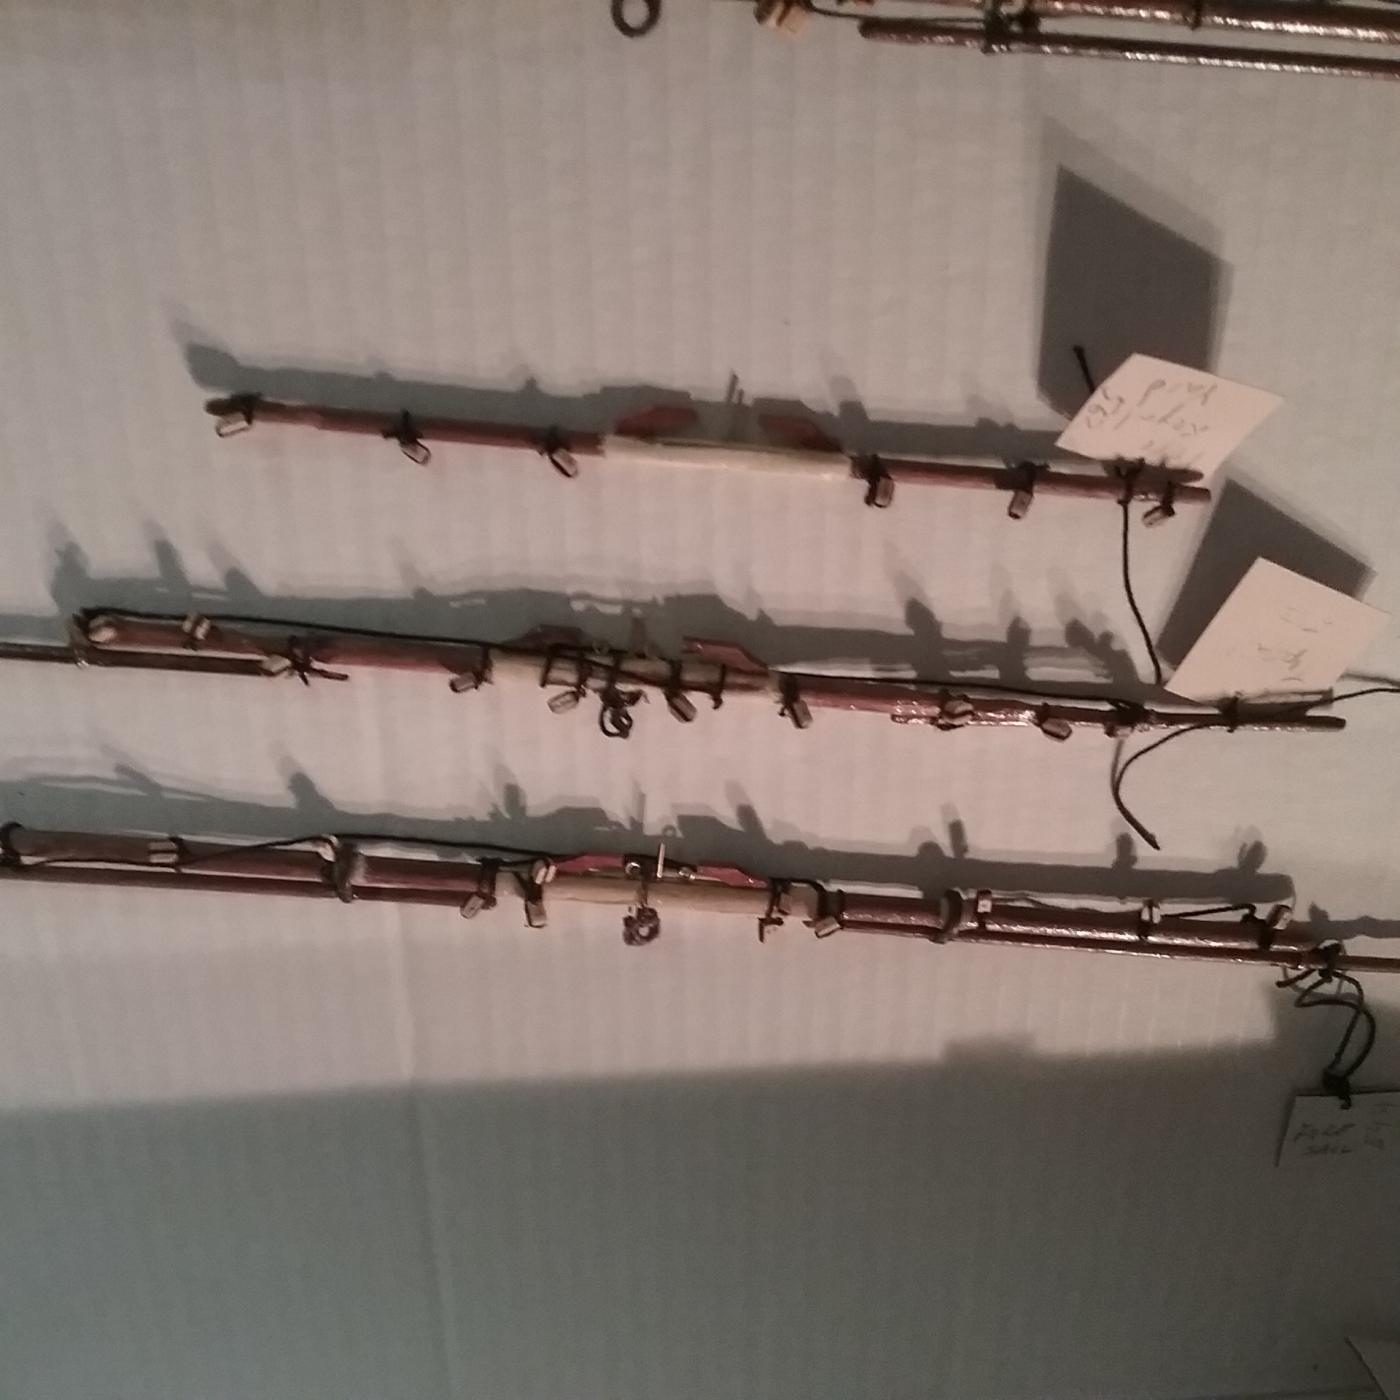
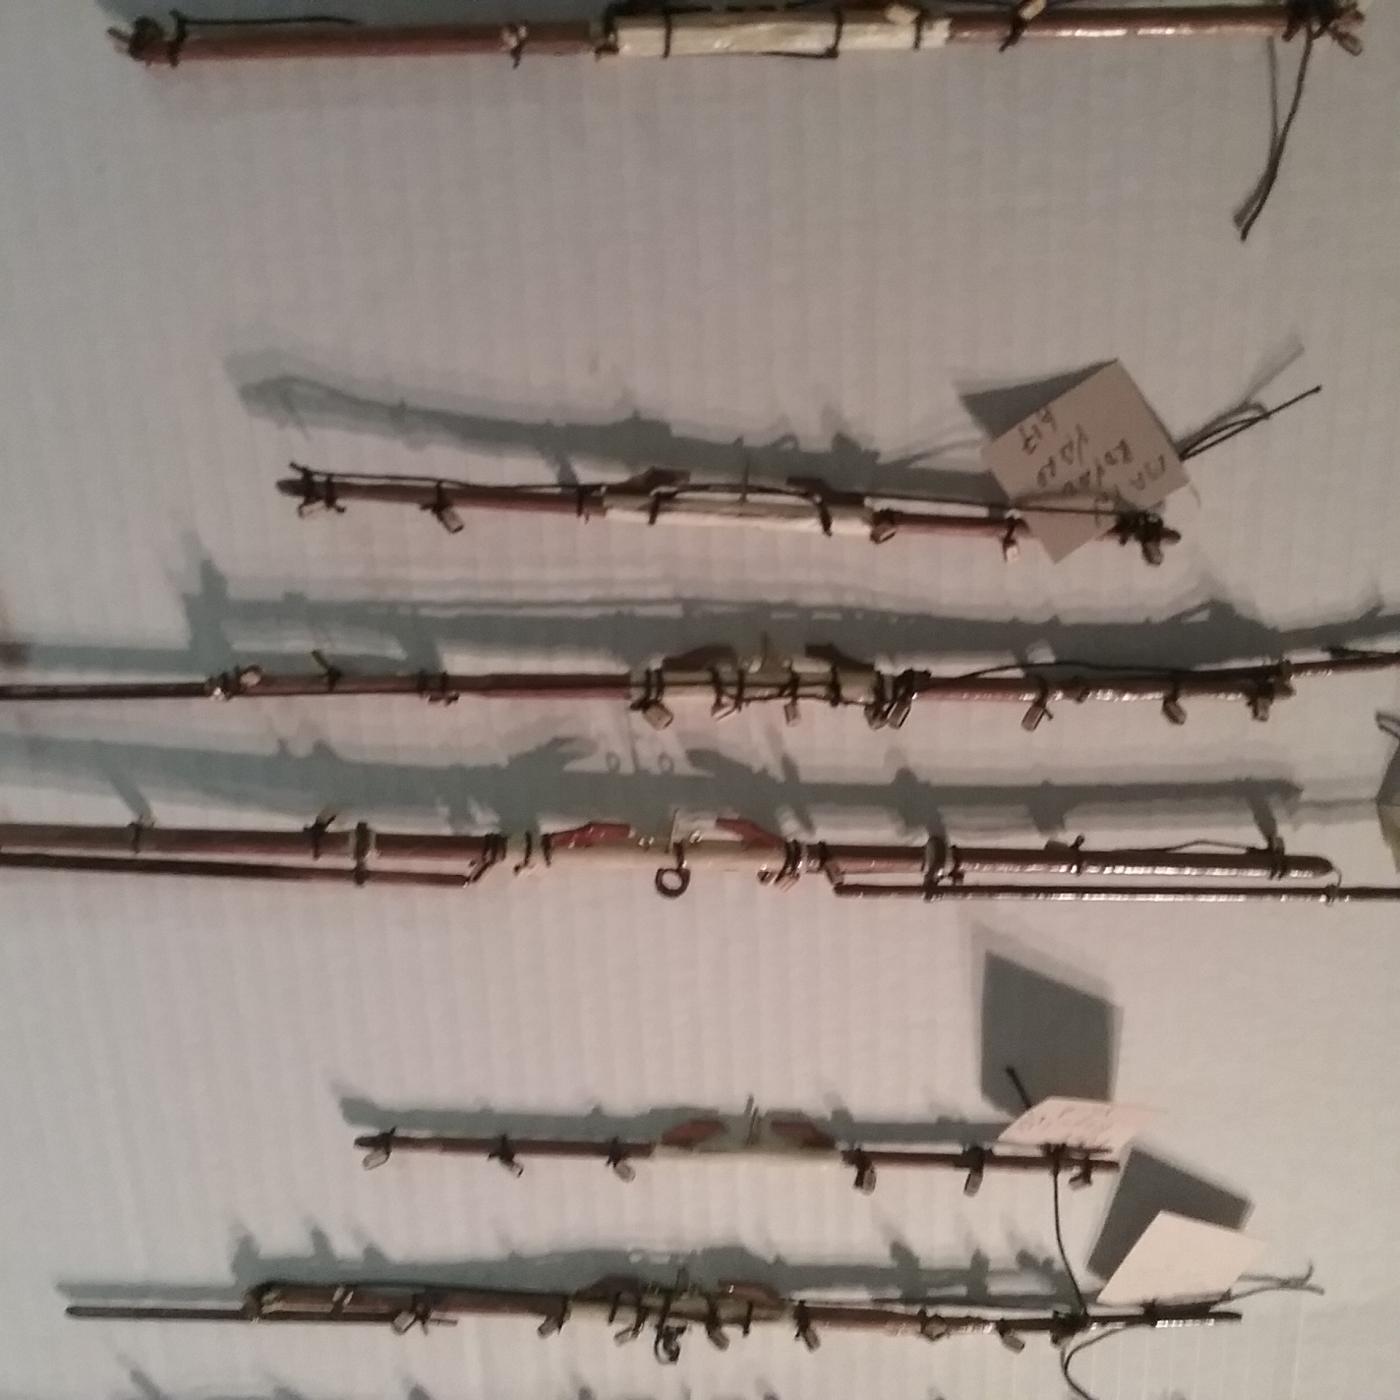
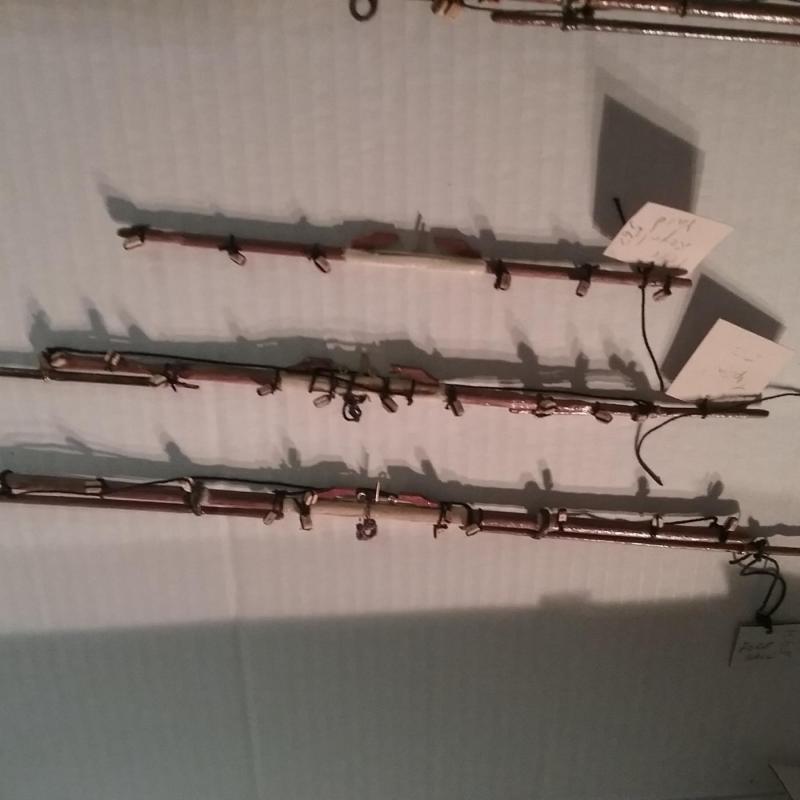
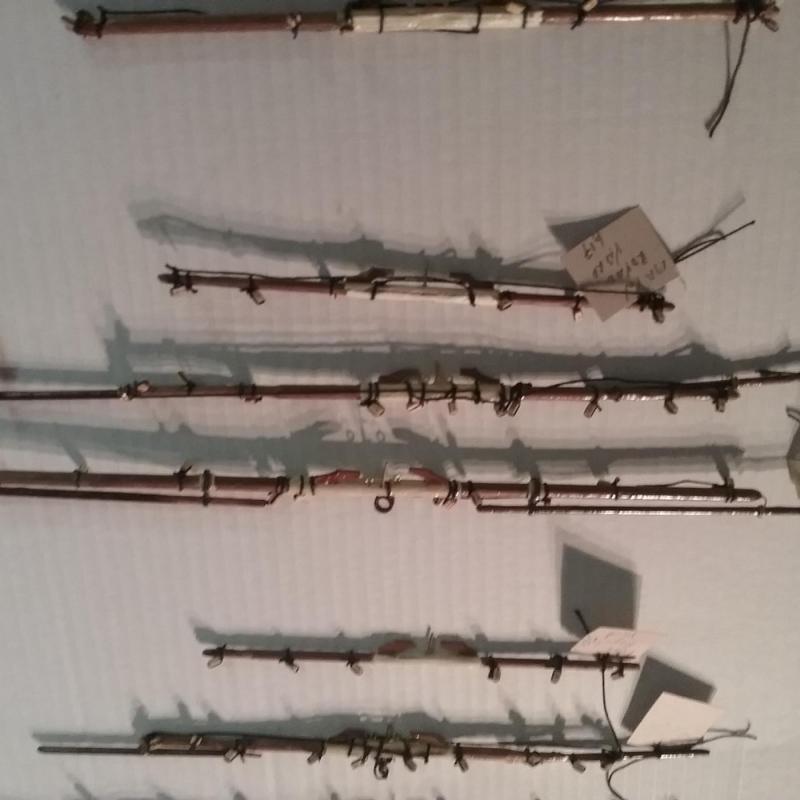
and finally, for now, the very first of the yards. As shown in previous pictures, I've built all of the yards and booms, chains, and studs. They'll be slung and rigged as specified in the less-than-complete instructions...

-
The mizzen mast halyards.....
-
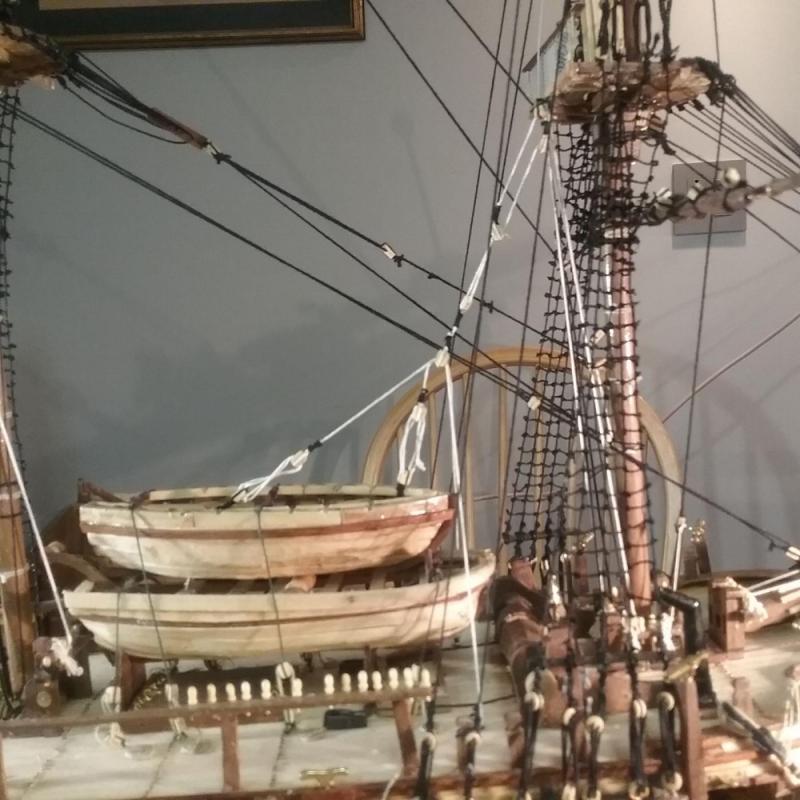
Here are the slings to manipulate the ship's boats......
-
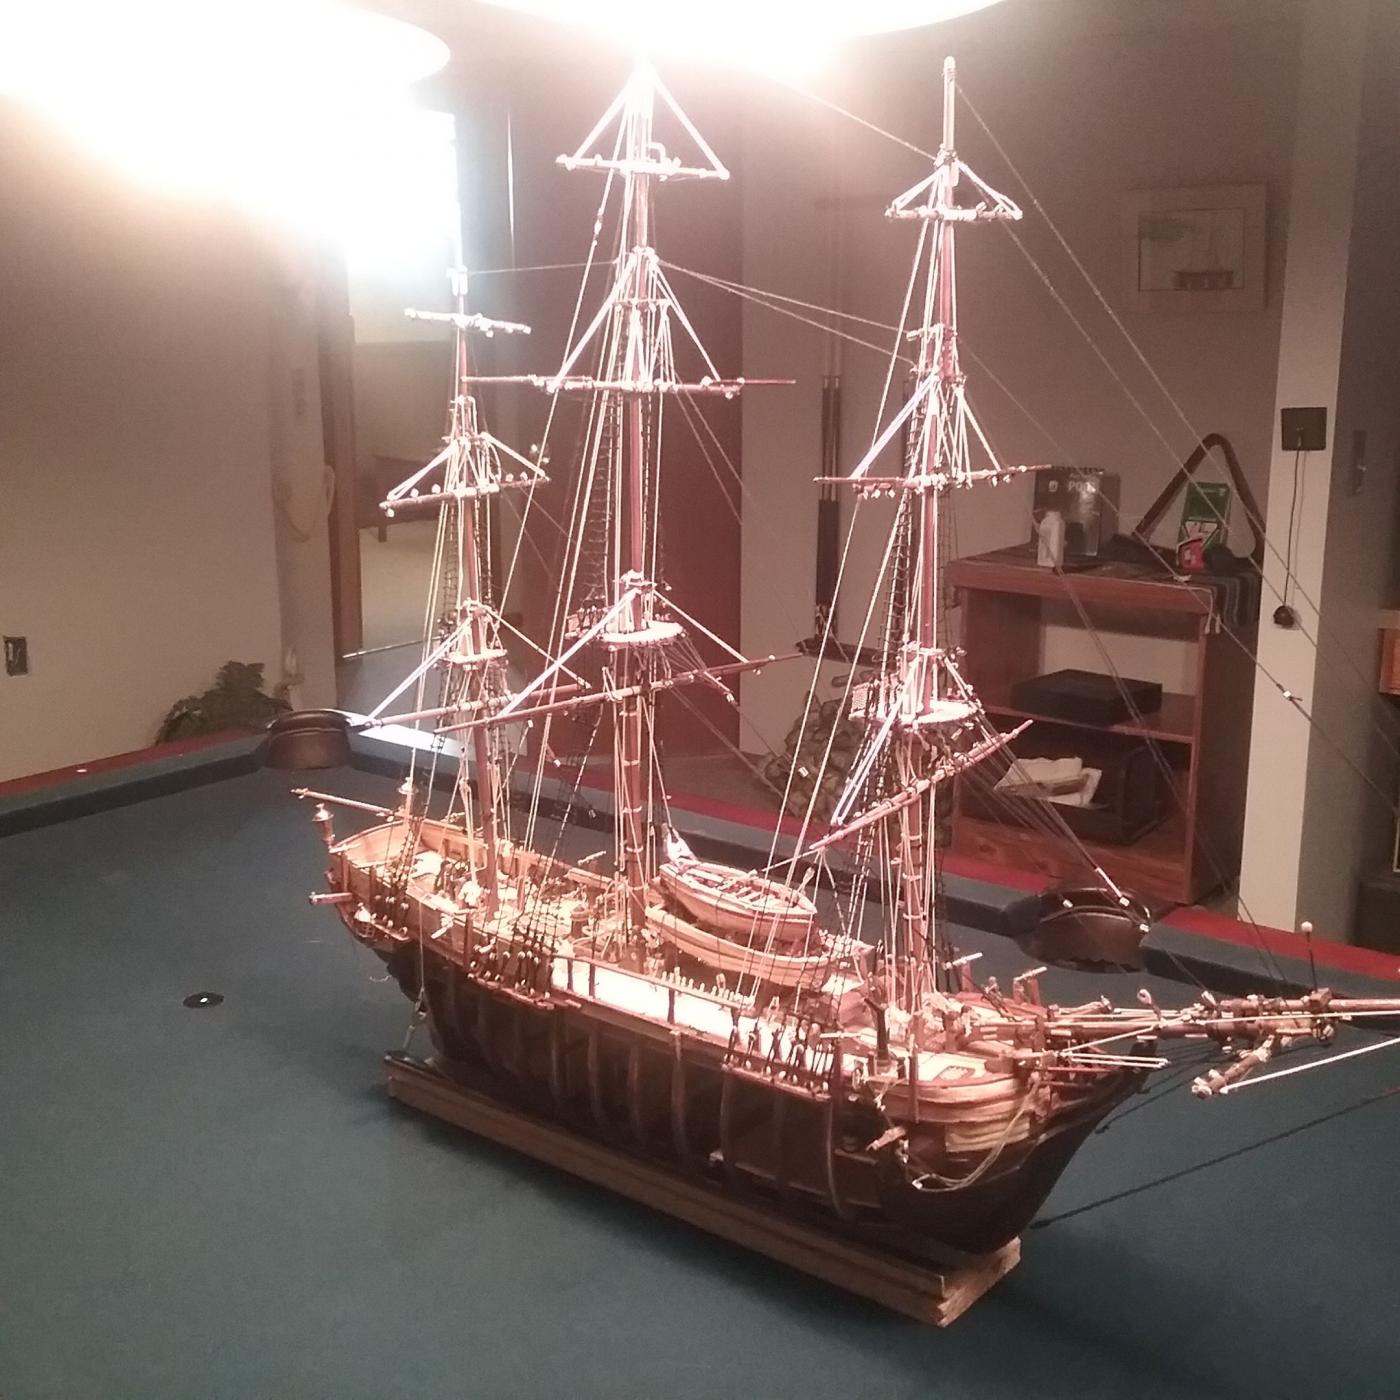
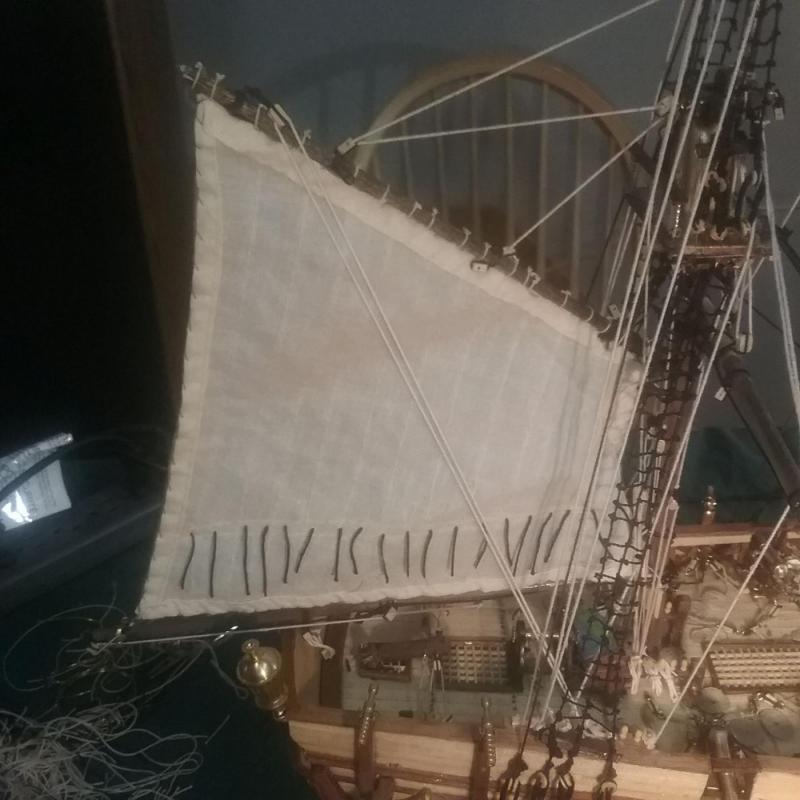
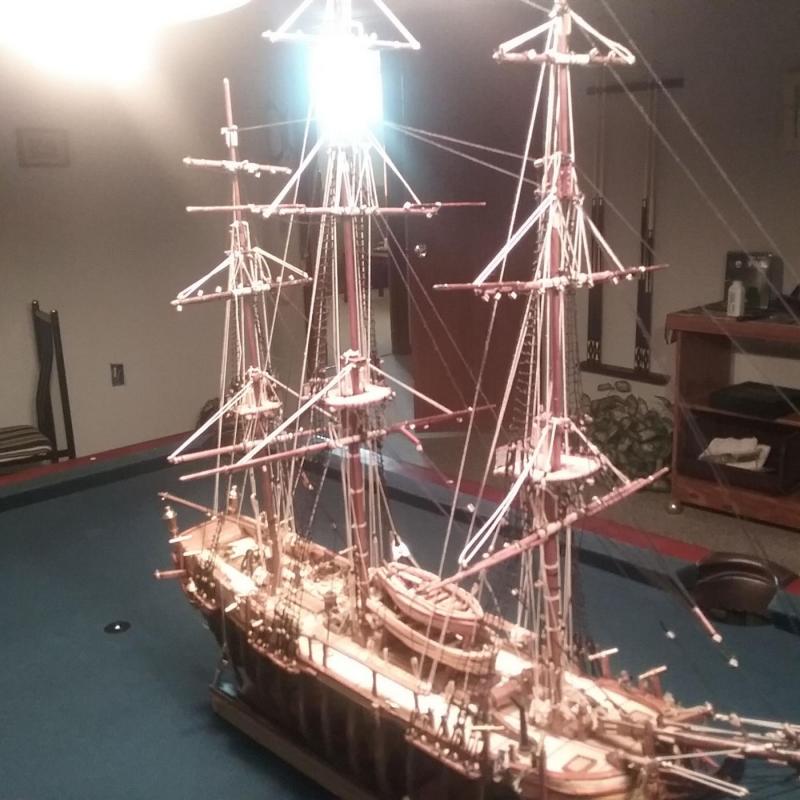
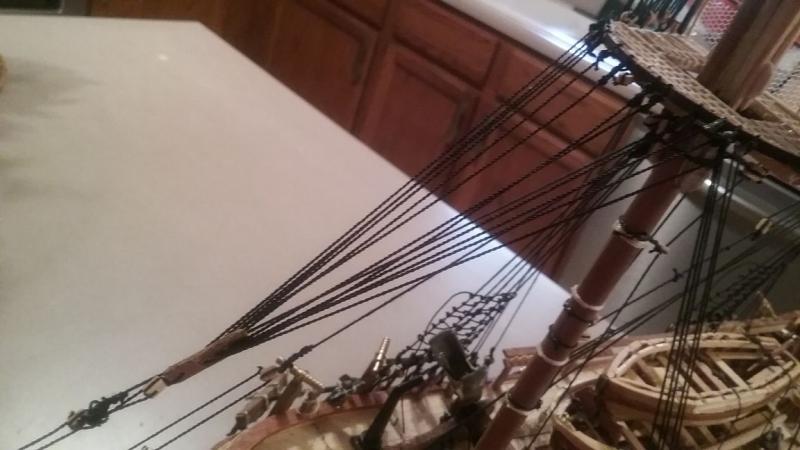
Here are a few more images of the work in progress. While it seems that the advancement is slow, I've been pretty good at working at least an hour a day, and now I am well along in the rigging process, having completed the standing rigging, and made a good start at the running rigging. I've decided to go ahead and rig her with all sails unfurled, even though an actual ship would never have ALL her sails out at once, unless to dry them, or for display (on a still day!). I've gotten far enough along to begin researching my next project, which, at this point, will be USS Constitution. I've been onboard her on several occasions, and I'm looking forward to building her. I haven't decided which of the many kits available to get , though. I'd like to work around the 1/50 scale, and suggestions are welcome. Back to the Bounty.....
-
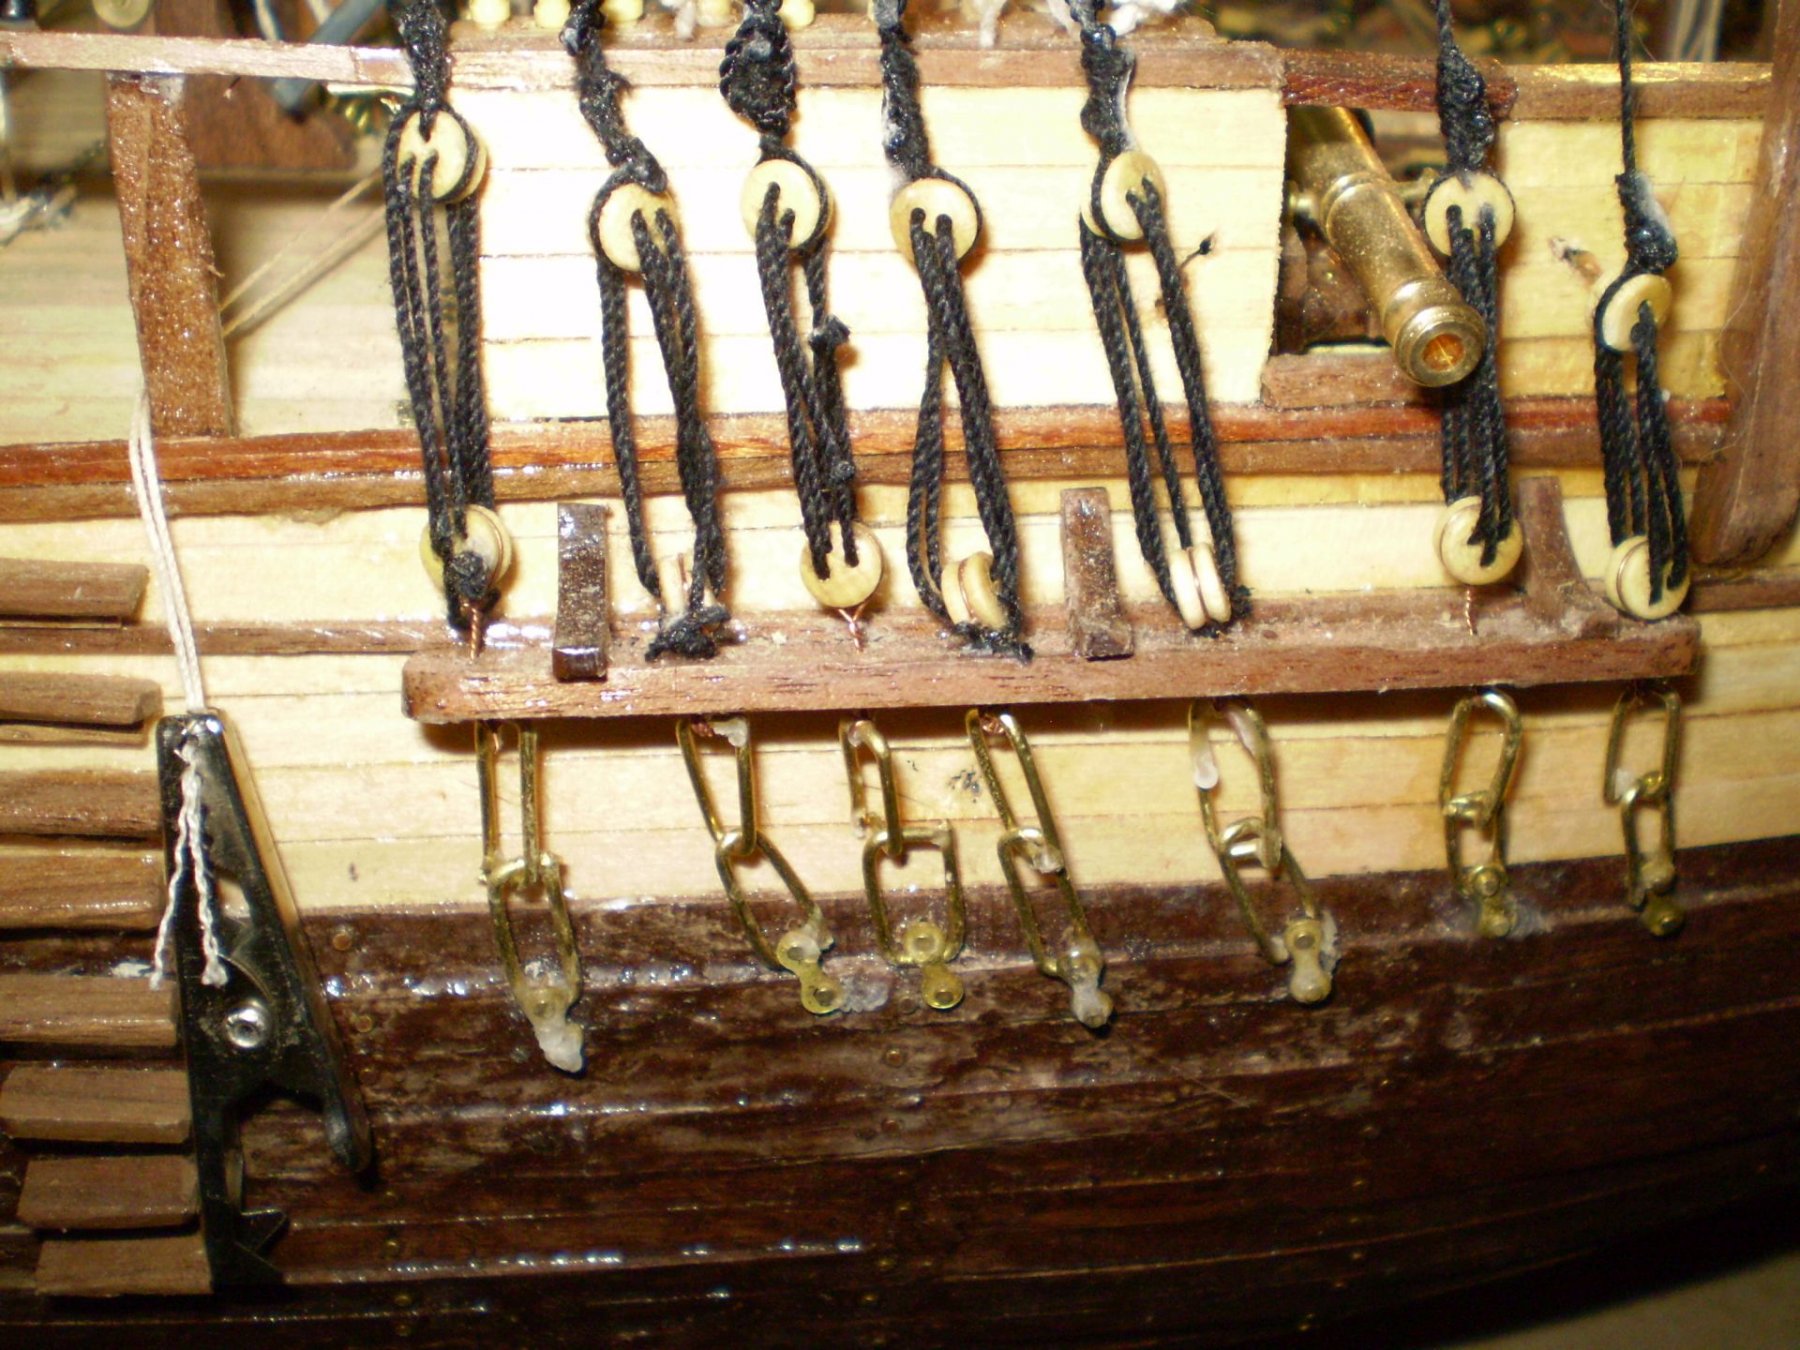
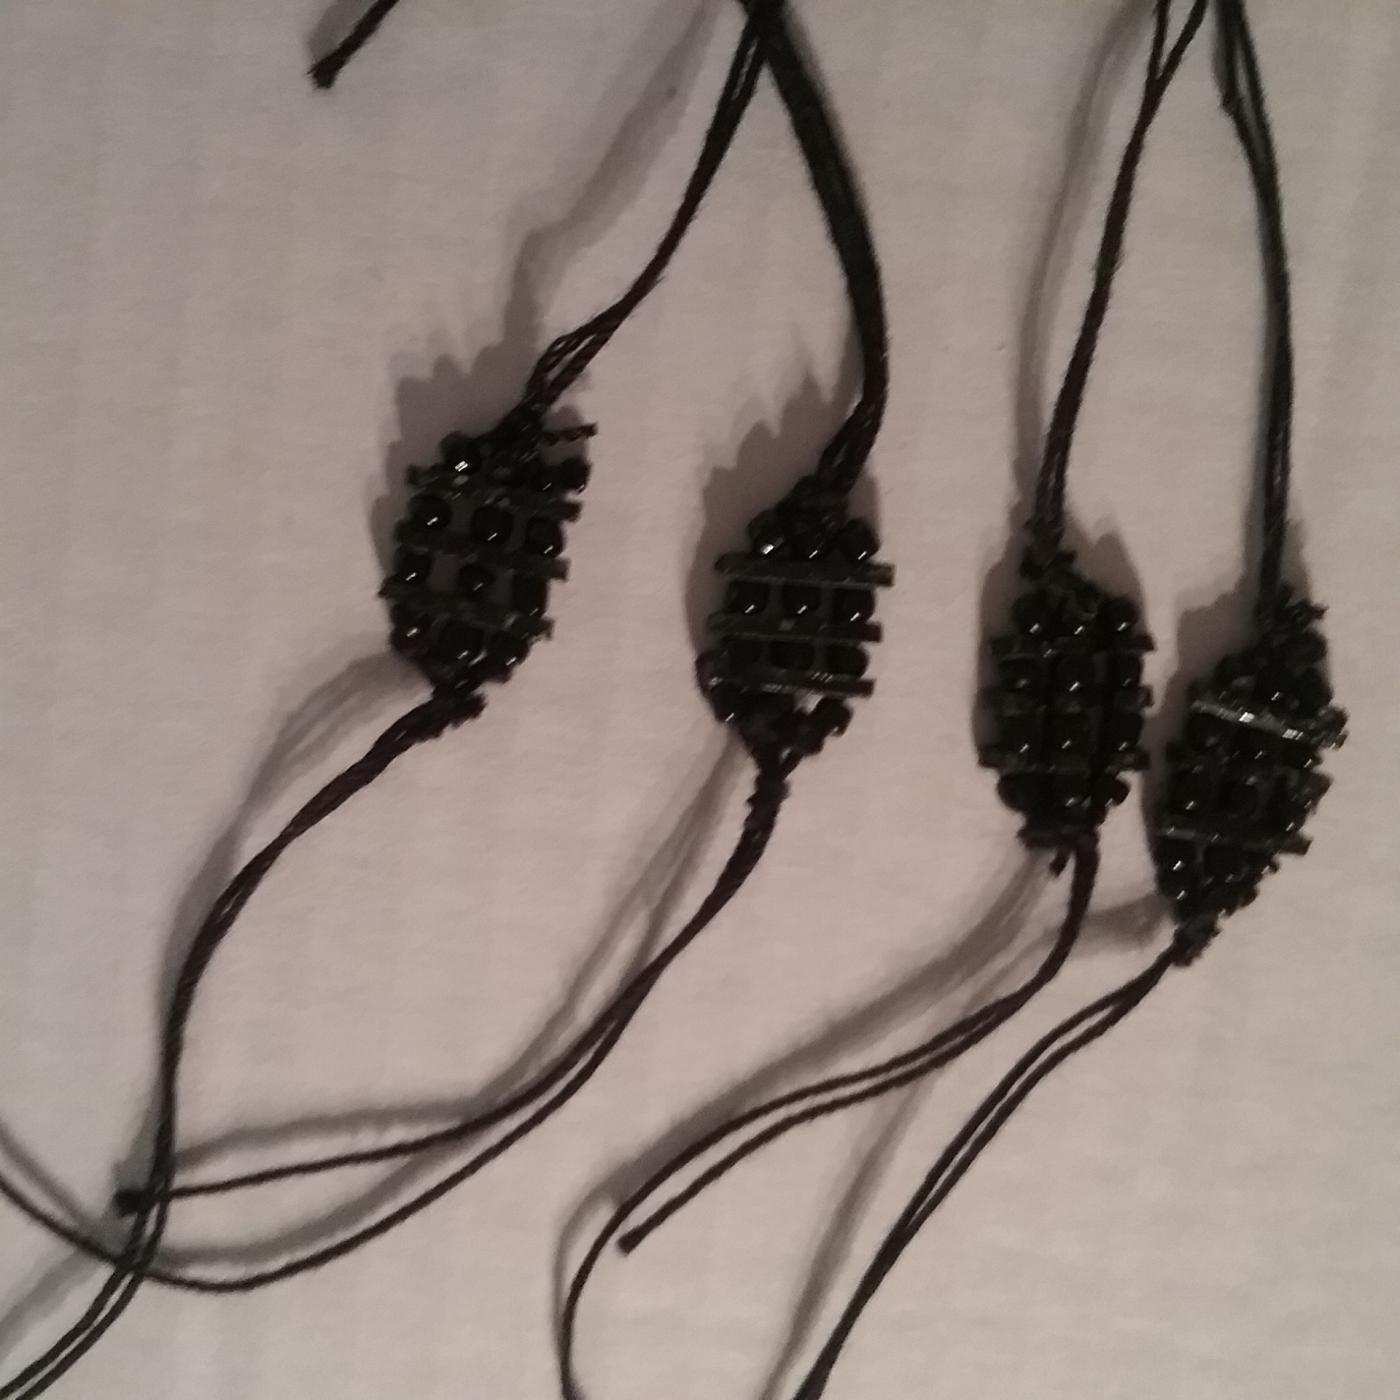
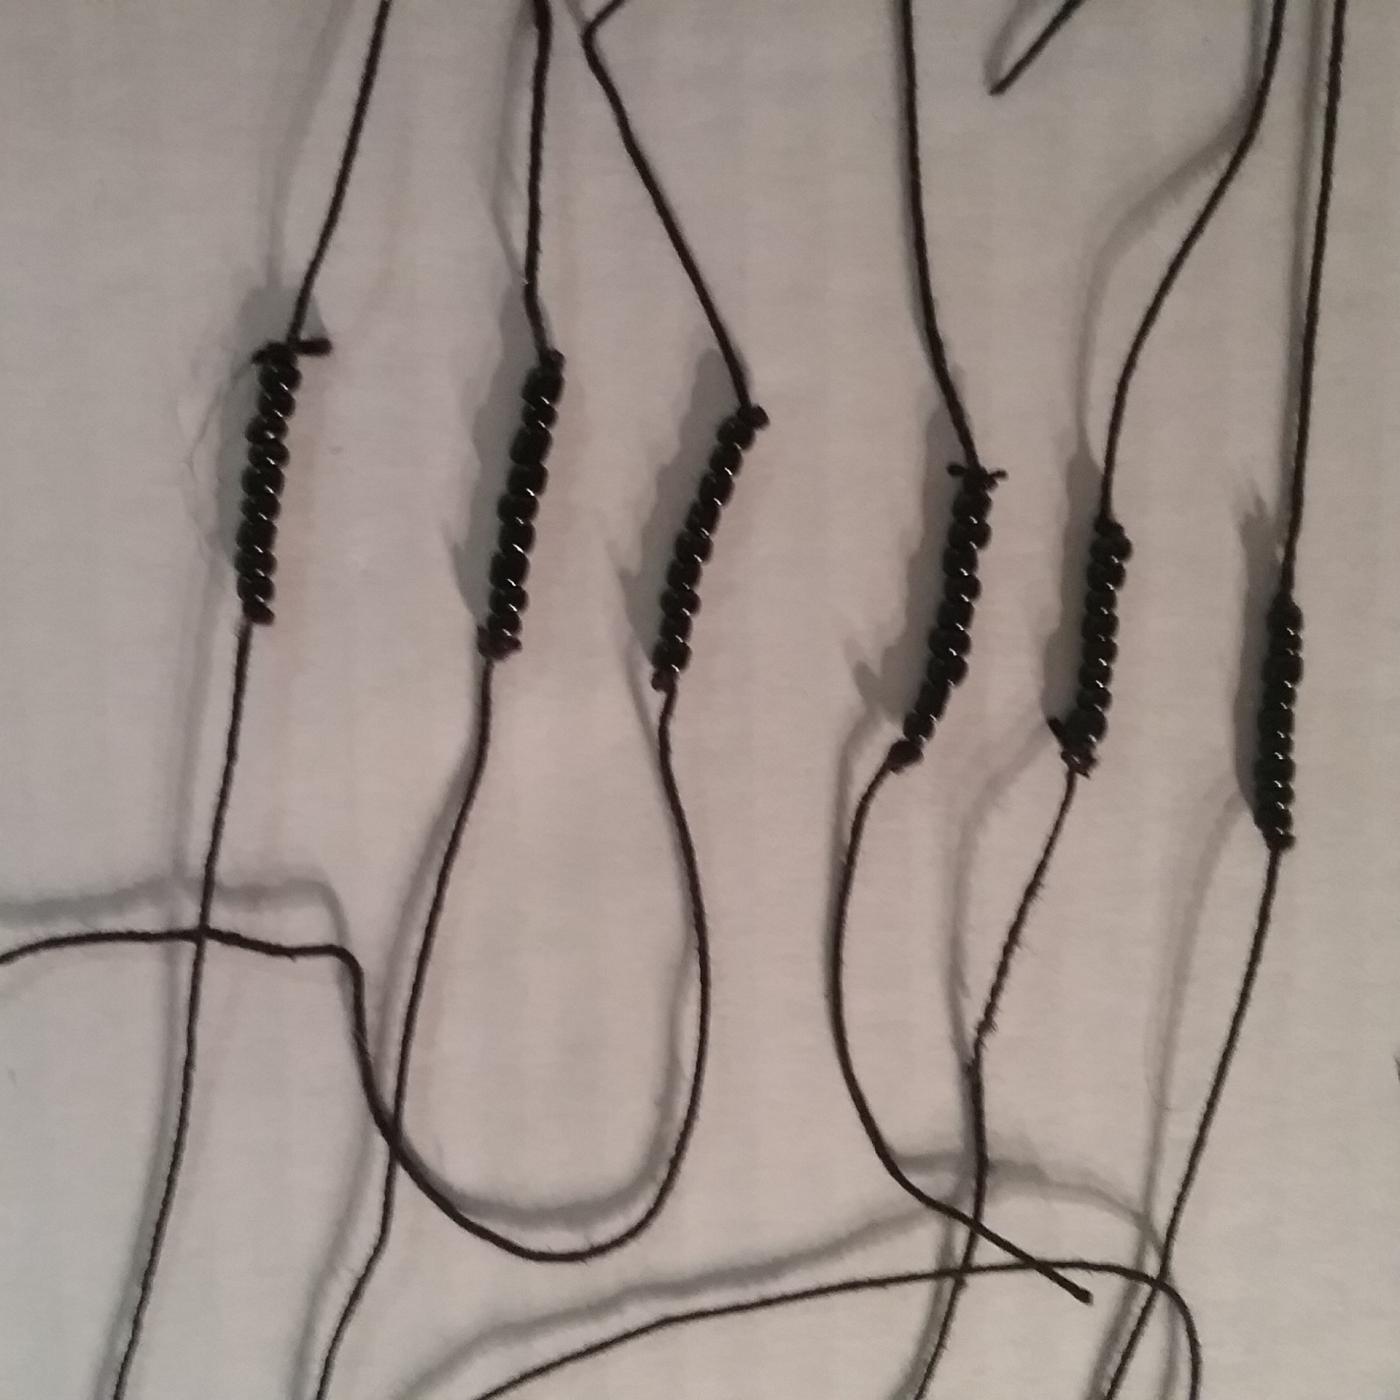
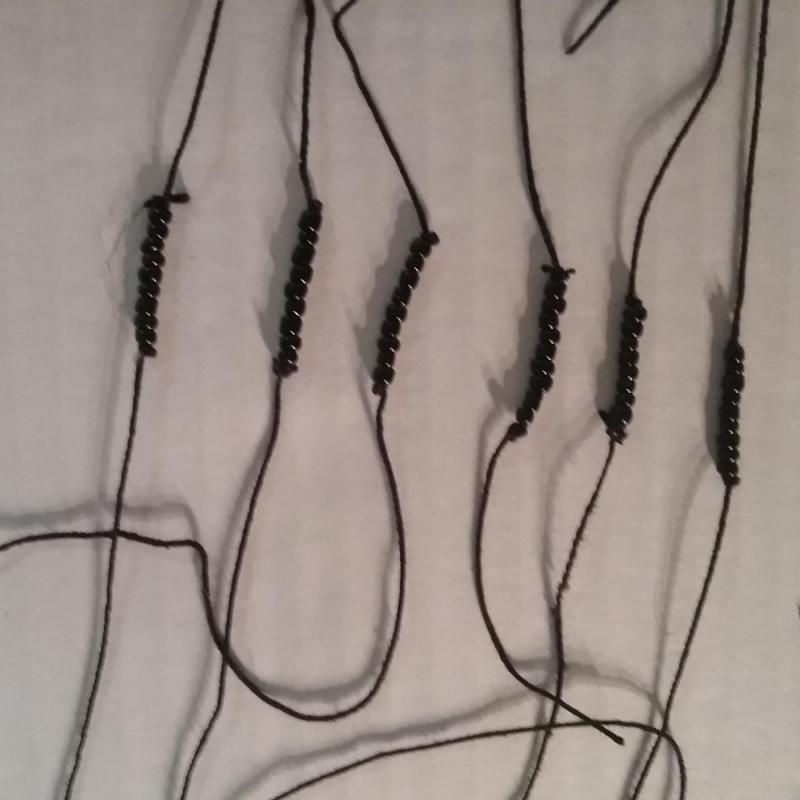
In the above images, you can see a couple of close ups of my ratlines, specifically the Fore Top area. Then are couple of shots of the chains that are used to hold the booms to the yards, and allow them to be raised and lowered. Finally, there are three images of all the yards I've constructed. I forgot to include the 2 booms for the Mizzen Mast.. I'll try to remember to take a shot of them tomorrow. You may notice that each boom has a thick(ish) brass wire sticking out of the center. I've done some experimenting and I've found that by drilling a hole through the yard and through the mast at the point of joining, that I can get a nice, solid joint with a minimum of glue and lashing. Here's hoping the actual construction experience matches the test joins!
-
Well, as usual, I've been working away on the Bounty, but have been less than diligent about posting pictures. I've now finished the ratlines on all 3 masts, and have completed the yards and booms. Next step will be beginning to work on the running rigging and install the yards, booms, and sails.

-
This is an attempt of a close up showing the ratlines and shrouds under construction. I'll attempt to get a few better detail shots over the next few days.
-
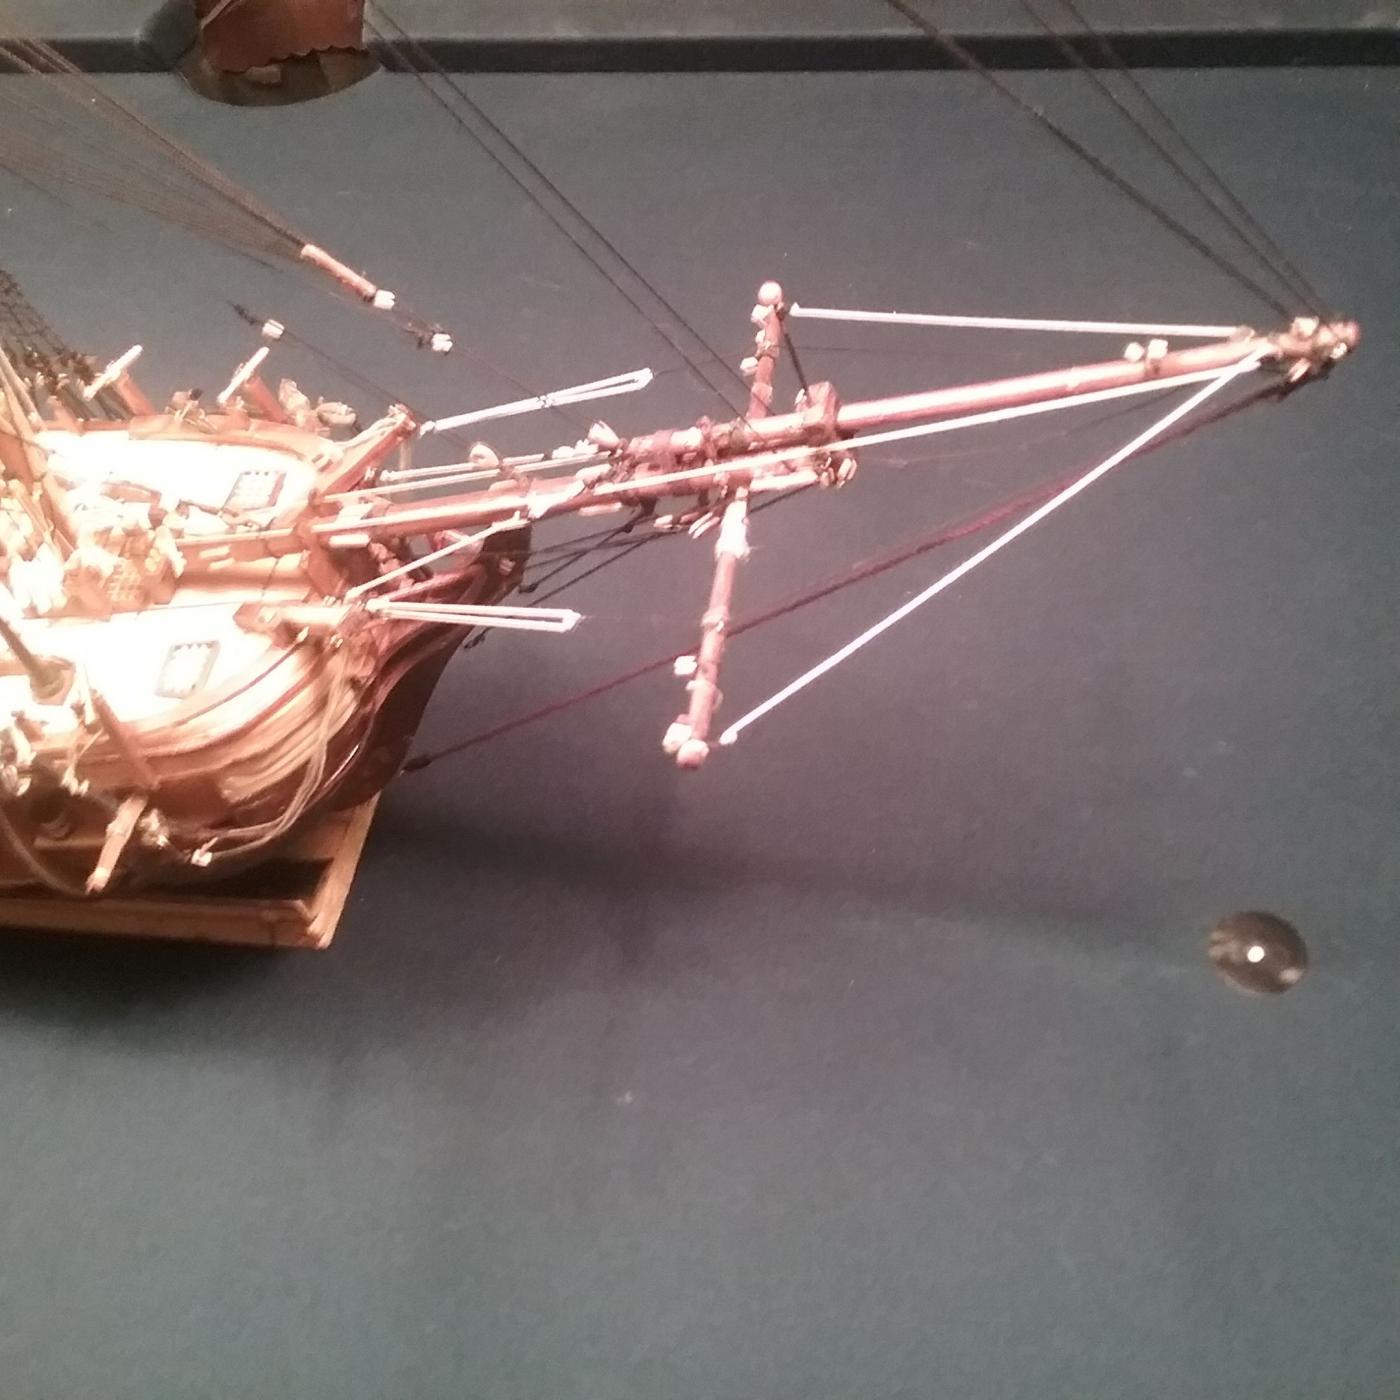
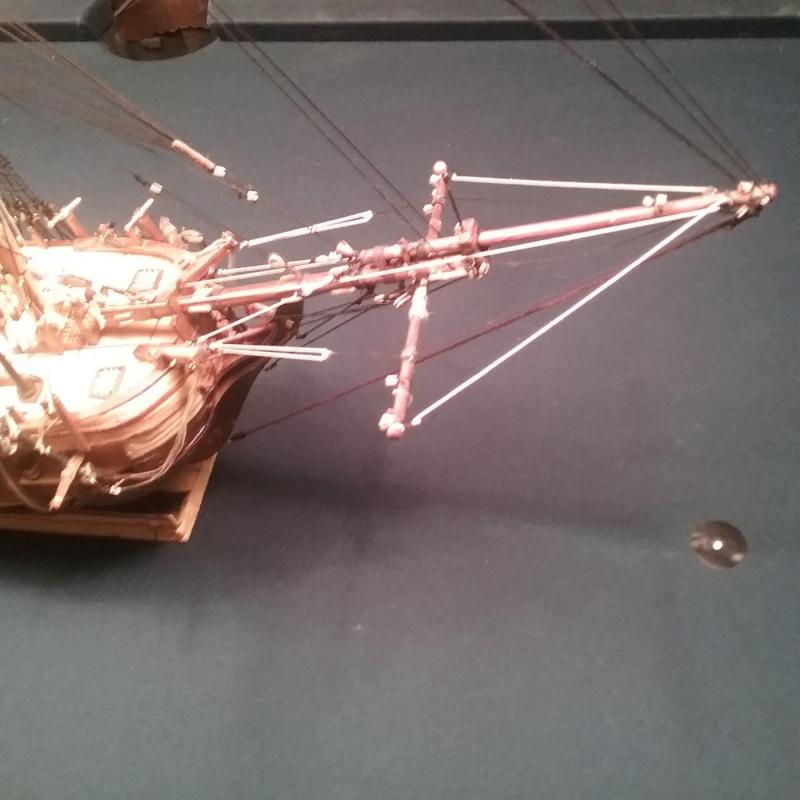
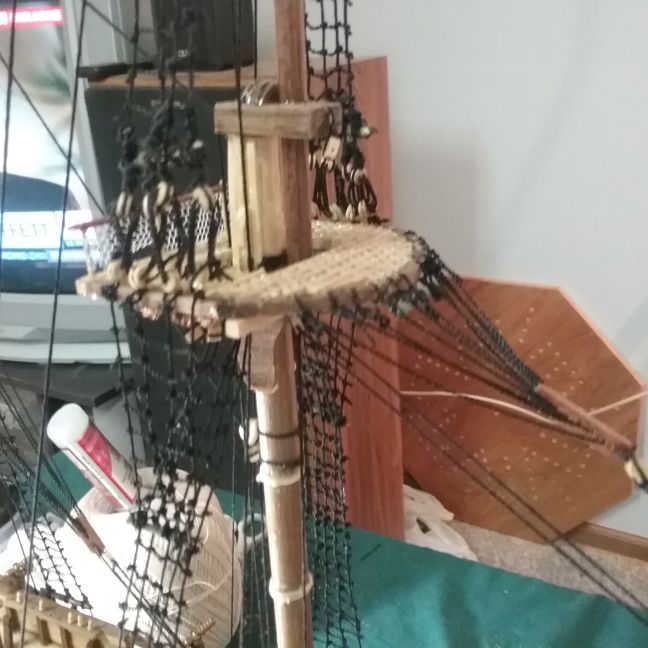
Here is a detail of the forestay spreader on the foremast. The plans call for these spreaders on all three masts, but of course, they are not provided as precut, and must be made from scratch. Fortunately, I love the hand-crafted details, so here's my take on it.

-
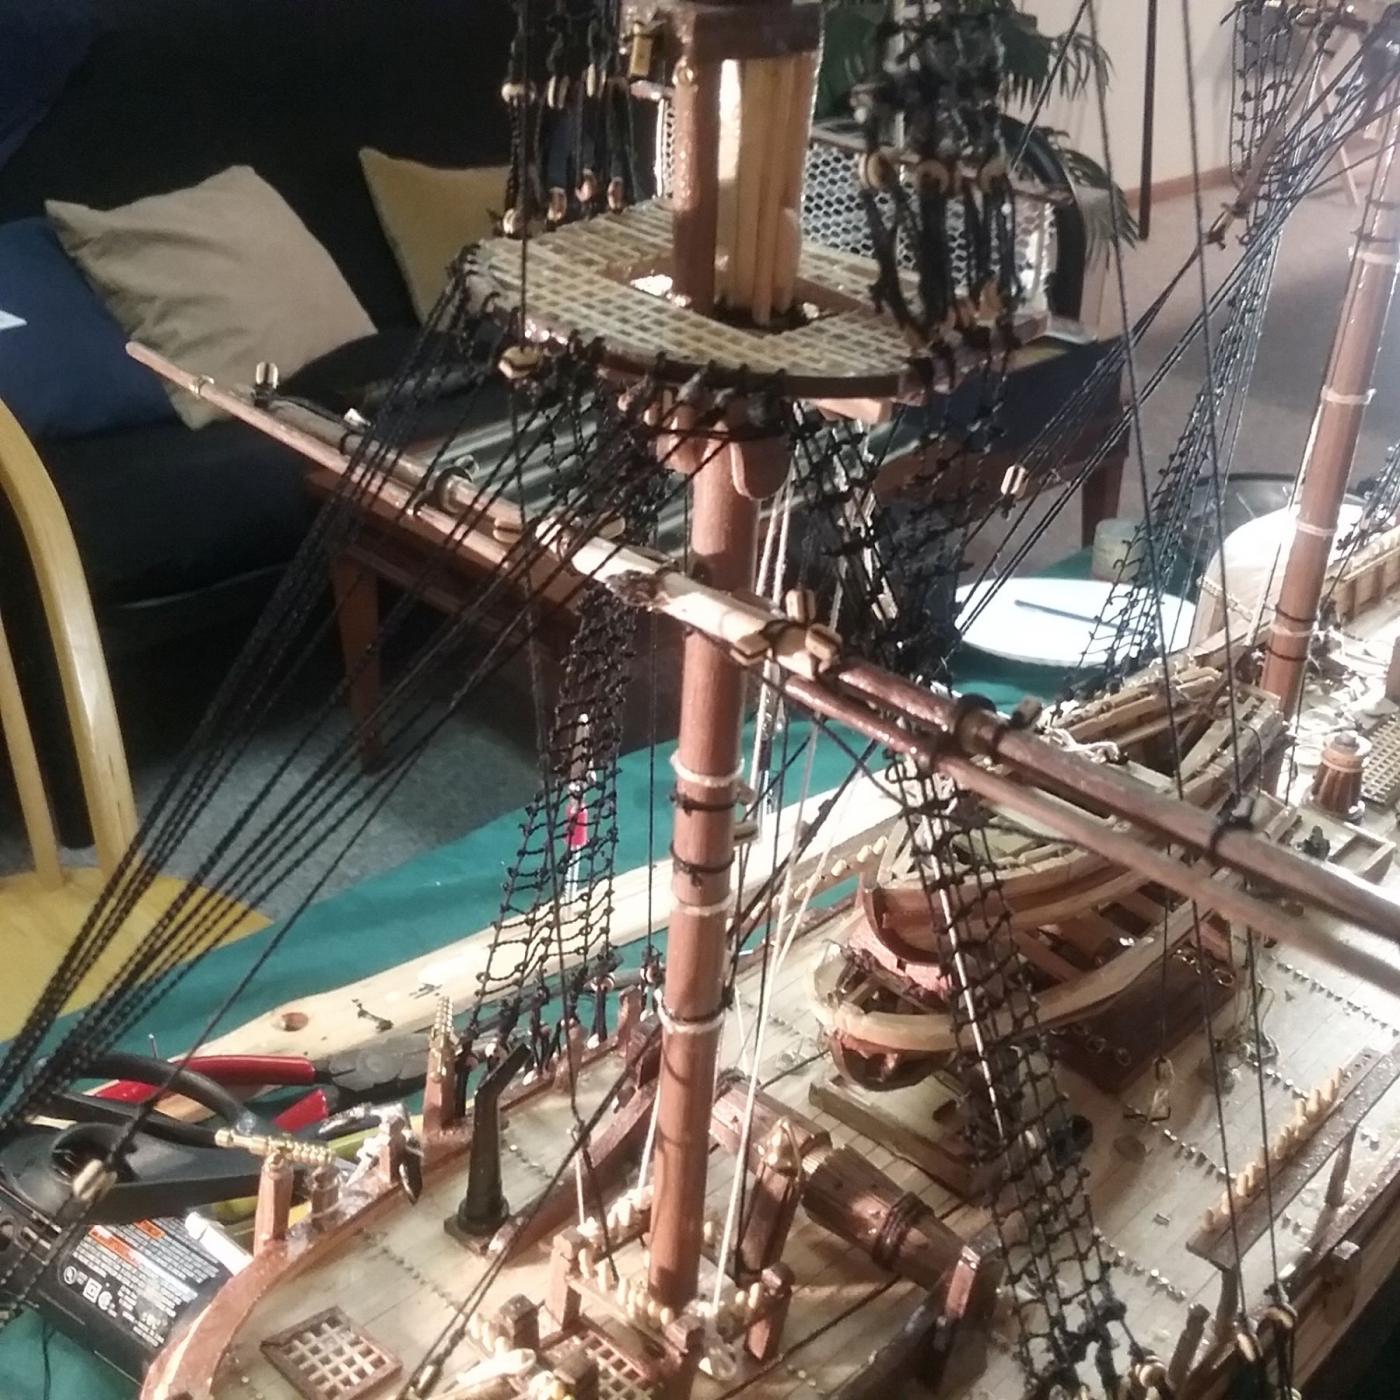
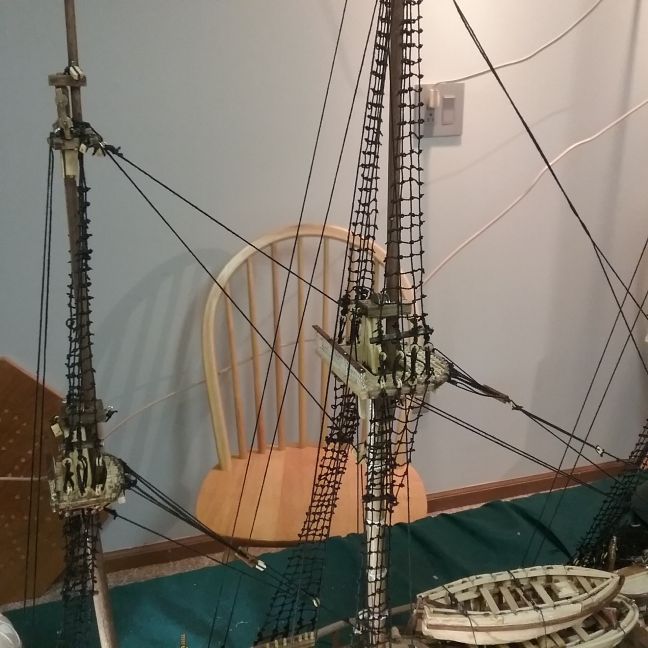
As can be seen, all the masts are in place, and all of the shrouds as well. The ratlines are under construction. In a previous build (the Bluenose, visinble in the background) I learned that it was a bad idea to use CA glue to secure knots while building ratlines... they get brittle and impossible to work with. This time, I am using a 50/50 mixture of water and carpenter's glue. The ropes remain flexible, but the knotting is sufficiently secured.
-
Here are a few more shots of the build, as it progresses. All the masts are constructed and installed, and I am now working on the multitude of forestays, and on rigging the shrouds and ratlines. I apologize for the quality of these next few shots. Rather than shooting with a neutral background, I simply snapped these in my kitchen, where I was showing the current progress to my wife, who is, fortunately, supportive and enthusiastic about my hobby. In addition, it's a brand new phone, so I'm still learning to use the camera effectively.
-
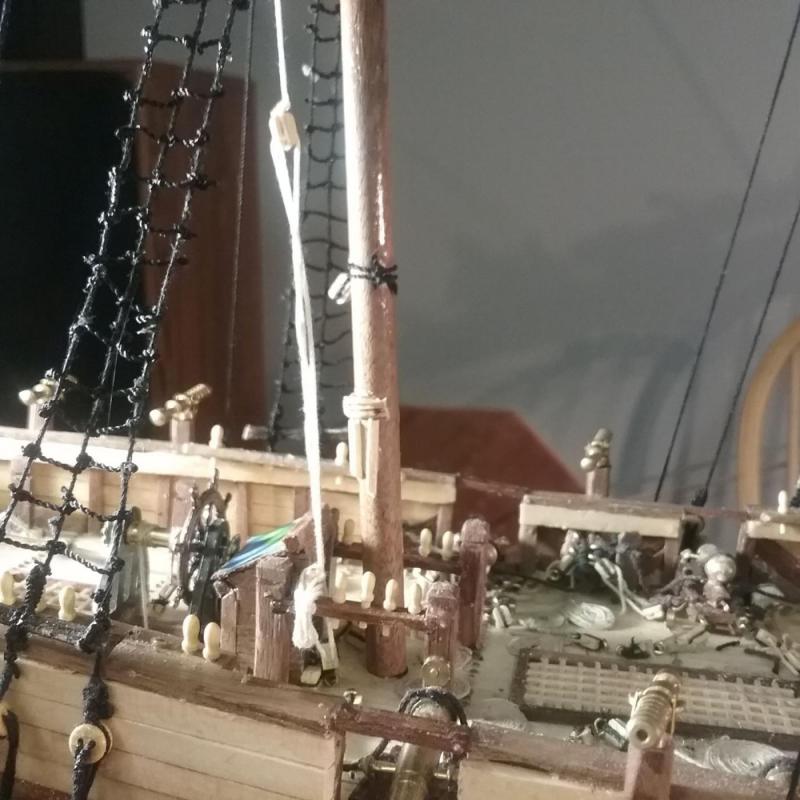
And finally, for now, here is a closeup of my steering ropes, ship's wheel, and stern area. I've progressed far beyond this point, and will post more pictures in the coming days. All the masts are built (lower, top, and royal), lower shrouds are done, and forestays are under construction! Happy Sailing!