HOLIDAY DONATION DRIVE - SUPPORT MSW - DO YOUR PART TO KEEP THIS GREAT FORUM GOING! (83 donations so far out of 49,000 members - C'mon guys!)
×


kostas_gr
-
Posts
239 -
Joined
-
Last visited
Recent Profile Visitors
1,581 profile views


-
 TimF reacted to a post in a topic:
Hermione La Fayette by kostas_gr - Artesania Latina - 1:89
TimF reacted to a post in a topic:
Hermione La Fayette by kostas_gr - Artesania Latina - 1:89
-
kostas_gr reacted to a post in a topic:
HMS Victory by Pfälzer - Corel - 1:98
-
brunnels reacted to a post in a topic:
Hermione La Fayette by kostas_gr - Artesania Latina - 1:89
-
PaddyO reacted to a post in a topic:
Hermione La Fayette by kostas_gr - Artesania Latina - 1:89
-
vossiewulf reacted to a post in a topic:
Hermione La Fayette by kostas_gr - Artesania Latina - 1:89
-
eatcrow2 reacted to a post in a topic:
Hermione La Fayette by kostas_gr - Artesania Latina - 1:89
-
Knocklouder reacted to a post in a topic:
Hermione La Fayette by kostas_gr - Artesania Latina - 1:89
-
ccoyle reacted to a post in a topic:
Hermione La Fayette by kostas_gr - Artesania Latina - 1:89
-
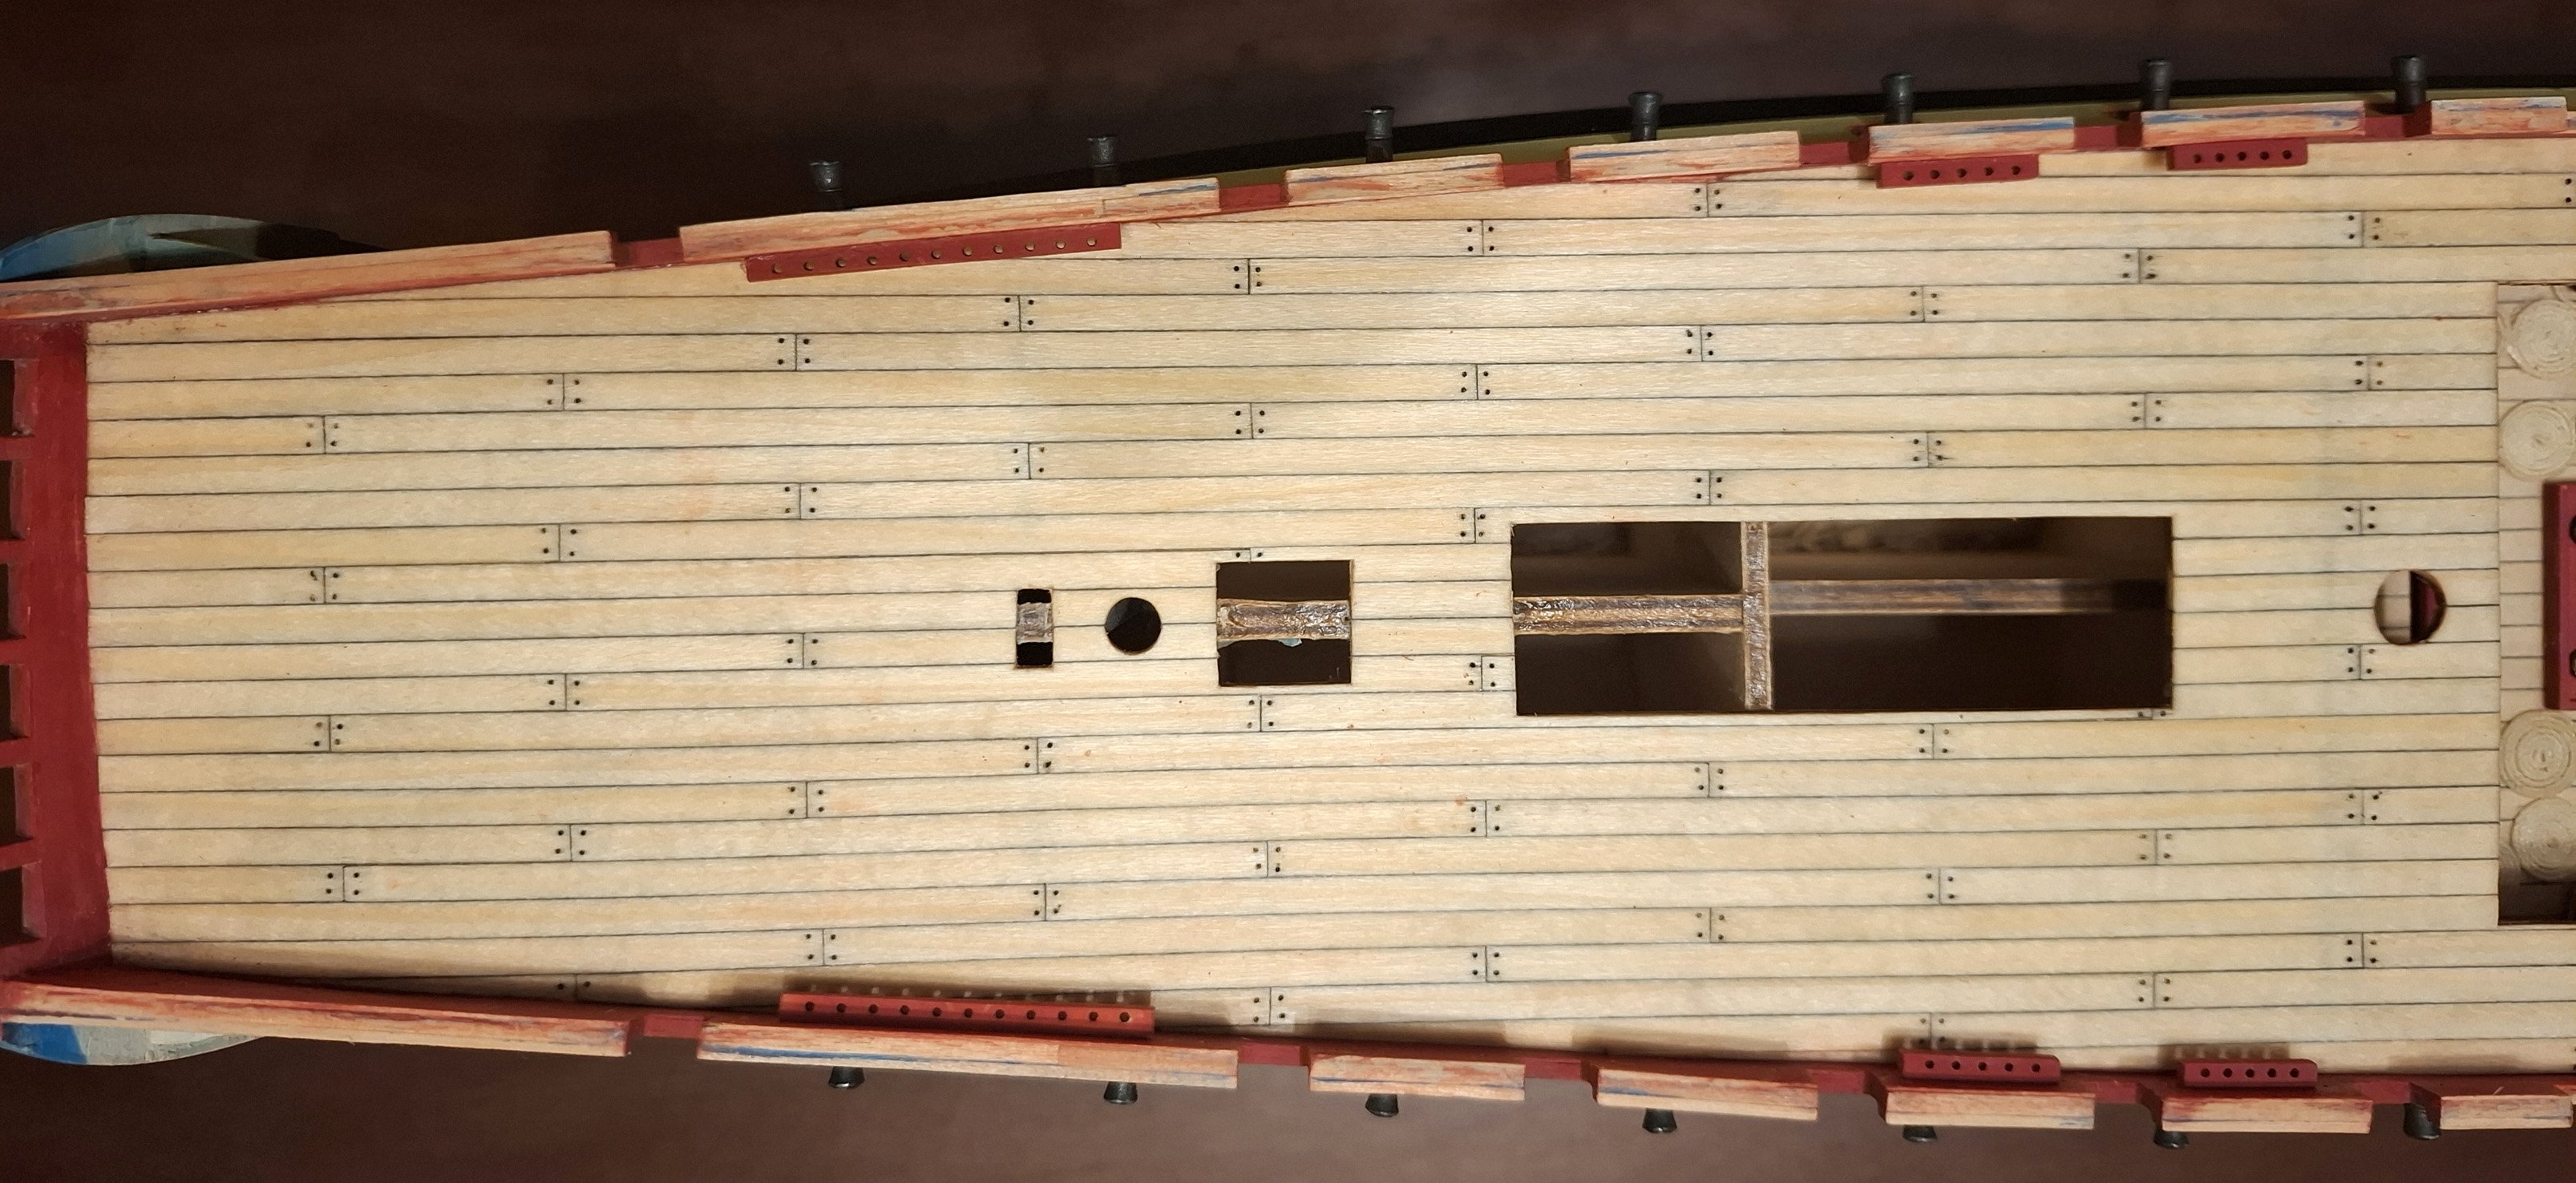
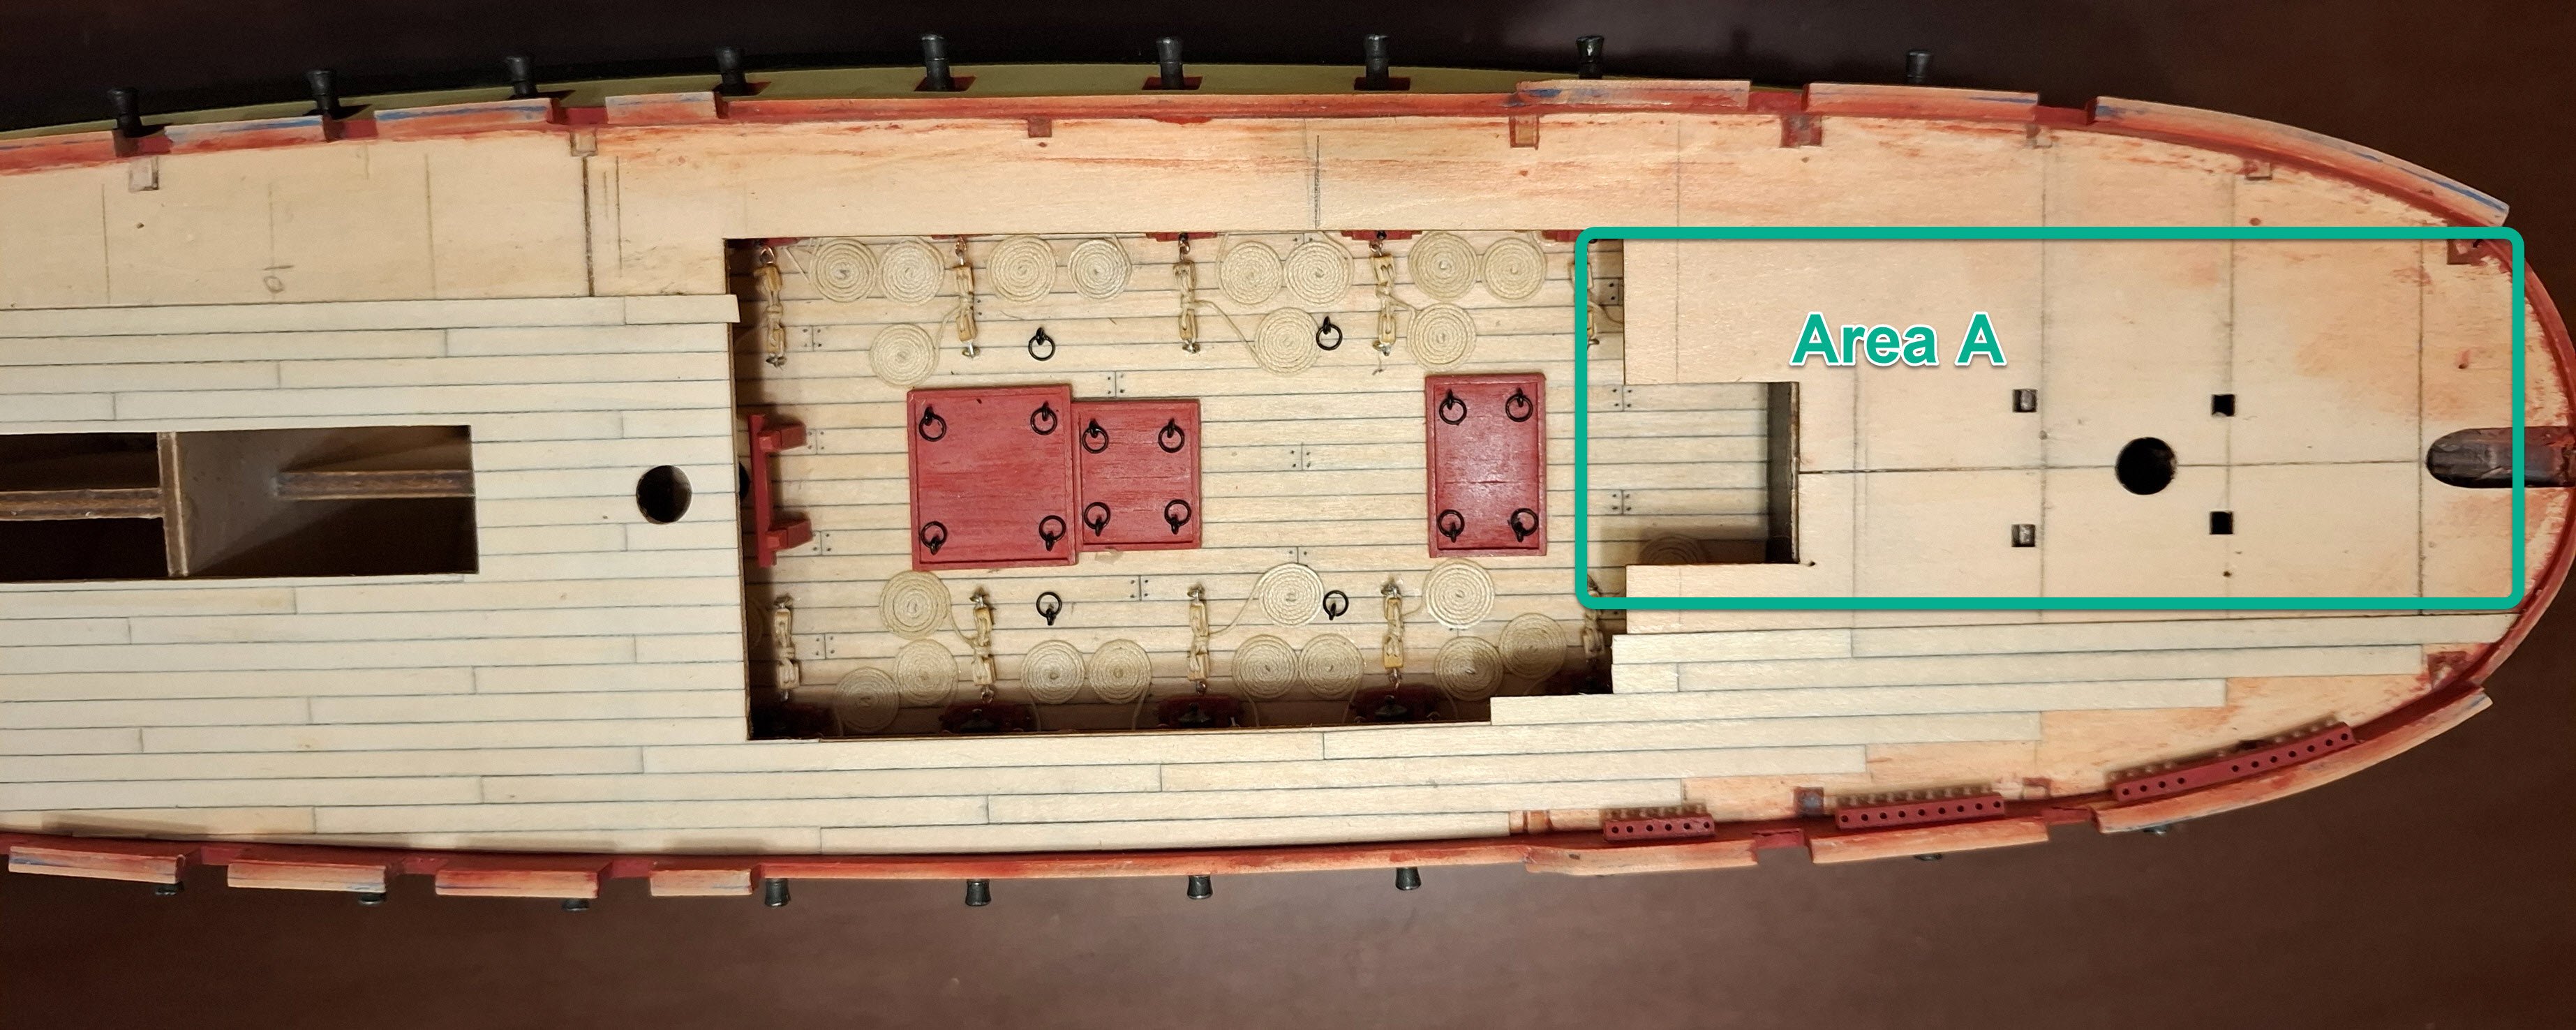
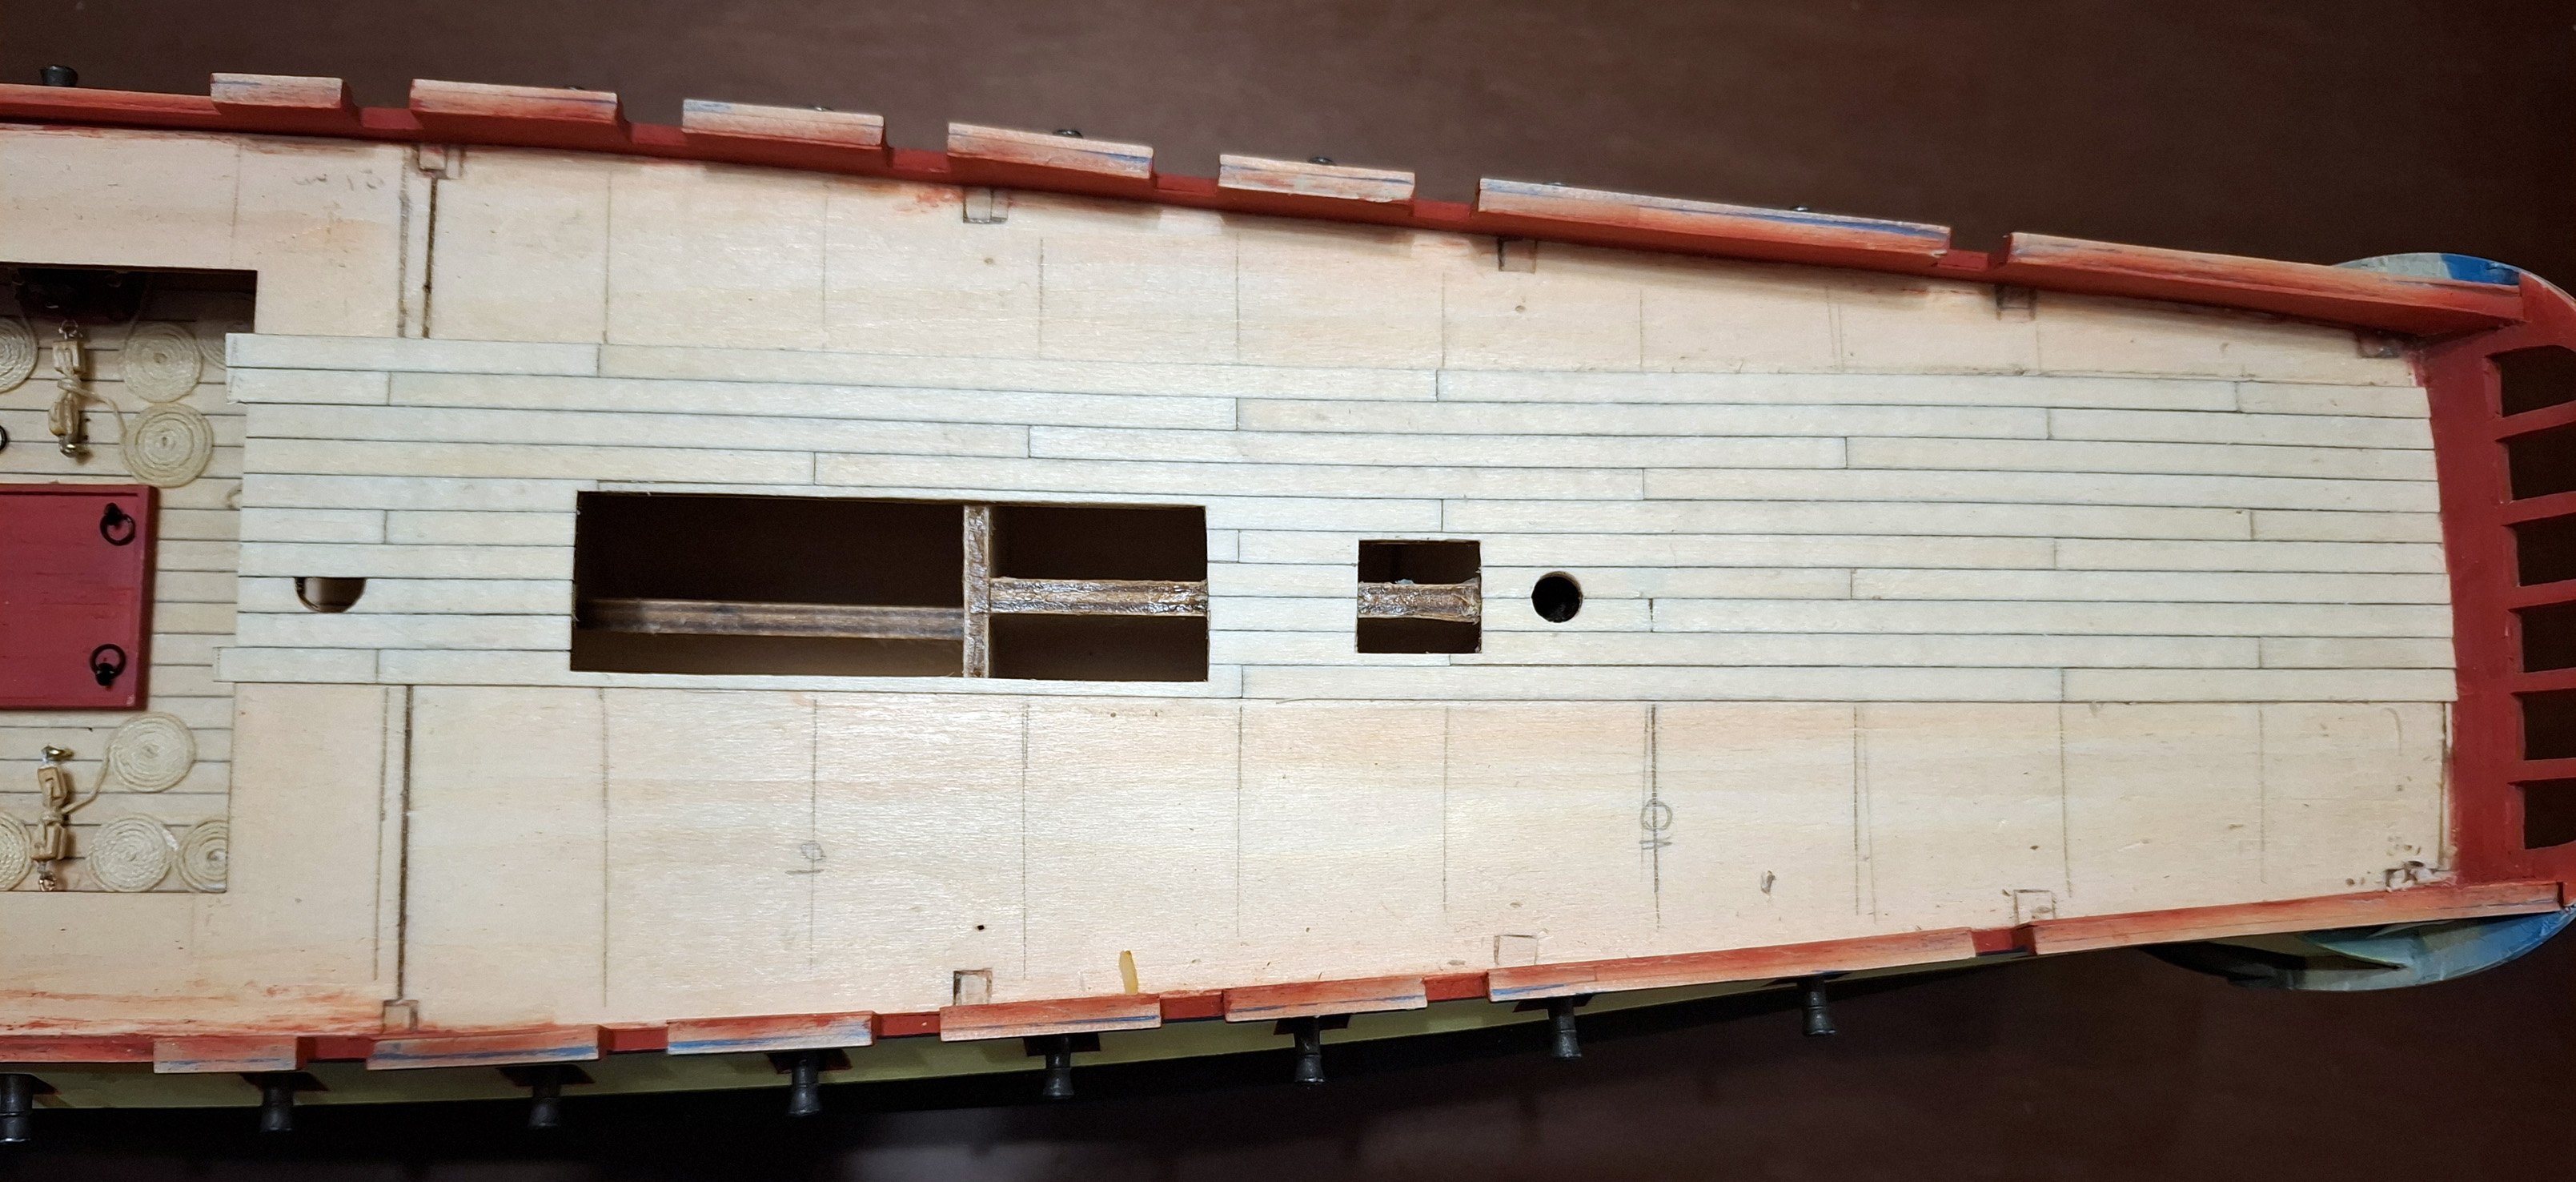
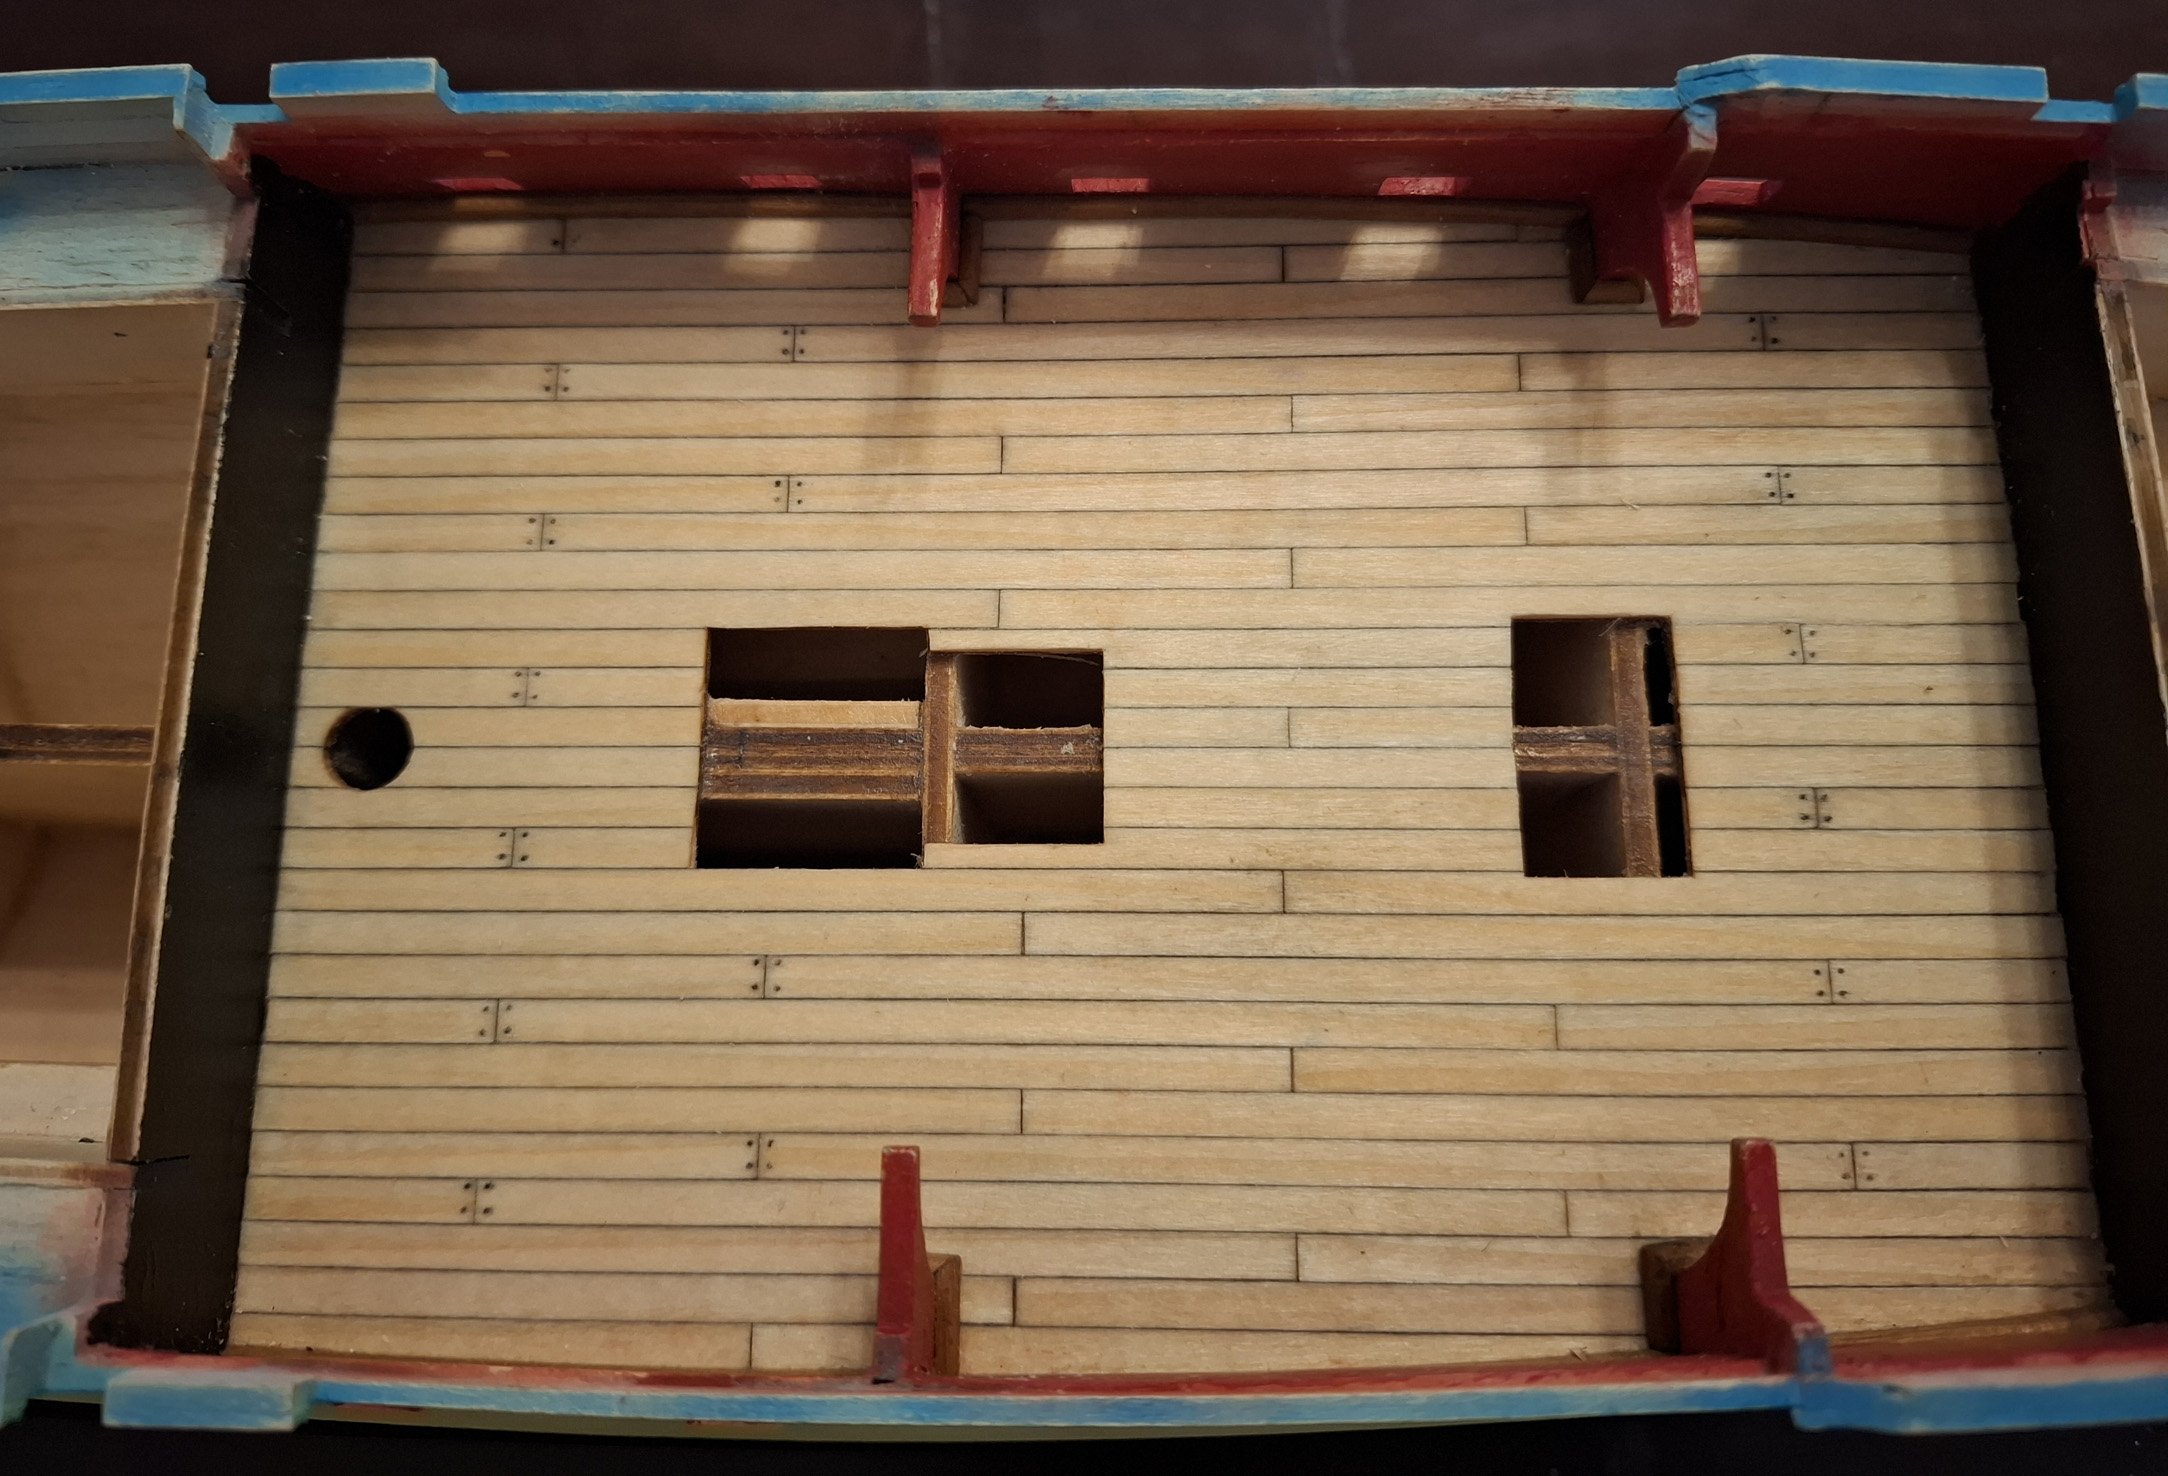
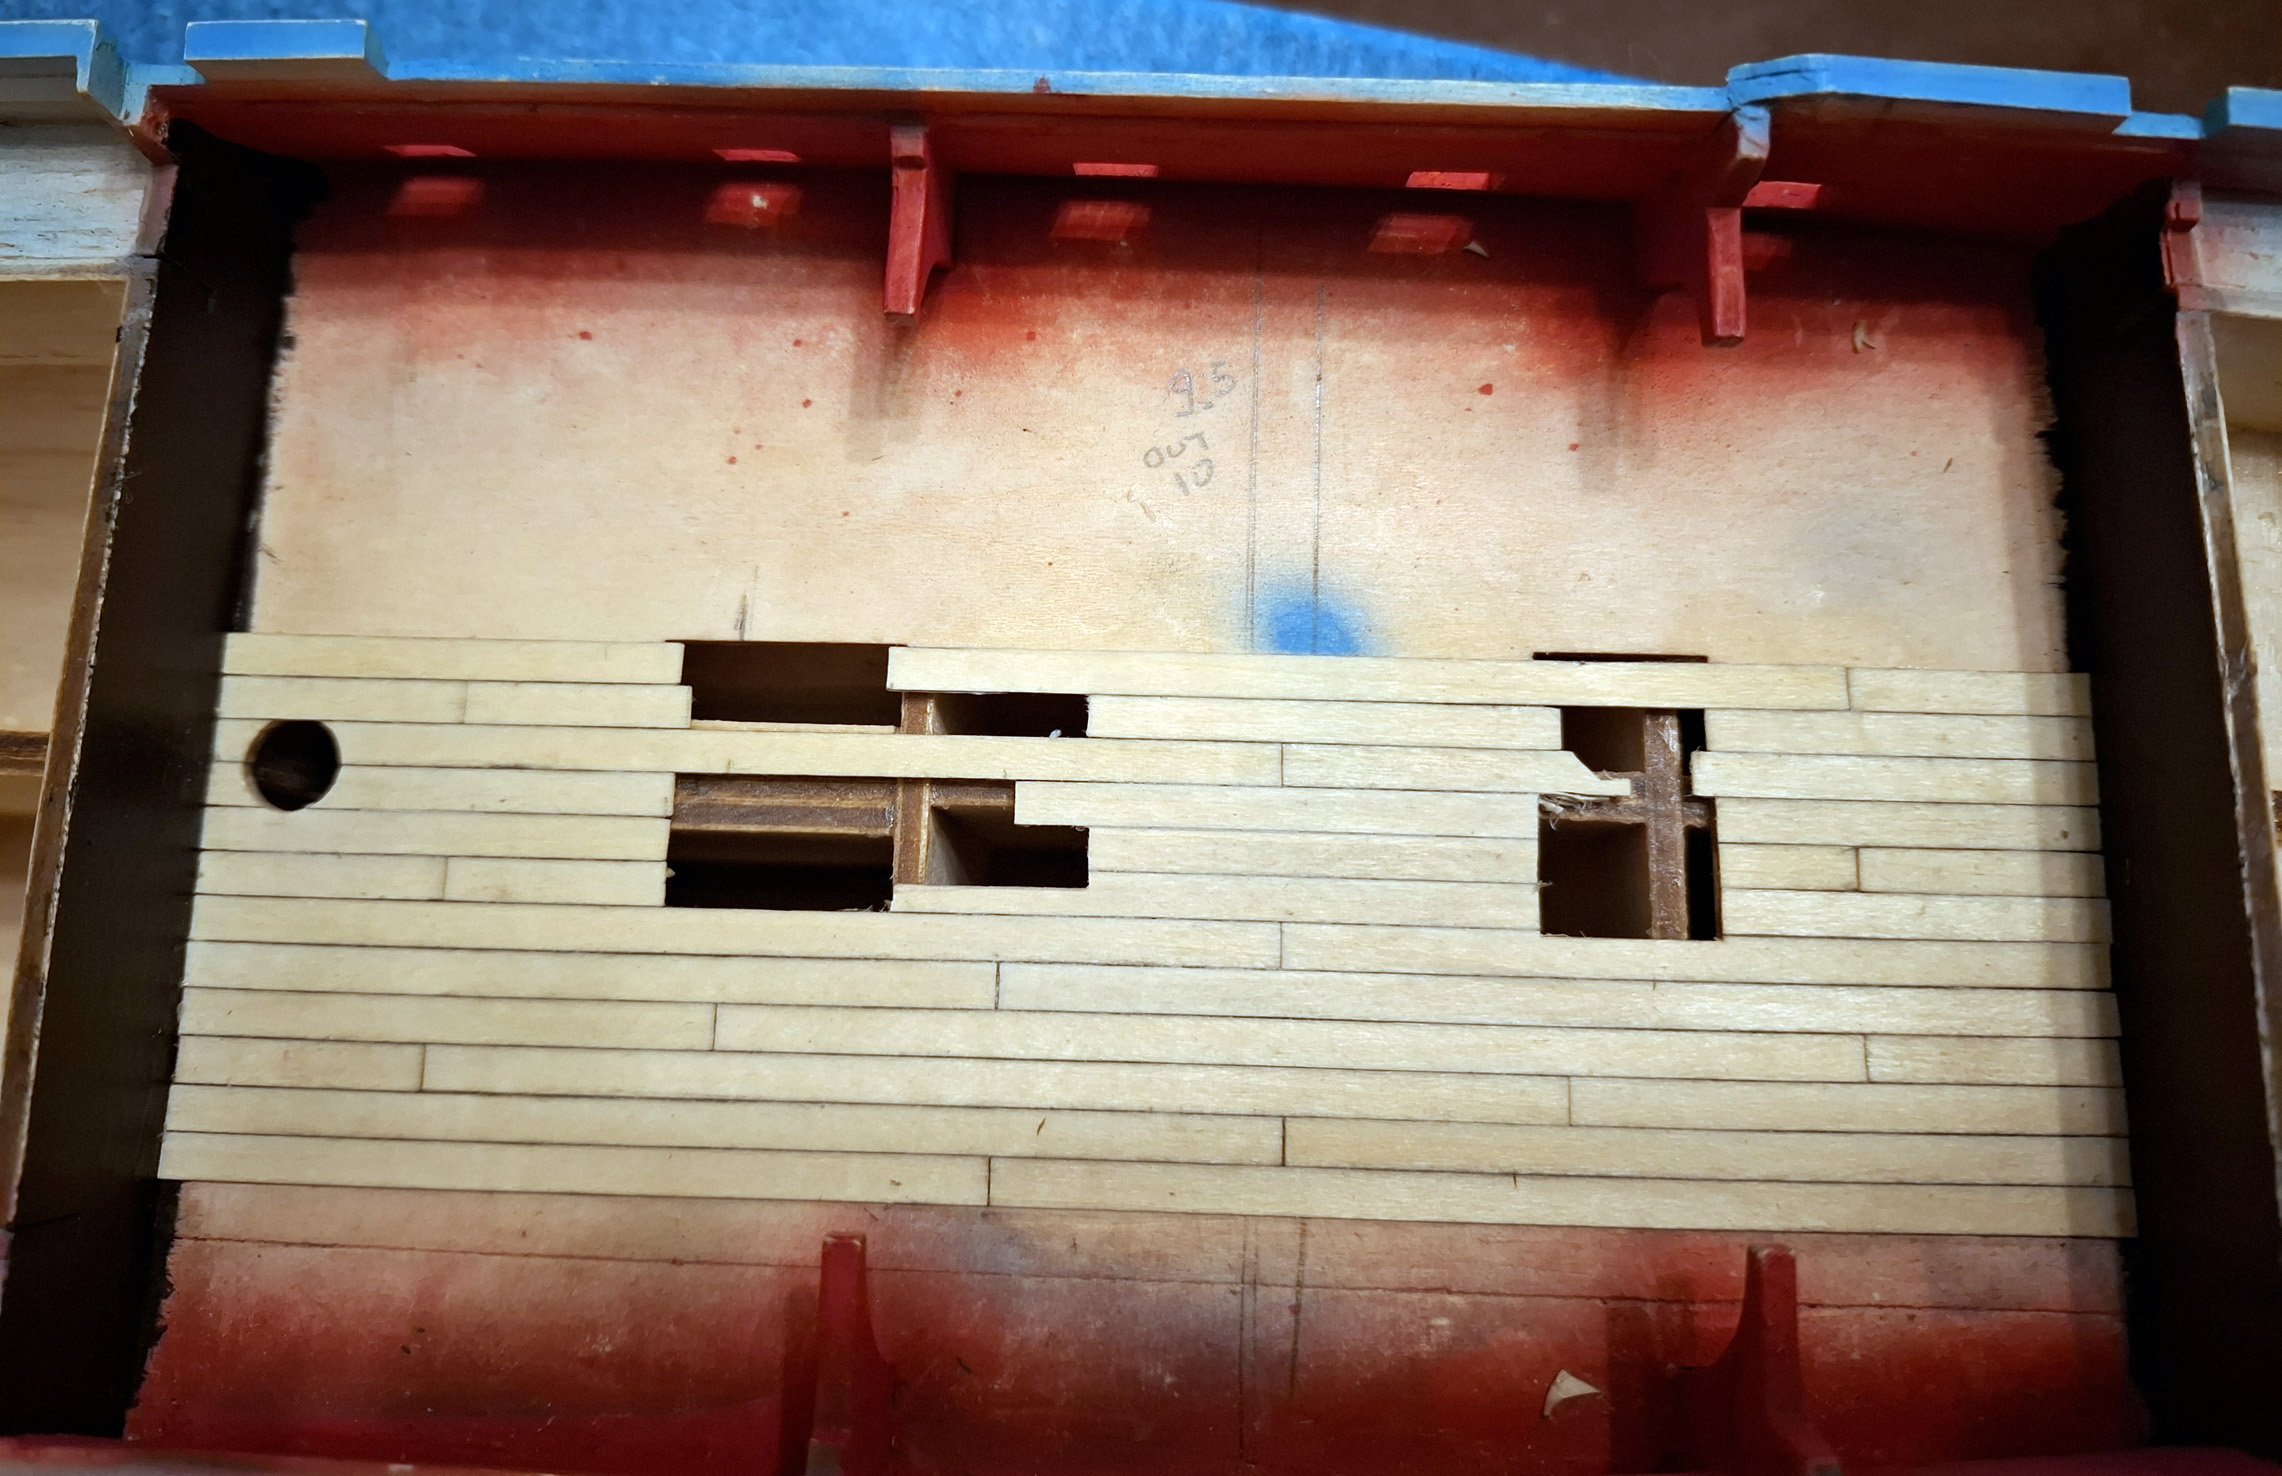
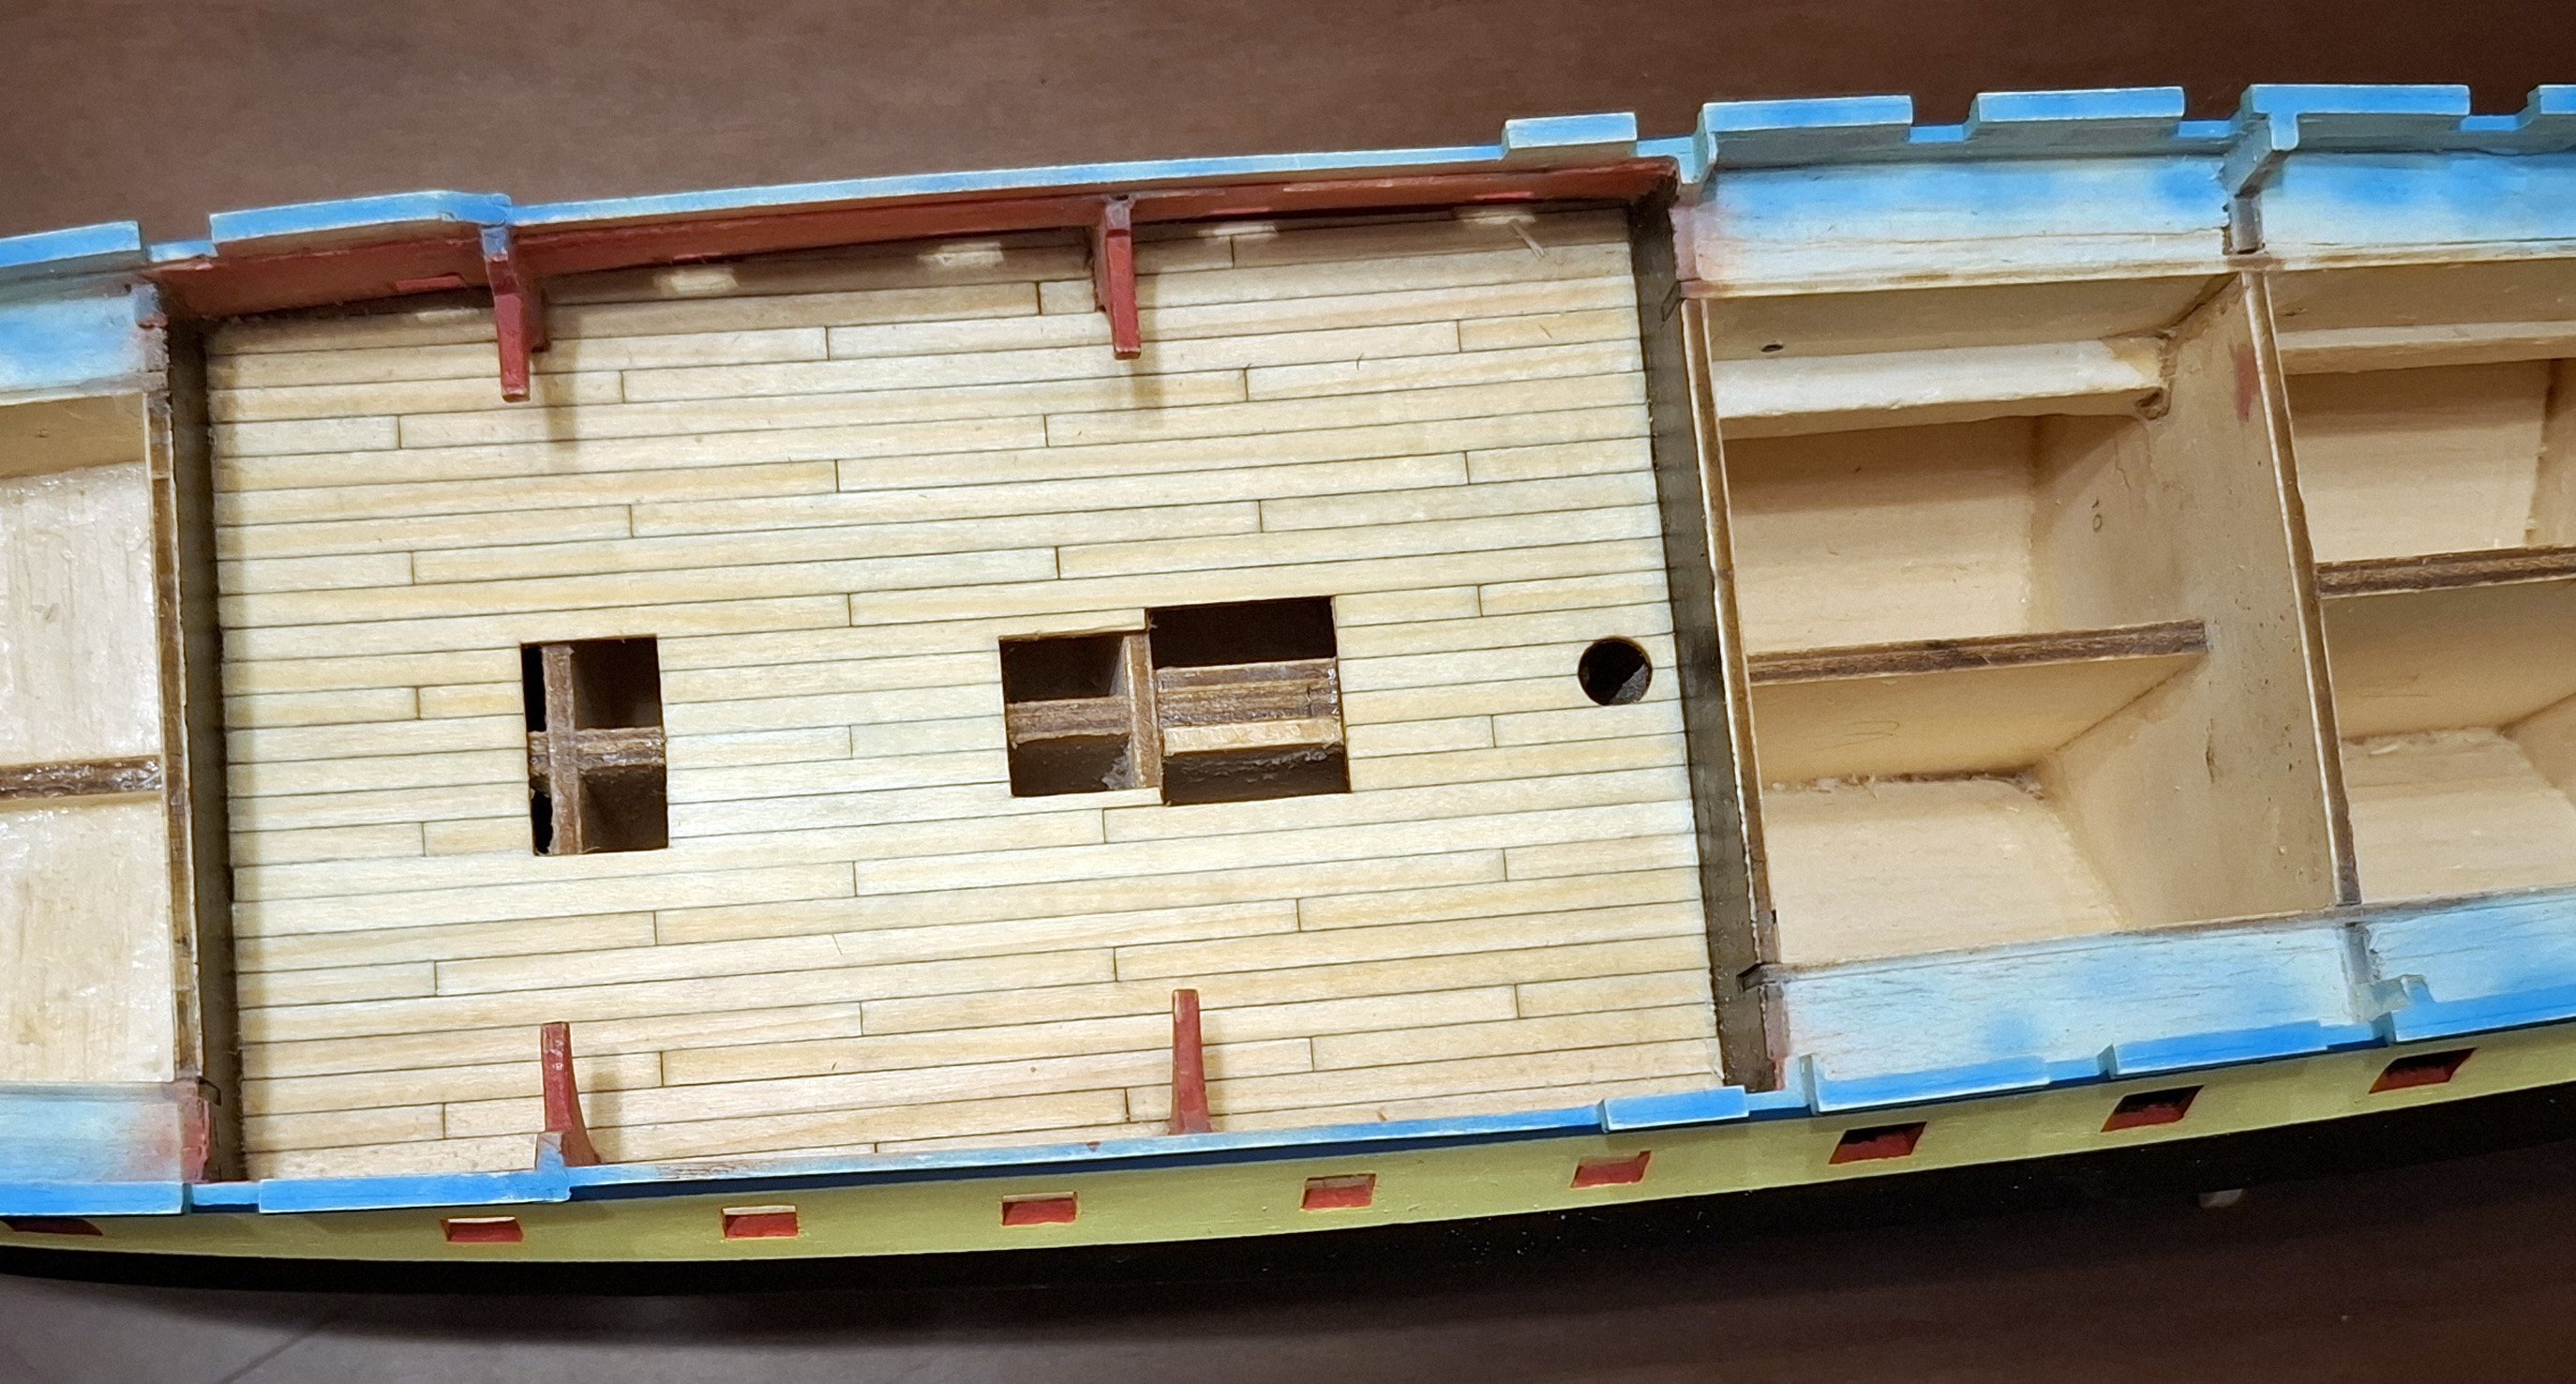
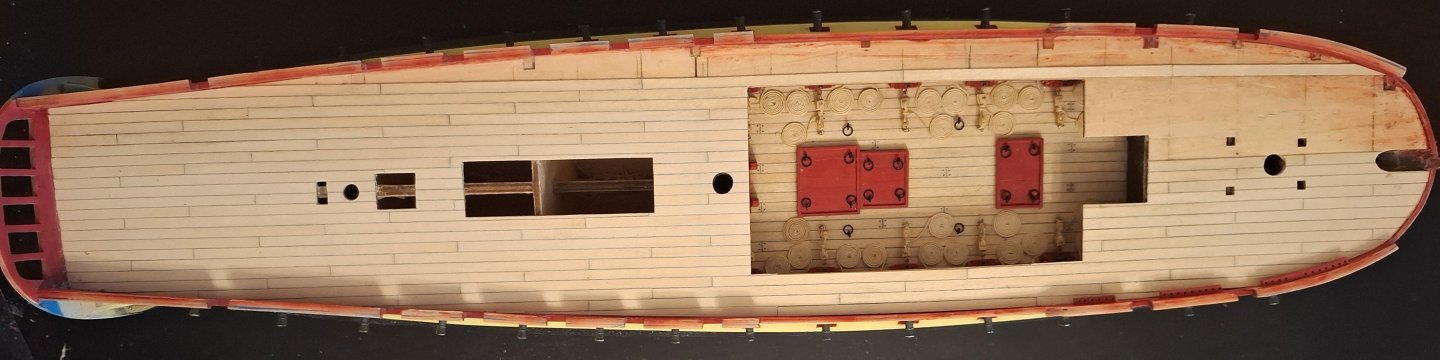
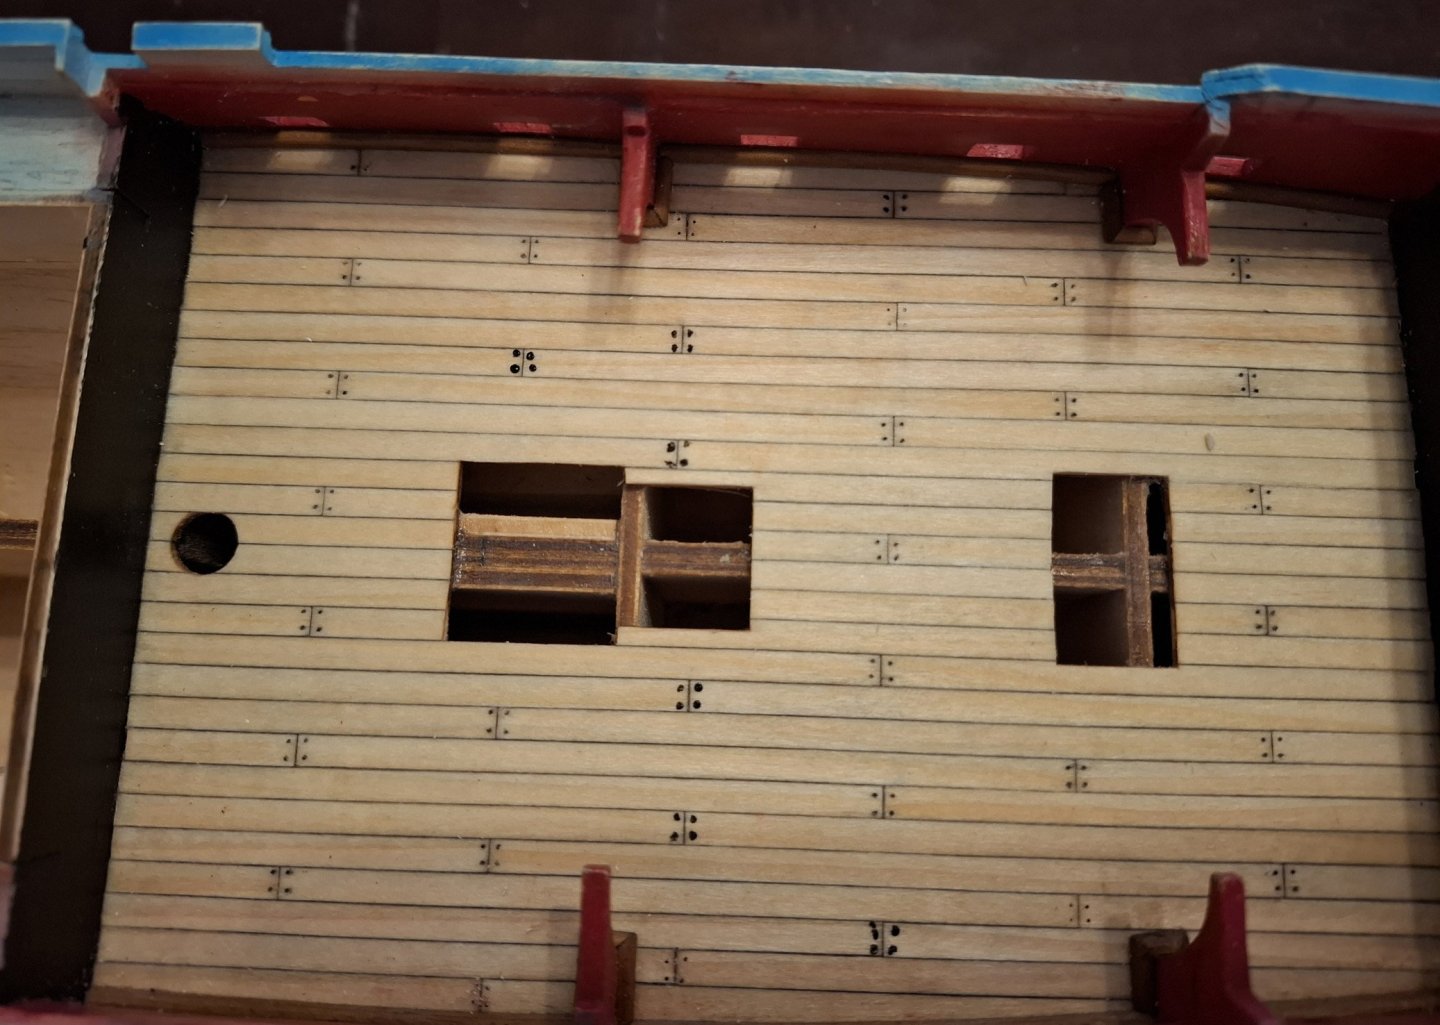
 Some planks in Area A have been trimmed to ensure full alignment with the main deck planking pattern, following the rule of I have made treenails as previously described during the main deck planking process. The next step is installing the deck rails
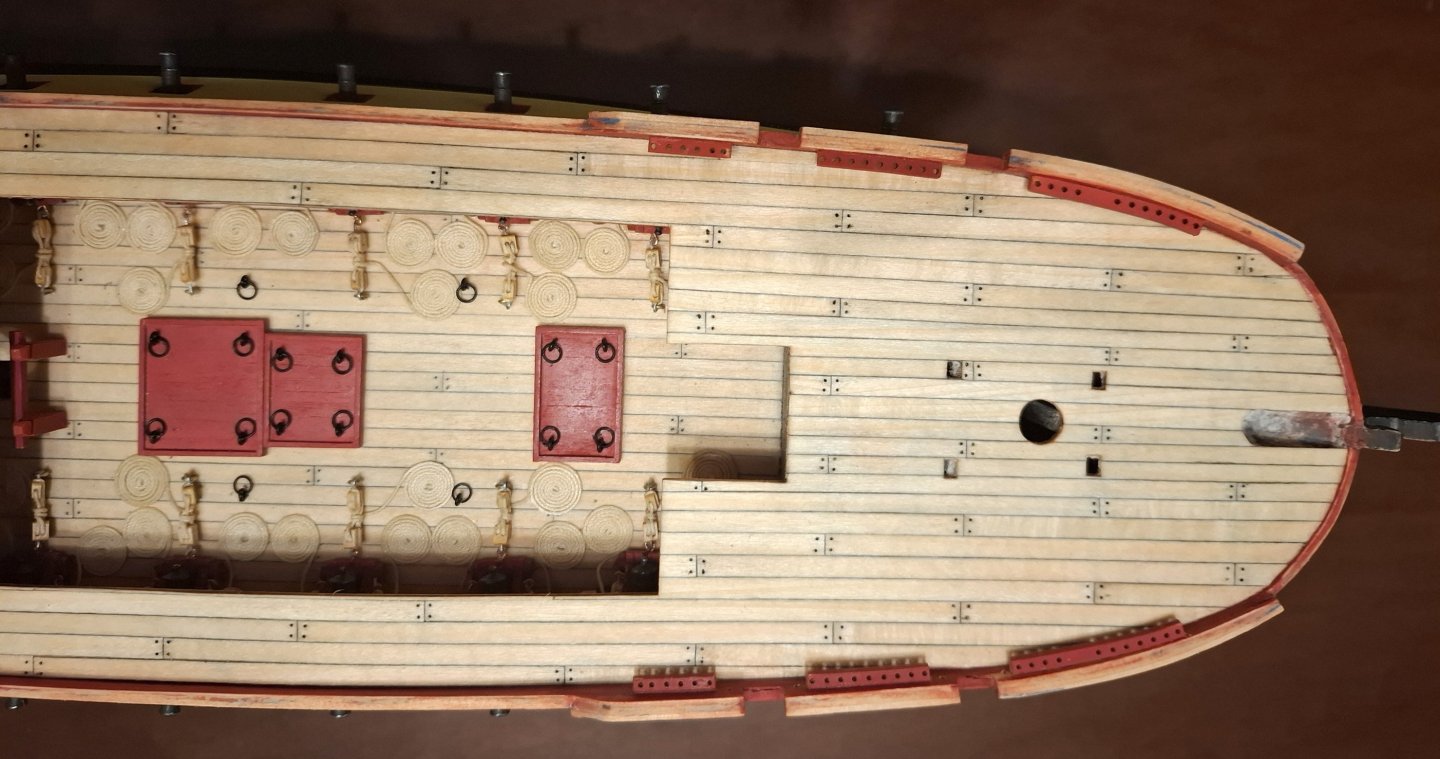

-
KARAVOKIRIS reacted to a post in a topic:
Hermione La Fayette by kostas_gr - Artesania Latina - 1:89
-
KARAVOKIRIS reacted to a post in a topic:
Hermione La Fayette by kostas_gr - Artesania Latina - 1:89
-
Knocklouder reacted to a post in a topic:
HMS Victory by Pfälzer - Corel - 1:98
-
kostas_gr reacted to a post in a topic:
HMS Victory by Pfälzer - Corel - 1:98
-
I’m building the same kit, but I believe Corel's version is somewhat outdated. After reviewing numerous build logs and pictures, I’ve noticed several differences. I found the stern gallery particularly challenging to complete, so I decided to take a break and work on another kit for now. I’ll be following your build log closely to gather ideas from your progress
-
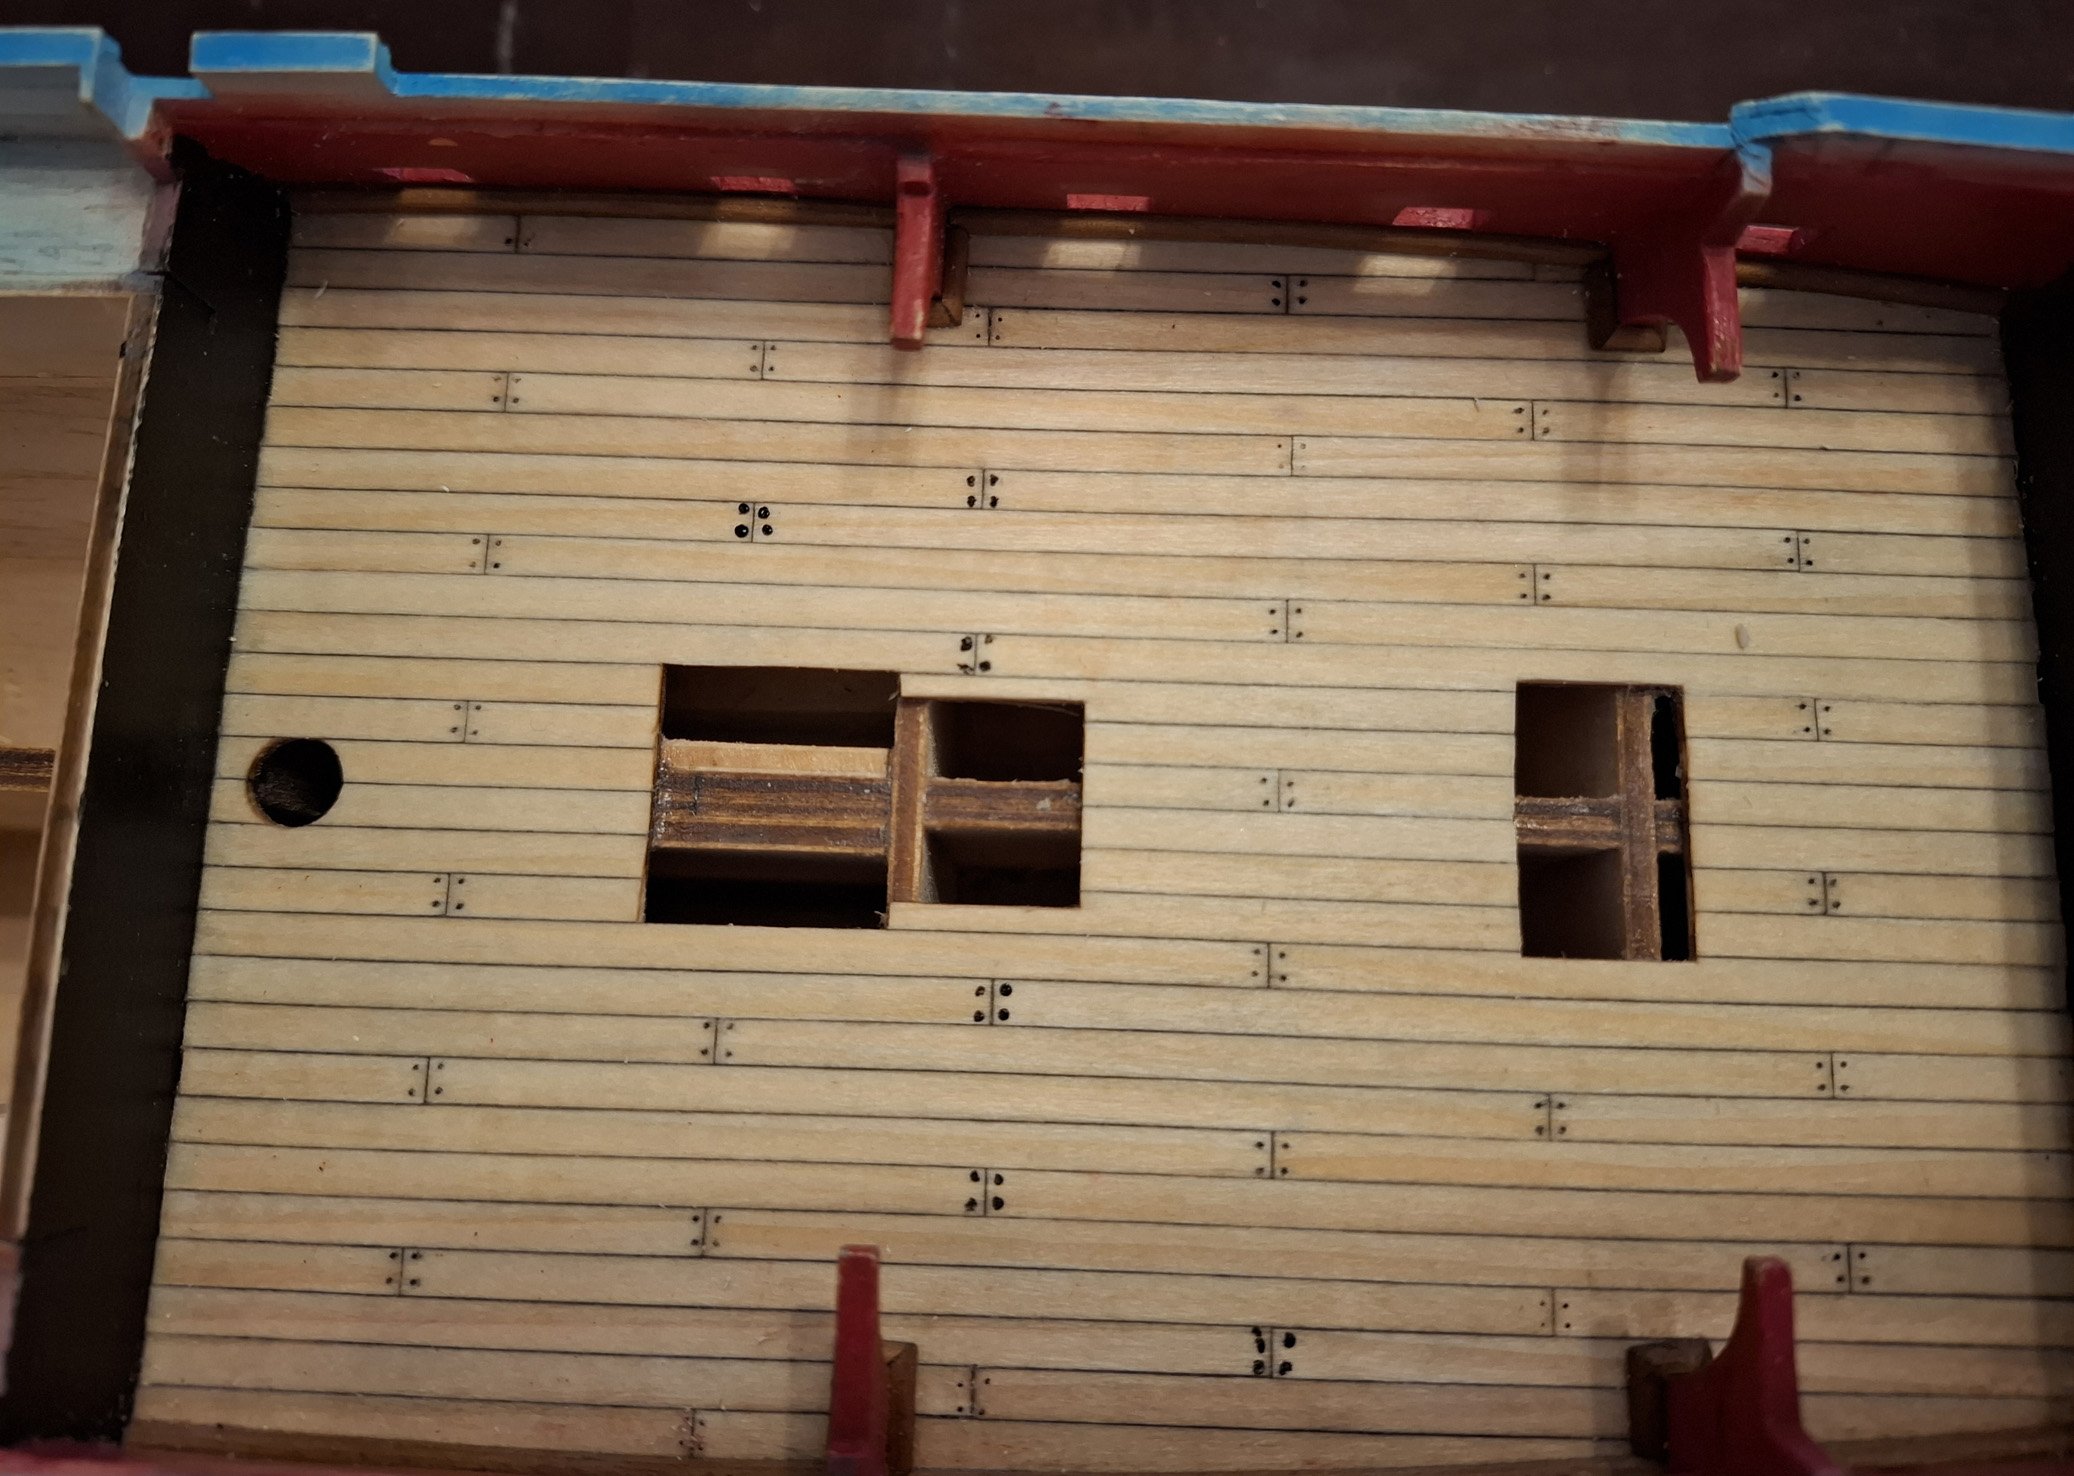
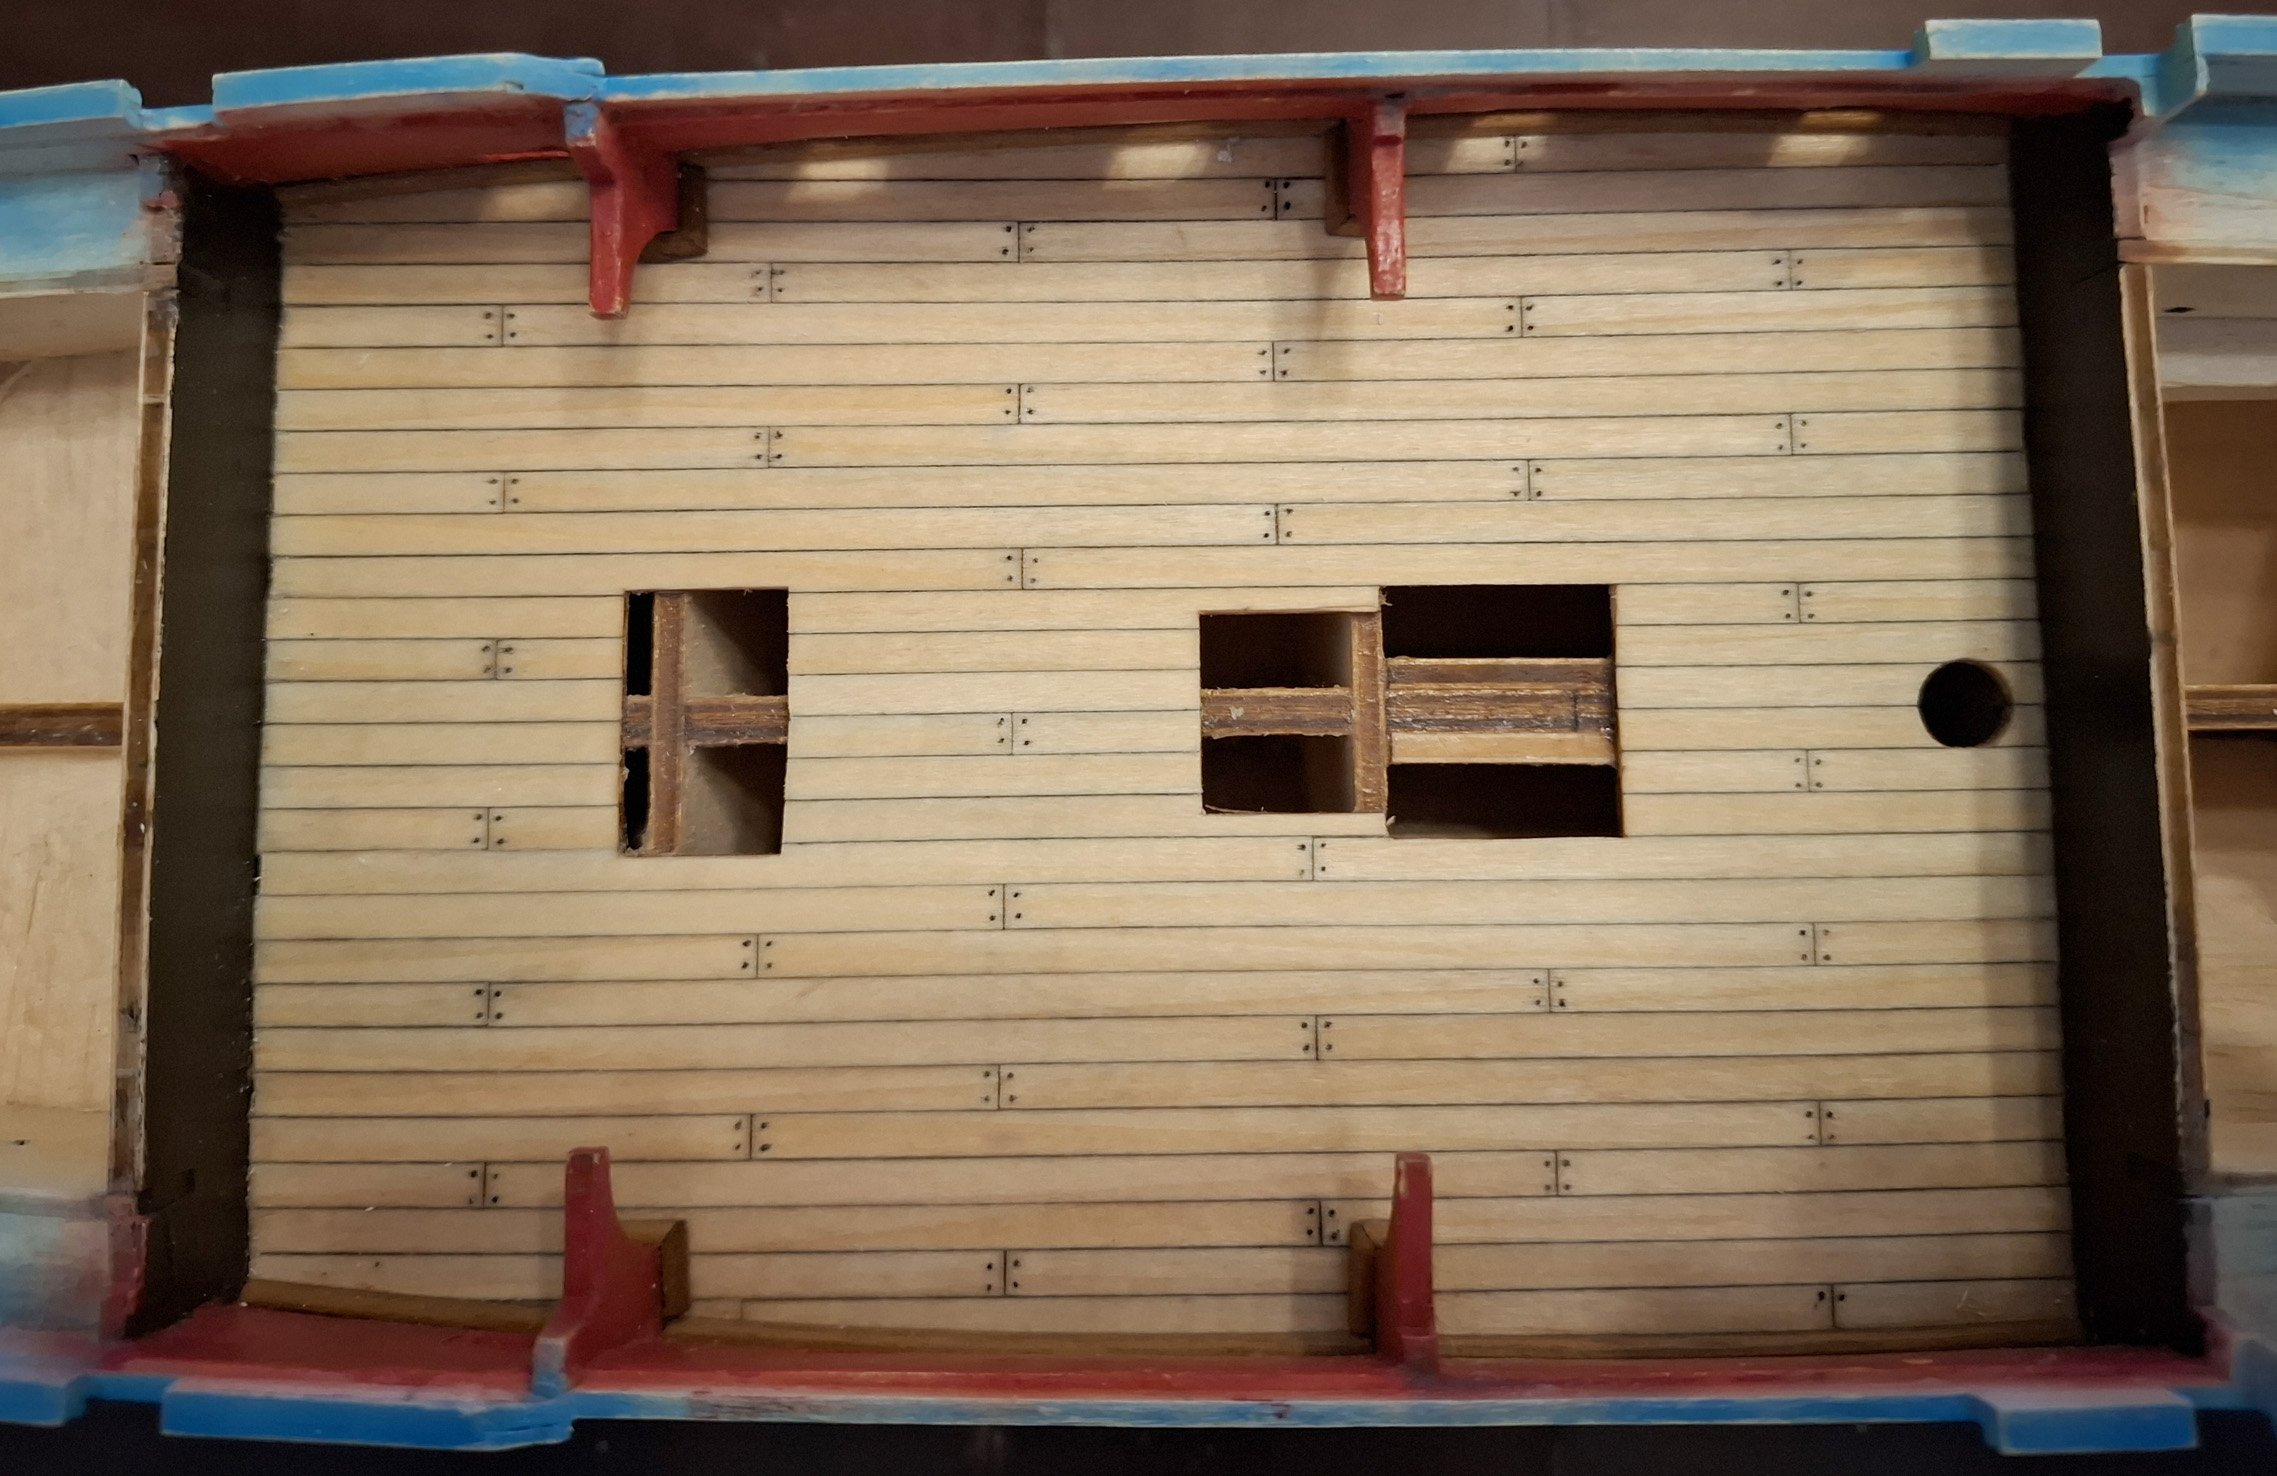
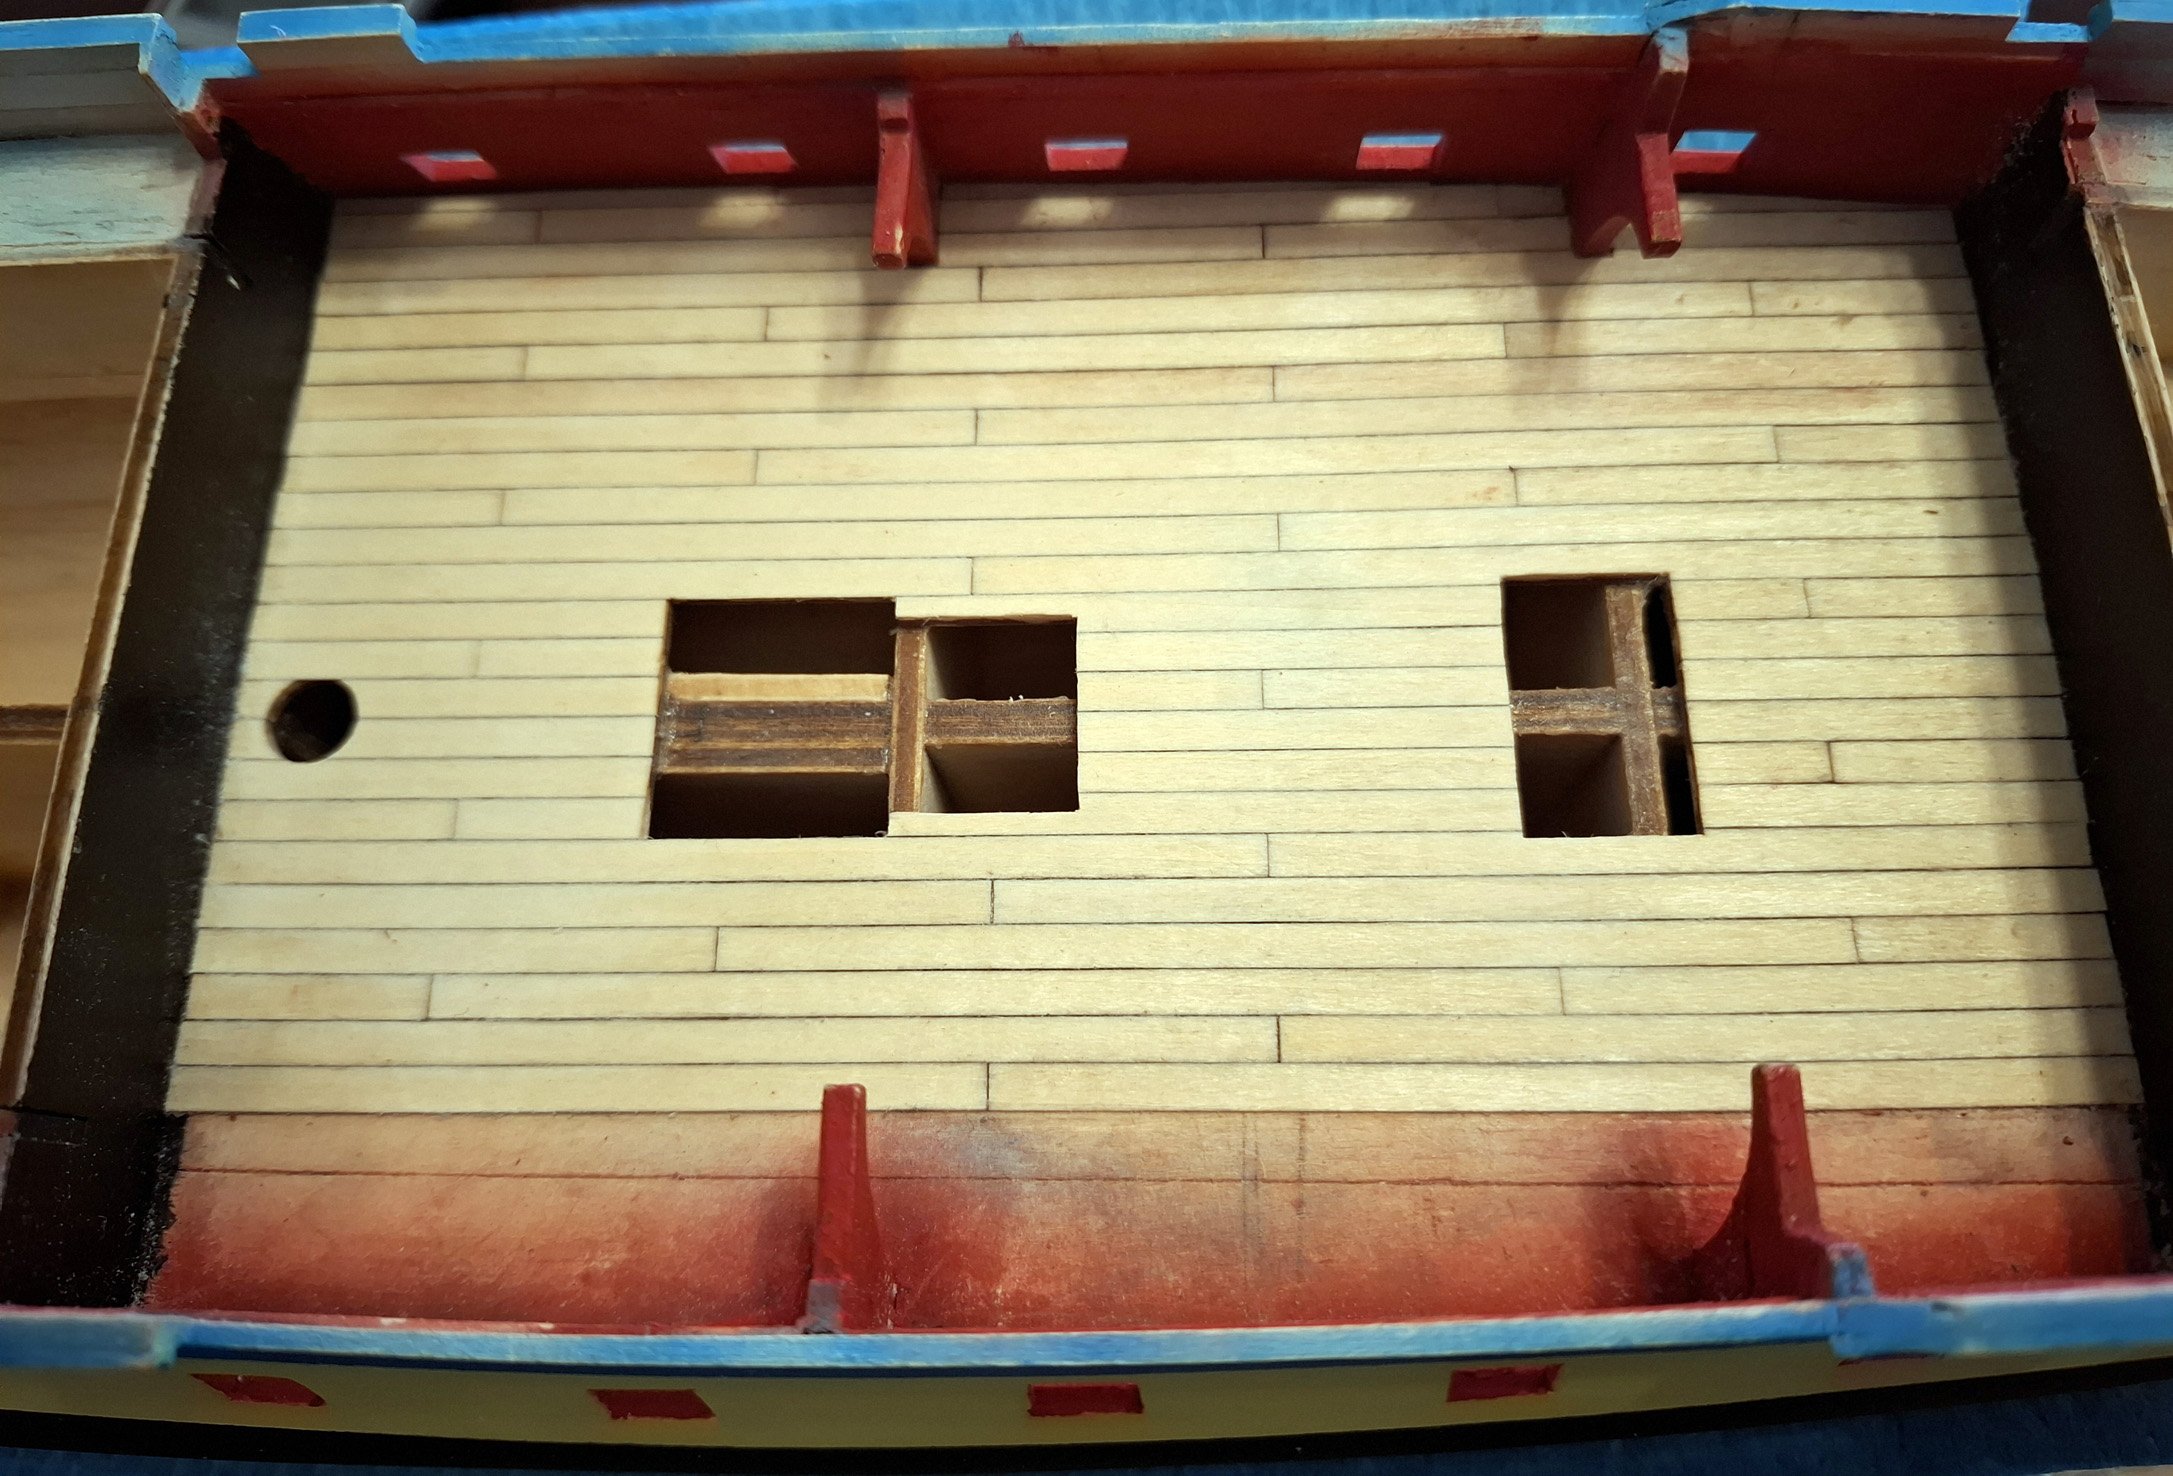
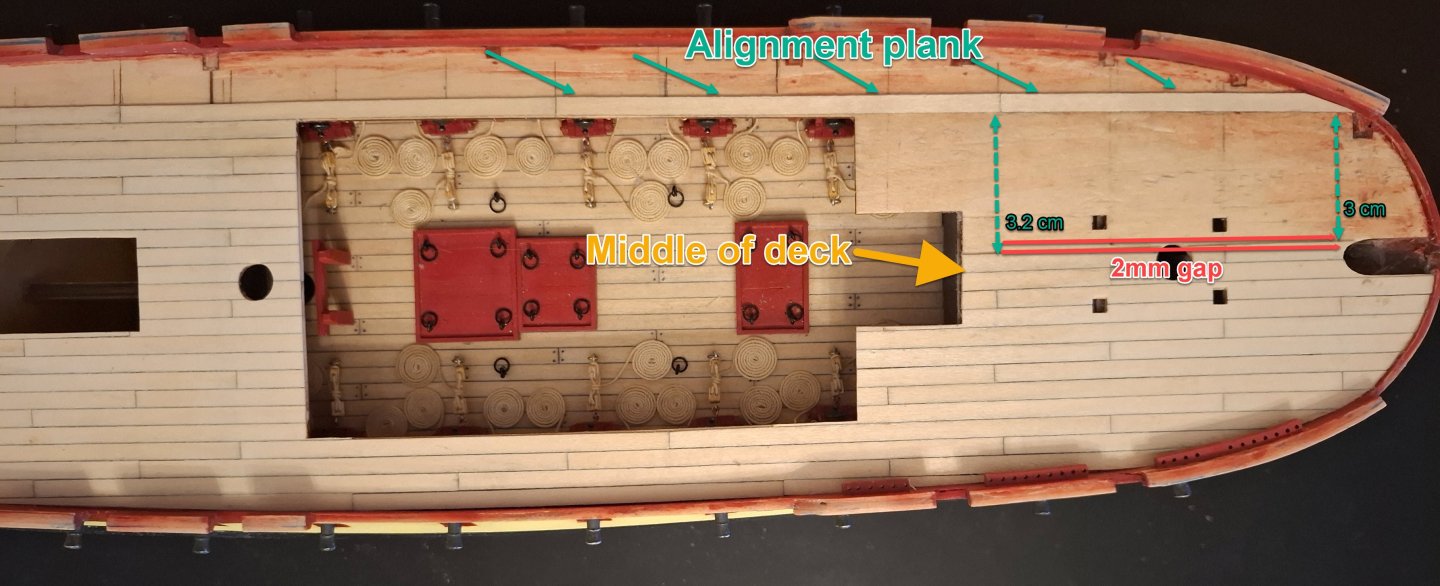
Feeling excited about completing the upper deck planking, I wanted to speed up the process. So, I decided to finish Area A first before continuing with the rest of the deck. After taking numerous measurements, I was confident that all the planks were properly aligned. However, in the end, I realized there was a 2mm gap error. With little I could do to fix it, I had no choice but to remove all the planks from Area A. By placing an alignment plank, I can get a clearer view of the corrections needed in Area A A top-down view shows that everything looks fine now

-
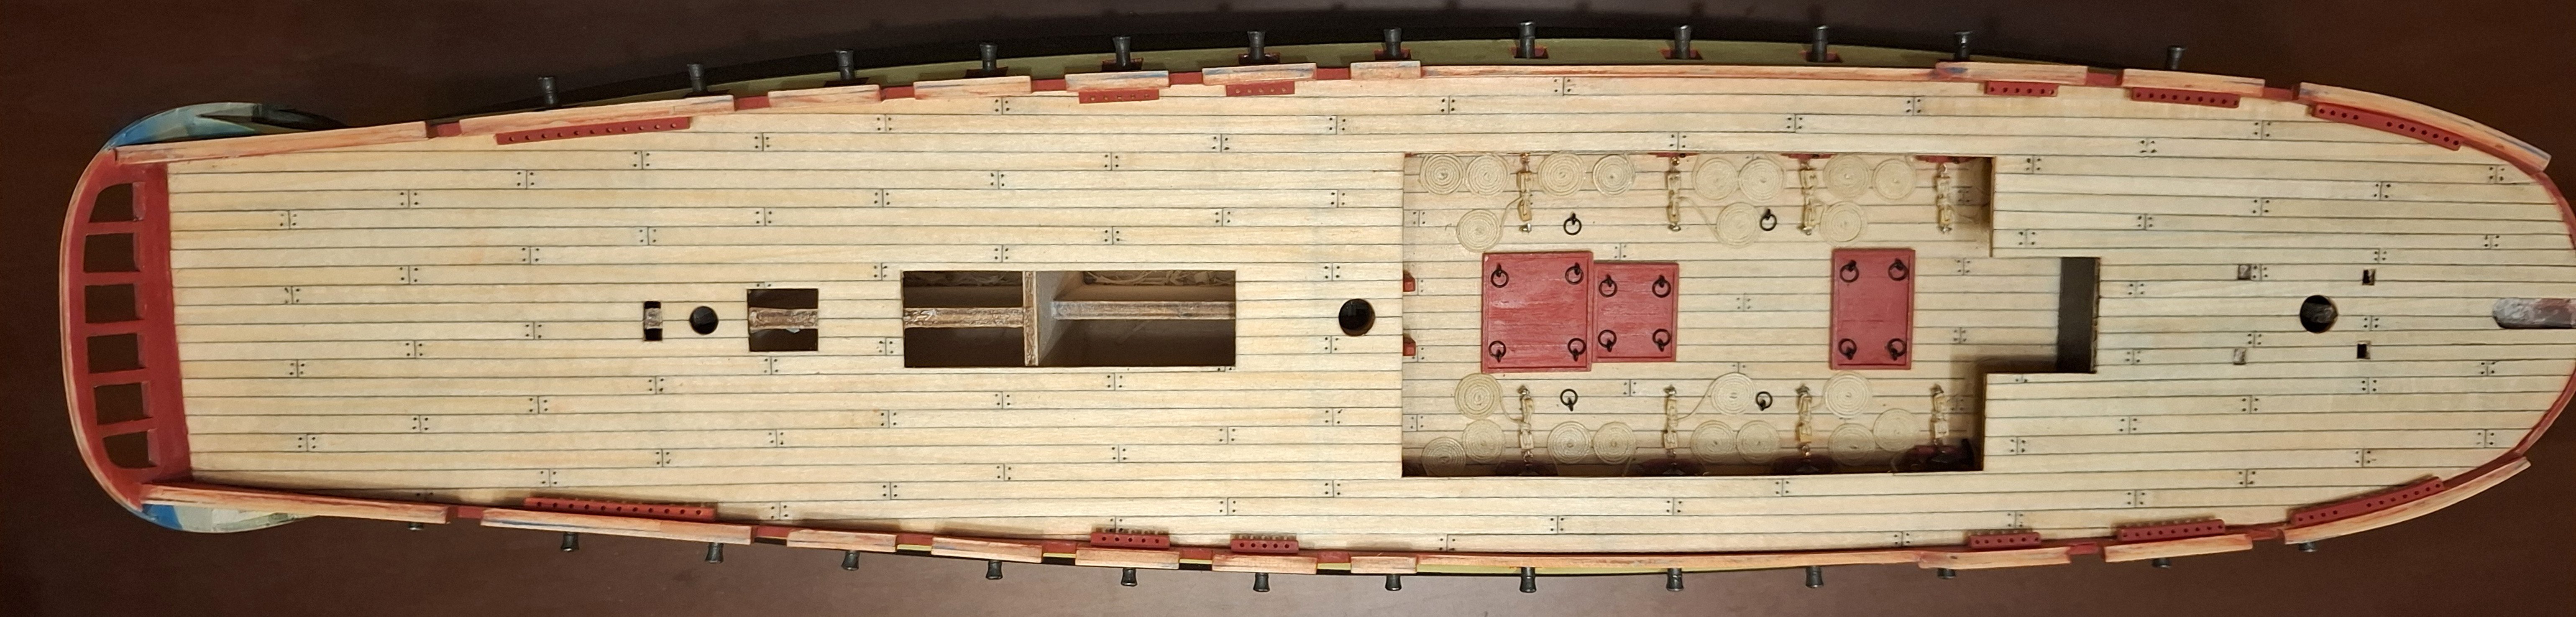
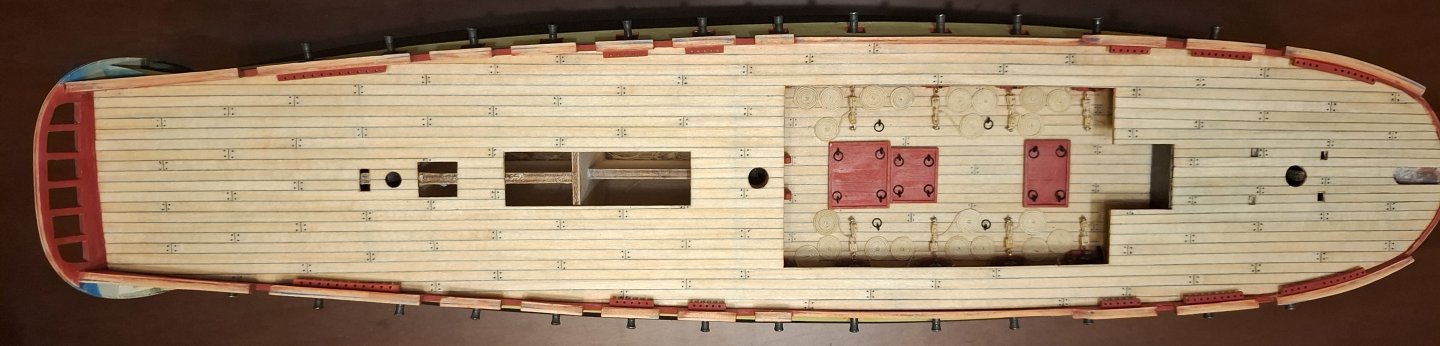
upper deck planking, using the rule of 4 once again

-
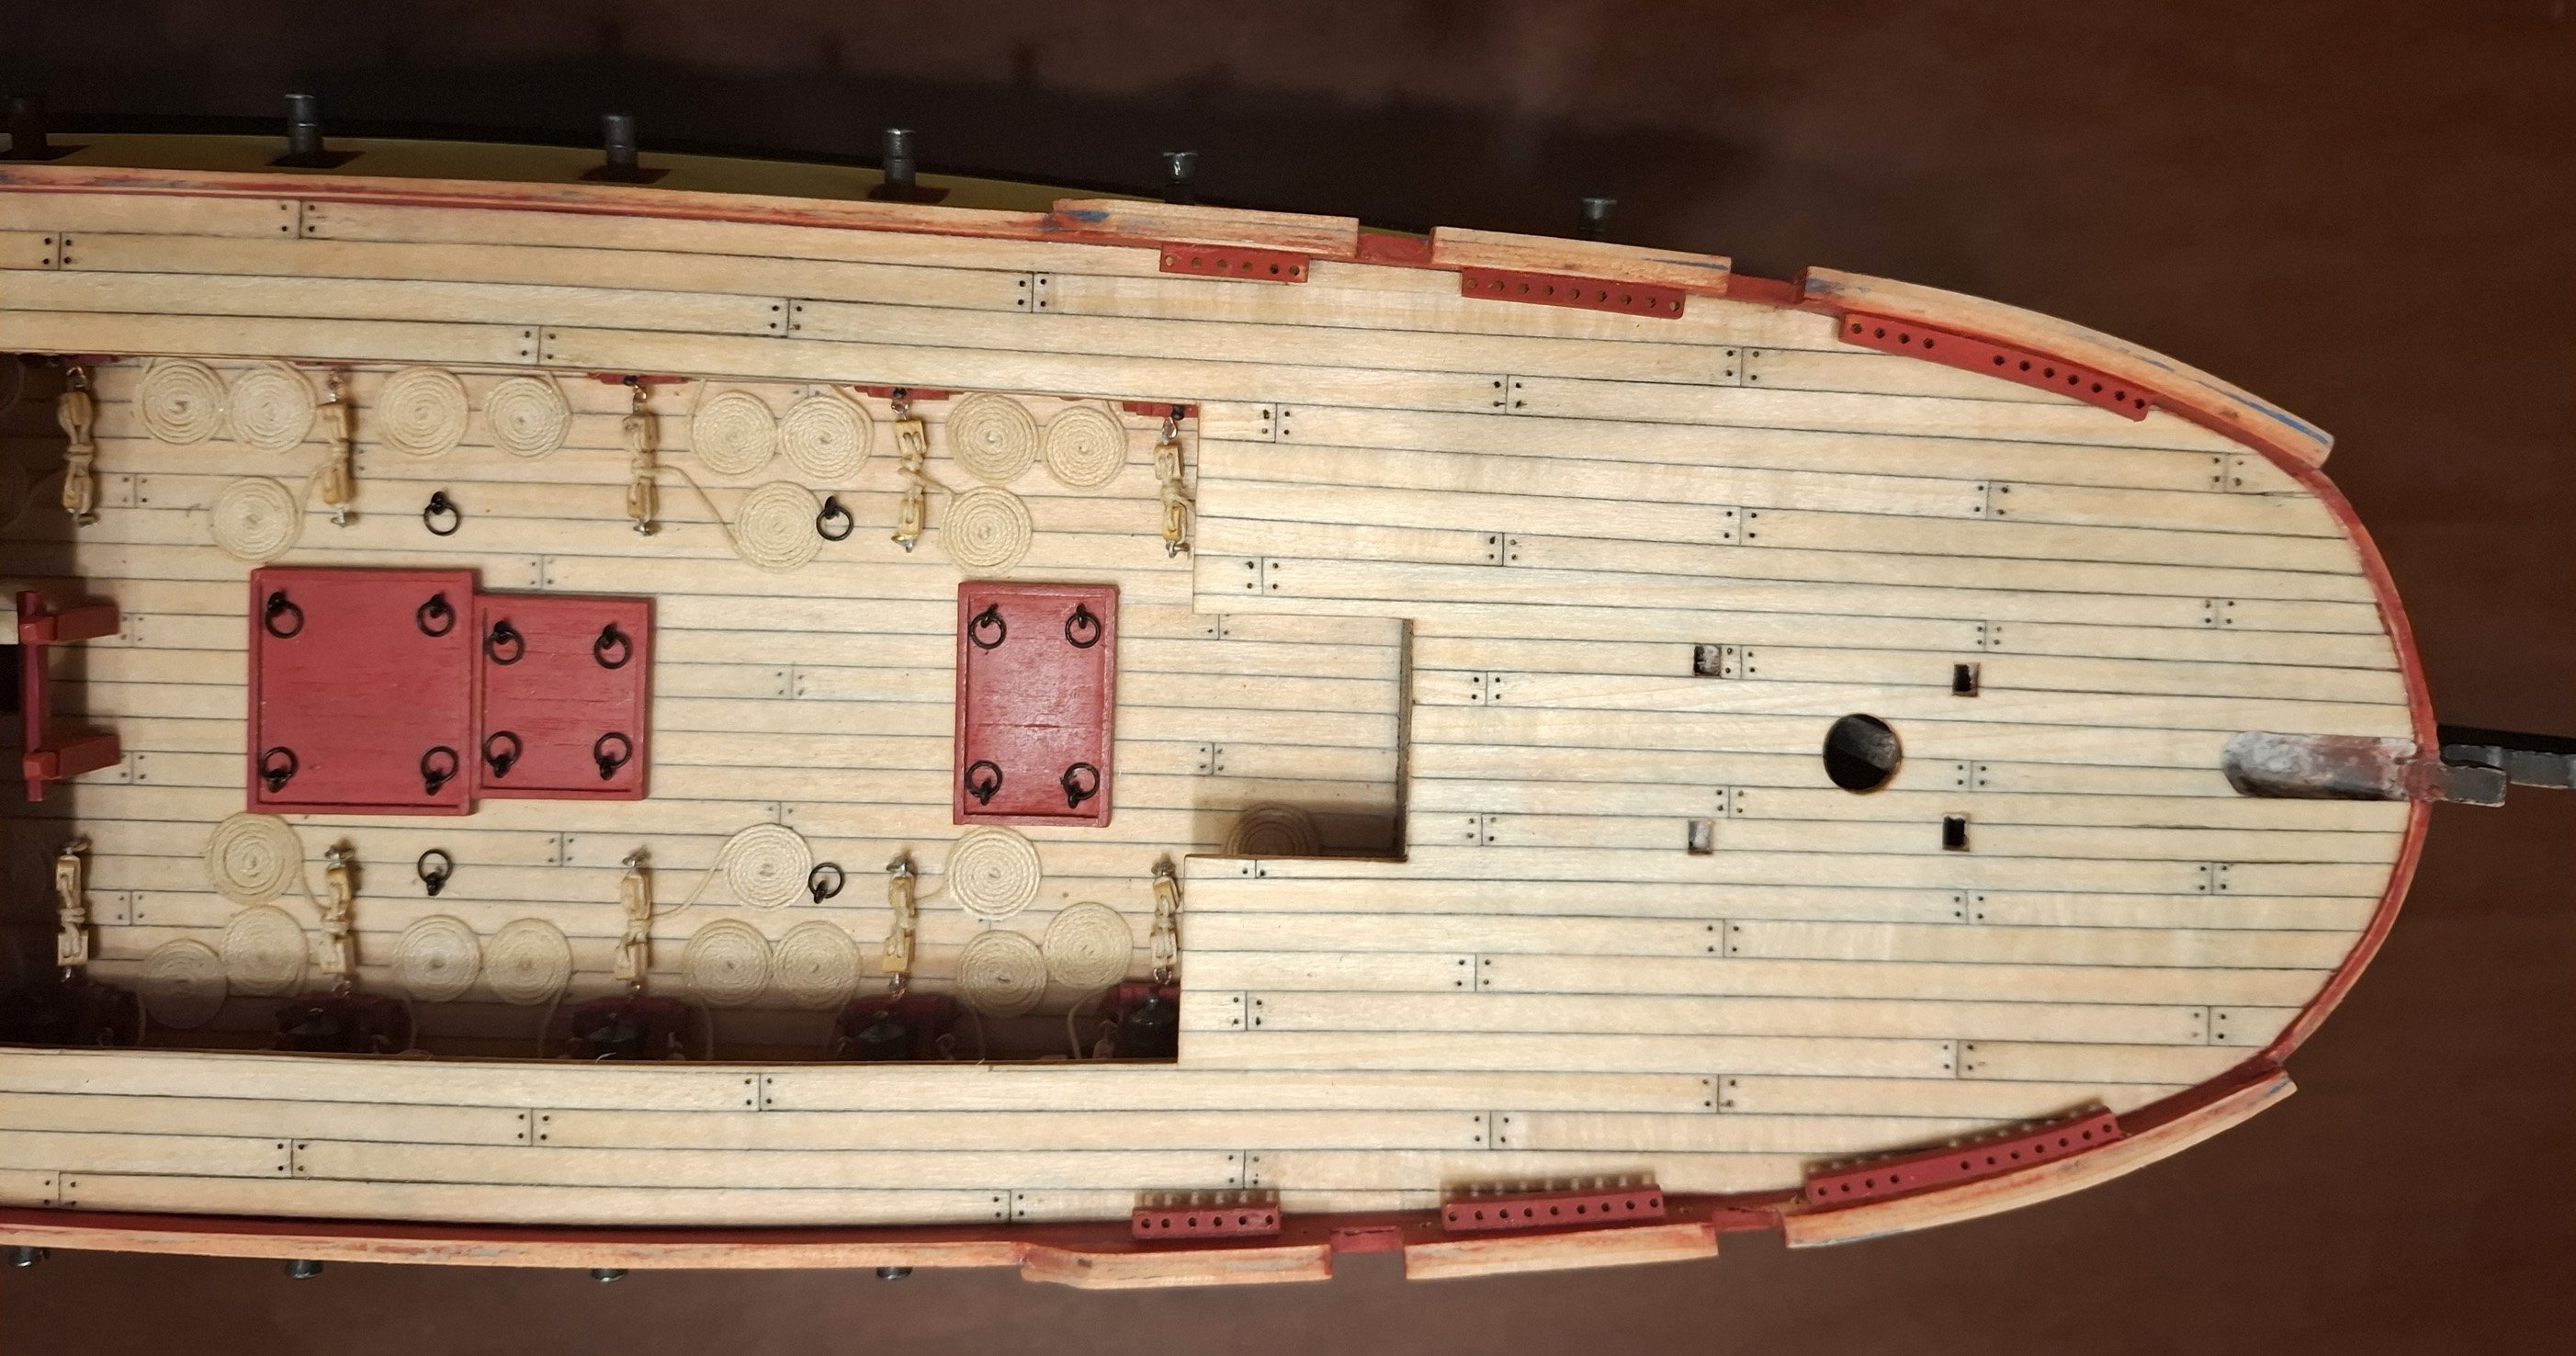
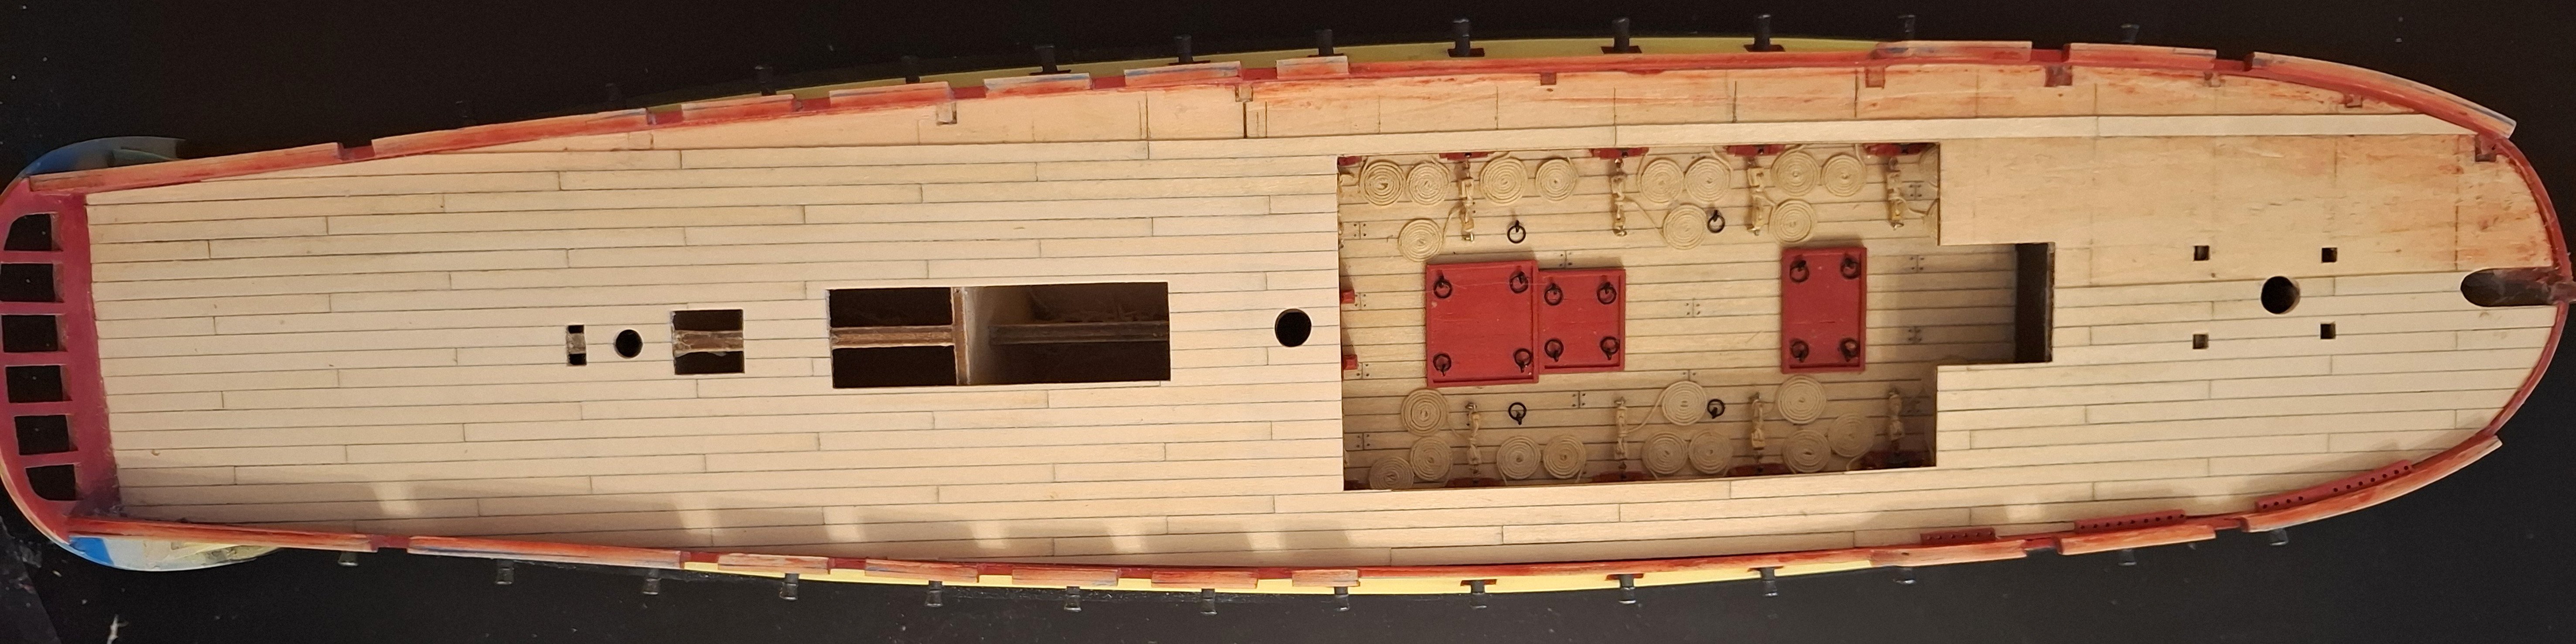
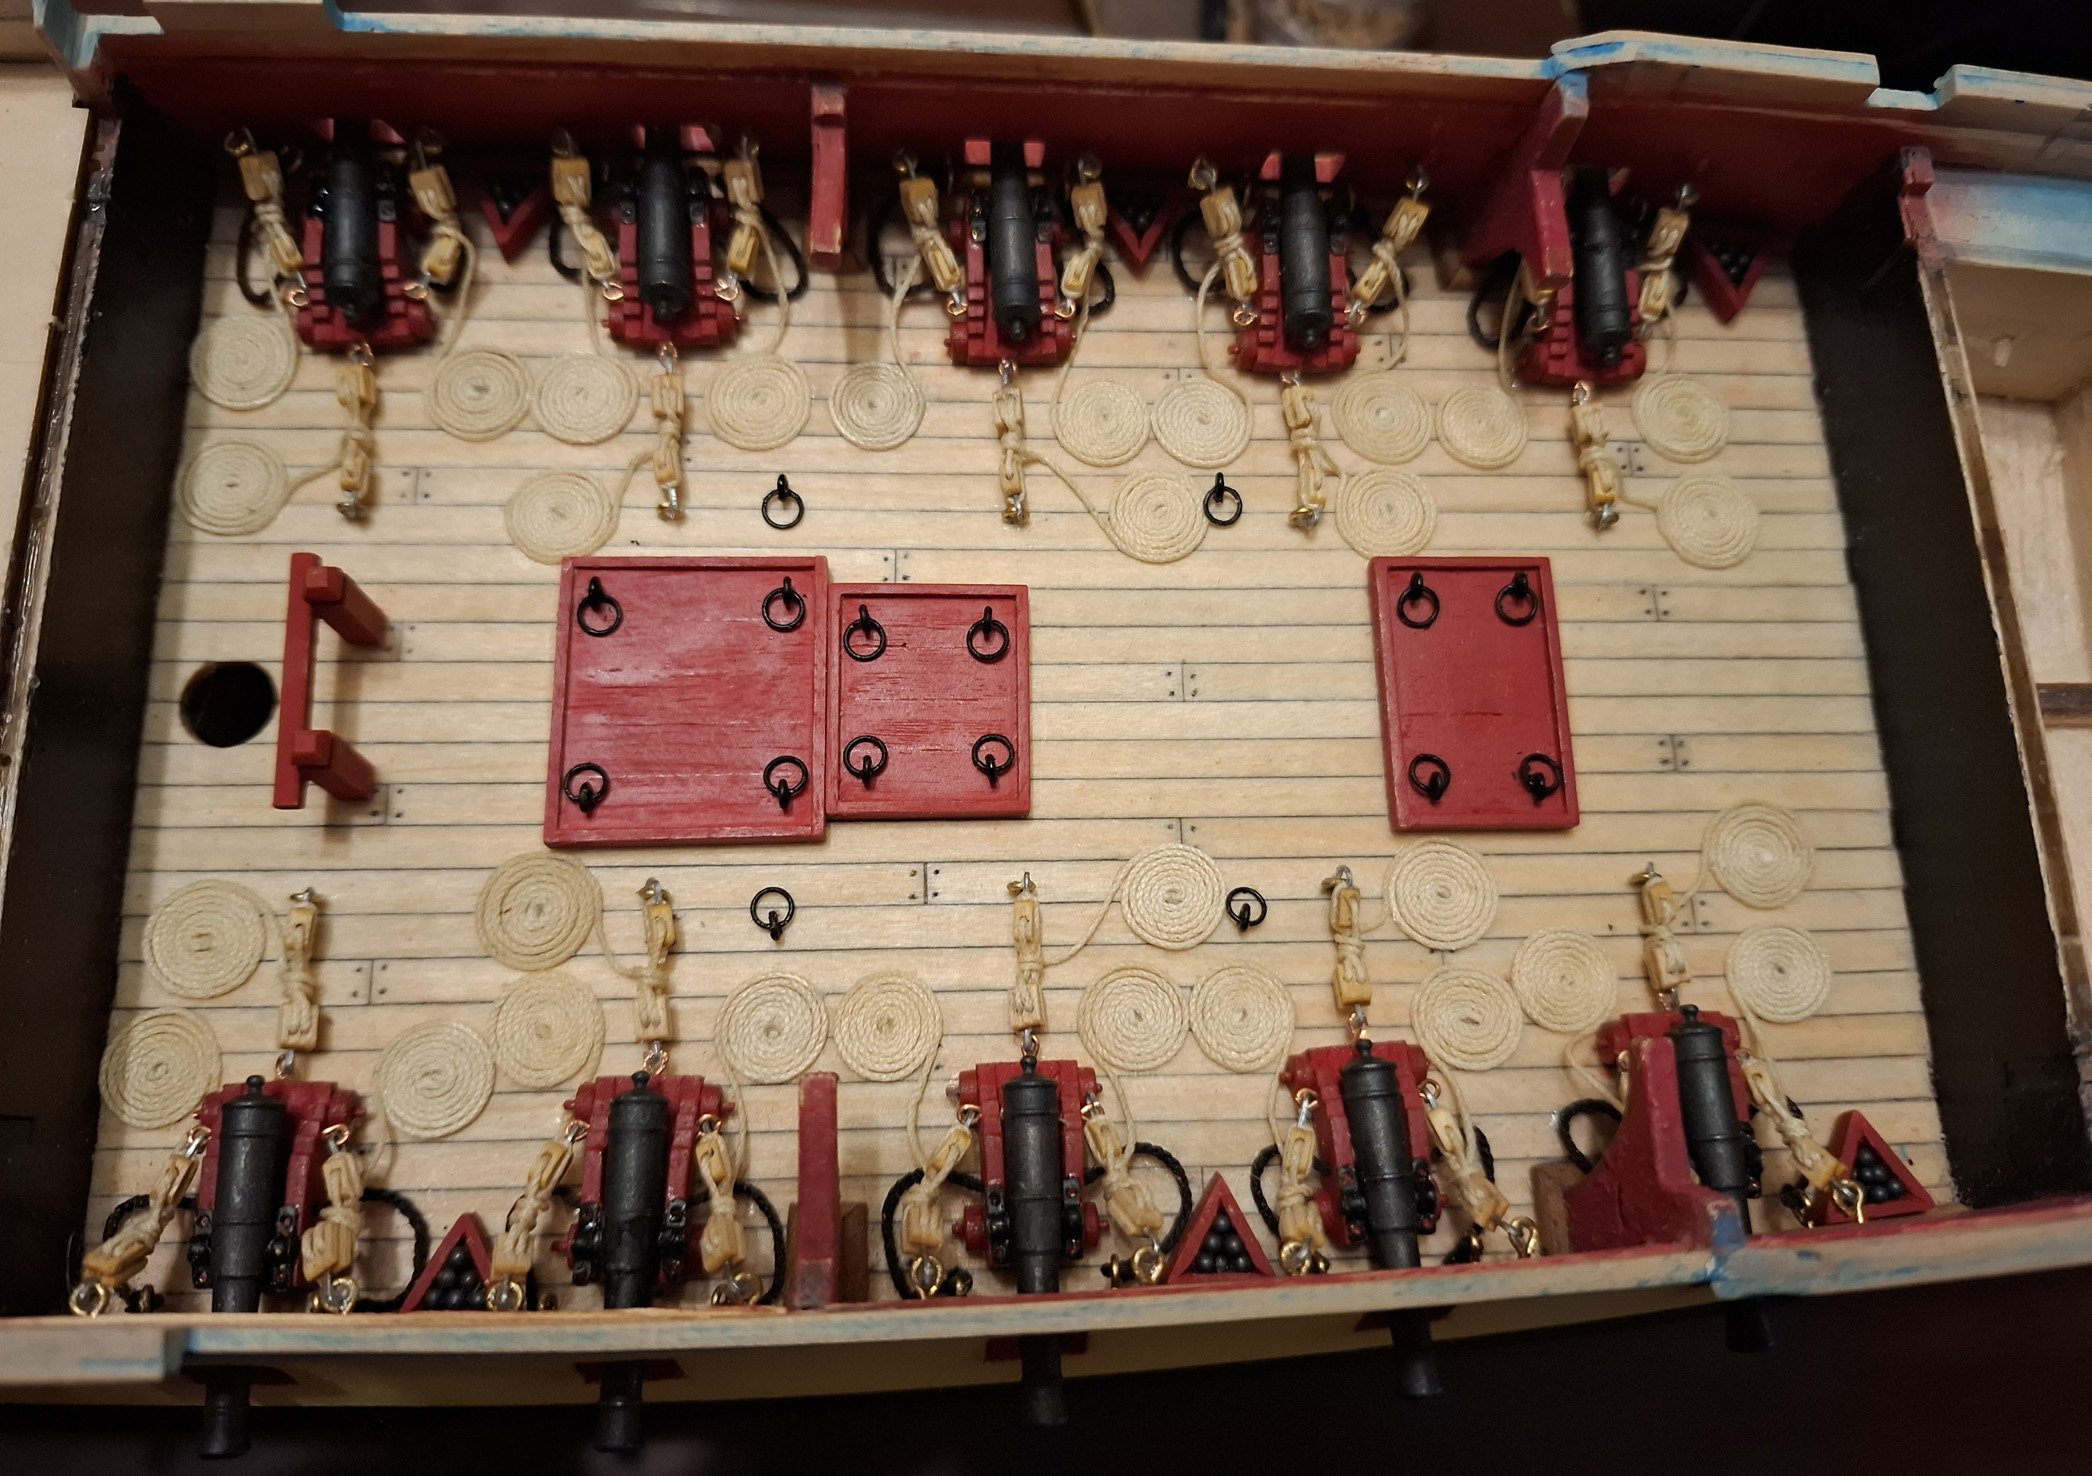
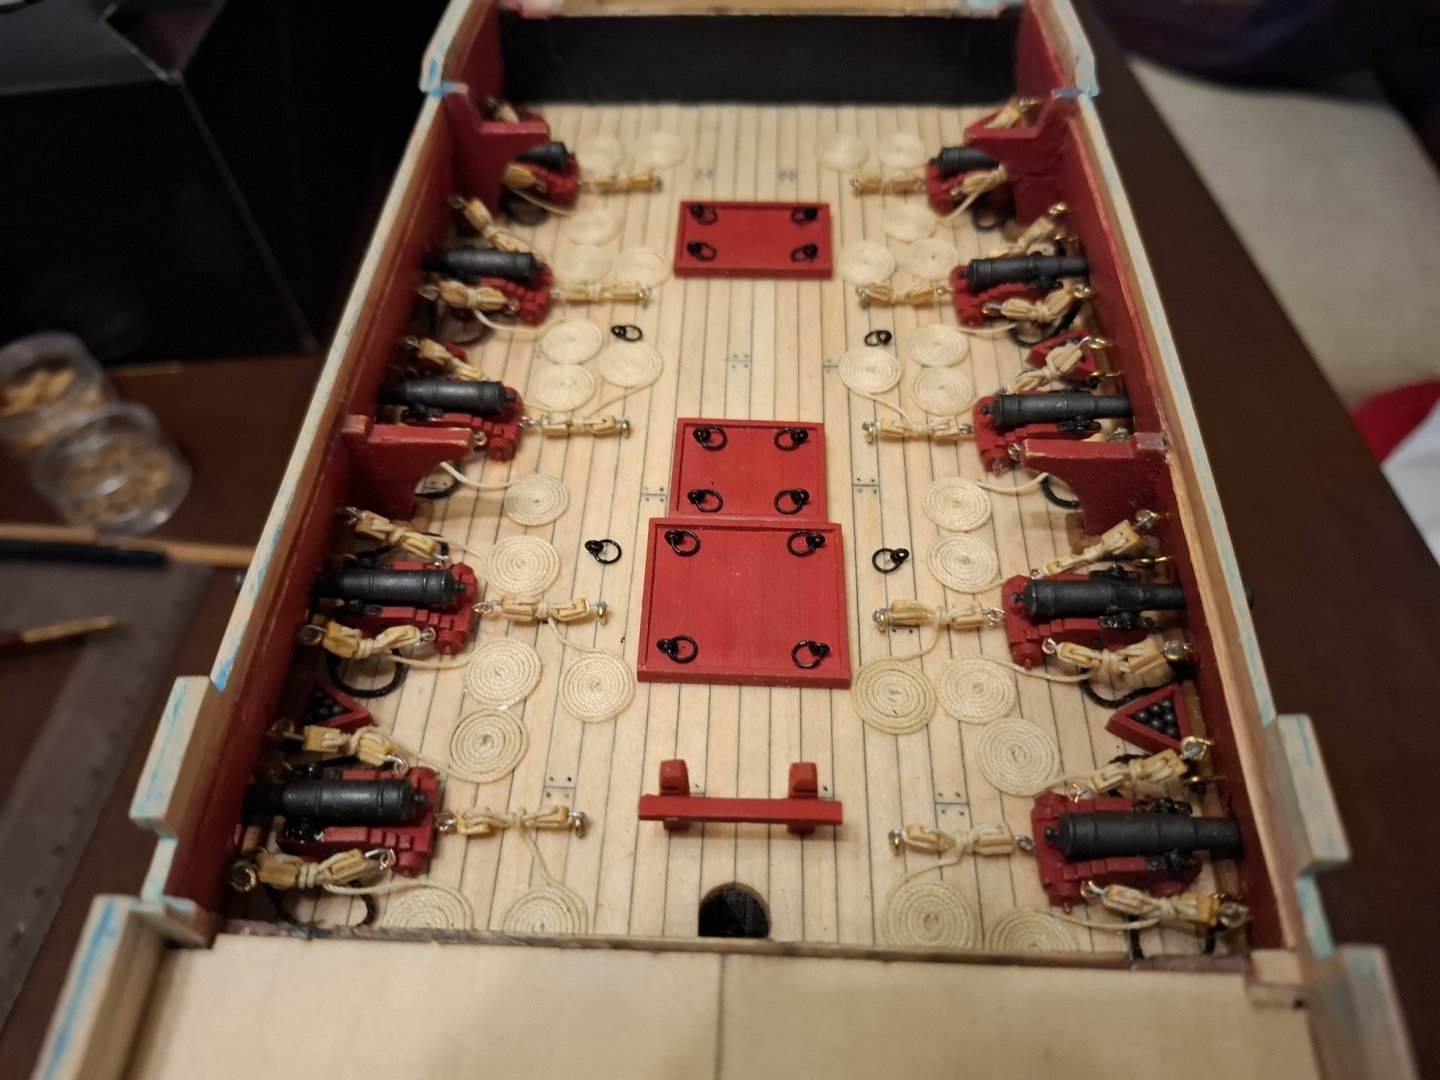
cannons with rigging are in place. Main deck almost ready

-
lol, Not even close, your build is outstanding
-
 kostas_gr reacted to a post in a topic:
Hermione La Fayette by jks1981 - Artesania Latina - 1:89 Scale
kostas_gr reacted to a post in a topic:
Hermione La Fayette by jks1981 - Artesania Latina - 1:89 Scale
-
kostas_gr reacted to a post in a topic:
Hermione La Fayette by jks1981 - Artesania Latina - 1:89 Scale
-
kostas_gr reacted to a post in a topic:
Hermione La Fayette by jks1981 - Artesania Latina - 1:89 Scale
-
kostas_gr reacted to a post in a topic:
Hermione La Fayette by jks1981 - Artesania Latina - 1:89 Scale
-
kostas_gr reacted to a post in a topic:
Hermione La Fayette by jks1981 - Artesania Latina - 1:89 Scale
-
Impressive build! I'll be using your log as a reference. Super clean work and an excellent paint job. I'm glad you're a bit ahead of my build so I can borrow some ideas!
-
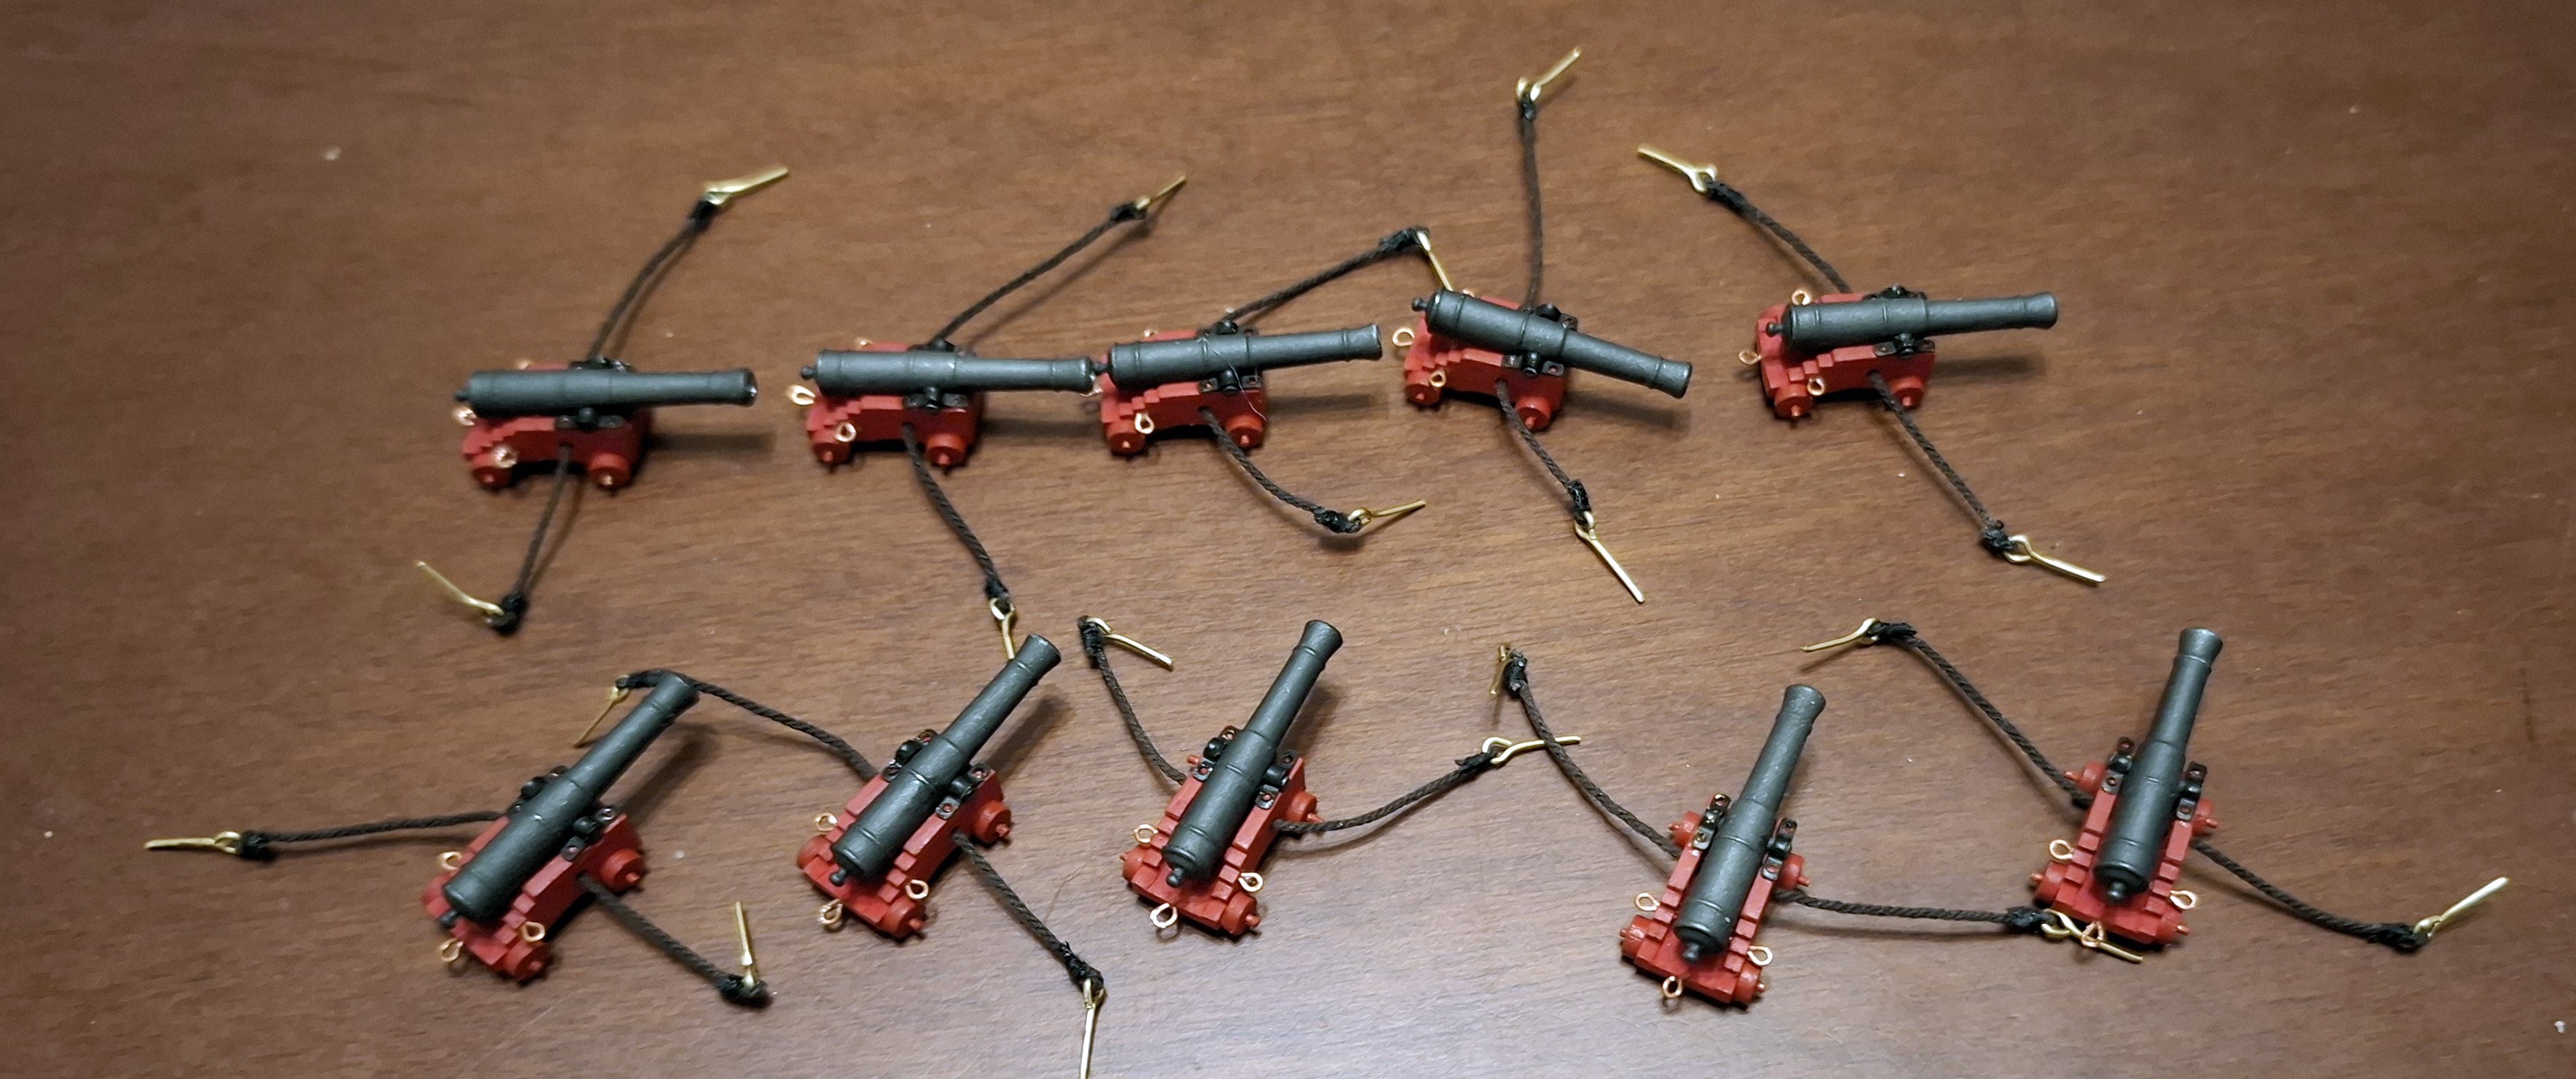
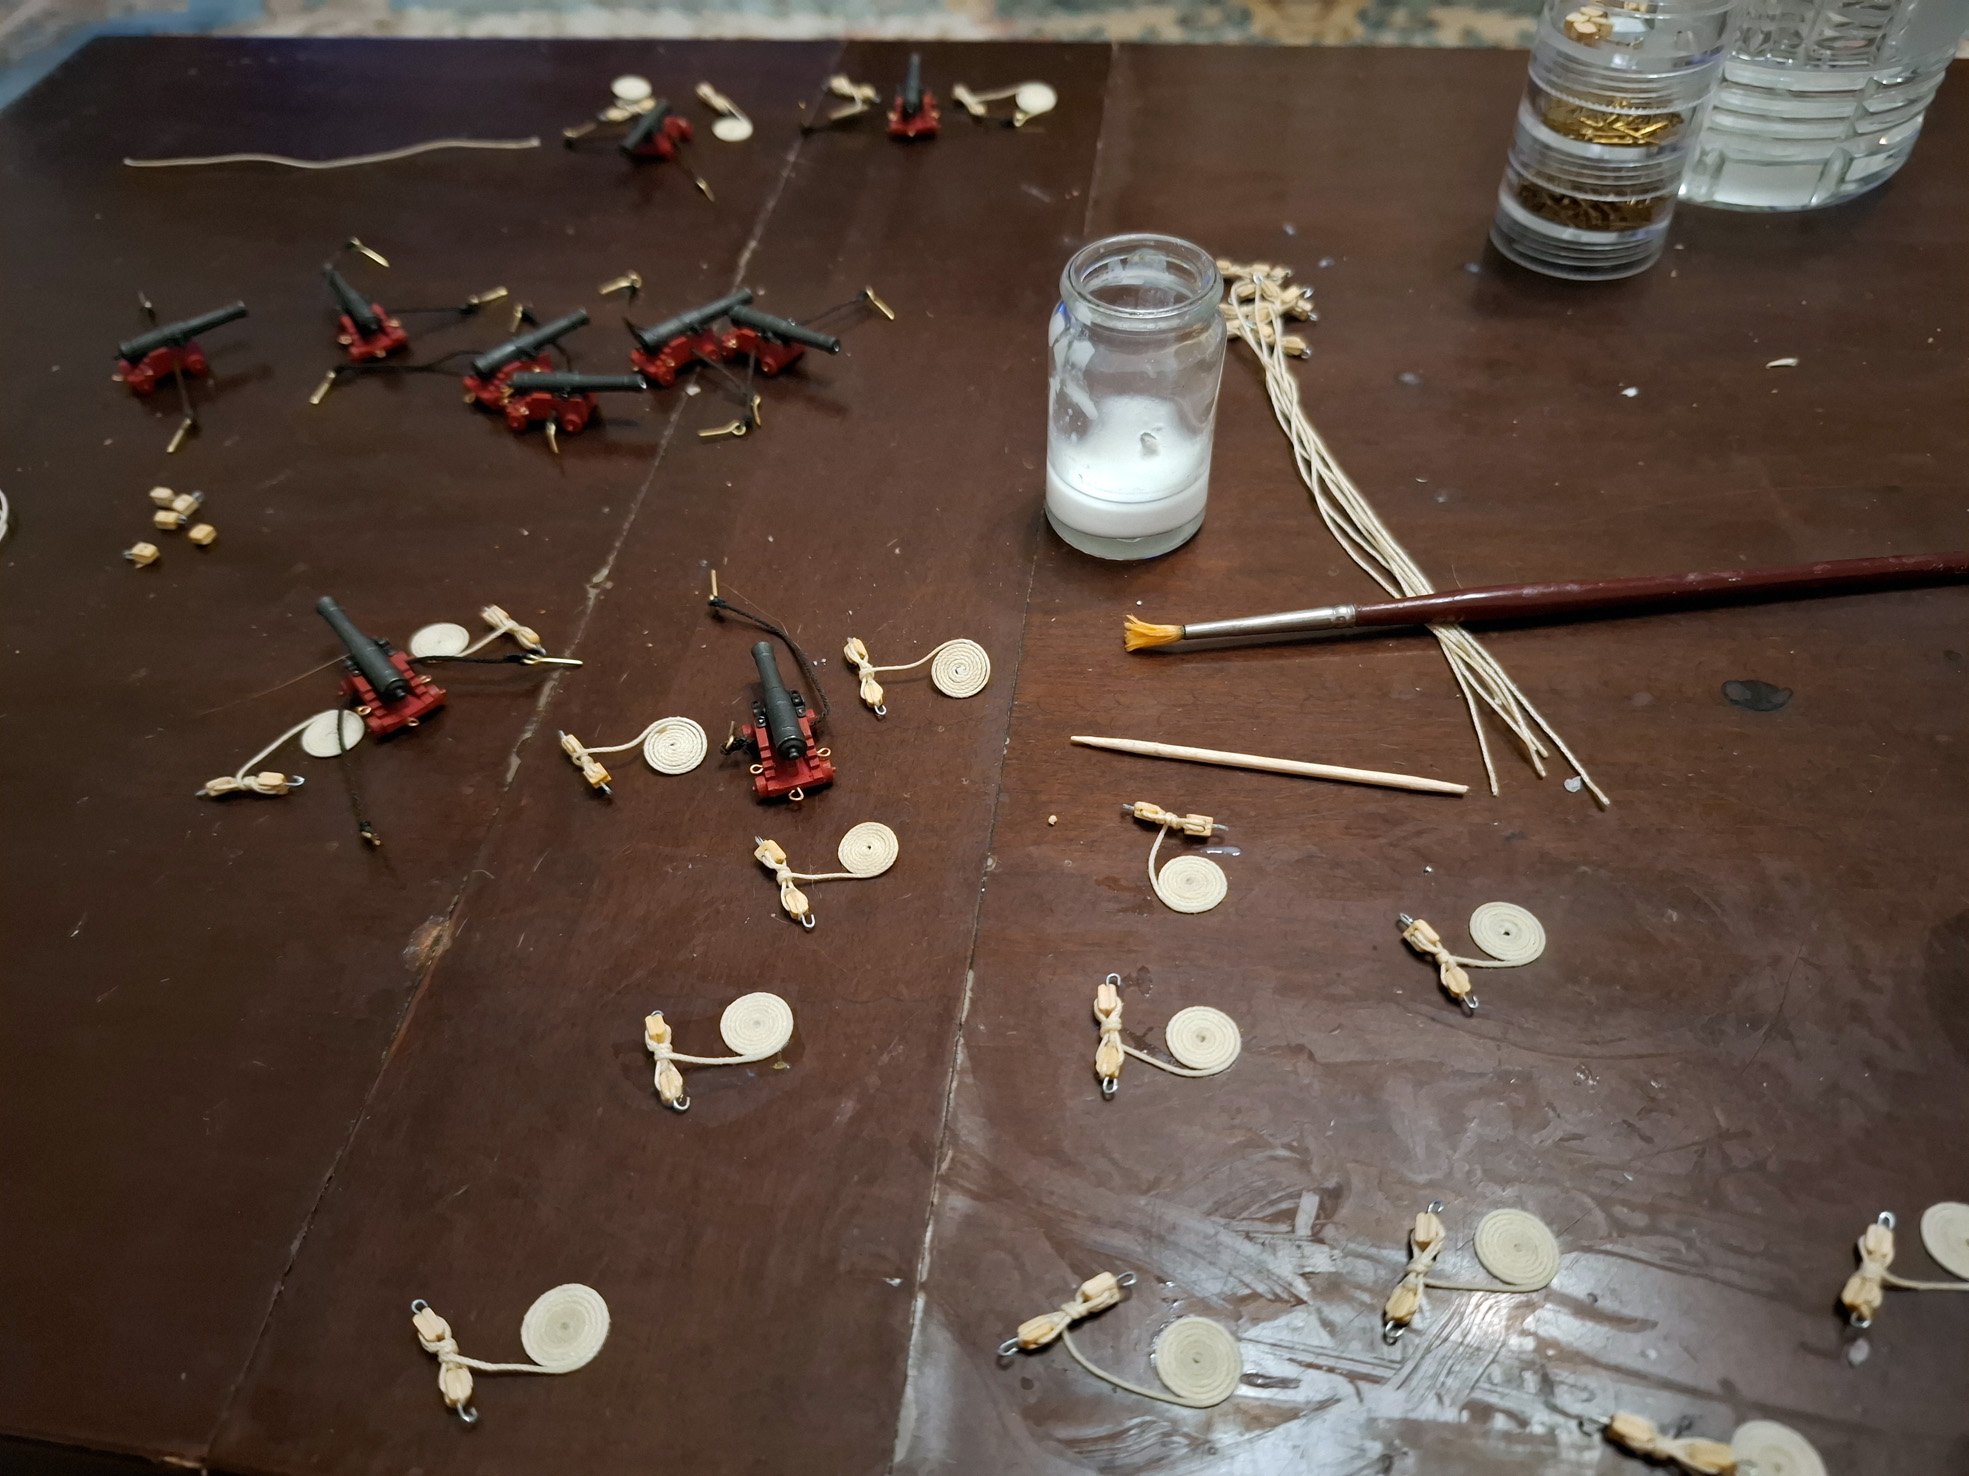
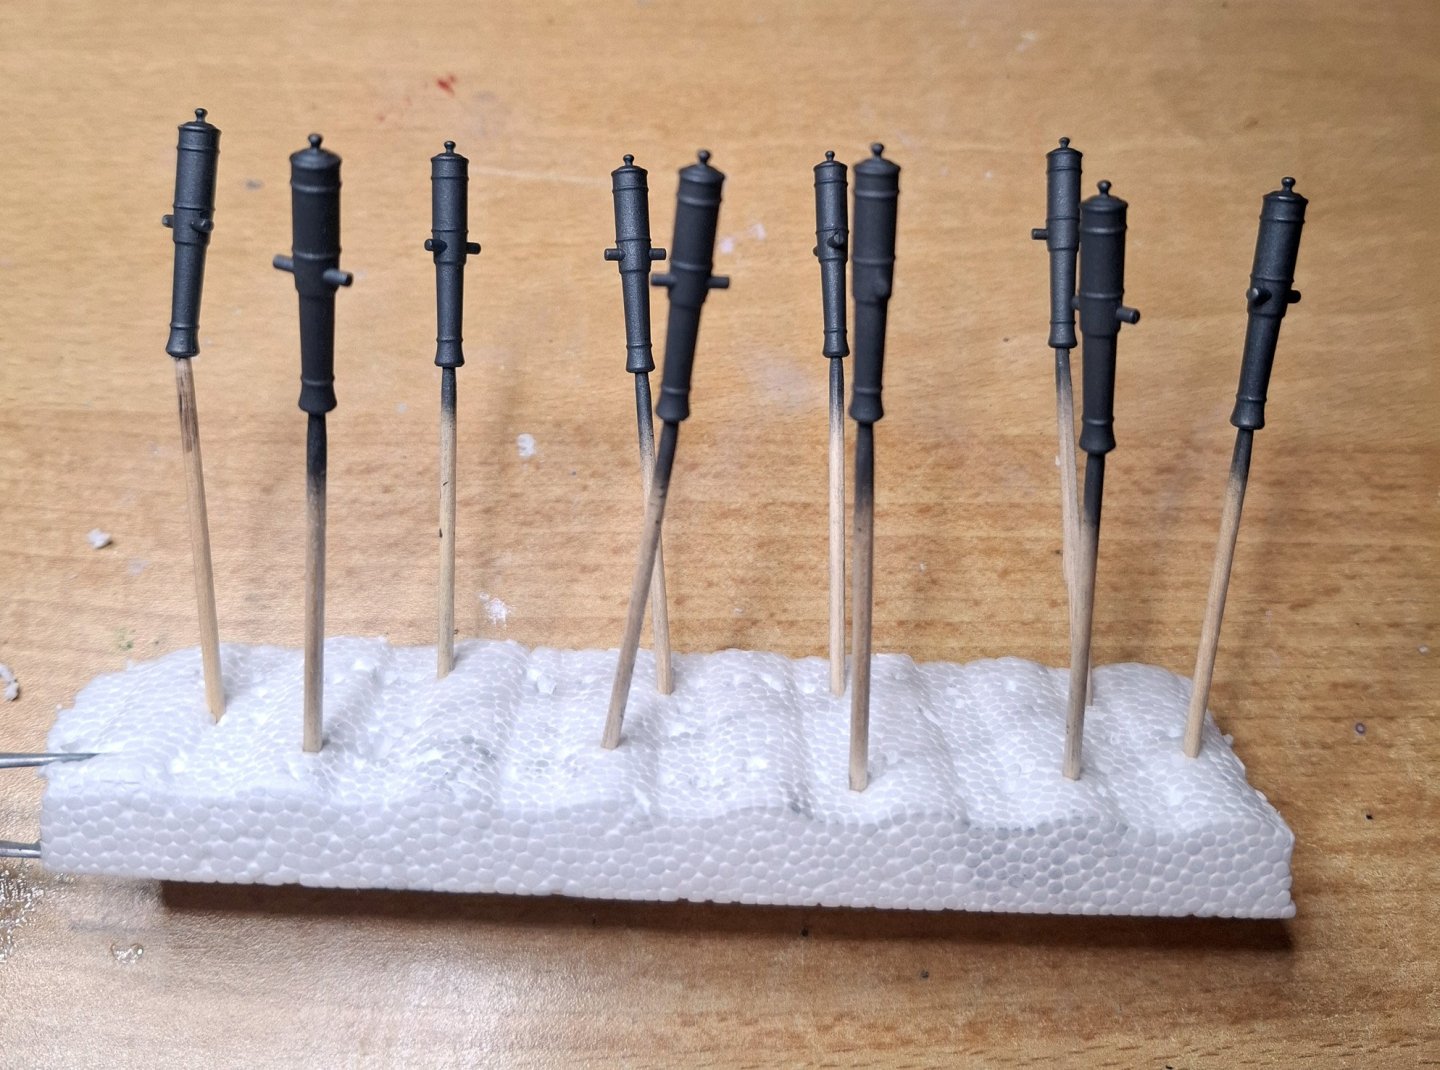
working with rope coils Cannon s almost ready


-
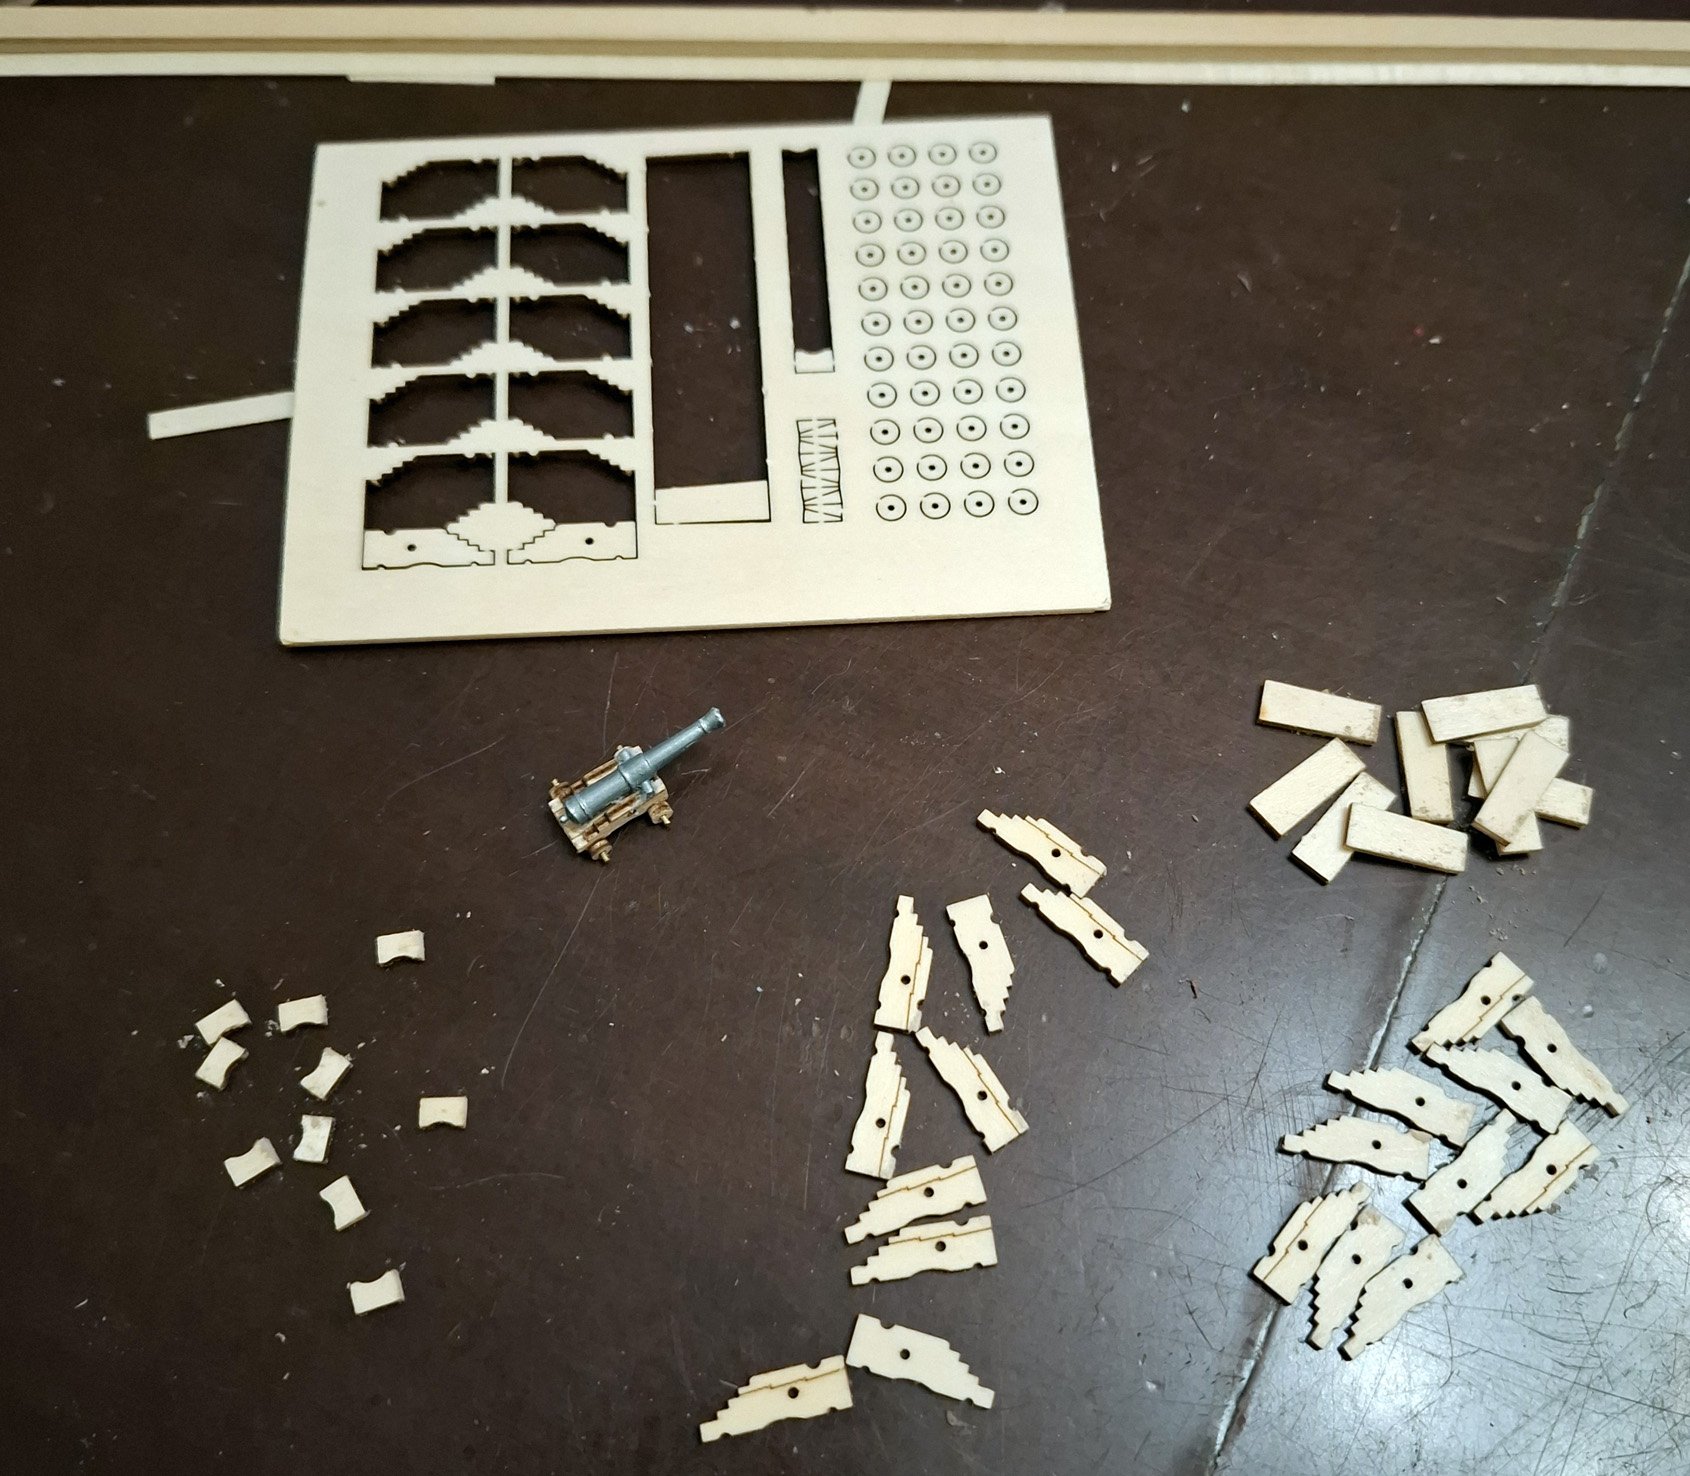
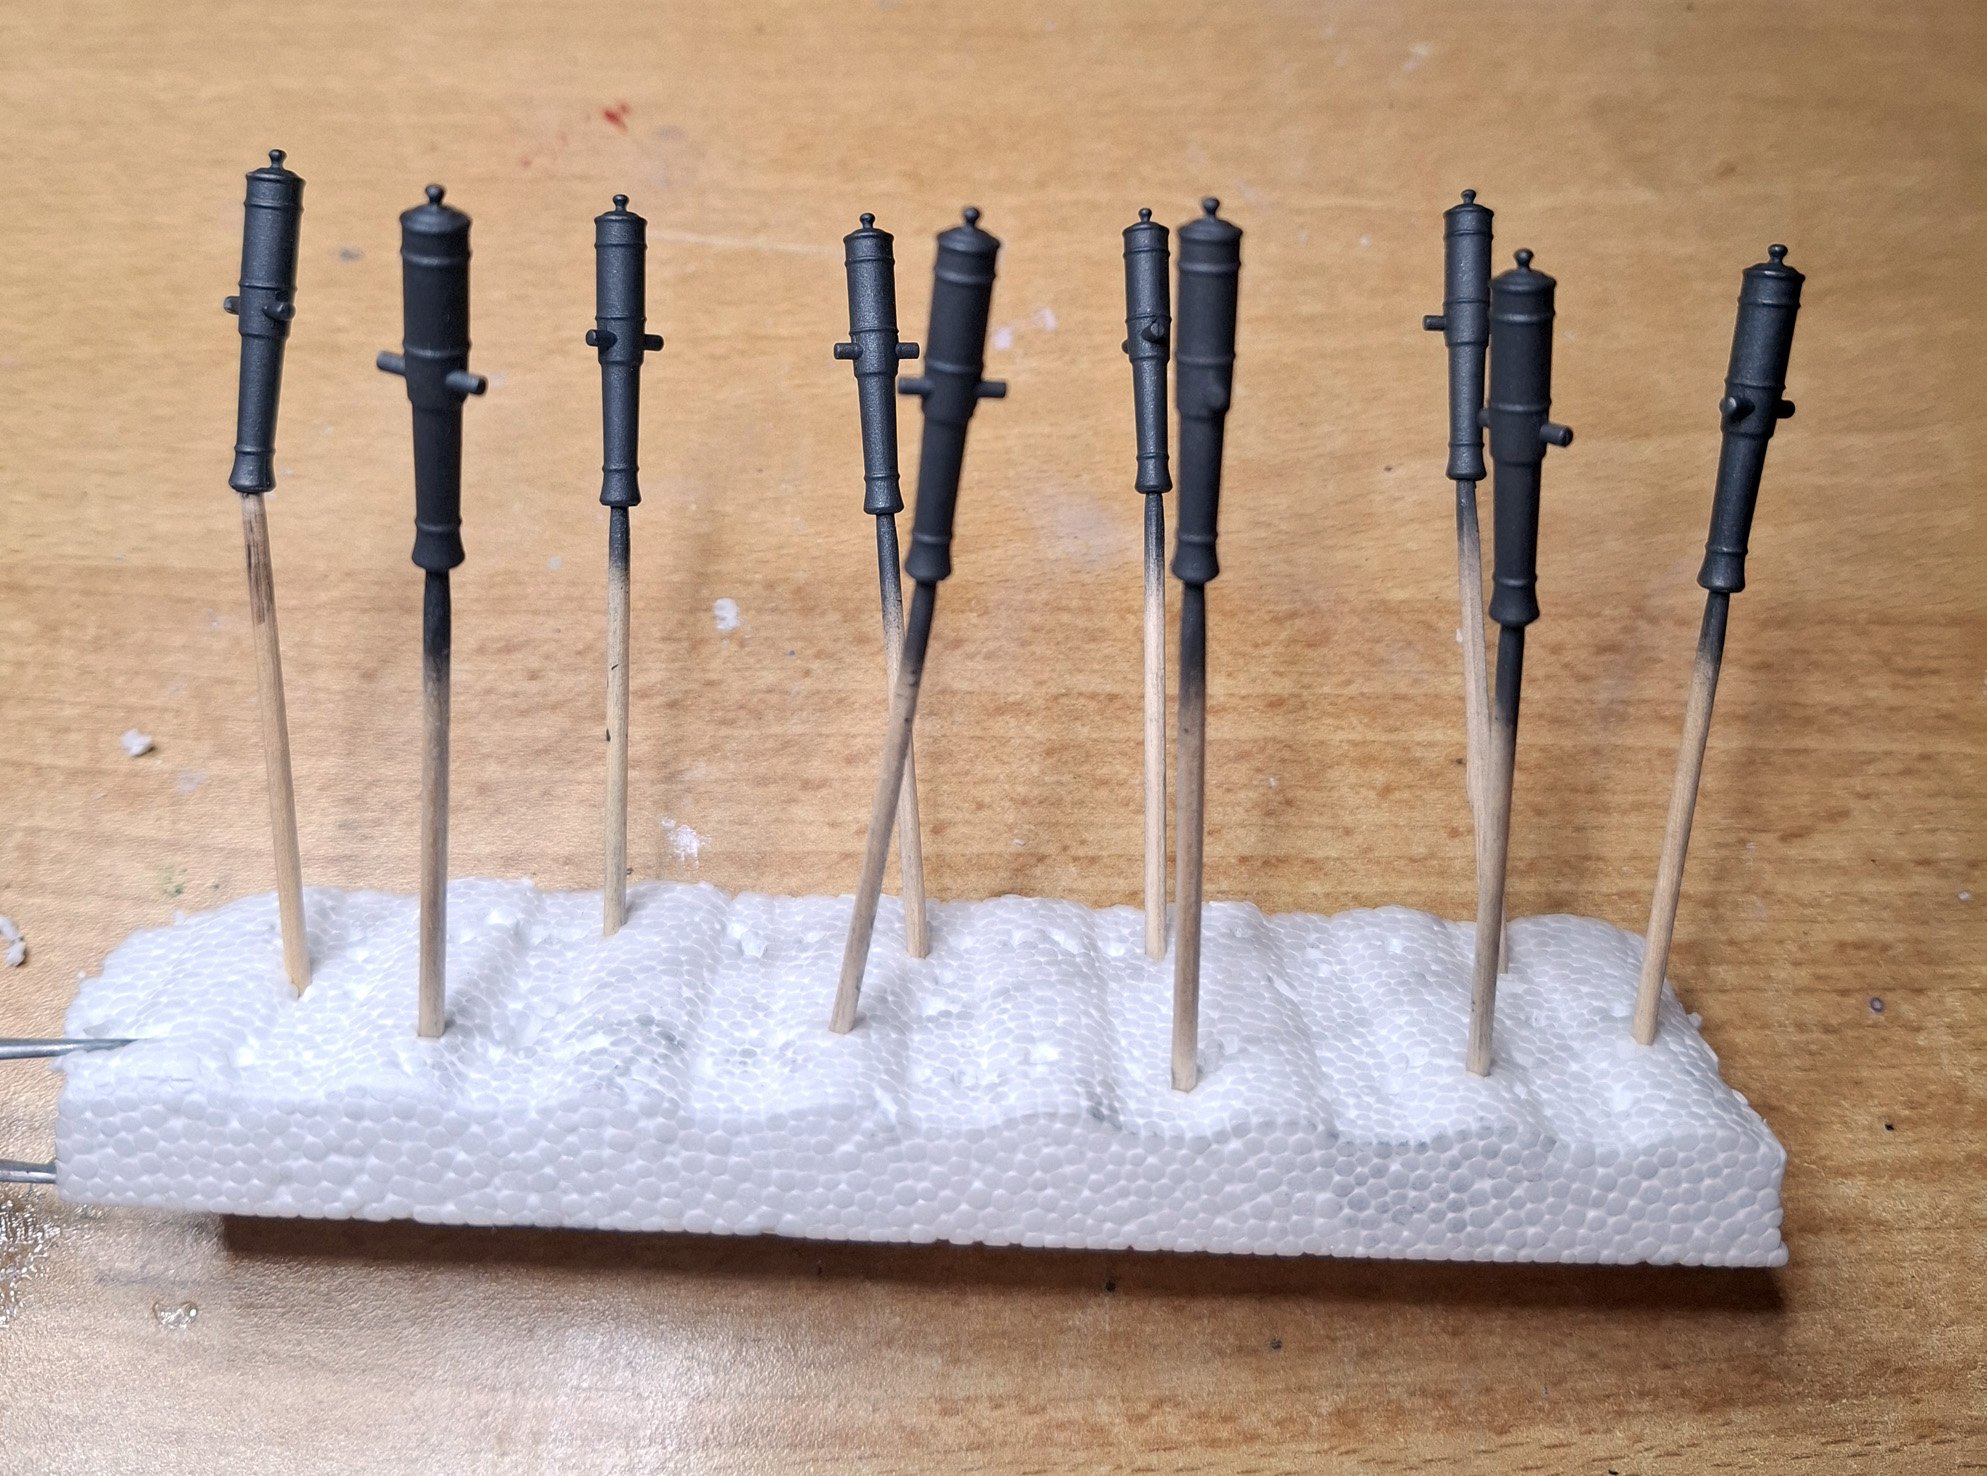
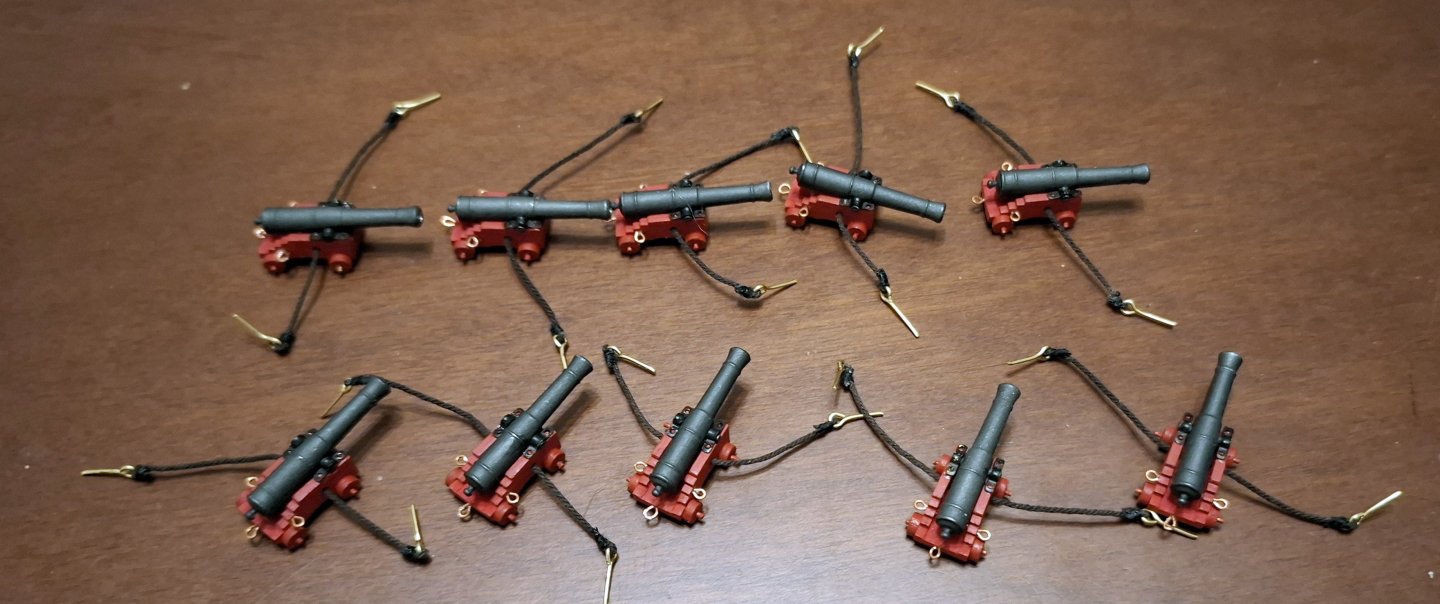
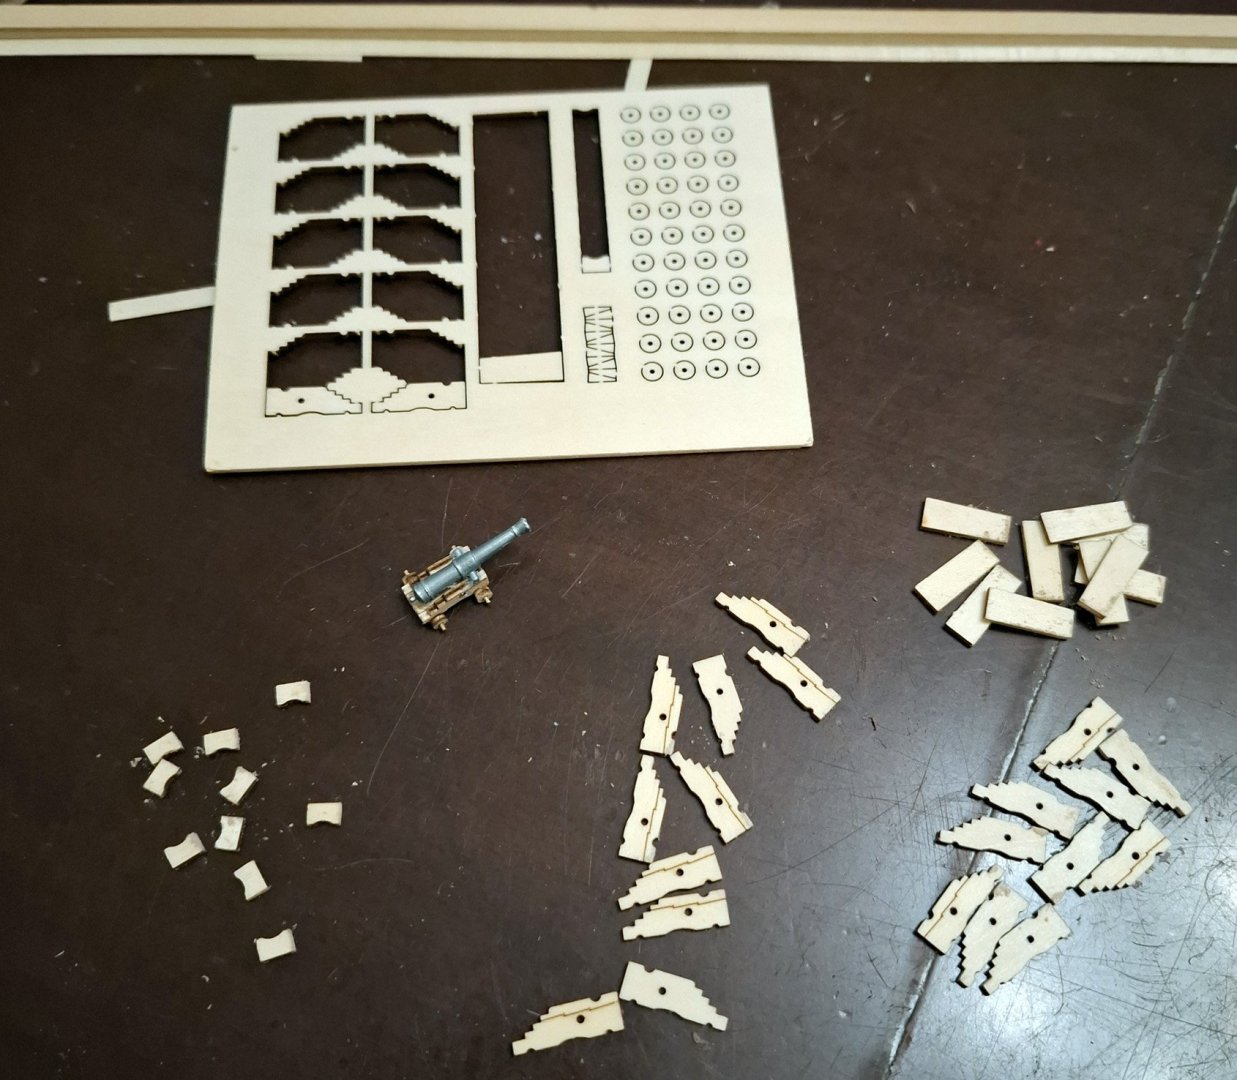
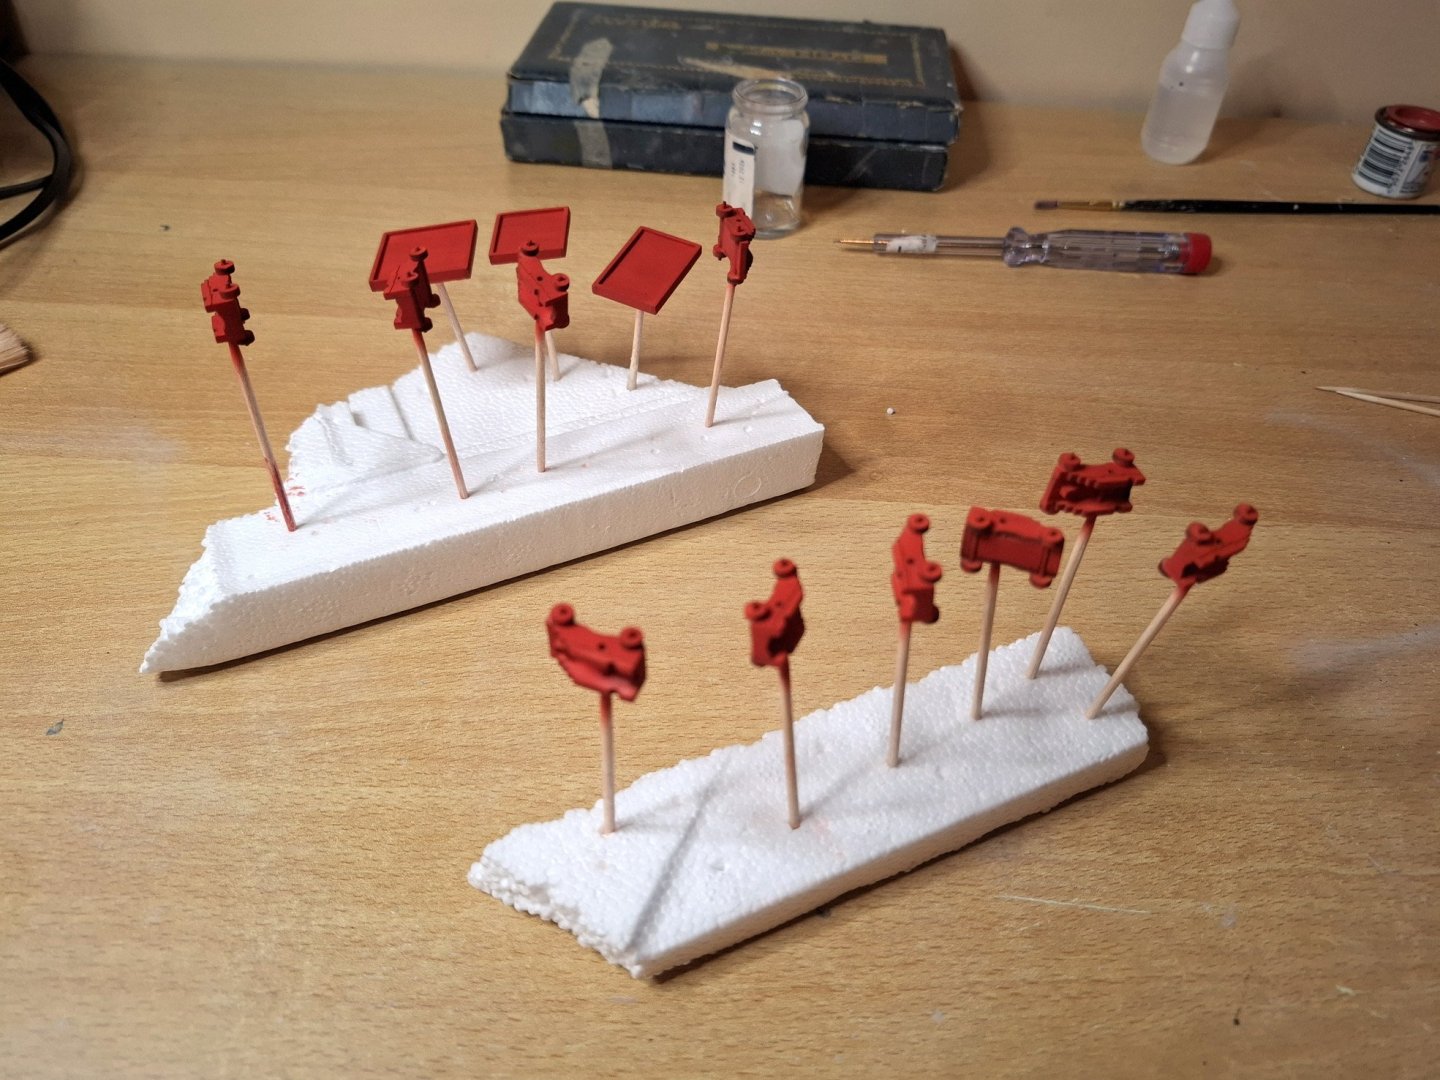
crafting main deck cannon carriages. Cannons need to be painted from silver to black color. cannons are painted with metalic blackish color (exhaust burned metal),
-
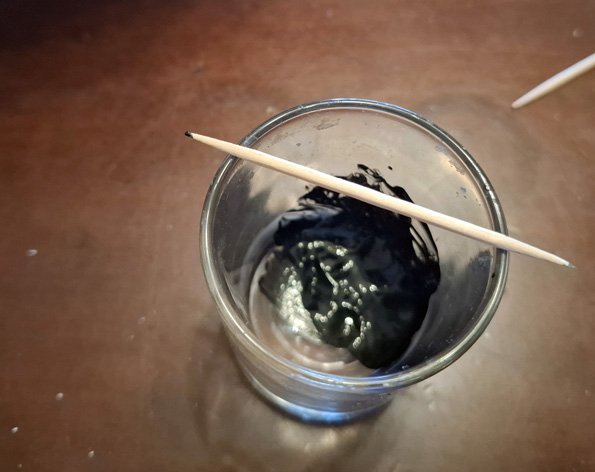
I’ve been considering whether to add treenails to the main deck or not. The reason I’m hesitant is that I’m not satisfied with how they usually turn out. Even when I drill the holes to the correct size, inserting the wooden treenails often makes the holes expand unevenly, resulting in inconsistent sizes and an out-of-scale appearance. Perhaps there’s an issue with my technique, but I’ve decided to try something different instead. My plan is to drill small holes and fill them with a thick paste made from white glue mixed with black acrylic paint. Using acrylic is crucial since white glue is water-based, and this approach will make it easier to clean up any excess paste with a damp paper towel, avoiding black stains on the deck fisrts holes are ready, drilled, filled up, cleaned. The rest of treenail are almost ready, in this picture you can see how the holes are looking before cleaning up the excess paste This is the final outcome, and I’m quite pleased with the result. I’m considering keeping this pattern as it is and not adding any additional treenails


-
The main deck will be planked following the "rule of 4" using 10 cm planks. I encountered a staining issue caused by a blue acrylic paint spot that I hadn't fully removed by sanding. When I oiled the deck surface, the blue paint somehow seeped into the planks. I believe this wouldn't have happened if the paint had been enamel. As a result, I had to remove and redo 4-5 rows of planks.


-
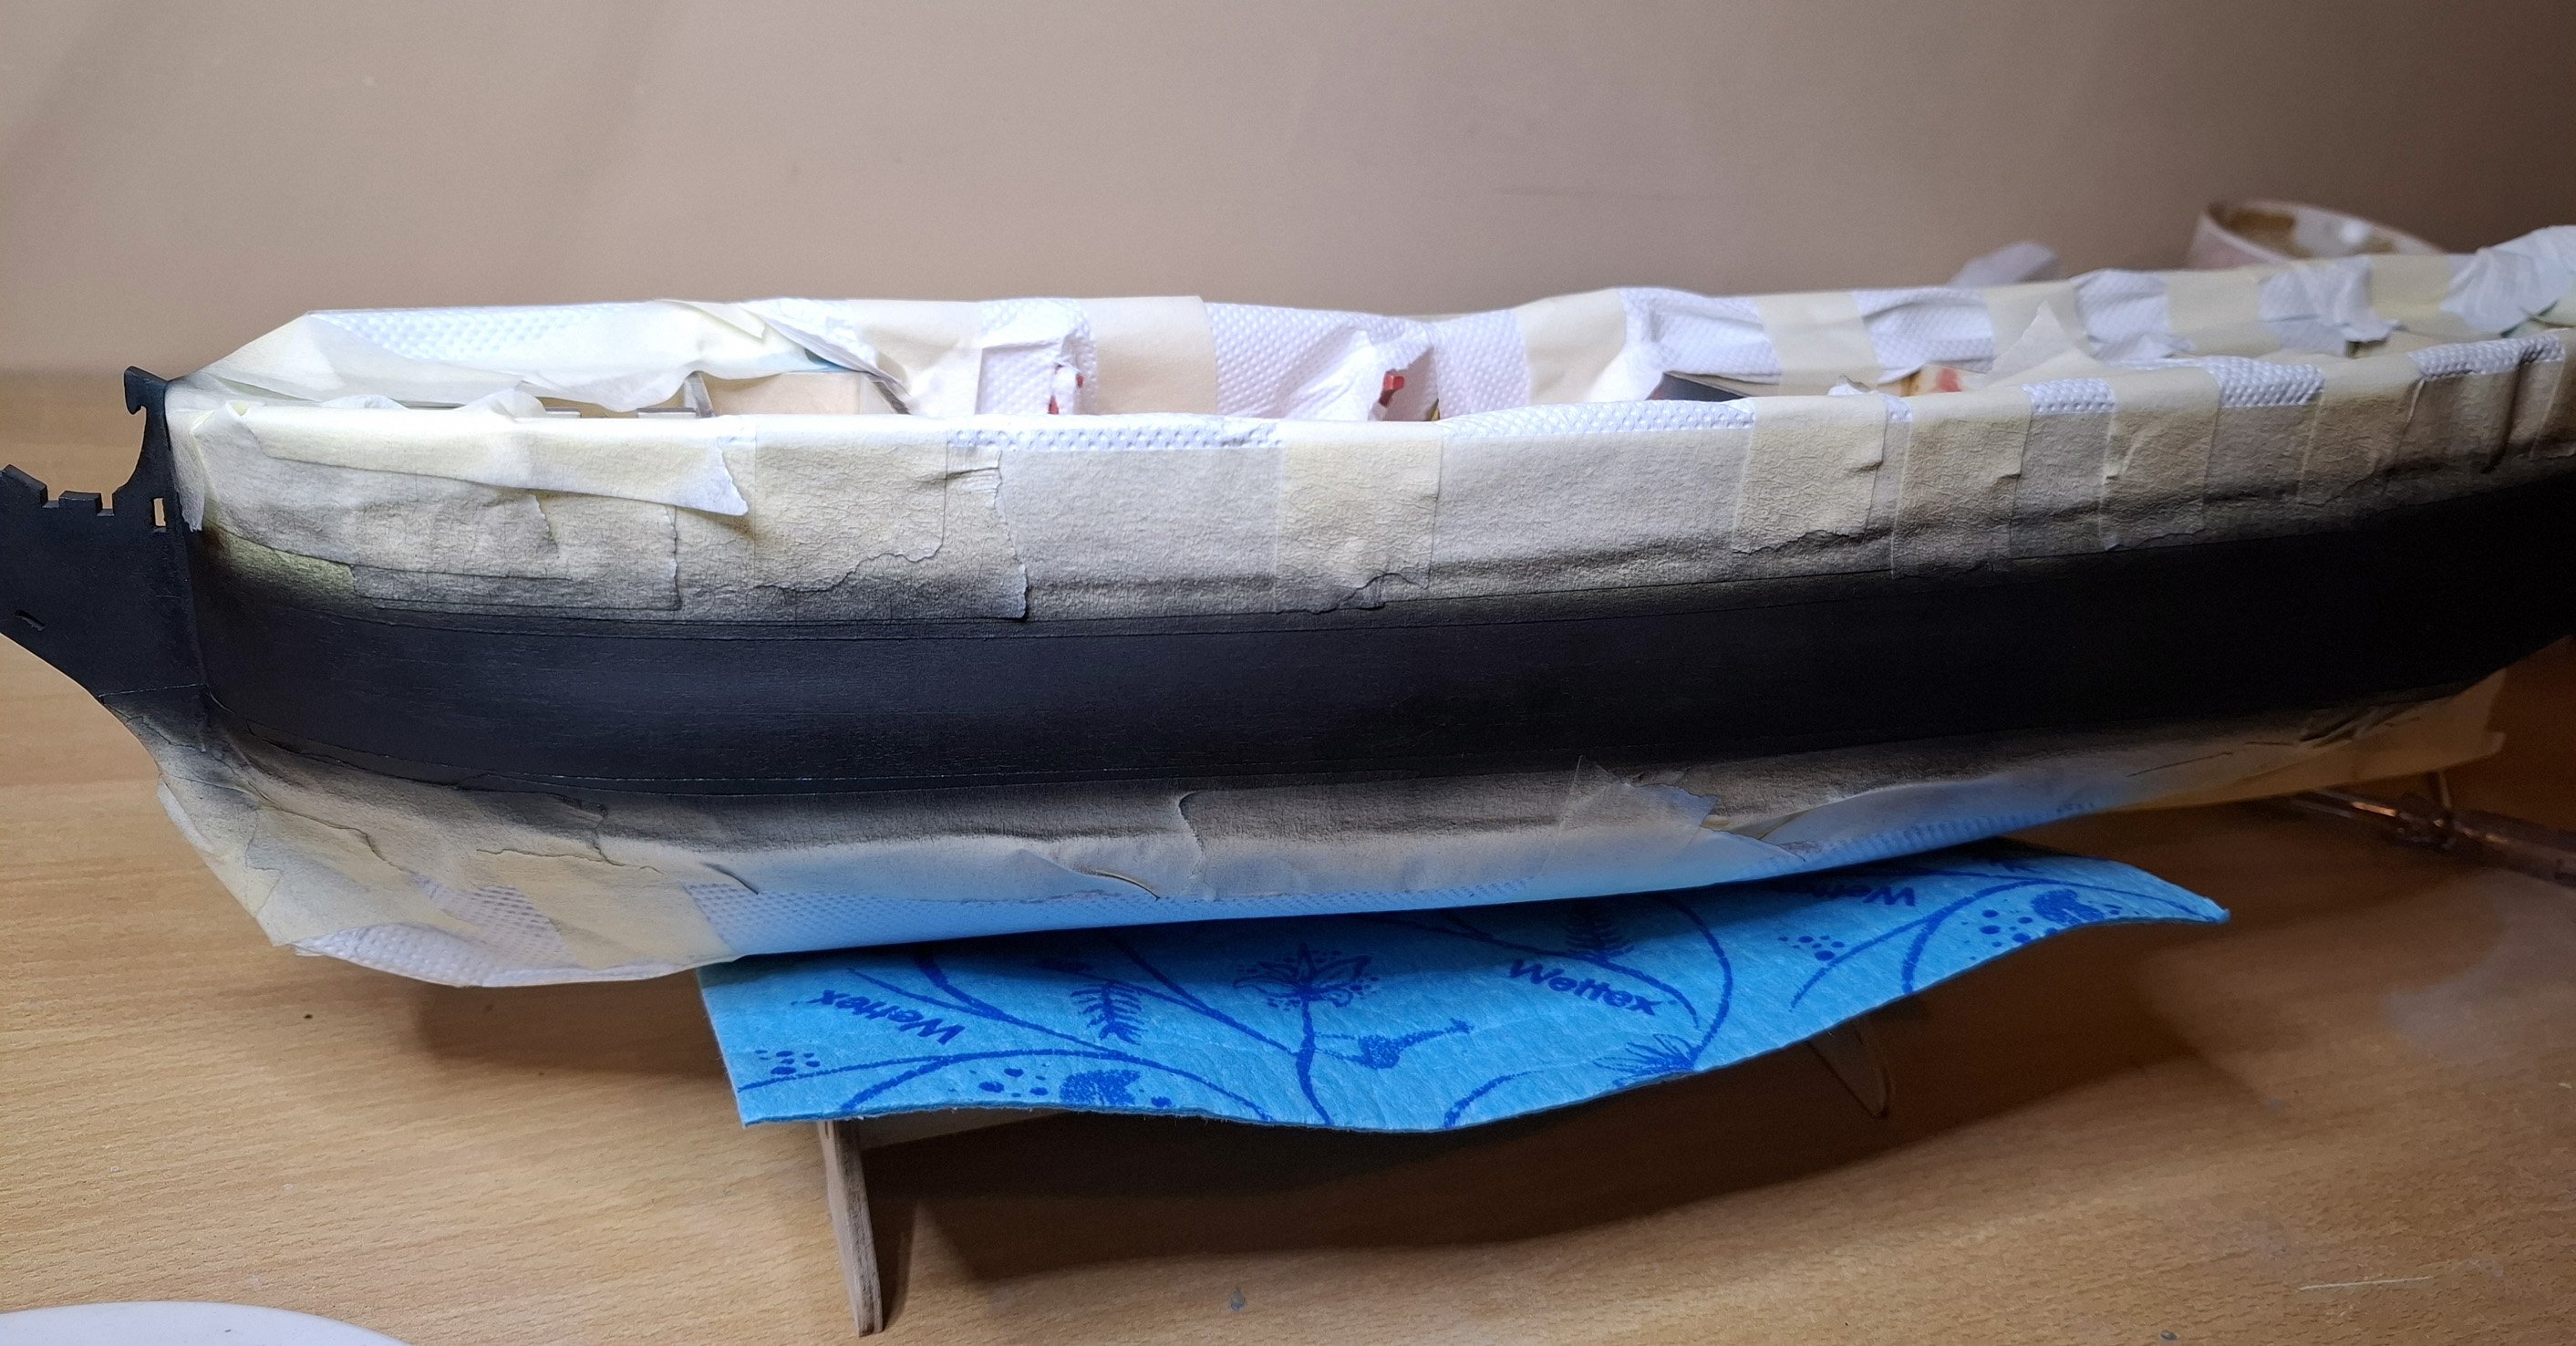
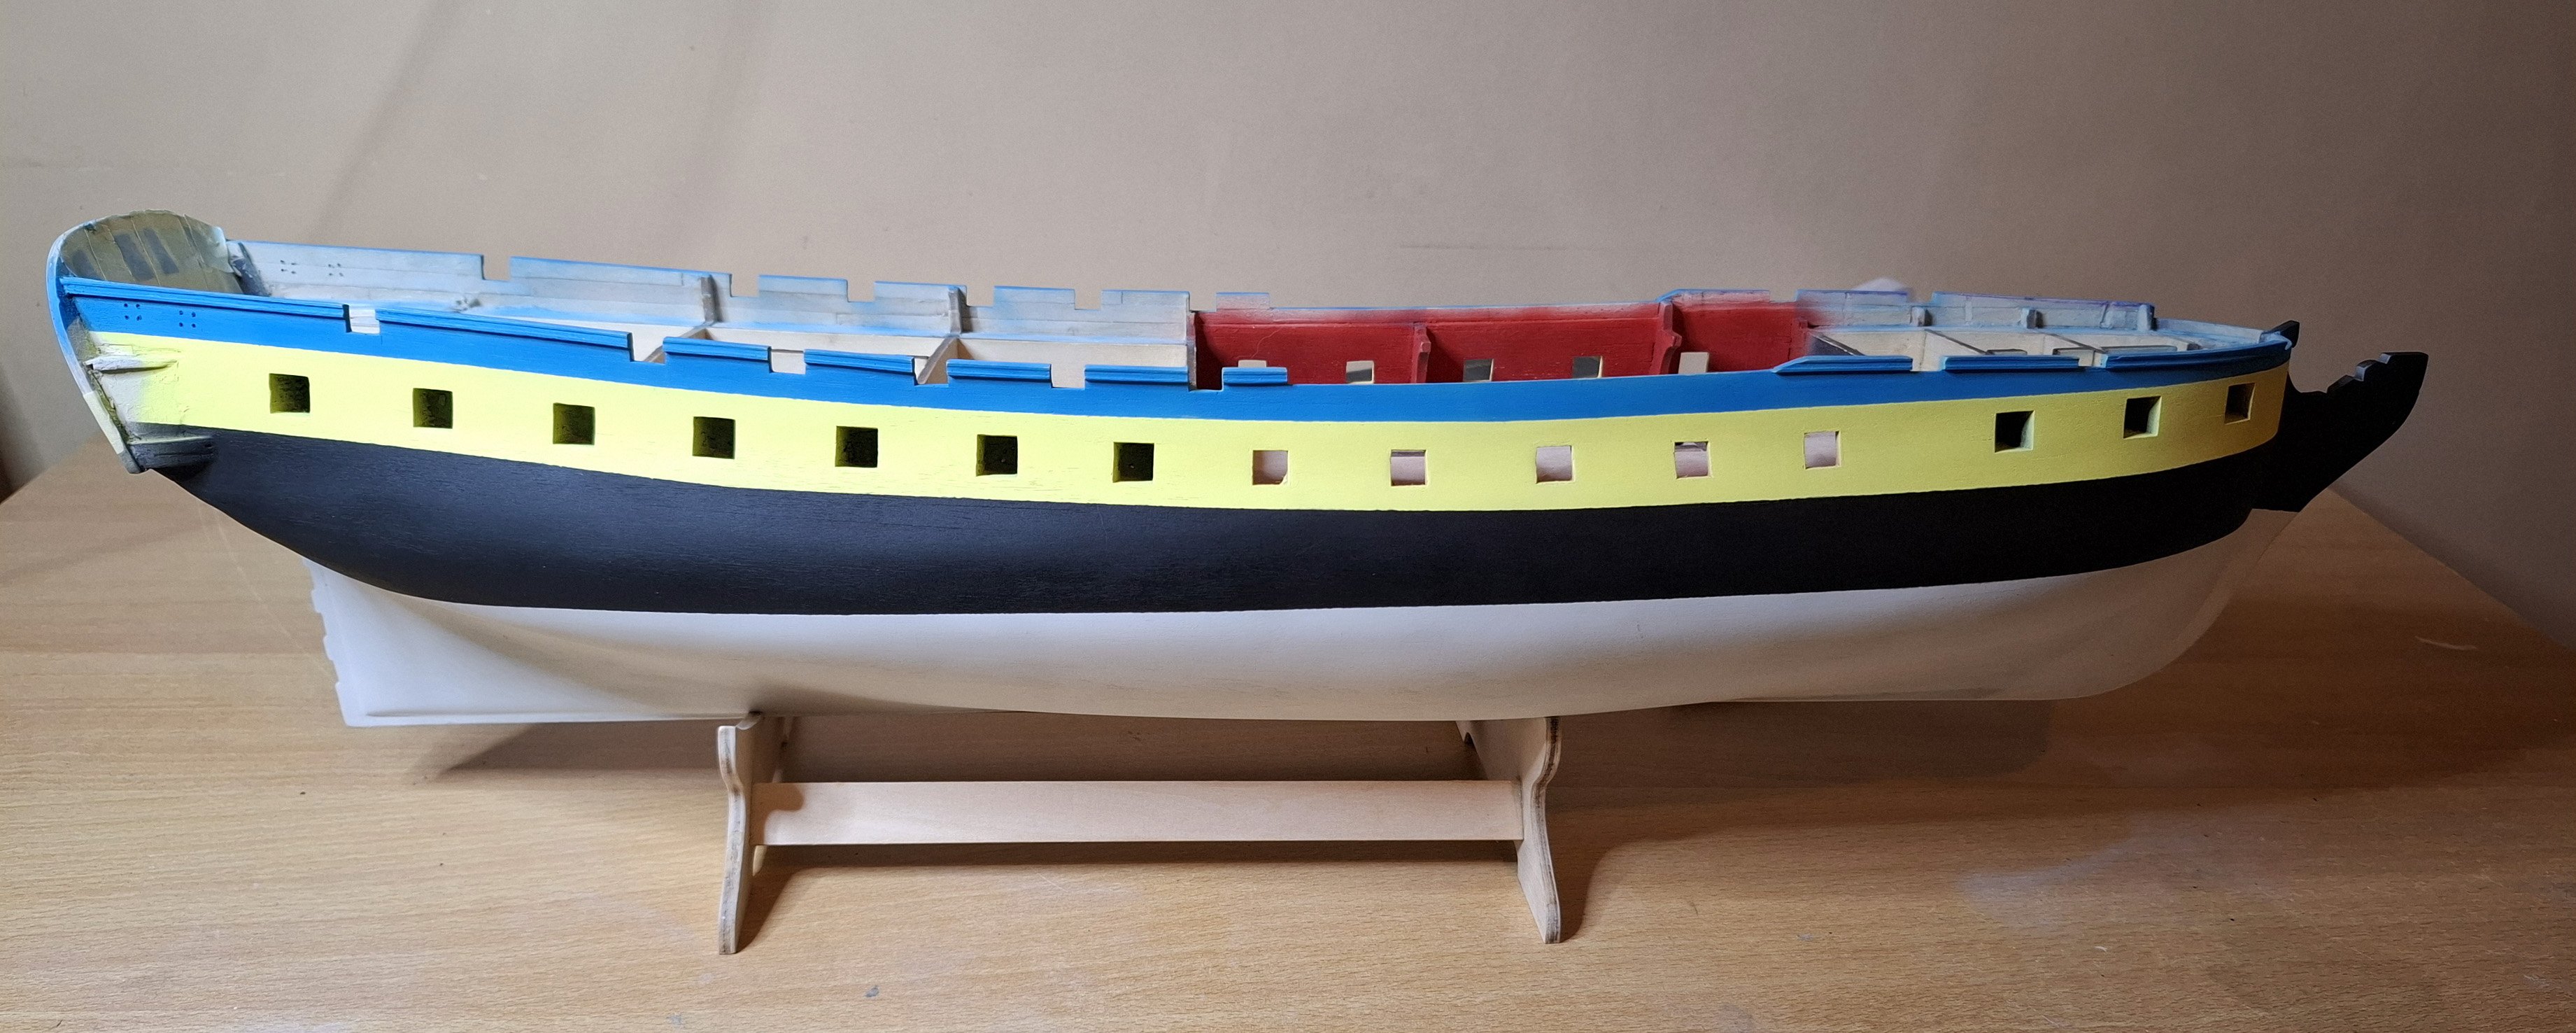
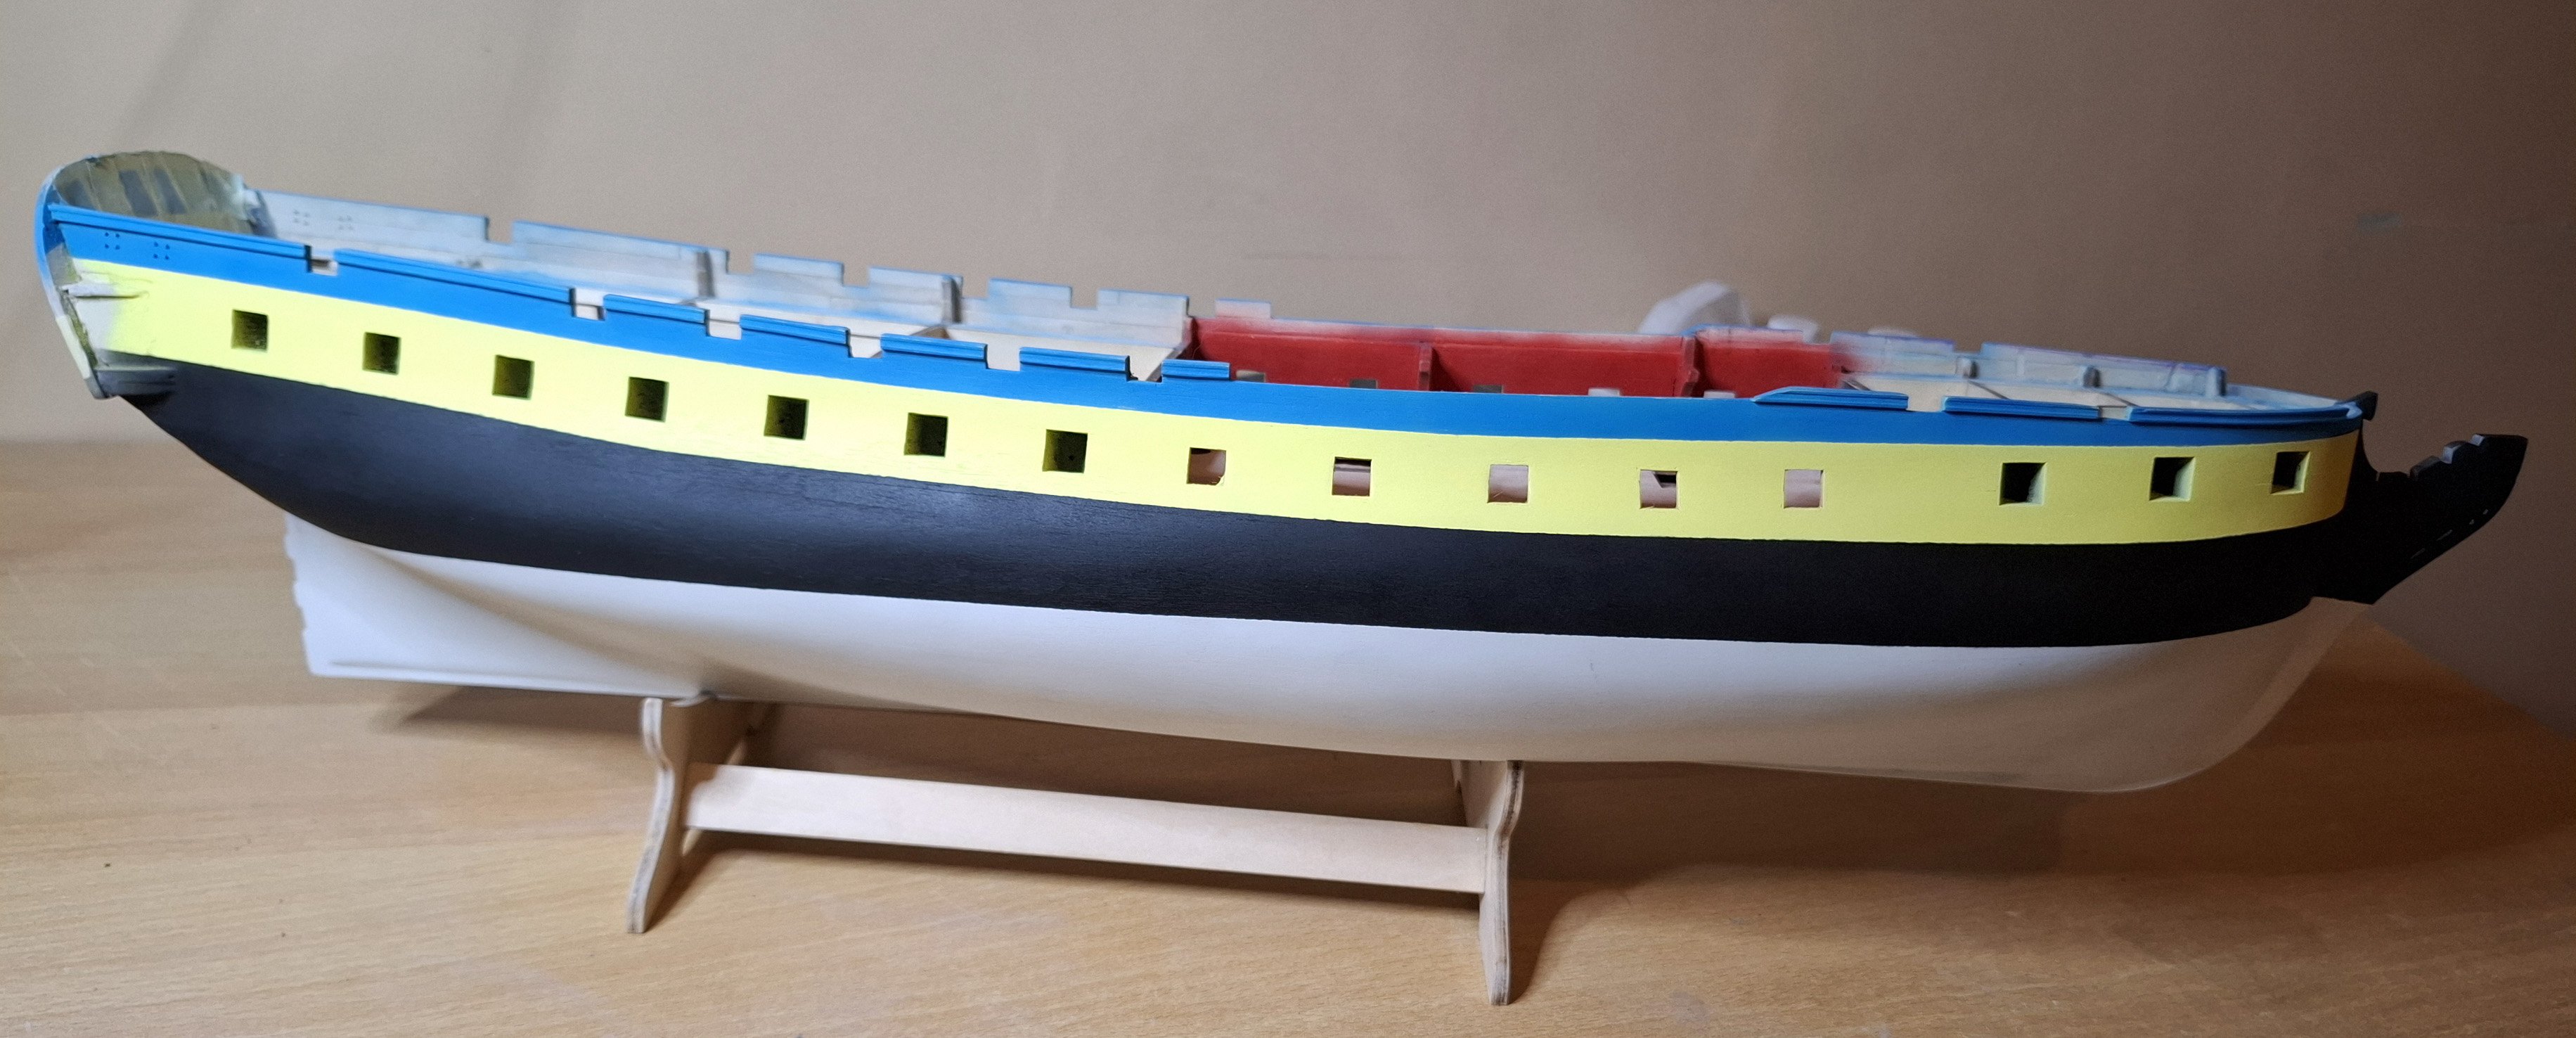
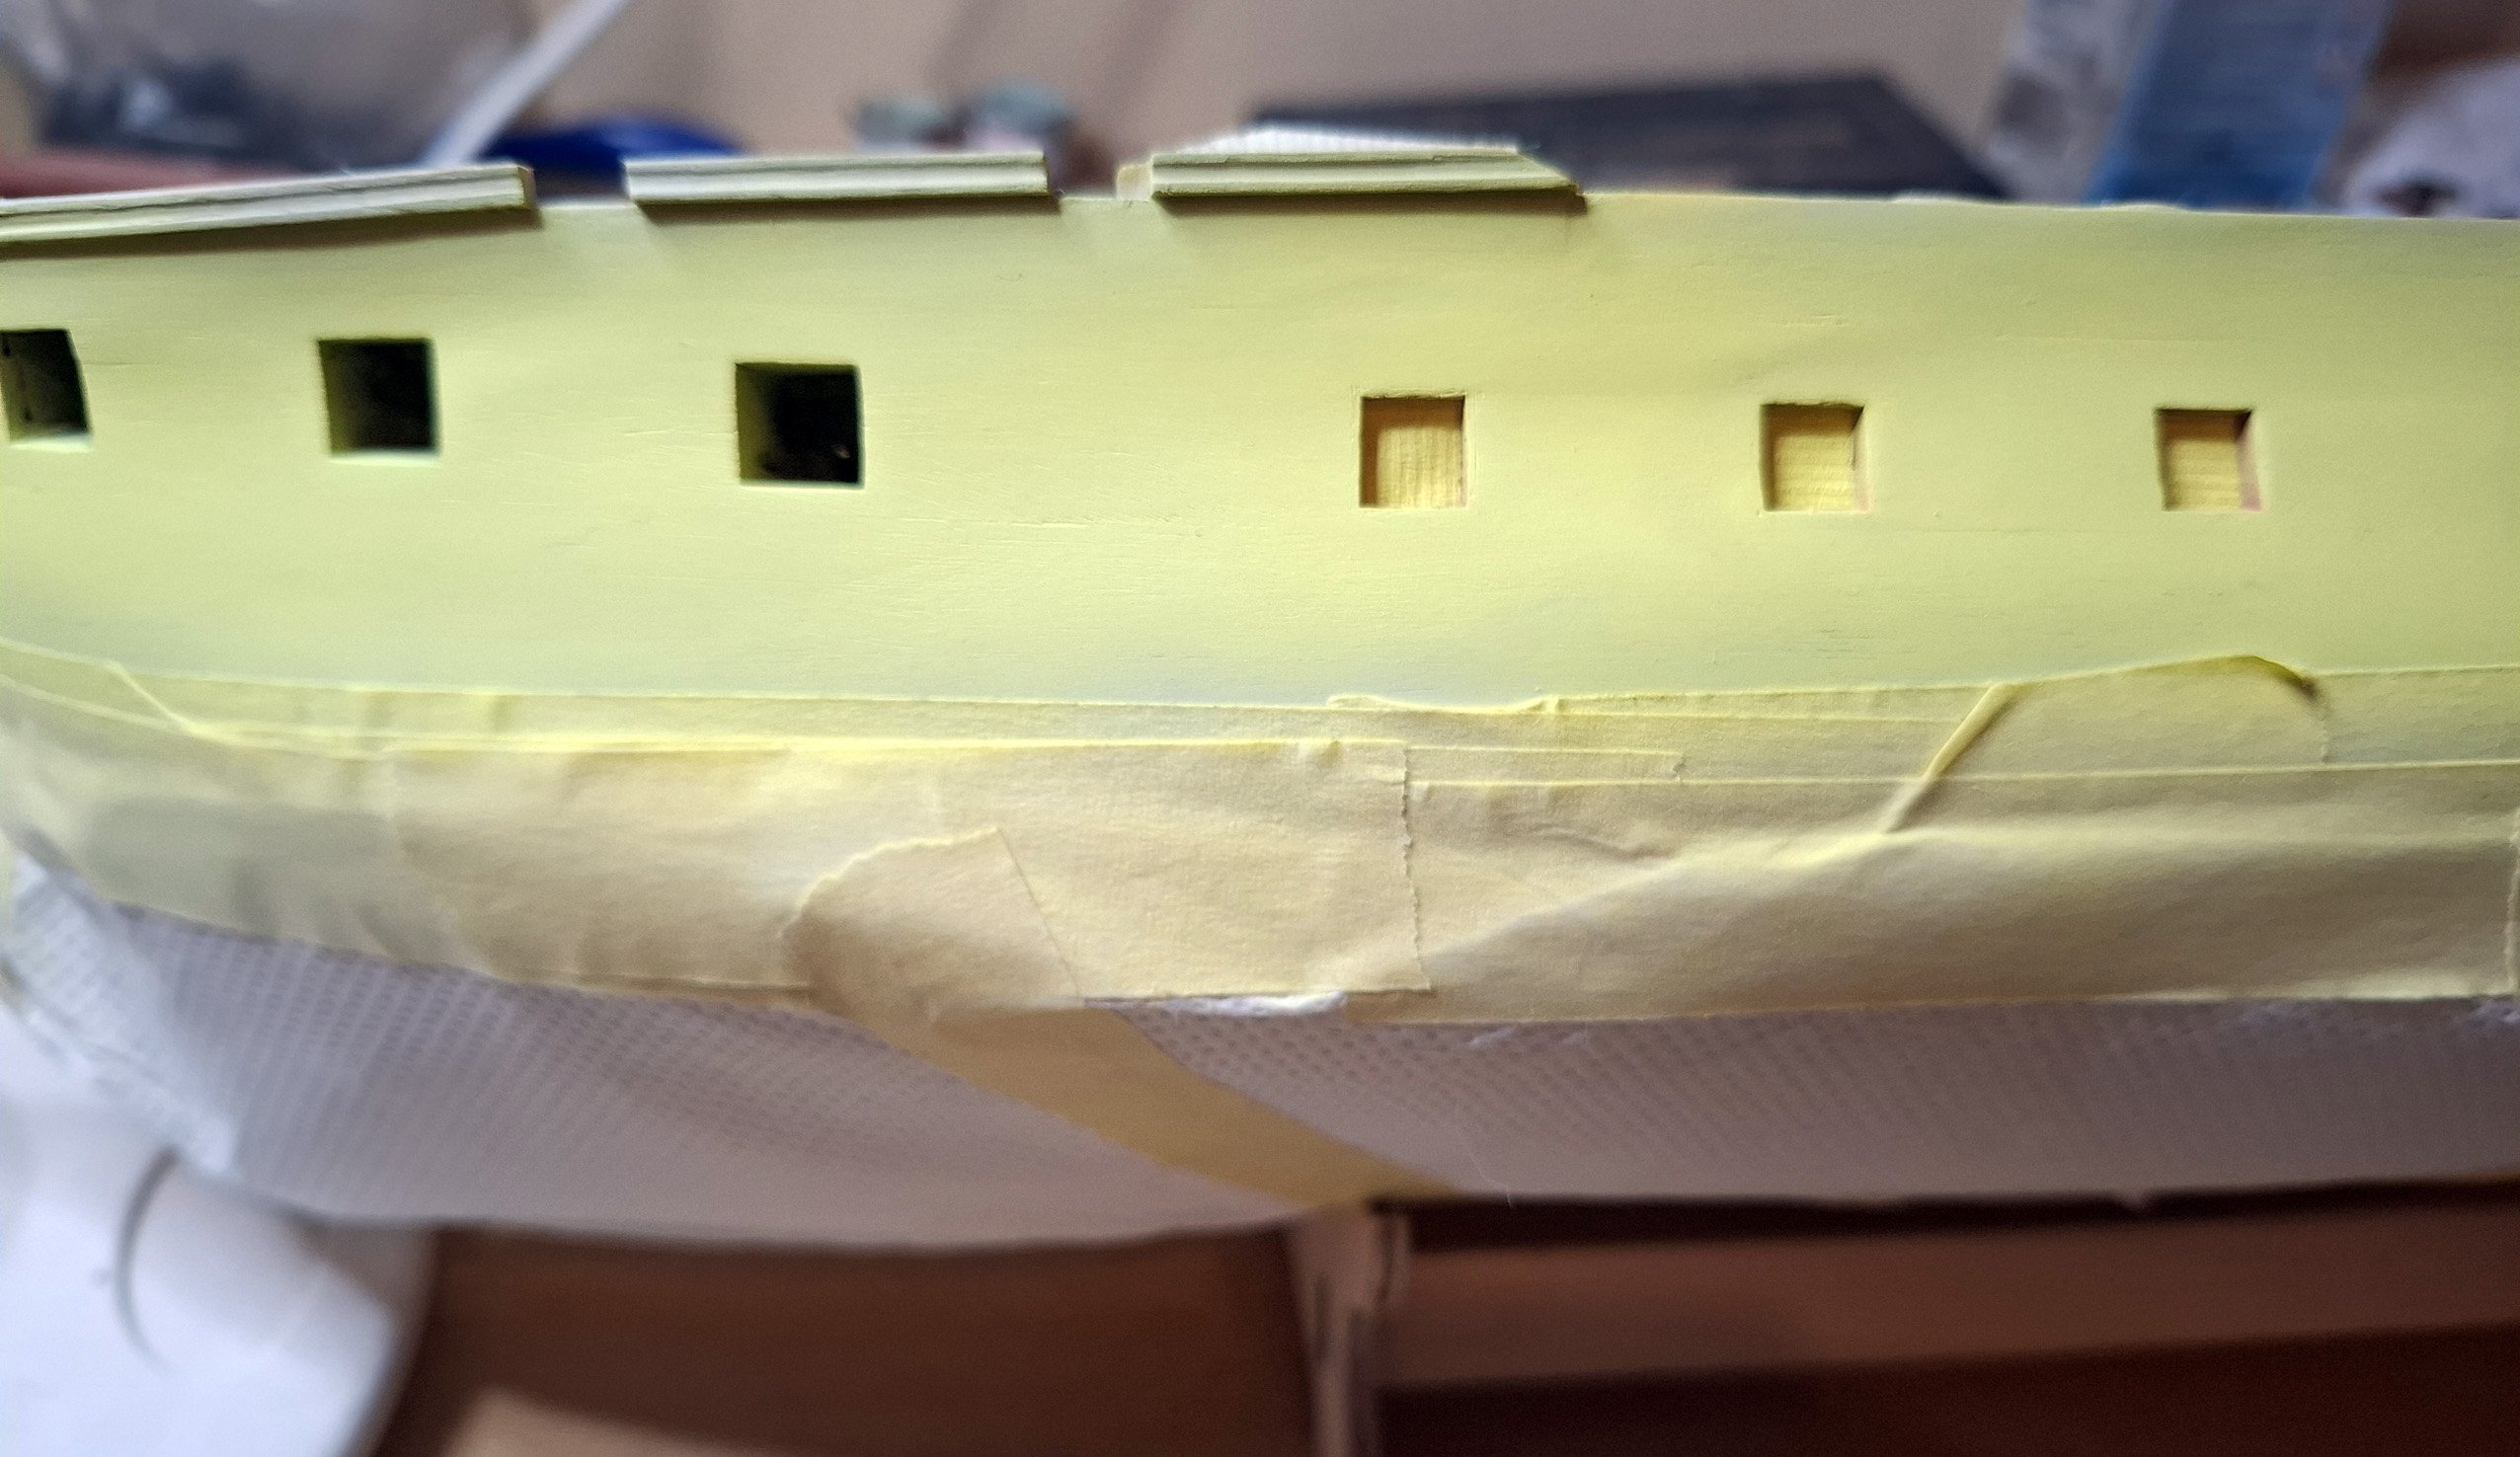
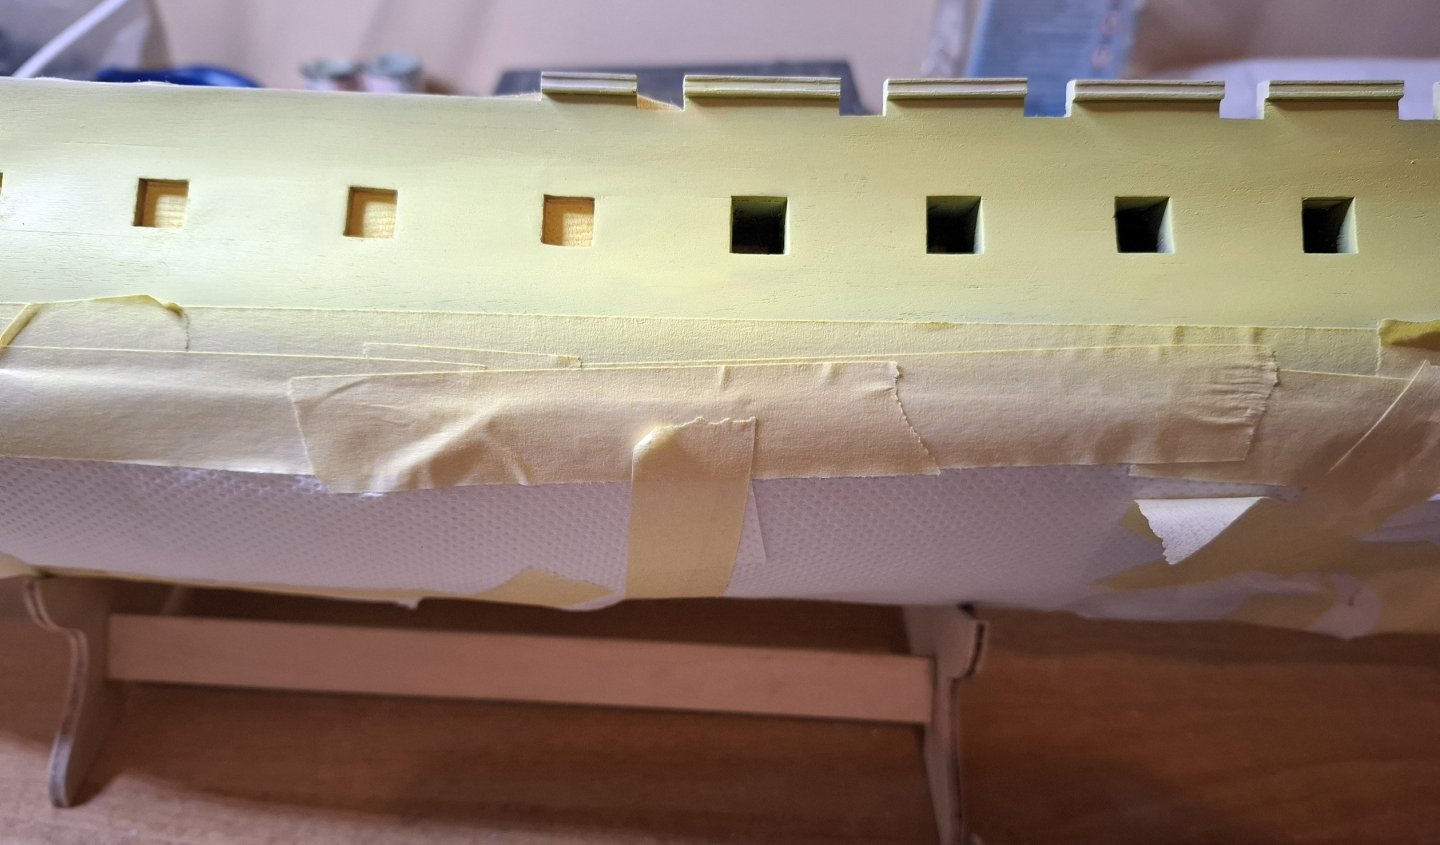
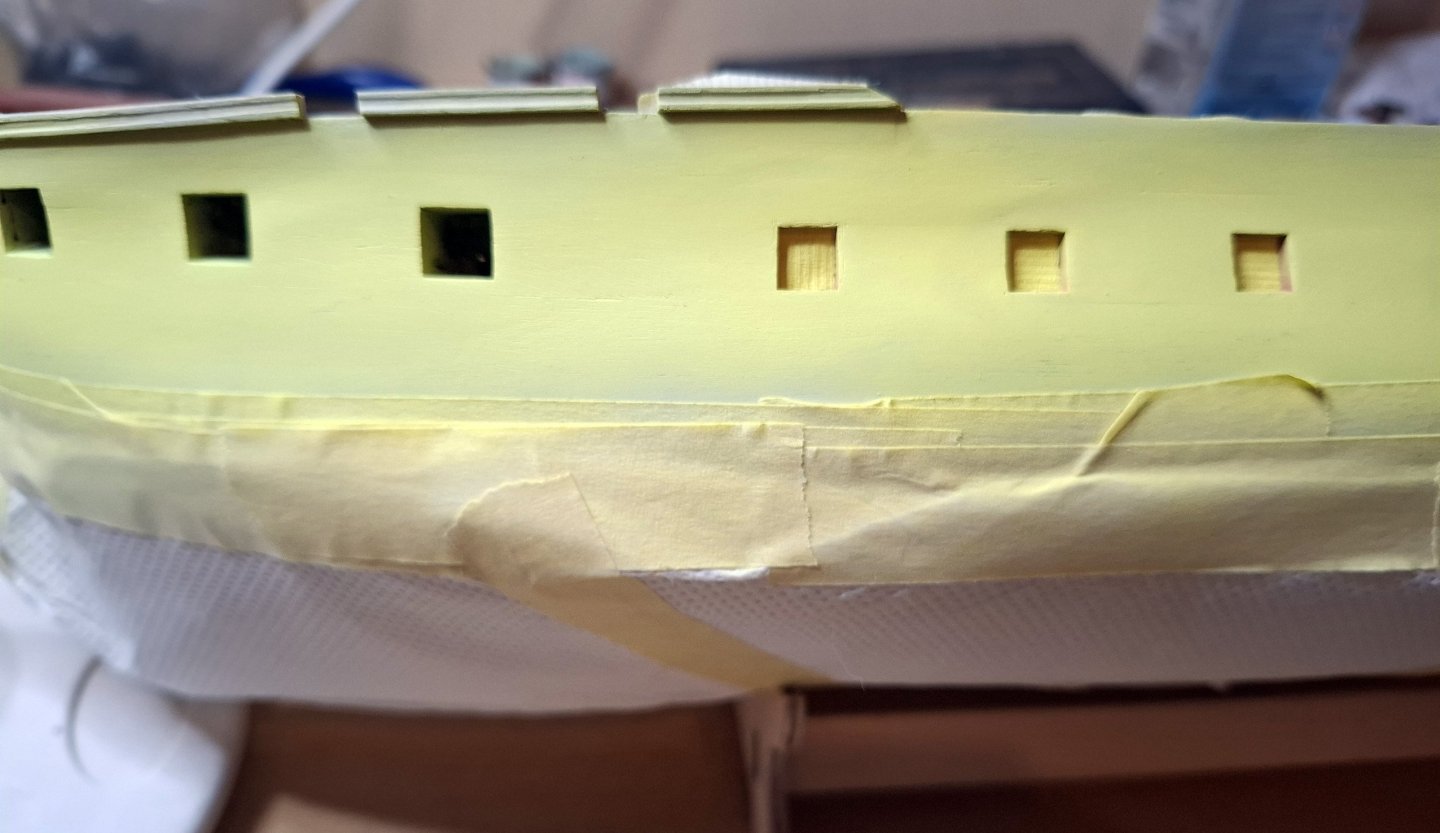
masking the lower hull, next color is yellow
-
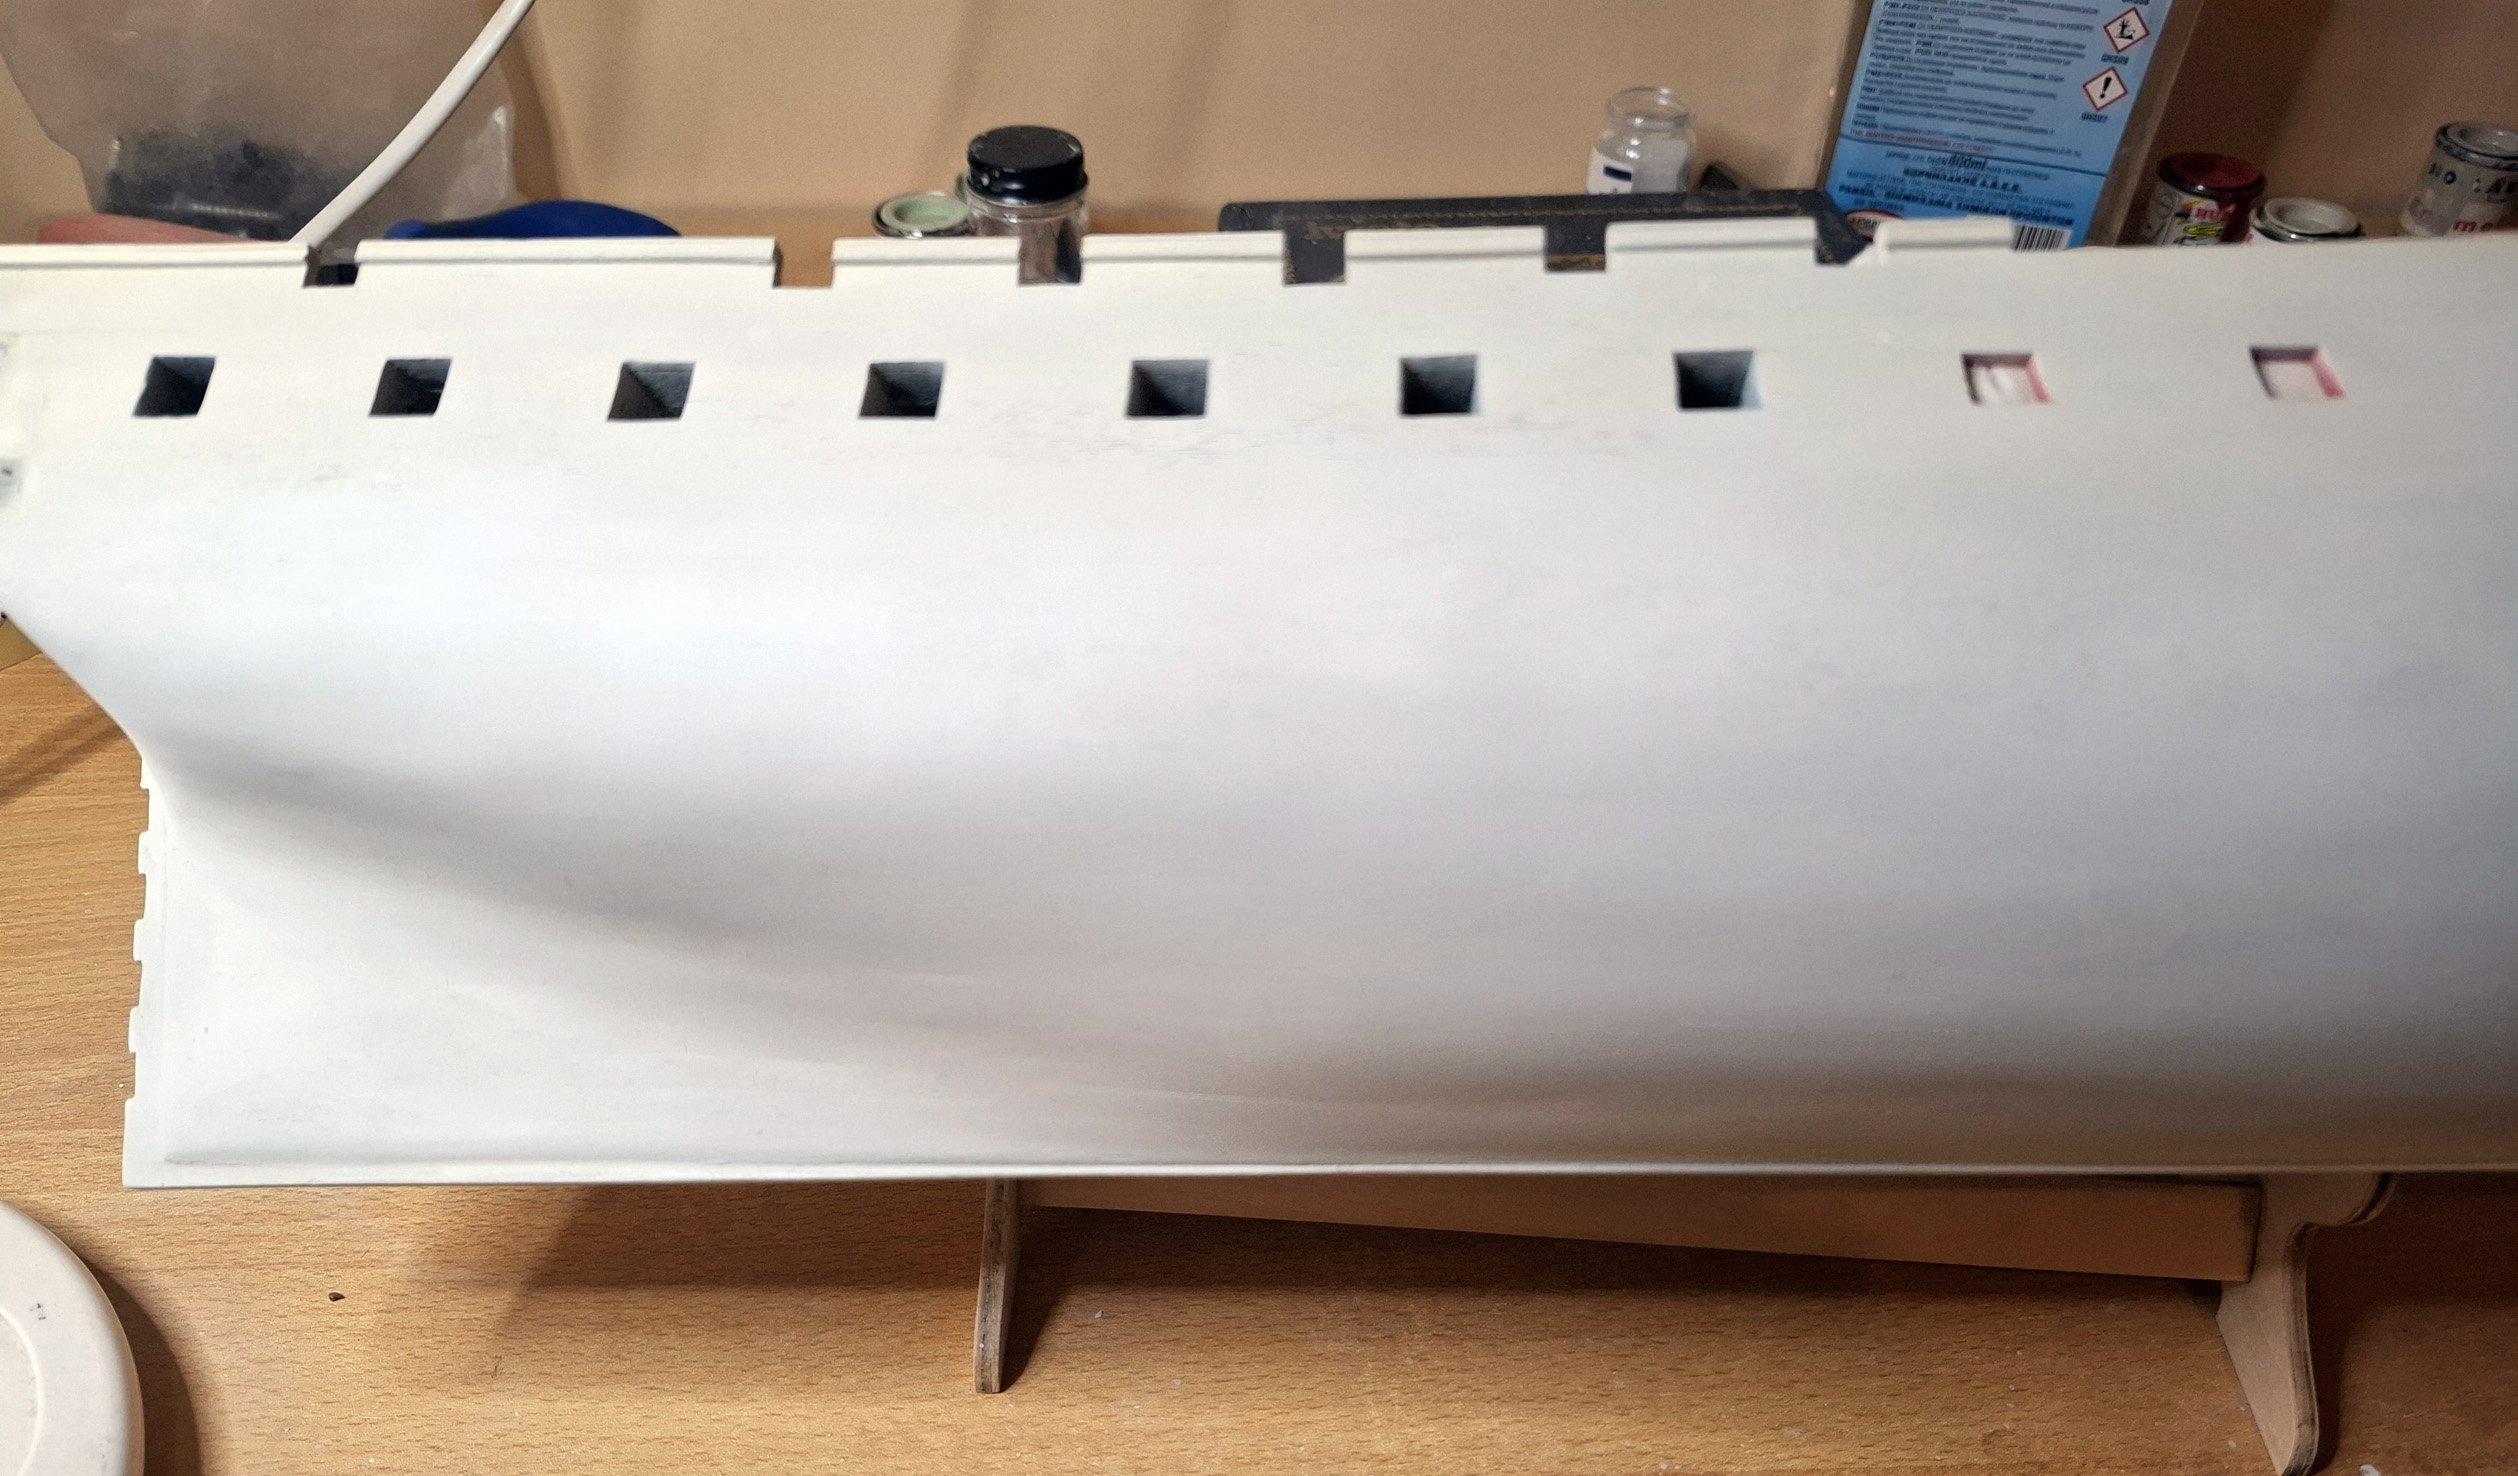
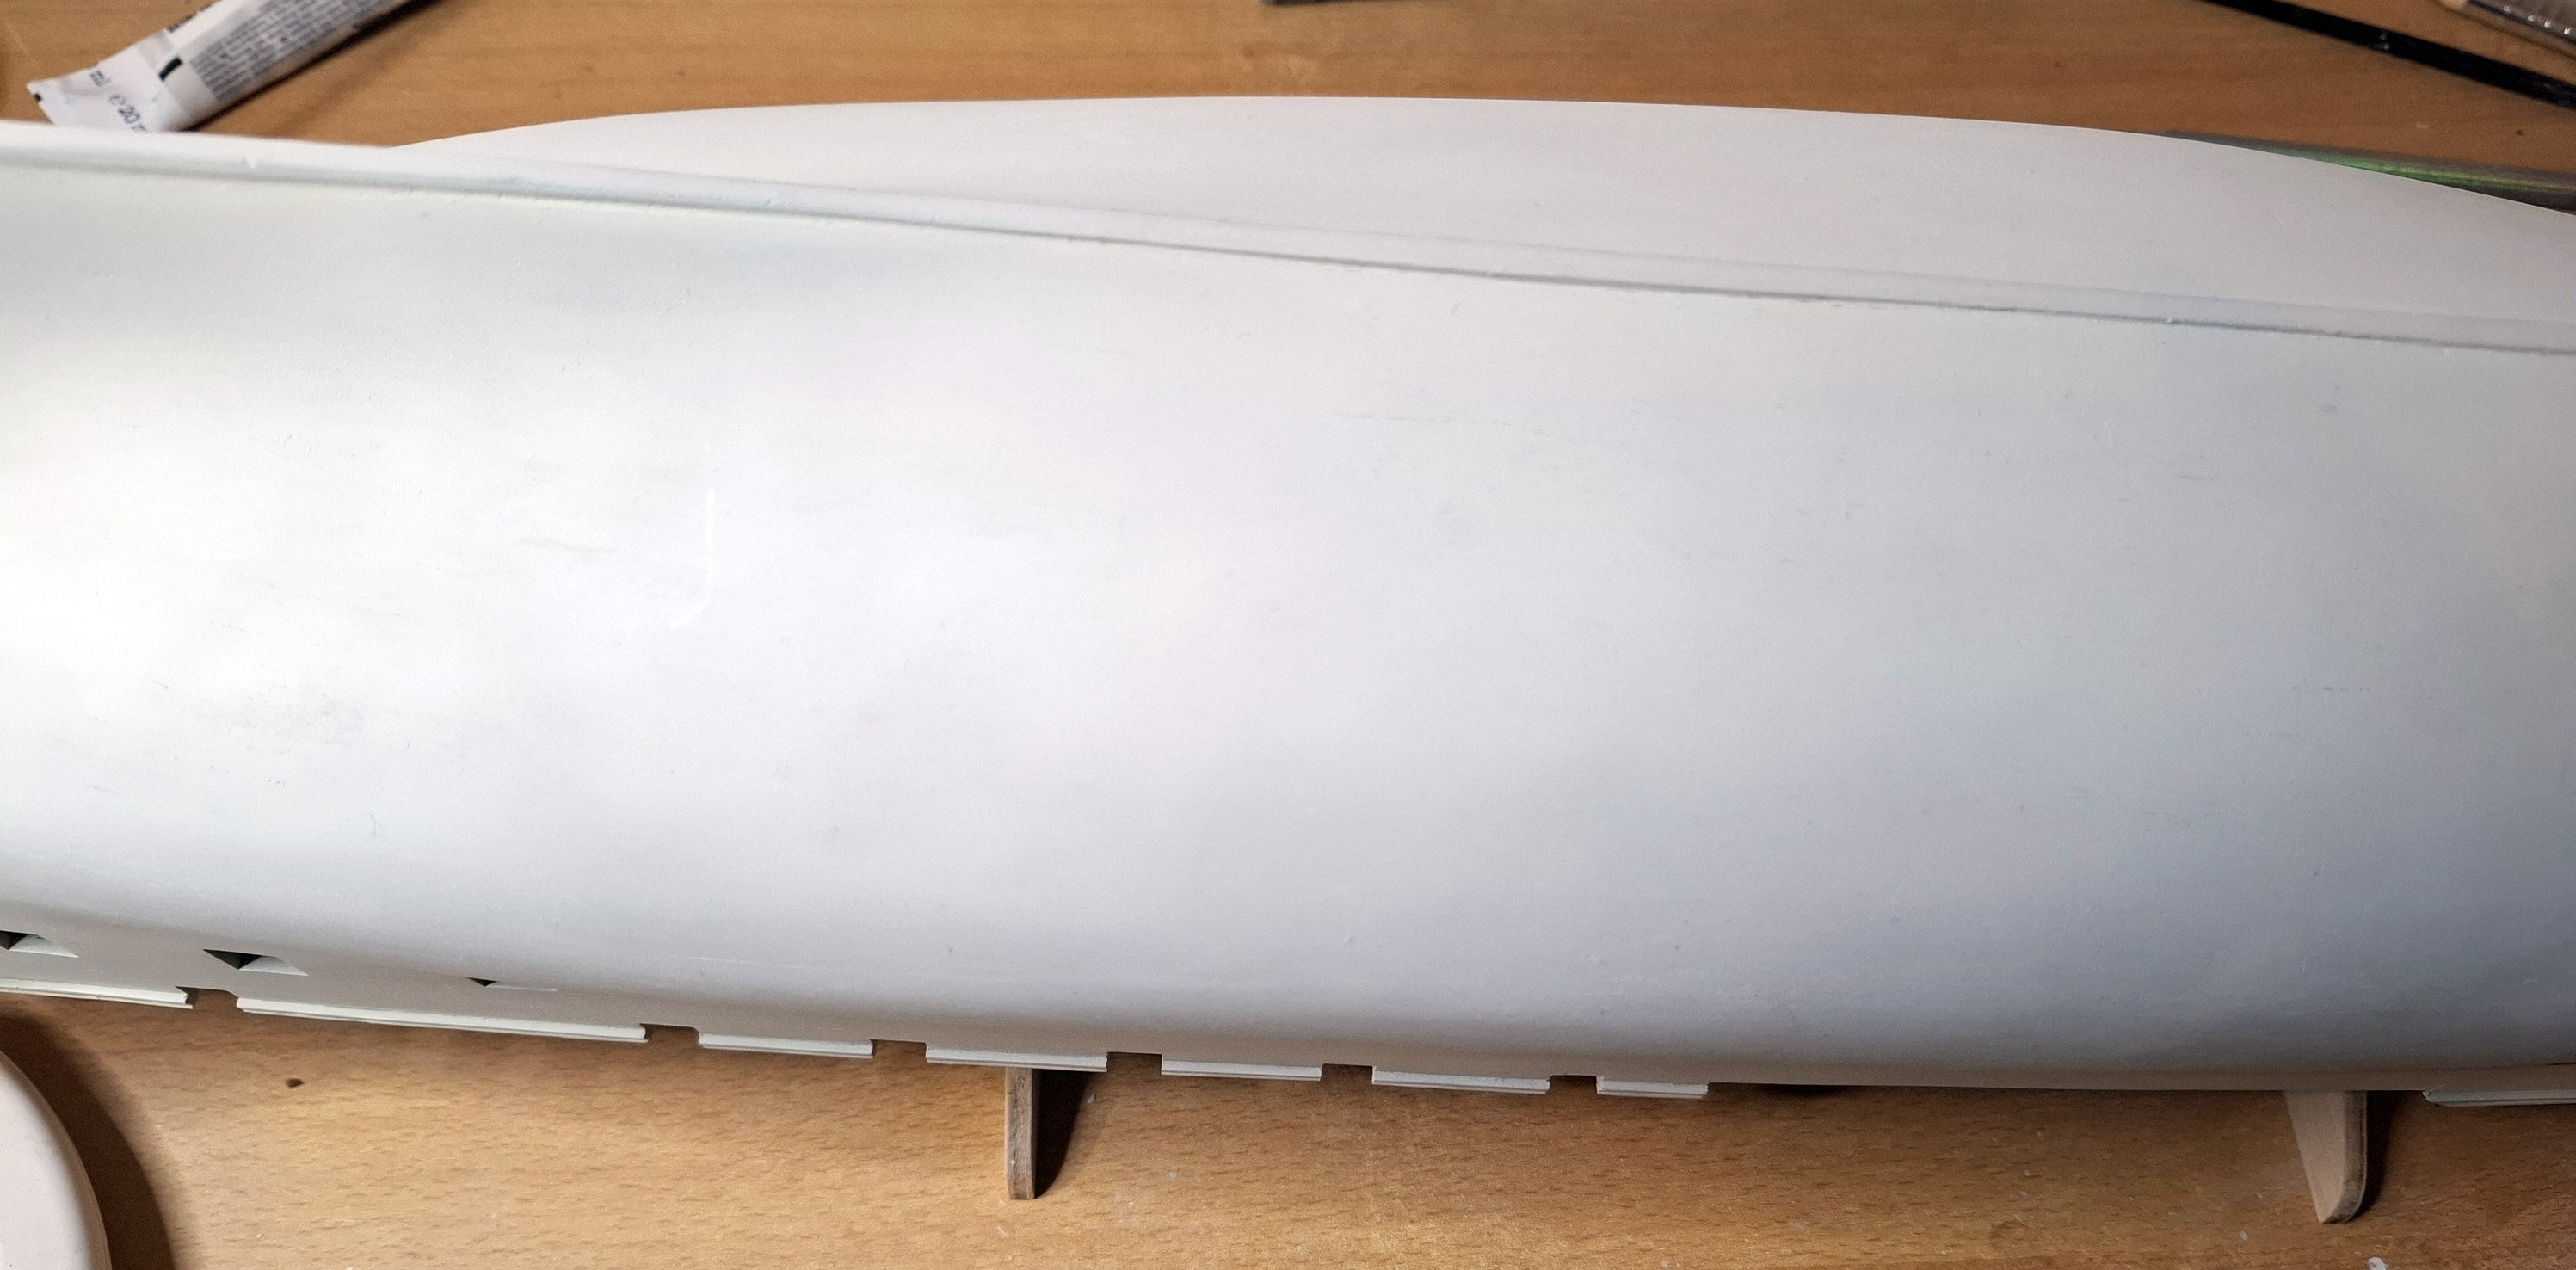
the lower part of hull is completed using white paint


-
more painting... painting hull 2.mp4