HOLIDAY DONATION DRIVE - SUPPORT MSW - DO YOUR PART TO KEEP THIS GREAT FORUM GOING! (Only 13 donations so far - C'mon guys!)
×


DonInAZ
-
Posts
138 -
Joined
-
Last visited
Content Type
Profiles
Forums
Gallery
Events
Everything posted by DonInAZ
-
 Does anyone make a sail kit for the Sergal Cutty Sark kit? All the builds I’ve seen of that kit show her bare-masted. I know the AL kit comes with sails but that kit is slightly smaller. Cutty Sark is such a gorgeous ship under full sail! Thanks, Don
-
I have not done a lot of building, so my observations are not born of actual modeling experience and therefore probably not worth much consideration, but I do own and have closely inspected (that is inventoried, and reviewed plans and instructions) quite a few kits from many of these manufacturers. I am actually quite surprised by almost 20% saying AL has the worst components, plans and instructions. I own 3 AL kits (HMS Bounty, HMS Surprise and Harvey) and while I cant speak to historical accuracy, I can vouch for the quality of the materials in the kits. At least as far as what I would want the quality to be. The wood seems to be free of burrs and of consistent color and texture and uniform width and thickness. The fittings don't exhibit an abundance of flashing or shoddy casting. The milled wood pieces actually look superior to many of the other kits I looked at. So far, I'm not missing any components (although I have not done a parts inventory on the Harvey). I don't know a lot about rigging line so I won't comment too much on that other than what's provided in the kits doesn't look much different from the line provided by other manufacturers in their kits. And the last thing I'll say is that the completed AL kits I've seen on this website look phenomenal. So, as I stated above, my lack of experience is notable and I'm sure there are others with MUCH more experience that can comment further on AL's kits, but I was indeed surprised by the near 1 in 5 who say AL is the bottom of the heap of wood ship kit manufacturers. I would like to hear what some of the issues others may have had with them and whether I've just been lucky... There are at least 2 or 3 more AL kits I have my eye on to snap up since they are gone and inventory is getting very limited. Thanks, Don
-
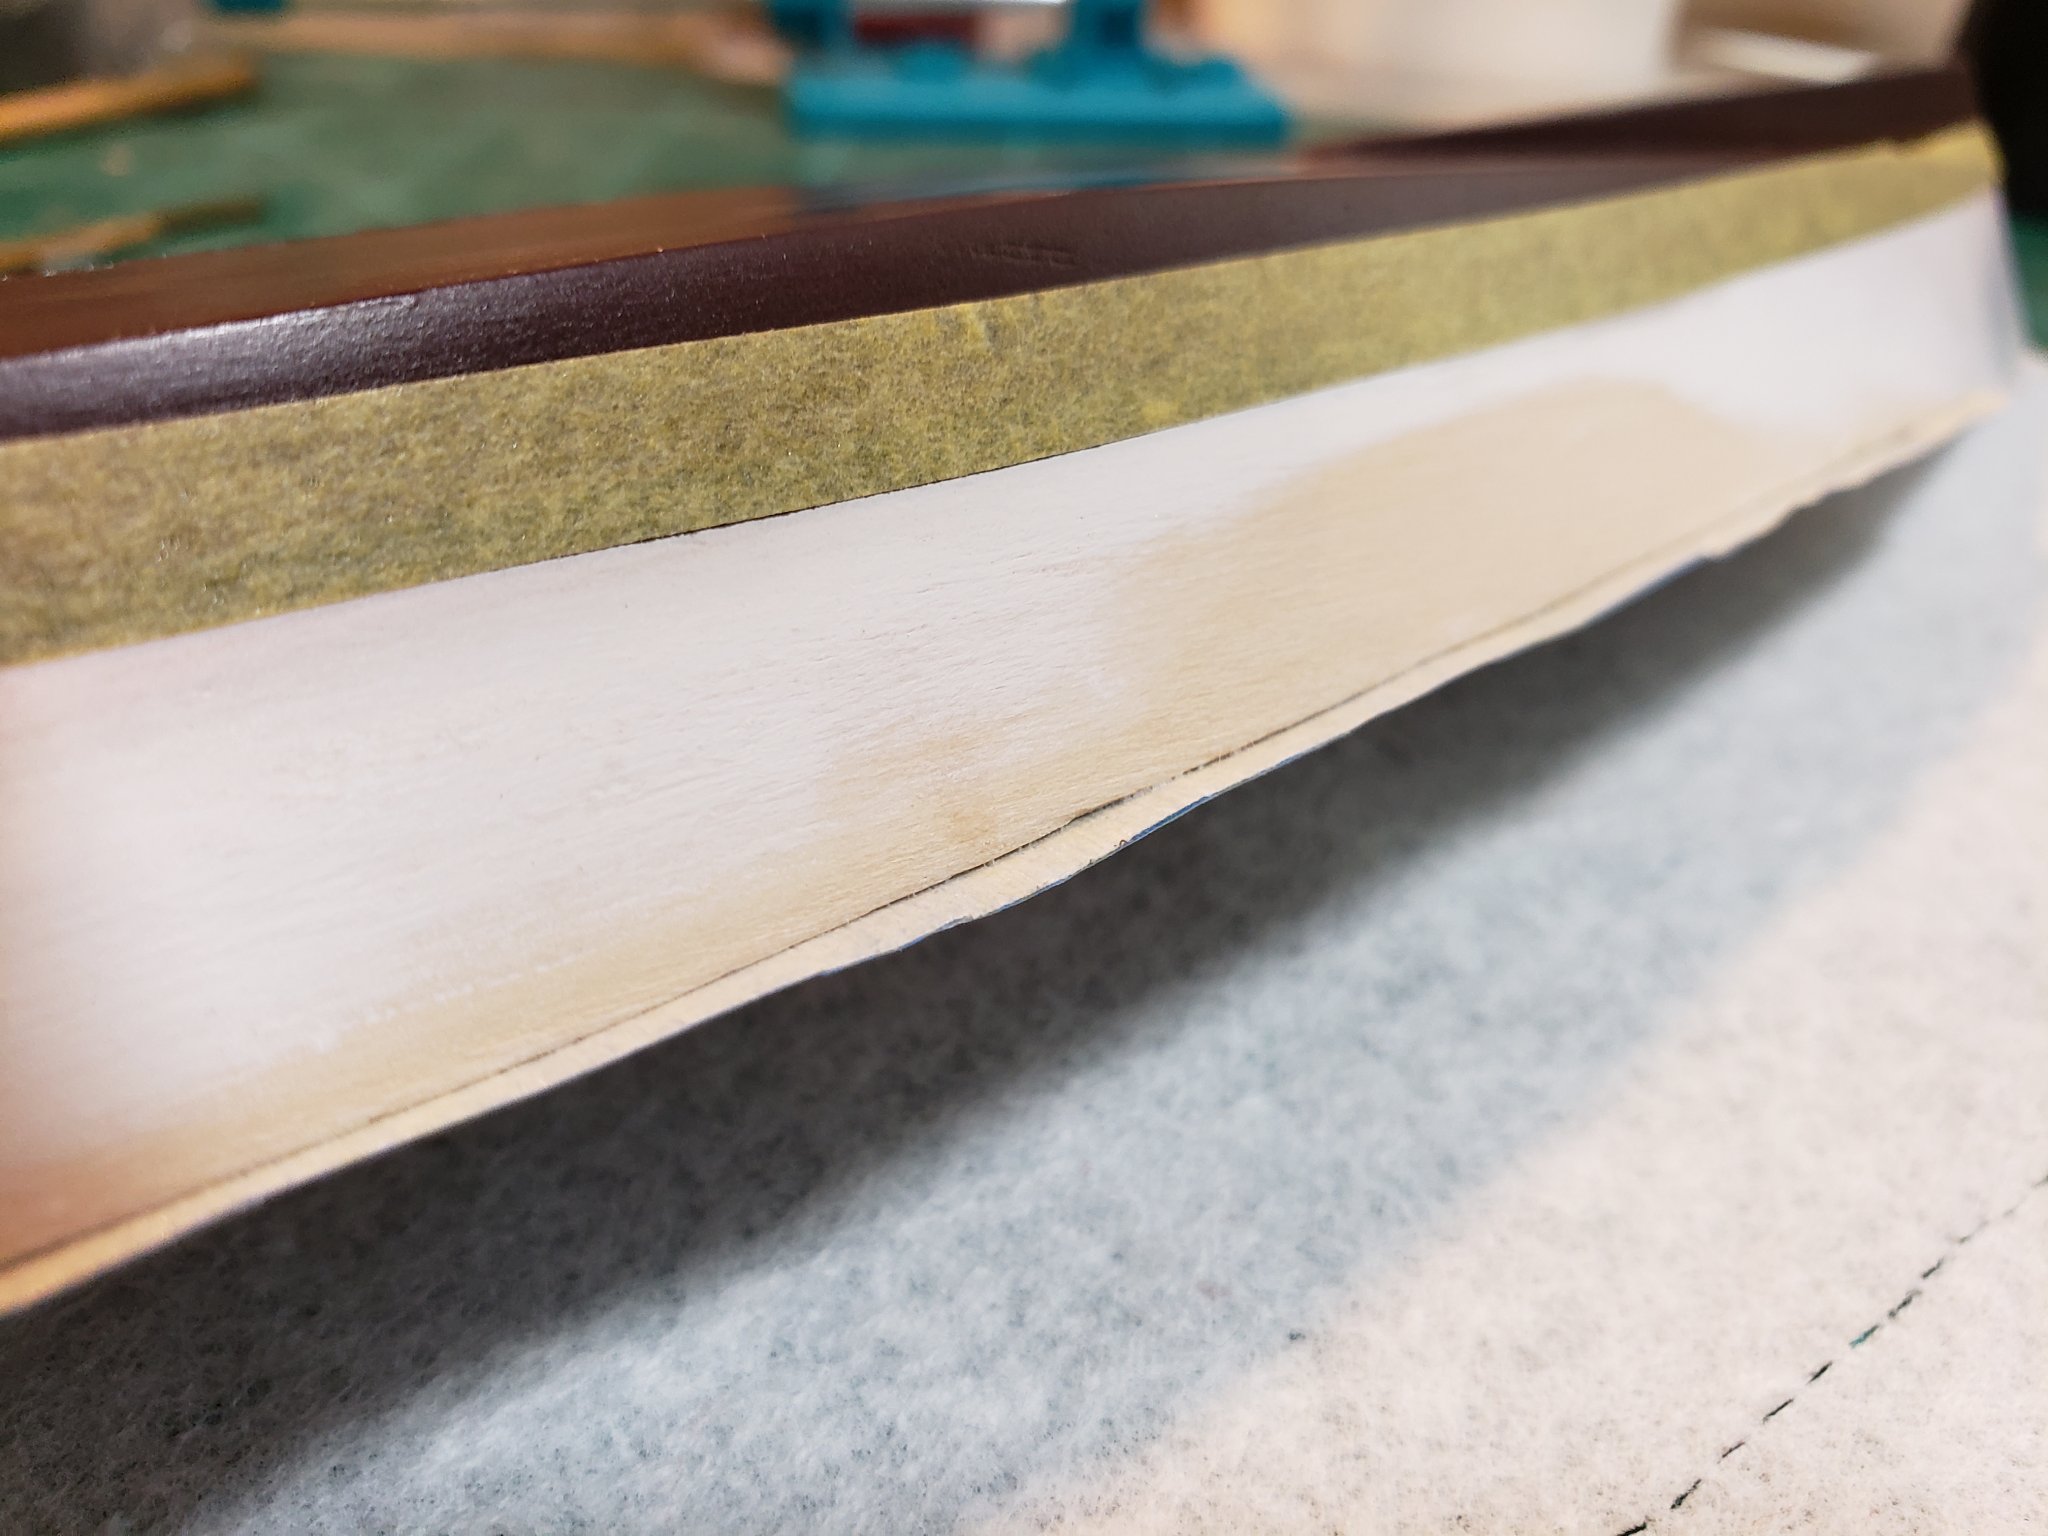
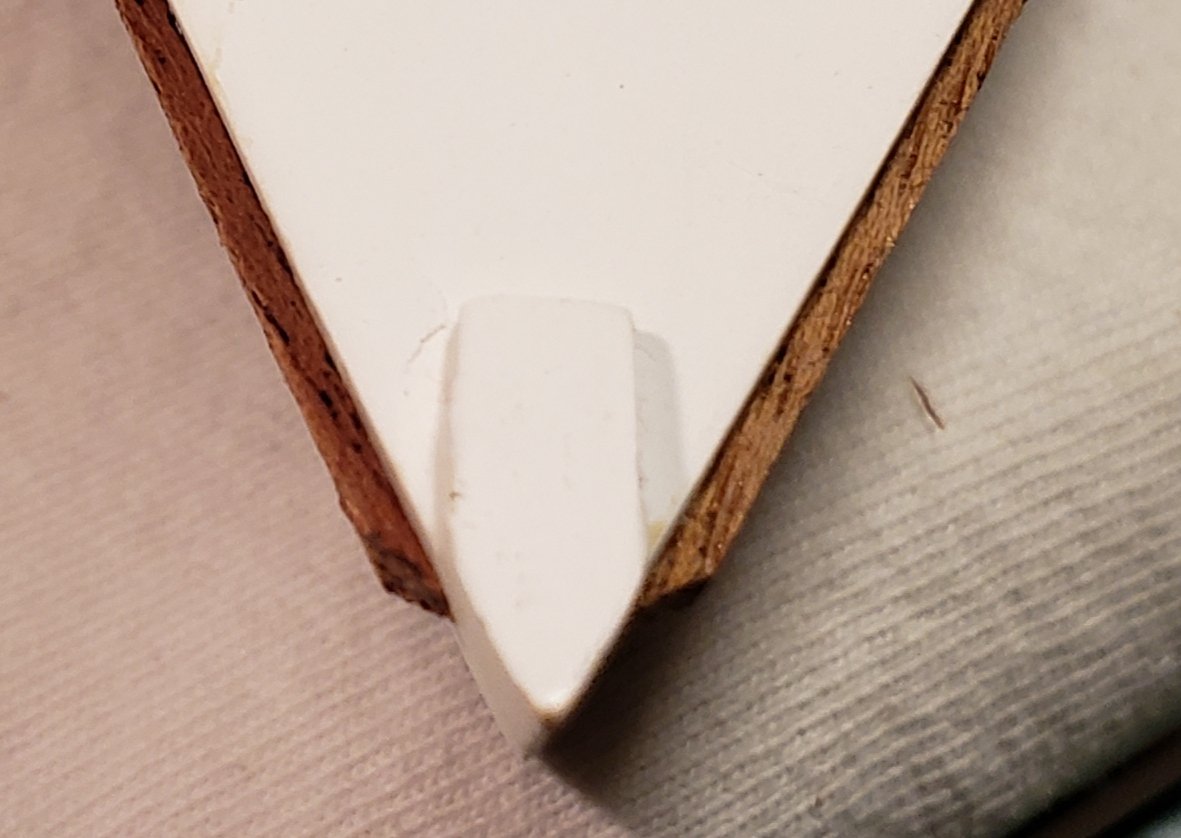
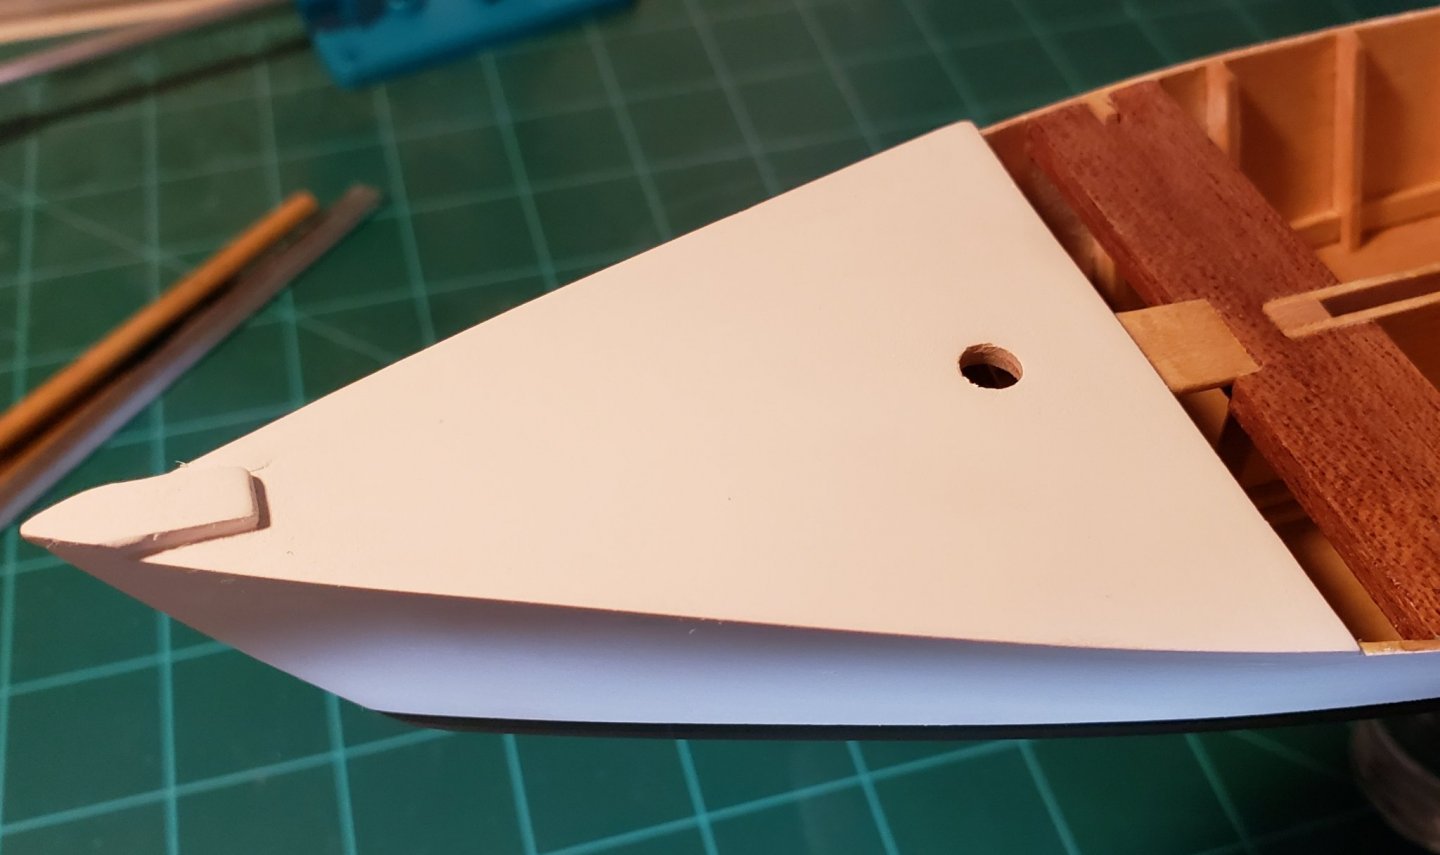
Just noticed this in the above pics. This does not show up this bad when looking at the actual model, but I definitely have to see what's going on here. Looks like peeling paint.
- 120 replies
-
- 3
-

-
- crabbing skiff
- Chesapeake Bay crabbing skiff
- (and 3 more)
-
Thanks for that John. How long did it take to eat all that crab?
- 120 replies
-
- 1
-
-
- crabbing skiff
- Chesapeake Bay crabbing skiff
- (and 3 more)
-
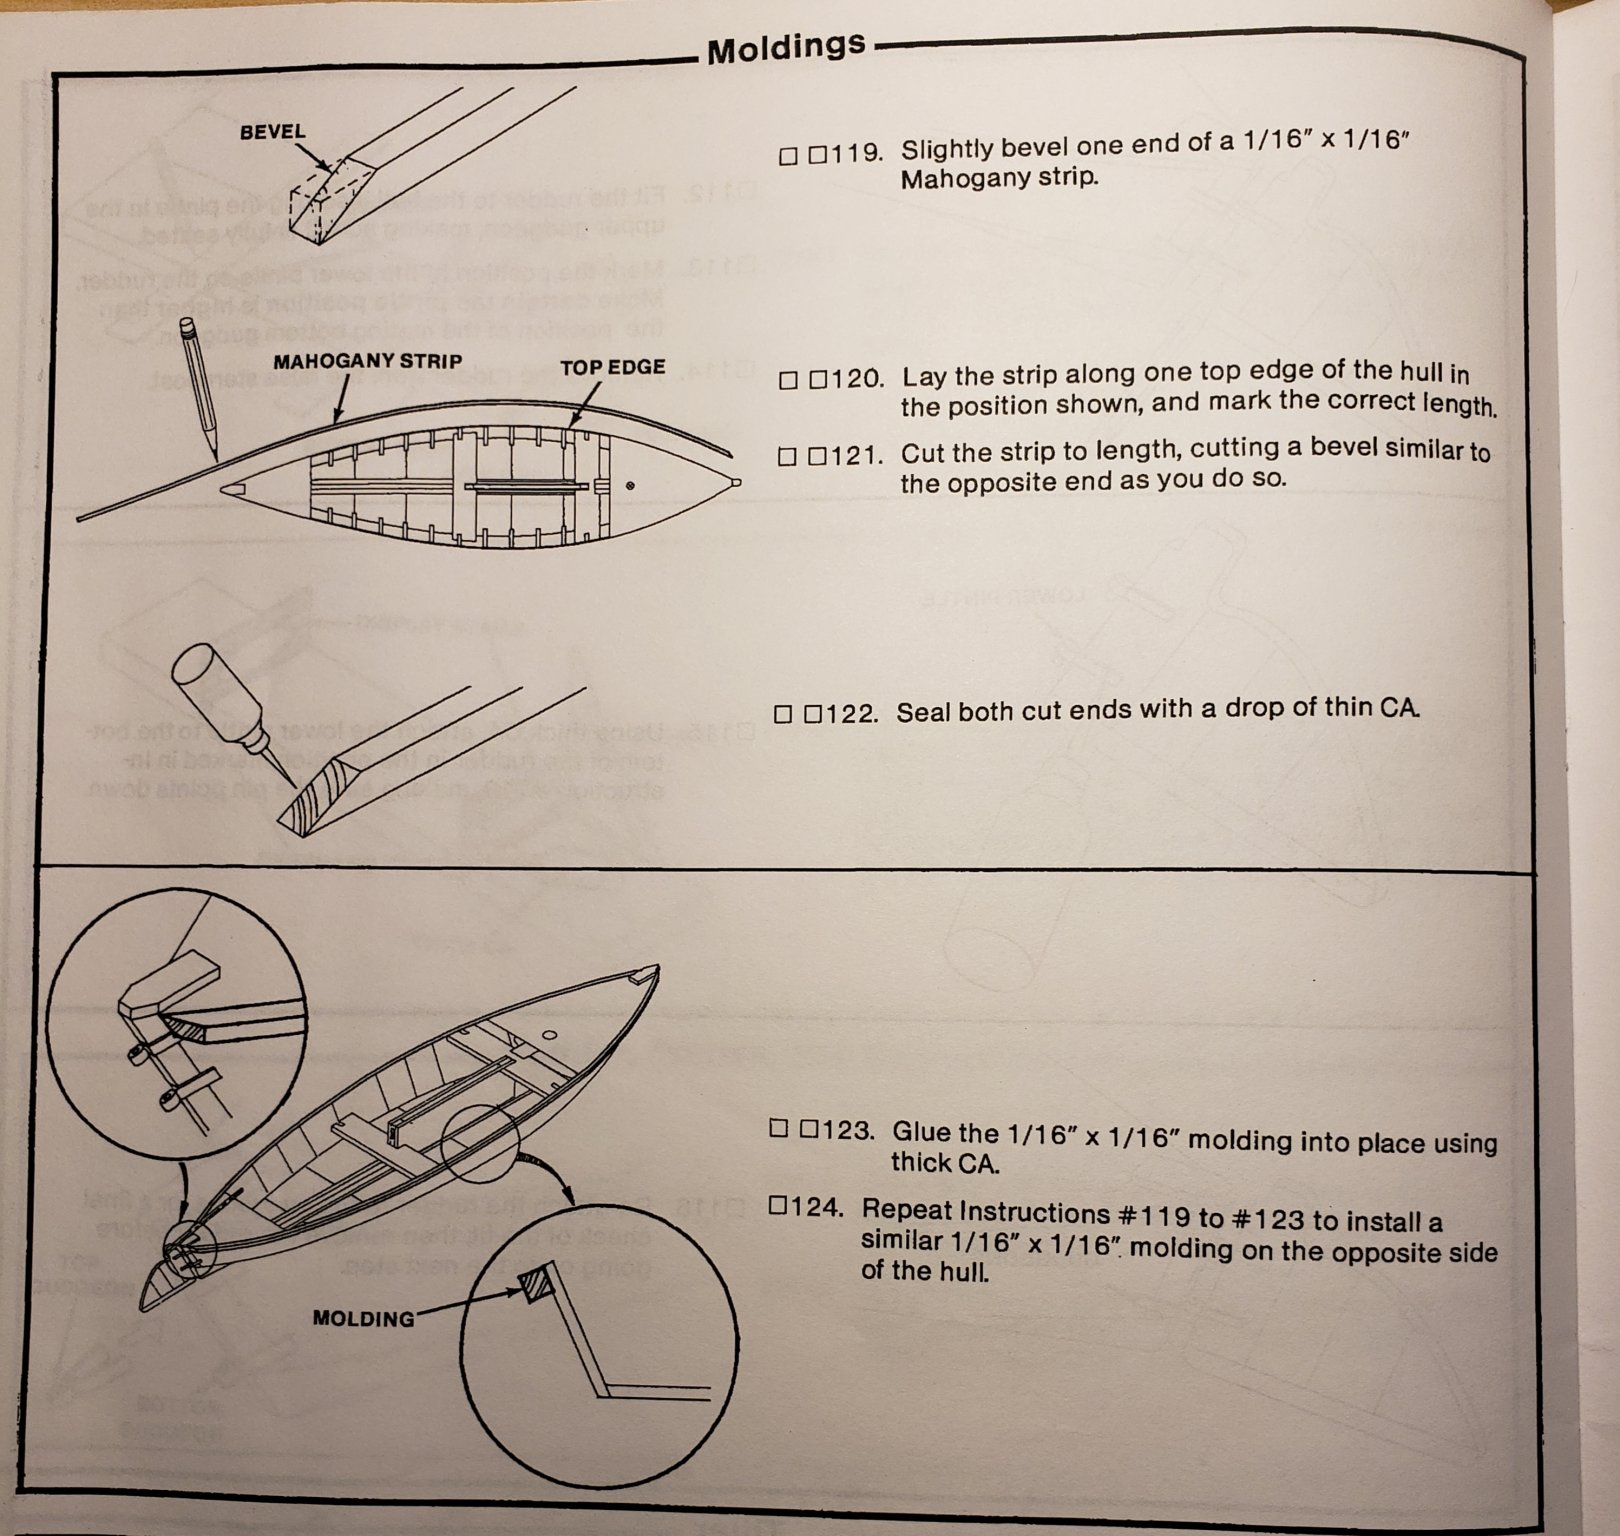
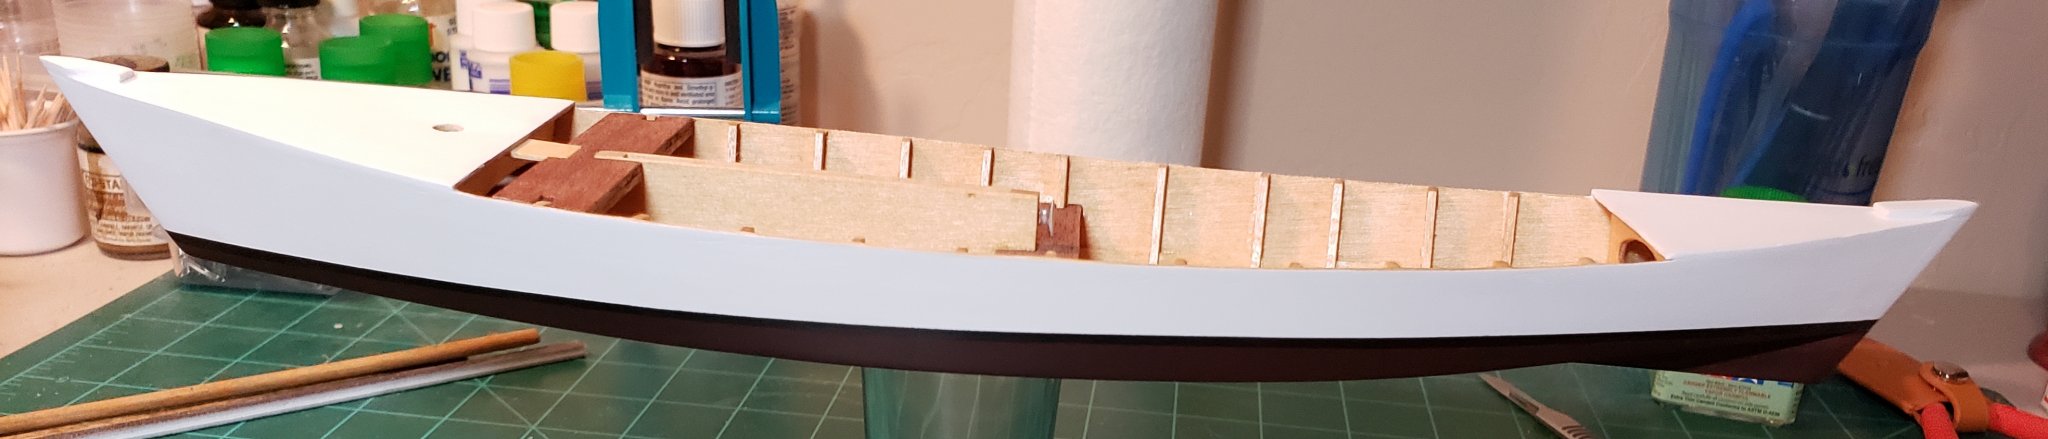
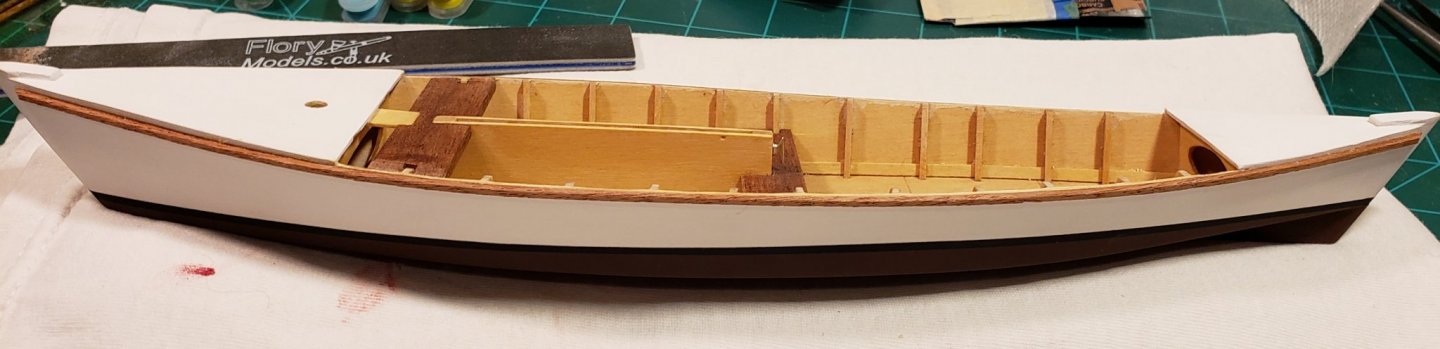
Mahogany trim boards attached.
- 120 replies
-
- 8
-
-
- crabbing skiff
- Chesapeake Bay crabbing skiff
- (and 3 more)
-
The Cutty Sark is my favorite tall ship of all time. I just think her lines are gorgeous! I have this exact same kit but do not currently possess the skill required to do it justice, so I will be watching this build with great interest when you get back to it. I'm hopeful I can get to your February meeting in Surprise and discuss your experiences with and opinions of the kit in more detail. Don San Tan Valley, AZ
-
Quick update: So I was planning on attaching the mahogany trim pieces last night but I learned another tough lesson in being in too much of a hurry... While removing the white acrylic paint from the thin strip along the top of the hull where the trim pieces attach (because I want to use wood glue and not CA), I ended up damaging the paint further down on the hull with the alcohol soaked paper towel I was using. I had masked off the thin strip but did not mask off the lower hull near the waterline. If I had taken the time to do that, I would be updating this log with pictures of the attached strips... instead I'm re-painting the hull (at least one side of it) again. To make matters worse the damage region extended down past the black waterline and into the lower hull color. So I will be repainting that whole side of the boat from the top down. 😡 Lesson learned...again!
- 120 replies
-
- 2
-
-
- crabbing skiff
- Chesapeake Bay crabbing skiff
- (and 3 more)
-
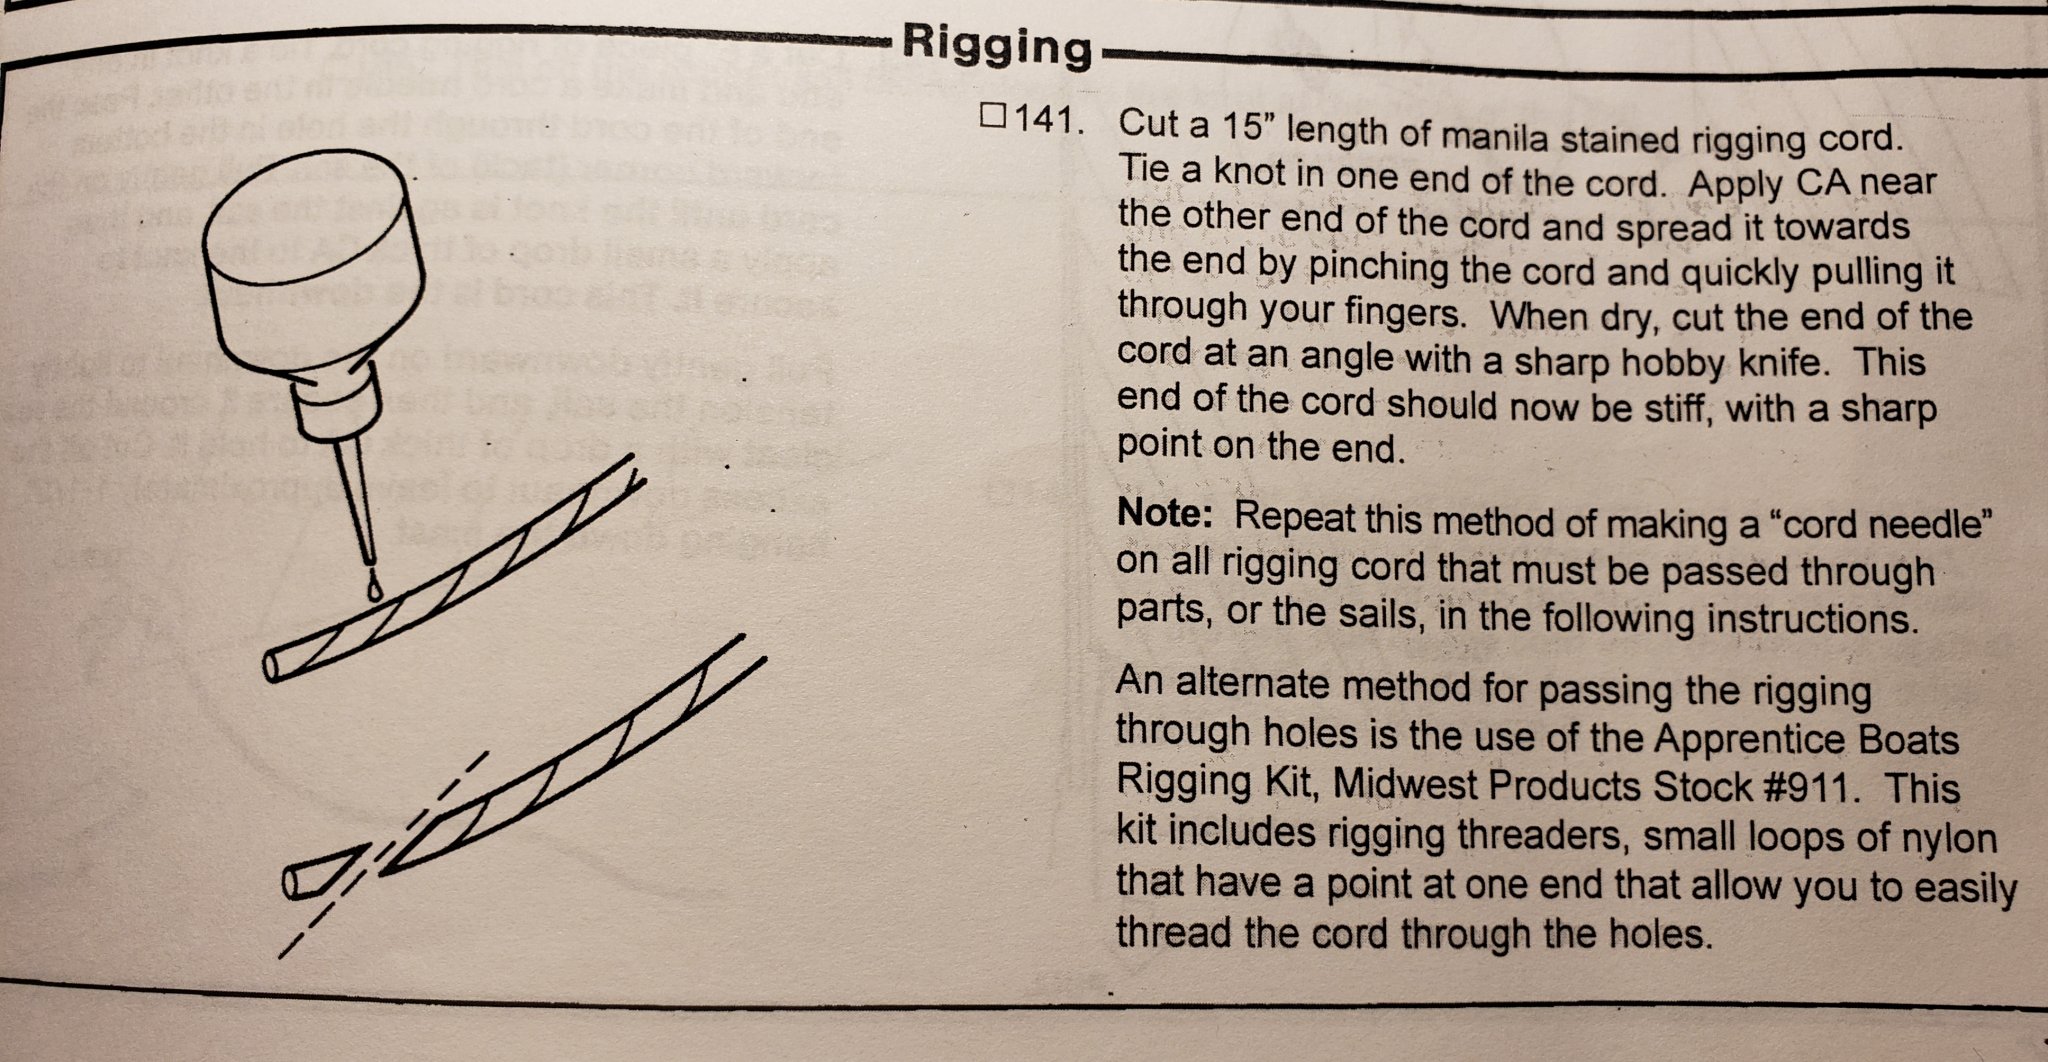
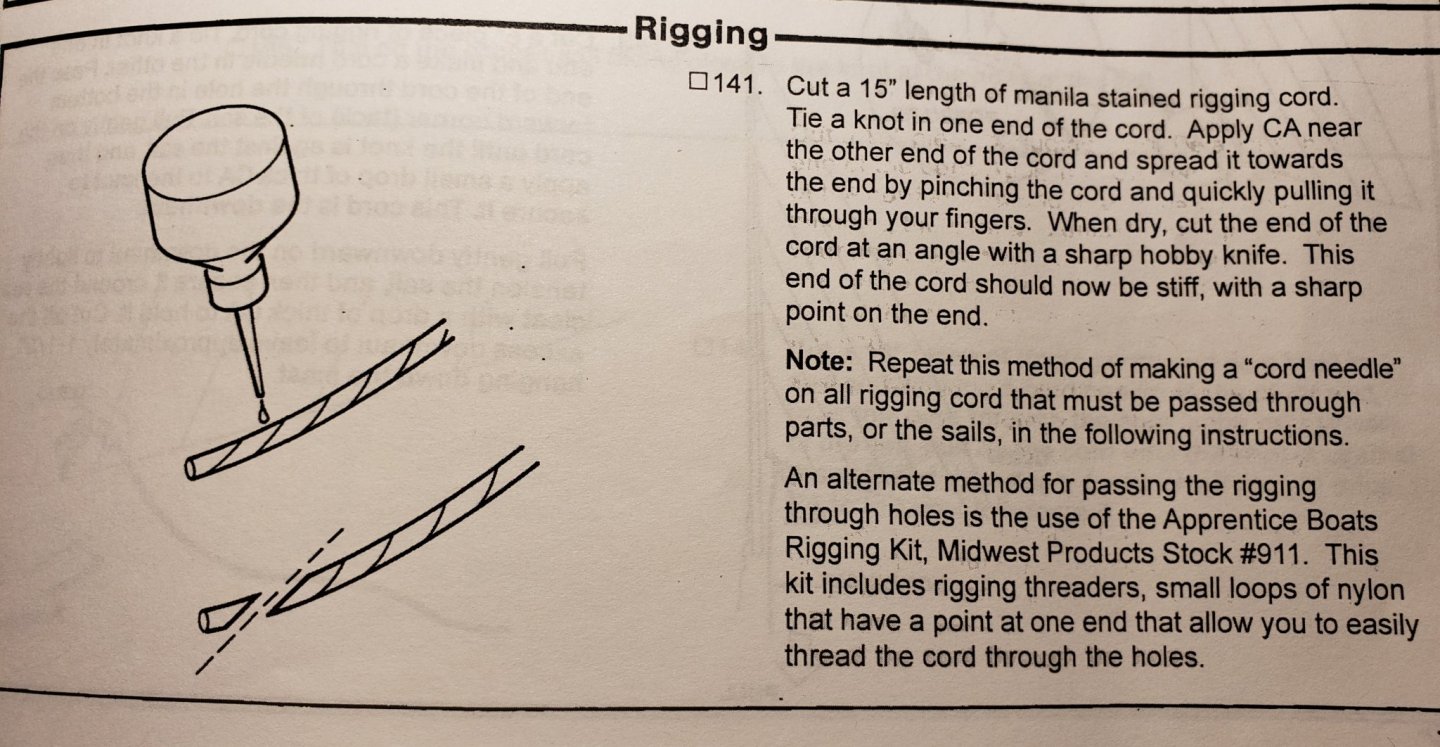
Thank you for the fast reply! OK, I guess that makes sense for dealing with the holes they want you to make in your masts, and also for blocks, deadeyes and other such wood rigging tackle. I guess for those things I was imagining just using the old "spit and thread" method... but this "cord needle" idea would be a lot more practical. This is a good example of why I wanted to start my wood ship modeling hobby with such a small project as this. Rigging model ships just seems like "black magic" to me. I have always been a little (ok...very) intimidated by it and it was the primary reason I chose this particular little boat as my first build as it has just about the simplest rigging plan of all the kits I looked at. All the kits that had at least one sail that is...😉.
- 120 replies
-
- 3
-
-
- crabbing skiff
- Chesapeake Bay crabbing skiff
- (and 3 more)
-
QUESTION: Is this "cord needle" method a standard practice with rigging wood ship models? Is there a reason not to just use a sewing needle? Inquiring minds want to know! 🤔
- 120 replies
-
- 3
-
-
- crabbing skiff
- Chesapeake Bay crabbing skiff
- (and 3 more)
-
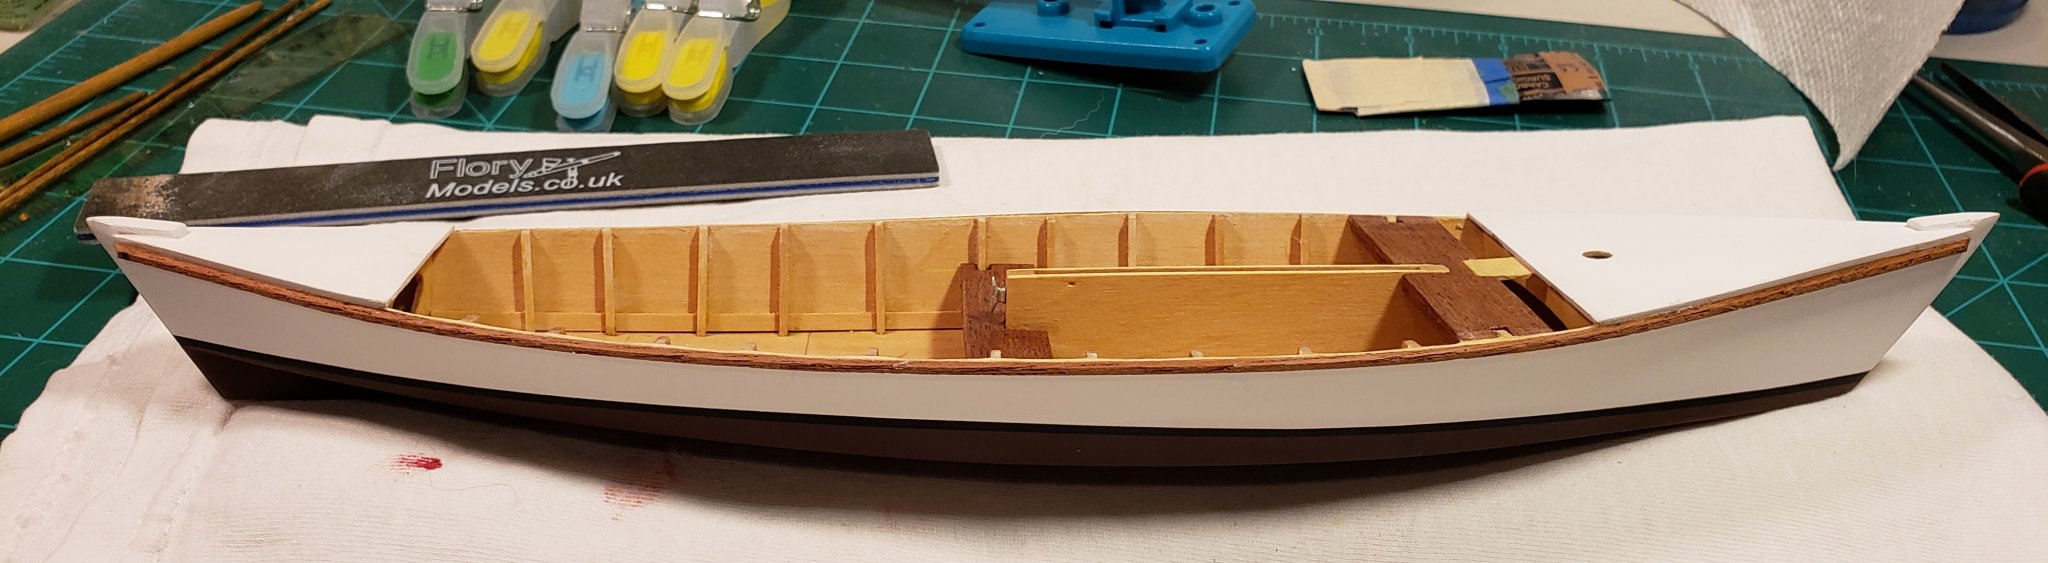
Soaked mahogany trim rails in warm water and set them on a jig to give them some shape. Will hopefully make attaching them a little easier. The instructions say to use CA glue for this step, but I don't want to risk having it soak into and stain the mahogany so I will be using wood glue.


- 120 replies
-
- 5
-
-
- crabbing skiff
- Chesapeake Bay crabbing skiff
- (and 3 more)
-
I actually phoned Model Space and asked them this very question because it seems quite obvious that what they offer, at more than twice the price, is a re-packaging of the AL kit (perhaps even a Chinese knock-off although I have no evidence to support that and am not making that accusation). At any rate, try as I might, I could not get anyone to tell me whether or not there were any upgraded components or additional details on the Model Space kit to justify the additional cost. My takeaway is that the Model Space kit is simply the AL kit and a VERY expensive practicum. And even that can be downloaded for free on their UK site.
-
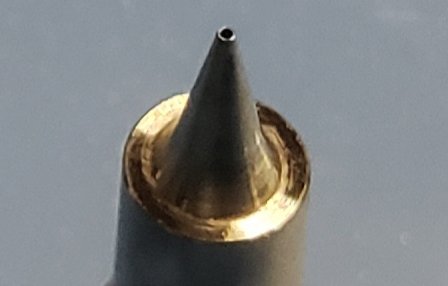
I was able to get my H&S airbrush to work after a complete tear down and cleaning. I found out that it came with the 0.2mm nozzel (shown below under hi magnification) installed which is probably too small for fast drying acrylic paints. I swapped it out for the 0.4mm nozzel and everything seemed to work fine. I'm pretty sure what was happening was that the paint was immediately drying at the tip and clogging the tiny nozzle. Even the 0.4mm tip would spit if I didn't cut to air at the end of each paint stroke to clear the tip. In the future I will probably have to use a little retarder and shoot at a lower psi. I plan to do a little experimenting before my next model. Fortunately, with wooden ship modeling painting (while important) isn't a huge part of the hobby (like it is with car modeling for example).
- 120 replies
-
- 3
-
-
- crabbing skiff
- Chesapeake Bay crabbing skiff
- (and 3 more)
-
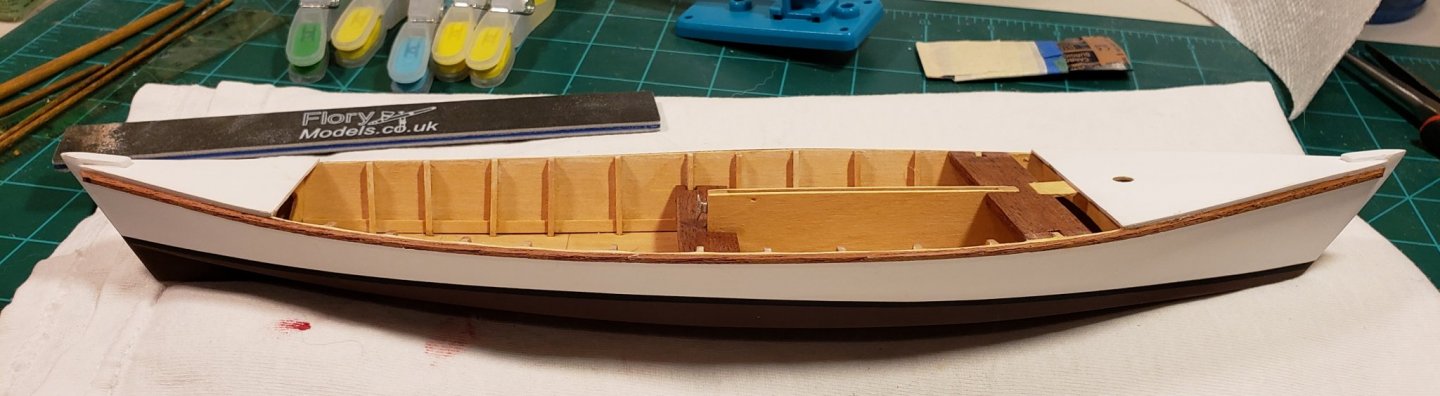
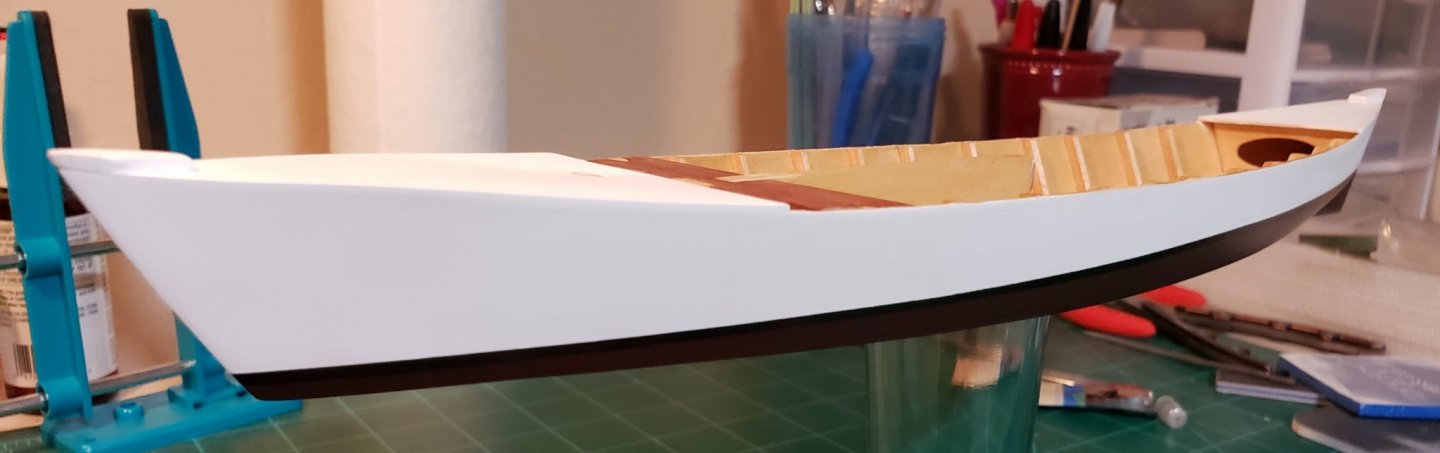
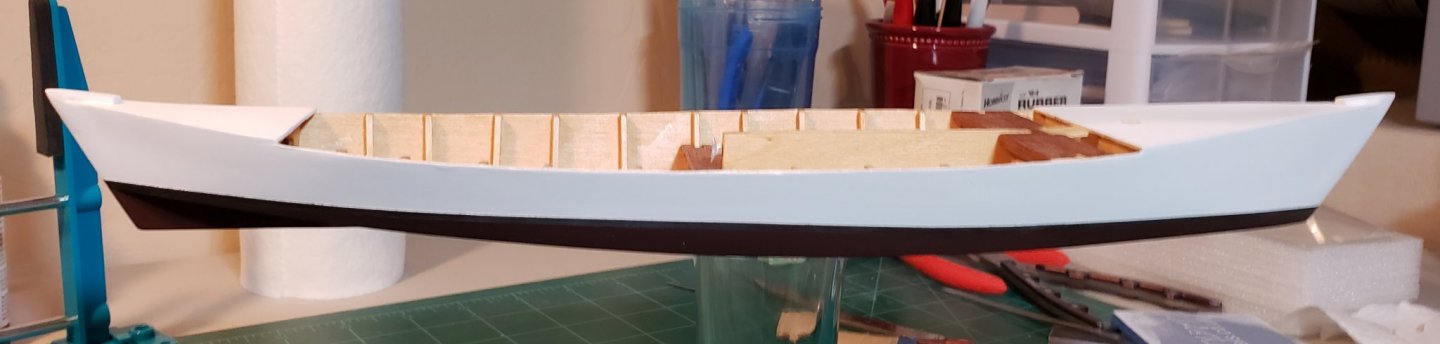
Paint touch-up completed successfully. It actually looks a little better than it did before the "incident" 🙂 . Now it's on to completing the hull which is basically going to just be adding the trim boards along both sides and getting the rudder and tiller attached.

- 120 replies
-
- 8
-
-
- crabbing skiff
- Chesapeake Bay crabbing skiff
- (and 3 more)
-
Got the first coat of Tamiya flat white on the touch up areas and it will need at least one more coat as there was still quite a lot of wood grain visible on the side that I sanded the paint specks off. I was a little disappointed in that I was hoping to make use of my new Harder & Steenbeck Infinity airbrush for this exercise and was greeted with spitting and a bubbling paint cup. Not sure what the issue is since it is a brand new $300 airbrush, but it made quite a mess in my spray booth. I'm just not having good luck with painting lately ☹️. Fortunately I had not moved the Skiff over to the booth yet so it was safely out of range of the spitting. I have a few other airbrushes and one of my old standbys was employed to safely get that first coat applied. The H&S is in a torn down state over on my other work area and I'll be keen to see what's going on with it as I was counting on that being my "go to" airbrush for acrylics.
- 120 replies
-
- 3
-
-
- crabbing skiff
- Chesapeake Bay crabbing skiff
- (and 3 more)
-
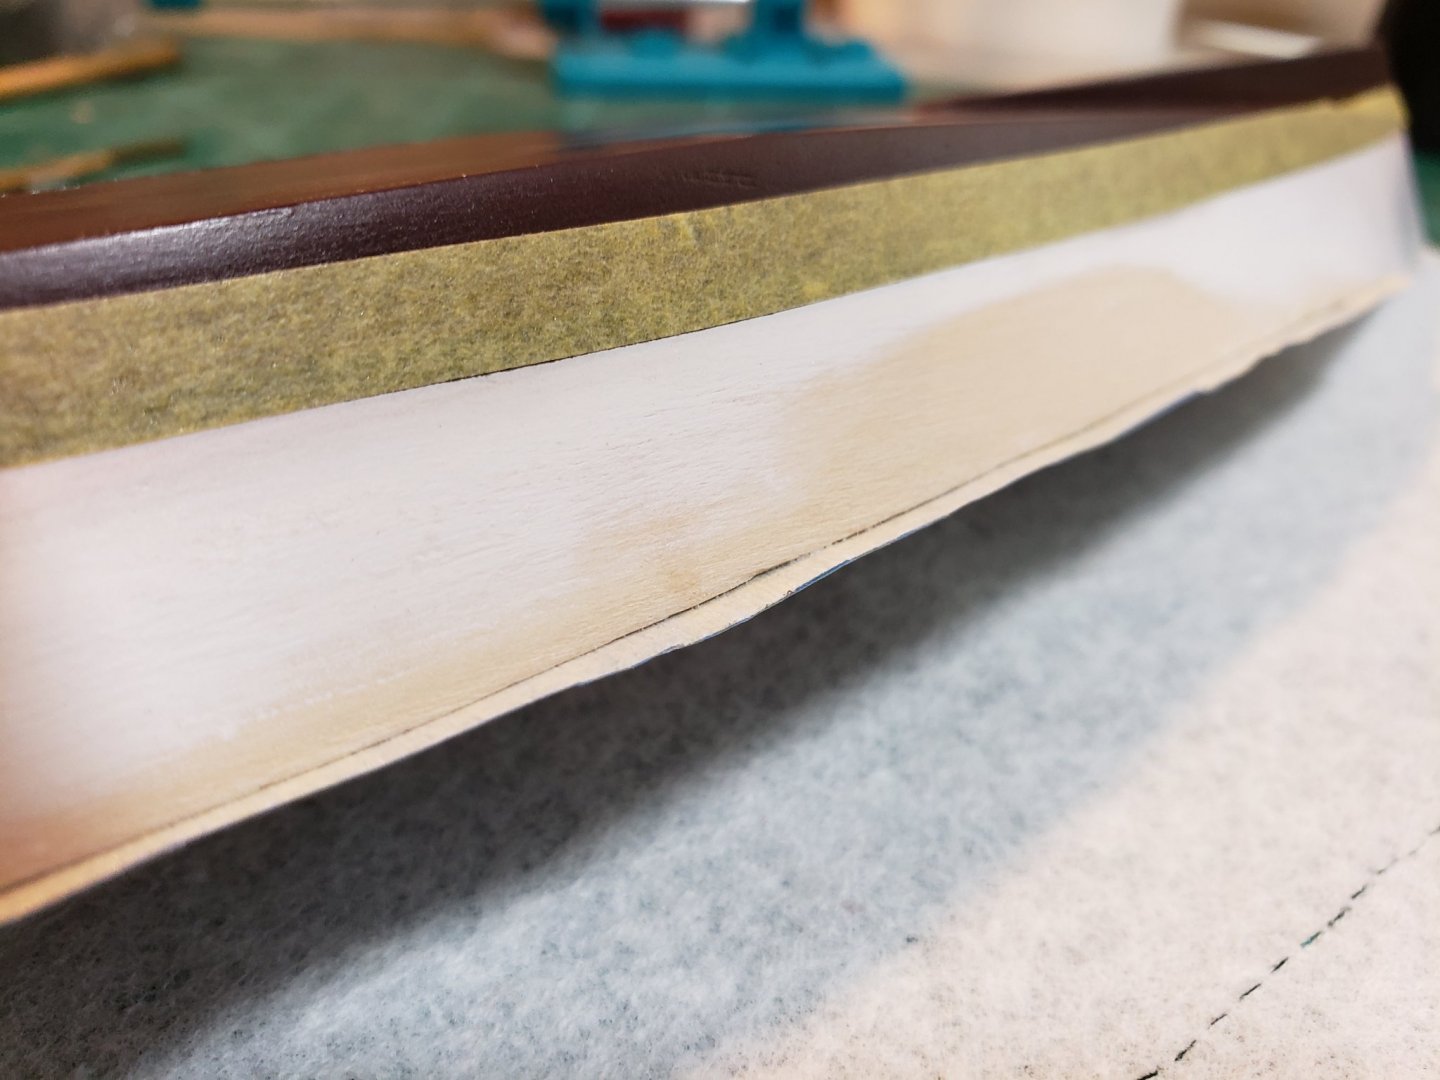
There is no better tape I'm aware of for masking hull lines than Tamiya masking tape. It’s flexible around complex shapes and provides the perfect amount of tack that gives you a tight seal without ripping up the paint off your model. A little pricey but definitely worth it.

- 120 replies
-
- 4
-
-
- crabbing skiff
- Chesapeake Bay crabbing skiff
- (and 3 more)
-
Touching up hull from exploding metallic blue spray paint accident. Paint specs have been sanded off in this pic.
- 120 replies
-
- 2
-
-
- crabbing skiff
- Chesapeake Bay crabbing skiff
- (and 3 more)
-
How is the size of a single block measured?
DonInAZ replied to DonInAZ's topic in Masting, rigging and sails
Model Expo only gives a single dimension in their kit instructions and on their website. -
Okay it is on the bench and ready for a paint touch up. Progress coming soon.
- 120 replies
-
- 2
-
-
- crabbing skiff
- Chesapeake Bay crabbing skiff
- (and 3 more)
-
Noob question. If I'm ordering a replacement block (single in this case), how do I measure it to make sure I'm ordering the right size? I see 3mm, 4mm, 5mm, etc as far as available sizes go, but I don't know what that dimension represents. Most blocks look to have an oblong sort of shape. Is the dimension the length? Width? Or is it the thickness? Thanks in advance for any help. Don
-
LOL! My ships aren't the models I wan't to sell... I have a lot of older plastic kits (airliners, sci-fi, military, cars, etc...) that I've had for a long time and don't really have any plans to build. So, it's those I'm selling to the hobby store. I'm keeping my ship models and my real space models as I definitely want to build these someday.
- 120 replies
-
- 2
-
-
- crabbing skiff
- Chesapeake Bay crabbing skiff
- (and 3 more)
-
New to ship modelling? But what do you build first?
DonInAZ replied to MSW's topic in Wood ship model kits
Was surprised not to see the Model Shipways Phantom on the list of beginners kits as it is so heavily promoted (or at least it used to be) as a good model to start with. It's also still readily available. In addition to losing Artesenia Latina, Midwest no longer makes model boat kits so some of those are getting harder to find. -
I started this kit many, many years ago (sometime in the mid 1980s if I remember right) and I keep that uncompleted first attempt as a reminder to slow down and not rush through steps. It actually doesn't look terrible but it's a far cry from what you and others have done with your kits. I bought a second kit and am hoping to have another go at it sometime in the not too distant future. For now I'm cutting my wooden ship modeling teeth on a couple of the smaller Midwest kits and to be honest, I'm having trouble even getting one of those tiny projects across the finish line. Anyway, you have the right attitude and seem to have the skills and resources to do a great job on the Phantom. Looking forward to your next updates.
-
Yes, I'm aware that Model Space has a US company. The whole point of my post at the time was that the Model Space HMS Surprise is basically the AL kit (which could be a had by itself for around $600 online when it was in stock). The only other thing they are offering beyond the AL kit for $1500 is what amounts to a VERY expensive practicum that you can download for free from the UK site. I inquired by phone to Model Space whether the kit included upgraded components or some other features that would justify the cost and they would not even confirm that it was the AL kit (which it obviously is)... so I chose to purchase the AL kit and download the free pdf files (which are all still available on the UK site).
-
Hi David, I just wanted to ask what size block you used to substitute for the plastic kit version? Thanks, Don
- 61 replies
-
- 1
-
-
- crabbing skiff
- finished
- (and 2 more)
-
Thanks for the reply Eric! I had never really considered using gel pens. I guess I figured that the ink would seep through the fibers in the cloth and make a mess but gel pens would be much more resistant to that. Plus it looks like you have saturated (sealed) your sail cloth with the polyurethane in the process of shaping them. BTW I hadn't thought about trying to shape the sail to make it look like its filled with wind, but I did coat my sails with clear aircraft dope (similar to polyurethane) to flatten it and prevent fraying. Now I want to try this "shaping" technique with my crabbing skiff. I also have the Midwest Flattie kit you are building here and will be referring back to this blog when I start that project. These Midwest kits are really fun and it's too bad that they have been discontinued. I was luck to have purchased several of them a few years ago. Anyway just wanted to say GREAT JOB! and thanks for sharing.
- 72 replies
-
- 2
-
-
- Chesapeake Bay Flattie
- Midwest Products
- (and 1 more)