G.L.
-
Posts
1,553 -
Joined
-
Last visited
Content Type
Profiles
Forums
Gallery
Events
Everything posted by G.L.
-
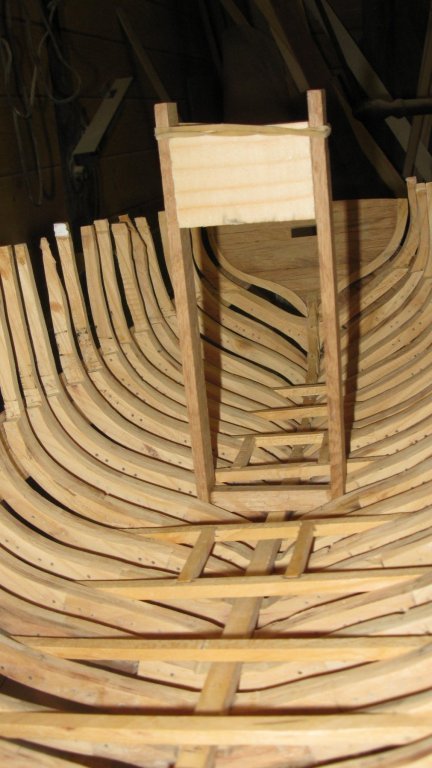
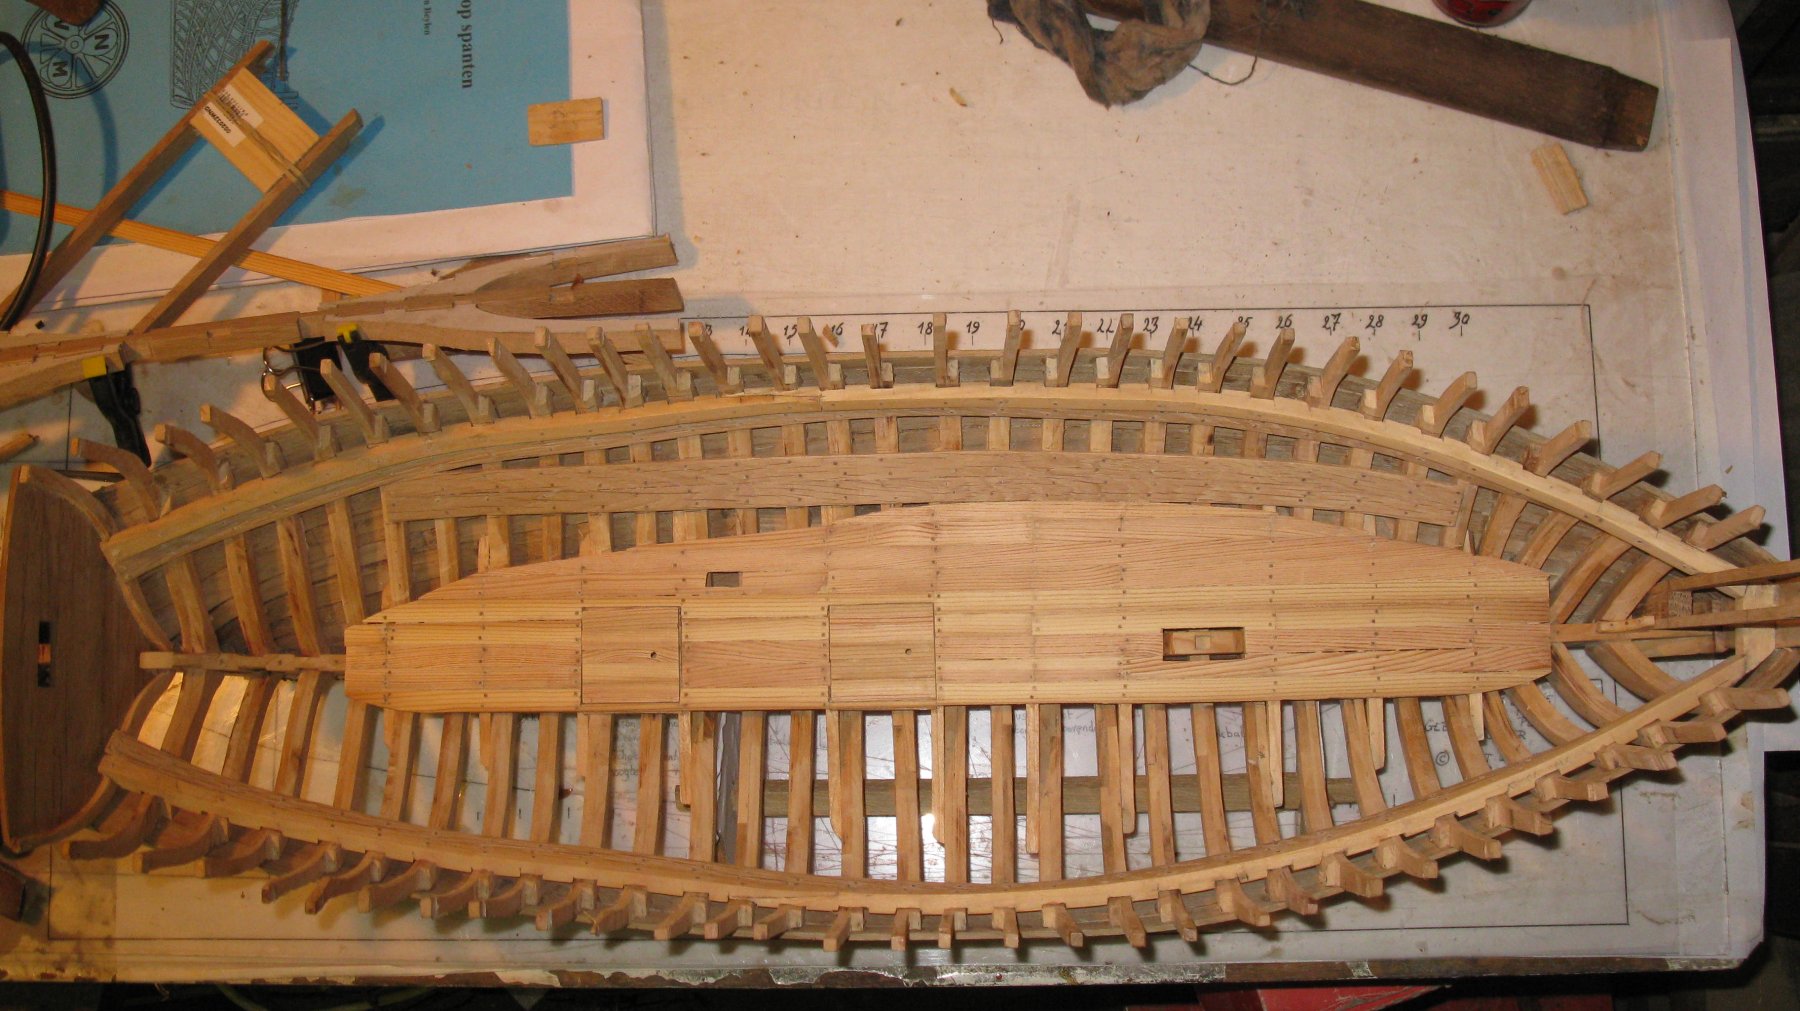
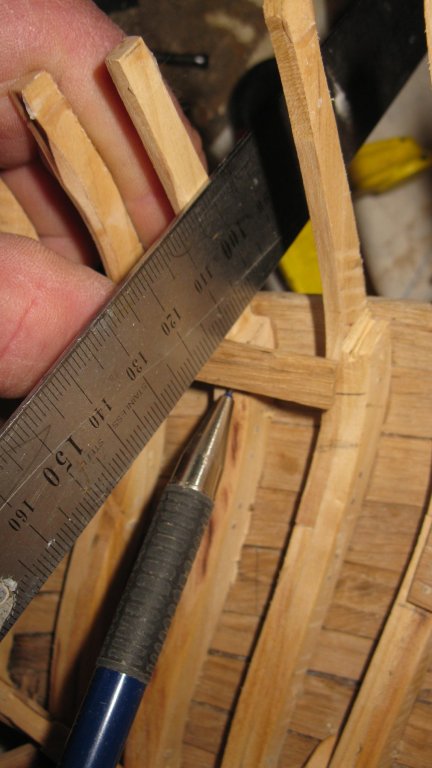
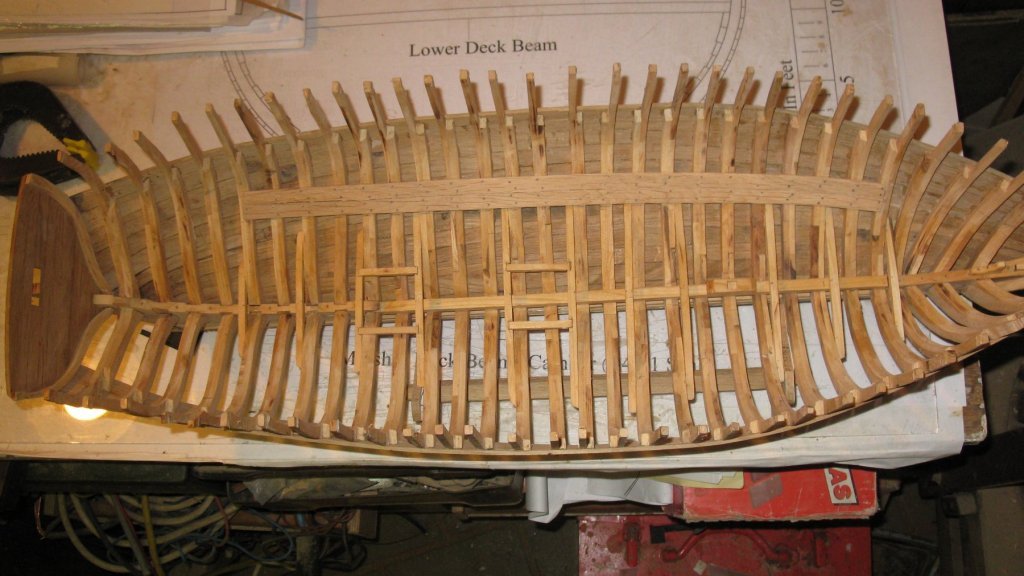
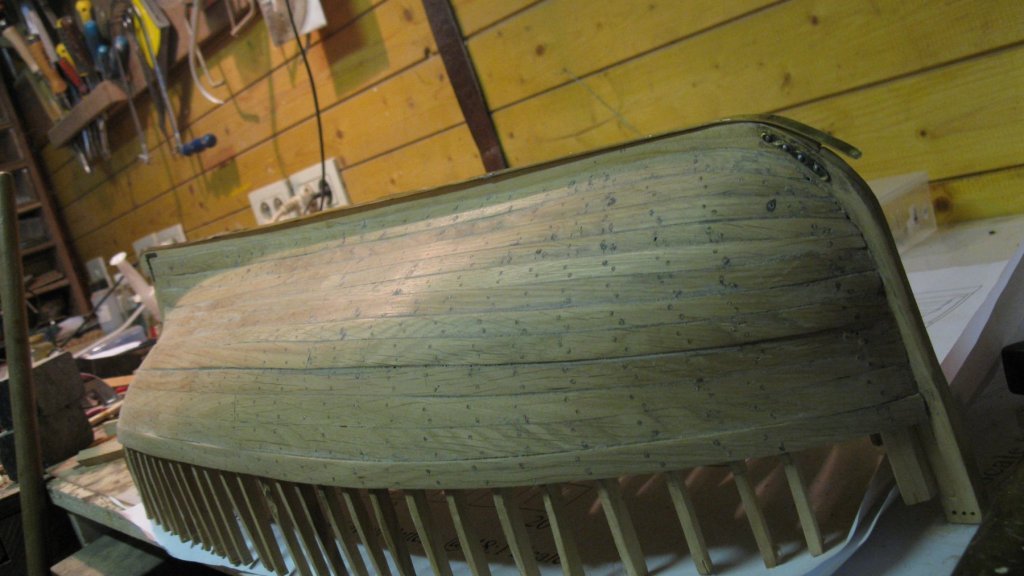
 8.17 Now the beam shelves and the lower beams are laid, I make the deck beams. There are 20 deck beams. I make paper templates of them, glue them on 6 mm thick planks and saw them with the hand fret saw. Afterwards I sand them with the band sander
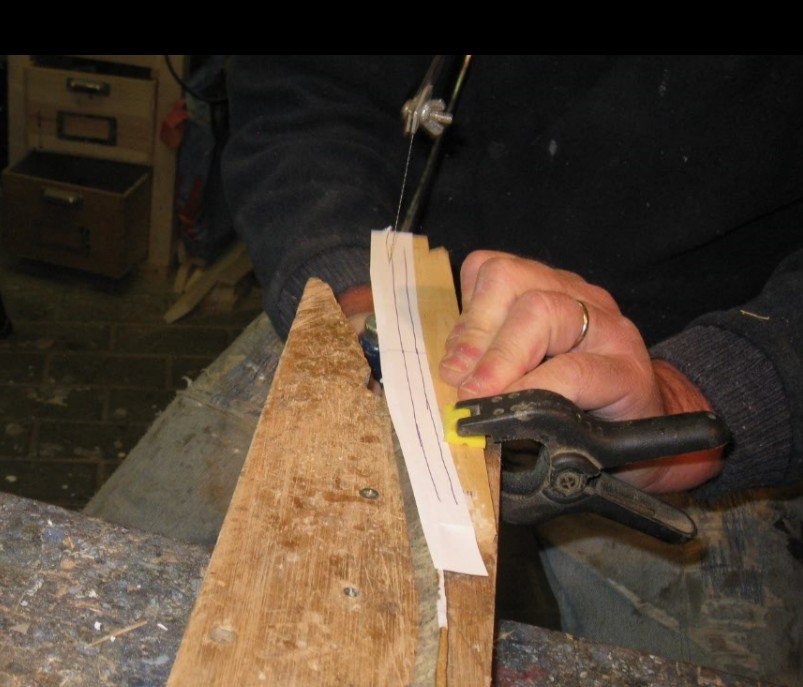


-
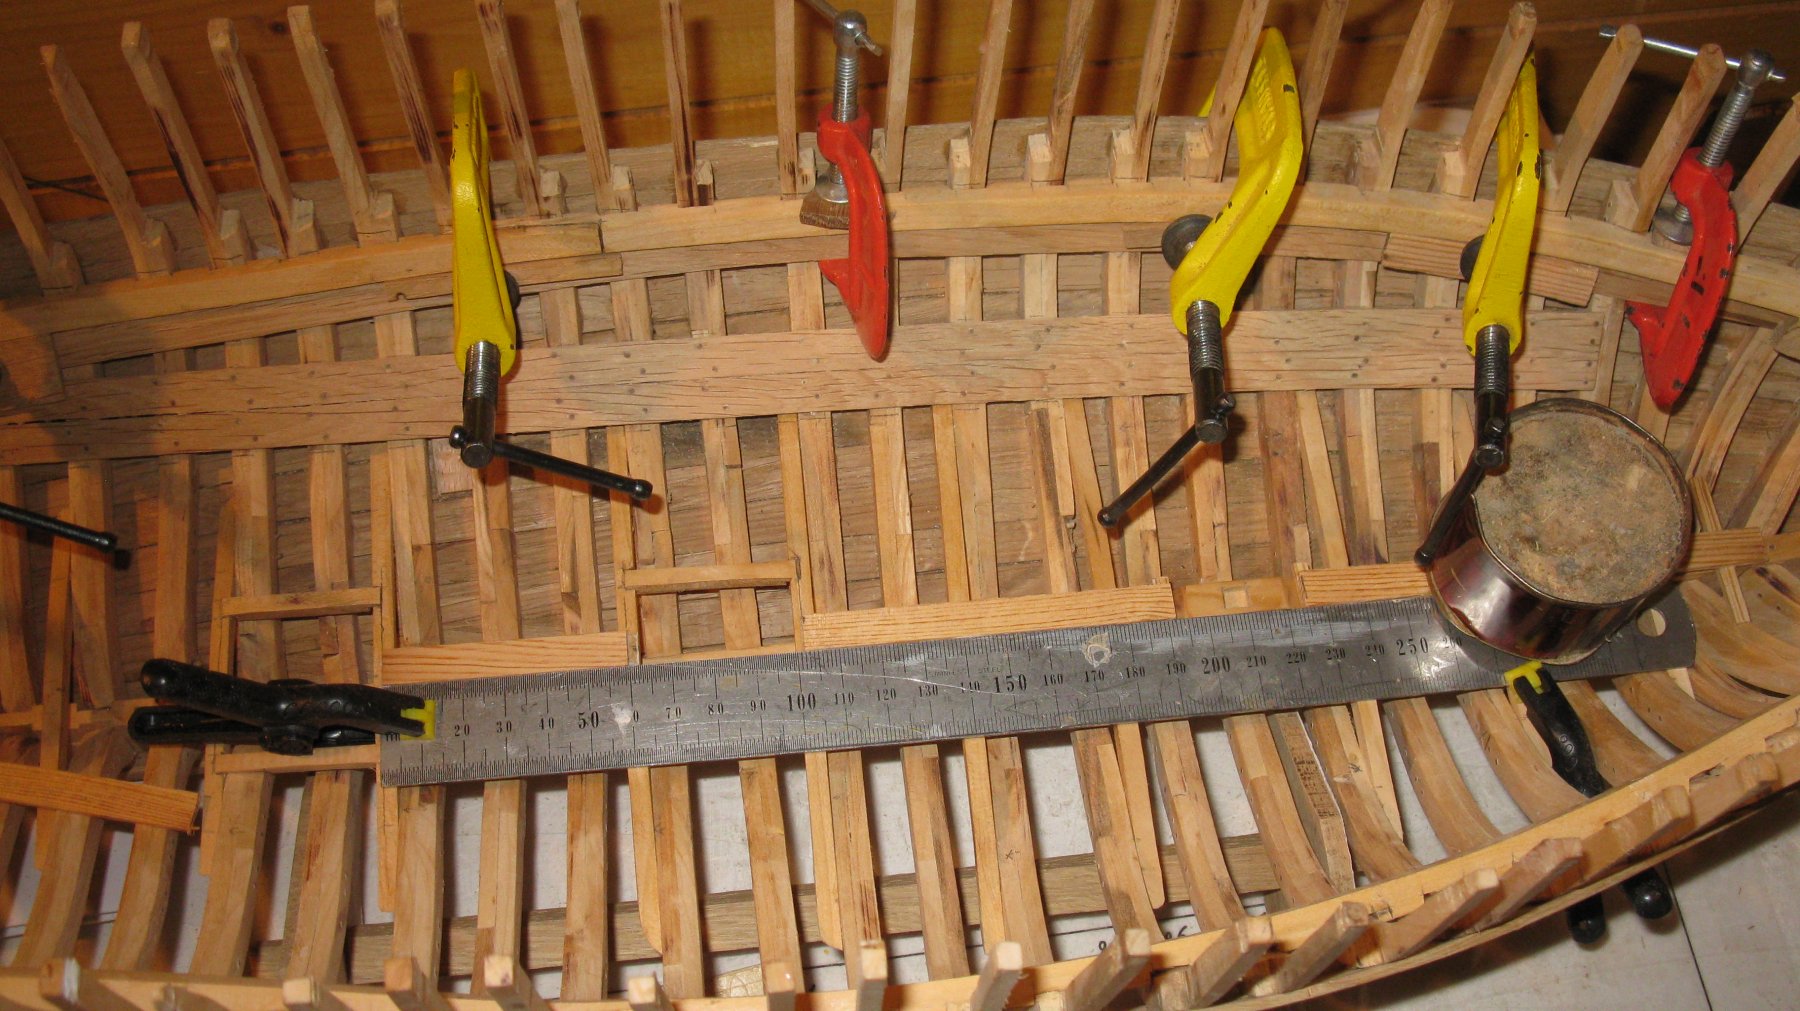
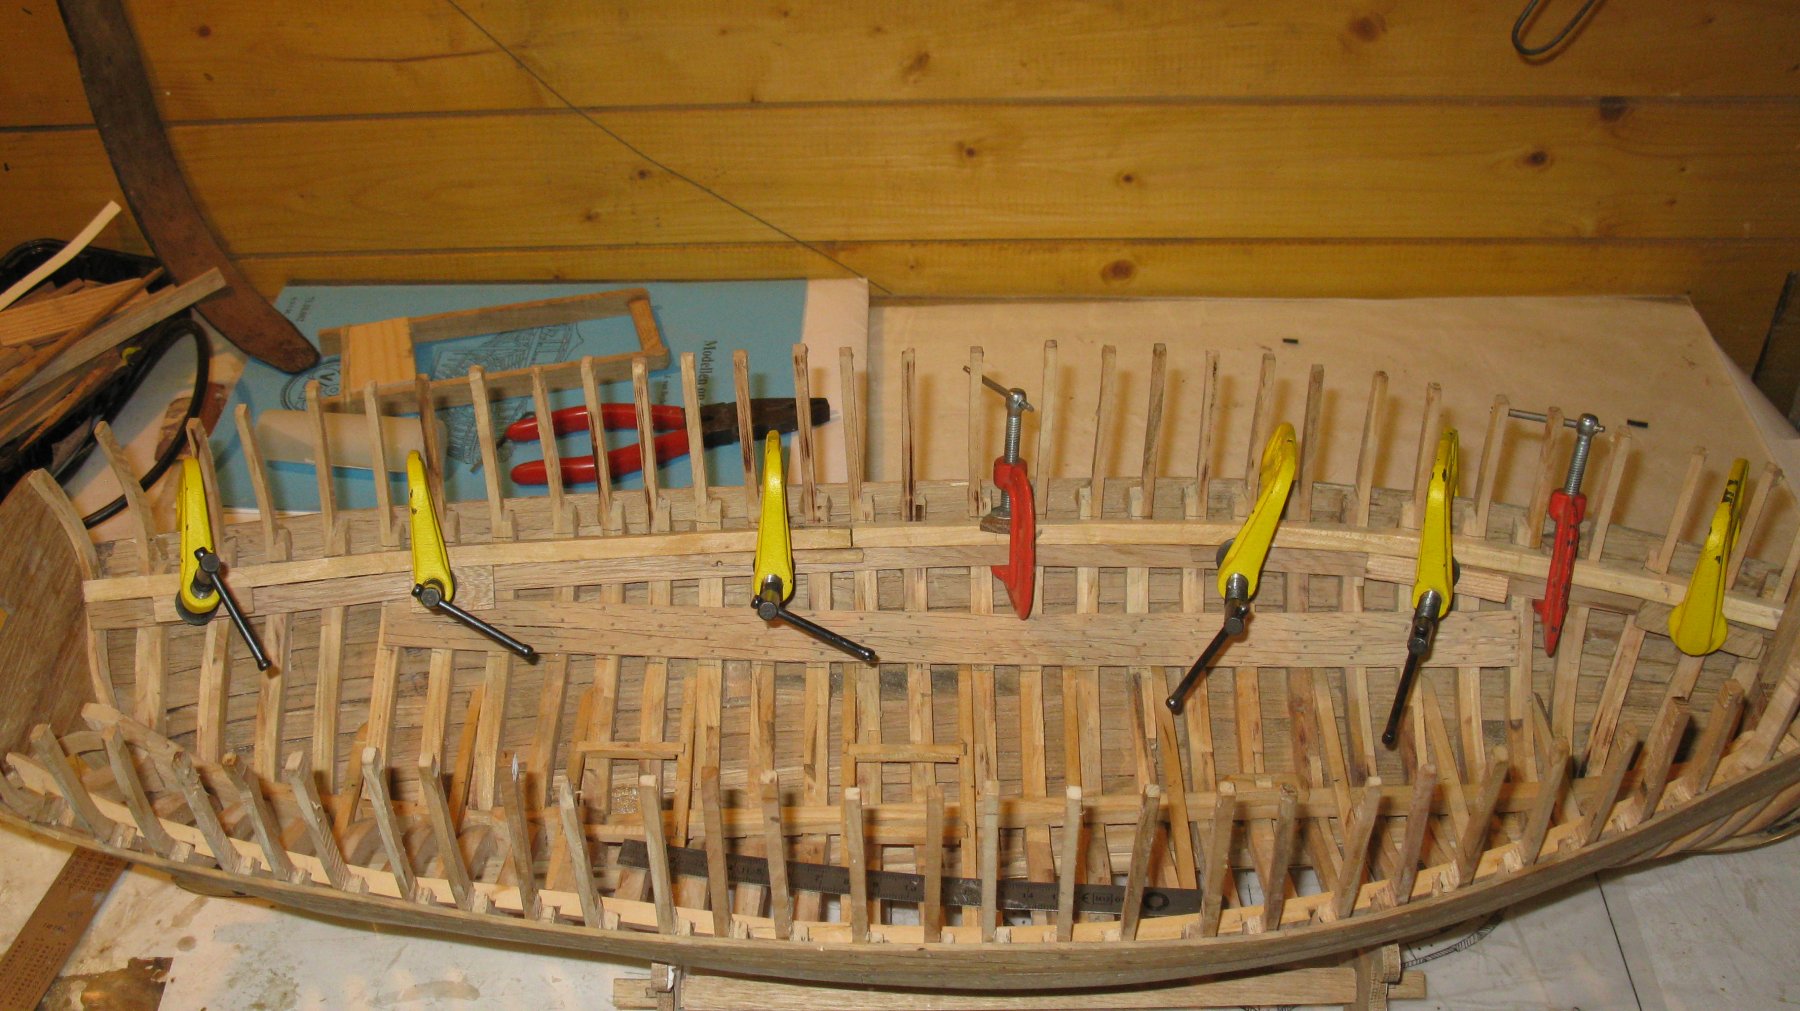
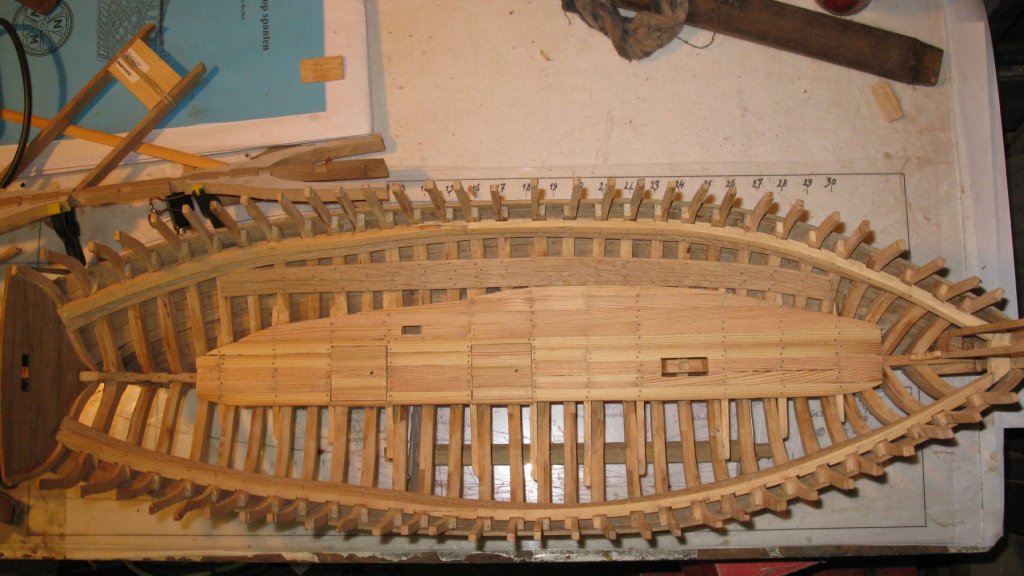
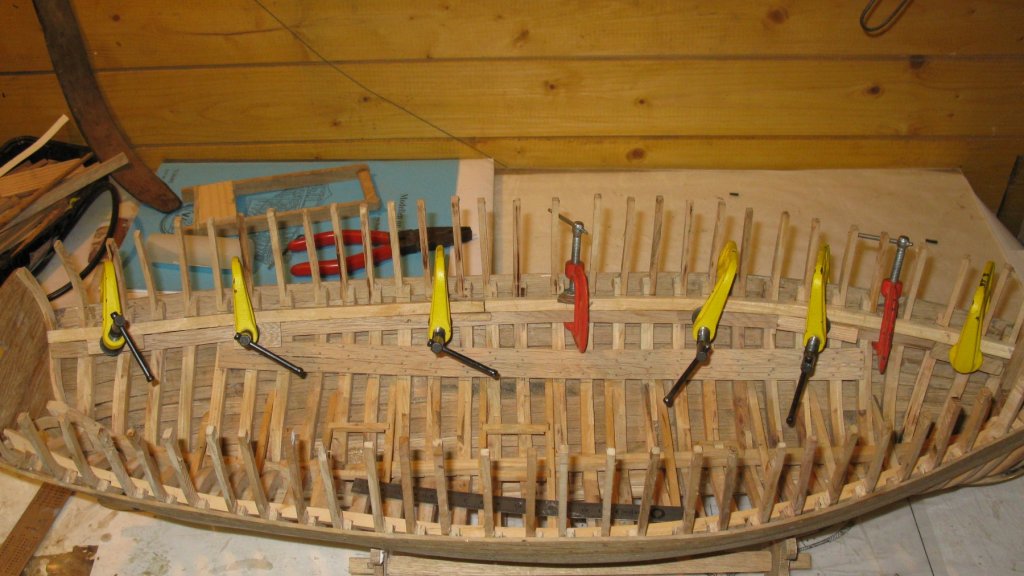
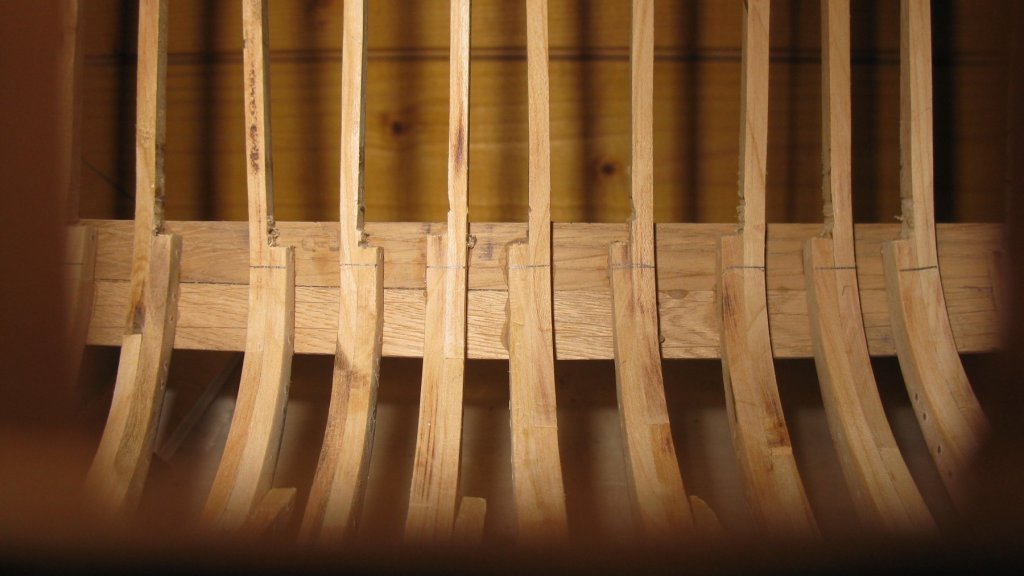
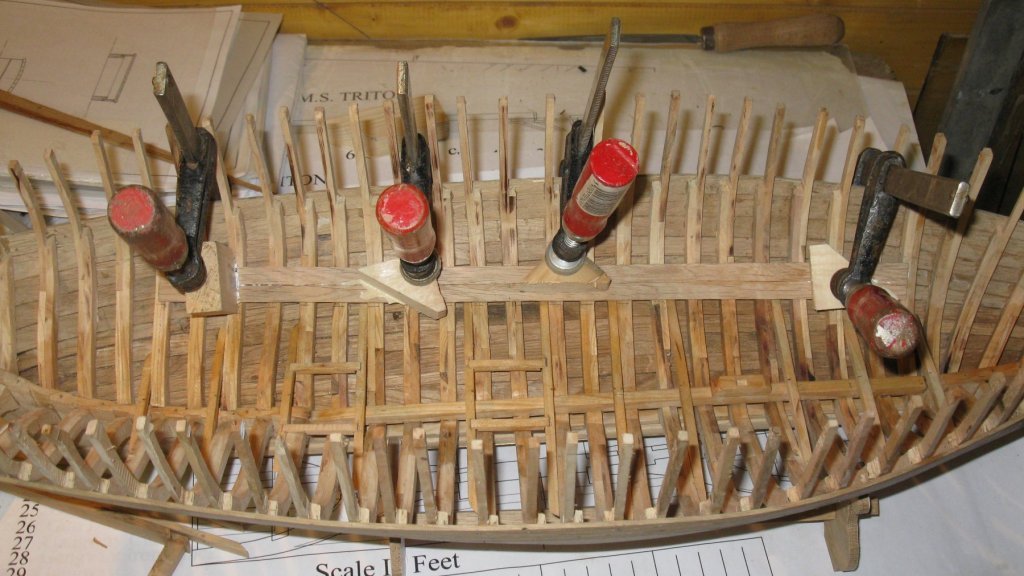
8.16 Just as so many times this episode ends with putting some hundreds of tree nails in the deck beam shelves and the lower deck.
-
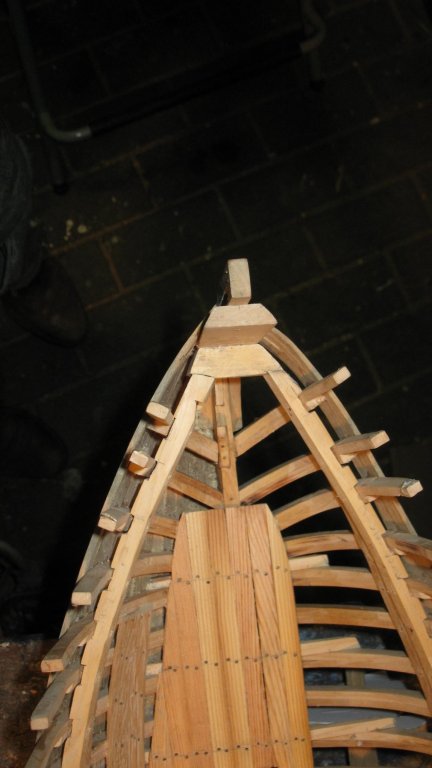
8.15 Starboard and port deck beam shelf are connected in the bow with a wooden deck hook.
-
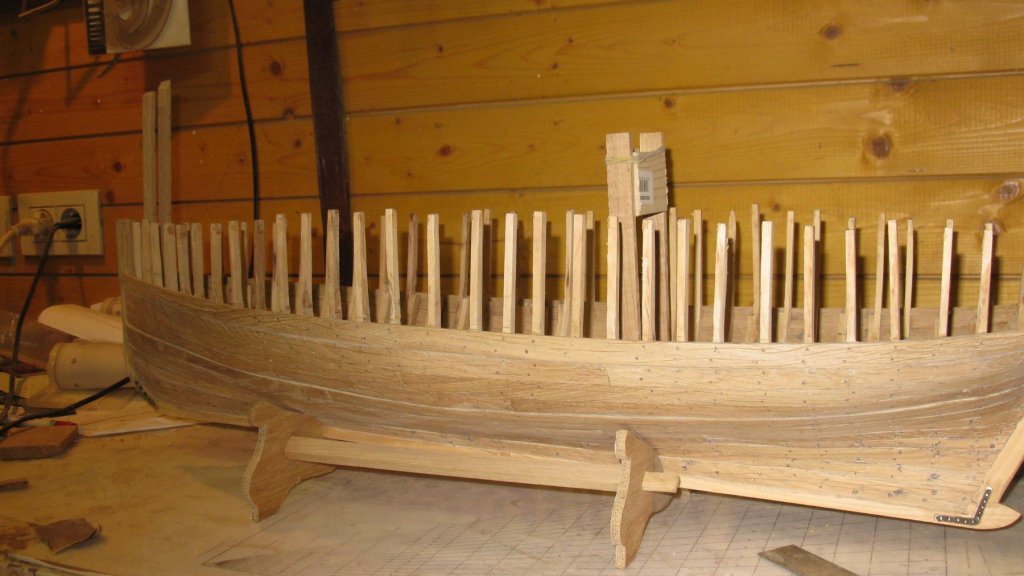
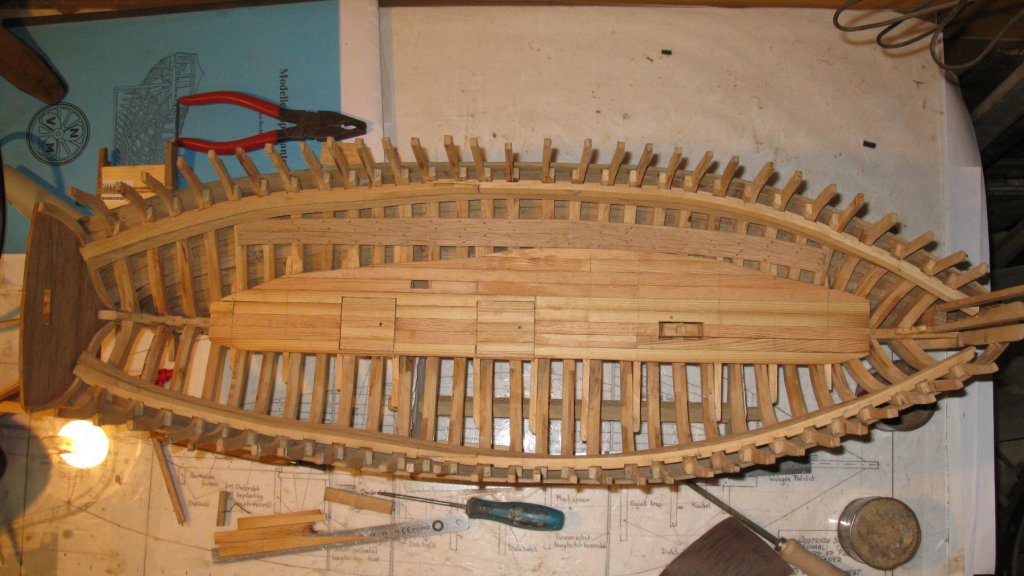
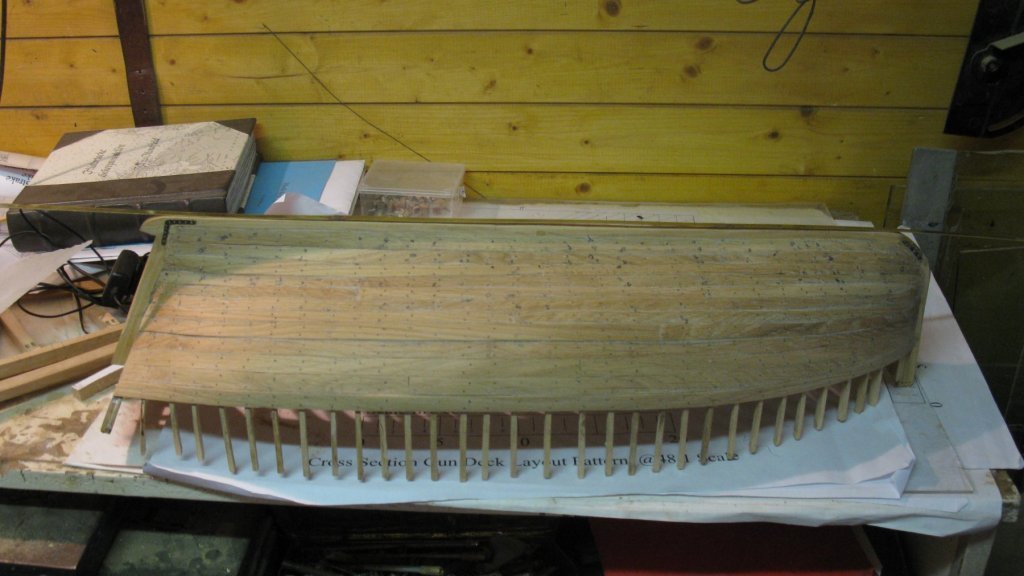
8.14 Lower deck laid. As you can see, I leave a considerable part of the port side uncovered.
-
8.13 Now I start to lay the lower deck. I use pine for the deck planks. I start with the midship plank. To obtain a straight line, I lay the first layer along a lath. I put a weight (small tin can filled with lead) on the glued planks to put some pressure on while drying.

-
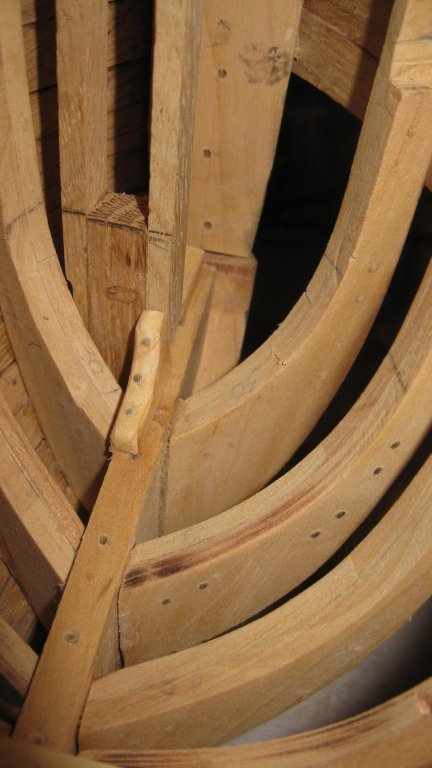
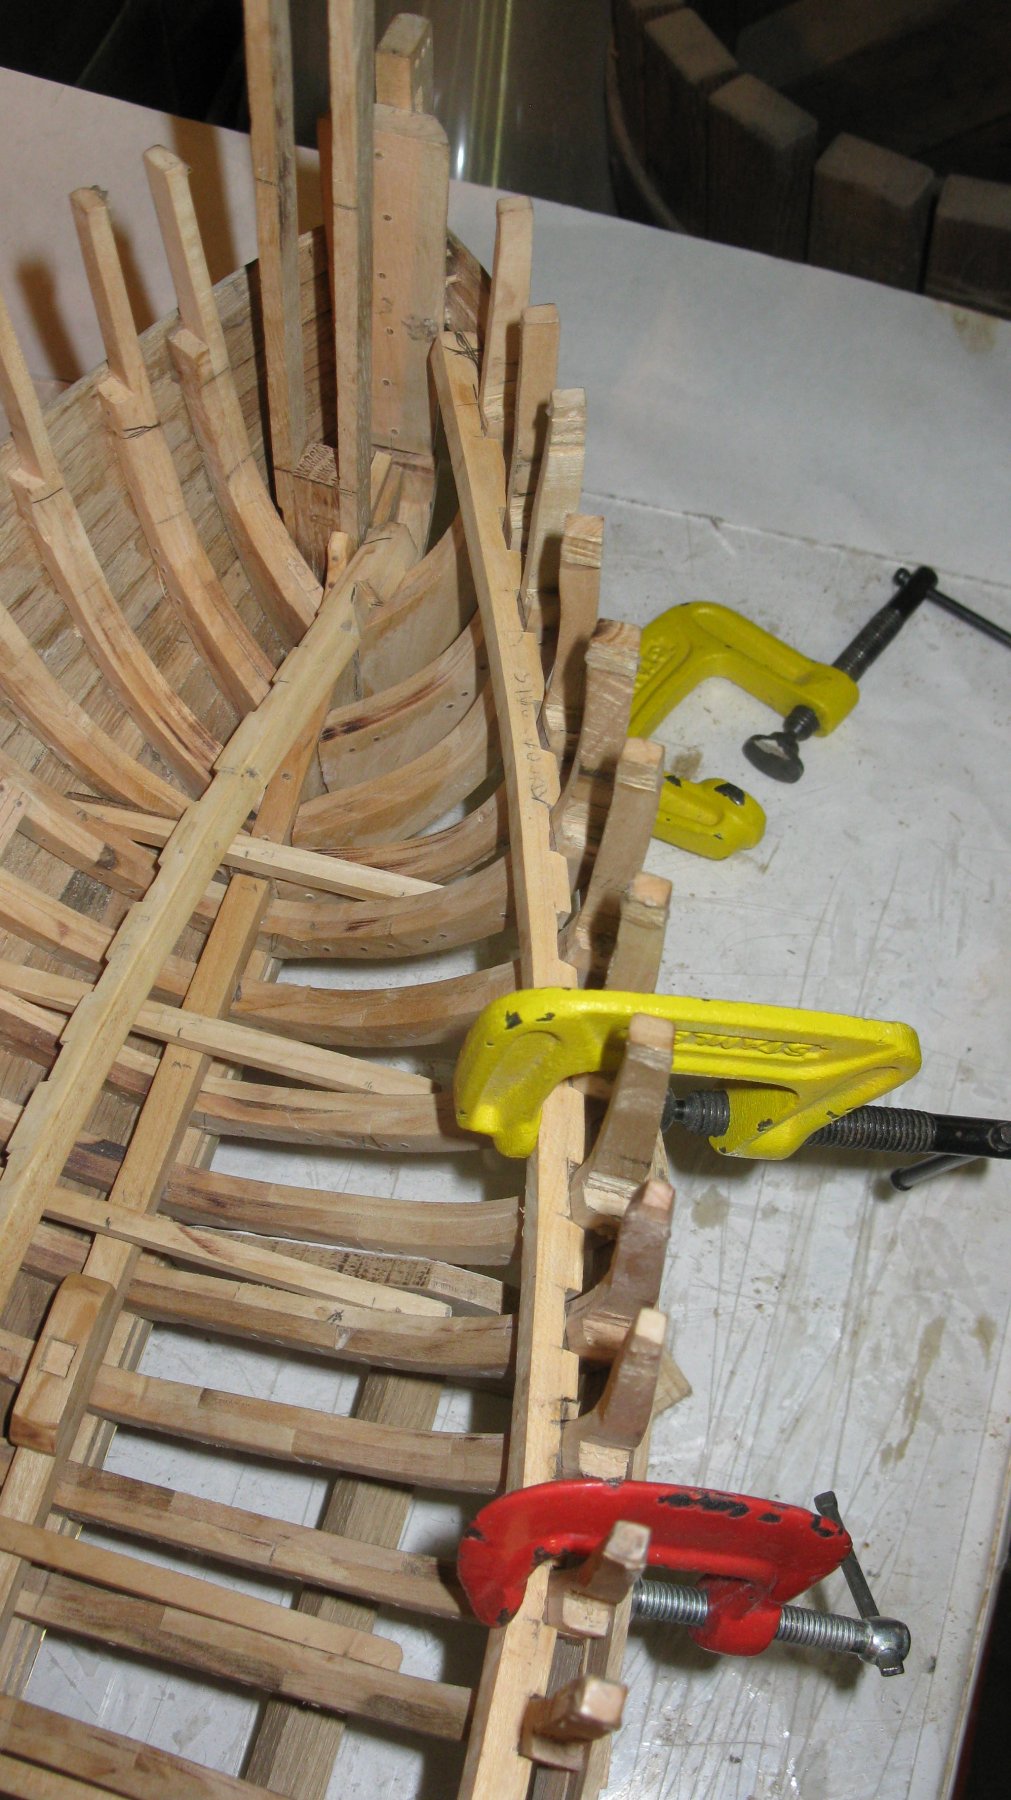
8.12 Below the deck beam shelf, There is a thinner lower deck beam shelf.
-
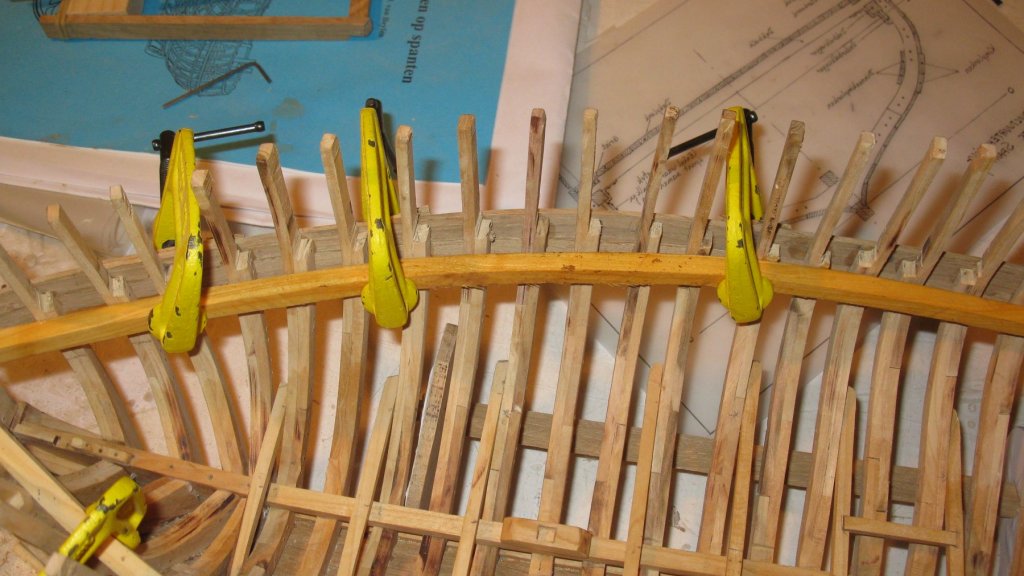
8.11 Both deck beam shelves, glued in place.

-
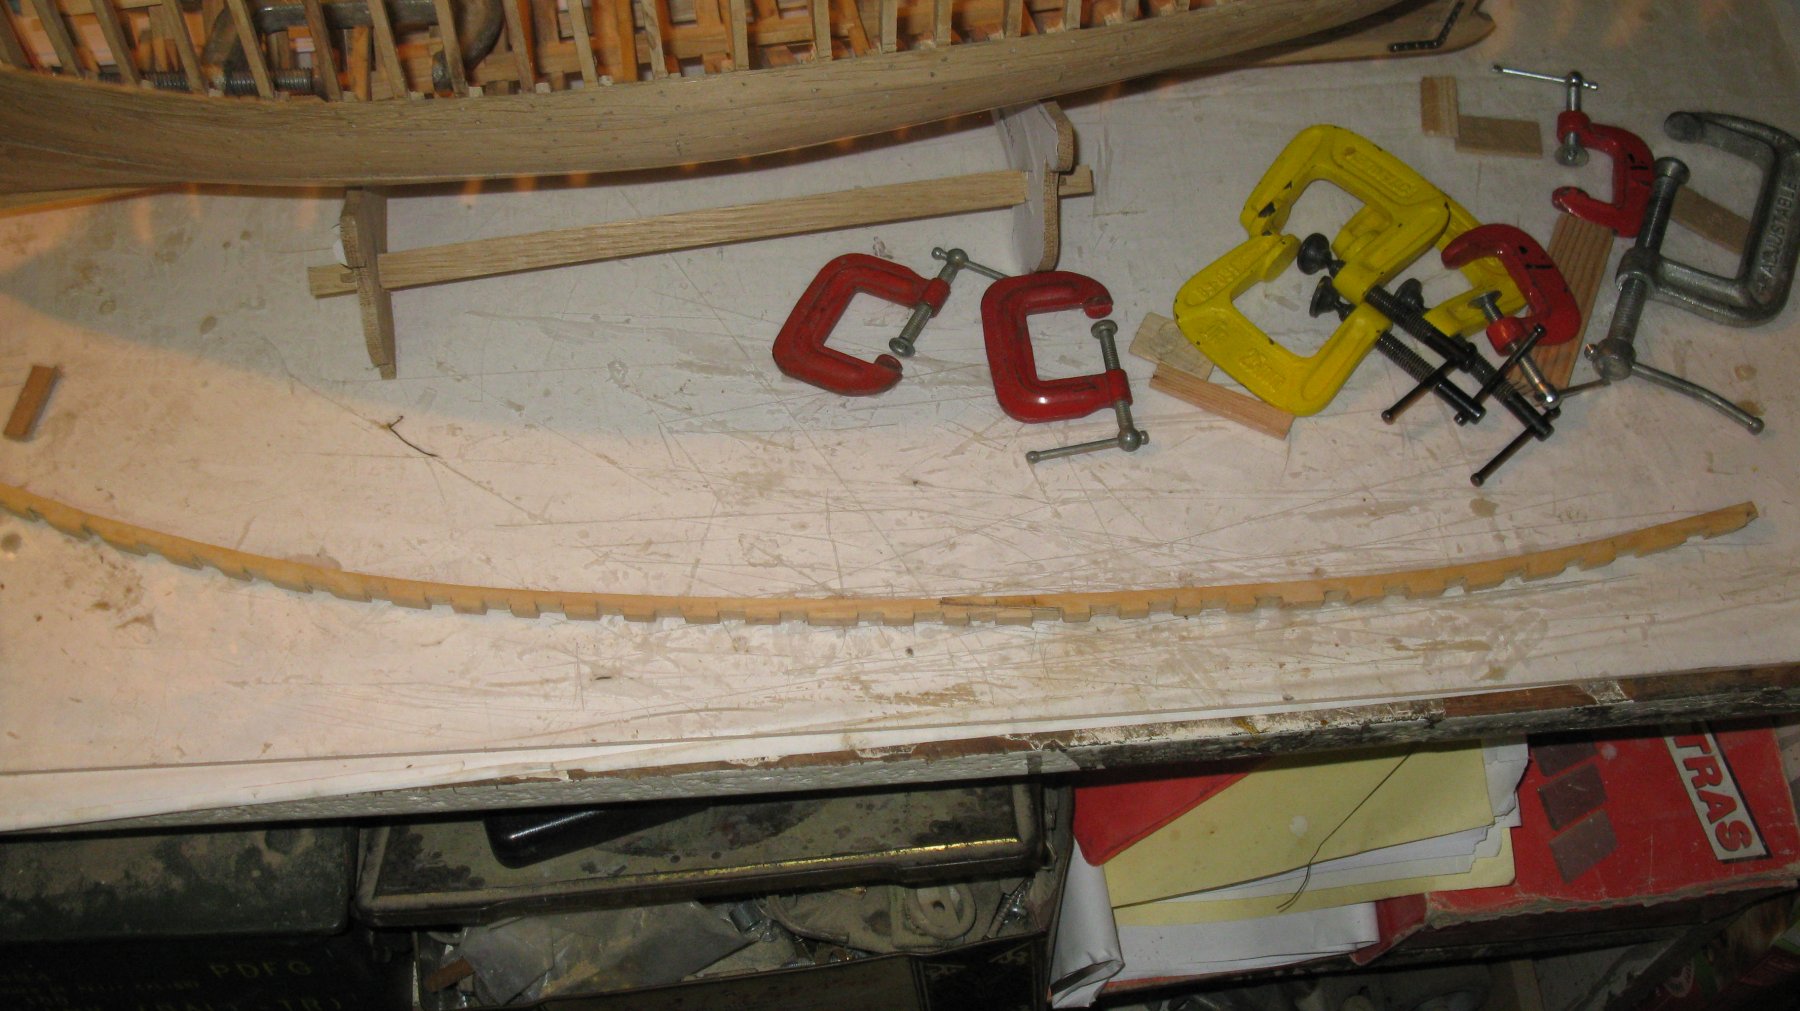
8.10 Each deck beam shelf is made in to pieces with a lap joint in the middle.

-
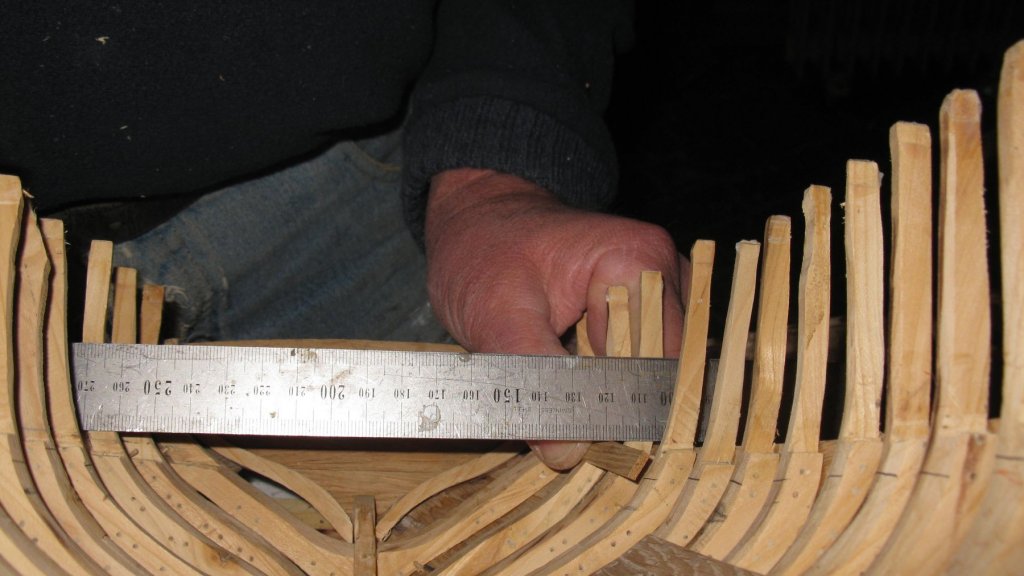
8.9 I cut the slots for the frames in the bars and check if they fit into the frames.


-
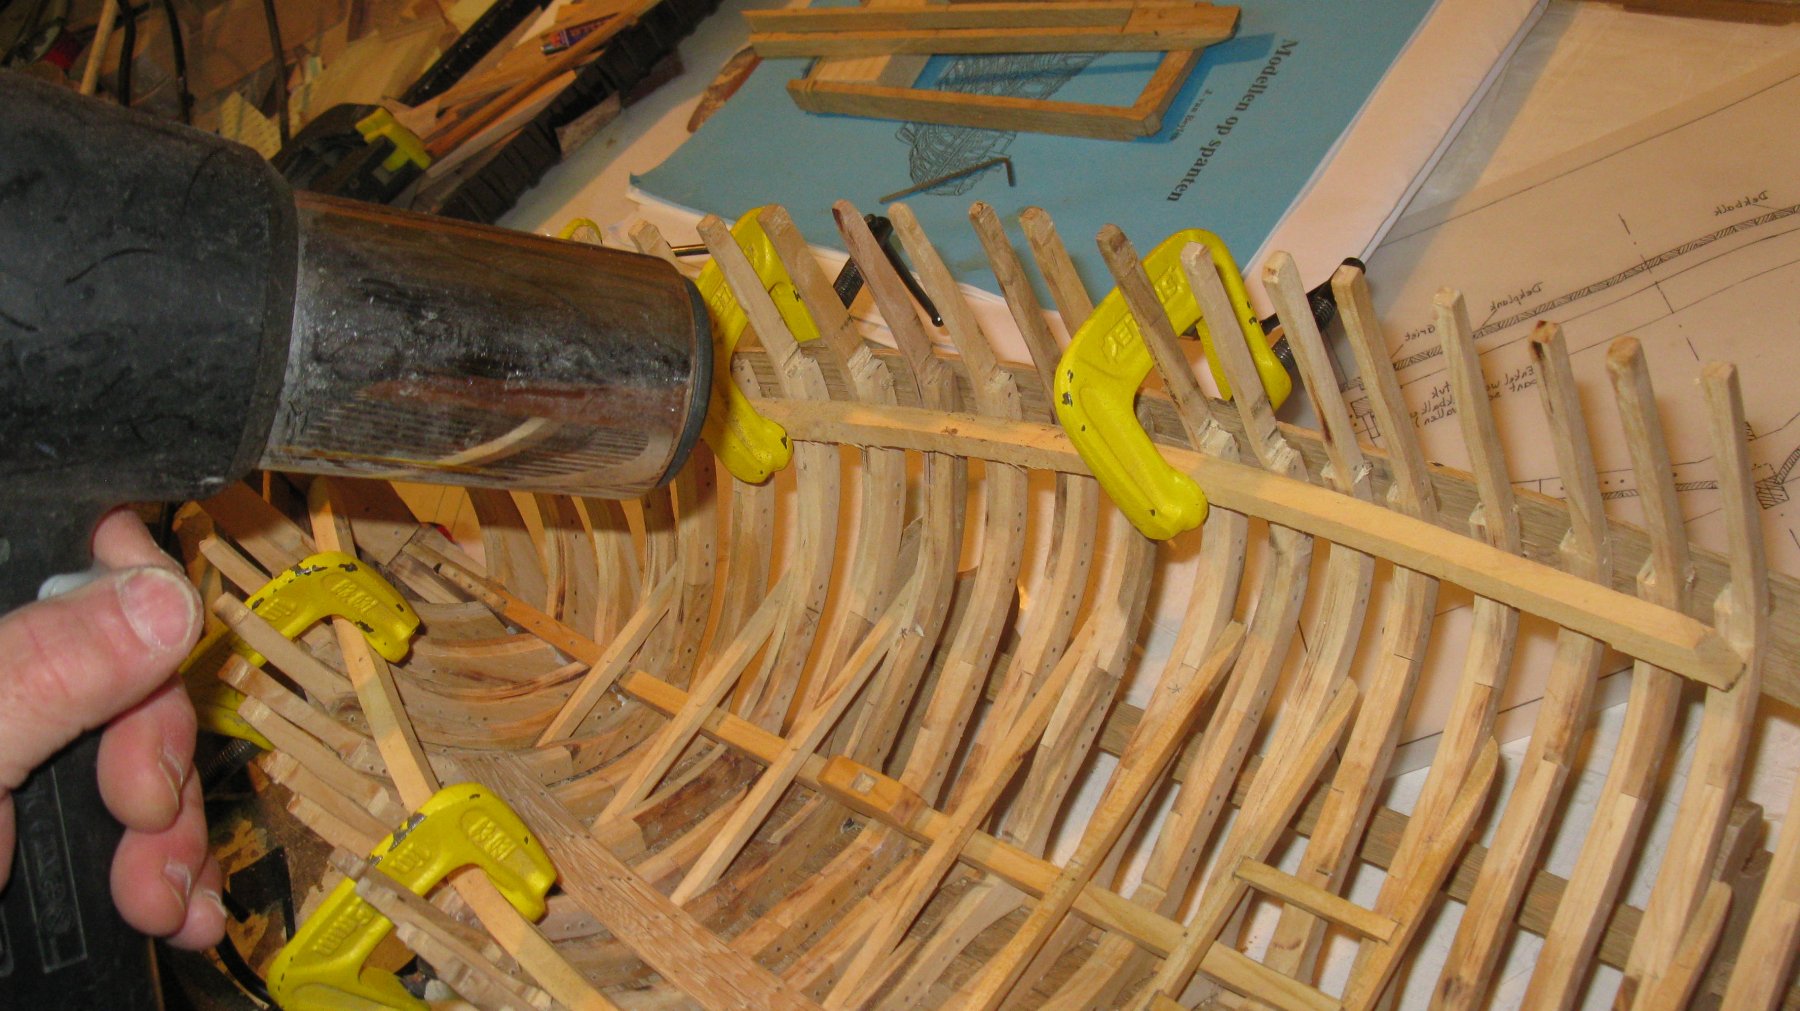
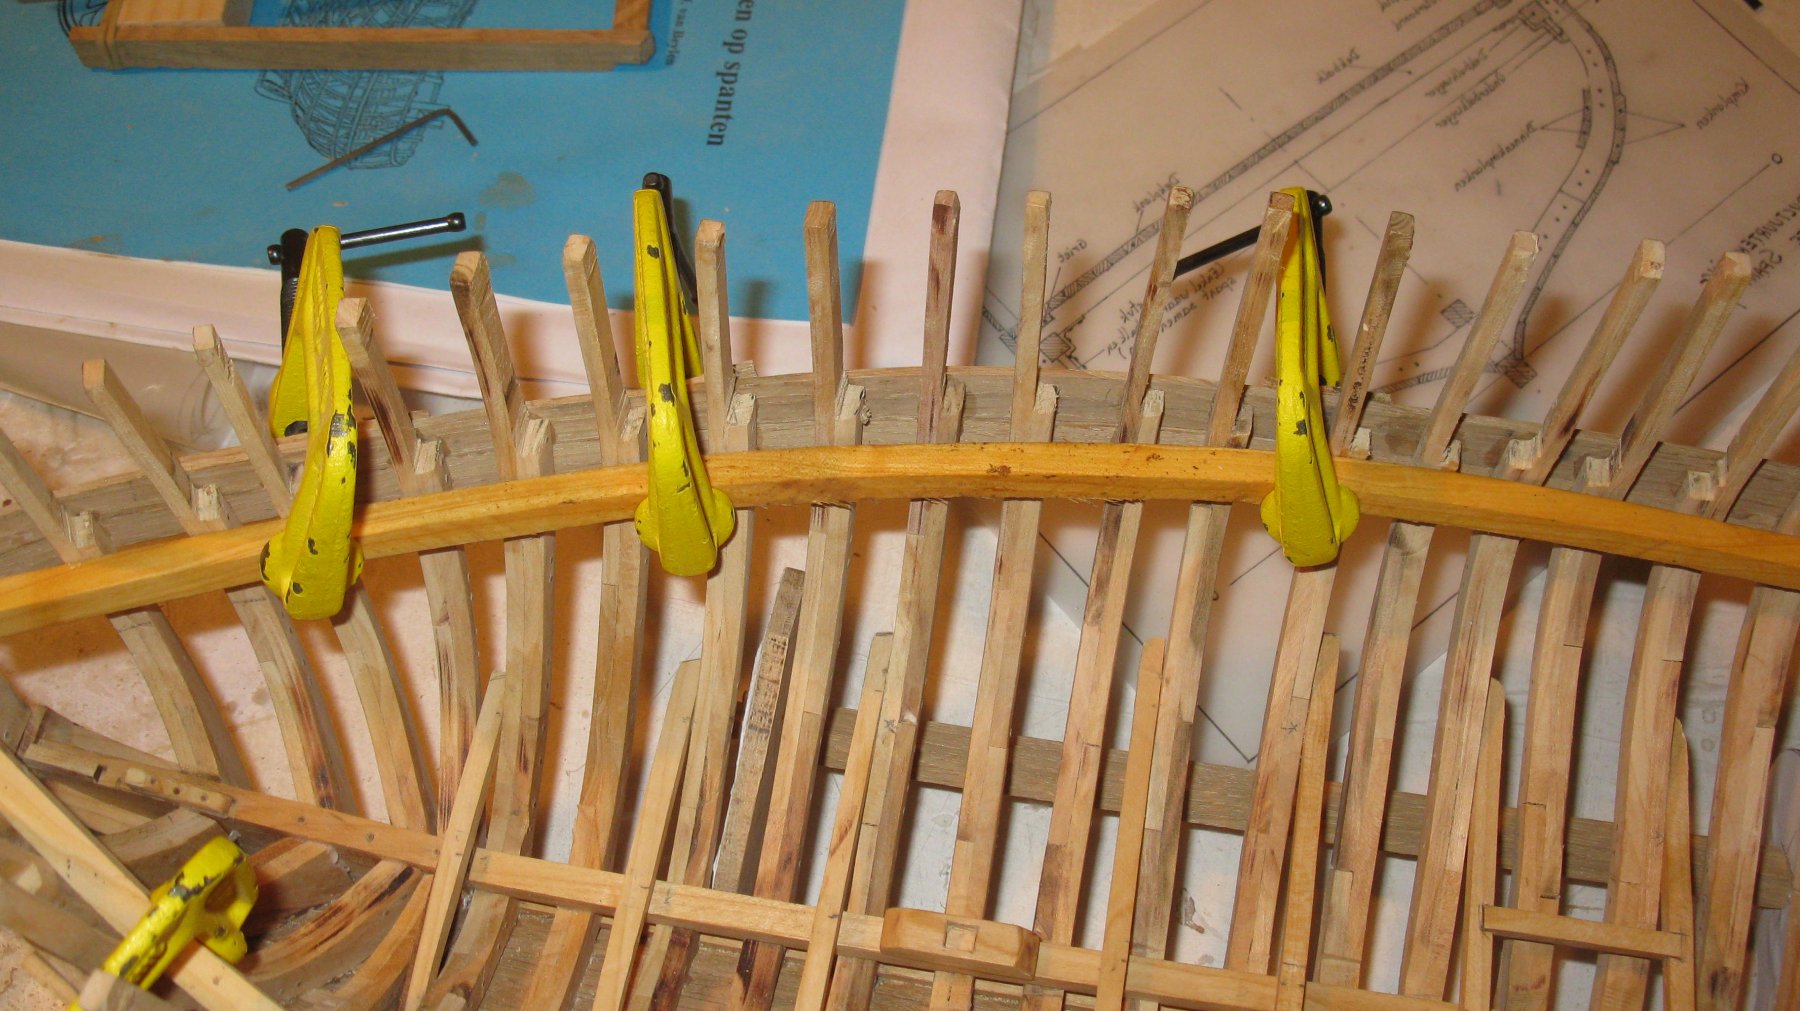
8.8 I dry them with a hair dryer and they keep more or less their curved shape. The shelves will be a little bit sunk in the frames, therefore I mark the positions on the frames on the bars (no picture of that).

-
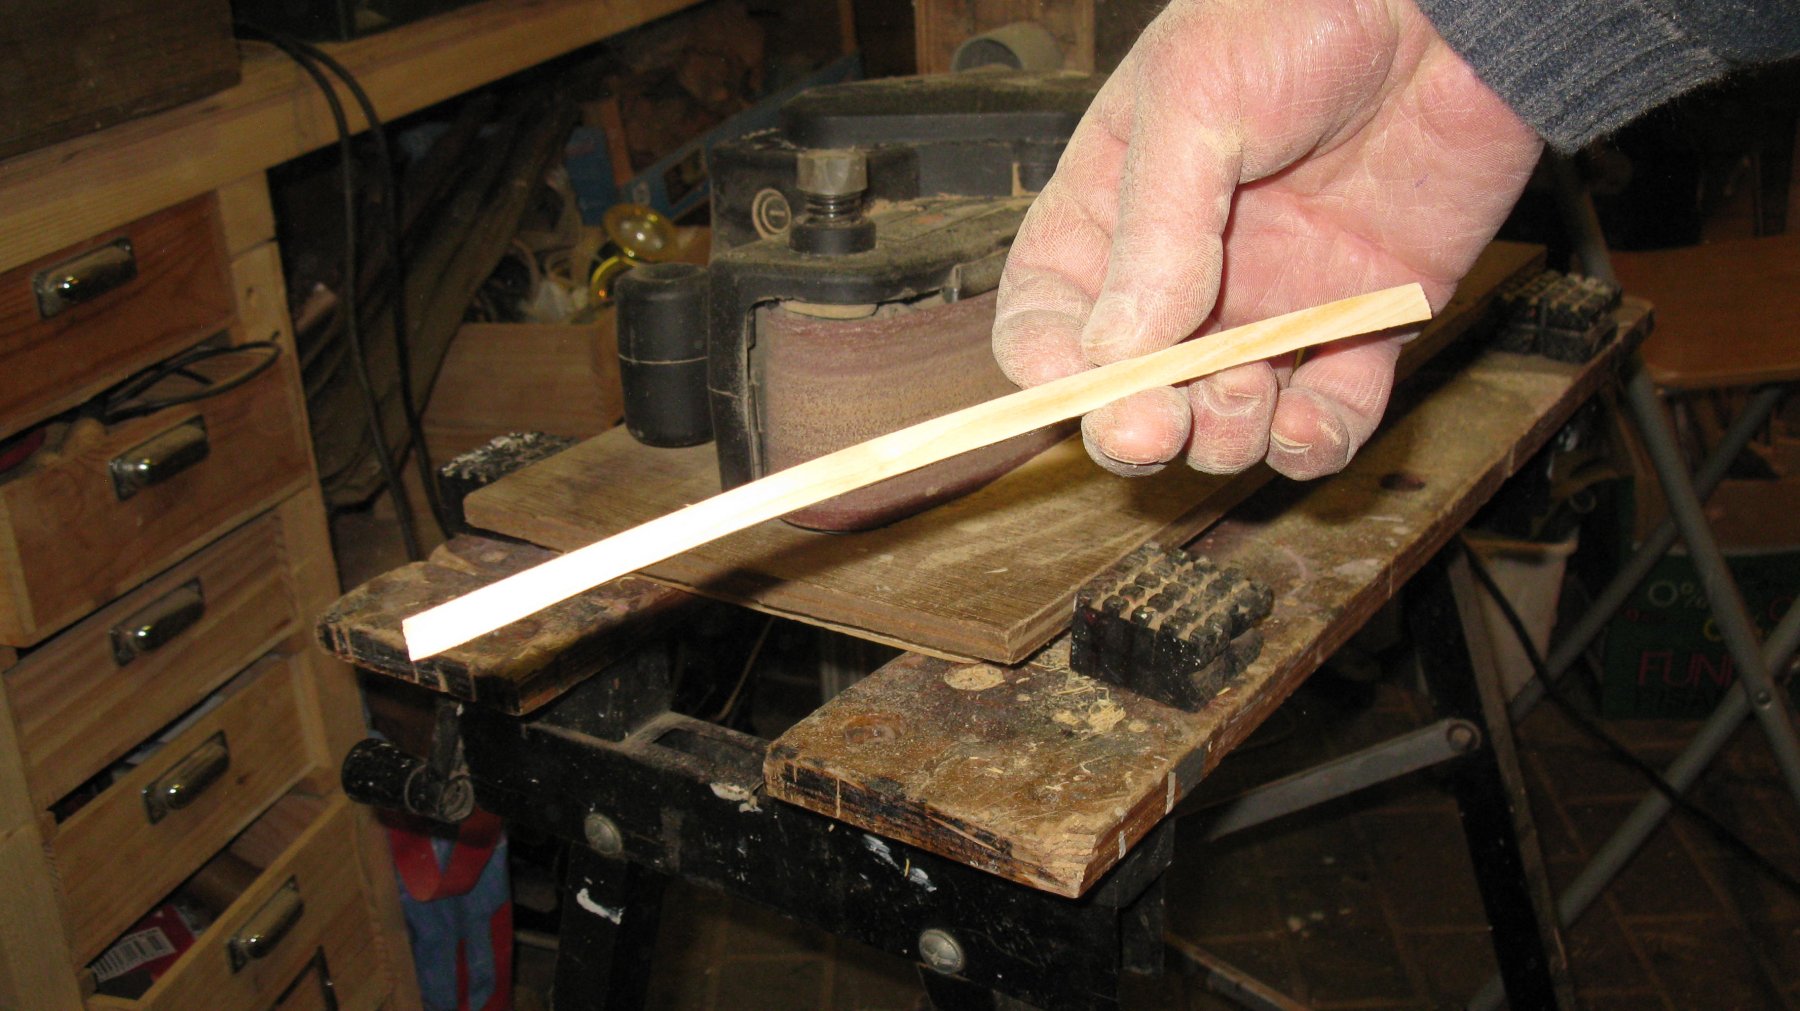
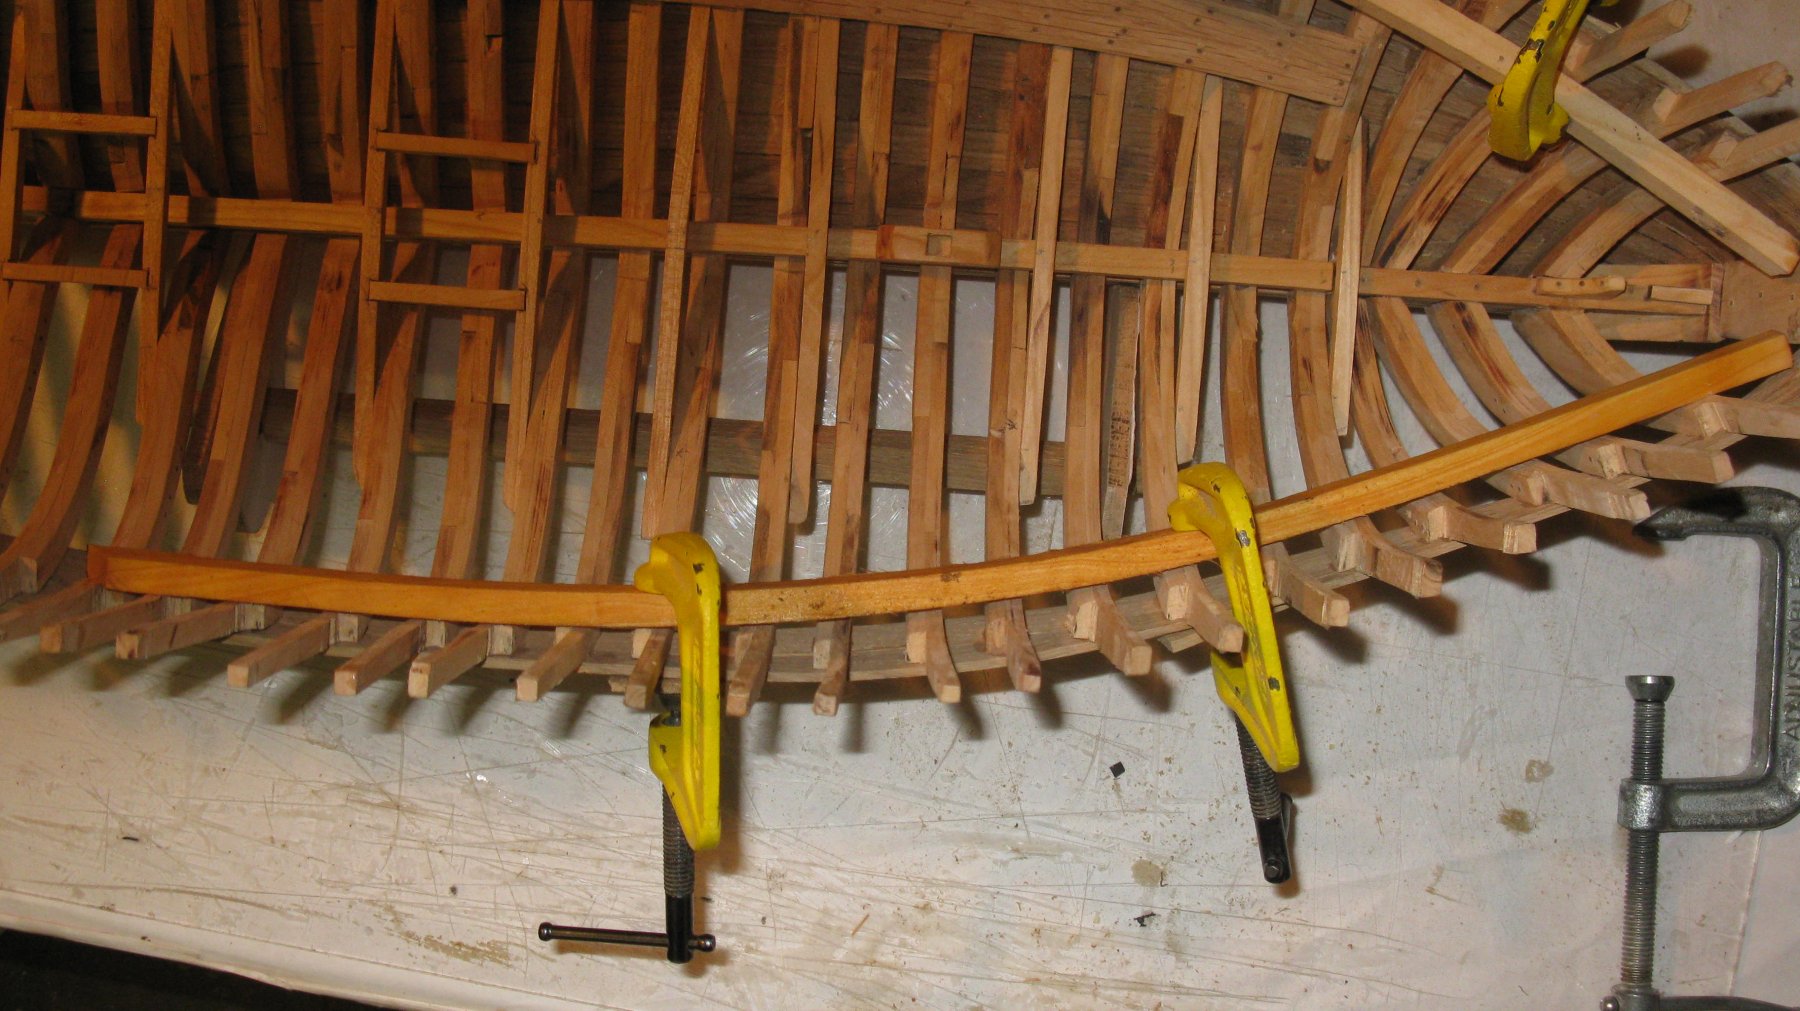
8.7 I saw the deck beam shelves as straight bars and soak them for a half an hour in water. Then I slowly bend them with the help of clamps to the to the curve of the model in the position where they have to come.

-
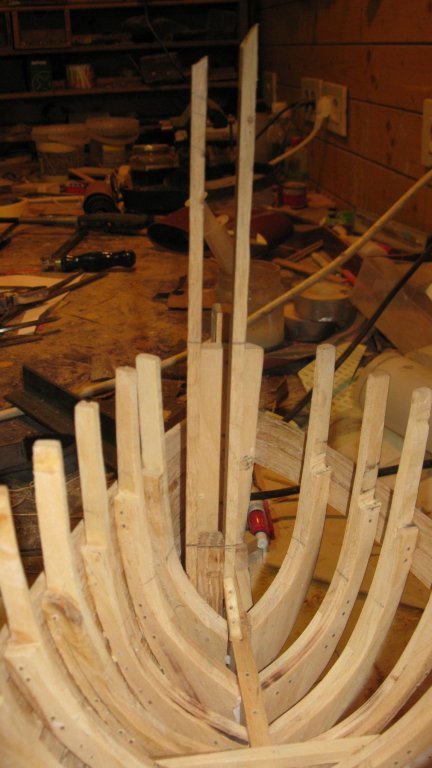
8.6 For the interior work, I start with the deck beam shelves. First I mark the level of their topside by laying a lath from wale to wale. Holding a small piece of wood that has the altitude of a deck beam below the lath, I mark the inner side of each frame with a pencil line.
-
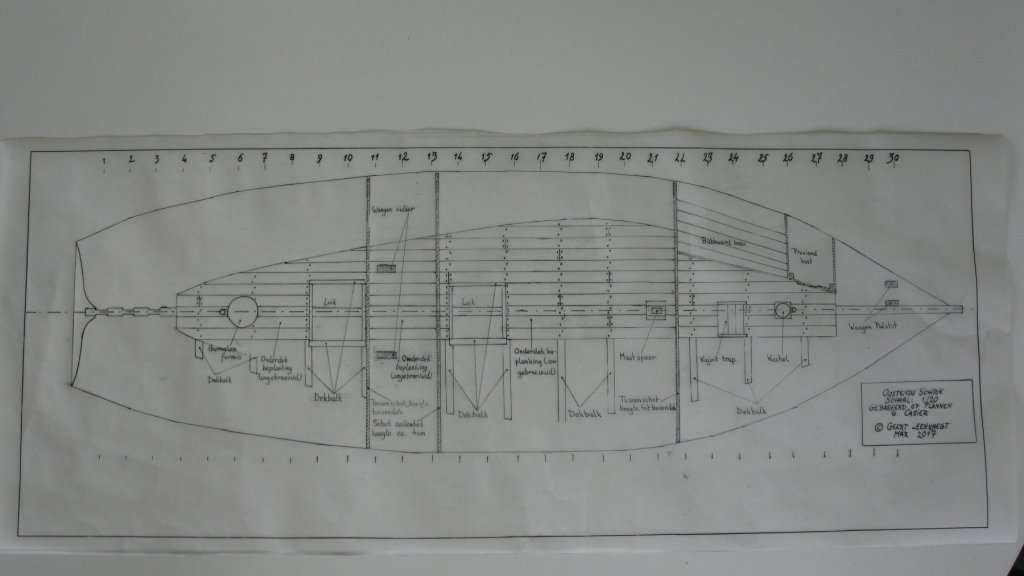
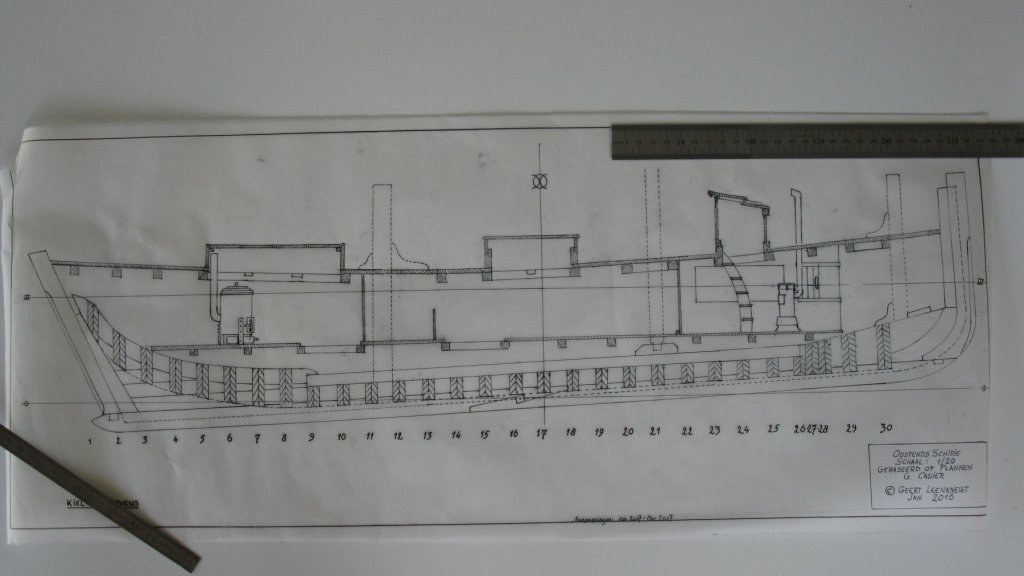
8.5 I try to redraw the interior arrangement of the boat to a more practicable version which sticks as much as possible to what is drawn on the sketch.
-
8.4 It is about time to think about the interior of the boat. I have only one contemporary sketch of how the vessel might look like. The sketch is now very precise. For example the crew shelter in the forecastle is not to scale at all. On my model I measure an average headroom of 1.2 meter, but the sketch shows al spacious cabin with two bunks behind each other. If I convert them to the real space I dispose of, I have such a small bunks that if they should lay me in it, I would never get out of them anymore. 167.bmp
-
8.3 The finished thick strakes.
-
8.2 I glue the strakes onto the frames using clamps.
-
Part 8: Lower deck and upper deck structure 8.1 My shrimper has two thick strakes. 164.bmp
-
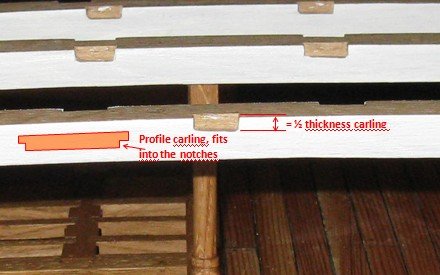
Wow Derek, You are going fast! I have some questions: I have the impression that you made de keel a bit shorter at one side of the model. Is there a reason for? You made the notches for the carlings over the whole thickness of the deck beams. The carlings are thinner than the deck beams. Wouldn't it be better to make smaller notches in which the carlings can be laid? Many regards, G.L.
-
Thank you Nils. Oak is a satisfactory wood to work with. I am also satisfied of the result. I was the first time I planked a hull. G.L.
-
7.6 The sand band is nailed to the keel.
-
7.5 Time to make a last measurement.
-
7.4 I want to blacken them with oxidant. It succeeds easy for the nails but the sand band obstinately keeps its brass color even after being coated several times with oxidant. I hope that it will become darker when I color the hull.
-
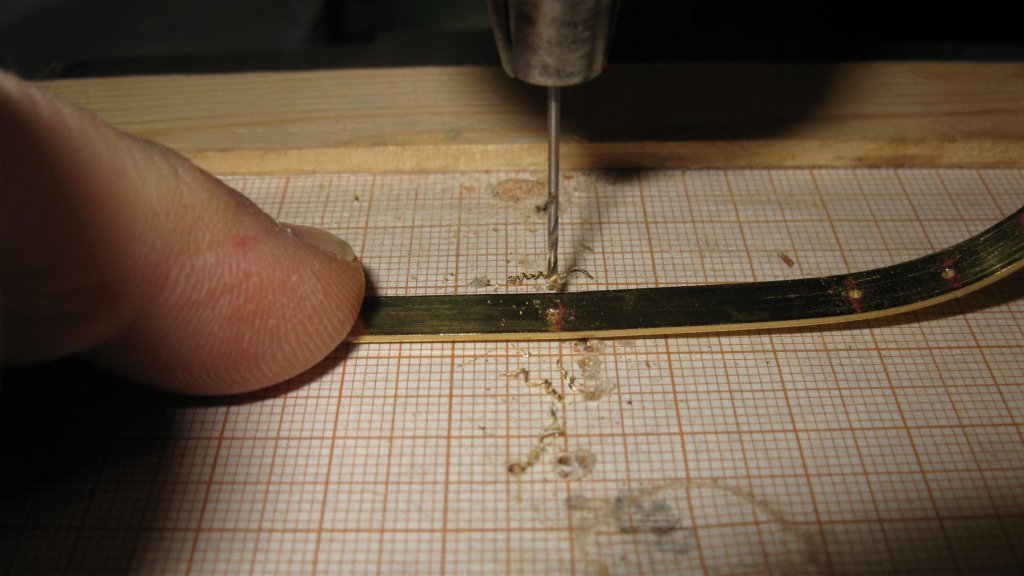
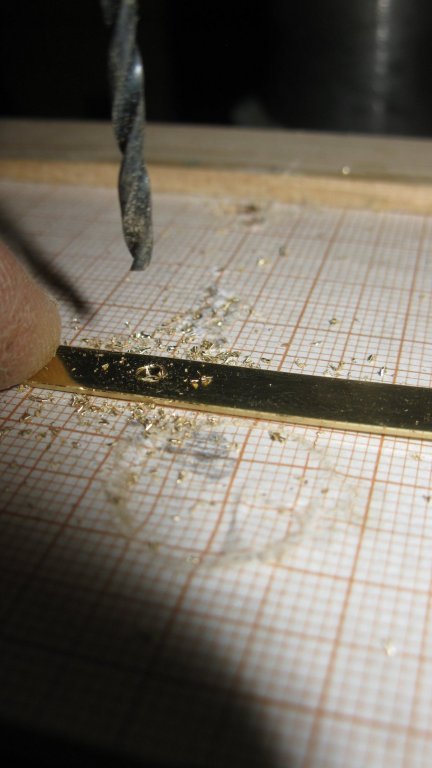
7.3 I drill holes for nails on regular distances. In the bottom side I deepen the holes with a drill of the diameter of the nail heads because I want them to be sunk in the sand band.
-
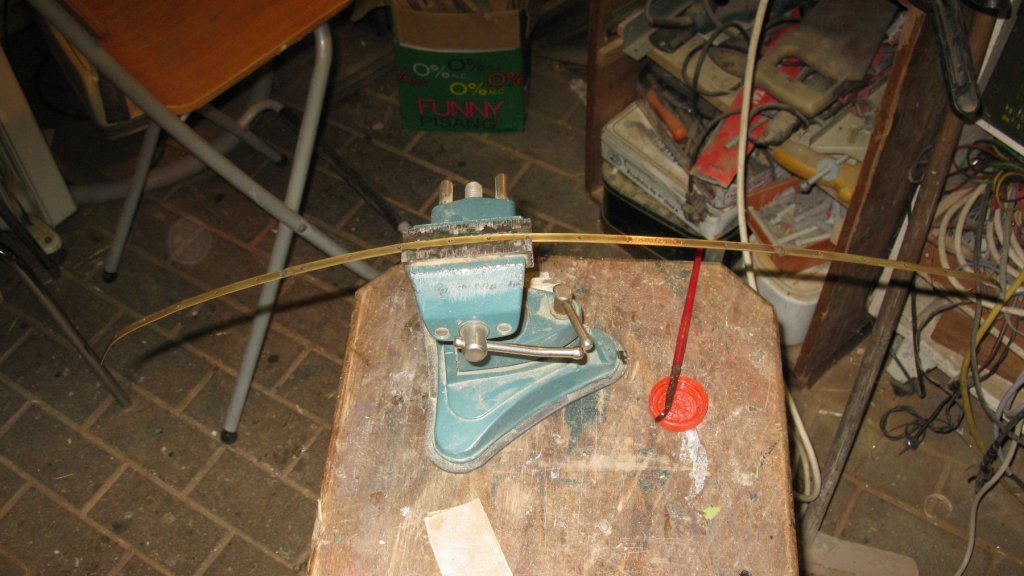
7.2 The under part of the keel of the shrimper was protected by a steel sand band. To make it I solder some brass strips to each other to form a long band. I file the front and after side round. 157.bmp

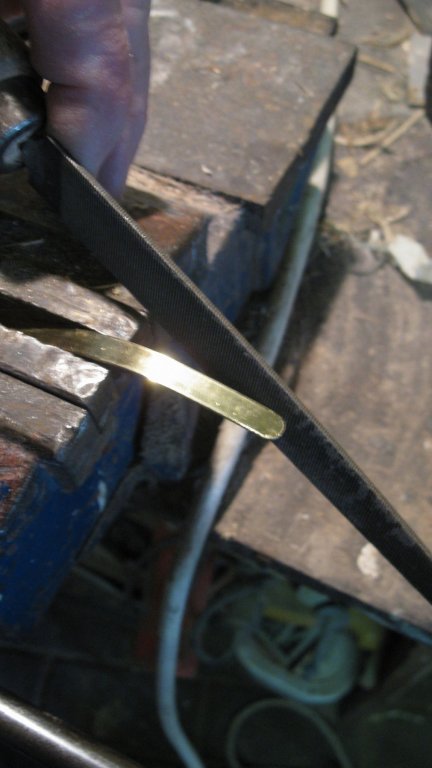
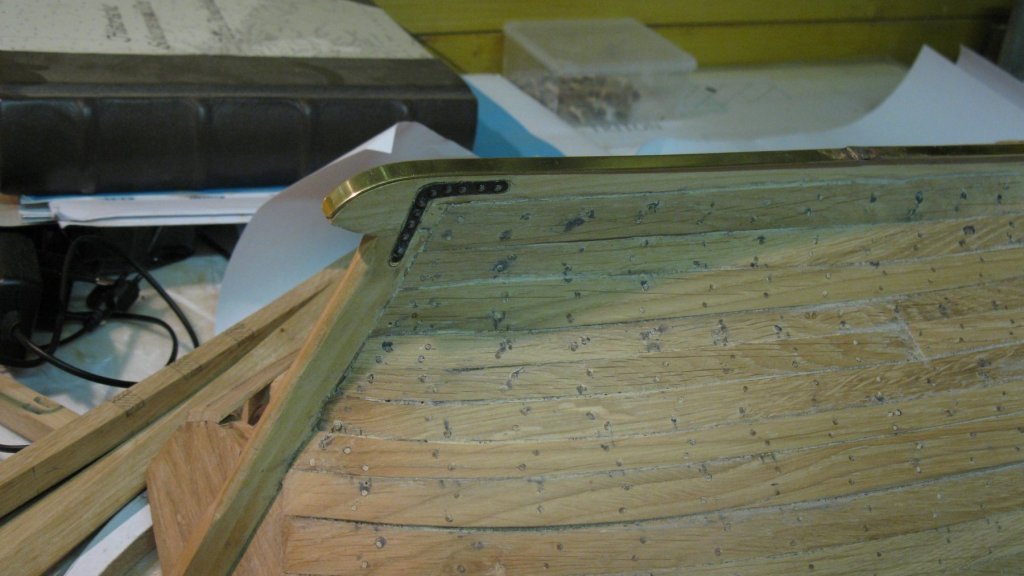
-
Part 7: Deck gear preparations and sand band 7.1 Some parts of the deck gear like the jib boom support and the fishing winch continue below the deck till the bottom of the vessel. I make their bottom pieces now. I leave them longer than needed. Later, when the deck beams are in place, they can be sawn at the correct height.