HOLIDAY DONATION DRIVE - SUPPORT MSW - DO YOUR PART TO KEEP THIS GREAT FORUM GOING! (Only 75 donations so far out of 49,000 members - C'mon guys!)
×


G.L.
-
Posts
1,553 -
Joined
-
Last visited
Content Type
Profiles
Forums
Gallery
Events
Everything posted by G.L.
-
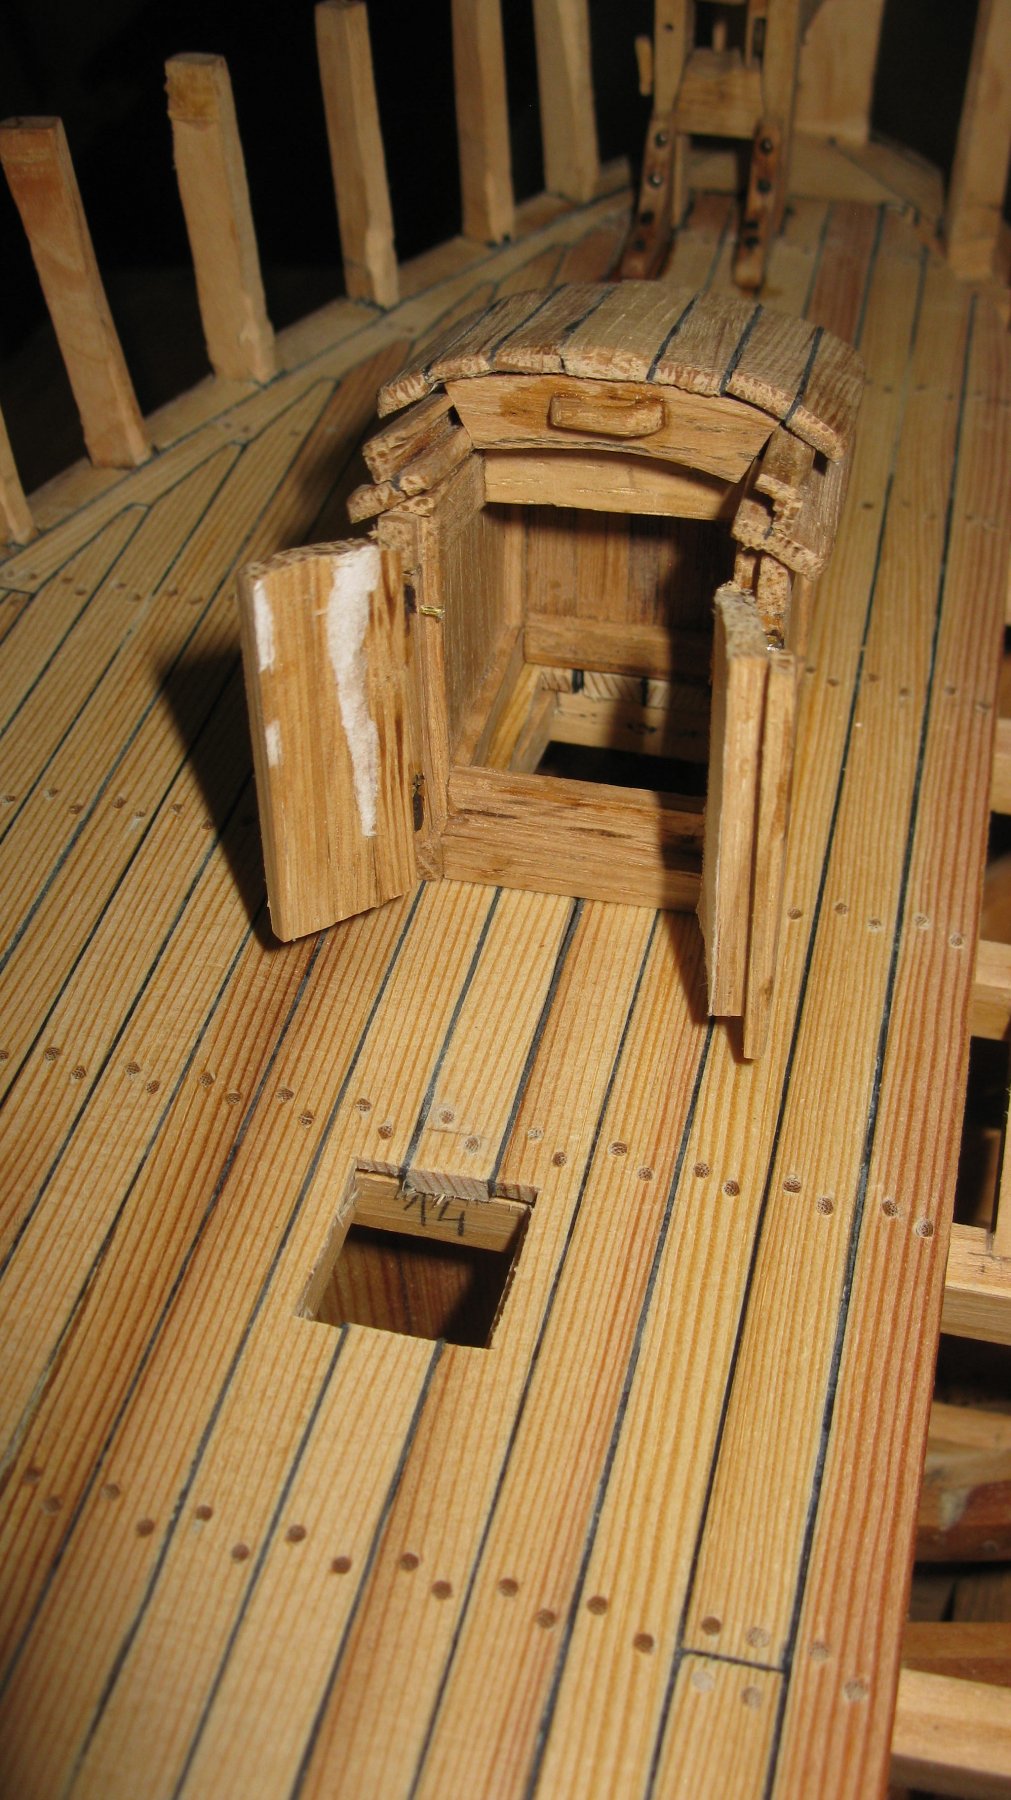
 12.16 Cabin entrance set into its spot. I do not glue it yet, I want to wait until all the deck gear is colored. It is located a bit right of mid ship to allow to pull the jib boom backwards.
-
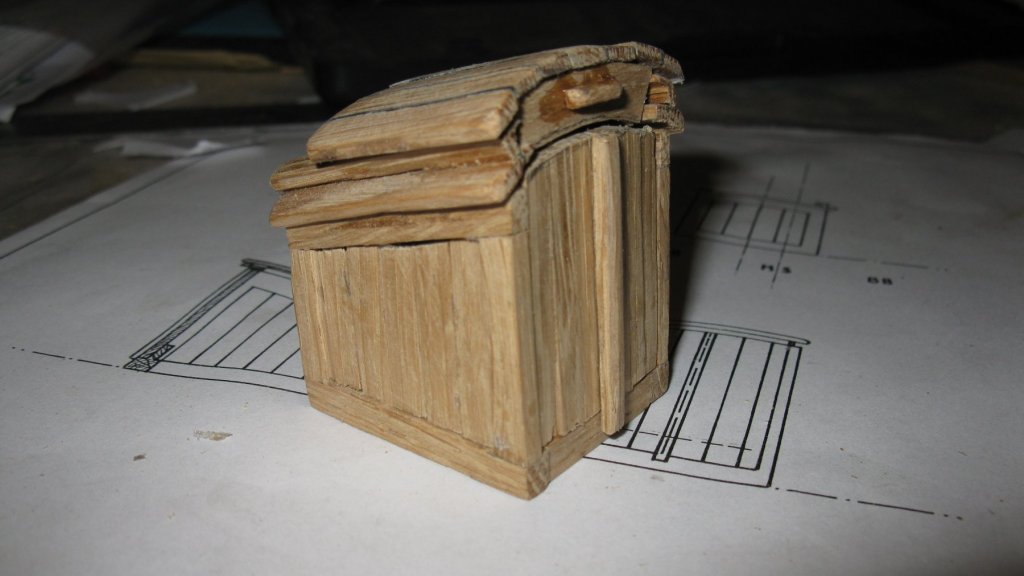
12.15 Doors and hatch open.

-
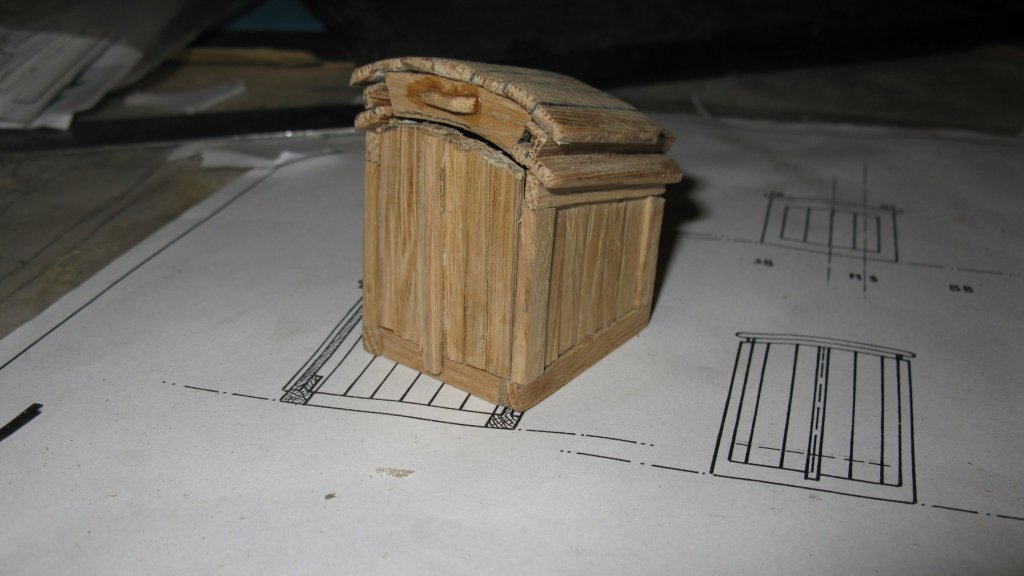
12.14 Doors and hatch closed.

-
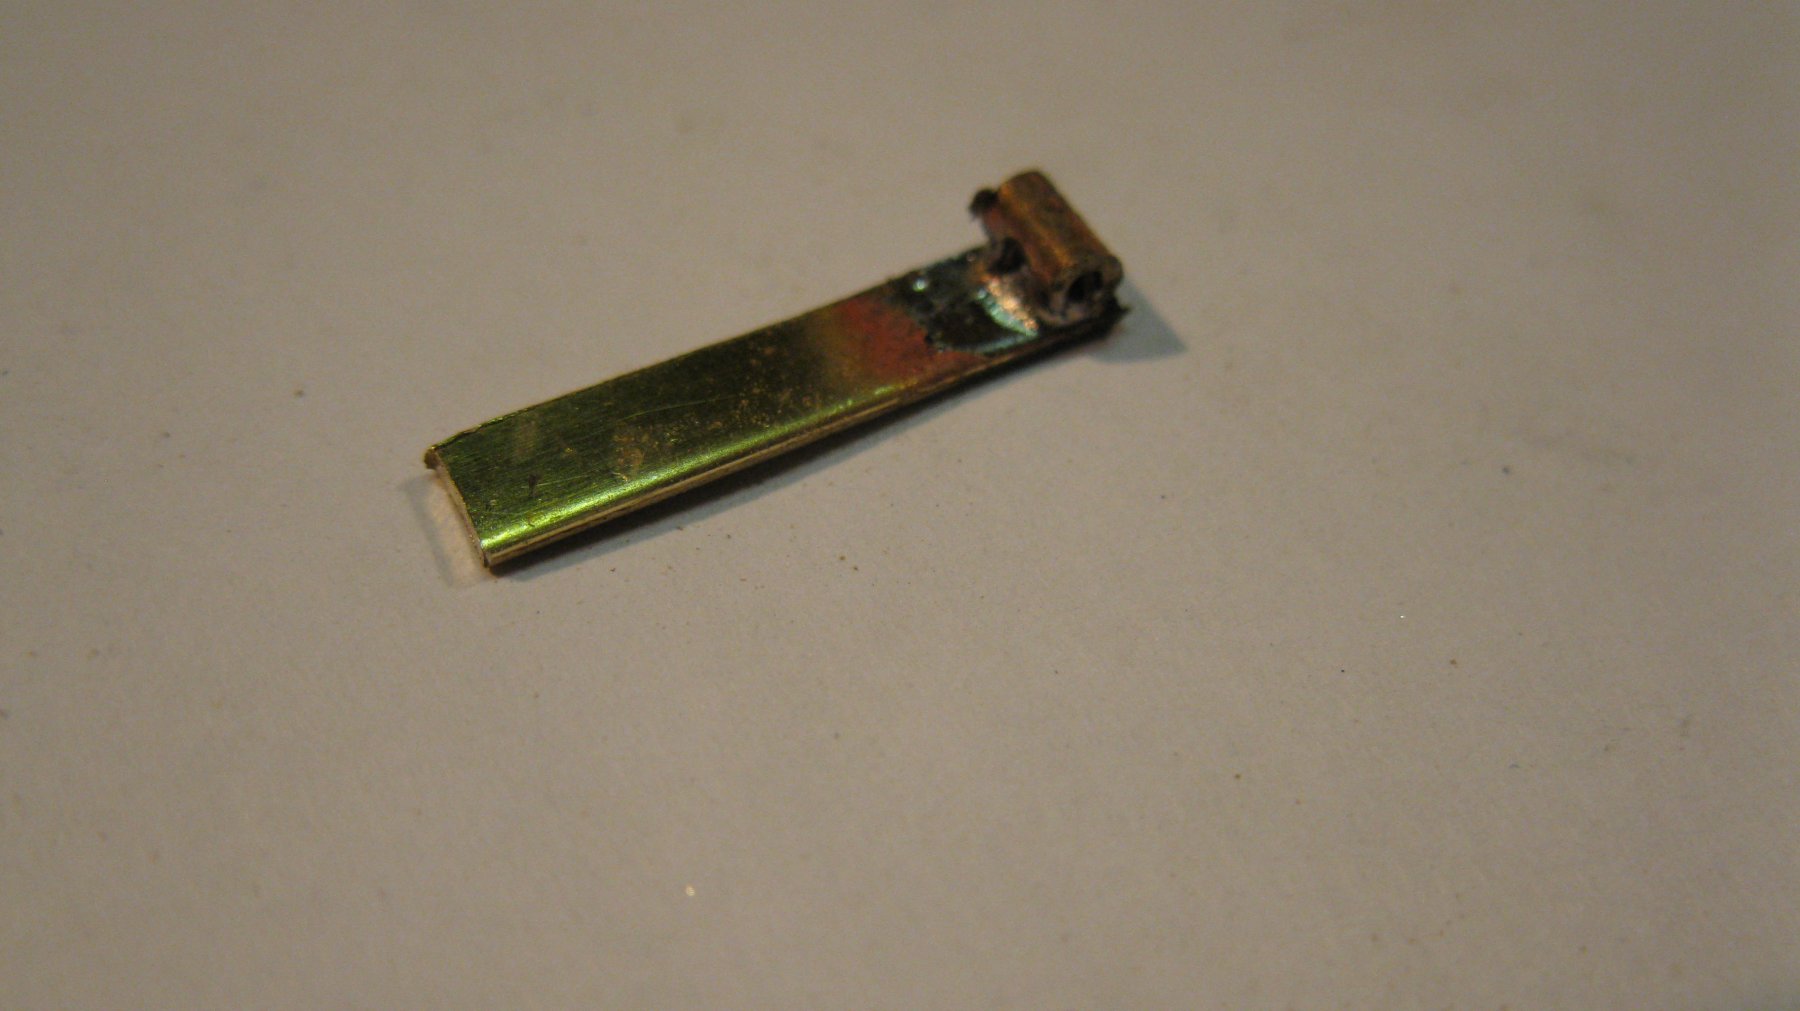
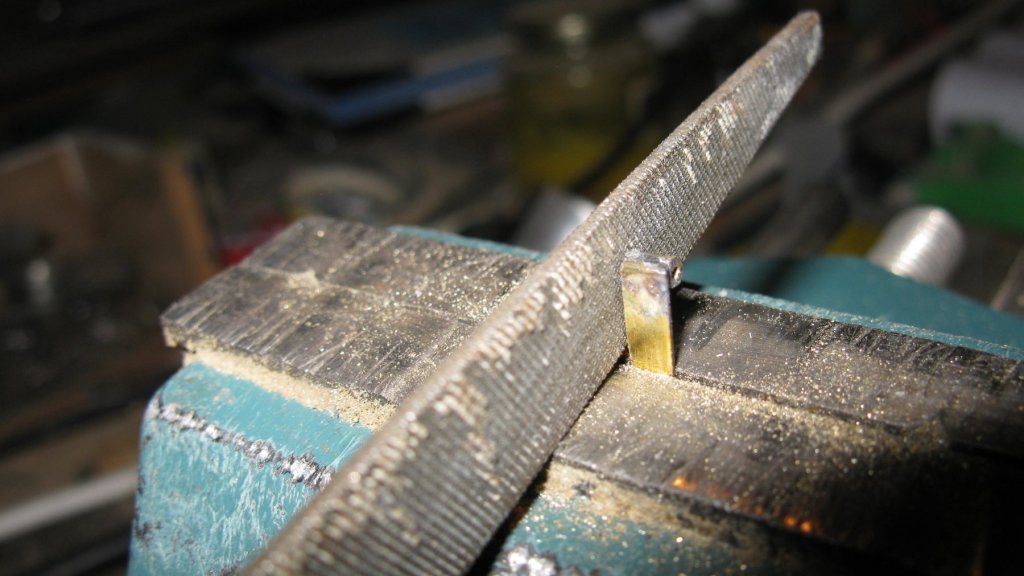
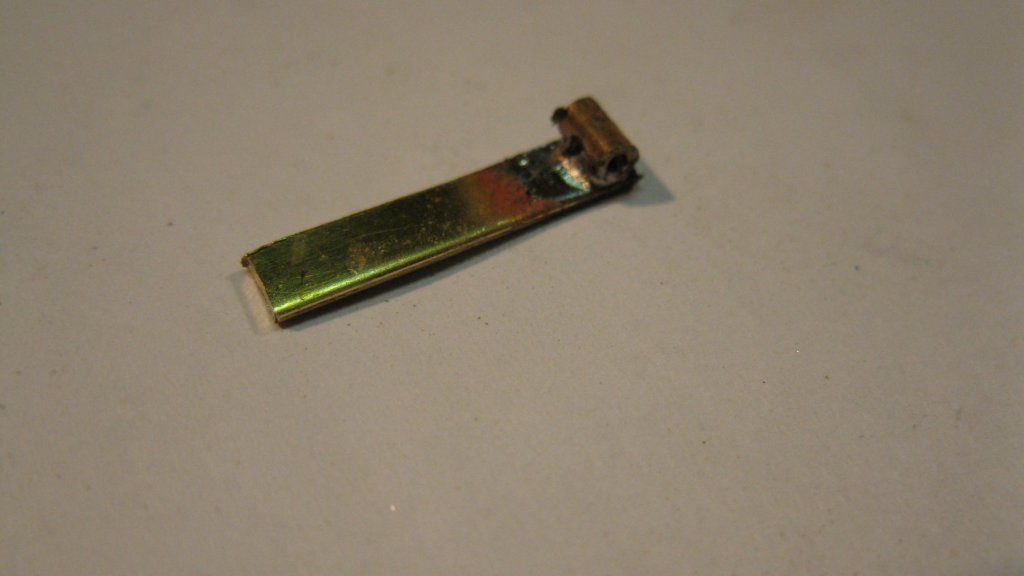
12.13 I finish the hinges by filing them.
-
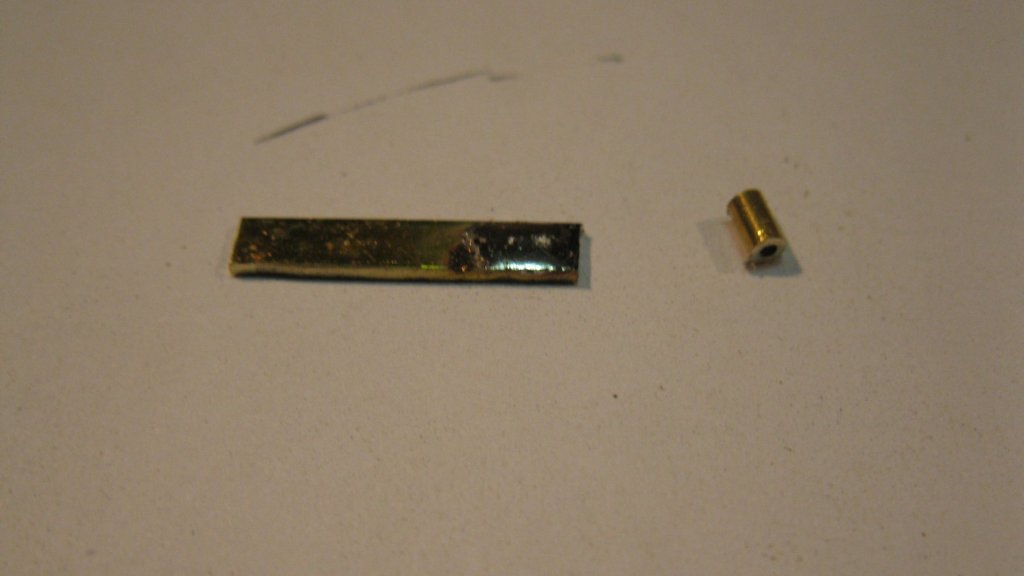
12.12 To make the door hinges, I make four brass strips and saw four pieces of brass tube with a length equal to the width of the strips. I solder the tubes on the edge of each strip.
-
12.11 The cabin entrance with hatch and doors. The doors are not yet attached with hinges.
-
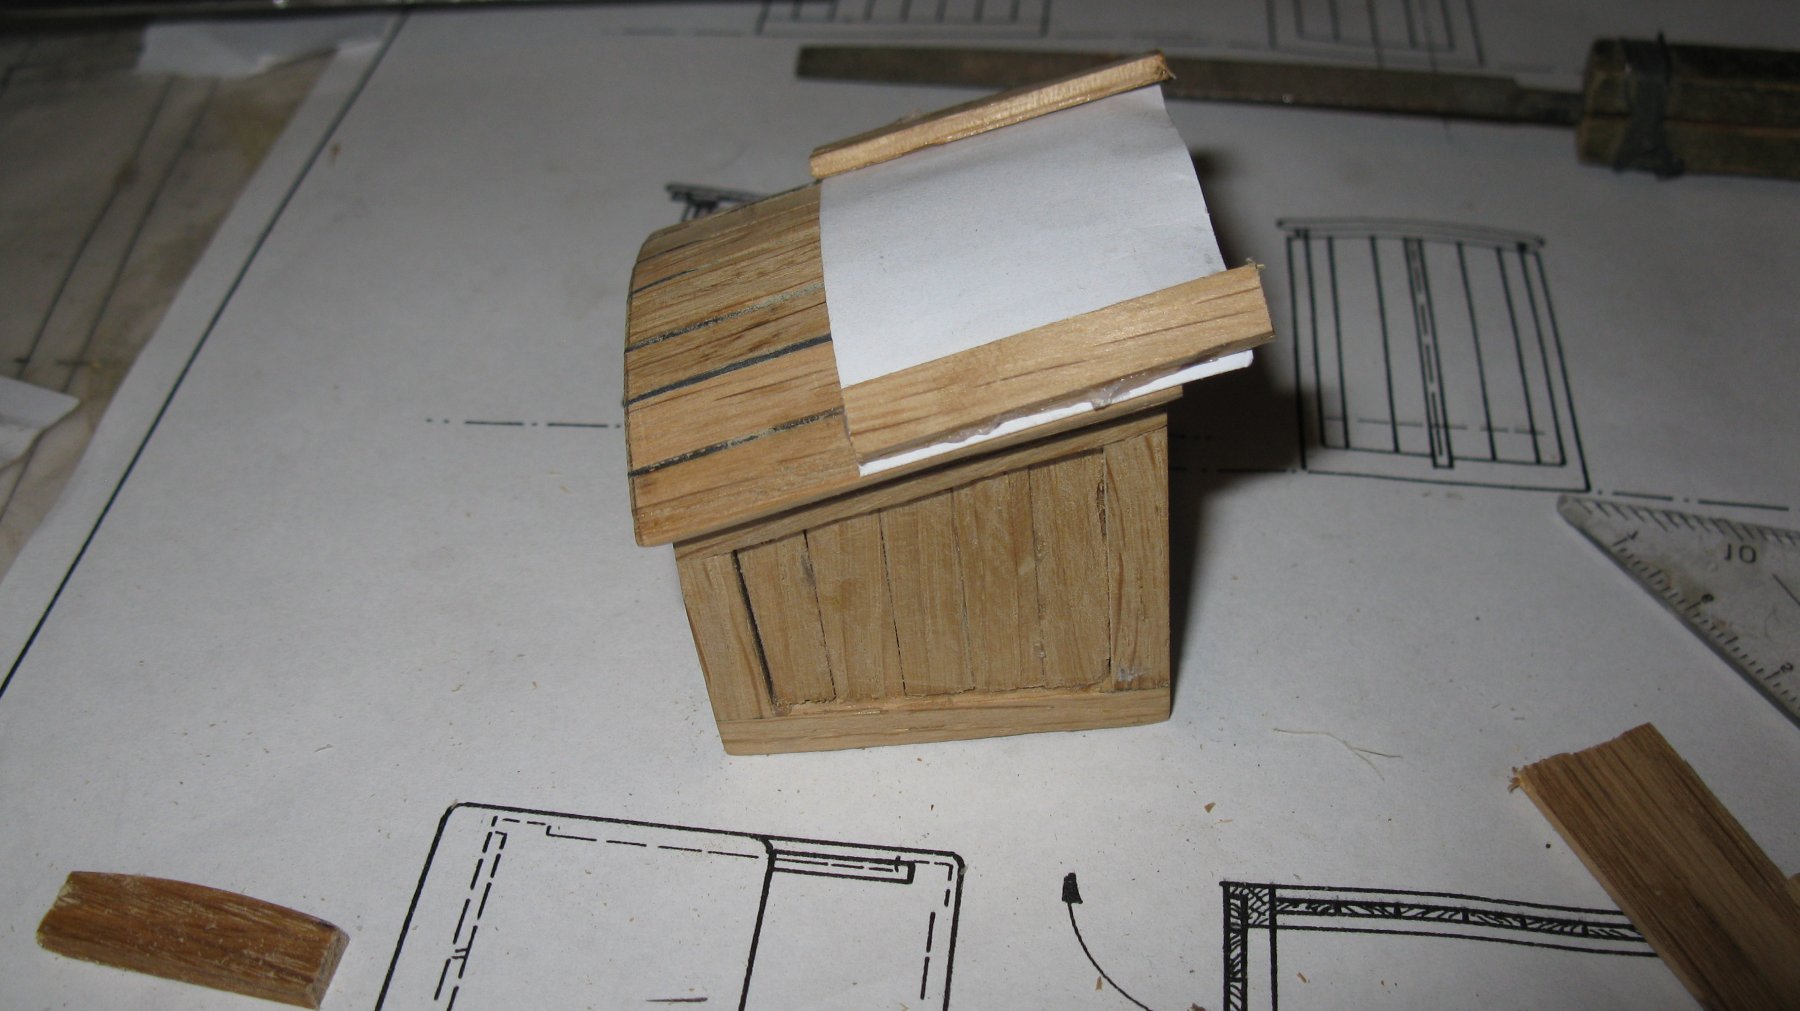
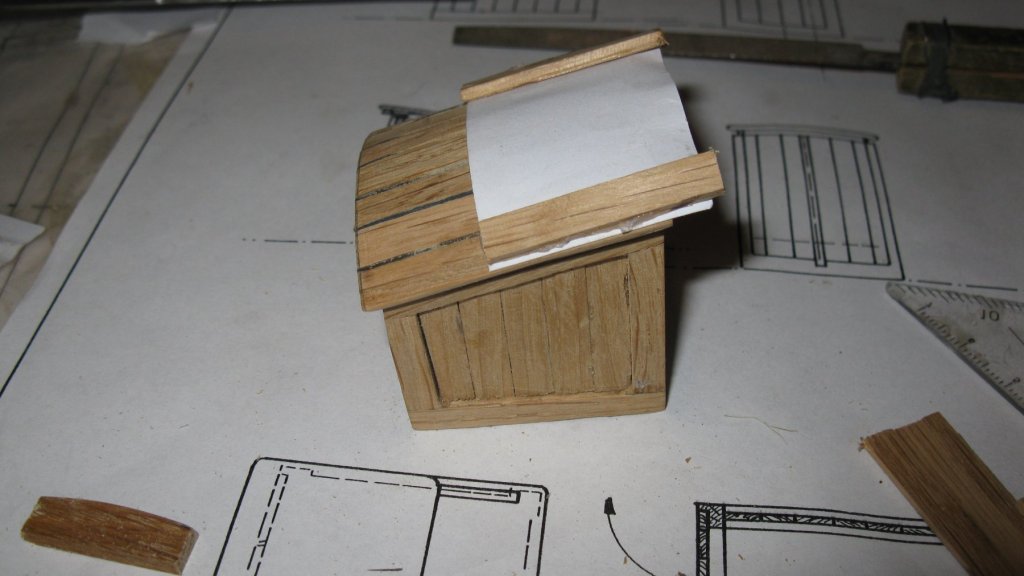
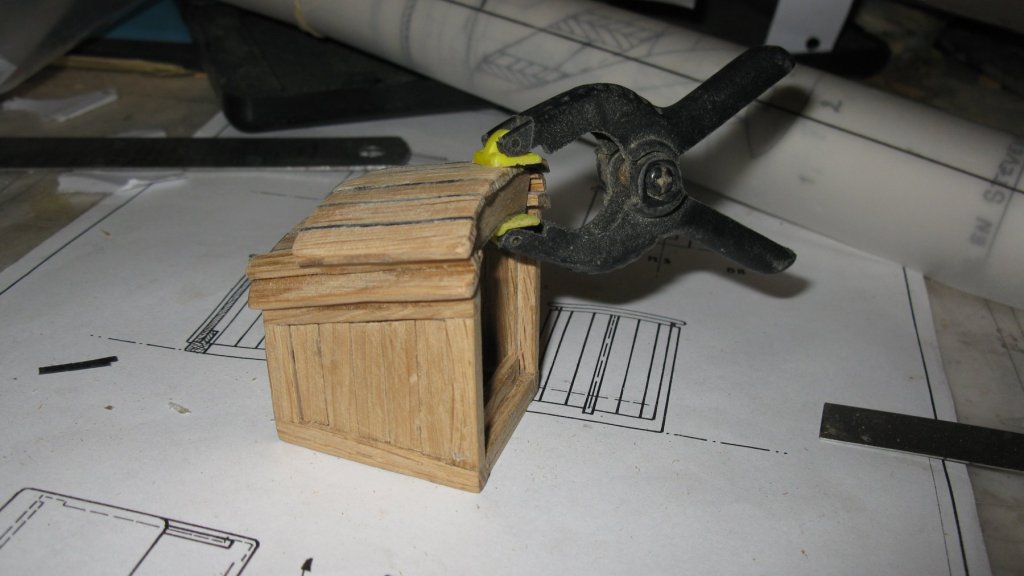
12.10 To give the hatch the same curve as the roof I glue it together on top of the roof. A piece of paper between both prevents that the hatch is glued on the roof. When the glue of the hatch is dry, I sand it and make the hatch rails. On the front side the pincher is holding the front plank in place while the glue is drying

-
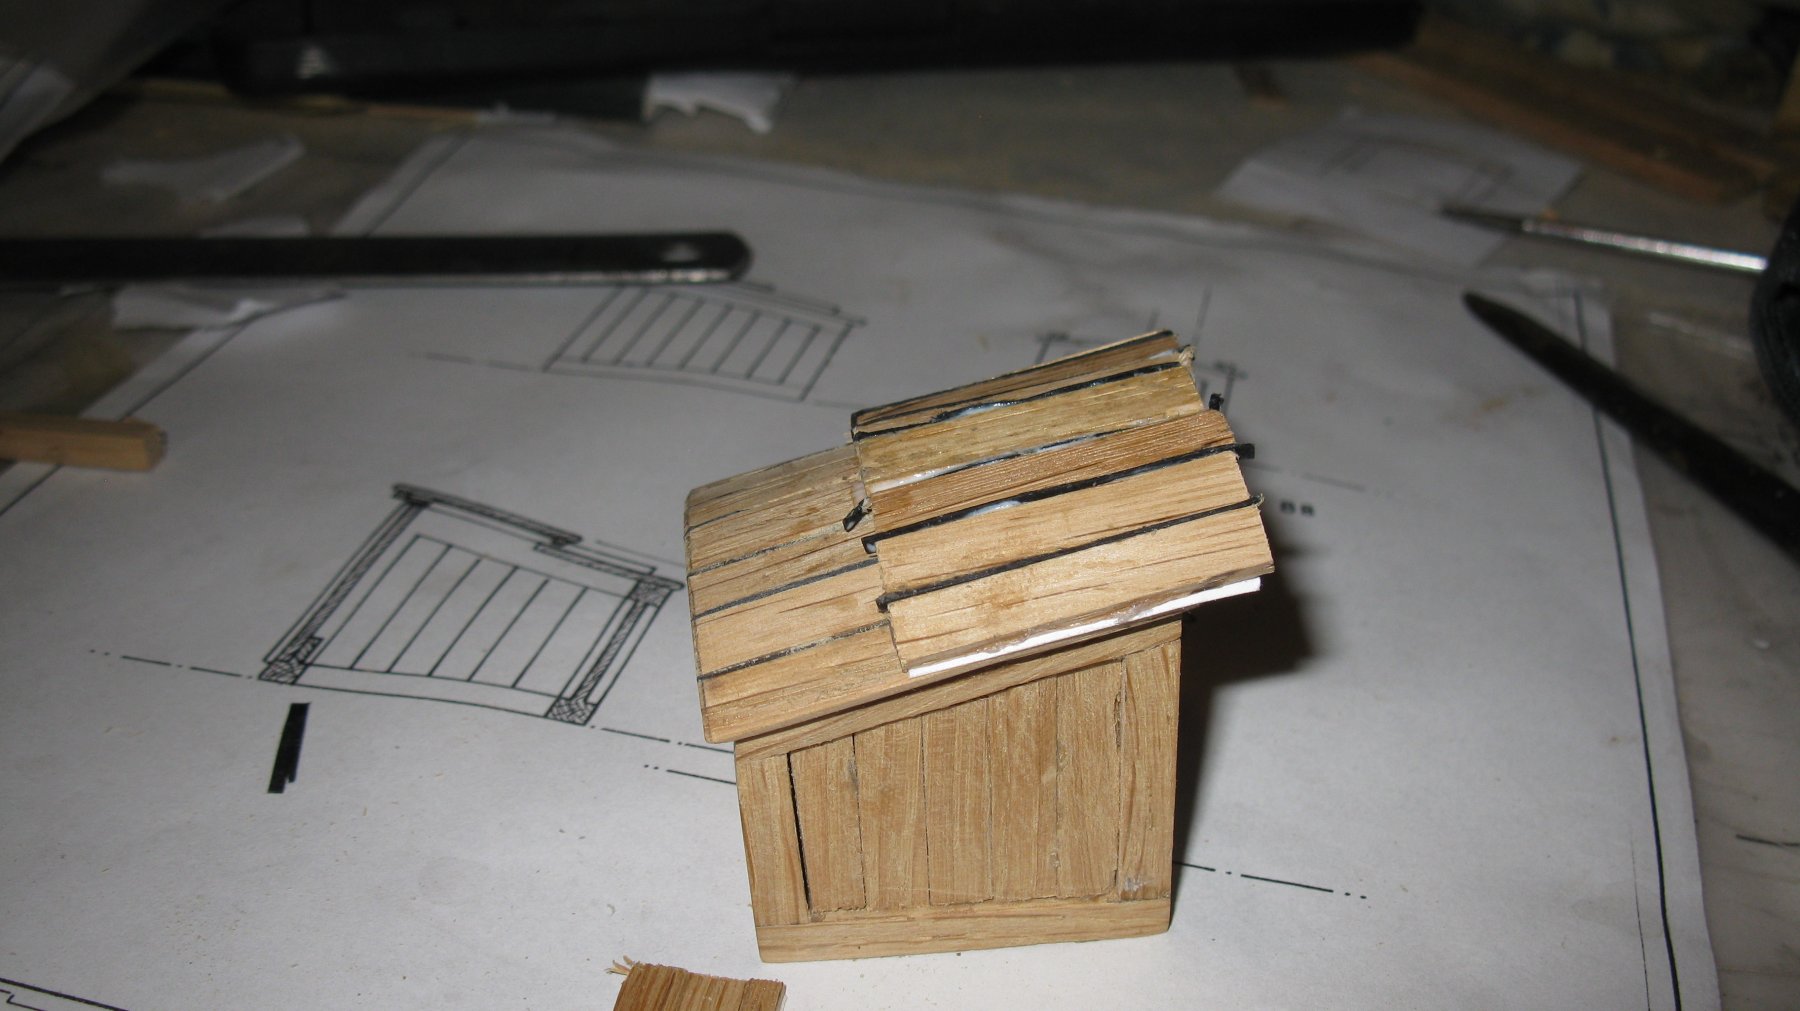
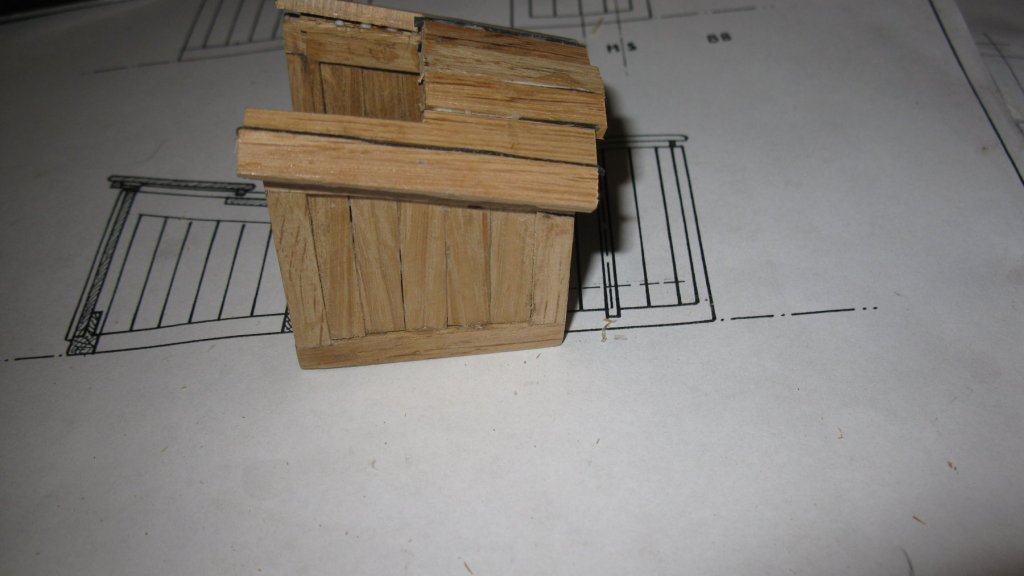
12.9 After the roof is sanded.

-
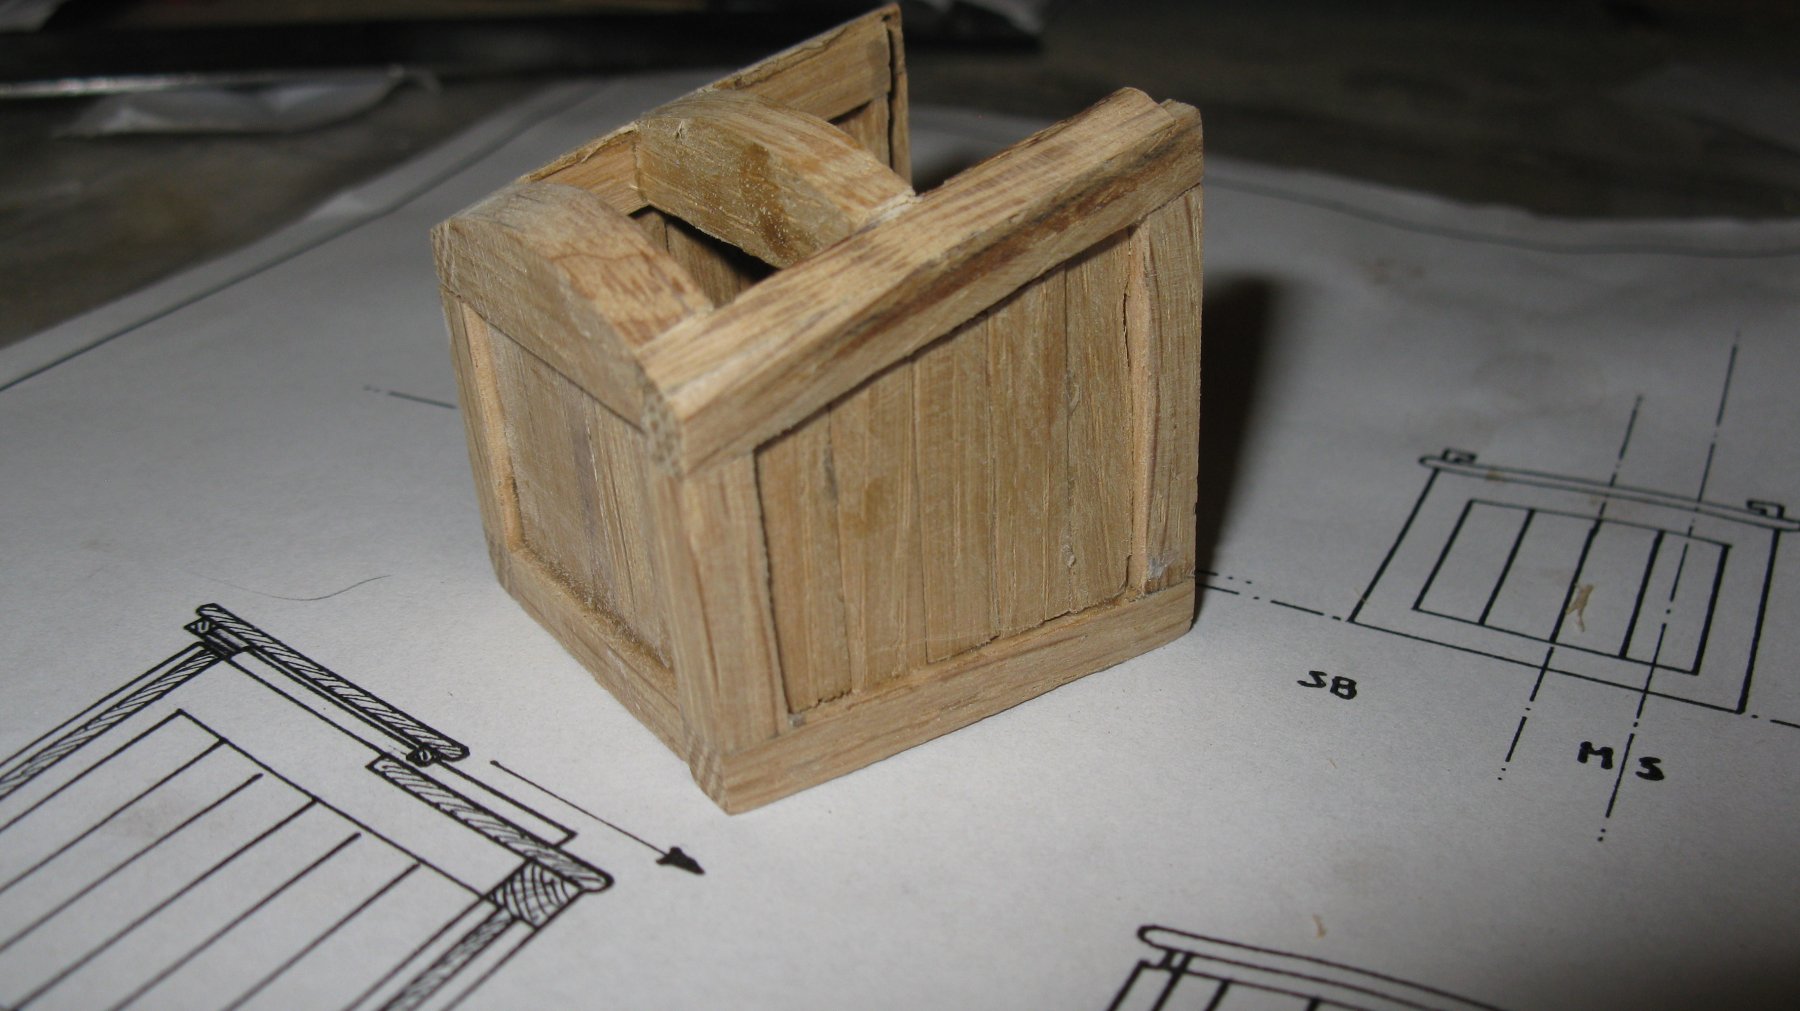
12.8 The top side of the cabin entrance can now be covered with planks. I glue a strip of black card board between the planks because I presume the roof was caulked. In the roof the opening for entering is left uncovered.
-
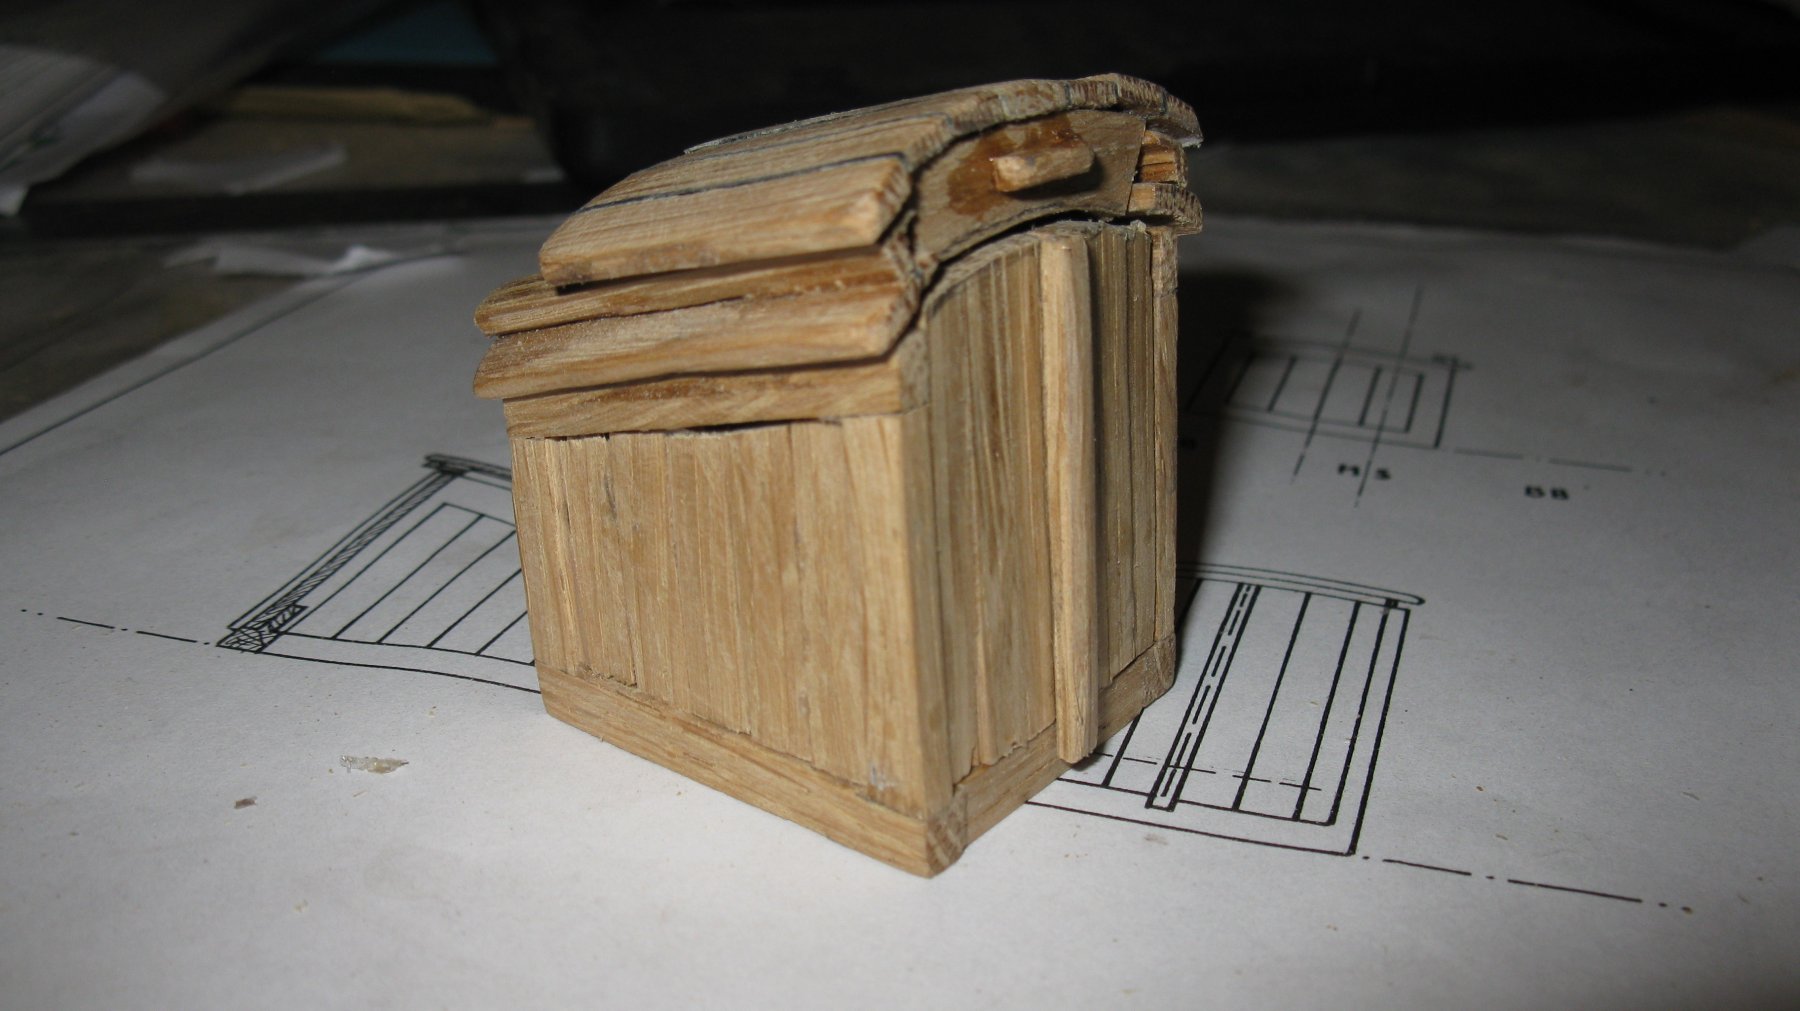
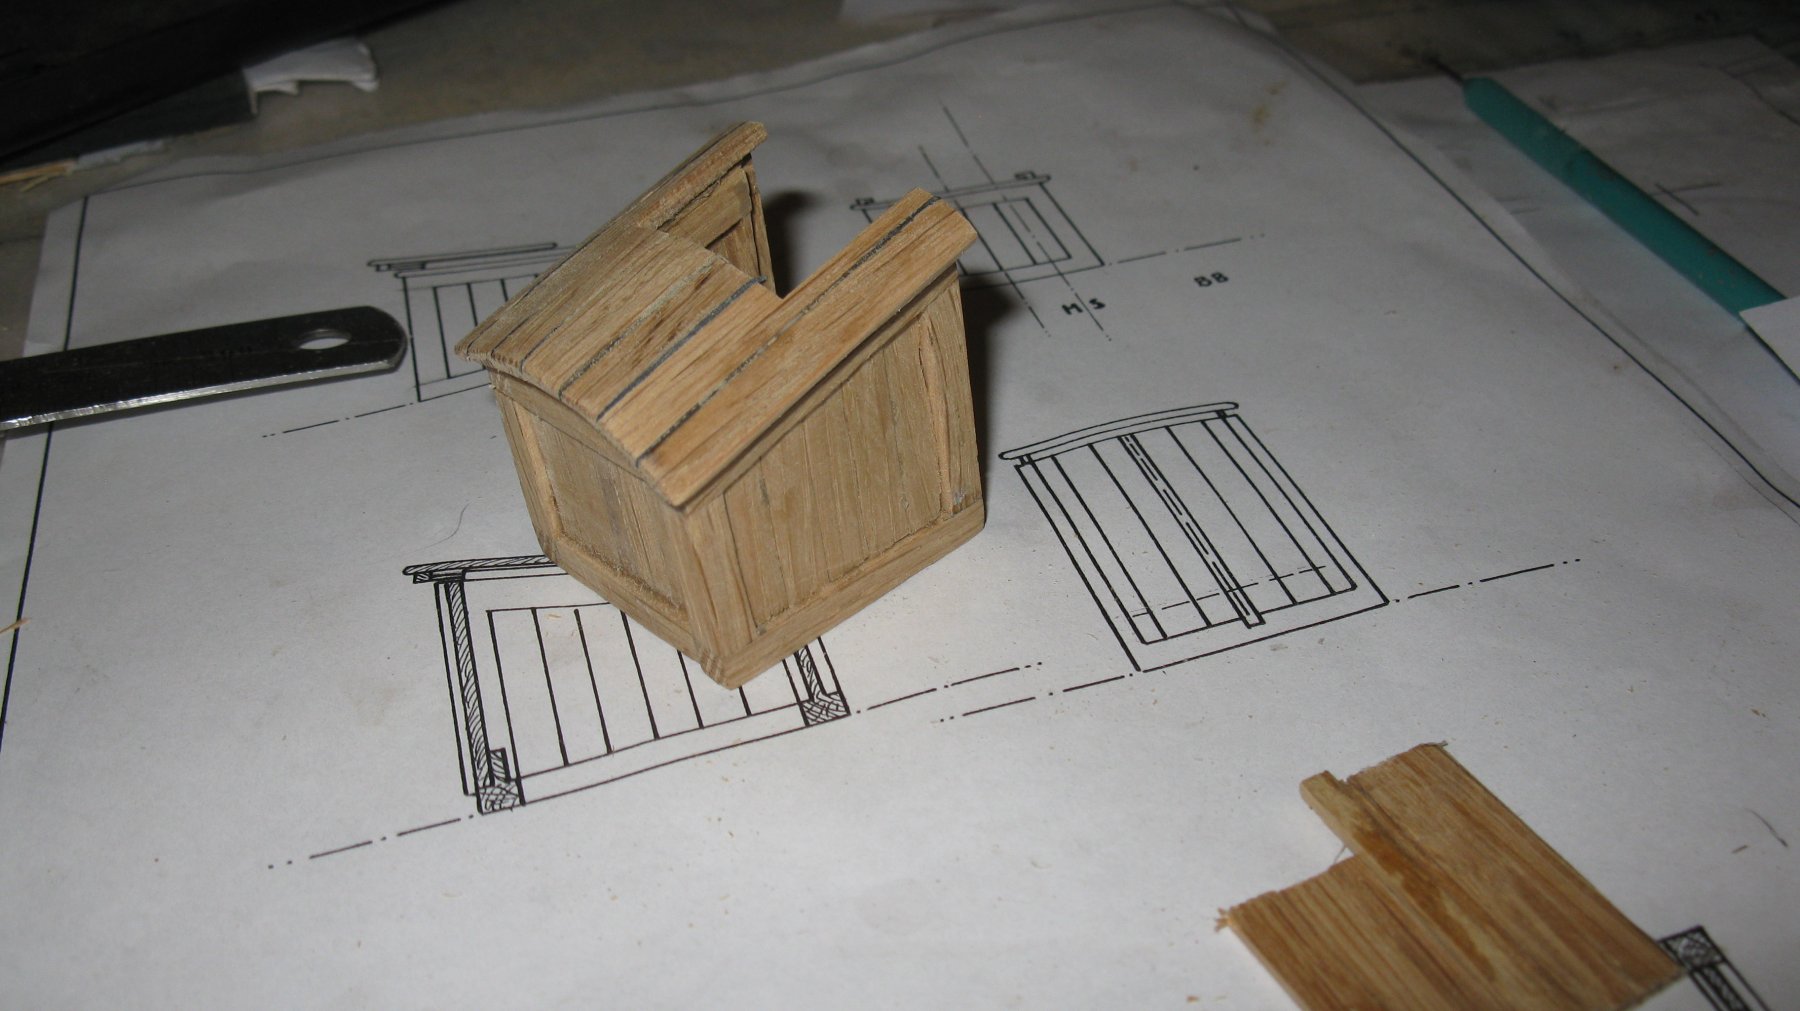
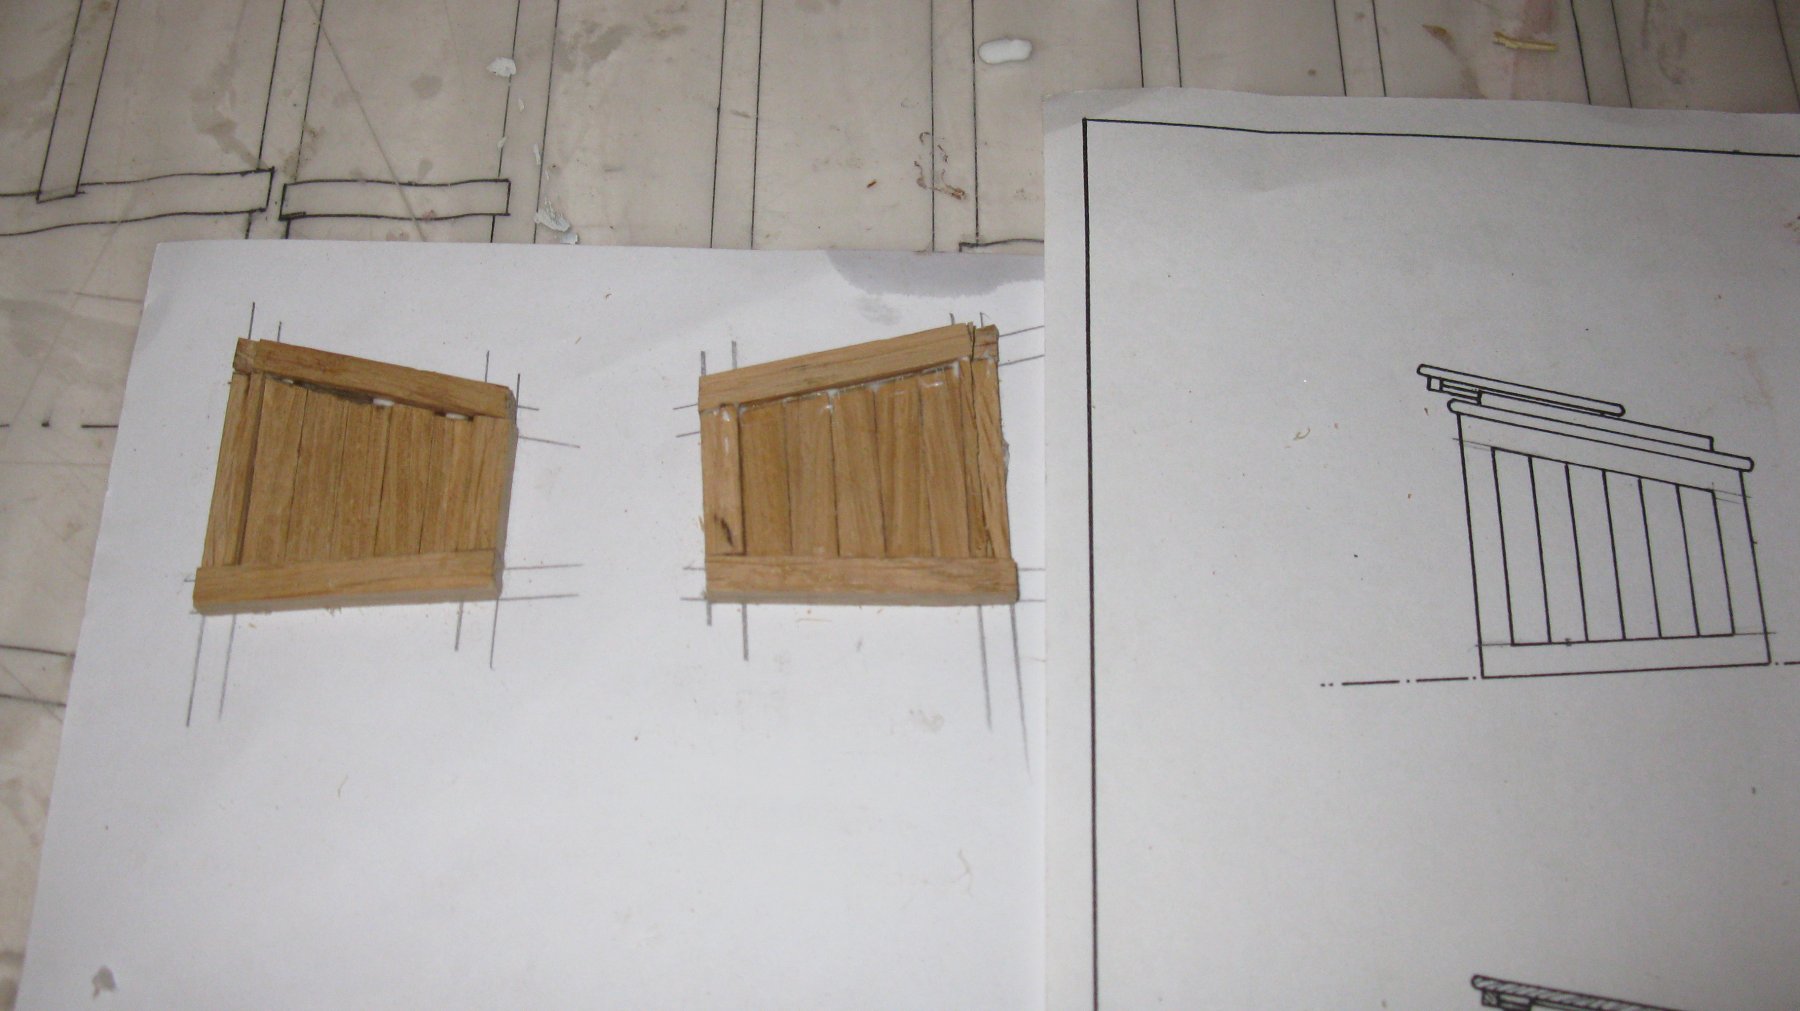
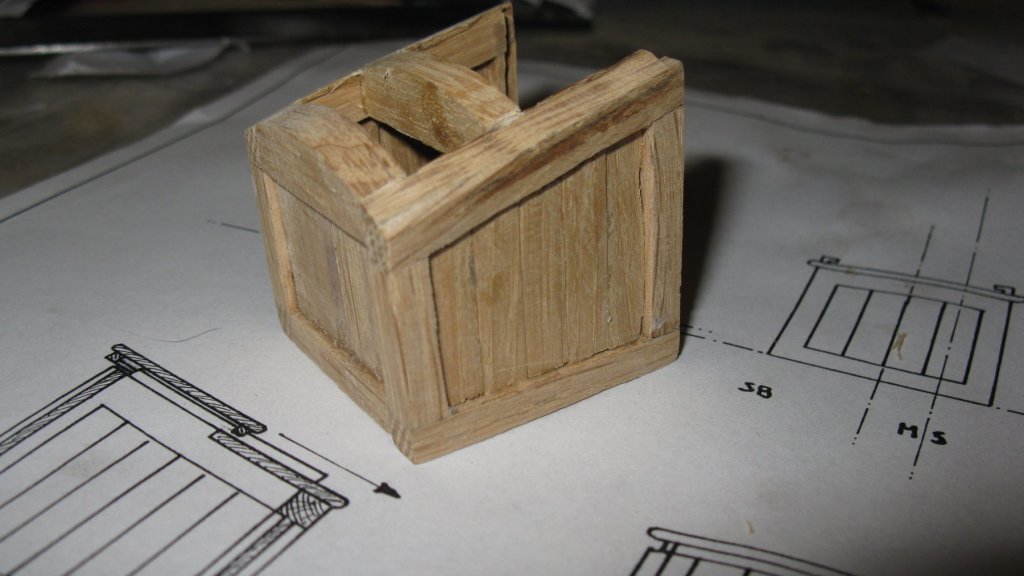
12.7 I glue the bottom-, top front- and top middle beam between the 2 sides and fill the so formed front frame with planks. The width of both top beams was almost double as it should be. When the glue was dry, I sanded the topside of the deckhouse arched with the band sander as can be seen on the picture.
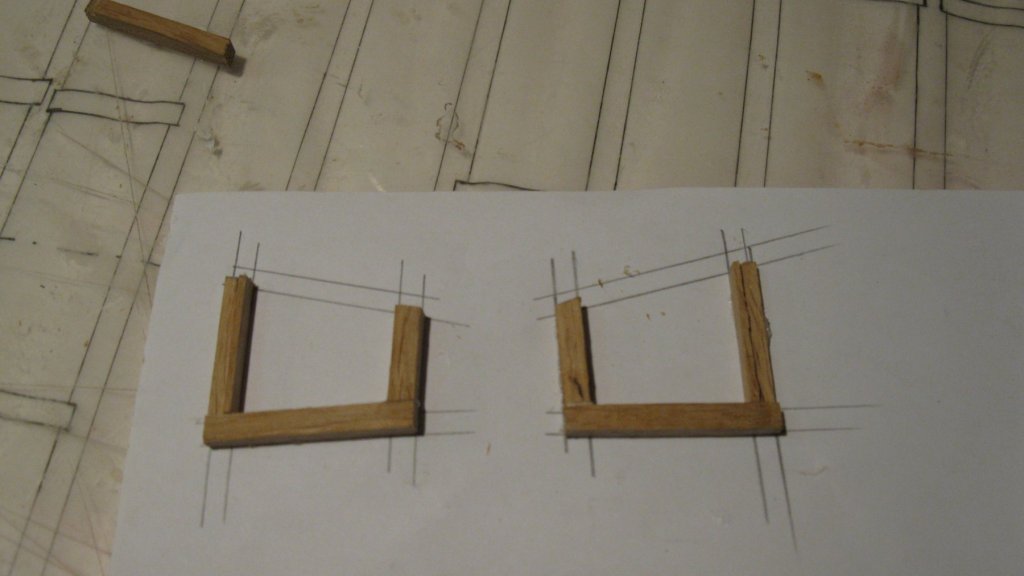
-
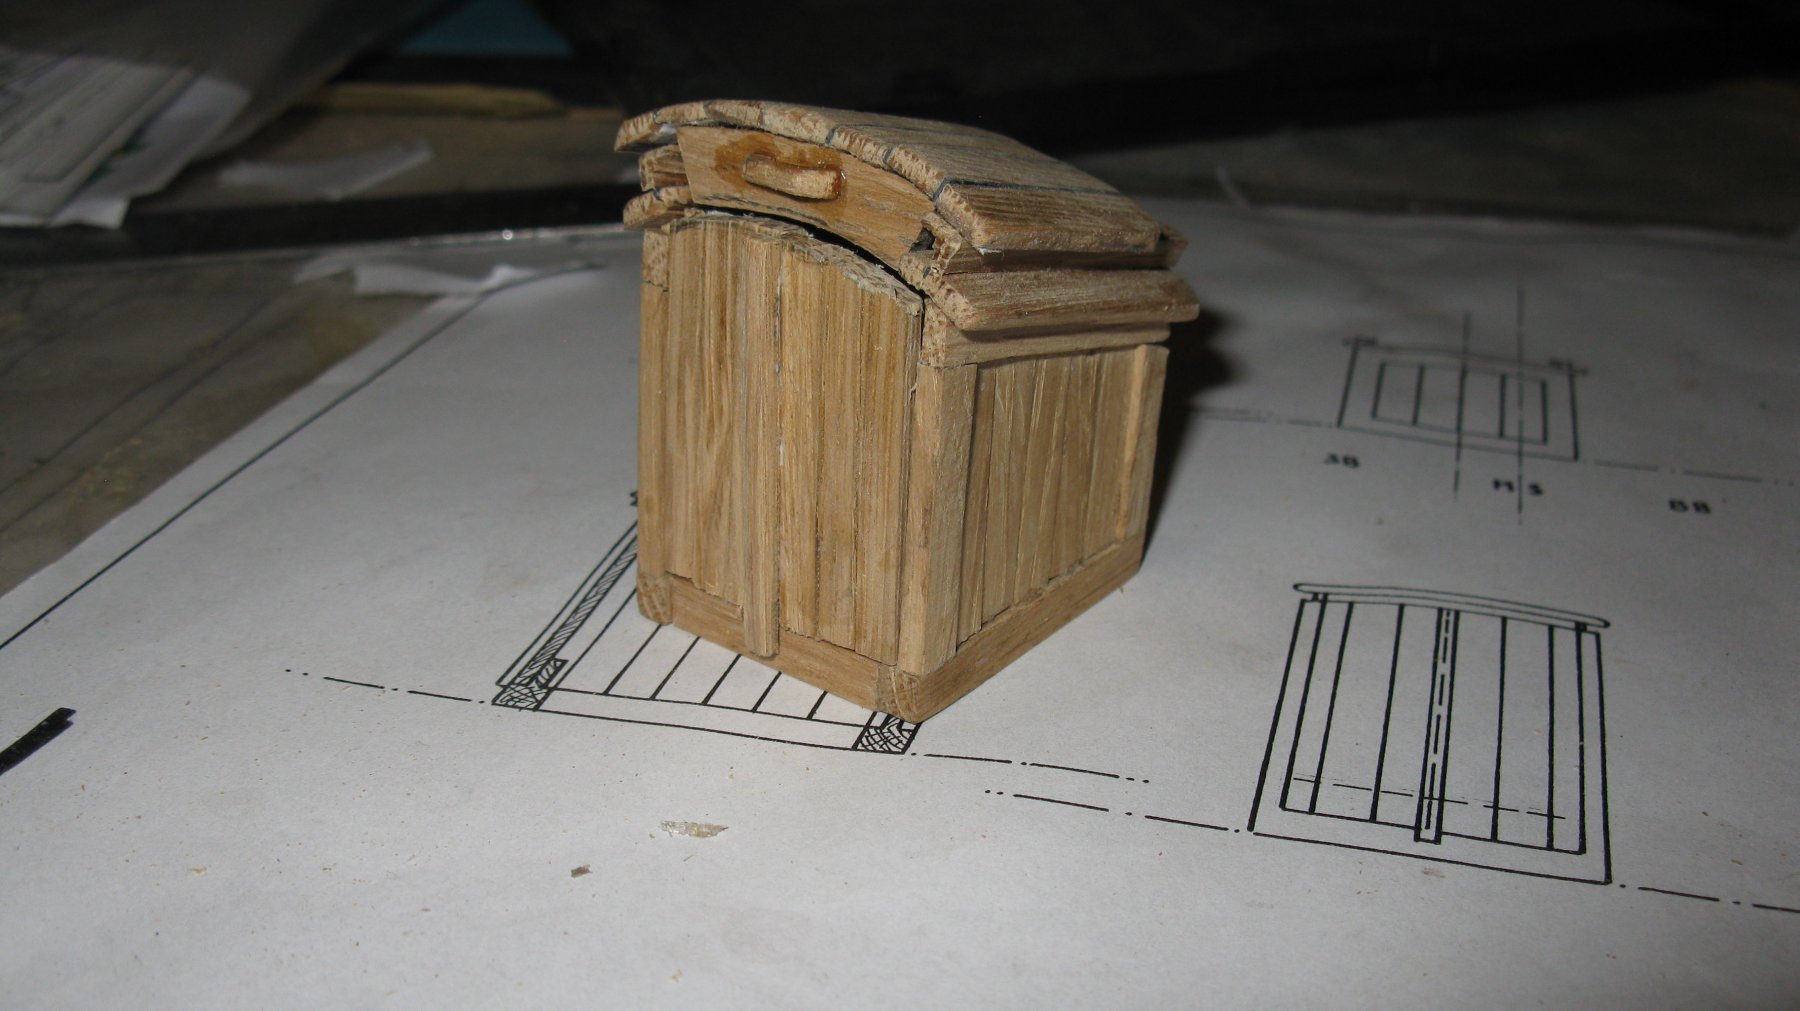
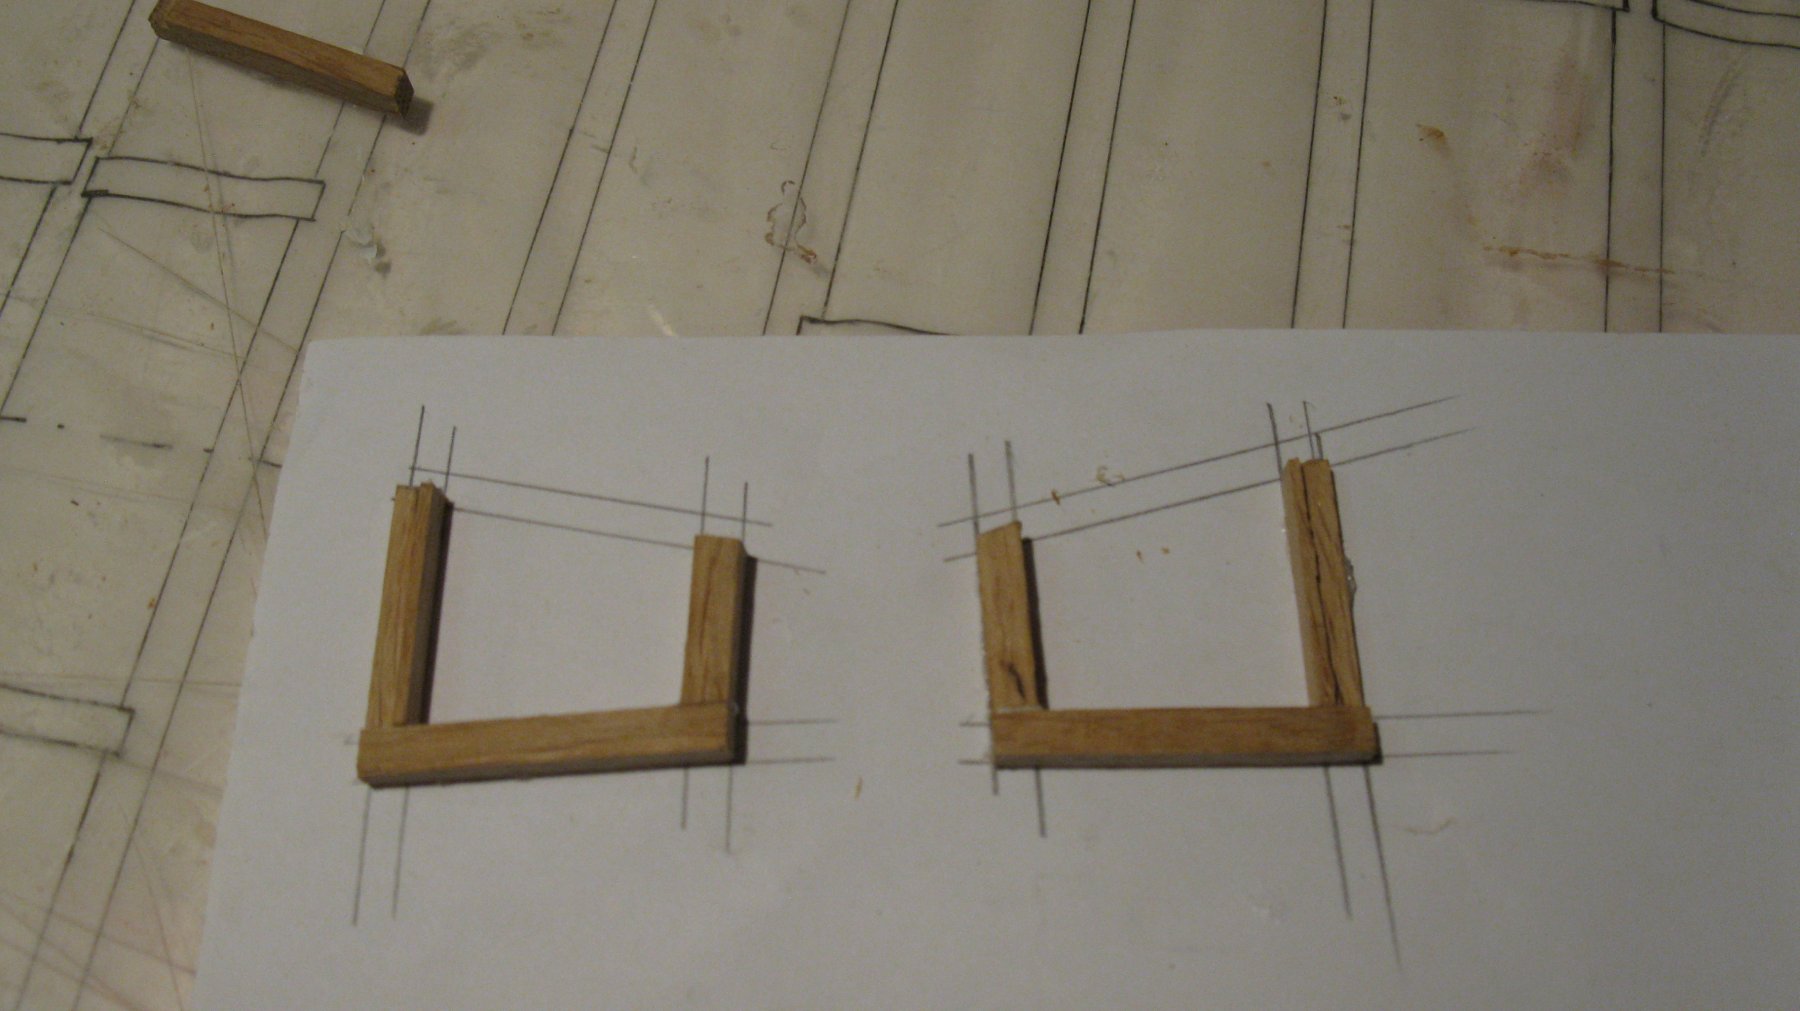
12.6 I start to make the frames of both sides of the deckhouse. Afterwards I fill the inside of the frames with planks.
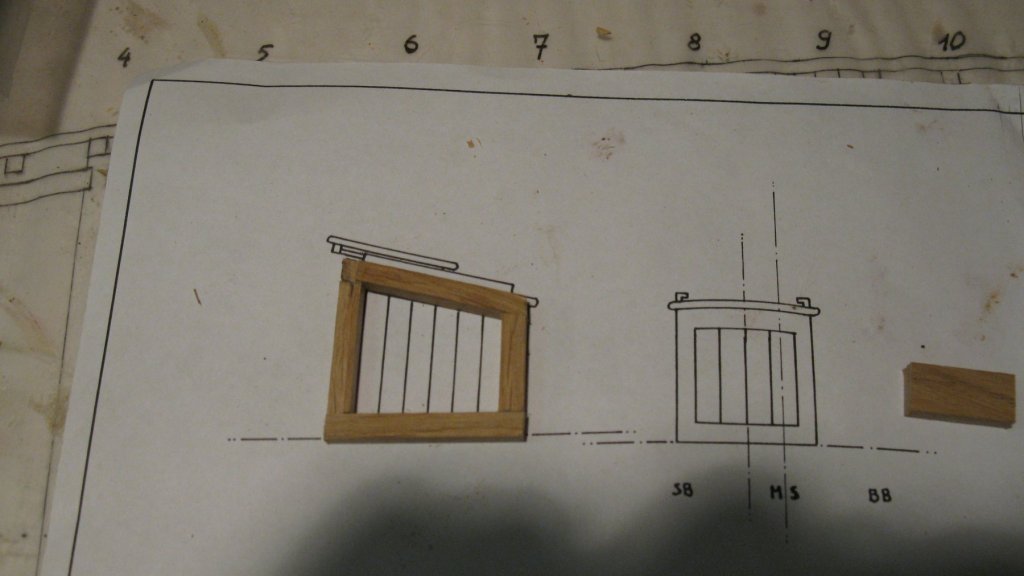

-
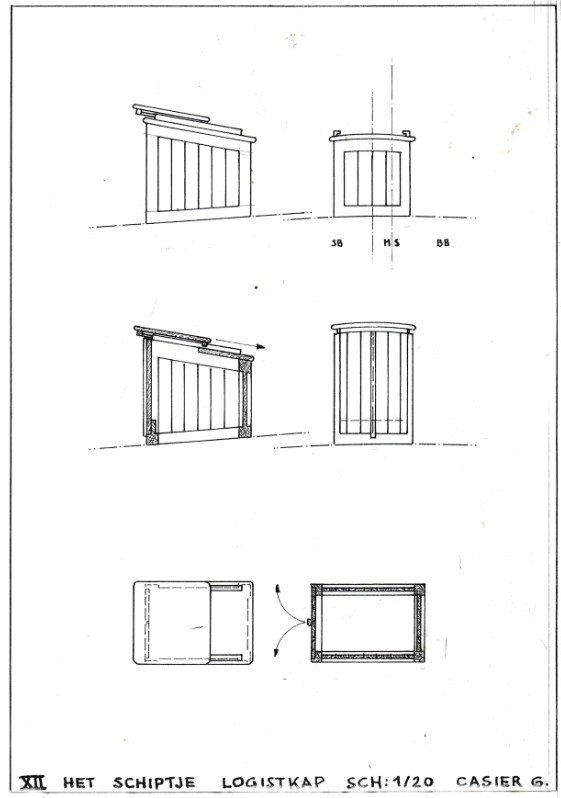
12.5 Just behind the chimney is the cabin entrance. It has a gliding hatch and double door. I would like to make a functioning hatch and doors.

-
12.4 Here it is assembled and standing into position. Before it will be placed permanently it has to be blackened.
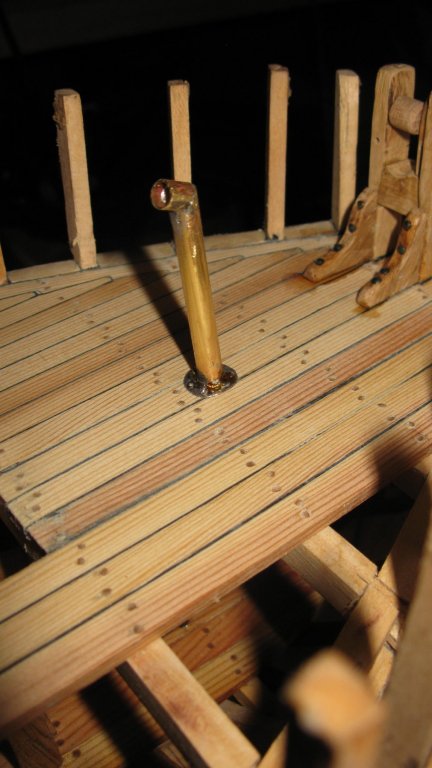
-
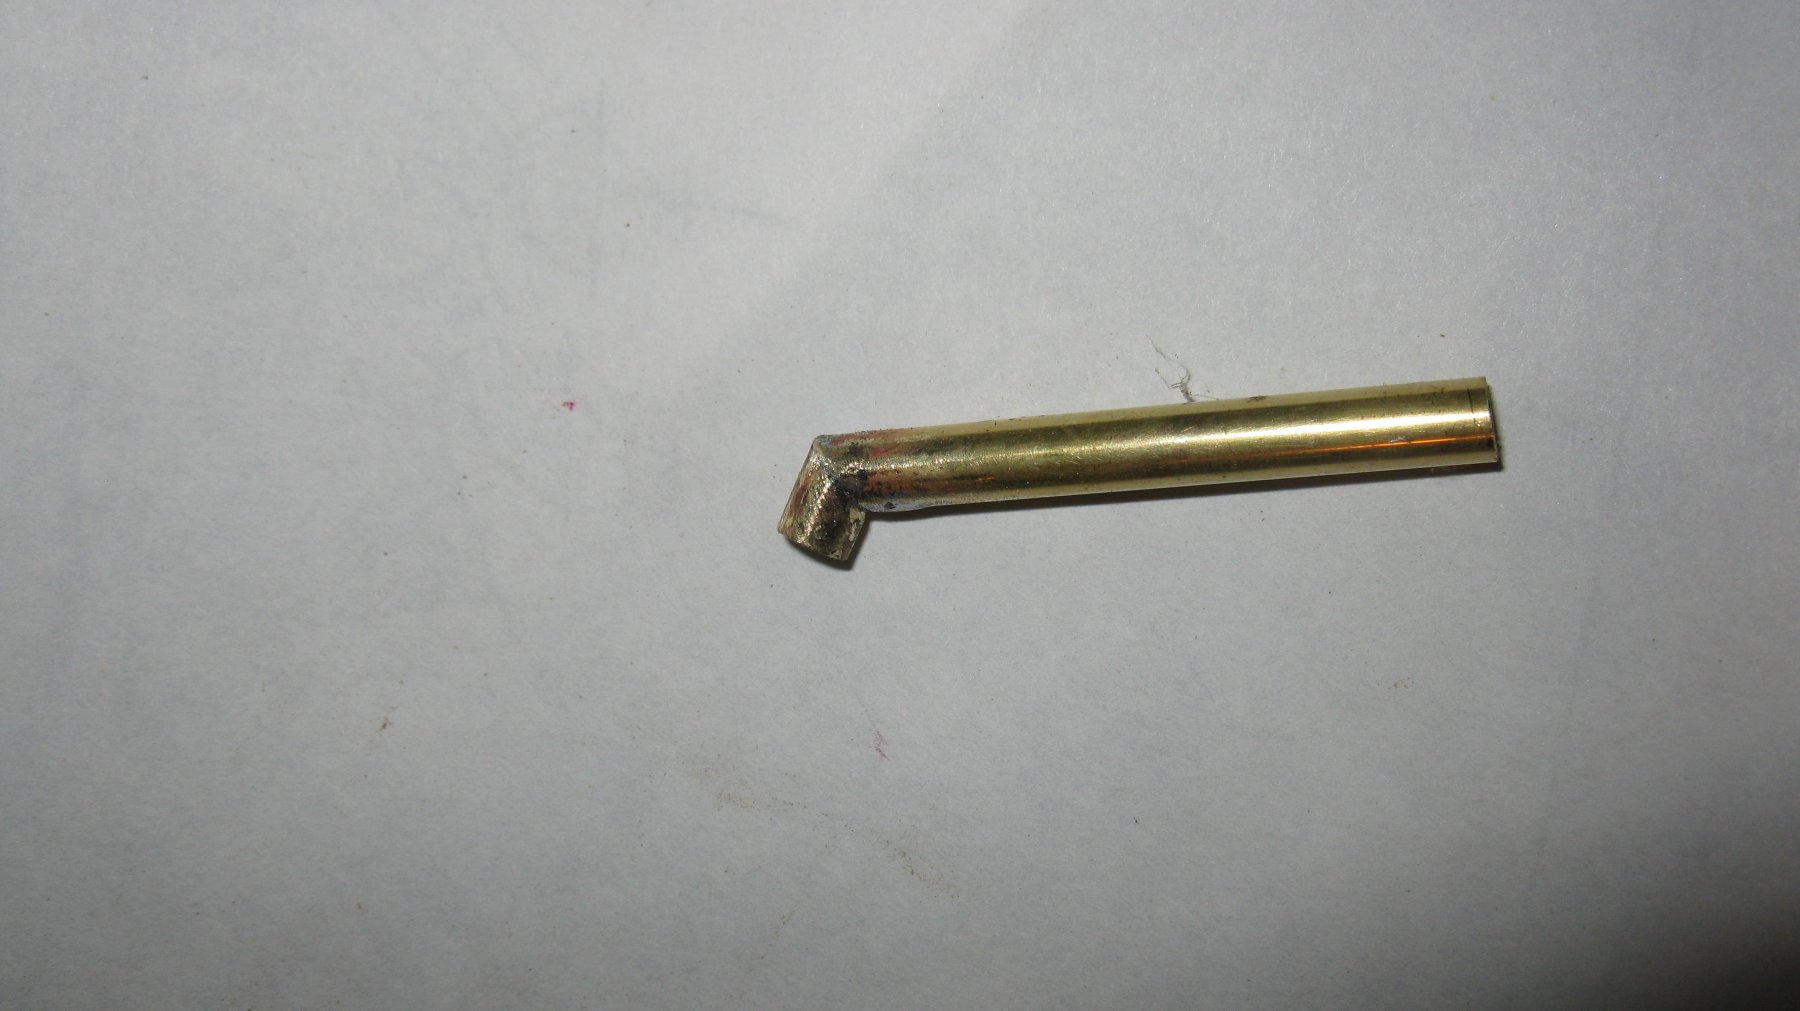
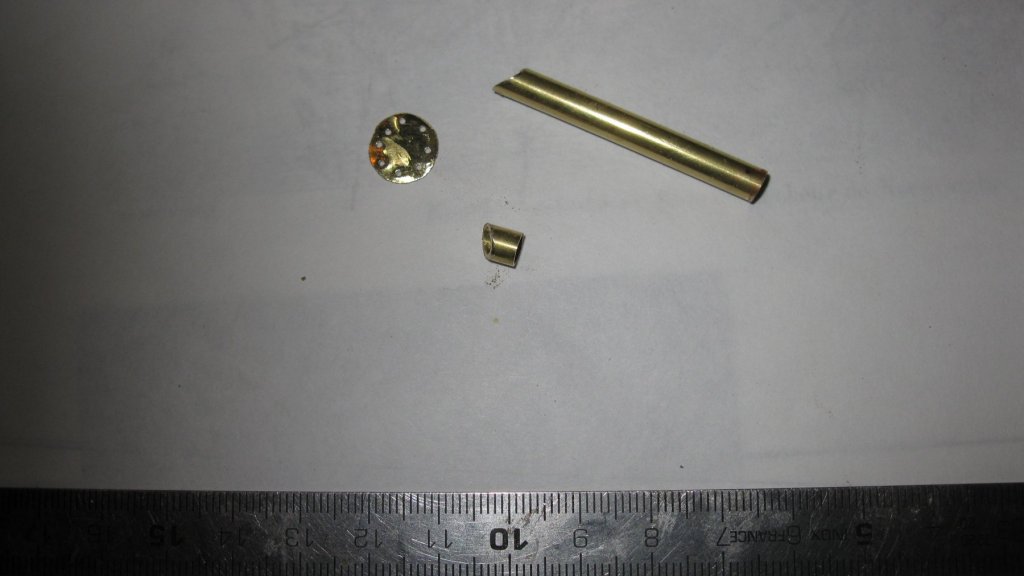
12.3 As there is a stove in the crew shelter, there has to be a chimney. I make it of a 5mm brass tube sawn under 45° and soldered together. It stands on a small brass ring, sawn and filed out of a brass plate.

-
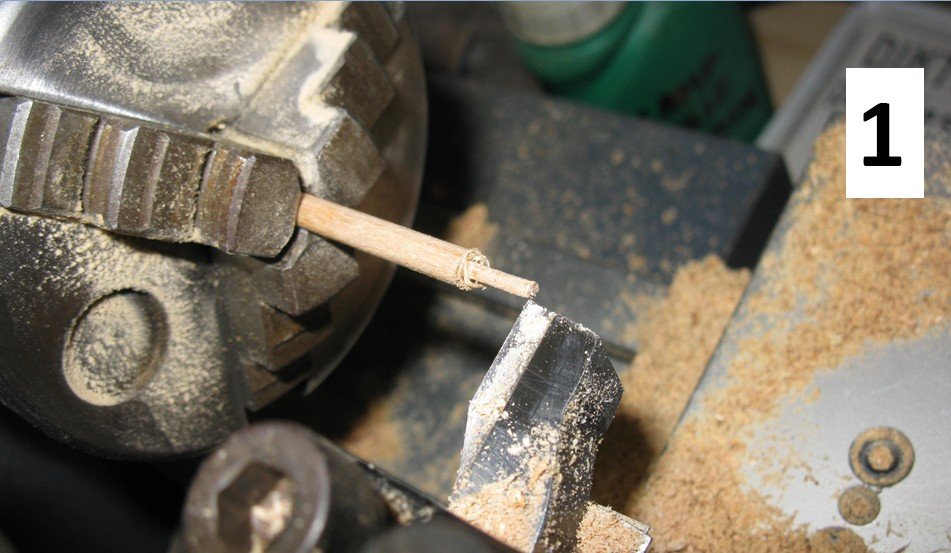
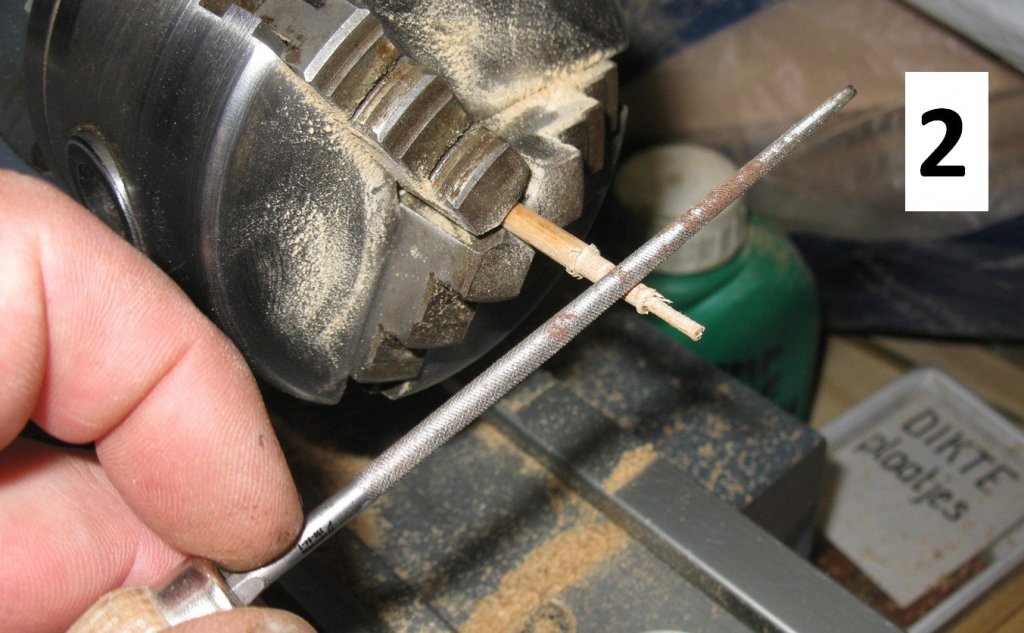
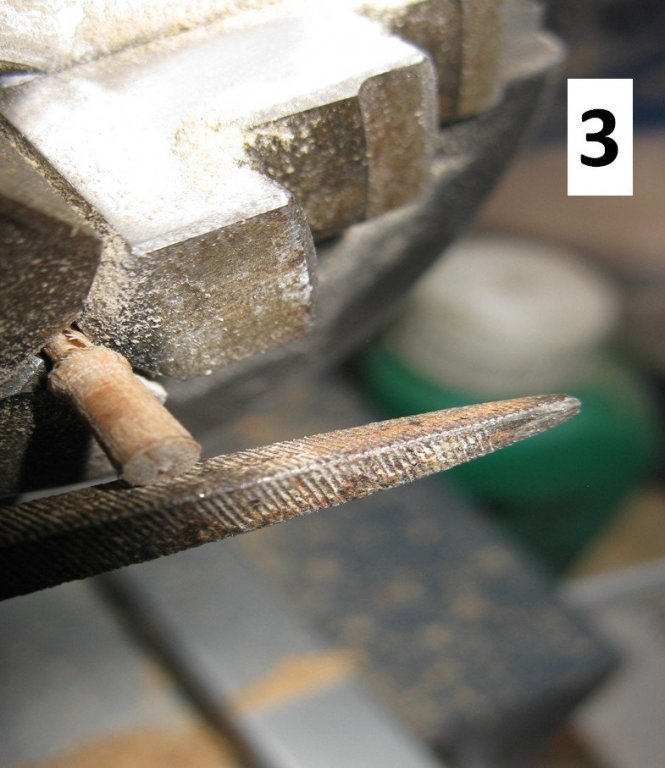
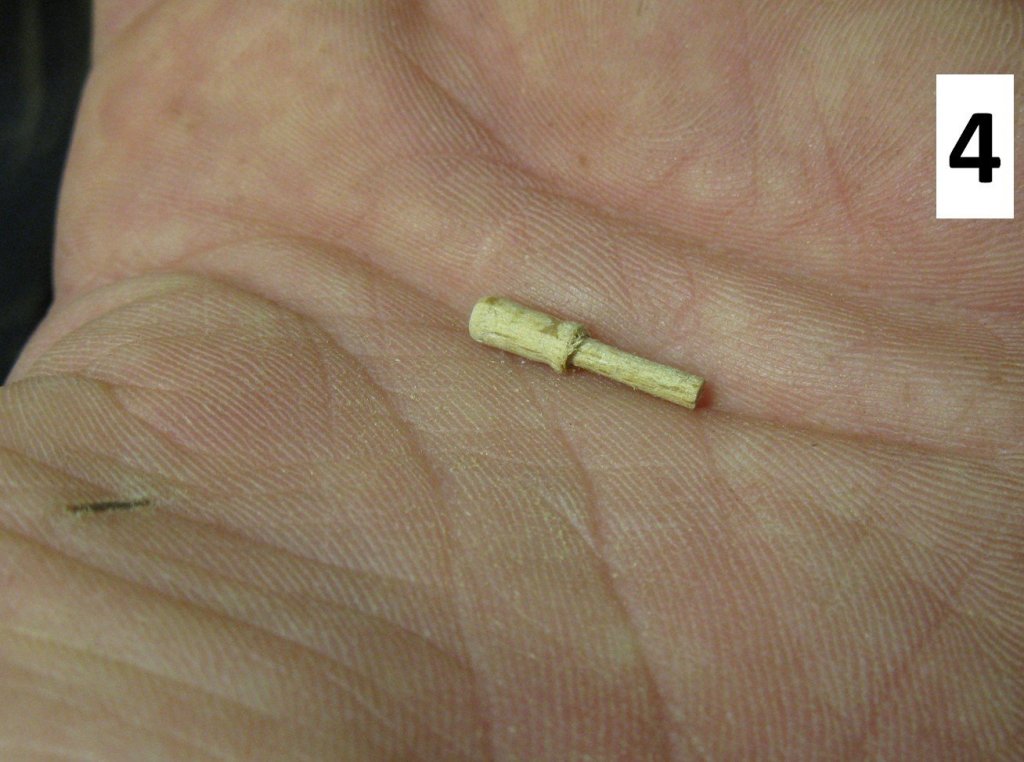
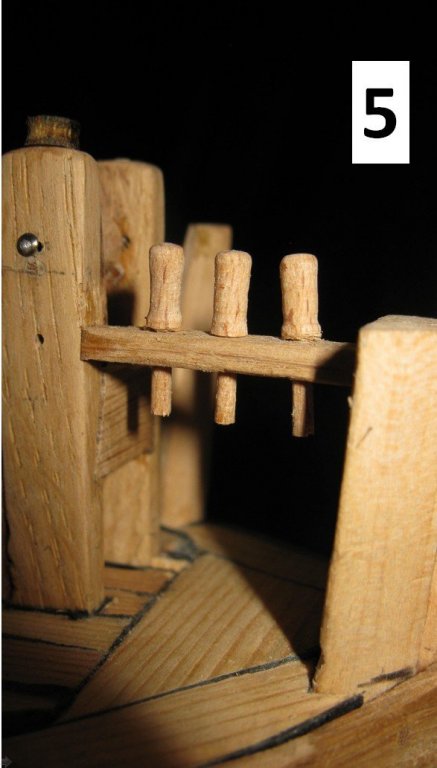
12.2 I add also the a small rail with 3 holes for belaying pins, connecting the jib boom support with the knight head. The belaying pins are made on the lathe of a spar of beech. 1. I first cut the thin part of the pin. 2. With a round file I shape the body of the handle. 3. I then cut off the pin from the spar and turn it around with the thin part in the chuck and I round the upper side of the handle with a flat (triangle) file. 4. The result. 5. The pins in the rail.
-
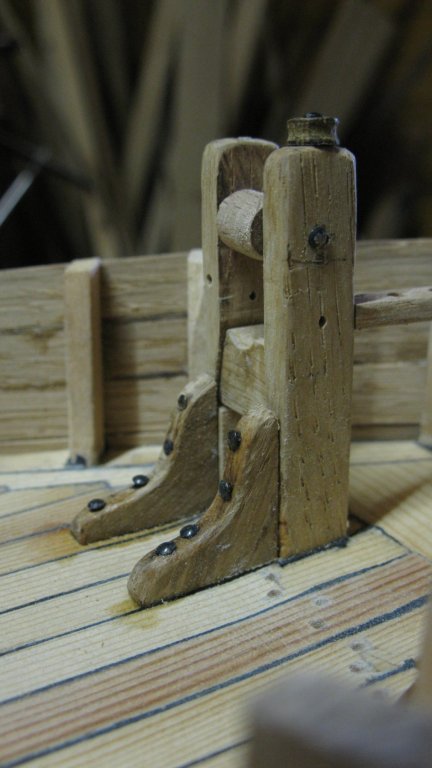
Part 12: Making deck gear 12.1 Now the deck is laid, I can finish the jib boom support with props on the deck.
-
Thank You Michael. I discovered recently your Bristol pilot boat log. That is ship modelling at a whole different level. It is clear that I have still a lot to learn. It is thanks to logs like yours that we can continue improving our skills. G.L.
-
John, Thank you very much for your comment. G.L.
-
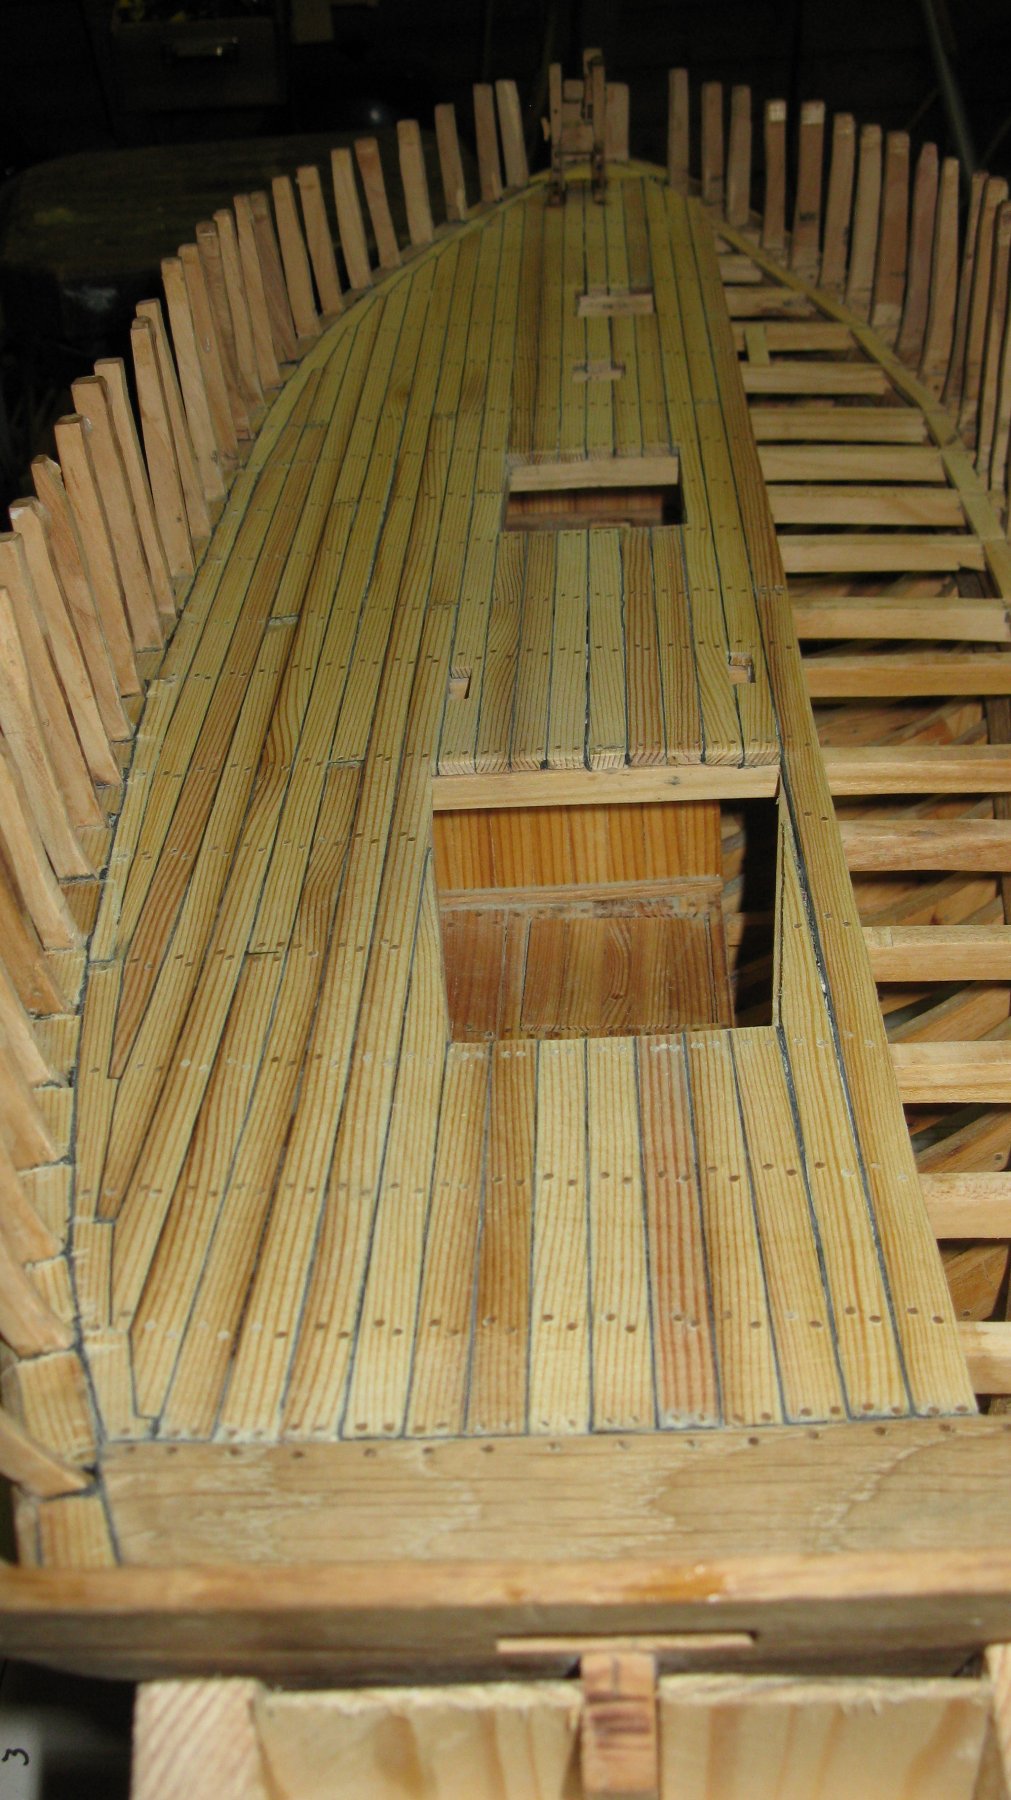
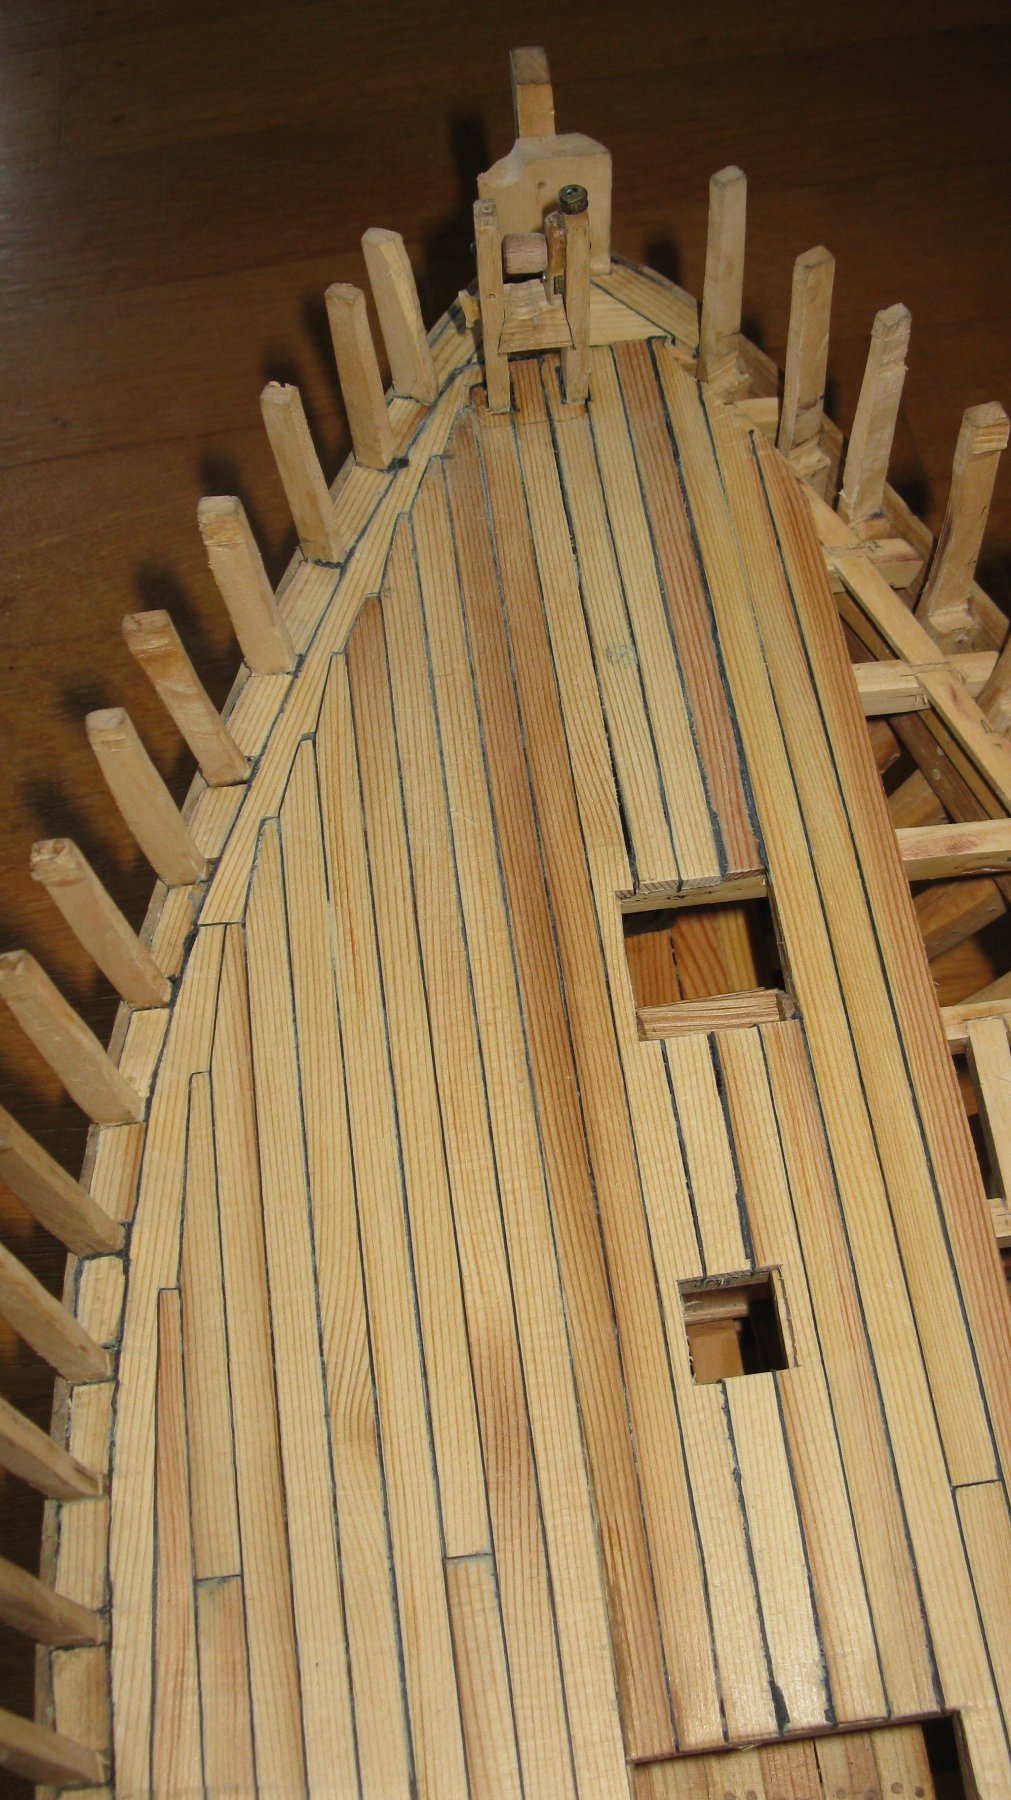
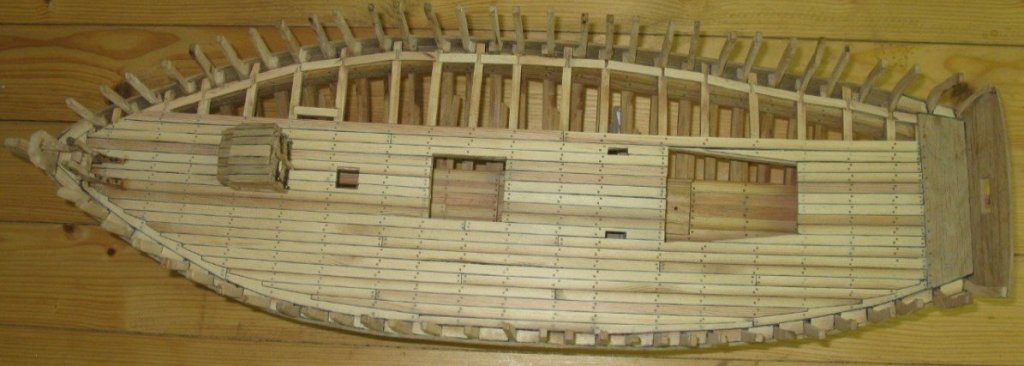
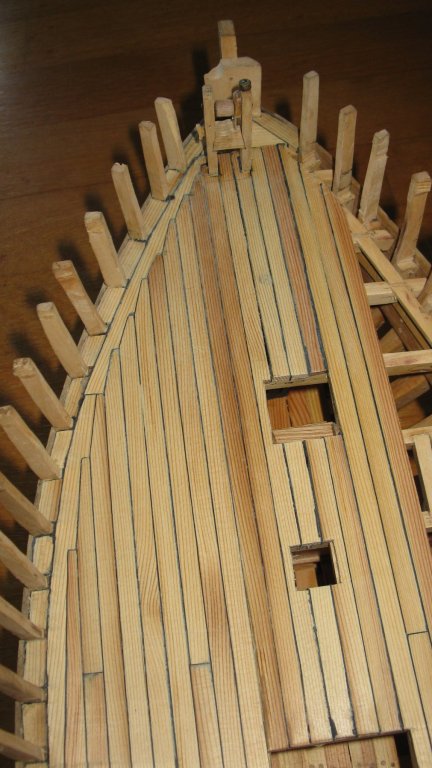
11.7 The deck is finished with tree nails and then sanding, sanding and sanding...

-
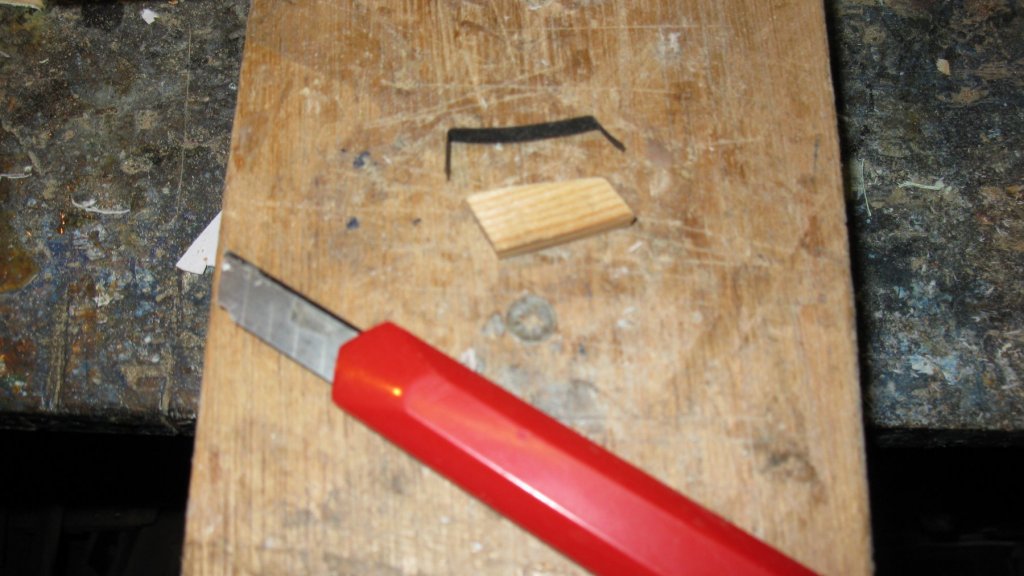
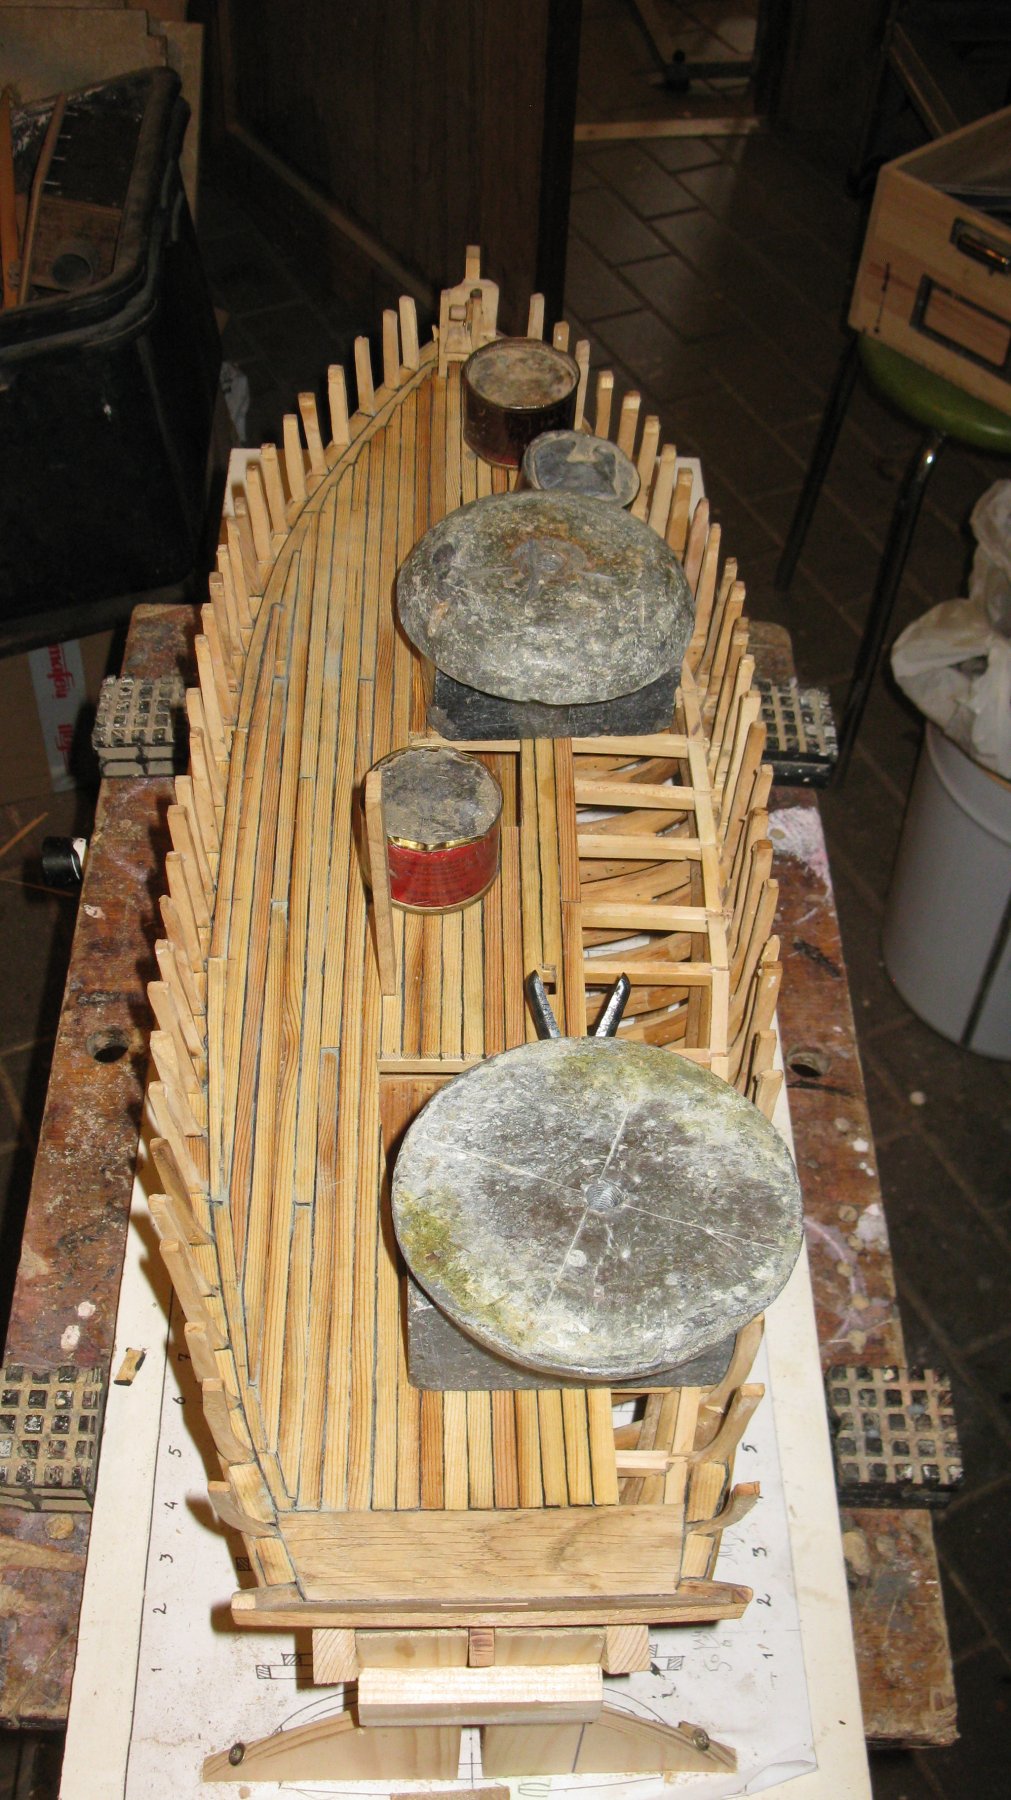
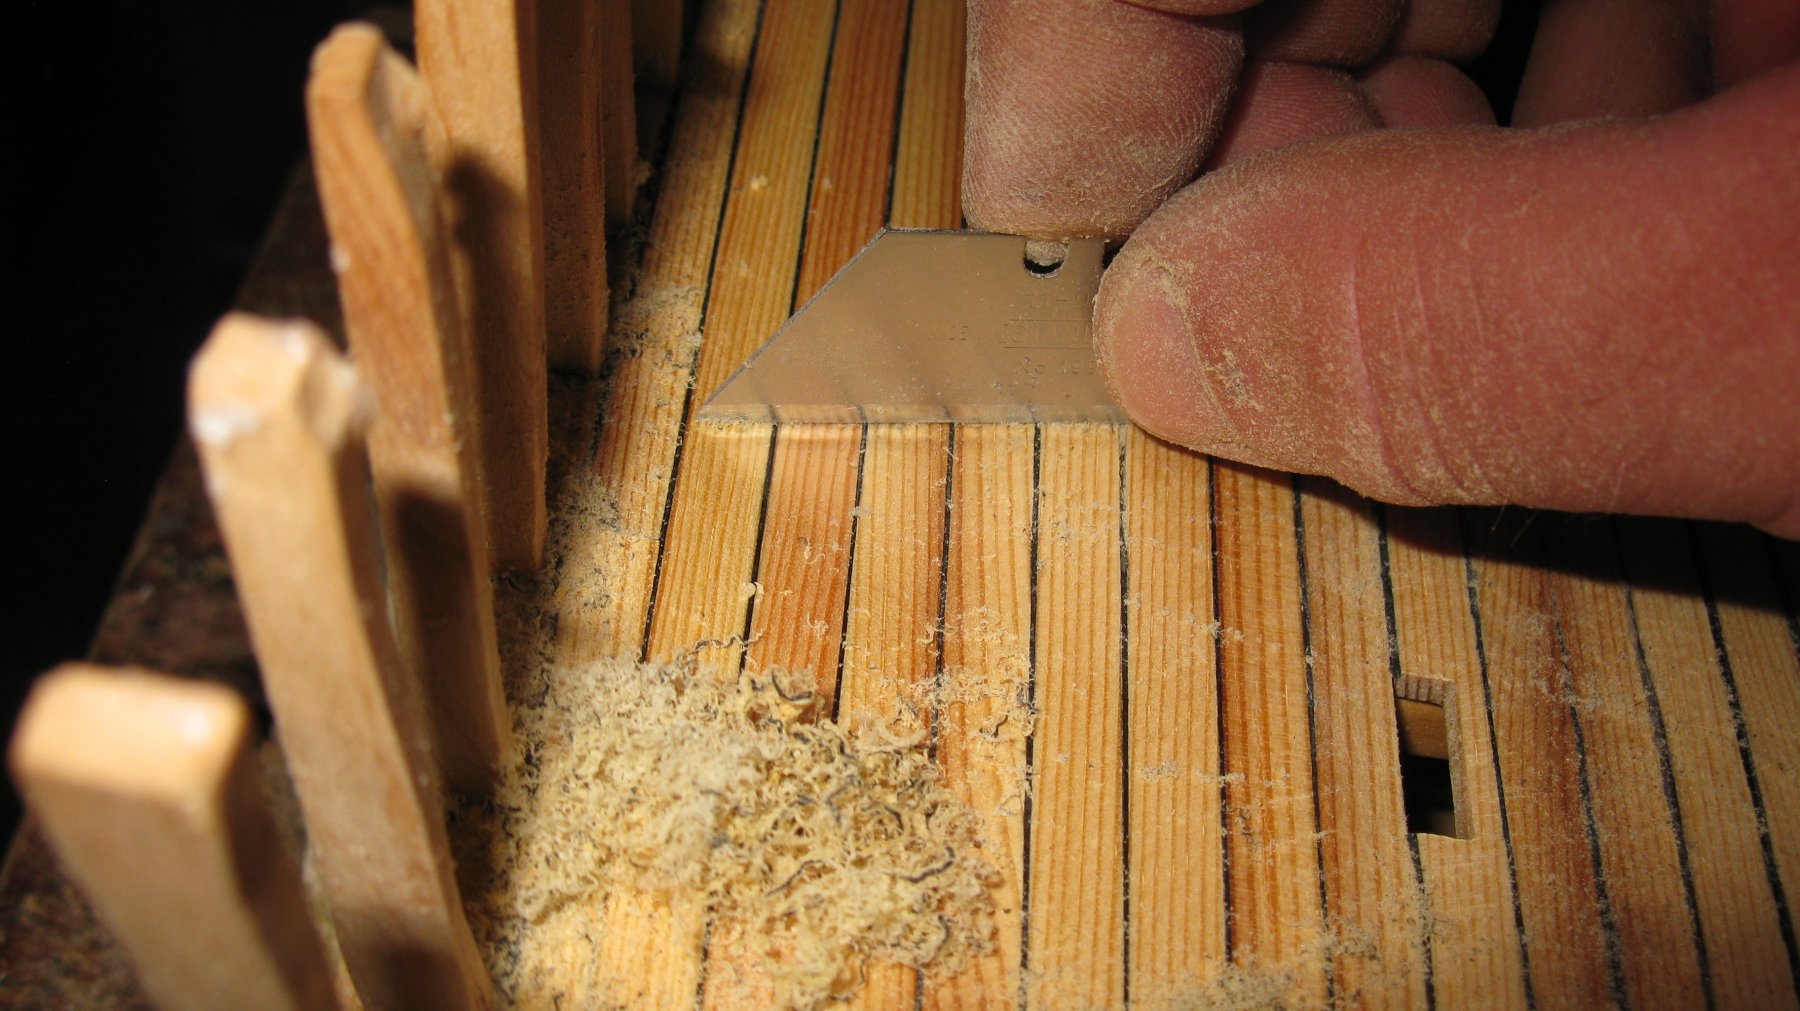
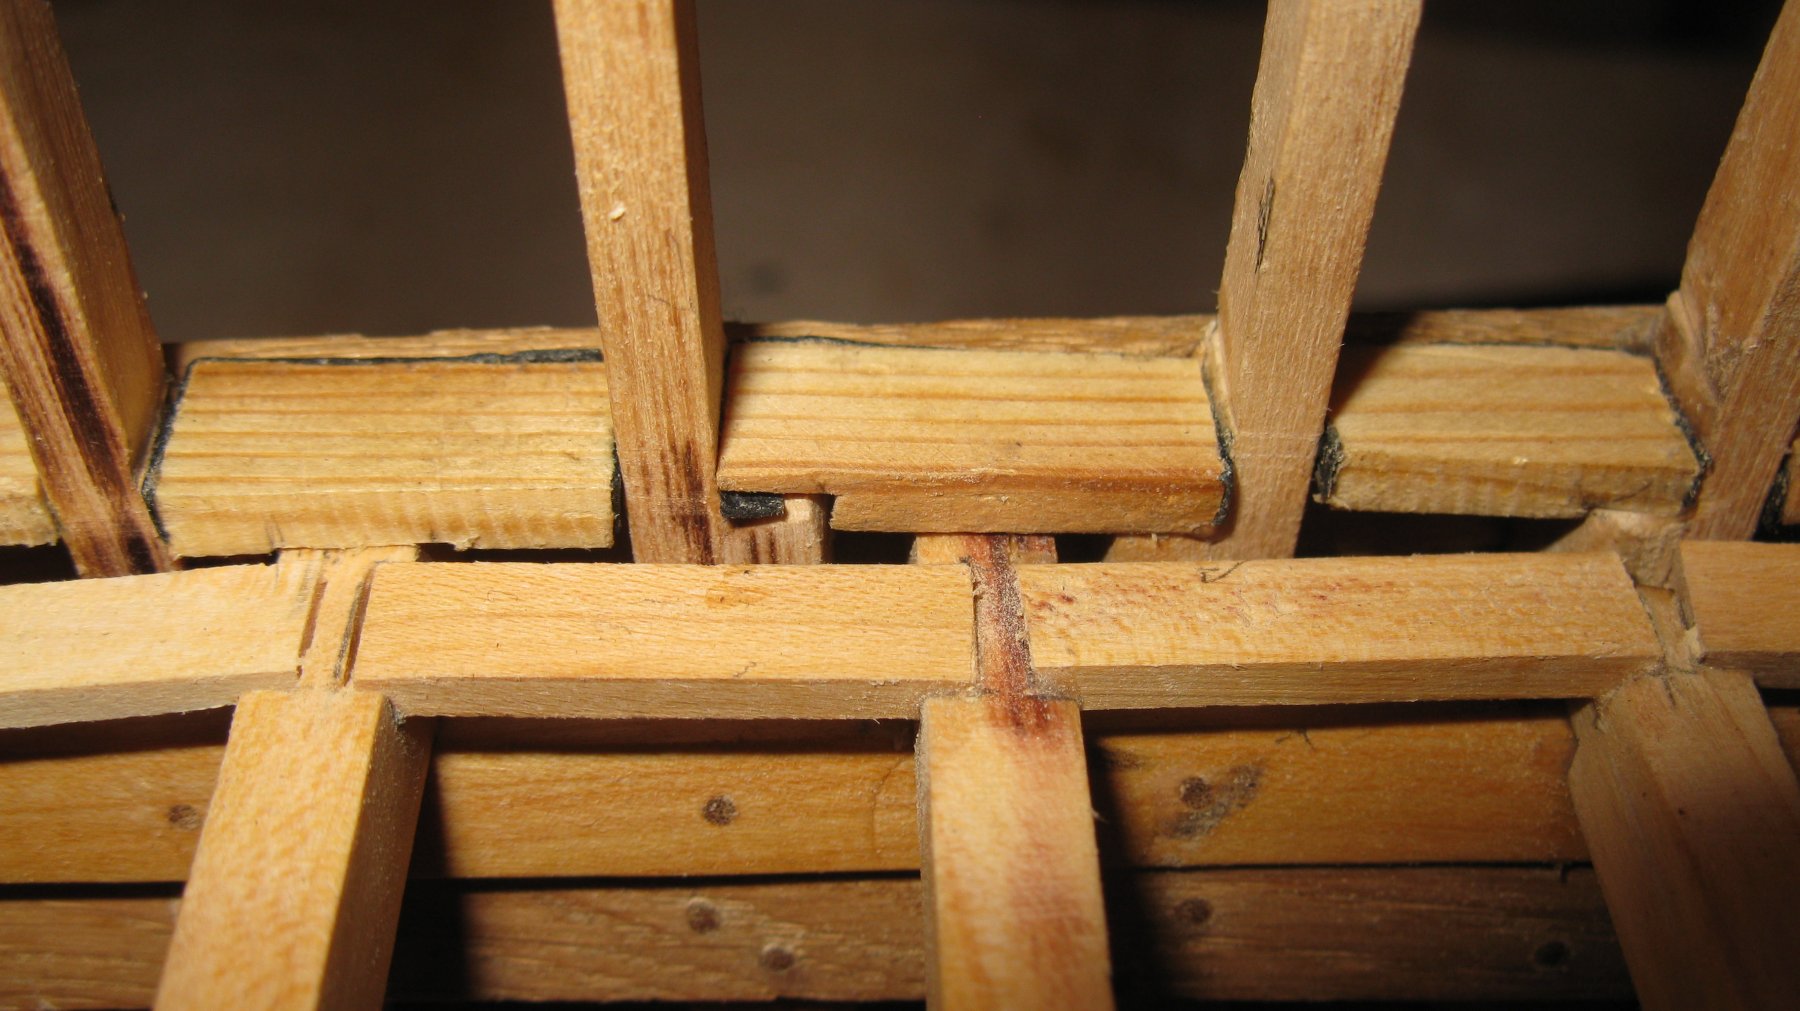
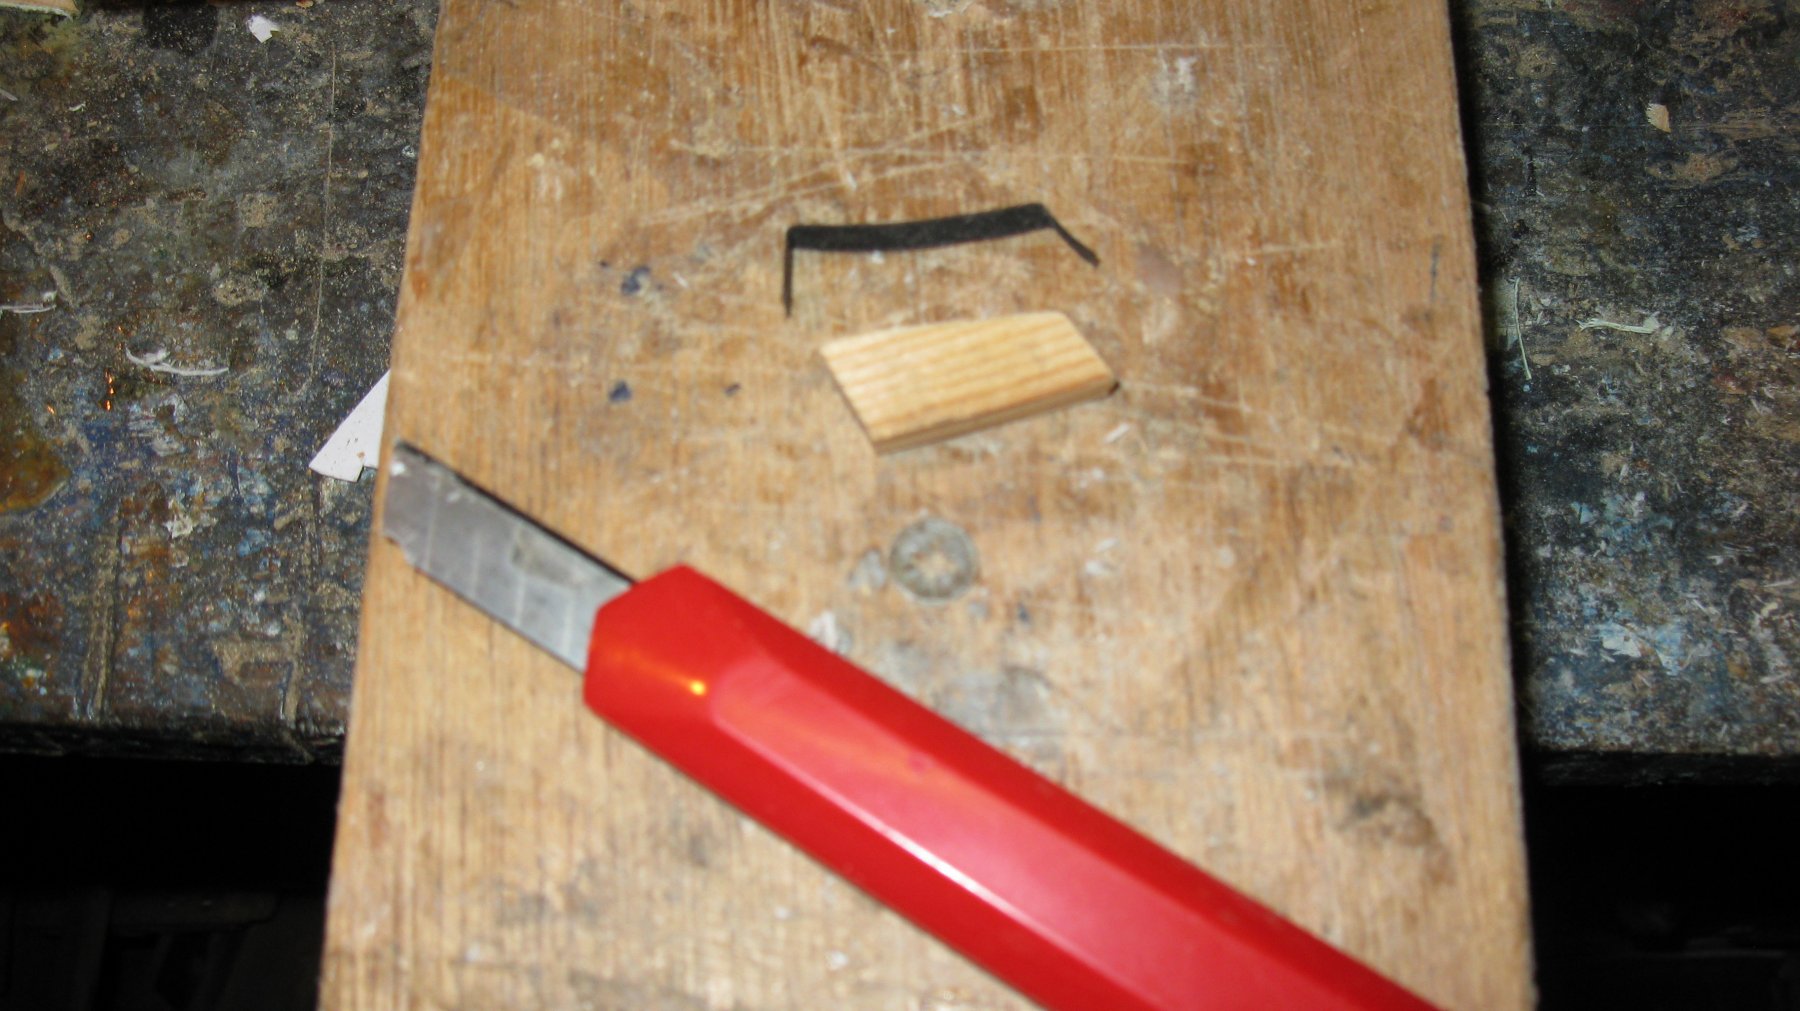
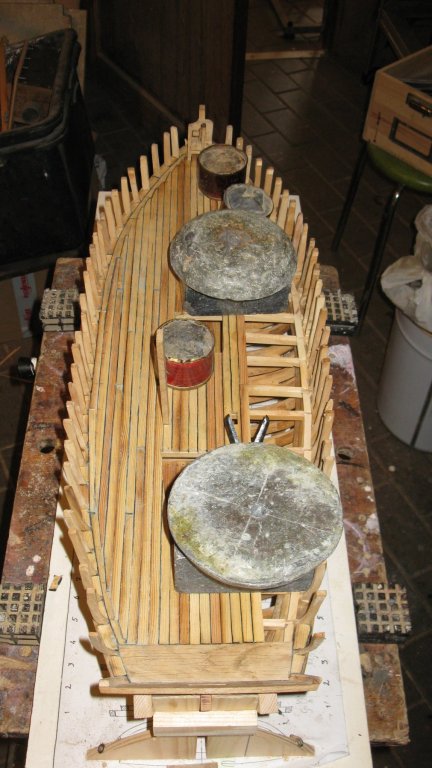
11.6 When the model is fully planked. I lay some weights on the deck and let everything dry. When the glue is dry, I scrape the planks smooth with a knife blade.

-
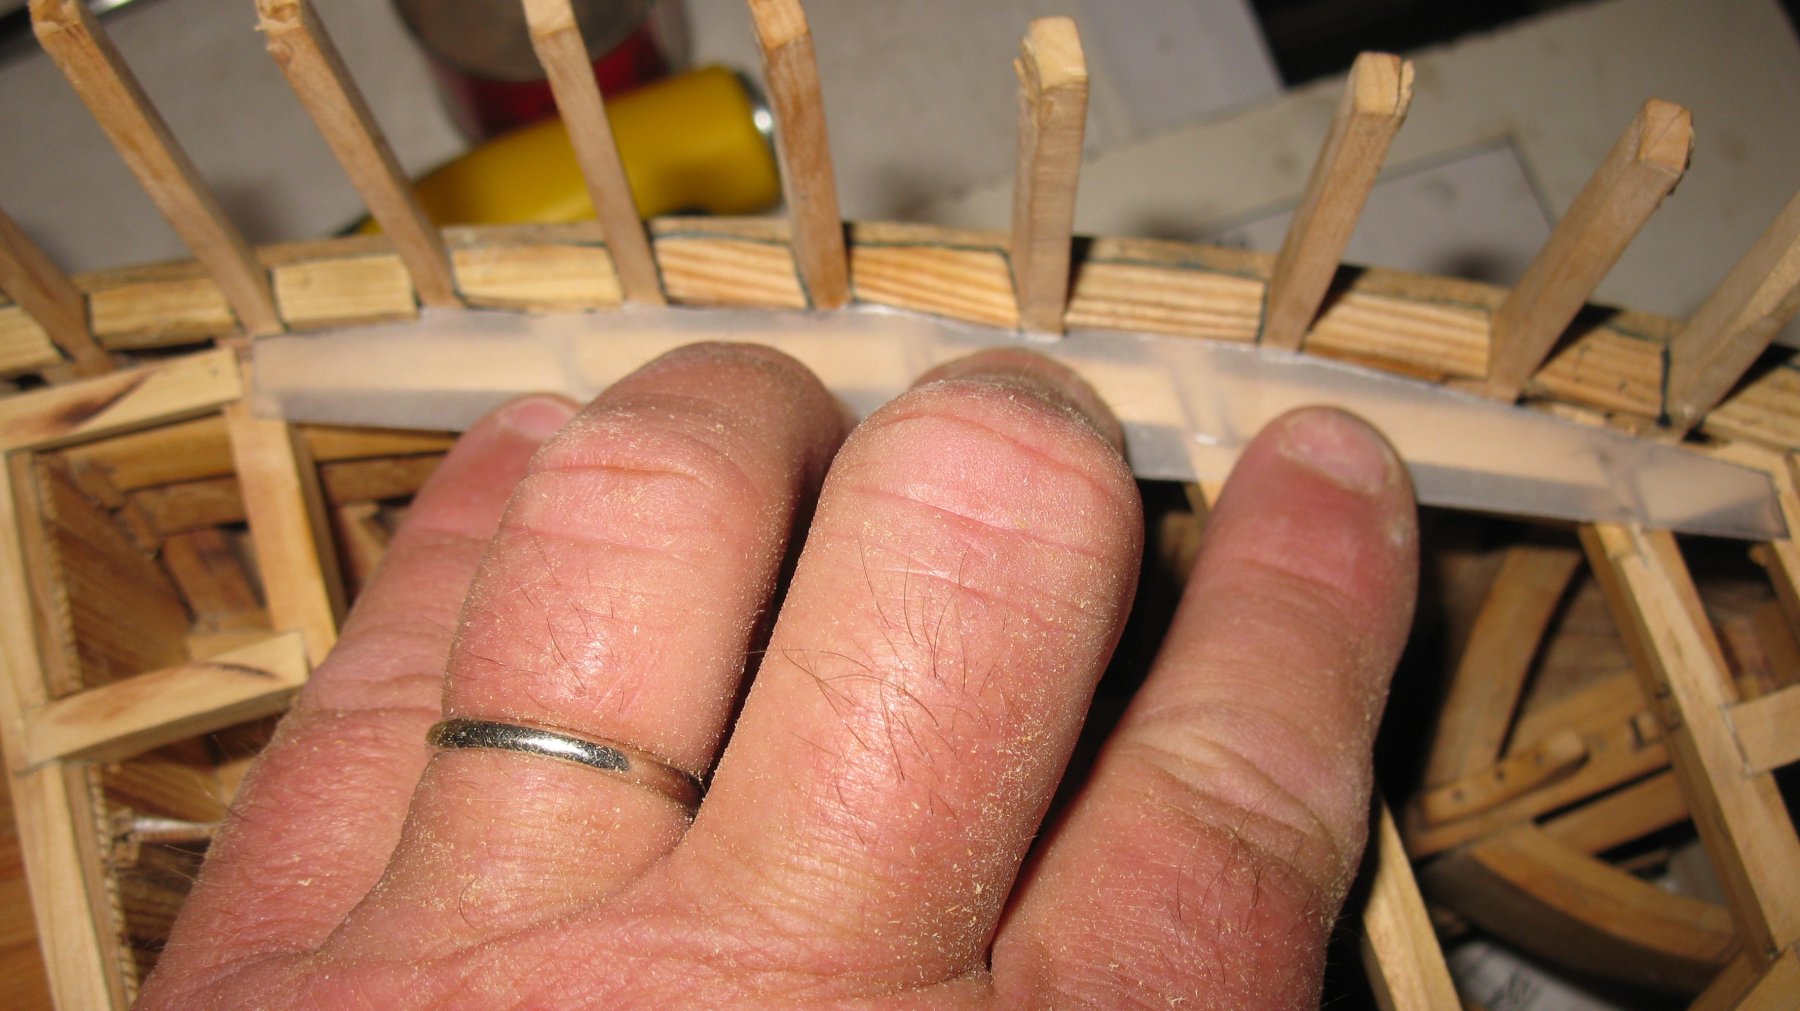
11.5 I start the planking from amidships and use a lath to glue the first planks in a straight line. At the sides and the heads of each plank I glue black cardboard strips to imitate the caulking. As the planking reaches the sides of the boat they can been cut into the waterways.
-
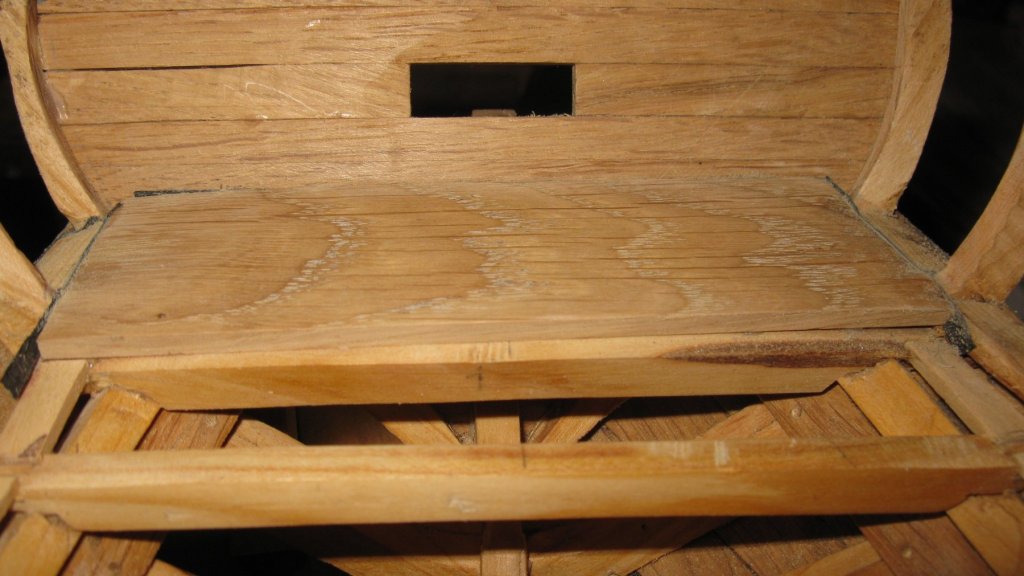
11.4 The waterways in place, but not glued. The inner edge is not yet shaped. I will do that while laying the deck planks.
-
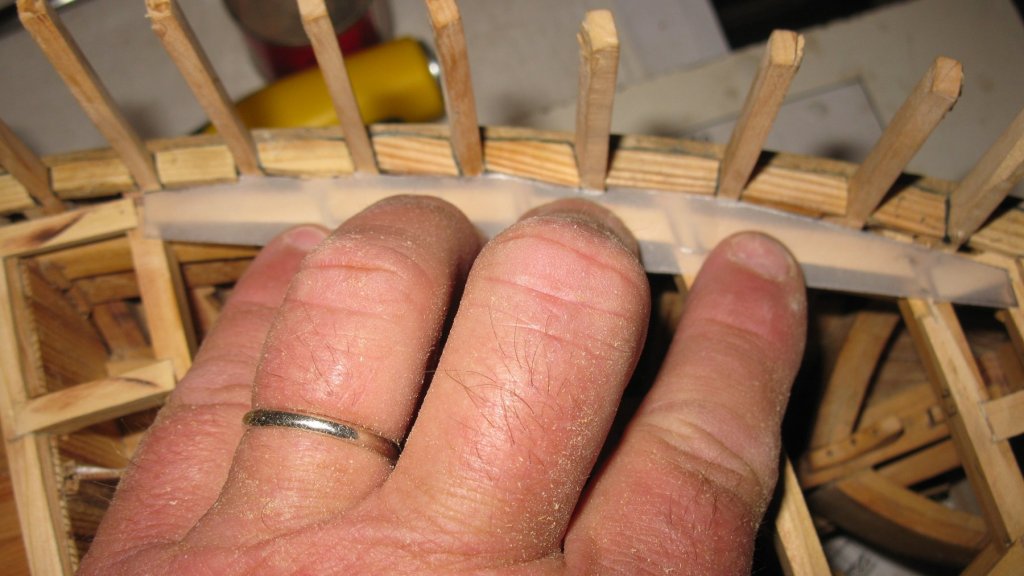
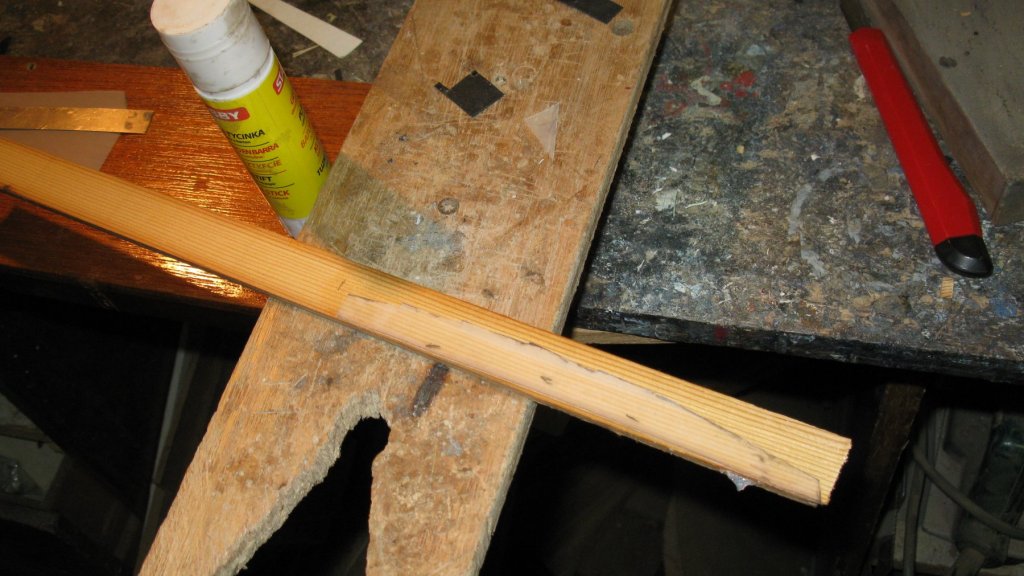
11.3 I copy the shape of the outer edge of the waterway on a piece of tracing paper. After the template is glued on a of pine plank of 3 mm thick, it can been sawn.
-
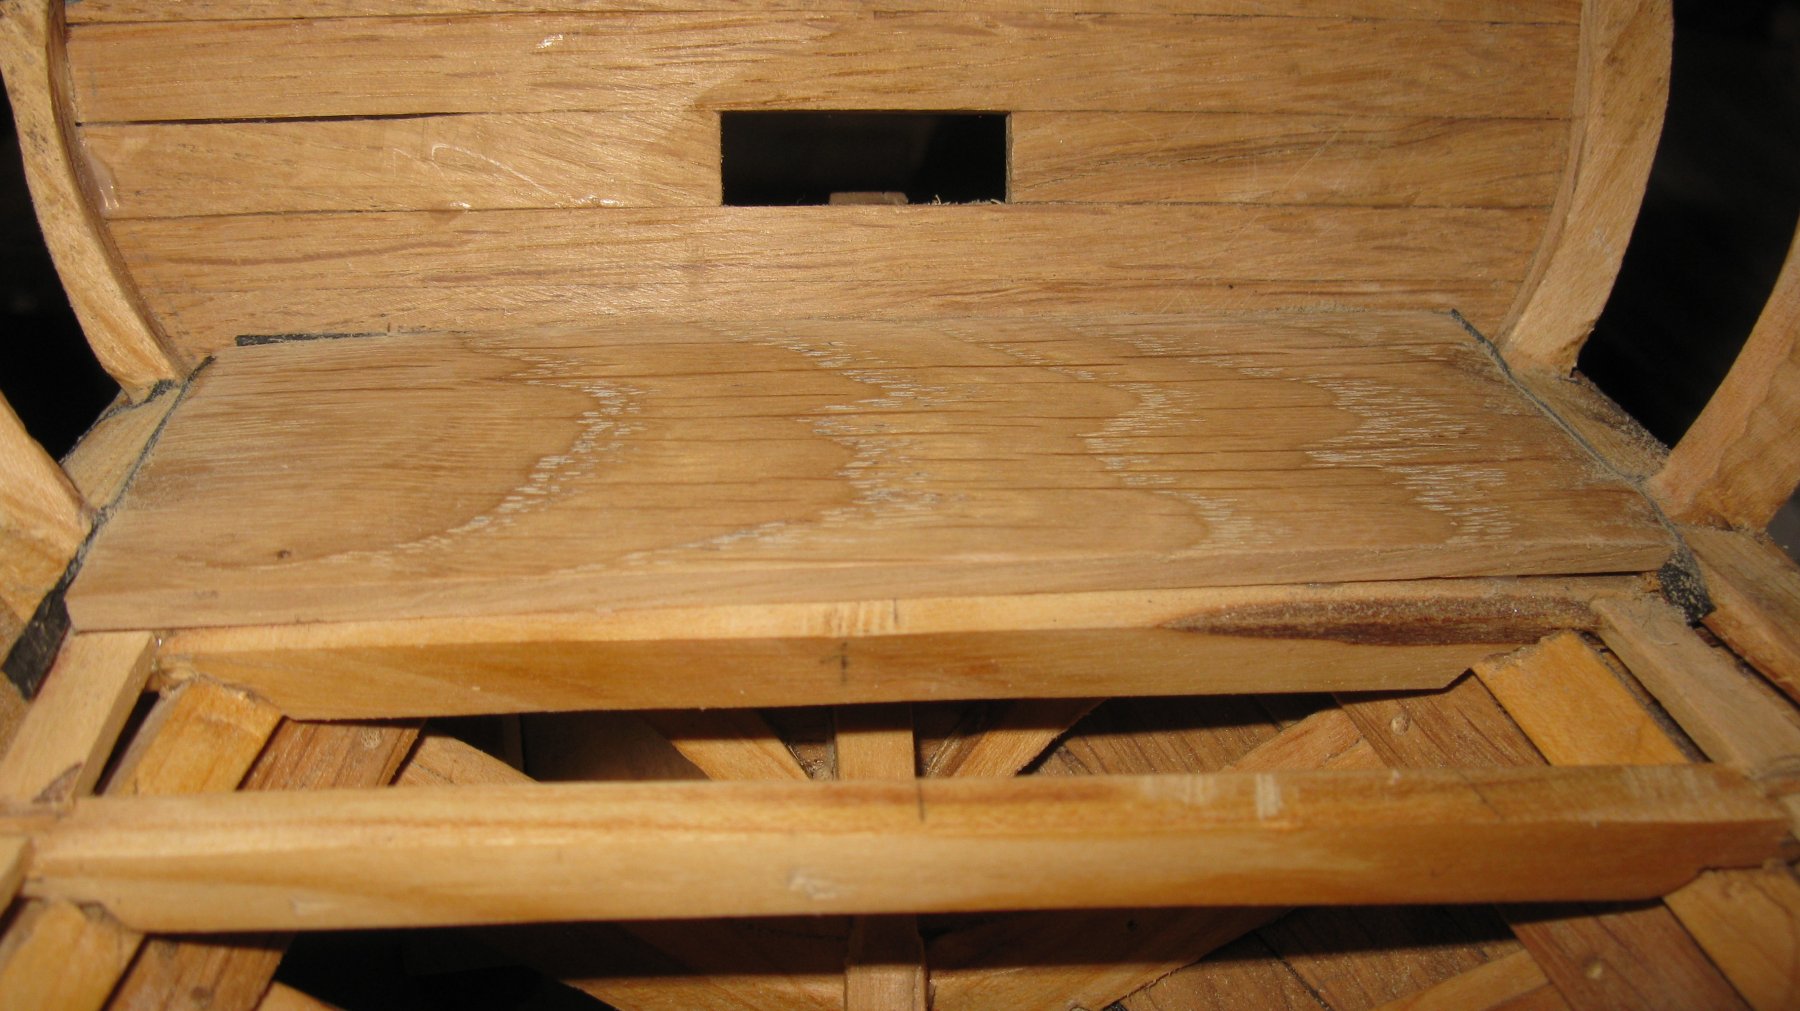
11.2 At the stern, an oak plank is covering the space between the stern and the last but one deck beam.
-
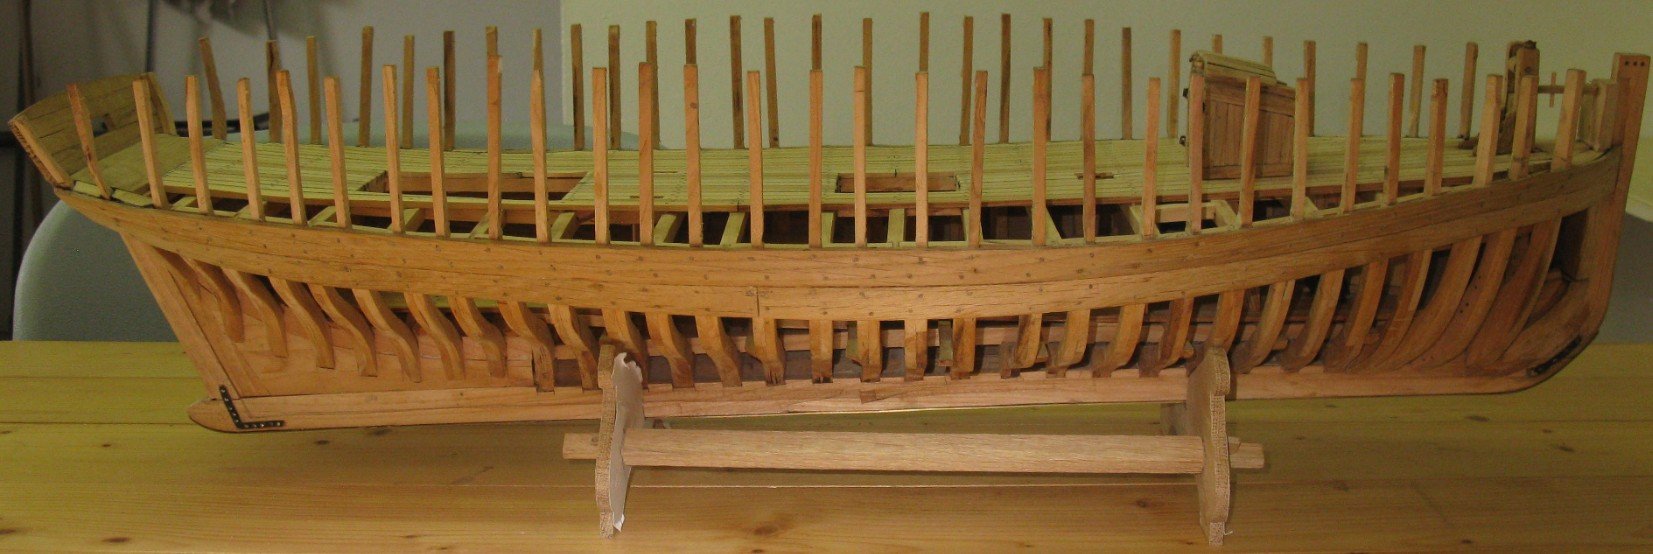
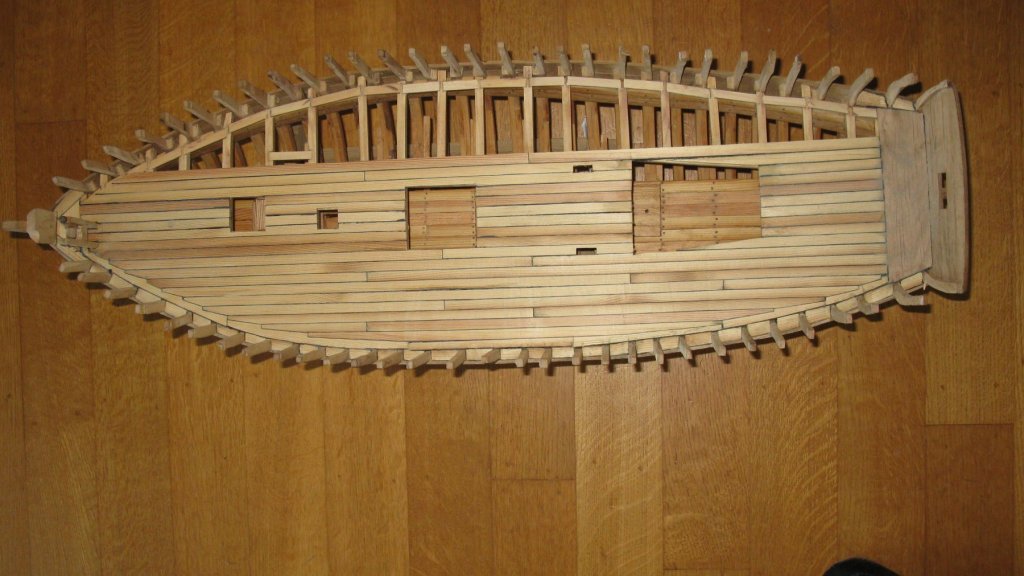
Part 11: Laying the deck: 11.1 Only the port side of the deck will be closed. I will leave the biggest part of the starboard side uncovered to preserve a view on the deck beam structure and the interior. I start with making and placing small filling pieces between the bulwark stanchions. On the sides of them I glue a strip of black cardboard to imitate the caulking.