Seventynet
-
Posts
797 -
Joined
-
Last visited
Content Type
Profiles
Forums
Gallery
Events
Everything posted by Seventynet
-
 Thank you so much for taking the time to respond so comprehensively. I will definitely take your advice with the black filler. Your explanation makes perfect sense. I think what you describe for shaping the planks at the bow is what I called spiling and there is likely no google translation for that technical term. But you have verified to me that this is what you did. What thickness did you have the walnut planking milled to? The kit supplies 1 mm thickness but I may go a little thicker say 1.5 mm if that makes it easier. I've had some success in milling my own planks and I have a nice piece of walnut that I could use. I am not sure I am brave enough to attempt the anchor stock planking you did for the whales but it sure looks good. I do have a good saw and taper jig if I do decide to go that way. I would be honored if you would comment critically on my build as I progress to this next stage. Thanks, Ian Edit: oh and by the way your English is excellent! As Jerry has pointed out.
 -
Hello Heinz, beautiful workthroughout! I wonder if I may ask you some questions. I am just about to install whales and start my second planking on my Victory. I so admire your second planking and want to [try] to do something similar. My questions are would you see any benefit in applying any kind of dark coating to your first planking so that cracks between the walnut planking would not be so visible? From your pictures it doesn't look like you did and I could see how that might interfere with any lines to guide the second planking - but I thought this idea might have some merit? Second, I am anticipating that I will need to spile planks at the bow from thicker stock. Did you spile your planks at the bow - your planking line at the bow is exactly what I aspire to! If you did spile from thicker stock, did you use the 1*16 mm walnut supplied in the kit? In other words is there enough to line the gunports and do spiling? And finally, did you settle on a preferred method for tapering and cutting the planks? I know how easy the limewood was to work with and see right away how brittle and crack prone the walnut is. I apologize for the long post and know that English is not your first language. Thank you in anticipation. Ian
-
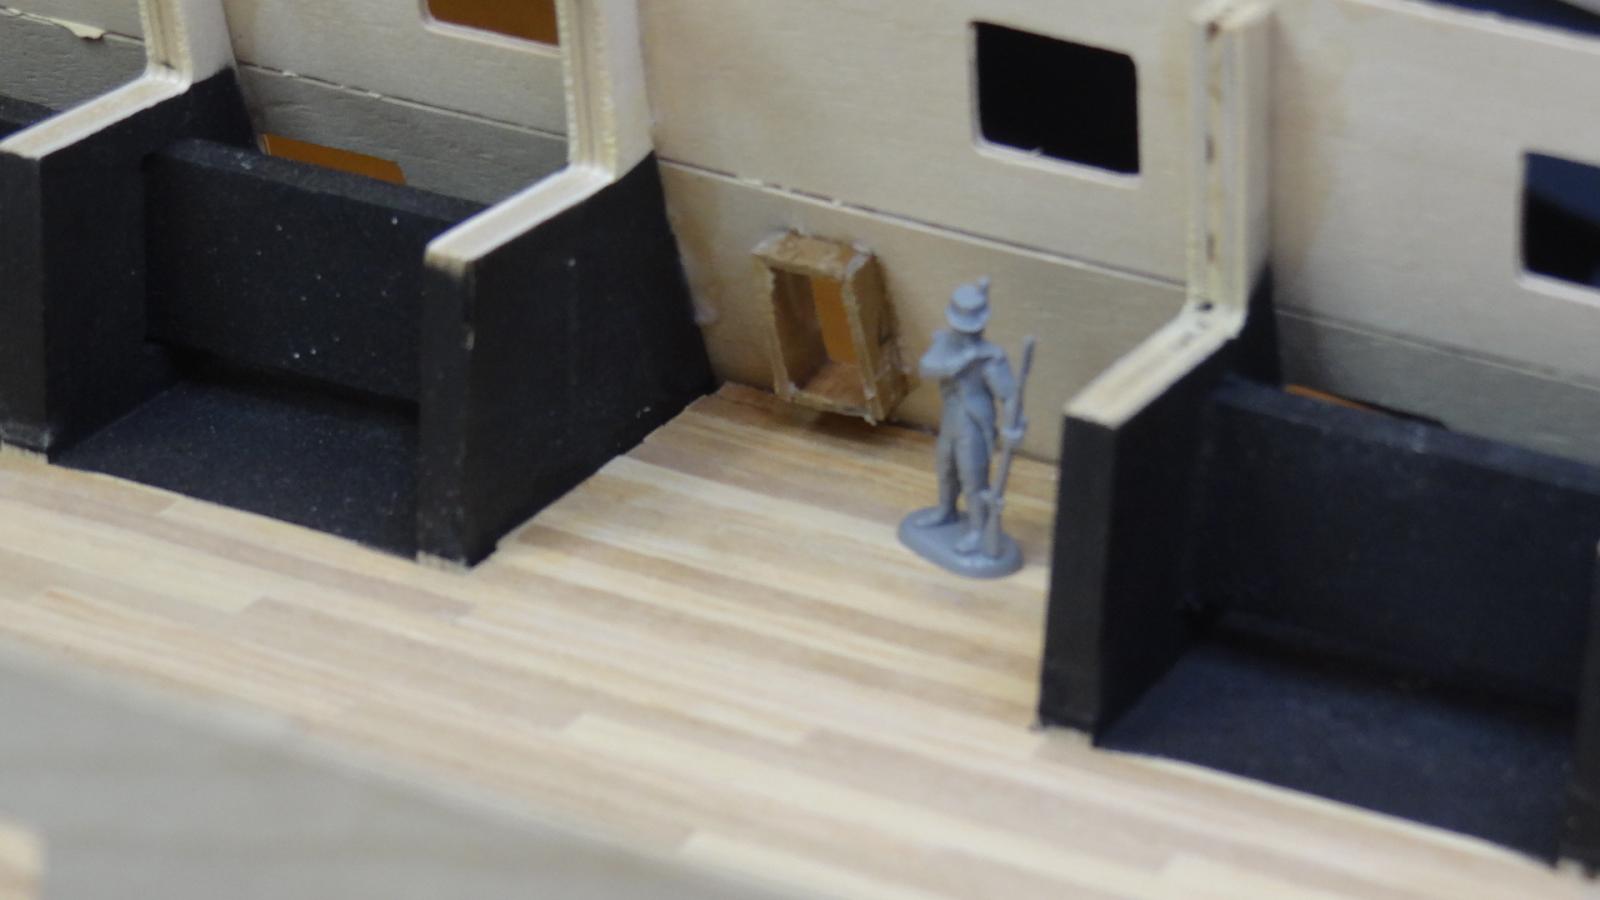
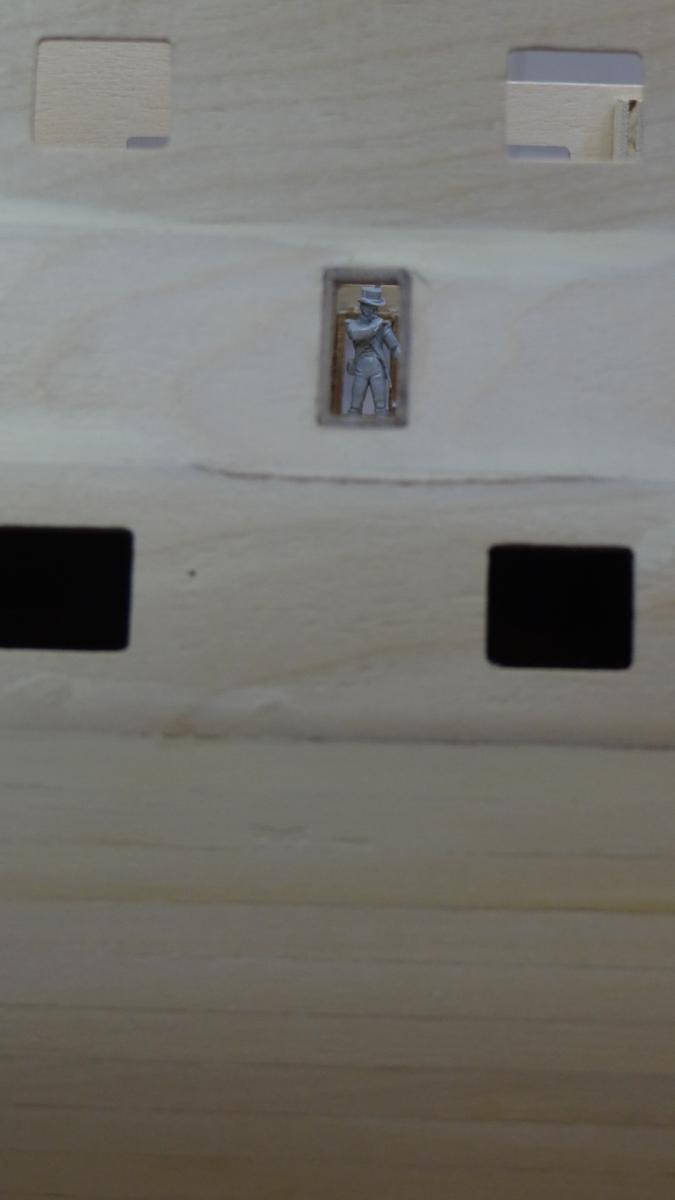
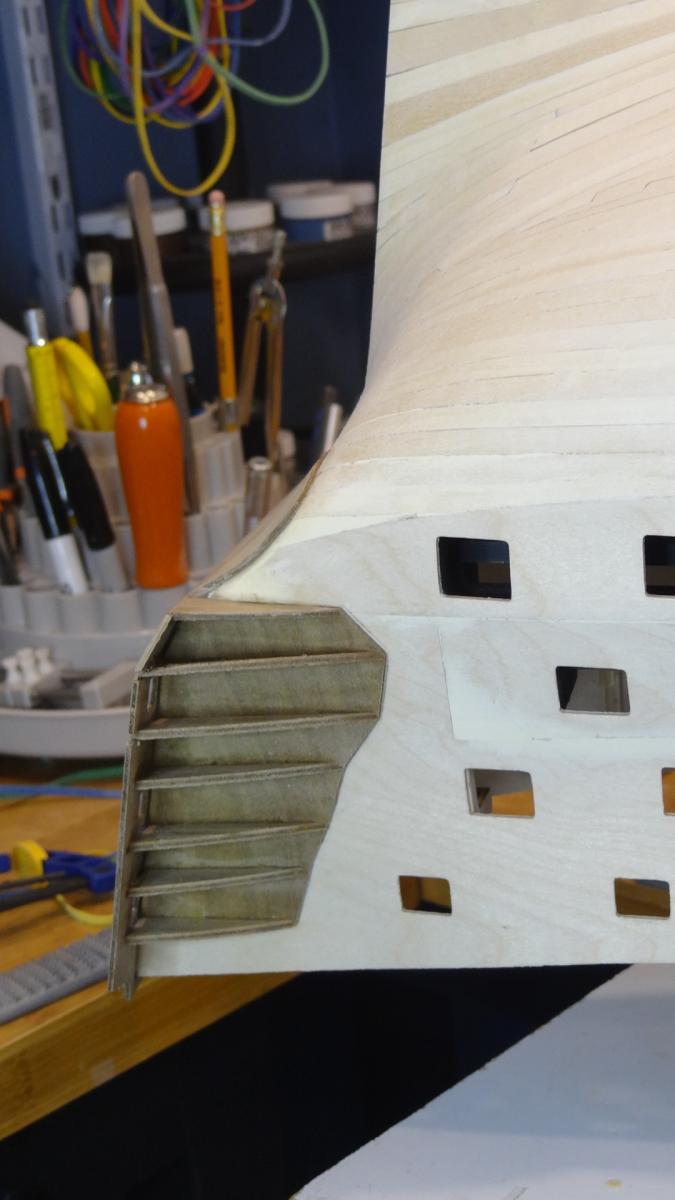
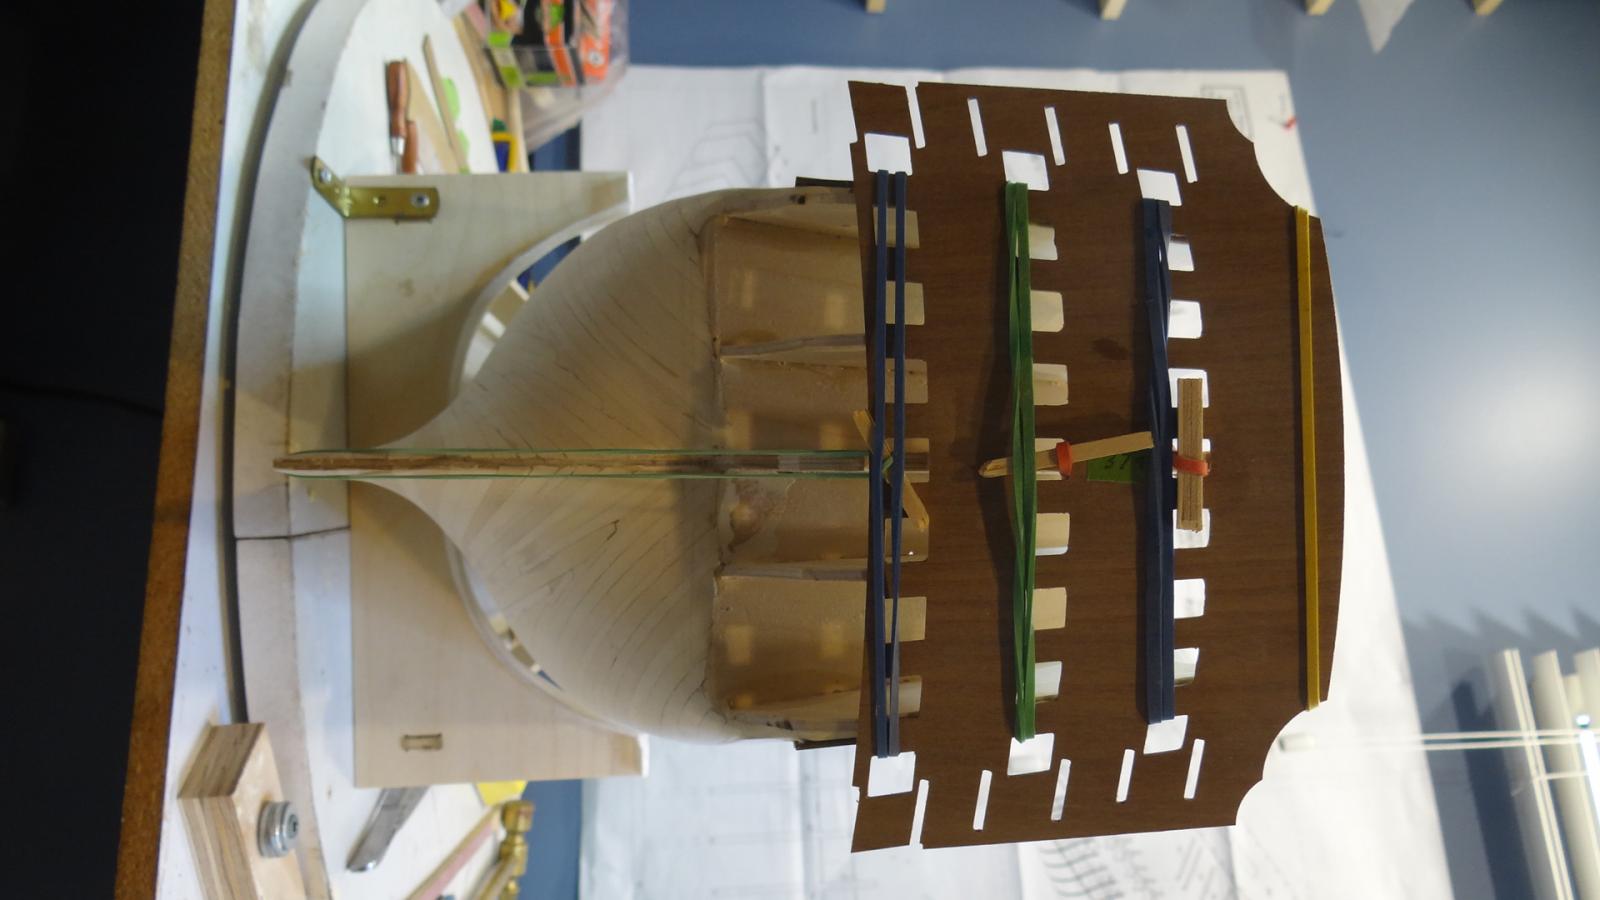
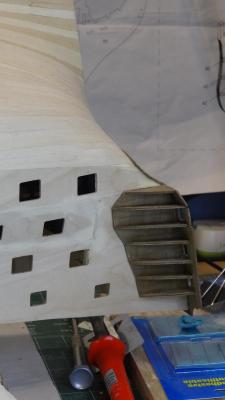
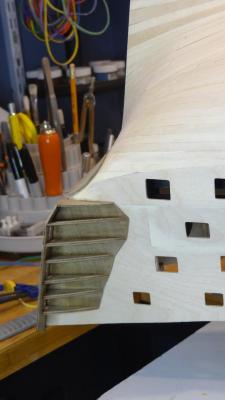
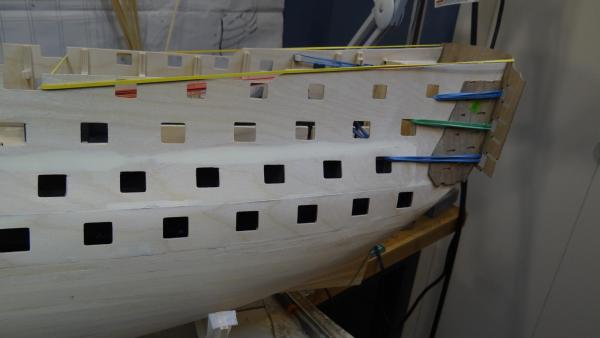
Good day, I have lined the entry ports. I see it will be quite a learning experience working with walnut. Chips and cracks galore. Anyway a couple of pictures. I'm onto wales and second planking now. Best, Ian

- 191 replies
-
- 4
-

-
- victory
- caldercraft
- (and 1 more)
-
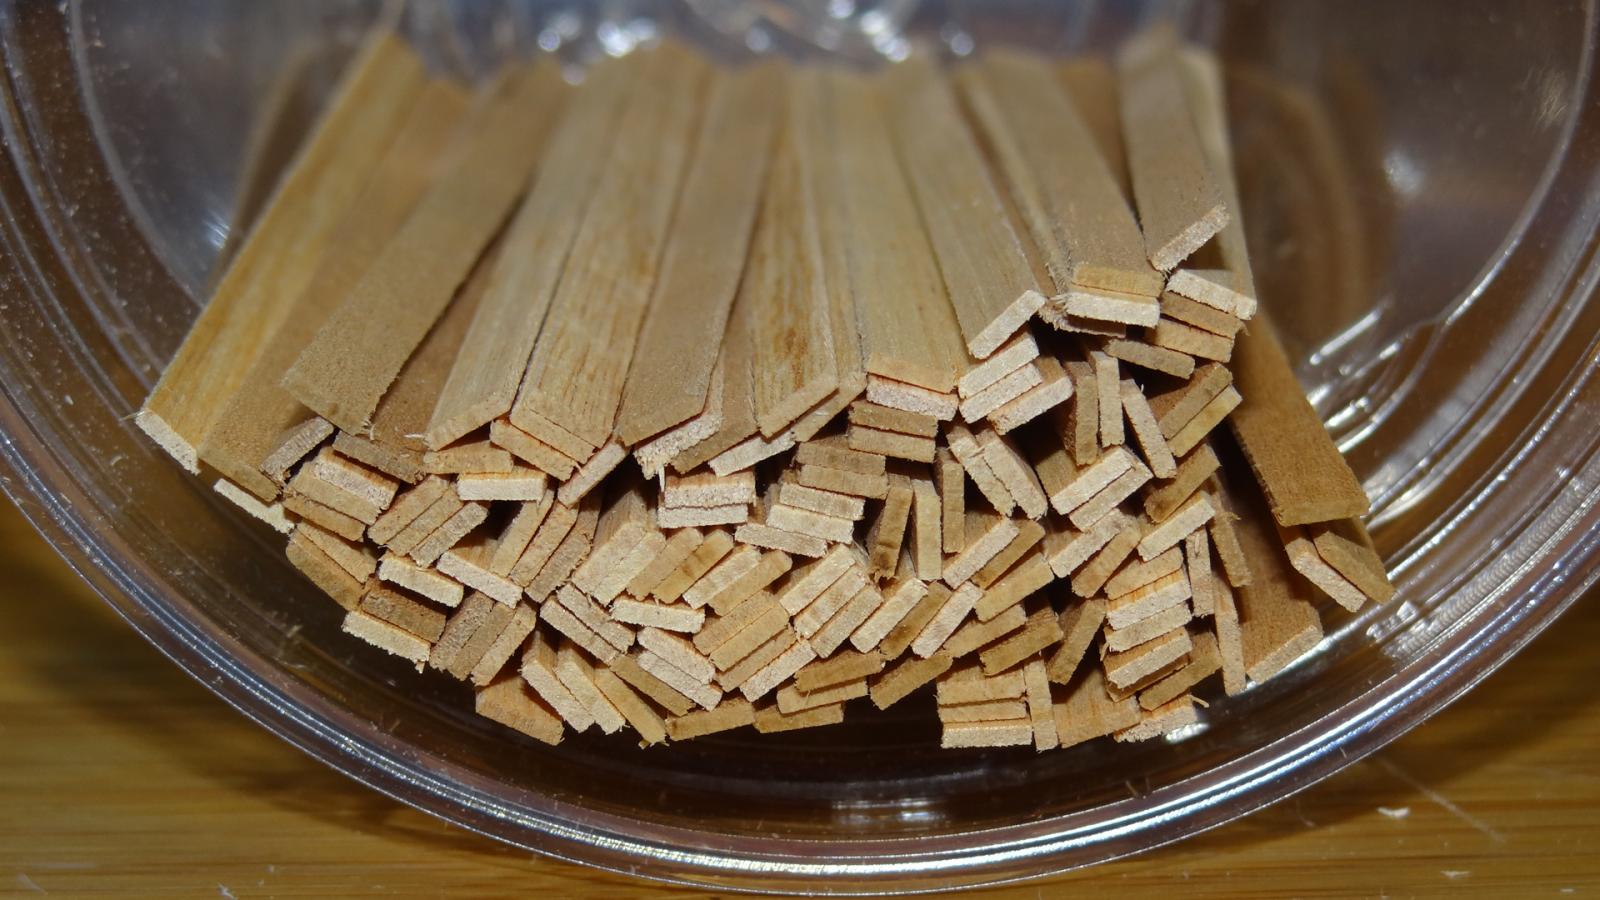
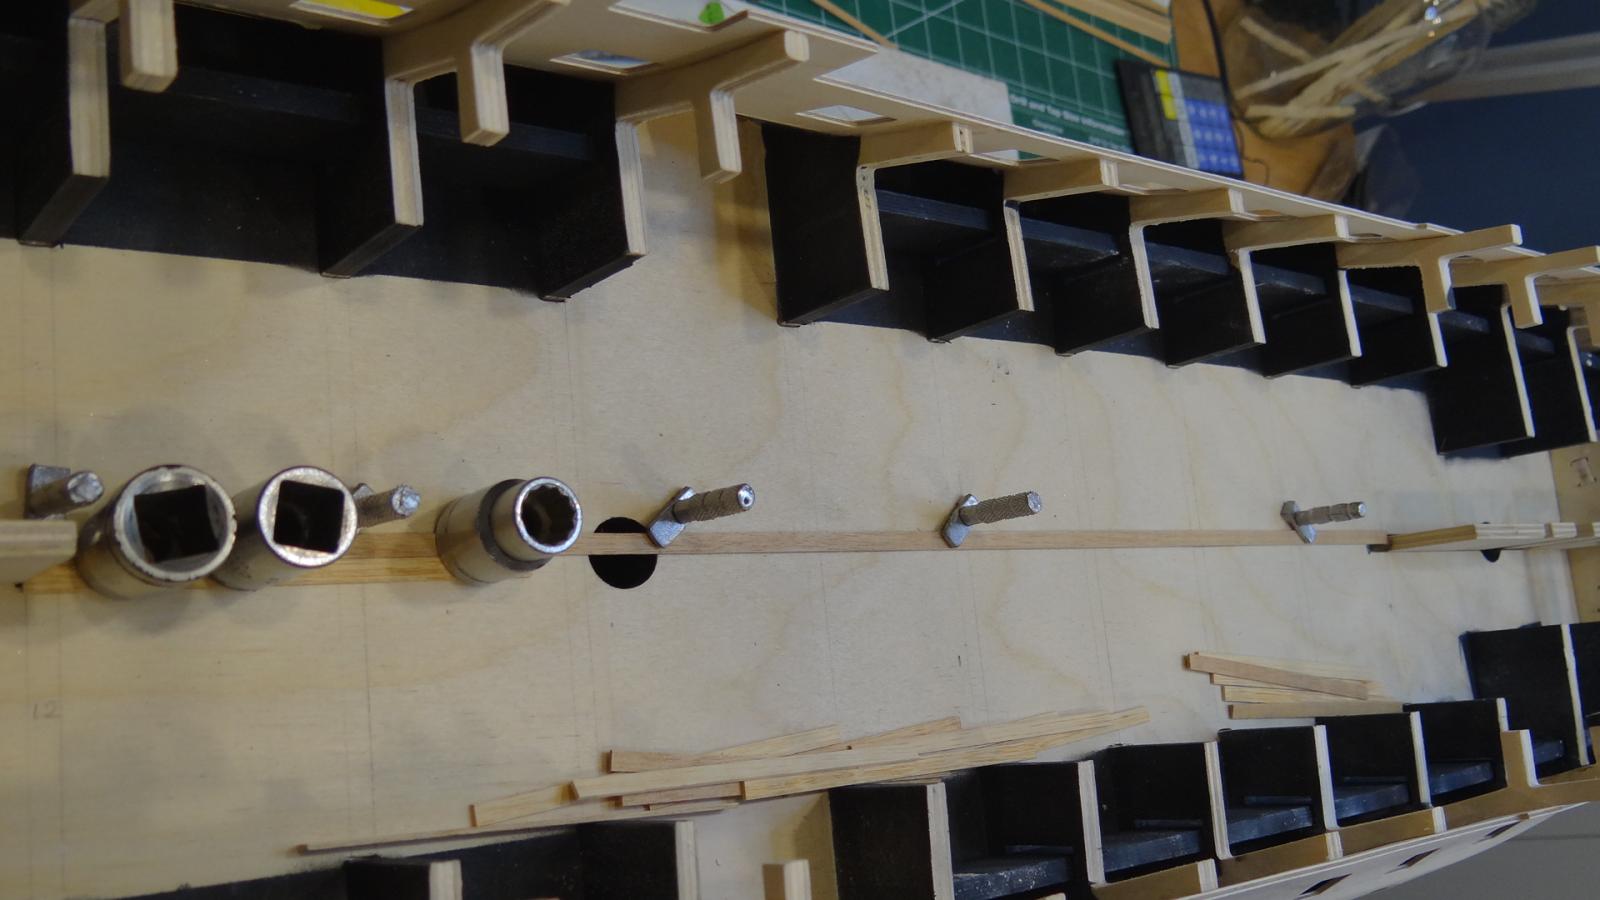
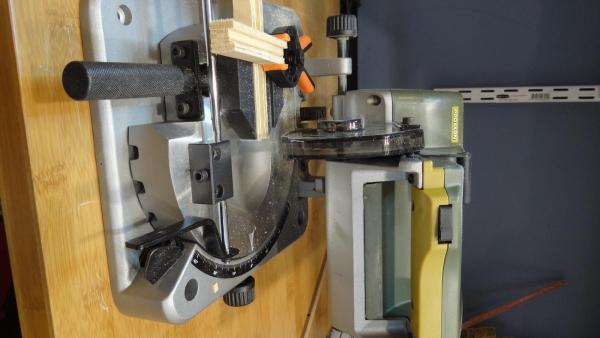
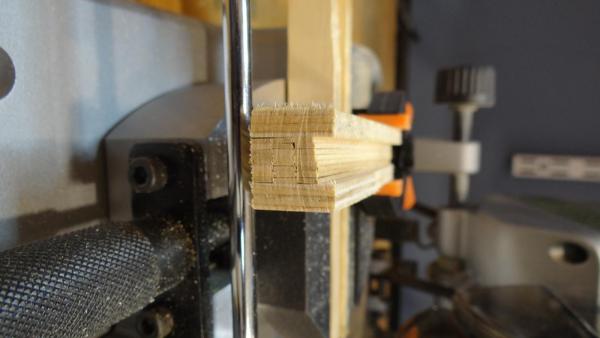
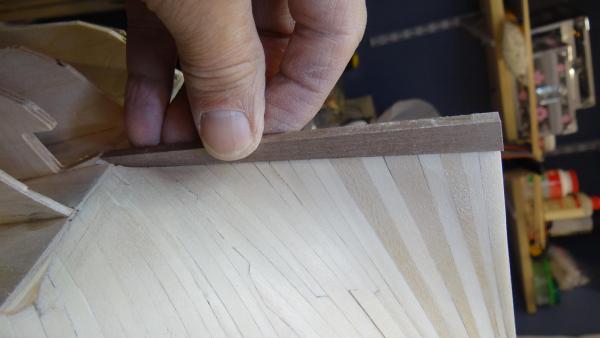
Good Day, I finished planking the middle gun deck. Now I guess I need to find something to seal it with. Anyway, a few pictures... The first pics (I hope) show the clamping I devised to cut the planks to length without chipping the edges to death on my chop saw. As you can see they came out pretty well and allowed me to get a little assembly line going. I then sorted the planks according to width based on eyeballing how they looked standing on edge relative to each other. After the first half of planking I used the micrometer on each plank and resorted them. I found this helped in closing some of the gaps that were showing up. I set up a temporary centre plank to get started with a straight line. I got a much better pattern going with the different shades of wood on the port side - methinks. On to the entry port linings. I keep reading on how to apply glue to the ends before cutting the walnut strips to size. So I will have to figure that out next. Best, Ian


- 191 replies
-
- 7
-
-
- victory
- caldercraft
- (and 1 more)
-
Gorgeous detail Nick. I shall return to your build many times as I slowly make way on my Victory. Best, Ian
-
Nick thanks for looking in and encouraging me. I've started planking the middle deck. It's going well so far except I realized too late that I paid scant attention to randomizing the different colour planks (I'm doing the 4 butt shift with 85 mm lengths). I know it doesn't matter for this deck but it is great practice for the more visible decks. Ian
- 191 replies
-
- 1
-
-
- victory
- caldercraft
- (and 1 more)
-
Hi again, Thanks for the views and likes. I've added the q-g braces and counters. You may notice that I put the lower stern counter on backwards . After I soaked it and preformed it, I figured I would run into issues if I tried to bend it the opposite way. So on she went. I've made pin pricks where the corners of the two windows are supposed to be on the counter facing outward by transferring scotch tape tracing from the correct side. Something to figure out later. Oh and I did in fact break a fascia tab off! I'm not sure where I'm going next. I know I can leave the rest until I finish second planking but there is also no good reason why I shouldn't finish the quarter gallery now - other than I want to move onto another surface. Ian

- 191 replies
-
- 5
-
-
- victory
- caldercraft
- (and 1 more)
-
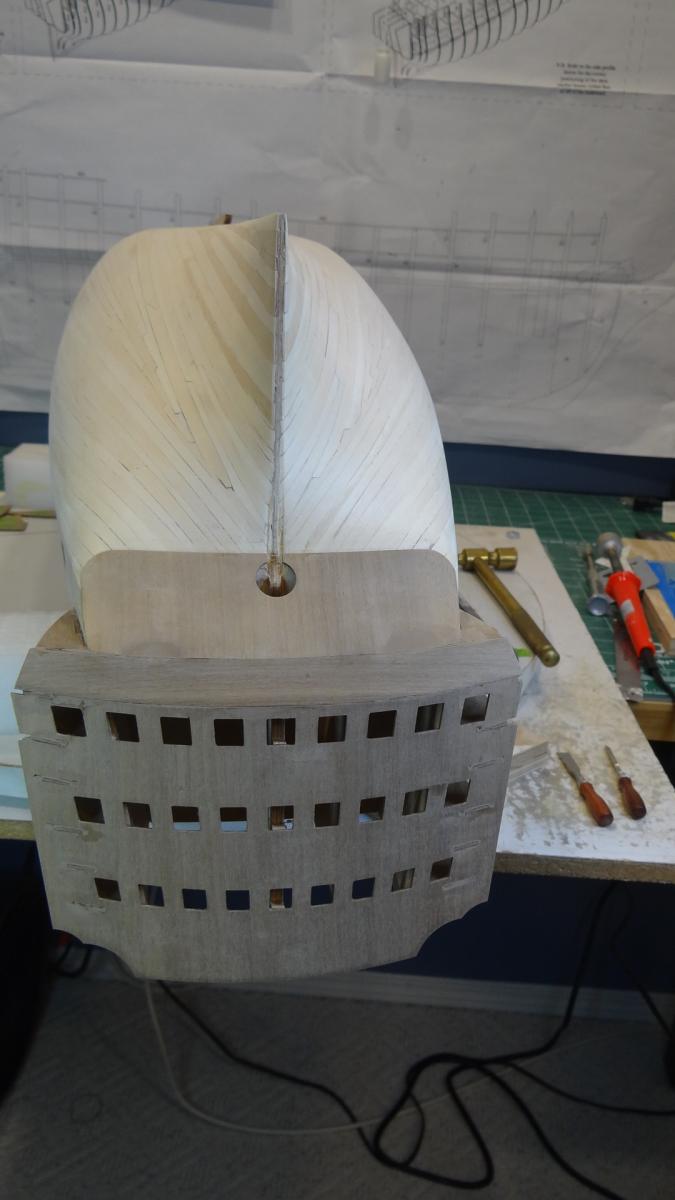
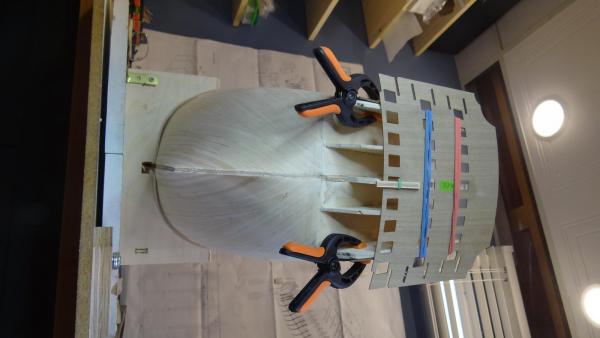
Hi folks, Here we go. First picture is showing the stern post fit. I spent some time sanding and chiselling out a channel for the post. I thought I might otherwise run into problems doing that once the fascia is on. Next pictures shows a few dry fits and then gluing the inner patterns and fascia. The fascia patiently waits for me to catch the edges on my sweater so that I can join that august club . Best, Ian


- 191 replies
-
- 6
-
-
- victory
- caldercraft
- (and 1 more)
-
Question to my fellow CC Victory builders. I am at the stage where I am told by the instructions to install the quarter galleries. I am not quite seeing why I need to do that at this stage of the build or at least to the extent suggested - perhaps other than to do a dry fit to make sure nothing has gone off the rails. I have done a dry fit and everything associated with the inner fascia (374) and inside patterns (373) and associated right angle patterns, upper and lower stern counters (371 and 372) look like they will go together fine. Would I be able to get away with simply gluing on the 373 inside (side) patterns and leaving the rest until later? The idea being that 373 would help guide the second planking. My main concern is breaking something especially when so much work in and around the quarter galleries remains. Maybe I'm making too big a deal of it but it just seems unnecessary at this stage? Edit: It looks like I have answered my own question. The lower and upper counters also need to be in place for second planking - which means that the fascia would also need to be there to make sure the counters are fitted appropriately. So there we go. Ian
- 191 replies
-
- 1
-
-
- victory
- caldercraft
- (and 1 more)
-
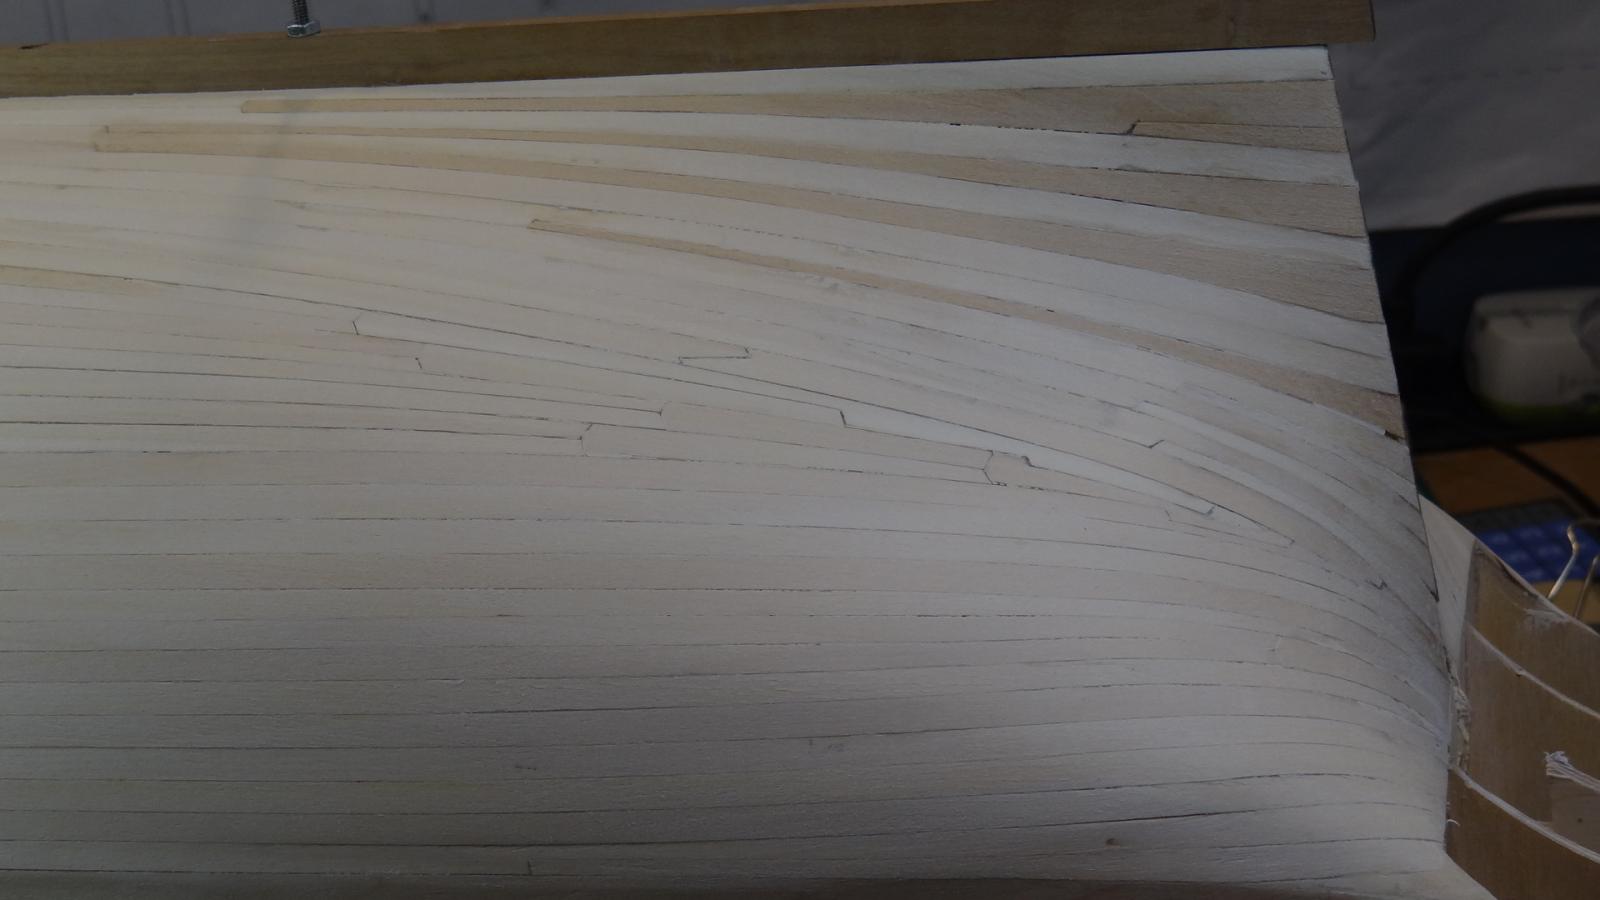
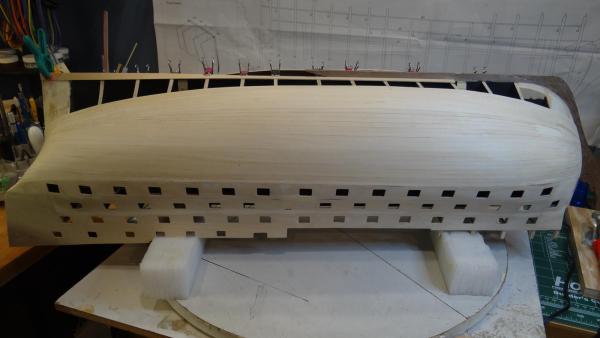
Thanks a lot David for the advice and others for the likes. Please be critical of my efforts, I am a neophyte at best. So I've finished the first planking with the exception of filling a few shallow areas and final sanding. I am so ready to move on to the next task! Some picture mainly of the starboard side:

- 191 replies
-
- 4
-
-
- victory
- caldercraft
- (and 1 more)
-
I am sure it will look beautiful when you are done - with your skills. Ian
-
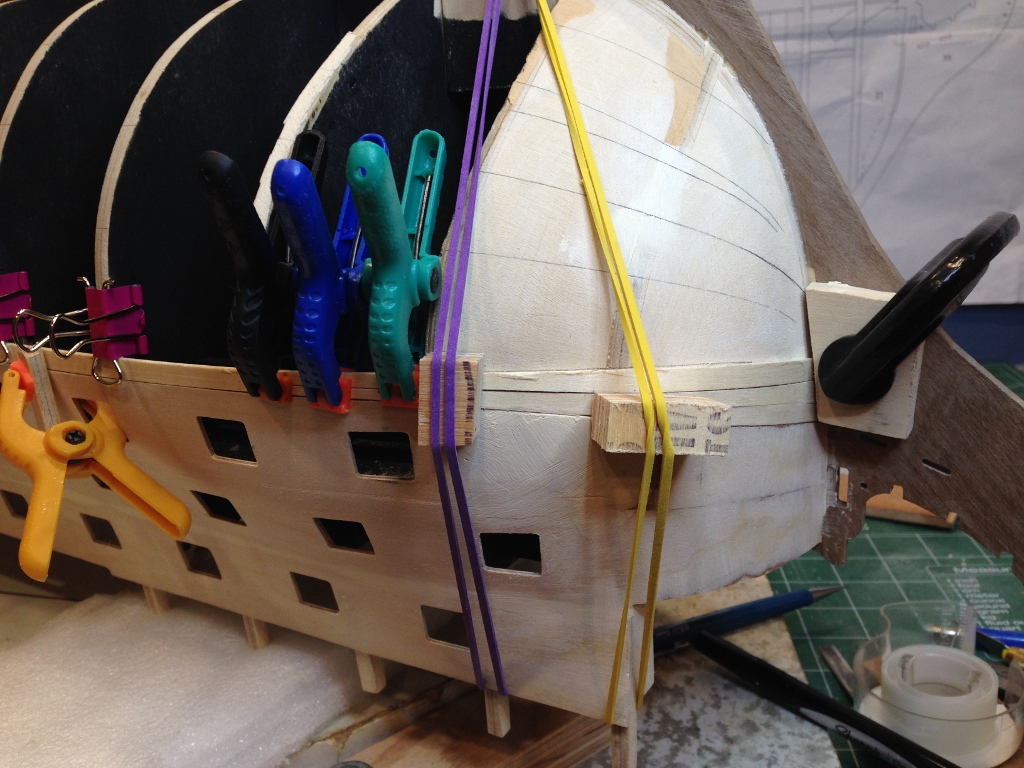
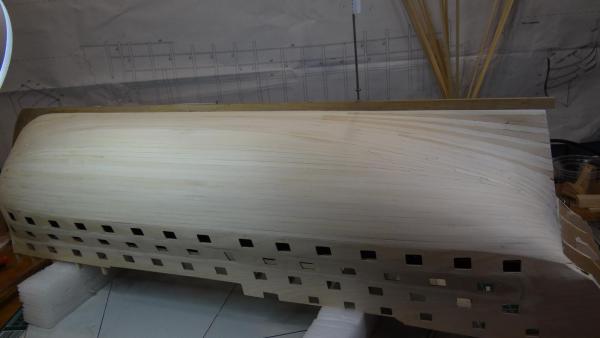
Hi Folks, I have finished the port side first planking. The darker wood pieces in contrast to the lime wood are basswood planks. I cut them a little thicker to reduce the number of drop planks/stealers. I noticed that they snap a little more readily than the lime wood . I'm 80% complete on the starboard side and once I am finished I will go after a few shallow spots that I noticed. I'm not sure what is the best was to find all of these areas but I'll figure it out when I get there. Can anyone tell me whether I can still use PVA with the walnut planking if I prime the first layer? I've noticed that some of you prime the walnut layer before coppering but I haven't noticed whether anyone has primed the first layer as a means of detecting flaws and smoothing the hull. Best, Ian


- 191 replies
-
- 7
-
-
- victory
- caldercraft
- (and 1 more)
-
Jeez I apologize for posting on your log Dominic. I thought I was in my build. I'll remove it straightaway.
-
Great work Dominic. Thanks for showing me the way, but I have to say you are making me feel like I moving at the pace of a glacier on my Victory build. Ian
-
Thanks Jeff I appreciate the words. Best of luck on Fair American.
- 191 replies
-
- 1
-
-
- victory
- caldercraft
- (and 1 more)
-
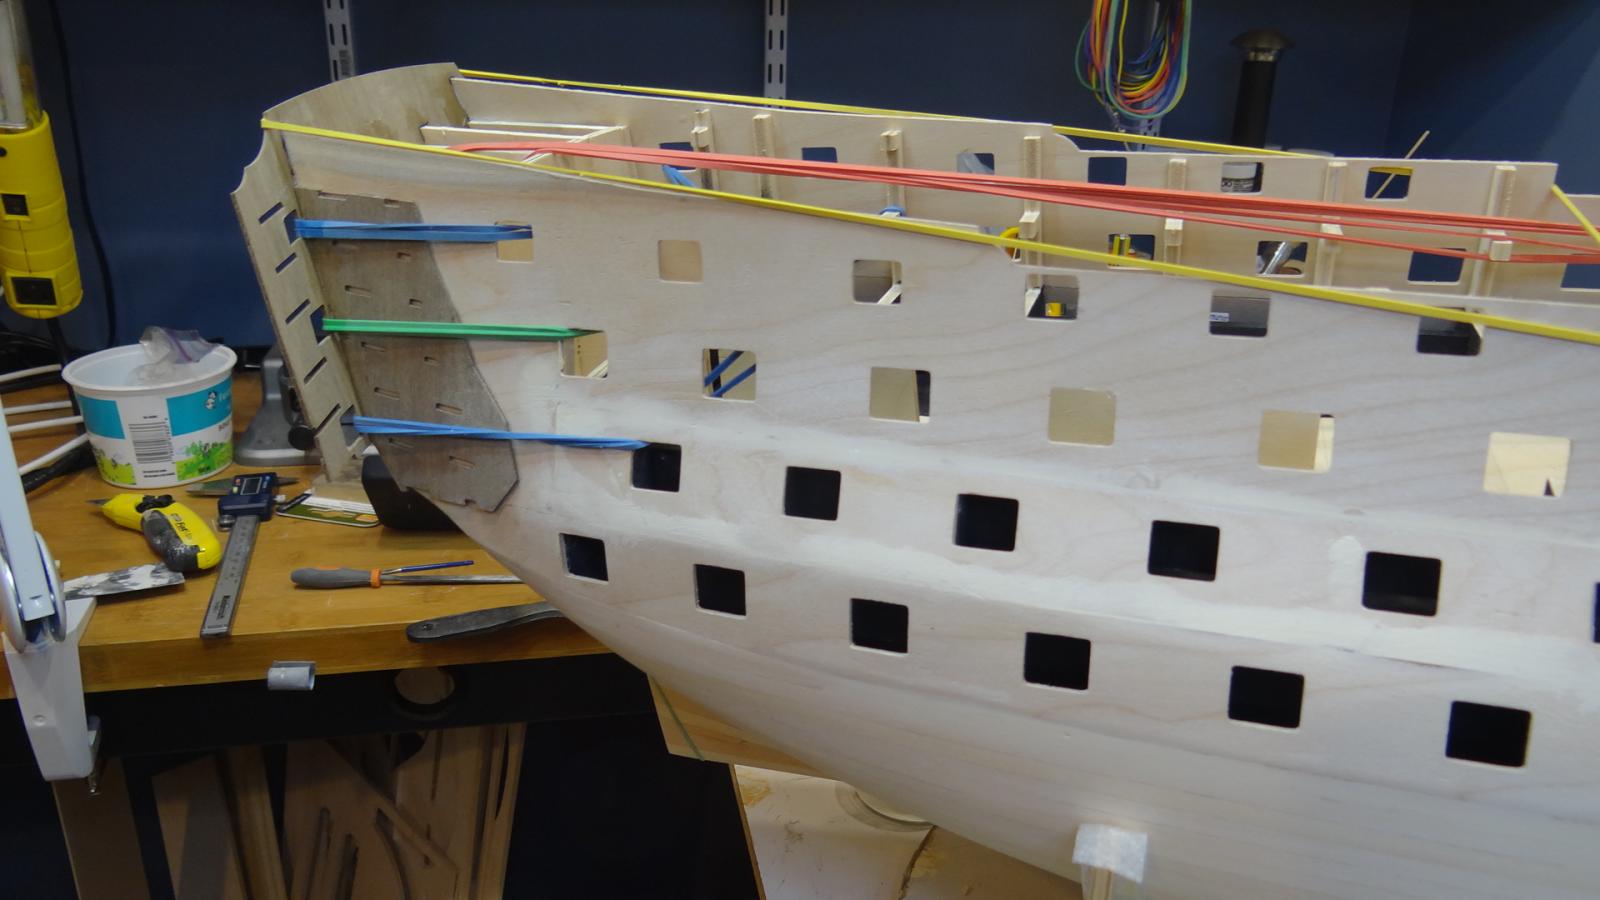
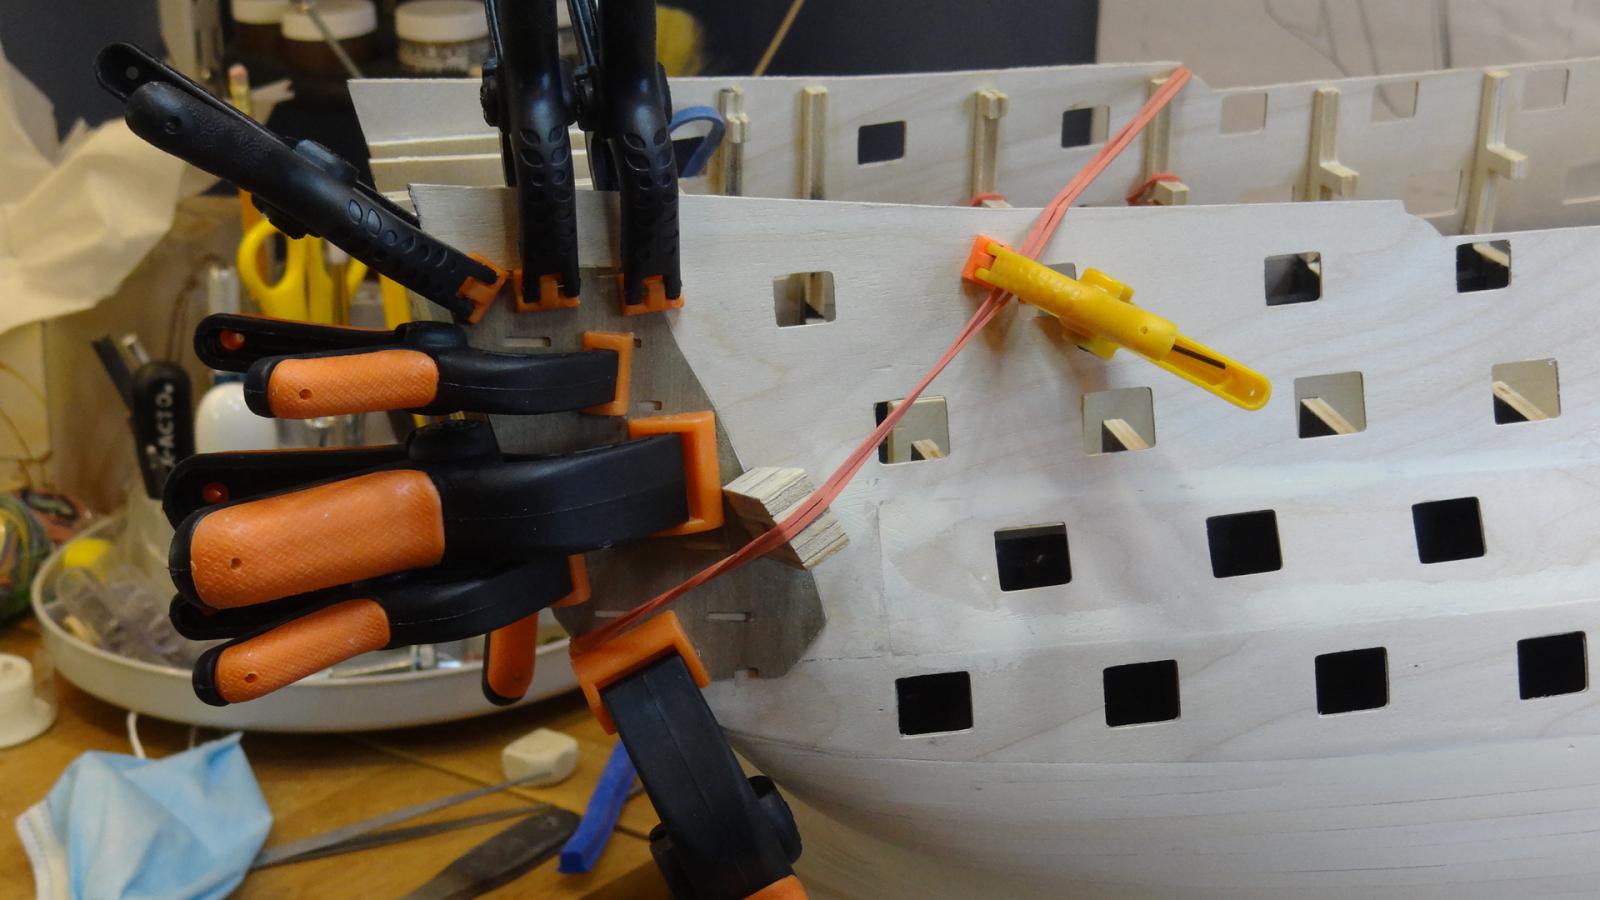
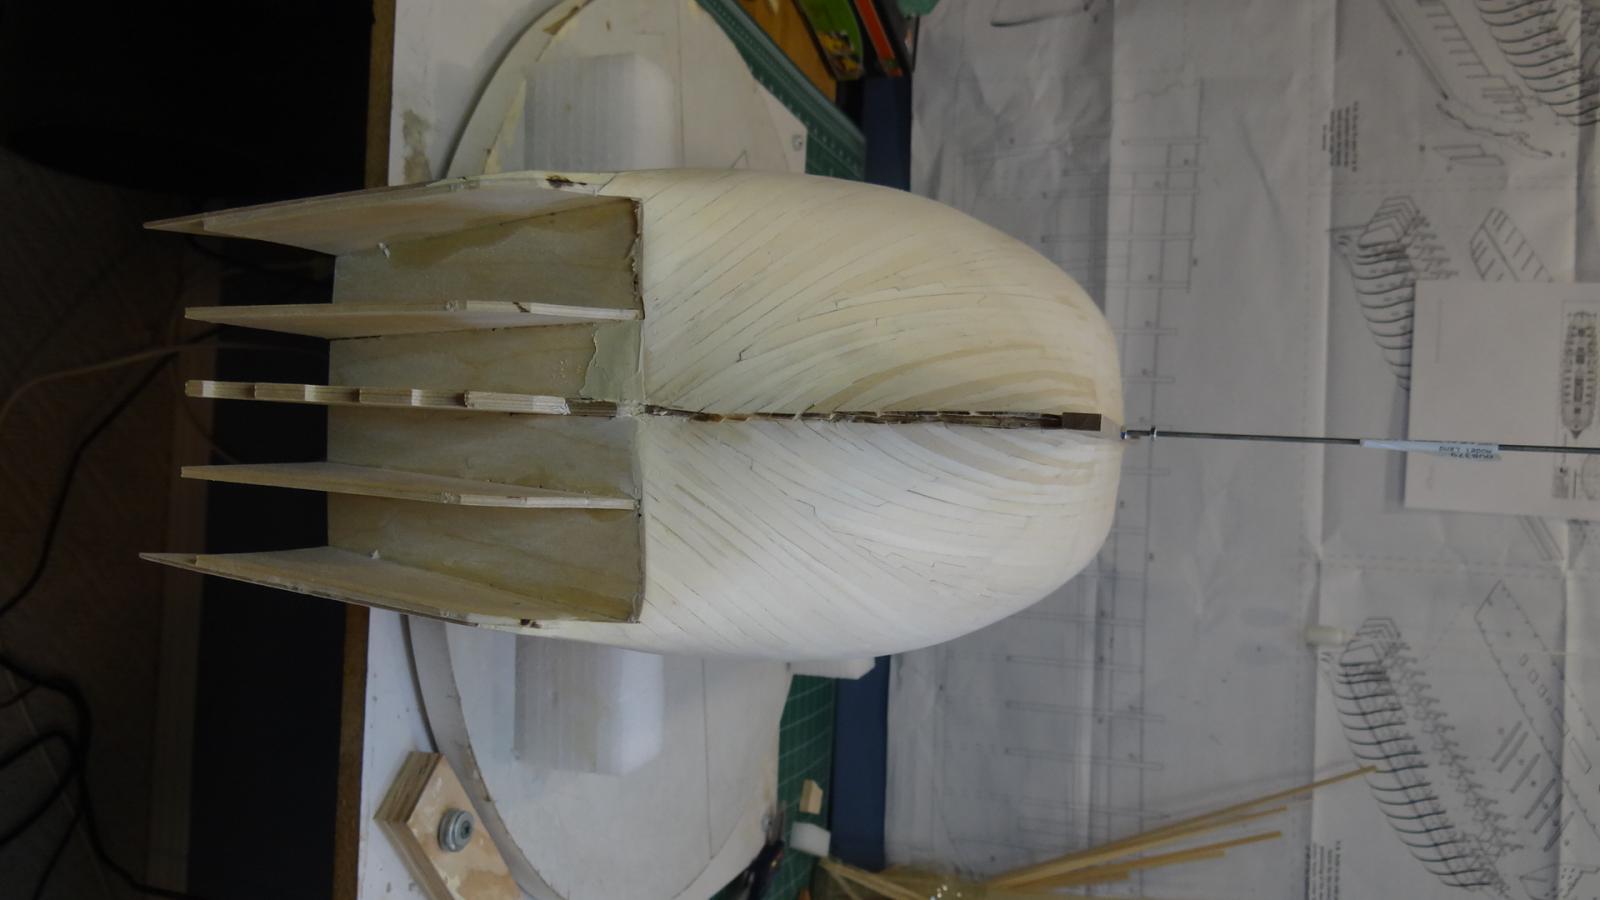
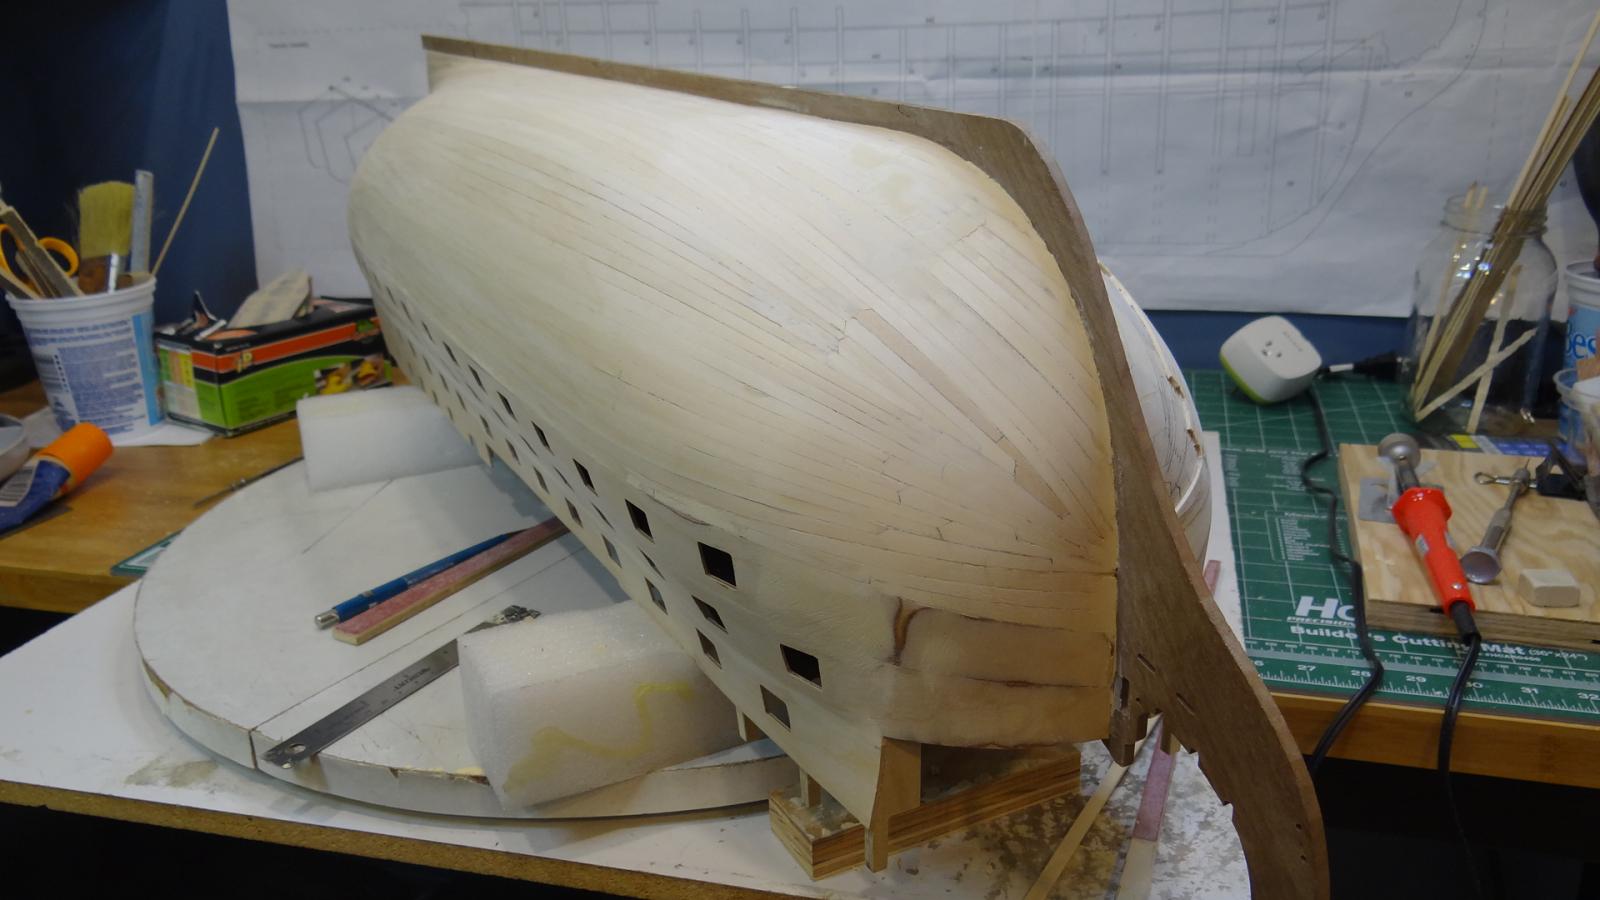
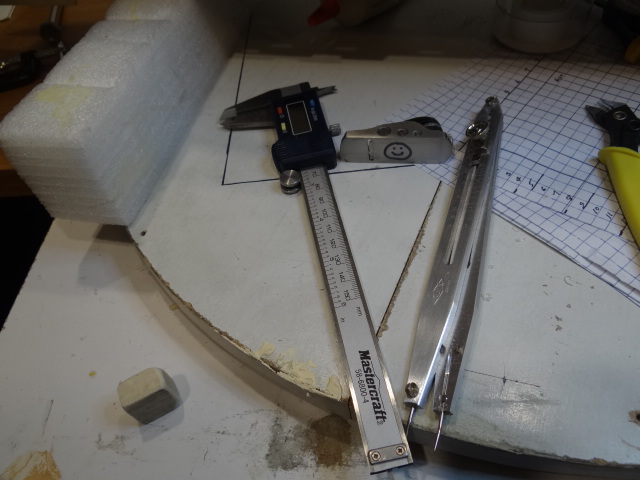
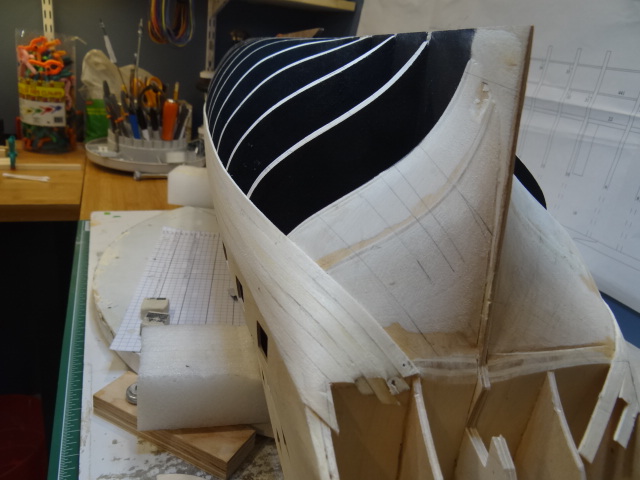
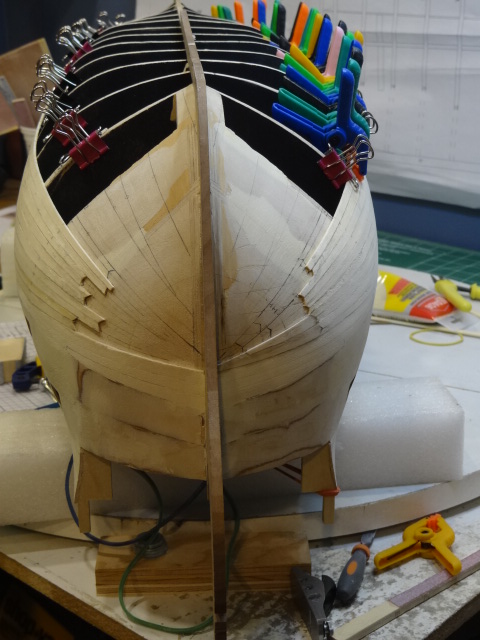
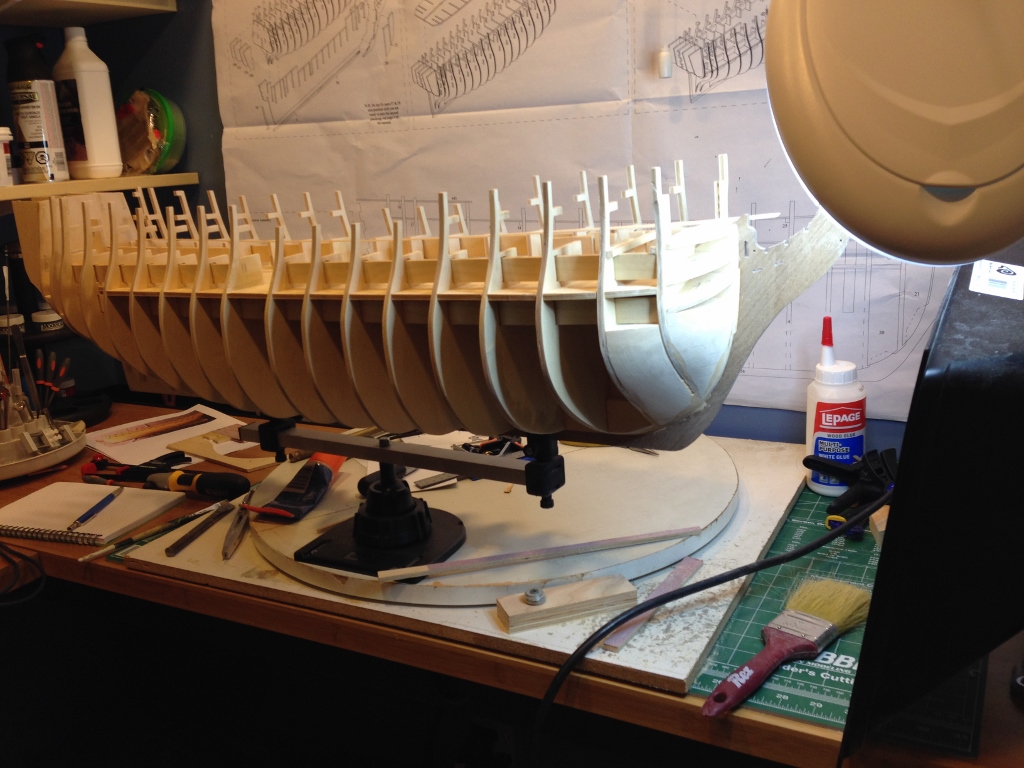
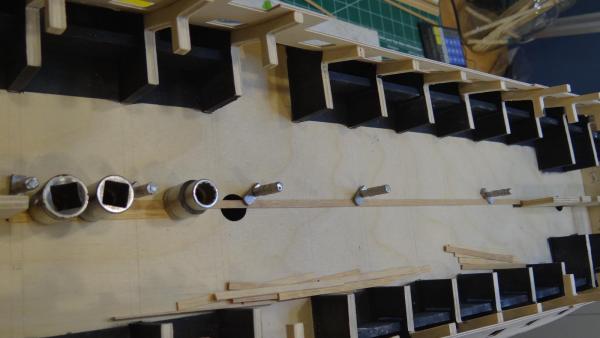
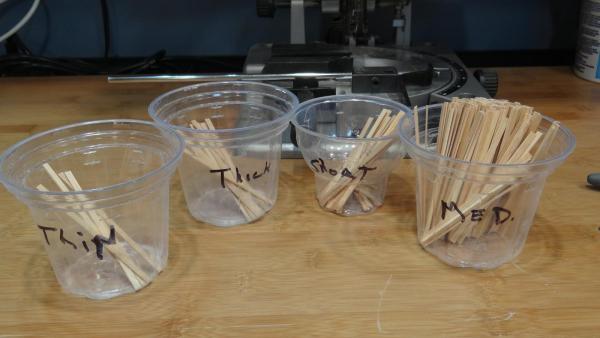
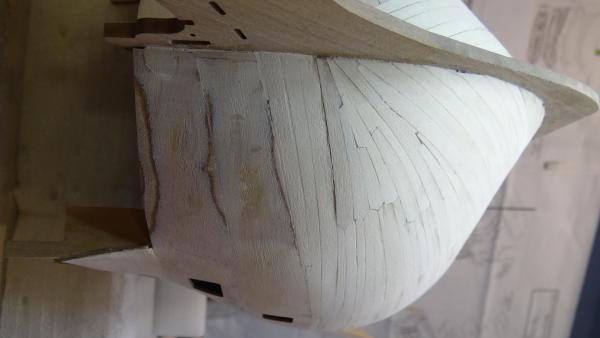
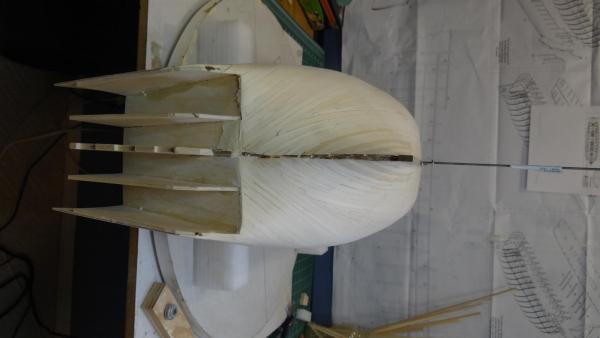
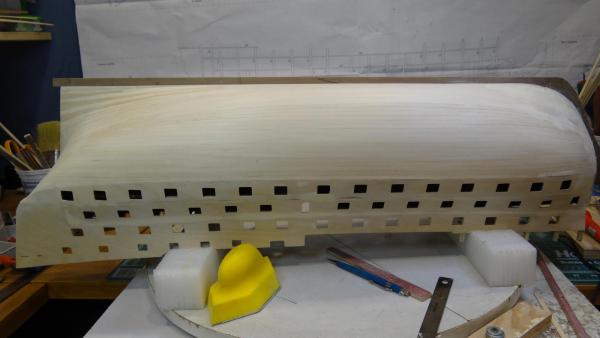
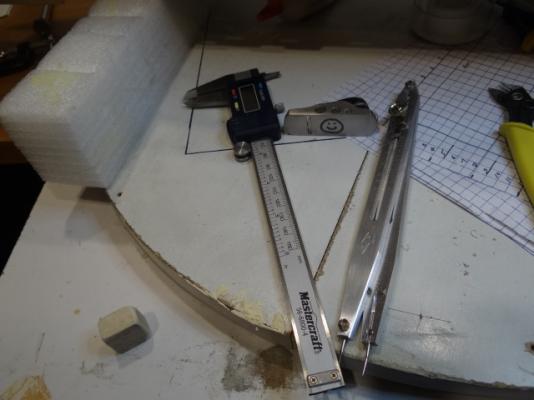
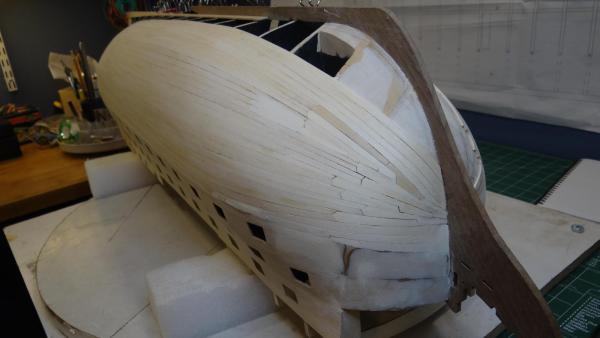
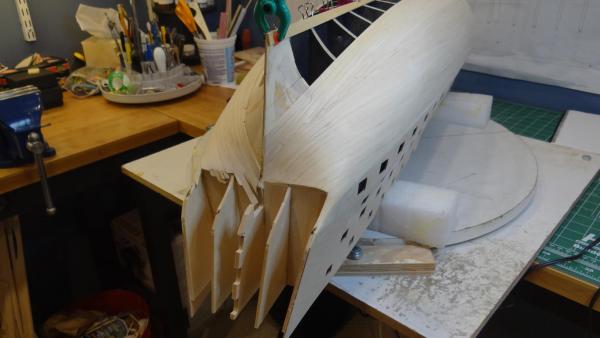
Thanks for the encouragement David. Ok a quick update because I will be away from the shipyard for a week or two. As you can see I haven't progressed that far but I feel as though I have conquered a few challenges. The first picture is of my good friends whom I relied on so much for this first planking. I have found them to be invaluable. The next pictures are of the port stern, midships and bow. I am not unhappy with the stern planking. I found the bow approach to be tedious and not pleasing to the eye. I should mention that my main goal for the first planking was to let the planks go where they wanted and minimize edge bending. This of course results in pretty obvious convergence points at bulkhead 17 and right at the bow necessitating lots of tapering and drop planks. I know it's only first planking but I have relied on this stage to educate myself about how it's done so that the second planking will be better. I have in my mind that I would like to more closely imitate the bow planking on the real Victory which as far as I can determine is for all of the planks to run parallel and horizontally. I am guessing this will require lots of spiling and as a consequence, wider walnut planks. Ian
- 191 replies
-
- 9
-
-
- victory
- caldercraft
- (and 1 more)
-
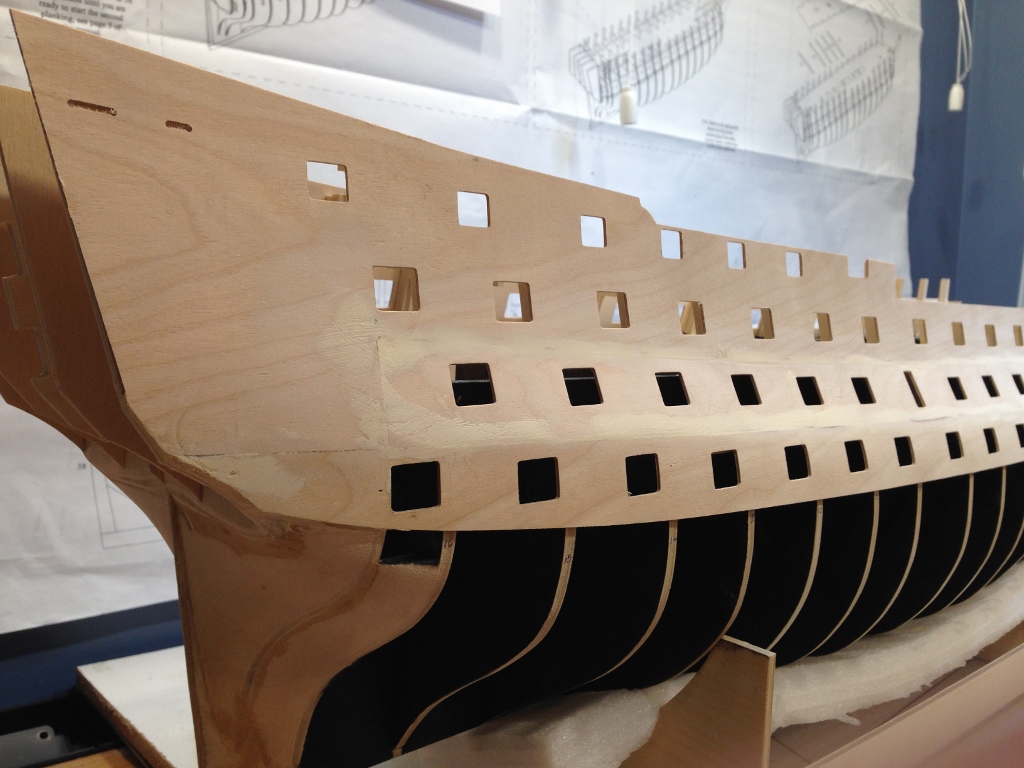
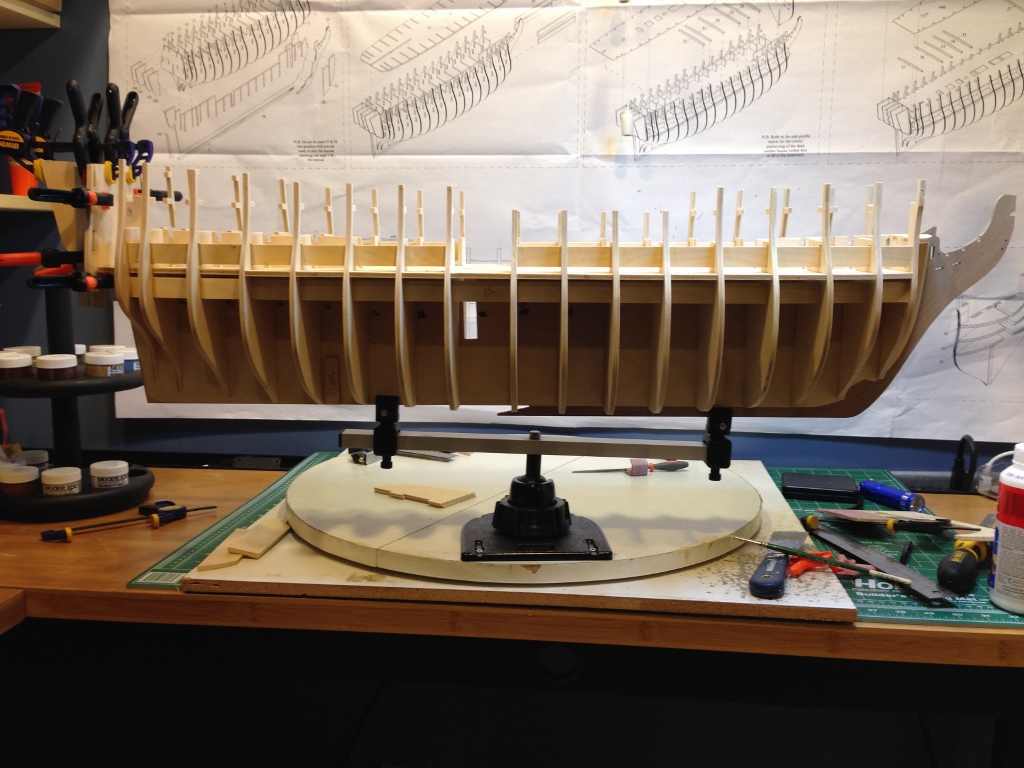
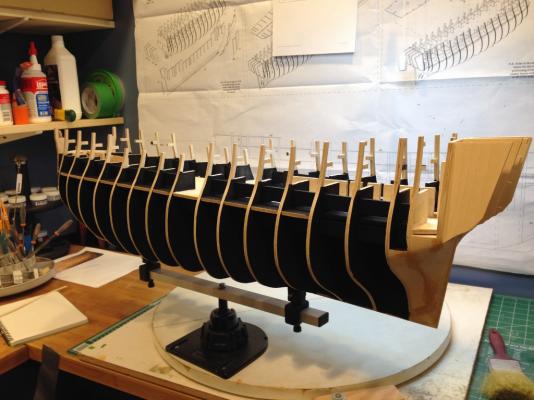
Thanks Malcolm and clearway for the like. I have learned so much from reading about other builds; I would not have attempted this build without this site. In spite of all of these other experiences, it is amazing what I have learned on my own. My number one - on-my-own learning is to not assume that the kit supplied parts are always accurate. I didn't realize that almost all of the bulkheads need fixing. I only paid attention to the bow and stern bulkheads and paid scant attention to bulkheads 6 to 14. If I sight down the top edge of successive planks I can see my folly. I will be spending far more time sanding and filling than if I had paid attention at the outset.
- 191 replies
-
- 3
-
-
- victory
- caldercraft
- (and 1 more)
-
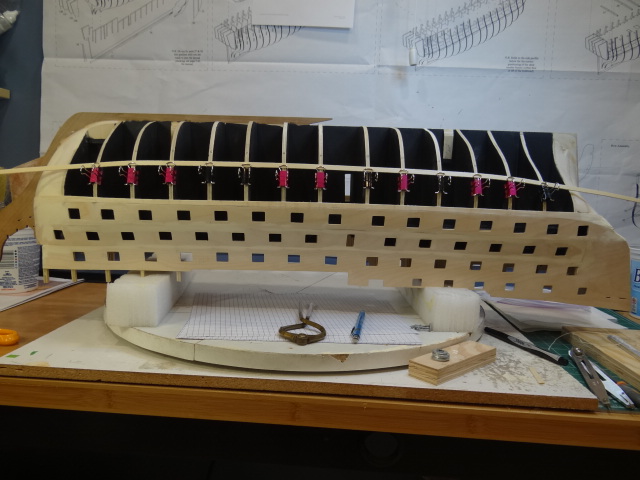
And final set that brings me up to where I am now. Lots of work ahead! Ian


- 191 replies
-
- 12
-
-
- victory
- caldercraft
- (and 1 more)
-
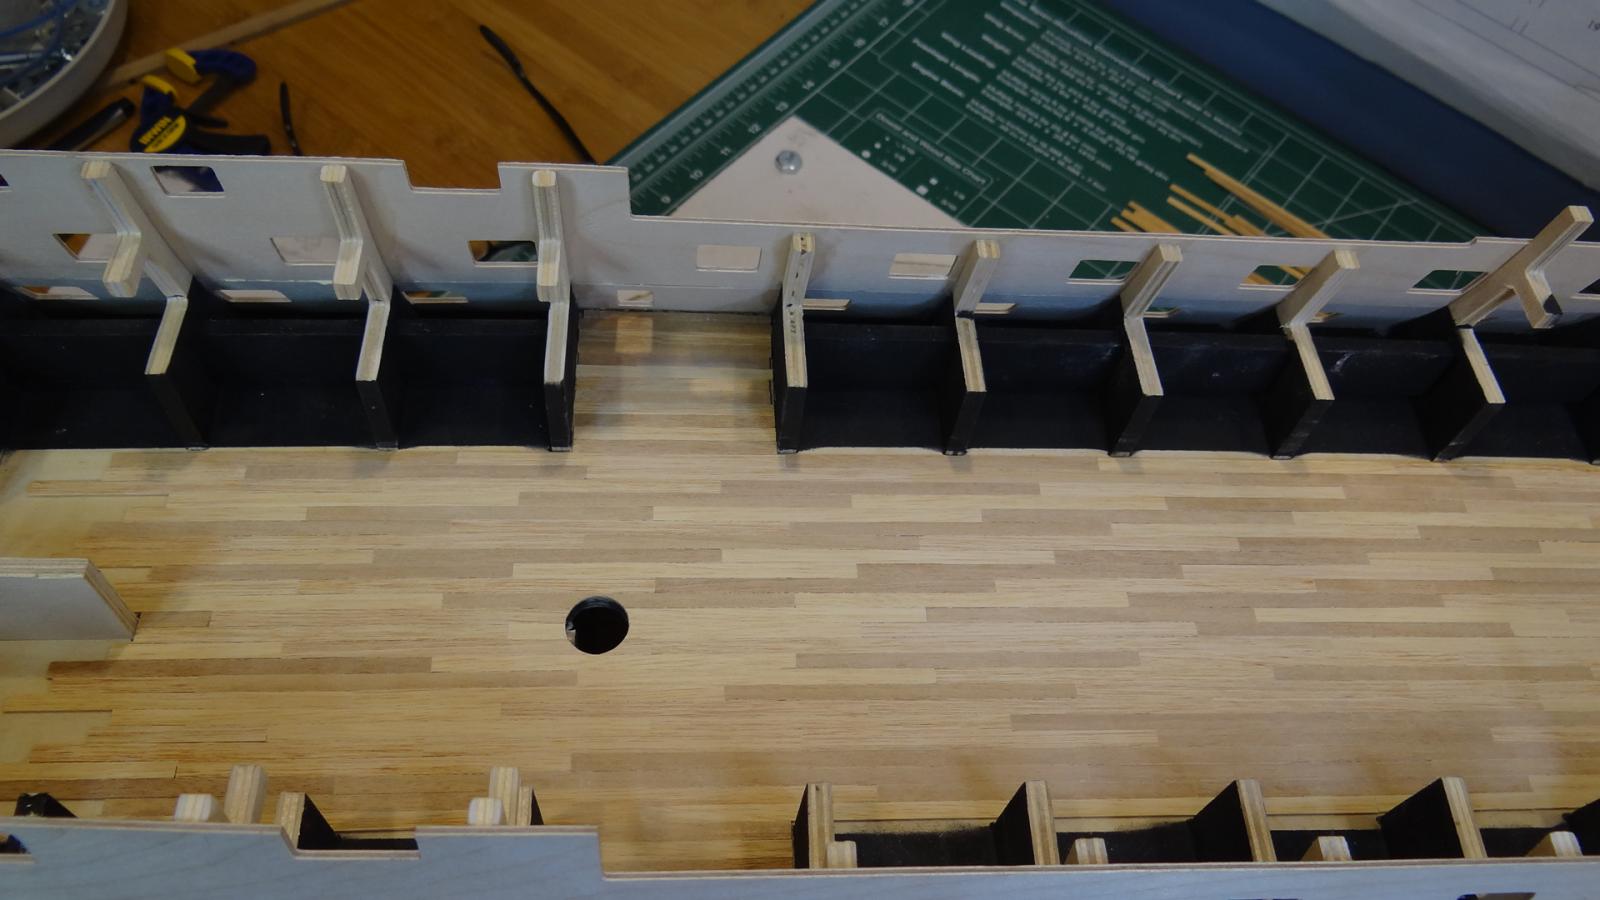
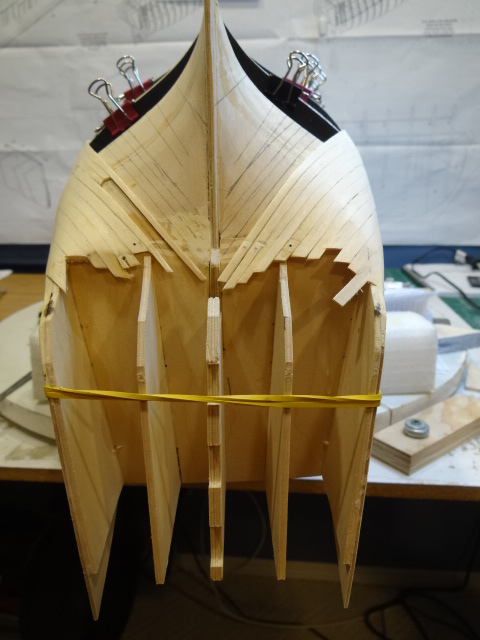
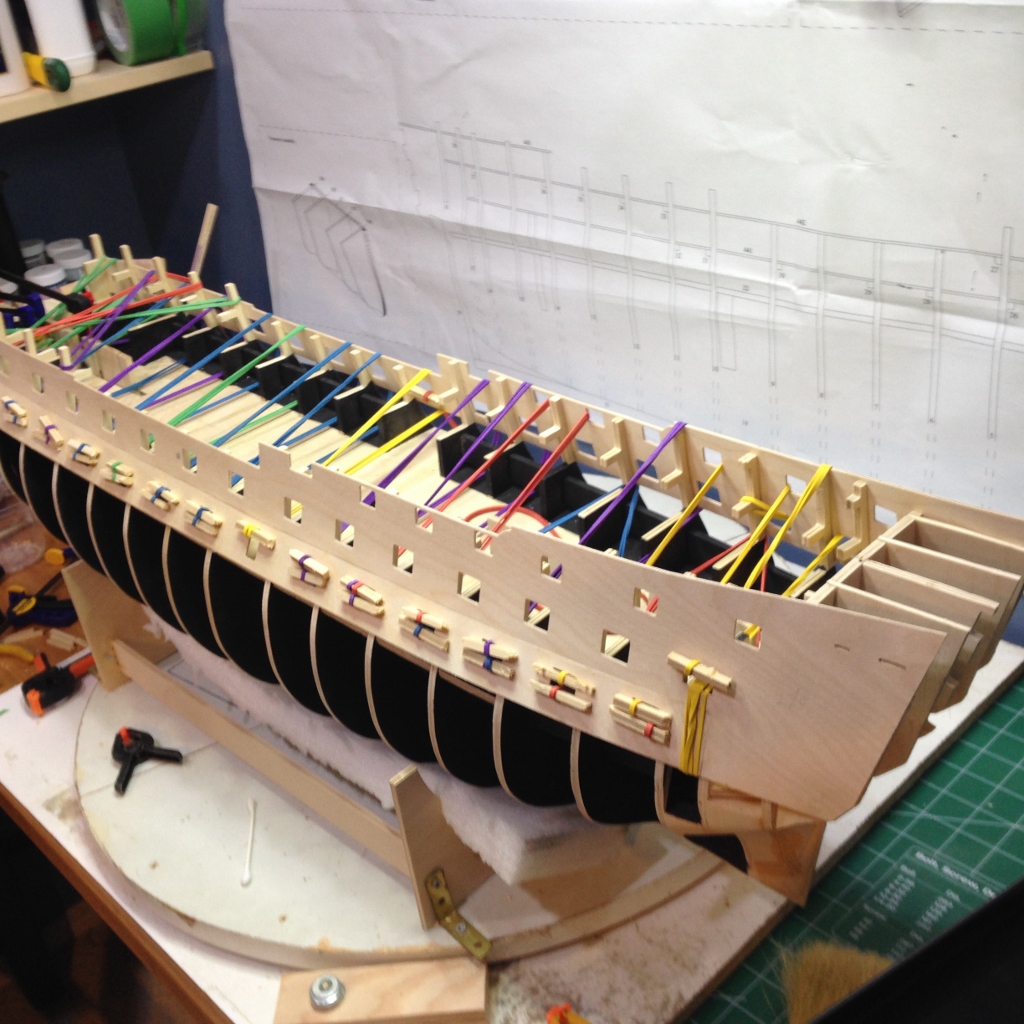
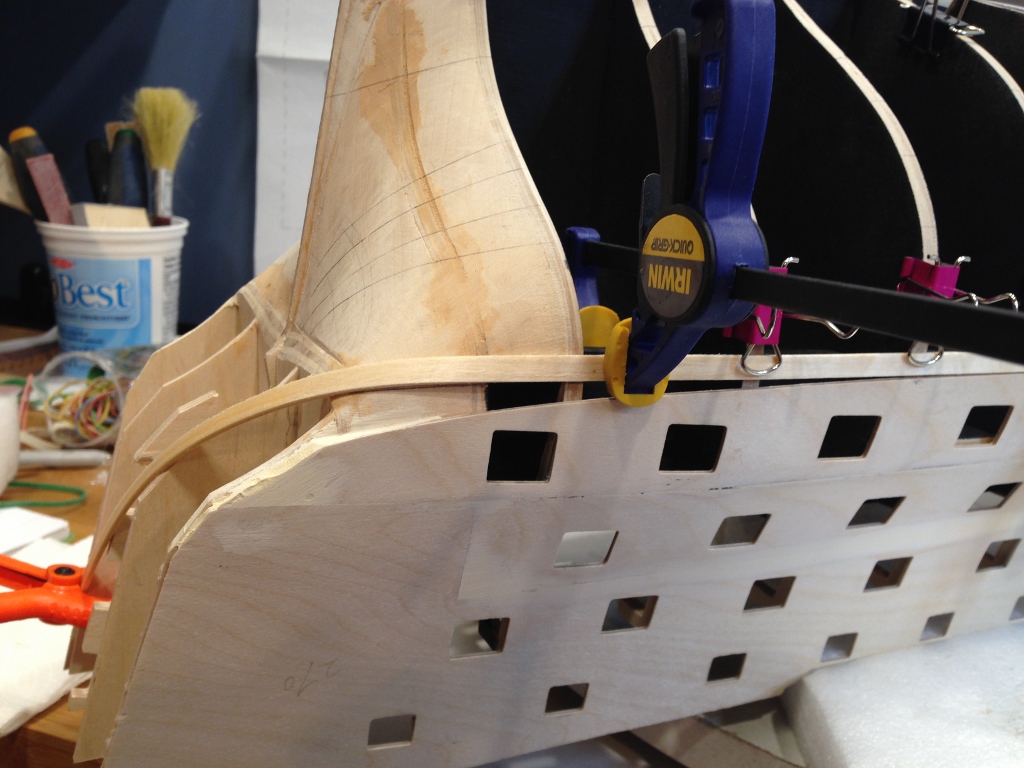
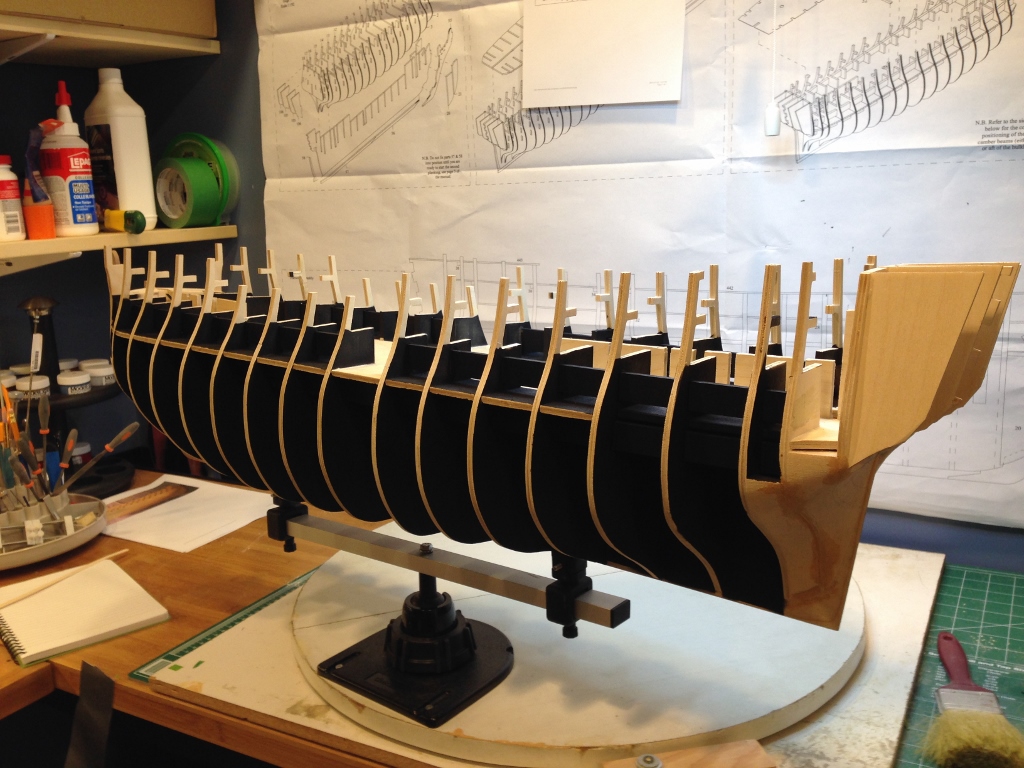
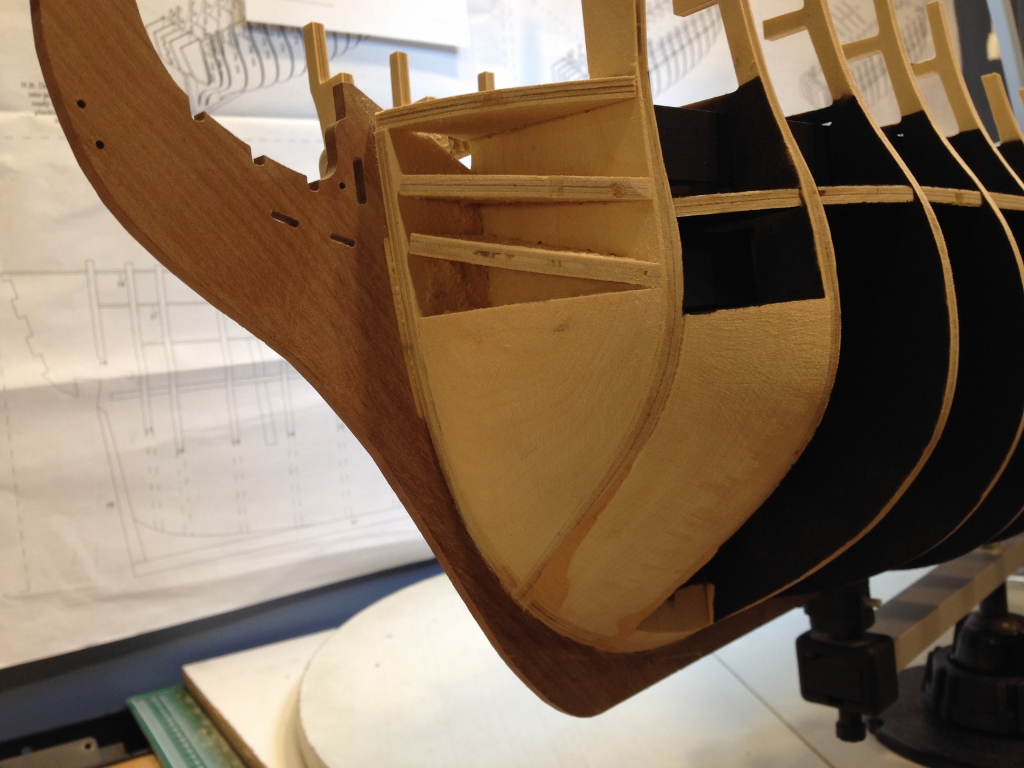
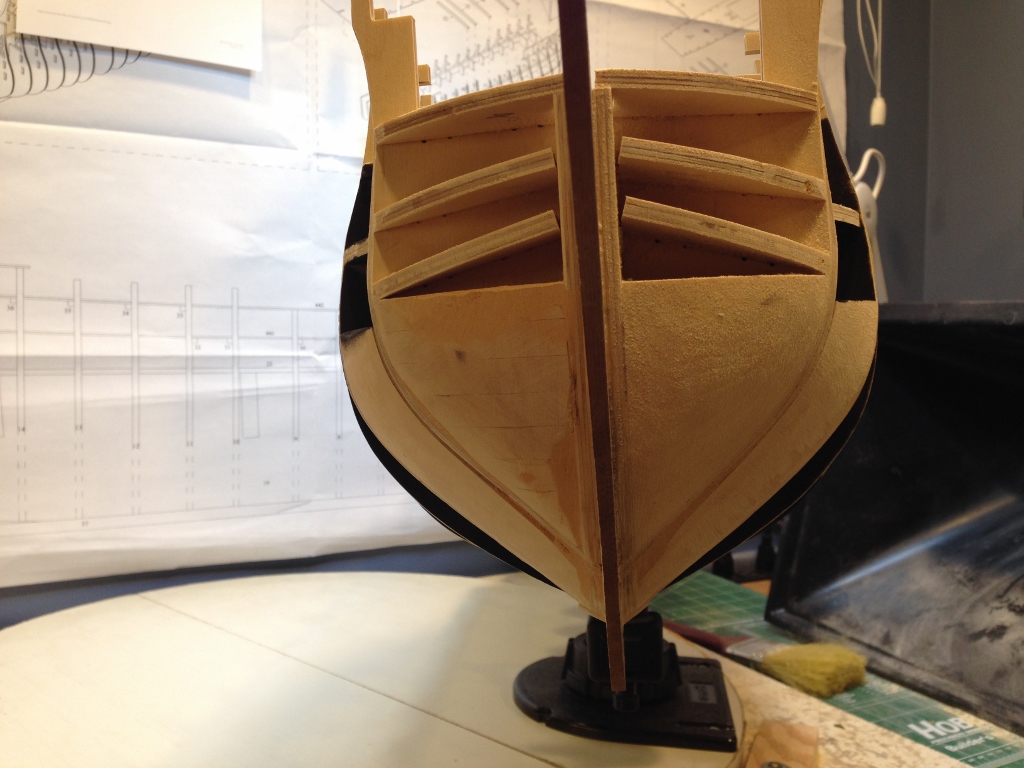
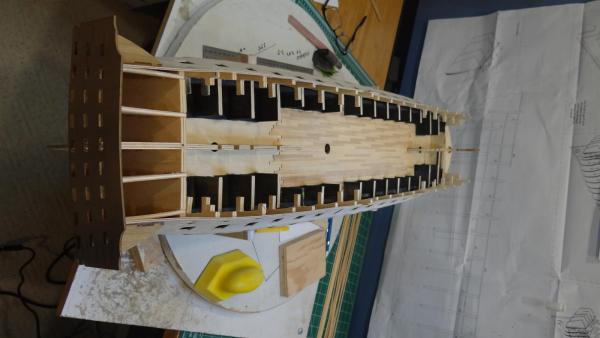
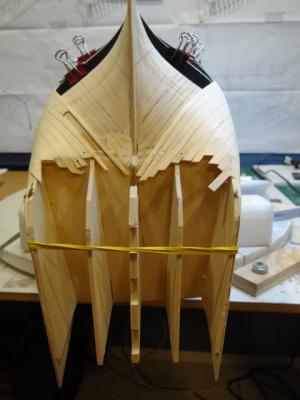
Hi all, This is my first build and I am aware this ship represents an expert level kit, but I love a challenge, and so far, at least with all of the excellent build logs on this site I don't feel out of my depth. Although please be the judge of that as my efforts unfold. I elected to take the bulkhead filler block path and even though it took me a while to shape these, I was happy I did. It allowed me to see how the planks would lie and provided a solid surface to mate the planks in these geometrically complicated areas. Next set of pics to follow.


- 191 replies
-
- 9
-
-
- victory
- caldercraft
- (and 1 more)