Seventynet
-
Posts
797 -
Joined
-
Last visited
Content Type
Profiles
Forums
Gallery
Events
Everything posted by Seventynet
-
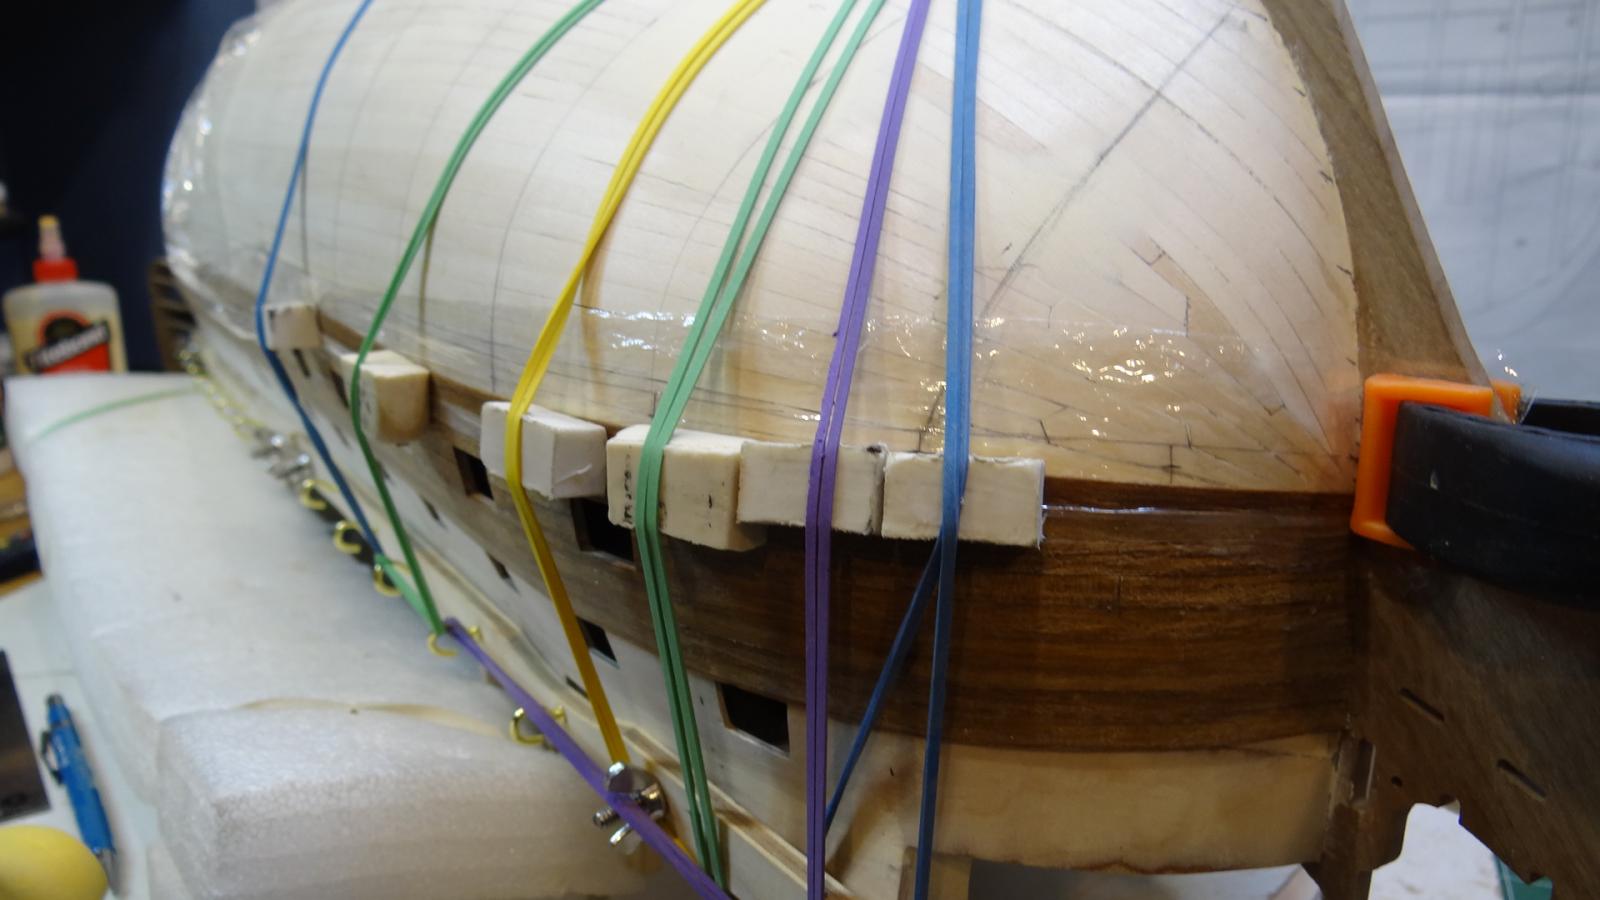
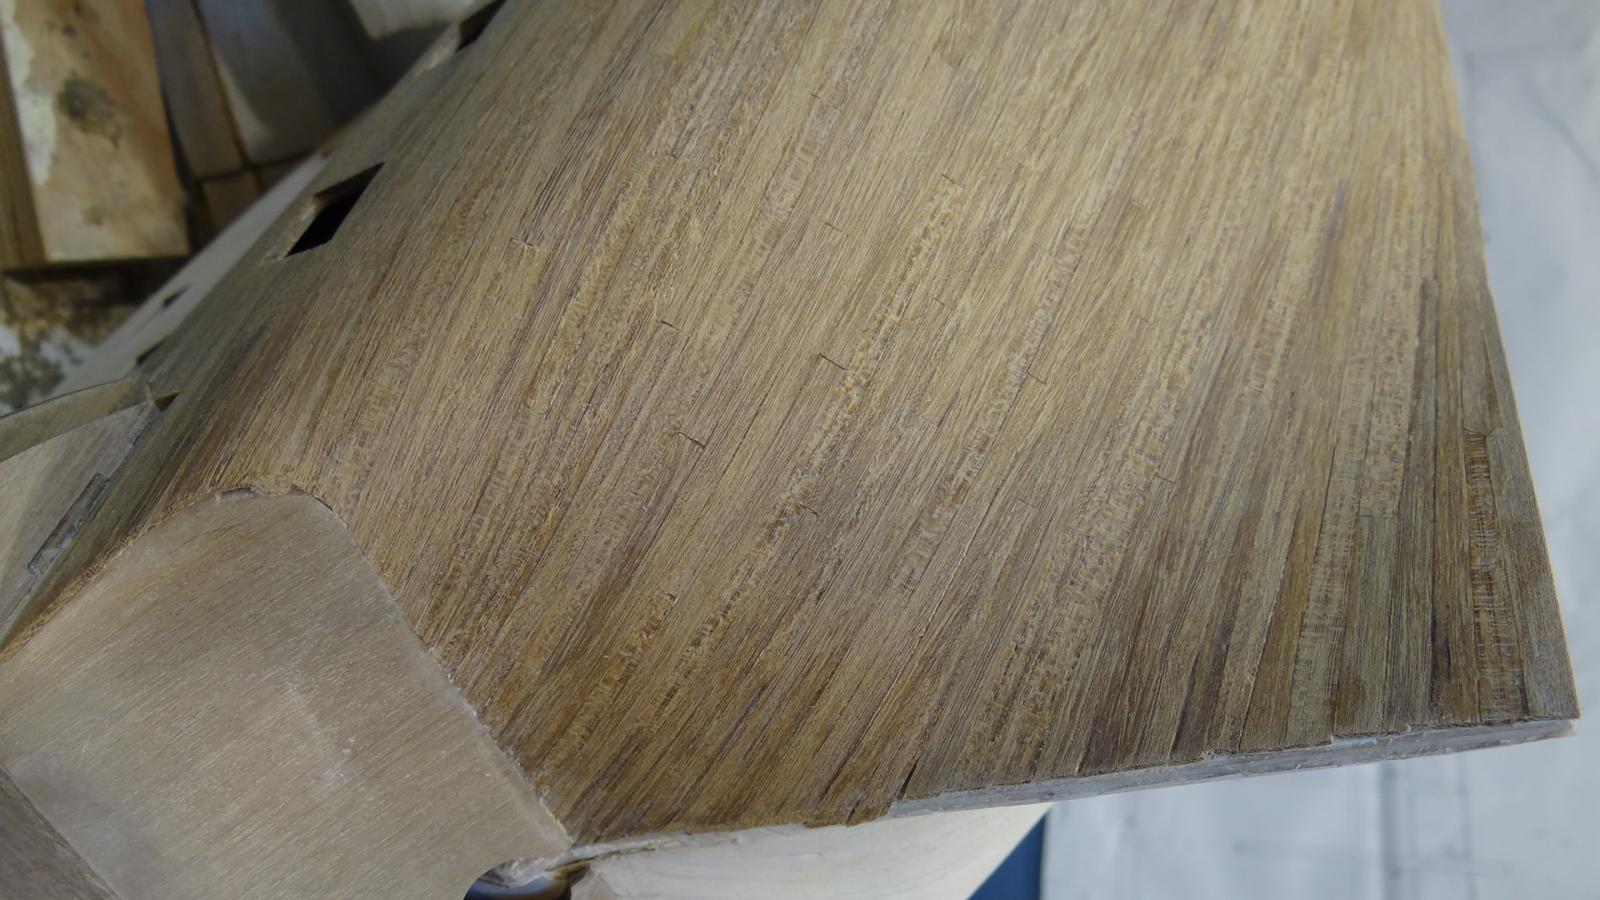
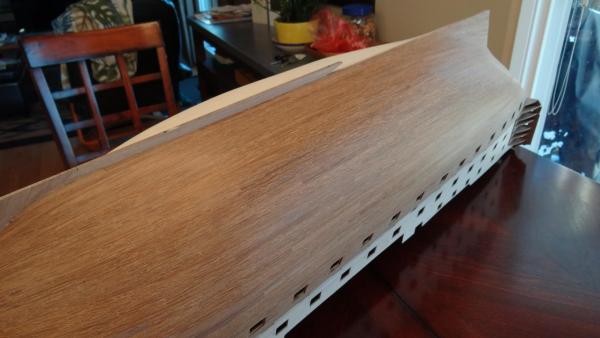
 Good day edge benders, For what it's worth I thought I'd post a technique I've been using for quite a while now as I work through the second planking on my Vic. The reason it may be useful for CC builders is that unless you have elected to source different wood for your second planking with options for wider stock from which to spile from (and you're not going to copper) you will need to practice edge bending. I have been successful using the following technique (note I am not concerned at this particular juncture with using 85 mm planks because this part will be covered by the lower wales): 1. mark the required plank taper on the hull 2. transfer the taper measurements to the plank 3. plane and sand the plank to those measurements 4. soak the plank for 1/2 hour 5. cellophane the area where the wet plank will be bent on (cellophane because the wet plank will mobilize the glue from the adjacent plank (etc.) so it won't stick and pull fibres and just generally make a mess 6. clamp the piece using elastic bands and cut up erasers - ensuring that the top edges that otherwise want to lift up from the edge bend are pressed down 7. let dry 8. glue plank on the bare wood using the same clamping system. The key thing is the use of elastics (wear eye protection) and erasers. Both of these things allow you to minutely adjust the pressure points and the erasers have the added benefit of sticking or holding the piece in place. While you cannot tell in the picture, this bend is not a simple one plane bend - hence the need for a slight edge bend here. You will see that my first planking has a severe uplift near the bow. That's where the planks want to go without spiling. So that's also an option with the second planking. But if you want to simulate a more lateral orientation you need to spile and edge bend (or just spile if you have the stock). Sorry for the length of this post. Hope some may find this to be useful.
- 191 replies
-
- 9
-

-
- victory
- caldercraft
- (and 1 more)
-
Alexandru, Your work is truly inspirational. On the one hand it makes me regret that I didn’t start this hobby several decades ago so that I would have had a chance of attaining 1/10 of your skill level – and on the other, it makes me happy that I am engaged in a hobby that is so truly remarkable. Best, Ian
-
Harbor Freight Mini Wood Planes
Seventynet replied to grsjax's topic in Modeling tools and Workshop Equipment
Great question that I'd like the answer to as well. Although I have to say that in spite of quite a bit of use, especially with the mini plane, I haven't had a need to sharpen these things yet. -
Absolutly gorgeous detail. Wow.
-
Dimitris, Heinz and Gunther thanks for following my progress and the likes. I have not yet decided whether I should cut in and fill spaces between the planks, I've just got my head down planking the other side. But I will say that I love the look you have created with your model Heinz. Whether I have the energy and skill to do that might be the real issue. Interesting what you say about the wood getting darker with time. That may be the solution in the end because I have been unsuccessful finding a source of mansonia wood (aka African walnut) to replace those spiled pieces. Best, Ian
- 191 replies
-
- 3
-
-
- victory
- caldercraft
- (and 1 more)
-
Ryan, I'm enjoying the detail as well. It looks like a fairly straightforward planking job with a little bit of tapering at the bow. I am sure everyone has their favorite approach but I found a small miniature plane to work well for me. Best, Ian
-
Hi Rick, just wrapping our discussion up, my little investigation on the article can be found here: http://modelshipworld.com/index.php/topic/439-planking-tutorials/page-2#entry366331. Have a good one. Best, Ian
-
It sure sounds like you have it in hand. The best article I came across on spiling (which in my case means the simplest) was called "planking the hull - a tutorial". I did quite a bit of spiling on my Victory but ended up using a slightly different kind of wood since the kit doesn't supply wider mansonia planks. So the experience was bittersweet. Best, Ian
-
Rick, far from me a first time builder to give advice, and I don't know how realistic this advice is for your particular build, but the solution to severe twists is to spile. You seem to have mentioned that in your last post but since you did not mention the need to start with wider planks to make spiling possible I am not sure you are doing it. It is really amazing how a plank will fit in 3 dimensions once it has been spiled. Since I am taking the risk of telling you something you don't already know, I will now shut up. But if you do want more information on the technique to use let me know and I can point you to some good sources. Best, Ian
-
Just discovered your Victory Nick. Looks great. You've given me some excellent tips and lots of things to think about for sure. I will be following the rest of your build with interest. I'm way behind you on mine. Best, Ian
-
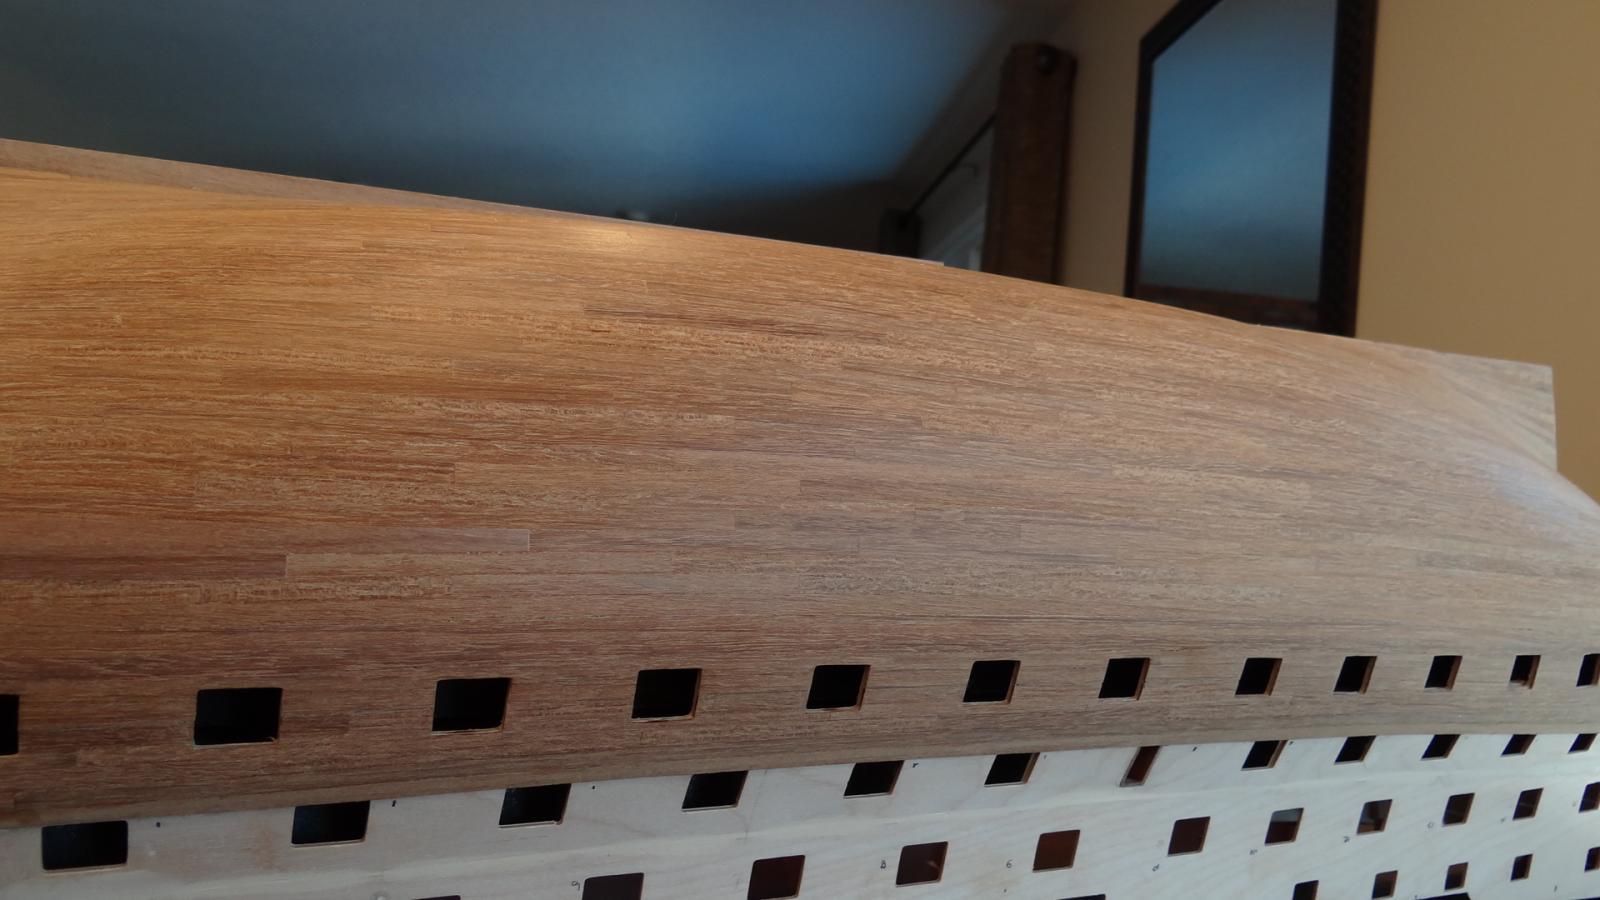
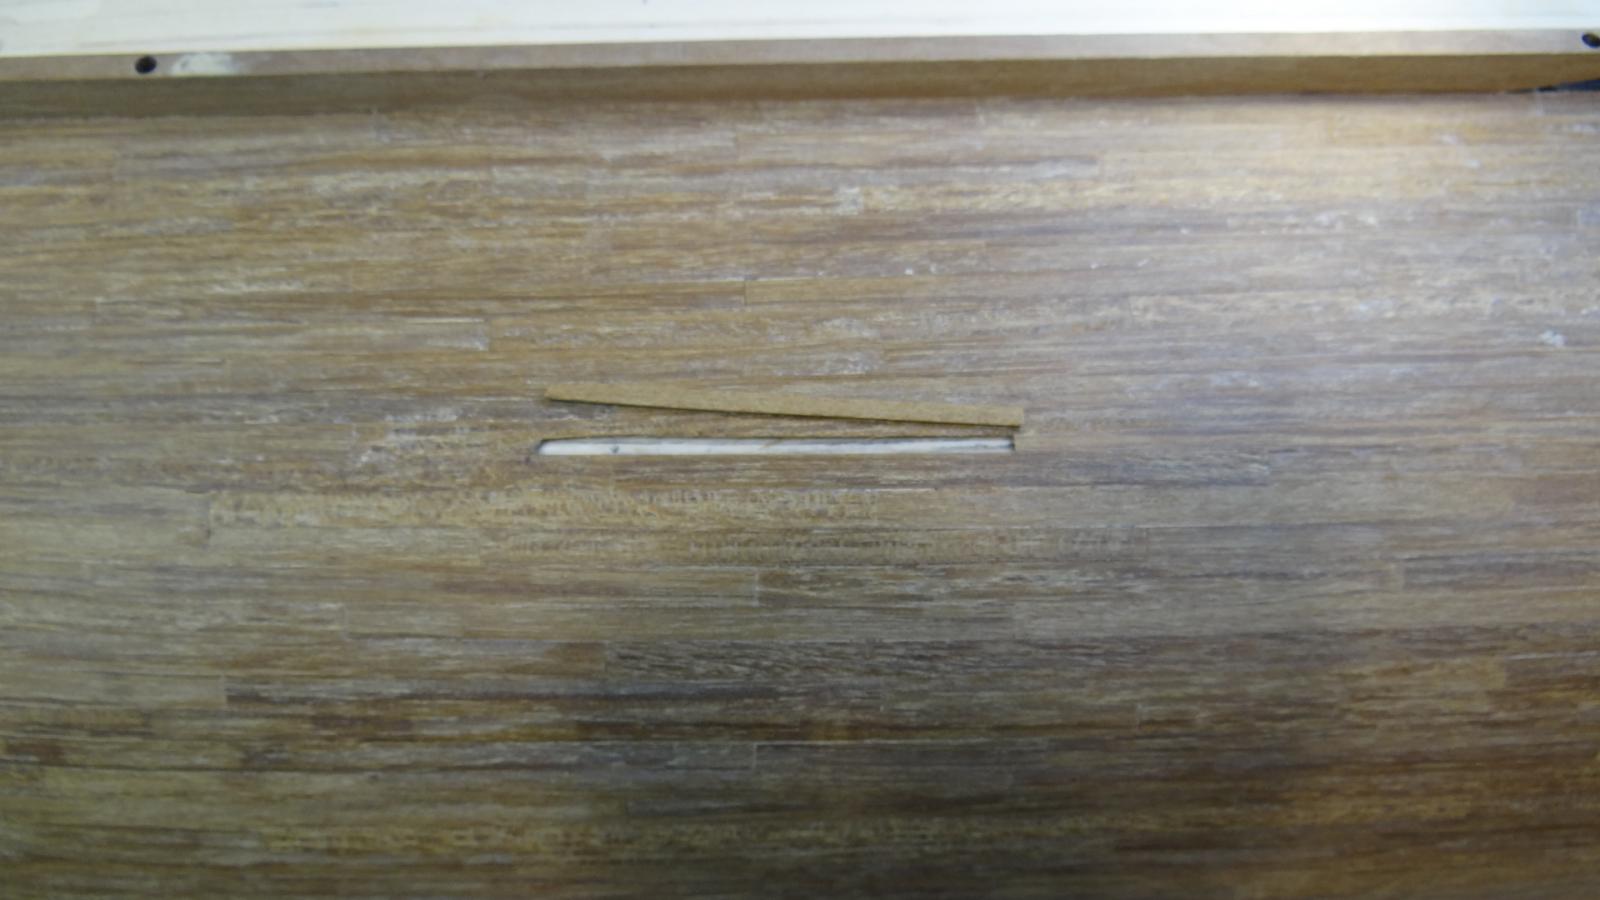
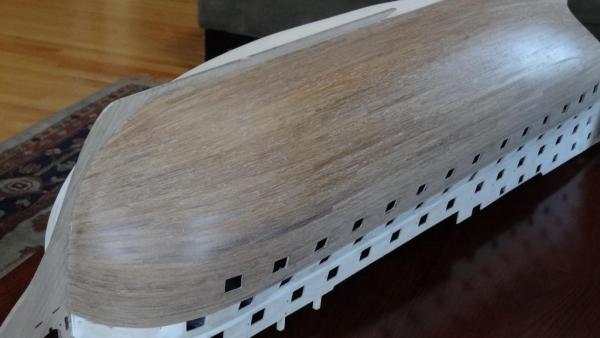
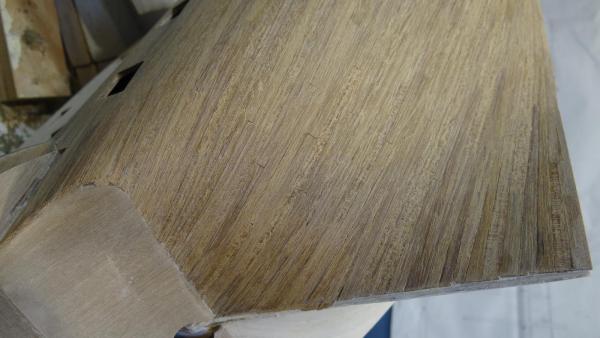
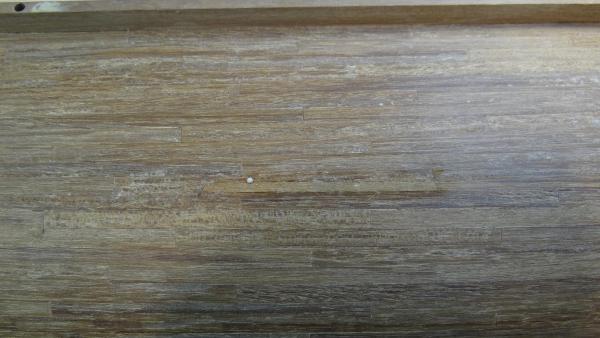
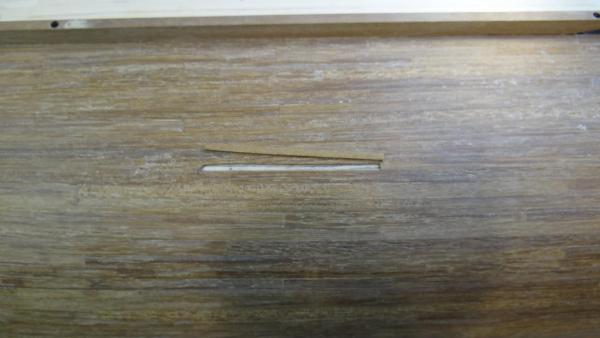
Thanks for the likes Ken, Mike and Dimitris. Arthur you have turned me into a hardened scraper for life! It really is a superior method for surface preparation. I bought a cheap plastic holder from Stanley and a box of blades. Shihawk you are right the wood does take on different character depending on the light. See my pictures below. Can I ask for those in the know; should I seal the planking now? I won't likely finish the port side for 3 months given my various plans and typical snail-like pace. I am thinking that I'd use minwax wipe-on poly. My main concern would be whether that would limit the adhesives I might use if I do go ahead and copper. Best, Ian

- 191 replies
-
- 12
-
-
- victory
- caldercraft
- (and 1 more)
-
All the best Brian. It's funny how less shipyard work is good for some of our health problems and yet for others, present company included, more shipyard work is the solution. Ian
- 831 replies
-
- 5
-
-
- Armed Virginia Sloop
- Model Shipways
- (and 1 more)
-
Thanks a lot Don. I'm really not sure that masonia wood deserves to be shown off. I'll reserve judgement until I sand or scrape to a finer surface. Speaking of which I will look into scraping as an alternative to sanding Arthur, but I actually know nothing of scraping. I'll have to do a bit of research on this site. Thanks, Ian Edit: Ok, I'm sold: http://modelshipworld.com/index.php/topic/10704-do-you-use-a-scraper-in-shaping-instead-of-sanding/page-1#entry323292 I just need to figure out what tool to use...
- 191 replies
-
- 3
-
-
- victory
- caldercraft
- (and 1 more)
-
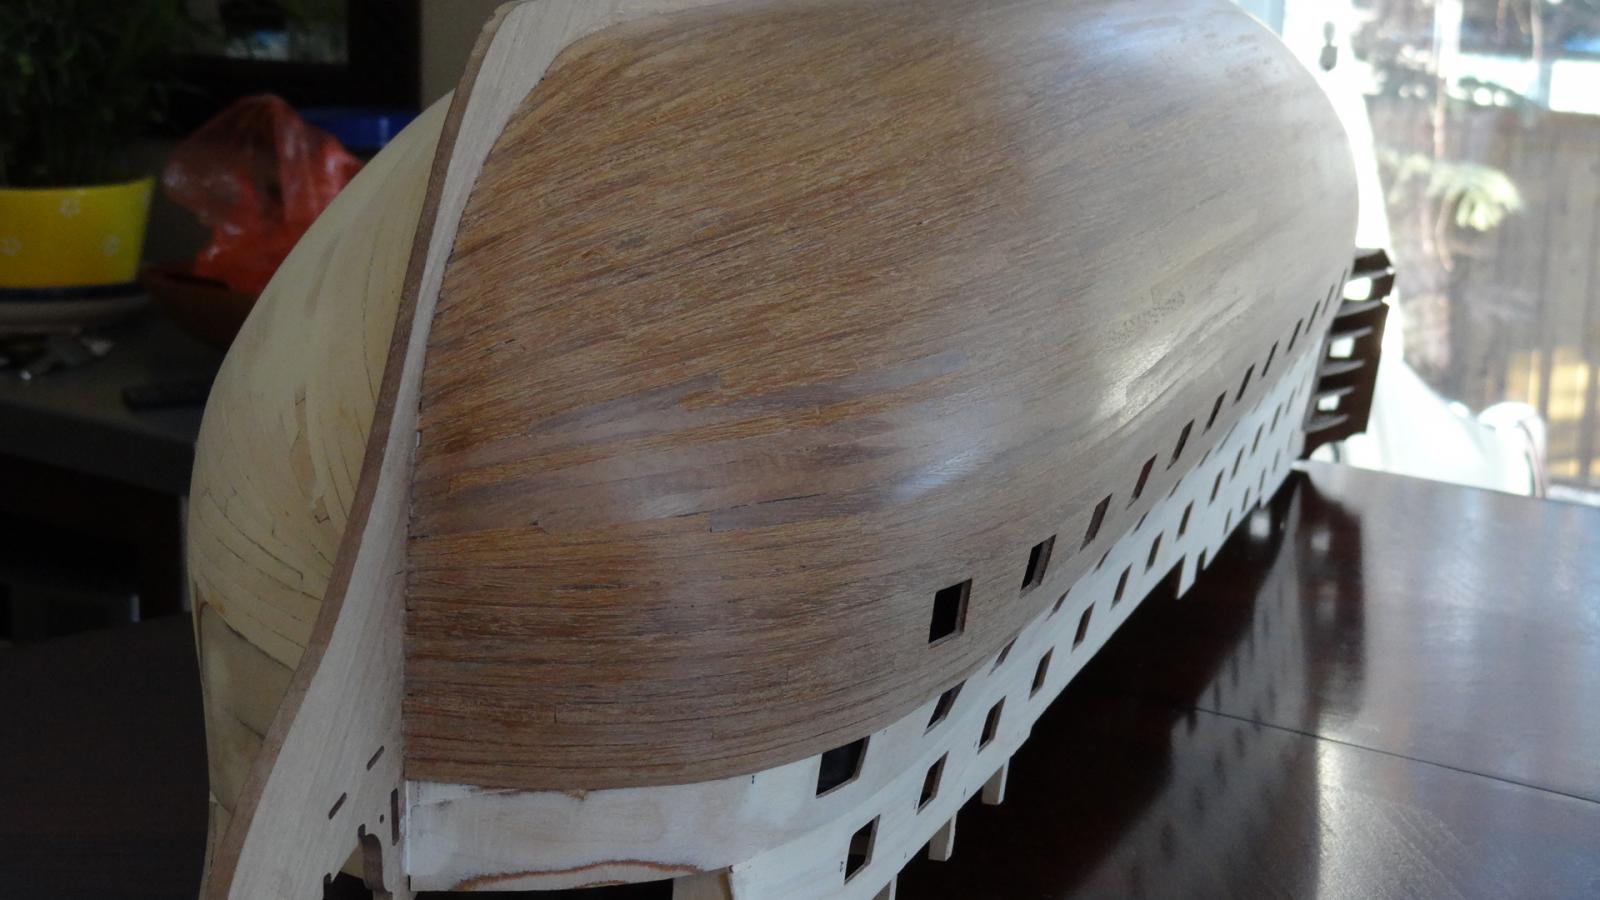
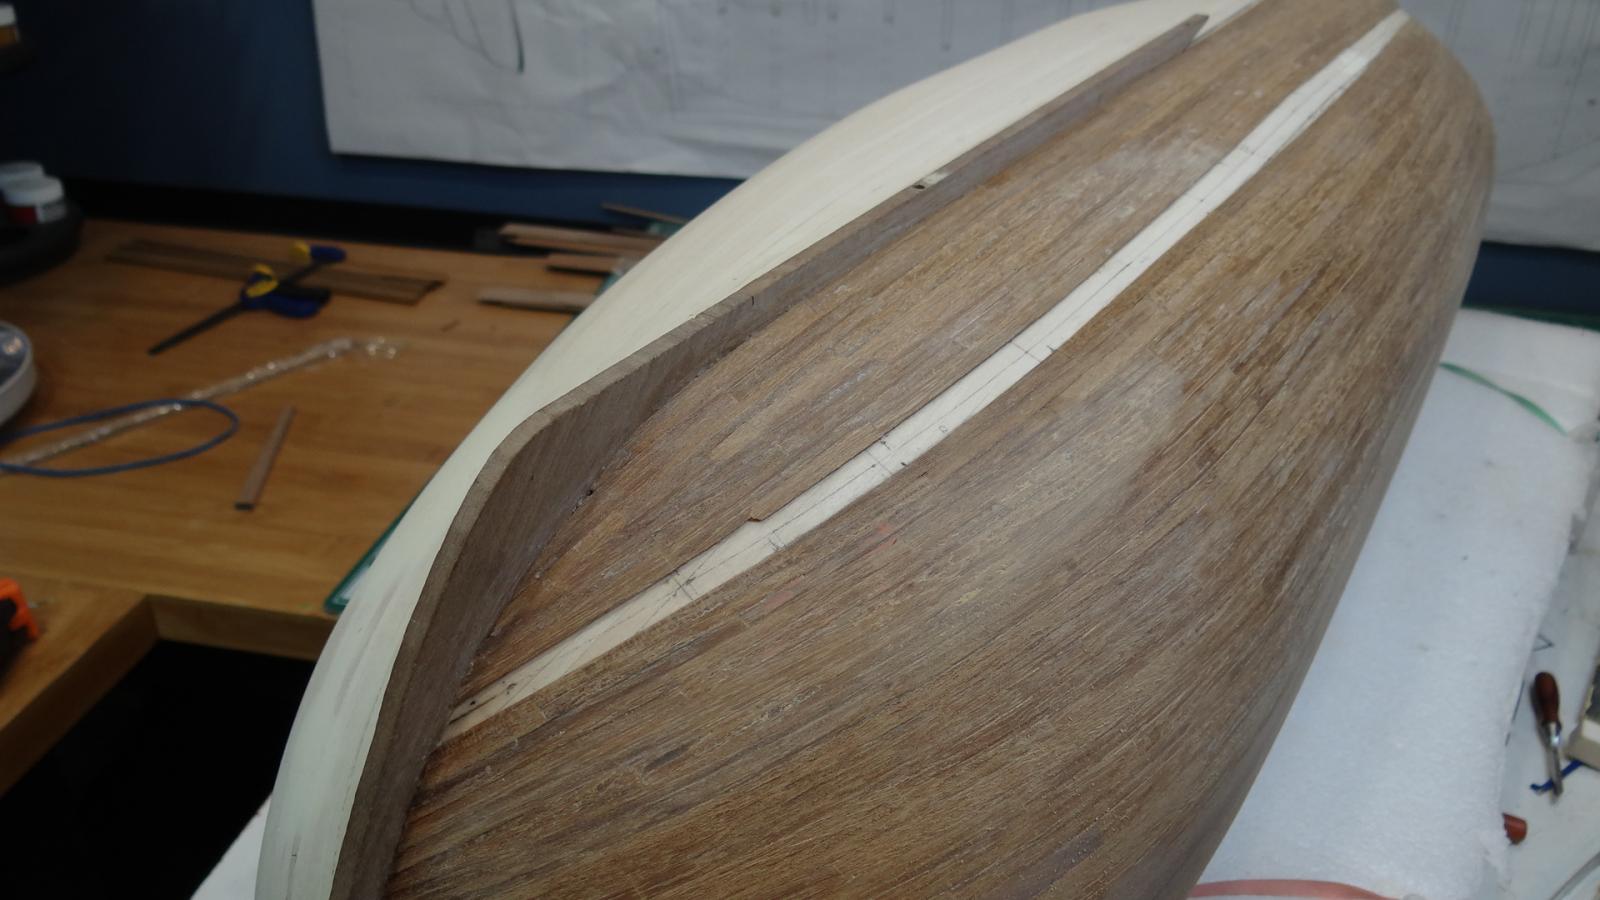
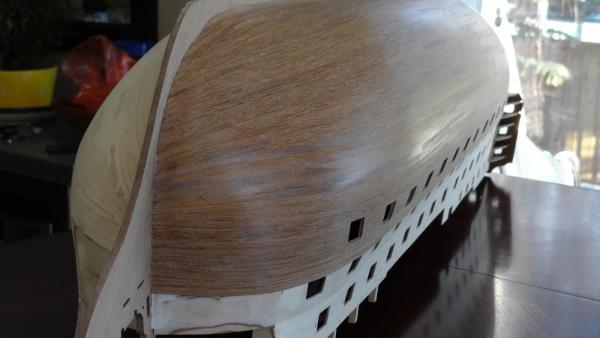
Thanks for the kind words Heinz, ZyXuz and David and the likes Dimitris, Ken, Arthur, Mort, Shihawk and others. Very much appreciated. I finished up the starboard side. Last plank installation below . Tomorrow I am going to cut the excess at the sternpost, fix a couple little issues, give it a sanding and then I'll be back. Best, Ian
- 191 replies
-
- 10
-
-
- victory
- caldercraft
- (and 1 more)
-
Georgeous Dimitris! Such nice work. Cheers, Ian
-
What a great start to this model. If you don't mind I will pull up a chair and follow this build. Thanks, Ian
- 120 replies
-
- 2
-
-
- mercury
- victory models
- (and 1 more)
-
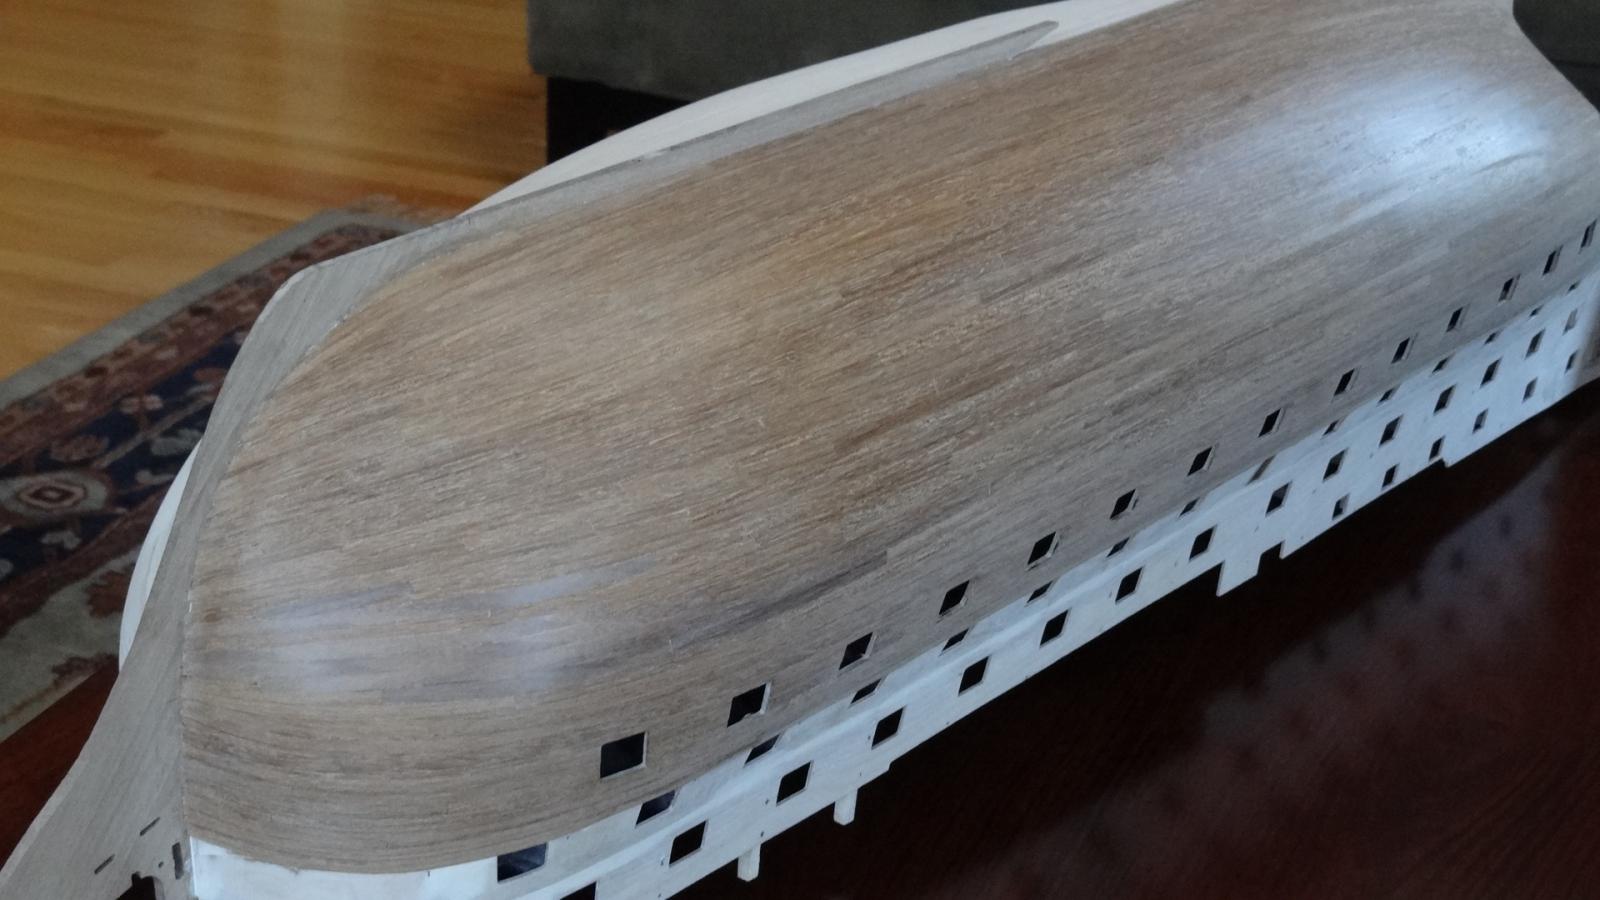
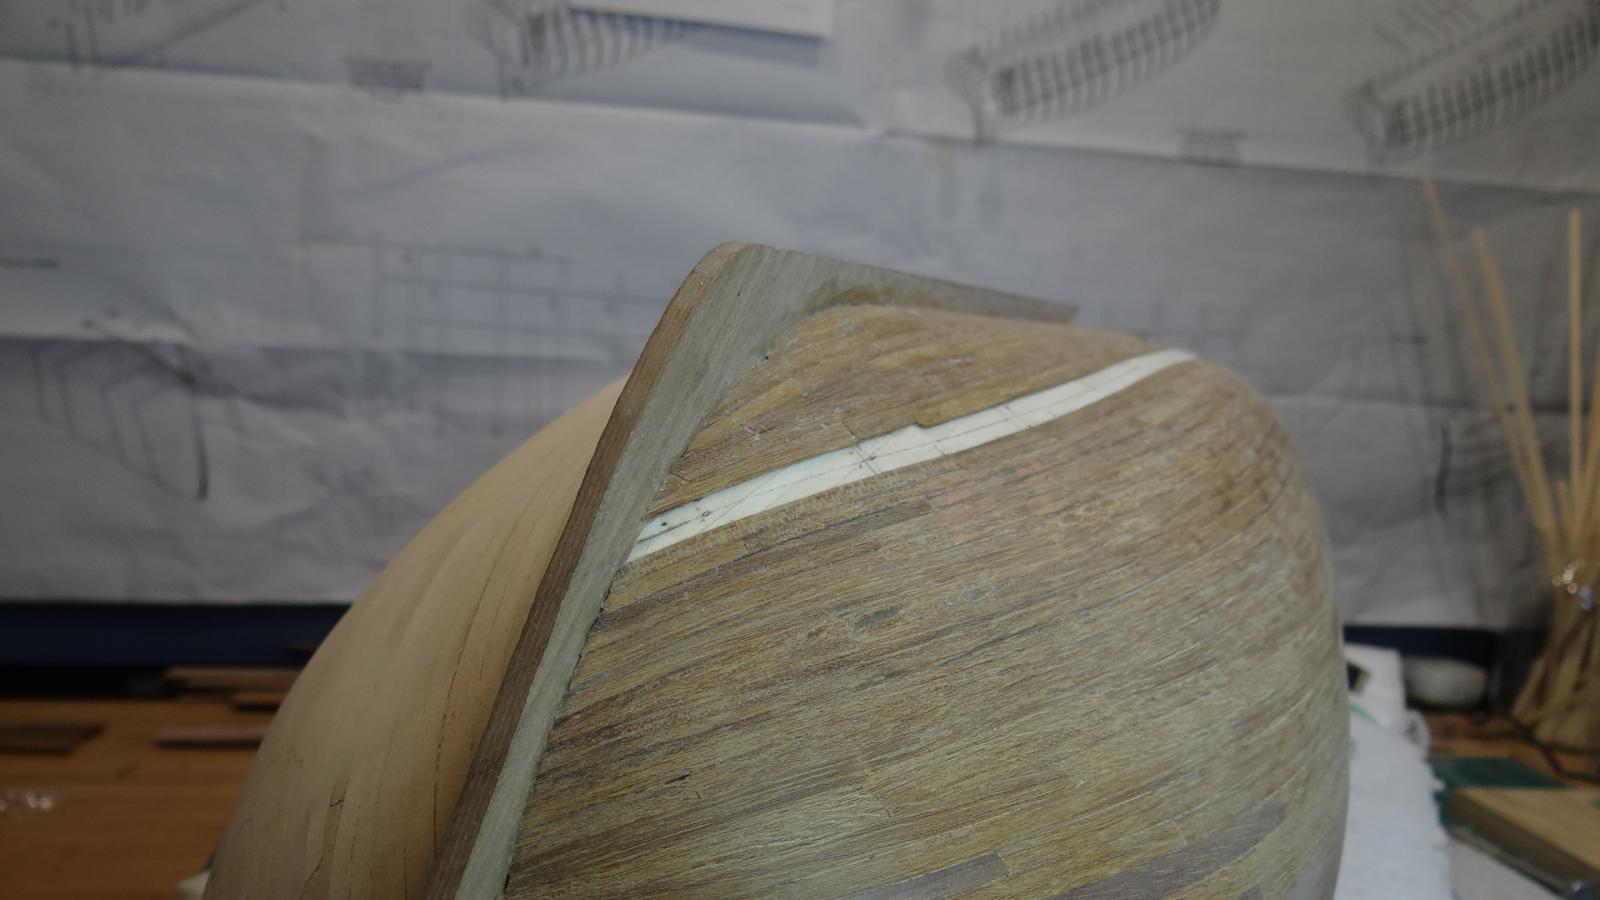
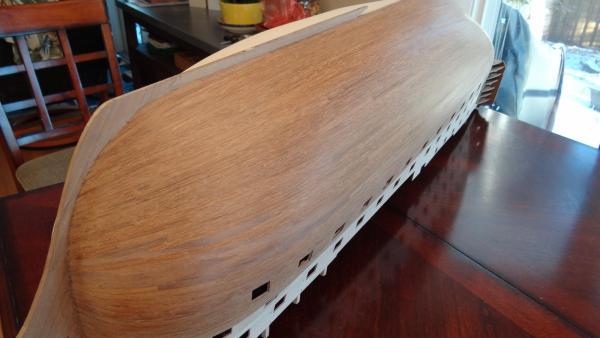
I'm closing in on my starboard side second planking, at least from the middle gundeck down. We'll have to see whether a good sanding can improve the looks of this so-called "walnut" planking. But anyway, I think after the 481st plank I'm beginning to get the hang of it. Best, Ian


- 191 replies
-
- 8
-
-
- victory
- caldercraft
- (and 1 more)
-
I like your clamping solutions. Nice job! Ian
- 203 replies
-
- 4
-
-
- artesania latina
- marie jeanne
- (and 1 more)
-
Oh boy does this bring back memories. I grew up in the 60's and early 70's sailing a 24 foot sloop rigged (converted) cape cod cat that looked exactly like this (just a bit bigger). It was strip planked and leaked like a sieve for the first 24 hours after launching it every spring. My bud and I sailed it from Montreal down the St Lawrence and Richelieu River to Lake Champlain one summer. Very sorry to reminisce in your thread - but move over, I will be following your build Marcus and then copying it! Best, Ian
- 165 replies
-
- 7
-
-
- cape cod catboat
- Finished
- (and 1 more)
-
Beautiful model and well deserved honour Brian. Best, Ian
- 831 replies
-
- 3
-
-
- Armed Virginia Sloop
- Model Shipways
- (and 1 more)
-
Thank you for the praise Dimitris although it is undeserved. I think the difference between a beginner and an expert is primarily the time it takes to figure out and do something. Anyway it sure is nice to see others follow my build and give me advice. Thanks again. Best, Ian
- 191 replies
-
- 3
-
-
- victory
- caldercraft
- (and 1 more)
-
What a lovely careful build Dimitris. I am going to follow this if you don't mind. Best, Ian
-
Thanks for that answer Heinz. Then I will temporarily lay my keel to have something to butt up against and get a flush fit. I guess I will be then able to remove the keel to get a uniform sanding. Anyway thanks for the advice. I have 11 plank layers left on the starboard side and hence am just going to start from the keel to meet the rest of the planks. I think all of your solutions worked very well in spite of being out of sync with the instructions. I only wish I had your skills! Best, Ian