Seventynet
-
Posts
797 -
Joined
-
Last visited
Content Type
Profiles
Forums
Gallery
Events
Everything posted by Seventynet
-
 Hi Heinz, In my humble, inexperienced opinion the carvings look just great. I don't think you should regret leaving them as they are if you decide to go that way. If you don't mind me switching gears for a moment, can I ask if you carved in a rabbet or groove into your keel and stern post for your second planking? I'm just about to start my keel batten. I see merit going with a flush planking to the keel (as I did at the stem but through lack of planning) because I might get better sanding access but might get a better fit if I install a rabbet. Just curious what you decided. Sorry to hijack your thread. Ian
 -
Don thanks so much for the tip on Mansonia. I shall visit my favorite store today. Ian Edit: Windsor Plywood (Calgary) say they haven't carried it for over 5 years - and talked to one of their buyers for me. They didn't appear too eager to hunt any down for me - probably when they learned how little I needed.
- 191 replies
-
- 3
-

-
- victory
- caldercraft
- (and 1 more)
-
shaping planking
Seventynet replied to bluenose2's topic in Building, Framing, Planking and plating a ships hull and deck
Great advice on this site Les: http://modelshipworldforum.com/ship-model-framing-and-planking-articles.php- 1 reply
-
- 4
-
-
I can't take much more of this model and this great work before I order this model. I must complete one before I start another...I must complete one before I start another... Here's the 3-D site (you may have to navigate a bit to accept some terms): http://amatimodel.com/3d-revenge.php
-
That's it and it reminded my of the 6th item - the chisels - another set of tools I use all the time. Somewhere along the line I'm going to have to learn how to sharpen these things... Ian
-
Alan, that's a Veritas miniature low-angle block plane. High quality plane, Canadian company but marketed by Lee Valley. I bought a set of 6 planes (router plane, shoulder plane, block plane, spokesplane, edge plane and ??). I have only used the block plane for tapering planks. But I use it all the time.
-
You're welcome Jazzchip. Let us know what you get and how it works. I imagine we all have different needs at different stages of our builds but it is interesting to see what vices rise to the top (no pun intended).
-
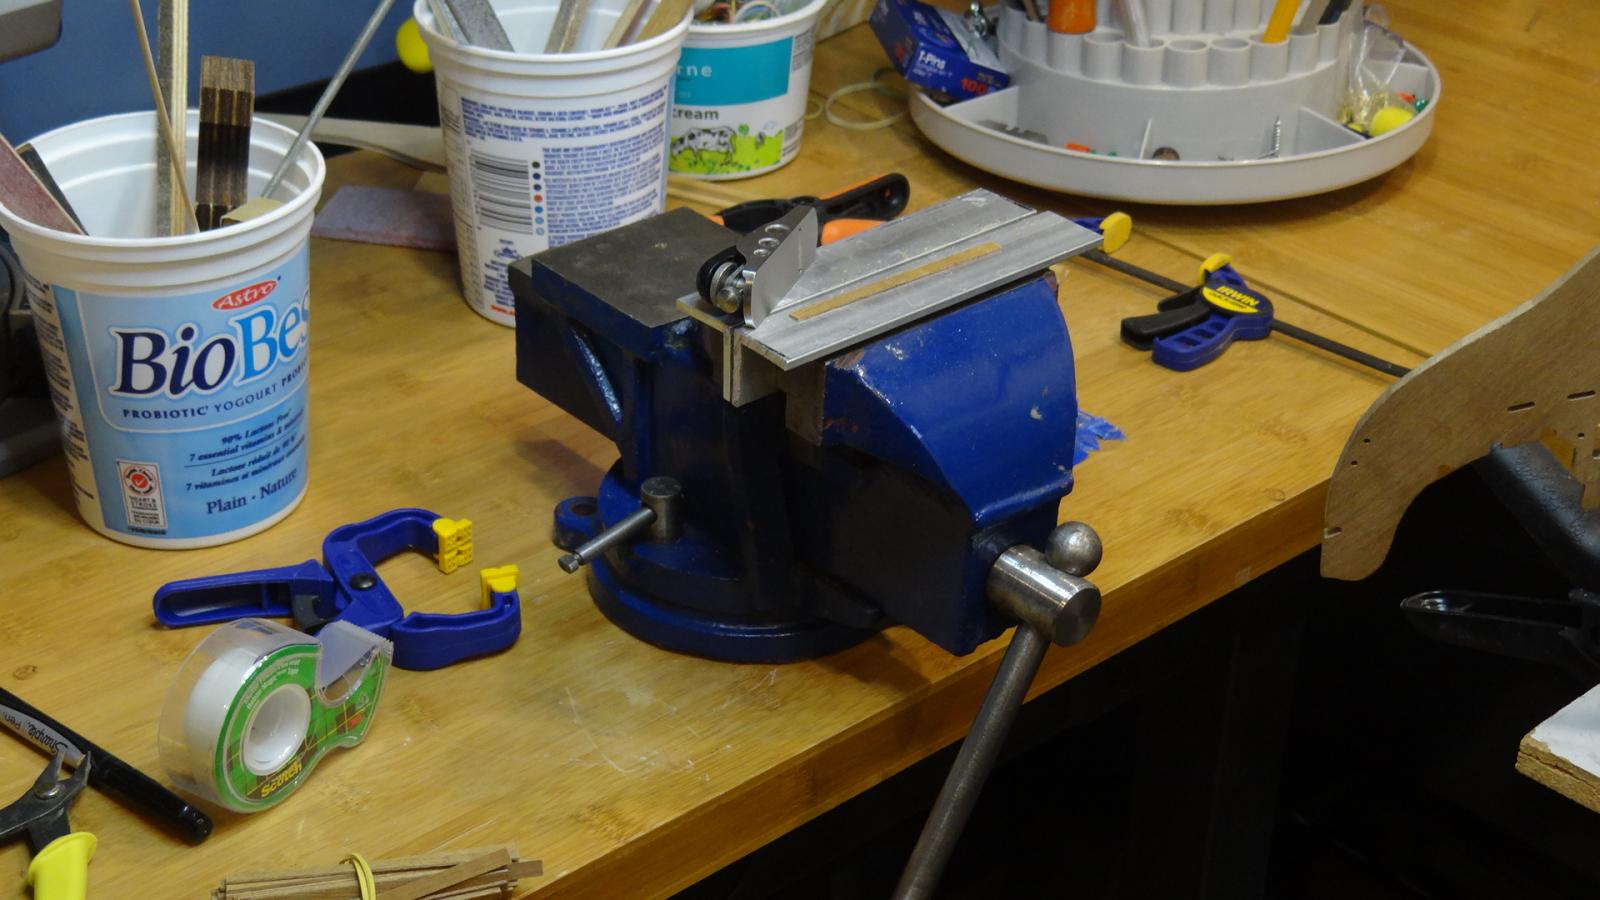
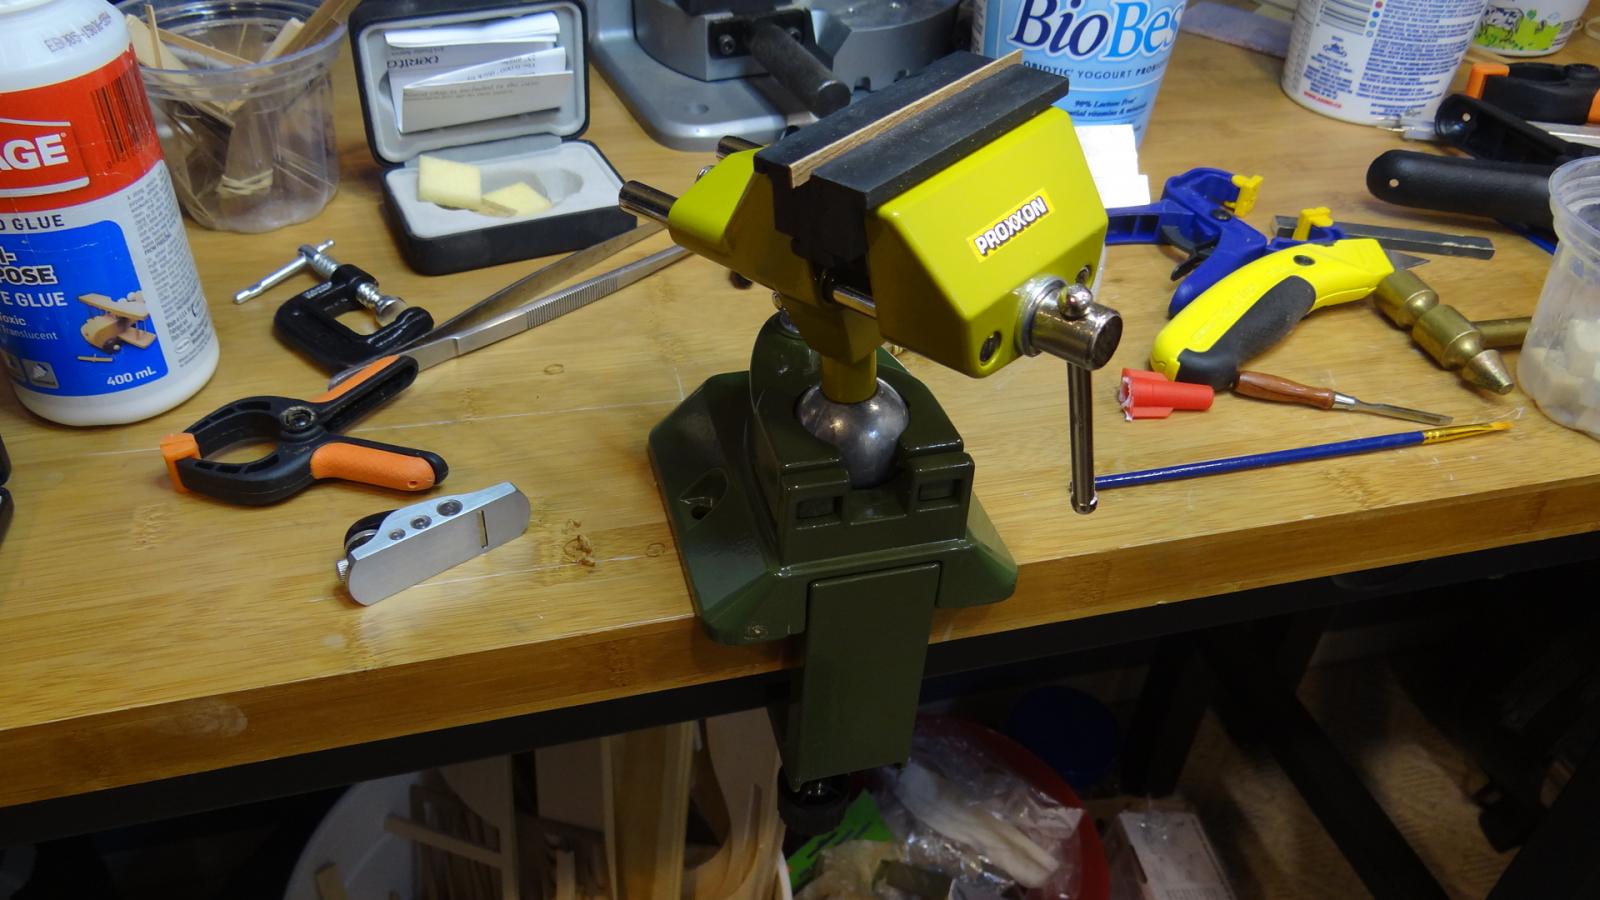
HI all, I said I would post a review after I got my Proxxon vice. I have only started using it today but I have a few things to say. Keep in mind I am a first time builder and most of my world for the last few months has been planking. So hopefully that qualifies my comments appropriately. I have been using my big 20 year old vice (first pic). It is heavy and must be bolted down when I need it. Not such a big deal except it uses up a lot of room and if I want to change the position I have to drill new bolt holes. The Proxxon vice is clamped on and is articulating (second pic). No assembly required out of the box. There's no plastic anywhere. The metal ball is firmly clamped and the vice mechanisms appear to be solid upon initial fastening. The jaws have a rubber insert that clamps my planks firmly without the need for as much pressure as the aluminum angle stock I use for my other vice. The insert width is 78 mm (~3 inches) which seems adequate for my plank planeing although I wouldn't mind a little wider. I could easily use my aluminum inserts to create that extra width if I find I need it. So I find this vice to be much more convenient than my old big one and I can see this being very useful going forward. $54 CDN delivered in 2 days free shipping. Best, Ian


-
Wax Caulking?
Seventynet replied to NMBROOK's topic in Building, Framing, Planking and plating a ships hull and deck
That is really beautiful looking. Is it possible that the gaps are created by edge sanding or otherwise beveling the top edges of the planks or are the strakes actually laid with those gaps? Thanks, Ian -
Aye aye Jazzchip. I should be able to file my report Monday.
-
I just ordered the Proxxon FMZ as it looks just perfect for my neverending planking job. I really like the way you can just clamp it on the bench wherever you want. My existing 20 pounder is bolted on and I'm forever moving it. Love this site! Ian
-
Thanks Arthur! Yes I've tried moistening the area to see if that would give any improvement but it does not. I'm going to quit fretting about it and continue until I can find some suitable wood to replace those planks or just copper the thing. But I'll continue trying to do the job as if it is the final surface. Best, Ian.
- 191 replies
-
- 2
-
-
- victory
- caldercraft
- (and 1 more)
-
Thanks to your thoughts Boyd, upon closer examination I would say that almost all of the 1 by 5 walnut planking supplied with the kit is edge grain on the face whereas the 1 by 16 is typical face grain. I think this has caused the spiled planks to look quite different. I would guess that all of the planking should be face grain (I hope I am using that term correctly but you can probably guess what I am trying to get at) if it is to be a final surface. Ian
- 191 replies
-
- 5
-
-
- victory
- caldercraft
- (and 1 more)
-
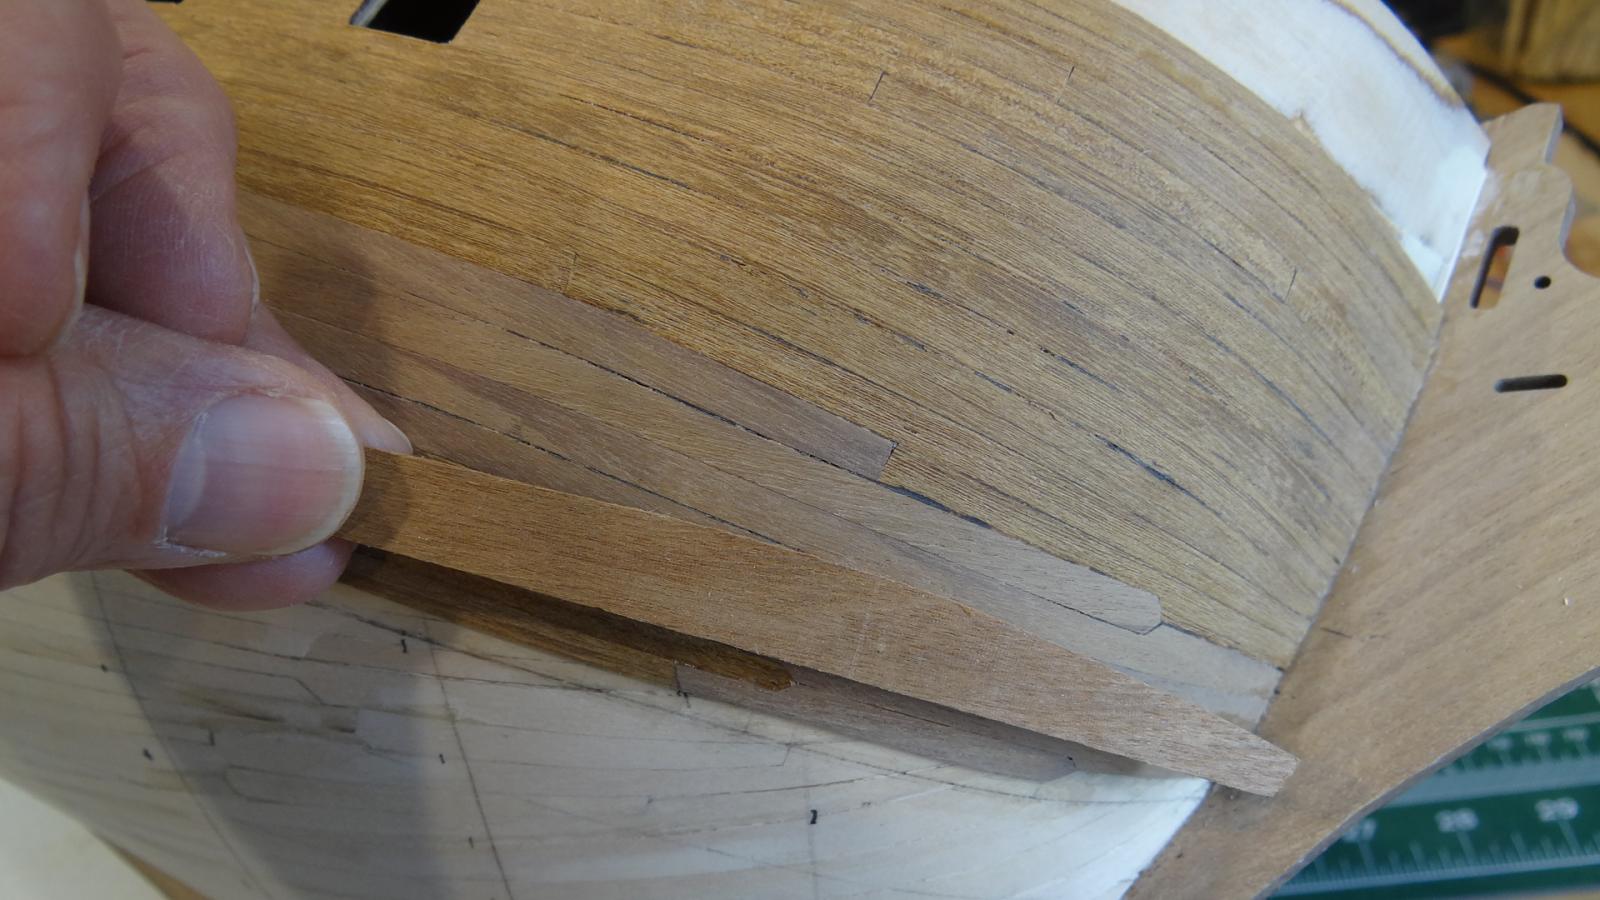
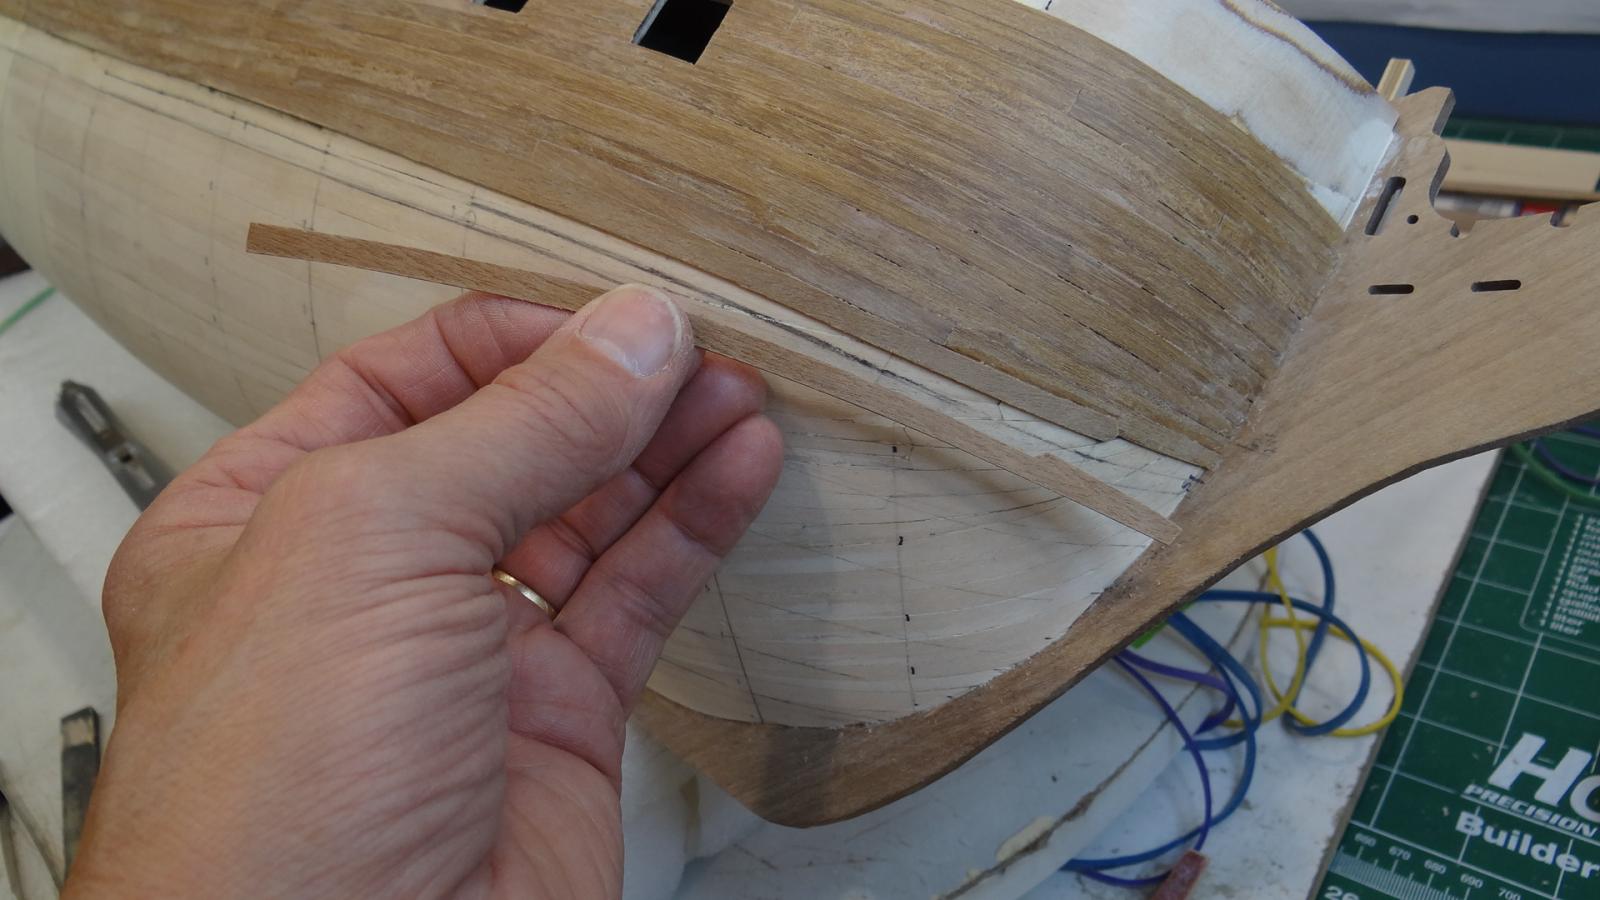
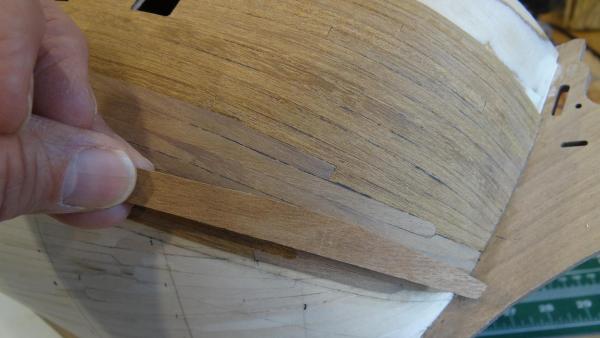
Thanks so much Heinz and Boyd for the kind words and realistic advice and others for the likes. I guess I didn't really want to hear it but knew it was right all along. However I'm afraid I can't peel the planks off (not sure if I'll be able to pry just those off or whether there'll be collateral damage) until I can find more suitable wood. I've actually spent quite a bit of time at our Calgary specialty wood stores trying to figure this out. I am most certainly out of luck picking up any European walnut which I believe must be that supplied with the kit. There only seems to be only west coast caro (sp?) and an eastern black walnut varieties available locally. In any case I'm still baffled because when I compare the 1 by 16 kit supplied walnut which I used for spiling to the non-spiled planks in place, there appears to be very little difference. The in-place spiled walnut looks more like black walnut. And before you question me, I am absolutely positive I did not mix up my black walnut. See picture. Boyd you must be right it must be a cross grain effect. In any case I need to figure this out. Heinz, I get what you mean about bending. That is why I spiled those planks (see picture). However I may not fully understand your technique. Would you have made your planks so slender that they were able to bend in 2 planes? I know I can get away with slight lateral bends and even greater bends when the plank is tapered but it does not always seem the right way to go to me. Also I know that the shorter planks of 85 mm which I am using provide more opportunities for lateral bends and those spiled planks are in fact longer than 85 mm (for a variety of reasons). Maybe I'm just not understanding your technique. Also, I have divided the hull up into 5 plank lateral battens but I only pencil in the individual planks one batten at a time because I have found that once I have completed one batten I am either a little fat or a little short and need to compensate in the next batten - if that makes sense. Anyway I've added a picture to hopefully show the battens more clearly. Any advice would be greatly appreciated. Best, Ian

- 191 replies
-
- 6
-
-
- victory
- caldercraft
- (and 1 more)
-
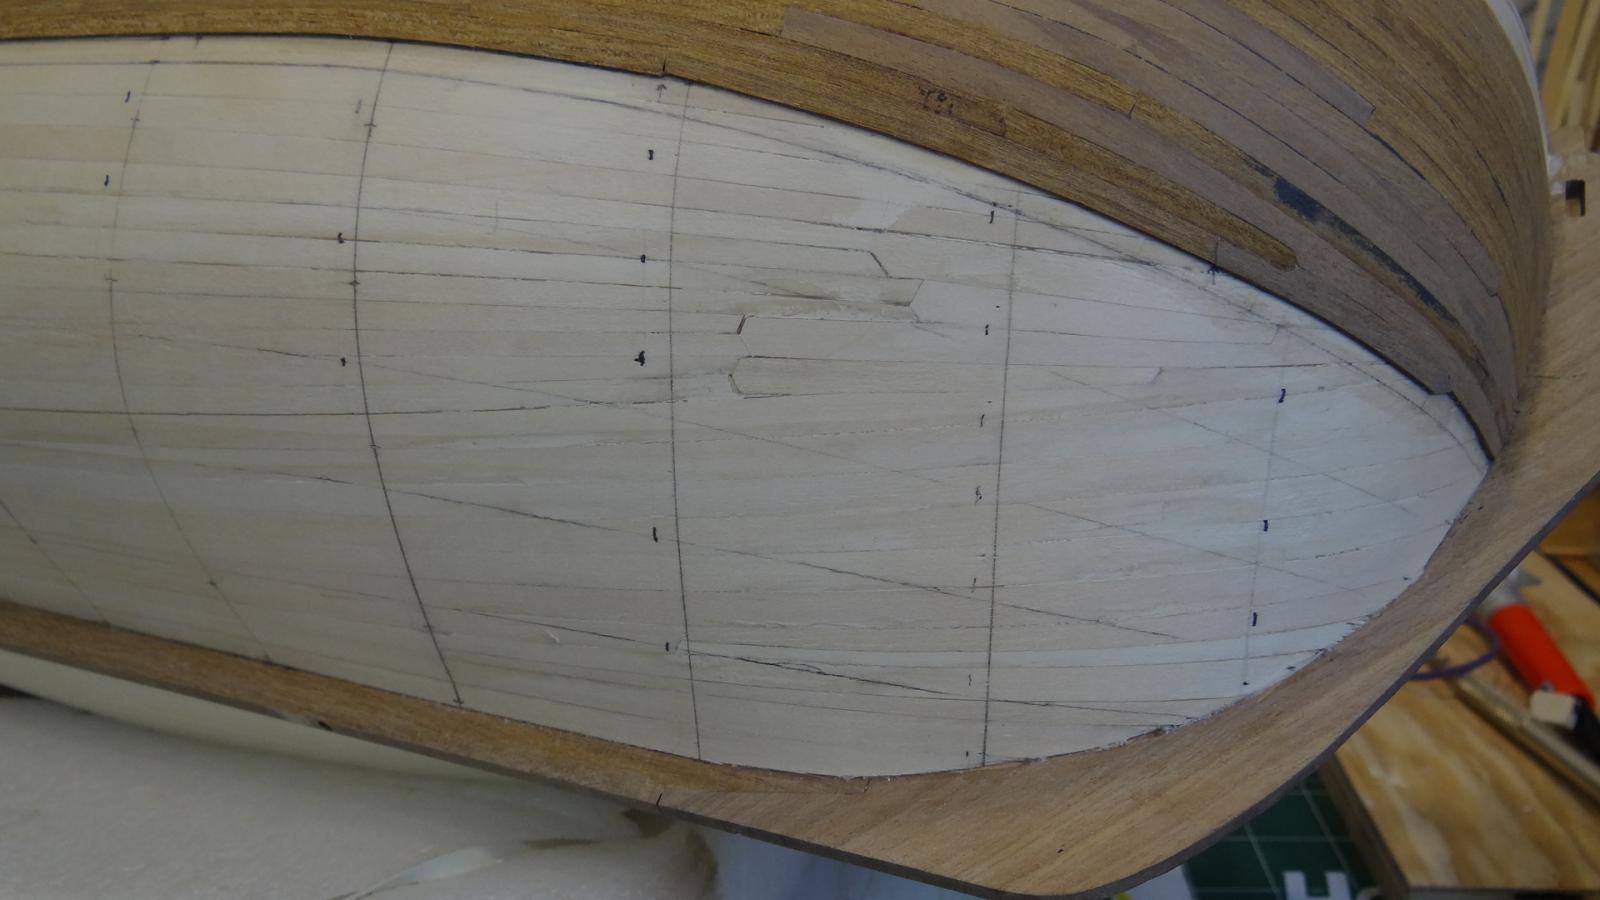
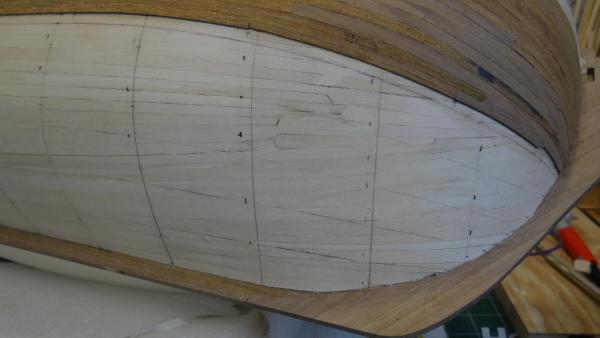
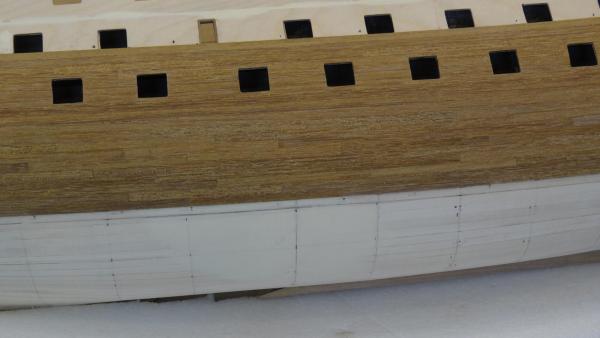
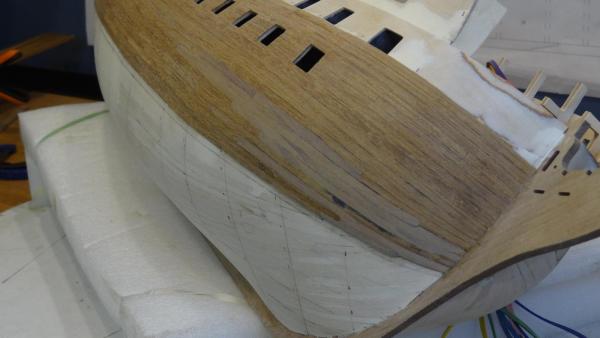
Hi again folks, I wanted to show you a problem I ran into which of course would not be a problem if I had any other intention than coppering the hull. But there you have it. I had the temerity as a first time builder to think I could do a good enough job to show the hull off in walnut. First the stern - I think looks pretty good... Then midships, things are fitting together fairly well... Finally, the mess of different colour woods at the bow. The lighter coloured wood is the 1 by 16 mm walnut gun port planking used to spile the bow section planks so that I could achieve a horizontal lie (that I want to emulate). Obviously this kit supplied walnut was sourced from a different stock (not to confuse with the walnut I also bought locally and milled). I honestly didn't notice how different the wood looked until I gave it a light sand and moistened it. Dread. So unless I can figure out how to get this stuff to look more like the other planking, or rip it out and find some other wood (seems very difficult to do), I am going to have to accept that coppering is in my future. Anyone have any advice/encouragement/pity for me?? Best, Ian
- 191 replies
-
- 5
-
-
- victory
- caldercraft
- (and 1 more)
-
Keep it up Heinz! Very inspirational. Ian
-
Proposed purchases to start my first wood kit
Seventynet replied to BobSki's topic in Wood ship model kits
Hi Bob, Welcome to the first time club! My most useful planking tools are: Sanding sticks - get a tin of contact cement and various grades of sandpaper Clamps, you can never have enough - but my most used clamps are elastic bands and cut up eraser blocks Mini plane - I have a Veritas plane - probably my most used tool Proportional divider if you can afford it - makes dividing up planking battens easy and accurate A micrometer is a must. Lots of small paintbrushes to apply PVA Best of luck, Ian -
Very methodical. I find your step by step approach a nice addition. I too am a first model ship builder and so appreciate the time you're taking to illustrate your approach. Best, Ian
- 18 replies
-
- 5
-
-
- constitution
- model shipways
- (and 1 more)
-
My pleasure. I am only at my second planking around the middle and lower wales. I find great inspiration in your and other Victory builds as I labour, endlessly, on this massive project. Ian
-
Hello Heinz, I think the transom and your lettering looks magnificent and adds to the uniqueness of your build. Keep it up! Ian
-
Hi Mike, I decided to put in basswood fillers because I didn't trust myself to make smooth curves between those tortuous areas. The instructions are silent on this issue. I also thought that if I had to join planks in those areas that I would be spending time building in wider attachment points on the bulkheads anyway. If one terminates or begins a plank in an area like this without filler blocks you have to be very careful that the bend is uniform because the bend before or after the joint is influenced. Let me know if that is not clear. Although I spent what I know is an inordinate amount of time shaping the blocks, I feel it paid off. Balsa wood in those areas is too soft to take a pin or screw clamp which I found necessary. I think balsa is fine in other non- curvey areas as small fillers and I used them between bulkheads 13 and 16 adjacent to the keel where I had to start stealers. Not much stress in those areas and I had the balsa fillers glued and shaped in no time. Words of a novice and subject to correction by more experienced builders. Best of luck with your build and I am happy to discuss things with you if you decide to go ahead with the build. Best, Ian
- 191 replies
-
- 1
-
-
- victory
- caldercraft
- (and 1 more)
-
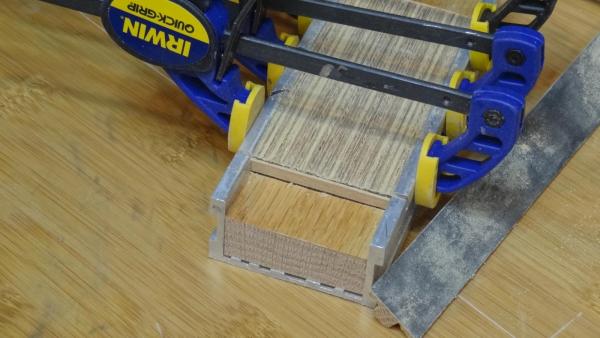
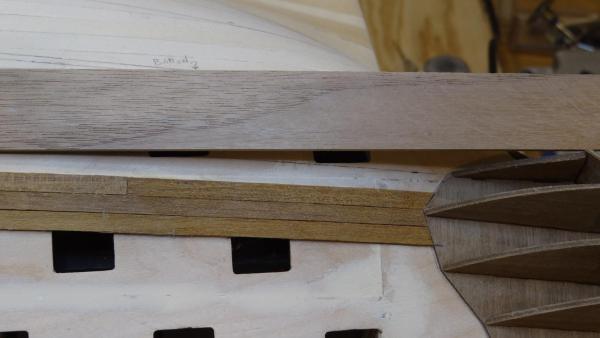
Hi folks, I have been moving along at the pace of a snail and I don't have very much to report. Just two things. First is my jig for cutting second planking (I'm using 85 mm planks). I used an aluminum mitre box, that I don't really find useful for anything else, with a strip of oak for a base and saw cuts through the box to mark 85 mm. Once I use my chop saw I place strips on either end so that I can sand the planks down to about the same width. I get 45 planks each go. Second, just an observation. I had a piece of walnut that I bought a month ago to mill into strips that I could use for spiling at the bow. As it turns out the strip in the picture is going to have to be used for my wales (at 2mm) and gun port linings as the contrast would be ok I think - and I will use the gun port lining strips (1x16mm) supplied with the kit for the spiling instead. Reason is that the walnut I bought (I assume black walnut) is not the same colour as the planking. In fact the walnut I bought is much closer in colour to the transom fascia and keel than the planking. I have always felt that the planking walnut looks more like mahogany than walnut, but I guess I'm used to North American walnut. Now many of you might be saying who cares, you're going to copper the hull anyway. And I'd probably agree. Best, Ian
- 191 replies
-
- 4
-
-
- victory
- caldercraft
- (and 1 more)
-
Hi Heinz, Thank you again for your detailed explanation. I spent the morning milling some 2 by 20mm and 1 by 20 mm walnut strips so that I can skip double planking for the wales and so that I have some stock (1 by 20) to use for spiling the hull planking at the bow. I am not sure I'll use the anchor stock planking approach for the wales that you have (it looks beautiful by the way) but now I have wide enough strips to use if I do decide to go that way. I'm not sure I have the skill to do that. I have to say that if you consider yourself a beginner that would make me at the level of pond scum . And I have followed Alexandru's Victory build for many months now. From my view he is the Michelangelo of shipbuilding. Amazing work. Ian