HOLIDAY DONATION DRIVE - SUPPORT MSW - DO YOUR PART TO KEEP THIS GREAT FORUM GOING! (Only 24 donations so far out of 49,000 members - C'mon guys!)
×


aydingocer
-
Posts
916 -
Joined
-
Last visited
Content Type
Profiles
Forums
Gallery
Events
Everything posted by aydingocer
-
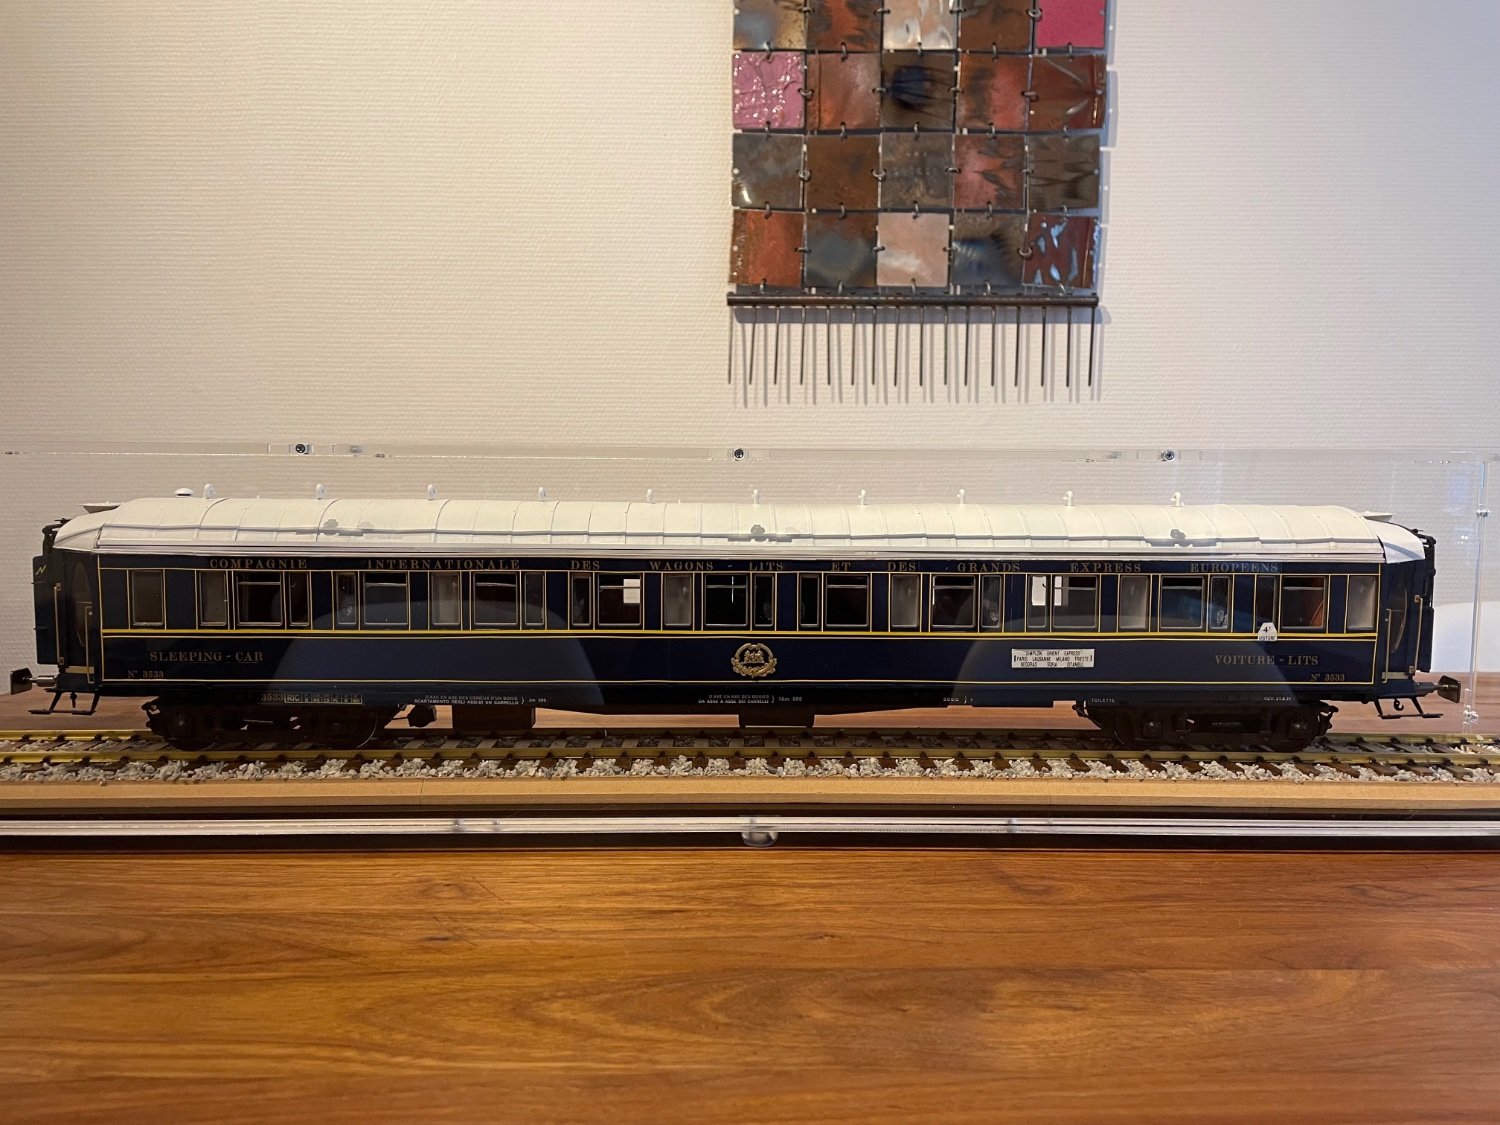
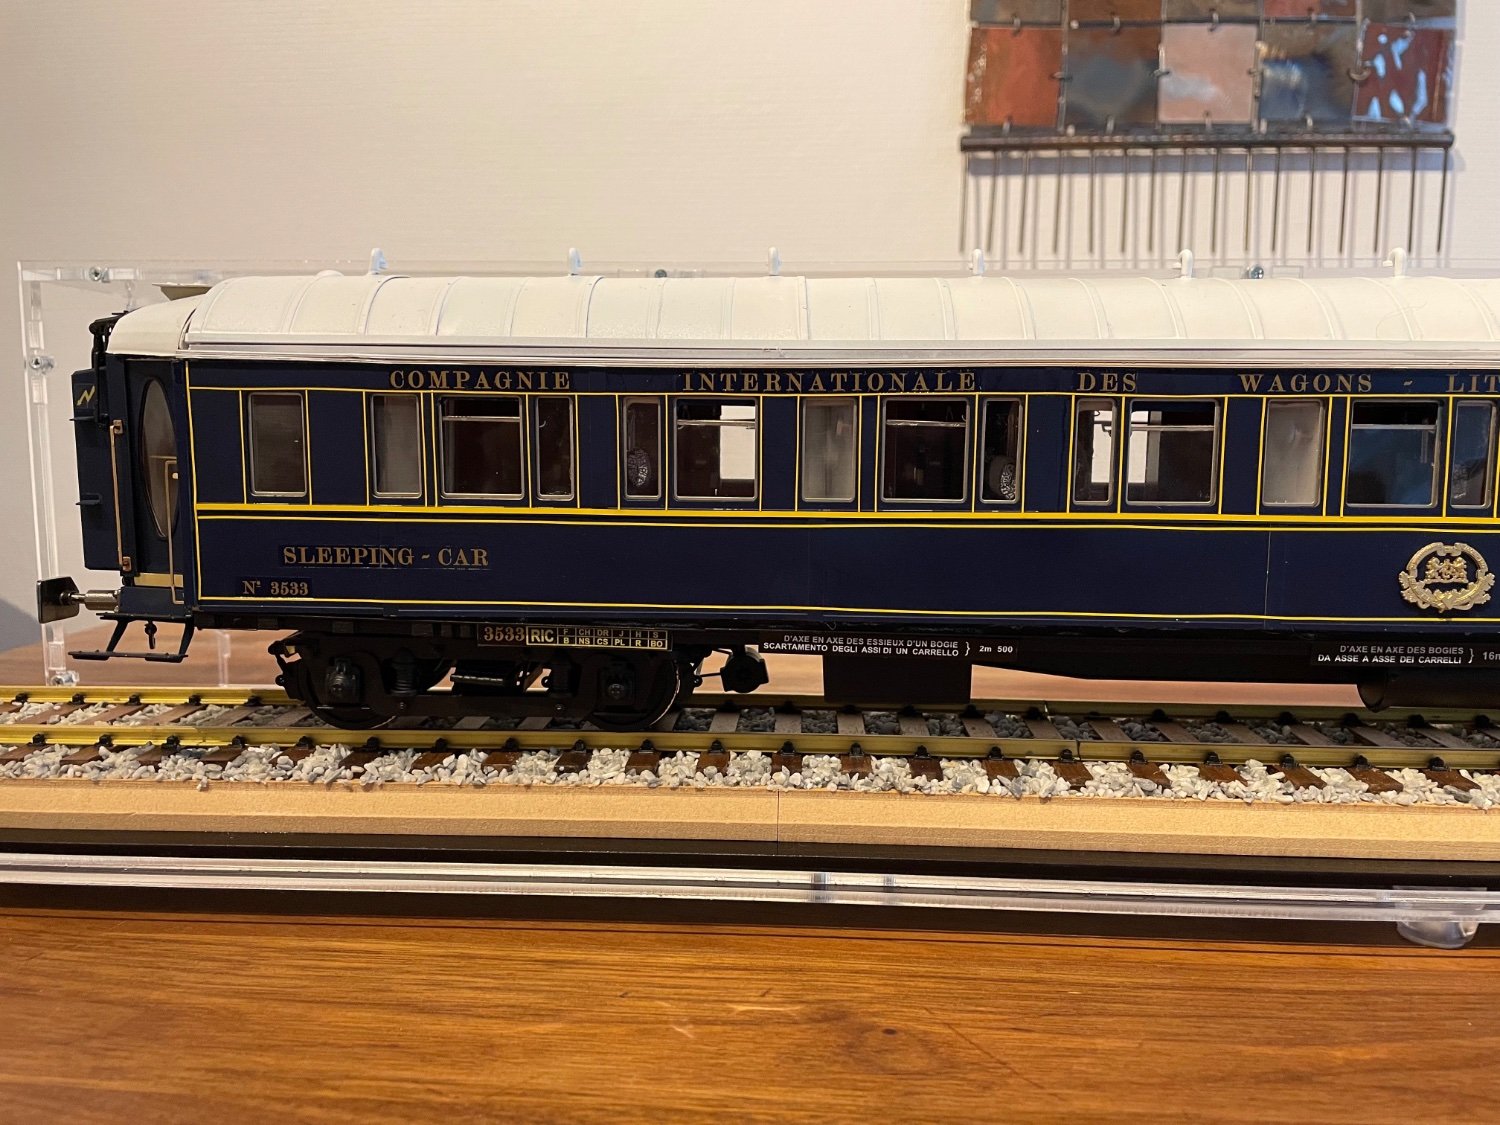
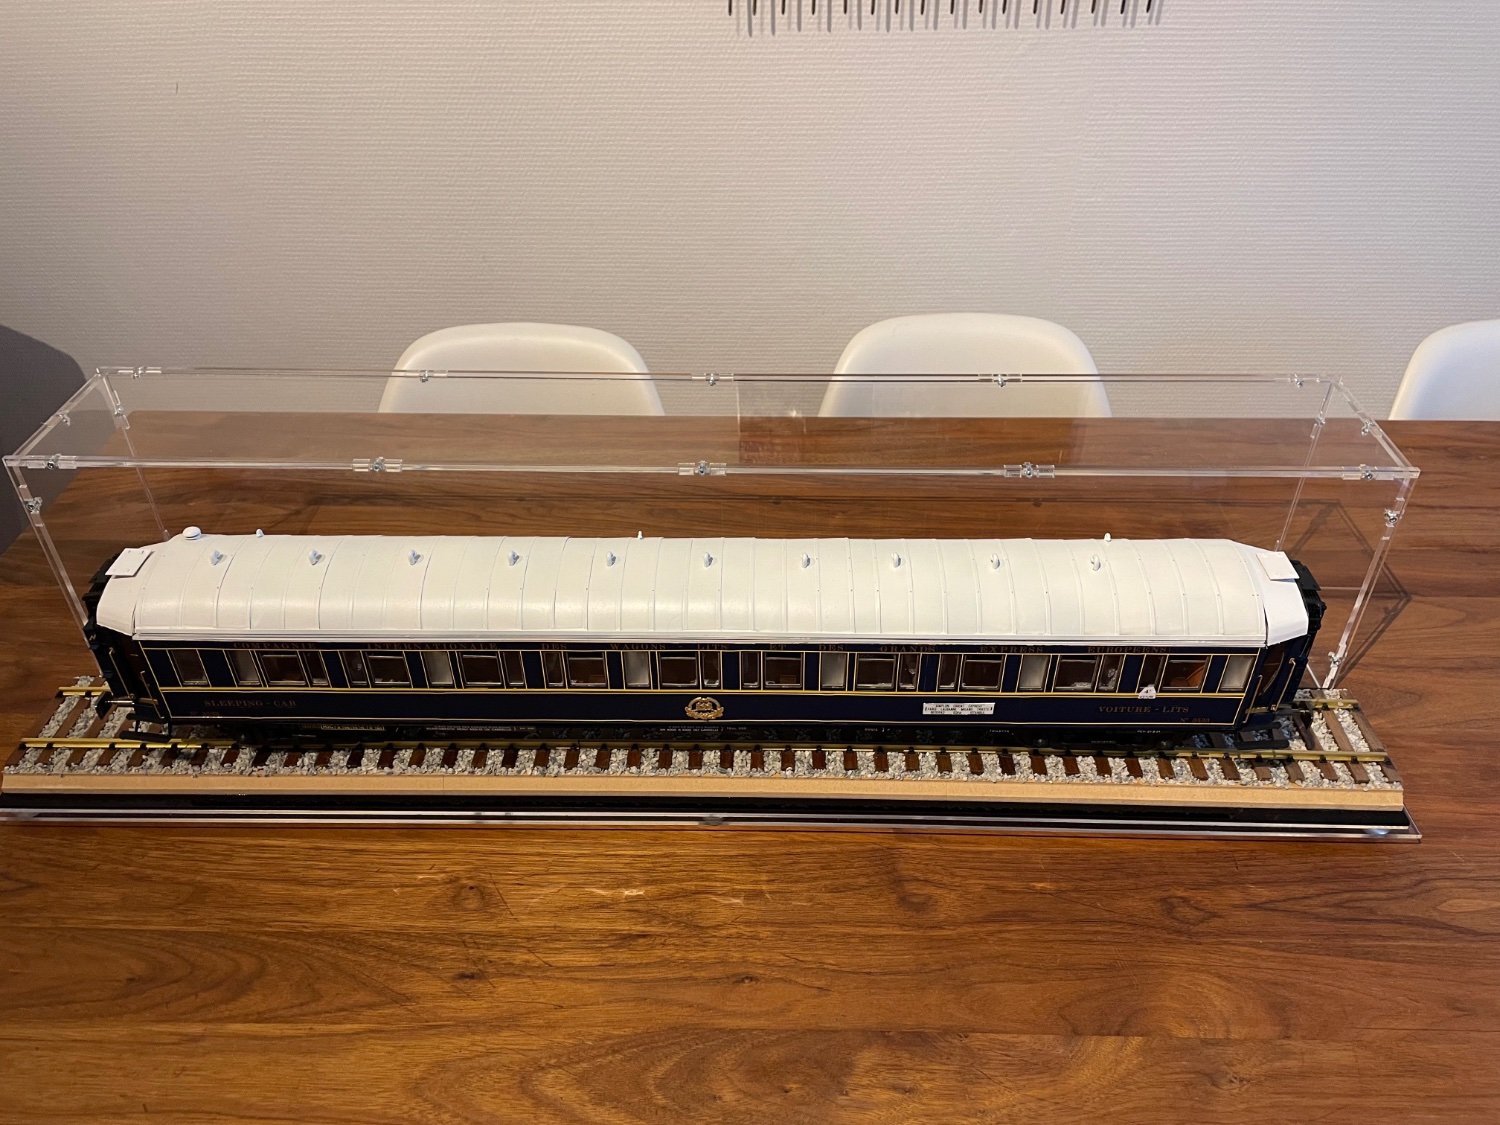
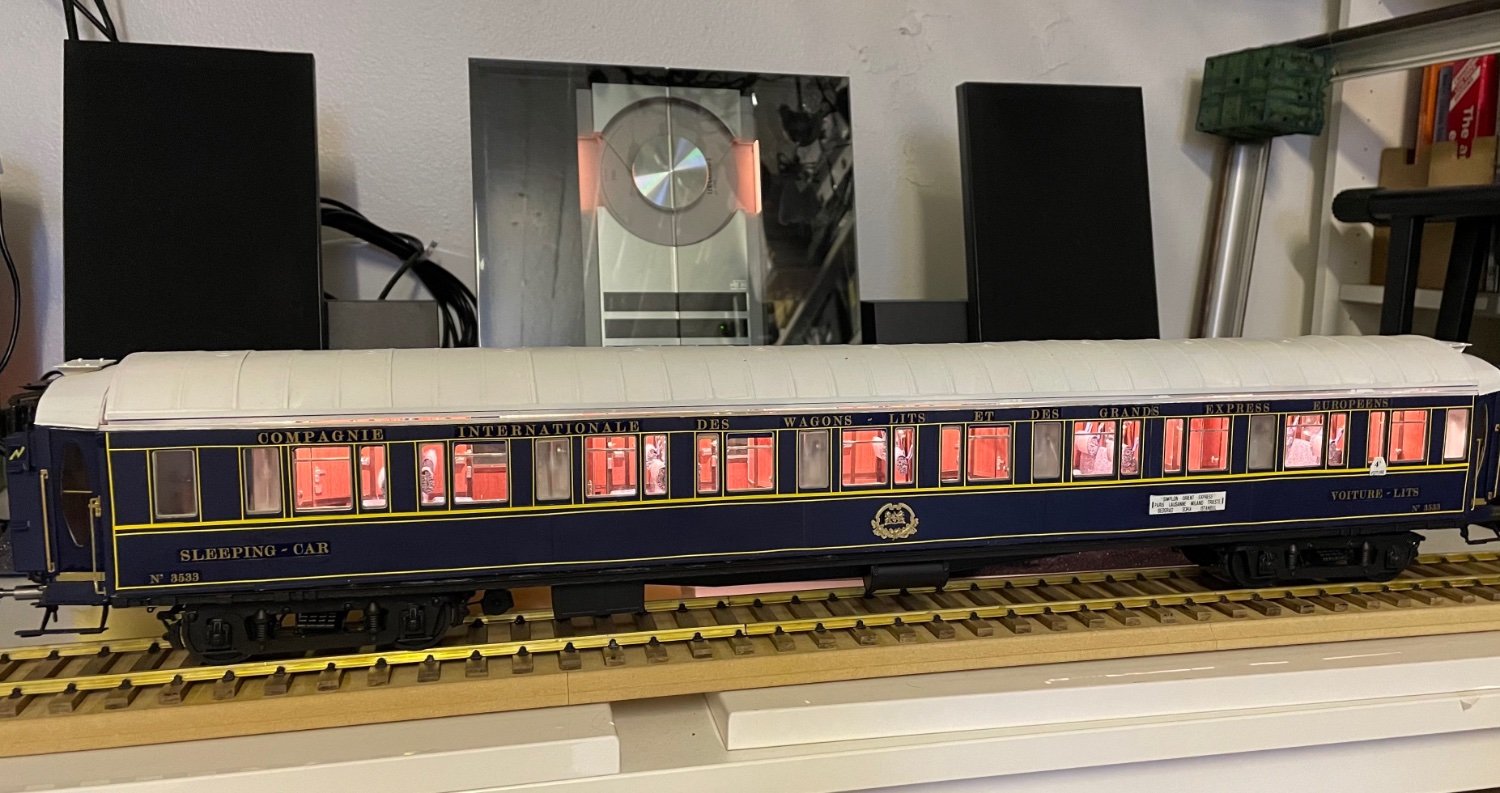
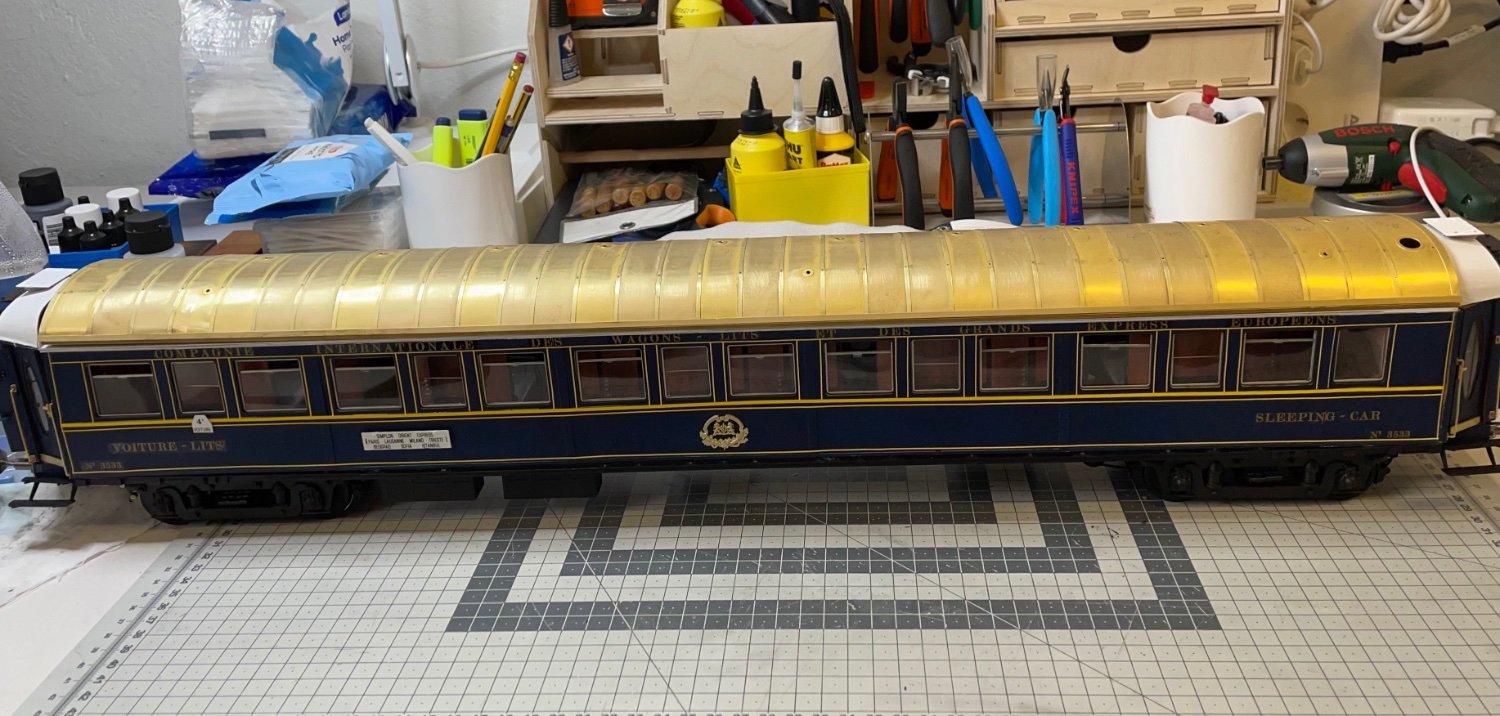
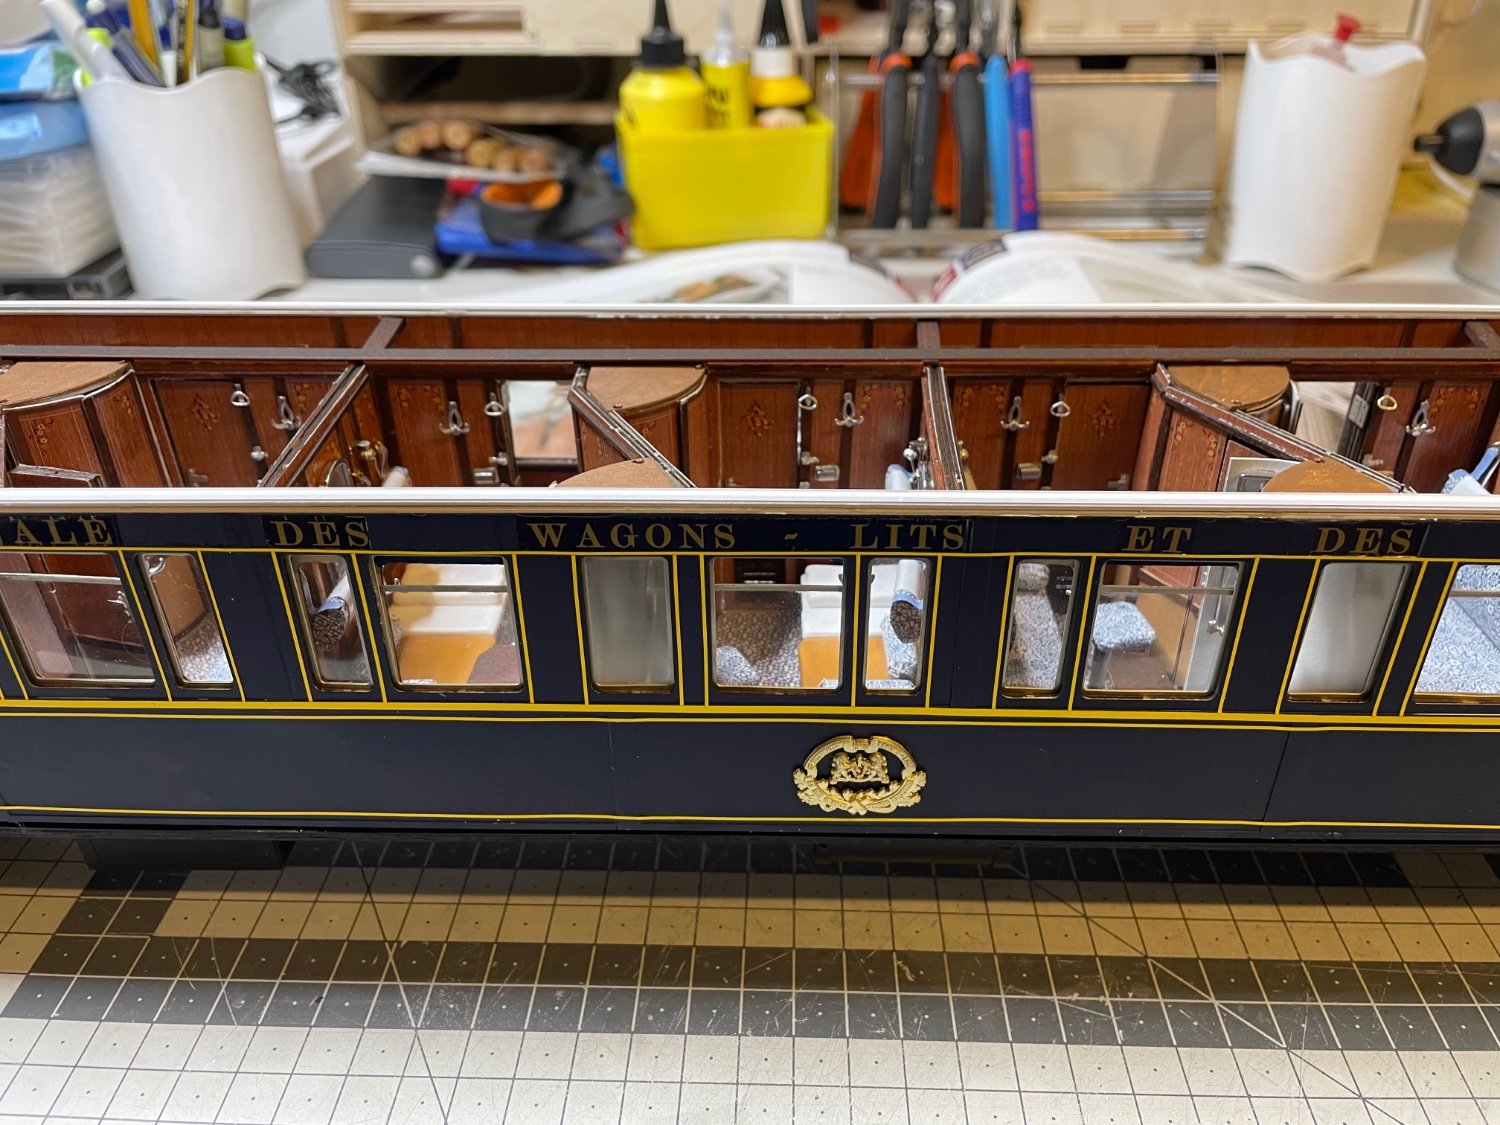
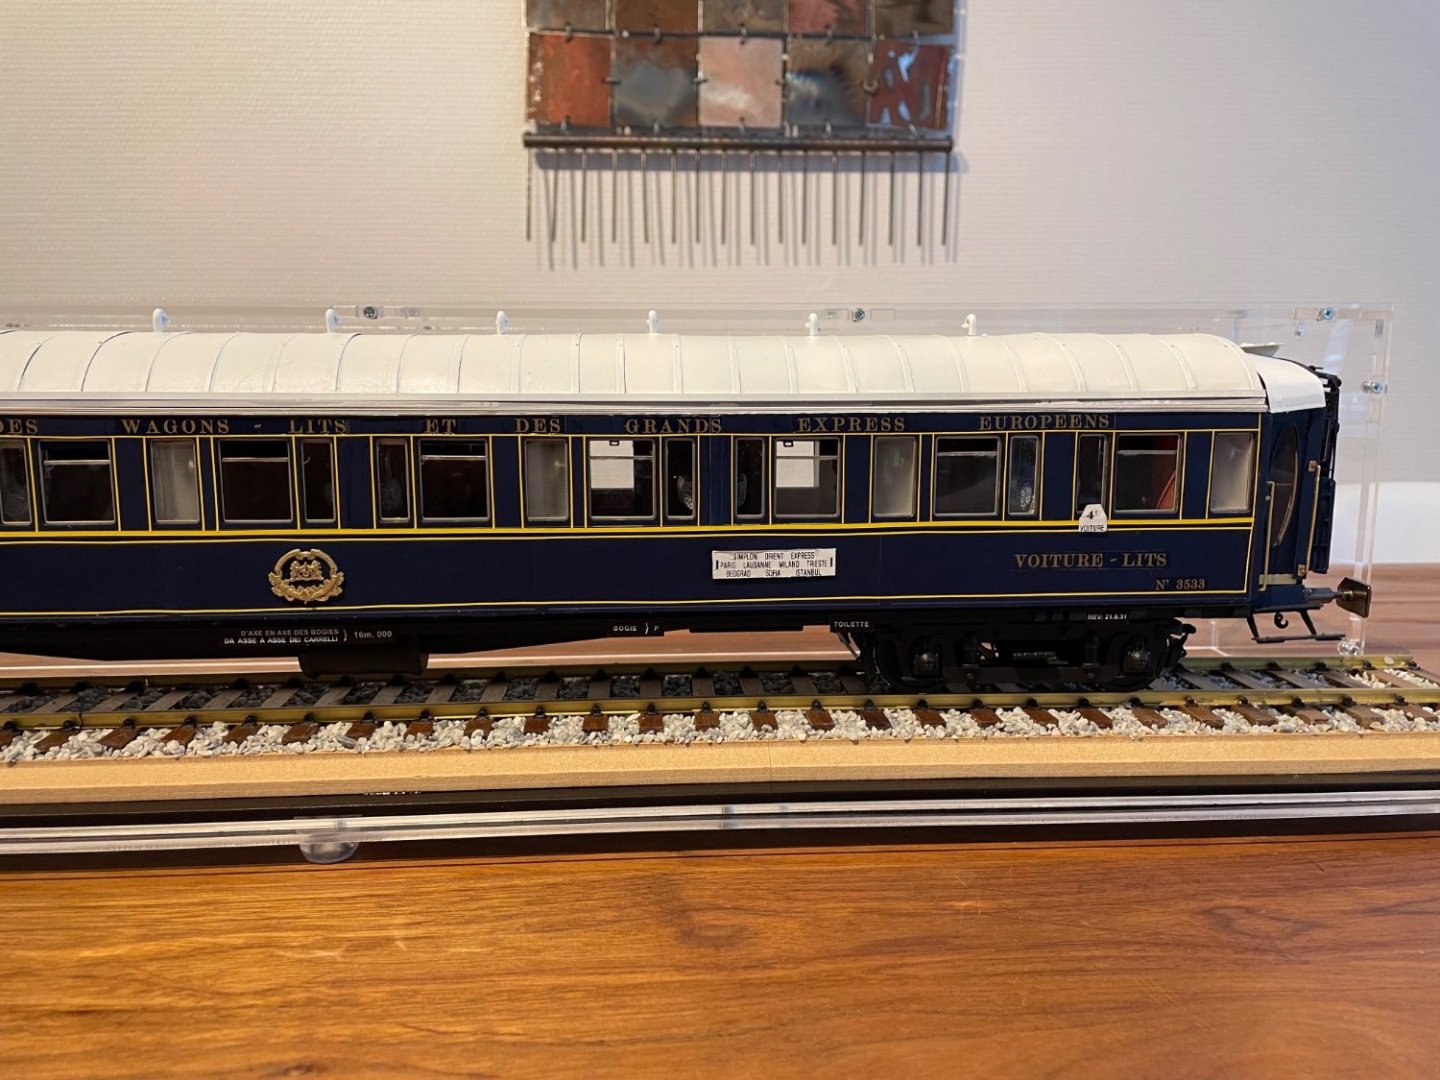
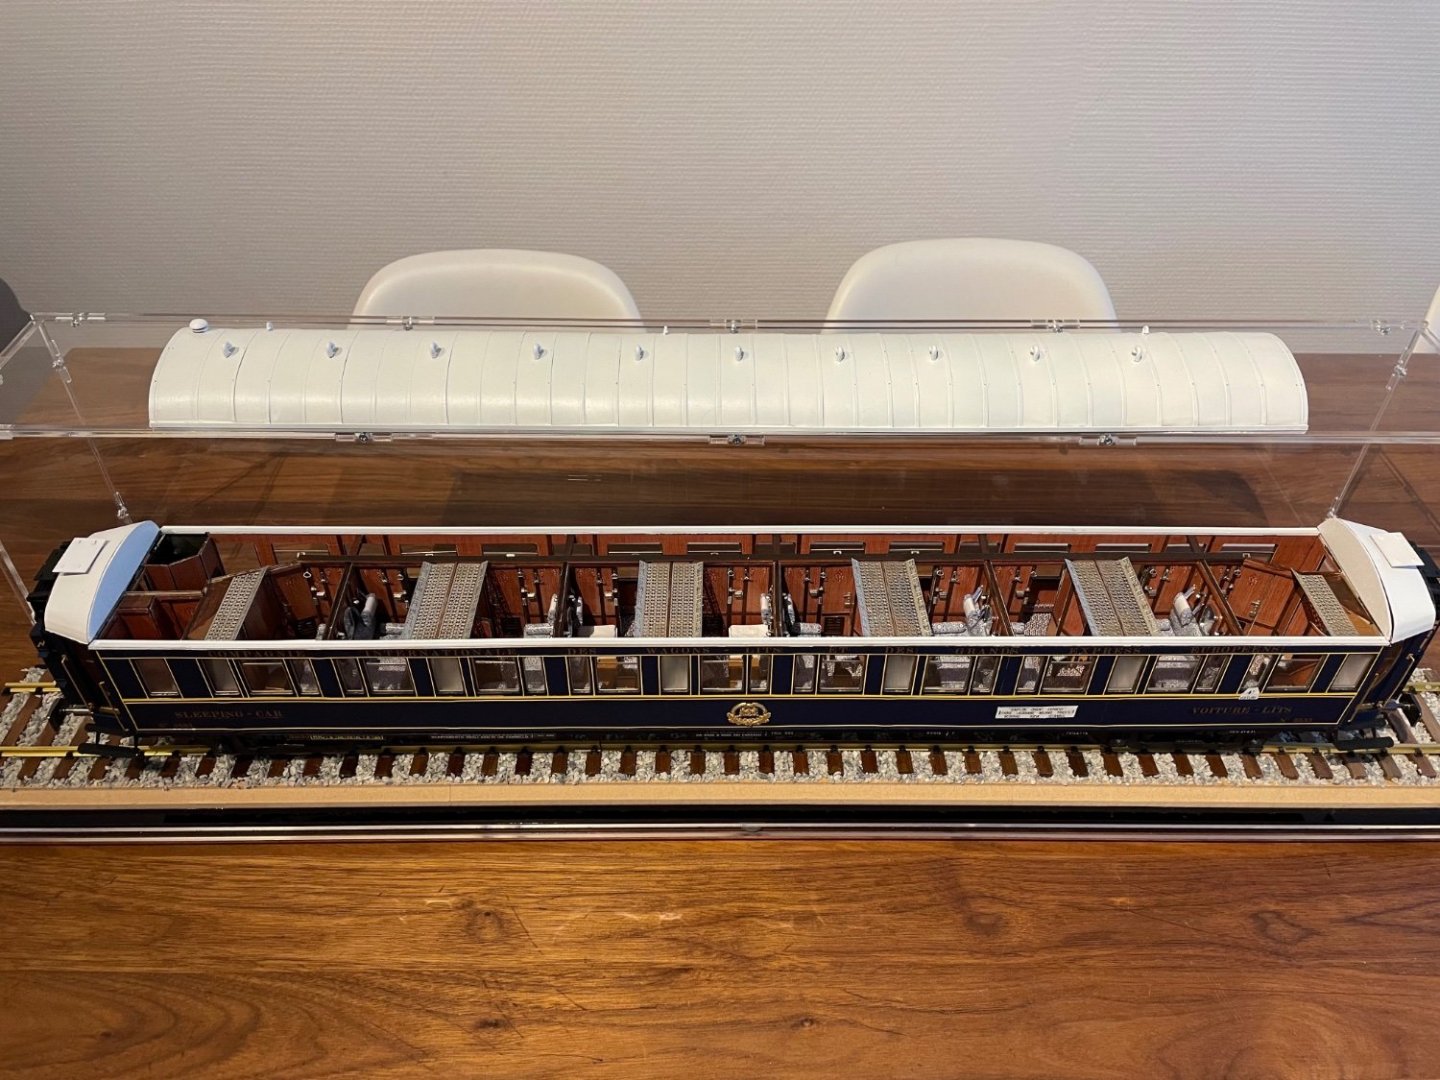
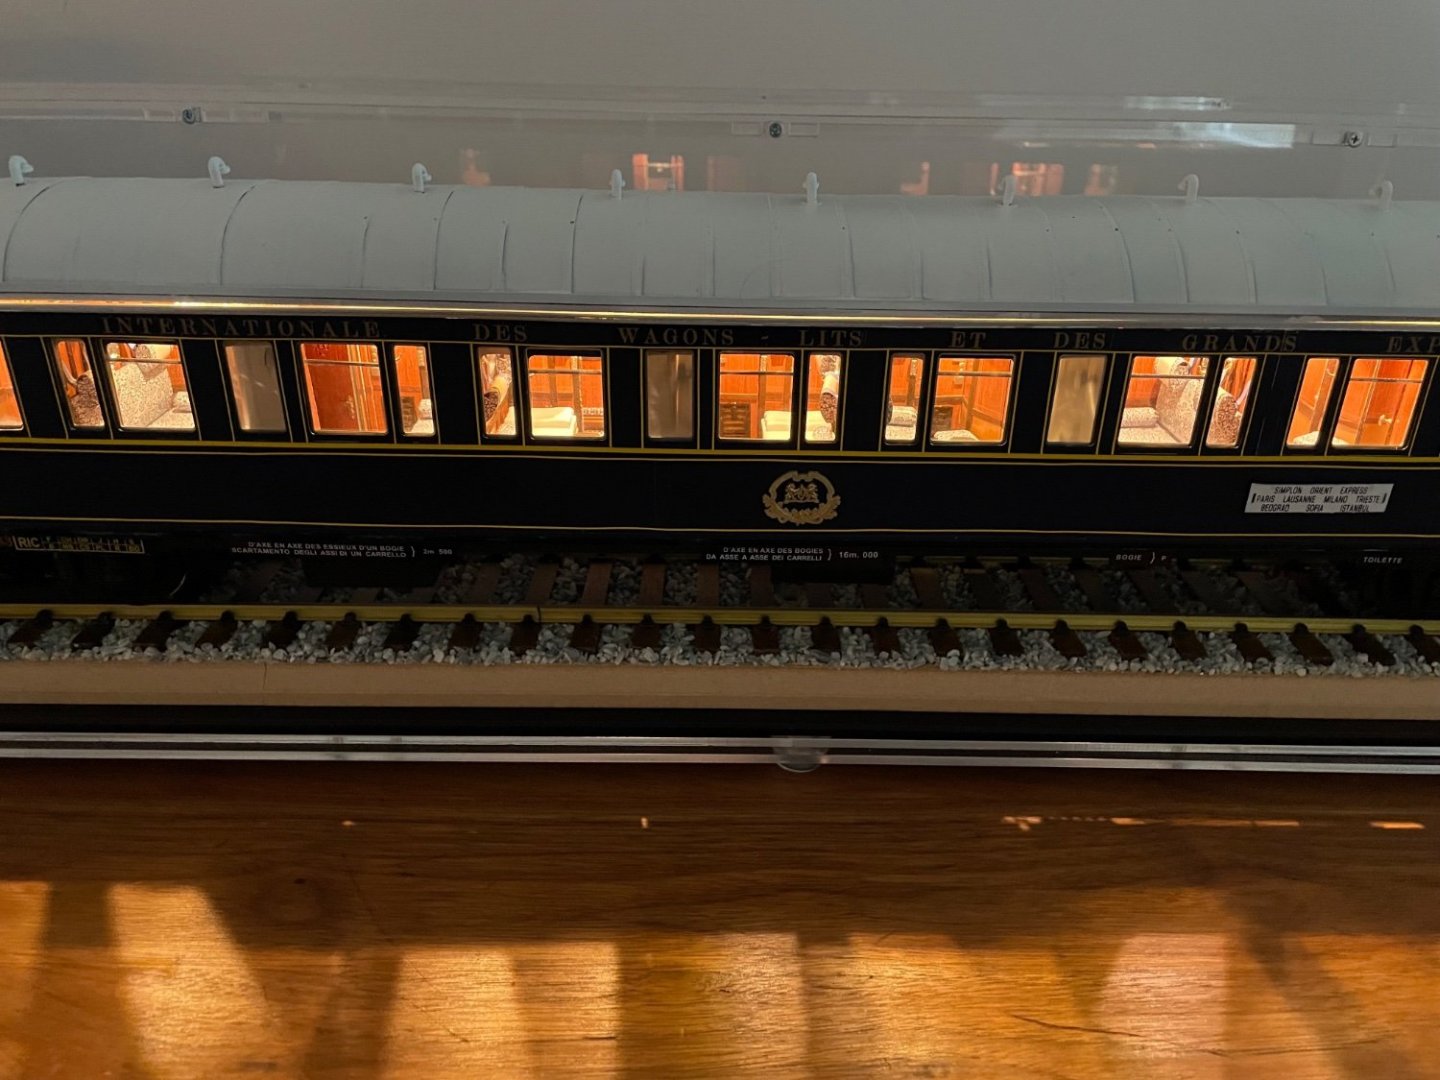
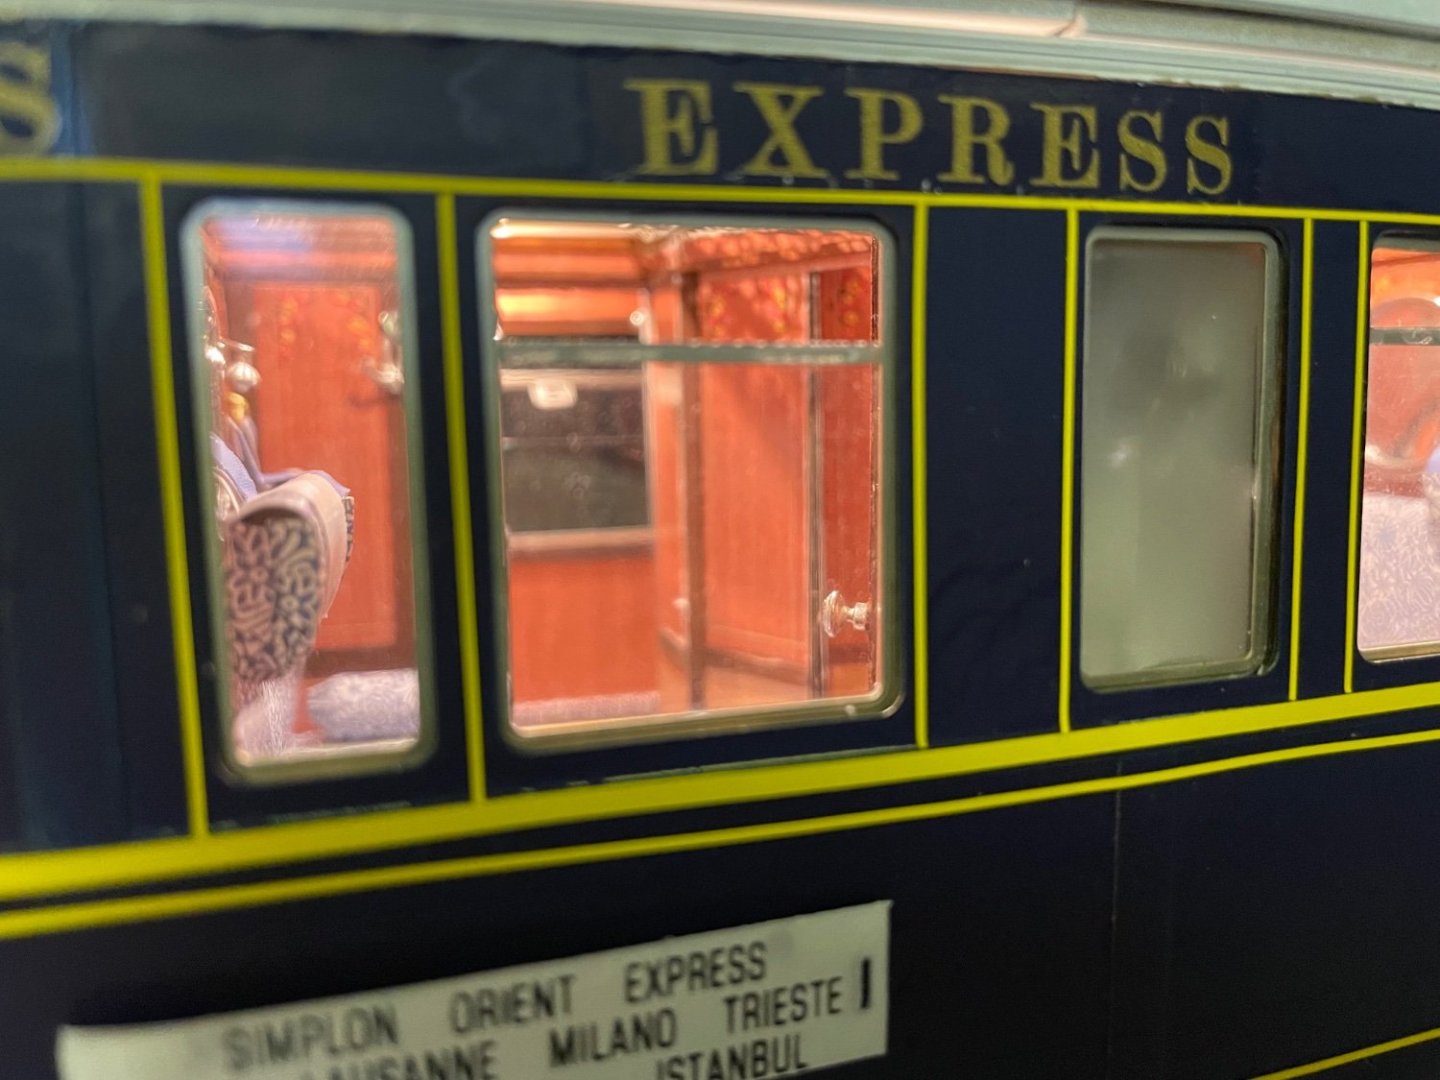
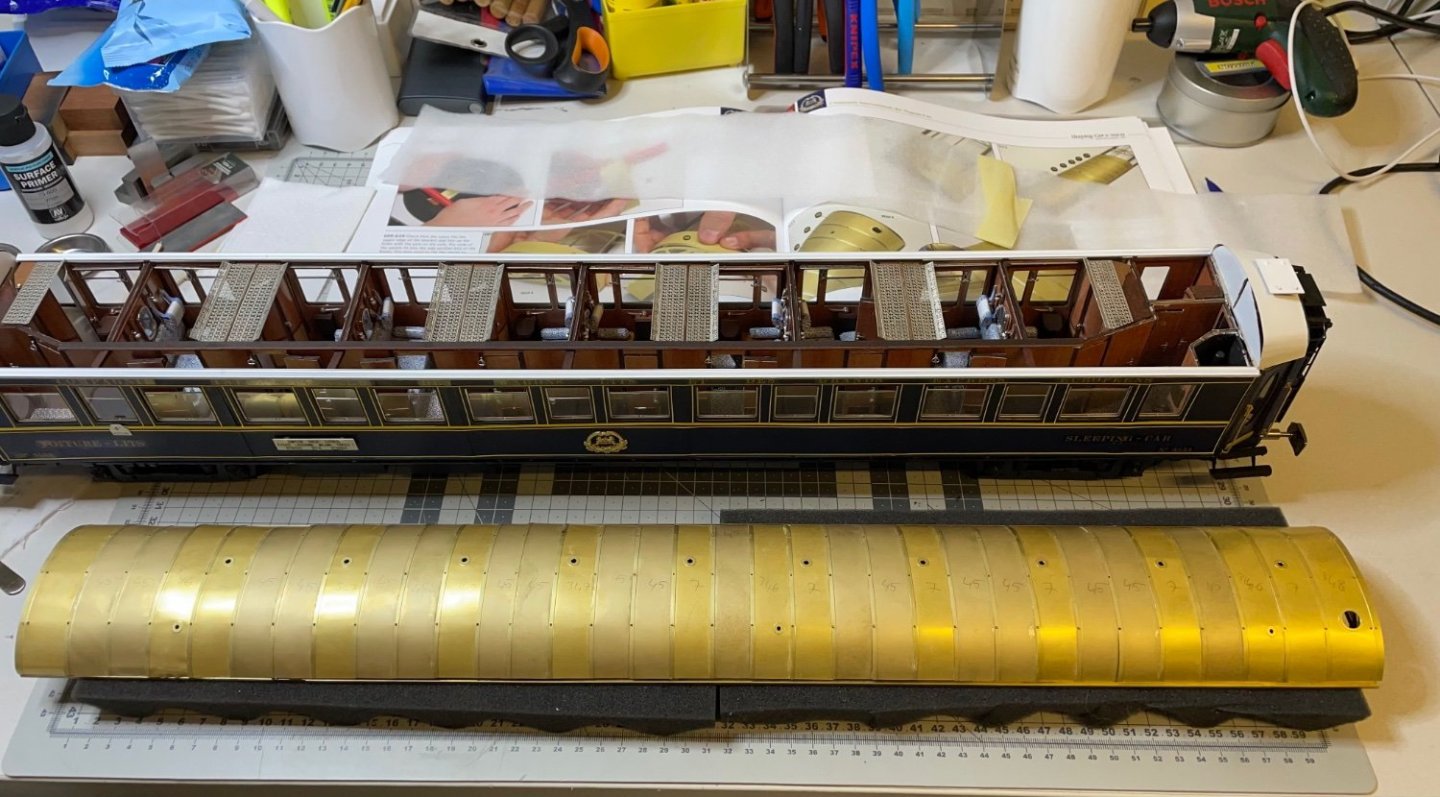
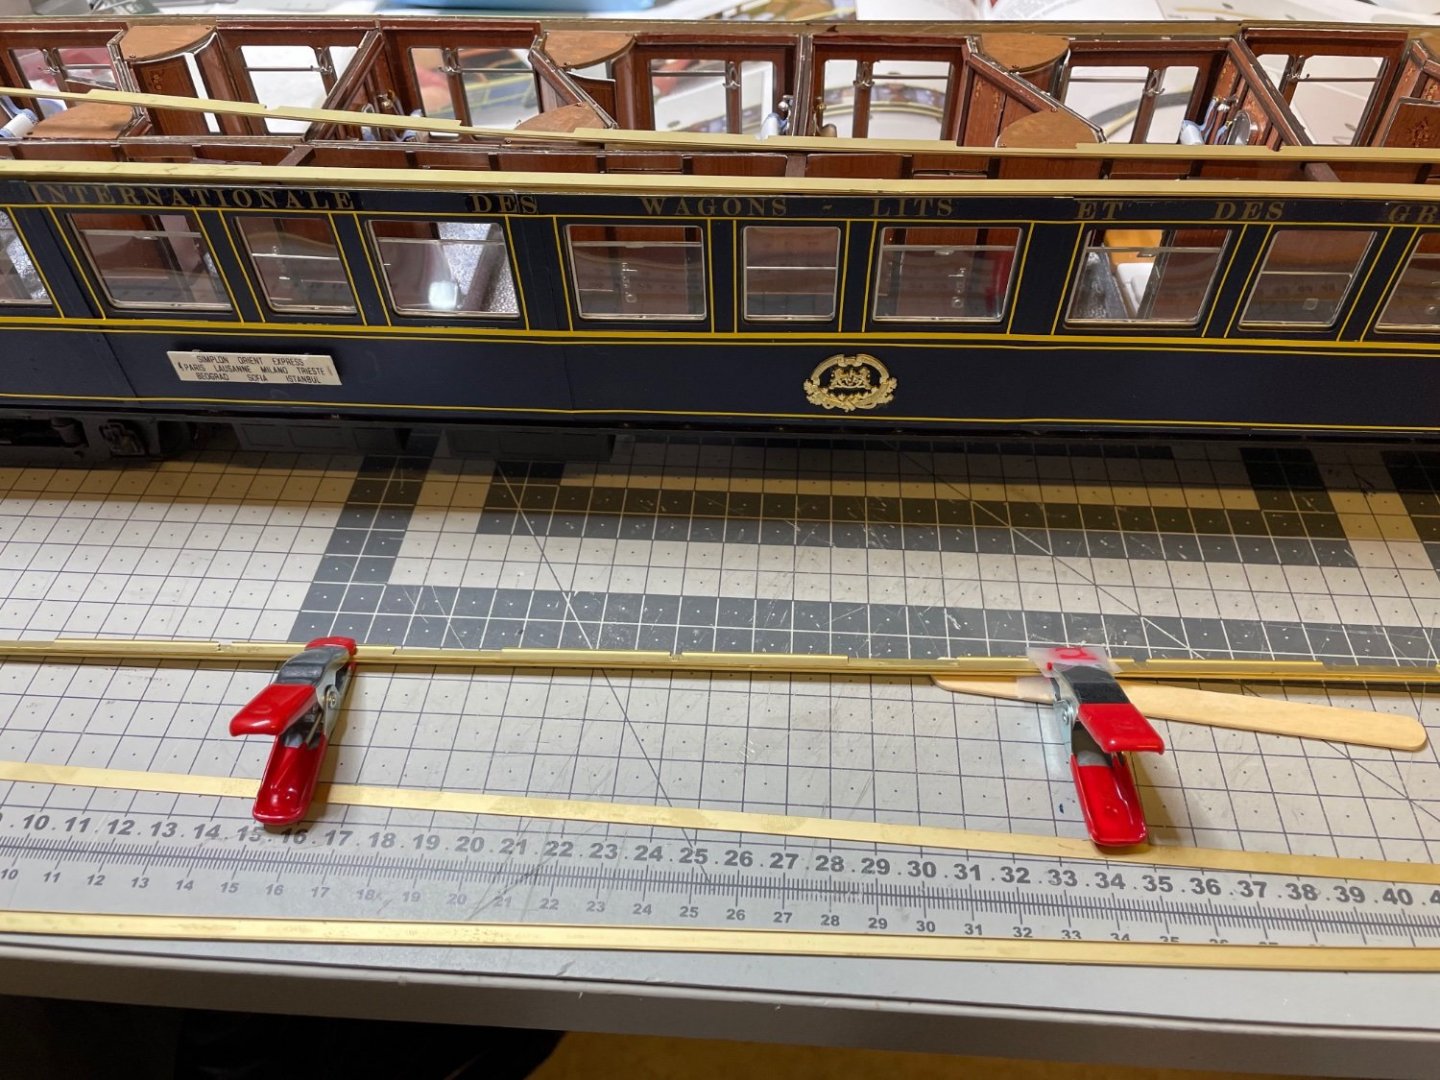
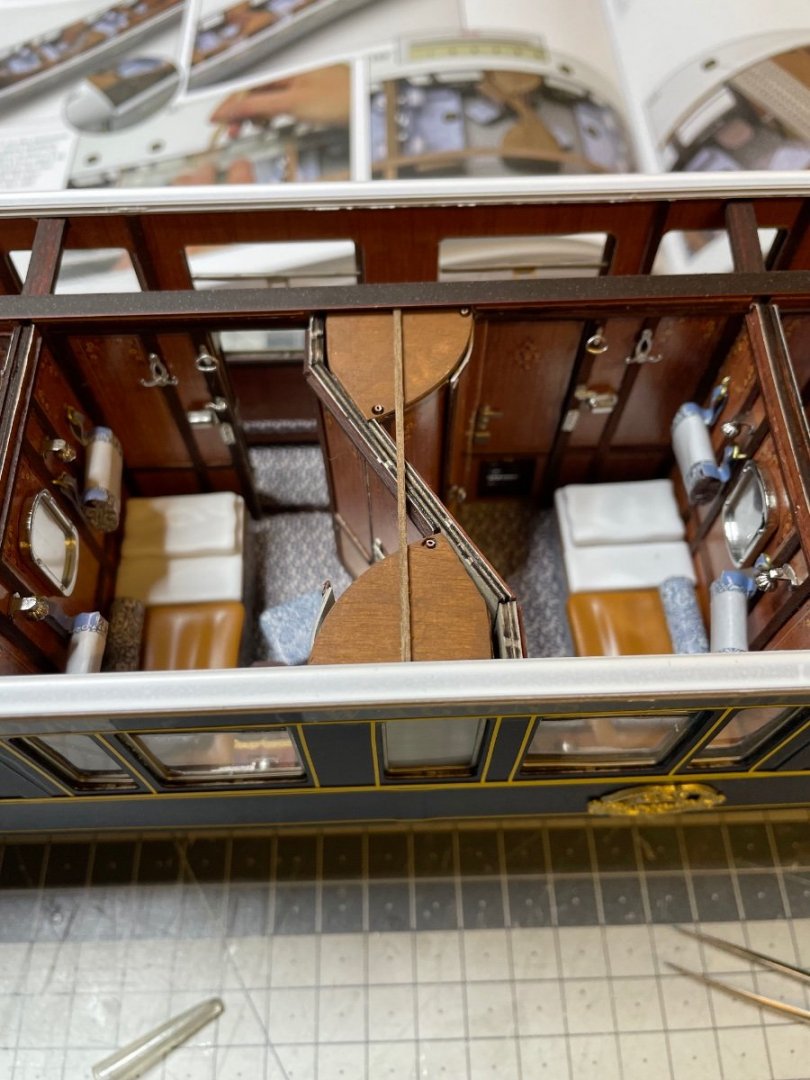
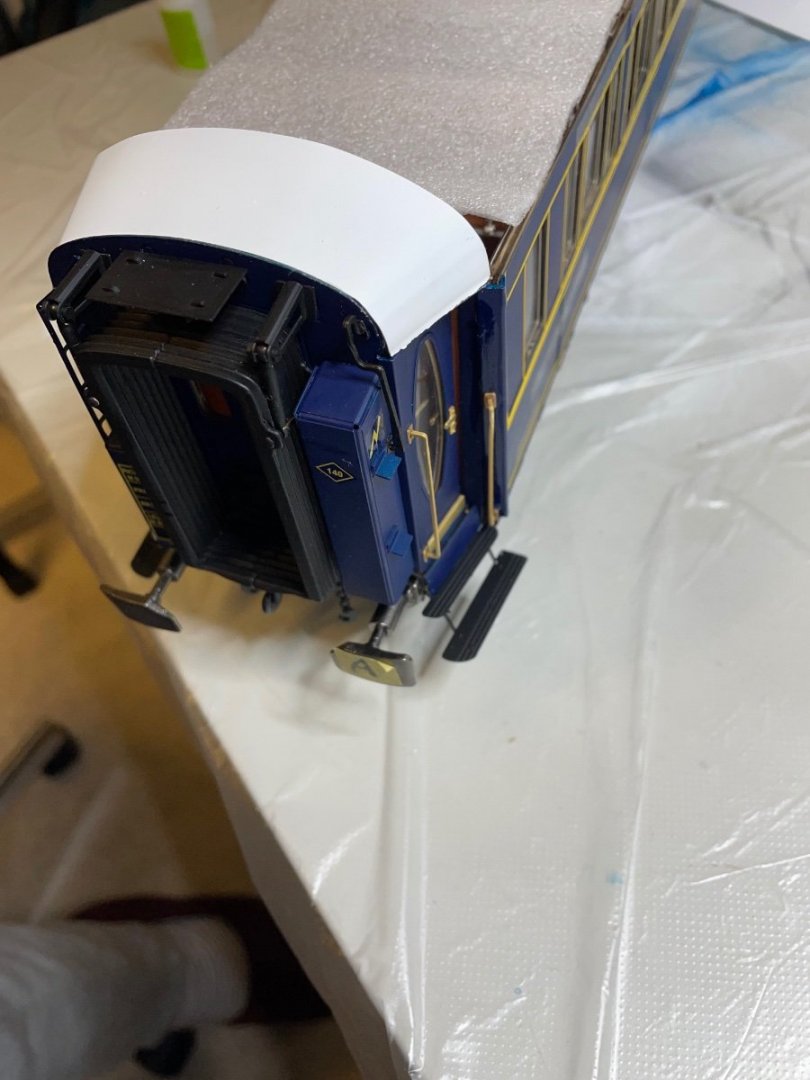
 Figure 476 - 485: Final photos Orient Express is finally ready. I ordered the custom size display case from Sora Shop in Germany (sora-shop.com). Highly recommended. This one cost me around 53€ + 13€ shipment to Finland. Thank you all for watching, following and your inspiring messages! Aydin.


- 293 replies
-
- 22
-

-

-
Amati Riva Aquarama Transmission and RC
aydingocer replied to tomsimon's topic in RC Kits & Scratch building
Hi Tom! Check my log for some hints on RC. The RC section should start somewhere here: -
Indeed!! 😃
-
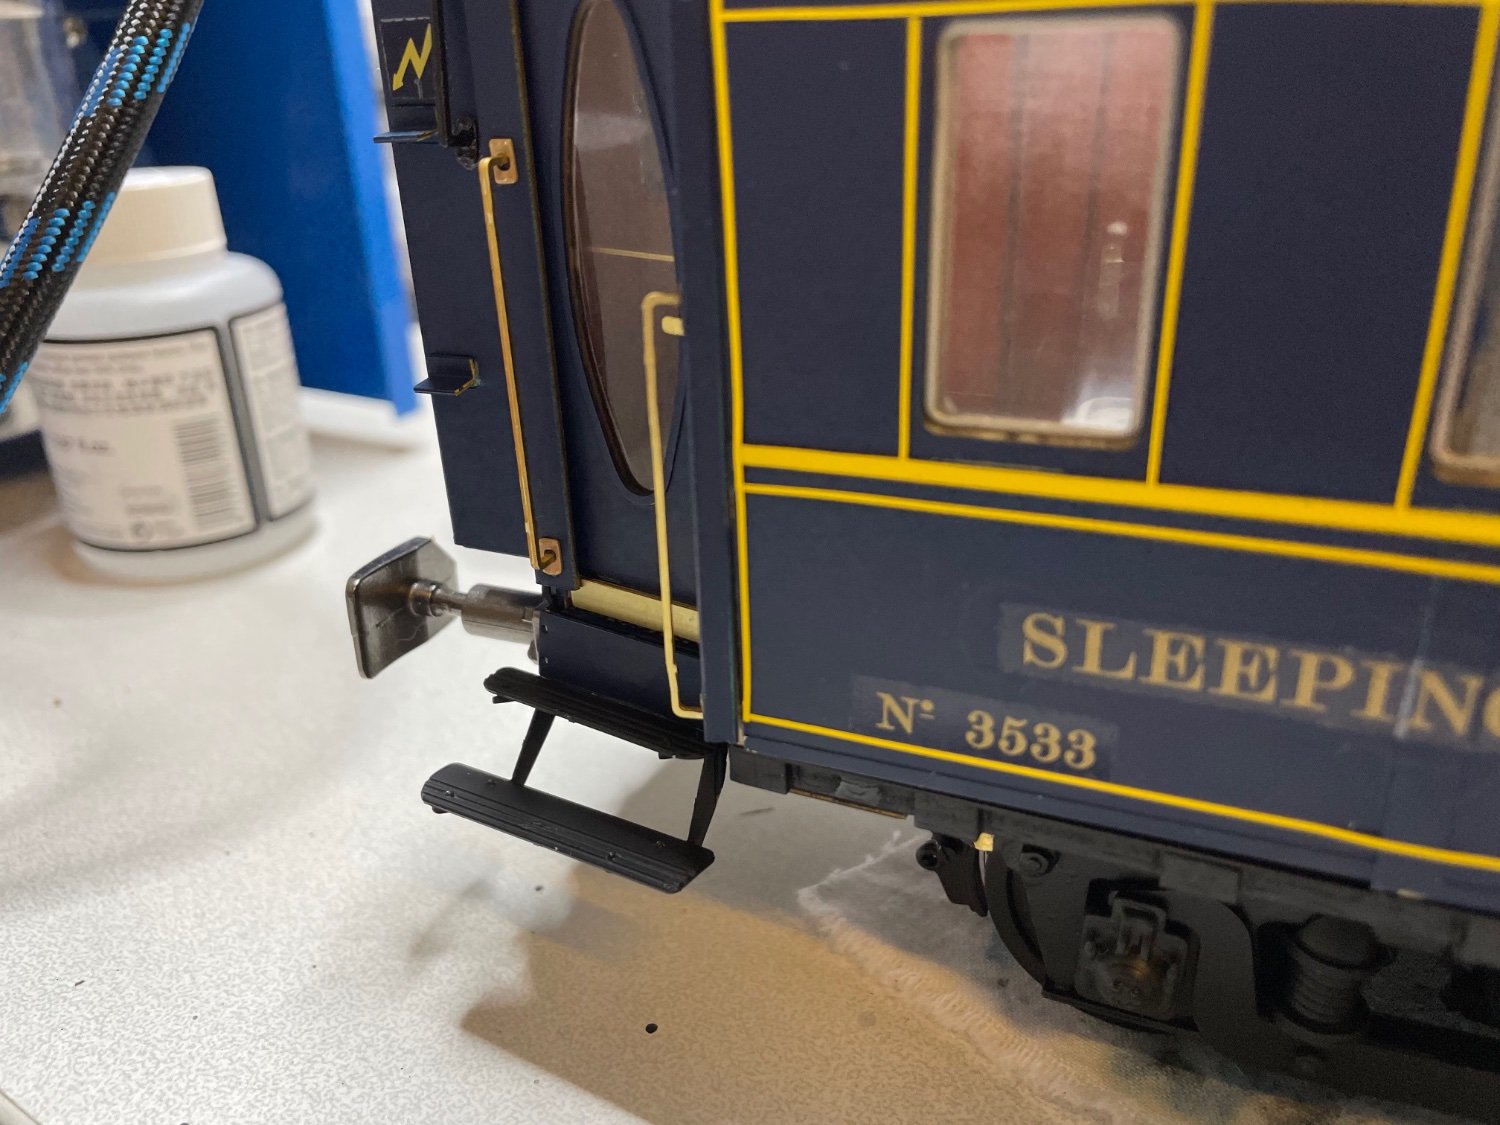
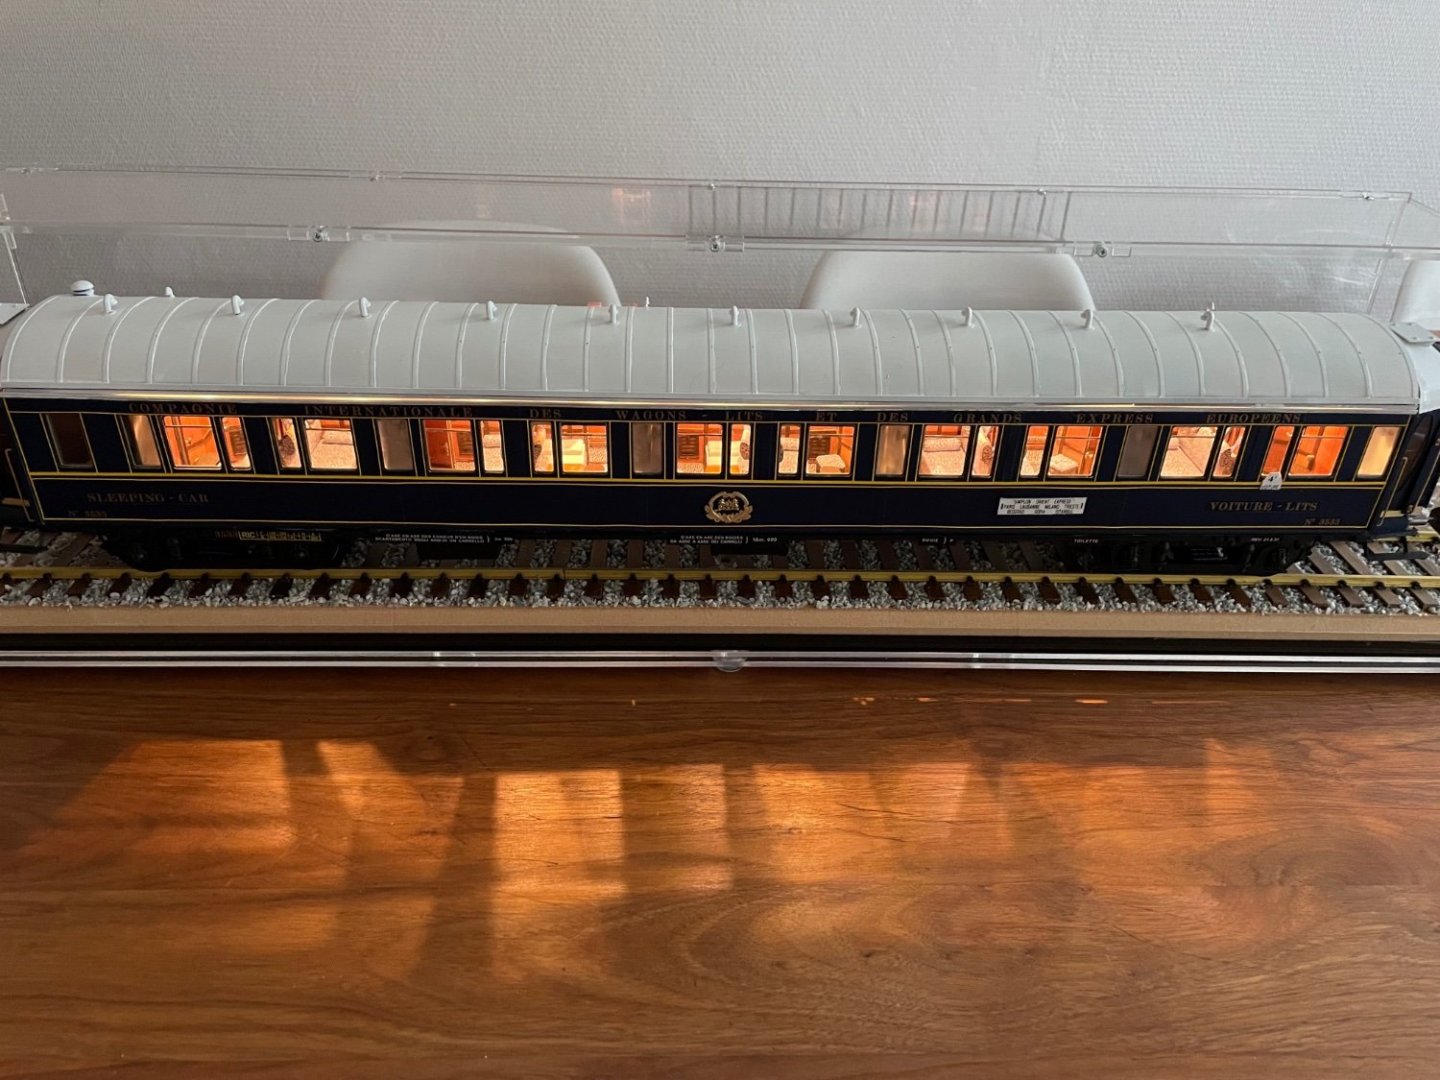
Figures 473-475: The lighting is in place and it doesn't look bad at all! That's all for now. Thanks for watching!


- 293 replies
-
- 19
-

-
-
-
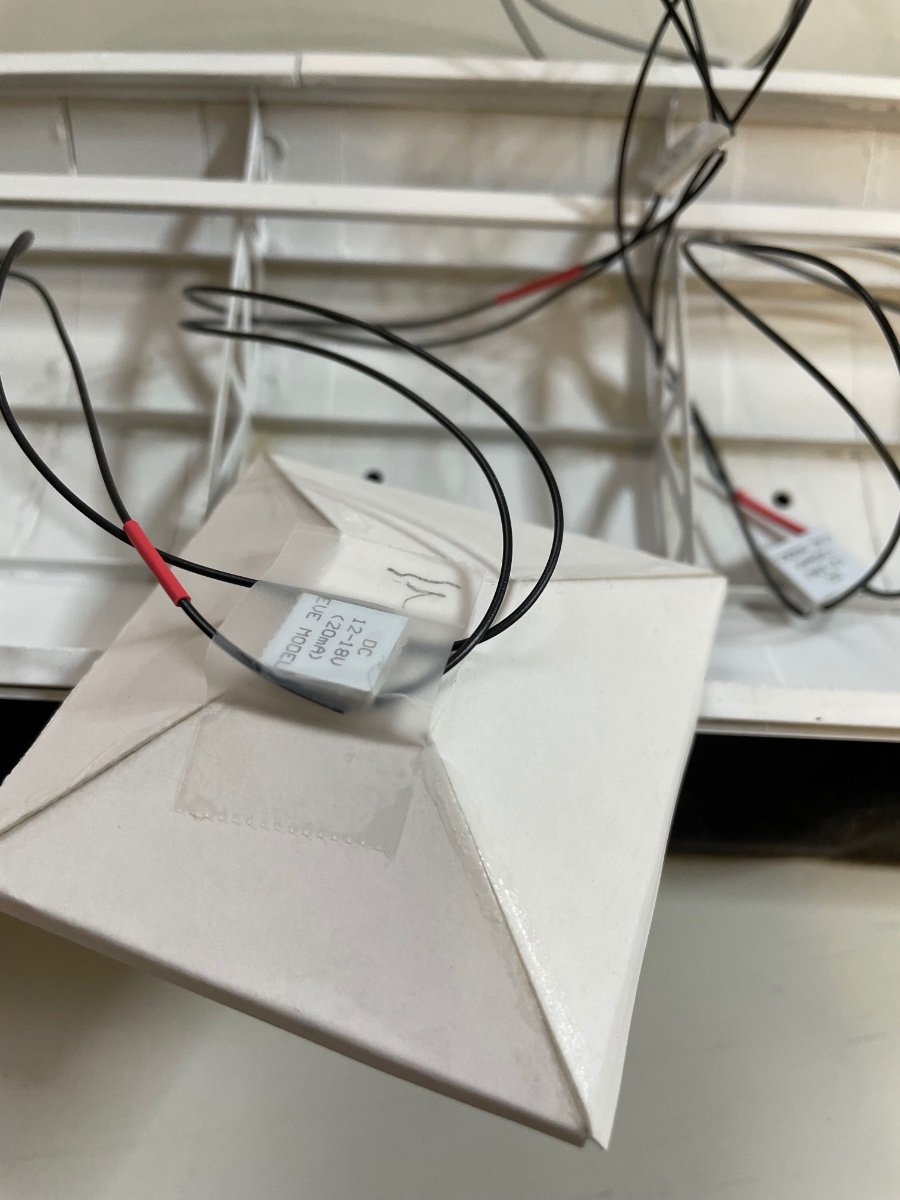
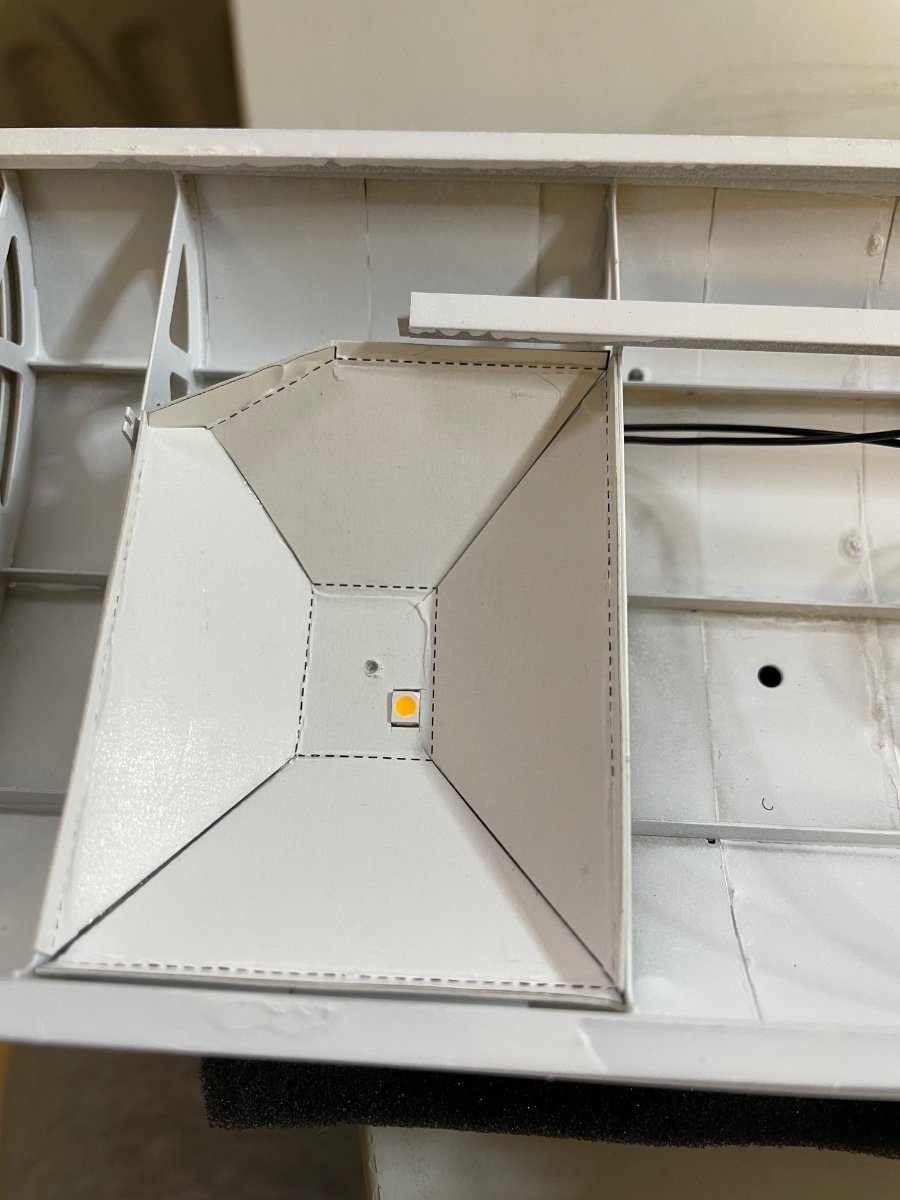
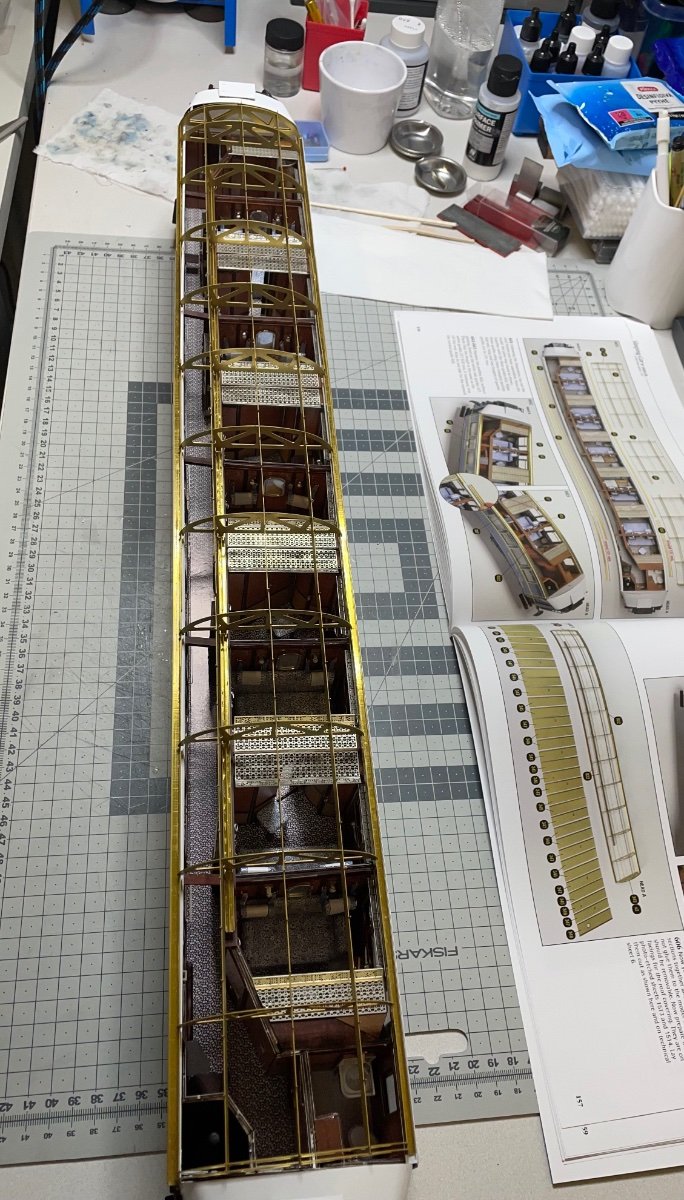
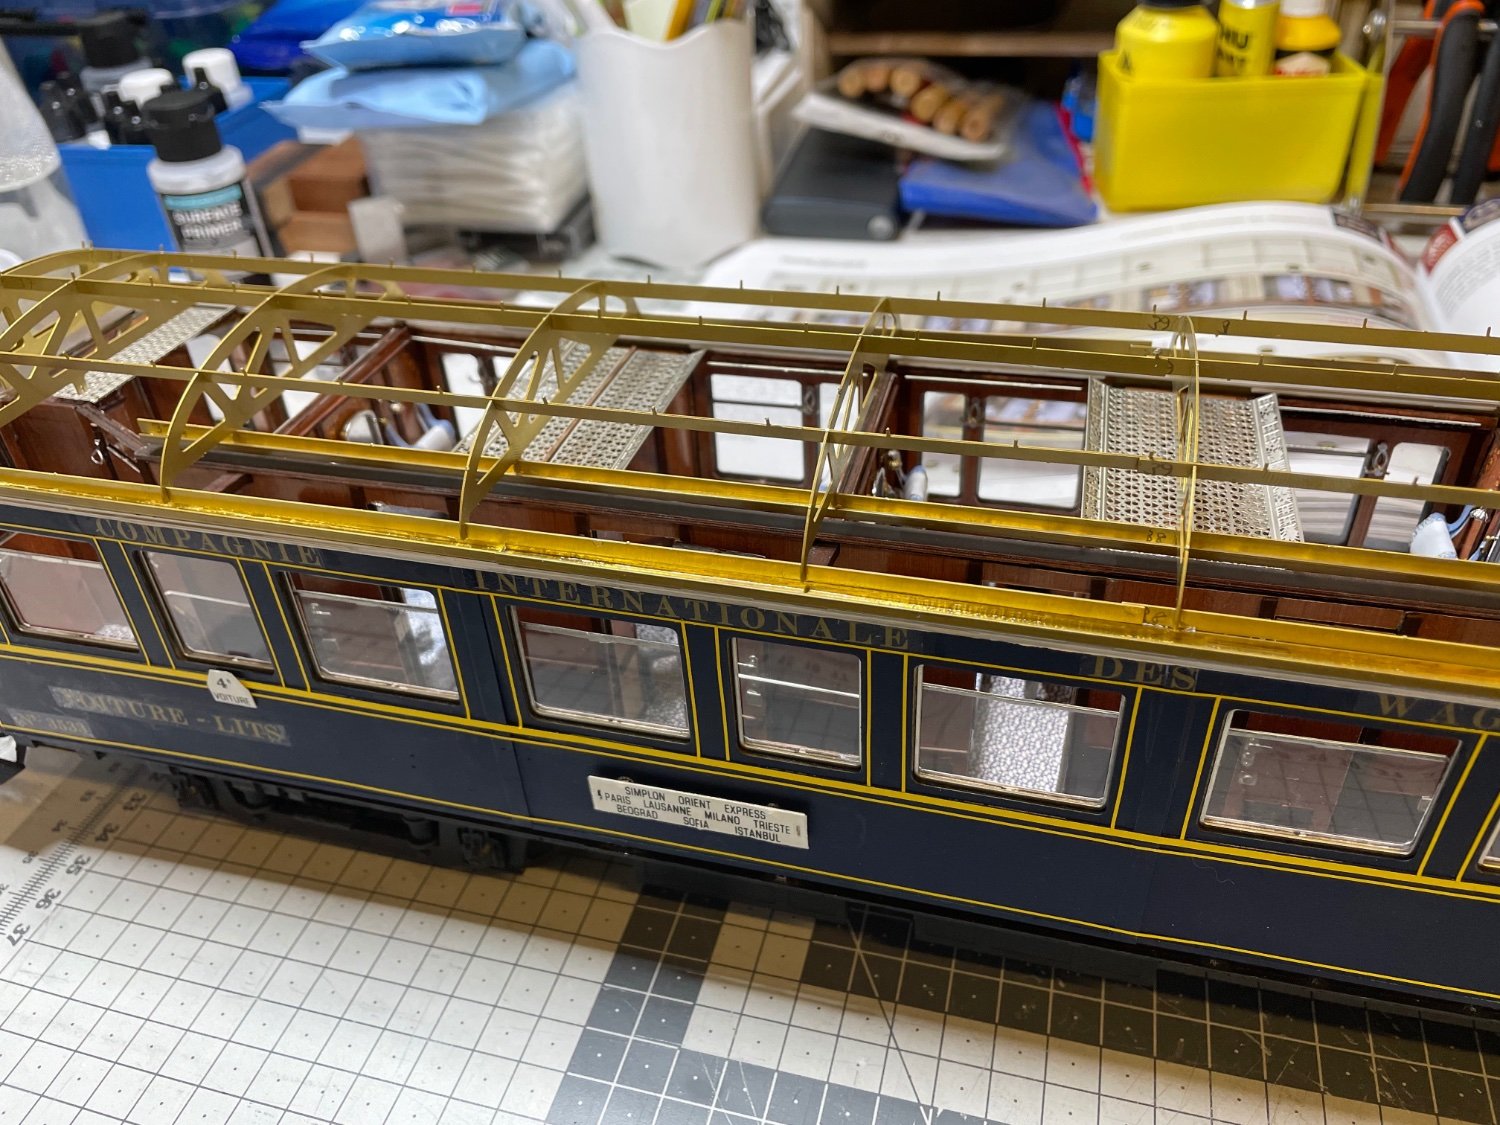
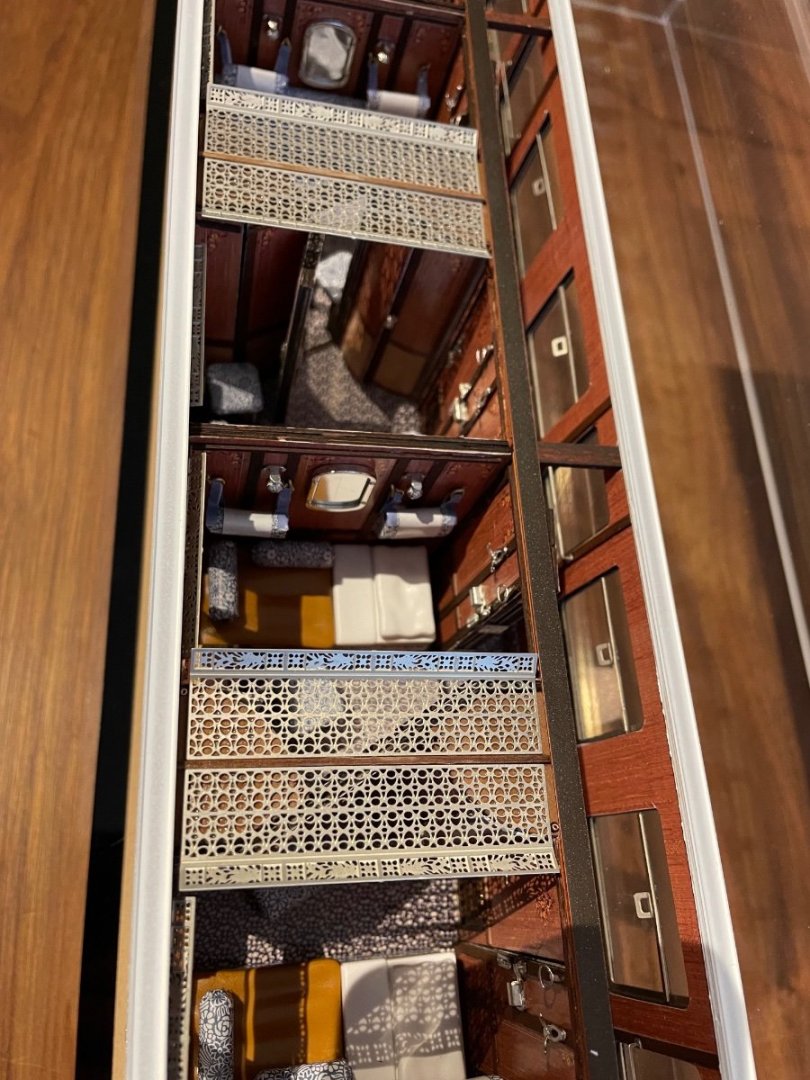
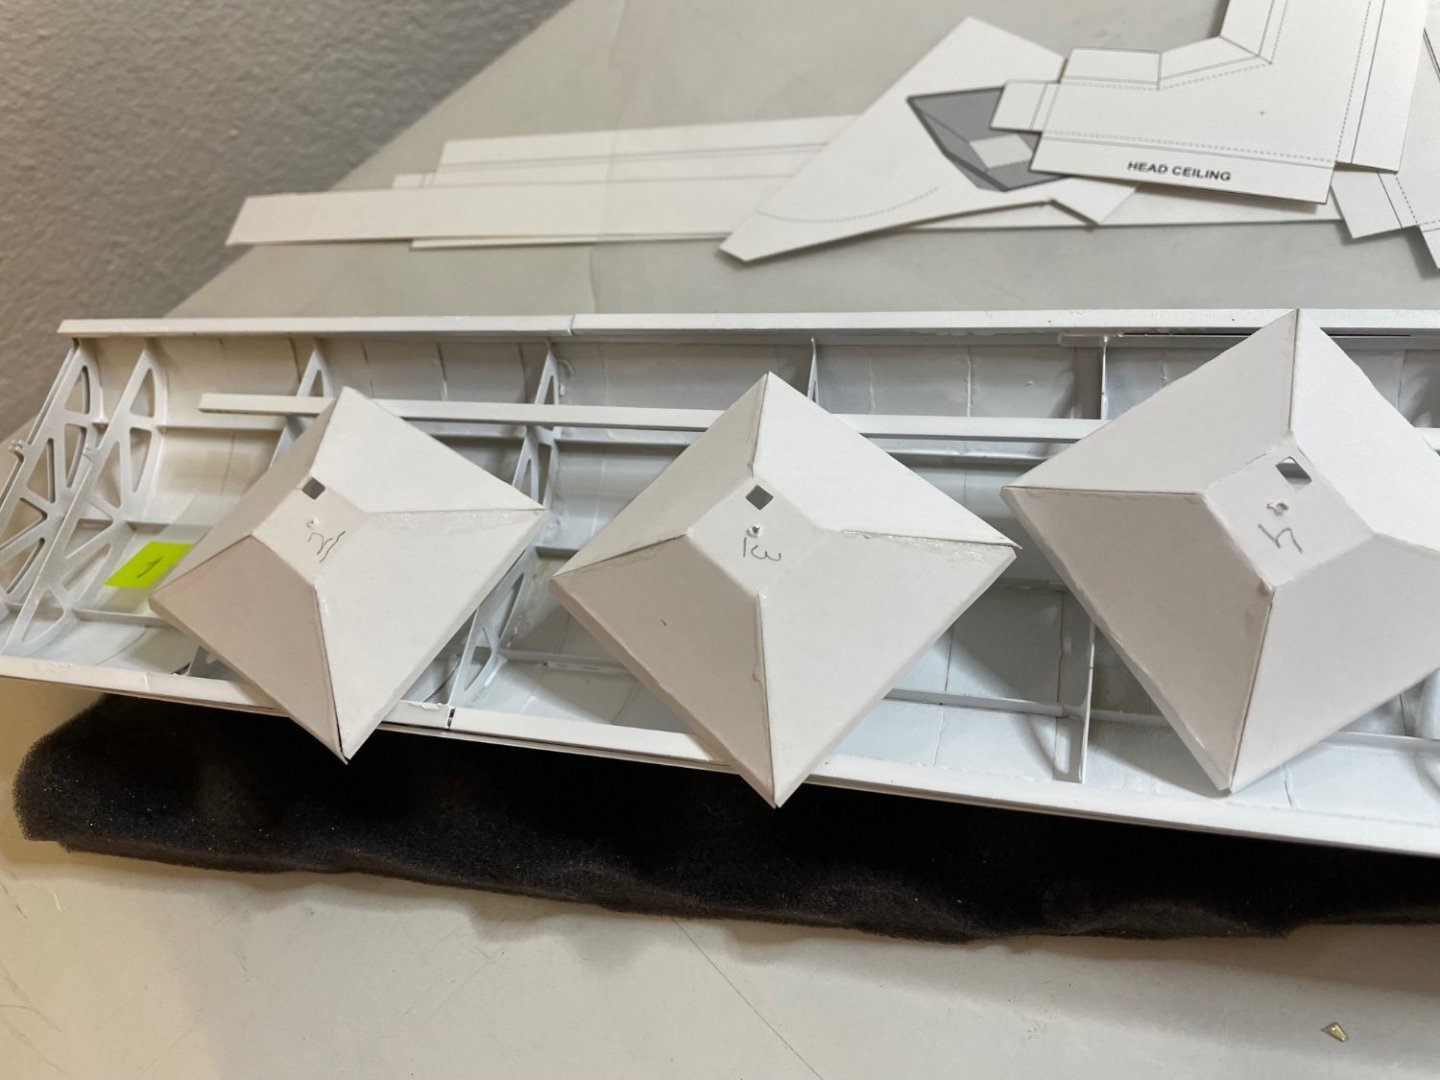
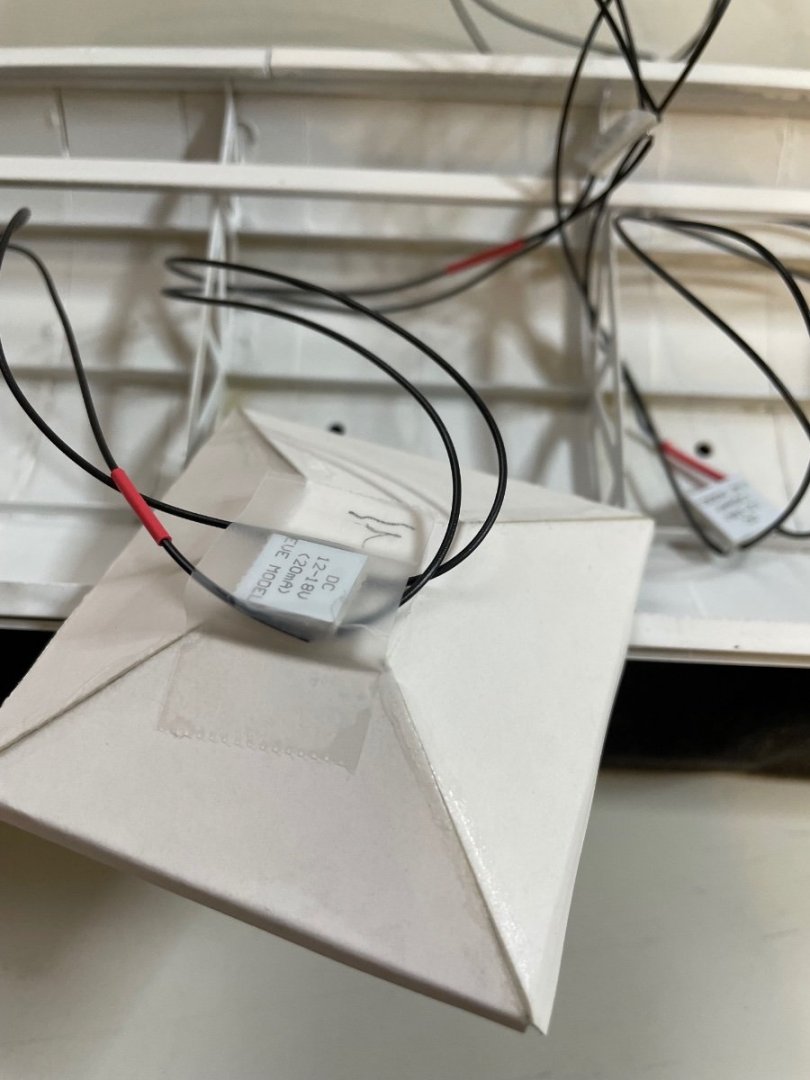
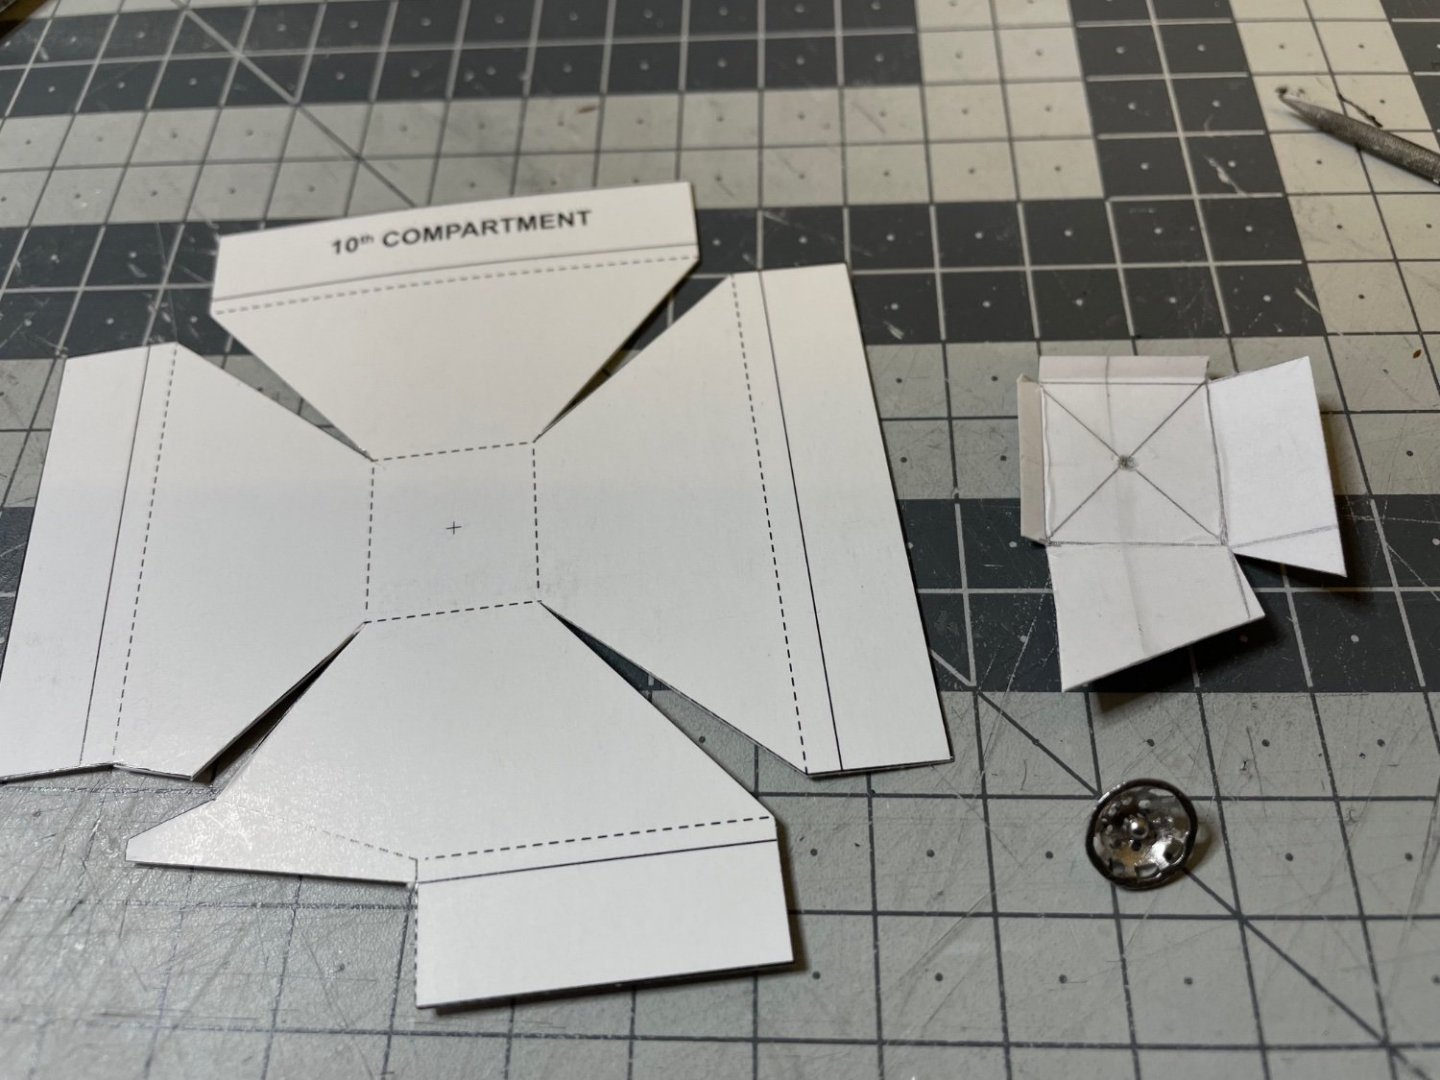
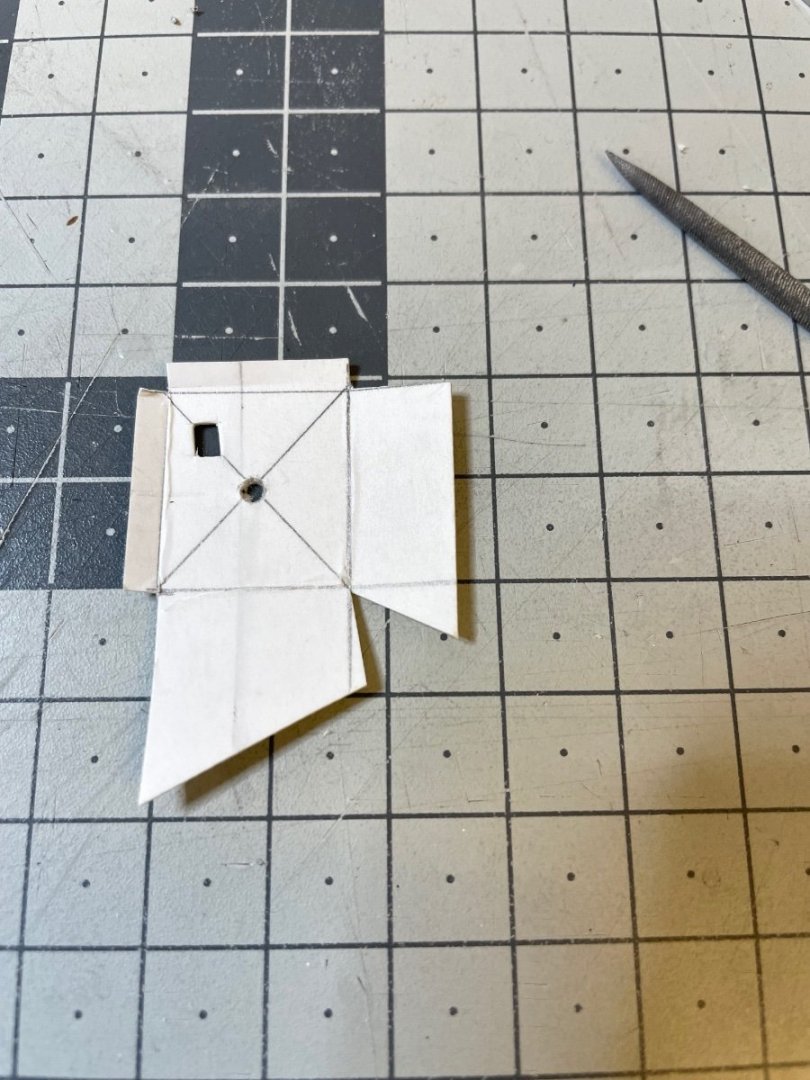
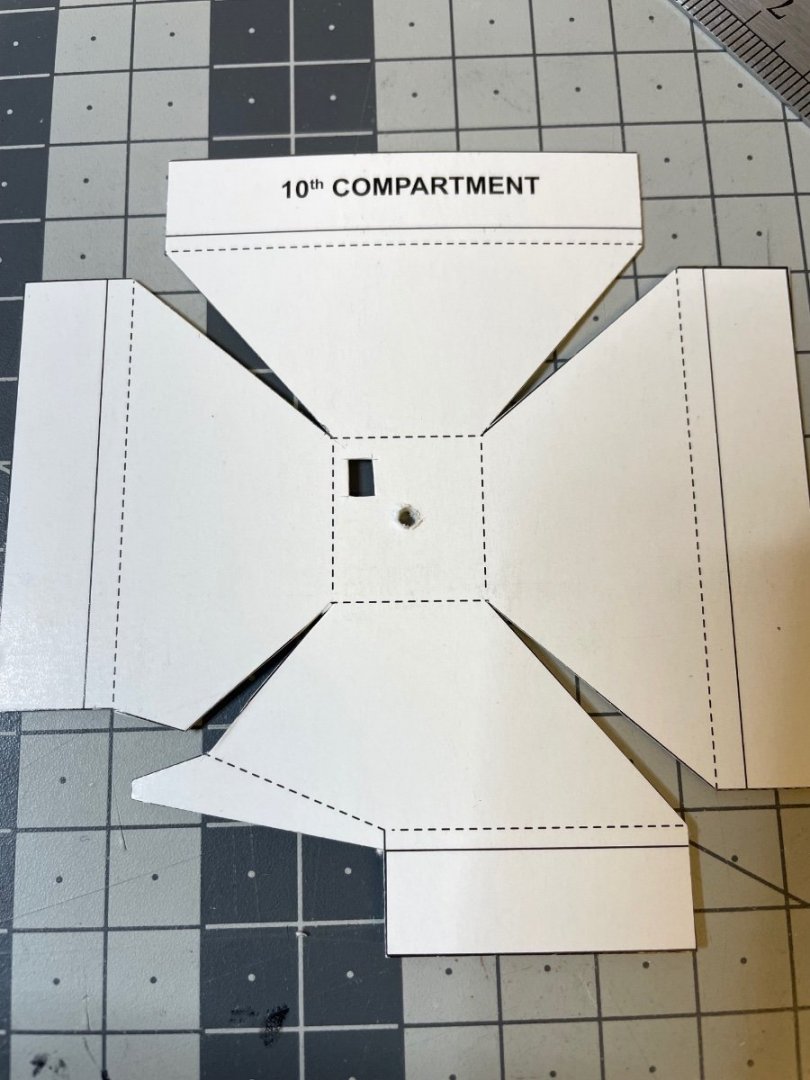
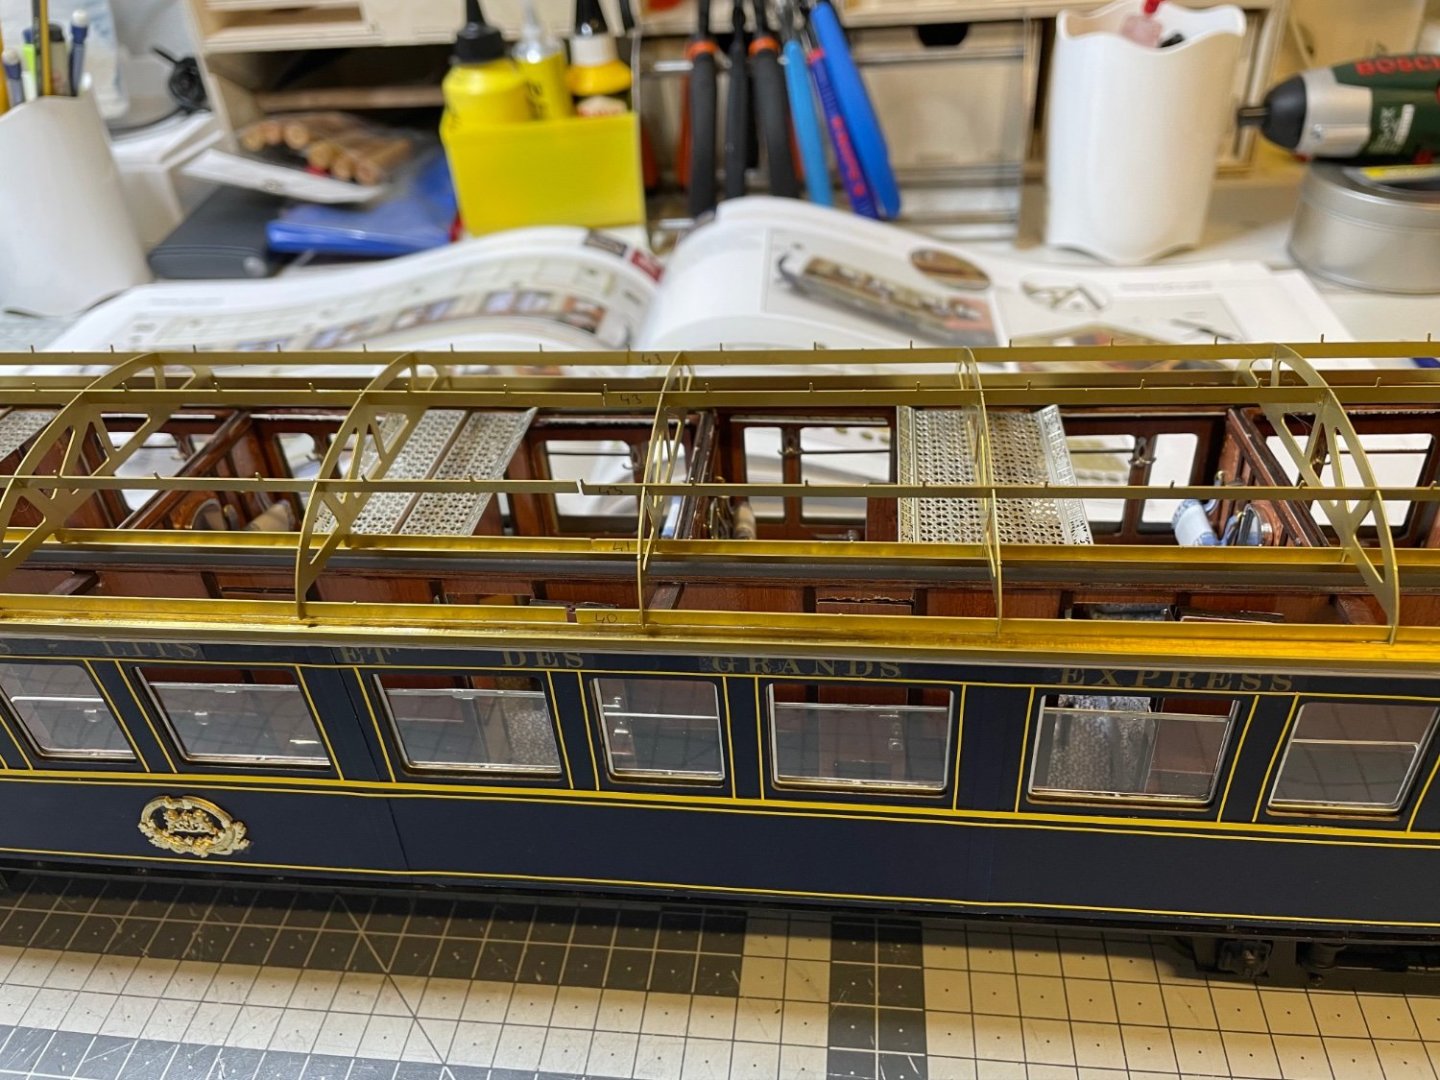
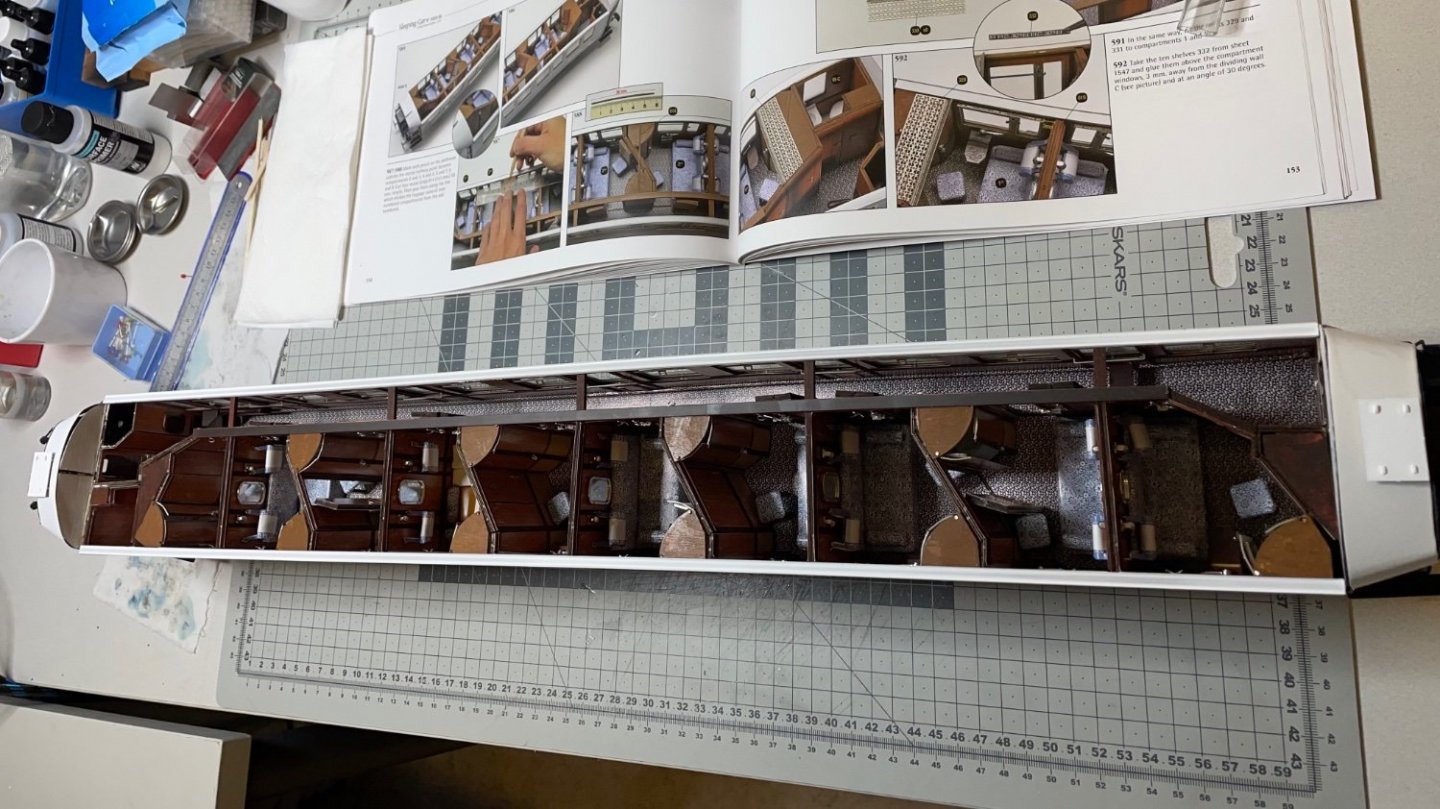
Figures 467-472: Ceiling structure, made of carton, to be bent at the designated lines and glued to the roof structure. I had to follow a certain order as I install the leds and wiring during the construction.


- 293 replies
-
- 12
-
-
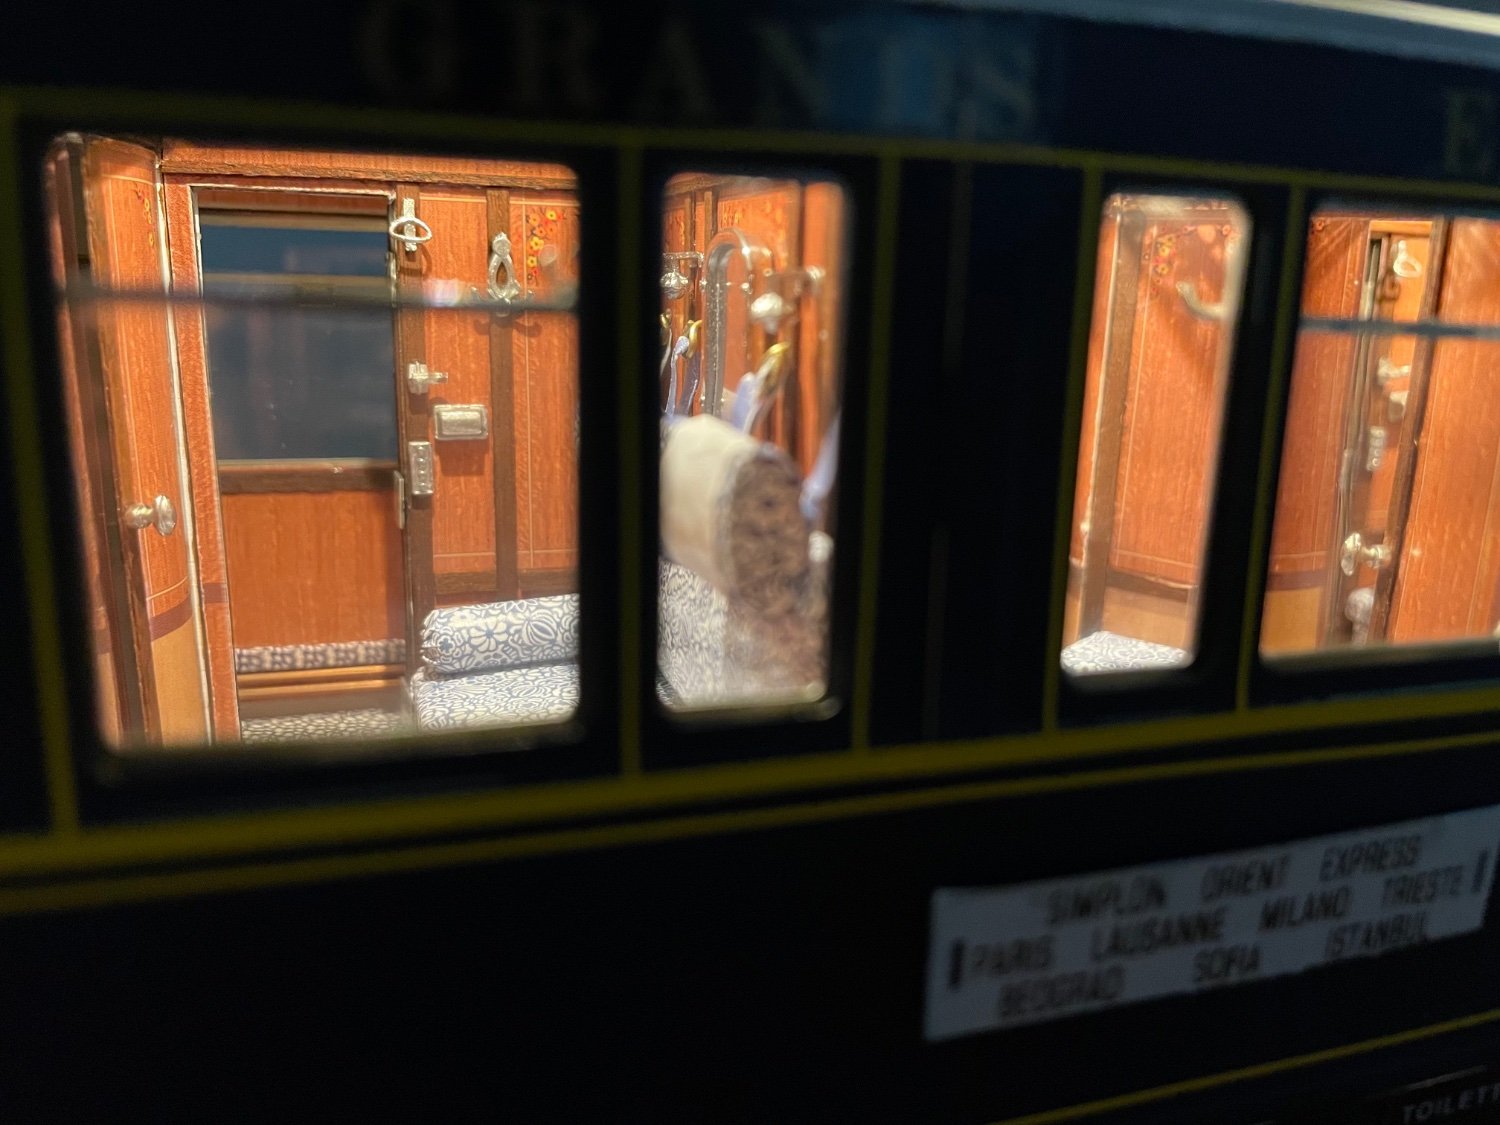
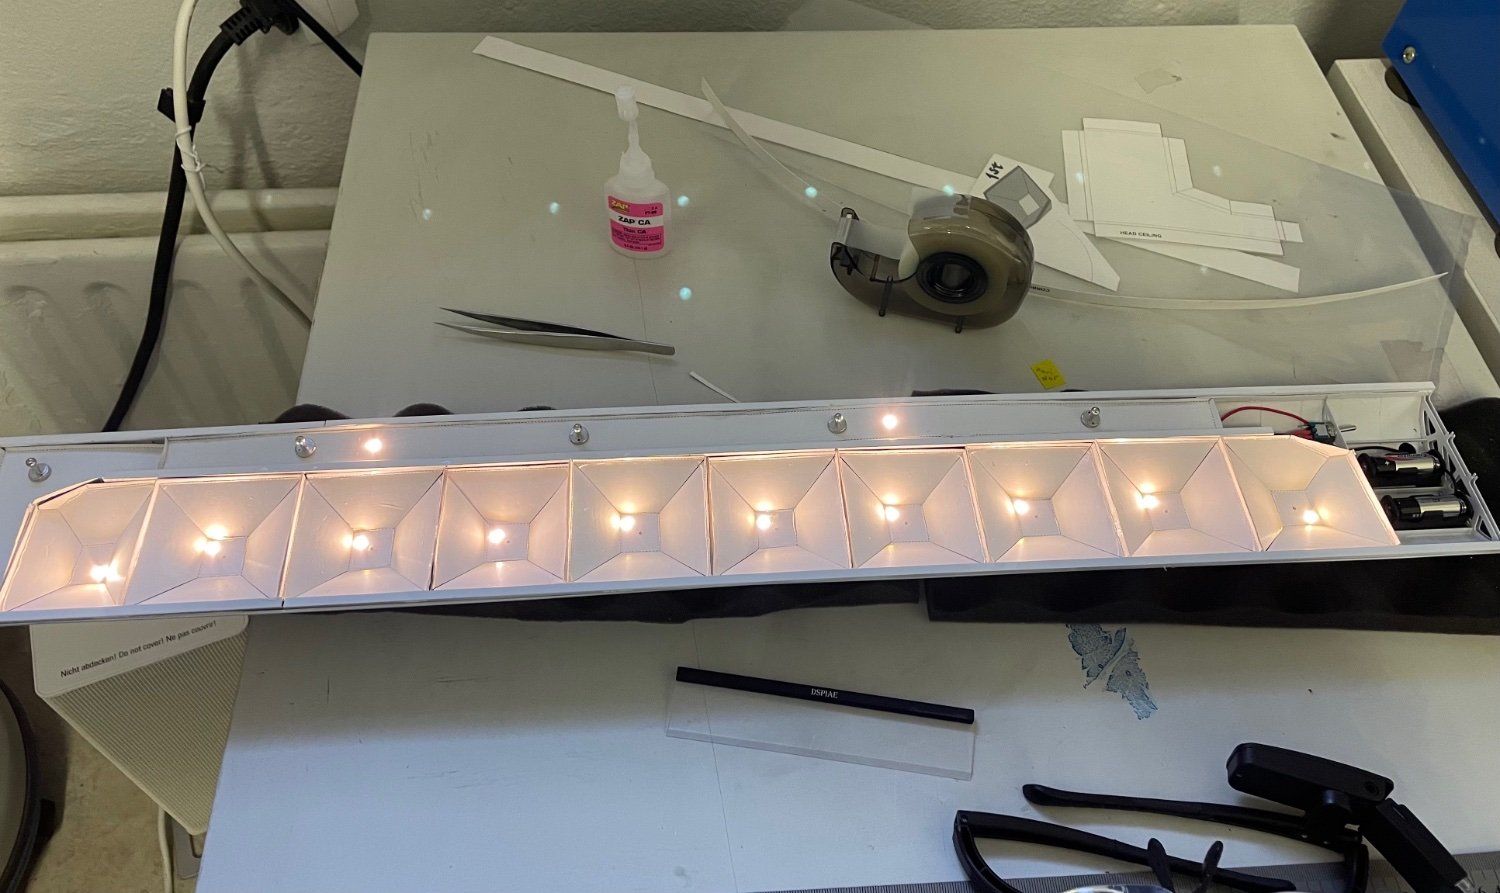
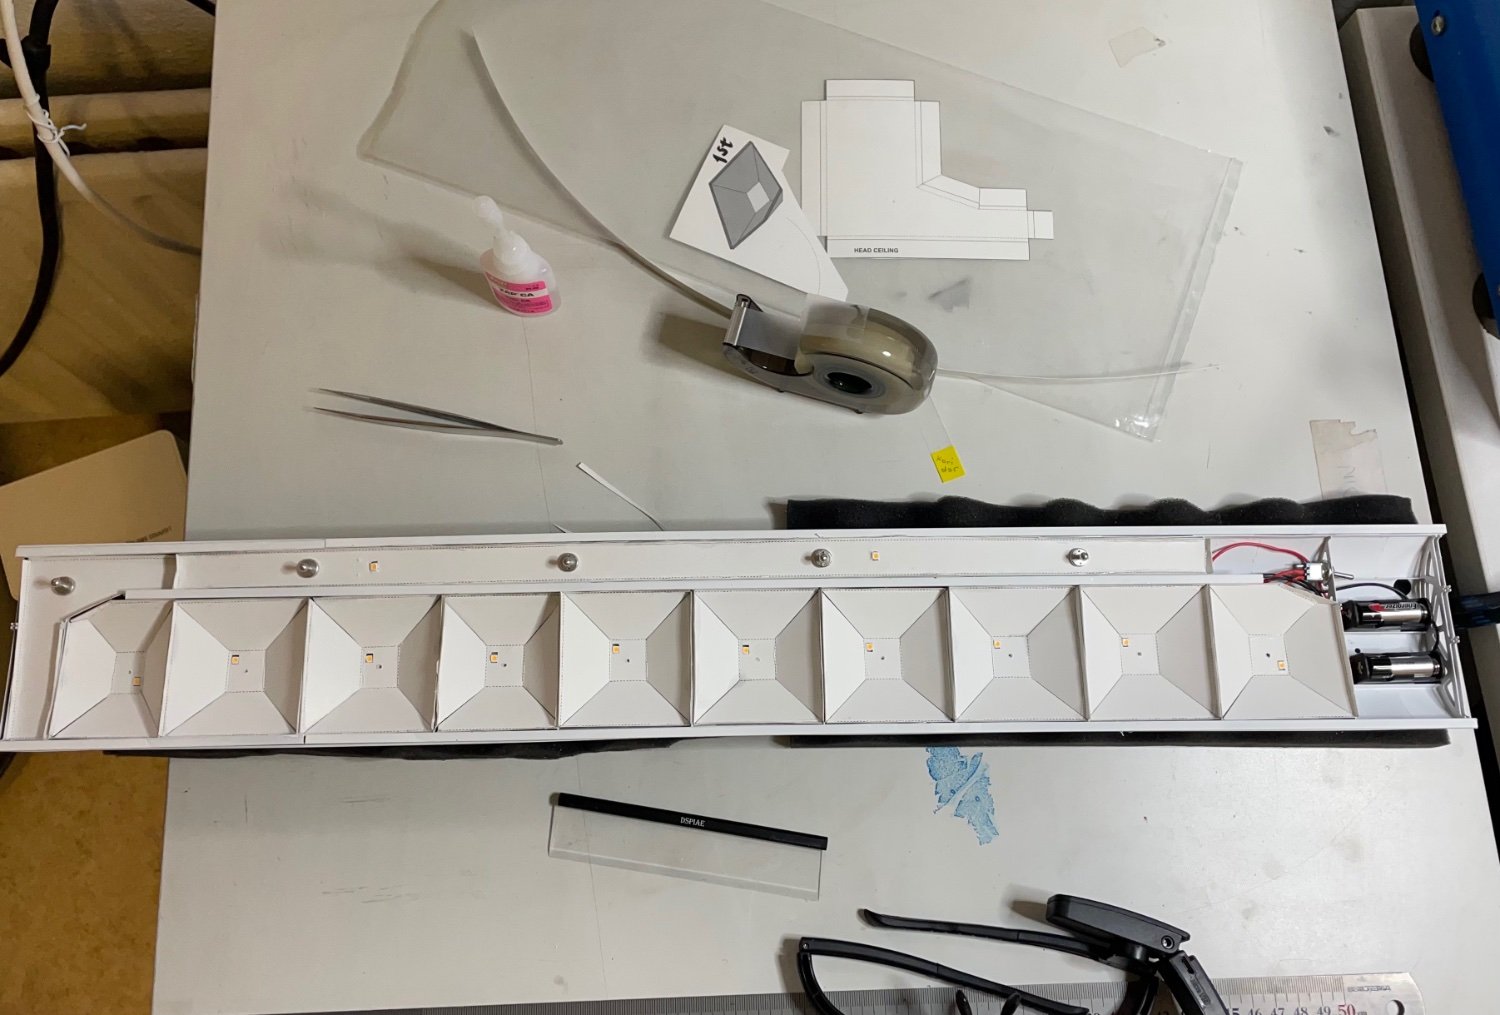
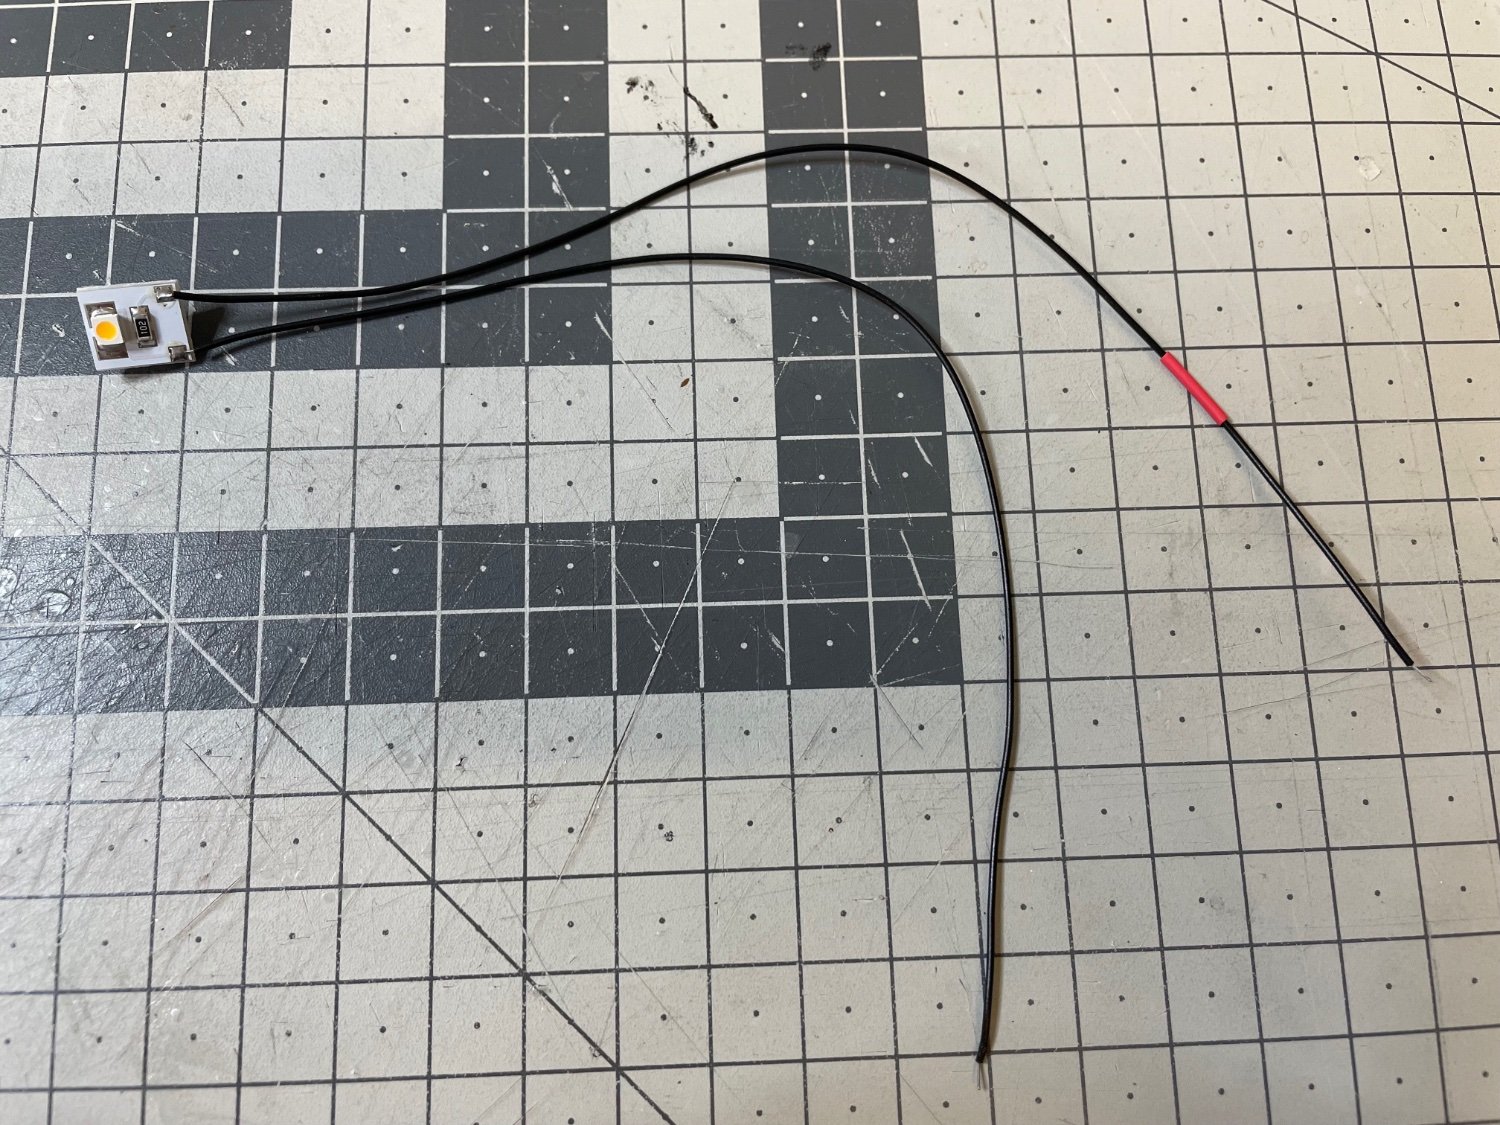
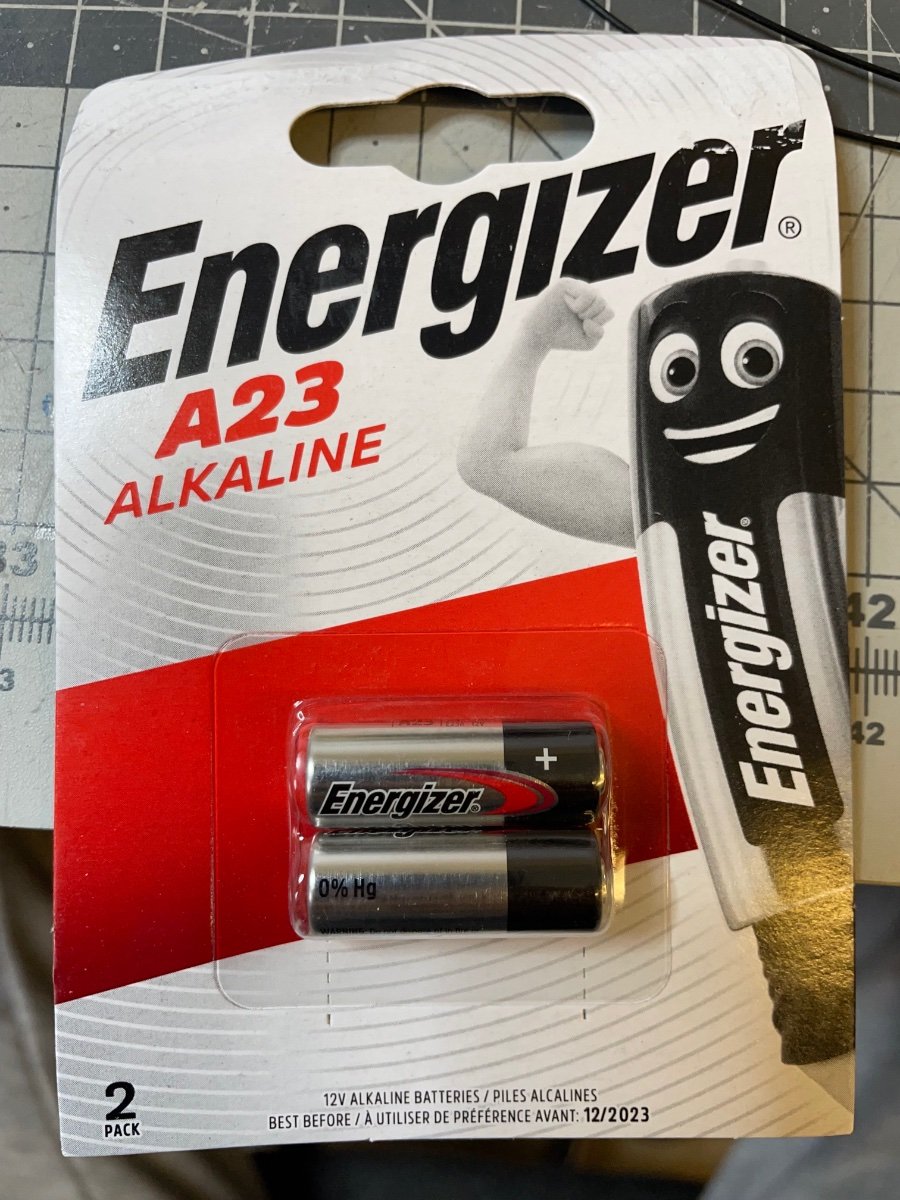
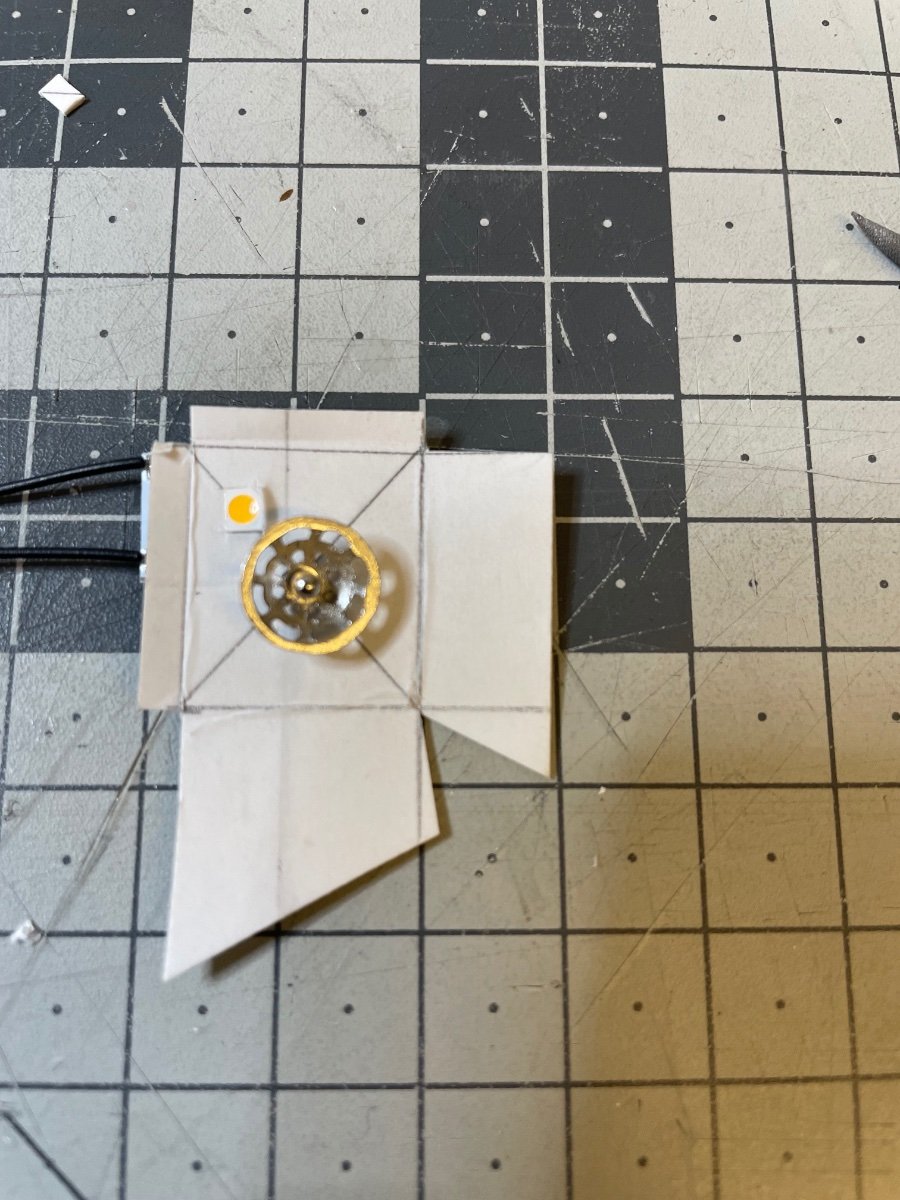
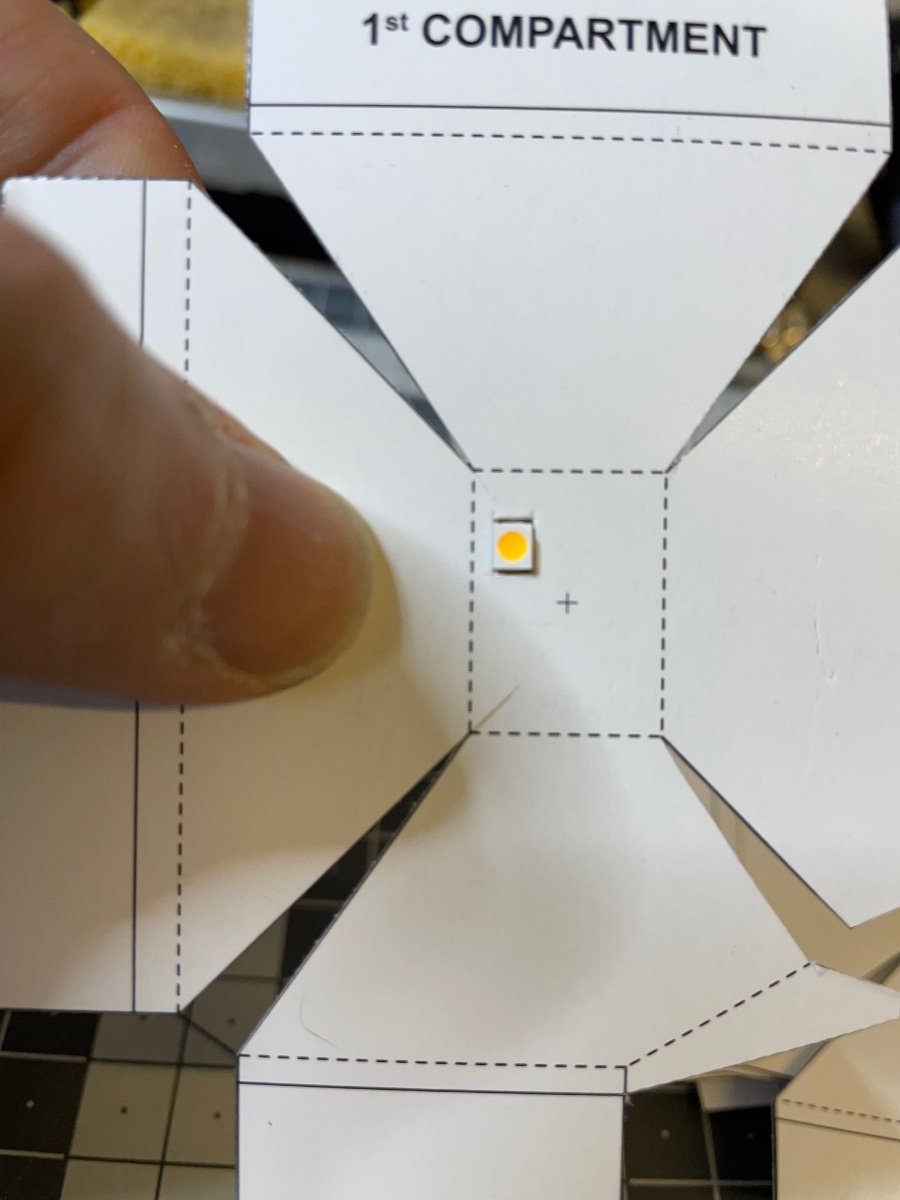
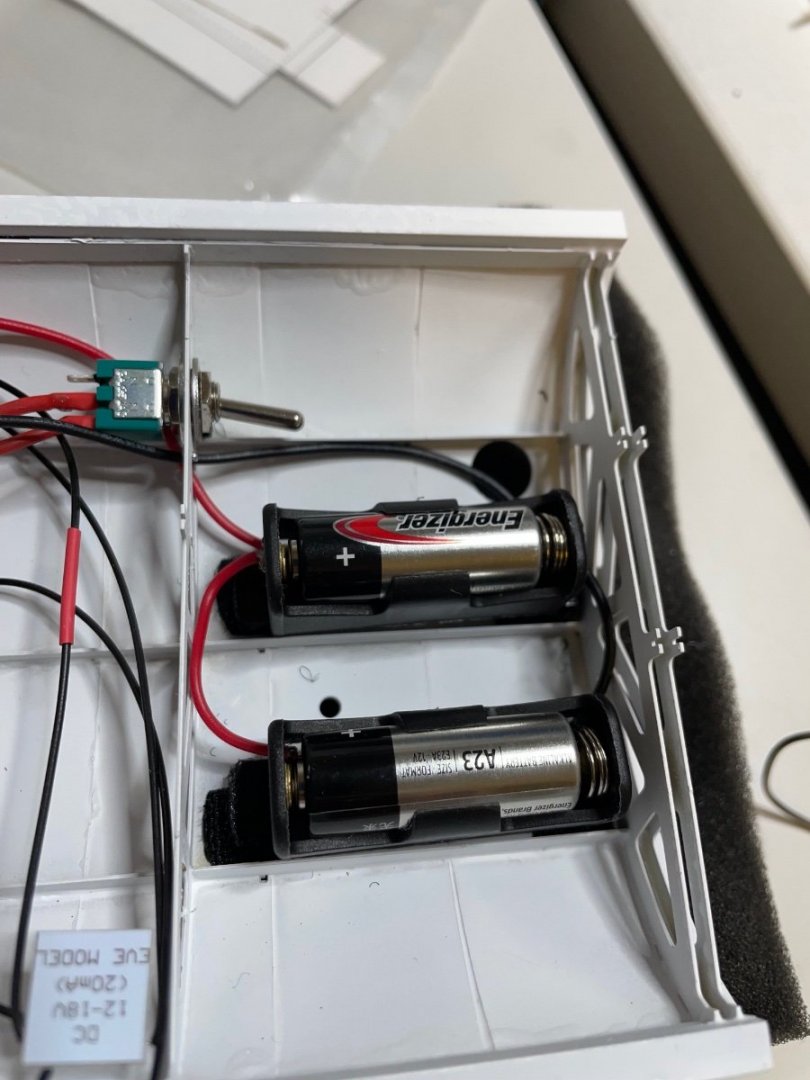
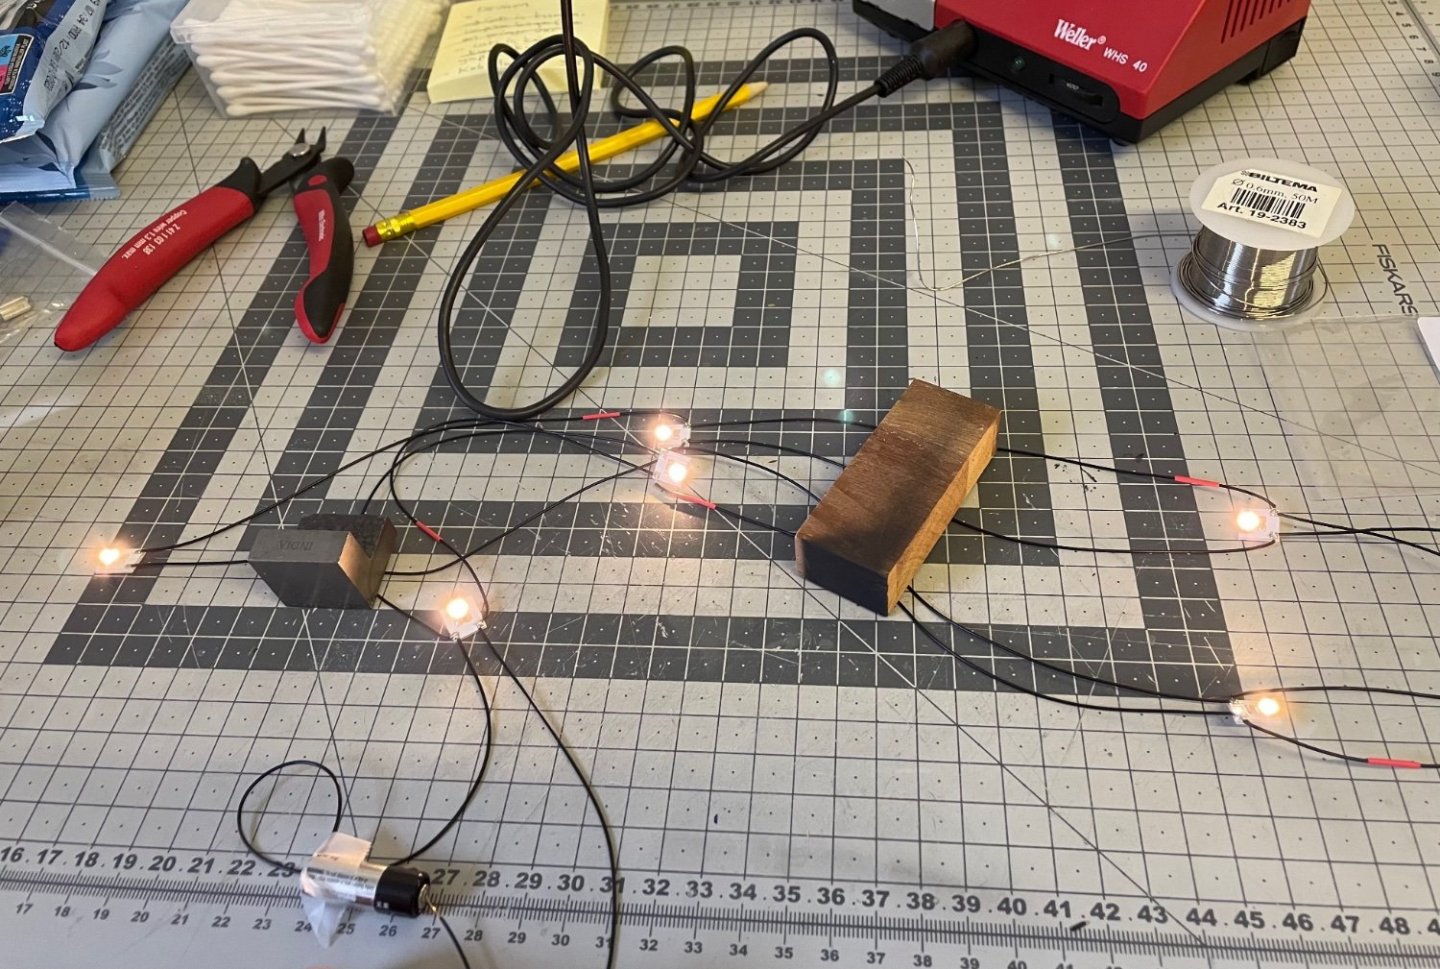
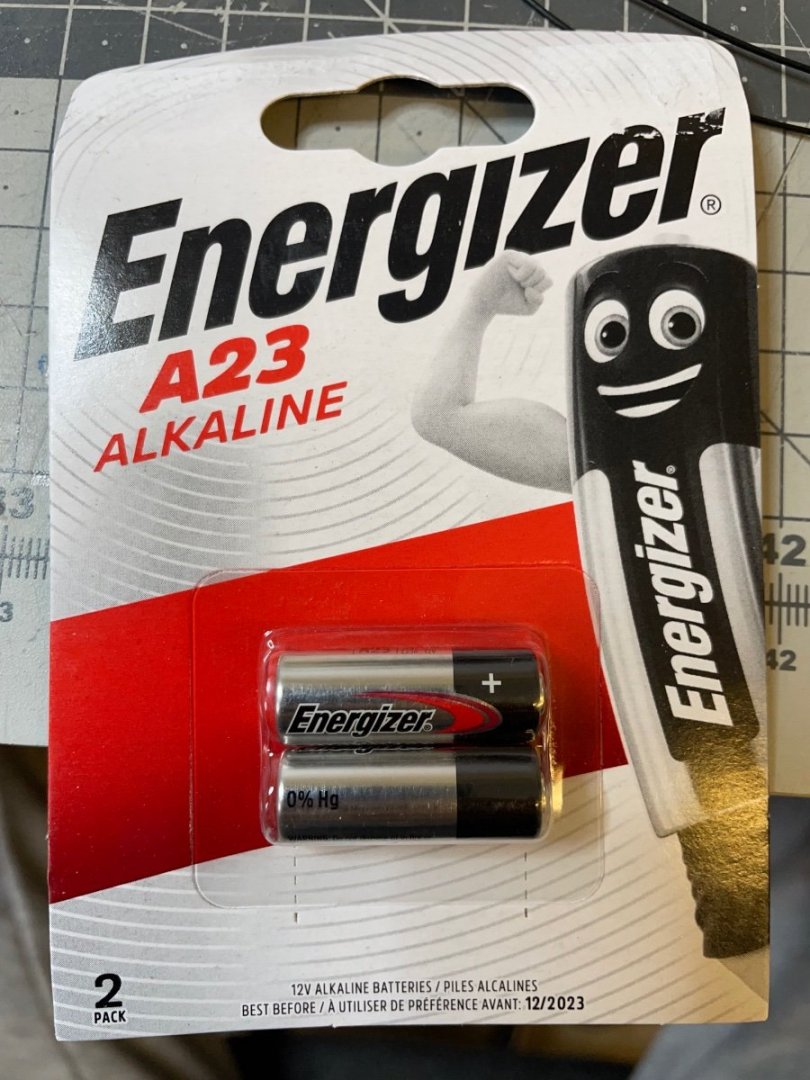
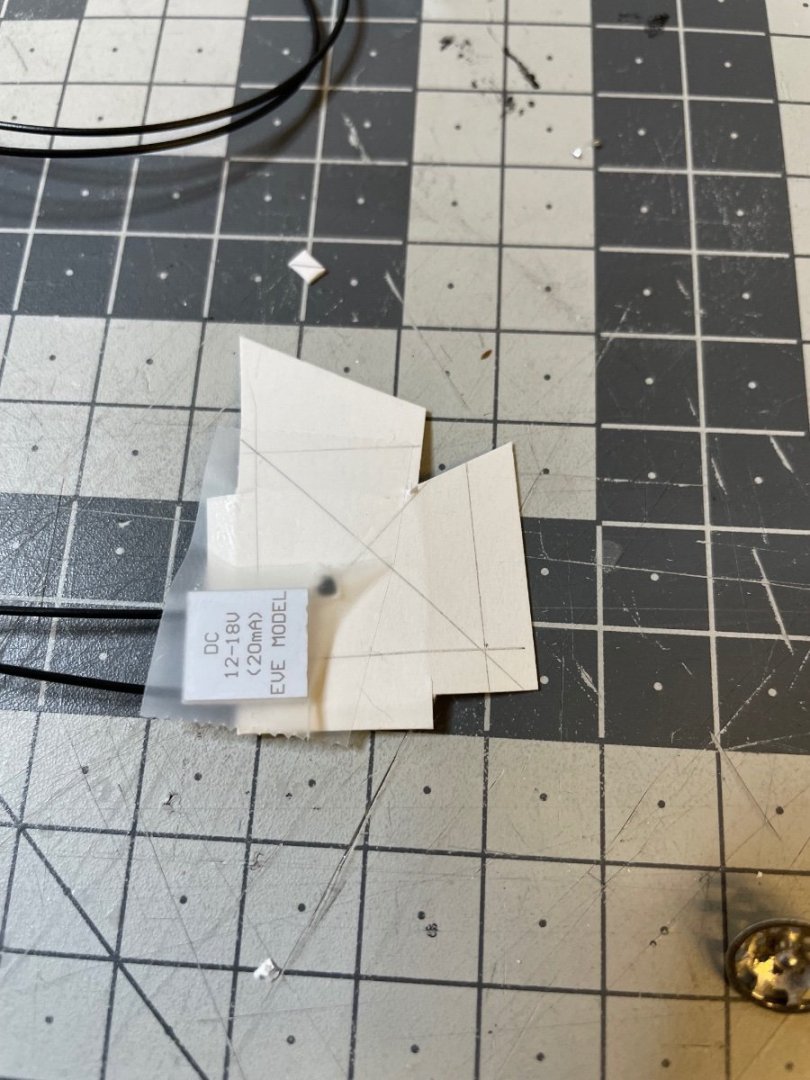
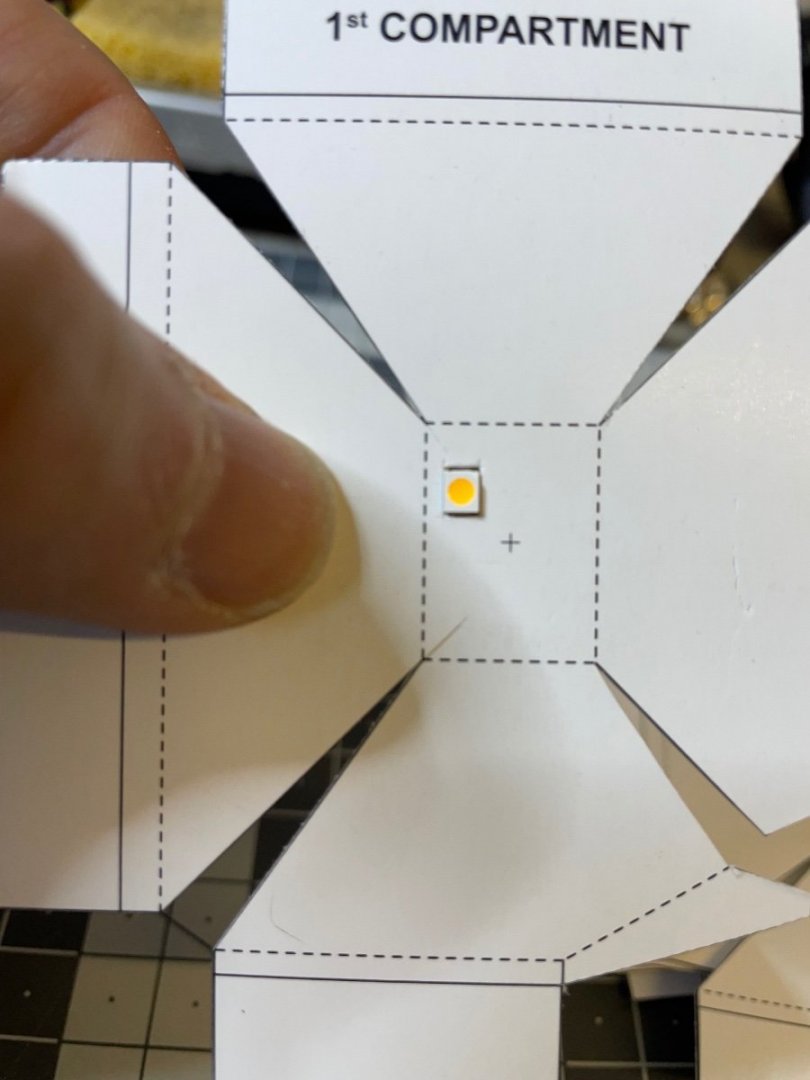
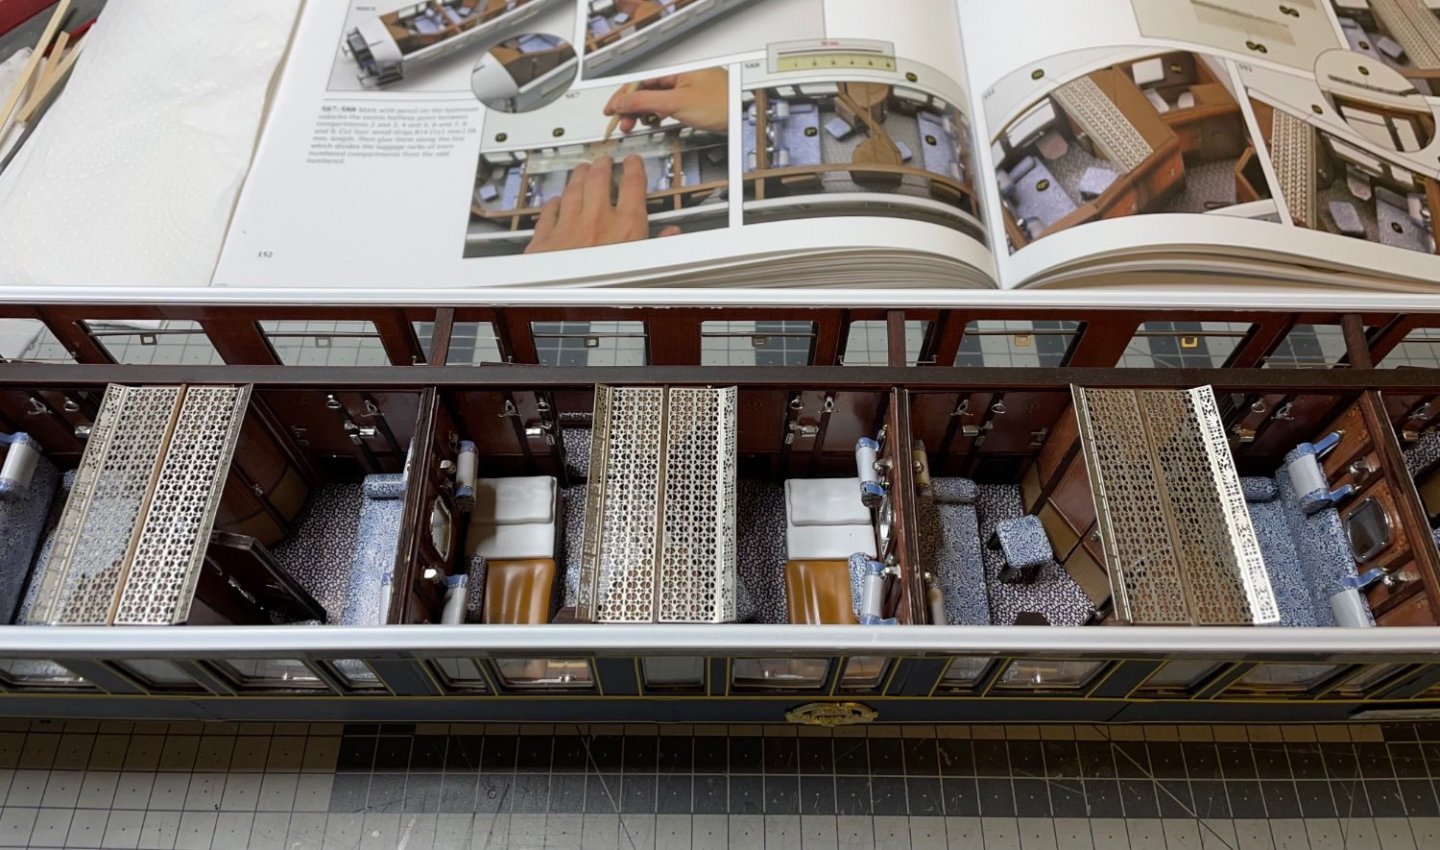
BUILD DAY 45 / 6 hrs / (TOTAL 115 hrs) It has been a while since my last build post. I have been traveling and time to time investigating how to install lighting on the ceiling. As I wrote earlier it had to be close to original lighting with at least one per compartment, not just some spots here and there. I also wanted to fit all the lighting elements (i.e. incl batteries, switch, wires) into the roof structure to avoid hanging of wires around and be able to remove the roof freely without any obstacles. Here in this post I will show my ceiling structure and light installation. Finally I was able to find led lamps, small batteries and switch with suitable specs. LEDs: They are 12 volt and resistors already soldered on the PCB board. They are from a small supplier in UK, https://www.smallscalelights.co.uk. The owner of the webshop, Jennifer, is the same person who is actually producing most of the nice railroad lighting items. Not all the countries are available for shipment, I sent an email request and she sent my order to Finland. So, if you like something on her webshop but your country is not in the list, it may be worth sending an email to her! Switch: Simple small size 1-pole toggle switch. Battery: A23 12 volt batteries. Here I installed two of them in parallel. So, still 12 volts but more power to light all 12 leds. Figure 458: Here is a single LED. It is ready to use if you just hook it up to a 12V battery source. Figure 459: Here I soldered them to each other in parallel to make a strip of 12 leds, with enough cable in between for installation. Test with the battery looks good. Figure 460: These are the batteries I use. Figures 461-464: Experimenting the installation on a scrap test piece (on the right) Figures 465-466: Testing the installation on the real ceiling piece. I think it looks pretty OK like this


-
Yep, it is ready for painting in white!
-
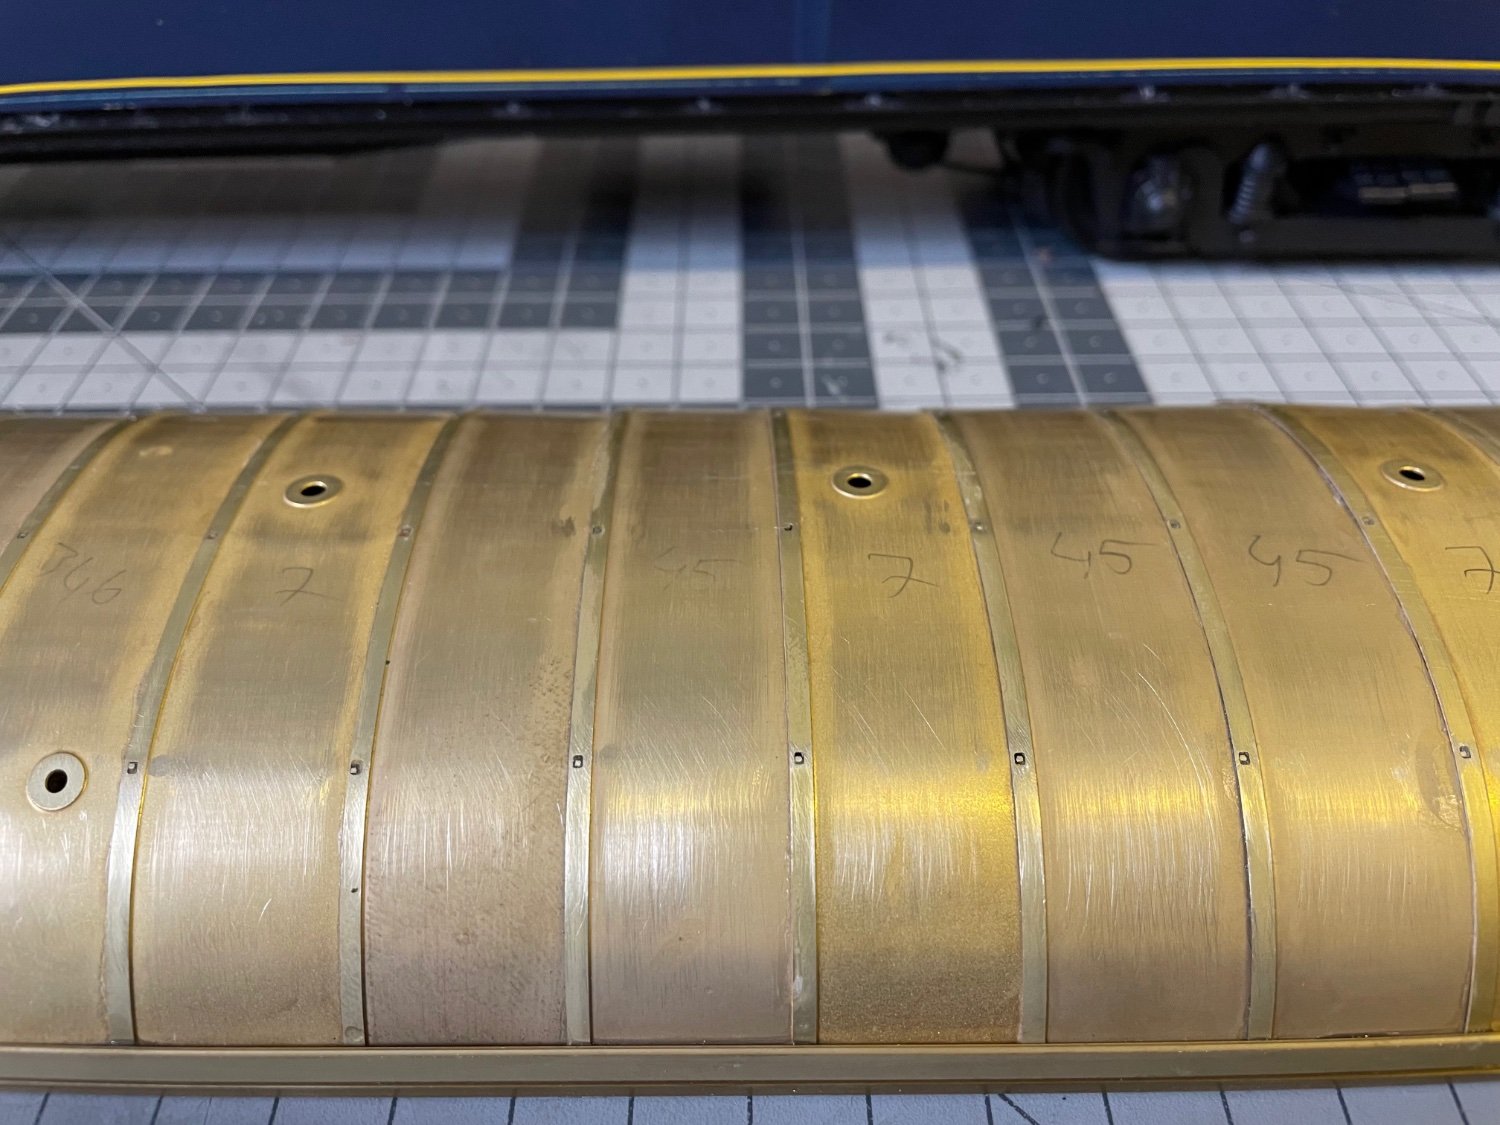
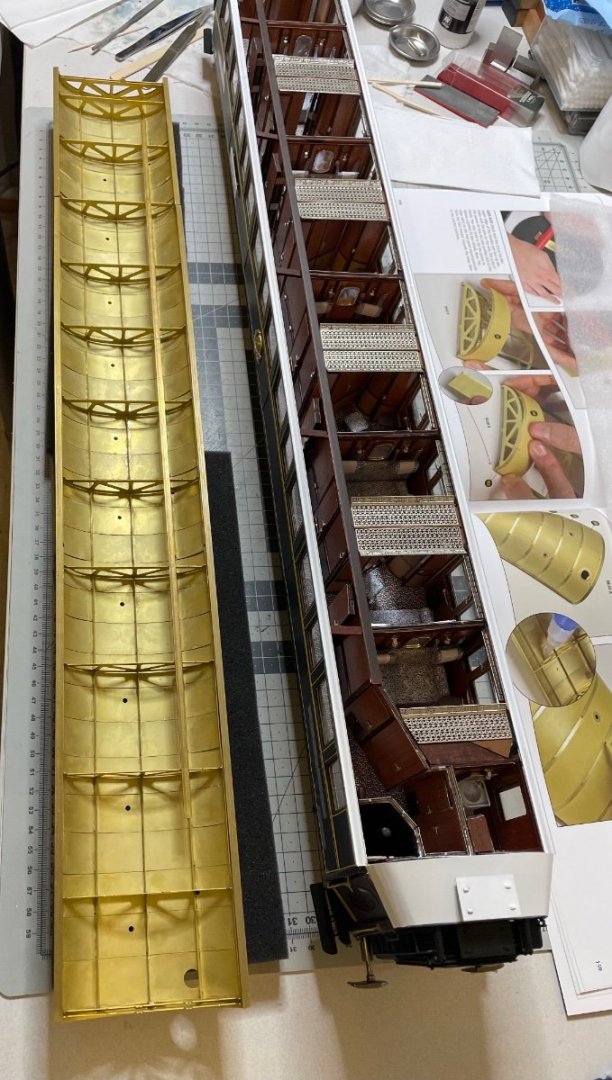
BUILD DAY 44 / 2.5 hrs / (TOTAL 109 hrs) Figures 451-457: Here is a series of photos from the roof construction. Overall it went smoothly. Once all parts glued, the next task was to do some surface finishing: remove the spikes coming out of the roof and smoothen the surface using sandpaper and file, especially to get rid of any glue residue. It was pretty much like finishing the hull planking of a ship model. That's all for now. Thanks for watching!


- 293 replies
-
- 17
-
-
-
Though I am not a big fan of "bringing a model to life" (e.g. with human figures, lights, sounds etc), I am considering to add leds to this model, only if I am truly convinced with the possible options. I will try to plan the lights at as accurate as their original spots, such as one on the ceiling of each compartment and a few on the corridors, if this approach works. That would mean I will not install just one or two lights to give a general illumination. For this purpose I ordered the special leds below: https://www.smallscalelights.co.uk/product/3528-12-18v-chip-leds-on-pcb
- 293 replies
-
- 11
-
-
Thanks for all the encouraging comments!
-
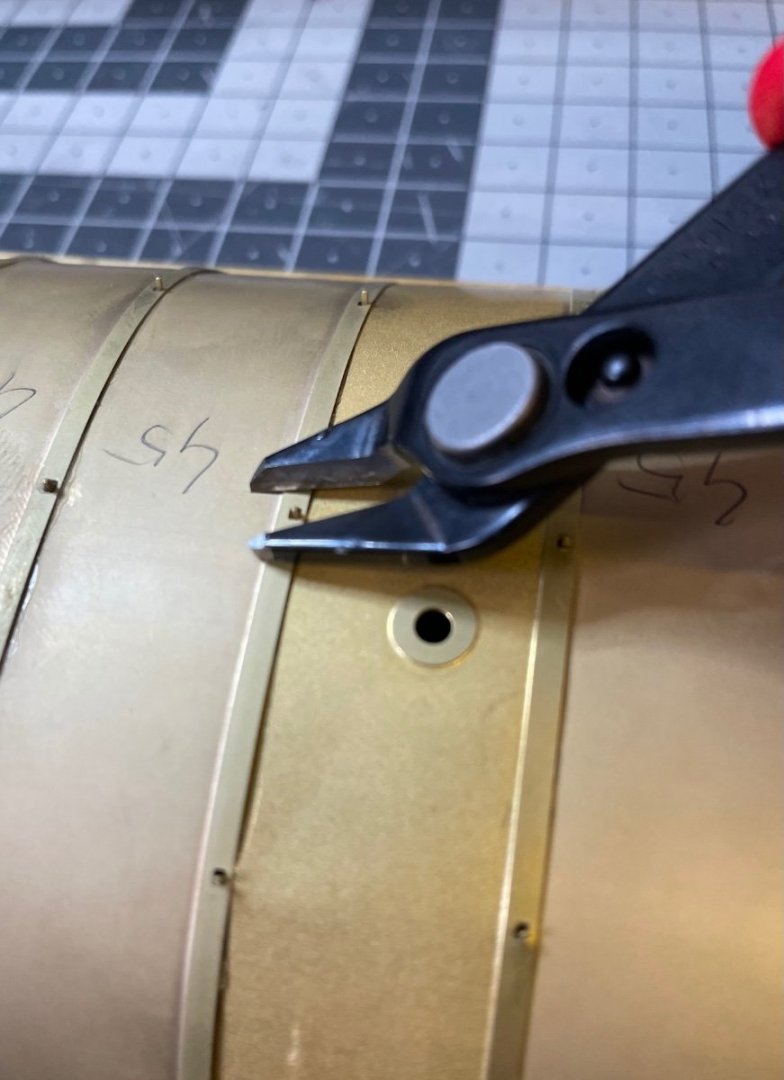
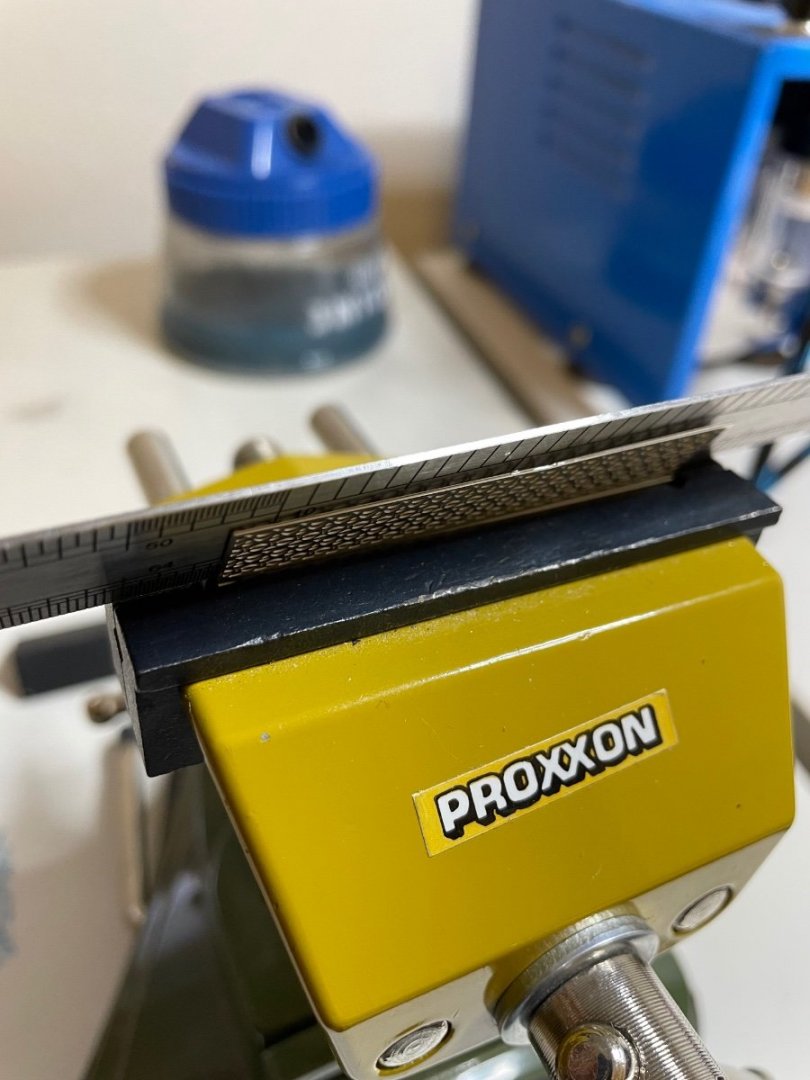
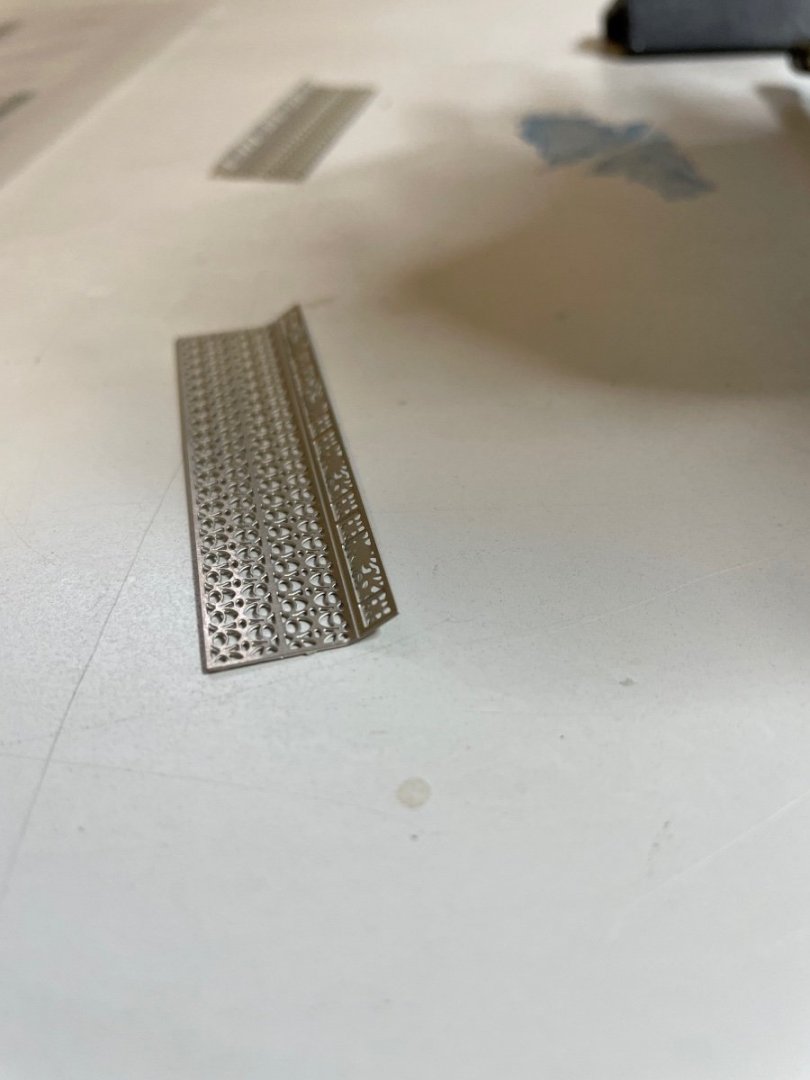
Figures 450-451: By the way for this task I use this etch bender I bought from Occre. That's all for now. Thanks for watching!

- 293 replies
-
- 14
-
-
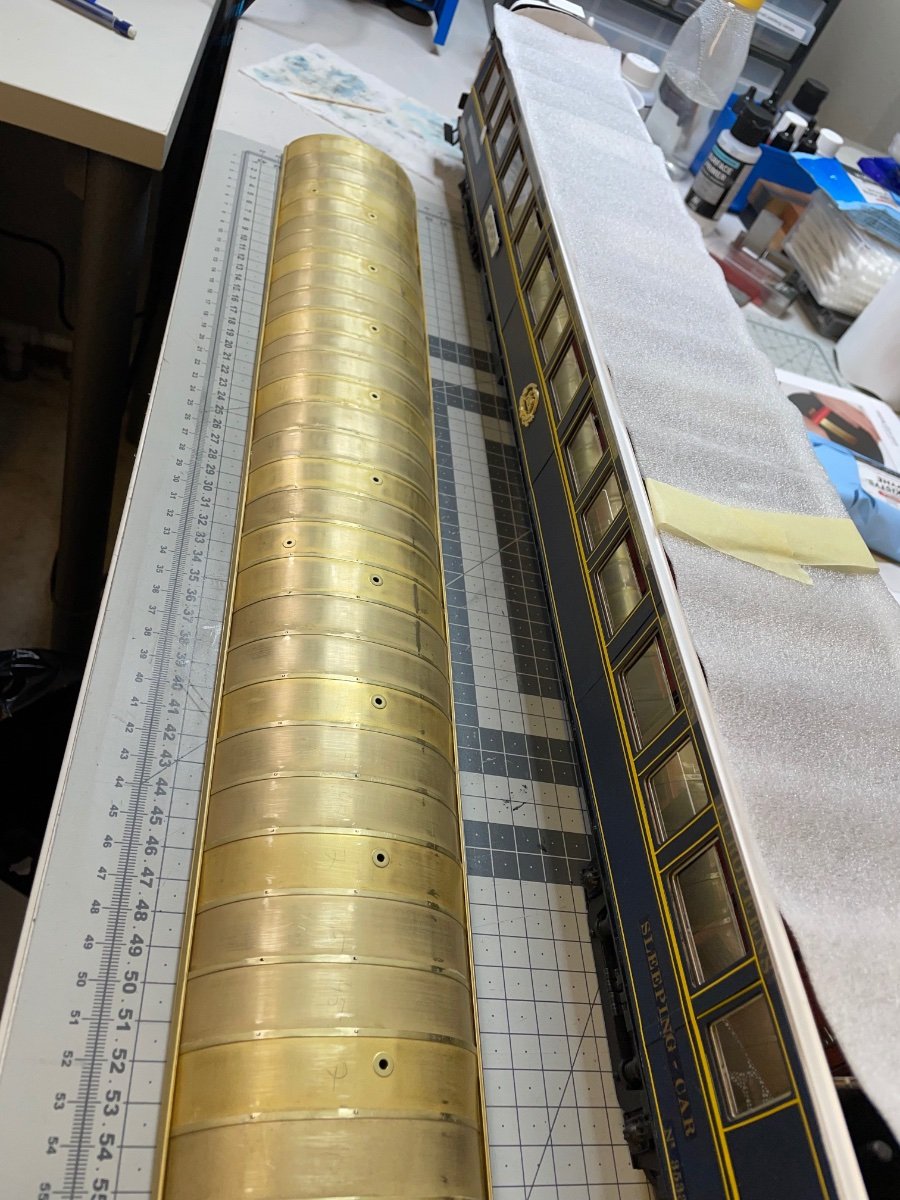
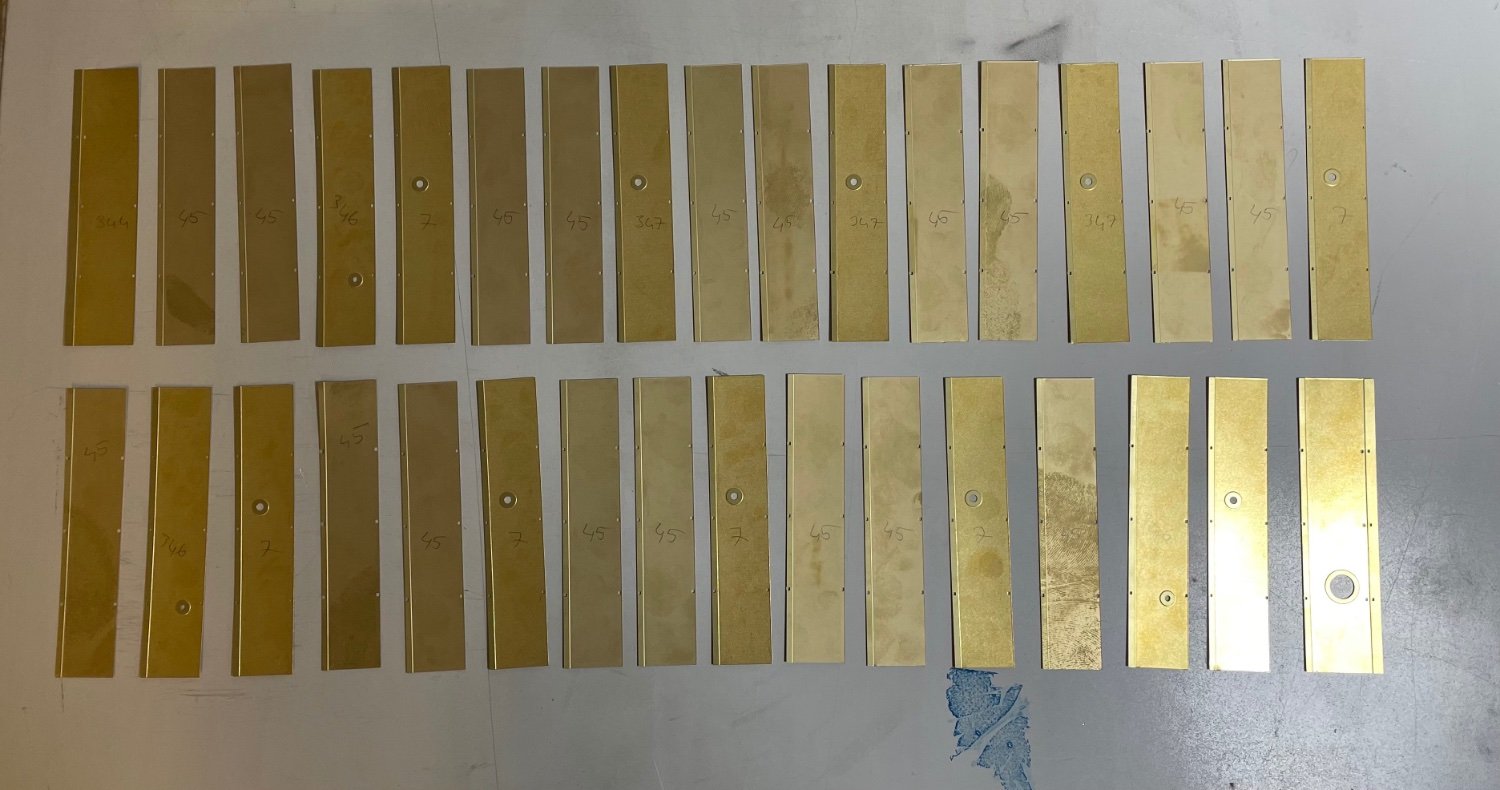
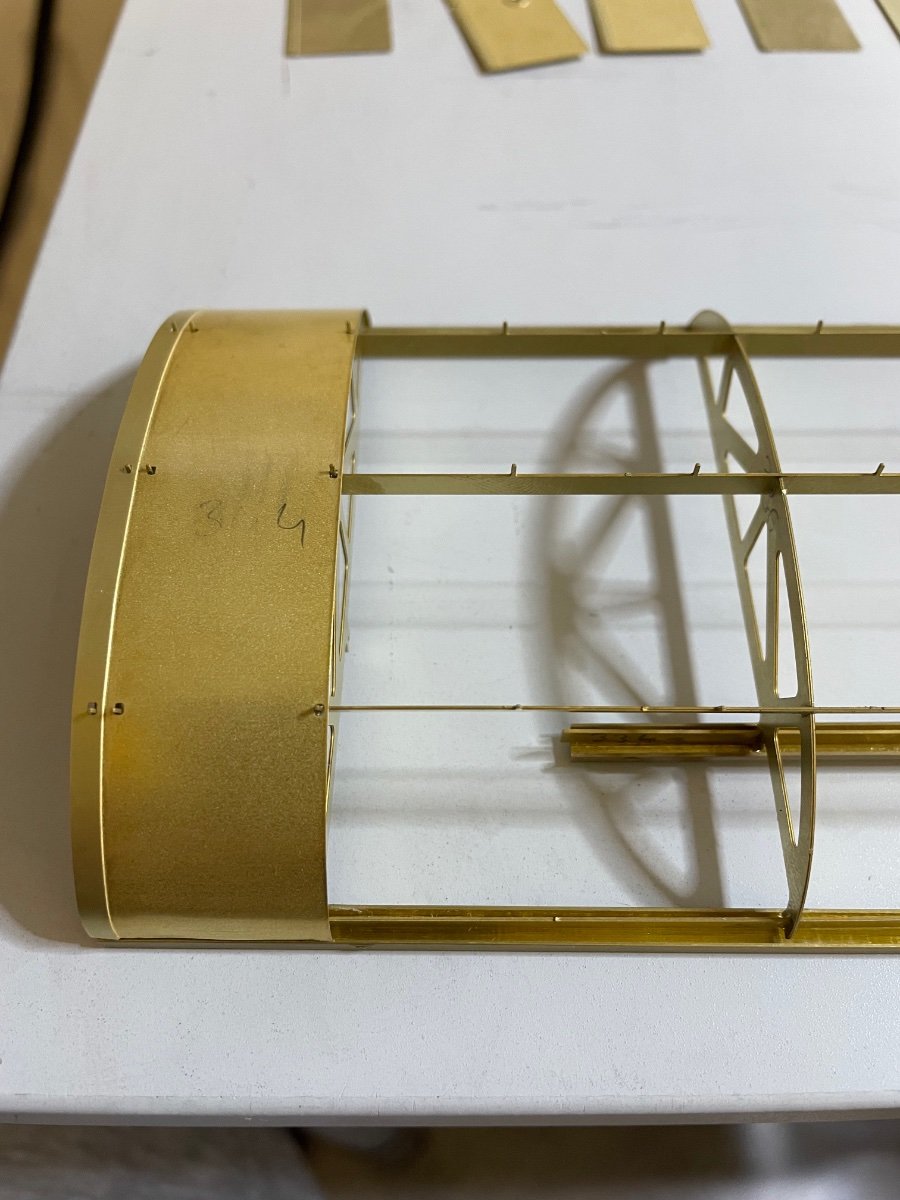
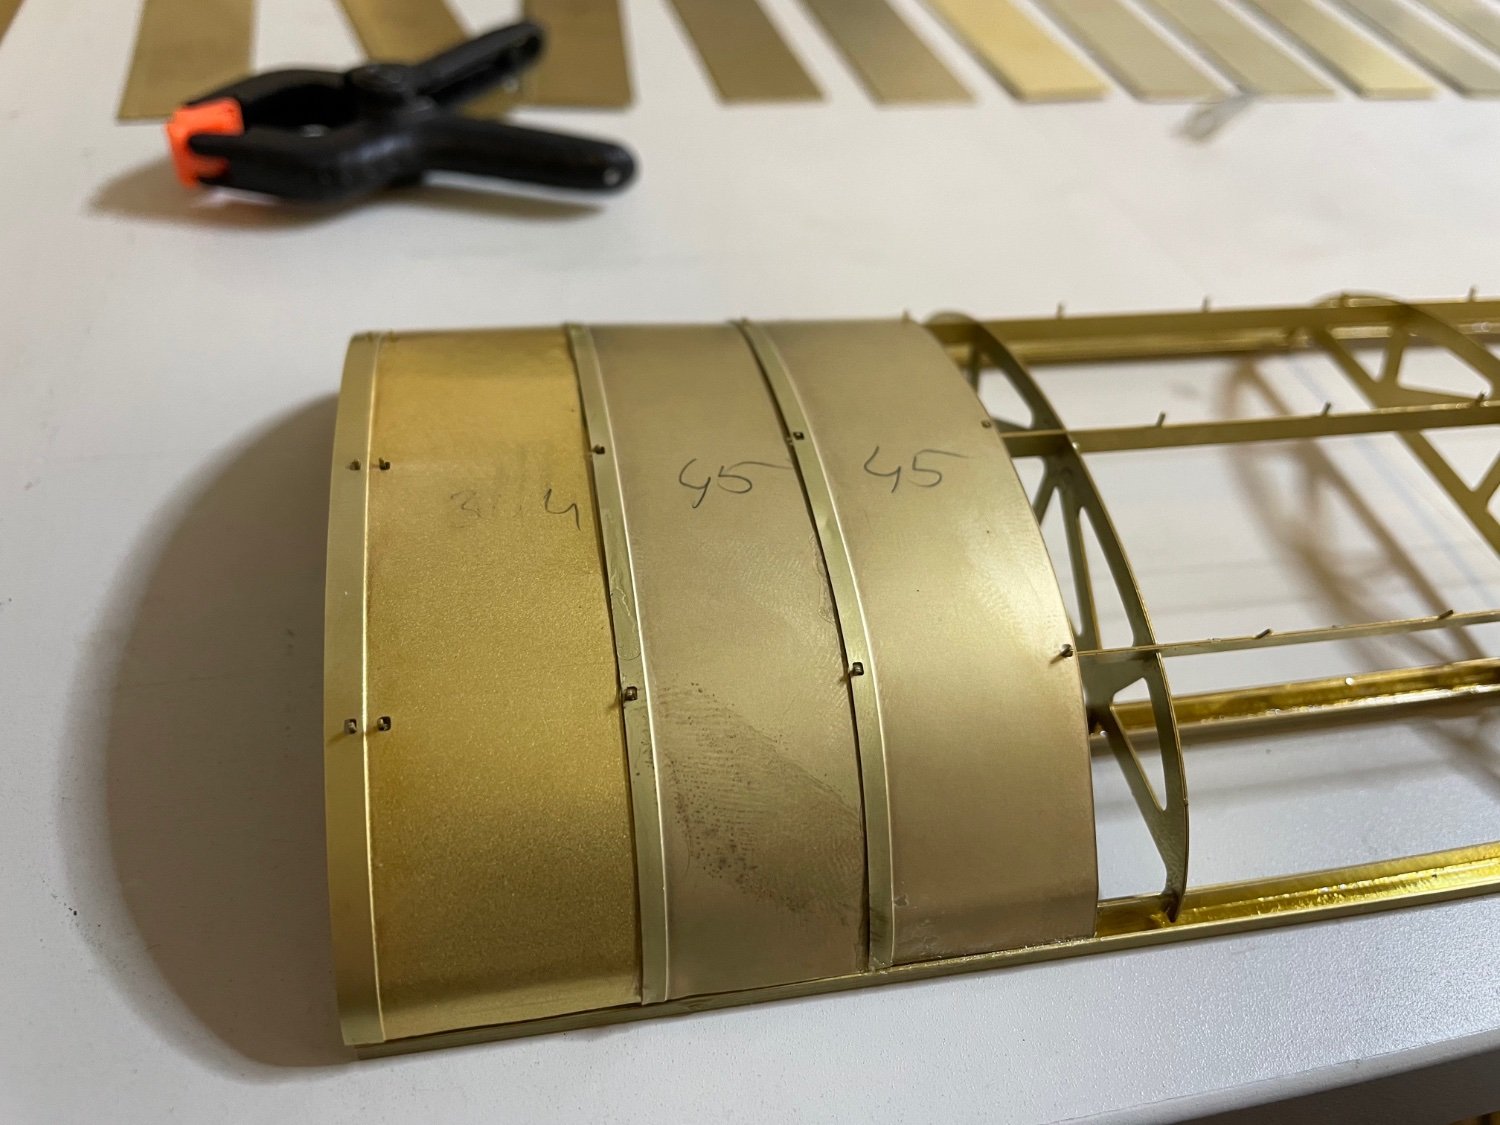
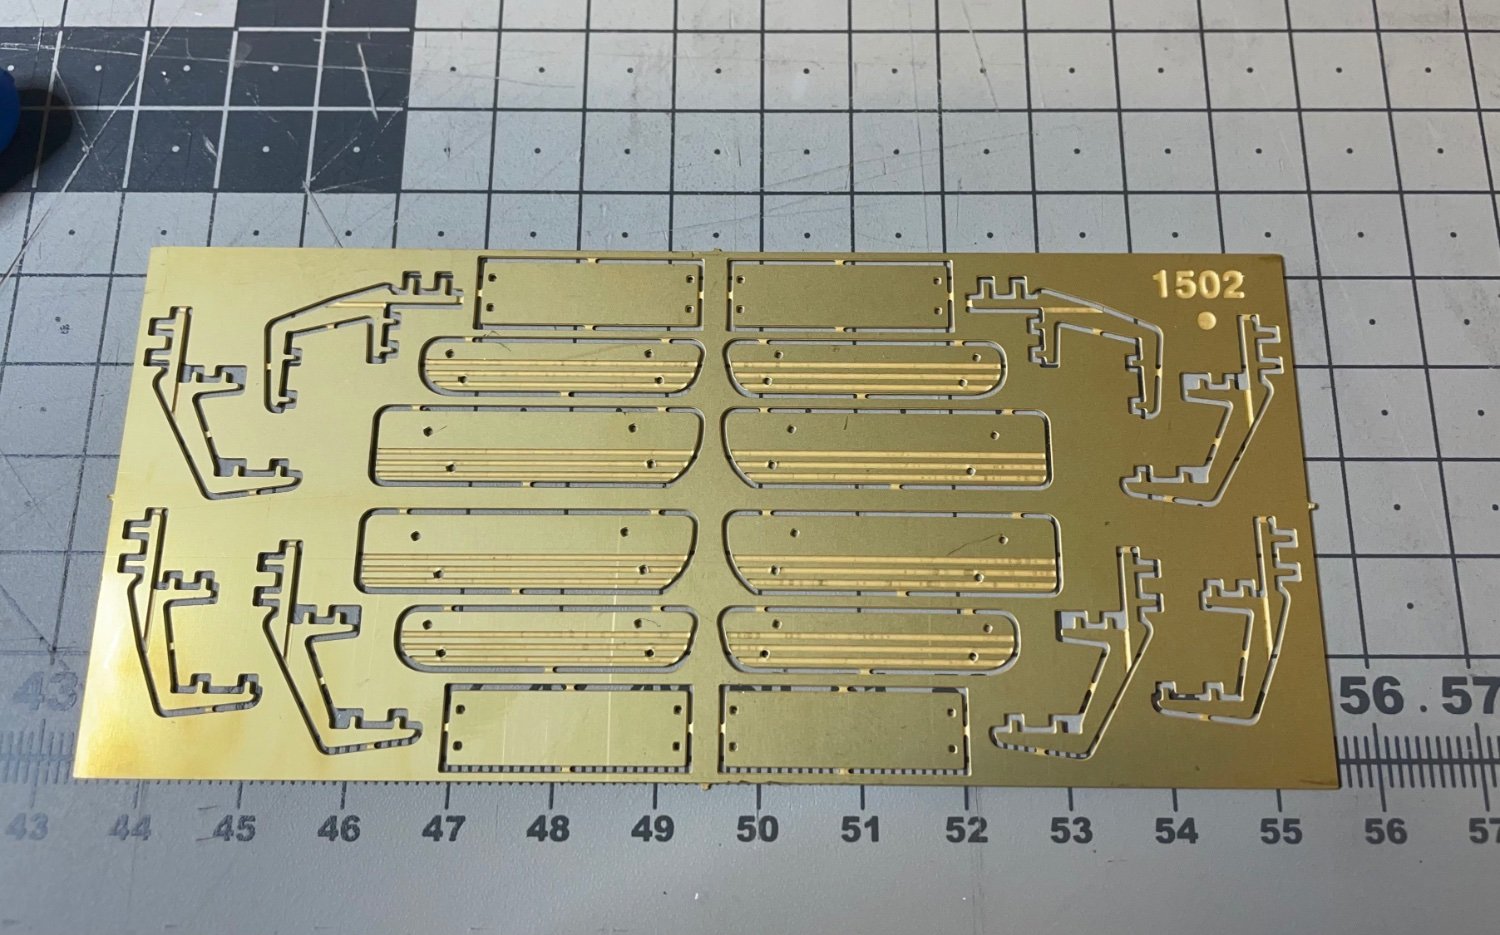
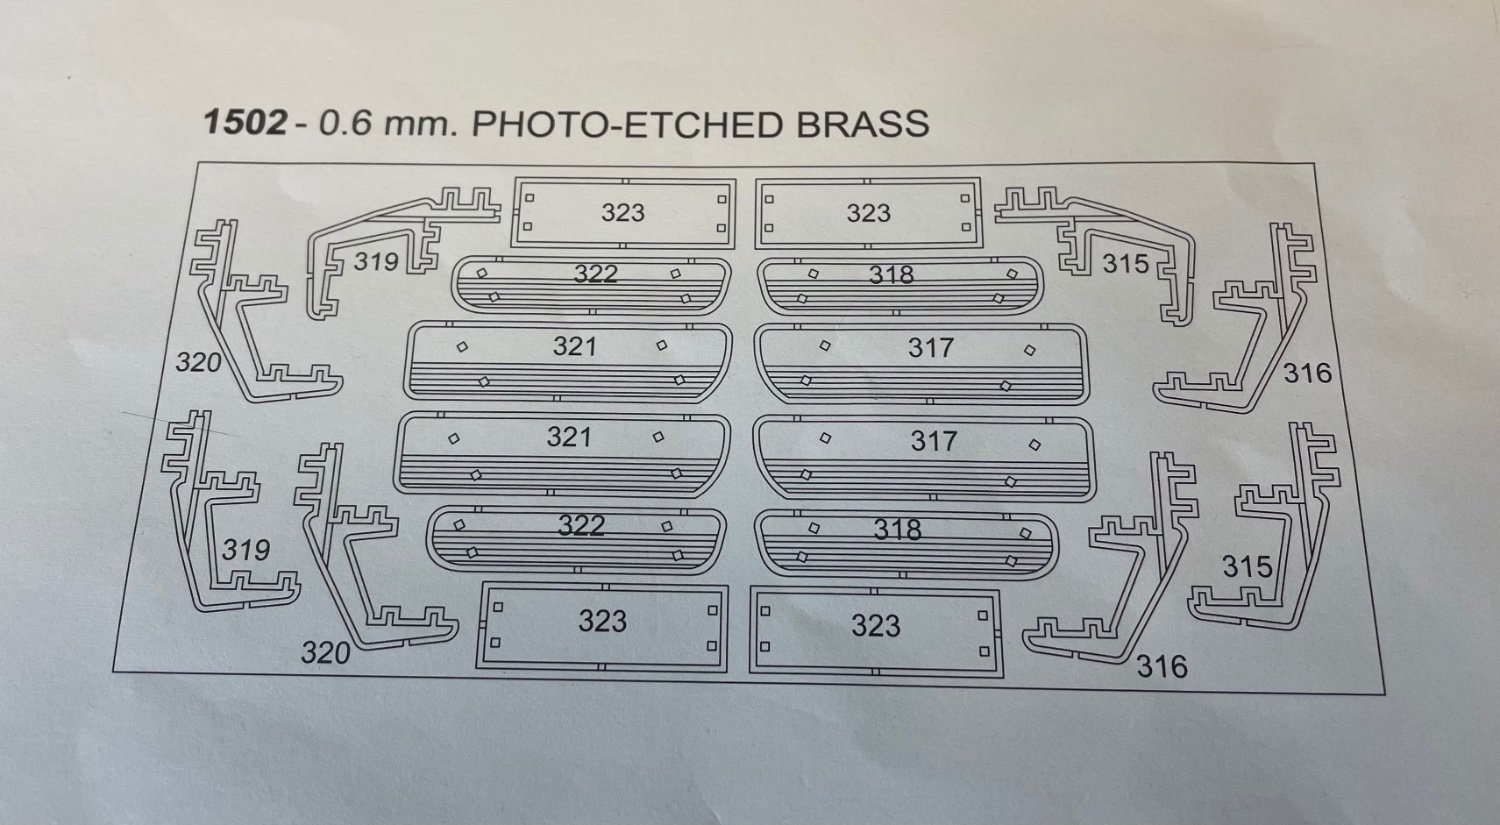
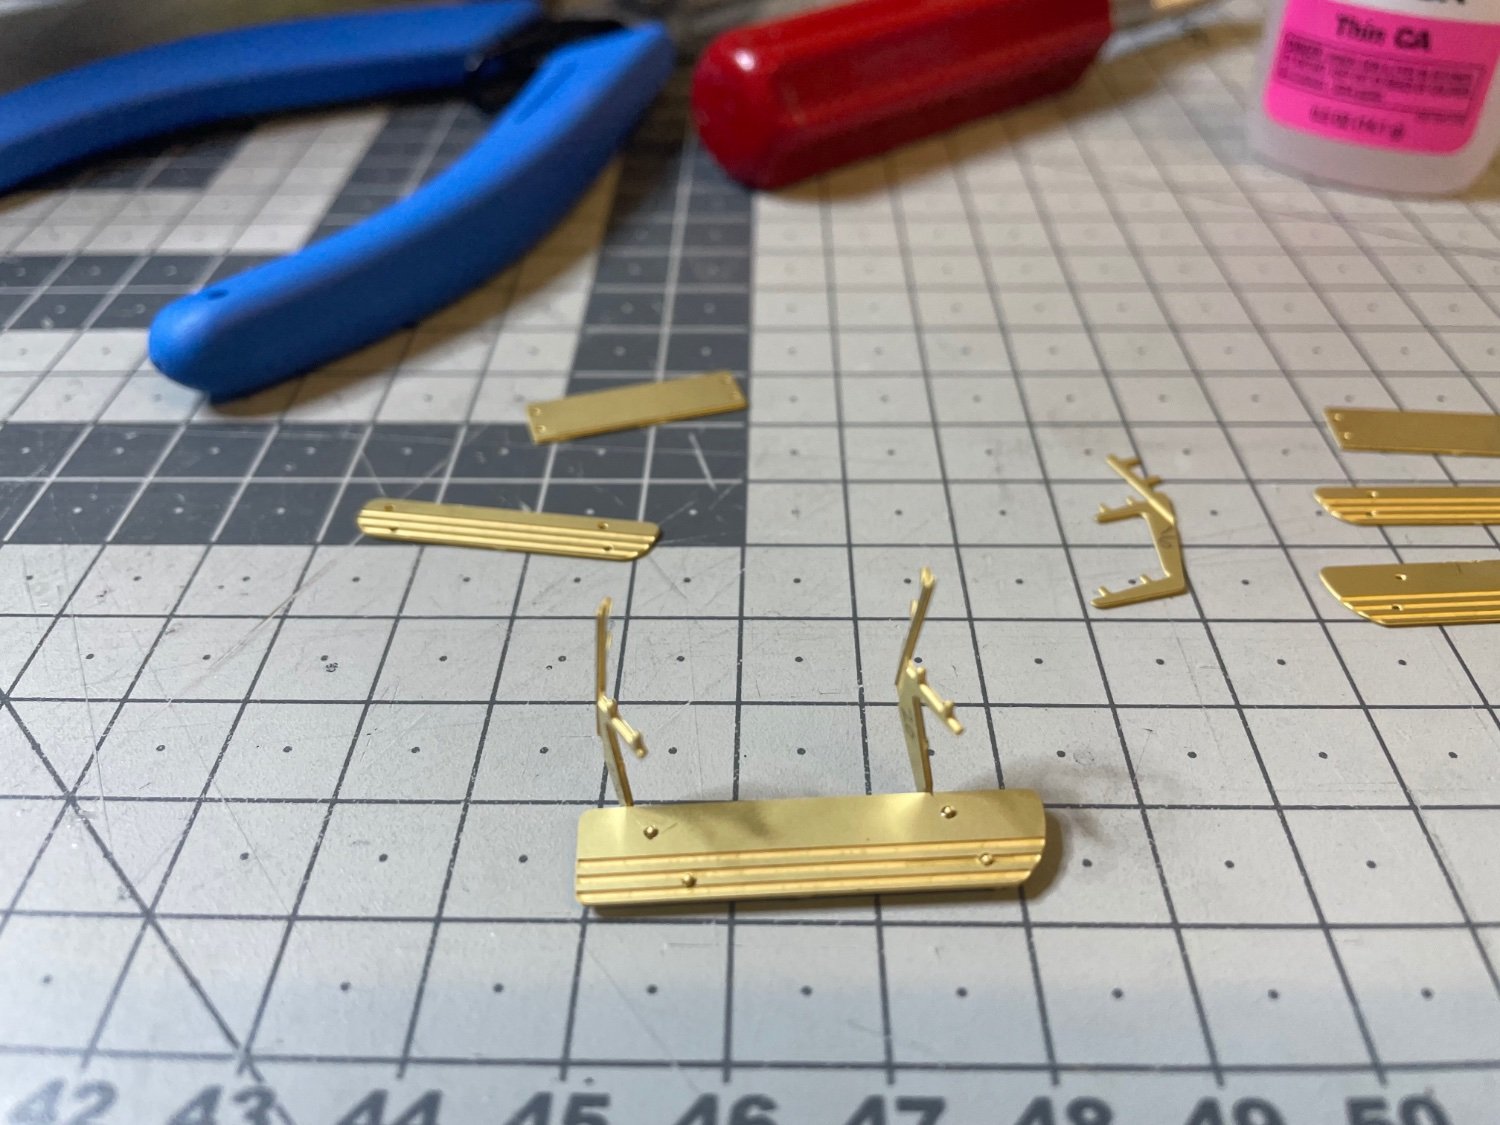
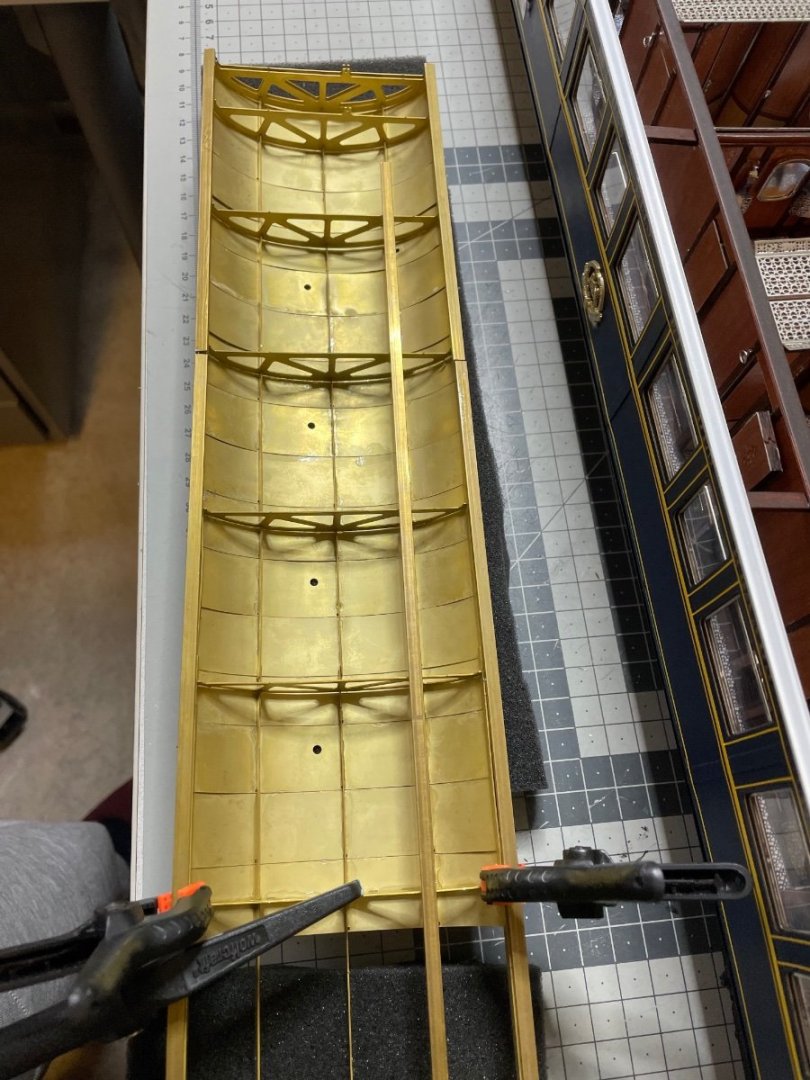
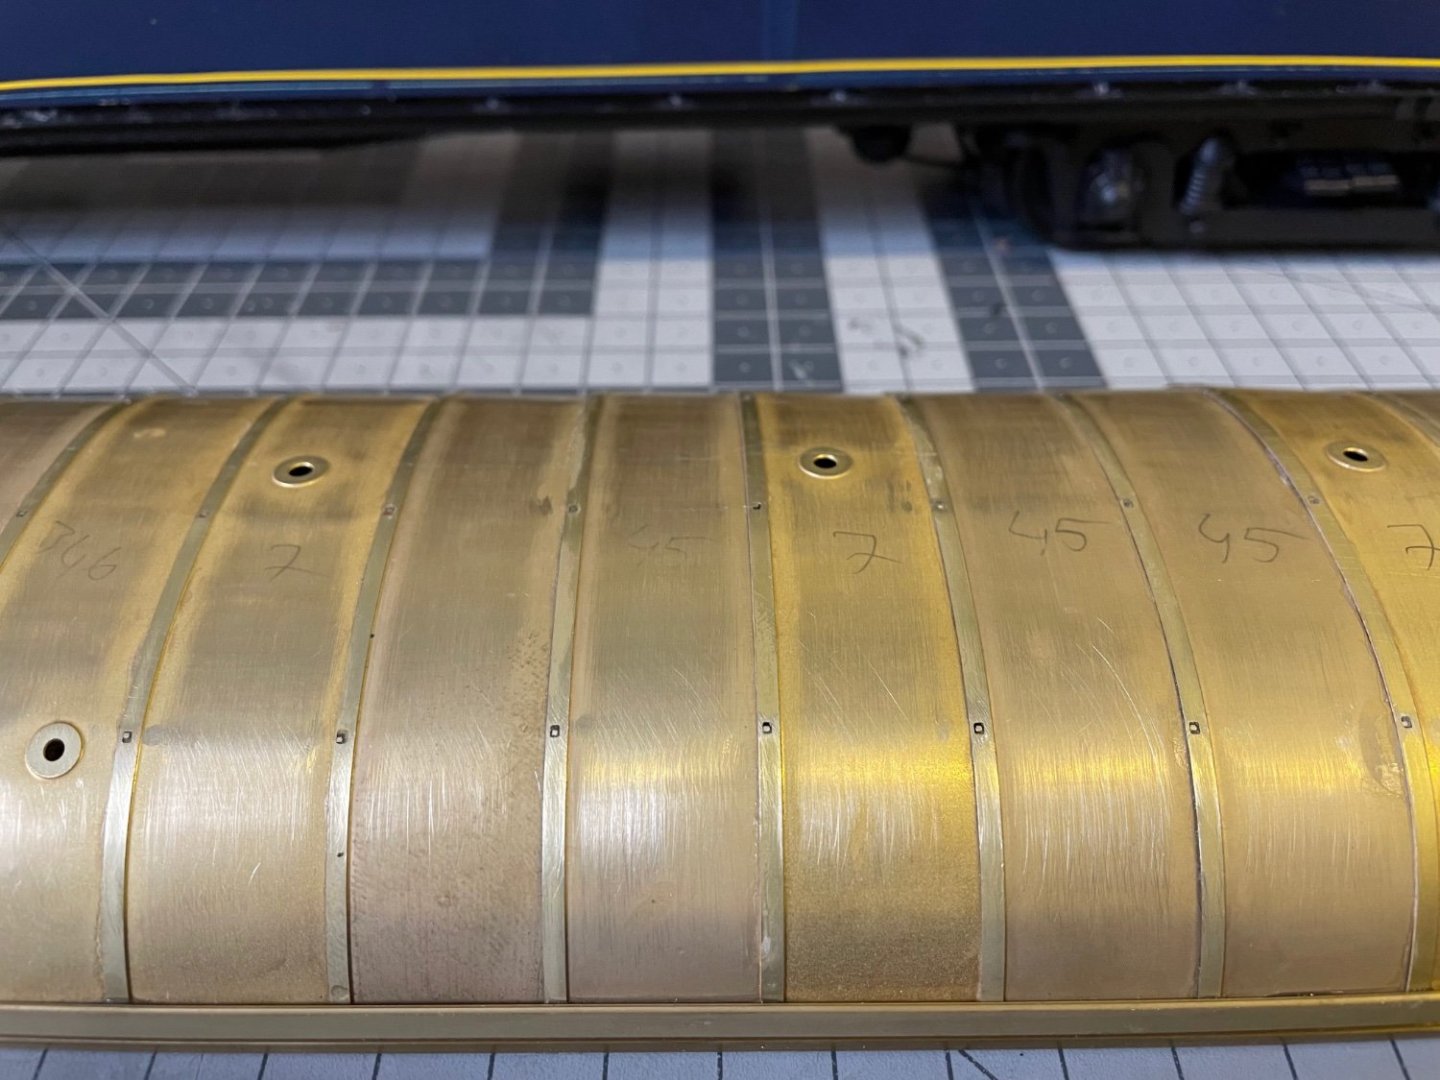
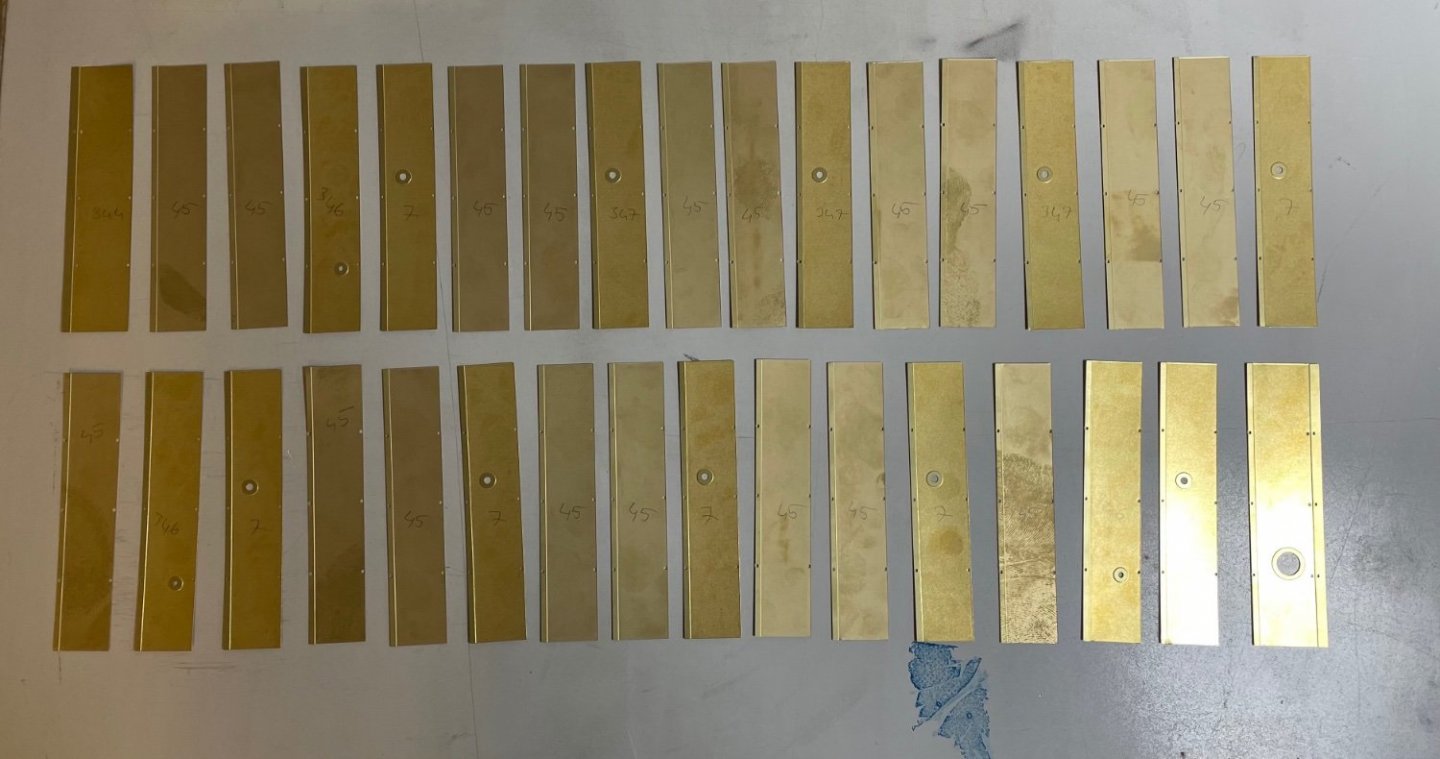
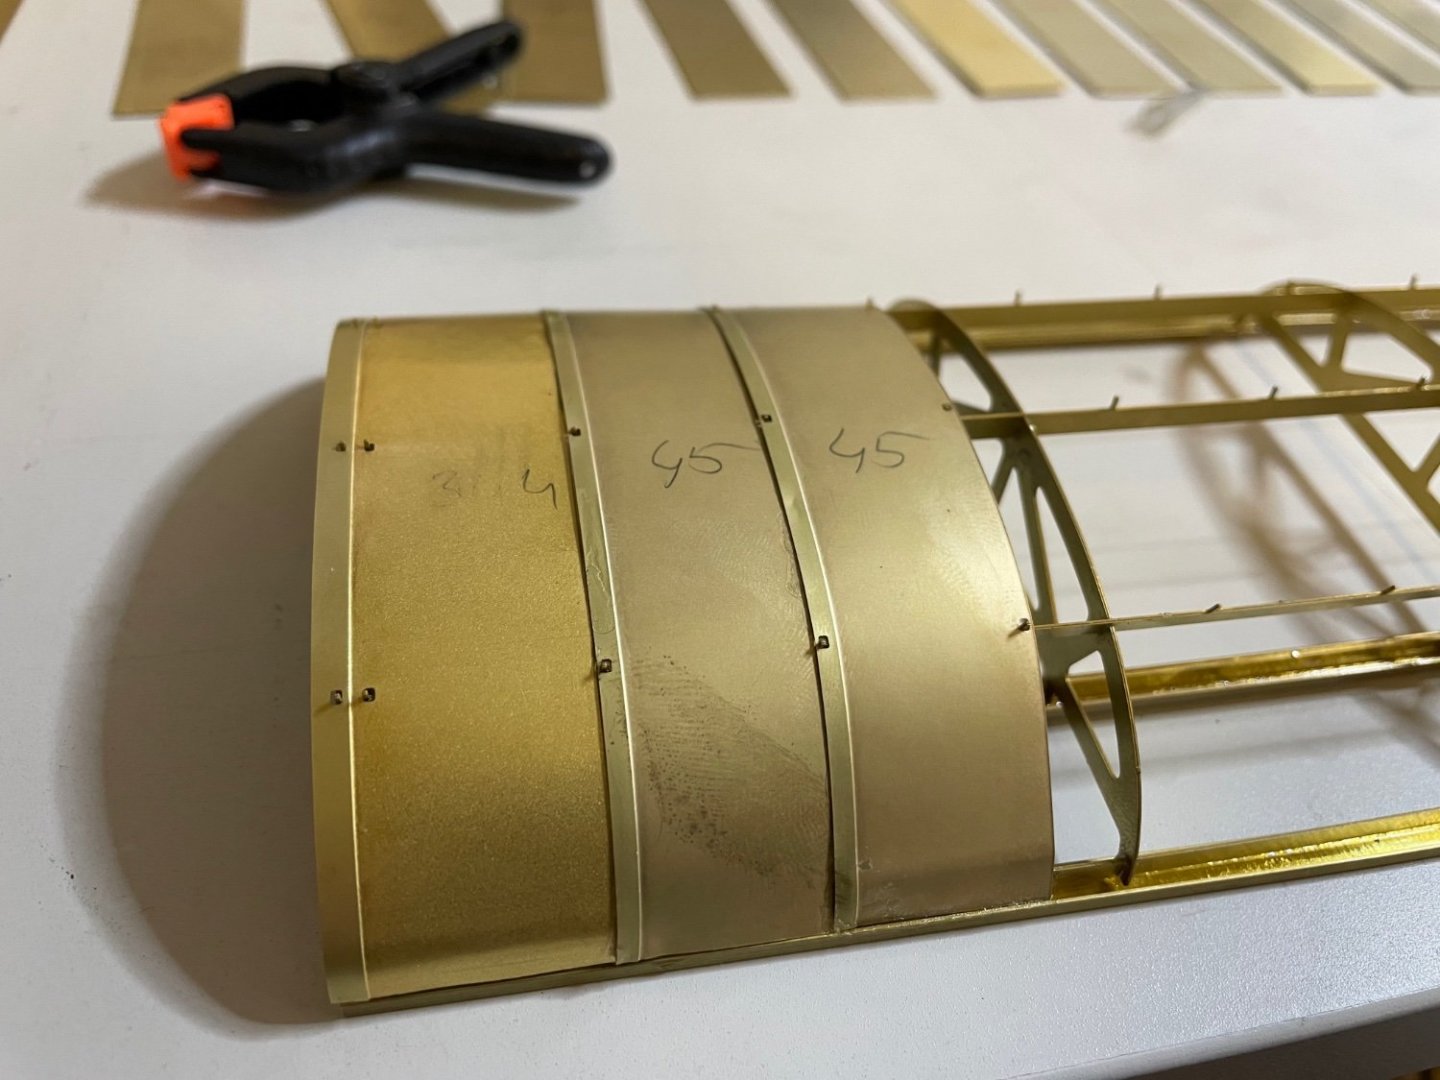
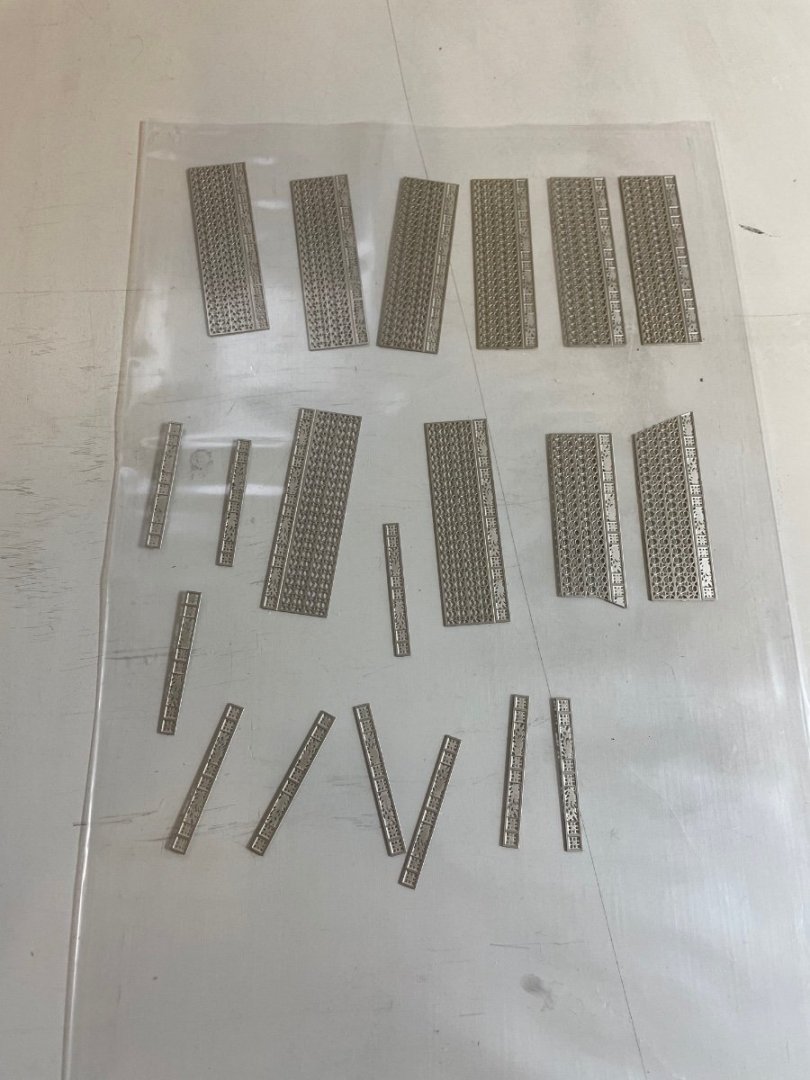
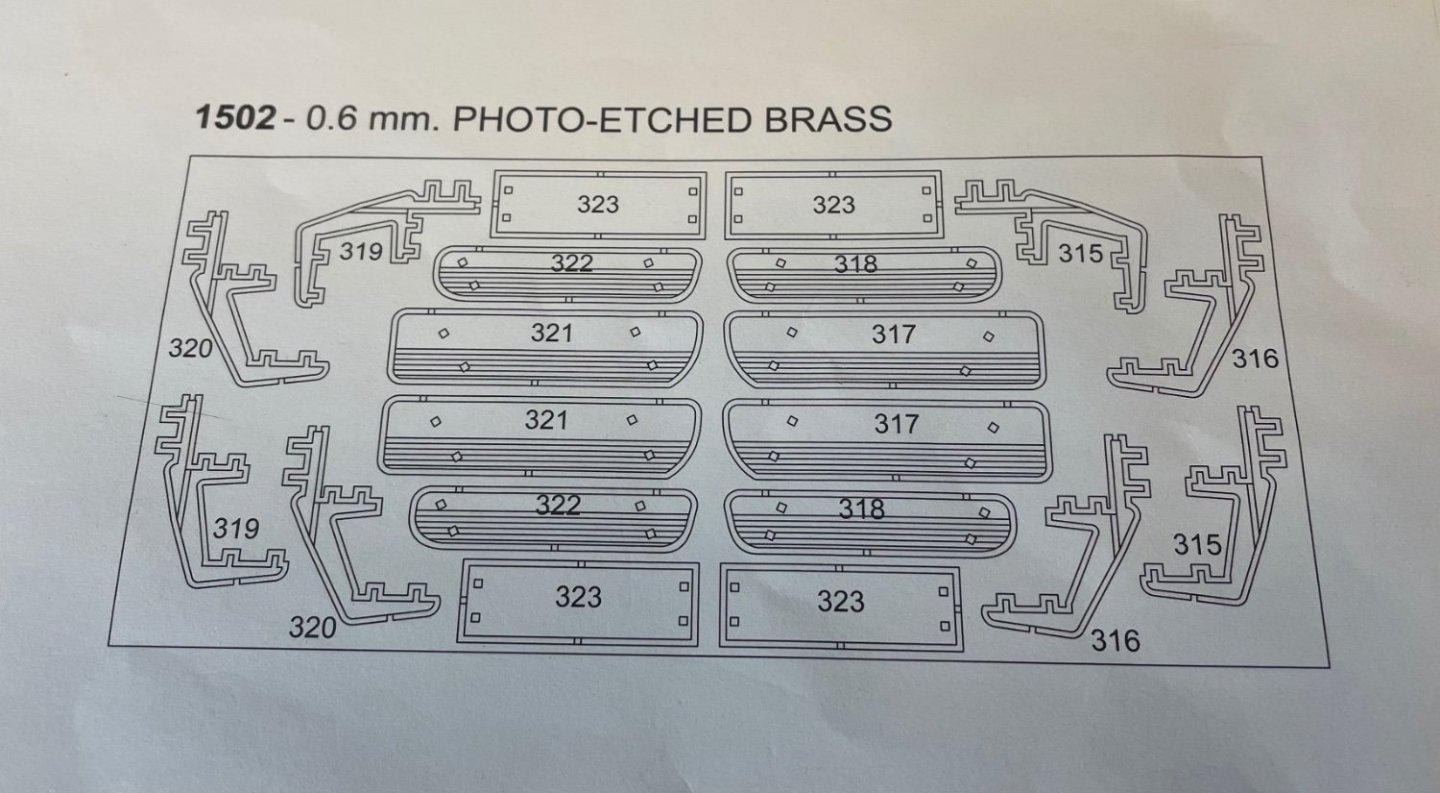
Figures 447-449: Roof sheets from etched brass. There are 33 of them. I was going to stop for today but then got tempted and started installing a few of them.

- 293 replies
-
- 12
-
-
BUILD DAY 43 / 0.5 hrs / (TOTAL 106.5 hrs) Figures 444-446: Dry fitting the roof structure on the rails, which I installed in the previous step. After ensuring the positions, I will glue the roof structure on its own rails. These rails then will sit on top of those on the wagon.


- 293 replies
-
- 13
-
-
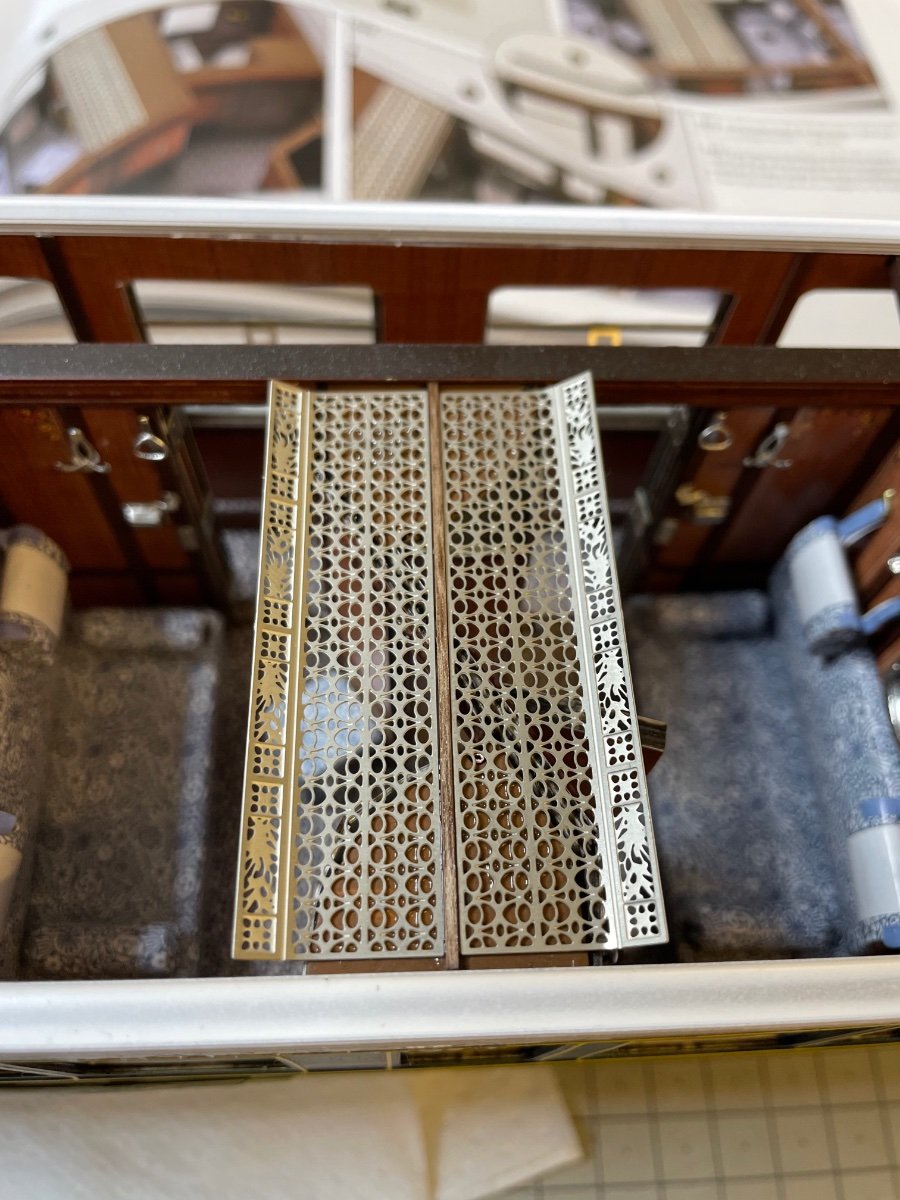
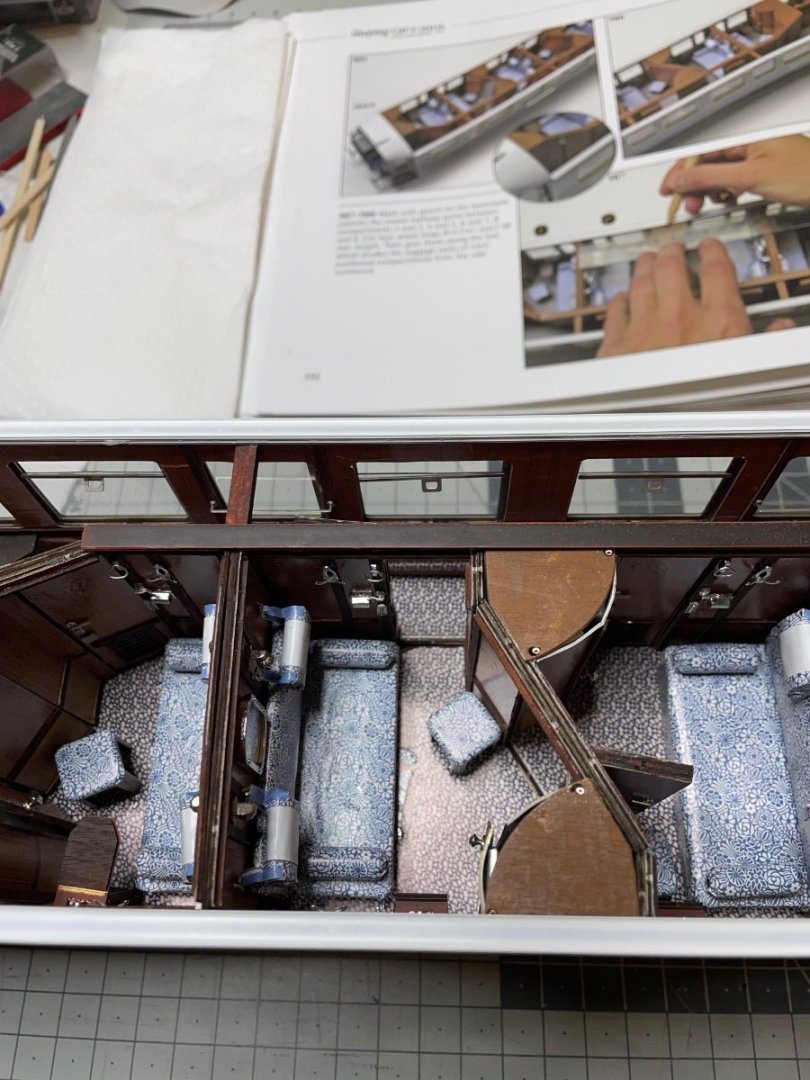
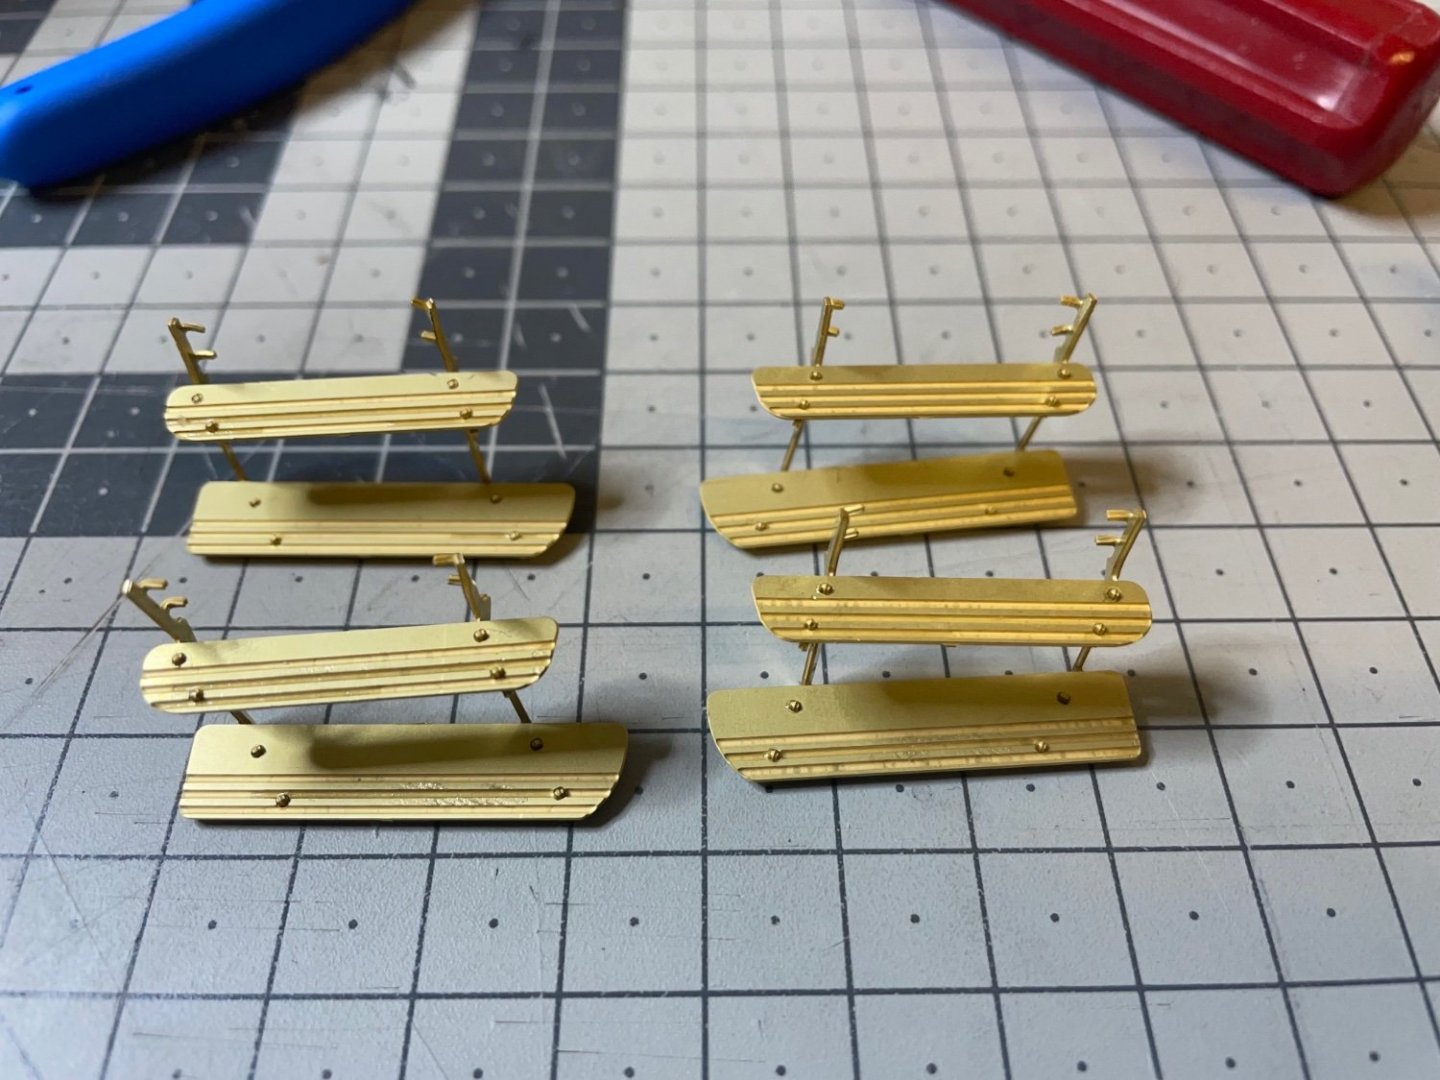
Figure 439: Overhead luggage/hat shelves. One for each compartment. The shelves for the 1st and 10th compartments are slightly different shape. The thin shelves are to be placed over the windows. Figures 440-441: The overhead shelves are bent around 30 degress on the compartment side, in order to prevent the stuff from sliding and falling. Figures 442-443: Some photos showing the shelves in place.

- 293 replies
-
- 12
-
-
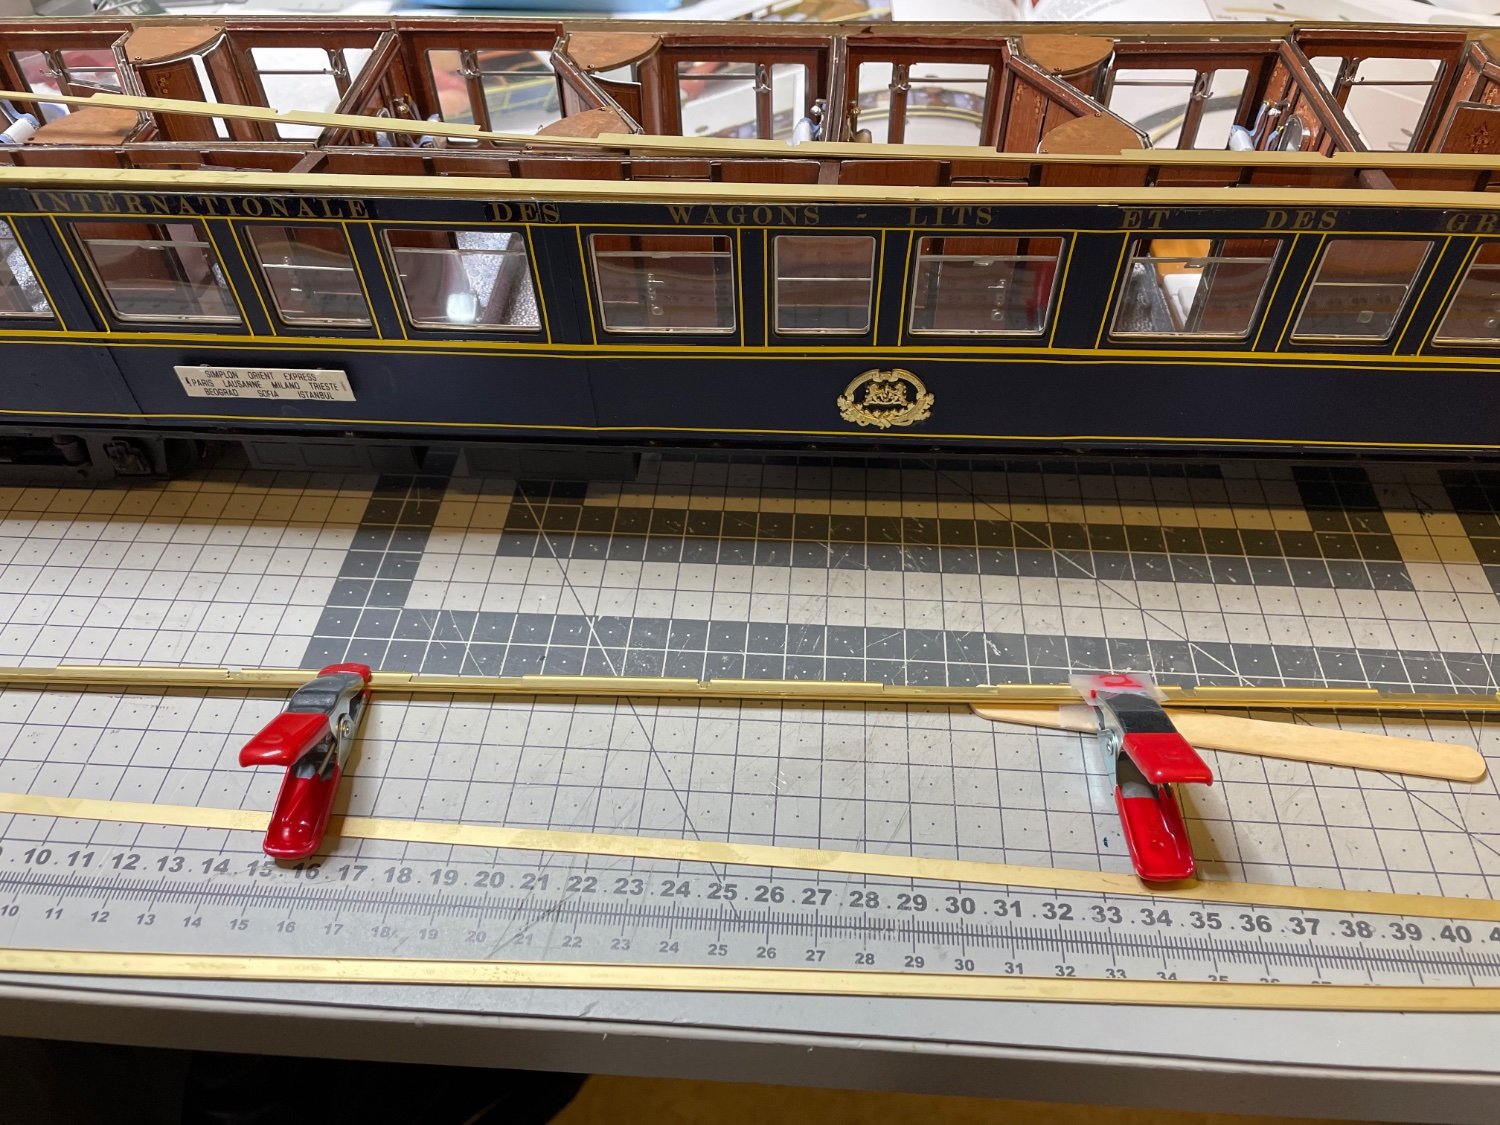
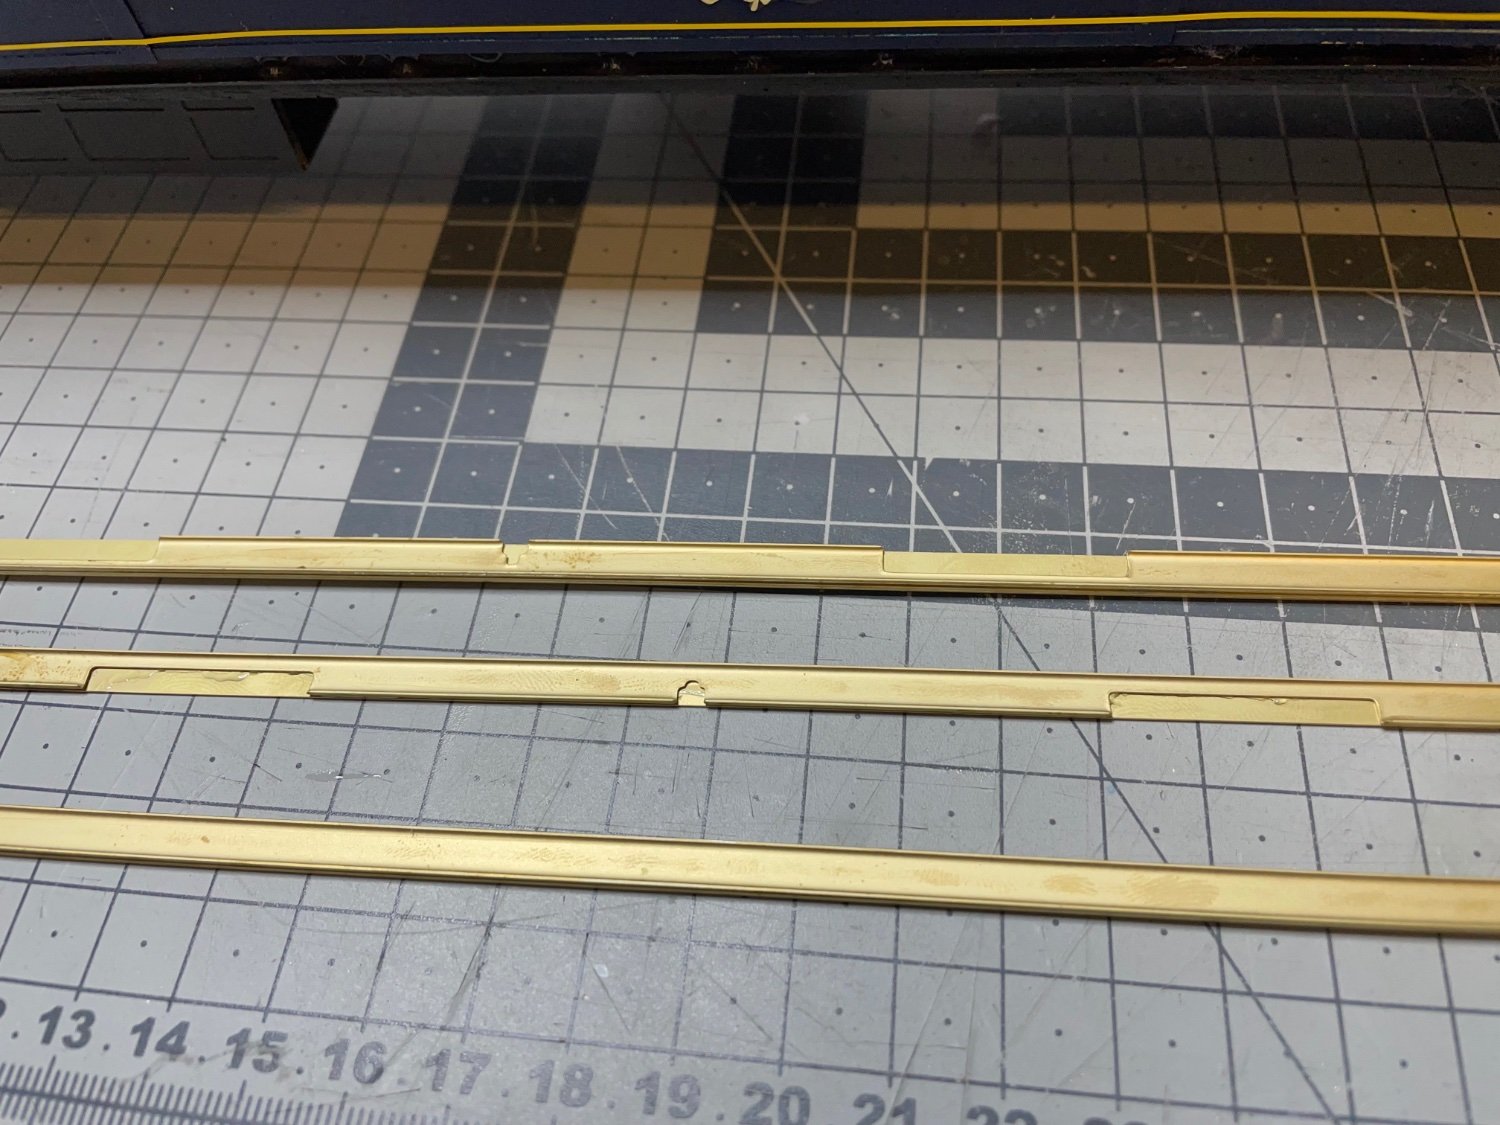
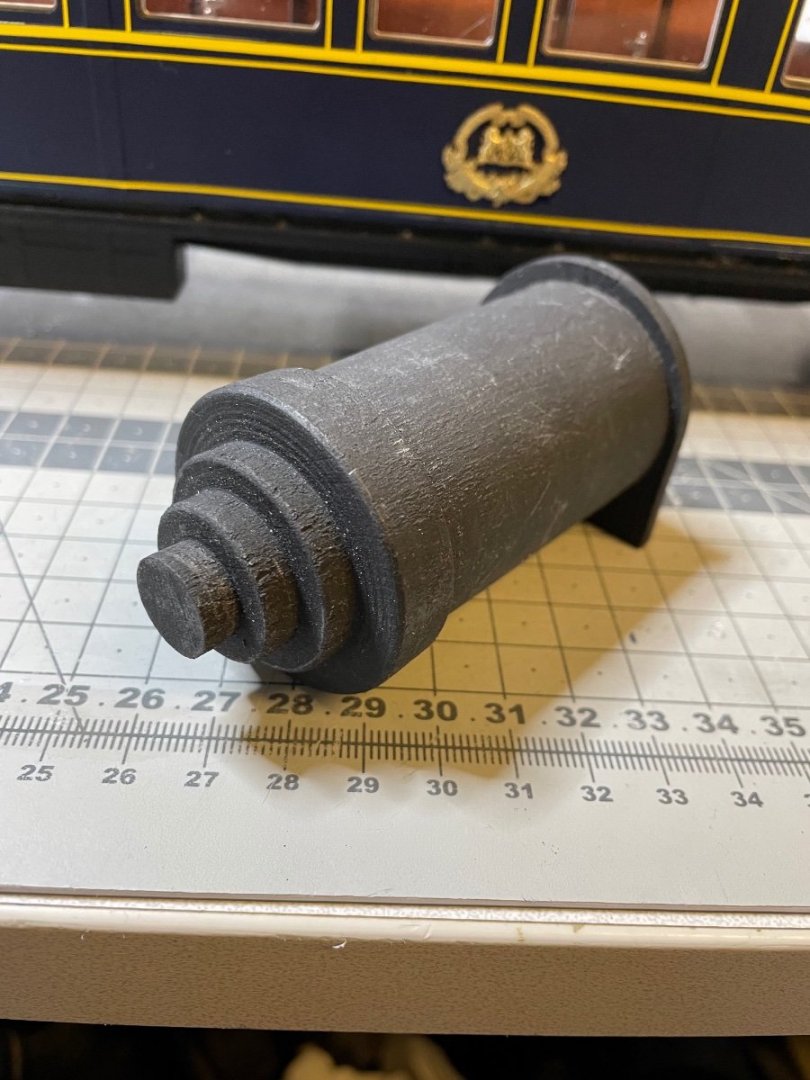
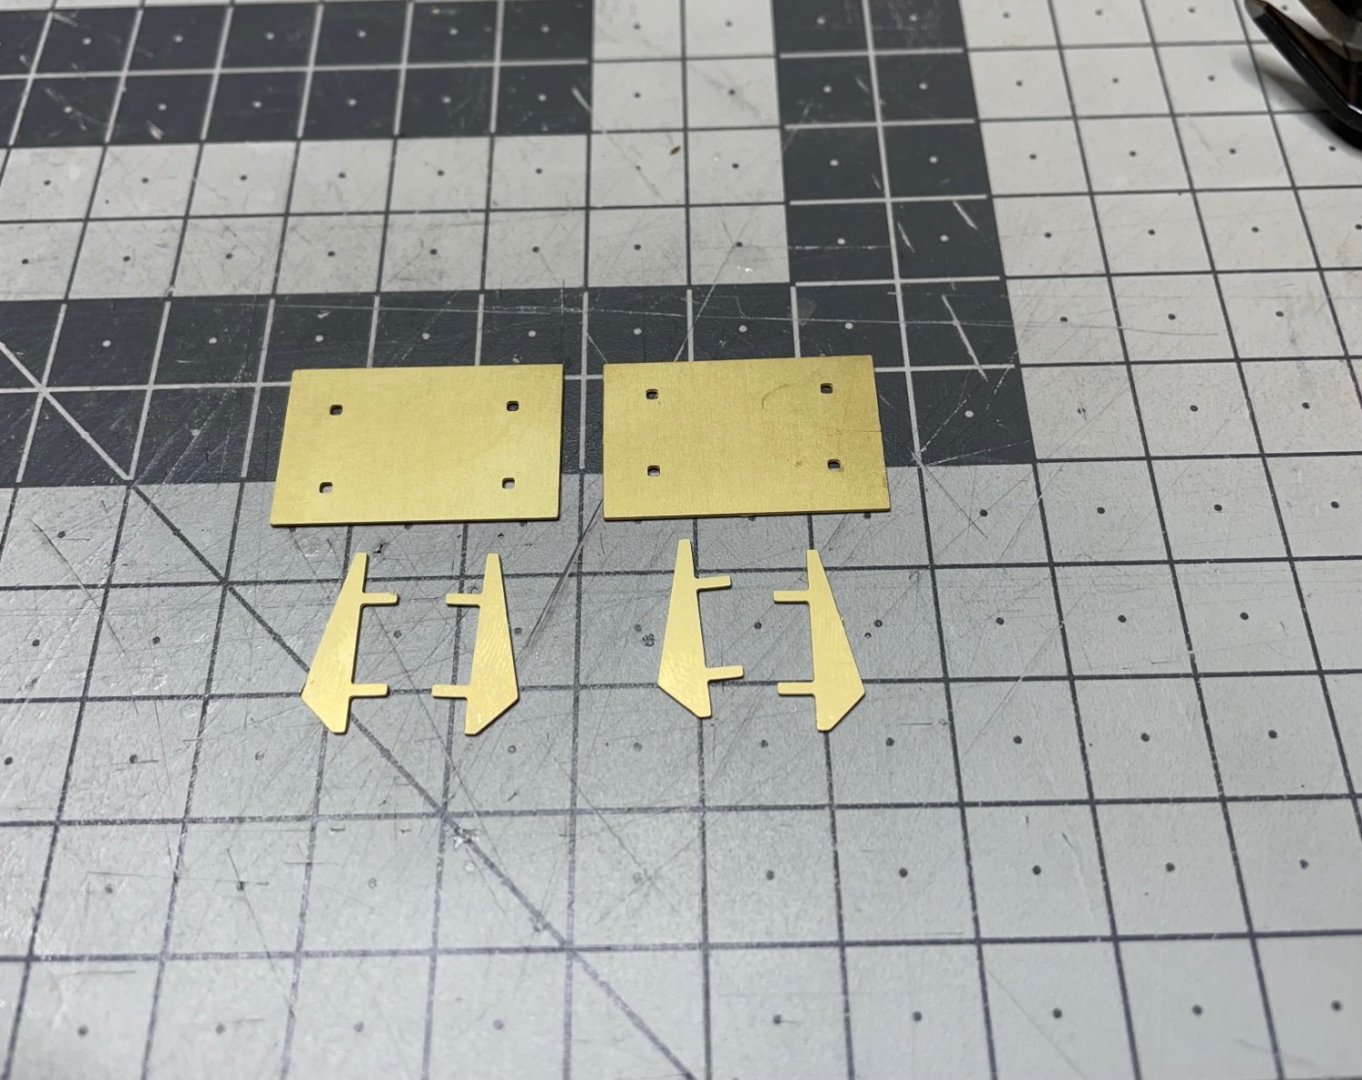
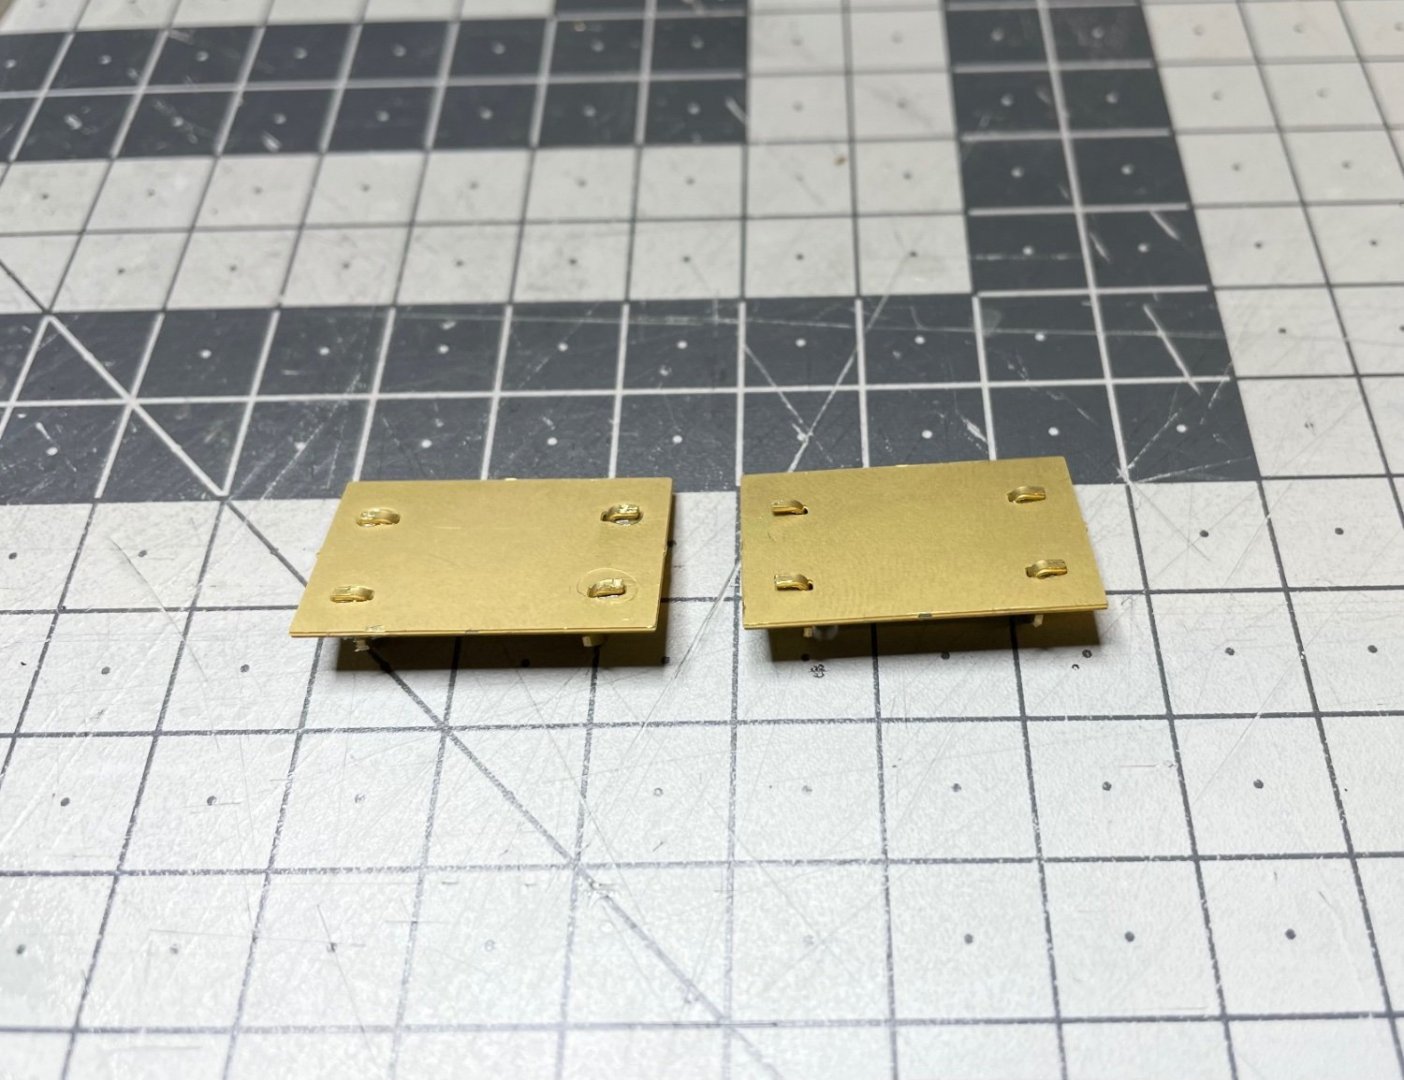
BUILD DAY 42 / 2 hrs / (TOTAL: 106 hrs) Figures 433-438: Rails for sitting the roof on. There are 3 rails: 2 on the sides and one going over the compartment doorline. The latter is to be painted in brown while the two on the sides will be white. The rails are composed of two pieces each. The lower part has grooves to fit the structure while the upper part is flat to accomodate the roof structure.


- 293 replies
-
- 11
-
-
-
Proper ventilation for sure when dealing with all types of chemicals and also keep our hands at 10 and 2 on the steering wheel while driving.🙃 I can comment more when I have received it and read the warnings on the back label 😉.
-
I found this one and ordered it.
-
I can check Amazon Germany
-
Good point! 👍. Would it work if I brushed matt varnish?
-
If they drop some day, then I think I will just glue them back. When it comes to soldering, although I am familiar with soldering electronic parts, I still don't dare to do it in this model. For the purpose of the handles, it would also create other challenges such as isolating the handle while painting the bar in blue, since any soldering should be done before paint.
-
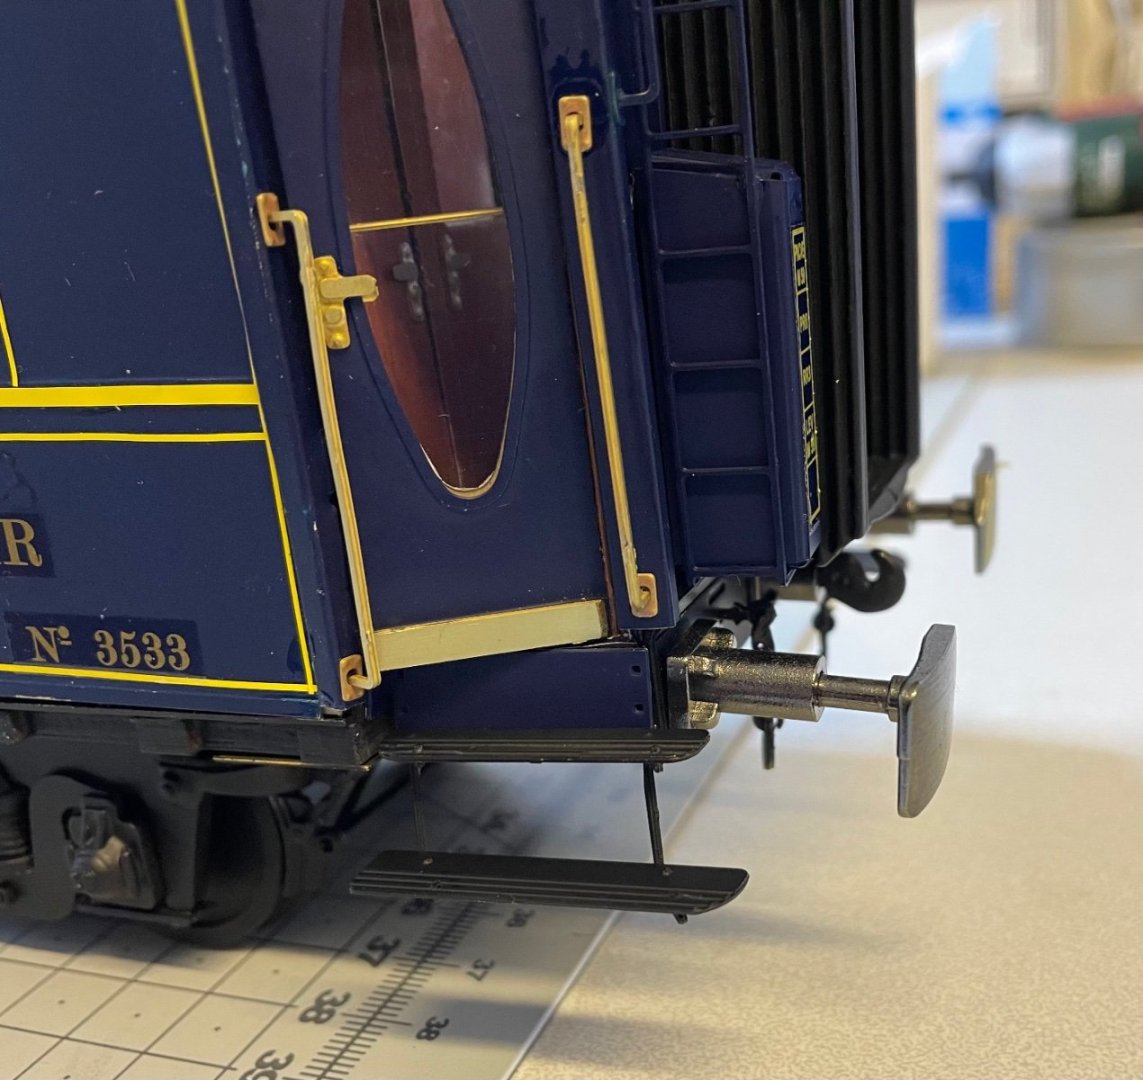
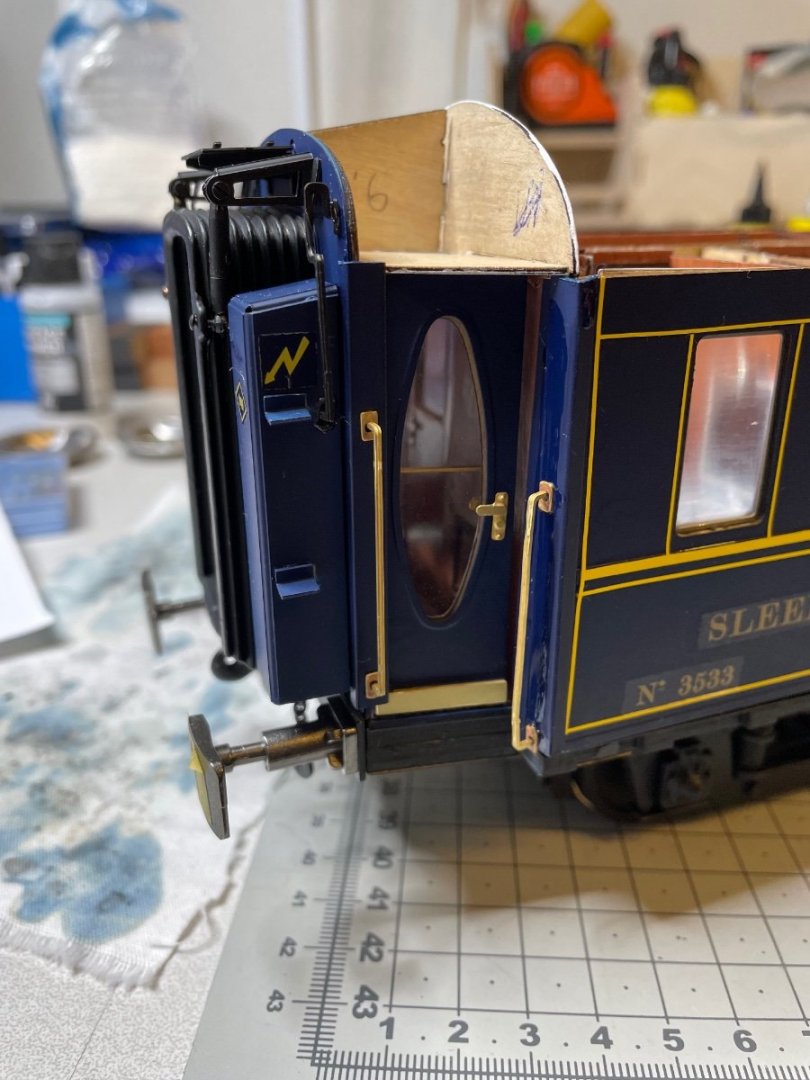
Figures 429-432: Several photos showing today's output. Handles, doorsteps, side roofs. That's all for now. Thanks for watching!


- 293 replies
-
- 14
-
-
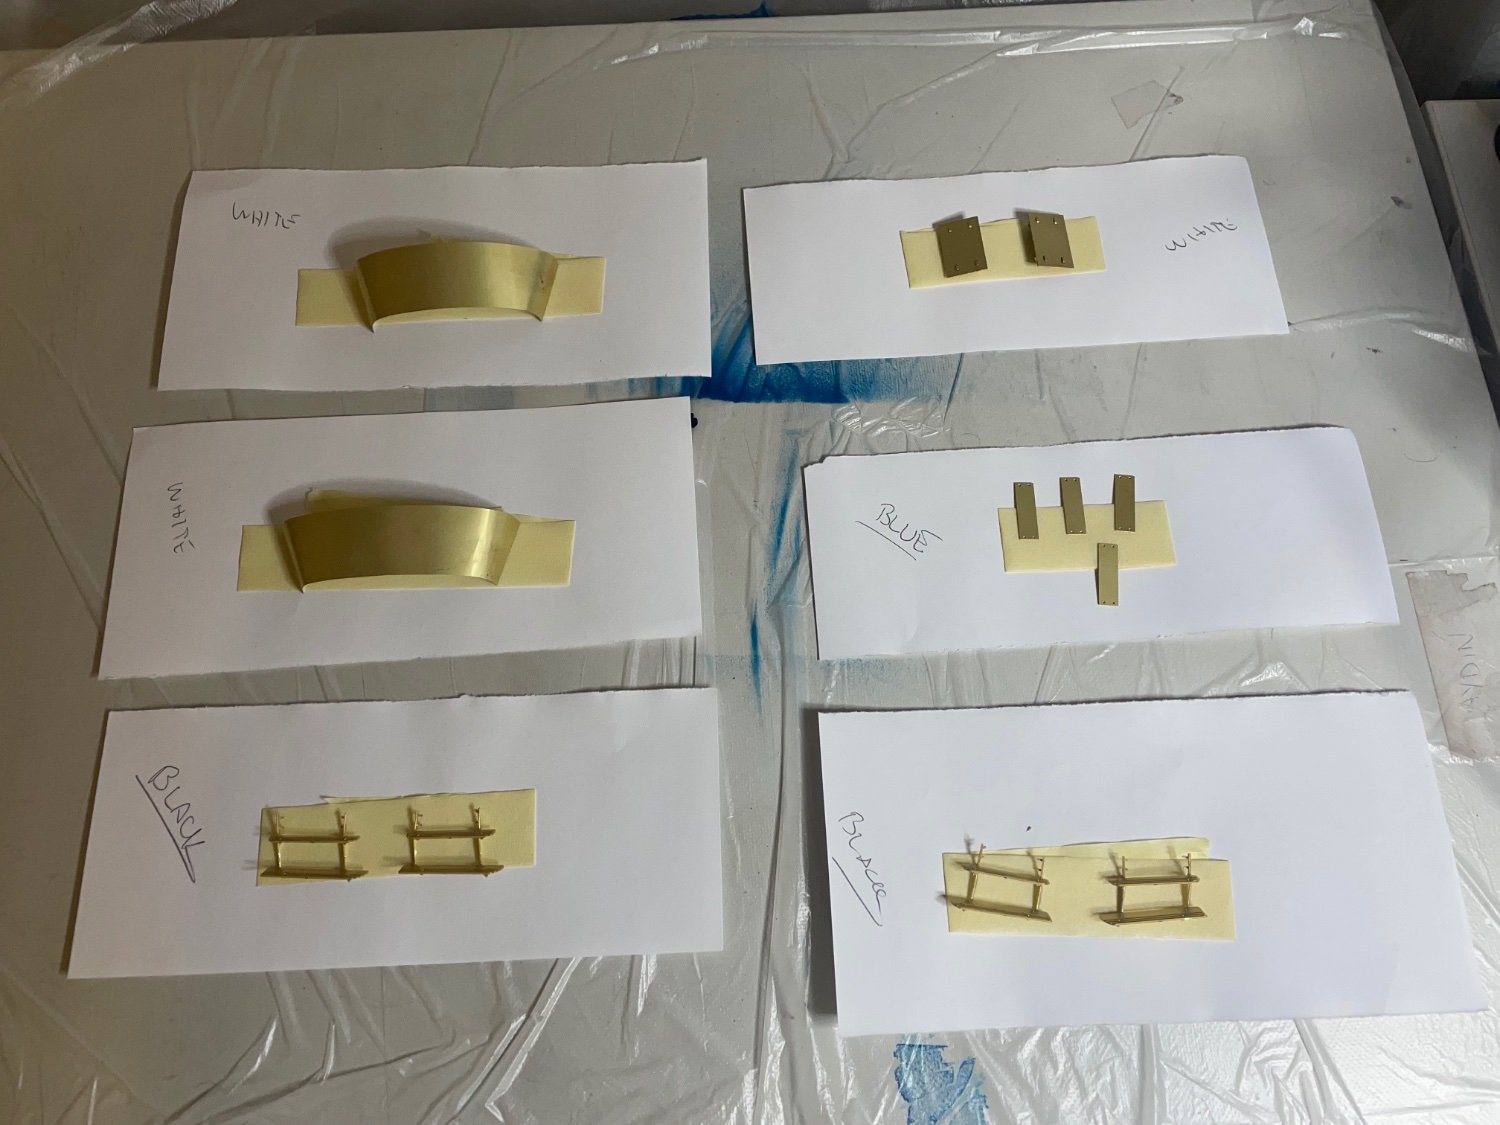
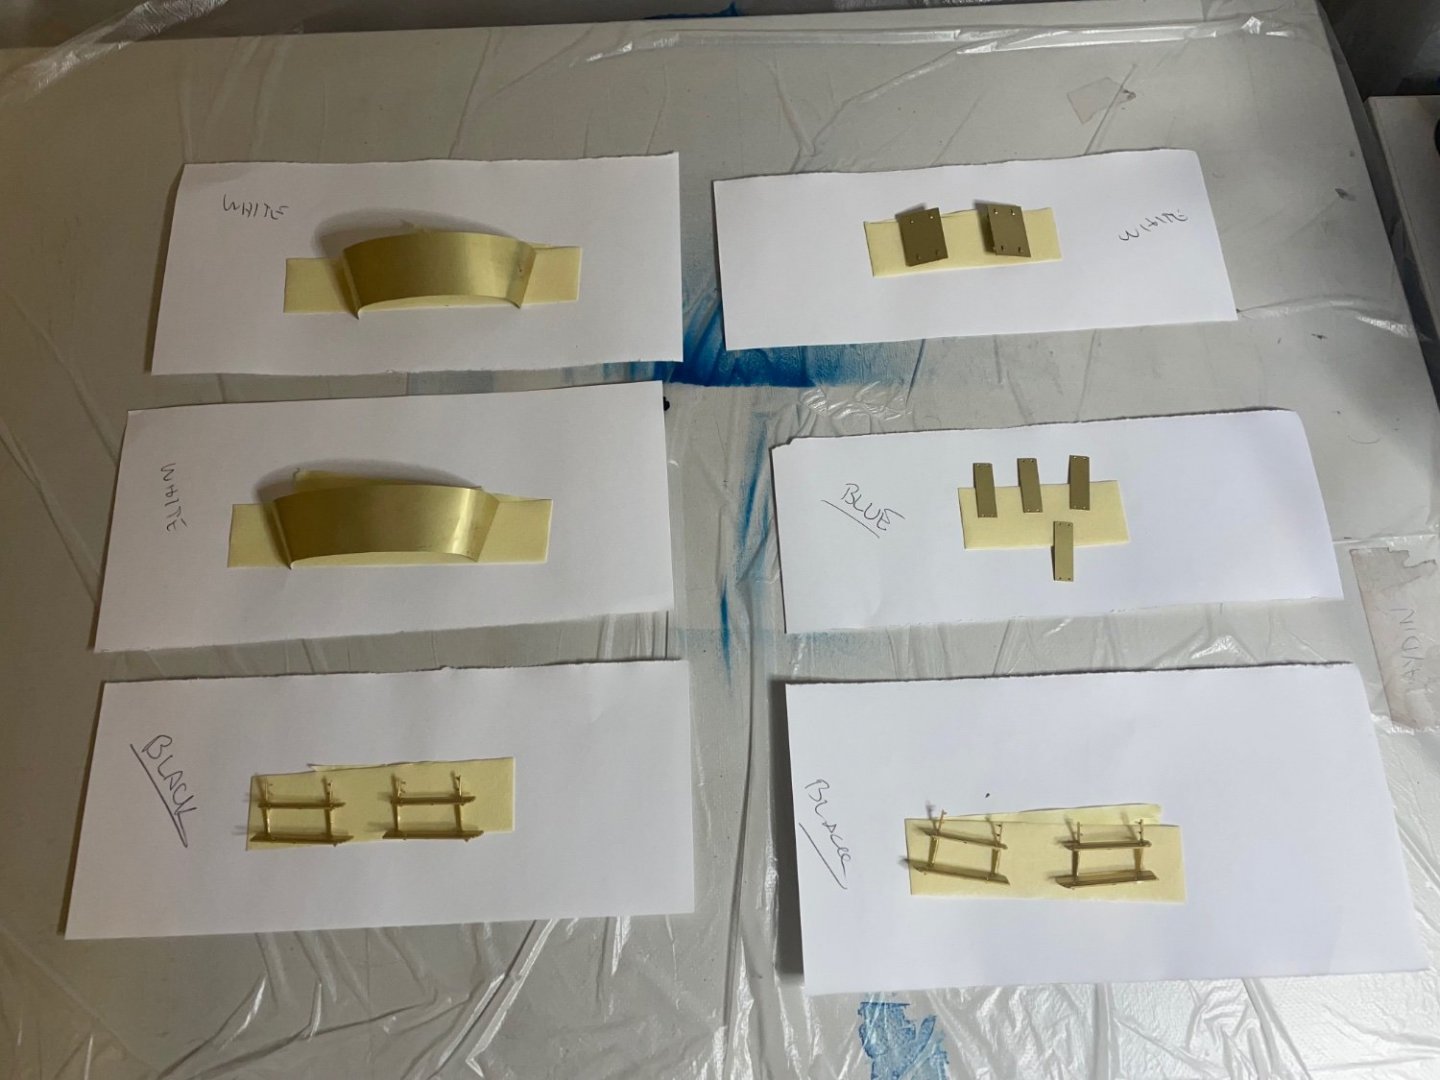
Figure 428: All parts ready for paint. I labelled the color not to make a mistake. I will start with white and proceed with blue and finally black, so that I won't need to clean the airbrush in too detail between the color changes.
- 293 replies
-
- 13
-
-
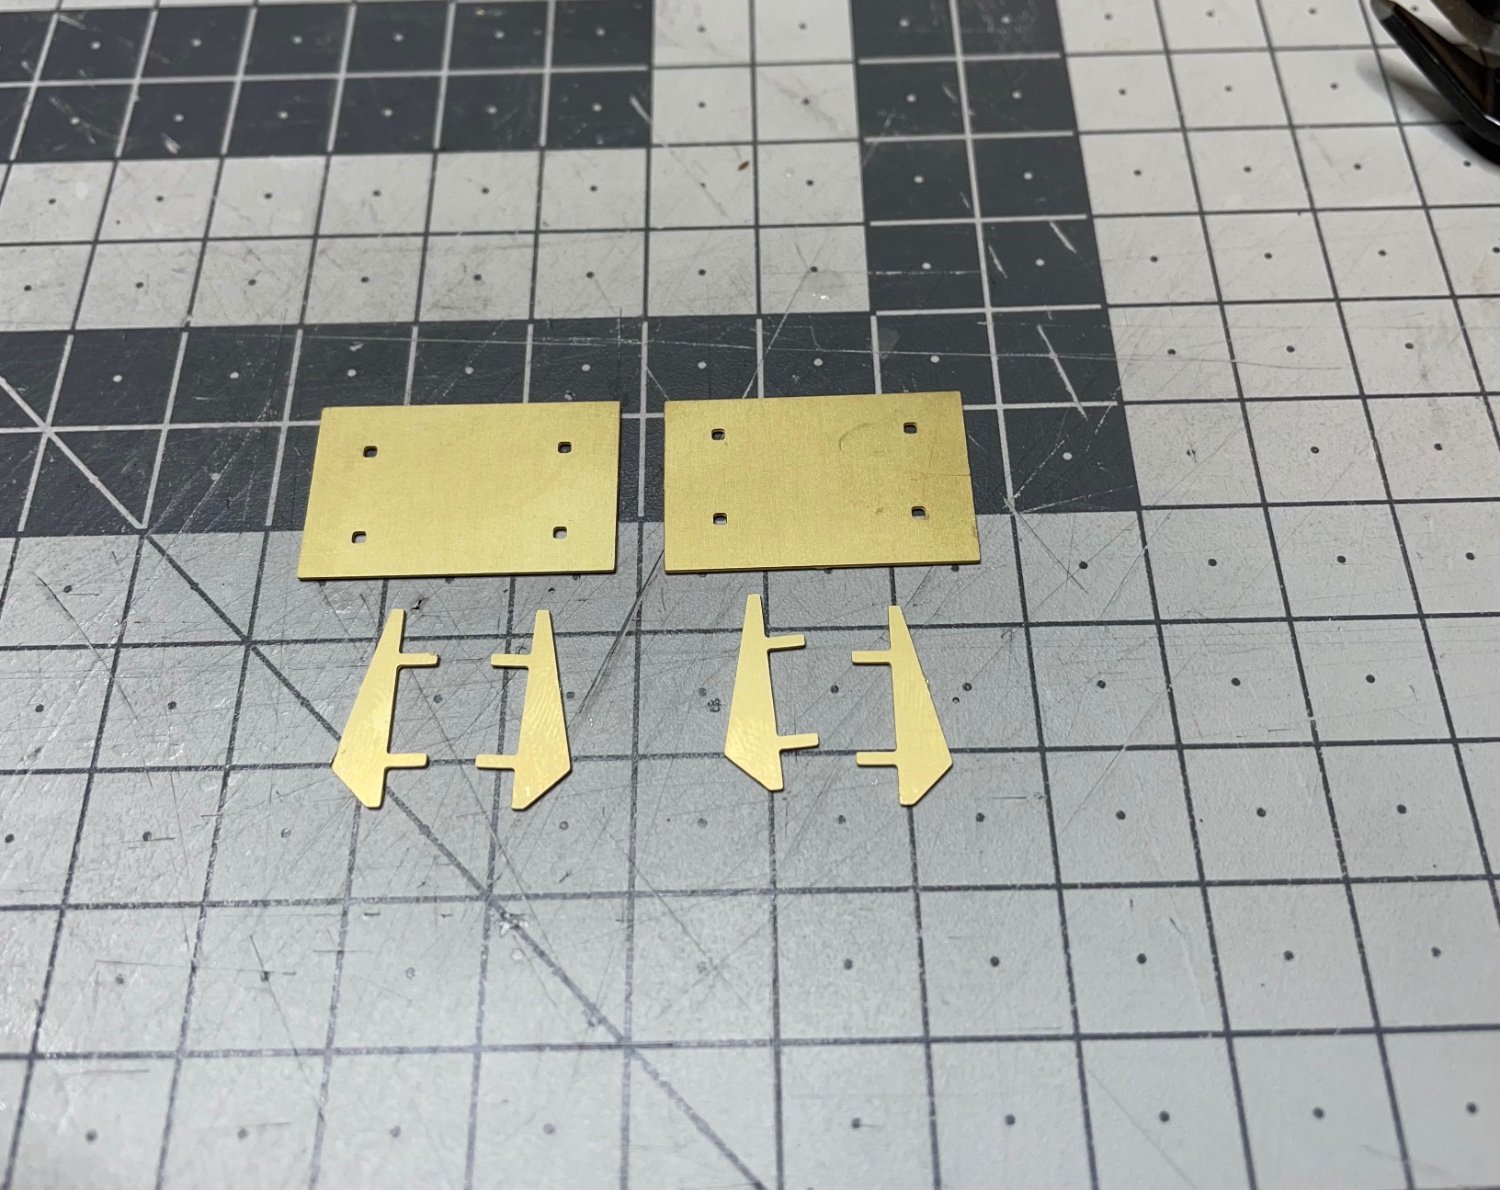
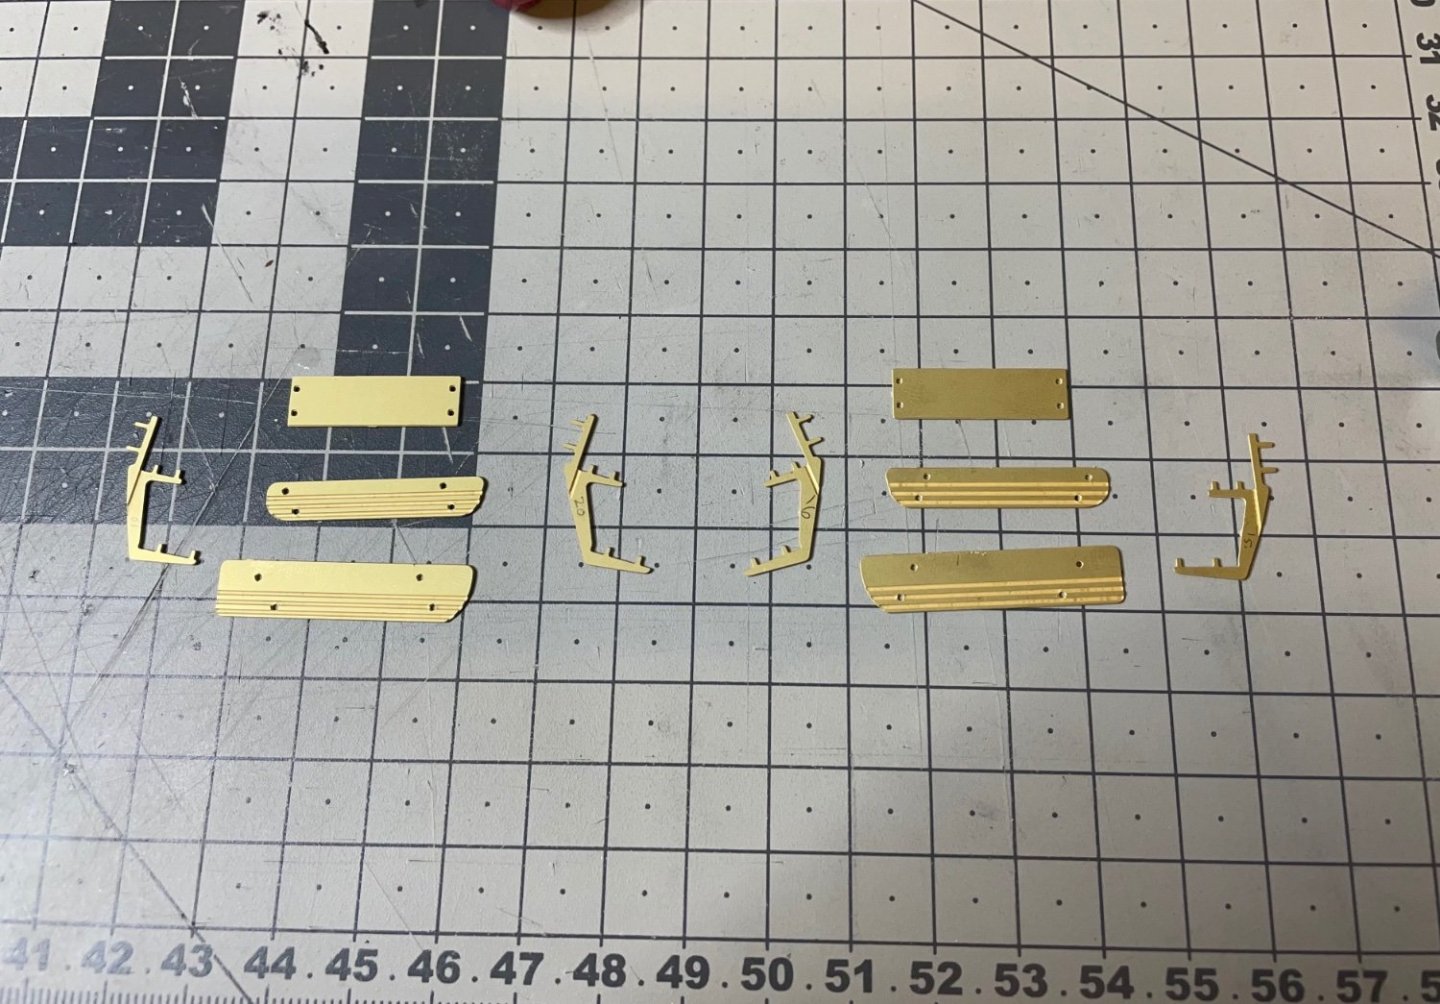
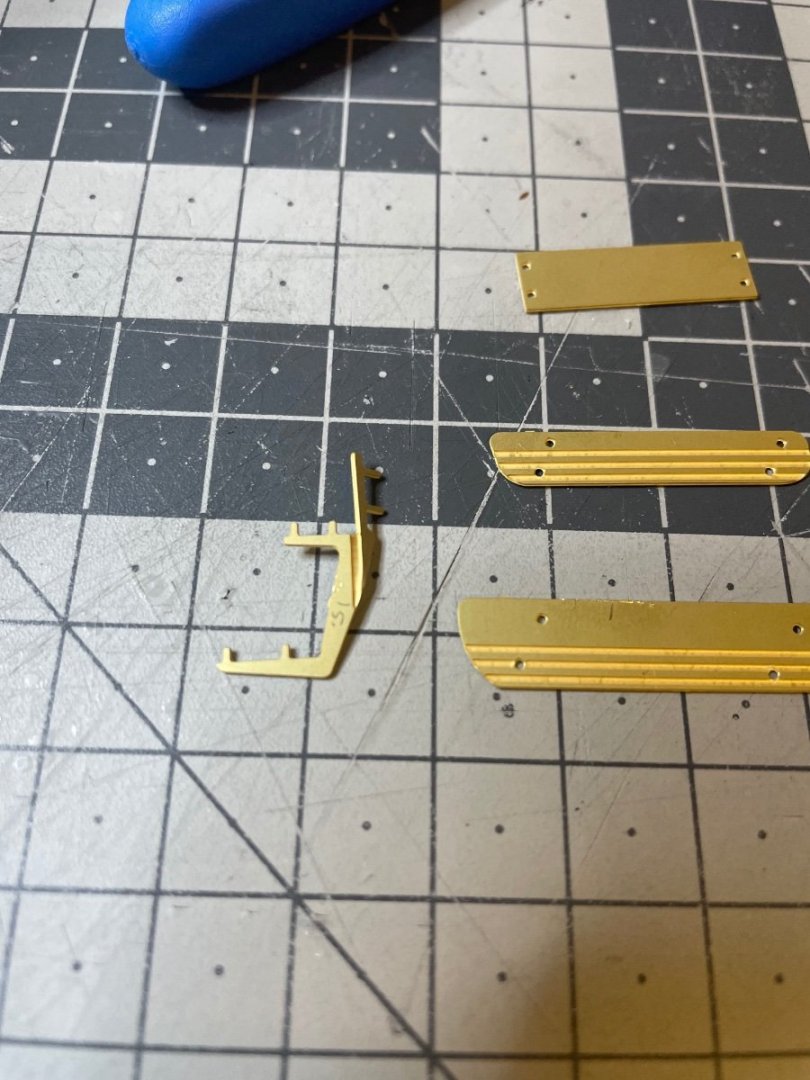
Figures 421-427: Doorsteps. You will note that when assembled the two steps are not parallel to each other. It is very easy to confuse the parts as they are very similar, I keep the technical sheet handy as reference.


- 293 replies
-
- 11
-
-
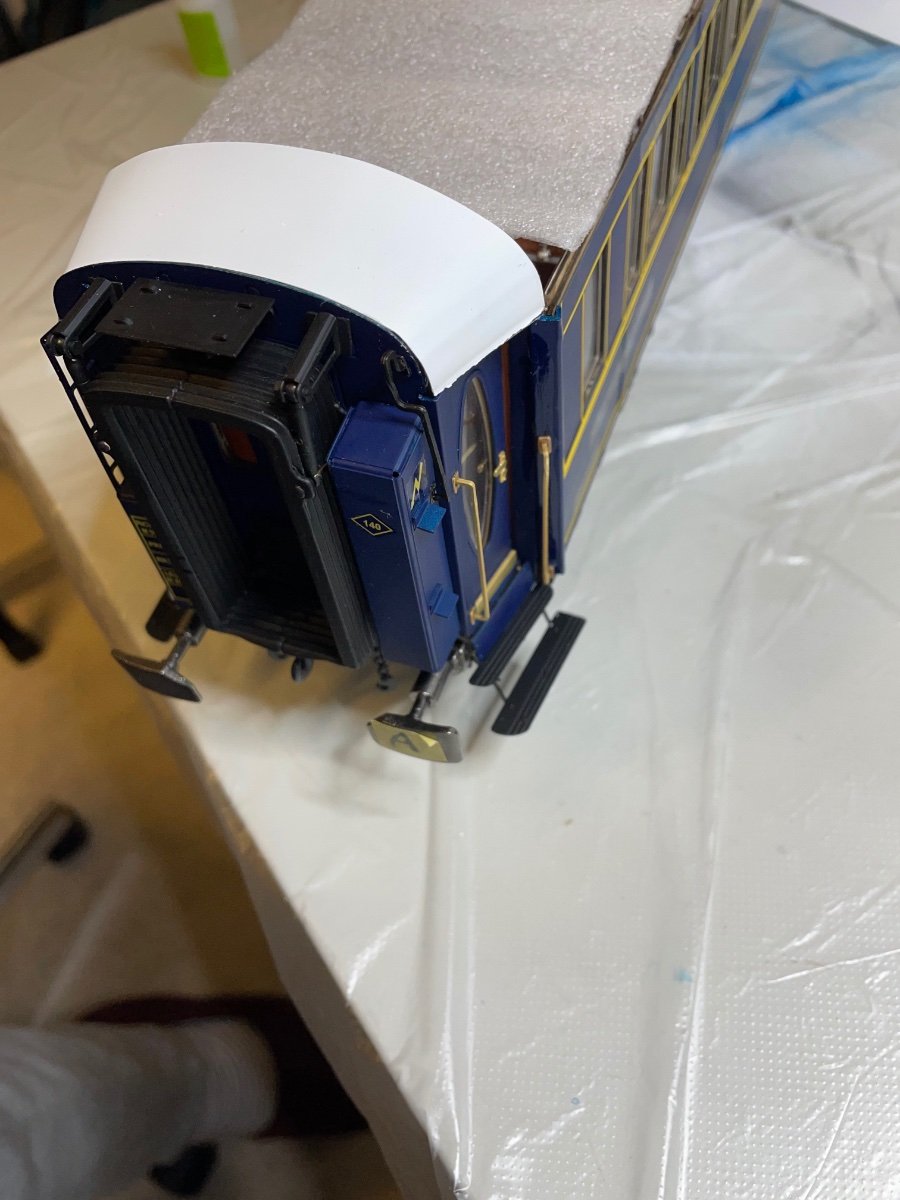
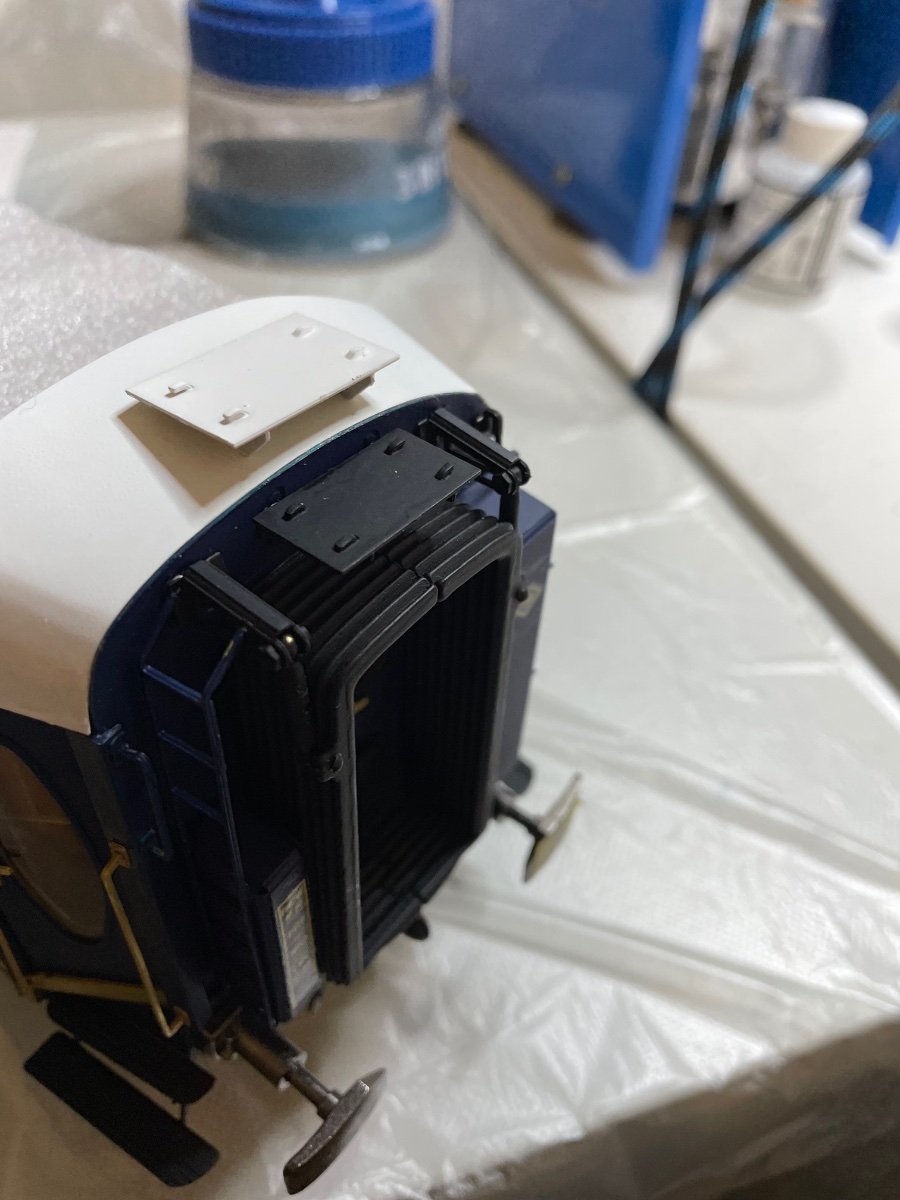
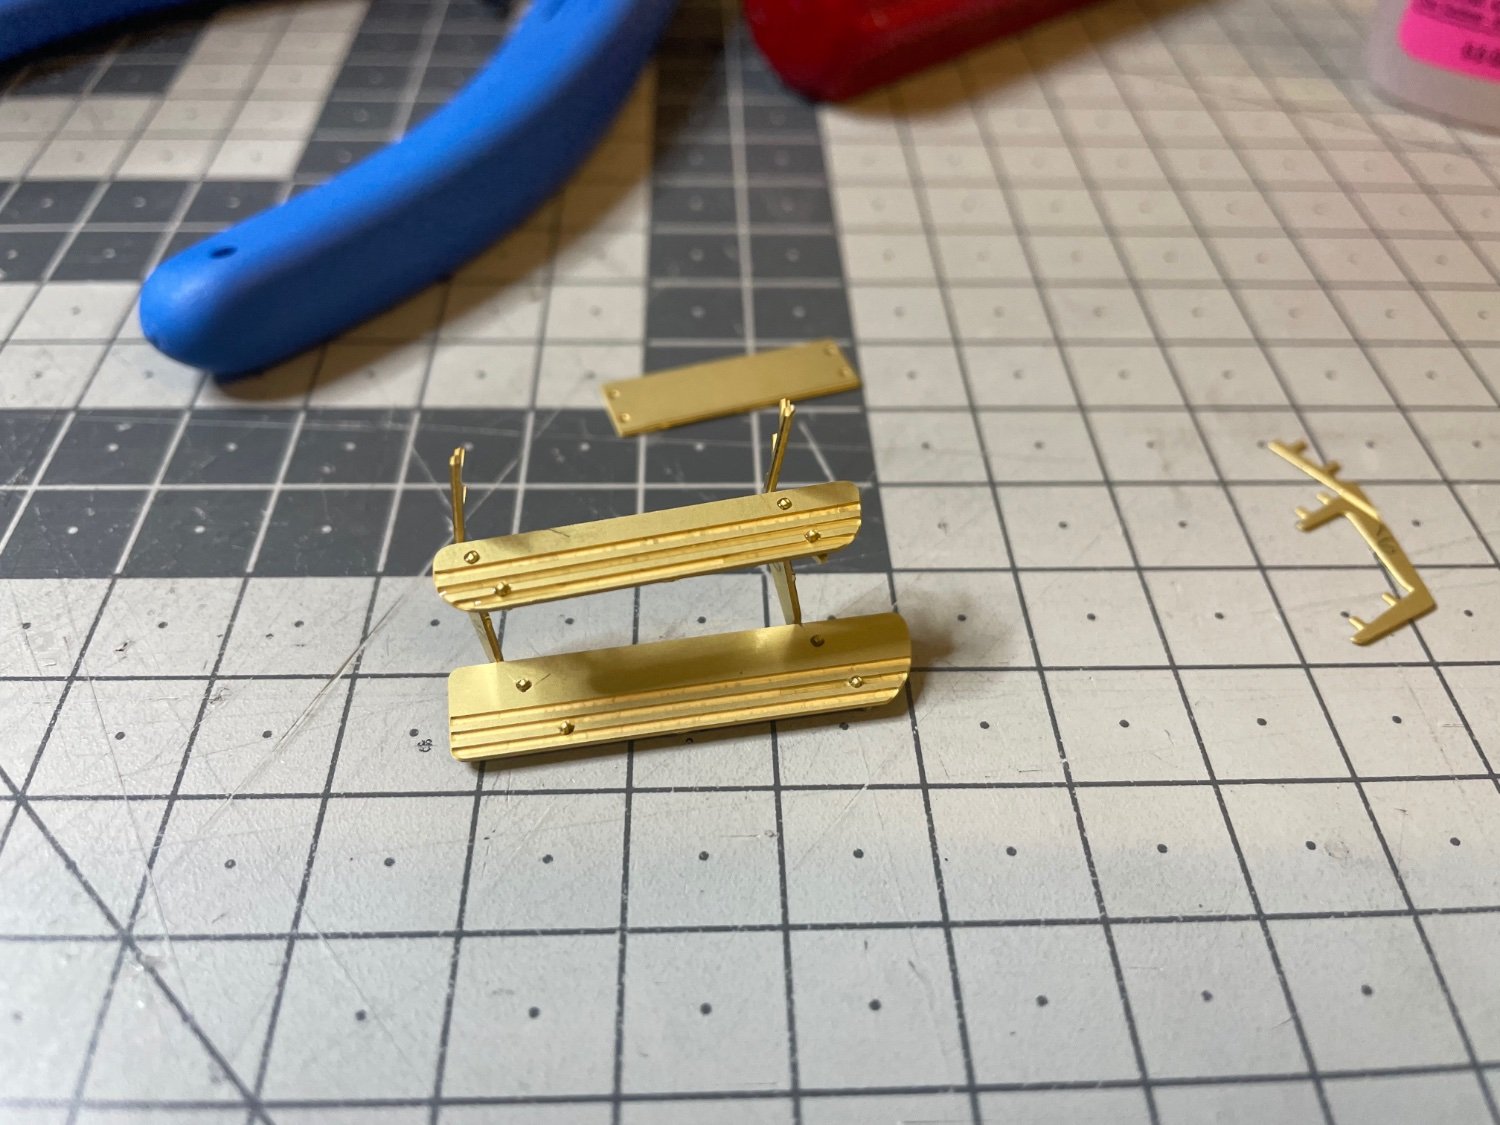
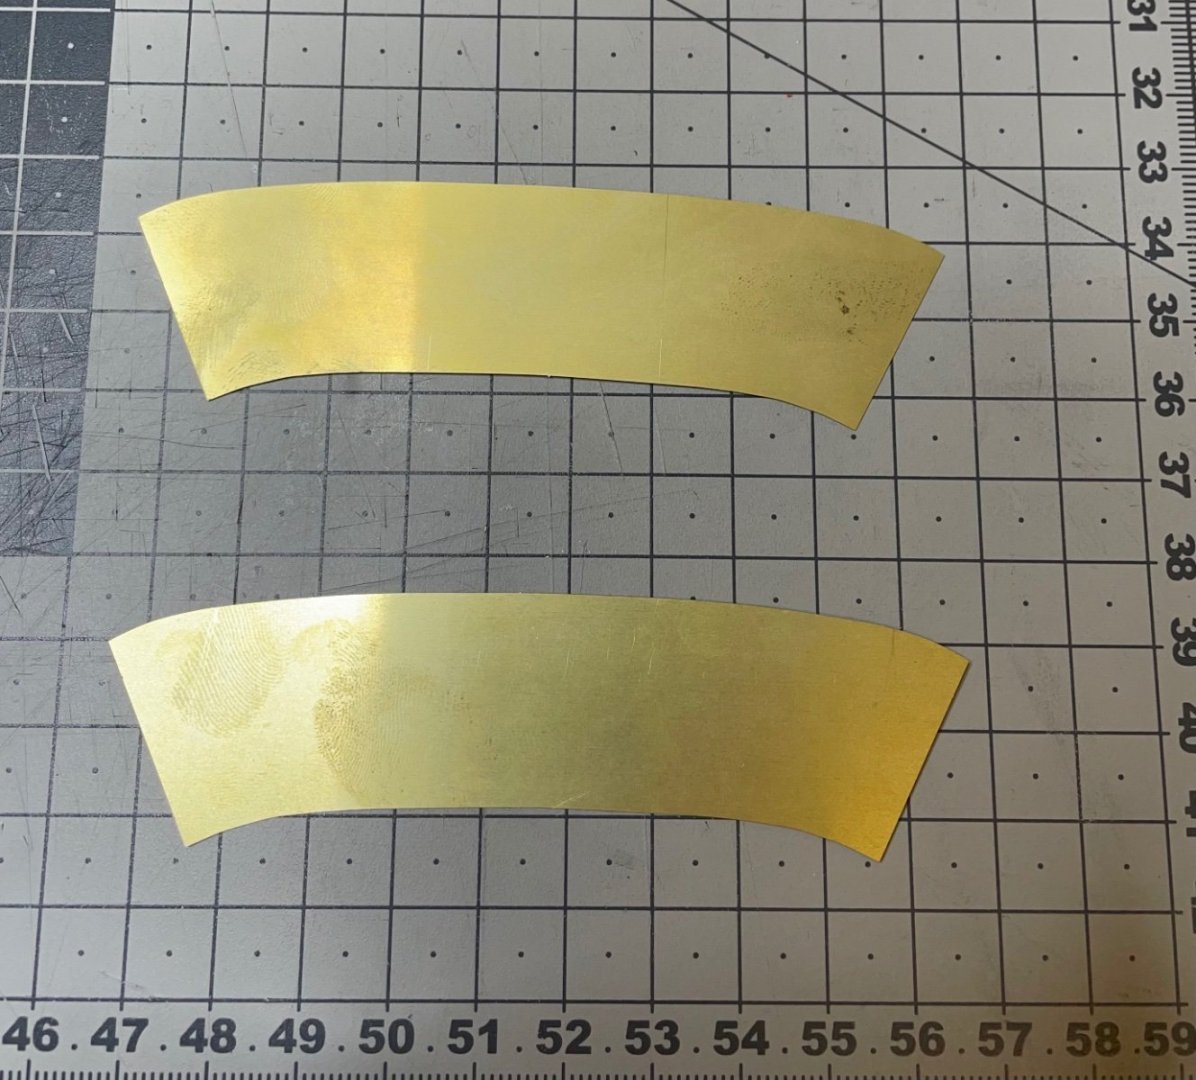
BUILD DAY 41 / 2 hrs / (TOTAL: 104 hrs) Rooftop on both ends. These ones will remain fixed on the wagon, while the middle section will be removable. Figure 418: Roof parts. Figure 419-420: Roof steps.
-
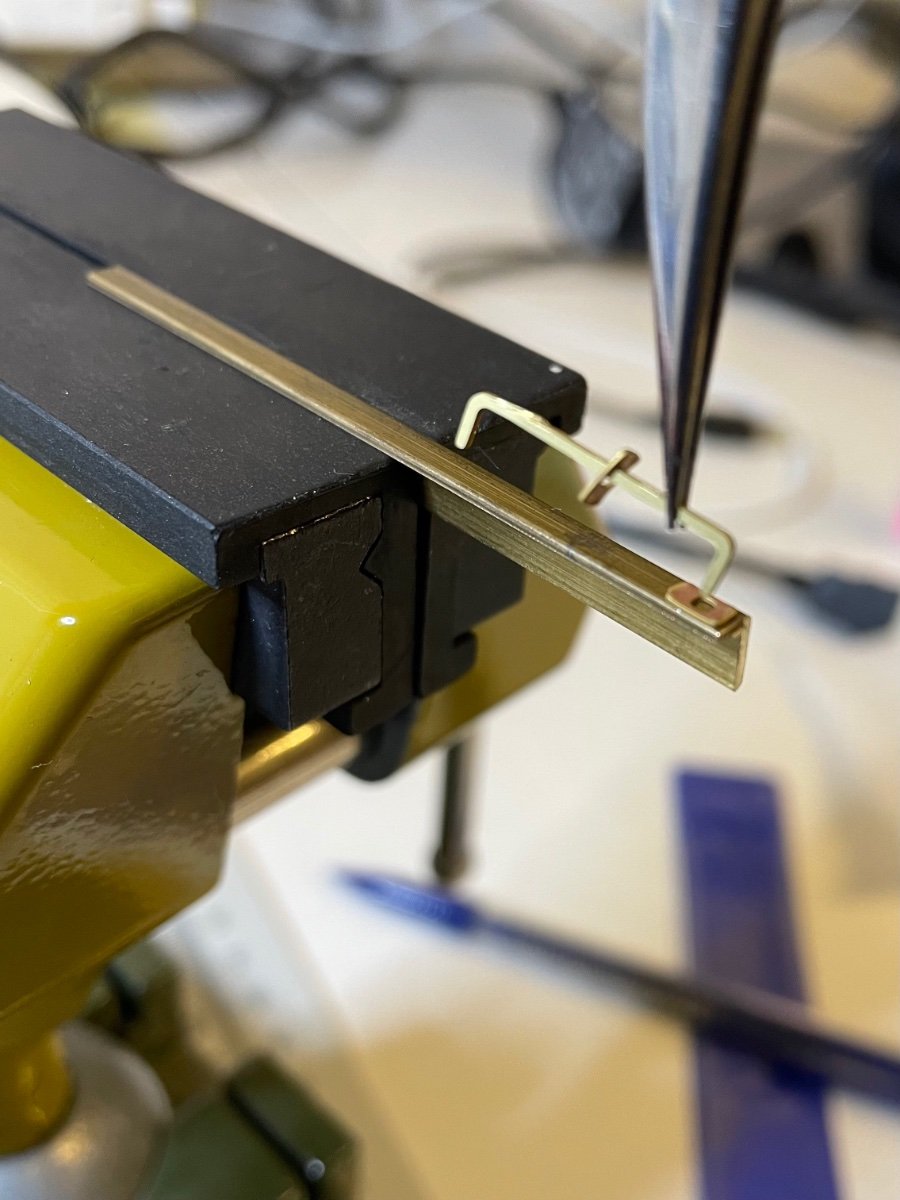
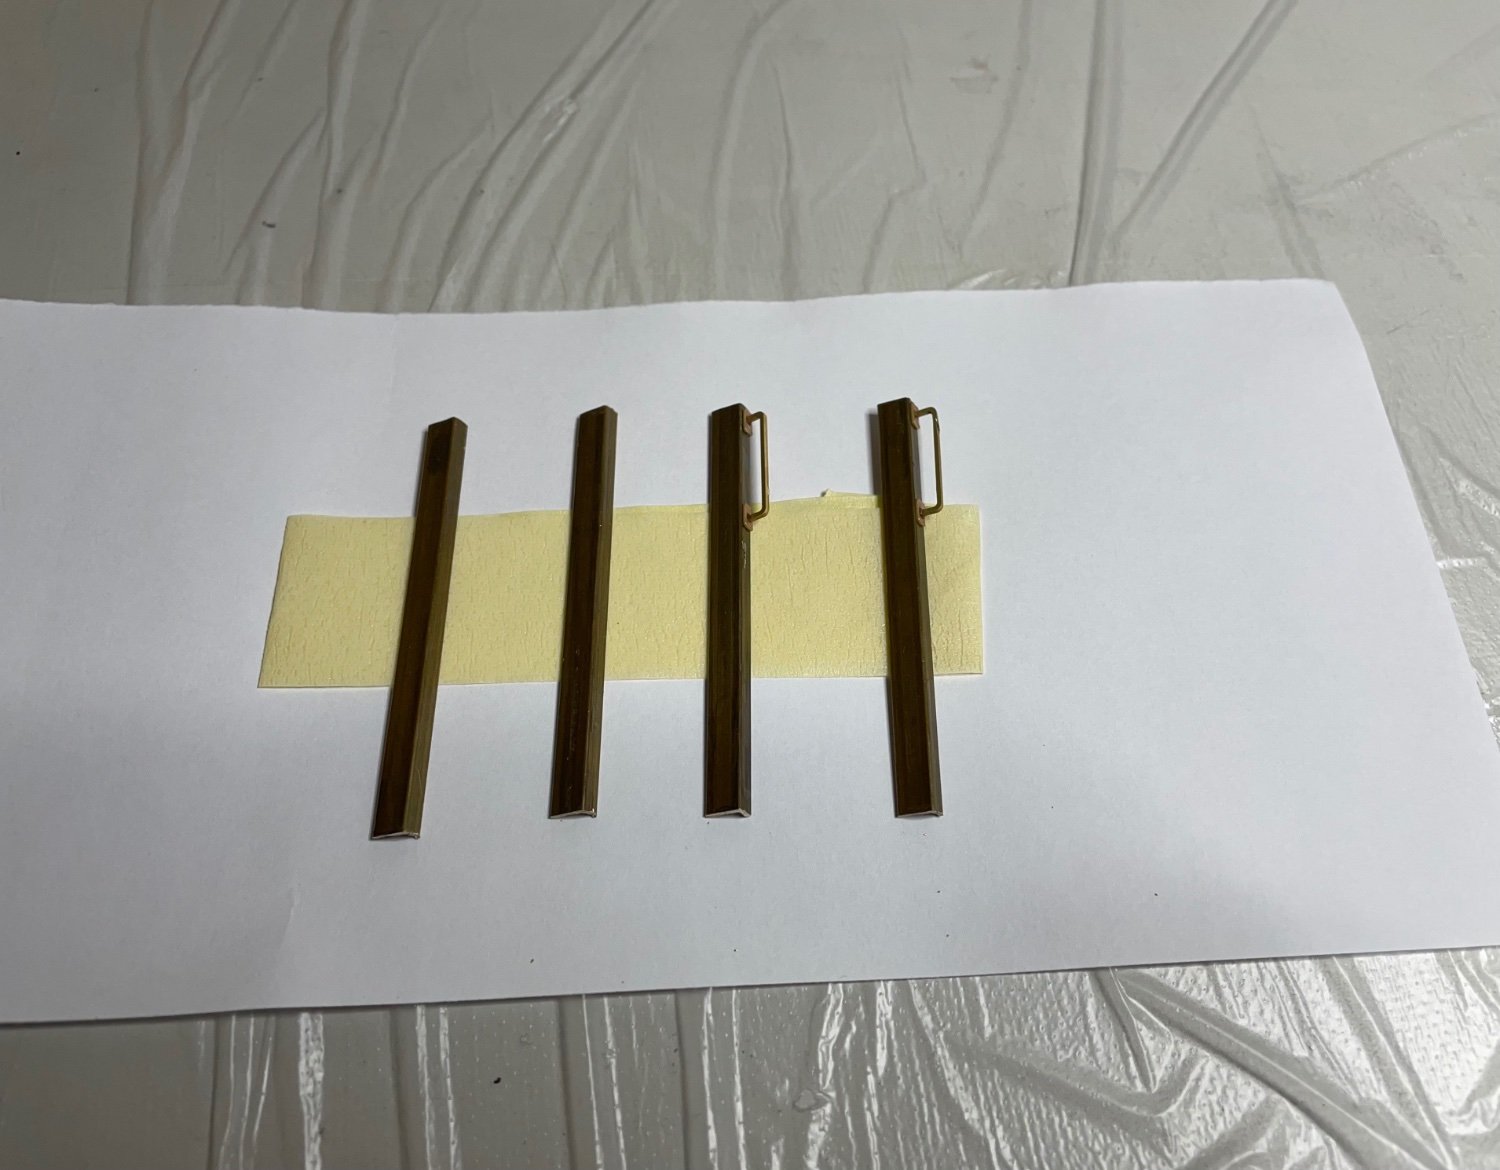
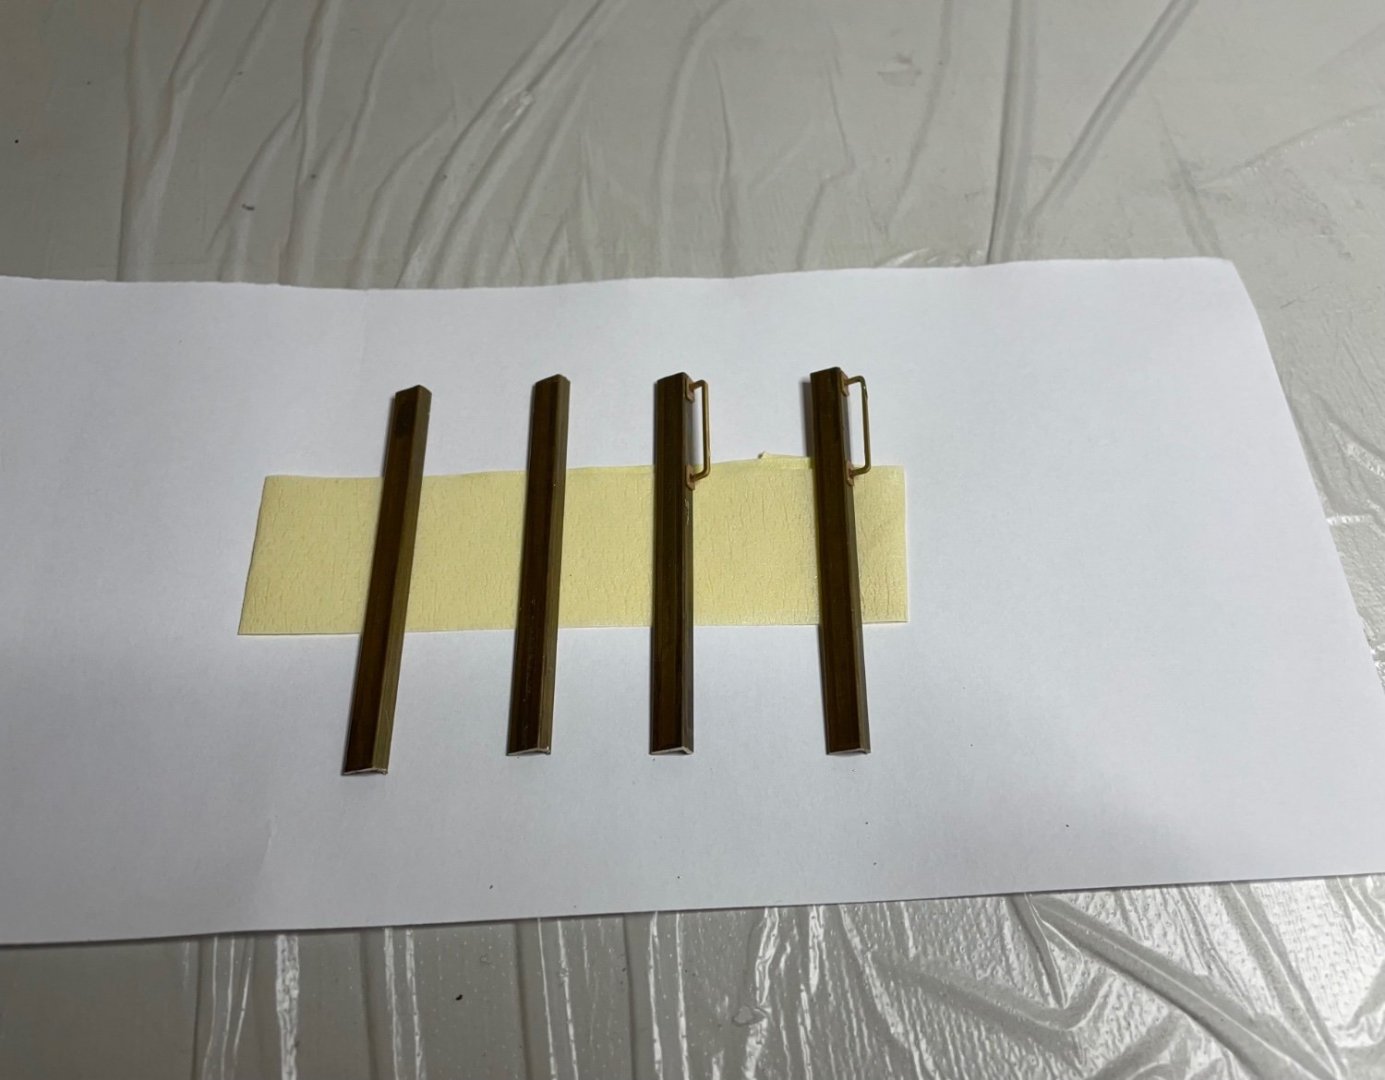
BUILD DAY 40 / 1 hr / (TOTAL: 102 hrs) Handles on door sides. They are to be installed without any painting. There is also an additional handle in body color on the ladder side. Photos showing my way of gluing the handles. - First I glue one of the "hinges" on its place. - Then I insert the handle to other hinge - Then I glue the handle at both ends. - Finally I move the second hinge and glue it in position. This way all three parts are aligned perfectly. Figures 414-415: --------- Figures 416-417: Parts ready for paint and in place.


- 293 replies
-
- 11
-