
HOLIDAY DONATION DRIVE - SUPPORT MSW - DO YOUR PART TO KEEP THIS GREAT FORUM GOING! (Only 13 donations so far - C'mon guys!)
×


Erik W
-
Posts
470 -
Joined
-
Last visited
Content Type
Profiles
Forums
Gallery
Events
Everything posted by Erik W
-
 My progress over the last week has been to plank the first layer of planks of the starboard bulwark. With my extended time off from this build, 6 1/2 years, I sort of forgot how long it takes to get quality planking done! I had to break out the hair dryer again to get the bends toward the bow in the planks that sit below the gun ports. There was a bigger gap than I was comfortable with between the false deck and the bottom of the planks between the forward two gun ports, so I used 7/32" wide planks for the lower plank in that area. I wasn't too concerned with the finished look of the planks below the gun ports since they'll be covered with a second layer of planks. Once this first layer was sanded smooth, I measured the total thickness of the bulwark at the top. It comes in at 5/32", or a hair less. With this new layer of planking I then painted the frames of the gun ports. This revealed areas that needed sanding to hide the visible seam between the gun port frames and the interior planking. I used a hard sanding stick to do that. Then I applied another layer of paint. It seemed like a good idea to paint the gun port frames at this point as it also gives a good opportunity to visually confirm that the port frames are a proper shape and thickness. The next step is adding the layer of 1/32" thick planking below the gun ports. Erik
.JPG.103247eabbcbf9f469c642b05248c96b.JPG)
.JPG.a30517afad4712e88d4ae5602ebb9bc1.JPG)
.JPG.2e4917c373701547fd3302dbcf199f5d.JPG)
-
Thanks Mike! It's been nice to look through your recent builds. I've enjoyed your Winny, and now the Speedwell. Also, your on-hold Hayling Hoy is interesting. The fully framed builds are definitely graduate level modeling! Erik
-
Thanks for the likes and nice words guys. And it's always nice to get an 'Outstanding' from Chuck! I installed the false deck this weekend. I used a piece of 24" x 8" x 1/16" basswood. I cut it in half lengthwise and taped the two halves together. I cut the false deck template out of the plans. I then cut all the square deck furniture locators out of the paper plan. I used clear tape to tape this onto the Cheerful (The plan is wavy in my two photos below. It was reattached after the fact for these photos). The clear tape made it easy to locate the center line running through the cutouts. I then followed Chuck's instructions in the Monograph and used masking tape around the edges to get the actual size of the false deck. I removed this carefully and taped the false deck plan to the two basswood sheet halves, again using the clear taped sections of the deck furniture cut outs to locate the center line. Once that was done, I carefully removed the clear tape one section at a time and used the cutout borders to draw their locations on the wood false deck. Reapplying the tape to that square when finished and moving on to the next opening. Once the false deck was cut out of the basswood sheets, I faired the edges to get a good fit. I also wound up adding a thin basswood strip to the stern section of the deck. There had been a bigger gap than I wanted there. I installed each half of the false deck using the visible center of the middle of the five plies of the piece of plywood running lengthwise on the center line as the true center line. Lastly I enlarged the hole in the deck for the mast to it's actual size. I had left it slightly under size when attaching the decks halves, and trued it up afterwords to make sure it was precisely placed where it should be. Erik
.JPG.4cd9ddda58c7c2b4703914ab95360a5f.JPG)
.JPG.95a73279333f916c06fb42b271de734b.JPG)
.JPG.a4d9c3081f8cc5d2bac1a692c1ca50c9.JPG)
.JPG.4c2d049dd84f27f44d3ef58f7f05ba44.JPG)
.JPG.a4ed4390621944f3bbad00c5b9d2df48.JPG)
-
I finished adding the fancy molding to my Cheerful. I planned ahead with the lower molding and didn't glue the portion that will be removed for the addition of the top boarding ladder step. I spent a few evenings thinning and fairing the inboard bulwarks. Yes, this was a messy pain in the butt. There was a bit of a learning curve to sand/fair the inside of a curve vs. fairing the hull planking. The bulwarks framing/gun ports measure in at a hair under 1/16" of an inch thick, which is what Chuck recommended in his monograph. I also faired the bulkhead tops so the false deck will sit flat on them. Lastly, I added the keel plates. I still haven't touched up the paint on the hull exterior, so the build still looks a bit rough at this point. I've decided I'll do that after the deck planking is finished. Erik
.JPG.6e8f36c2c51ccad8883c3f0f1612f664.JPG)
.JPG.000450b66899c6448673b5c478dcfb52.JPG)
.JPG.9c04f3c16e68712fb49f845e2acb08f9.JPG)
.JPG.981300b604fb0621d8161dde25fbdb33.JPG)
.JPG.1a5b3c657f443ec586415ce9bc48a4e6.JPG)
.JPG.a5011fd301dd15fd58c2bf33038217ca.JPG)
.JPG.2f905c9b43b415cad5c660b73d909f2b.JPG)
.JPG.c1f22166ff1f556253b167051692b99d.JPG)
-
Hey Steve, Thanks! I like your Pinnacle and Dory builds. Erik
-
Phil and Glenn, Now I don't feel so bad. Haha. I always seem to find my way back to projects I set aside for a while. I try not to have too many things half done at once though! Eric, Thanks for the nice words! I'll try to post updates regularly. The interaction with forum members helps keep me involved. One nice thing with picking Cheerful up again this late in the game is there are many other excellent builds to reference as I progress with mine. The plethora of photos are invaluable as visual aids. Erik
-
Thanks Gregory. Yeah, at this rate I might win the award for longest time spent on a build start to finish. Haha. Erik
-
After a short, er . . . 6 ½ year break, I’ve resumed work on my Cheerful. I imagine few of you actually remember my build. It was sort of unexpected to be bitten by the wooden ship building bug again. In August I was on a vacation in the Netherlands visiting the Museum Kaap Skil maritime museum in Oudeschild on Texel Island, off the north coast. They have a huge 60 foot long diorama of the Texel Roads as it appeared around 1660. It looks to be about 1/100 scale. There are 160 ships/boats represented in the diorama! Seen here: https://kaapskil.nl/en/discover/expositions/ship-in-sight-the-roads-of-texel-and-the-world/ That led me back to Modelshipworld. And here I am. I feel a bit like Rip Van Winkle waking up from a long sleep. This website itself has changed. Yellow Cedar is a new wood of choice. Wood suppliers have changed. No more Crown Timberyard, but it looks like a good replacement with Modeler’s Sawmill. Chuck is a few projects further along after the Cheerful (the laser cut fully framed Speedwell is a fascinating project, by the way). There are still a lot of the same faces here, but the skill level on current projects has kicked up a few notches. So, my hat is off to you folks. It’s been an interesting few years for me. We had this global pandemic thing. After 14 years at the local government, I changed jobs a few times. I was a bicycle tour guide in Boulder for 7 months (a great way of keeping in shape as a 53 year old). Was the accountant for Left Hand Brewing here in Colorado. And finally settled into being an accountant for the National Center for Atmospheric Research. Though not working on Cheerful, I’ve still been active modeling from time to time. One thing I seem to gravitate towards is building things in smaller scales than the norm, and detailing them to a level of the larger scale (which is why Cheerful is unusual for me, I’d be more comfortable building something 1/96 to 1/144 scale! Haha). A few of my latest projects - A resin tugboat featured on this website: https://modelshipworld.com/topic/22995-ytl-45-taiwanese-navy-tugboat-by-erik-w-finished-1350-scale/ For my model railroad, an N scale (1/160) 3d printed boxcar that I scratch built full underframe details: https://www.therailwire.net/forum/index.php?topic=55256.msg758608#msg758608 and finished here: https://www.therailwire.net/forum/index.php?topic=55365.msg760492#msg760492 A 1/72 scale WWII F6F Hellcat on a carrier deck with super detailed engine and cockpit: https://www.militaryimages.net/threads/f6f-5-hellcat-wwii-usn-fighter-plane-1-72-scale.10858/ And probably my favorite, a 1/72 scale M1A2 Abrams tank with over 400 individual pieces of styrene and wire add by me to customize the tank. Scroll down to see the scratch built stowage items: https://www.militaryimages.net/threads/m1a2-sepv2-w-crows-ii-lp-1-72-scale-kitbash.10777/ Well, I’ve prattled on enough. Where I had left off was having finished the hull planking. The next step is supposed to be tree nailing. I’ve put a lot of thought into that and I’ve decided to skip it. It’s not because it’s time consuming and tedious as much as it’s a process that you can’t pull out and redo. Most things on the build can be pried loose if you’re unhappy with them. That, and I’d rather jump right back into cutting wood. That’ll help maintain my motivation to keep making progress. There are a few really good Cheerful builds out there where the builders have skipped tree nailing, Mike (stuntflyer), Glenn (glbarlow), and Ian (Seventynet). You all have some outstanding other builds as well by the way. Something to really aspire to for us newbies. Ian, I particularly like your Hayling Hoy. Never thought I’d desire to build a fully framed model before, but now . . . So, where I am now is I’ve done what I’d call an almost-final sanding of the lower hull. There were a few spots that needed attention. I’ll do an absolute final sanding and paint touch up later. That’s why the planking and hull still looks a bit rough. I’ve also been adding the fancy molding. It took a little trial and error to get my brass scraper made the way I wanted it. I’ve added the molding to the stern, and port side. Feels good to be building again!! If you’re new to viewing this build, it’s good to have you along. And if you’ve followed along before, welcome back! Without further ado, here are some proof of progress photos. It's hard to get the lighting right to show the contour of the fancy molding, but you get an idea from the last photo. Erik
.JPG.396dd553db74000e9b686767c3bd3de3.JPG)
.JPG.8c5d589b8f8ea636bc1b078b2d3cf34e.JPG)
.JPG.59a3b9b369b64e85feb76eb8f5fd4407.JPG)
.JPG.1917b34aeb6ceb1100325d665b09b418.JPG)
.JPG.f275e88af30dc6c62be708f70264ef36.JPG)
-
Chuck, No. I haven't given up on her. Sadly, I'm afflicted with I-have-too-many-hobbies syndrome. The end result being for each project I seem to have the attention span of a squirrel sometimes. 😀 My Cheerful is lovingly protected and stored away until I resume construction (next step, a bazzilion tree nails in the hull). It's normal for me to set various projects down for a length of time, before picking them up and finishing them. Also, I'm one of the 45 million folks recently out of work now, so my immediate priority is figuring out how to land a paycheck again. Thanks, Erik
-
YTL-45 Taiwanese Navy tugboat by Erik W - FINISHED - 1/350 scale
Erik W replied to Erik W's topic in Plastic model kits
Chuck, Thanks. I seem to be back in modeling mode now, and had packed Cheerful away carefully expecting to pick it back up again. I'm in the middle of a small project now, so I'll see how I feel when I'm finished with that. It would be nice to move forward with the Cheerful build. Erik -
YTL-45 Taiwanese Navy tugboat by Erik W - FINISHED - 1/350 scale
Erik W replied to Erik W's topic in Plastic model kits
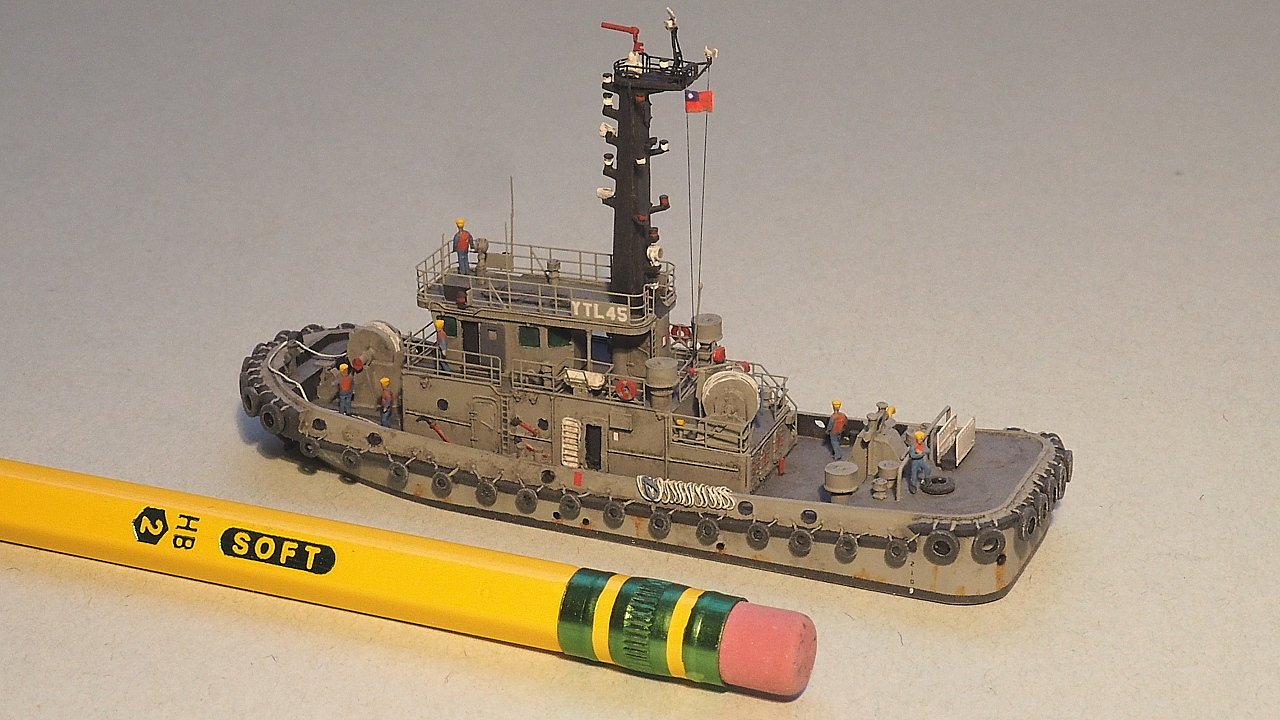
Thanks guys. Mike, yeah, weathering is a bit tricky in smaller scales. If you weather heavily it looks OK when viewed in person, but looks overdone in enlarged photos. Erik -
YTL-45 Taiwanese Navy tugboat by Erik W - FINISHED - 1/350 scale
Erik W replied to Erik W's topic in Plastic model kits
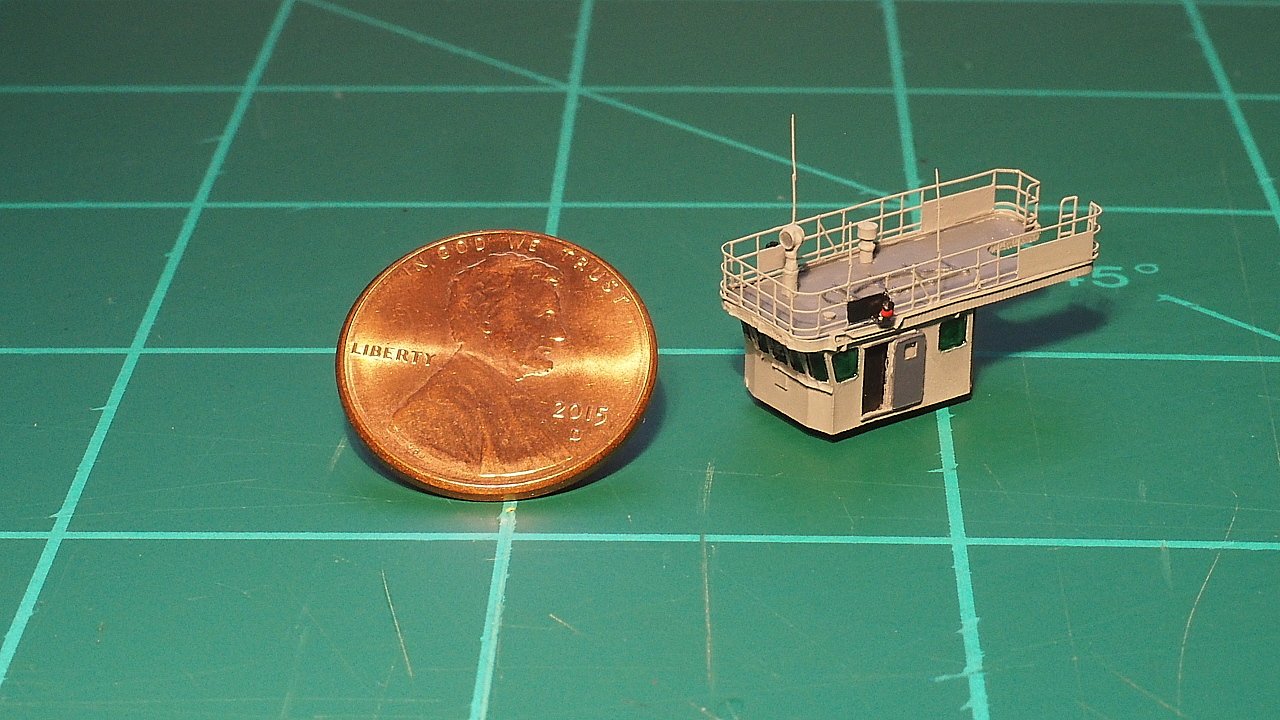
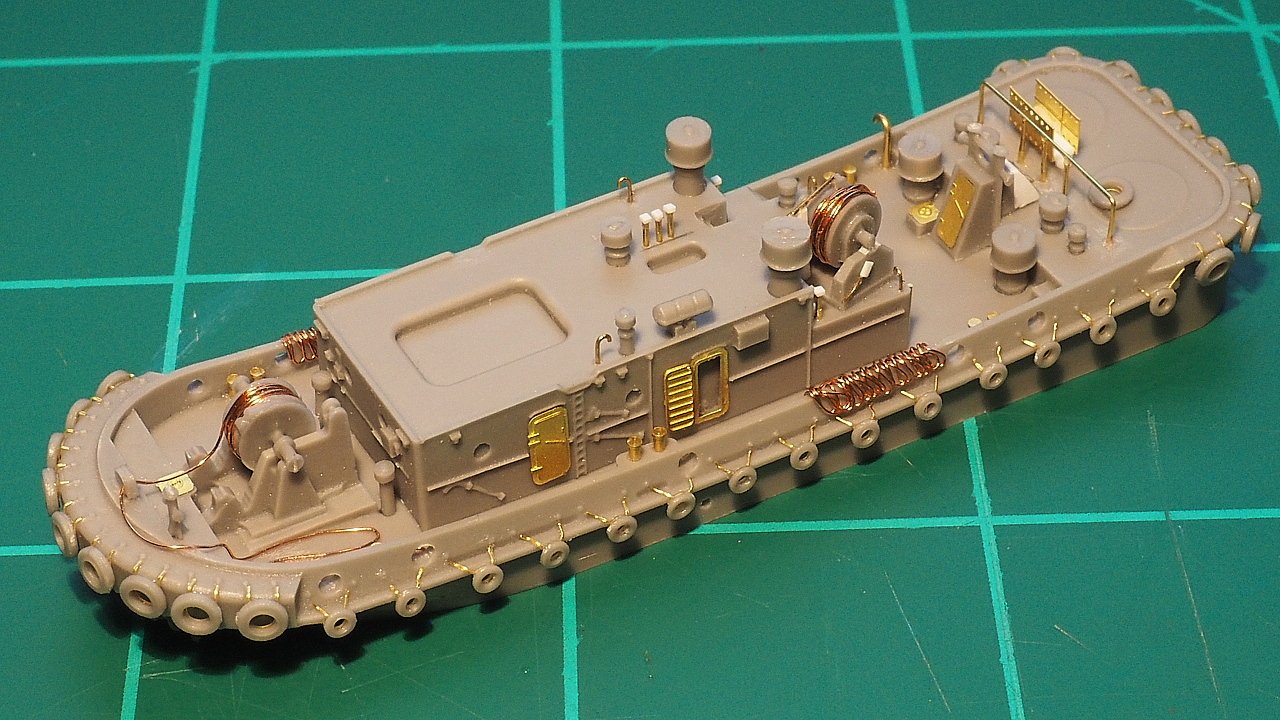
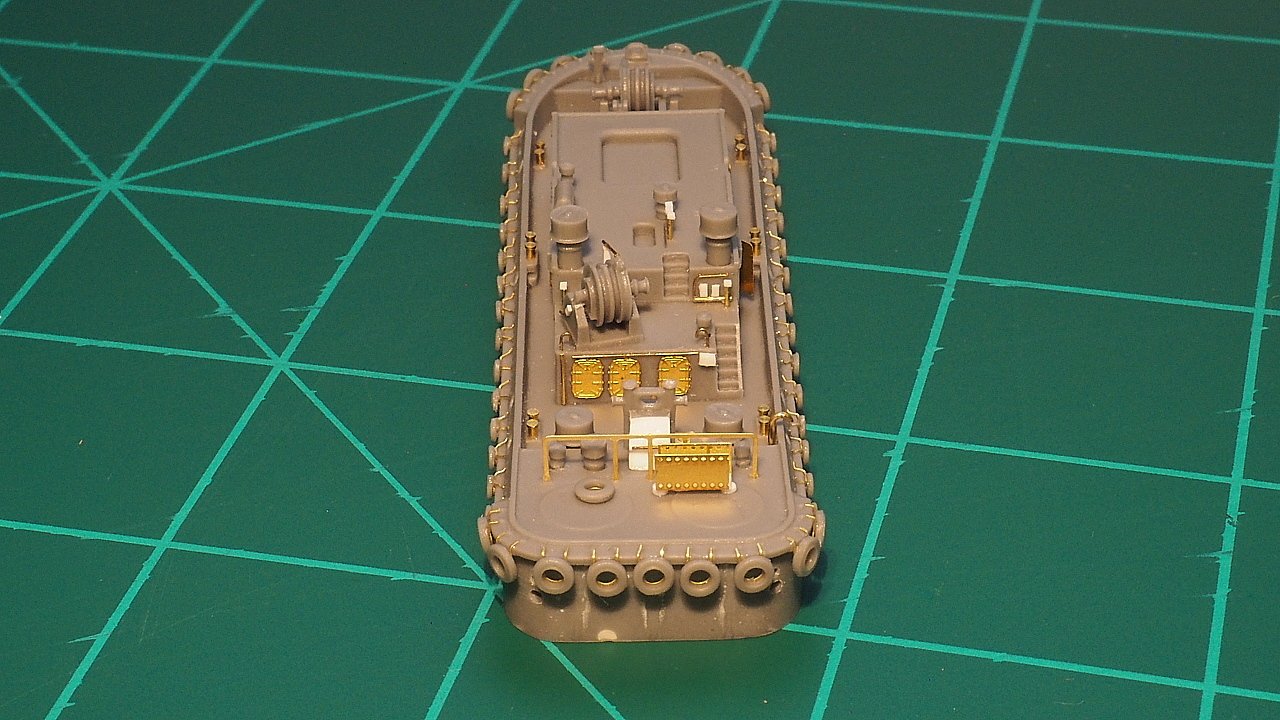
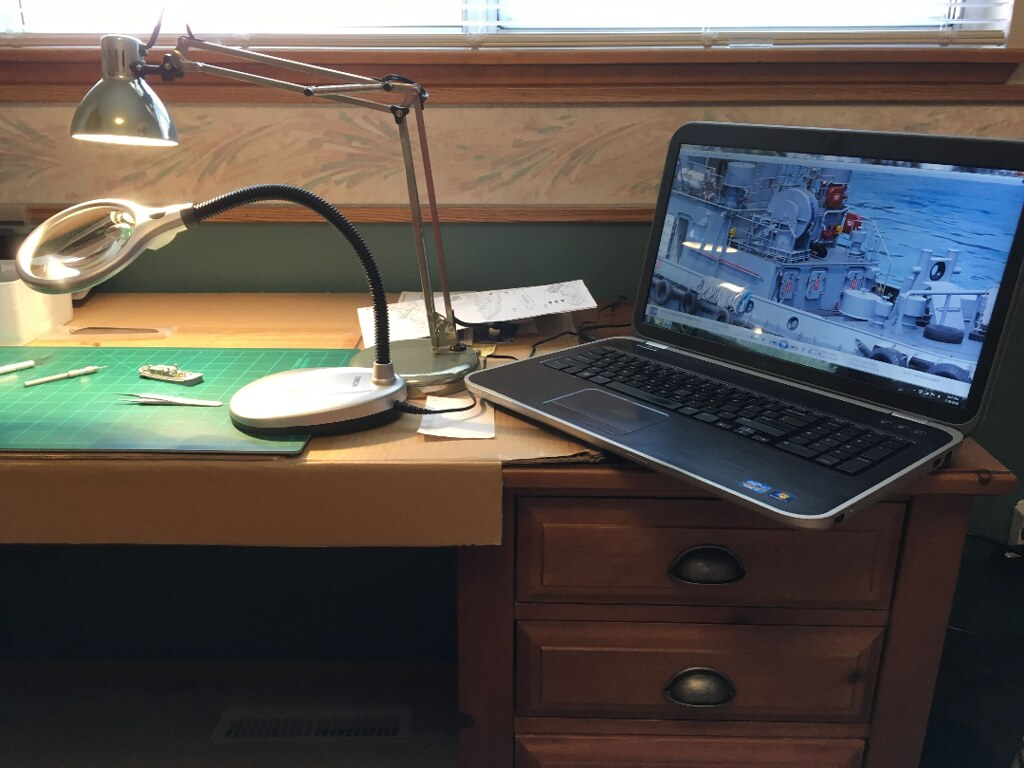
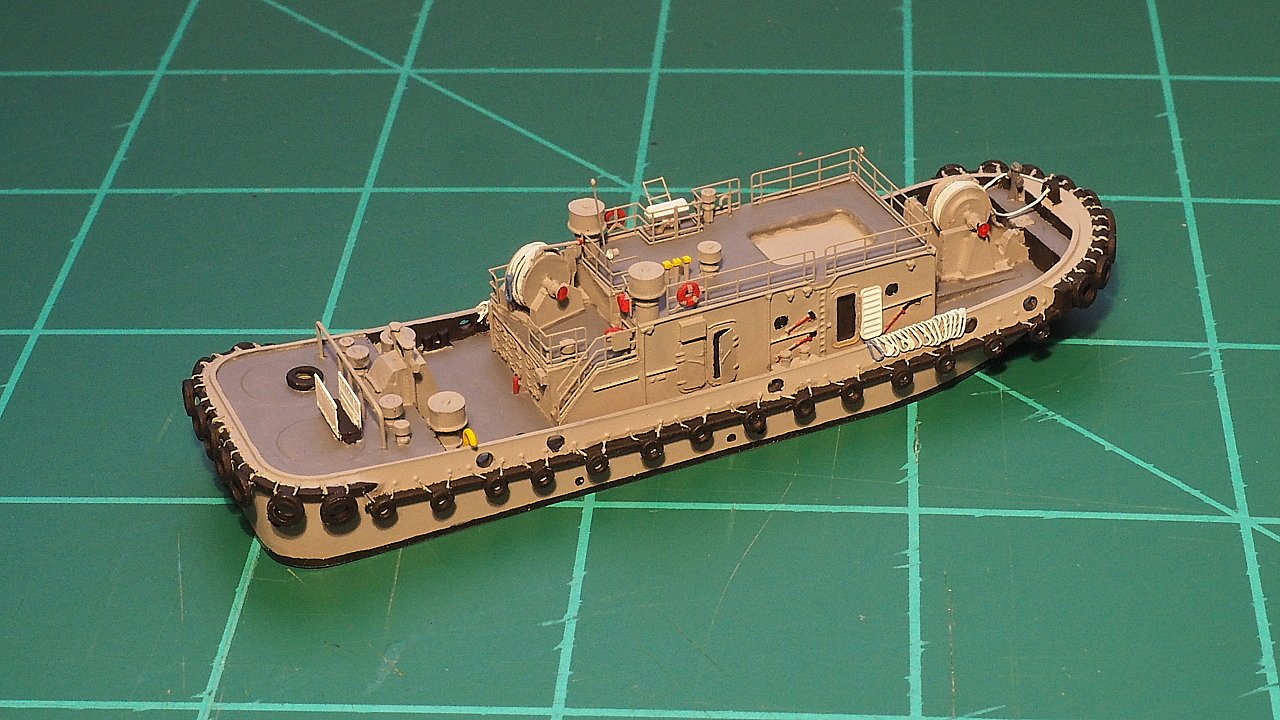
Here are some in-progress photos. Erik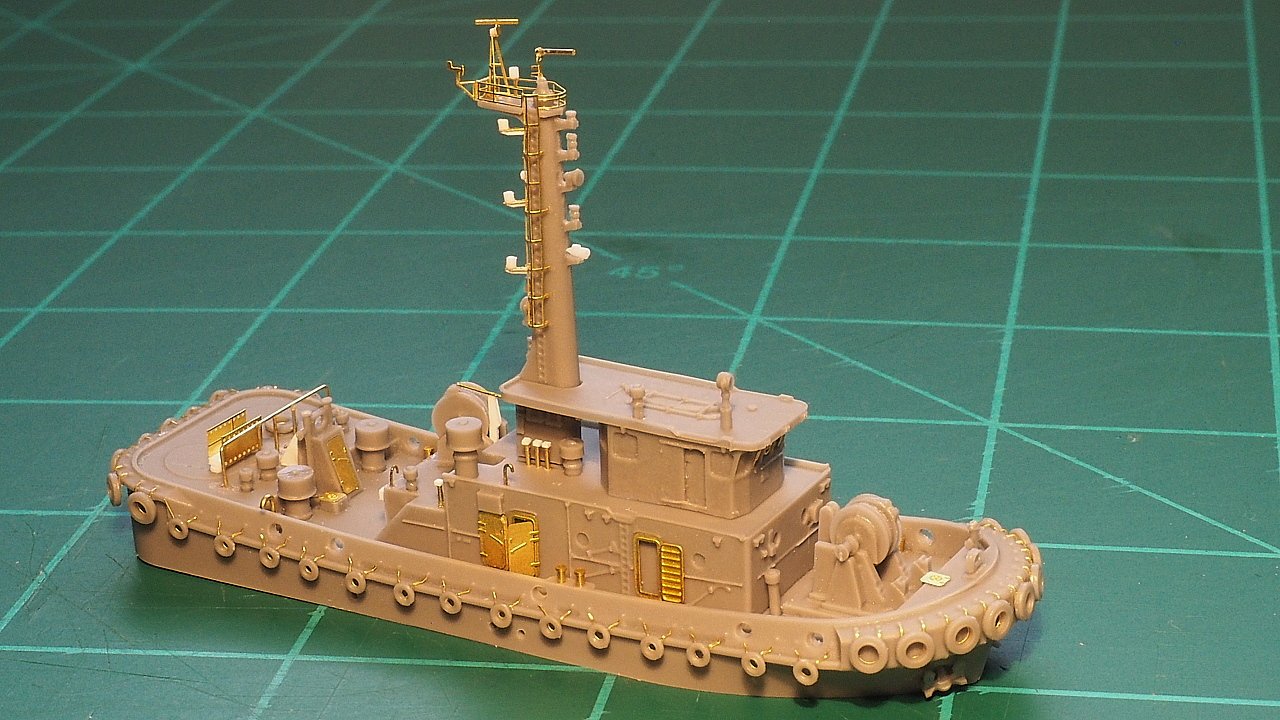

- 10 replies
-
- 10
-

-
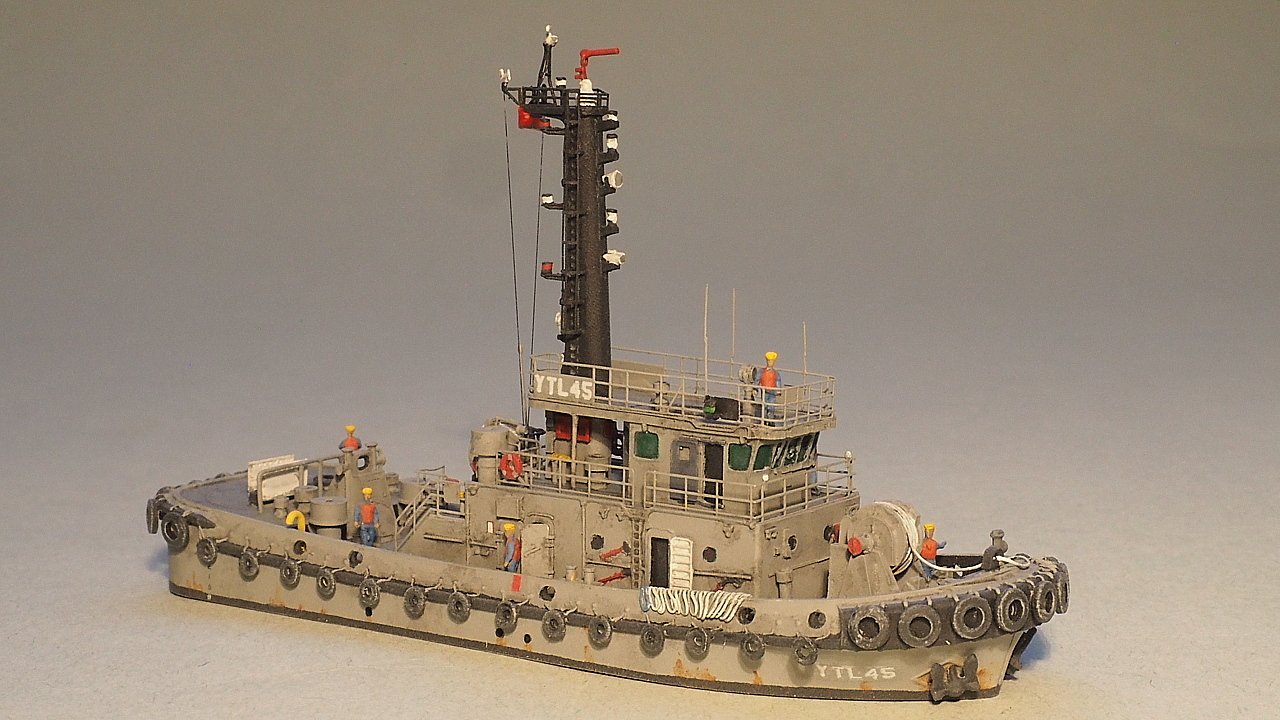
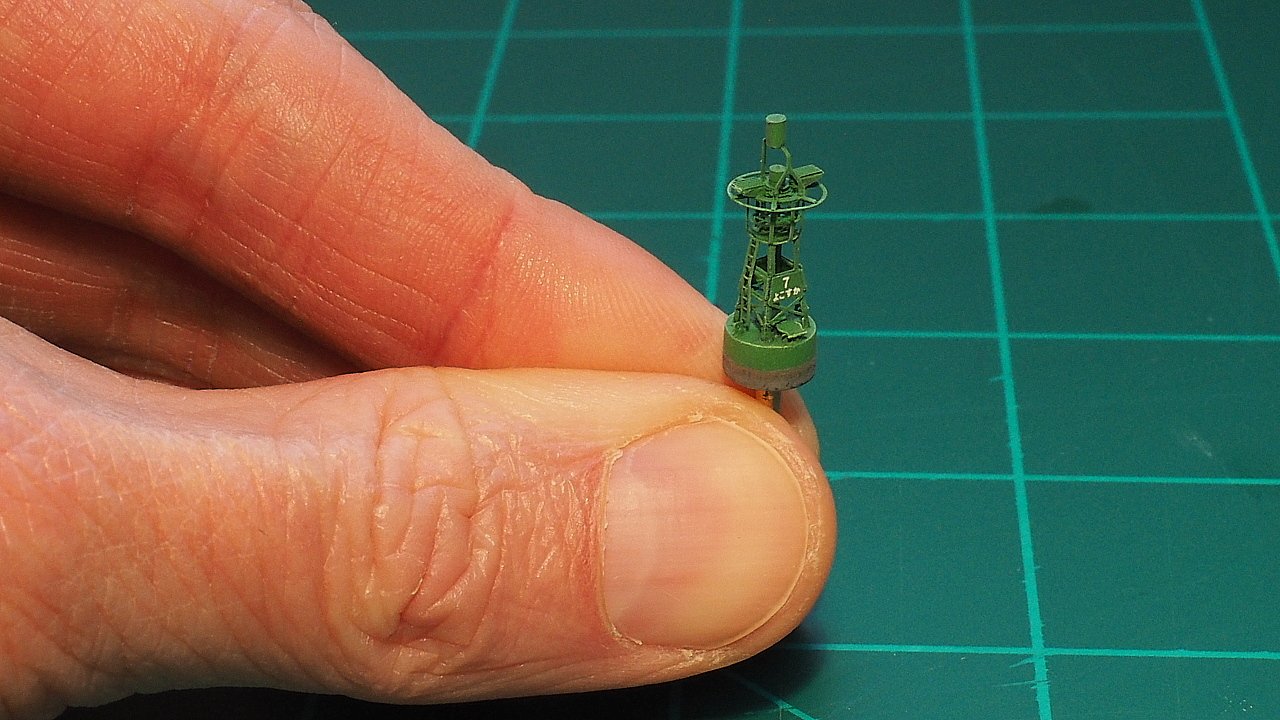
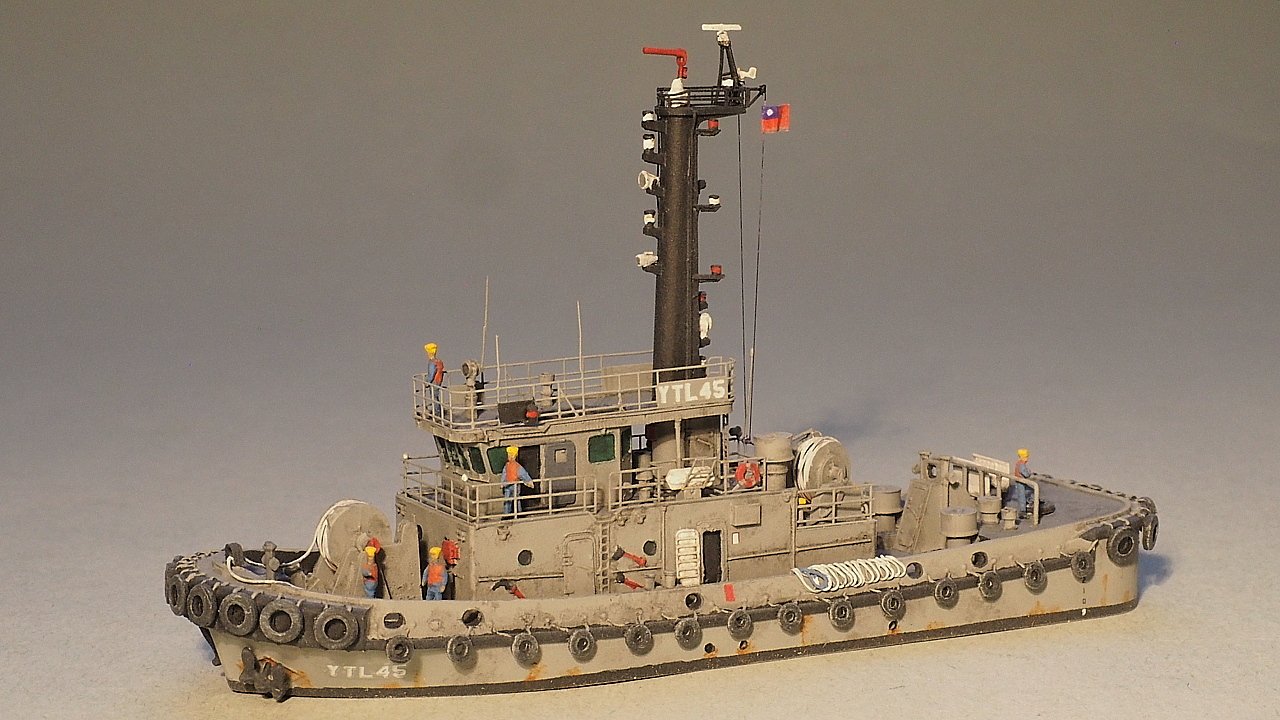
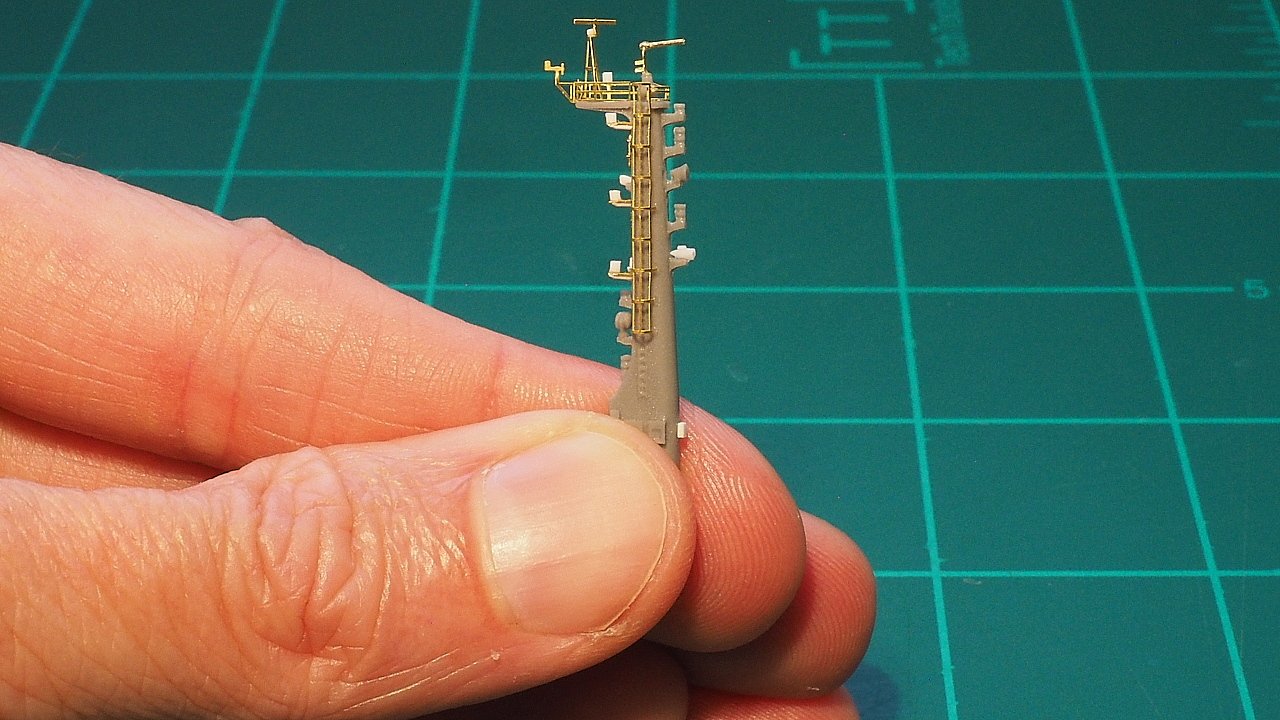
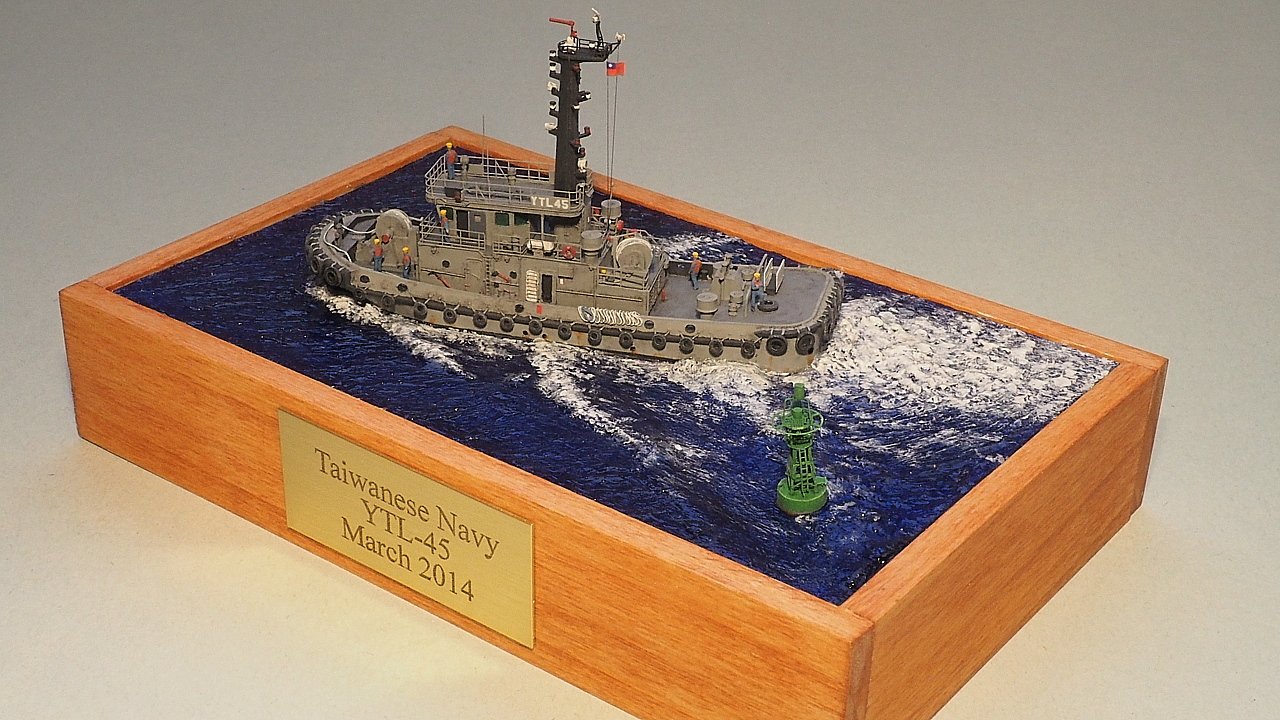
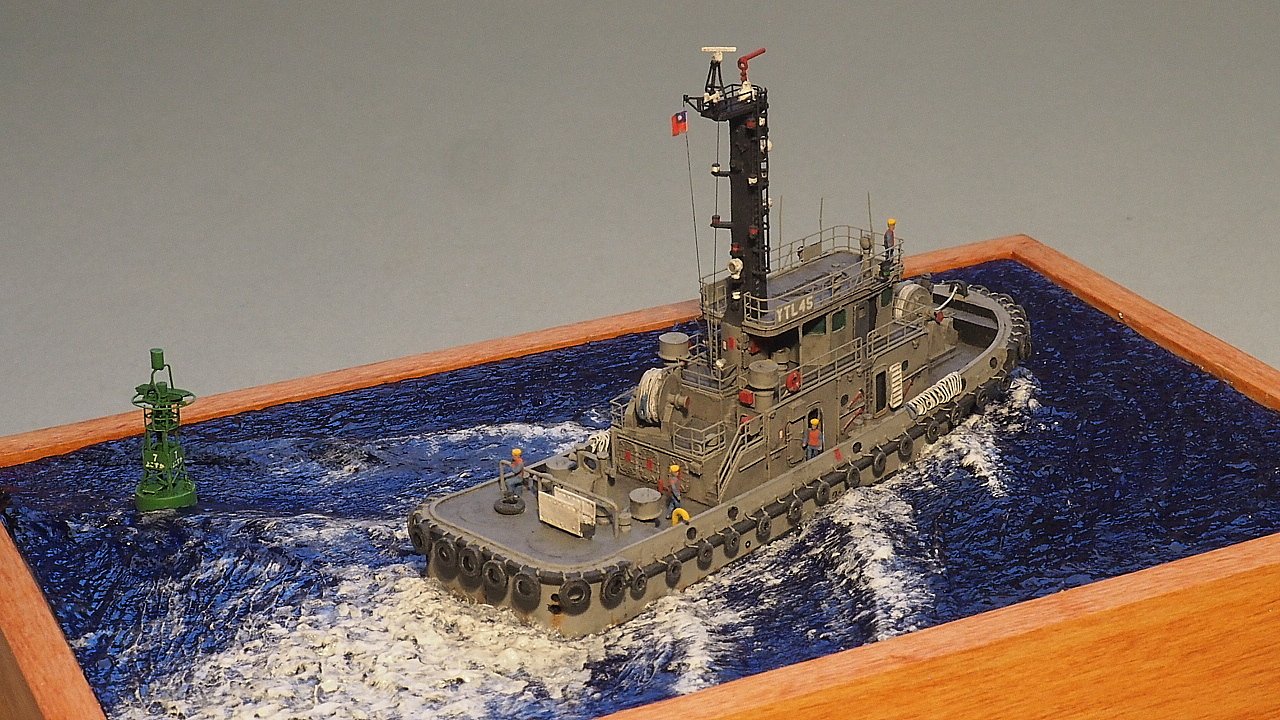
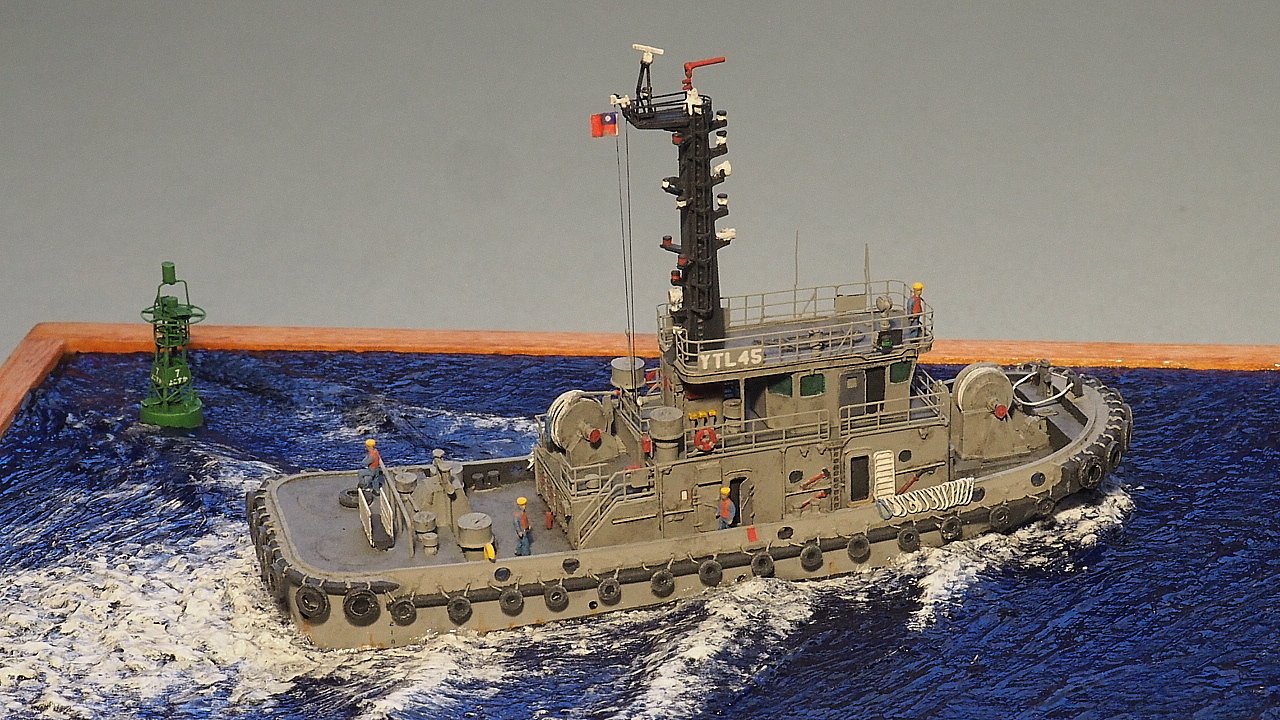
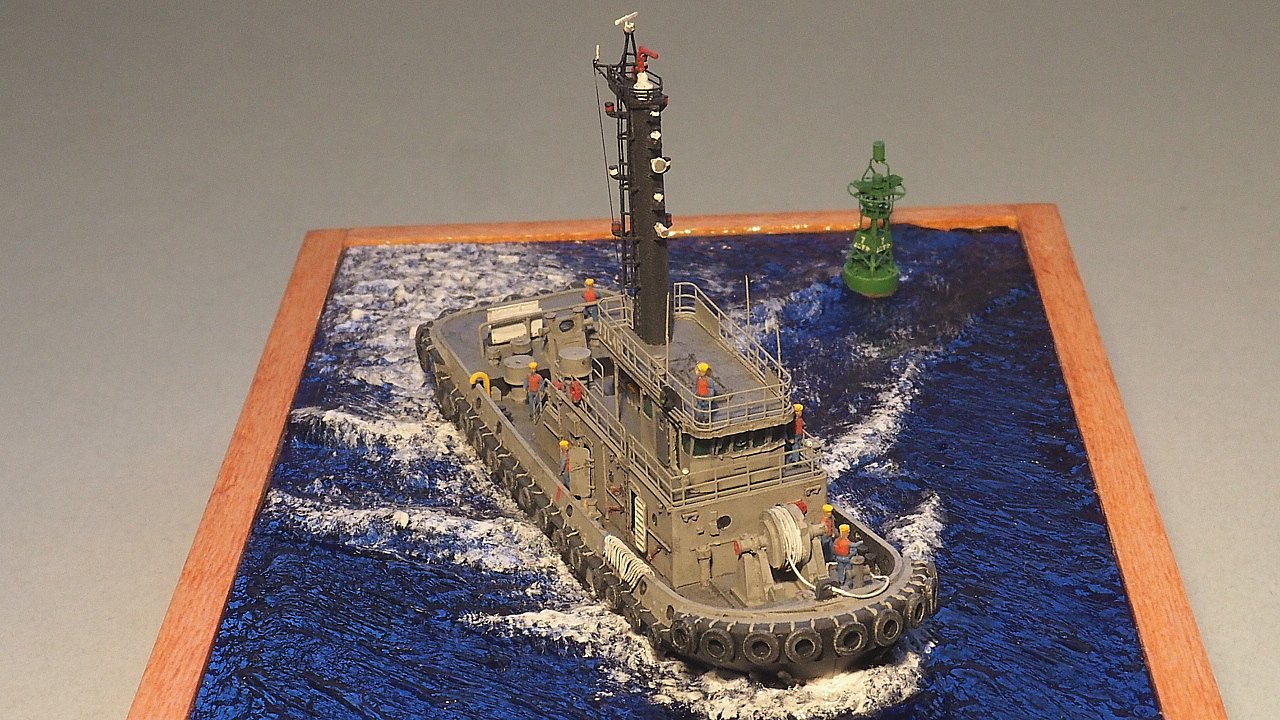
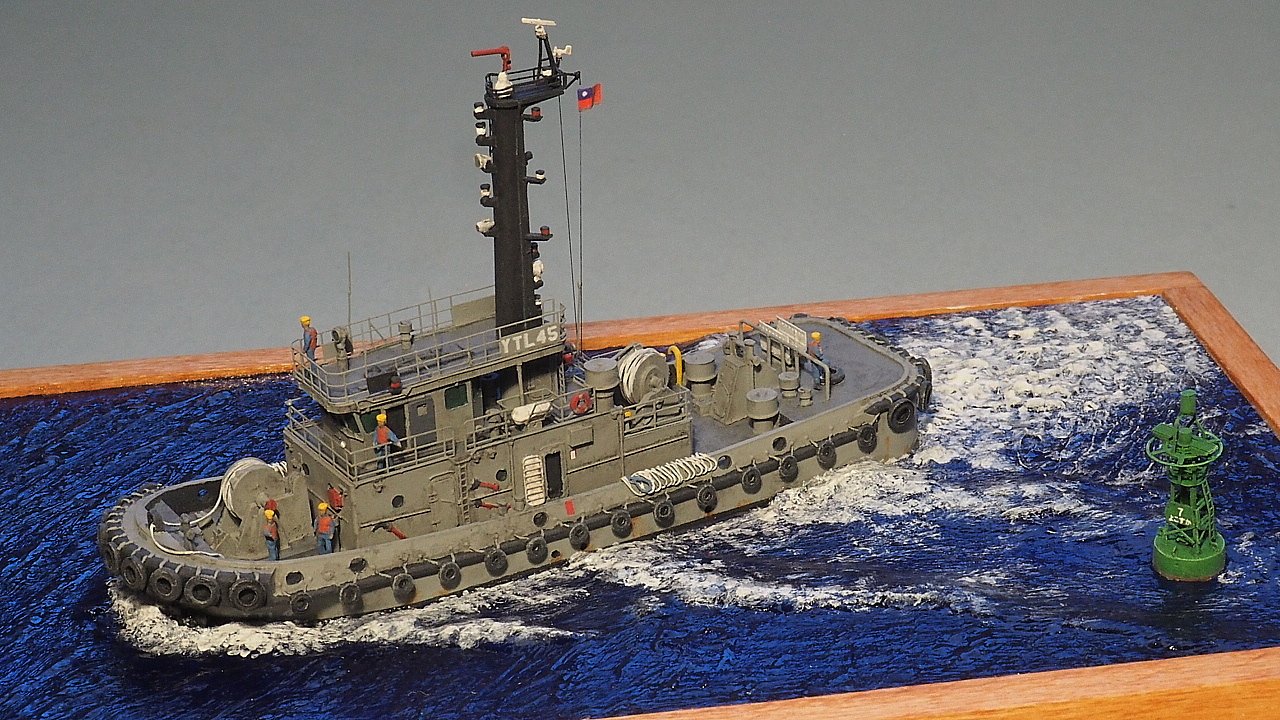
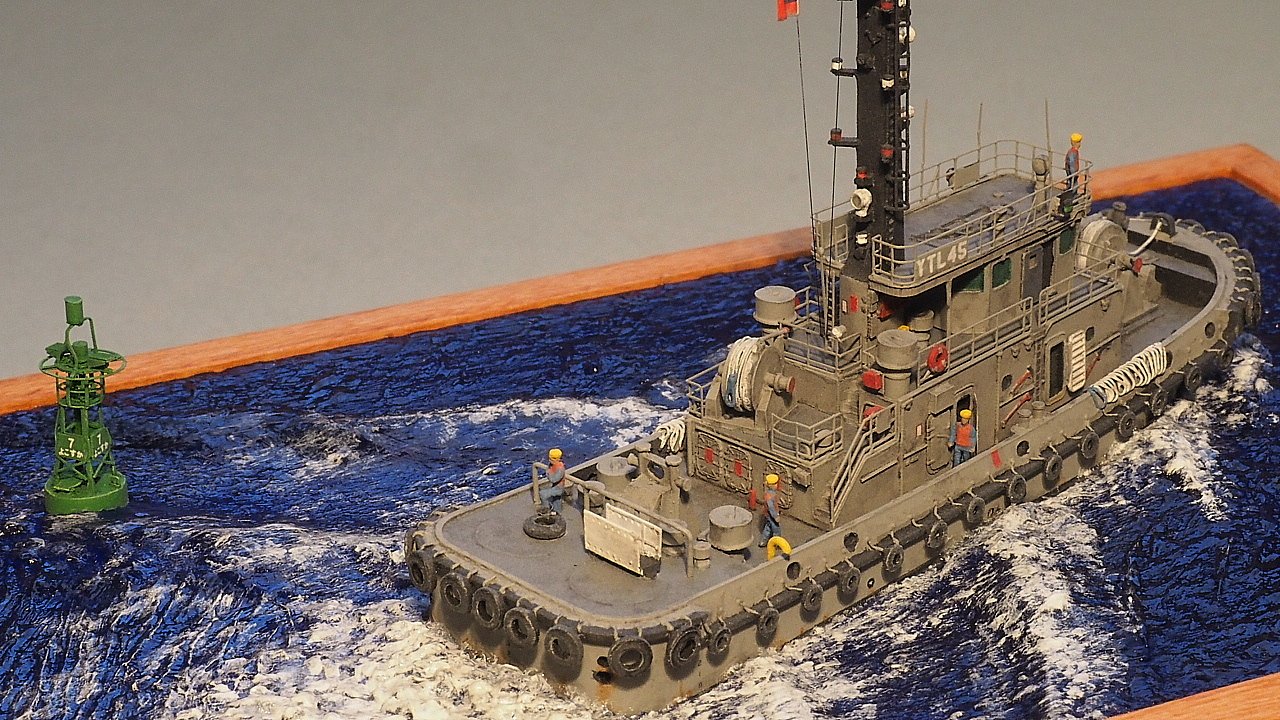
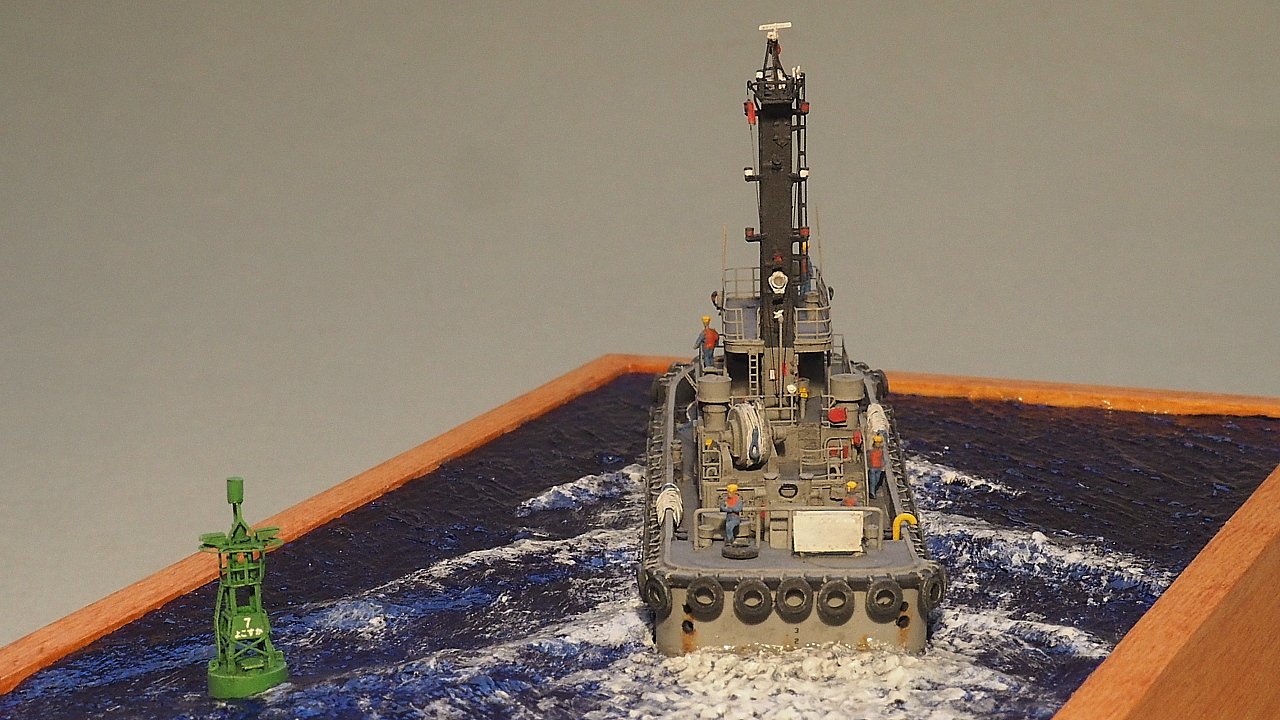
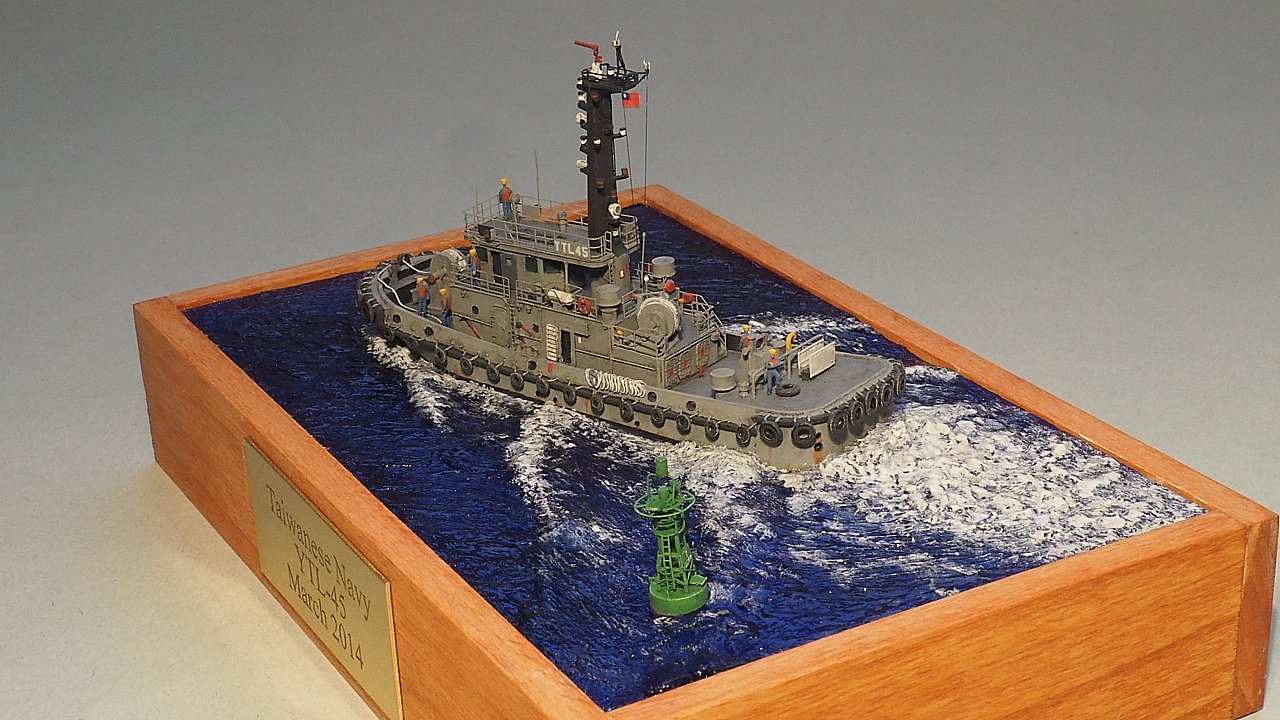
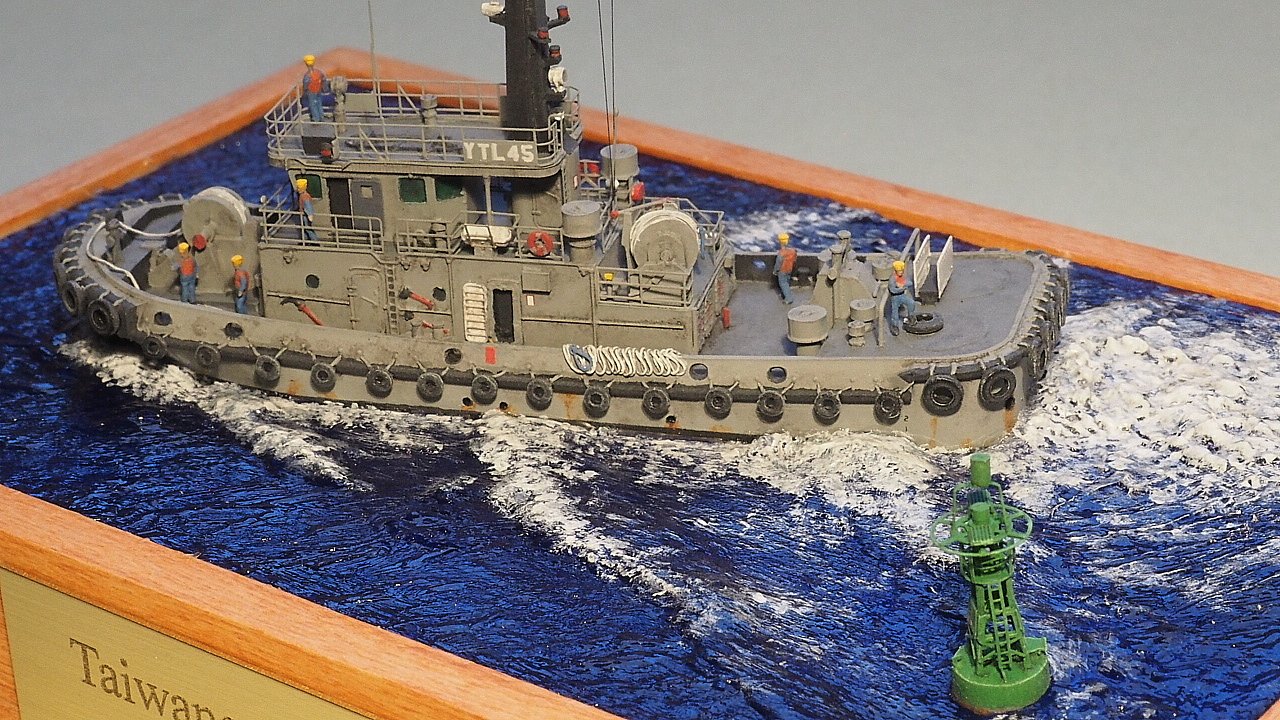
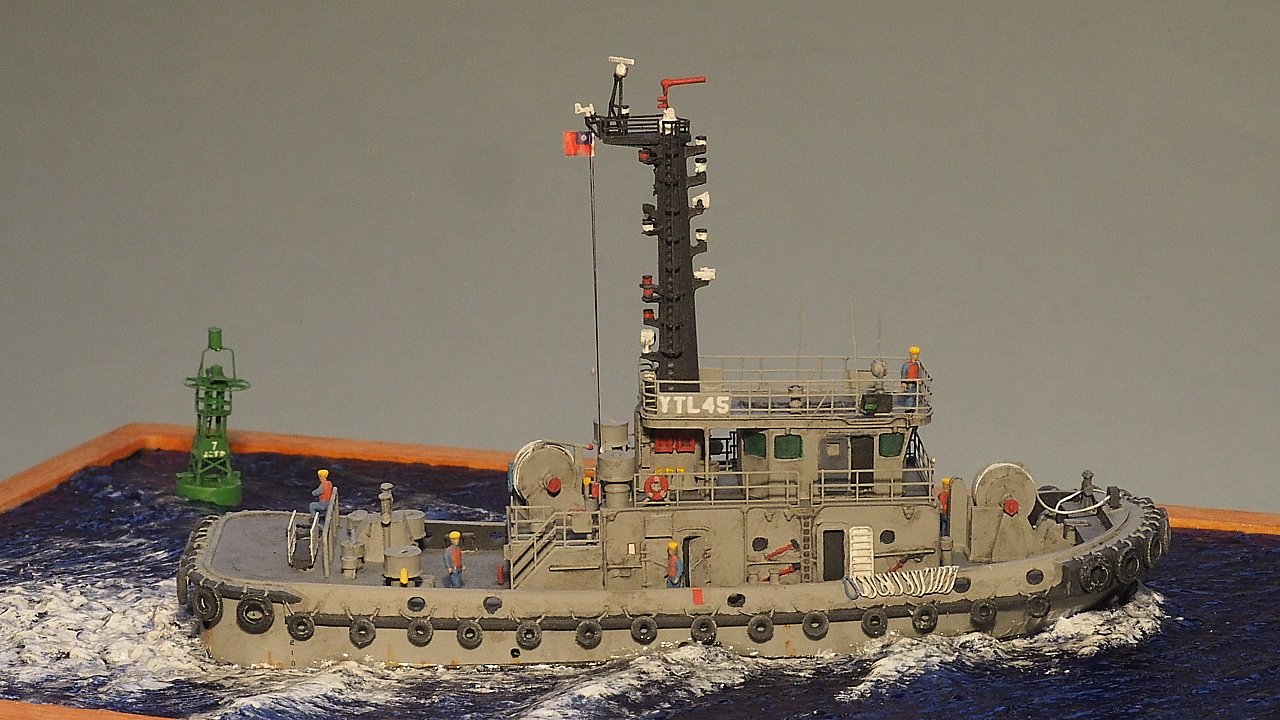
Though I haven't made any progress on my Cheerful in a couple of years, I did manage to complete a ship build. This is my Orange Hobby resin 1/350 scale YTL-45 Taiwanese Navy tugboat. The buoy is also from Orange Hobby. I work slowly, so the entire project wound up taking around 6 months. The tugboat is 240 pieces, with around 60 of those being fabricated by me. The buoy is 25 pieces! Erik


- 10 replies
-
- 14
-
-
Chuck, That's perfect! Since I have an identical 1/48 scale longboat sitting on my shelf, that definitely helps me visual the larger boat's size. Thanks! Erik
- 421 replies
-
- 4
-
-
- medway longboat
- Syren Ship Model Company
- (and 1 more)
-
Chuck, I haven't been in ship-mode for quite a while now. Real life has taken up too much of my time and mental space this year. I recently returned from a trip to Denmark, where I visited the National Maritime Museum and the Viking Ship Museum. Feeling my ship modeling interest being rekindling, I thought I'd check in here. Wow! I'm quite excited by this longboat kit you're working on. While I'm hoping to channel my renewed interest into picking up where I left off with my Cheerful build, this longboat looks like it will be a phenomenal kit. I'm impressed with how much more realistic this larger scale longboat looks, especially when compared to the 1/48 scale boat. Though I understand the size from the dimensions you've given, I'm having a hard time picturing the actual real world size of this boat. Any chance you can post a photo with something we can all relate to, like a can or bottle of soda/beer, or coin, or lighter, etc. I know that's kind of gimmicky, but 1/24 scale isn't something we're used to seeing everyday. Thanks, and glad to see after my time away that you're still doing what you do best! Erik
- 421 replies
-
- 7
-
-
- medway longboat
- Syren Ship Model Company
- (and 1 more)
-
I also used individual planks. I'm a perfectionist, so planking the hull wound up taking quite a while. I'd do 1 or 2 planks a day after work, and 3 or 4 on the weekends. I started getting sloppy if I tried to do any more than that. Patience is key. As far as the plank ends go. I would mark out on the bulkhead the center point of each plank end and make sure the plank's end was perfectly vertical on the bulkhead (with the curvature of the hull this usually means the end is not square with the plank length). Sand lightly, test fit, repeat. The key for square/tight looking plank ends was that test fitting part. If there's a bit of a gap, sand lightly, test fit, repeat. Again, patience is key. This hobby in general vs. other's I have, has really taught me the value of going slow! Erik
- 574 replies
-
- 9
-
-
- cheerful
- Syren Ship Model Company
- (and 1 more)
-
B.E. I've been following your Cheerful build. I've been meaning to compliment you on your progress. My build is in dry dock currently while I wait for the time and mental space before I resume work again. It's been a joy following the progress of the other Cheerful builders though. Yours is coming along nicely! Regarding the color of red you're using. I too decided to use Vallejo Flat Red #957. I knew from past experience that Vallejo paints are high quality and easy to brush paint with minimal streaks. I think you won't regret your choice. To see how the Vallejo flat red looks farther along in the build process, just check out the most recent photos of my build. Keep up the good work! . . . and keep the photos coming. Erik
- 574 replies
-
- 2
-
-
- cheerful
- Syren Ship Model Company
- (and 1 more)
-
Mike, Thanks for the additional photos! You did a superb job on her . . . and set the bar high for the rest of us Cheerful builders! The detail shots will be useful as a reference when I get farther into my build. Erik
- 452 replies
-
- 1
-
-
- cheerful
- Syren Ship Model Company
- (and 1 more)
-
Hey Rusty, Looking good! One request as you cross the finish line with your Cheerful . . . post lots of photos of the completed ship. Erik
- 310 replies
-
- 4
-
-
- cheerful
- Syren Ship Model Company
- (and 1 more)
-
This is exactly what I'm thinking with my Cheerful. I' glad to see that Rusty is on the home stretch. I've been following lurking closely. Keep up the good work Rusty! Erik
- 310 replies
-
- 2
-
-
- cheerful
- Syren Ship Model Company
- (and 1 more)
-
Mike, Congratulations! This looks great!! You definitely set the bar high for the rest of us Cheerful builders. Any chance you'll do a photo shoot of the finished build and post more photos? Erik
- 452 replies
-
- 5
-
-
- cheerful
- Syren Ship Model Company
- (and 1 more)
-
I finished planking the hull. Woohoo! Feels kind of weird to not be adding a plank or two after work every day. I also added the stern post, and did a more thorough sanding of the planking on both sides of the lower hull, paying close attention to getting rid of any high and low spots. I still need to do more work where the planking meets the keel and the stem. Also, the black paint on the wale has taken quite a beating. I'll fix that later. I was hesitant to include the bow shot, since the planks on either side don't line up at the stem too well. Figured it was still an interesting angle for a photo though. Erik
.JPG.ac563ed718f6402e6caa8948d2172ddc.JPG)
.jpg.57ecfdac67818266ed17c282cbba155b.jpg)
.JPG.4d49117b708dbbdf36f66a178223bb57.JPG)
.JPG.506427c92c2c671a1ec680e980696be0.JPG)
.JPG.74eb224156e62d1c1b3cc6c969348906.JPG)
.JPG.91b7980de397708ebb64b541dc786f00.JPG)
.JPG.42400cb70242dfae3b90a753a39f5af3.JPG)
-
Mike, This is looking really good! You continue to set the bar high for those of us Cheerful builders following in your footsteps! Erik
- 452 replies
-
- 5
-
-
- cheerful
- Syren Ship Model Company
- (and 1 more)
-
Mike, Thanks. In looking at my plans, and then looking at your yards in the photo, I understand what you did with the diameter of the yards when shortening them. One of the good things about starting my build after you guys is that you figure out some of this stuff before I get to that point in the build. Also, that shorter main yard is a good thing. I've been wondering just how wide the shelf will have to be that I display my Cheerful on! Erik
- 452 replies
-
- 7
-
-
- cheerful
- Syren Ship Model Company
- (and 1 more)
-
Looks good Mike. How much did you shorten the yards? Were they mistakenly drawn too long on the plans? Thanks, Erik
- 452 replies
-
- 4
-
-
- cheerful
- Syren Ship Model Company
- (and 1 more)


