HOLIDAY DONATION DRIVE - SUPPORT MSW - DO YOUR PART TO KEEP THIS GREAT FORUM GOING! (Only 13 donations so far - C'mon guys!)
×


Erik W
-
Posts
470 -
Joined
-
Last visited
Content Type
Profiles
Forums
Gallery
Events
Everything posted by Erik W
-
I had to do some of that mental math between my first build and my current build. My first build was the Model Shipways 18th Century Longboat at $40, with some new hand tools, and some of Chuck's rope, say around $100 total . . . for a 6 month project. My current build is Chuck's Cheerful built with boxwood. Most of the cost was up front, with follow-on purchases as I've needed more supplies, or hand tools. I think my total cost will be around $800. I was a bit put off by this price tag, by far the most I've ever spent on a single model, but I did the math for the cost per day over an estimated 3 years (knowing my slow speed) of working on it, and it comes to $.73 a day. Very reasonable in the long run. At times, I've gone months without spending money on the Cheerful project. Of course, a new parallel hobby seems to be collecting sailing ship books . . . I, er, won't talk about the cost of those 35 books. Also, I made the decision to choose a second build that wouldn't require power tools. If I get to the end of the Cheerful, and am confident I've found another life long hobby, I may dive into the expense of power tools. Erik
-

Questions about double wale
Erik W replied to Erik W's topic in Building, Framing, Planking and plating a ships hull and deck
Pete, The only other thing the book says about the wales on the Rogers Collection model of the Royal William is the sentences following what I had quoted above, "This produced a solid-looking main wale that became the norm for the remainder of the century. The Royal William's main wale is solid, except that here it is made of two, not three, broad strakes, both painted black and lacquered. The upper wales, too, are solid, though unpainted, but the channel wales are of the old, double wale construction." Erik -
I just received this exquisite book today. It's filled with great color photos, and is chocked full of tons of interesting information. I'd highly recommend it to anyone interested in the history of these ships and models. Erik
-
Questions about double wale
Erik W replied to Erik W's topic in Building, Framing, Planking and plating a ships hull and deck
Today I received Seawatch Books The Rogers Collection of Dockyard Models by Grant H. Walker. I stumbled upon this in the section about the 100 gun Royal William regarding double wales, " . . . a Navy Board order issued on 14 October 1715 directed that this traditional practice was to cease, and that henceforth the main wale would be made up of three strakes, all of the same thickness." Erik -
Questions about double wale
Erik W replied to Erik W's topic in Building, Framing, Planking and plating a ships hull and deck
Mark, Good point. I hadn't thought that though pricey, the frieze paintings would themselves have been a cost saving and time saving during construction, compared with the carved work that was falling out of favor. I'd like to think that the real ships carried this elaborate frieze work. Sure would've been an impressive sight to behold! Chuck, It makes sense if the frame futtocks were secured directly to the wale, that you would have multiple wales. Thanks guys, Erik -
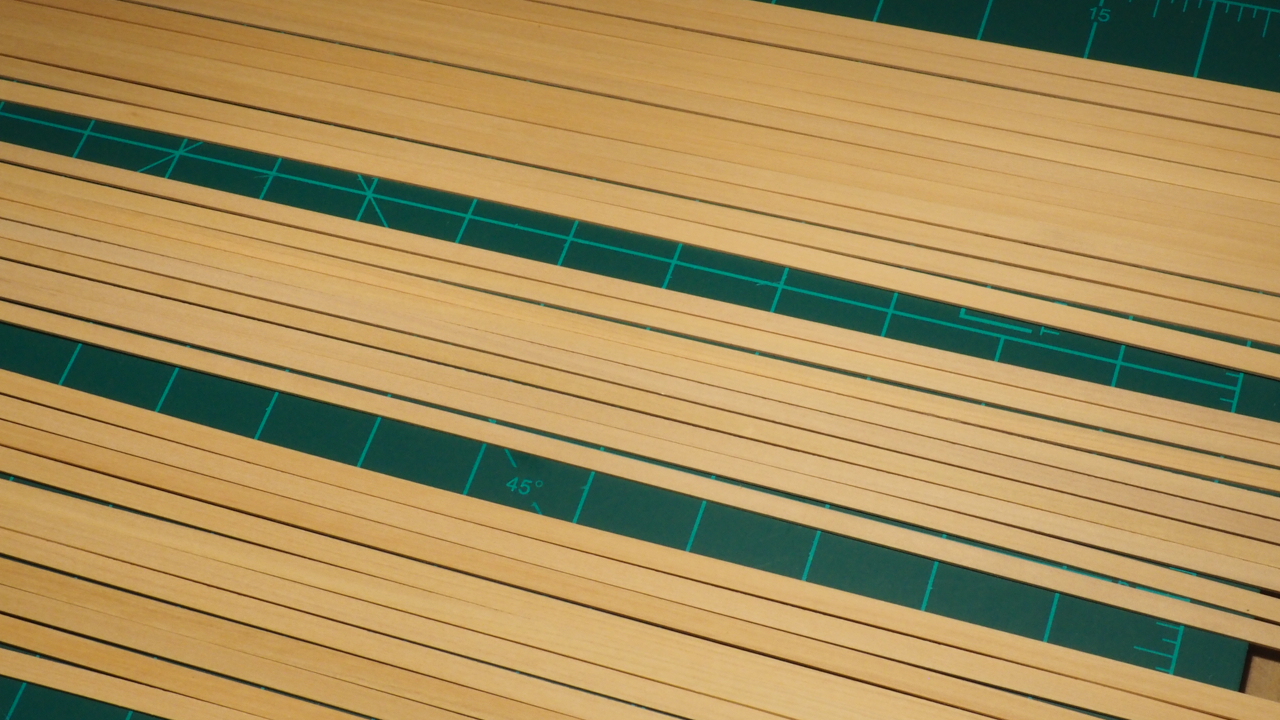
With the need for some wider planks (see my post above), I decided to order some 7/32" strip. Since I had ordered all my wood from Jason at Crown Timberyard for the build so far, I decided to place my order with him, which I did . . . I then decided that this would be a good opportunity to sample Wood Project Source, so I wound up placing an identical order, for 10 strips, with Roman. I contacted them both last Monday, and received a reply from both quickly. Crown's strips cost a little more, but the shipping was cheaper. So, the price was pretty close. I placed my order, and both packages arrived today. I must say the quality of the wood is identical, and has nearly the exact same color/shade range. Both supplier's strips measured out at exactly the correct dimensions. The photo below shows Wood Project Source 7/32" wood at the top, some of my original 3/16" wide strips from Crown Timberyard in the middle, and at the bottom 7/32" strip from Crown. I'm happy to say that when mixed together, I couldn't tell the difference between the two. Crown gave me 1 extra strip and a 3/64" sheet. Wood Project Source threw in 2 extra strips, and a few off size 3/64" thick strips. Jason has been great to work with over the last year and a half, and I'm happy that Roman has stepped in to be a supplier. Hopefully there is enough business out there for both! My lamp was centered over the front of the photo, so the back may look slightly darker than it is in reality. Erik

-
Questions about double wale
Erik W replied to Erik W's topic in Building, Framing, Planking and plating a ships hull and deck
Herring, Mark, Thanks for the info! That answers my question in as much detail as possible. Mark, I've often wondered how accurate these models are compared to how the ships were actually built, particularly in regards to things like the elaborate painted decorations. I guess to some extent we'll never be 100% sure, since, though a lot of the models survived, the ships themselves did not. Thanks again, Erik -
What was the point of a double wale vs. a single wale? And how common were these? Photo location, National Maritime Museum, Greenwich: http://collections.rmg.co.uk/collections/objects/66415.html Thanks, Erik

-
Julie, Both of these books address scale sail making. Both authors are committed to using techniques that make sails look realistic and correctly scaled. https://www.seawatchbooks.com/ItemDisplay.php?sku=115003This supplement is part of this revised masting and rigging book: https://www.seawatchbooks.com/ItemDisplay.php?sku=115002 https://www.seawatchbooks.com/ItemDisplay.php?sku=107002 Erik
-
Thanks for the input guys. That's pretty much what my thought on a correction was. Annnd . . . Chuck, thanks for the advice on not worrying about it. Believe it or not I woke up at 3:30am this morning fretting over this! You'd think in this day and age if I was going to be awake worrying at that hour, it would be about something of a more important nature! I have to say, thankfully this ship building is fun and rewarding, because it seems every step of the way some unforeseen problem rears it's ugly head. I try to remind myself that I just started this hobby in 2015, so I'm still a rookie. Just trying to reach for the bar a lot of you guys set so high! Erik
-
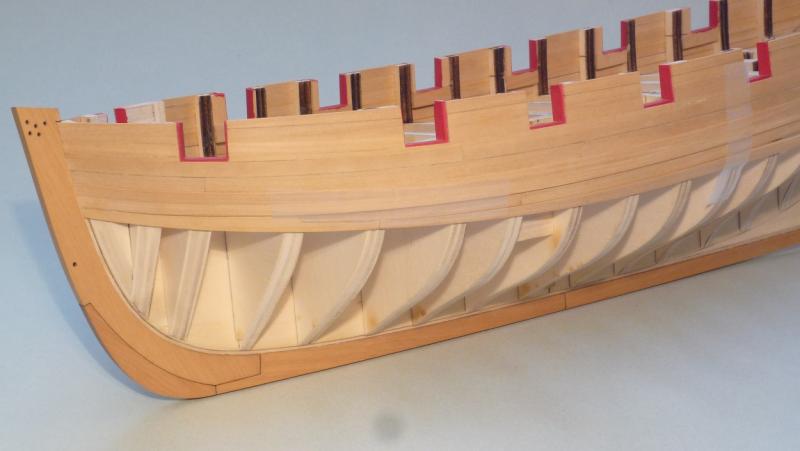
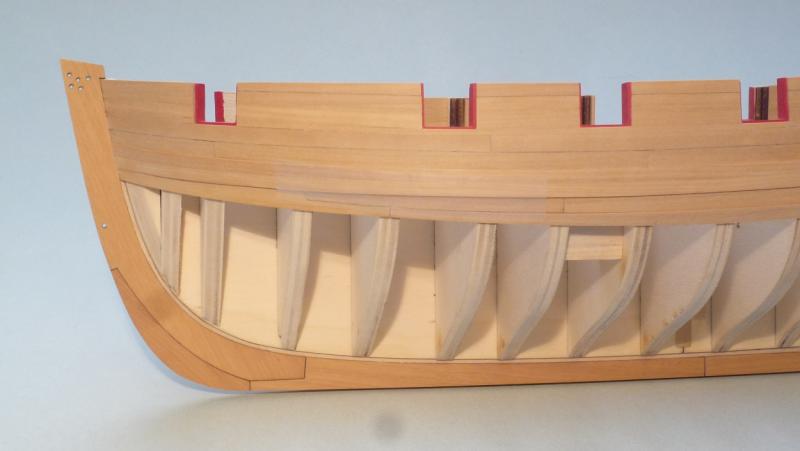
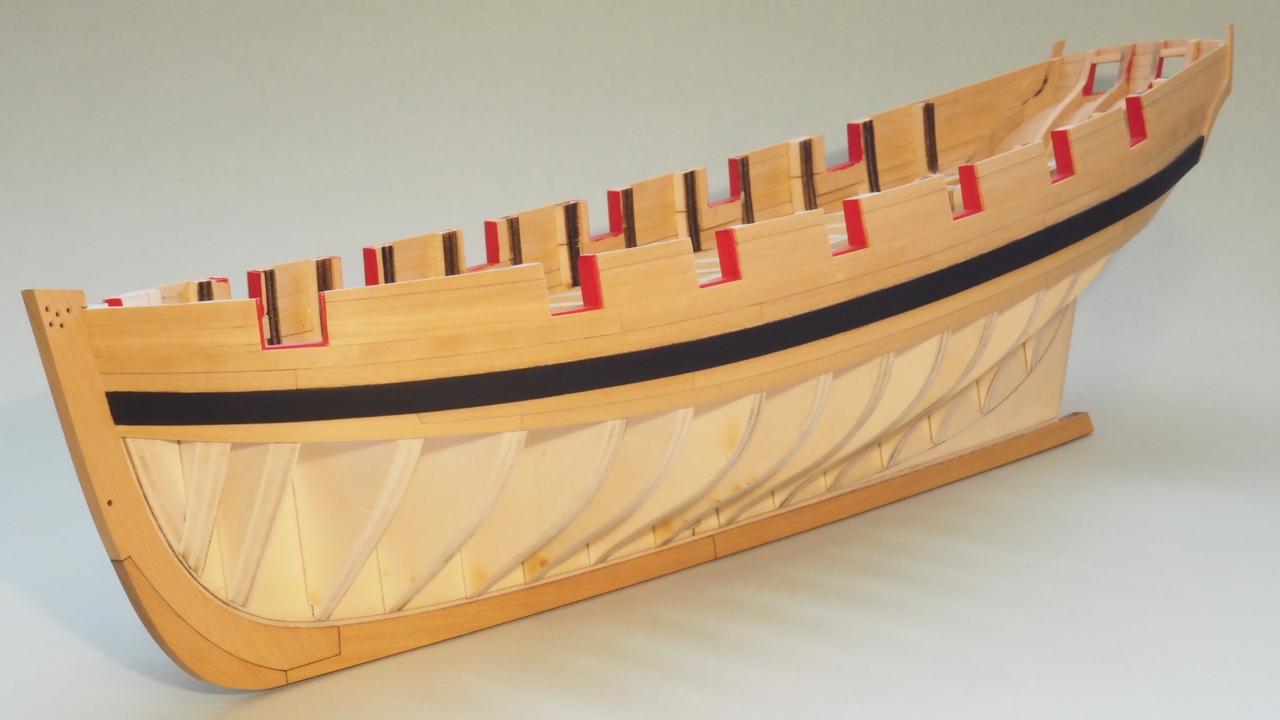
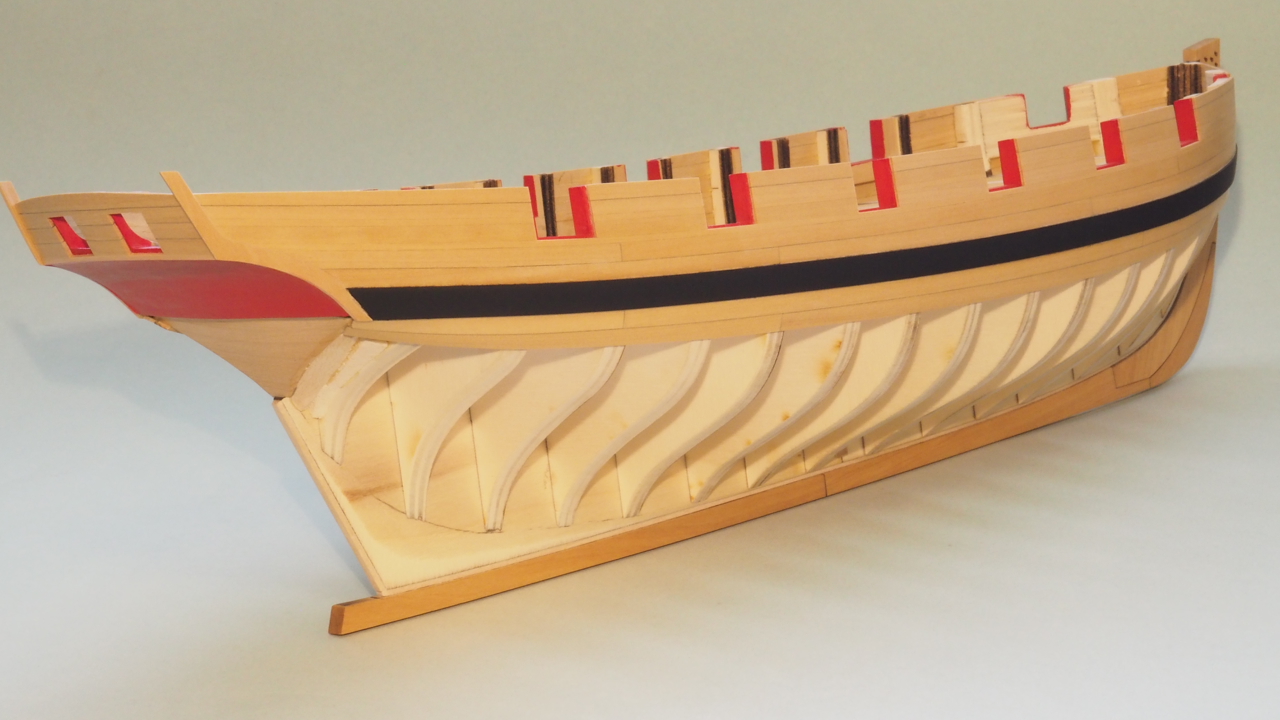
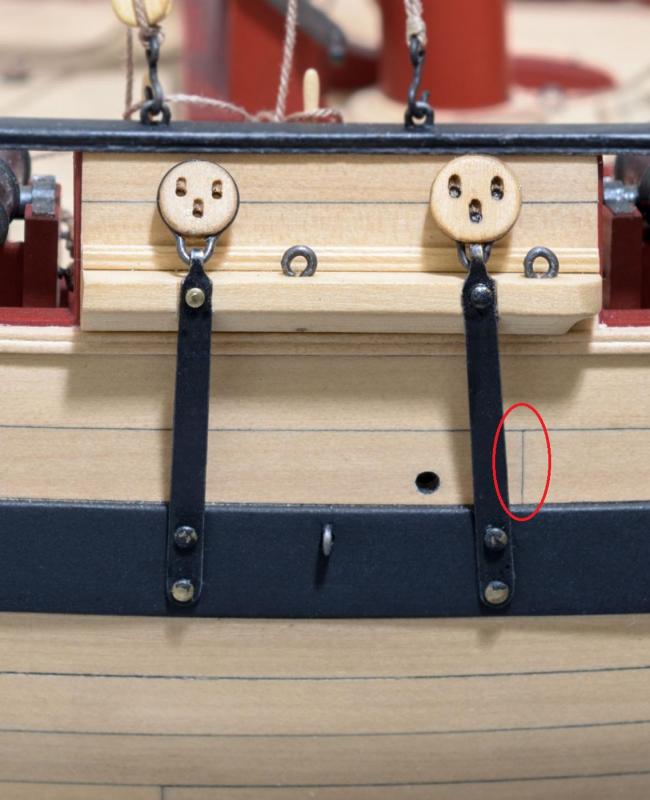
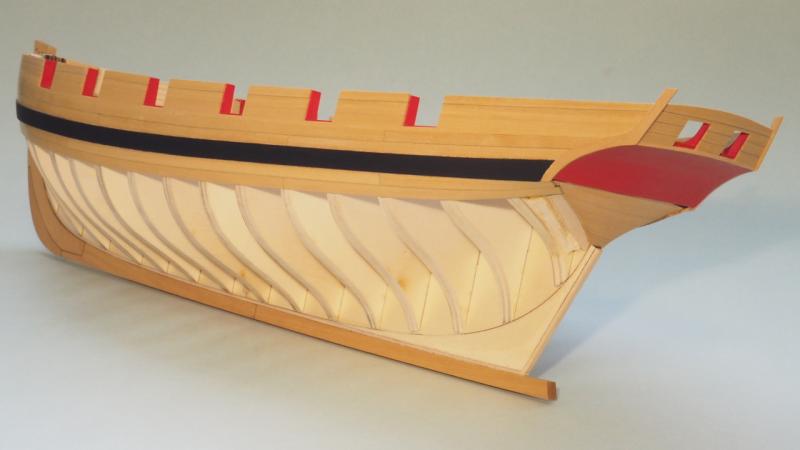
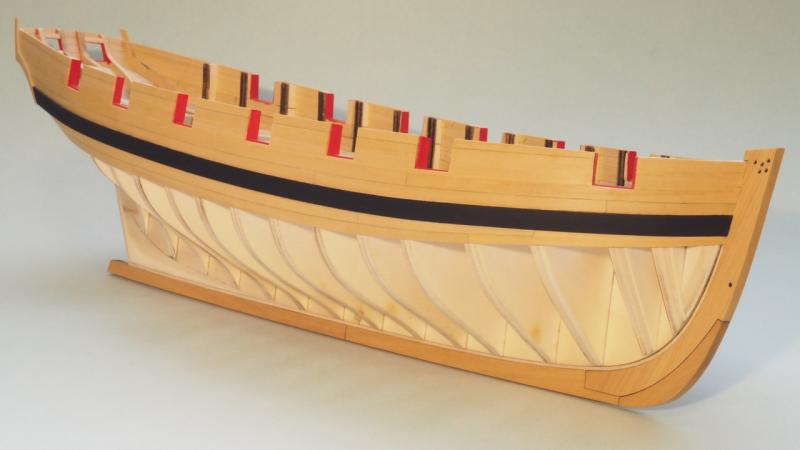
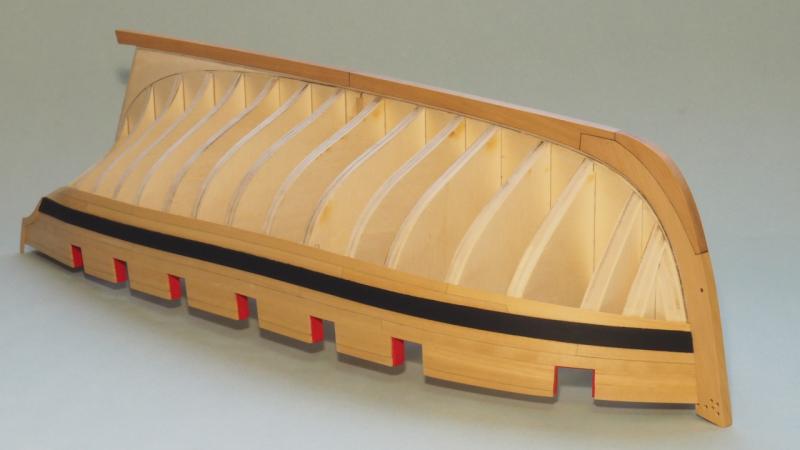
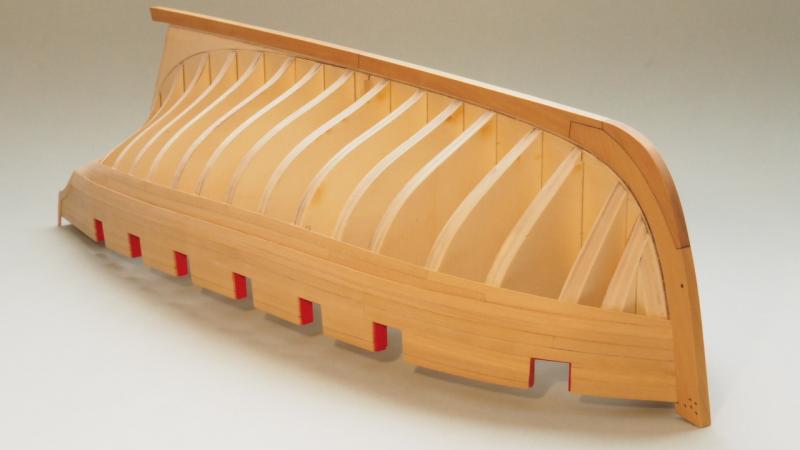
I spent the long weekend doing some planking. The good news is I'm happy with the way the planking looks. These photos area after a rough sanding, which I mostly did to see how the seams looked. One issue I'm having (as seen in the last photo), is though I've measured everything out, and the planking strips I'm using are a full 3/16" wide, with each row I'm putting down they seem to be falling farther short of my tick marks by a small amount on the middle frames. When I measure the space between what I've done and the keel, sure enough, I'm going to wind up with a bit of a gap (even with a wider garboard plank). My solution is to order more of the wider 7/32" strip from Jason at Crown Timberyard (or Wood Project Source, anyone have experience with them?), and use what will probably be a couple of those in the rows where the two belts meet (where wider planks on the middle frames won't be noticed). Otherwise, I'd have to add a 21st row of strakes, which would screw up the bow and stern. It's weird, everything measured out when I did the tick strips and marked the hull, and measuring the plank width of what I've done so far shows the amidship planks at a full 3/16" wide. The only thing I can think of it has something to do with how I was beveling one edge of each plank . . . but like I said, the mounted planks measure 3/16" wide. Any thoughts? Erik

-
Those traveler rings look great Chuck! I just placed an order. Erik
- 1,051 replies
-
- 4
-

-
- cheerful
- Syren Ship Model Company
- (and 1 more)
-
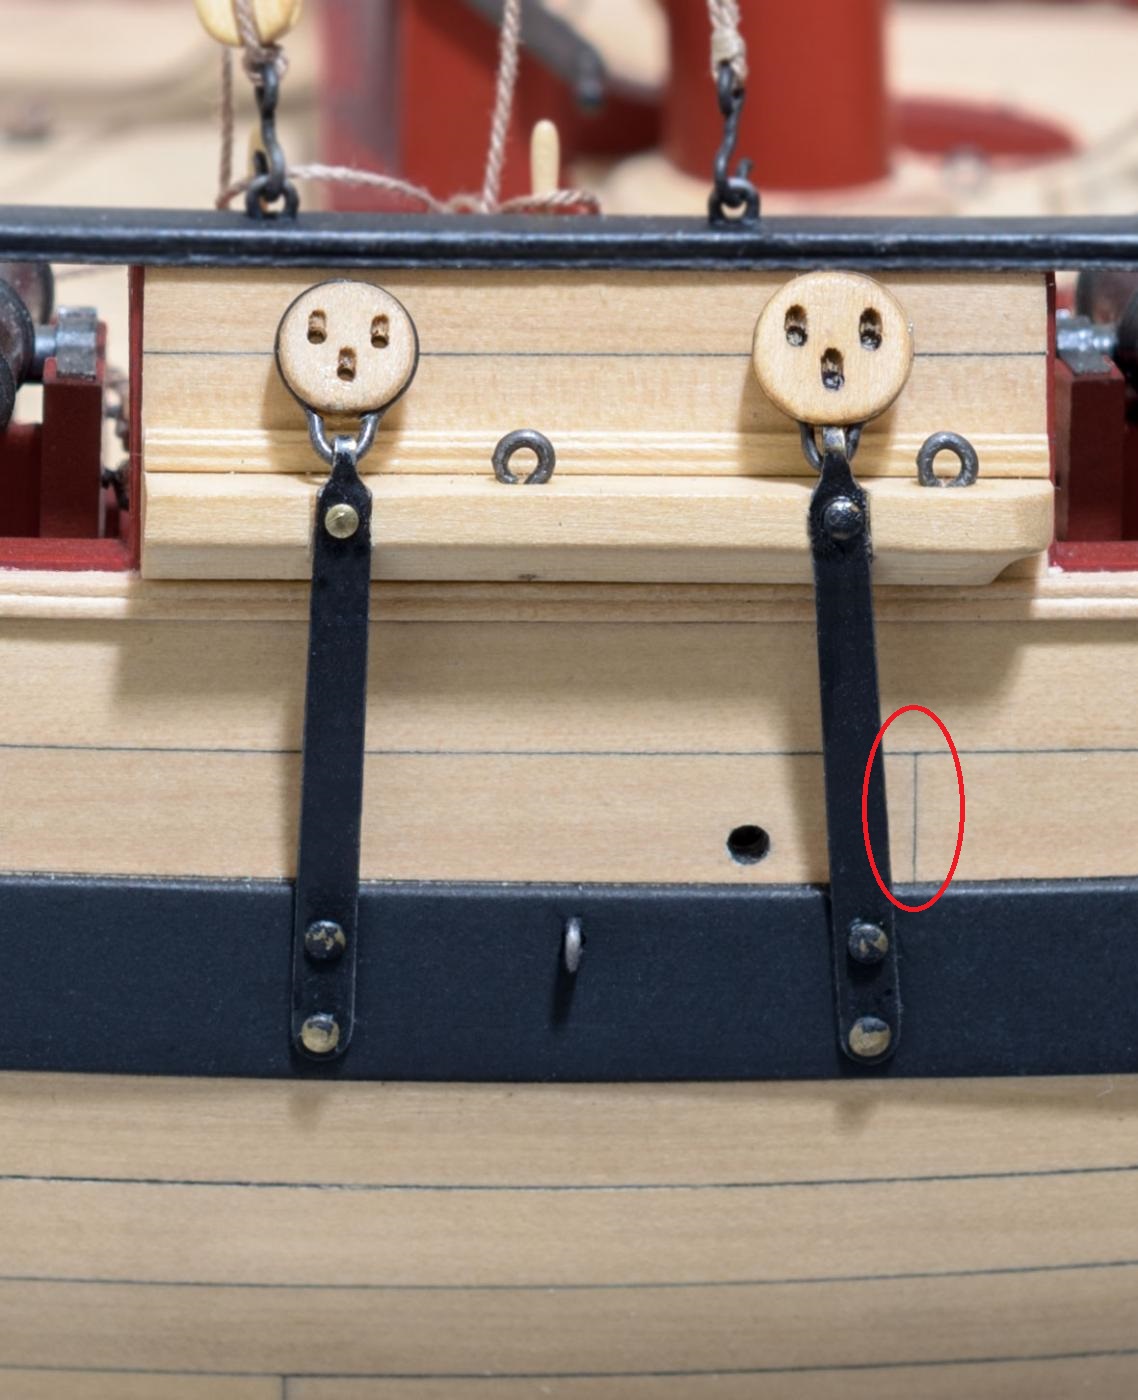
I just had to check to see which size deadeyes I bought from Chuck. 6mm. Annnnnnd, since I'm in full on planking mode, I have to say I admire this plank joint. It doesn't get any better than that! Erik
- 452 replies
-
- 19
-
-
- cheerful
- Syren Ship Model Company
- (and 1 more)
-
Chuck, Looks good! Thanks for photo 1. It's nice to see the whole thing in one photo. I'm having a hard time getting decent pictures of my hull only . . . seems like quite a challenge to get everything in one photo when masted and rigged! Erik
- 1,051 replies
-
- 3
-
-
- cheerful
- Syren Ship Model Company
- (and 1 more)
-
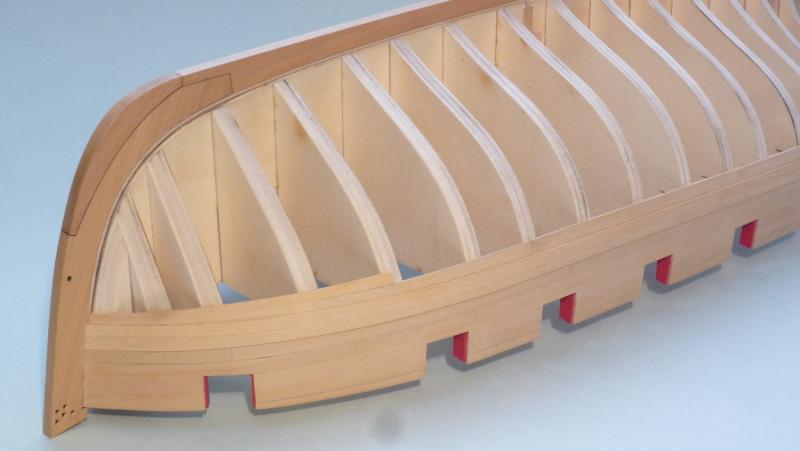
I'm moving on now to defining the separation of the two belts of planks on each side. After much measuring, checking, re-checking, and redoing certain areas, I got the drafting tape where I wanted it and drew my lines. Now it's on to carefully using tick strips to transfer the plank widths on to the frames. Erik

-
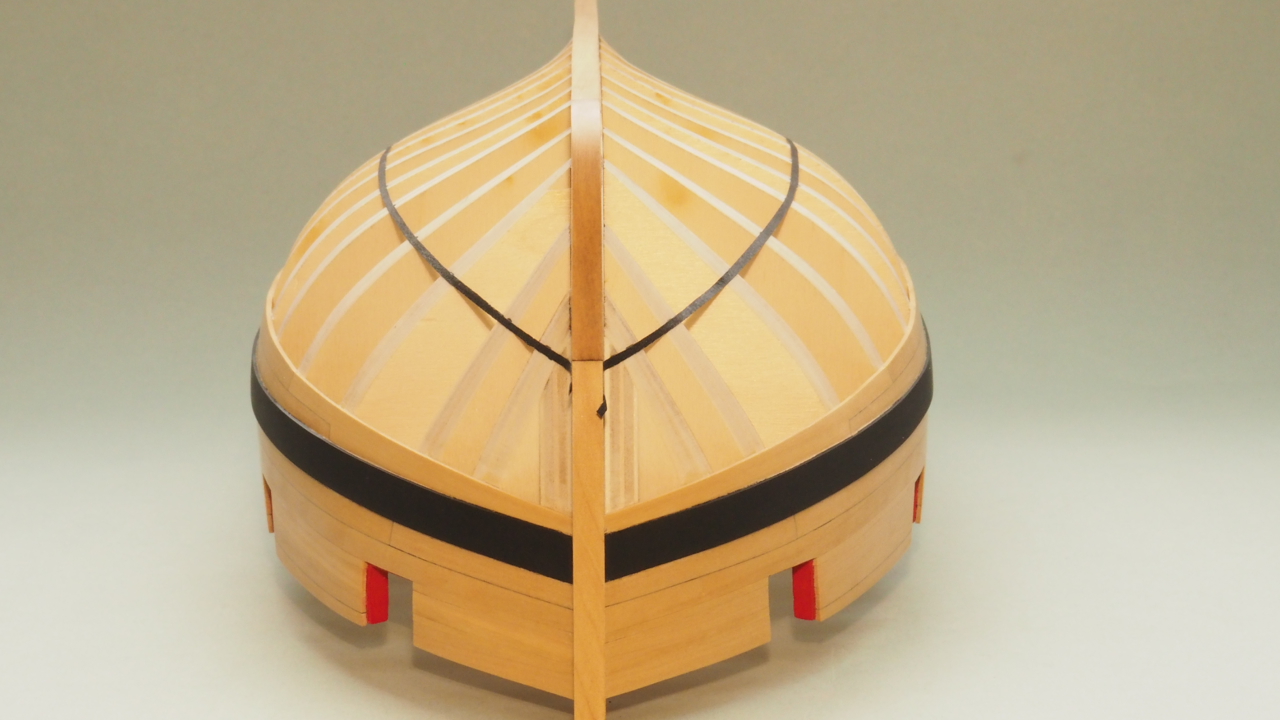
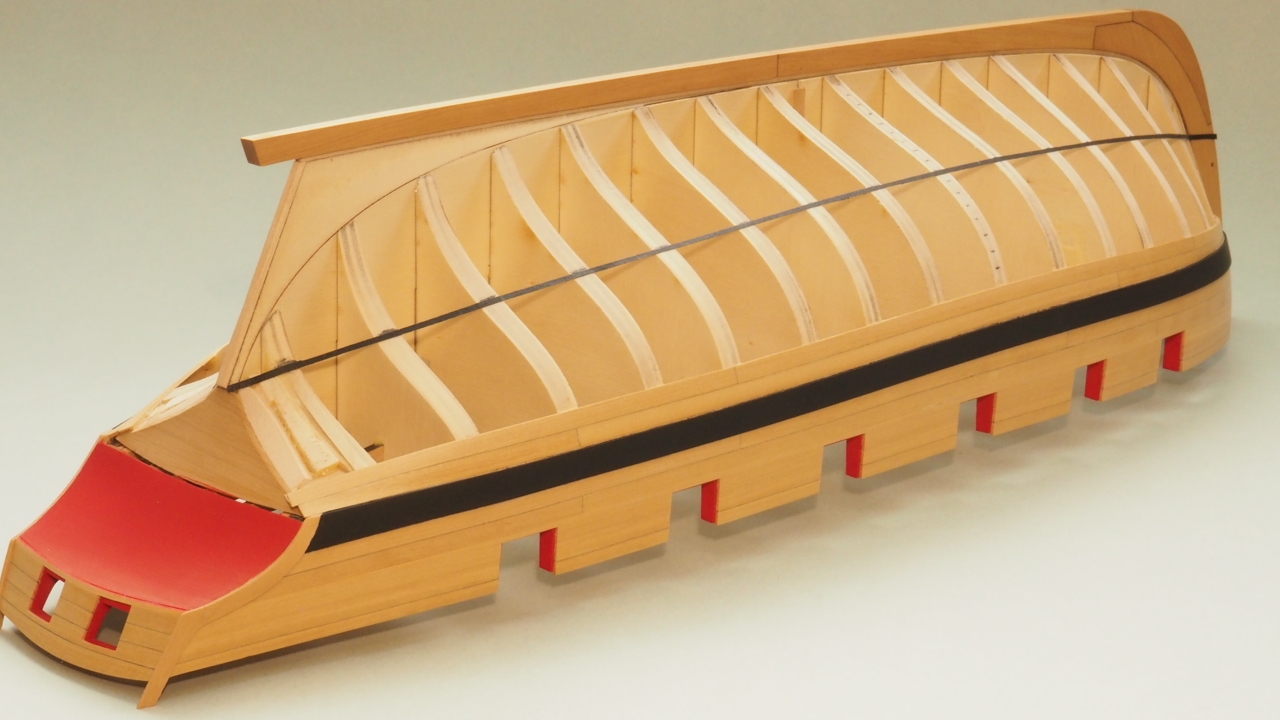
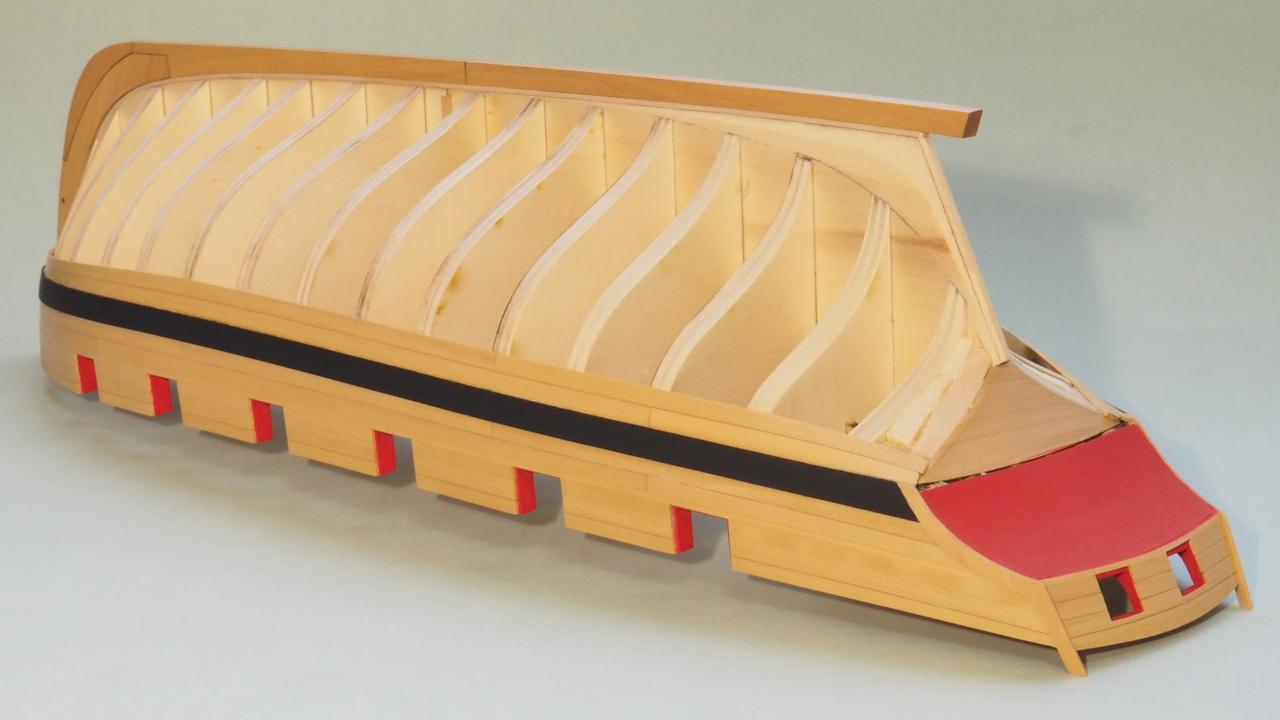
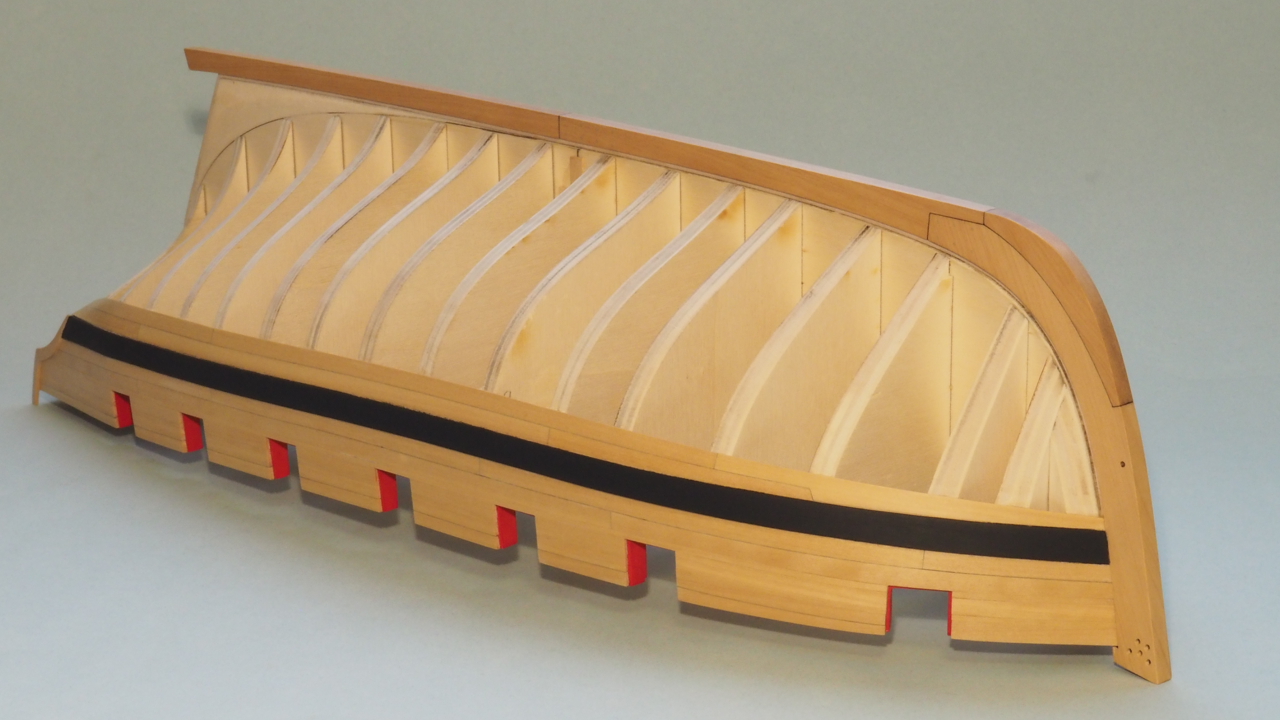
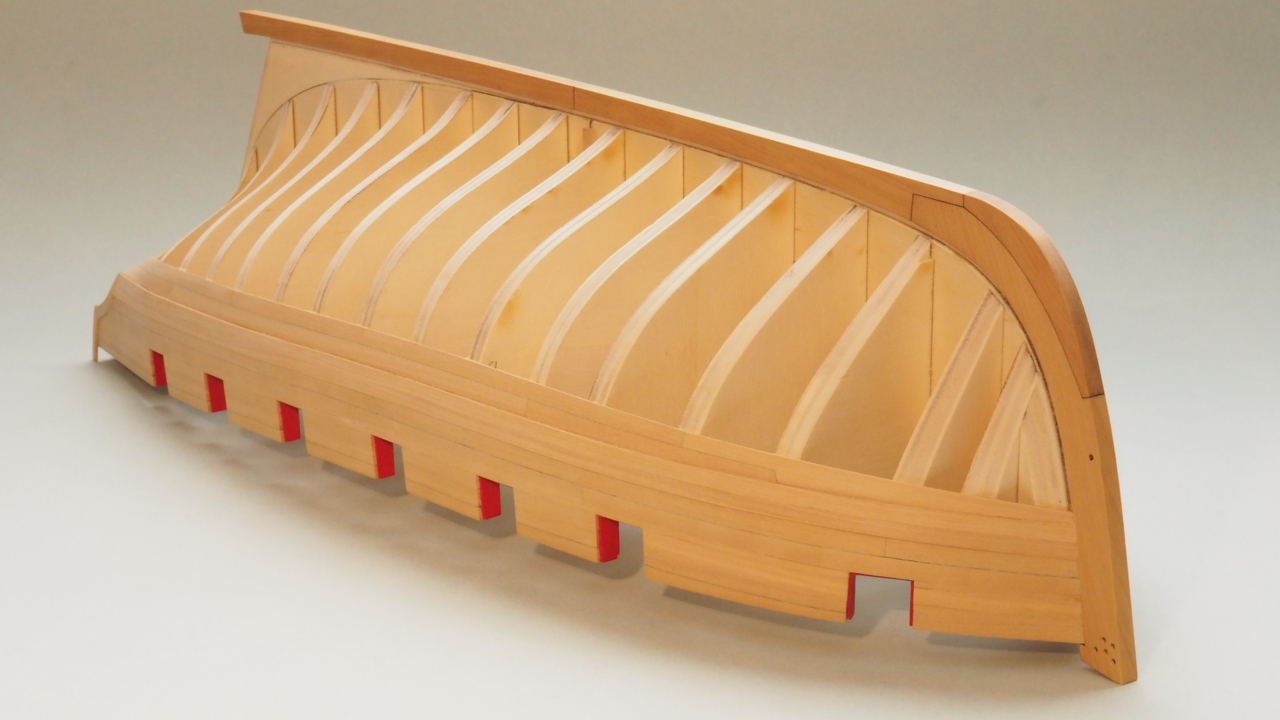
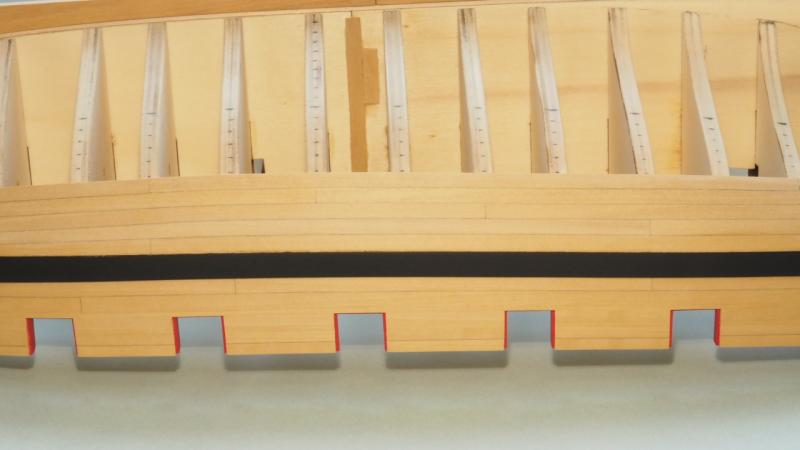
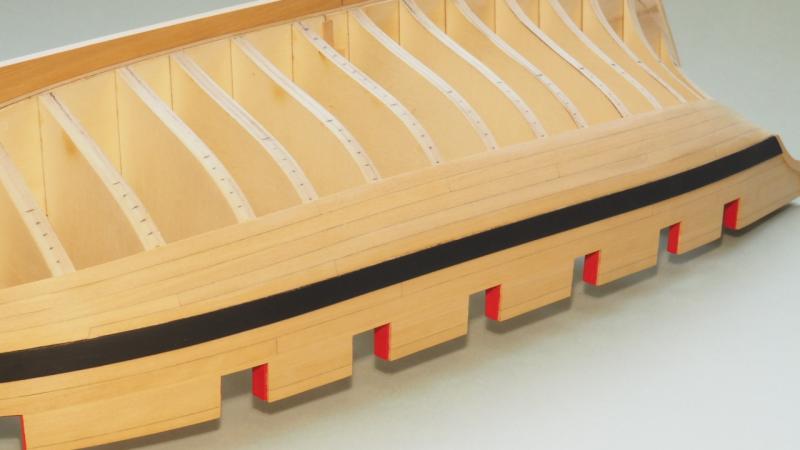
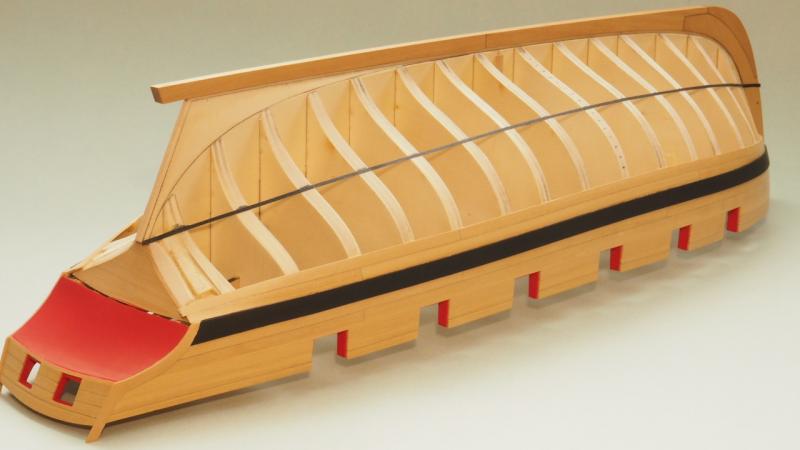
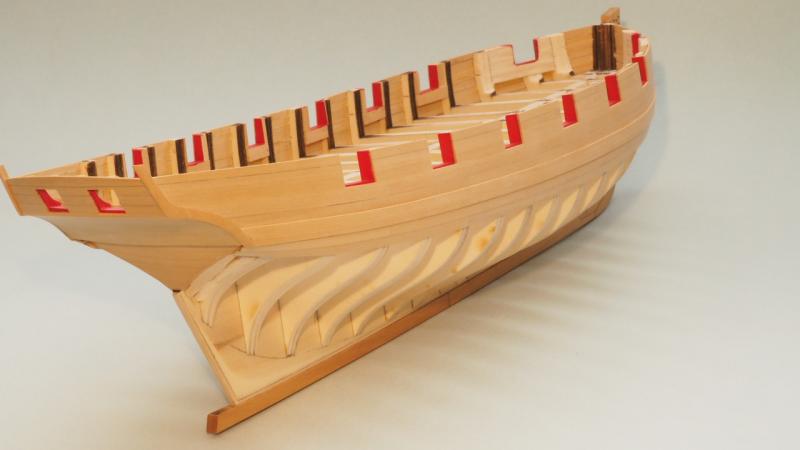
I painted the wales. This went well, but proved to be more difficult to clean up the bleeding under the tape than I had expected. It still looks a little rough for my liking in spots, but after days of tweaking, I'm calling it done . . . for now. I'll probably revisit it later. Anyway, it feels good to get some color applied. The painted wales and counter really add some interest to the natural wood! Up next planking, planking, and more planking. Merry Christmas everyone! And happy Hanukah. Enjoy whatever holiday you're celebrating! Erik


-
Druxey, I think that title might be sold out at Seawatch Books. I've looked for it before, and can't locate it on their website. Erik
-
Deon, Post photos of your homemade saw when you have them. I'm curious to see what you come up with! Erik
-
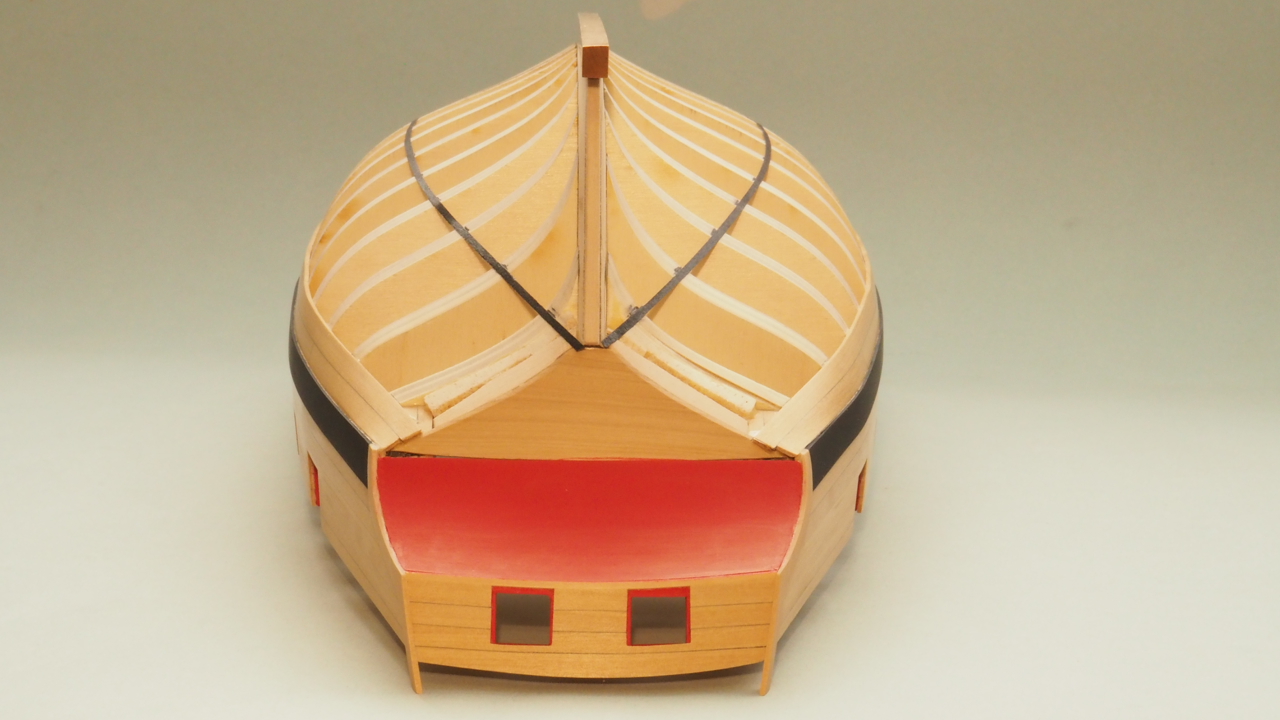
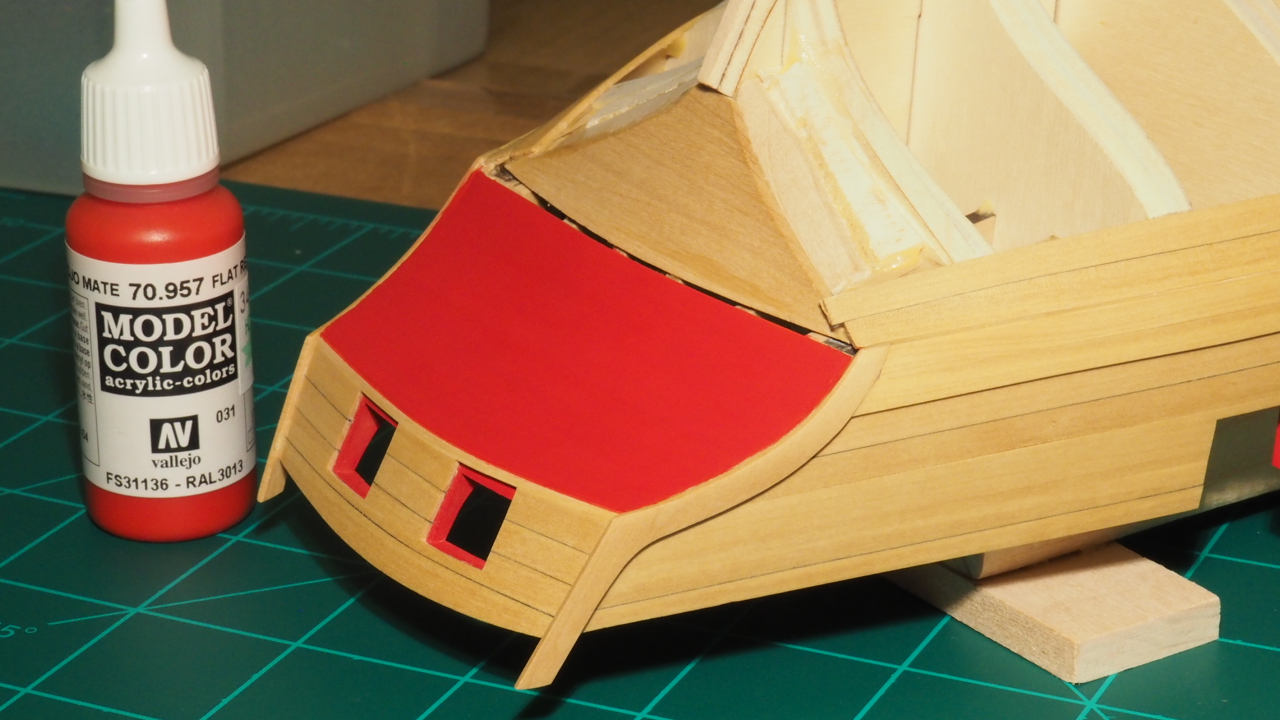
A quick photo. I applied Wipe on Poly to what I've done. I like the look of the pencil "caulking". I painted the counter using Chuck's technique of many coats of heavily thinned paint. This is about 10 coats. It turned out fairly evenly. I discovered Vallejo acrylic paints years ago, so being comfortable with them, used that brand rather than Winsor & Newton. It's funny I went to such great effort to keep my planks close and tight on the counter, and now it looks like a solid sheet! Well, it's just practice for planking the hull I guess. Erik

-
Thanks Druxey. One question, what do you use as a guide to get the lines of tree nails straight? Thanks, Erik
-
Thanks for the kind words guys. Steve, My plan is to do the tree nailing. I will do some testing first. I'd rather have no tree nailing, than poor tree nailing! Erik
-
Steve, Your longboat is looking really sharp and clean. Nice work! Erik
- 165 replies
-
- 1
-
-
- finished
- model shipways
- (and 1 more)
-
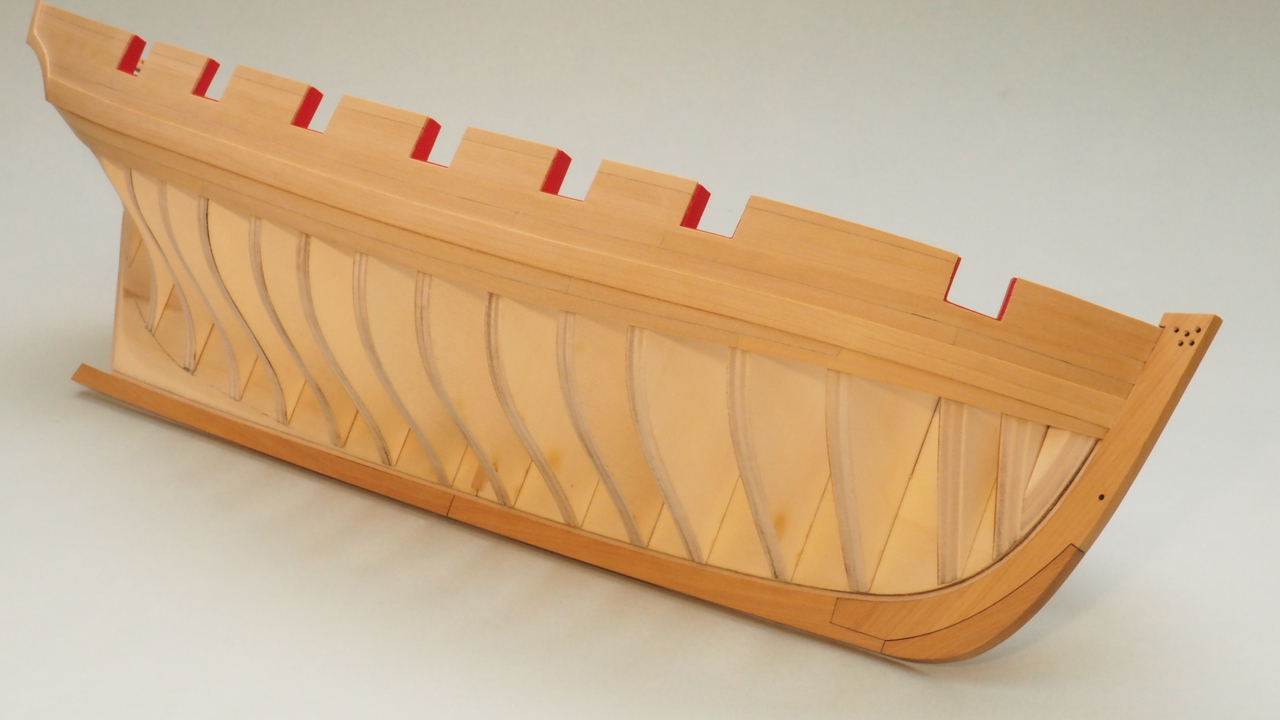
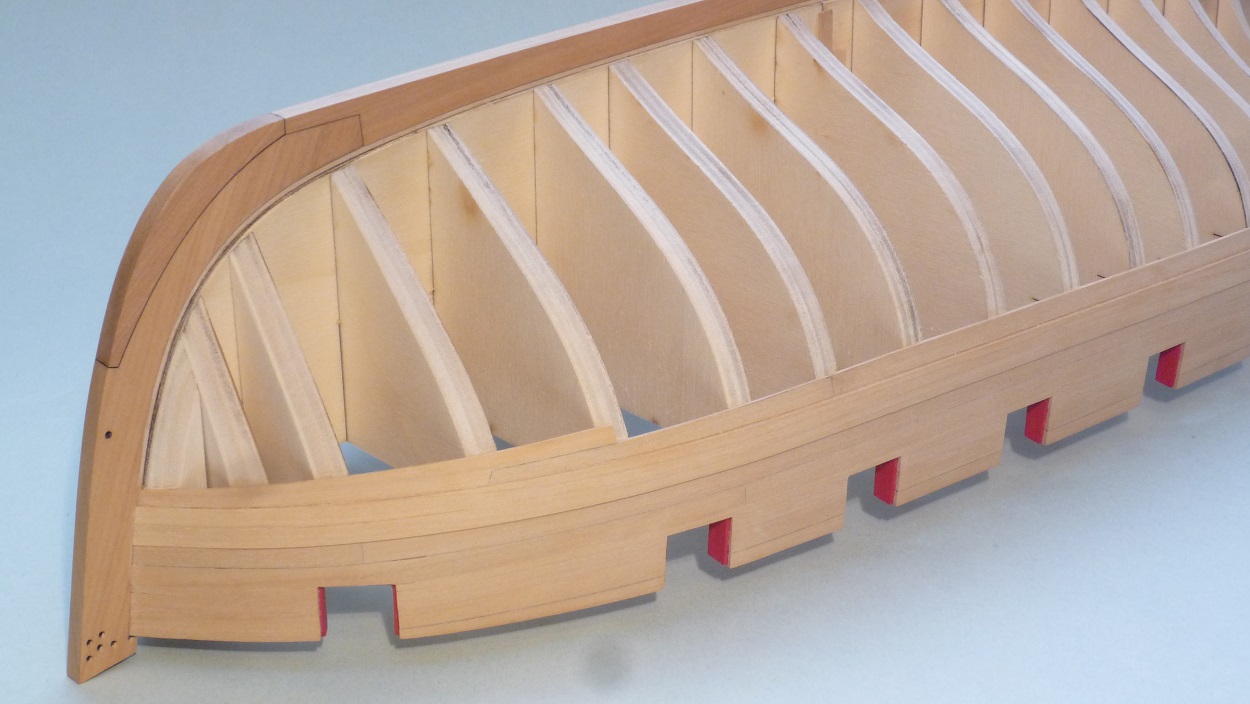
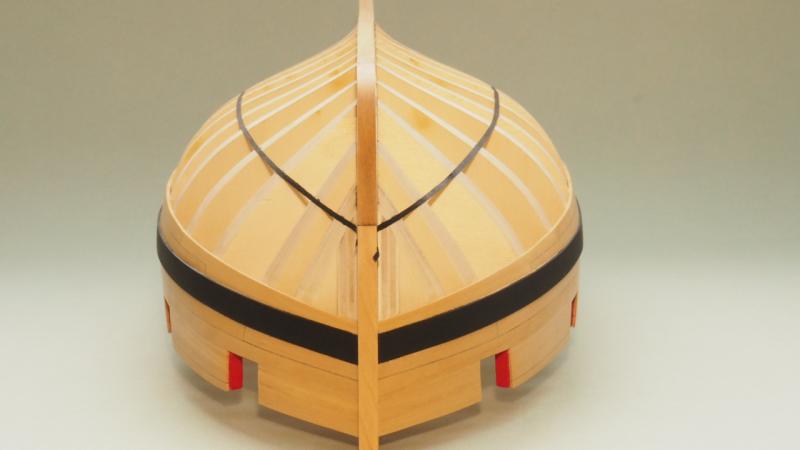
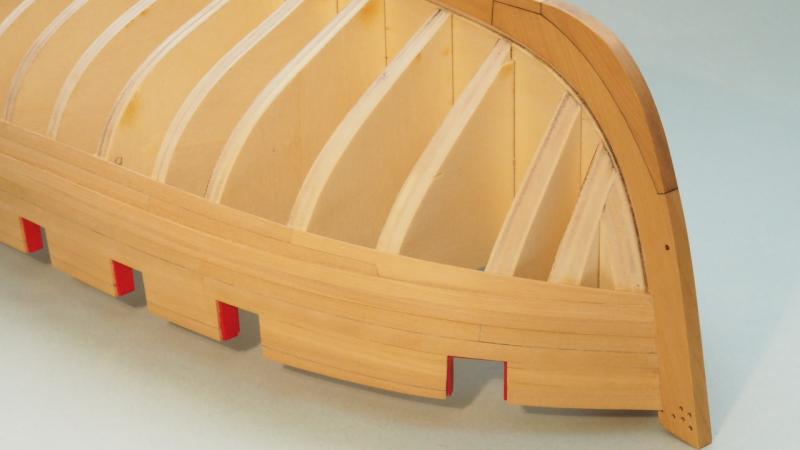
As the saying goes, the 3rd time is the charm. If you view my post above, you'll see I wasn't happy with the drop plank on the port side. That plank had in fact been the 2nd drop plank I had formed for that side. The first one snapped in half when I was pre-bending it! Though glued on with Elmer's Carpenters Glue, the plank was still quite difficult to get off. Part of the plank behind it chipped when I removed the drop plank . . . so I had to remove and replace that one as well. I'm a lot happier with the new drop plank. It looks good to the eye, and the run is smooth with no kinks. Now I can get rid of the rough look and do the final sanding of what I've done so far, apply WOP, and paint the counter, and wales. Erik


-
If there's one thing I've learned, it's that areas that are not smooth influence the alignment/run of adjacent planks, and cause more problems further down the road. Thanks for the kind words Druxey! Coming from a modeler of your talents, that means a lot. This is still the unrefined look too, with pencil smudges, excess glue, finger prints, etc. Erik
-
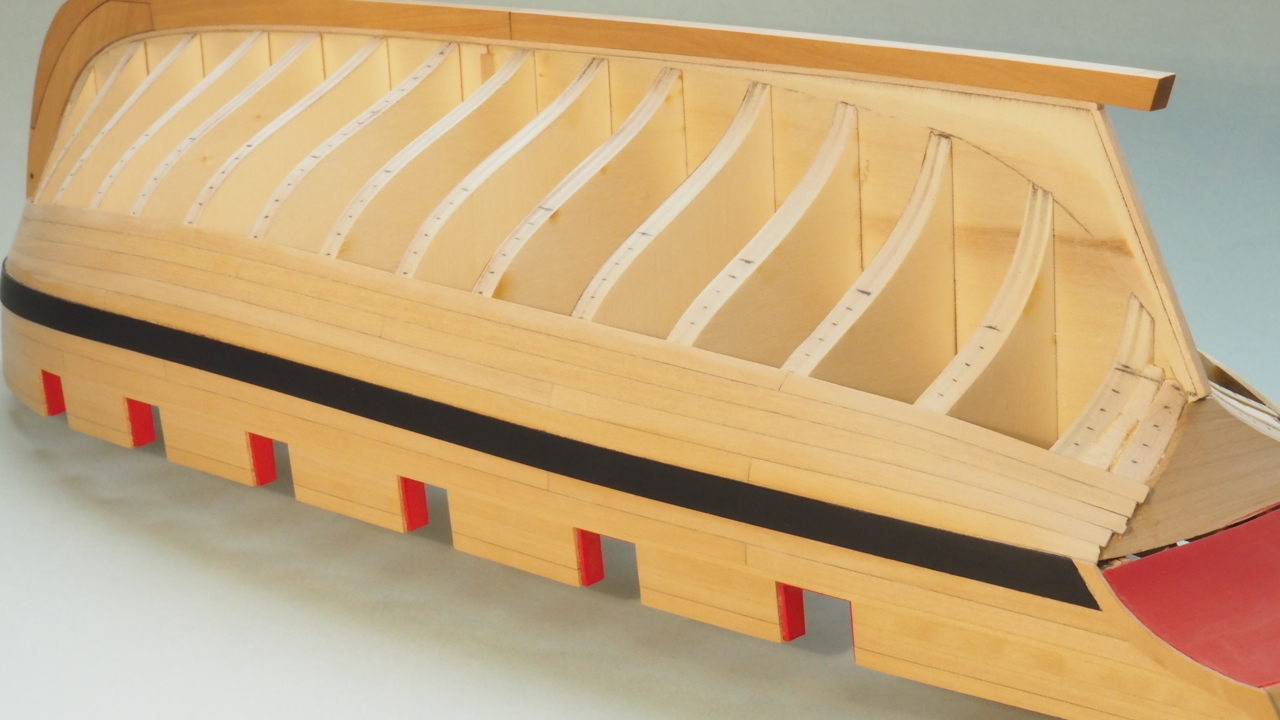
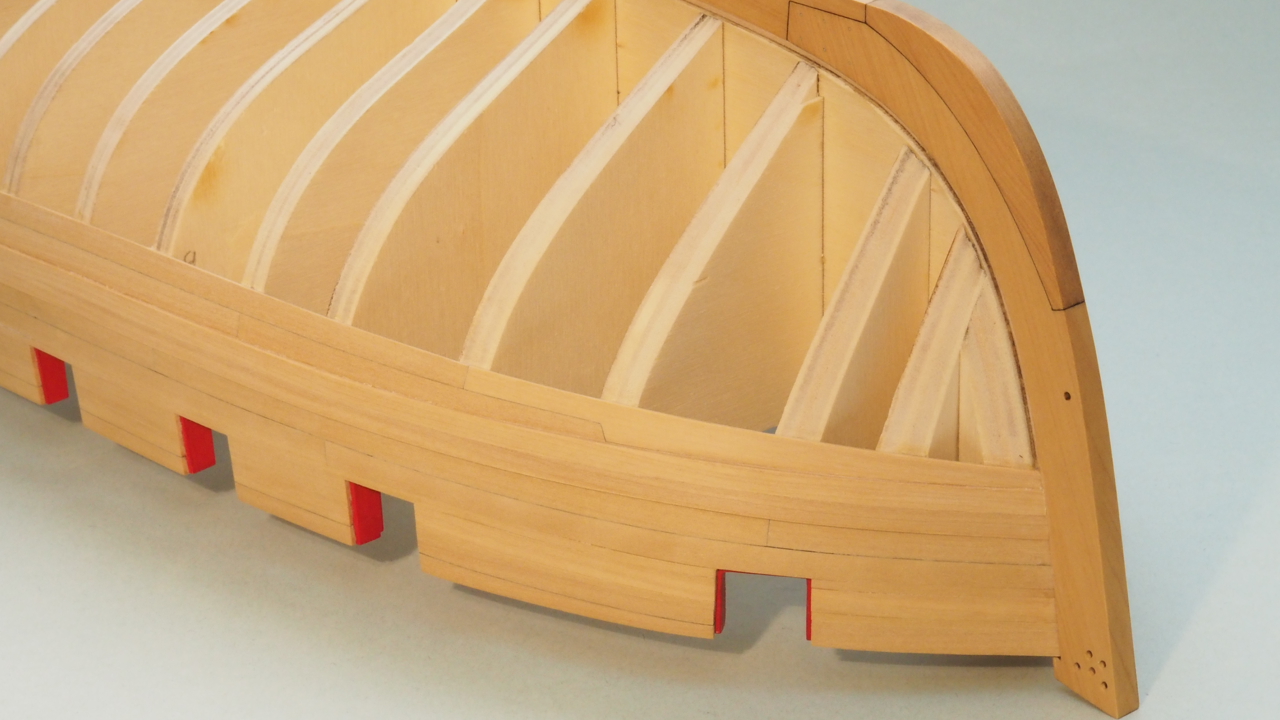
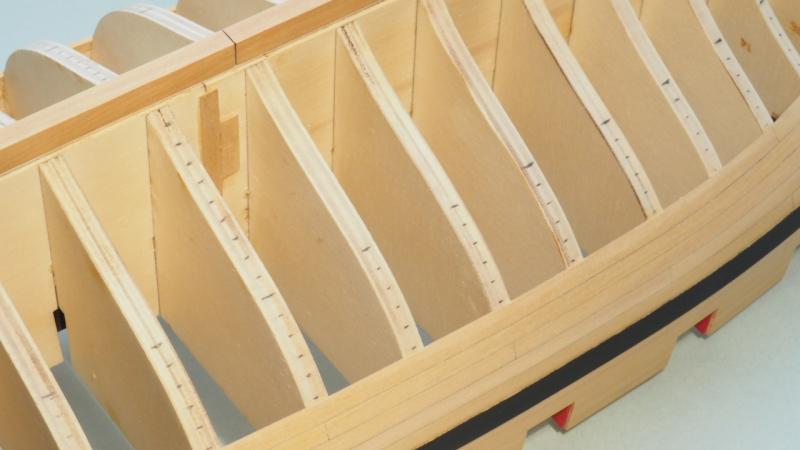
I'm working on the strakes below the wales. I have the first row completed, but have a bit of an issue with the drop plank on the port side. I over sanded the after end of the plank a bit which causes it to taper rather than widen at the aft end. When I shaped the plank behind it (seen temporarily taped on in these photos) I had to excessively thin the front of that plank. Looks a bit weird to my eye, and causes a kink where the drop plank meets the plank behind it. I plan on removing the drop plank and making another one with the correct profile. Taking the lessons learned from the port side, the starboard side drop plank turned out better and my test fit adjacent plank is of the correct width and the run is smooth. Erik