HOLIDAY DONATION DRIVE - SUPPORT MSW - DO YOUR PART TO KEEP THIS GREAT FORUM GOING! (Only 13 donations so far - C'mon guys!)
×


Erik W
-
Posts
470 -
Joined
-
Last visited
Content Type
Profiles
Forums
Gallery
Events
Everything posted by Erik W
-
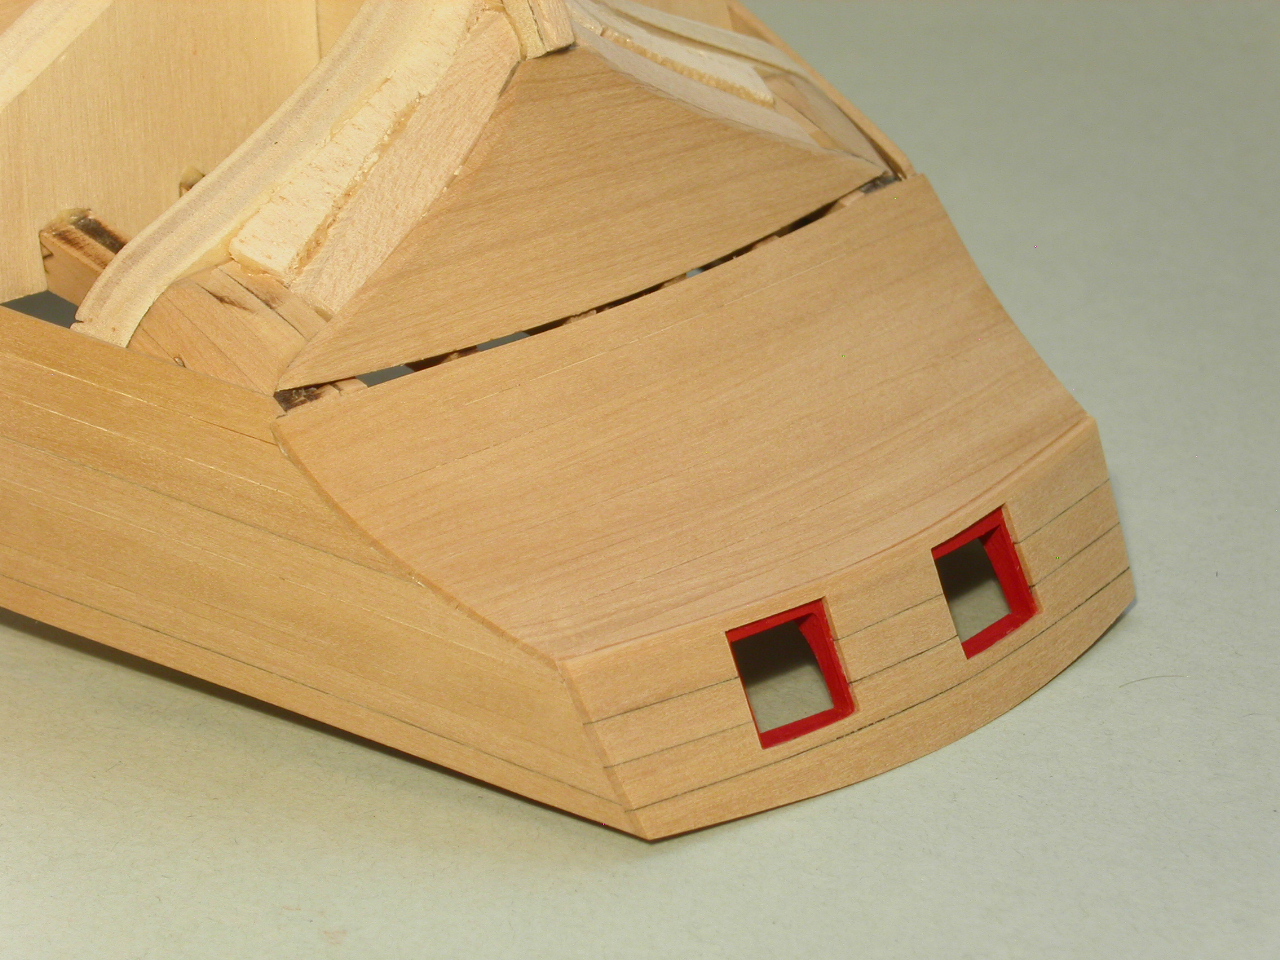
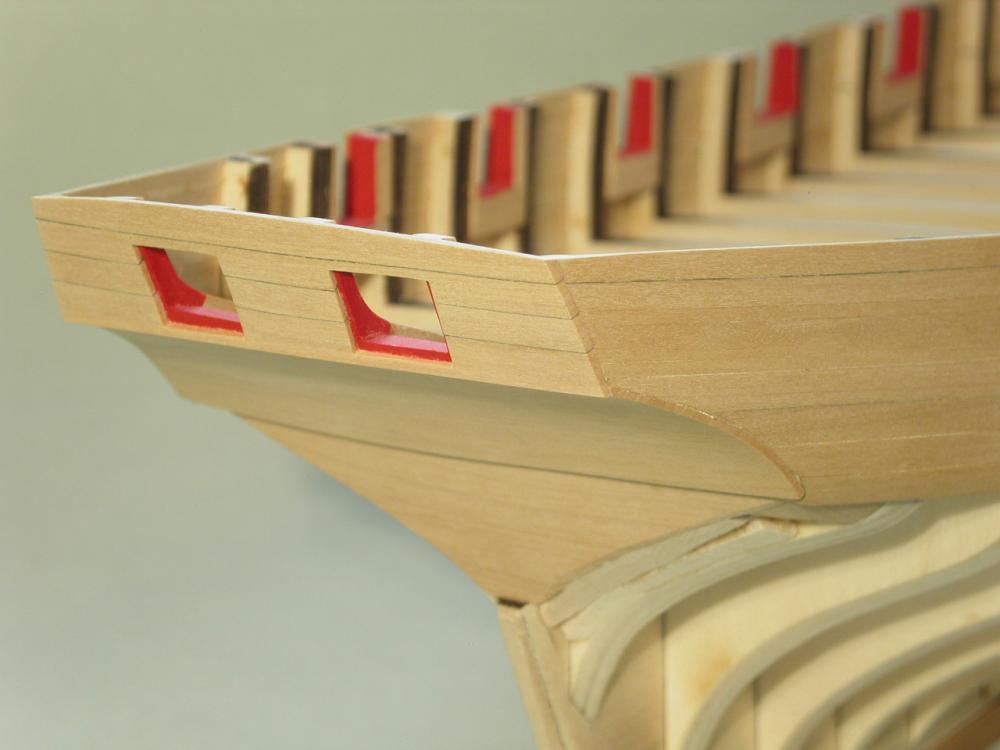
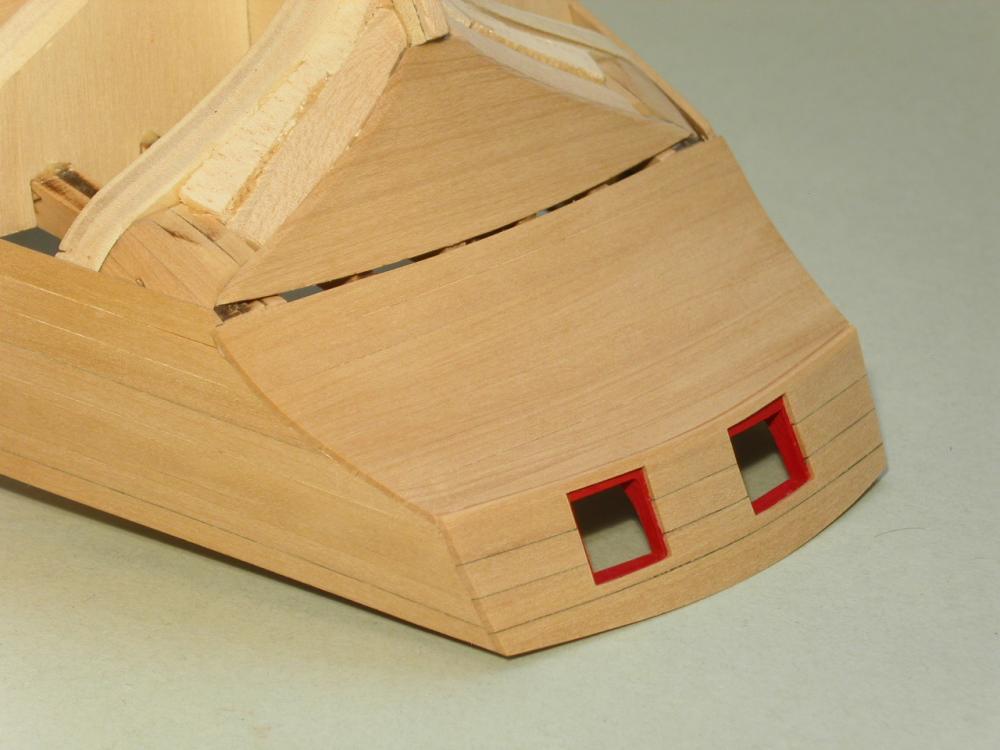
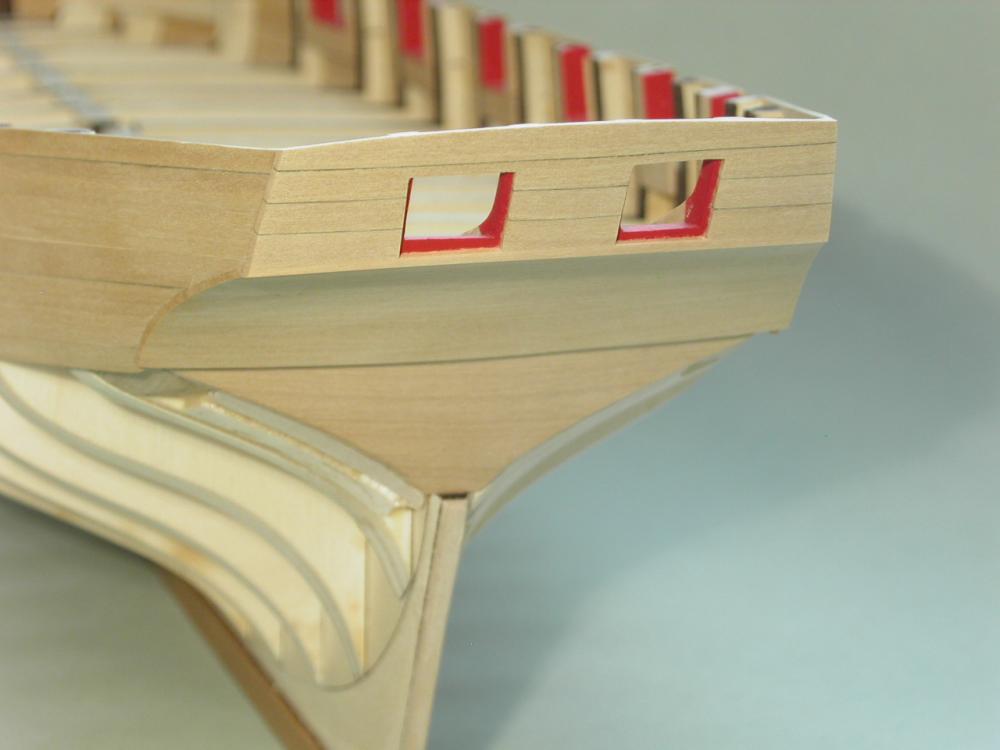
 I planked the transom. This was much more of a challenge than the photos indicate. Though the transom looks flat, it actually has a pretty good curve to it, so the edge bending is quite severe. I reduced the plank width by .010" on each plank, so the 4 planks are a uniform width going down the center of the transom. One of the gun port lower sills is a bit crooked. I figured this doesn't matter since the ports will be closed. I am more concerned with making sure both ports are the same size, and true and level. The transom and counter have both been given a first preliminary sanding. Erik
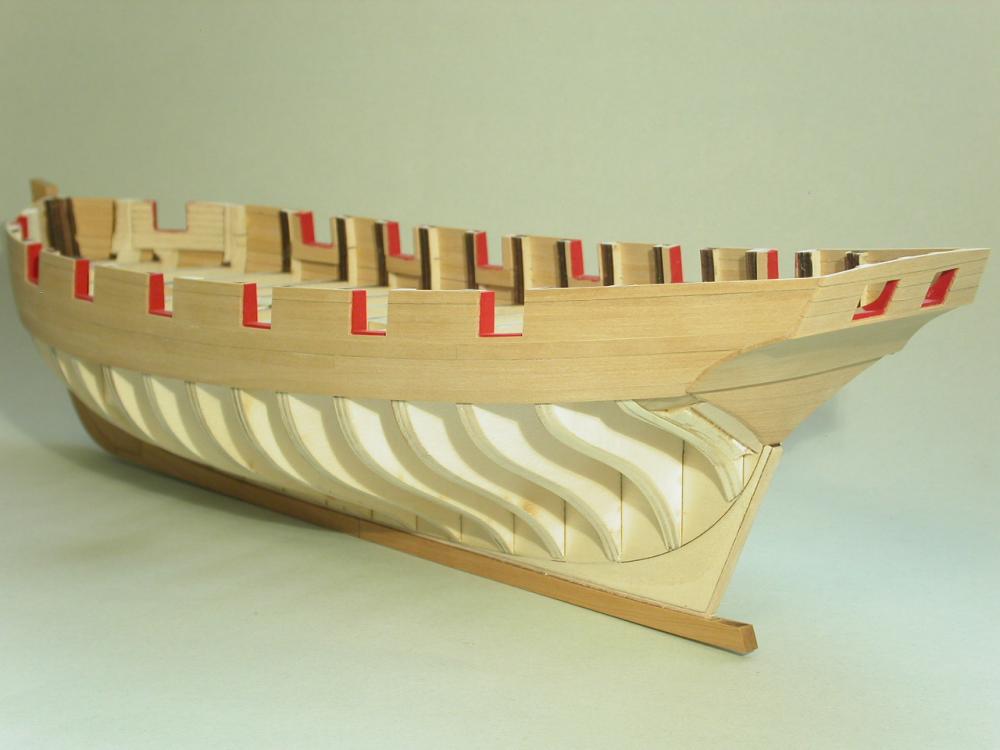
-
Mike, I've thought of doing something like that. I'll leave it as it is though. Once the ship is complete the counter is not really visible anyway. I'd rather have it look smooth, than overdo any attempt to more clearly define the plank edges. Erik
-
I planked the counter. Since this area will be painted red, I didn't bother running a pencil between the planks to make them stand out. The result being, the 8 planks look like a solid sheet! Since I've gotten pretty good at getting the planks snug against one another, I'm curious if once painted, this area will look solid, or if we'll be able to see the plank edges. I guess I could have worse problems than smooth planking with no gaps. Erik

-
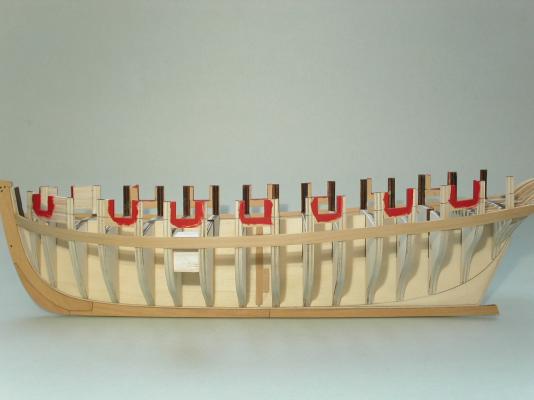
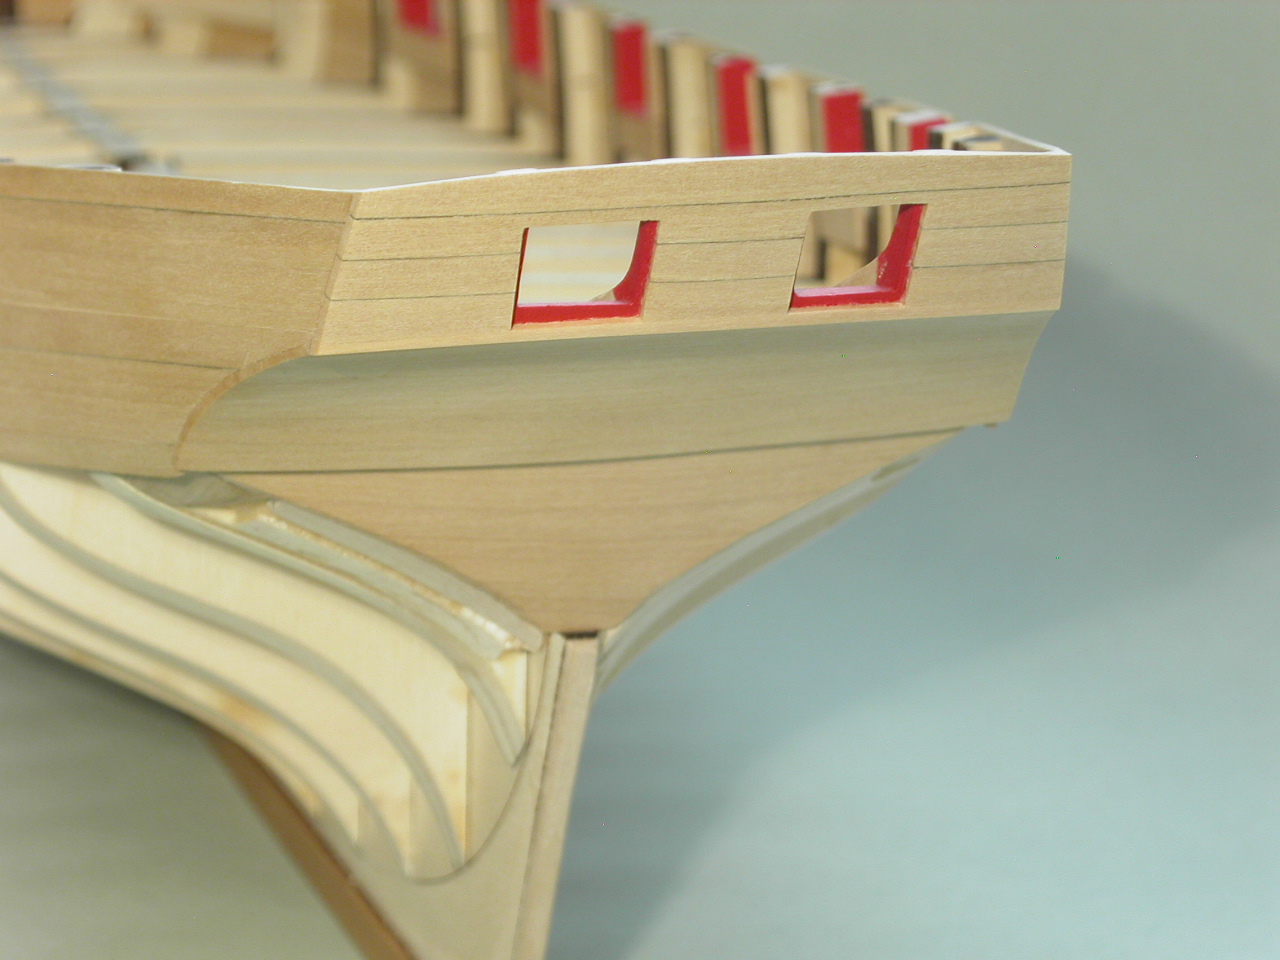
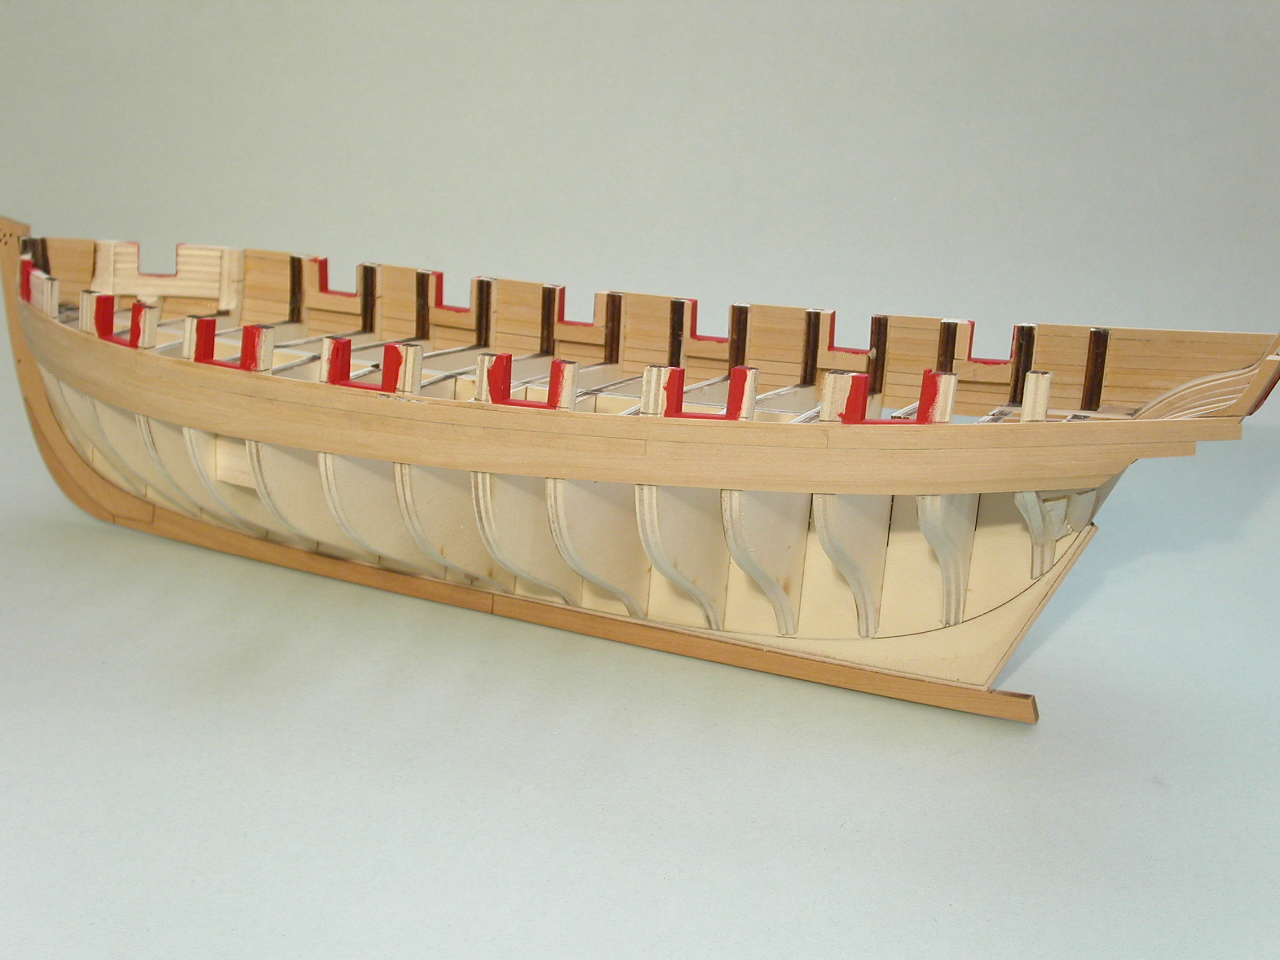
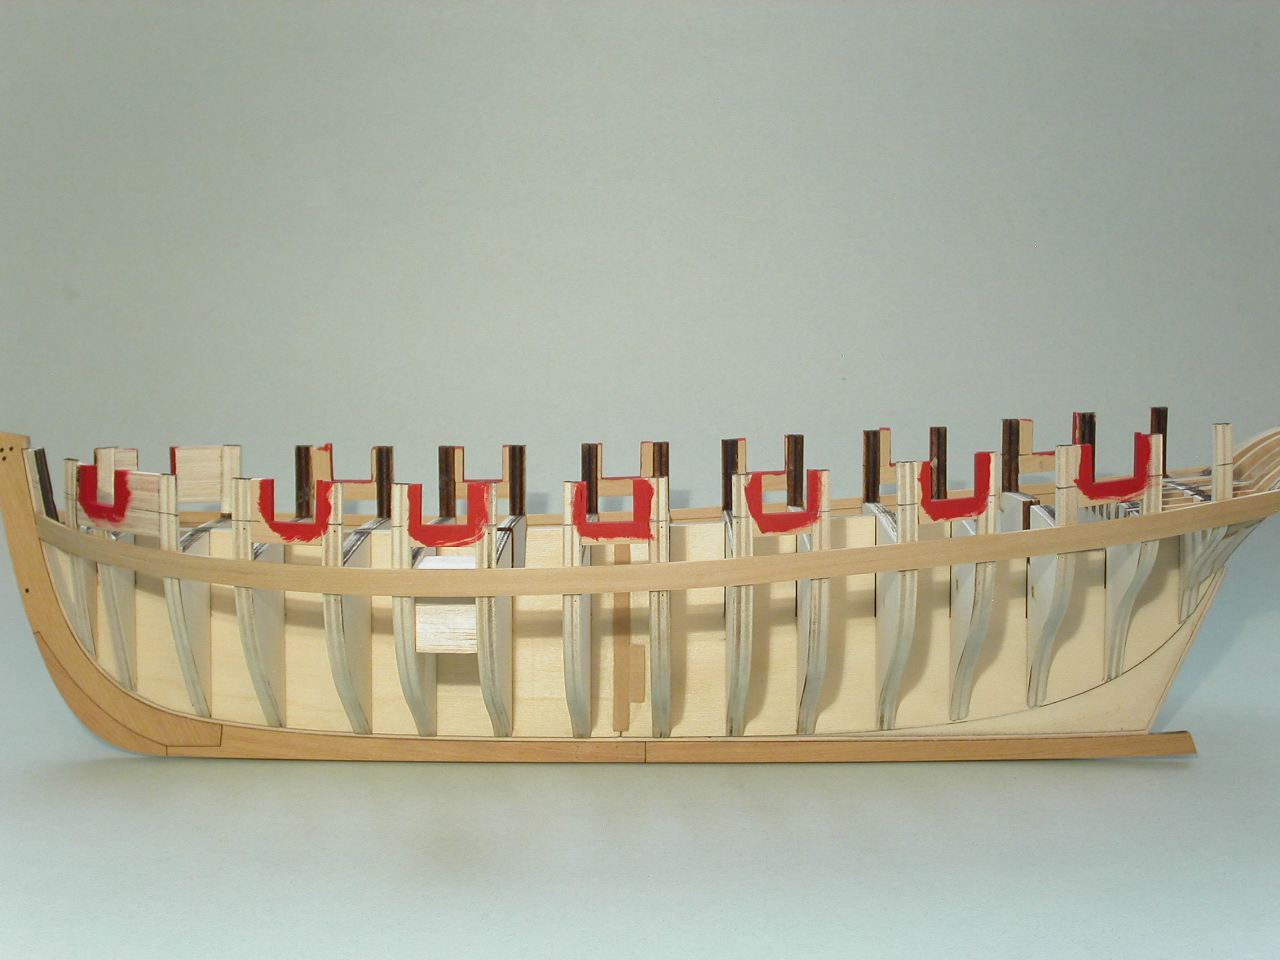
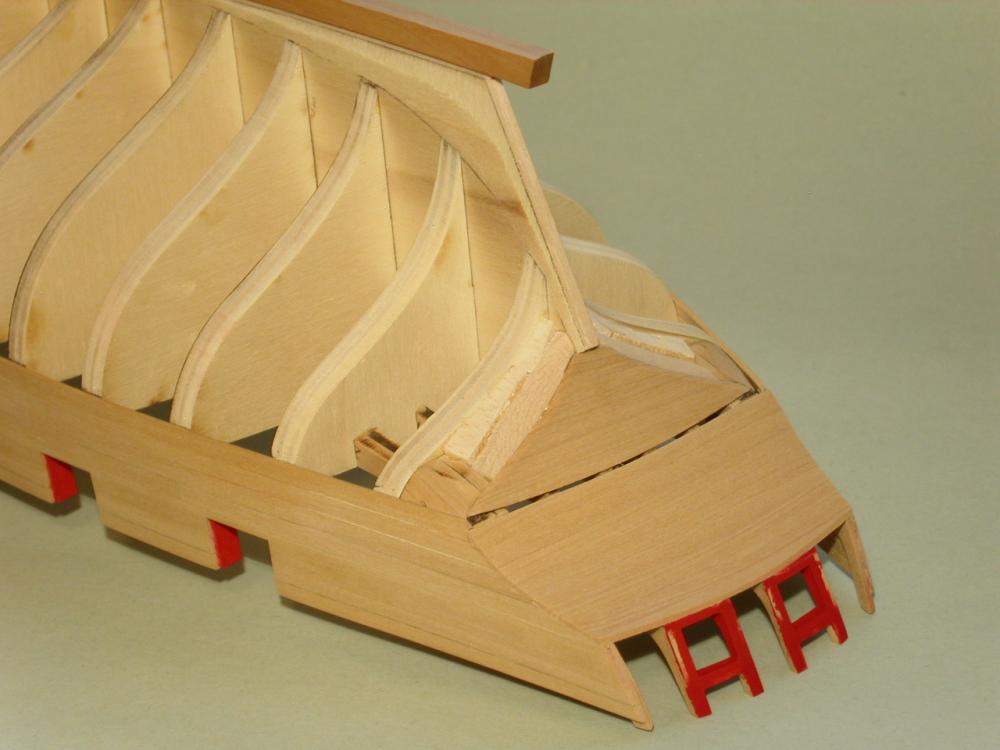
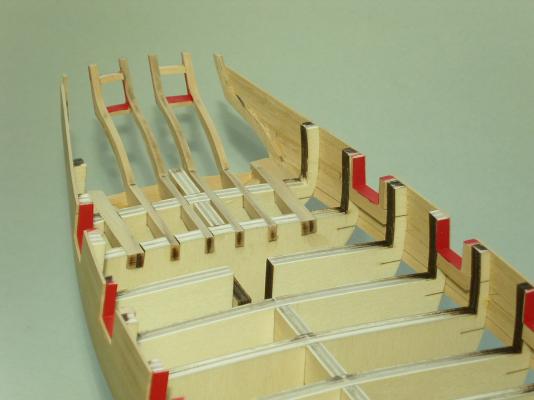
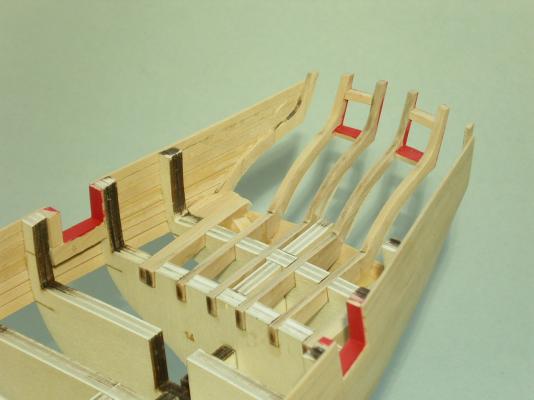
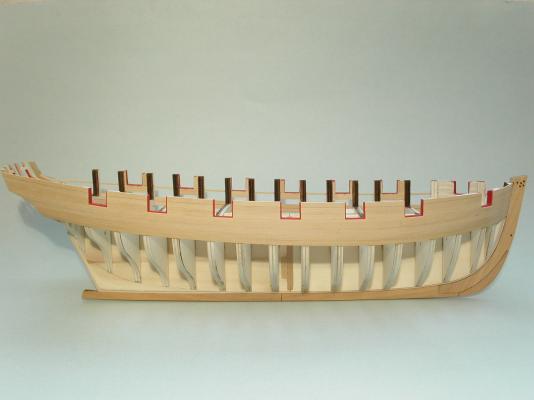
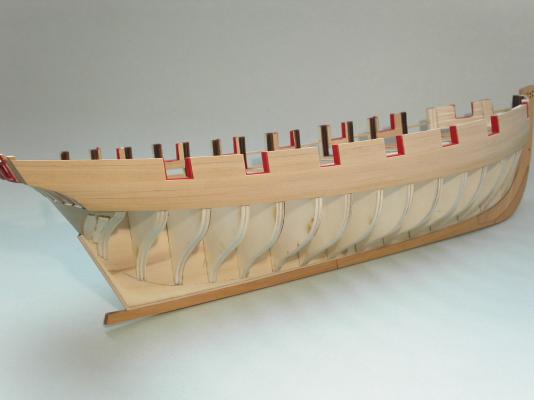
I cut away the framing at the stern with a small Dremel drum sander. I then cleaned the area up with sanding sticks. I thinned the frames to 1/16" using a .060" thick piece of styrene as a guide. With the planking at the stern still unattached, I sanded the hull bulkhead tops/stern frame tops to get the correct deck curvature. I figured this was easier to do now, than when the stern area is planked. Erik
-
More progress. I finished the planking around the port side gun ports. I've done the preliminary sanding, and also the fairing of the top where the cap rail will go. Erik


-
More progress . . . with the before-I-pretty-it-up look. I've settled into a pace that feels sustainable over the long haul. So, it's slow and steady. I work on the Cheerful daily, but with warmer temps, also have other things going on. Erik
-
Cutter Cheerful 1806 by rafine - FINISHED
Erik W replied to rafine's topic in - Build logs for subjects built 1801 - 1850
Bob, I'll add to the chorus of kudos here. Your Cheerful looks wonderful. It's truly an inspiration for me as I continue my own Cheerful build. I really like the results of your rigging. I'll definitely continue referencing your build log regularly from here on out. Erik- 525 replies
-
- 3
-

-
- cheerful
- Syren Ship Model Company
- (and 1 more)
-
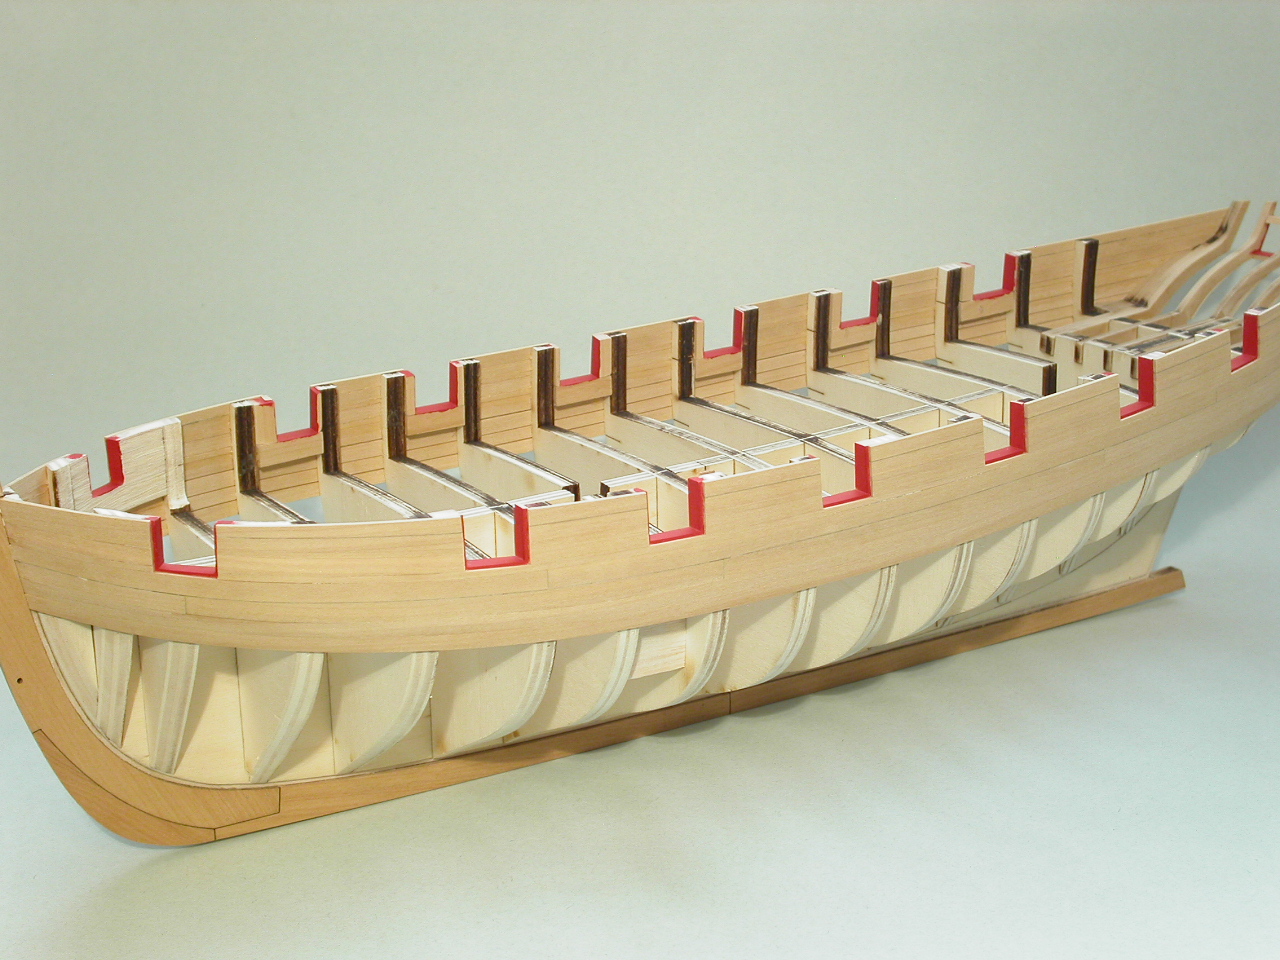
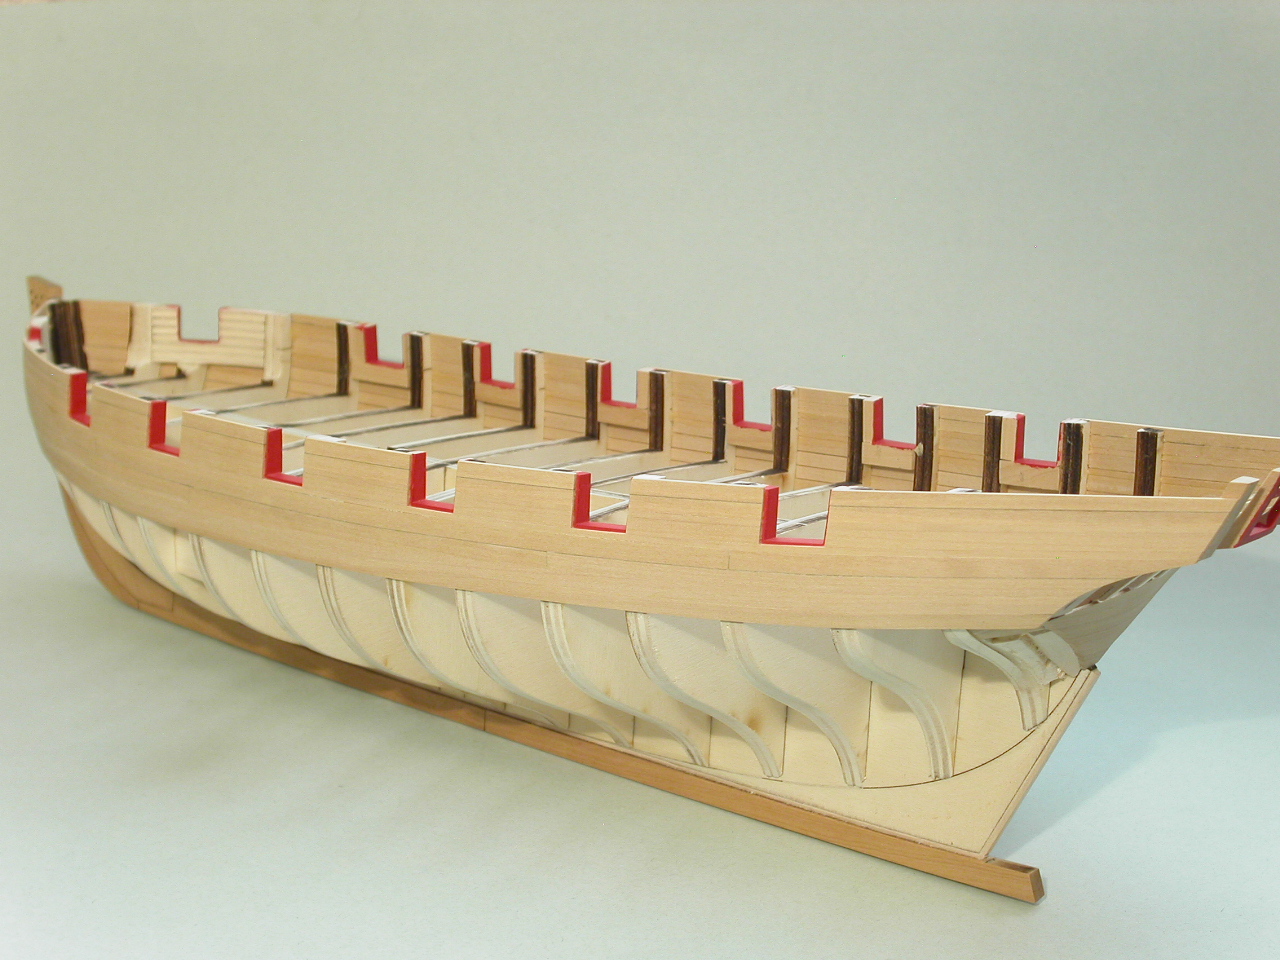
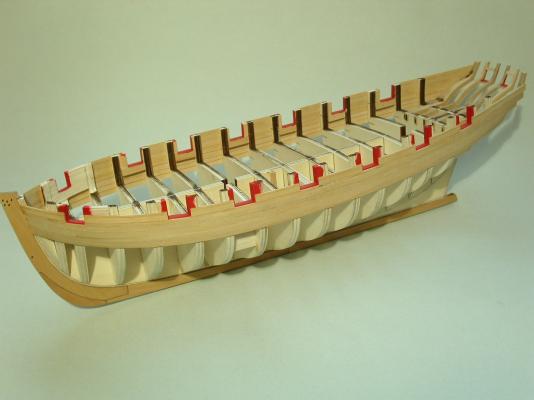
Here are a couple of photos of the port side of the Cheerful. You can see my high tech set up of how I'm holding it while planking this part . . . an old towel. It's something soft that won't damage the hull, and I can position the ship the way I want it. Also you can see the small clamps and clothes pins I'm using to hold the planks in place while the glue sets. These photos are the raw look before any sanding has been done . . . with finger prints, glue smudges, etc. Erik

-
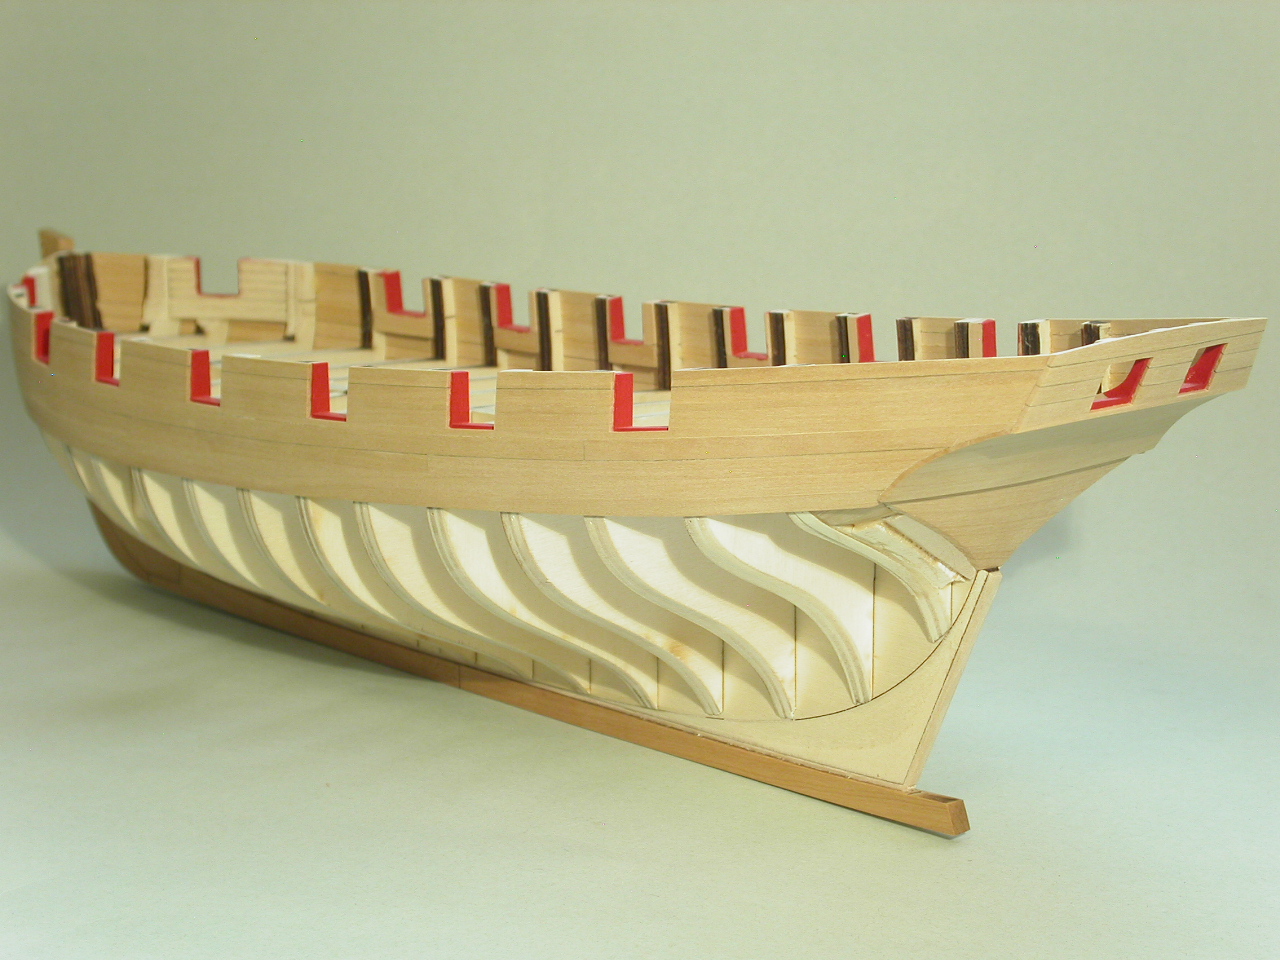
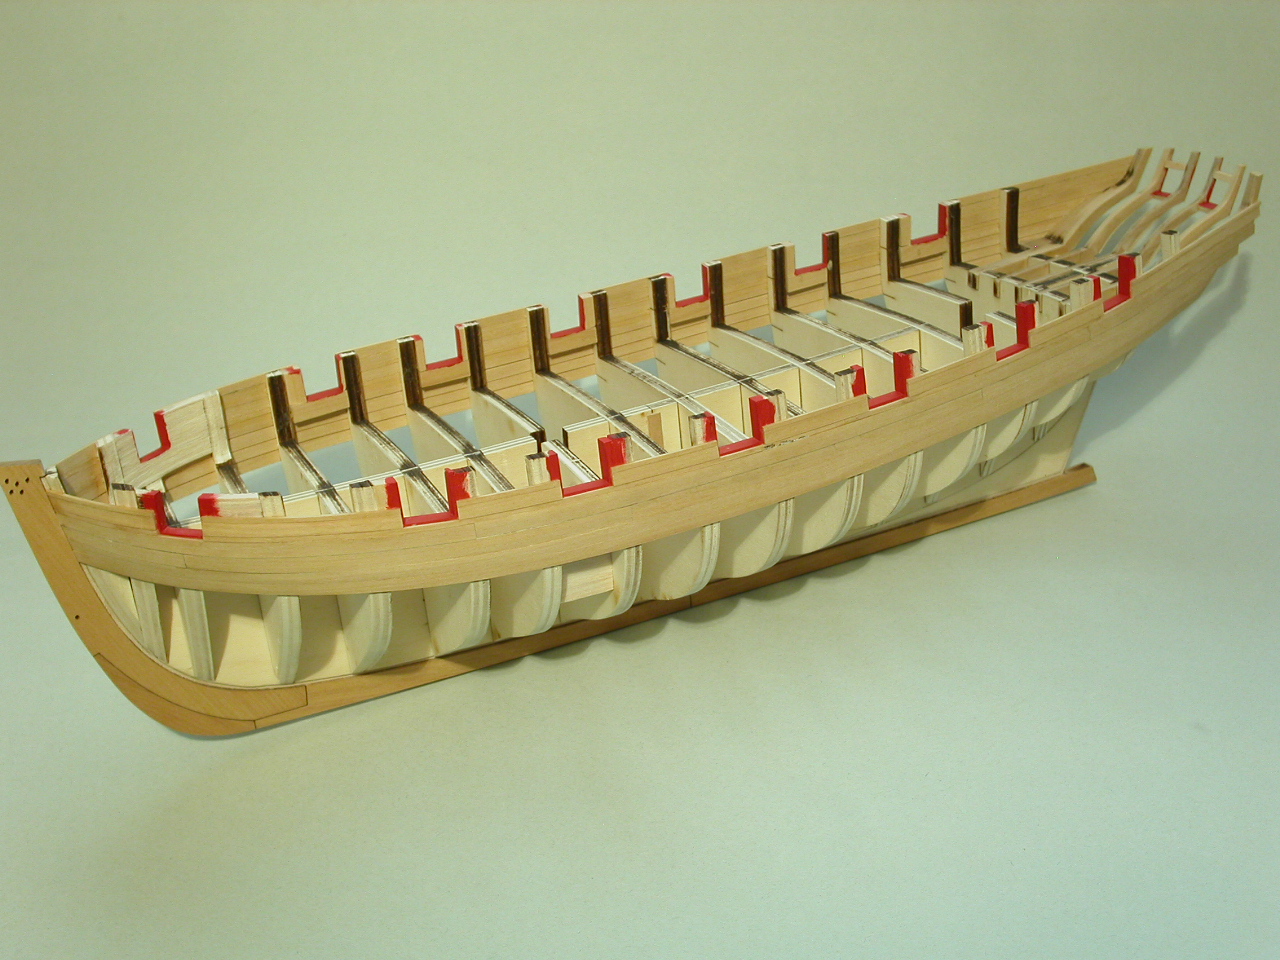
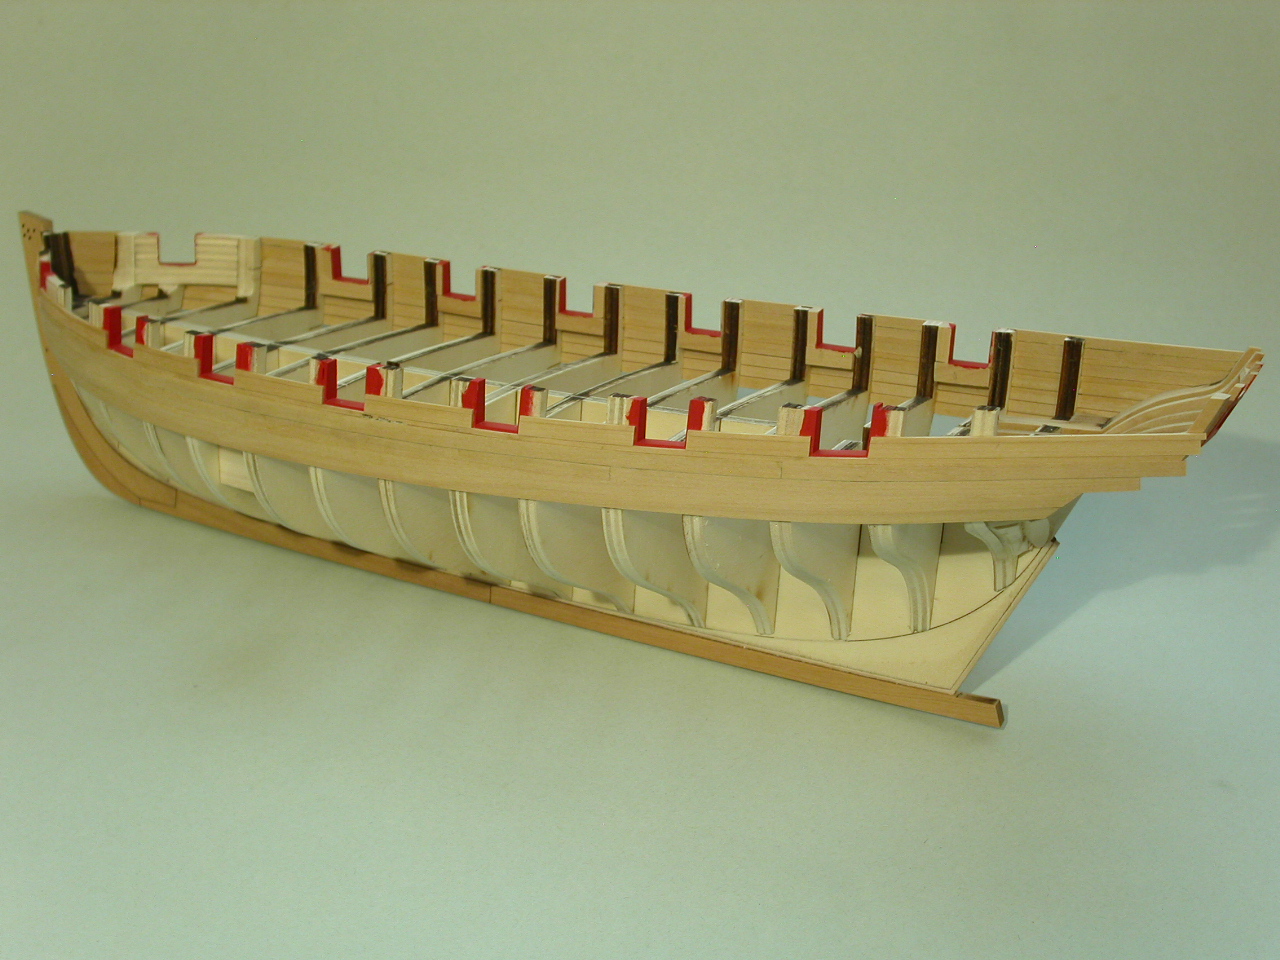
I reached a mini milestone by getting the above-the-wale portion of one side of the hull planked up to where the cap rail will be. The planking between the gun ports is fun, but a bit tedious. I've done the preliminary sanding of what I've planked so far, and a rough faring along the top of the bulwark. Still needs more work, but I'd rather wait until both sides are done before I tidy things up. So . . . it's still a bit rough looking. Erik

-
Cutter Cheerful 1806 by rafine - FINISHED
Erik W replied to rafine's topic in - Build logs for subjects built 1801 - 1850
Bob, As one who strives for accuracy himself, I feel your pain with this decision about the aft braces. With that said, I'm sure 99% of us, if not 100%, wouldn't have noticed the inaccuracy of the gaff below the lower yard as well as including the aft brace, if you had not pointed it out. While striving for accuracy, at some point we have to admit that we are creating a representation of the real thing. So in a case like this, in my humble opinion, what looks most interesting on the finished ship is what I'd go with. Either choice will in no way detract from what you've accomplished with this build. Erik- 525 replies
-
- 10
-
-
- cheerful
- Syren Ship Model Company
- (and 1 more)
-
I like option D followed by B. Not sure about authenticity, but those options visually look best to me. I haven't done tree nailed yet myself, but am pretty sure it's not worth doing on parts of the hull that are painted. I don't think they'll show up. Erik
- 64 replies
-
- 4
-
-
- 18th century longboat
- model shipways
- (and 1 more)
-
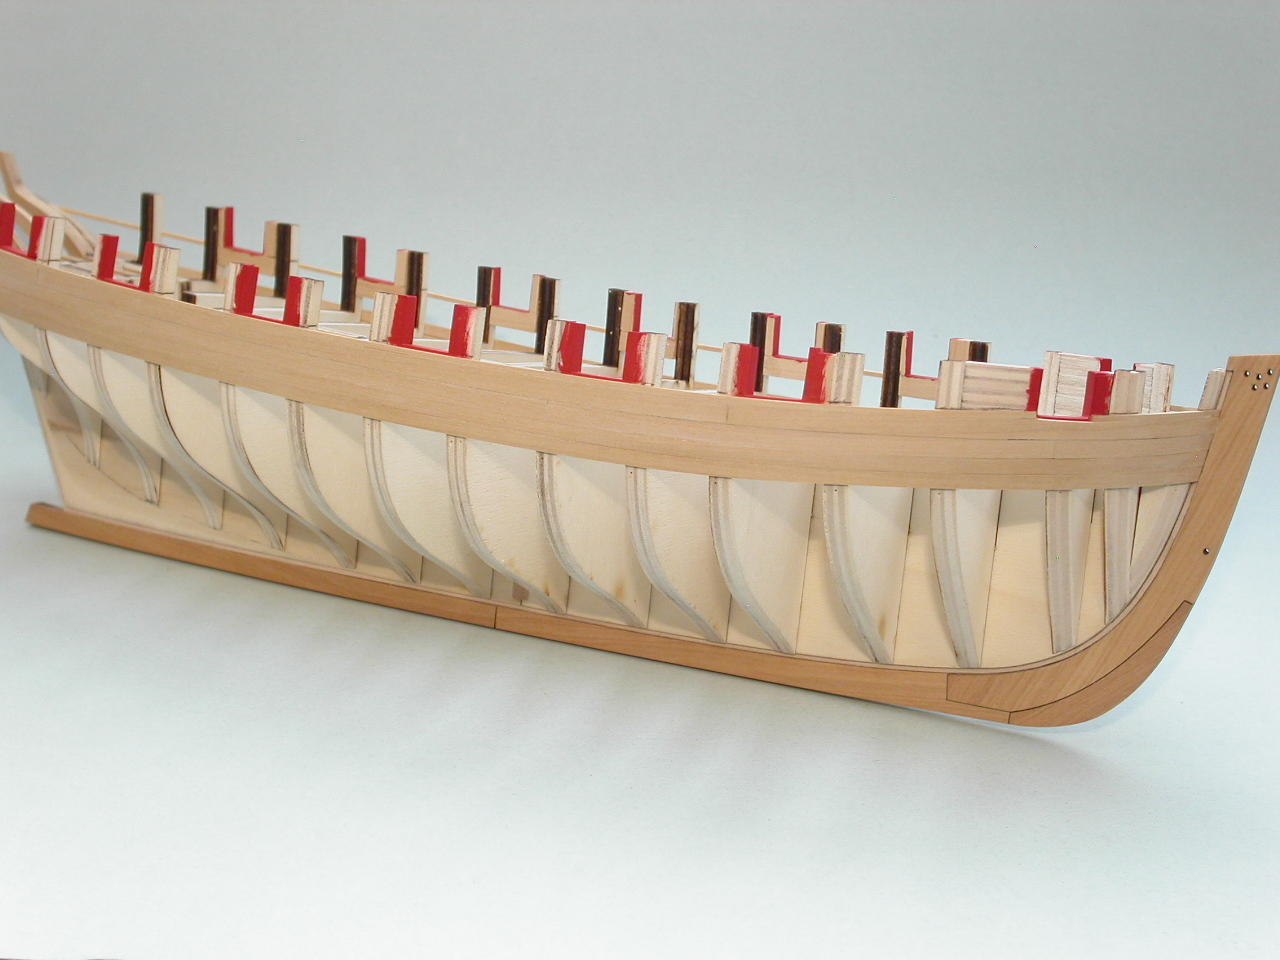
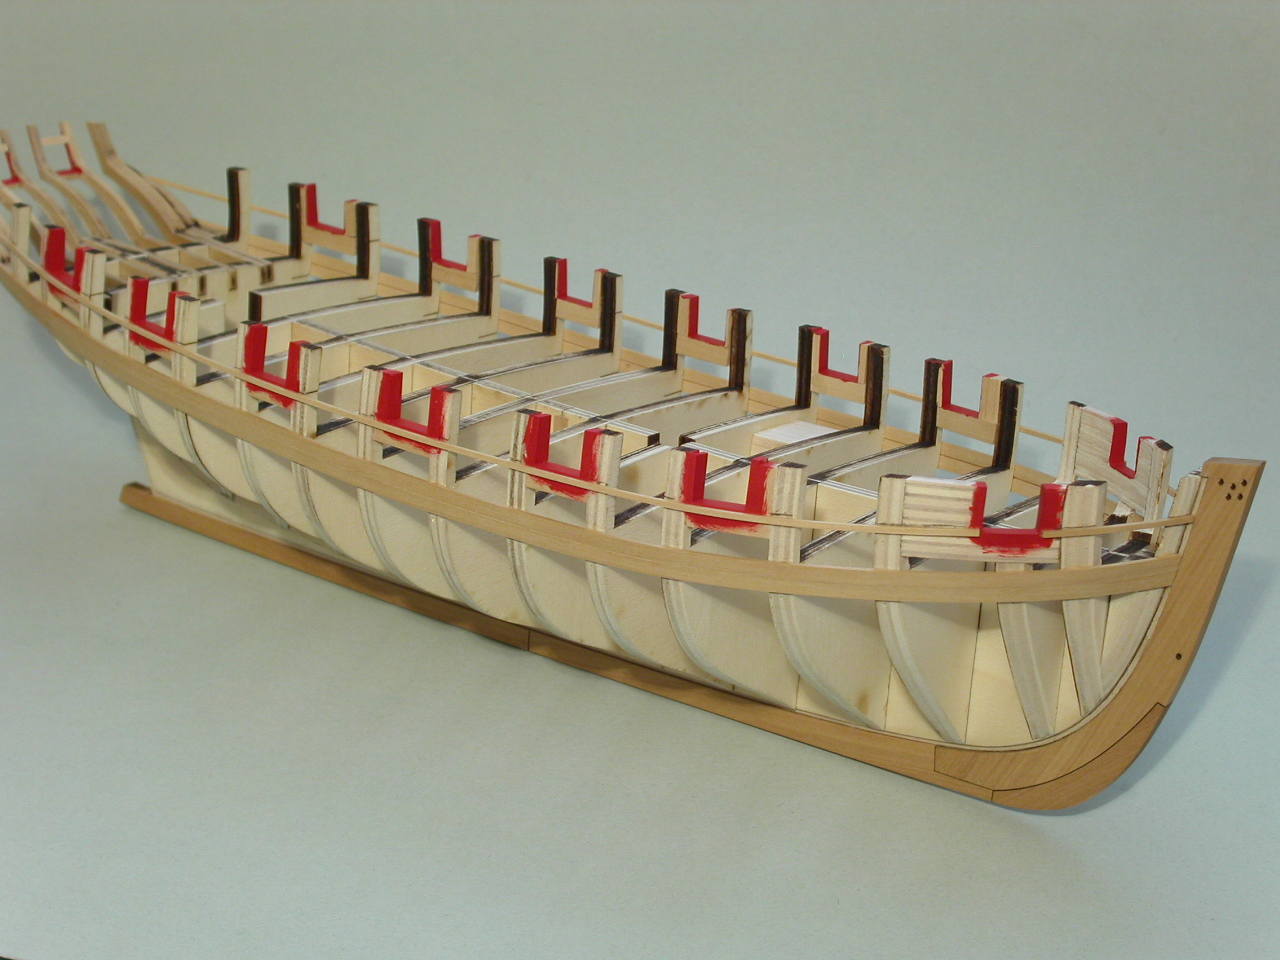
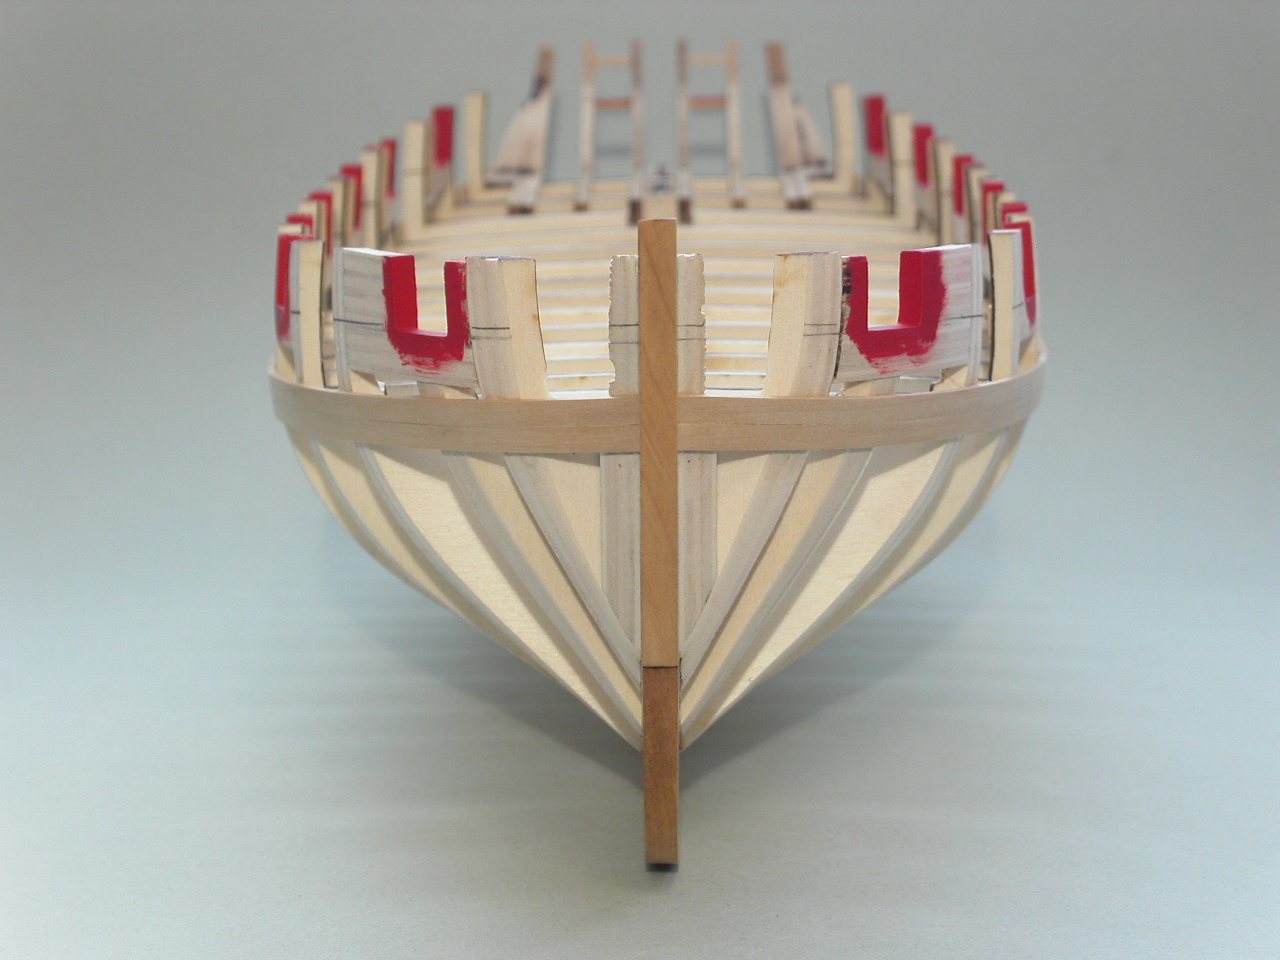
Well done Mike! I also like your lighting and photography with these. The bow and stern photos look awesome. Erik
- 968 replies
-
- 4
-
-
- hahn
- oliver cromwell
- (and 1 more)
-
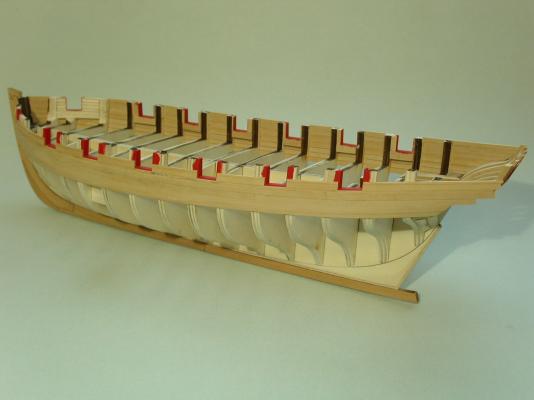
I'm working my way upwards with the planking around the gun ports. I'm taking my time. It seems best to wait to sand this area until I have all the planks down. This is the rough look then. I usually clean things up a bit for the photos I post. So . . .this is kind of the equivalent of meeting someone for coffee without first showering, brushing my teeth, and combing my hair. Erik

-
"I guess holding it up to the light could help judge plank thickness." - This is what I did on with my longboat when I was sanding. Erik
- 64 replies
-
- 4
-
-
- 18th century longboat
- model shipways
- (and 1 more)
-
Your plank run actually looks good. There does appear to be some unevenness in the finish that I think can easily be smoothed out by more sanding. Ideally the hull should be smooth to the touch as you're holding it. Your planking material is the 1/32" (.031") thick strip, which has some extra meat to it as far as how much you can sand off in order to get a smooth finish. The planks included in my kit were .020" thick (MS had substituted lower quality planking material than what the kit was designed for), and still had enough material for a good sanding. See the plank ends in this photo to see how thin my planks were: http://modelshipworld.com/uploads/monthly_08_2015/post-20029-0-22931000-1438540971.jpg Erik
- 64 replies
-
- 4
-
-
- 18th century longboat
- model shipways
- (and 1 more)
-
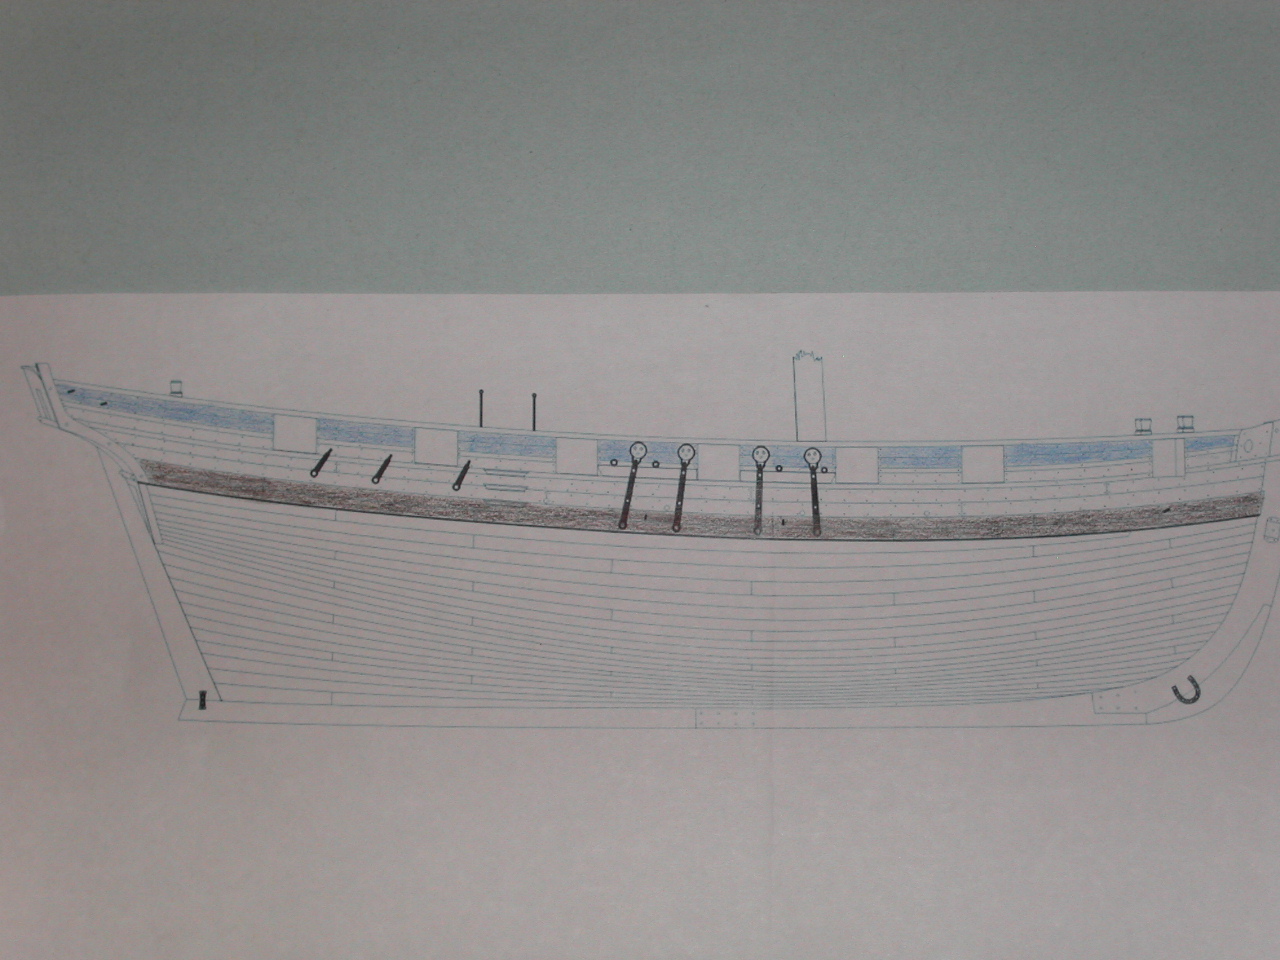
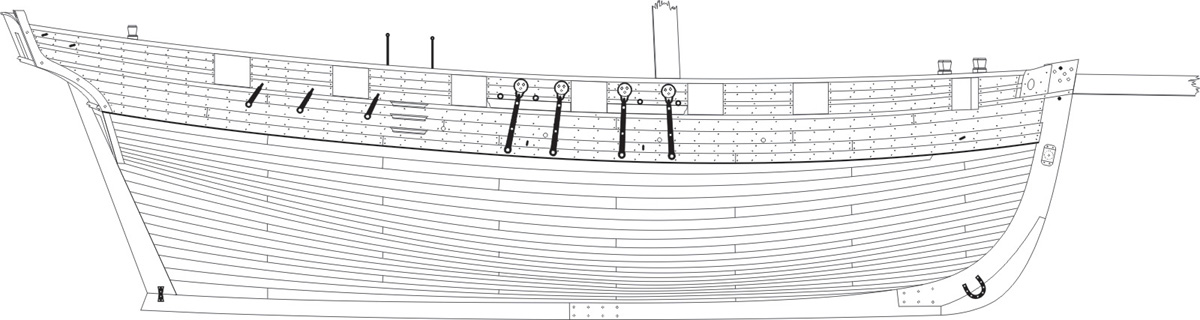
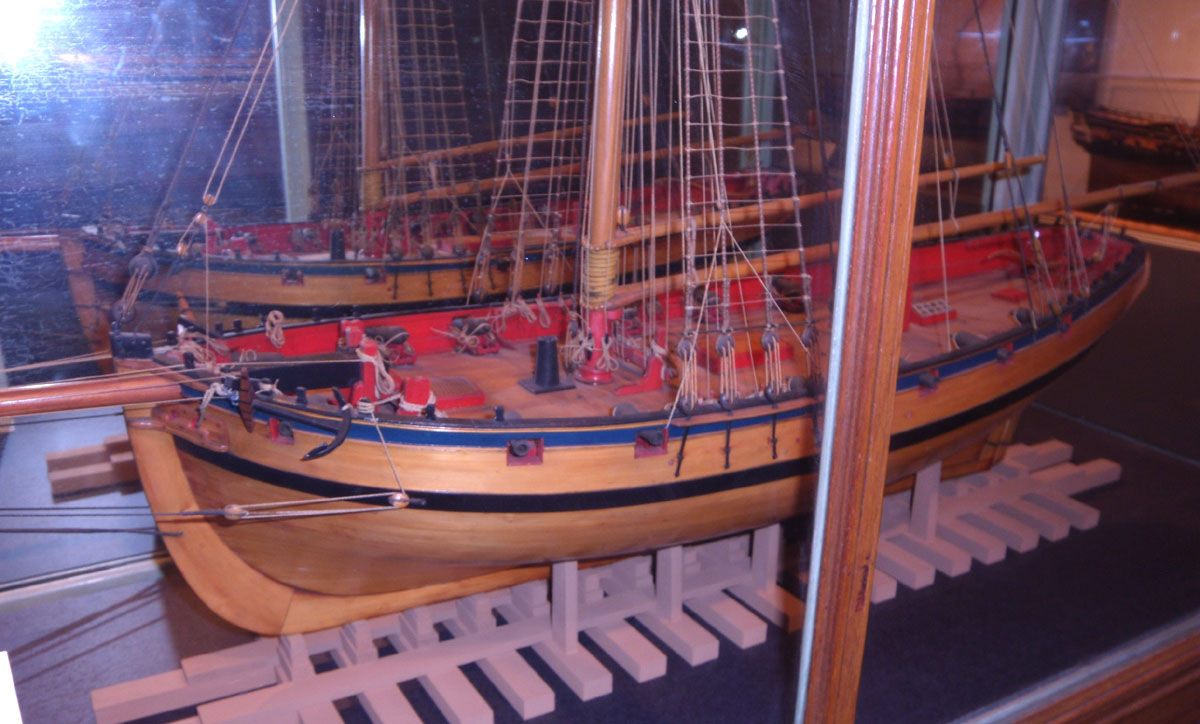
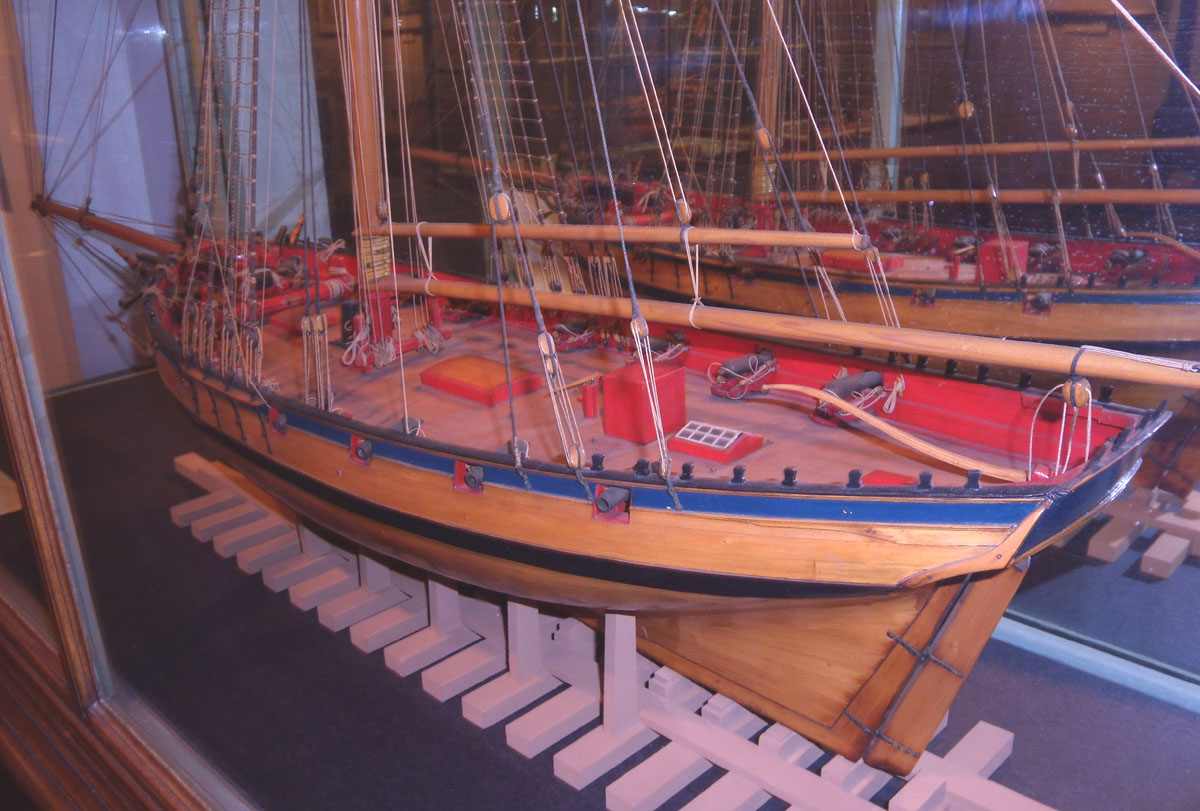
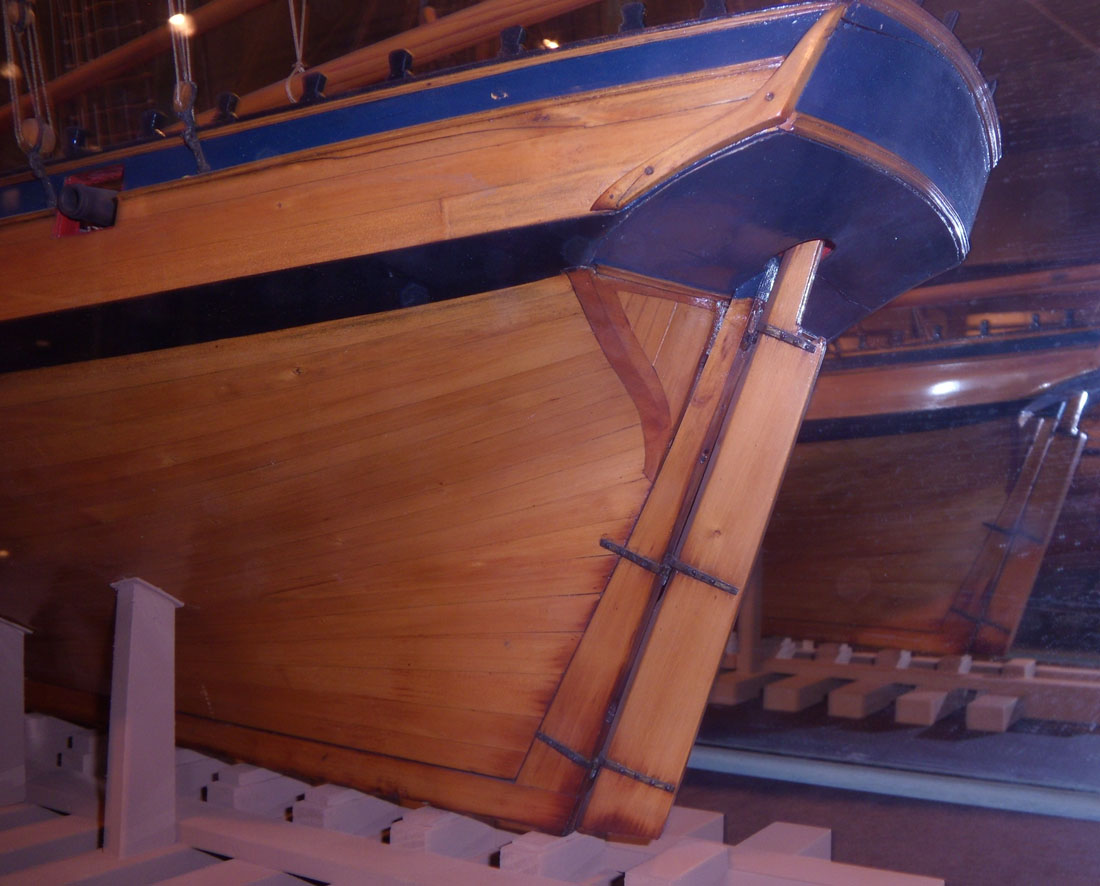
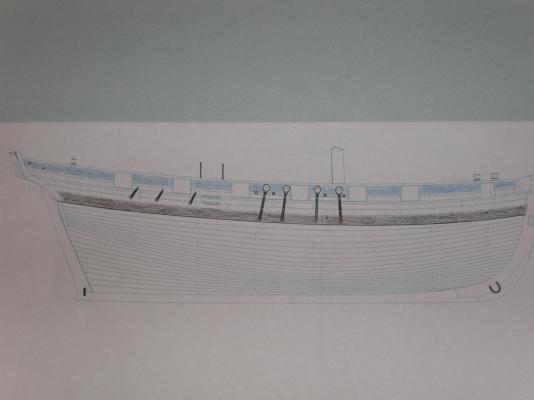
Druxey, Thanks for the second opinion. That's exactly the kind of feedback that is so much appreciated. It keeps me from screwing up what will otherwise be a good build because I pull an amateur move that seemed like a good idea to my inexperienced mind. All, I'm not going to go with the blue. If you compare the photos of the model in the Rogers Collection I posted above, with my high tech coloring project below, you'll see that rather than simply being trim, the two blue strakes will make up a greater portion of the above-the-wales planking. Also, as Chuck stated, it looks a little odd as those planks narrow at the bow and stern. Erik
-
Thanks for the feedback Chuck! Glad to get an expert opinion on the chamfer . . . and glad I asked before I went that route. I didn't have my mind set on the blue. You have some good points about the blue planks being wider than the wale. At this point then, I'm leaning towards not doing the blue option. I will do some tests using color paper, and coloring in a printed side view of your plans to get a visual on how it would look. Erik
-
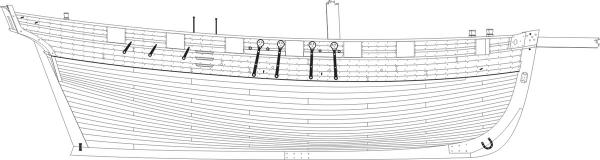
I've been considering going with an alternate paint scheme for my Cheerful than what others are doing. My thoughts were to paint the top two planks on the sides (the two between the top trim strip and the cap rail) blue. I'd also paint the transom blue, but leave the counter a natural color. I have two questions. 1. My thoughts were to sand a very slight bevel on one edge of one of the two planks to be painted, so once painted the planks can still be seen to be individual planks. Do you think this will work? Or is this not something that is done. What are the potential problems? 2. Is blue a realistic color on a cutter or ship from this era? It doesn't have to be accurate for the Cheerful, but if there's no chance a cutter had blue paint, I might skip it. I borrowed these photos from Chuck's build log to demonstrate what I'm talking about (thanks in advance Chuck!). The side view of the plans showing the top two planks. Photos from the Rogers collection in Annapolis showing some blue (but at Chuck has pointed out, not the Cheerful). Erik


-
Chuck, I almost didn't post the photos. I'm very much in the in-progress stage with this part of the planking. I know that the WOP will make the simulated caulking stand out . . . that and wiping off all the saw dust. Erik
-
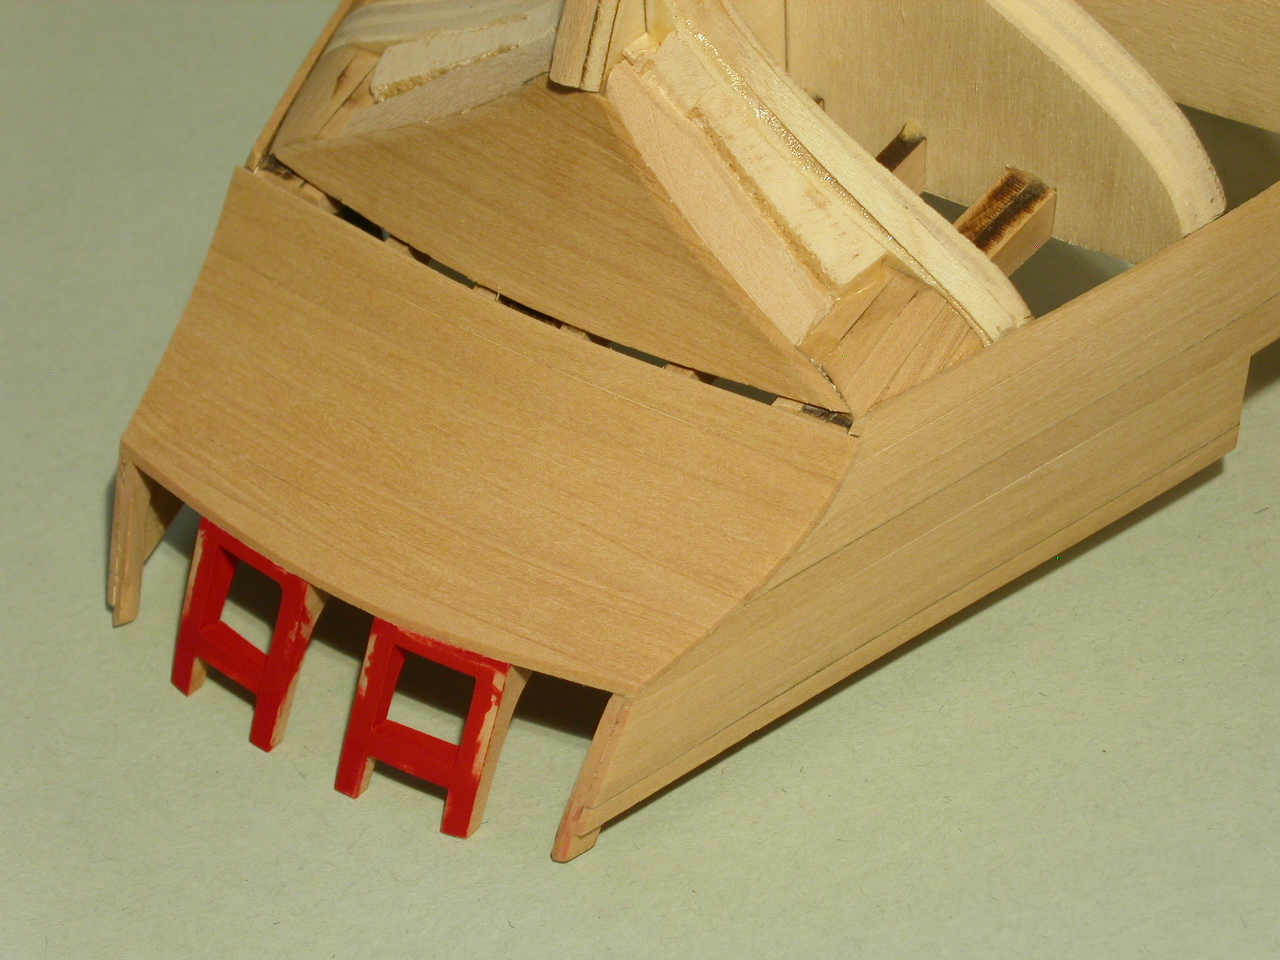
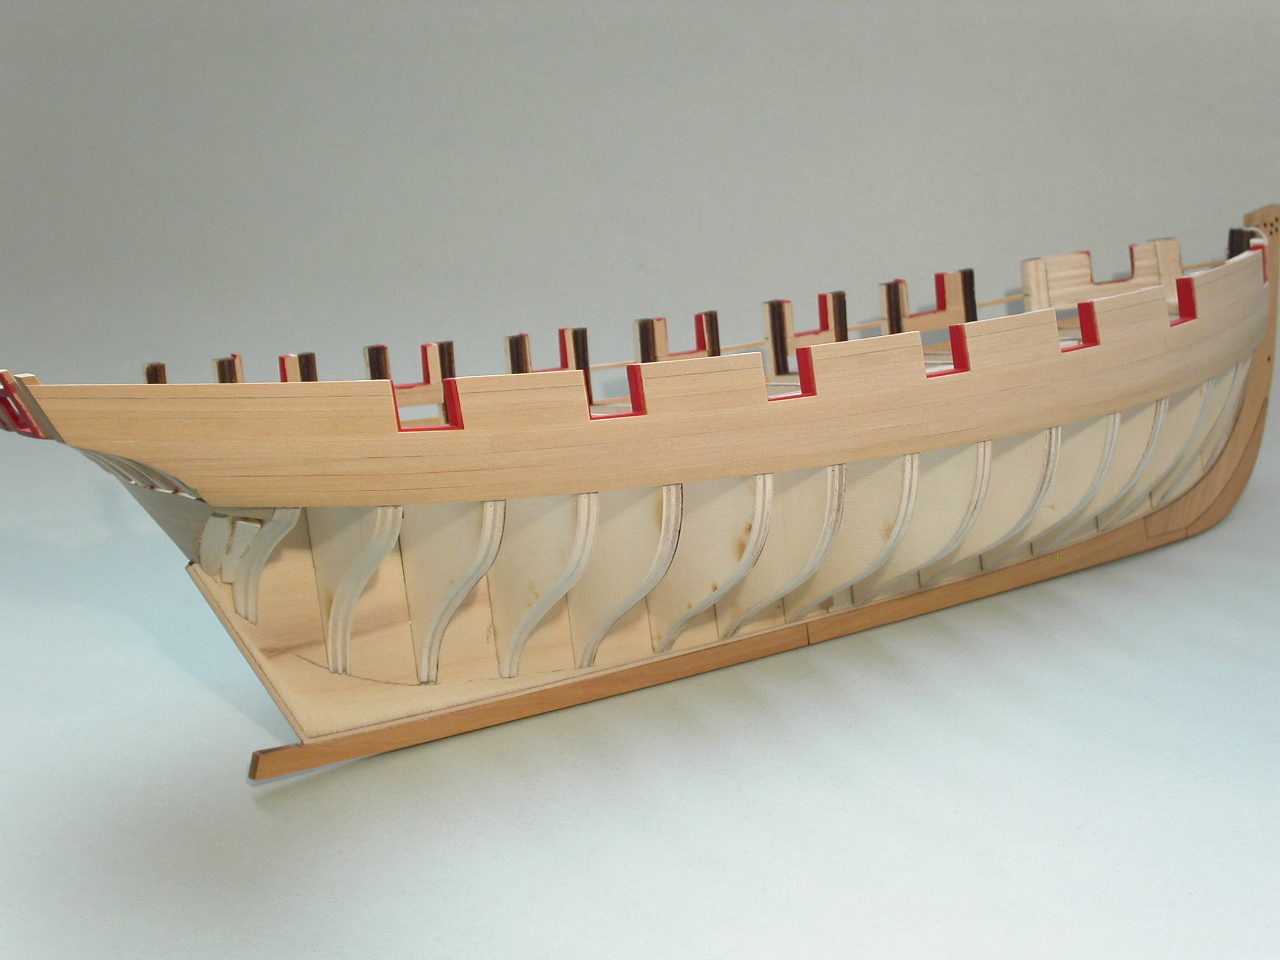
I'm continuing with the planking above the wales. Things are temporarily looking very rough in these photos. Some of the planks are partially sanded. Other planks are not sanded yet. Like Chuck, I only did the pencil caulking between planks in areas where it won't be hidden by the wales or trim pieces. So, it looks a little odd at this stage. The two red pieces of wood next to the ship are parts of the stern gun port framing I accidentally just broke off! Grrr! Thought I'd take a break, and snap a few photos . . . Erik
-
Ed, Impressive! Equally impressive is building 4 of these in a row. I know they're all different, but I'd imagine their is a lack of motivation that builds up by the time you get to the last one! Erik
- 3,618 replies
-
- 5
-
-
- young america
- clipper
- (and 1 more)
-
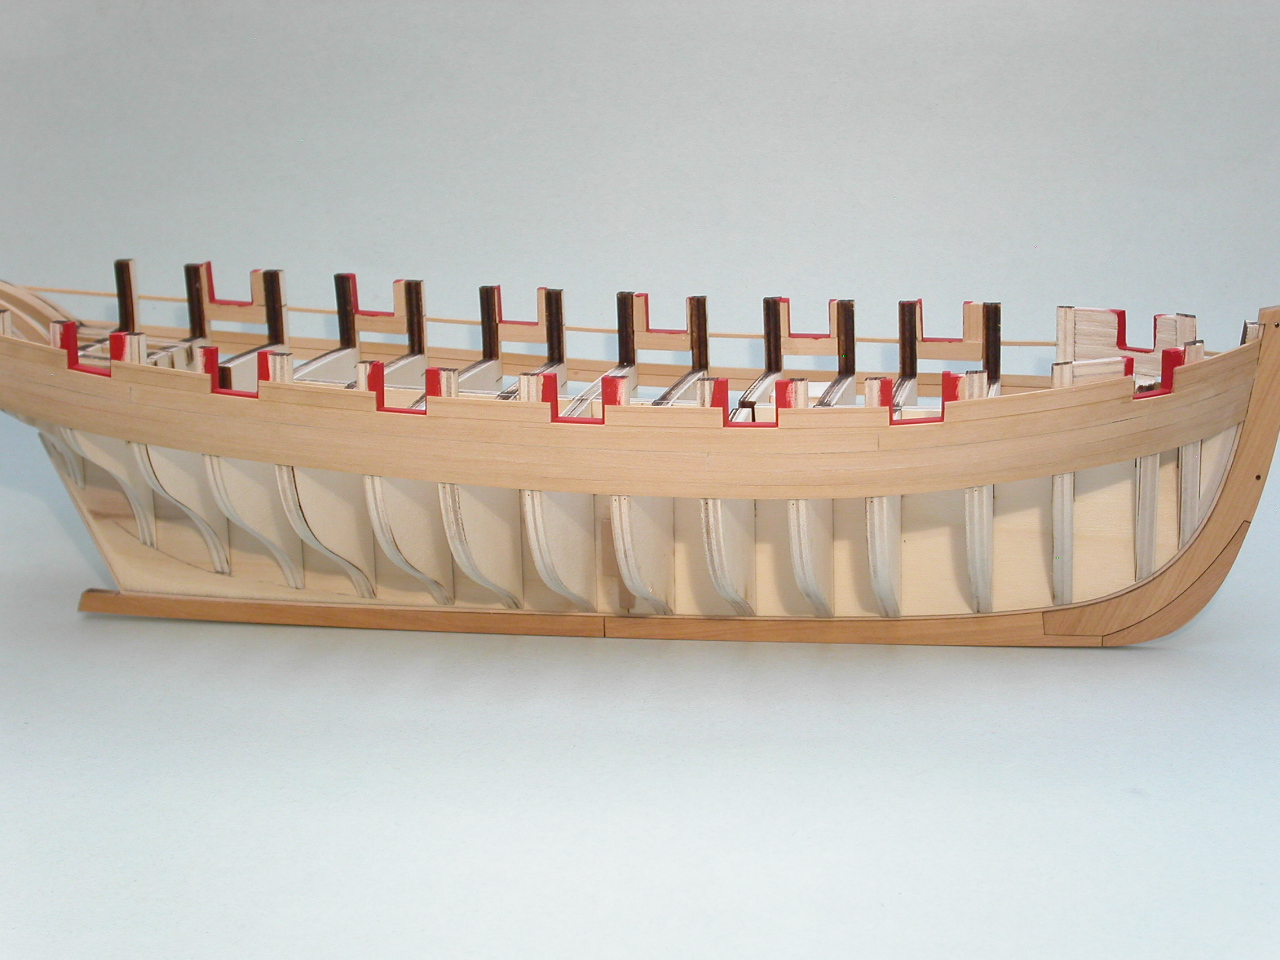
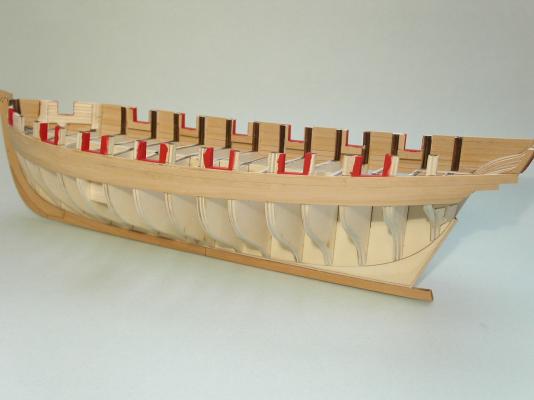
Since my progress is slow and steady . . . you get photos of every little step forward! I added the molding strips on each side, just below the gun ports. These were actually quite challenging to get a smooth run since they're so narrow. It's easy to accidentally kink them. The first side I did I wound up pulling off and reattaching the main strip 4 times, and the short strip in front of the forward gun port 2 times. I blame Mike (Stuntflyer) for setting the example of pulling things apart and starting over. The second side went much smoother with no need to start over. Erik
-
That looks better. Also, don't worry about the roughness of how the planking looks. Once you do the final sanding after you're done planking, it'll look a lot cleaner. Erik
- 64 replies
-
- 5
-
-
- 18th century longboat
- model shipways
- (and 1 more)
-
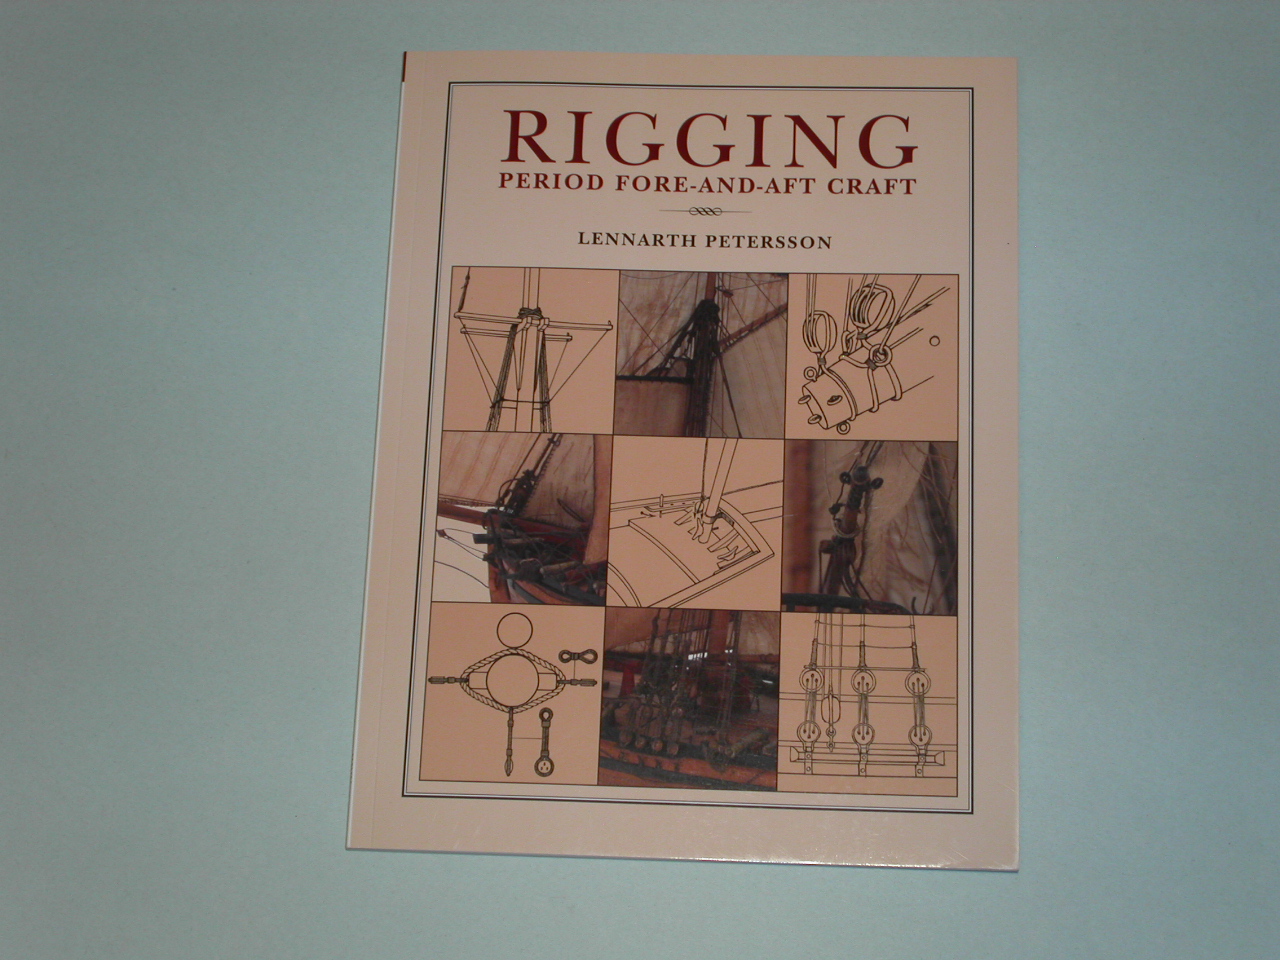
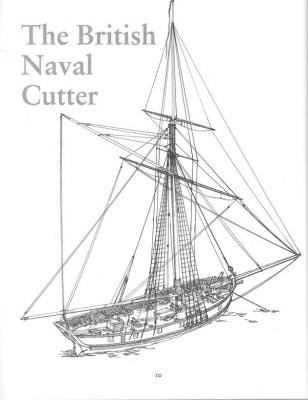
Thanks Jack! Al, I figure the longer it takes, the more bang for my buck I'm getting. This book arrived in the mail today. About a third of it is dedicated to rigging an English cutter built in 1778. While not rigged in the same way as Cheerful, it is similar enough to really get a good 3 dimensional view of the rigging, as well as an understanding of how a typical cutter was rigged. Here's a link to the book's description: http://www.amazon.com/Rigging-Period-Fore---Aft-Craft/dp/159114227X/ref=sr_1_1?ie=UTF8&qid=1457738065&sr=8-1&keywords=rigging+period+fore Erik
-
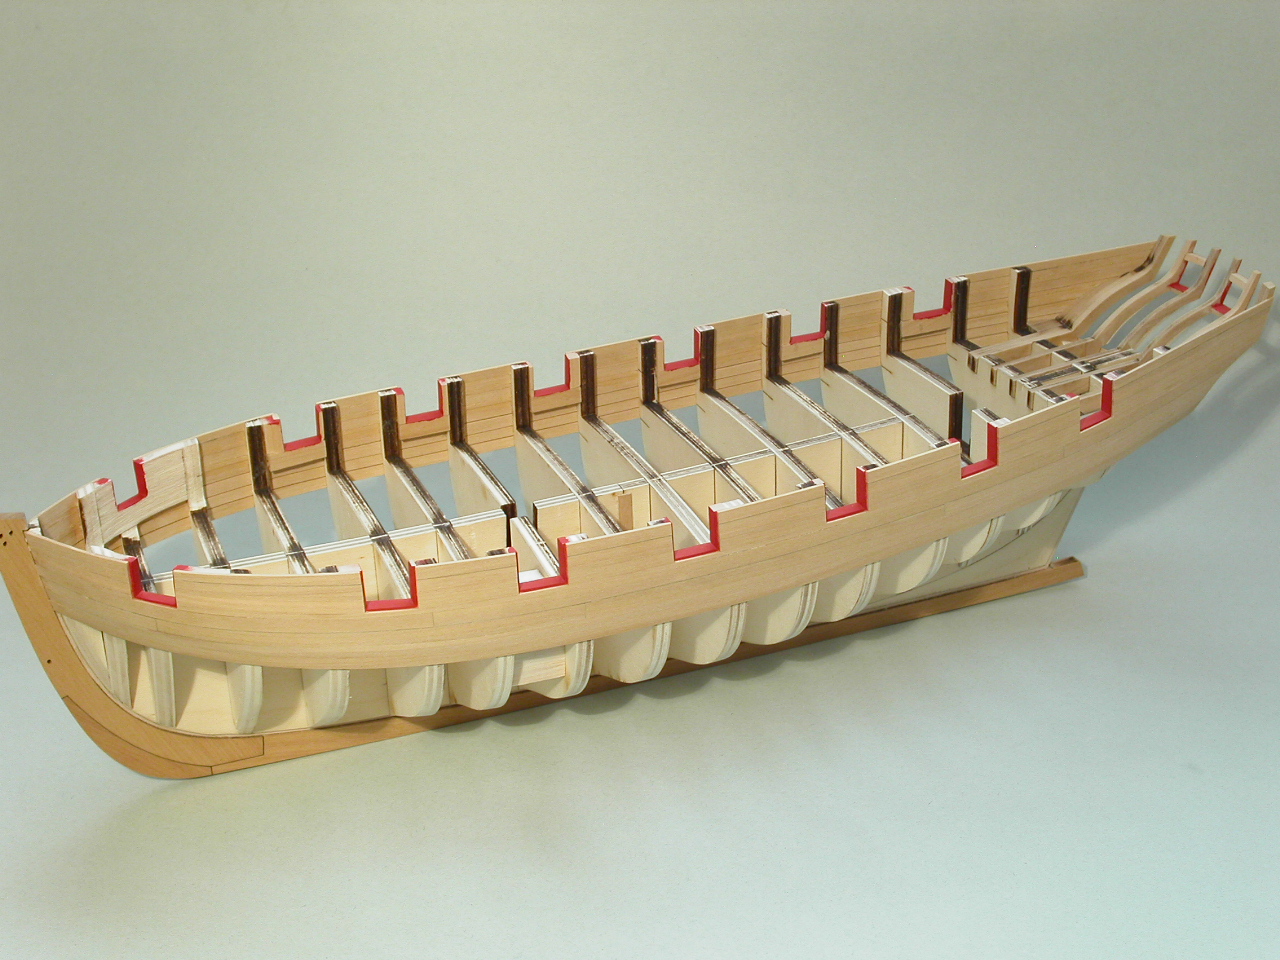
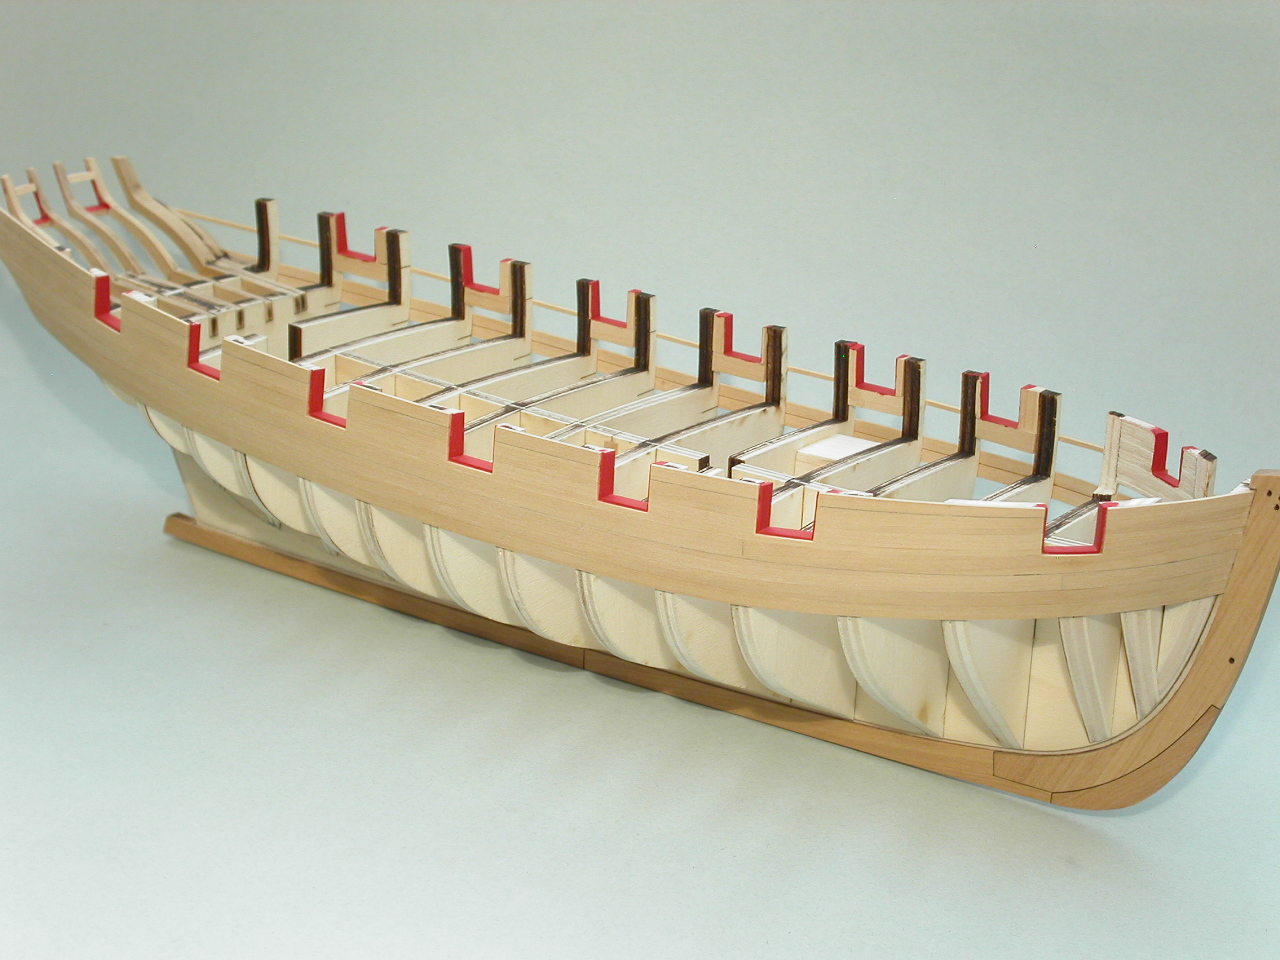
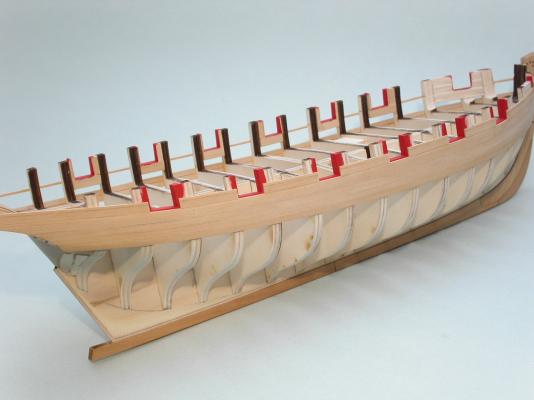
There definitely is something to be said for measuring a bunch, checking things a bunch, and taking it slowly. I've been concerned about getting the wales correct, and identical on both sides. I think I pulled it off. Both sides, to the best of my observation, have identical runs, and line up perfectly at both the bow and stern. I used the batten strip again to determine the run of the thin 3/64" x 1/16" plank that is located just below the gun ports and is higher at the forward most gun port. I drew that plank run with a pencil. Again, taking my time is key. So, in other words . . . this baby will be launched some time in 2028! Erik