Erik W
-
Posts
470 -
Joined
-
Last visited
Content Type
Profiles
Forums
Gallery
Events
Everything posted by Erik W
-

Fokker Dr.I by Torbogdan - FINISHED - Model Airways
Erik W replied to Torbogdan's topic in Non-ship/categorised builds
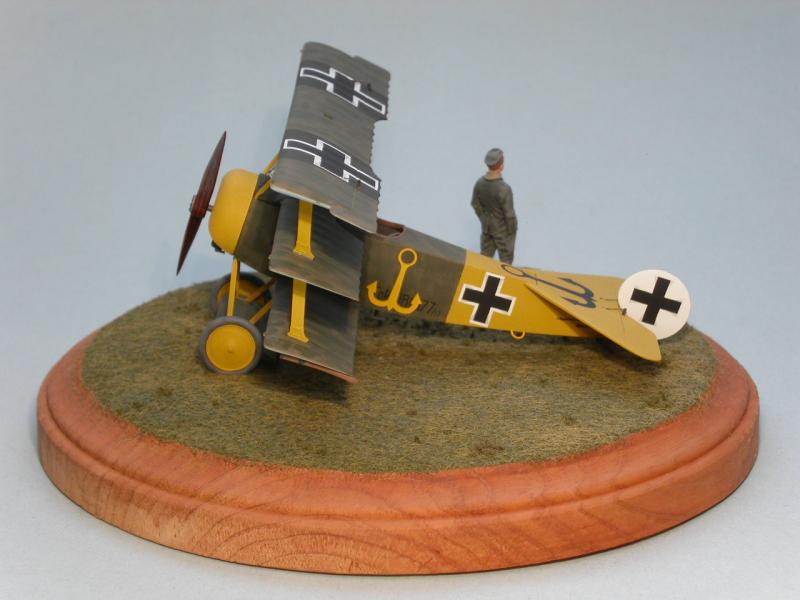
Cool! I love the Fokker Dr.1. That kit looks like a challenge. I like the complex look of WWI aircraft without fabric. After seeing these unique markings, I had built this 1/48 scale Dr.1 years ago. Erik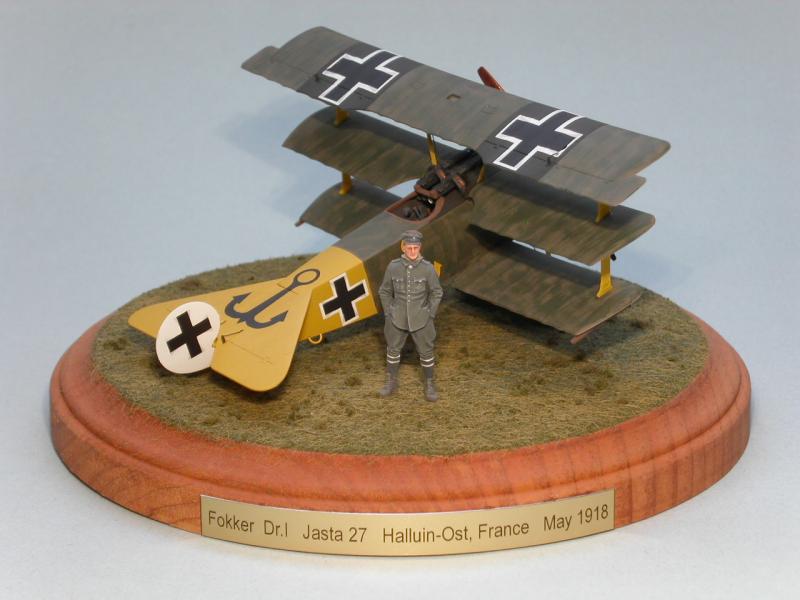
- 250 replies
-
- 24
-

-
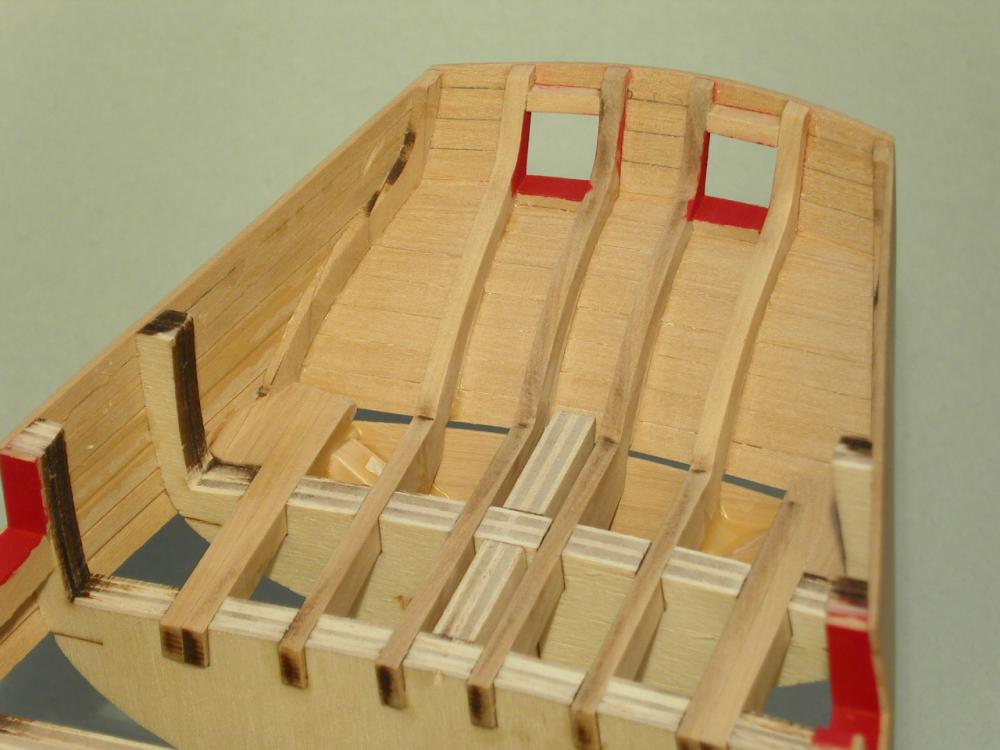
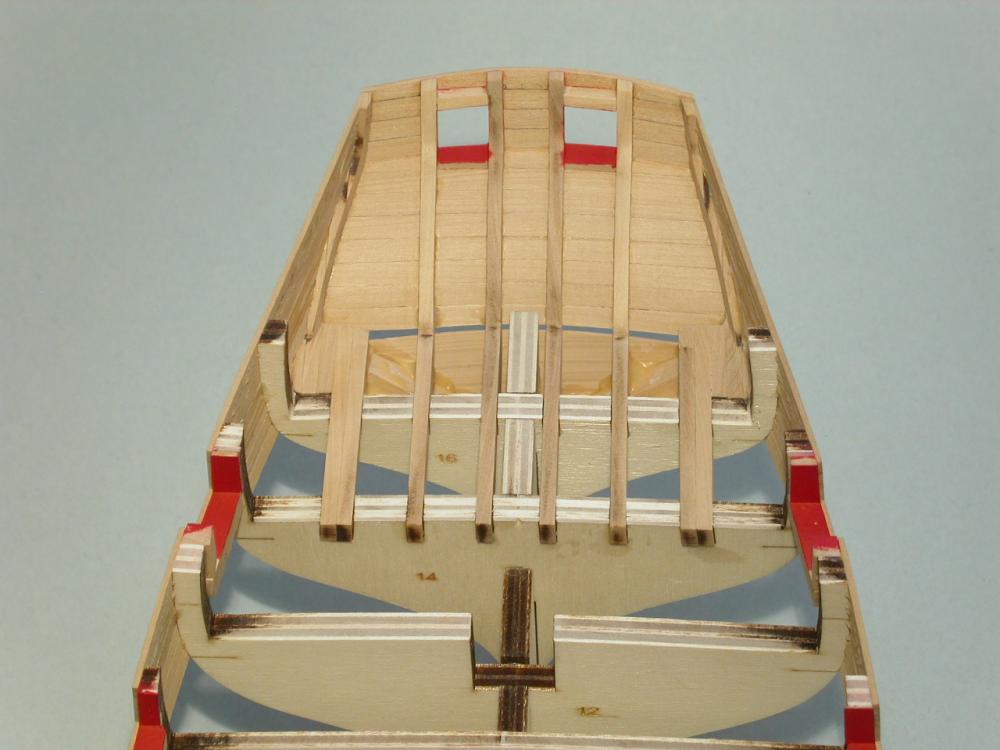
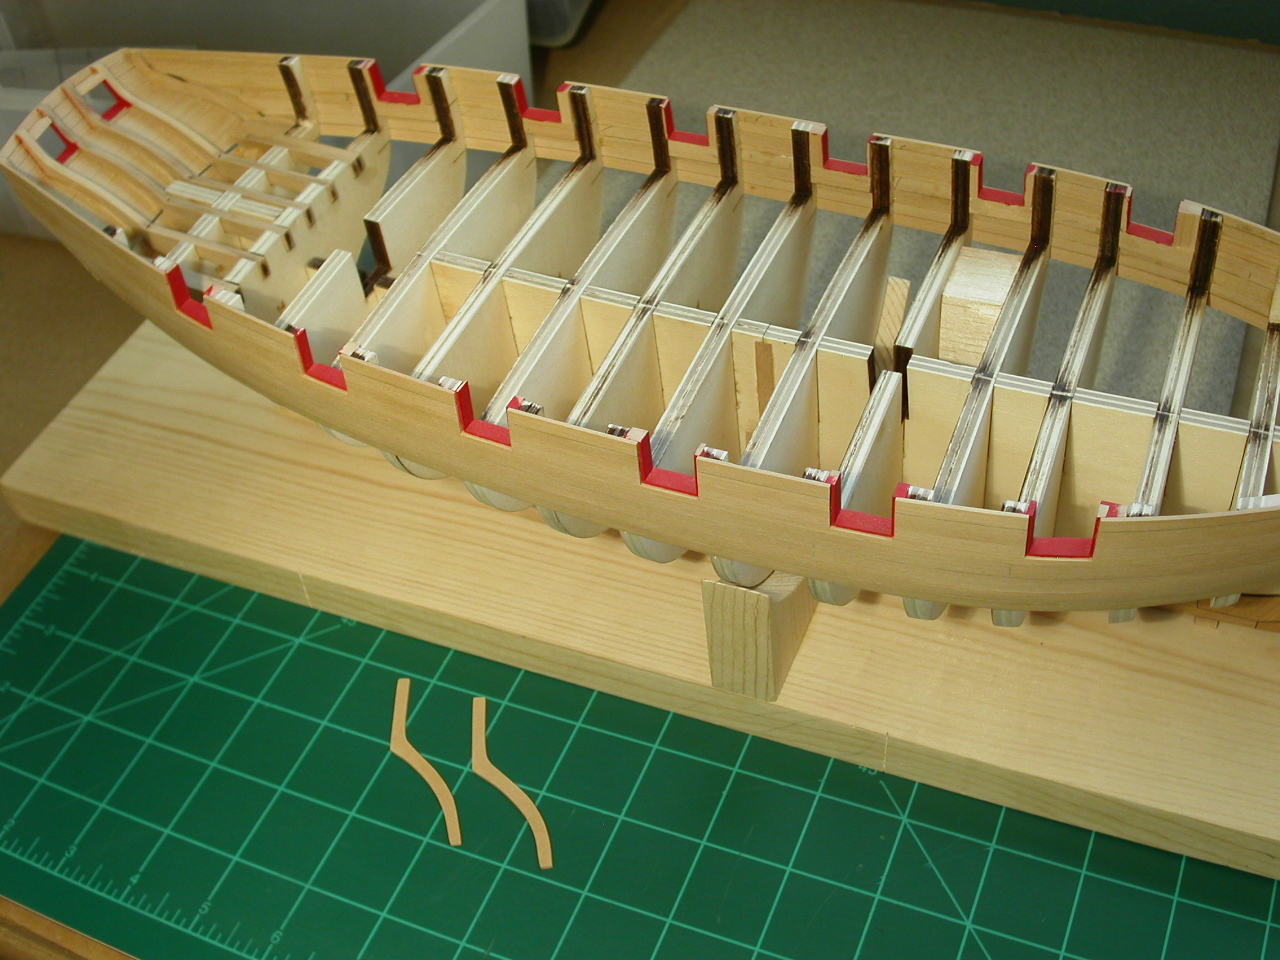
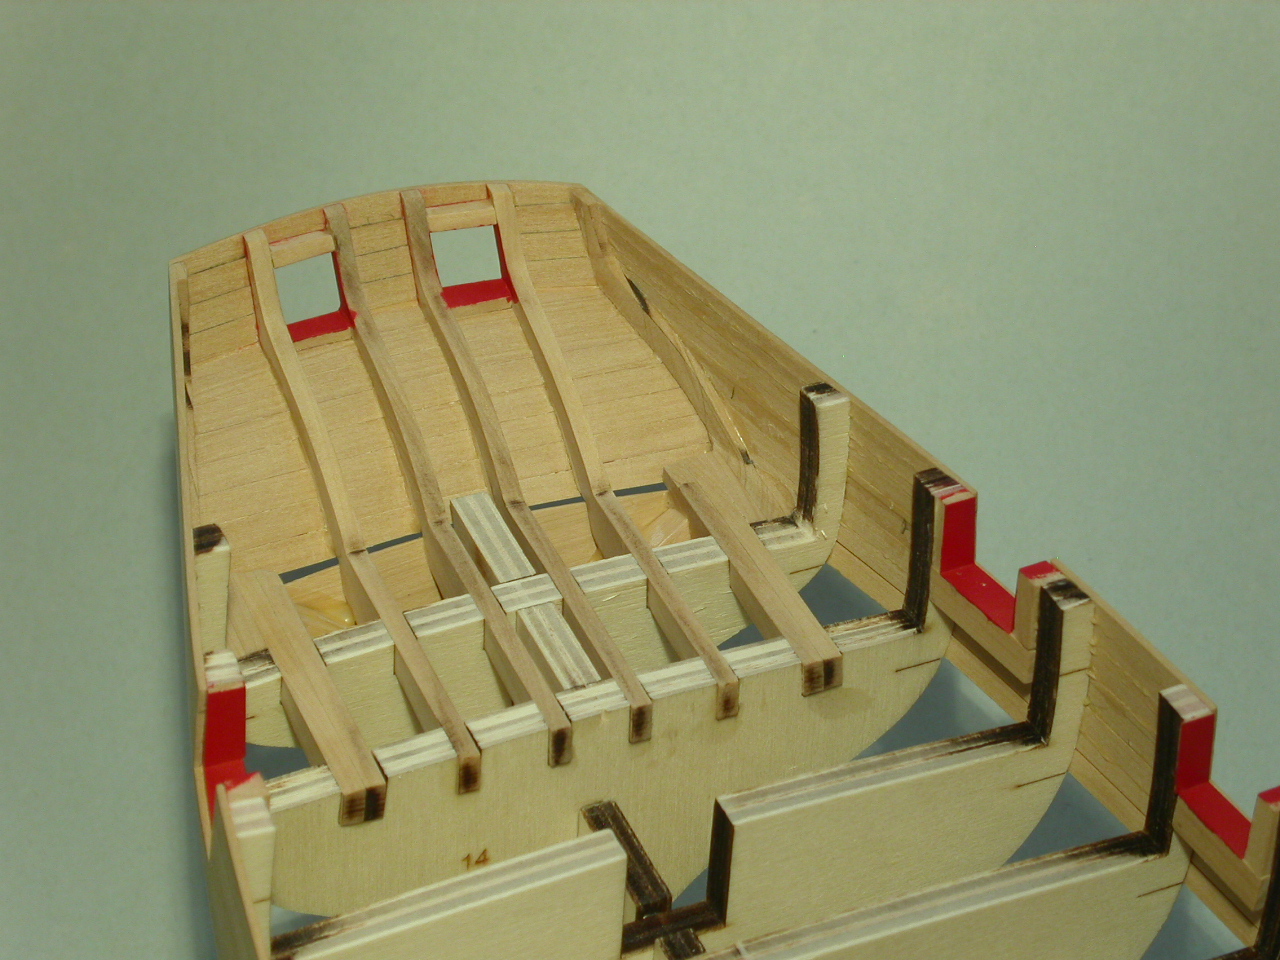
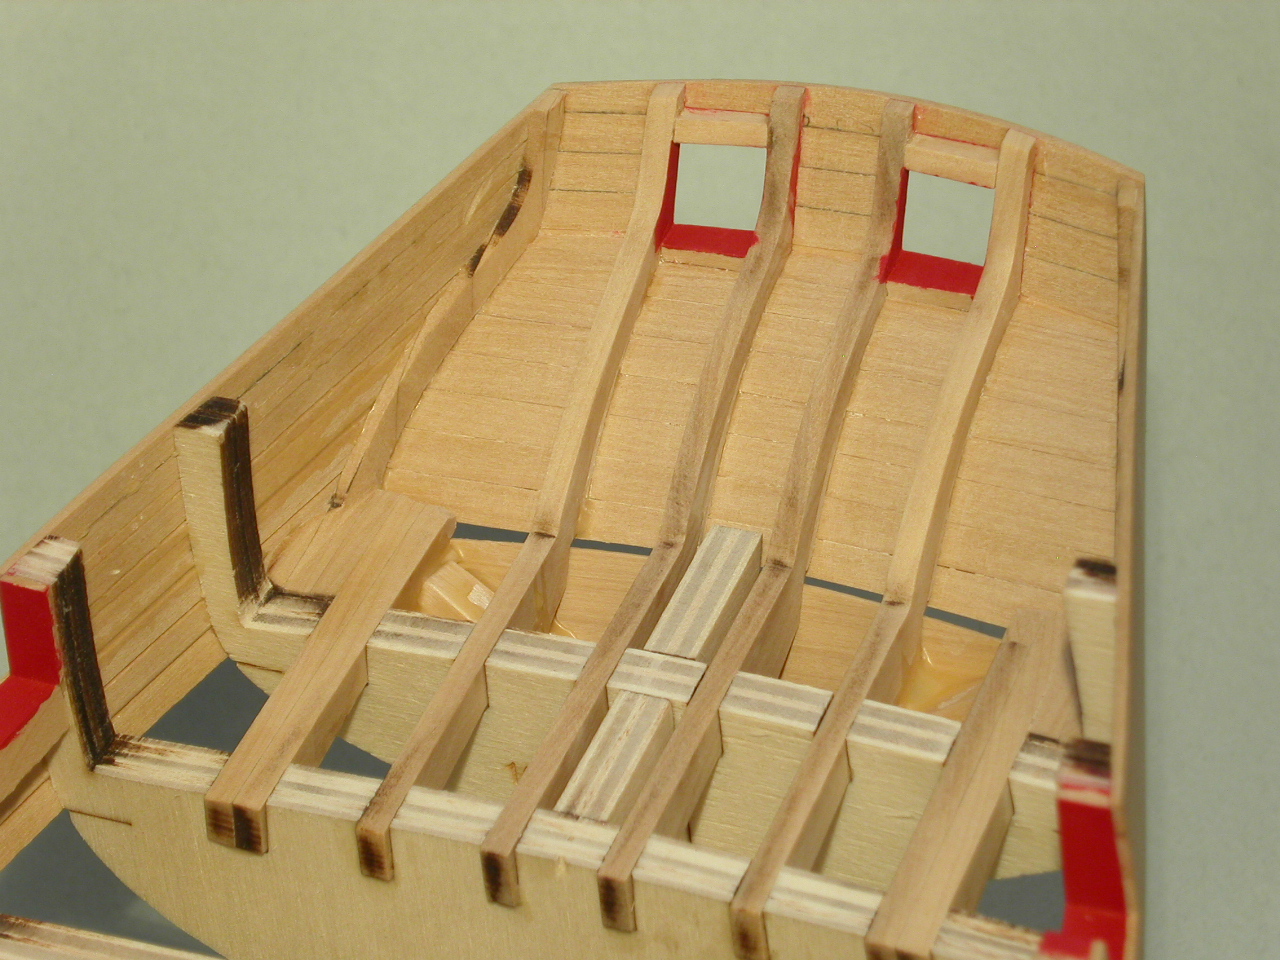
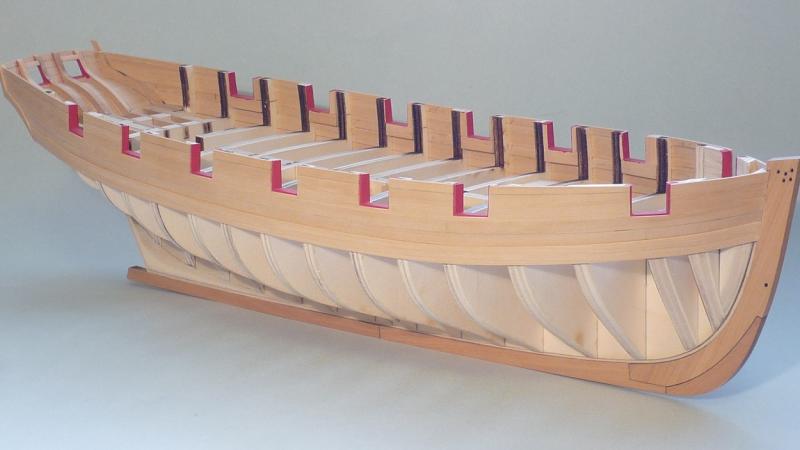
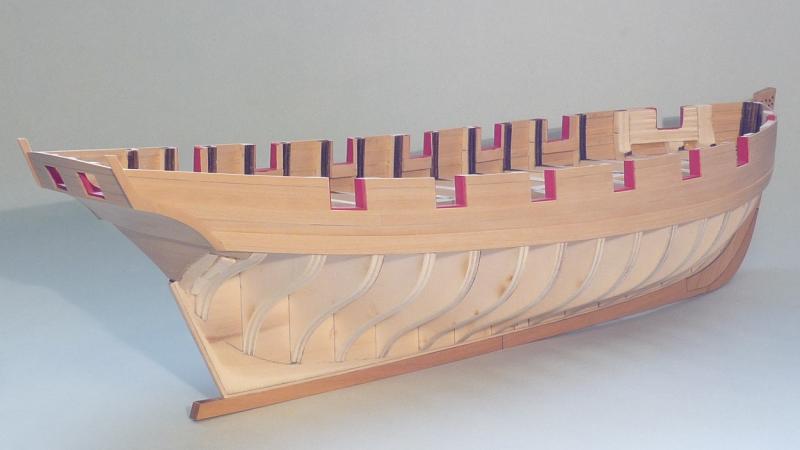
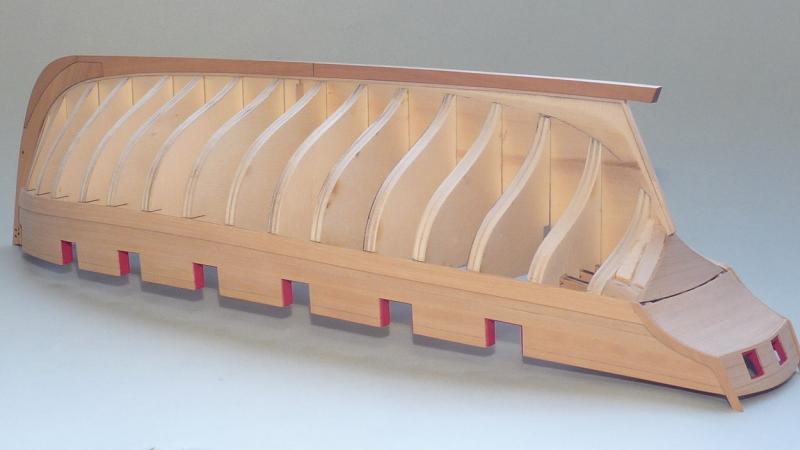
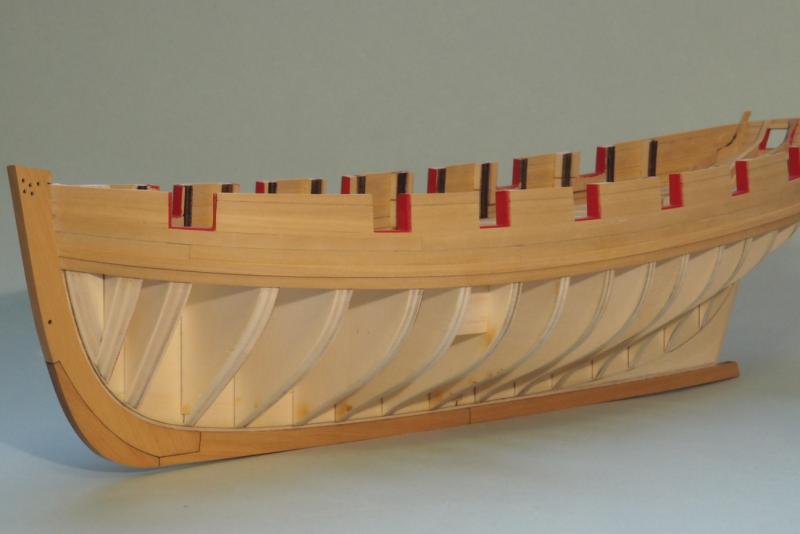
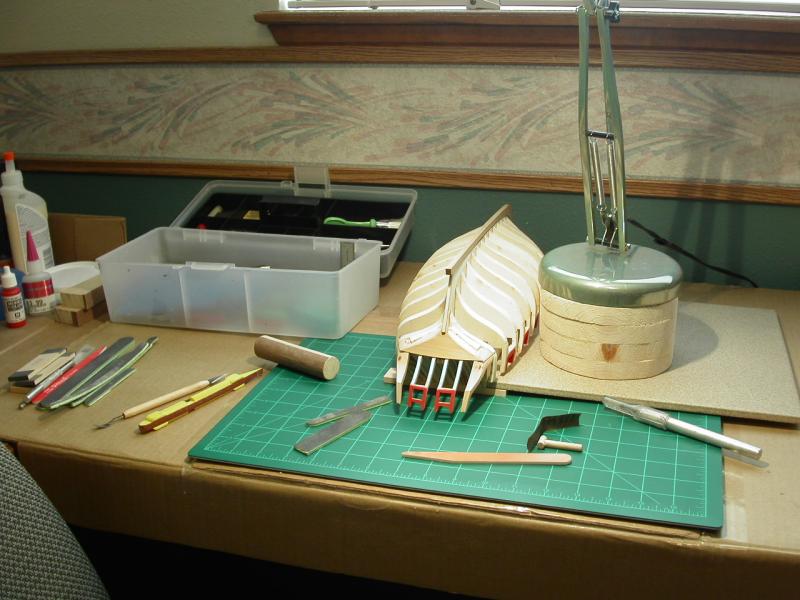
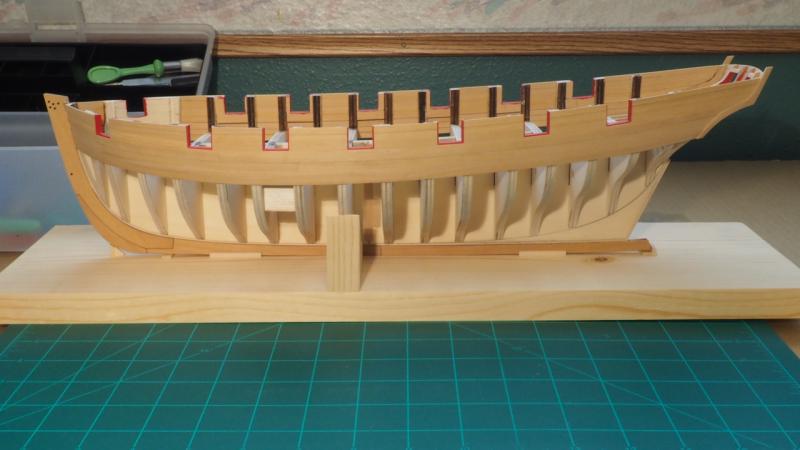
After starting work on my Cheerful again . . . I immediately went back east on vacation for the holiday. But I'm now back and cutting wood. I installed the wales. I'm going to wait to paint the wales until I have the two strakes below them installed. I have yet to apply any Wipe on Poly since I'm not yet done with the final sanding and cleanup above the wales. The plan then is to do the two strakes below the wales, do a final sanding of the wales and above, apply WOP, paint the wales and counter . . . and then proceed to plank the rest of the hull. Here's where I am so far. The wales have been added and sanded. Erik

-
Rusty, Nice to see you getting back to your Cheerful again! I just started back at mine after being away for the summer and most of the fall. Erik
- 310 replies
-
- 4
-
-
- cheerful
- Syren Ship Model Company
- (and 1 more)
-
Chuck, Just to be clear with your first post above, you do not permanently glue any of the lines where they attach to the ship, including the standing rigging? So for example, on your Cheerful build, once the tension is where you want it with the shrouds, you will not secure the lanyards running through the dead-eyes with glue? I like the idea of not using glue to secure the belaying points. It's easier to correct the line tension, and you can better minimize the discoloring of the scale rope that seems to be an inevitable result of gluing. Thanks, Erik
-
Mike, Thanks for doing the legwork for me. That's awesome! Erik
- 452 replies
-
- 4
-
-
- cheerful
- Syren Ship Model Company
- (and 1 more)
-
Mike, Thanks for the info. I'll have to take a look at what the local Michaels has in stock. Not sure why I'm trying to figure this stuff out now . . . I'm a wee bit far from the rigging stage at this point. Erik
- 452 replies
-
- 4
-
-
- cheerful
- Syren Ship Model Company
- (and 1 more)
-
Mike, Thanks for the link to the thread. Did you also use that brand for seizing the tan colored rope? I think I used 30wt (larger diameter) for seizing on my longboat and thought the thread was too large a diameter. Replacing the MS rope with Chuck's rope was the one aftermarket addition I made to the longboat kit. It's sooo much easier to work with! I've noticed with a lot of my modeling that I don't see the mistakes and imperfections until I look at a photo of the build. I can't tell you the number of times over the years that I've chosen to not post photos, or take them from a different angle, to avoid showing imperfections . . . that no one else would notice anyway. Erik
- 452 replies
-
- 4
-
-
- cheerful
- Syren Ship Model Company
- (and 1 more)
-
Mike, This looks really good . . . and passes the test of enlarged high resolution photography! You've made an exponential leap forward with the look of your rigging when compared with the rigging on your longboat. One question, where did you buy your 50wt thread? Thanks, Erik
- 452 replies
-
- 5
-
-
- cheerful
- Syren Ship Model Company
- (and 1 more)
-
Steve, My risers wound up not having any grooves either. I scribed the grooves into them, but the kit supplied wood was of such poor quality that when I stained them the grooves disappeared!! Getting the risers shaped properly and glued in the correct place was one of the more difficult parts of the whole build! Yours came out well. It looks good. Erik
- 165 replies
-
- 1
-
-
- finished
- model shipways
- (and 1 more)
-
Steve, I think it's always good to go with your gut feeling on the urge to redo things. Part of the learning curve is attempting an idea, and then taking it in a different direction if you aren't happy with the results. Also, glad my advice with the files helped you! Erik
- 165 replies
-
- 4
-
-
- finished
- model shipways
- (and 1 more)
-
Chuck, I know what you mean. I was just thinking the other day that I like the size of the parts when working in this scale. When I have my Cheerful rigging plans open though, and see the size it will be, I do look around the house and wonder where I'll put the finished model! Erik
- 1,051 replies
-
- 3
-
-
- cheerful
- Syren Ship Model Company
- (and 1 more)
-
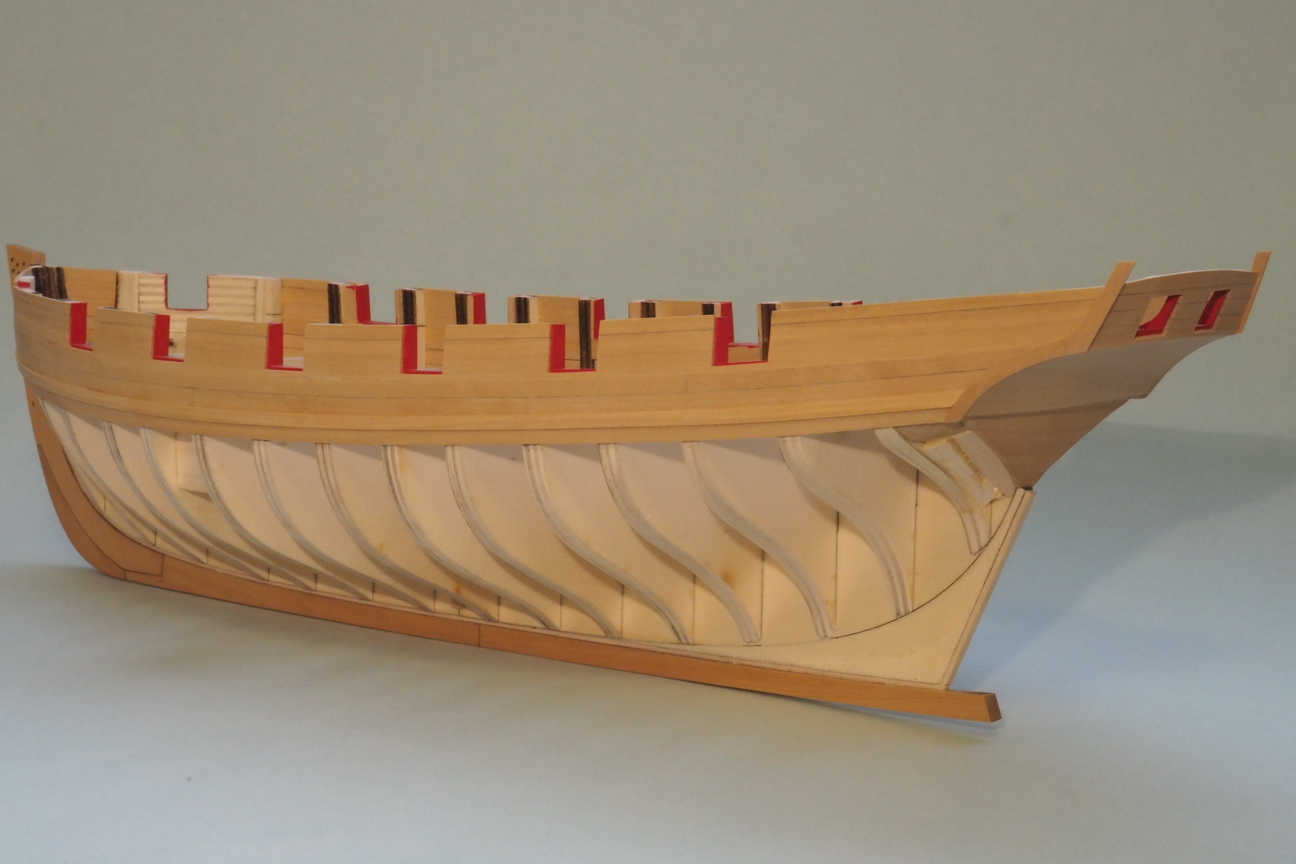
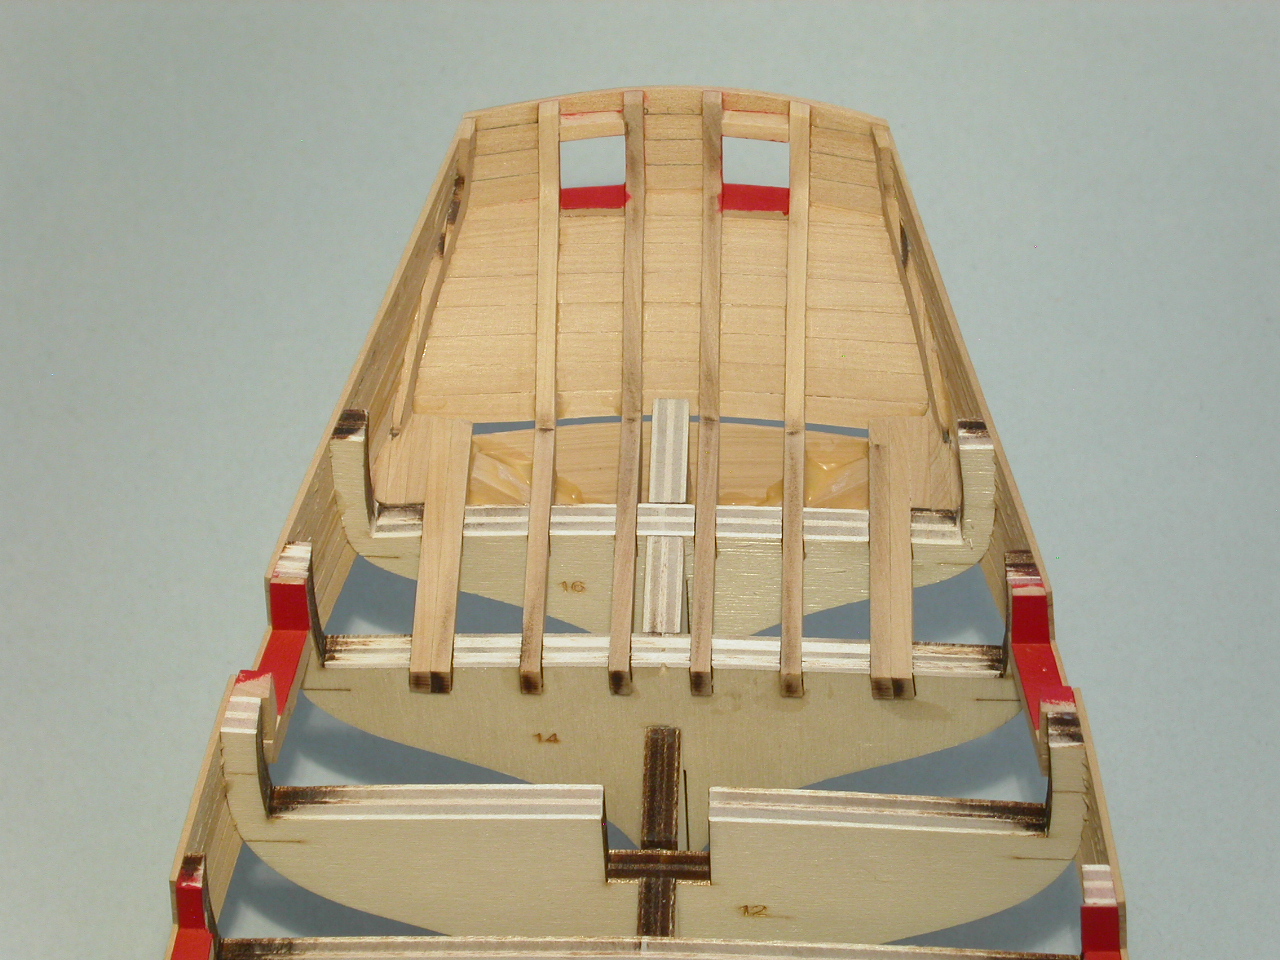
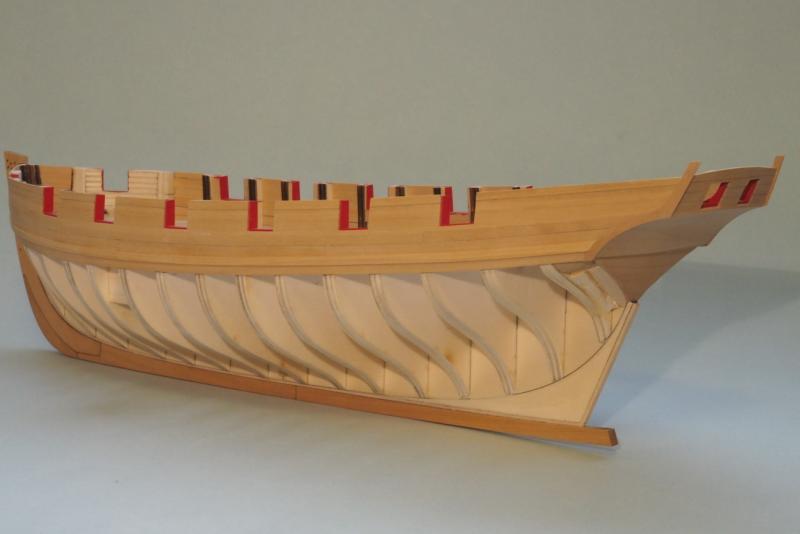
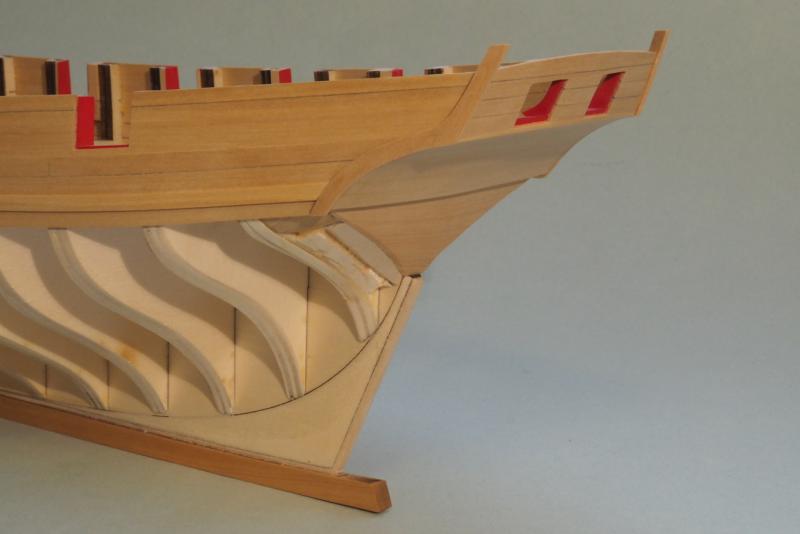
I normally wouldn't post after adding just one plank, but since yesterday was the first progress I've made on the Cheerful since early June, I thought I'd let you guys know that my motivation is returning. I'm working on getting the second layer of the wales added . . . so have photos of the first of the 2 planks on the port side. I also threw in a photo of the stern. I know the rear gun port frames are slightly crooked (you can't tell when viewing from the interior). Since the gun ports will be modeled closed, this won't be noticeable. I figured having the exterior planking smooth and straight is more important. I envy those of you who can stay focused on your one build. I am easily distracted by my other hobbies http://modelshipworld.com/index.php/topic/4423-what-else-do-you-model-besides-ships/?p=343803 . . . and life in general. Glad to be back. Erik
-
Welcome. It's good to see another wood supplier. Just out of curiosity, what city/state is Wood Project Source located? Thanks, Erik
-
One more definition: Druxey = Word used to describe wood that has decayed spots or streaks of a whitish color. Erik
- 452 replies
-
- 6
-
-
- cheerful
- Syren Ship Model Company
- (and 1 more)
-
Chris, I do all of my modeling on a nice desk I don't want damaged. I use a piece of cardboard cut from a large box and have a smaller piece of cardboard taped on top. I have a medium size cutting matt above the cardboard. Off to the left side of the large piece of cardboard, I have a box lid to hold my supplies. I can set up/remove all this from the desk in under a minute. Erik
- 16 replies
-
- 10
-
-
Chuck, Regardless of how accurate having the long guns in the forward-most ports is, I think they look better there vs. leaving those forward ports empty, (whether you move the long guns back, or just leave them off entirely). My thought with models, ships or otherwise, is that sometimes you have to forgo realism for the sake of esthetics. My humble $.02 is that the ship simply looks better with the long guns forward. Erik
- 1,051 replies
-
- 7
-
-
- cheerful
- Syren Ship Model Company
- (and 1 more)
-
Wow guys! Thanks for all the nice posts. That was very kind. Some of my fondest memories of my dad are our sailing trips from Annapolis, MD when I was a kid and then from Newport, RI when I was a teenager. My family, who had been taking care of him, told me that this last year he would always look forward to my Saturday morning phone calls, and reports of my progress on the longboat and Cheerful (one of the reasons my longboat build log had so many photos was because I was taking photos every few days that I could email my dad). As long as I can remember, my father always had an eye towards the sea. Though my shipyard has been quiet, I have been gathering some more materials for the build. I recently received an order from Chuck of a couple of his mini kits . . . and printed the latest chapters in his practicum. . . . and since forums are always better with photos, here's my Cheerful as she sits today. Erik
-
Steve, Thanks for checking in, and the kind words! Life has kind of gotten in the way of my build these last months. I spent some time traveling around Iceland and Norway for a while . . . er, call it research for future projects. Also, my father passed away last month after a long and painful battle with cancer. Lots to try to wrap my mind around lately. So, I've been working on getting my feet under me again. That said, I'm still on here regularly following everyone's progress, particularly the other Cheerful builders. One things I was able to share with my father in his last year, when he was very ill and house bound, was my longboat build, and the progress on my Cheerful. Ultimately, I think it fitting that this build is dedicated to him. Thanks for checking in, Erik
-
Chuck, This is the first build of yours that I'm here for the rigging stage. I'm following along with interest. Your work stands the test of being shown in the fairly large resolution photos you're posting! Erik
- 1,051 replies
-
- 5
-
-
- cheerful
- Syren Ship Model Company
- (and 1 more)
-
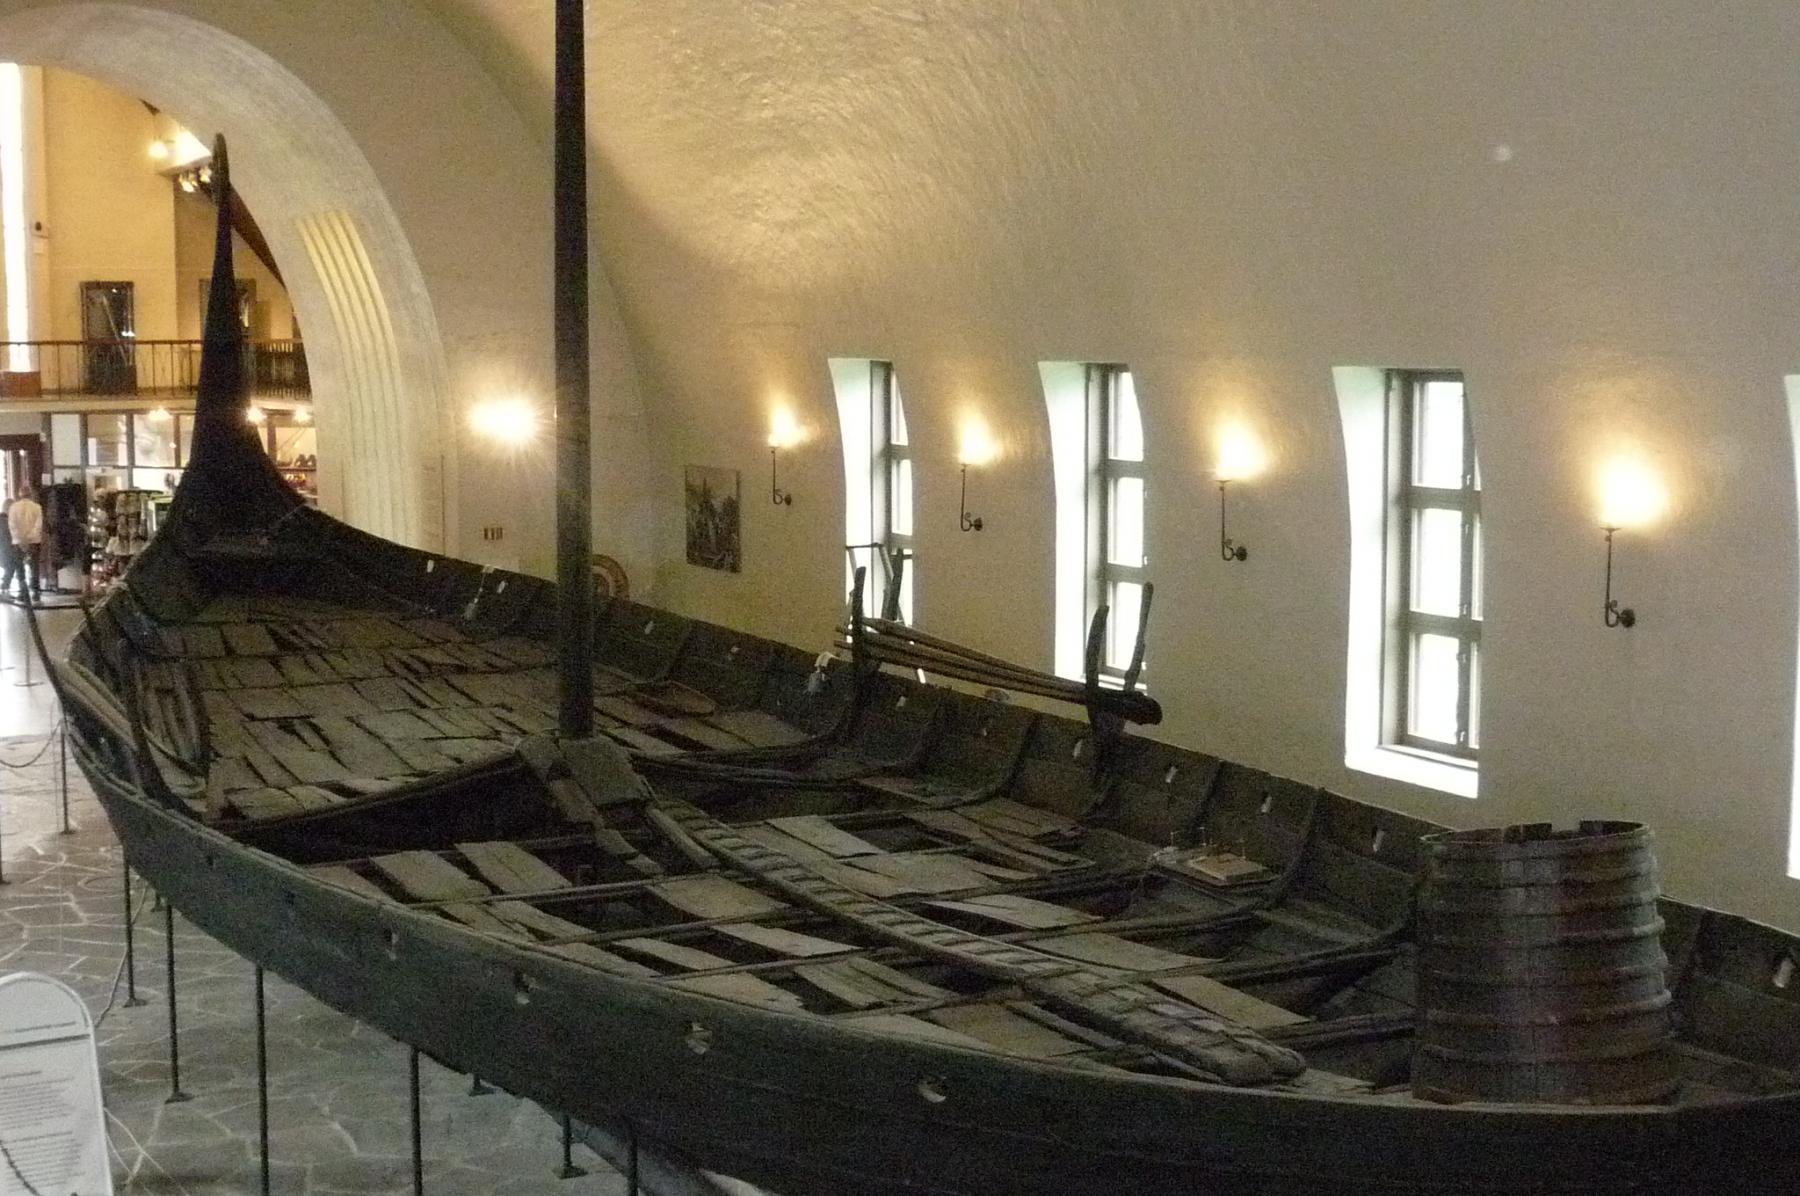
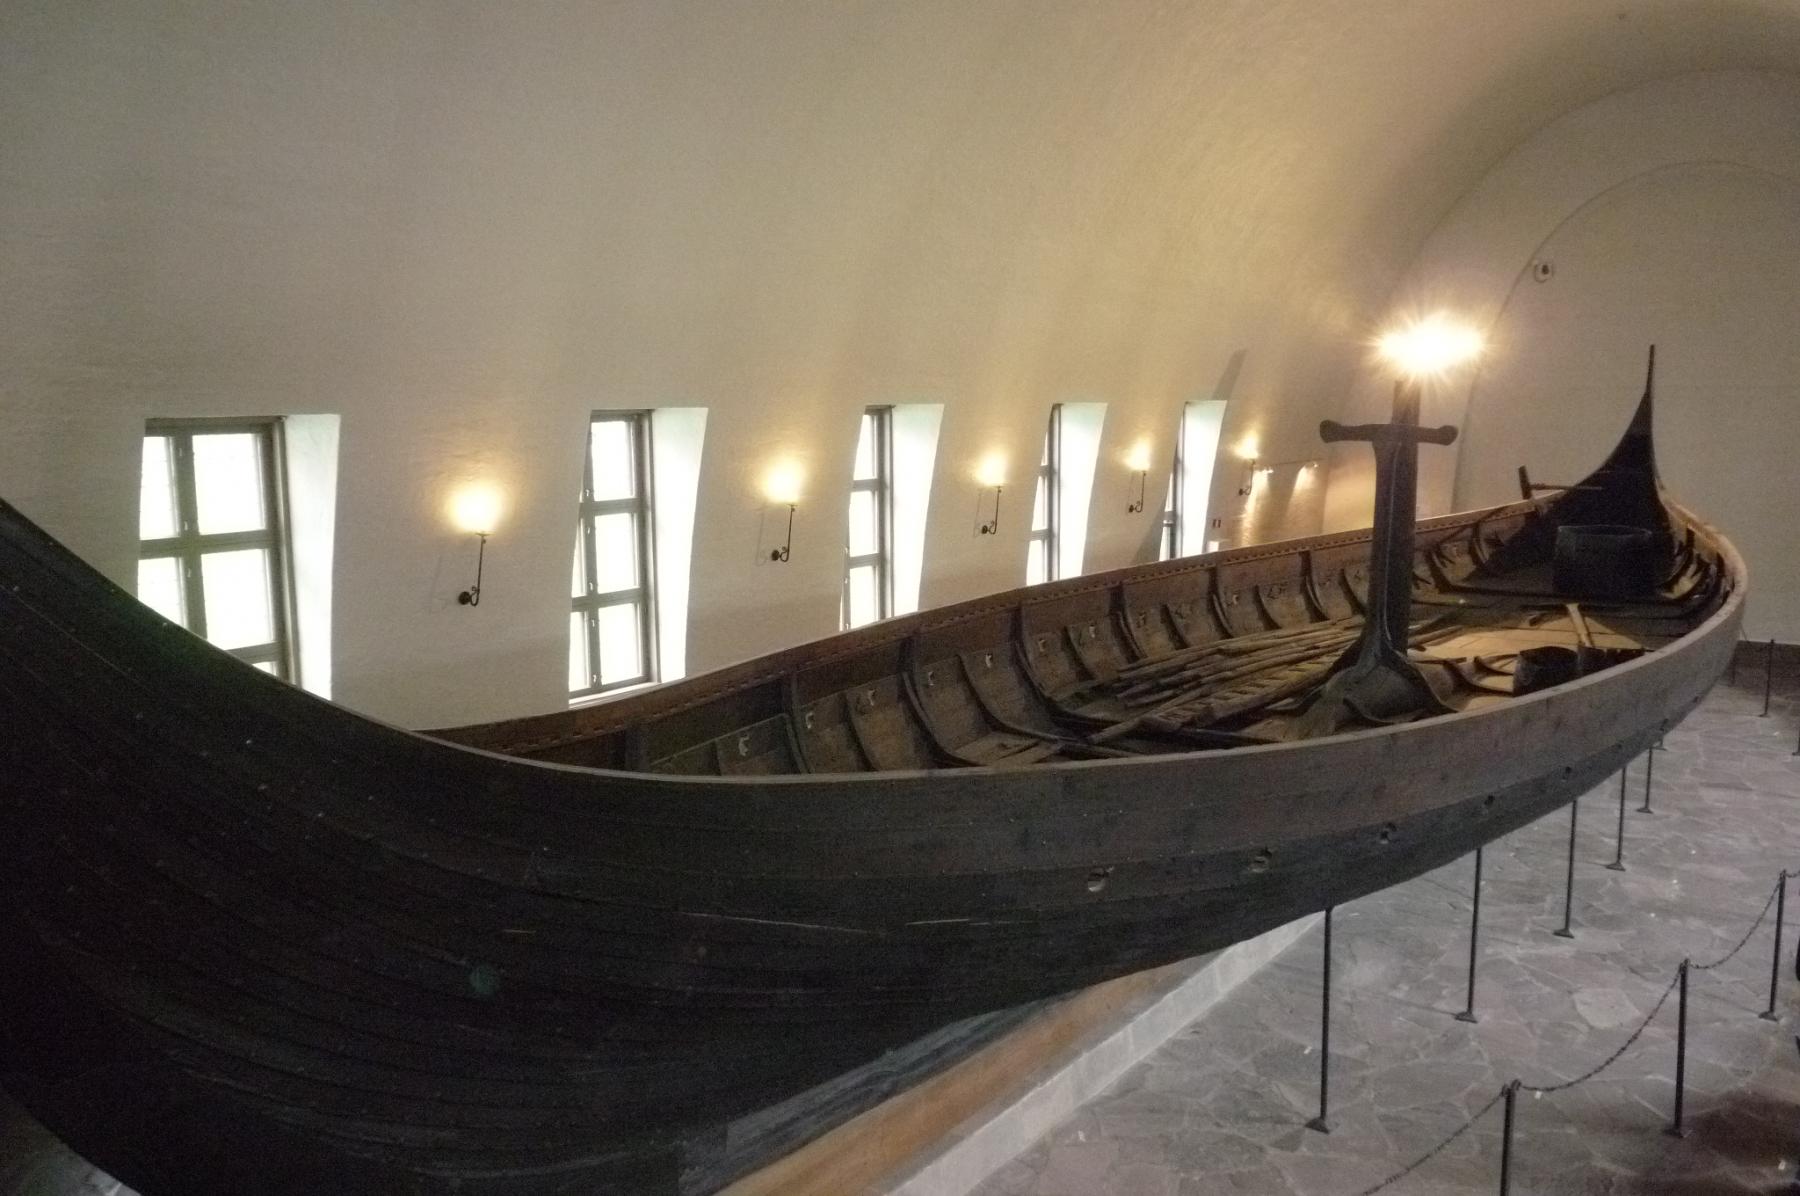
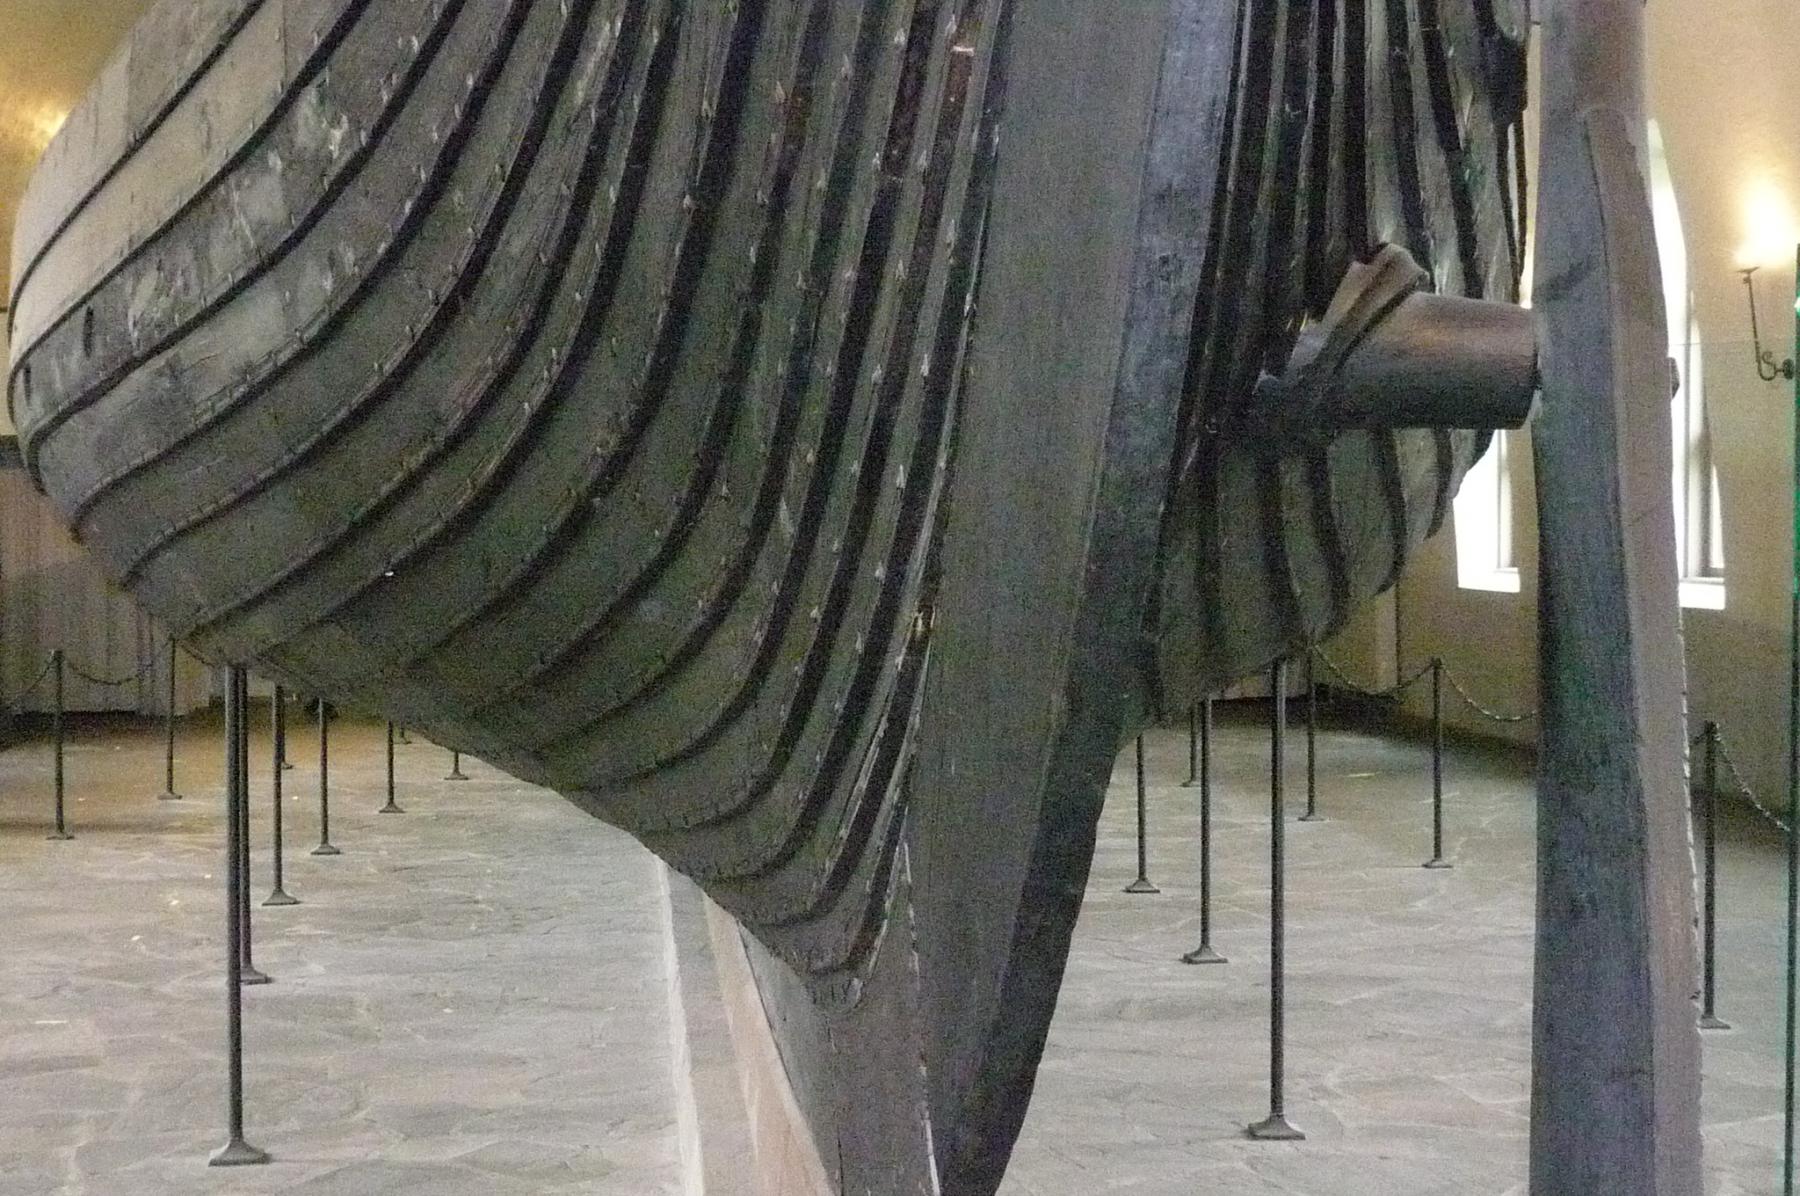
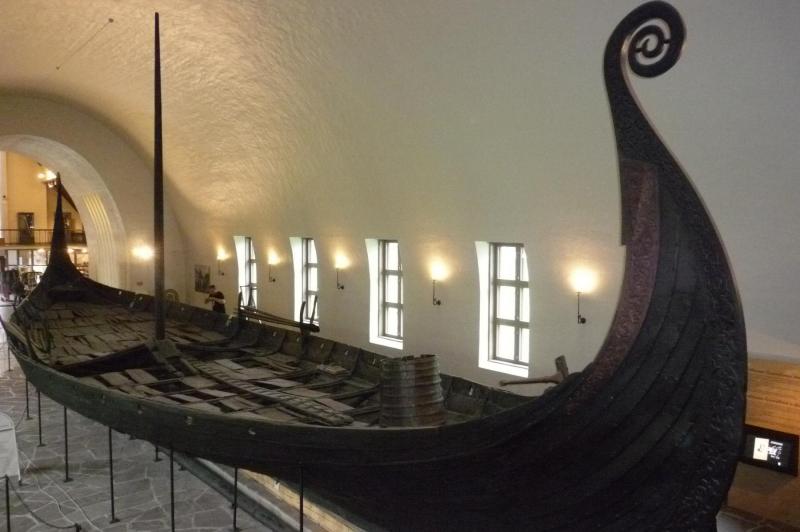
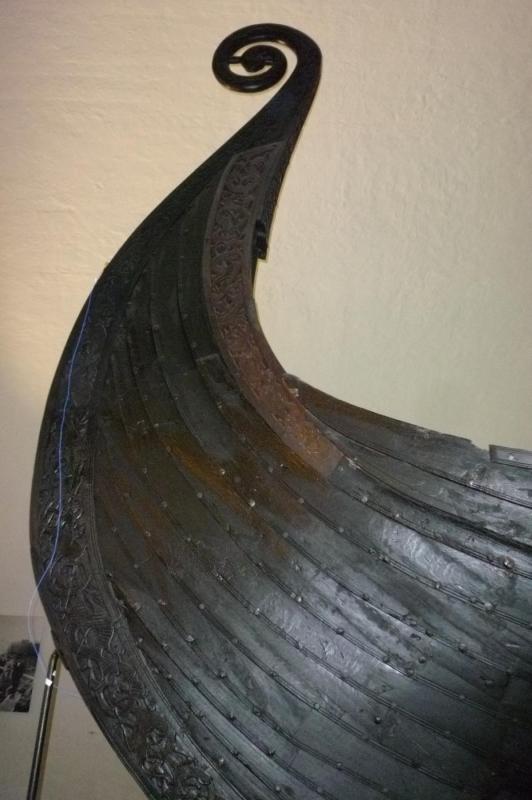
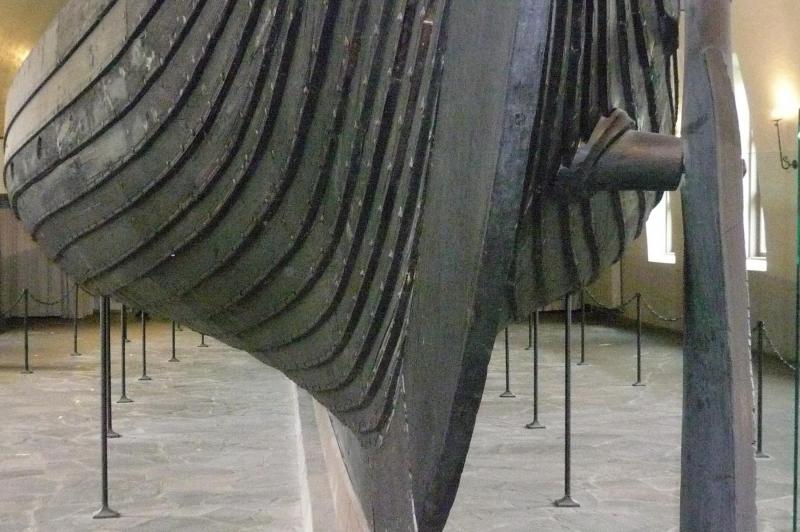
I recently returned from several weeks in Iceland and Norway. With wooden boats on my mind, I took photos of the Gokstad, Oseberg ships, built in the 800s, at the Viking Ship Museum in Oslo, Norway.


- 4 replies
-
- 11
-
-
I think the price is dictated by demand. I imagine the printing runs of these were fairly limited. I paid $45 for my copy a year ago. I see you can pick up a copy for $40 now. Not too pricey in my opinion for what you get. Erik
-
Looks great Mike. I've been looking forward to seeing how you progress with the masting and rigging. As always, I'm enjoying your attention to detail. Erik
- 452 replies
-
- 3
-
-
- cheerful
- Syren Ship Model Company
- (and 1 more)
-
Thanks for all the kind words guys! I won't be setting the Cheerful aside. I'll still work on it when I have time. I just acknowledge that here in Colorado, it's best to take advantage of any warm weather we get. BBQing, hiking, biking, etc. are calling. Erik
-
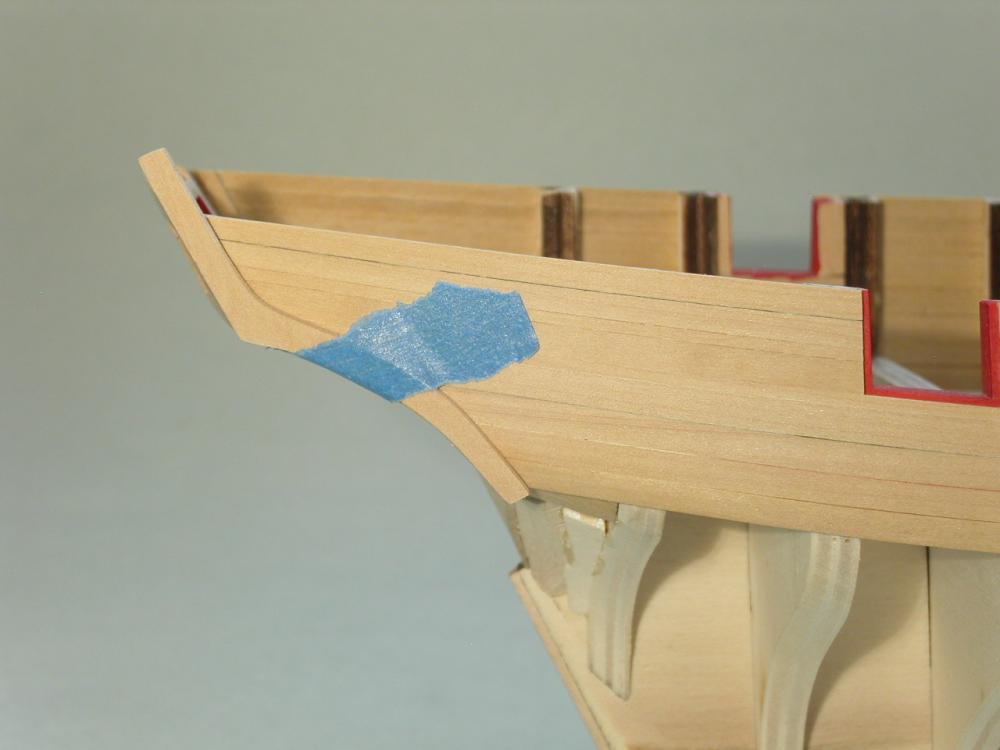
I took these photos a few days ago. I cut the trim pieces to shape using the plans . . . only to realize since my wales are a touch lower at the stern, the trim pieces were too short. So, I cut them again. I glued them on tonight . . . after snapping one while bending it to shape. I managed to glue it together again with no noticeable seam. My progress and motivation are slowing down as we get into warm weather and outdoor season. Once I add the second layer of planking to the wales, I'll most likely take a break until the weather is more conducive to sitting inside. Erik

-
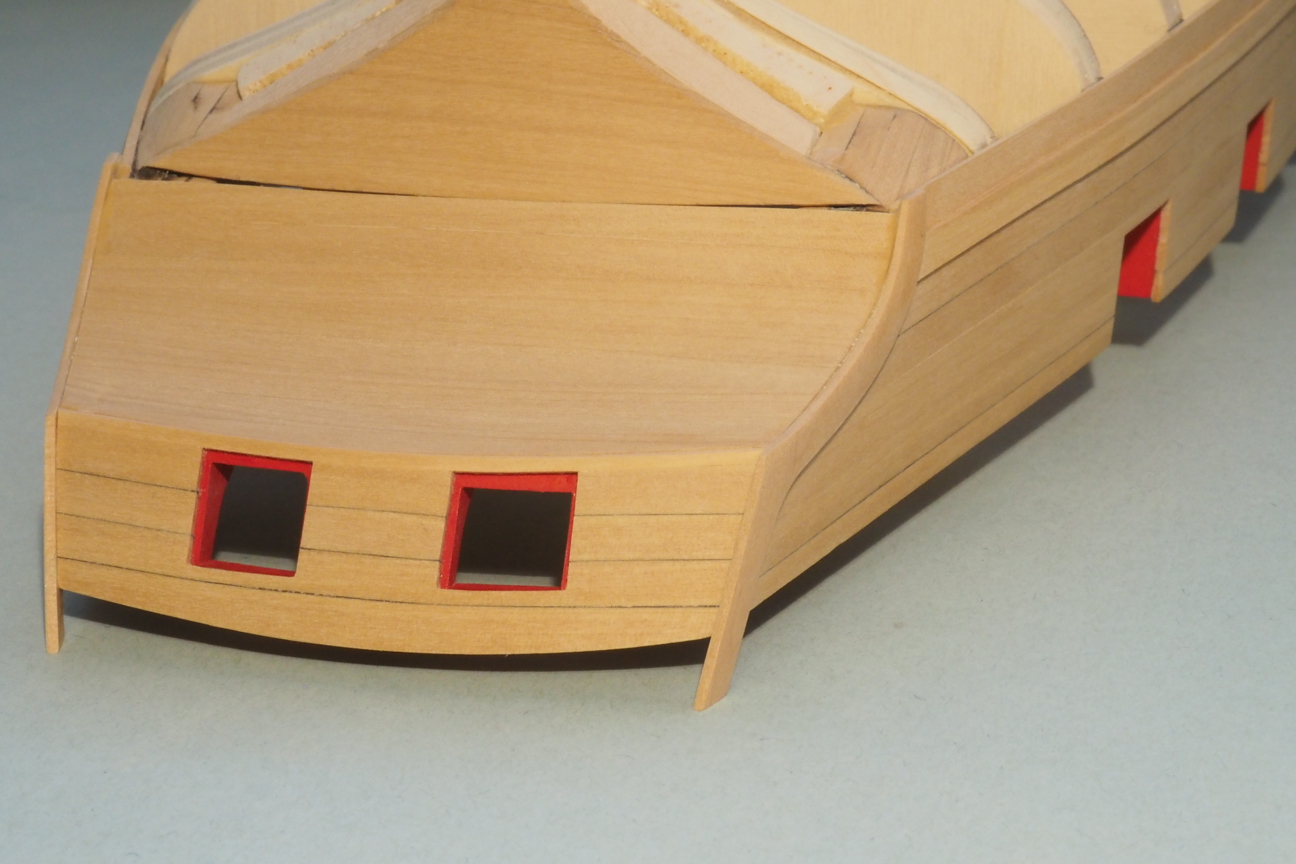
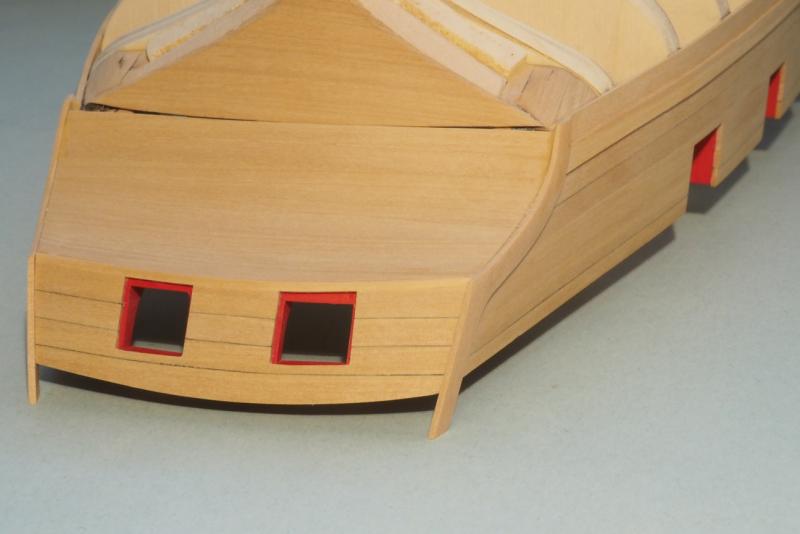
I did the preliminary sanding of the interior side of the planking of the counter and transom. I have to say, it's definitely much easier when you only have to worry about how the exterior of the planks look! Erik