Ilhan Gokcay
-
Posts
636 -
Joined
-
Last visited
Content Type
Profiles
Forums
Gallery
Events
Everything posted by Ilhan Gokcay
-
 Thank you very much friends.
 -
Janos, thanks. I followed the plans/drawings of the book(Hackney/Hölzel) for the rigging, but crosschecked everything using R.C.Anderson's book (17th c rigging..)and validated. The Anatomy of the ship "Susan Constant" by Brian Lavery was also very helpful.
-
Hi Janos, how are you? Thanks. Ferit, Christian thank you very much for the compliments.
-
Thank you Randy.
-
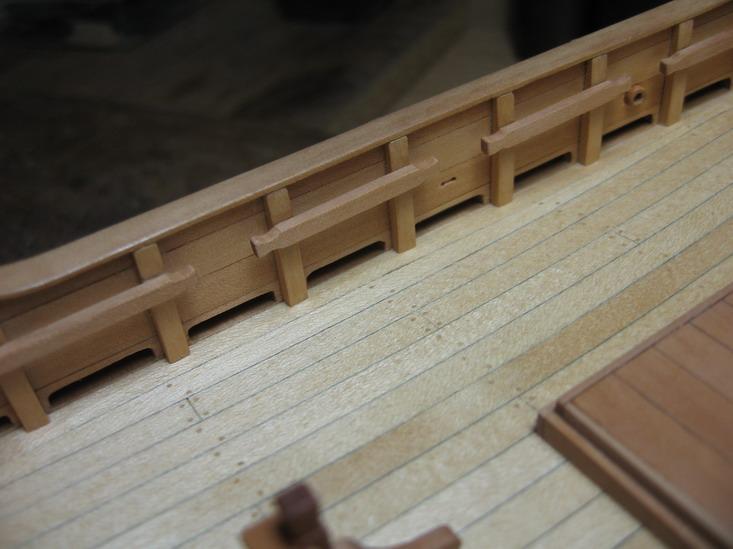
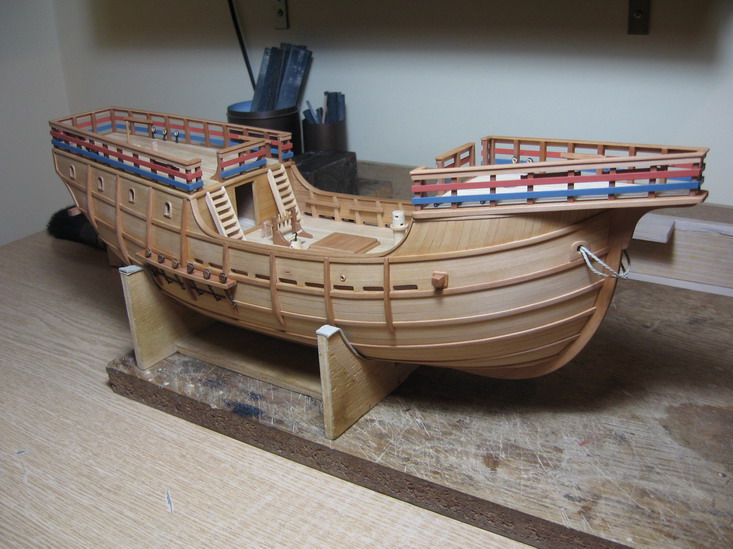
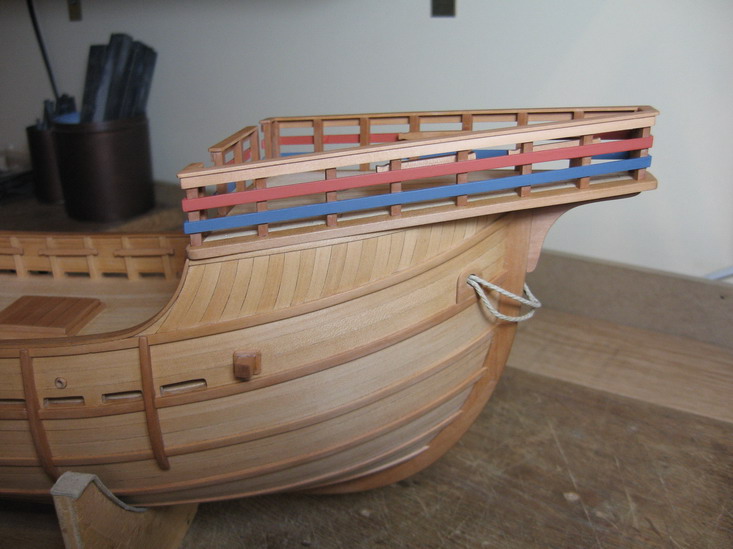
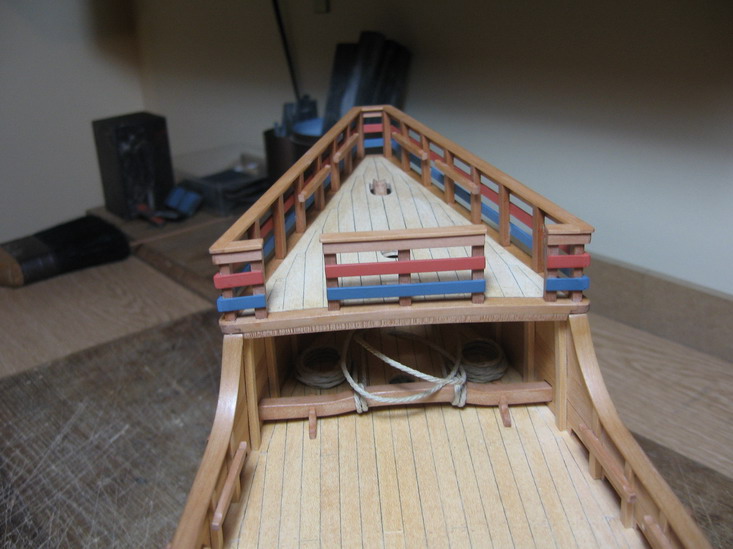
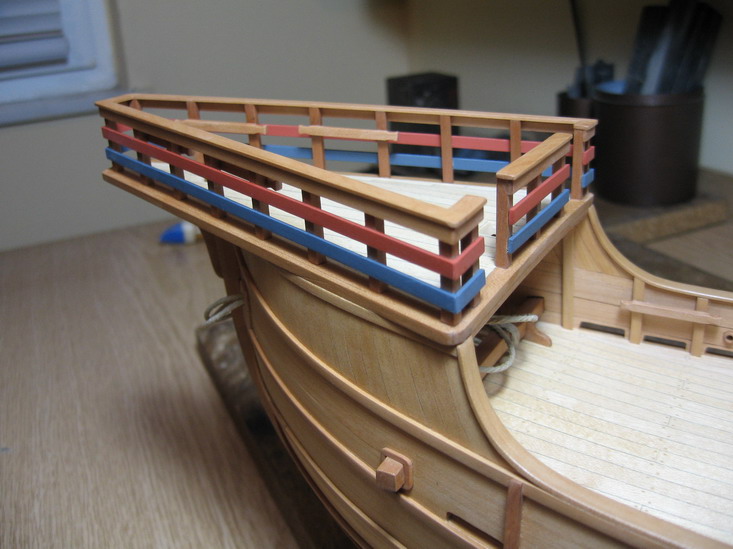
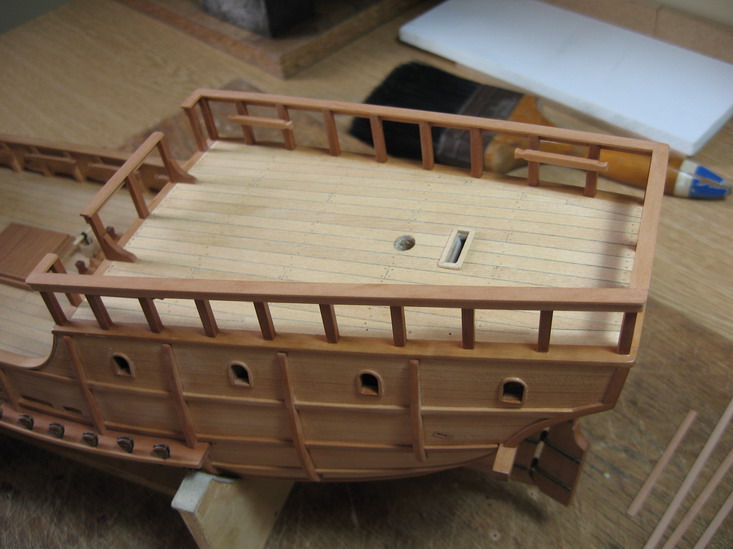
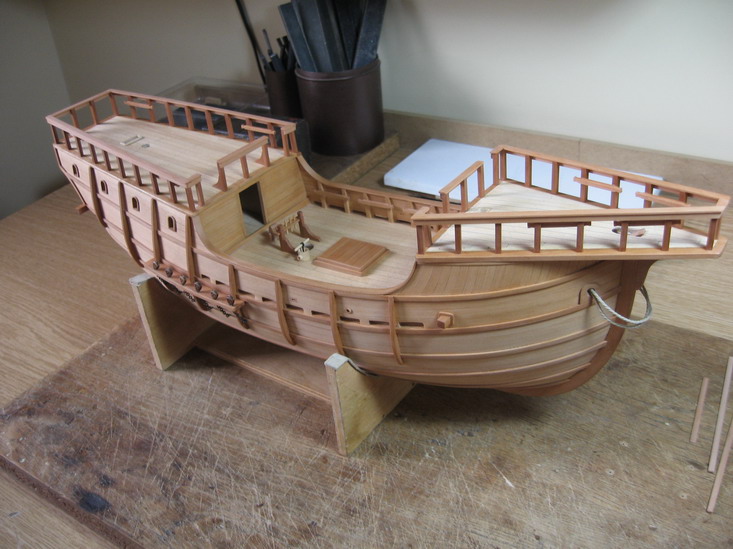
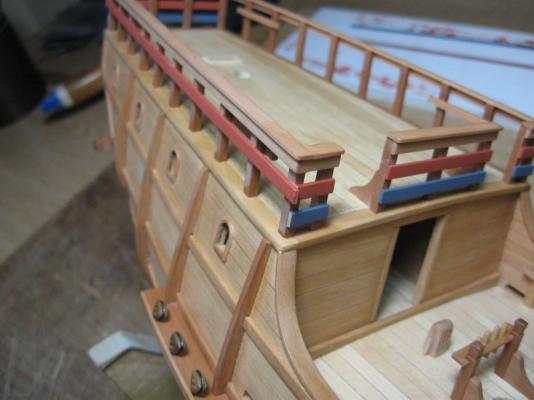
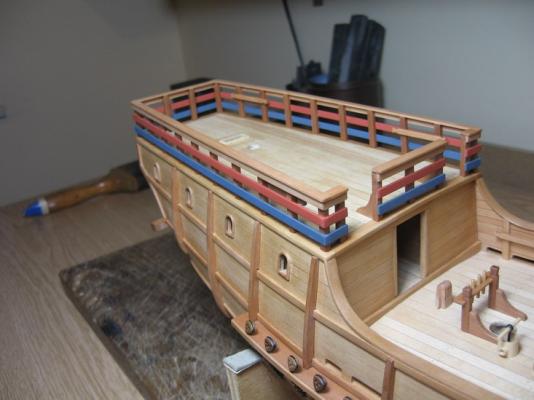
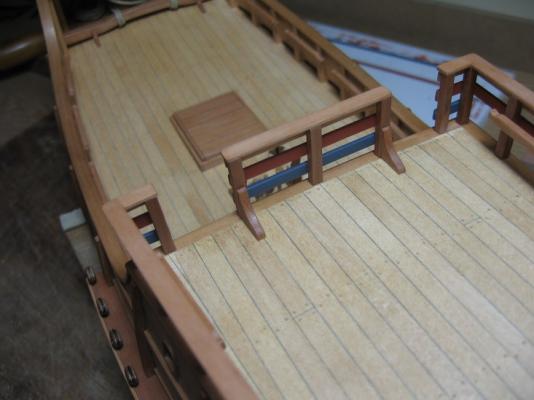
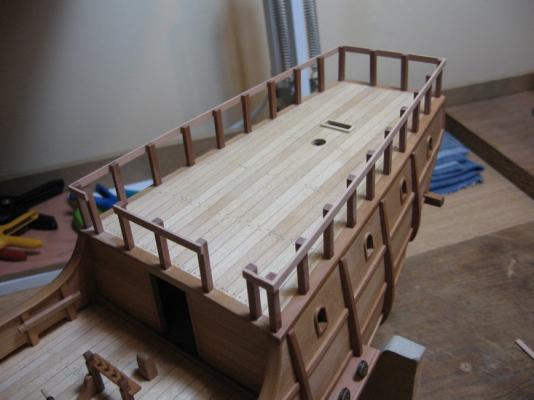
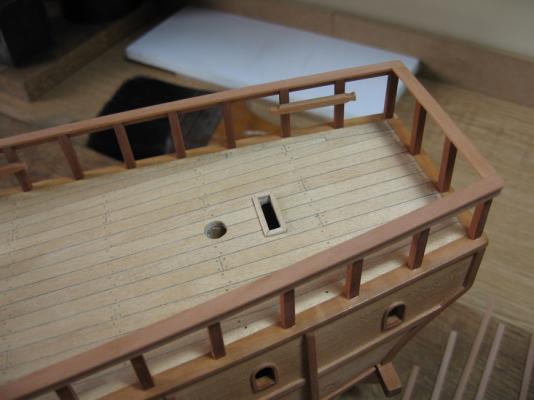
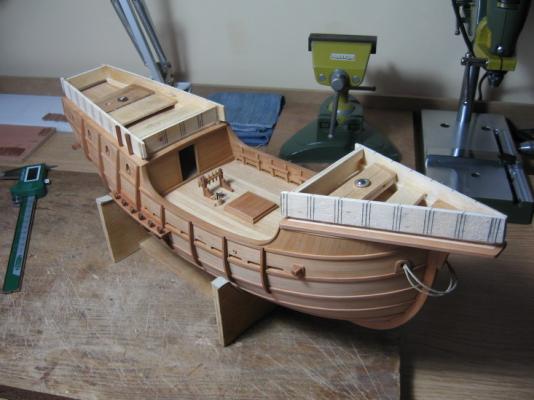
Finished the bulwarks. I’ve painted the remaining planks of the bulwarks seperately. Covered the contact surfaces with masking tape and handpainted with Humbrol enamel matt paint. Again used white glue(PVA) for glueing. Sanded the corners off which needed some touchup afterwards. For large and more detail photos see also: http://www.flickr.com/photos/ilhan_gokcay/sets Best go into the set and choose slideshow or http://www.flickr.com/photos/ilhan_gokcay/sets/72157626433922489/detail/?page=46
-
Thank you very much mathewp
-
Hi Keith, Basically Fe(III)Cl is used for dissolving copper to make PCB's(Printed Circuit Board) http://en.wikipedia.org/wiki/Iron%28III%29_chloride#Industrial The reaction should be (FeCl3 + Cu → FeCl2) + CuCl) and (FeCl3 + CuCl → FeCl2 + CuCl2) I works with brass but I don't know the reaction. There is an alternative which is Ammonium persulfate for dissolvig copper (again used to make PCB's) . I did not tried this for brass, I think it should work. While dissolving copper this solution gets blue. Fe(III)Cl stains everything and never comes off. Ammonium persulfate seems to be more safe regarding the stains and also does not need heating.
-
Hi Stelios and Ferit, thanks a lot. Ferit there is a Turkish text of my build, will try to upload to "Rapidshare" and inform you.
-
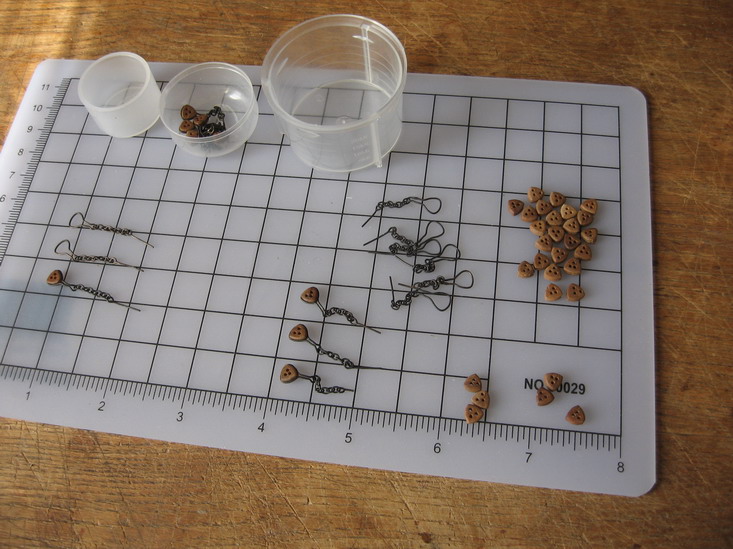
Hi Keith, you're welcome and thank you very much. I used a program called "Adobe Illustrator". I made the drawing by hand, scanned and redrawn(with points) with the program. The program allows me to put points and automayically connects them. It is also possible to move the points afterwards. The drawing as background I made as much points as possible to create the same shape. You described the process exactly as it is. The blue paper is called PNP(Press and peel) paper. The design should be printed on the flat side with a laser printer(ink does not work). Put upside down on brass and heated with iron so that it's transferred to the brass(toner+blue stuff). This print should be as sharp as possible and also dark. Take care while ironing that it does not slip. The solution to etch the unprotected brass is Iron(III)Chloride. Heated in hot water. 40-50'C is ideal but not crucial. For my parts it took 30 minutes to etch. It should be continiously stirred for a good result. Nitro thinner is ideal to clean the nail polish and the PNP. At first it was not that easy, I made several trials to get a good result. And Keith I'm happy to answer any questions, it's never a bother.
-
Thank you very much for the kind words my friends.
-
Thank you very much for the kind words Keith. For the brass etching there should be some sources but unfortunately I can not name any definitive address. Regards Ilhan
-
Hi Don, For the woods pear which I do use and cherry would be ok. Probably oak was used in original and the color of pear and cherry are close enough. For the decks I would suggest lime wood.
-
Hi friends, thank you very much for compliments.
-
Congragulations, very succesfull and beautiful.
-
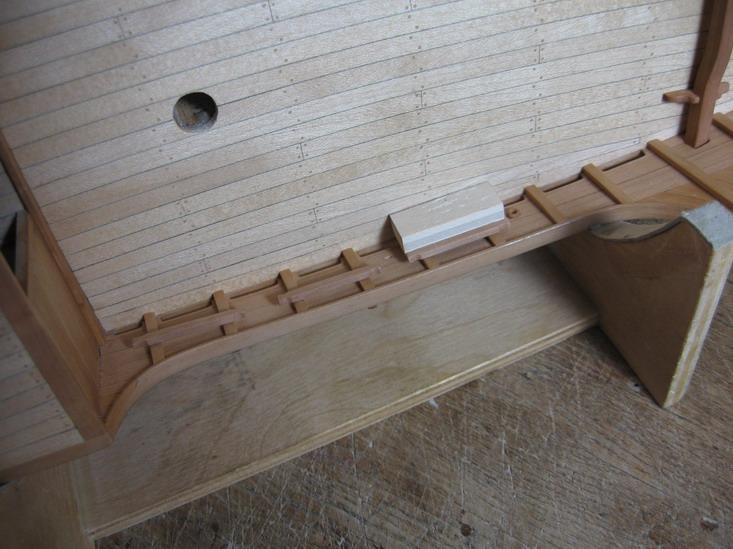
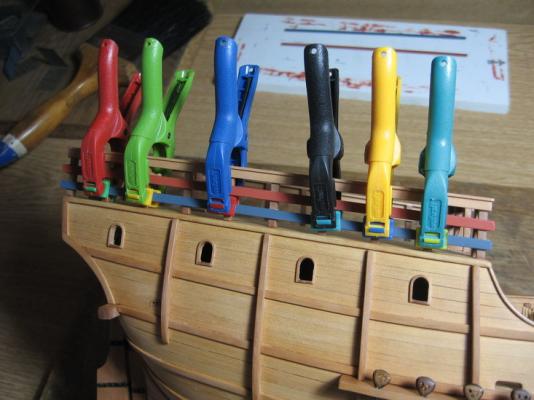
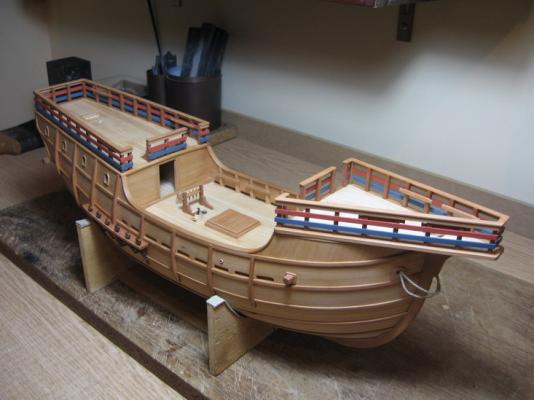
Going on with the bulwarks. I’ve glued the rail and the upper planking using white glue(PVA) and also got rid off the casings. For large and more detail photos see also: http://www.flickr.com/photos/ilhan_gokcay/sets (Best go into the set and choose slideshow)


-
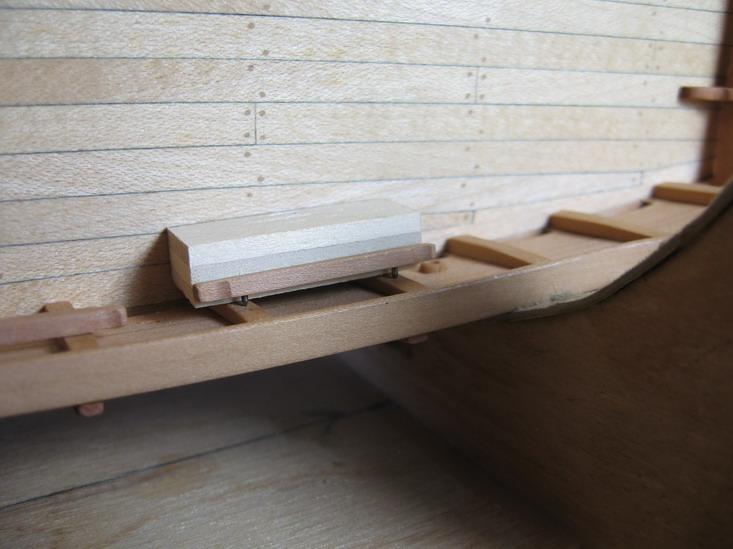
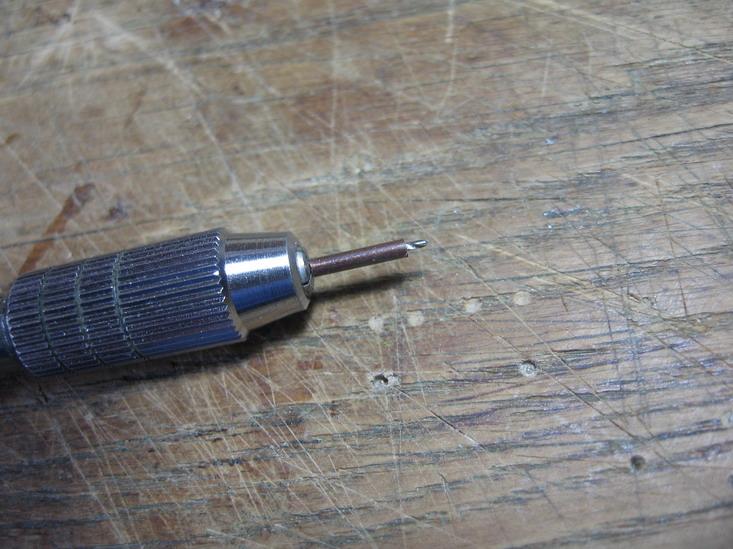
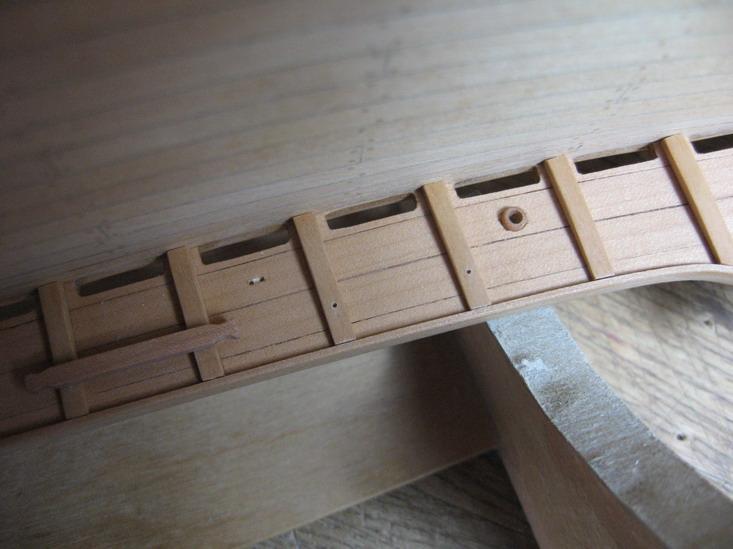
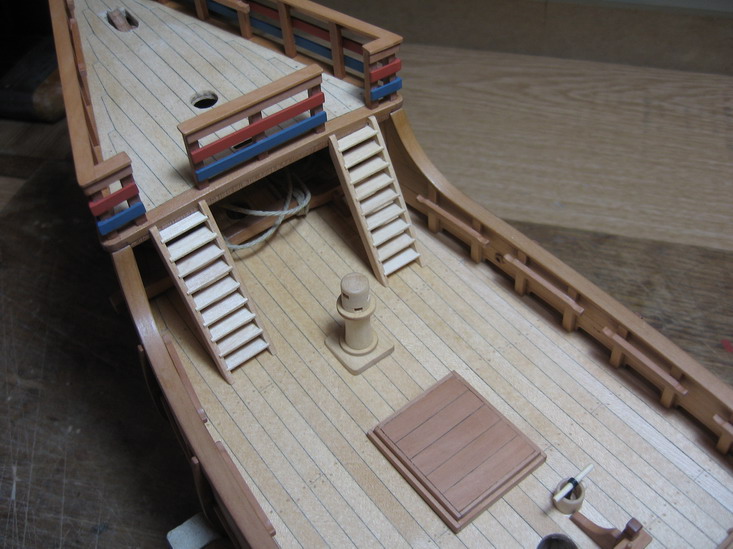
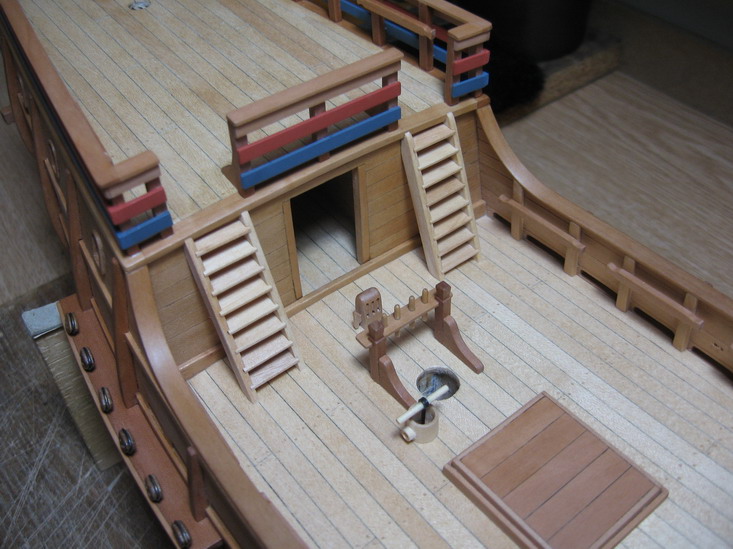
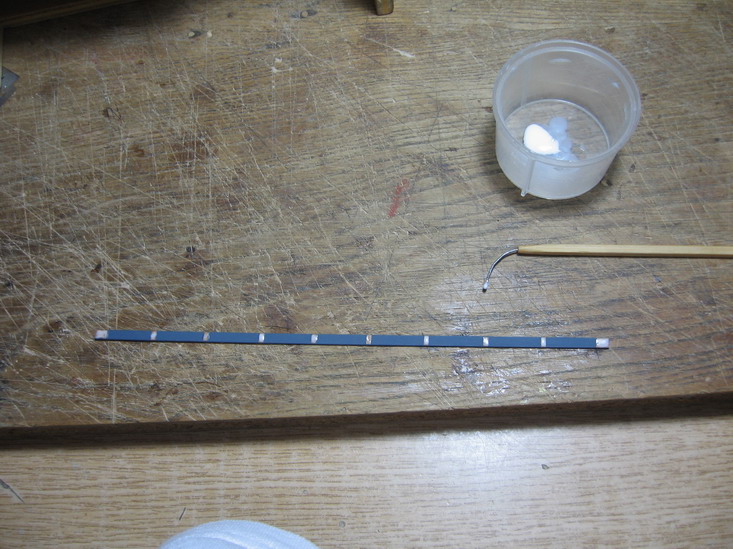
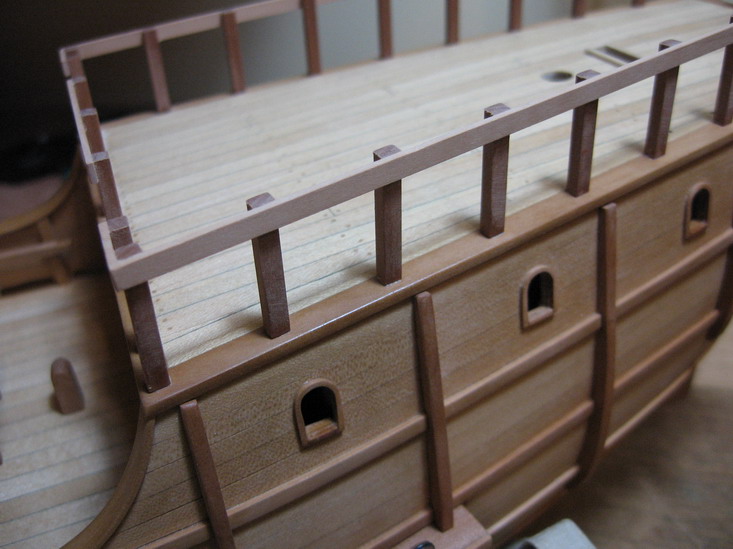
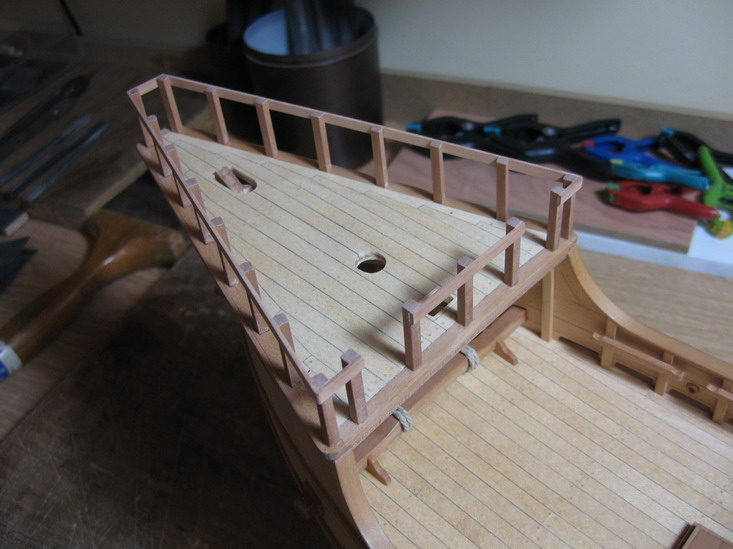
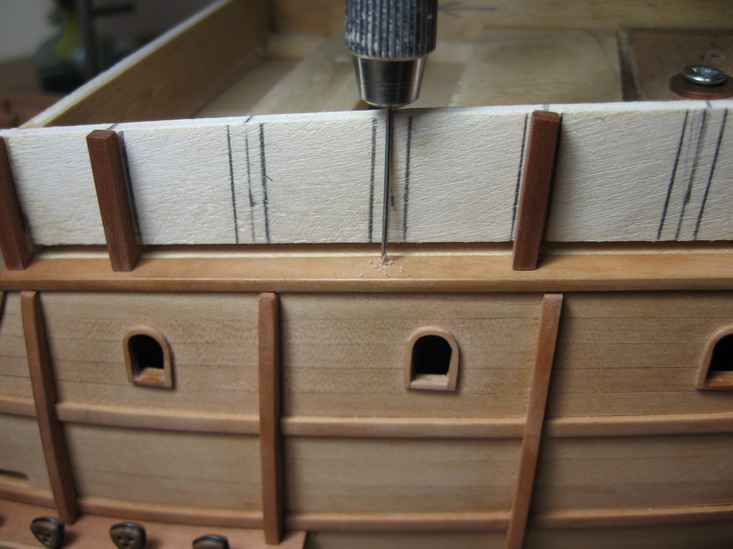
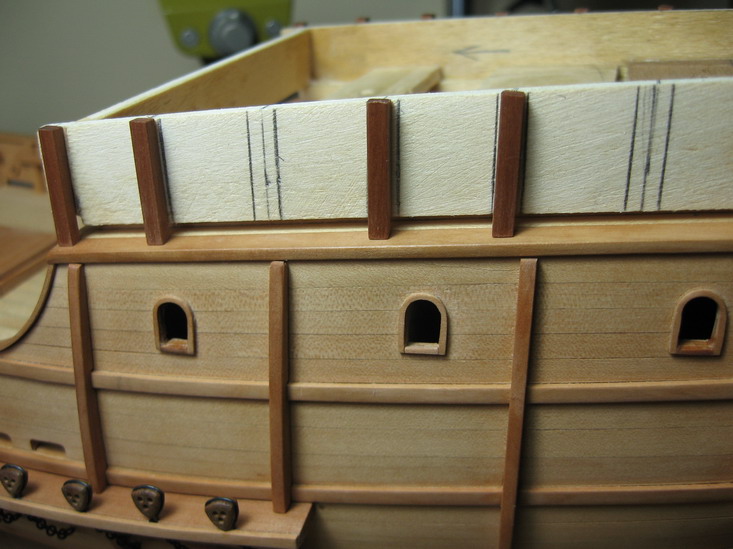
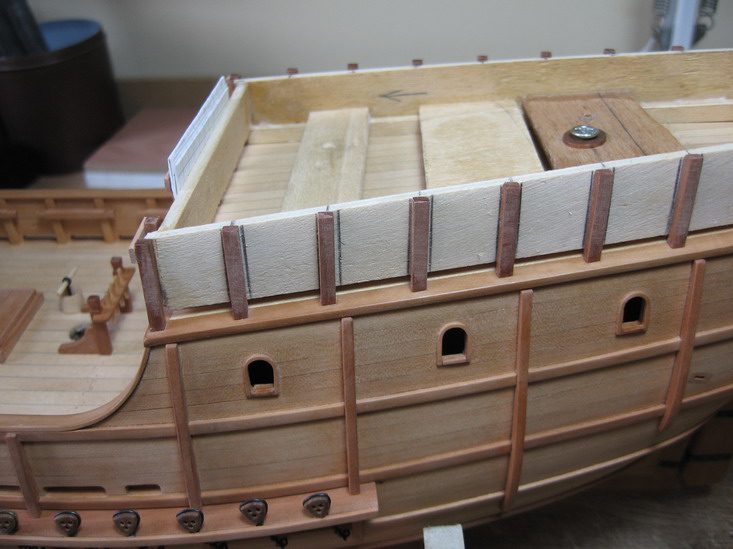
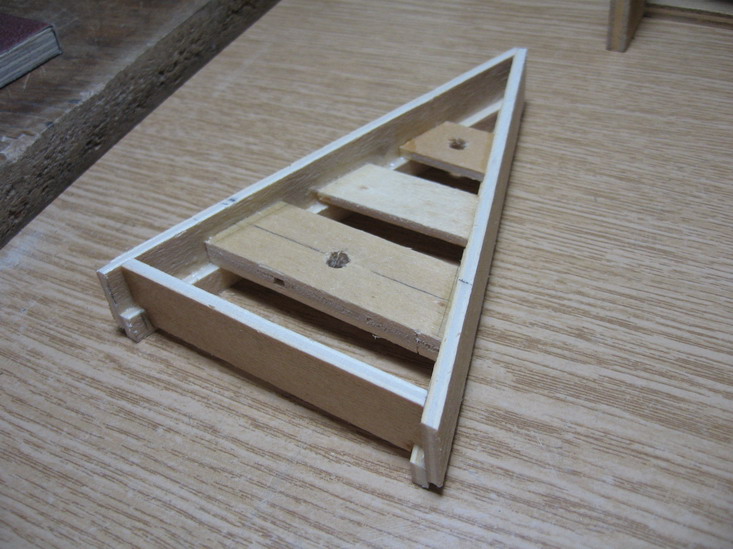
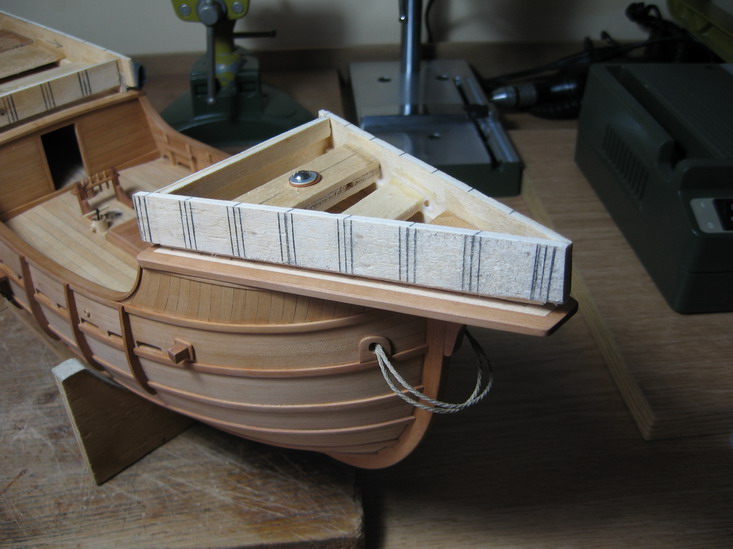
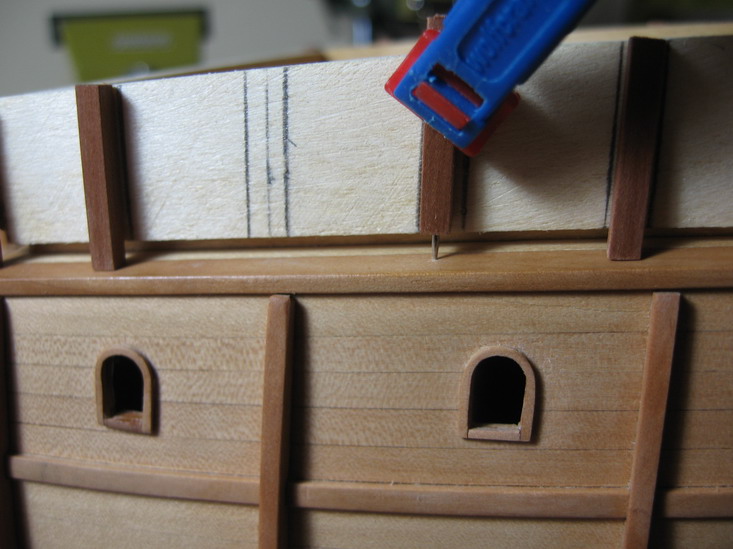
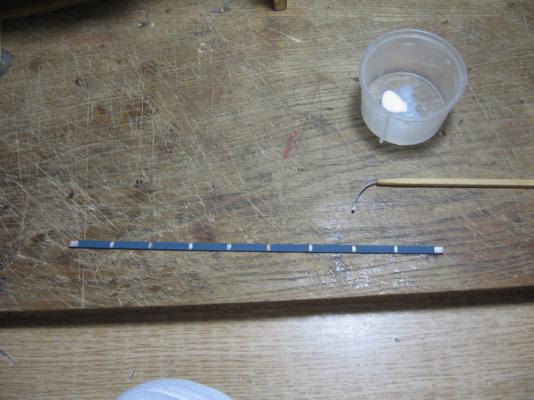
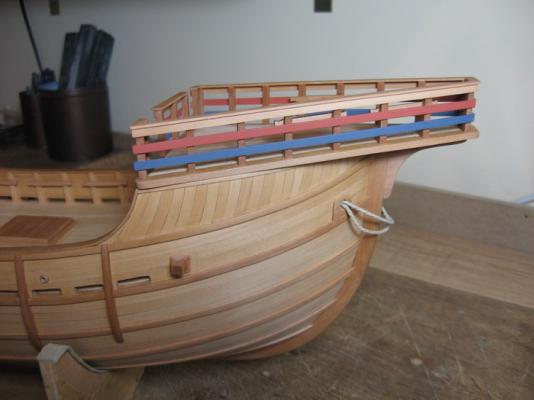
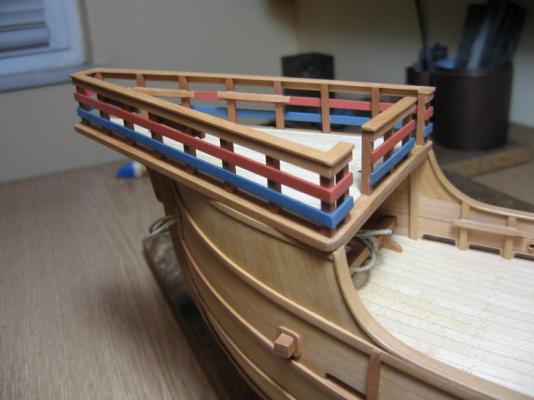
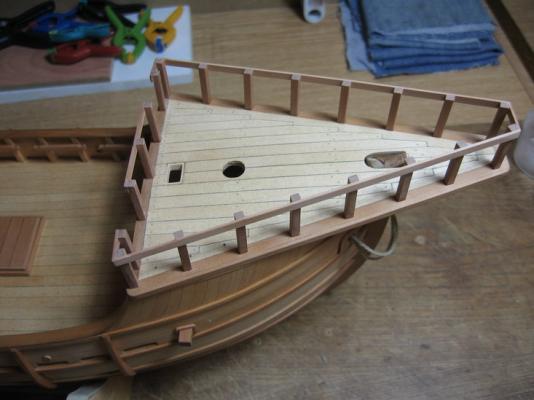
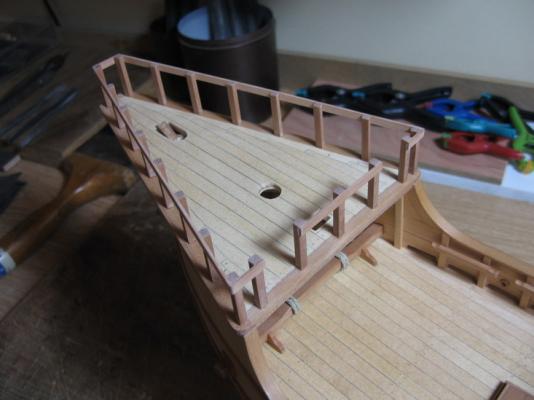
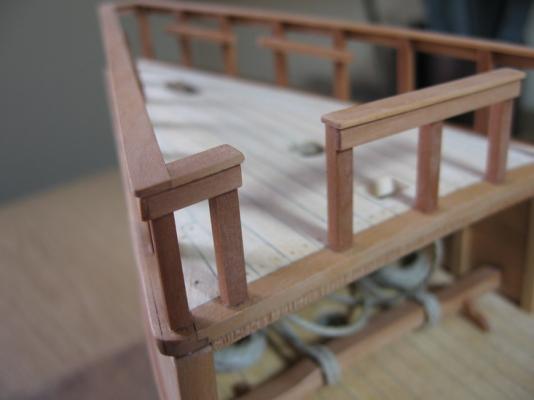
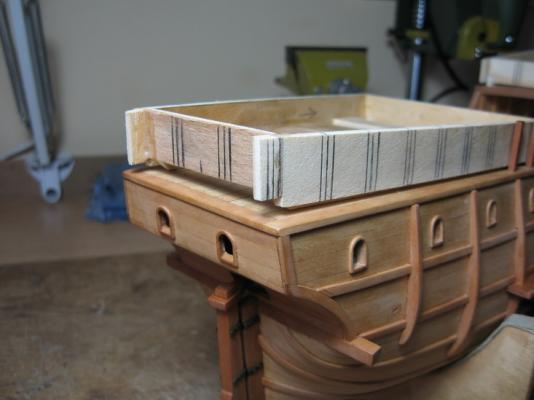
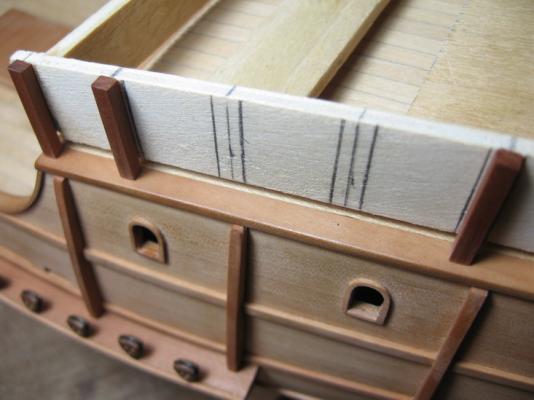
I’ve started to build the bulwarks on the fore- and aftercastle. To fix the stanchions at correct angles I’ve built two casings to guide the structure and fixed these casings temporarily using the holes for the masts. I’ve cut the stanchions from pear strip and drilled the ends 0,7 mm (diameter of an ordinary pin). Using the guide casing I’ve marked the positions, drilled the deck, and glued the stanchions with CA. Ilhan Gokcay ________________________________________ For large and more detail photos see also: http://www.flickr.com/photos/ilhan_gokcay/sets (Best go into the set and choose slideshow)


-
Hey Don, I don't recommend to use the plans form MSB to build a model. There are lots of mistakes which I do not remember all of them right now, but some of them are really serious.
-
Thank you very much for the kind words my friends.
-
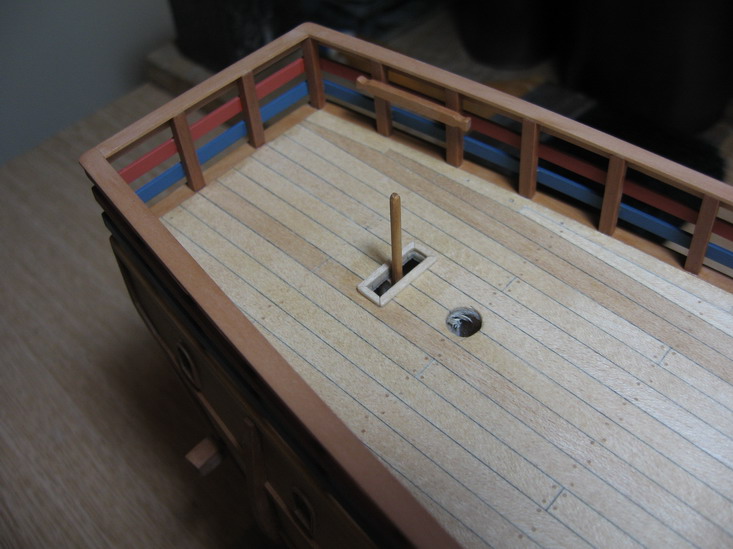
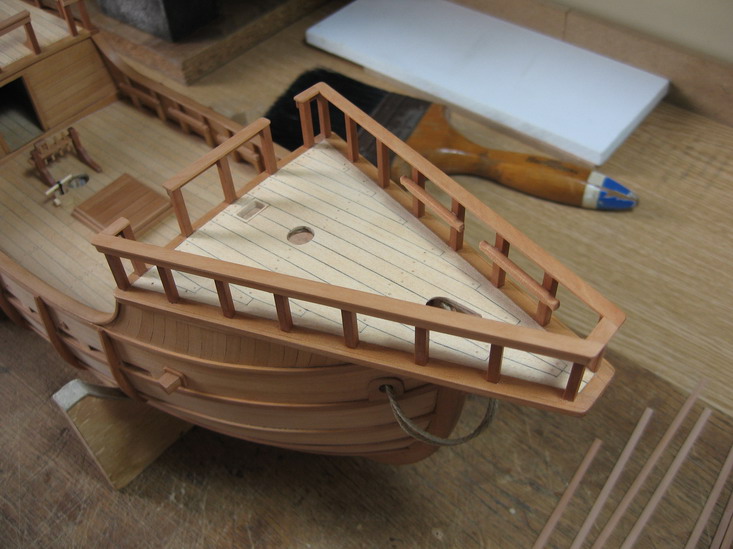
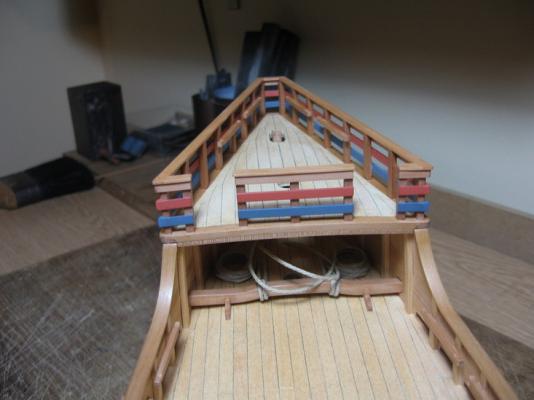
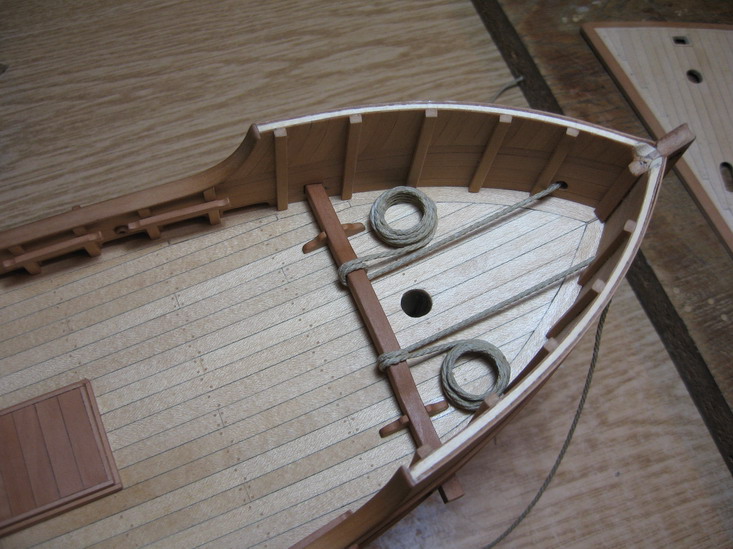
Little progress. Glued the anchor rope and the deck of the forecastle with white glue (PVA). For large and more detail photos see also: http://www.flickr.co...han_gokcay/sets (Best go into the set and choose slideshow)

-
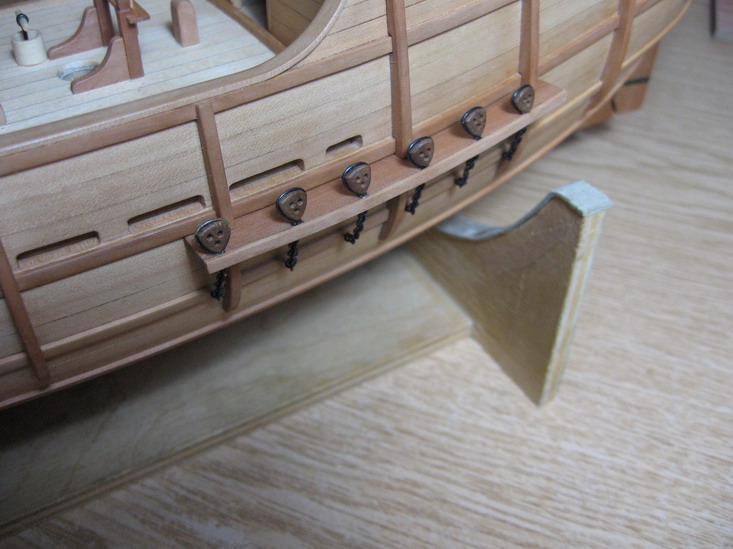
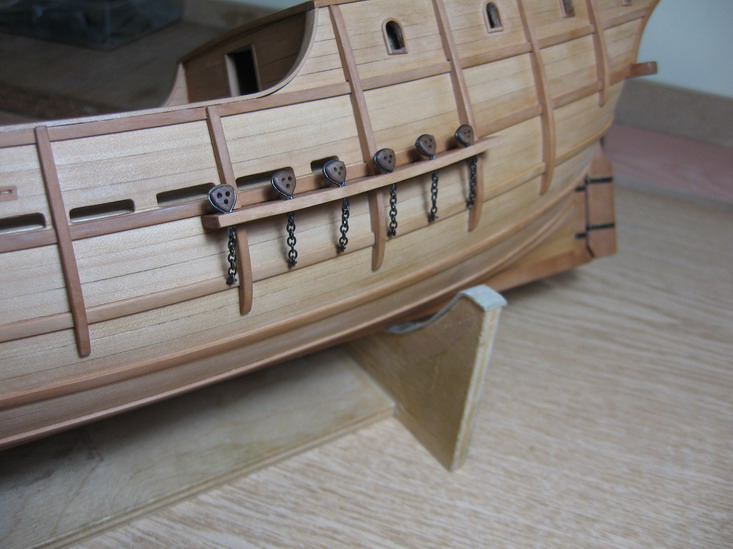
Installed the deadeyes. I’ve used epoxy glue while glueing to the channels. Fixed the deadeyes in correct angle with rubber bands while the glue sets. For large and more detail photos see also: http://www.flickr.com/photos/ilhan_gokcay/sets (Best go into the set and choose slideshow)


-
Thank you very much Pat.
-
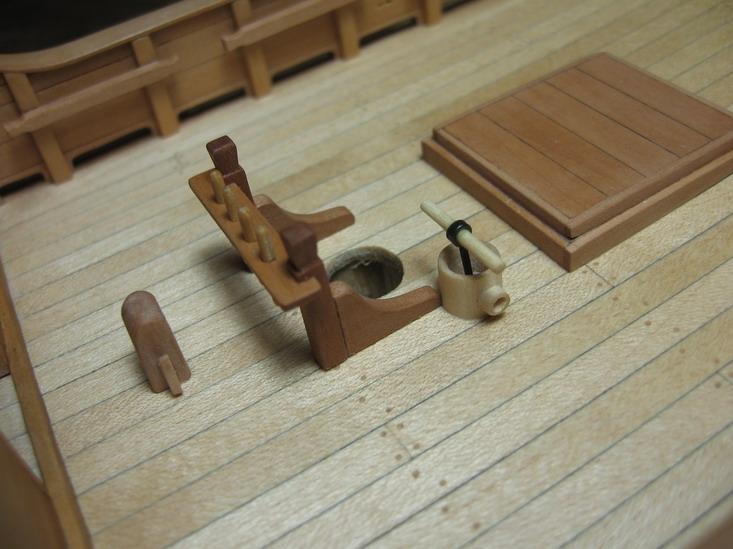
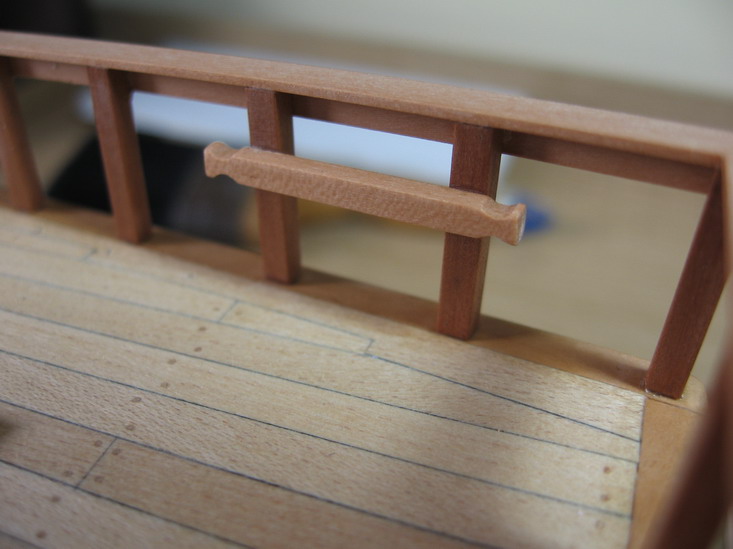
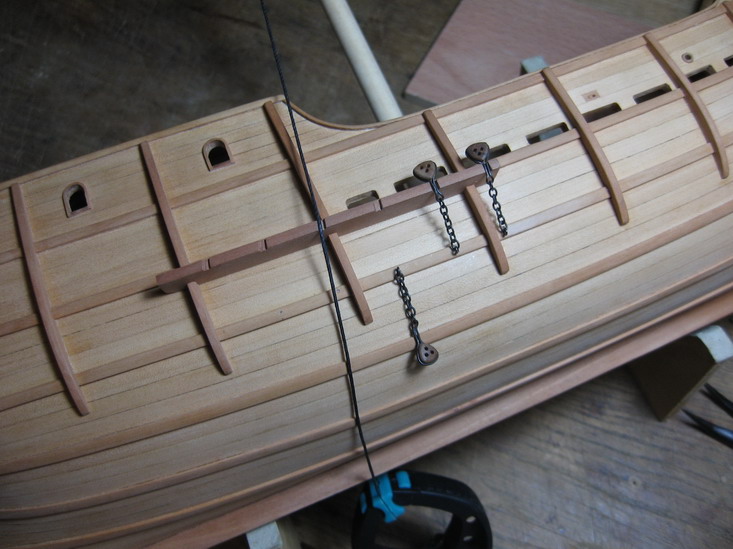
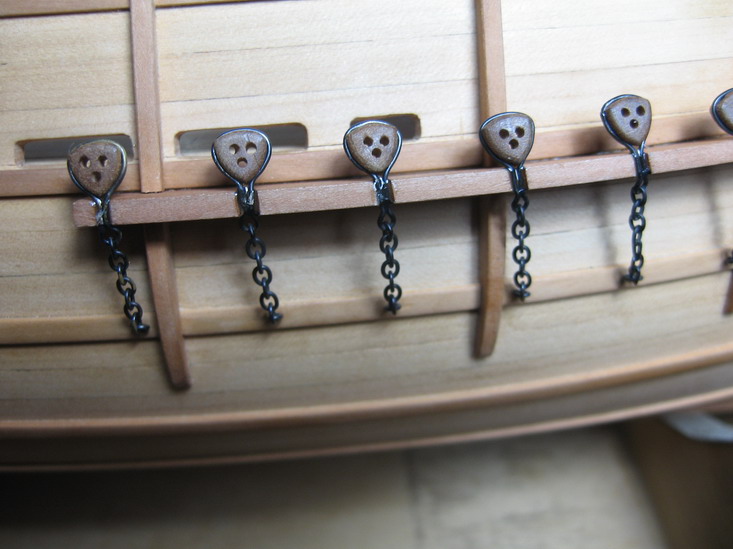
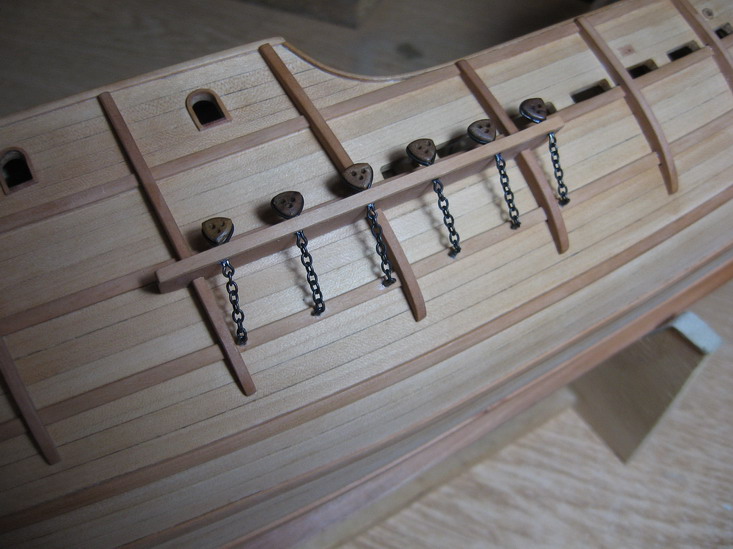
Glued the cleats at the bulwarks, knight, pin rail and pump at the main deck. I do pay much attention to the sequence of these operations in order that nothing will be obstructed later.