KirbysLunchBox
-
Posts
221 -
Joined
-
Last visited
Content Type
Profiles
Forums
Gallery
Events
Everything posted by KirbysLunchBox
-
Does anyone else get excited watching someone build a new kit or is it just me? So much anticipation! Get ‘er done Glenn!
-
Allan, such kind words! Maybe some day my skills will somehow measure up to the artists that are a part of this forum. Until then I just enjoy trying!
-
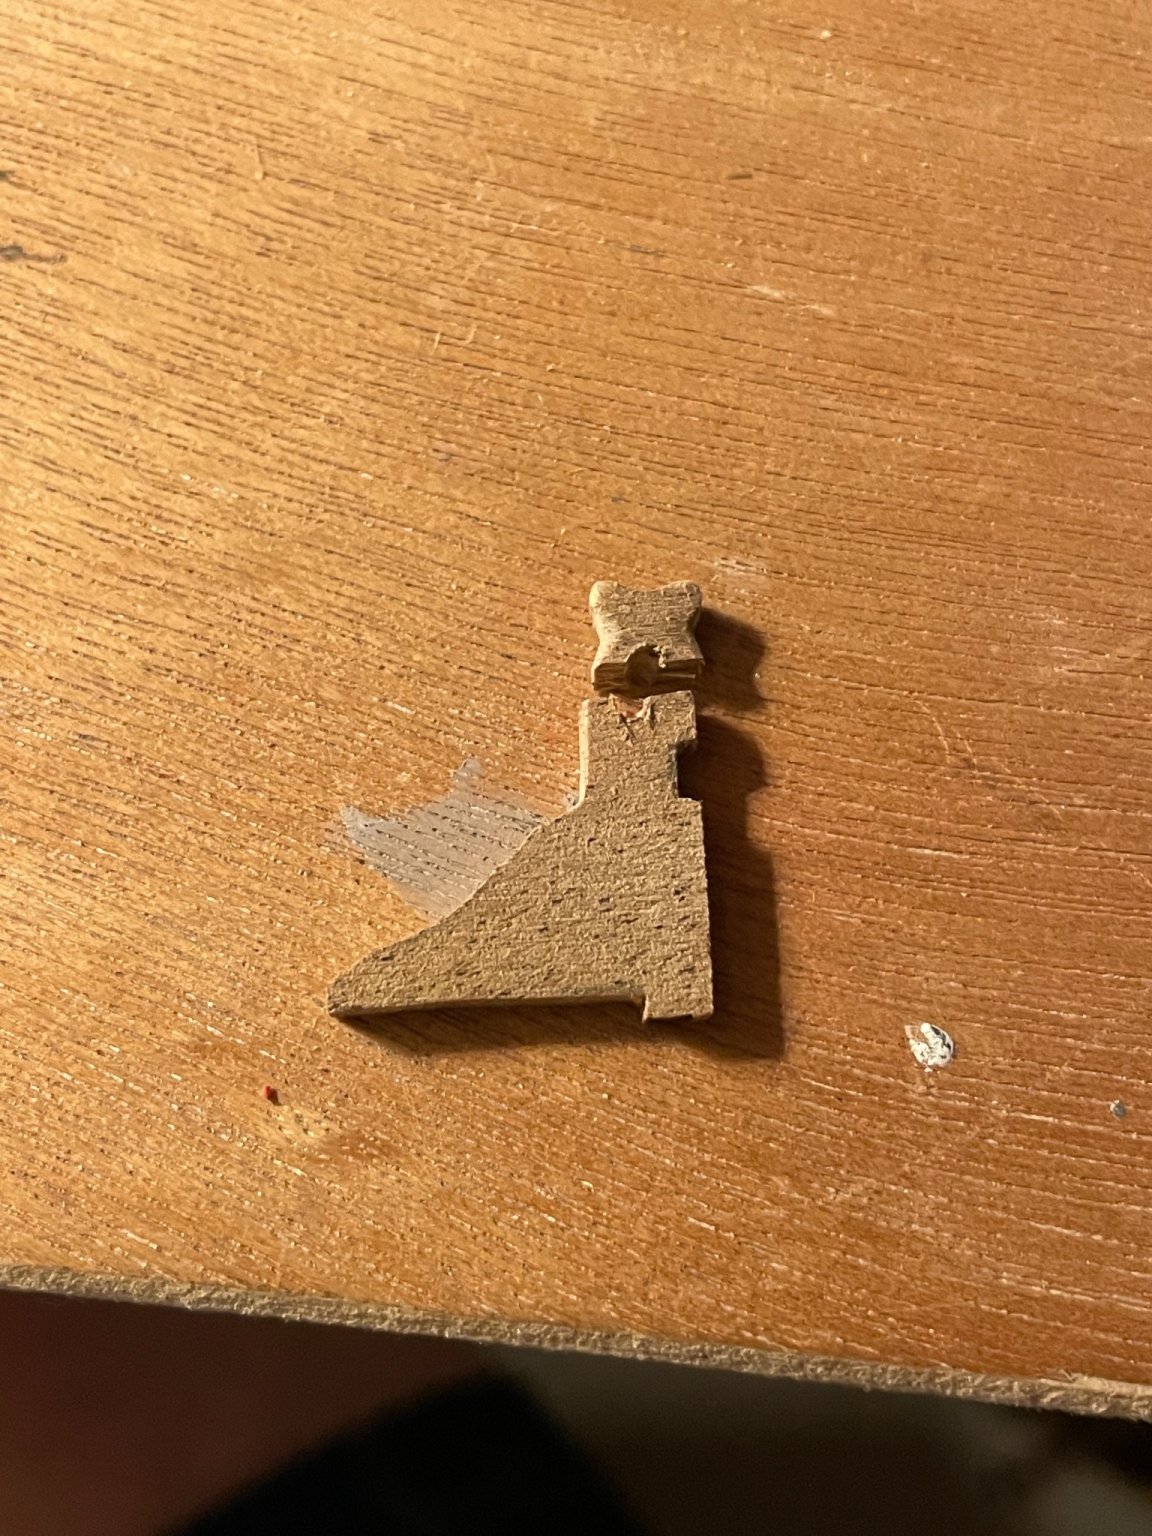
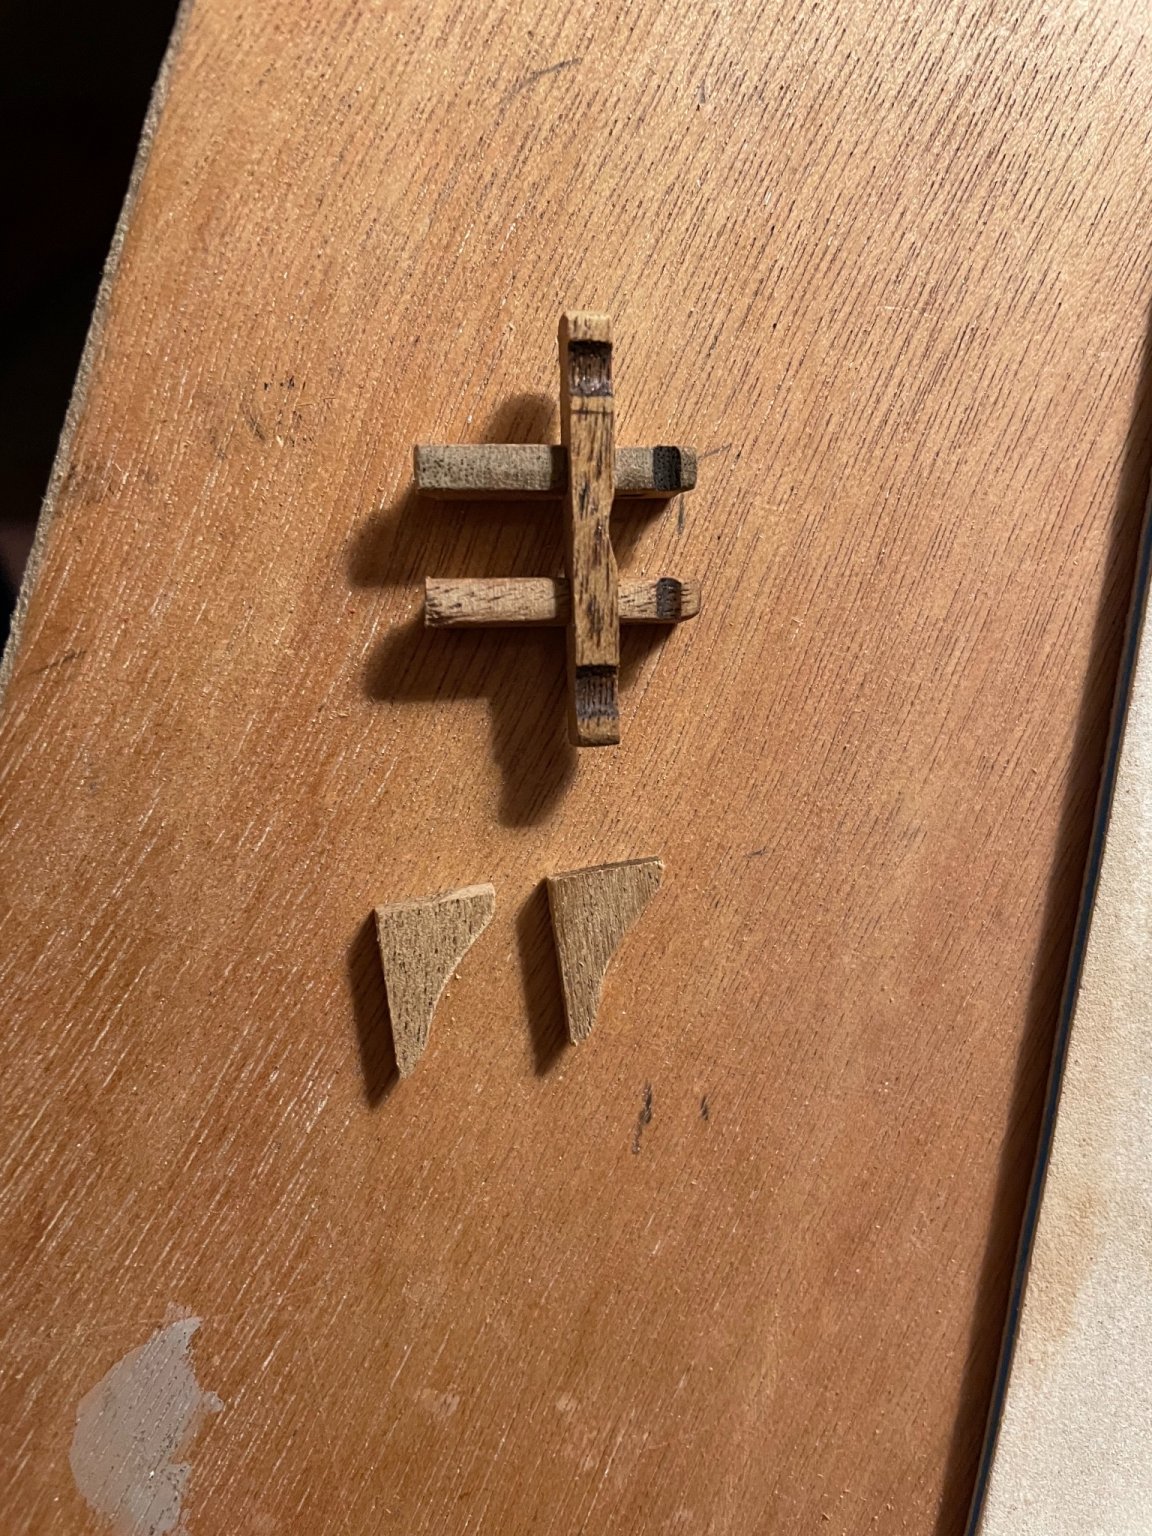
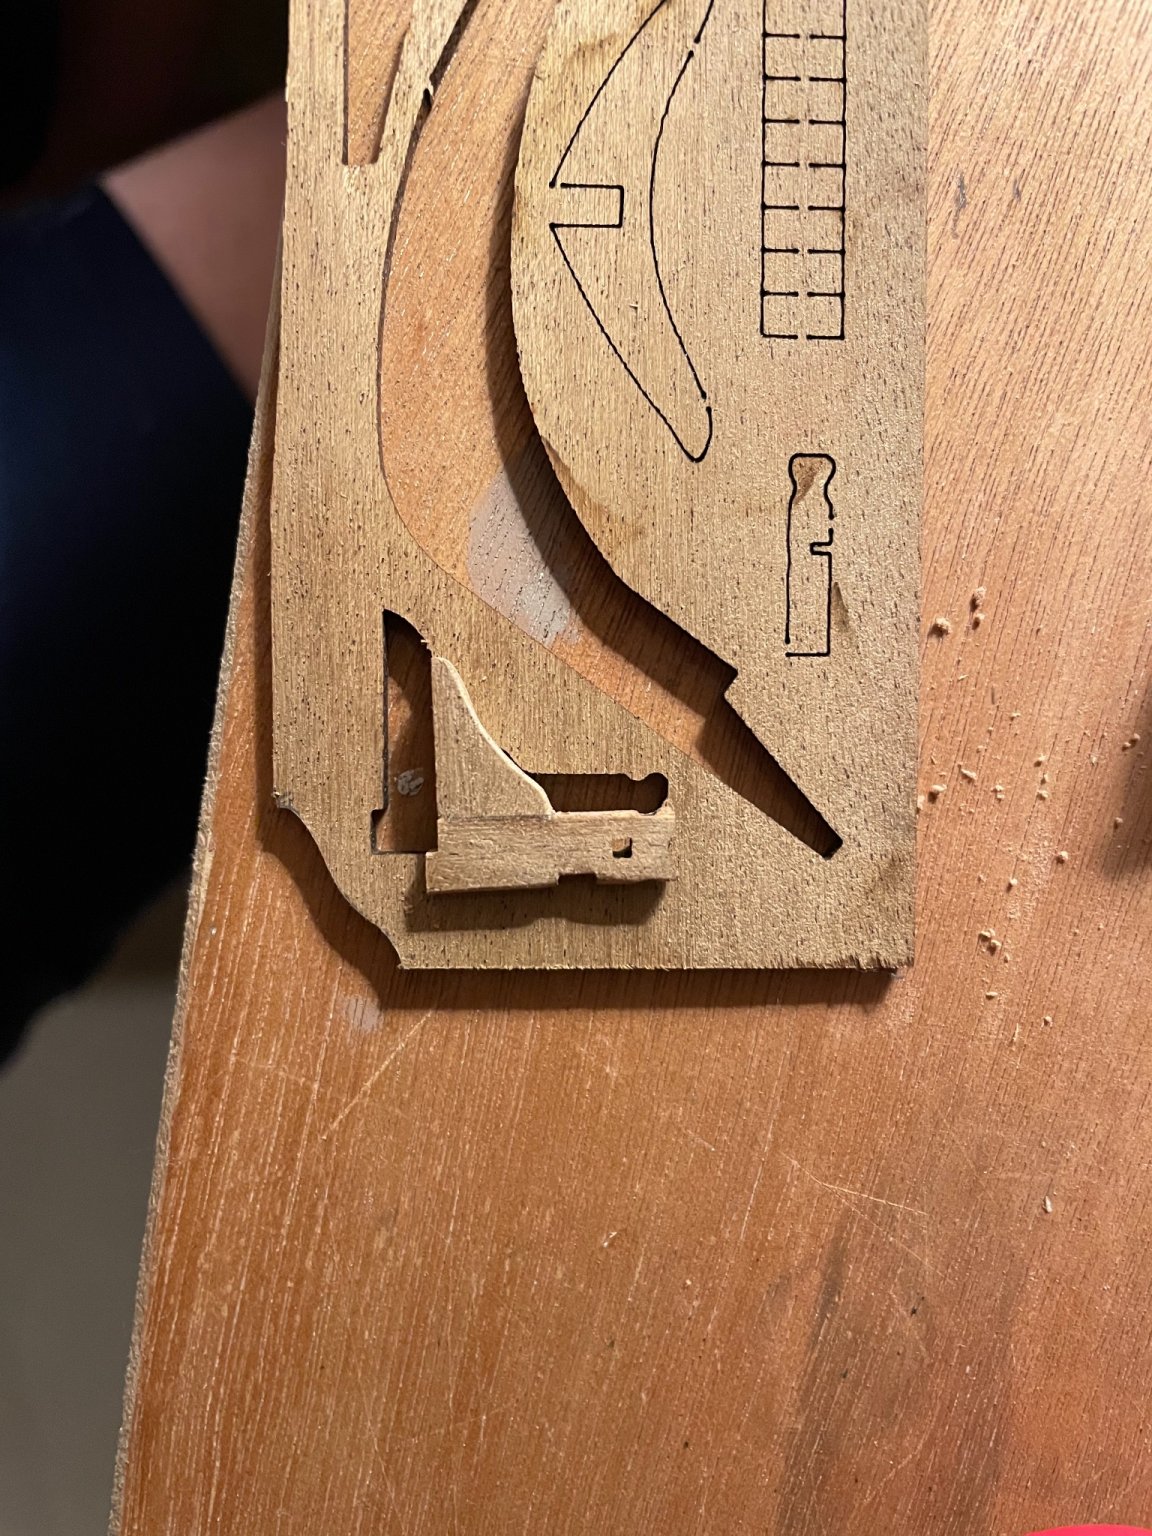
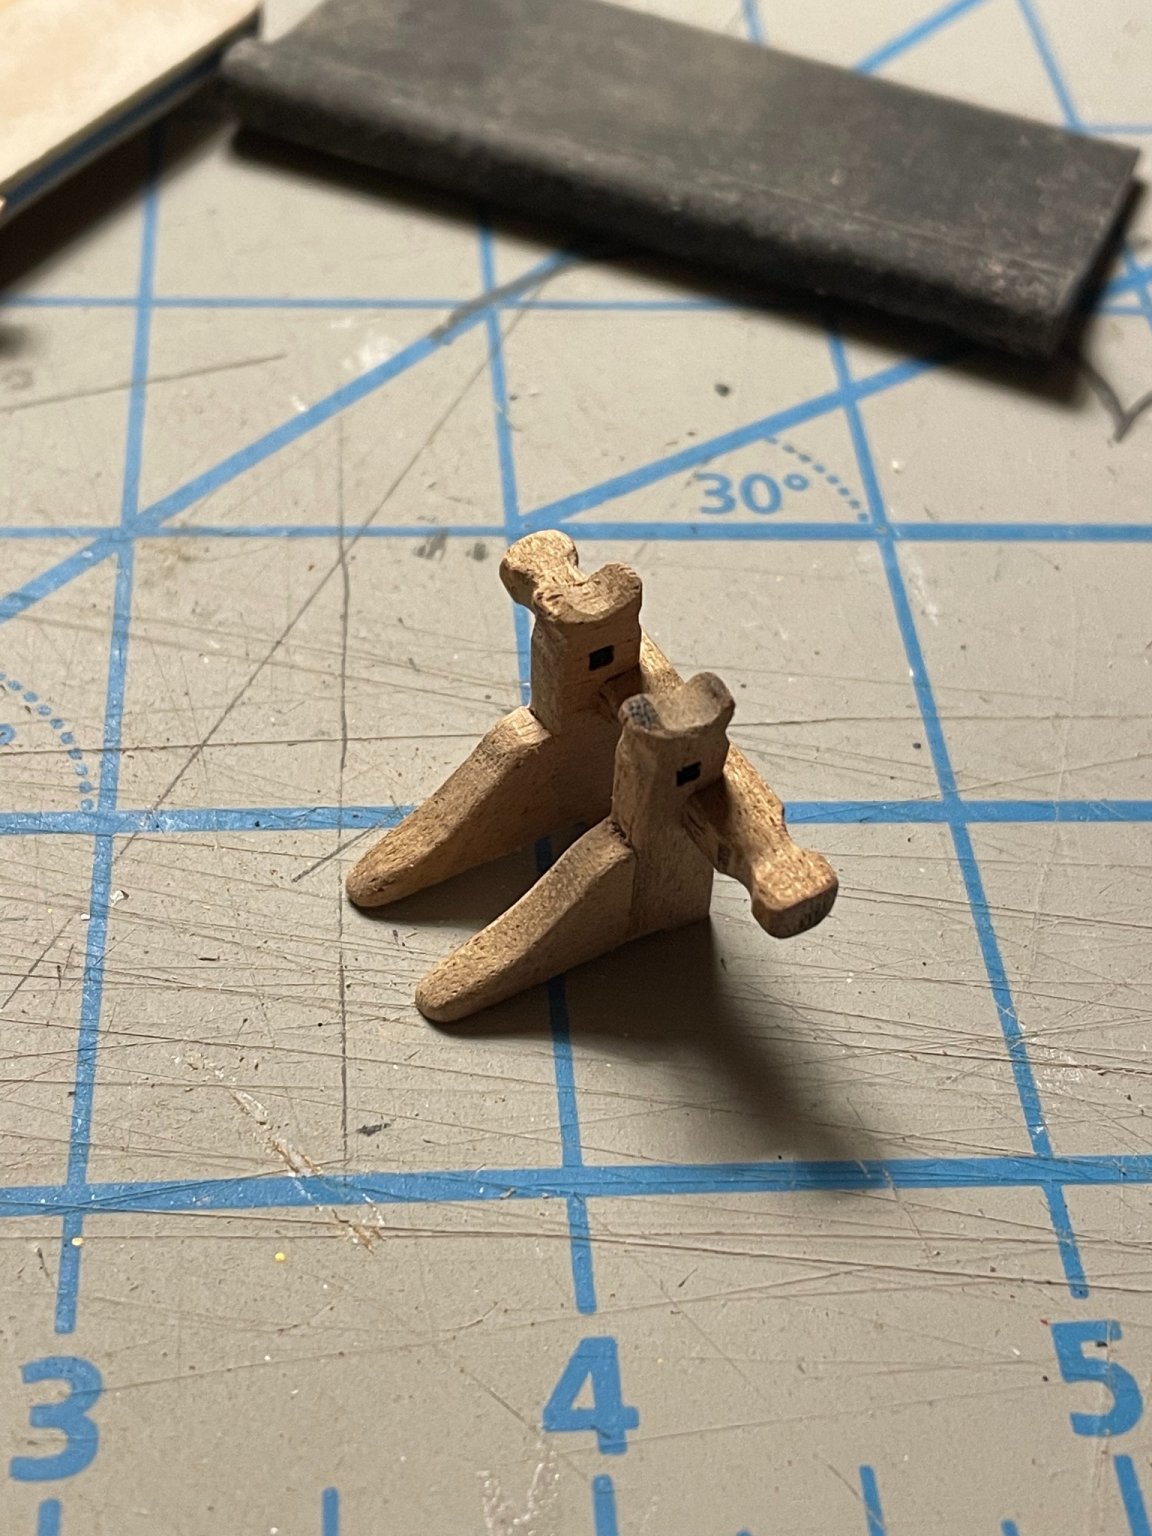
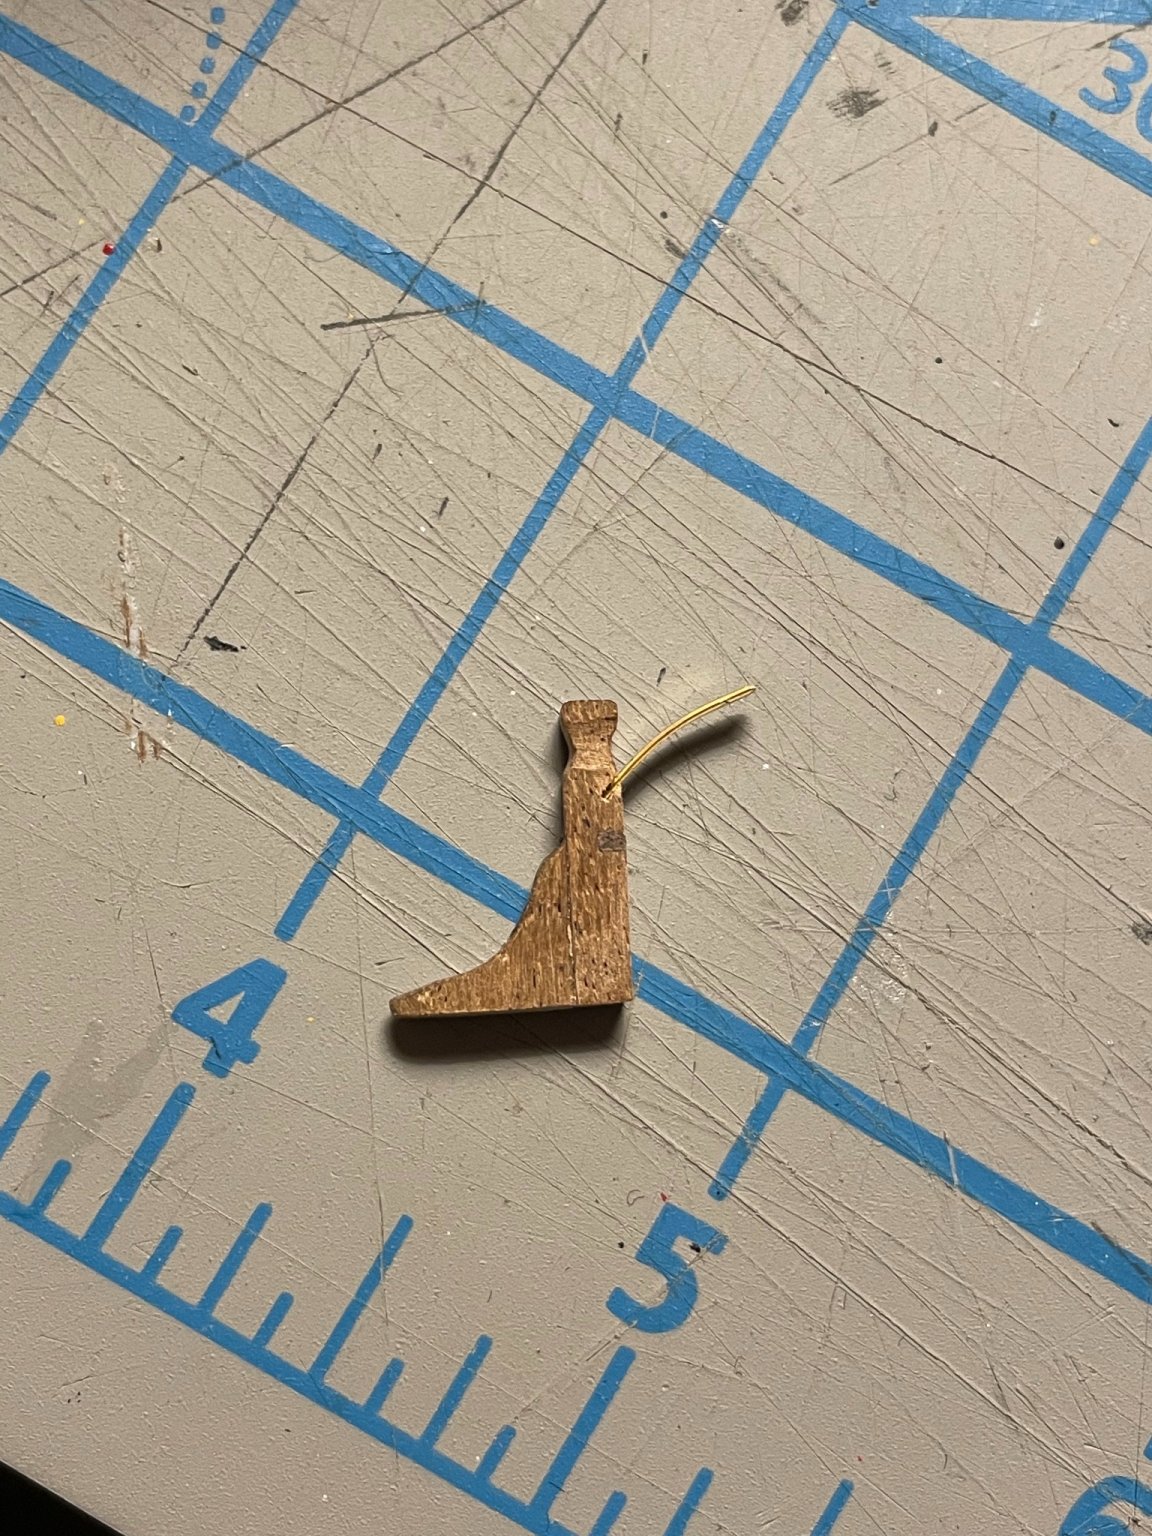
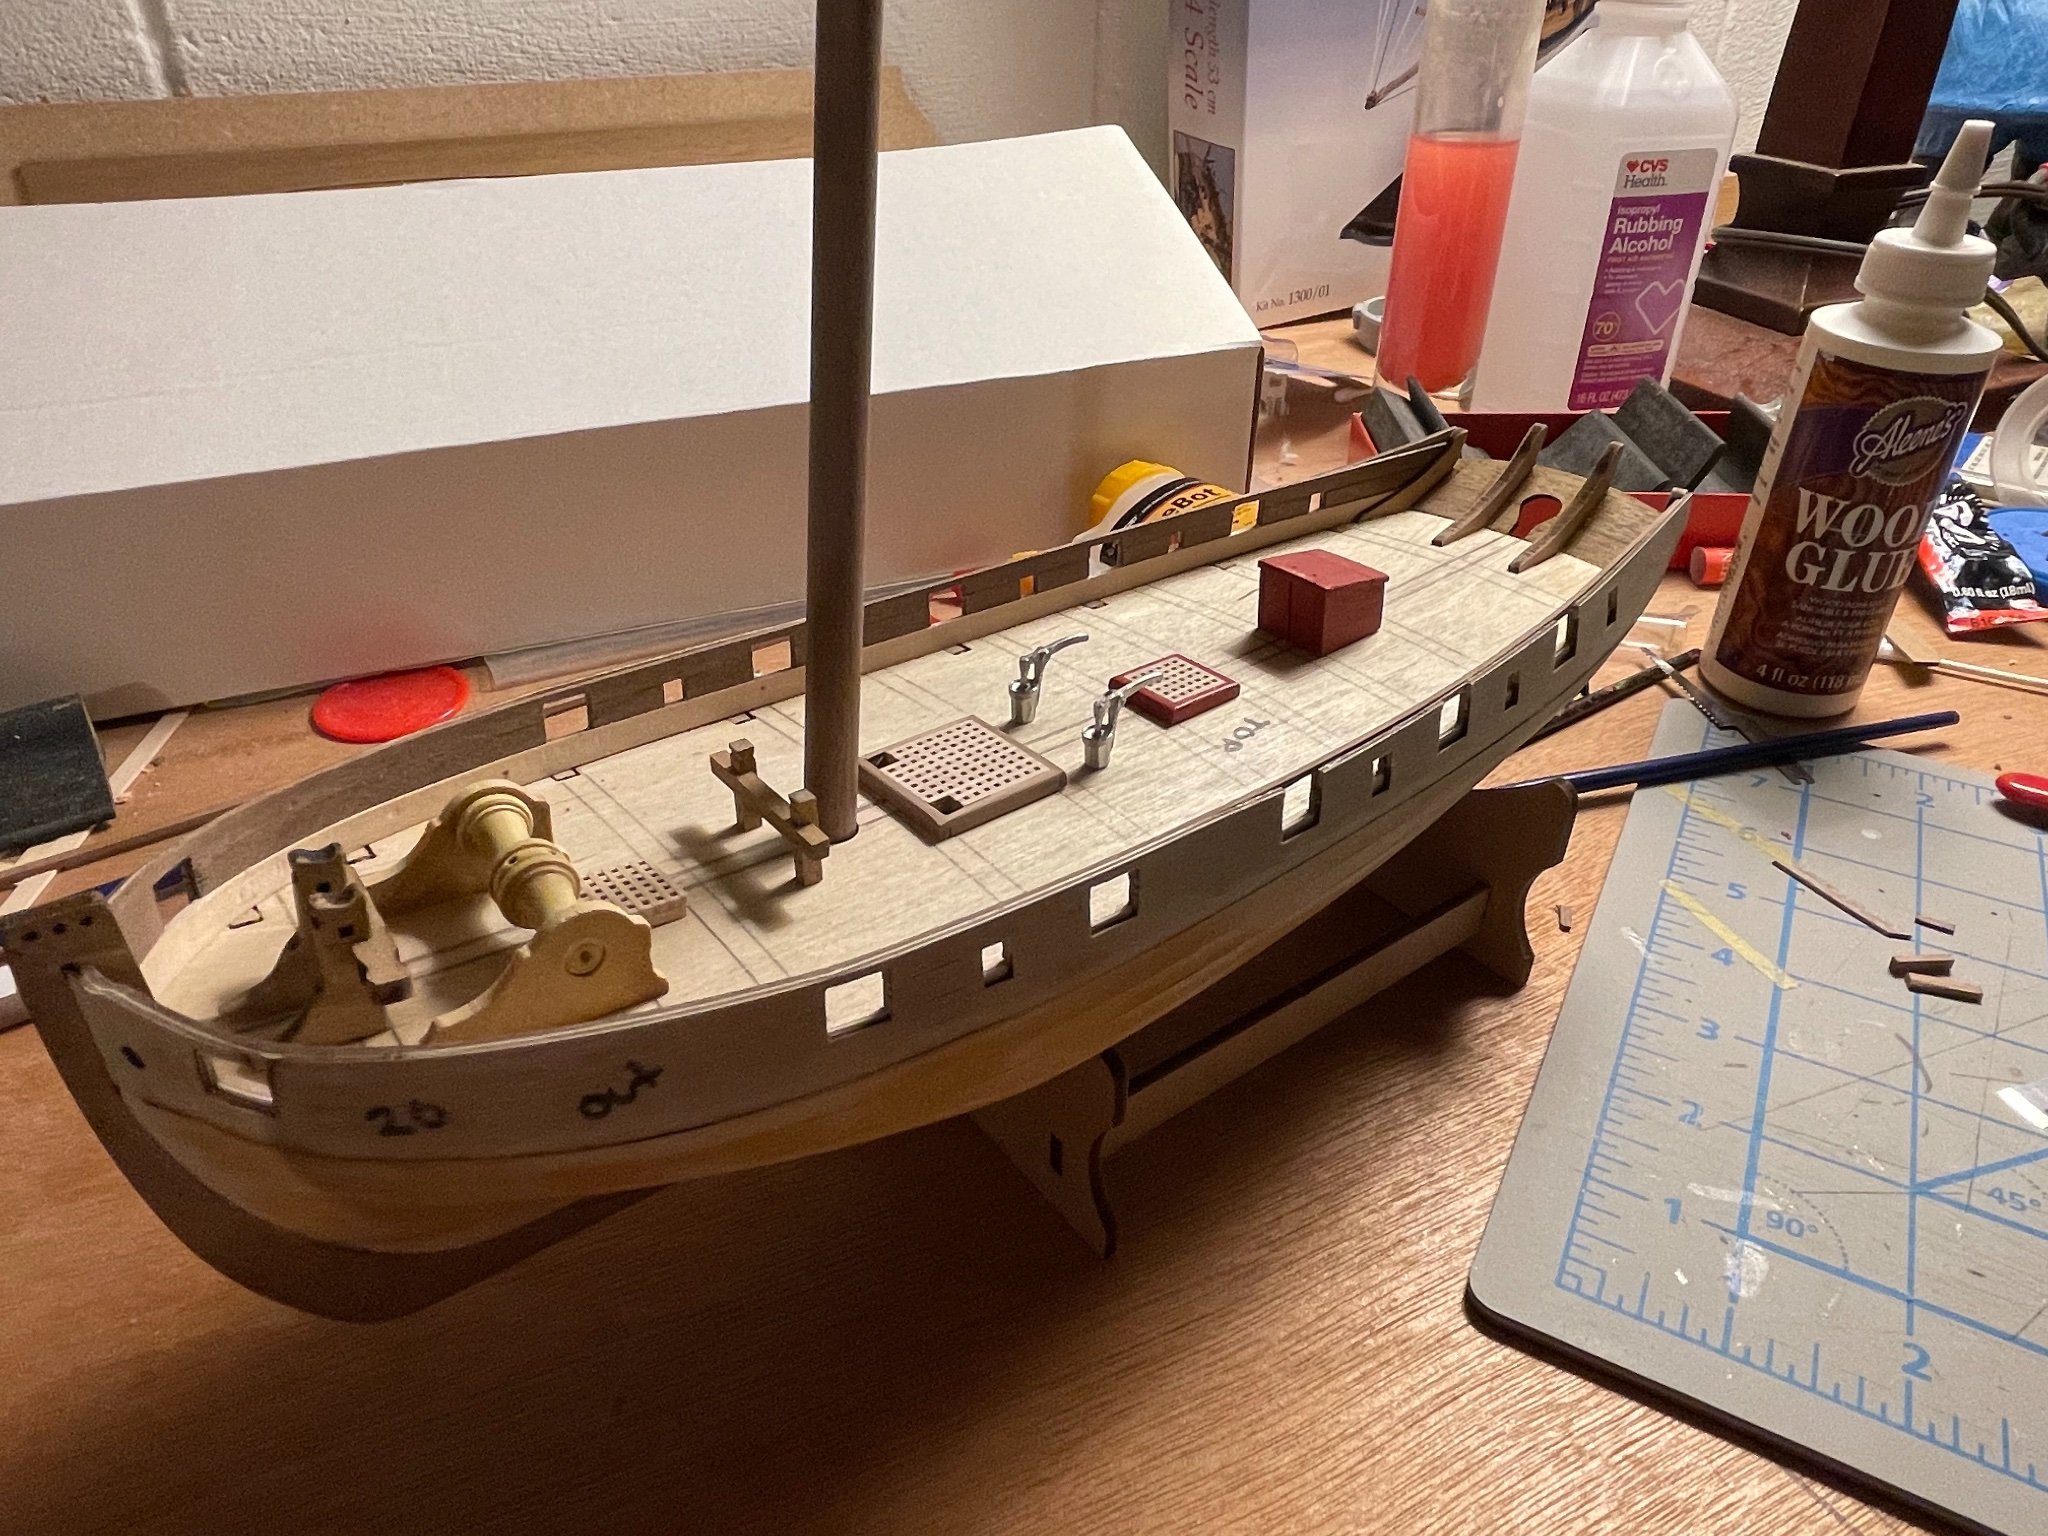
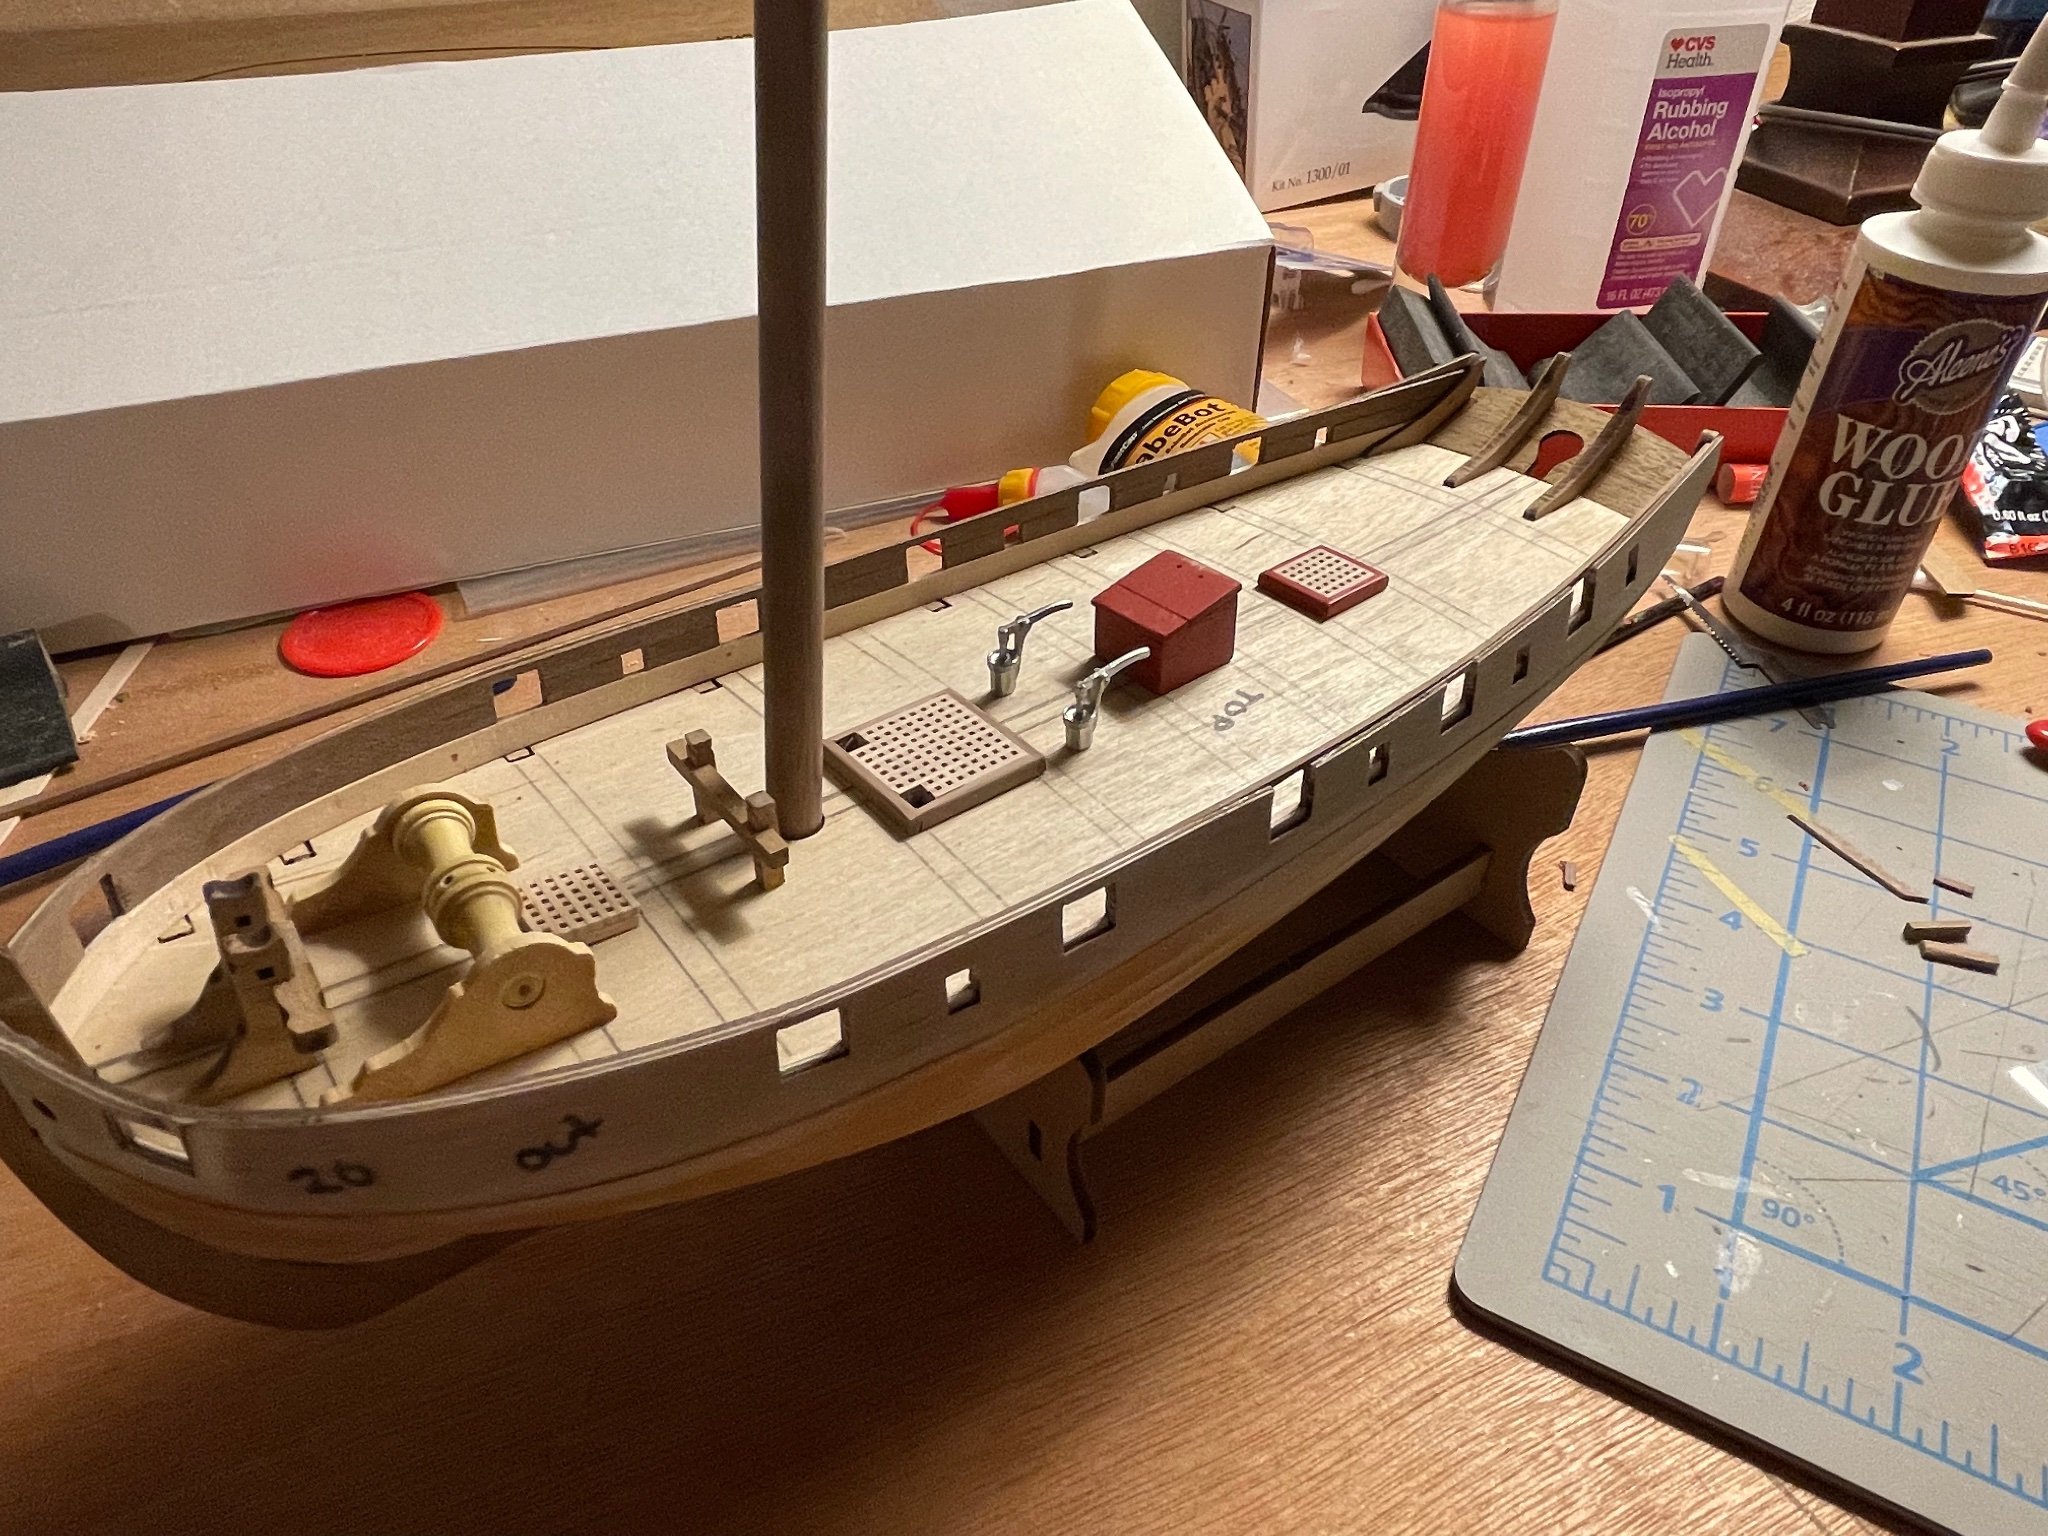
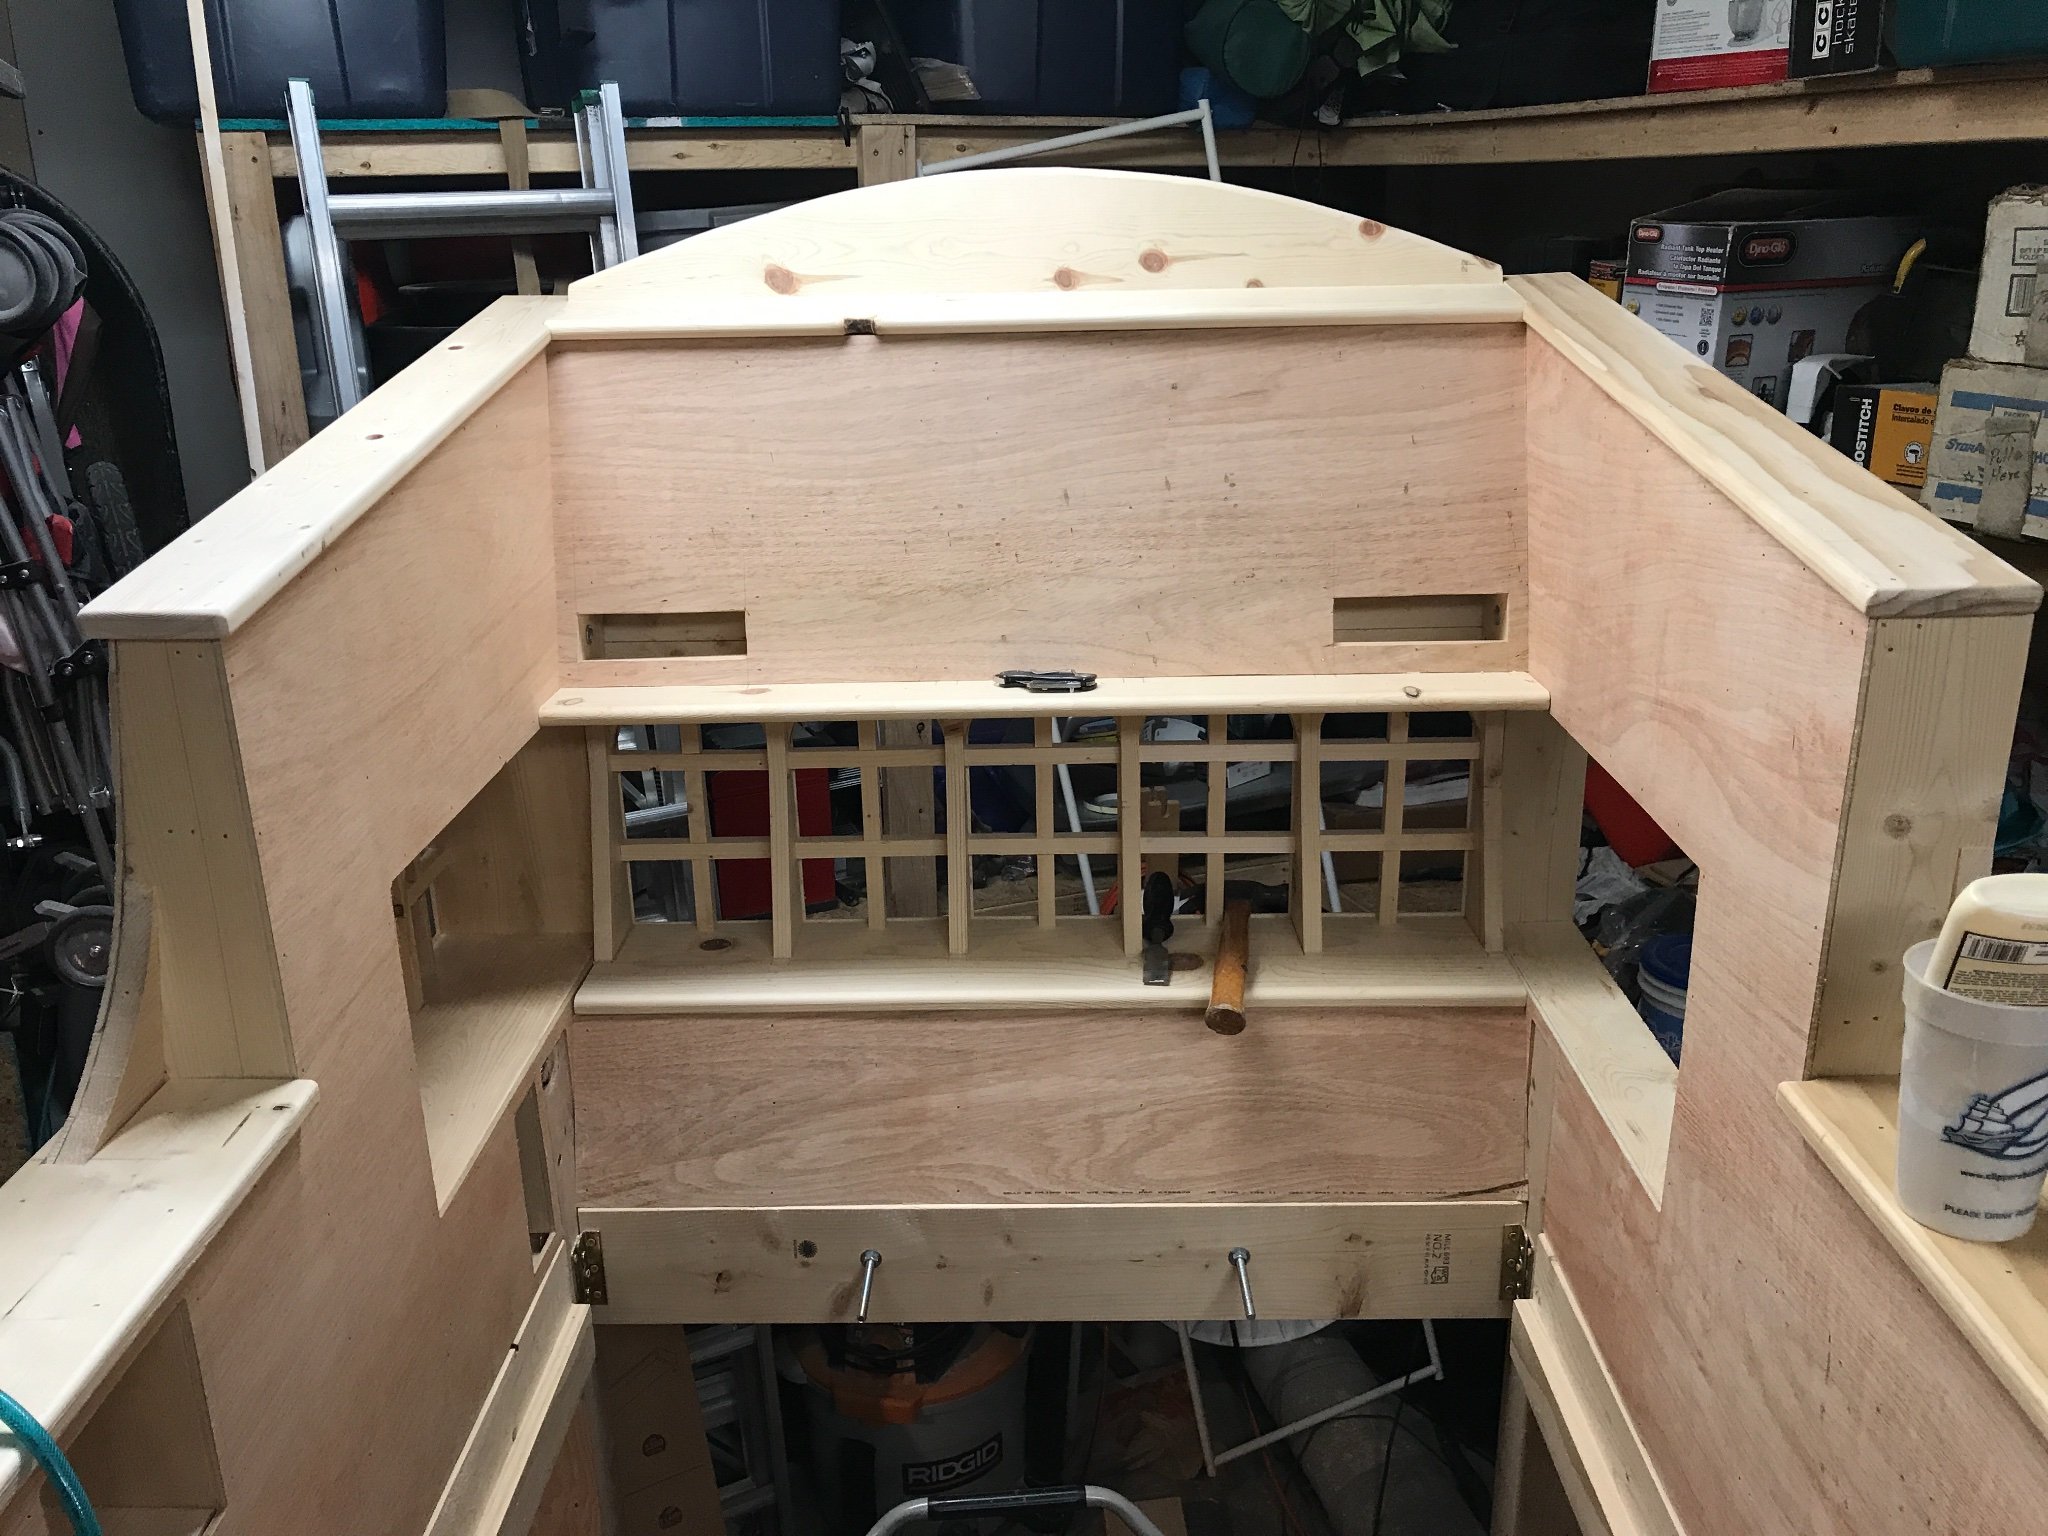
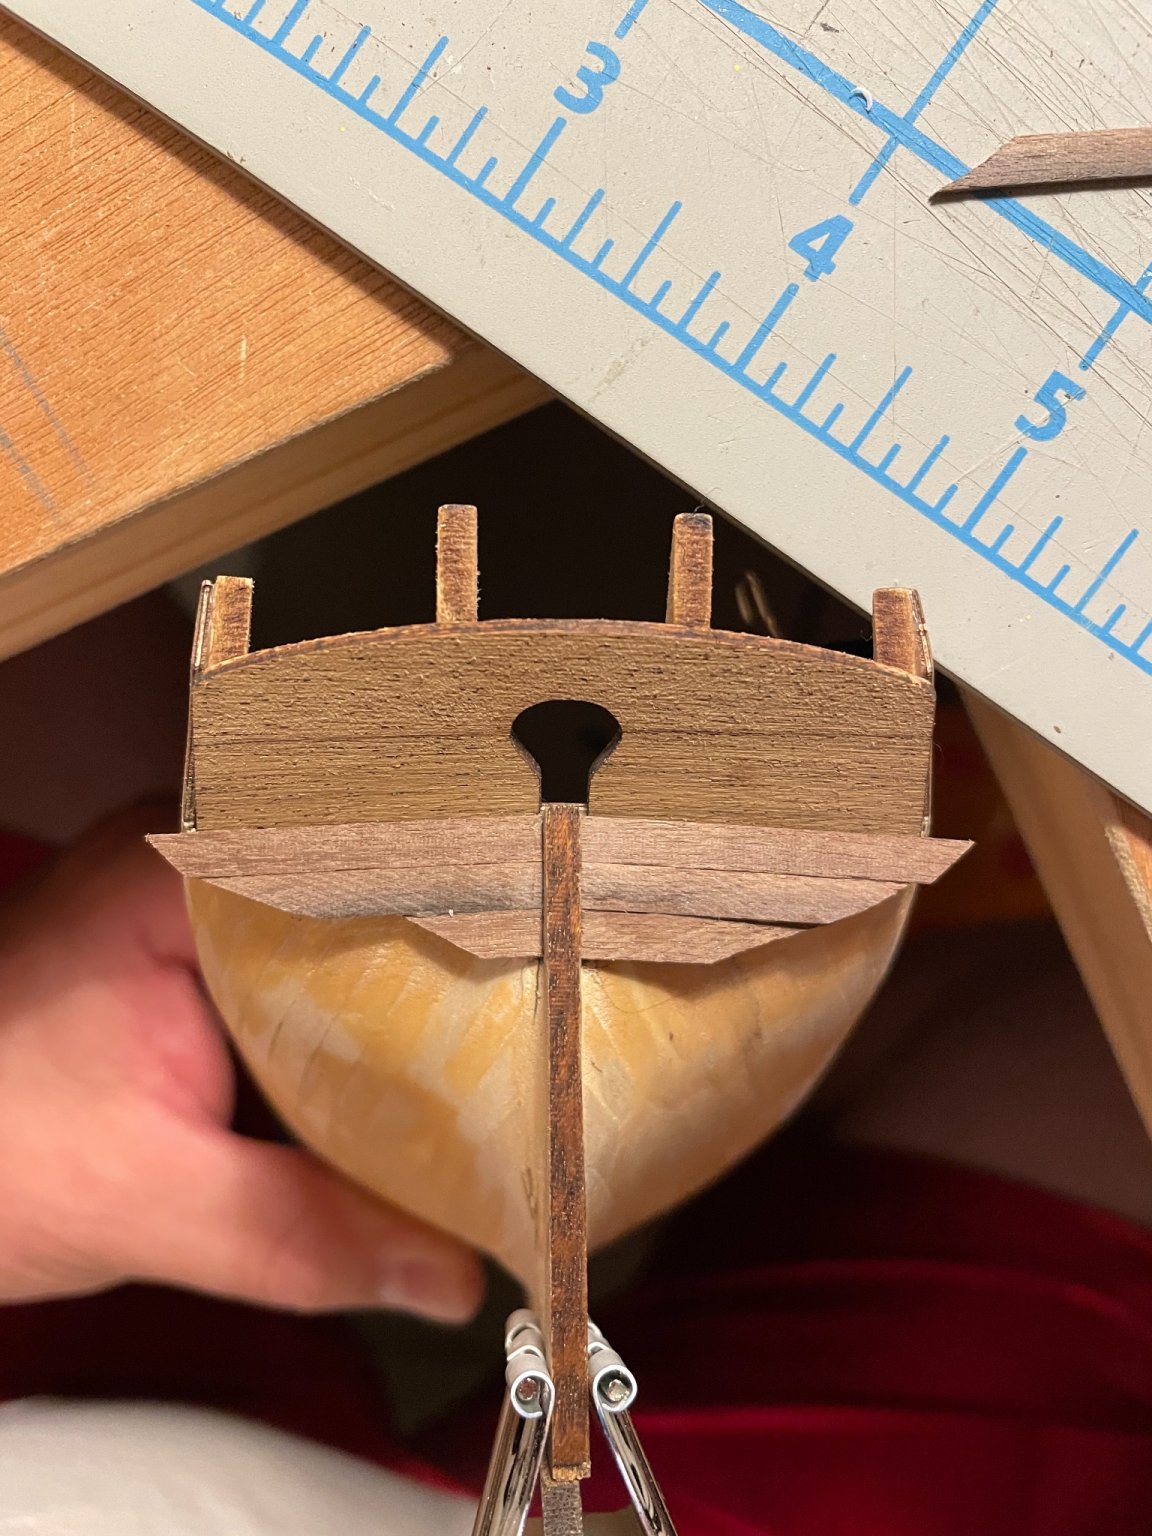
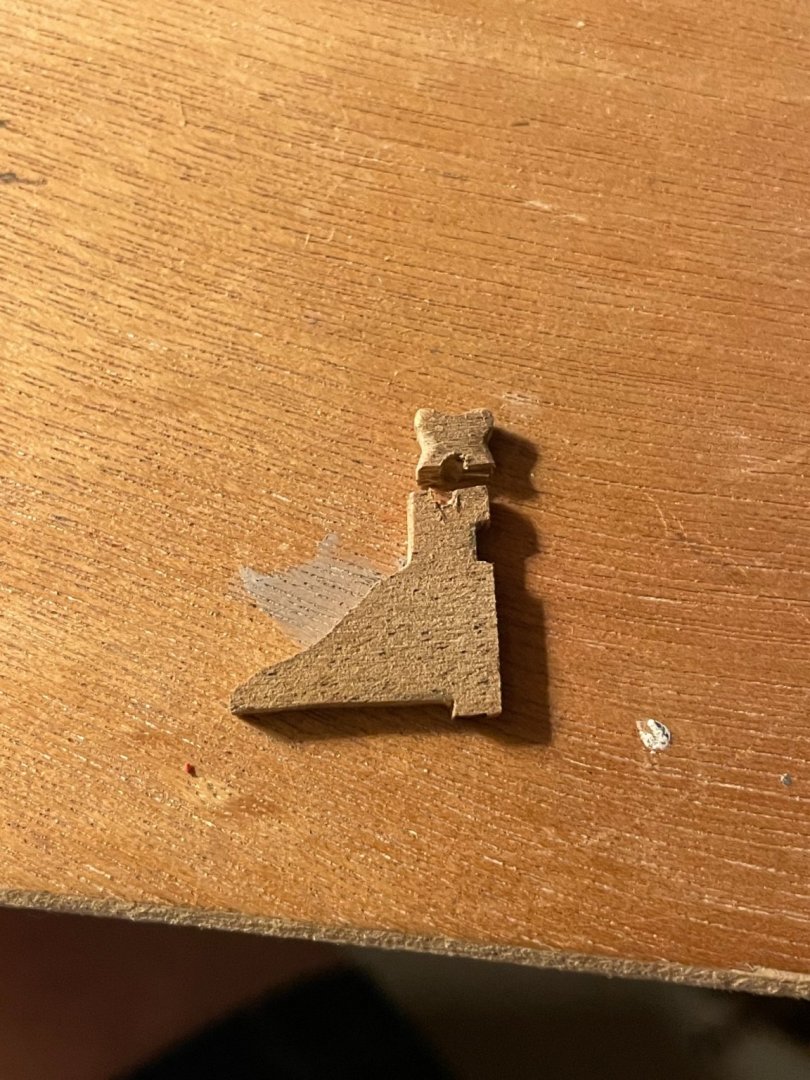
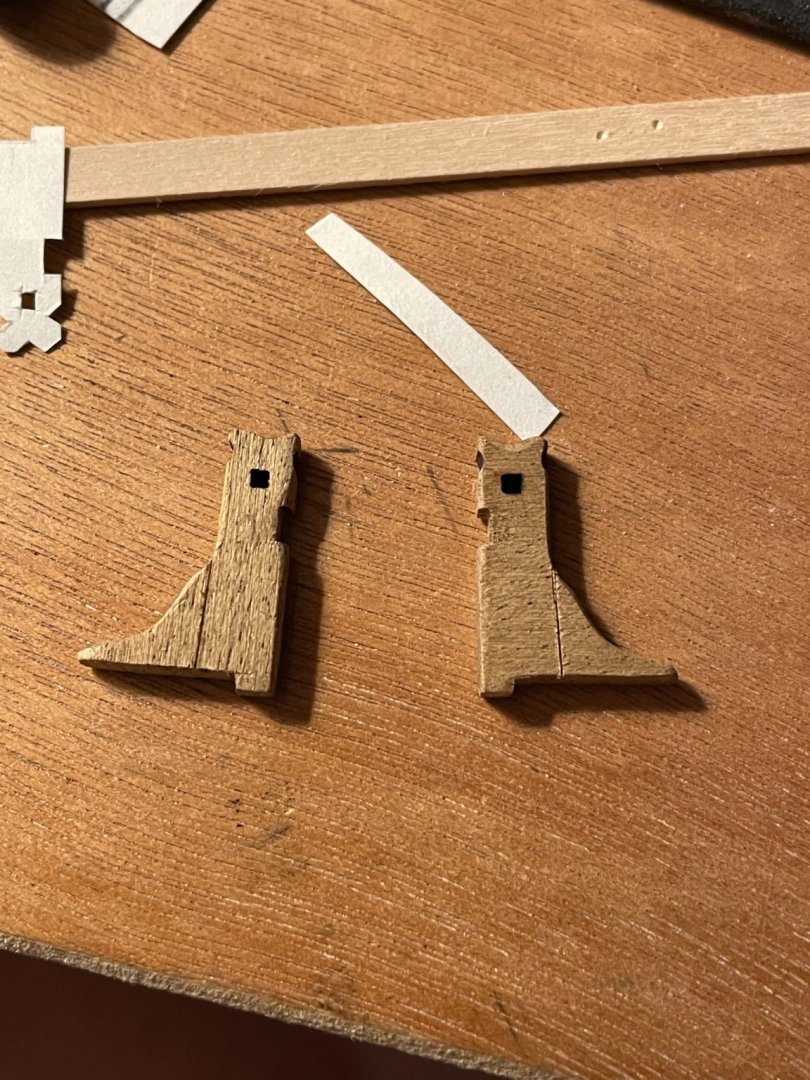
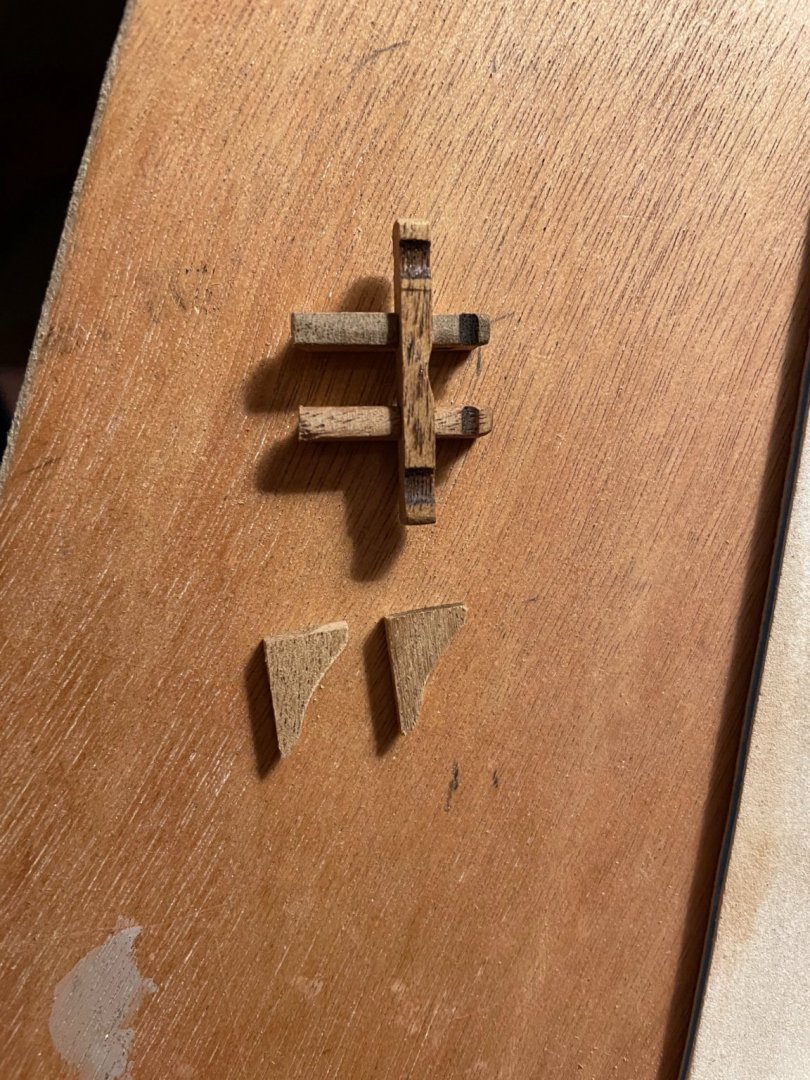
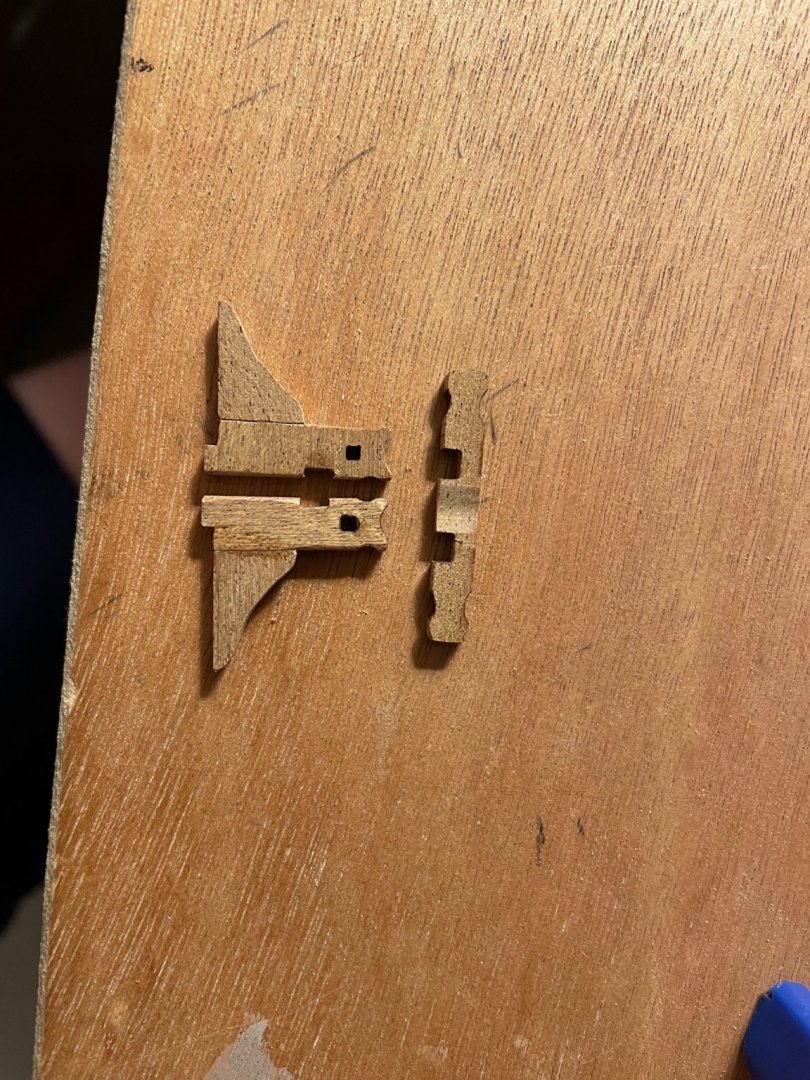
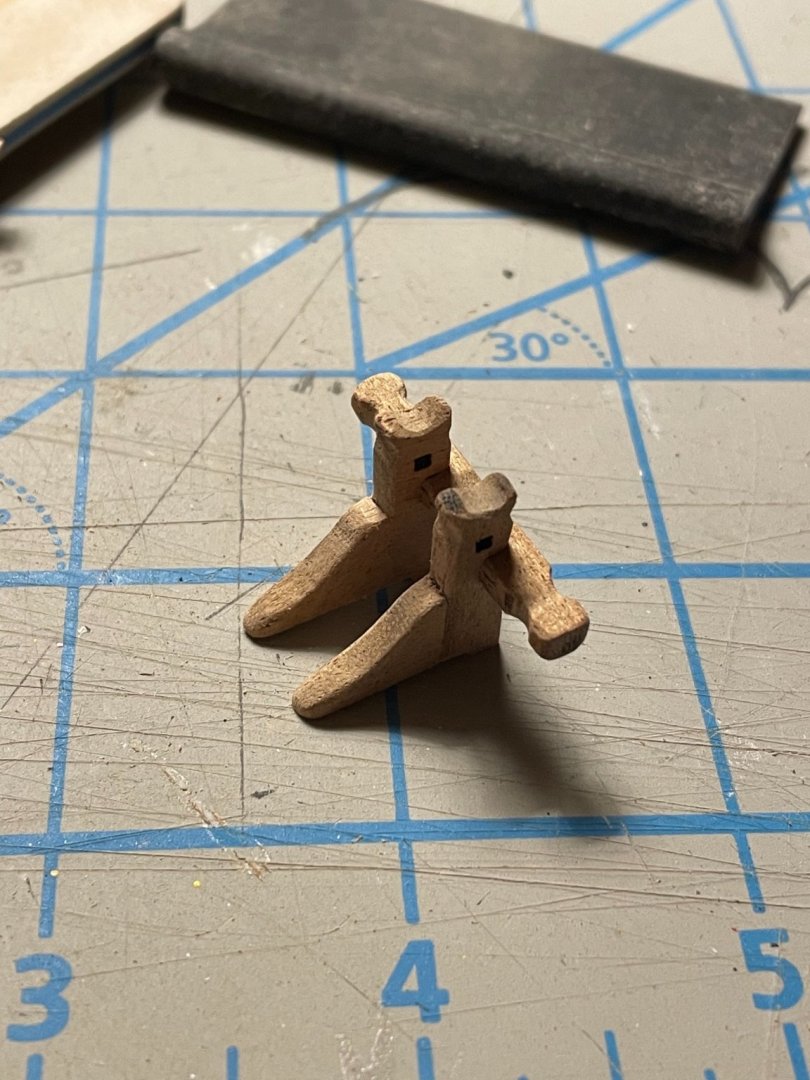
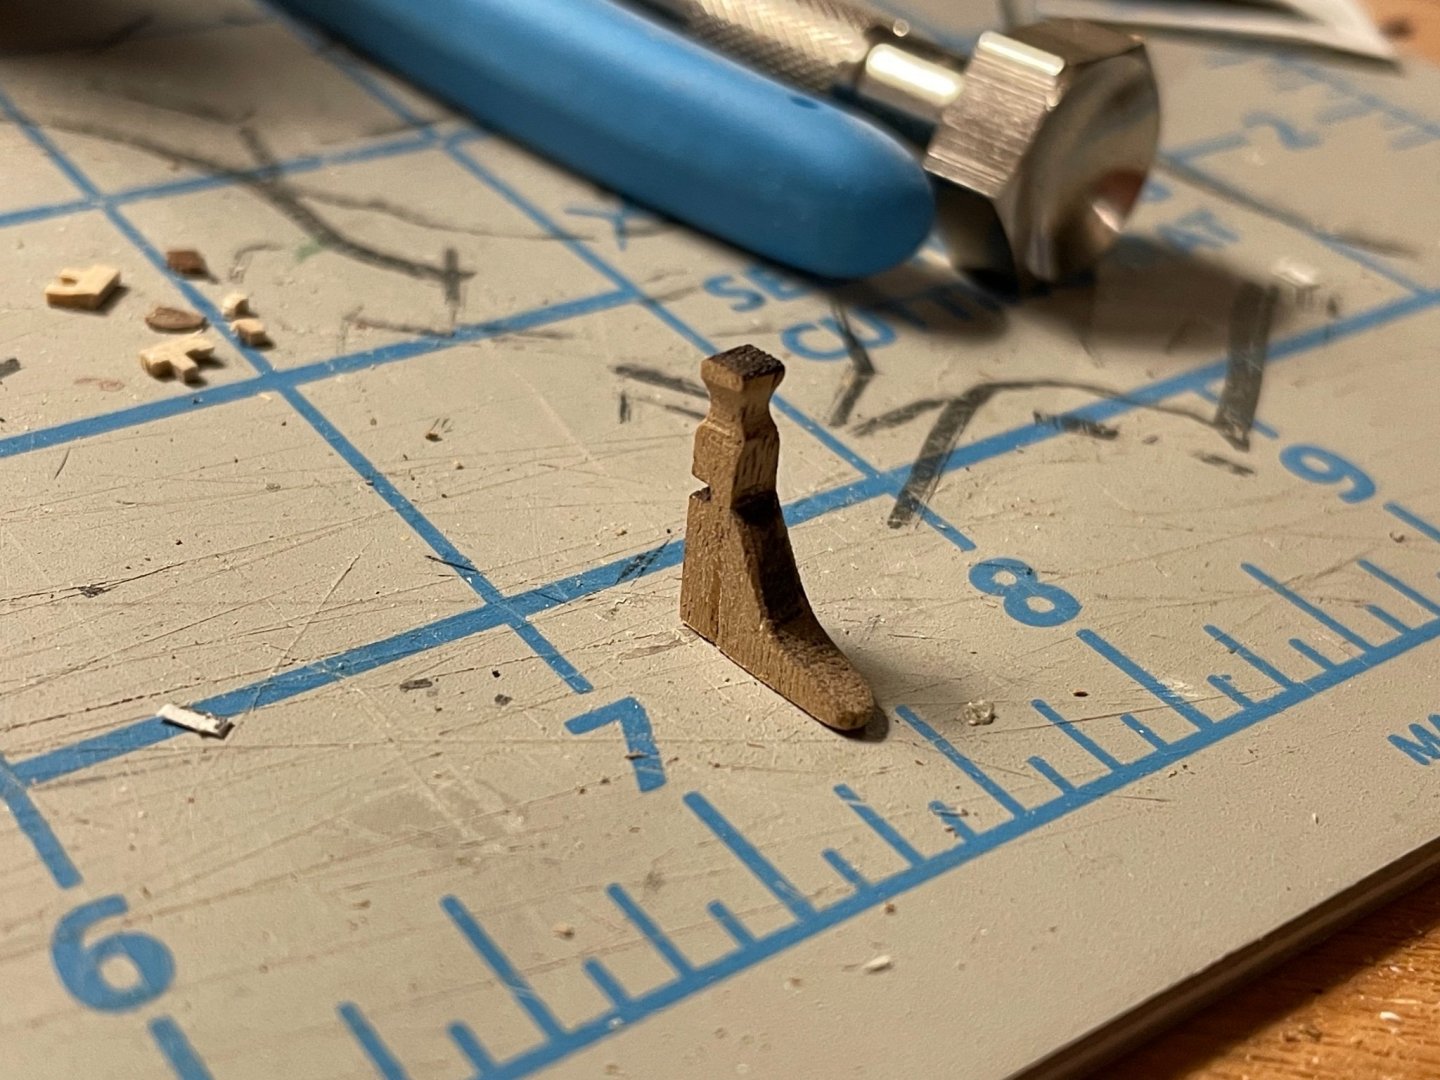
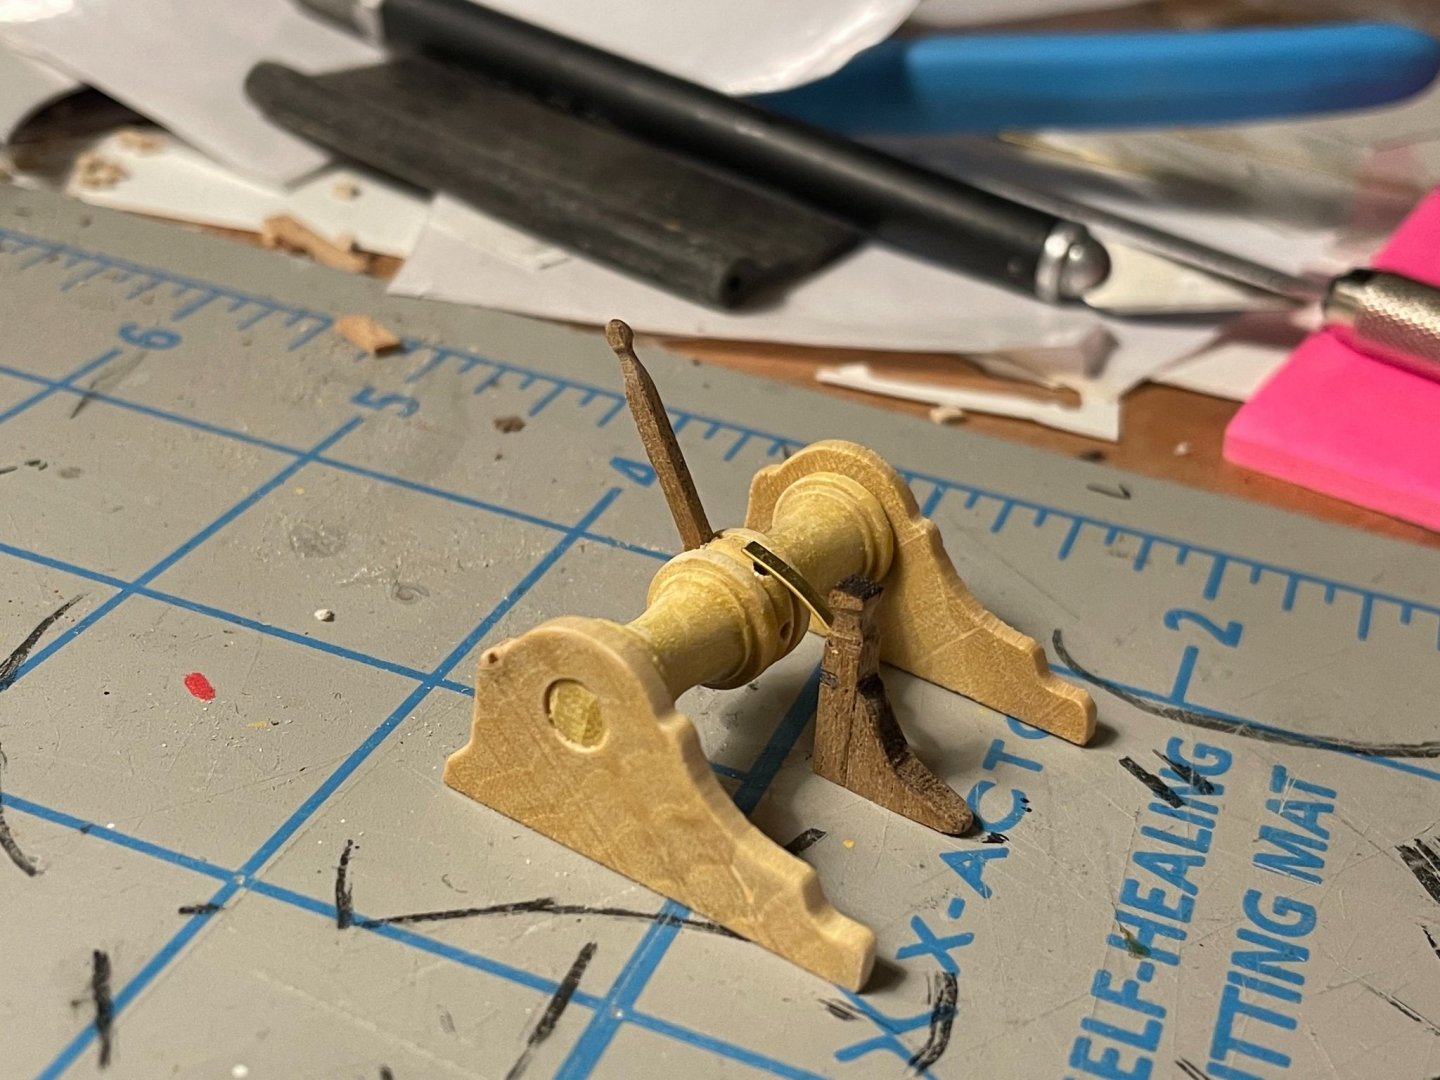
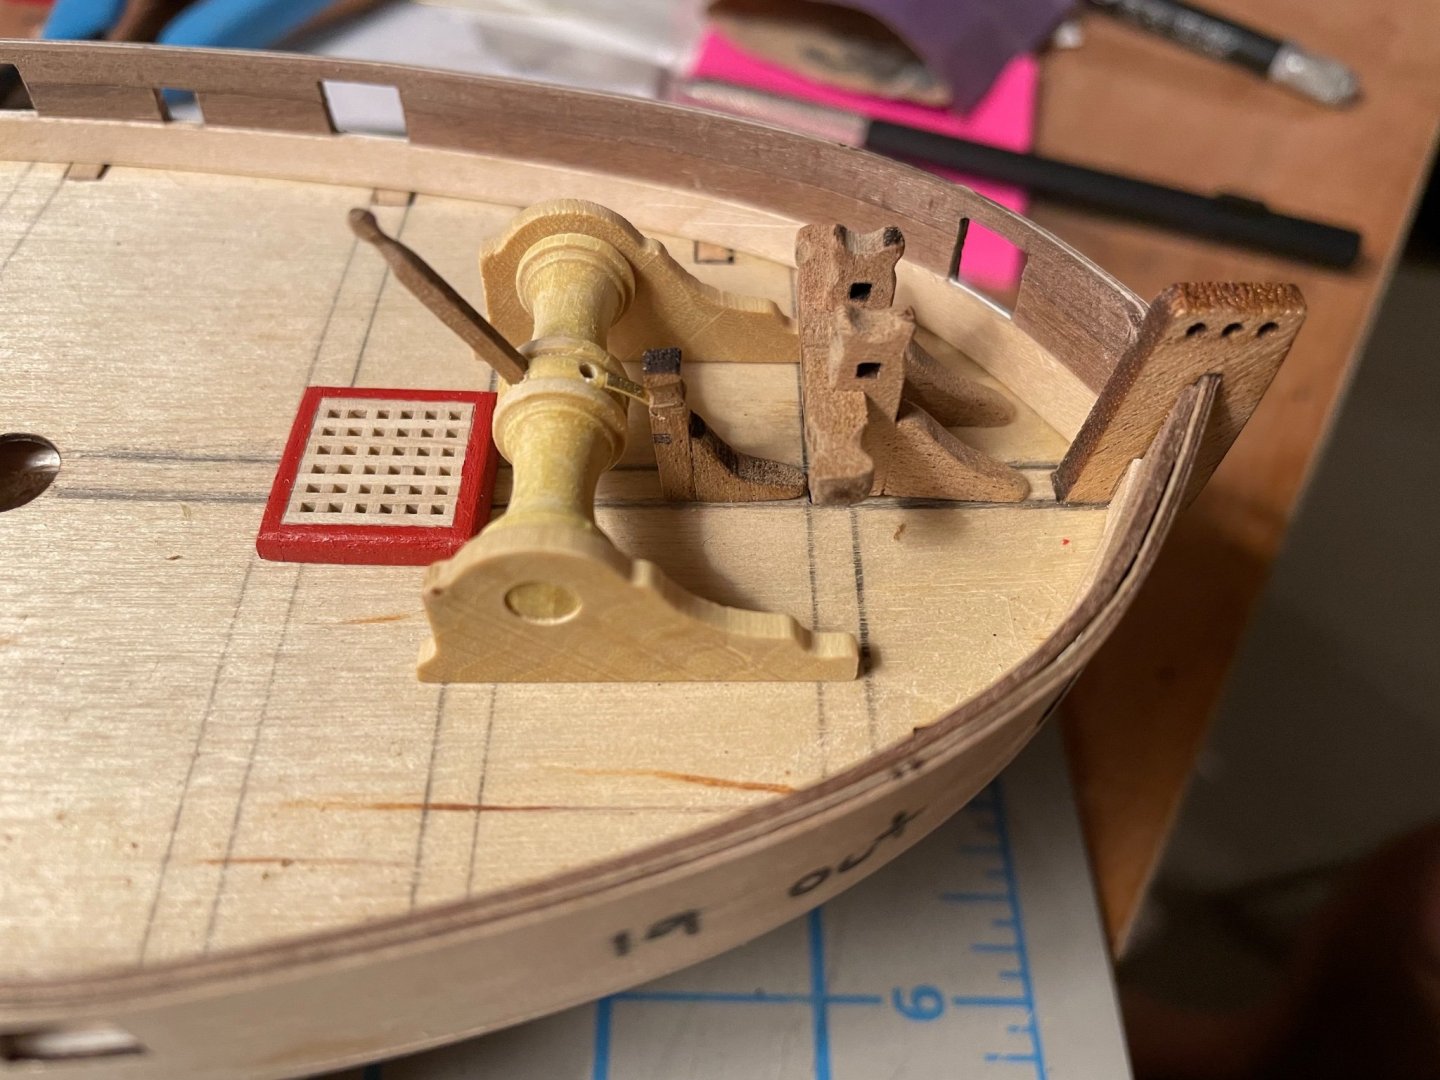
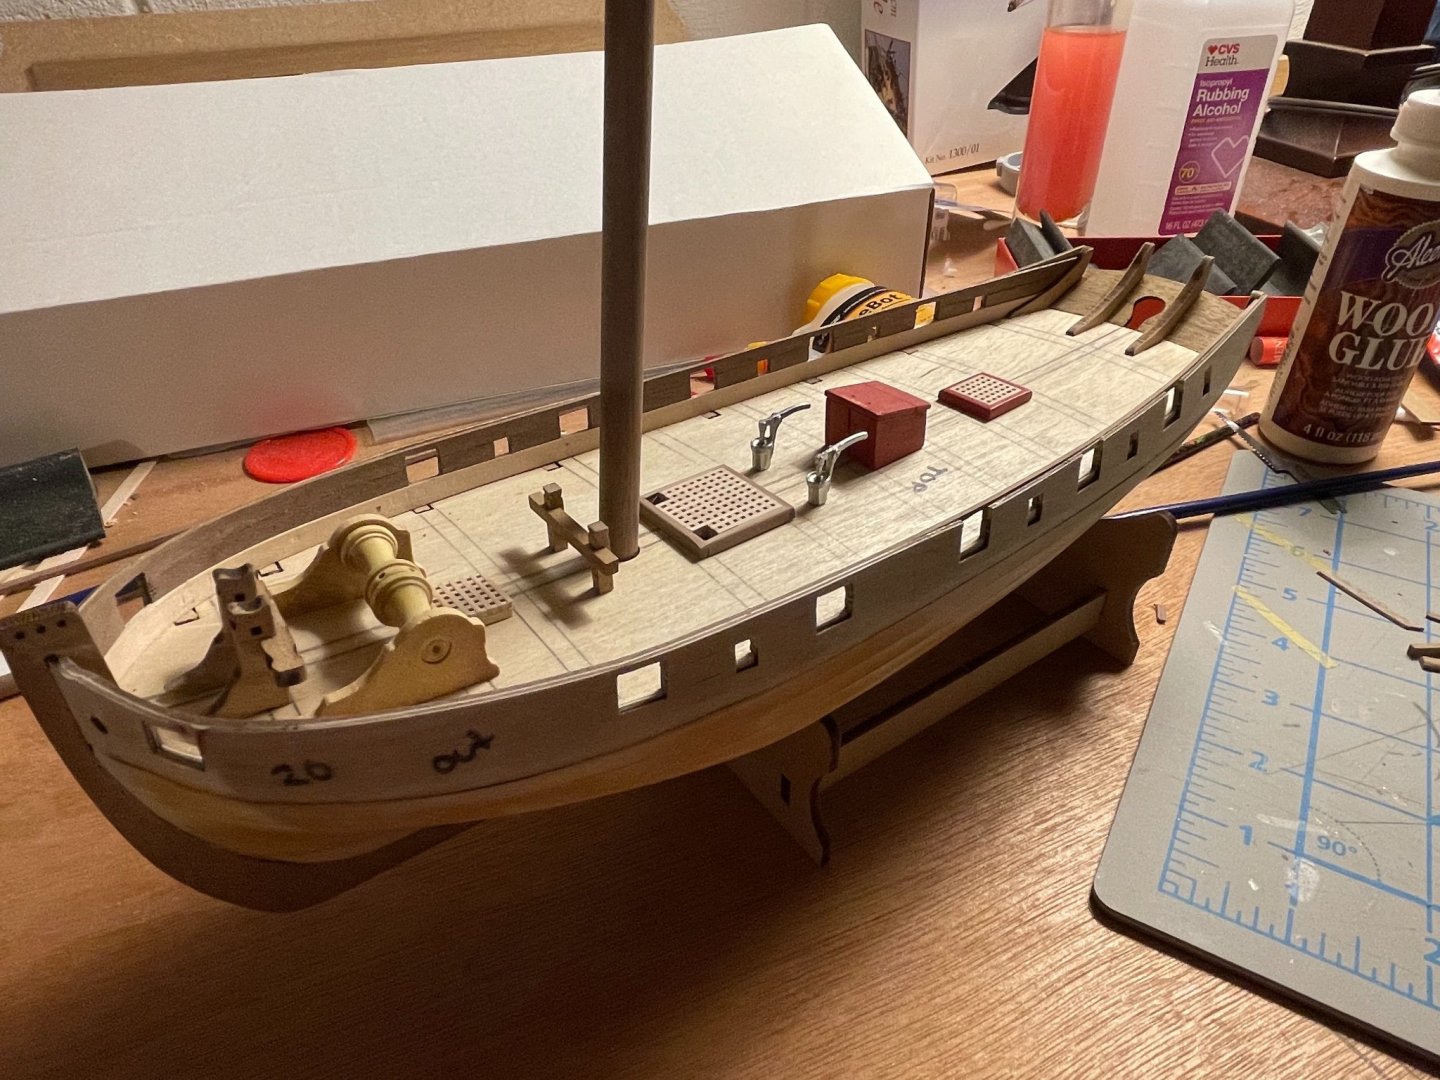
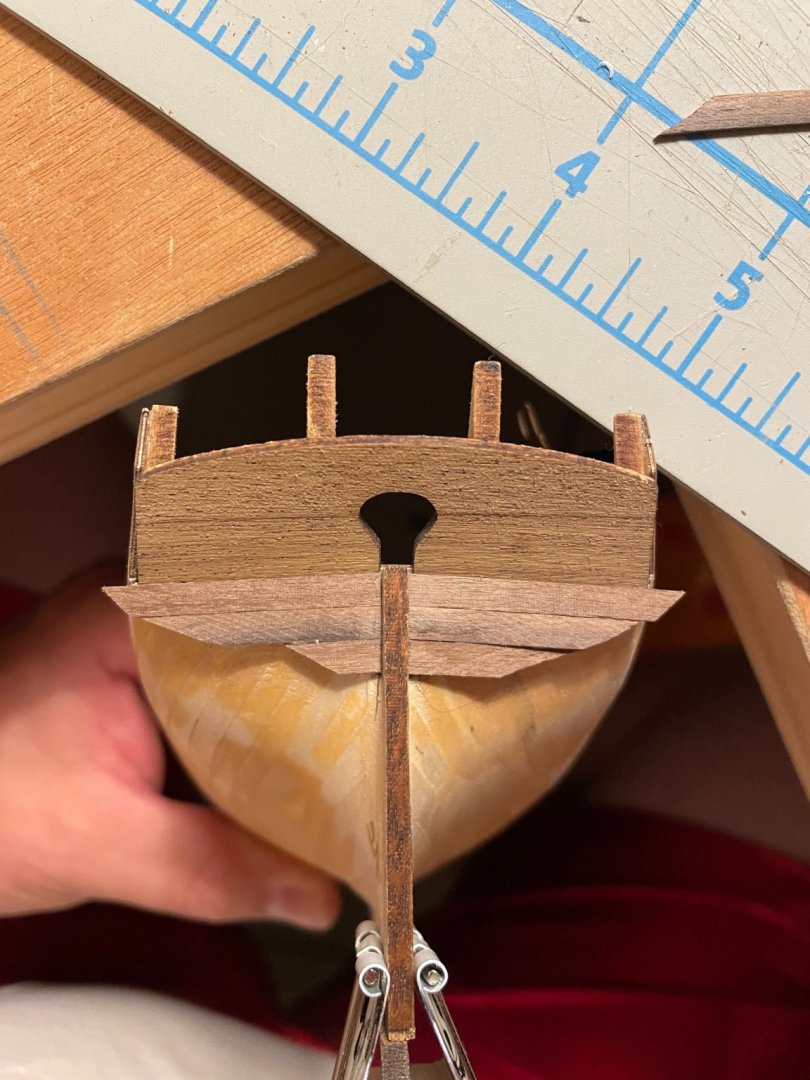
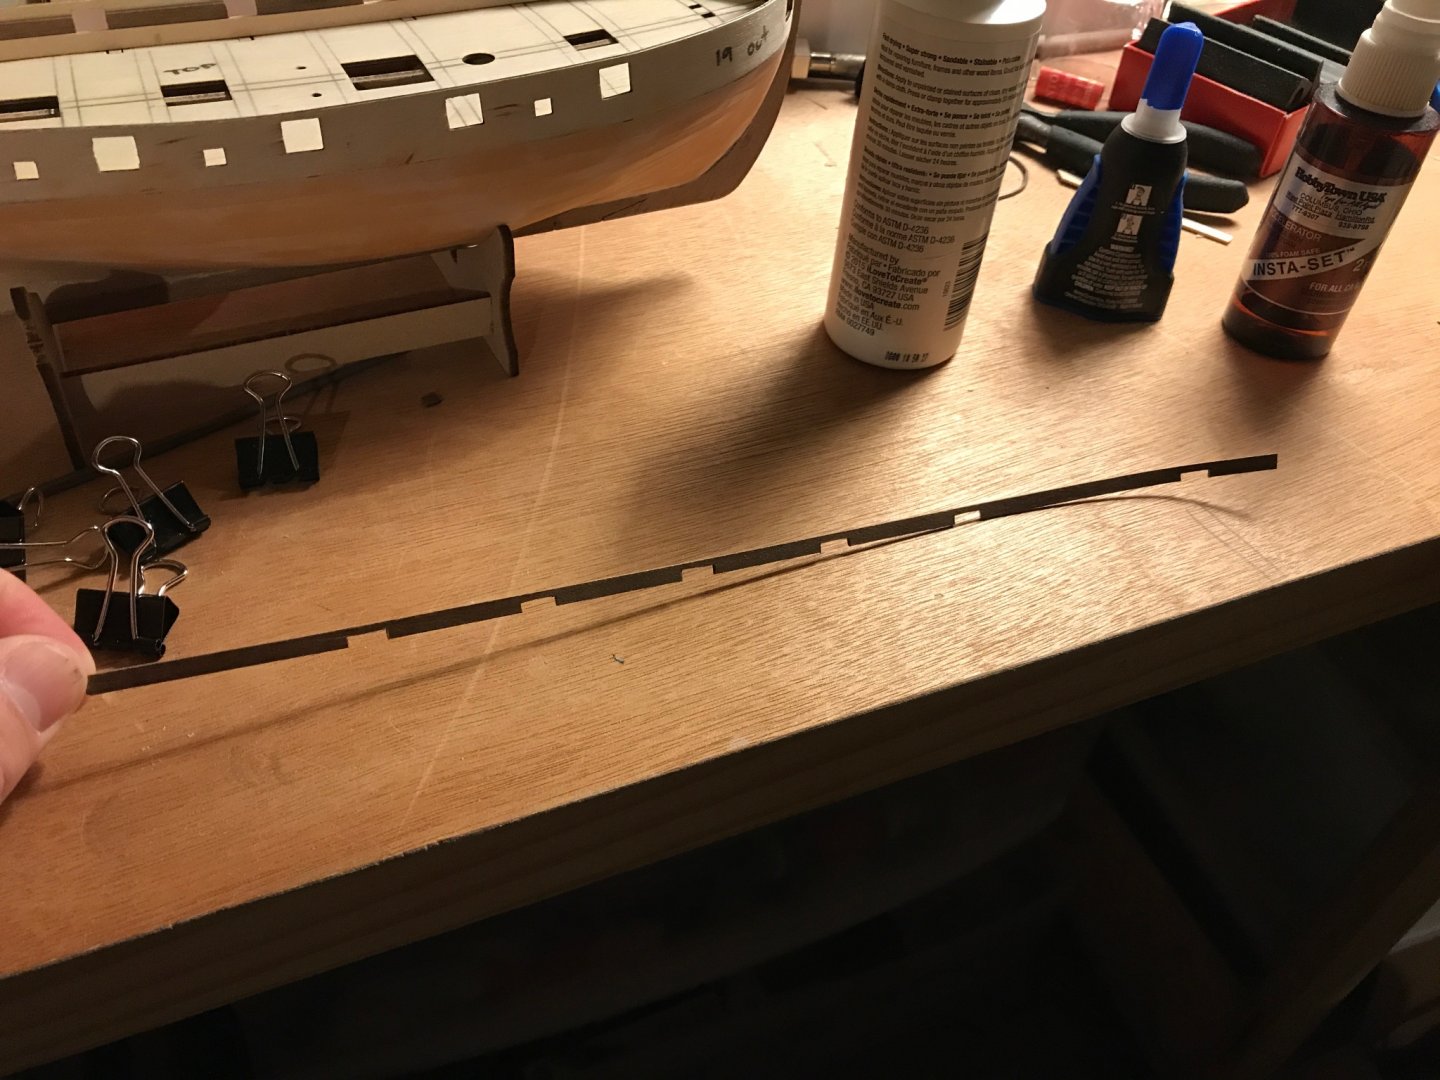
I finally got around to getting a jeweler’s saw. I am not sure how I ever built anything before having this thing! Love it! Anyway. I have spent a lot of time fumbling around with the bowsprit mounting thing. I tried cutting a new one out of scrap wood from the kit, but failed at it pretty hard. I then had the bright idea to cut the knee off of the kit supplied ones, cut down the remaining post and then just reattach the knee! I had to make one knee because I lost one to the darkness, but the end result was really good. Hopefully this will help anyone else out there that hasn’t made it to this step of the kit yet. I also found a compromising solution the the windlass. I know I saw a picture of a real boat with a windlass like this, but I can’t find it now. I am also pretty sure there are supposed to be teeth in the middle instead of the holes for the poles. The engineer in me just could not stand putting the lock tongue on the post without some logic as to how it should work. I decided to raise the groove for the lock tongue and place it at an upward angle. My thought is that instead of teeth on the windlass, the tongue would just hit the pole. This is probably not how anyone would have really done it, but it kept me from scratch building a new windlass and it at least appears to be functional! I also added a knee to the post.


- 139 replies
-
- 7
-

-
- Lady Nelson
- Amati
- (and 2 more)
-
Can’t wait to see them painted! Loving this build!
-
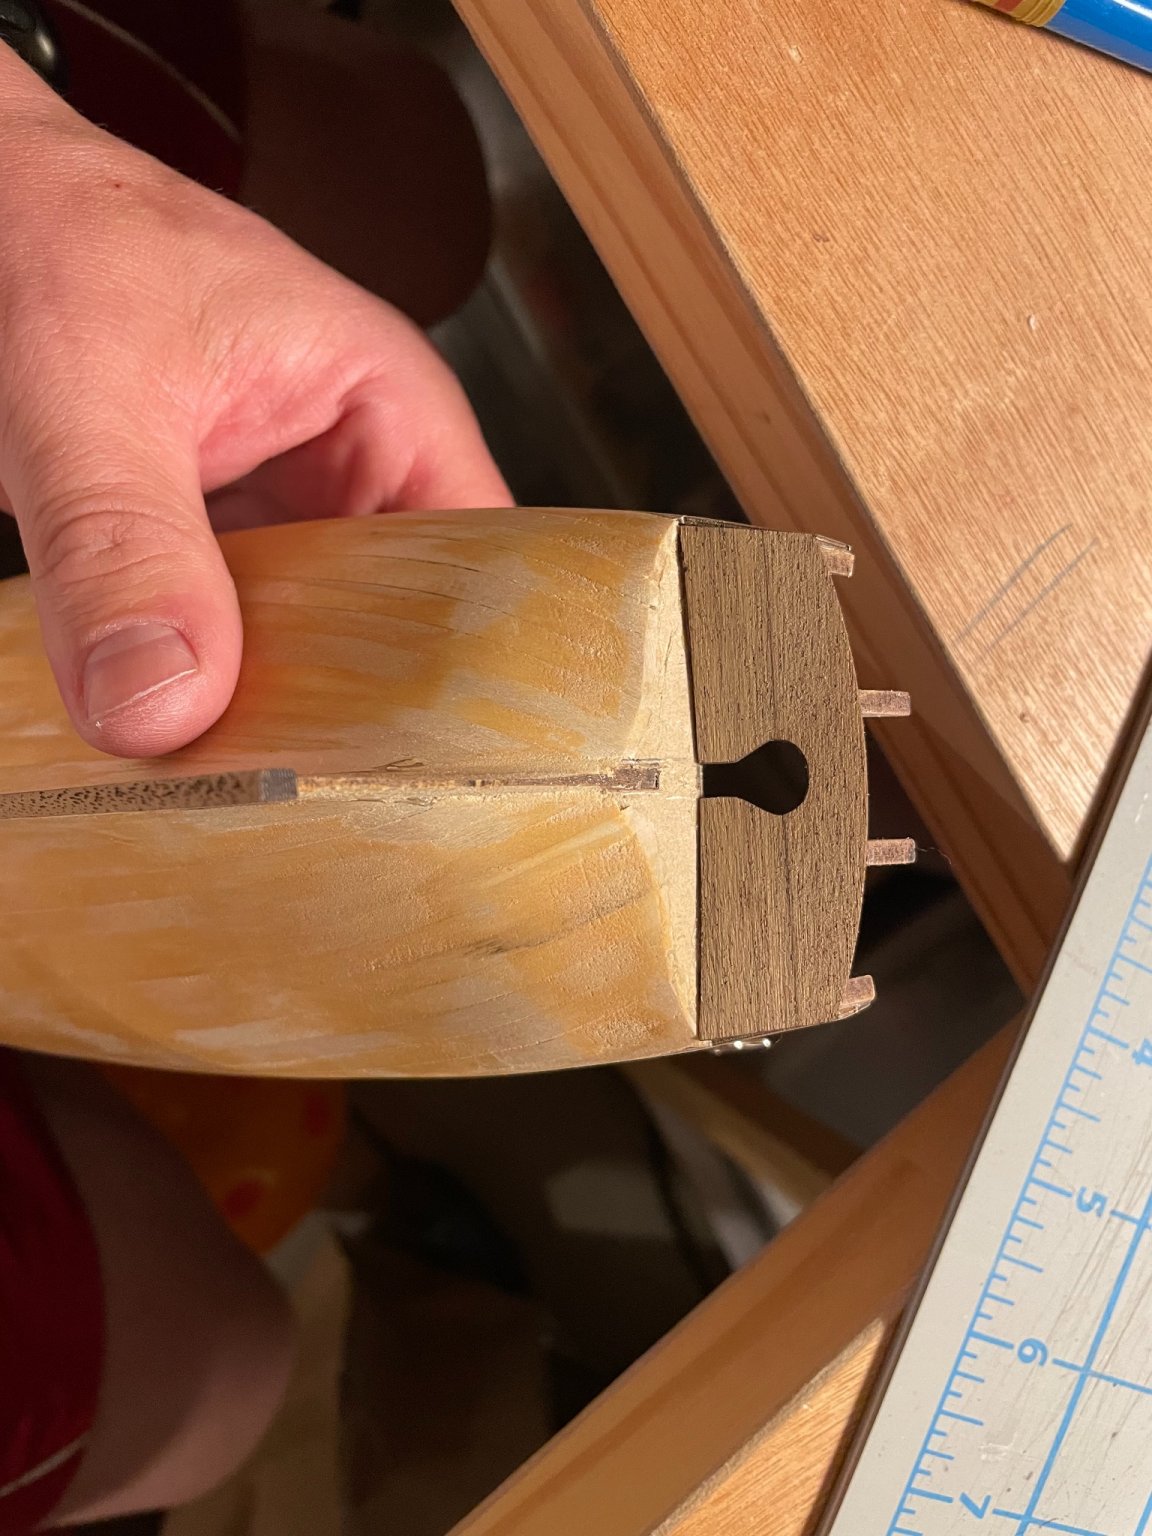
I got lucky. I only broke the stem once, but my keel has a twist right at the stern post junction. The wood is very finicky. I have been struggling to make a clean cut for the grating frames.
- 114 replies
-
- 1
-
-
- Lady Nelson
- amati
- (and 1 more)
-
I started messing with the carriages and canons as soon as I opened the box. They definitely look better when you file down the parting lines and sharpen up some of the soft edges. I had to put them to the side though. Hopefully I will have a good plan by the time I need to attach them!
- 114 replies
-
- 1
-
-
- Lady Nelson
- amati
- (and 1 more)
-
That is an intense build log! I have lots of reading to do for sure. Thank you! I played around with the deck structures. I think I am just going to go with what I think looks better, if I ever can decide. I think it looks faster in the 3rd picture… I will need to get the rudder and tiller in there too. All of this fuss so I can plank the deck….


- 139 replies
-
- 5
-
-
- Lady Nelson
- Amati
- (and 2 more)
-
Thank you! It does seem like it should face the stern. The plans also show it further back, but I think it is supposed to be closer to mid ships. Wouldn’t be much room to climb down the stairs I don’t think. It’s a made up ship though, so I think it comes down to whatever looks pretty to us. I won’t glue it down until the deck planking is done. Lots of time to decide.
- 139 replies
-
- 2
-
-
- Lady Nelson
- Amati
- (and 2 more)
-
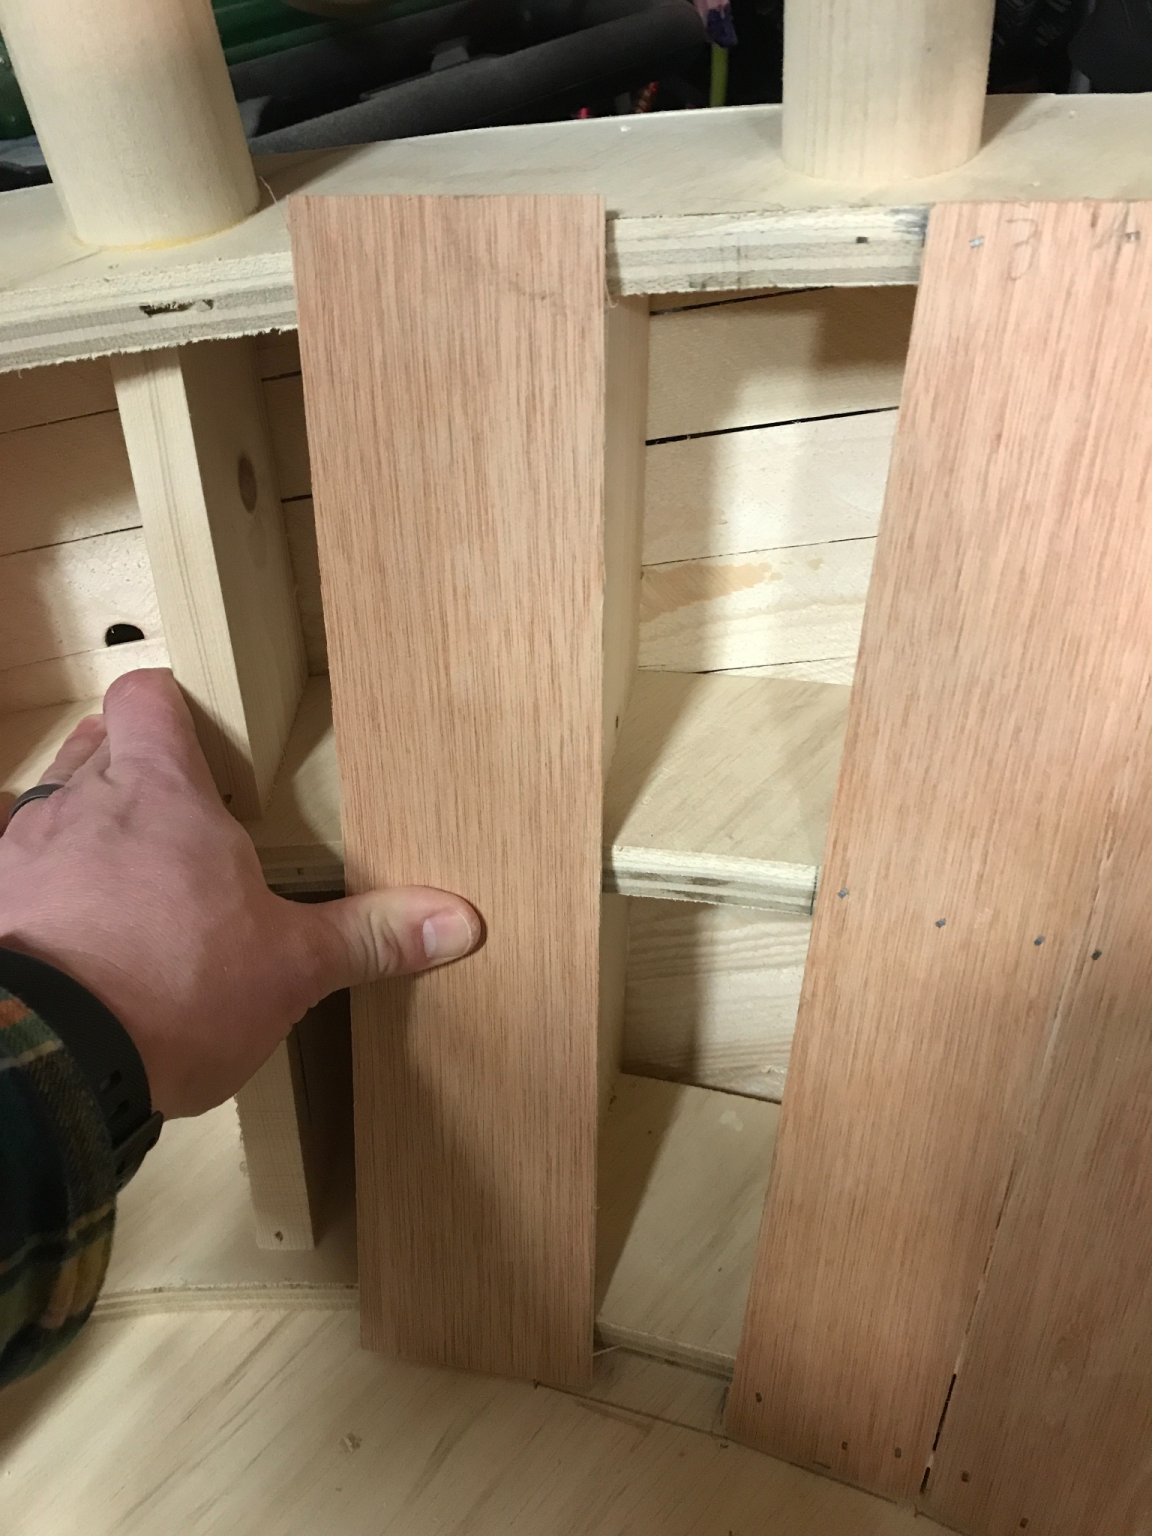
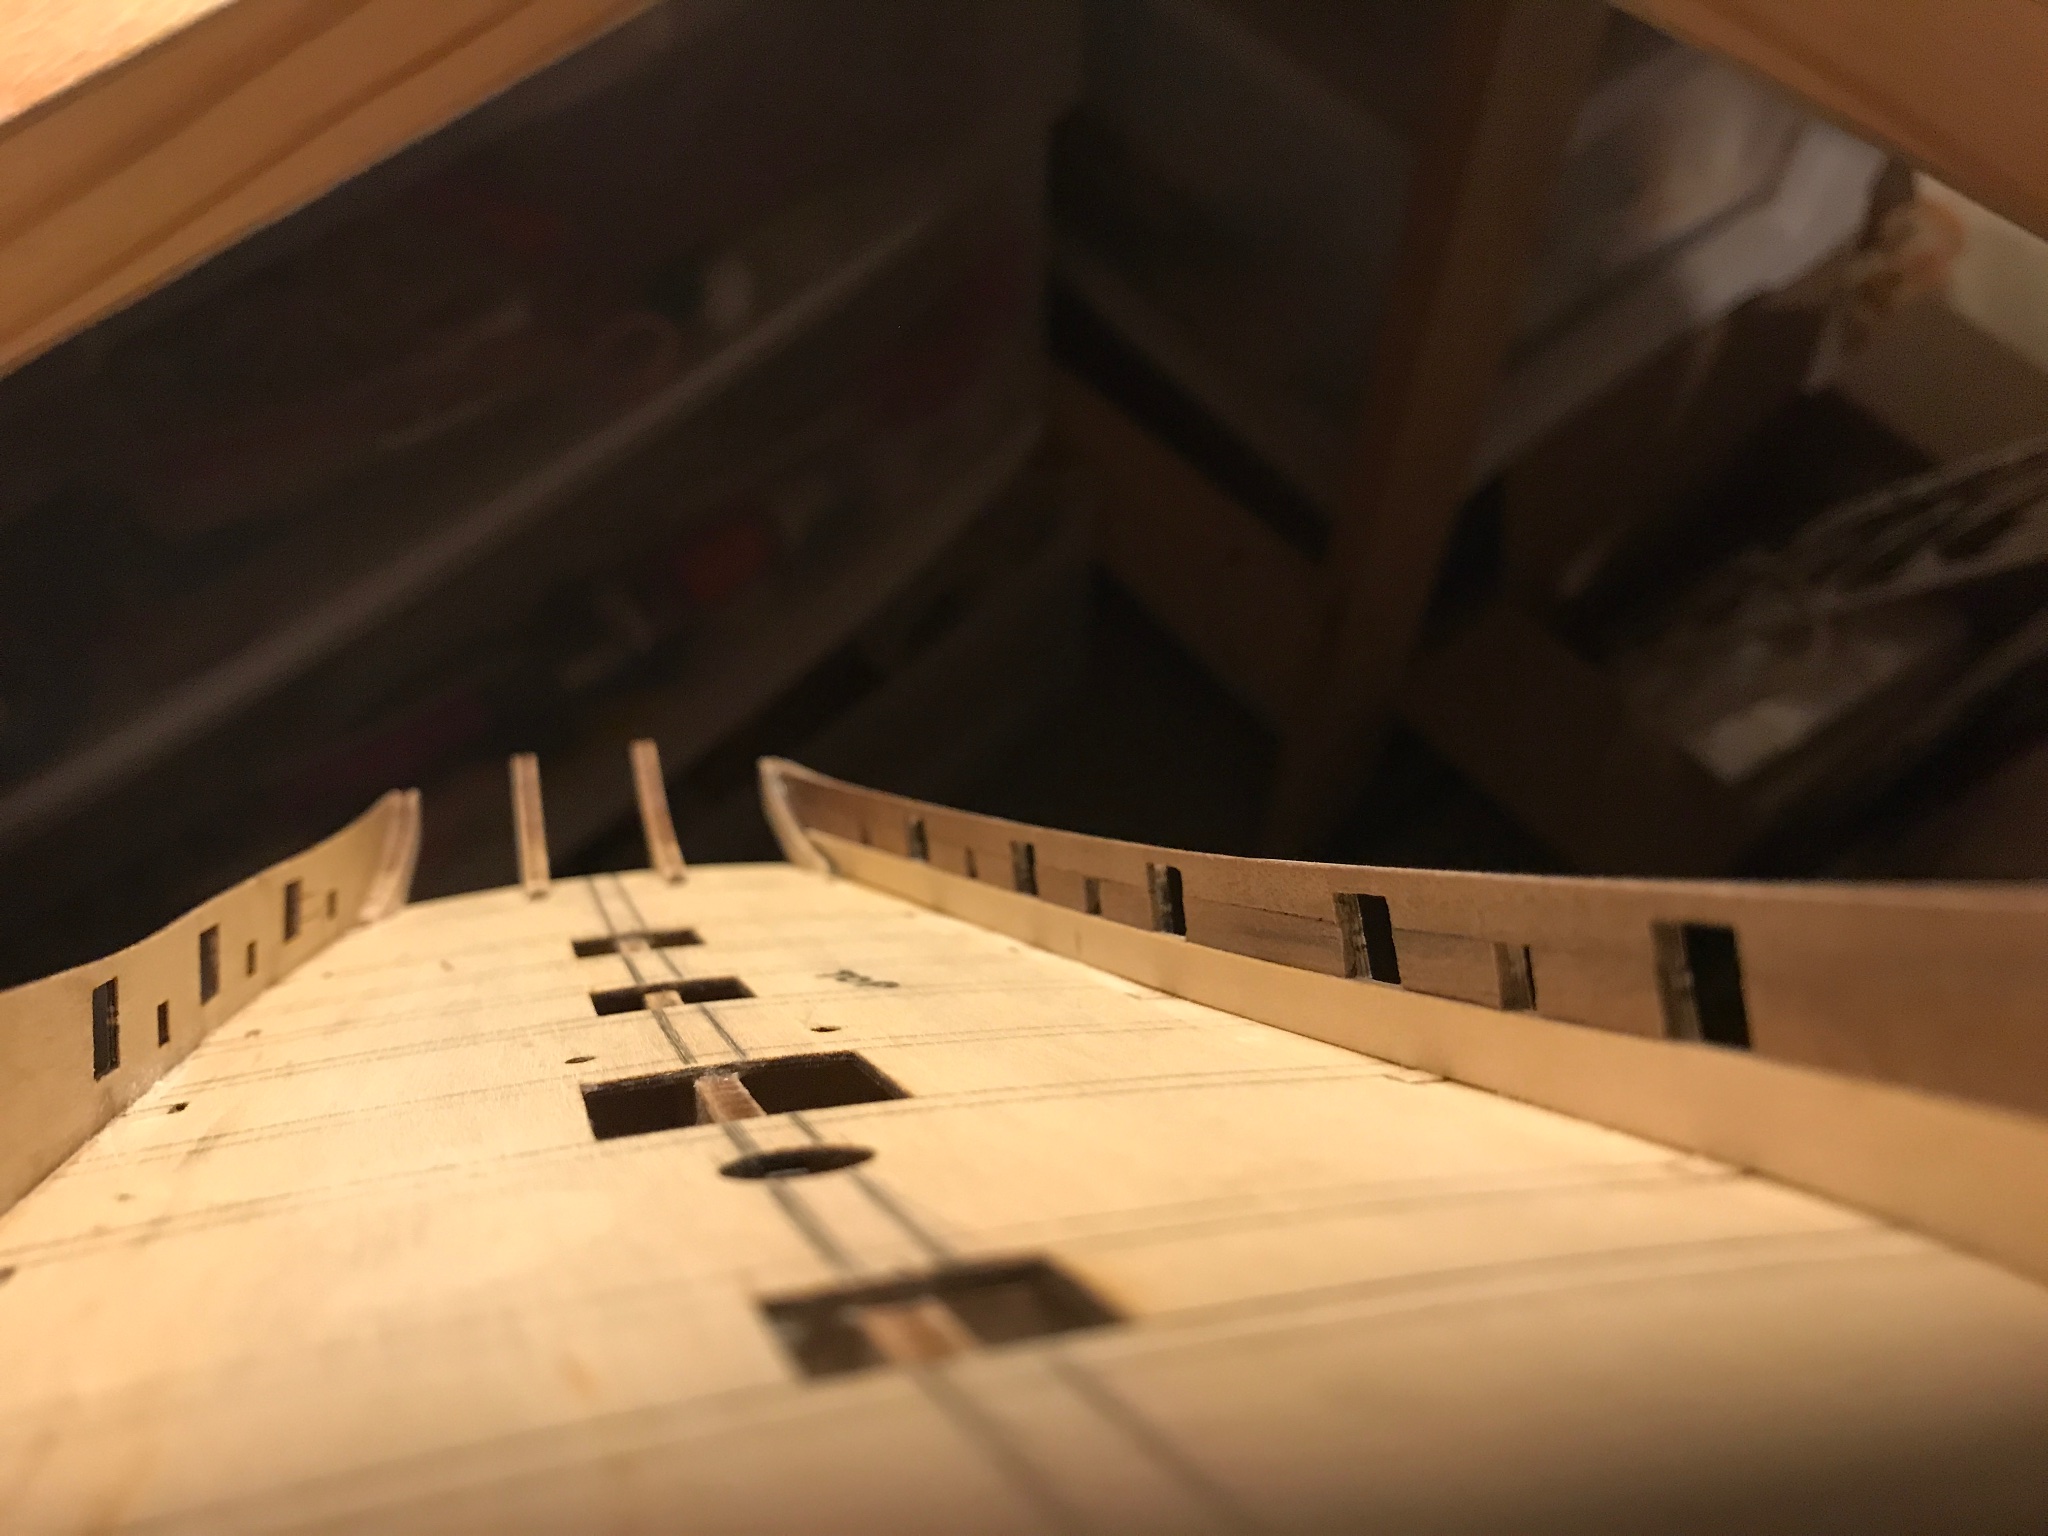
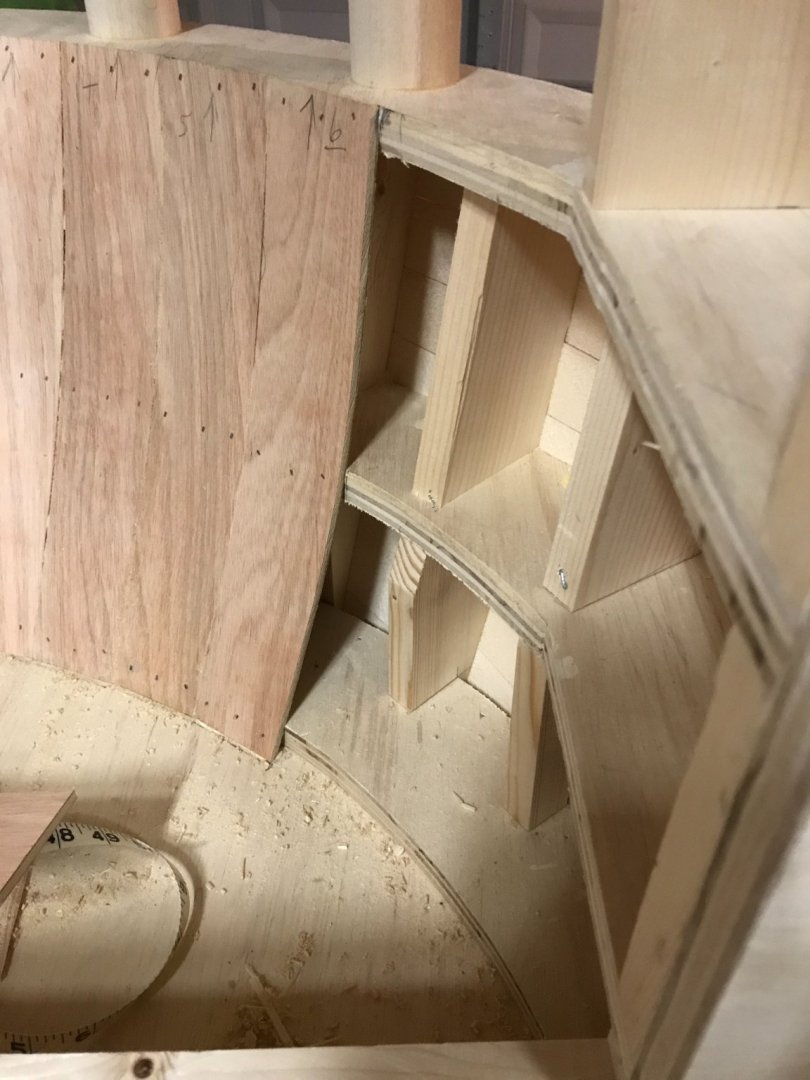
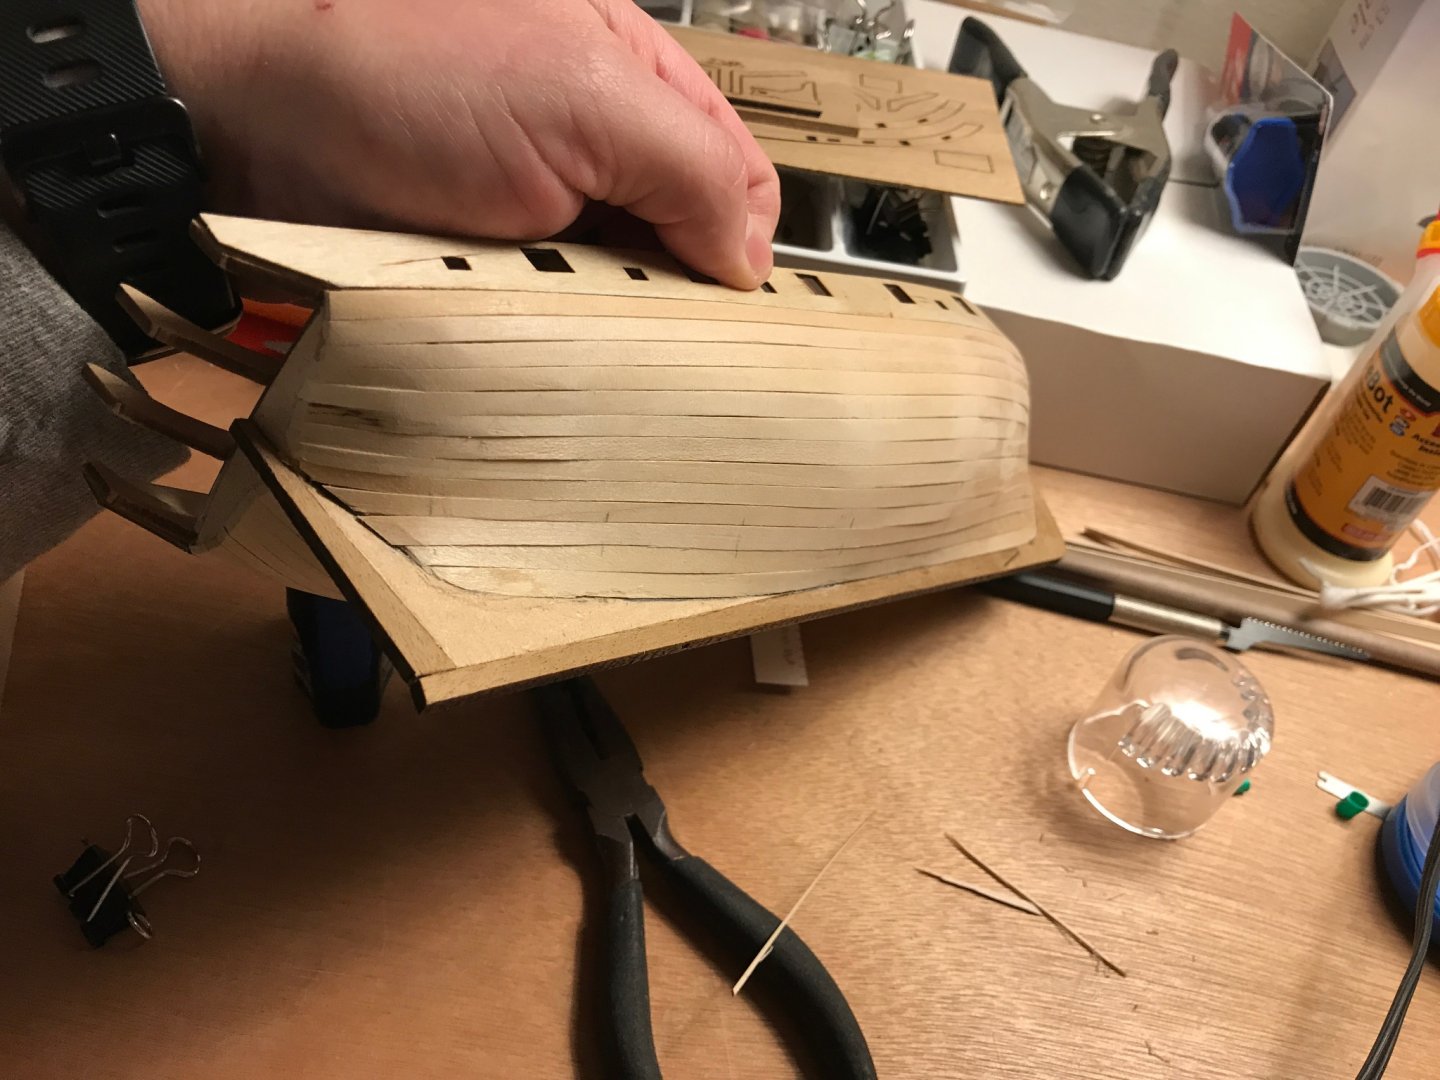
The internal planking on the stern was much easier. All flat cuts. The little holes are for the bolts. I will eventually make some doors to cover them.


-
To plank the inside of the bow, I first place a plank vertically and press it into the curve. I take another plank and lay it over and press it into the first and trace the edge. Then cut, and trim to fit. I completely guessed on how to do this but it worked out really well. Sometimes I get lucky!


-
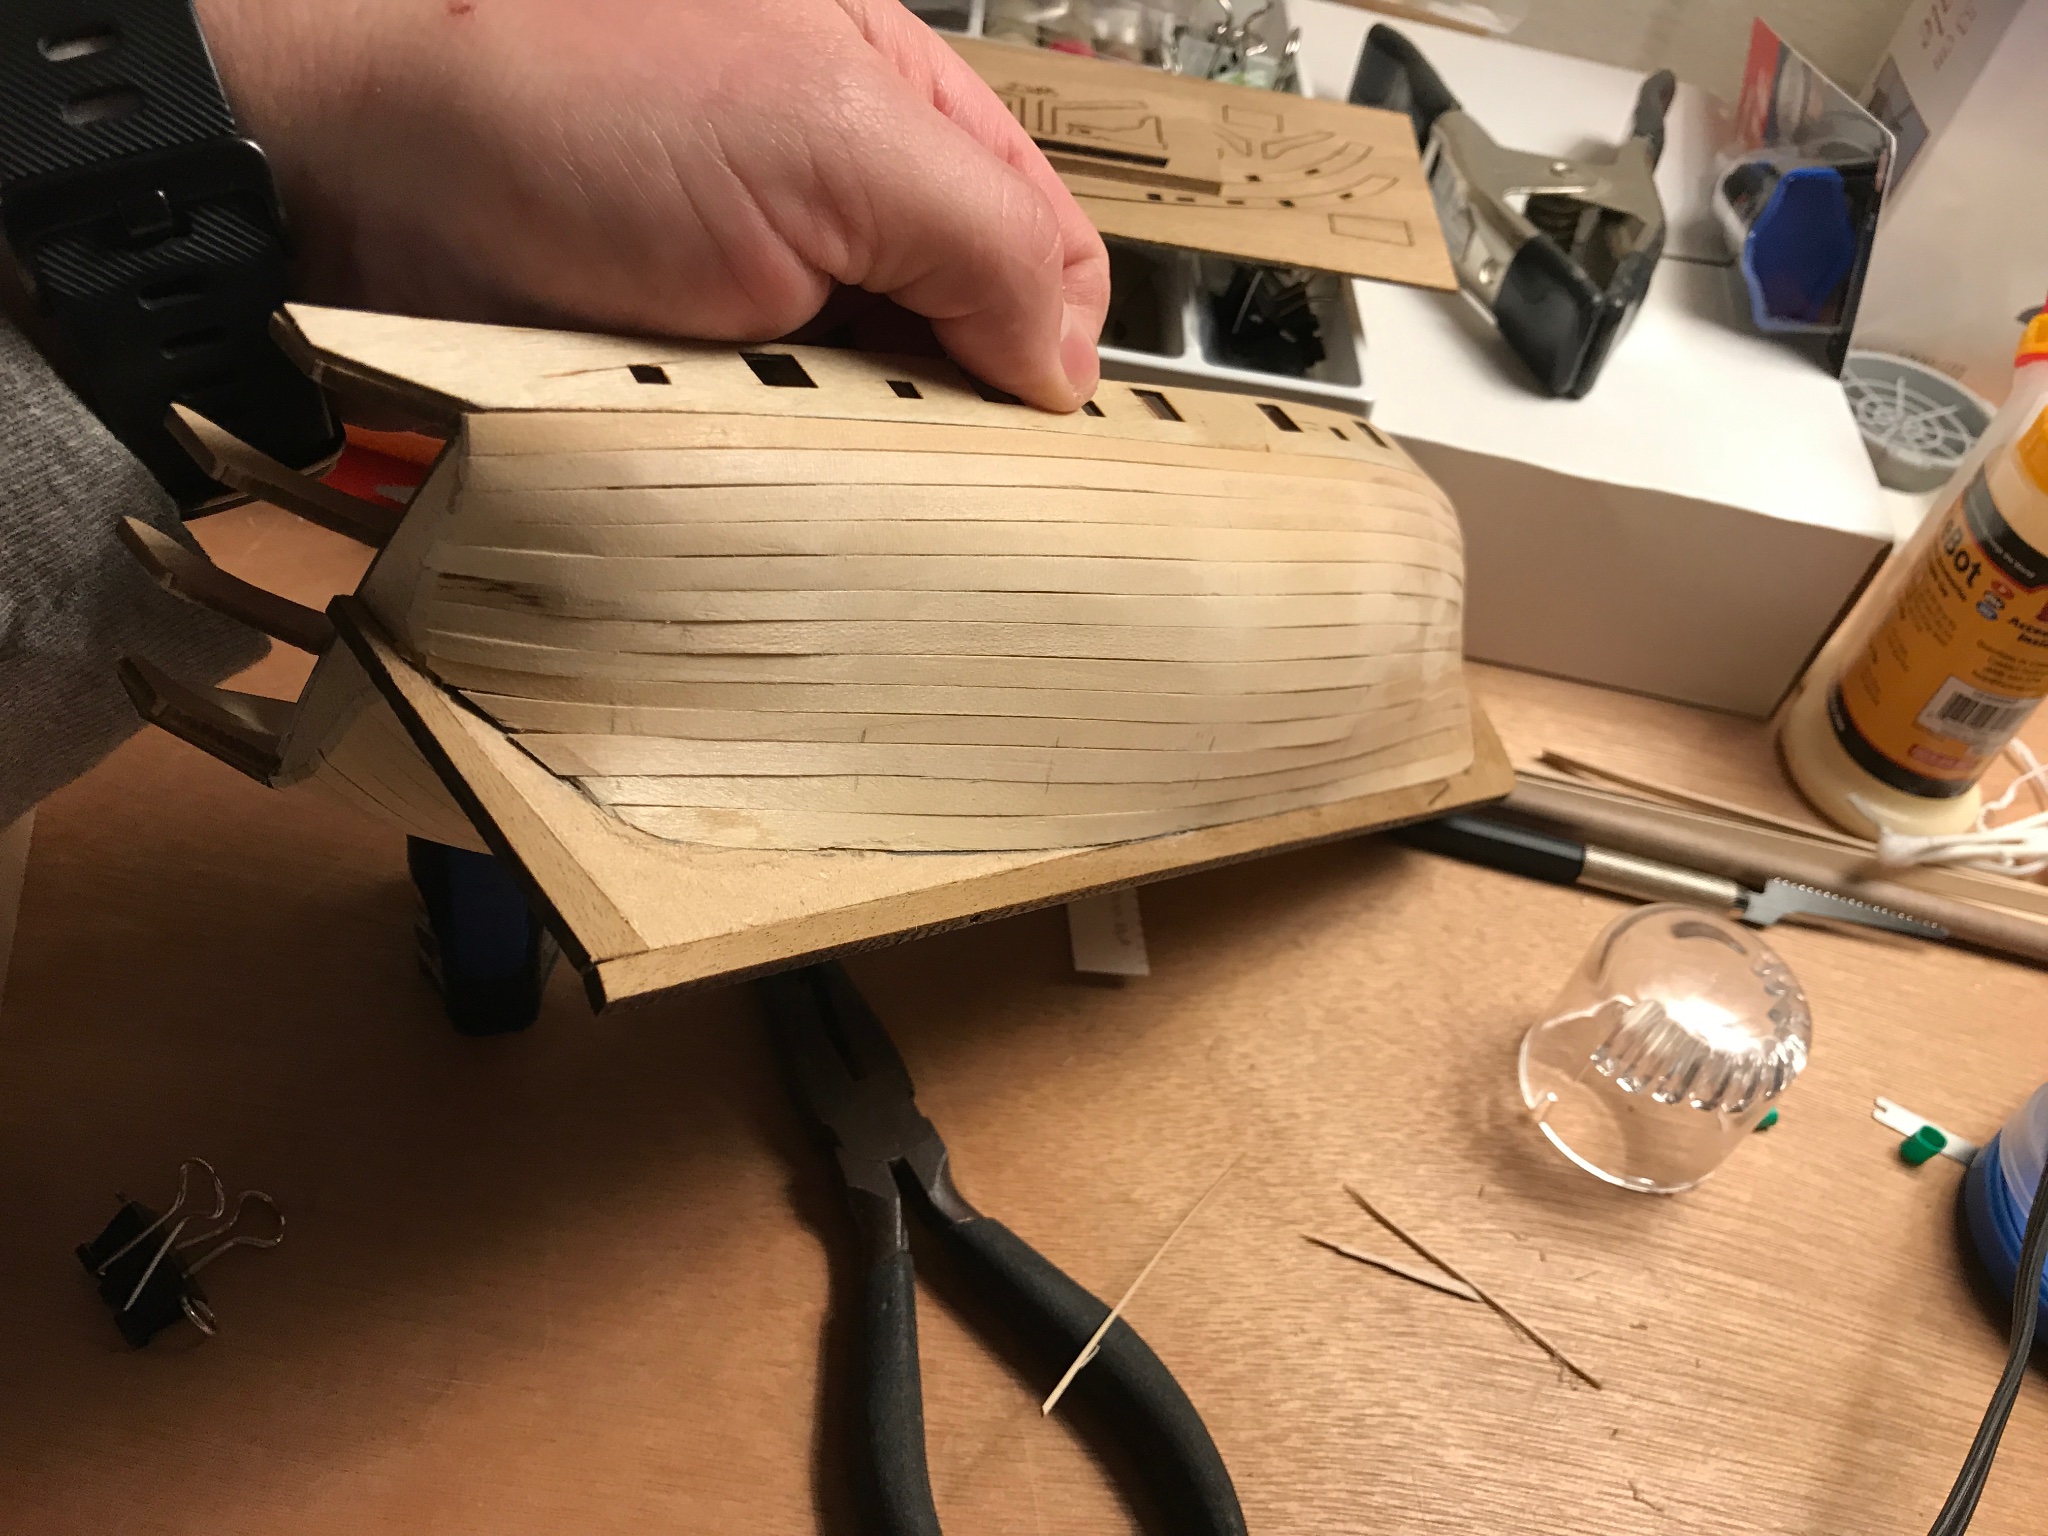
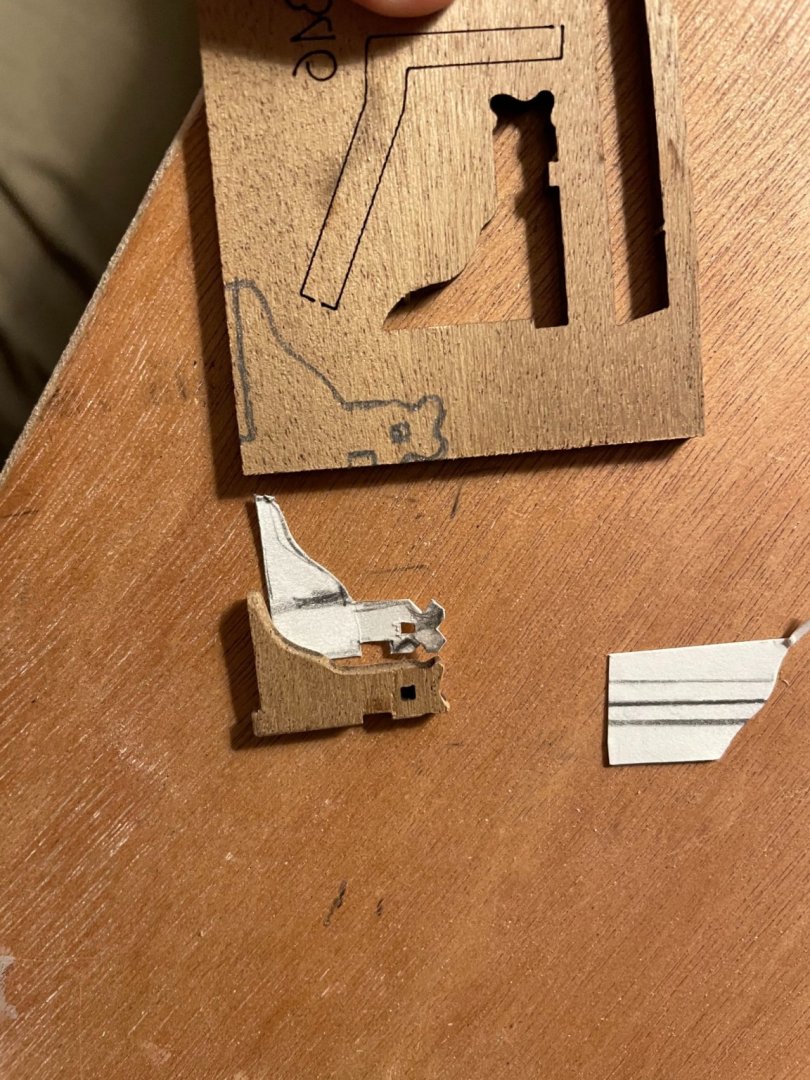
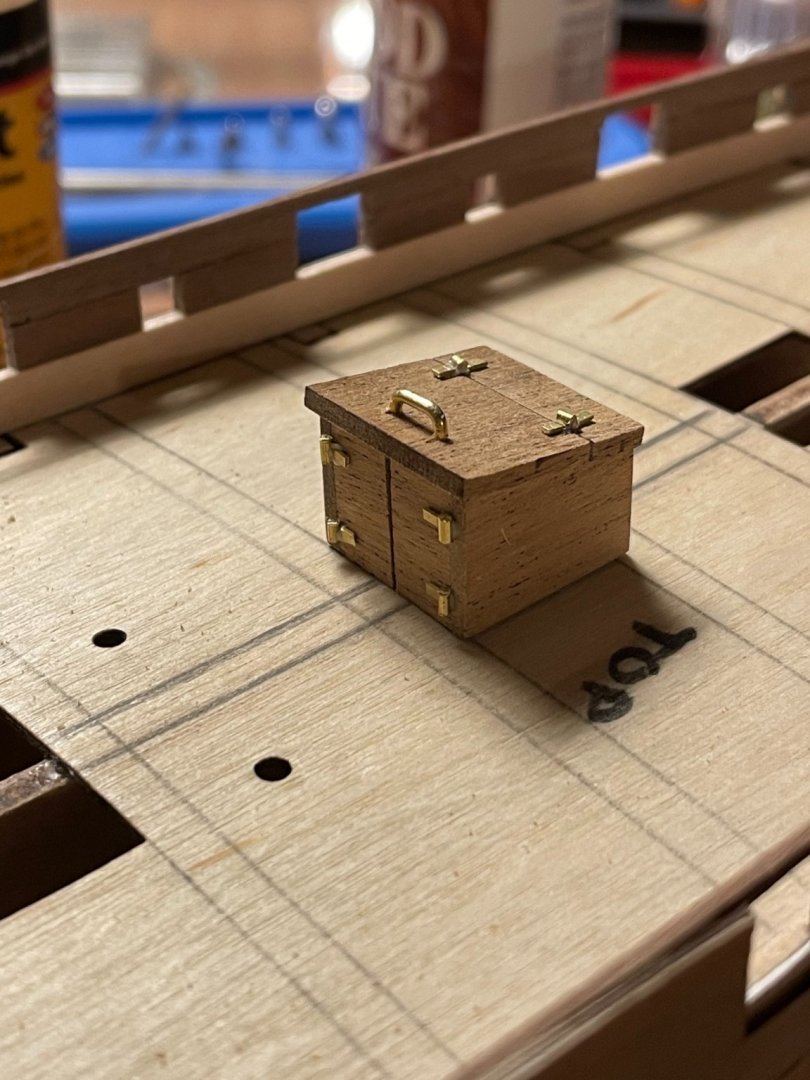
Keep forgetting to order that jewelers saw… anyway, I did some work on the companionway. I used the kit provided brass wire and stringers from the kit provided laser etch brass to make the hinges. I intend on painting this red and the hinges black. Hopefully it wasn’t a mistake to glue the hinges on before. I used a razor saw to cut the relief for the doors. On the box art, they show little handles on the doors, but if I understand how this thing works, the lid locks the doors in place from the top, so there wouldn’t be any exterior handles so I didn’t put handles. I think it would be too busy with handles and hinges anyway though.
- 139 replies
-
- 1
-
-
- Lady Nelson
- Amati
- (and 2 more)
-
But that is just the right amount of nuts don’t ya think? 🤪
-
Yes! I am always looking for an excuse to buy a new tool. I wouldn’t have thought a jewelers saw would be that cheap. Thanks for the advice!
-
It’s going to happen. I was ok with the shortening of the legs at first, but to cut them down again, there won’t be much left. I don’t have a scroll saw and my band saw is way too big for this small of work. Going to be a little touch and go with a knife but I will manage.
-
I read the instructions so many times. Finally looking at the plans for the umpteenth time I figured it out! At least I think. Lol.
- 139 replies
-
- 1
-
-
- Lady Nelson
- Amati
- (and 2 more)
-
Catching up on on the logs… you are well on your way. I honestly don’t know if what I did is right. I have seen it done both ways. I was just trying to plan ahead for the second planking, which I haven’t done yet. Fingers crossed!! Going to be following along with you!
- 114 replies
-
- 2
-
-
- Lady Nelson
- amati
- (and 1 more)
-
Absolutely the truth! Keep on keeping on!
-
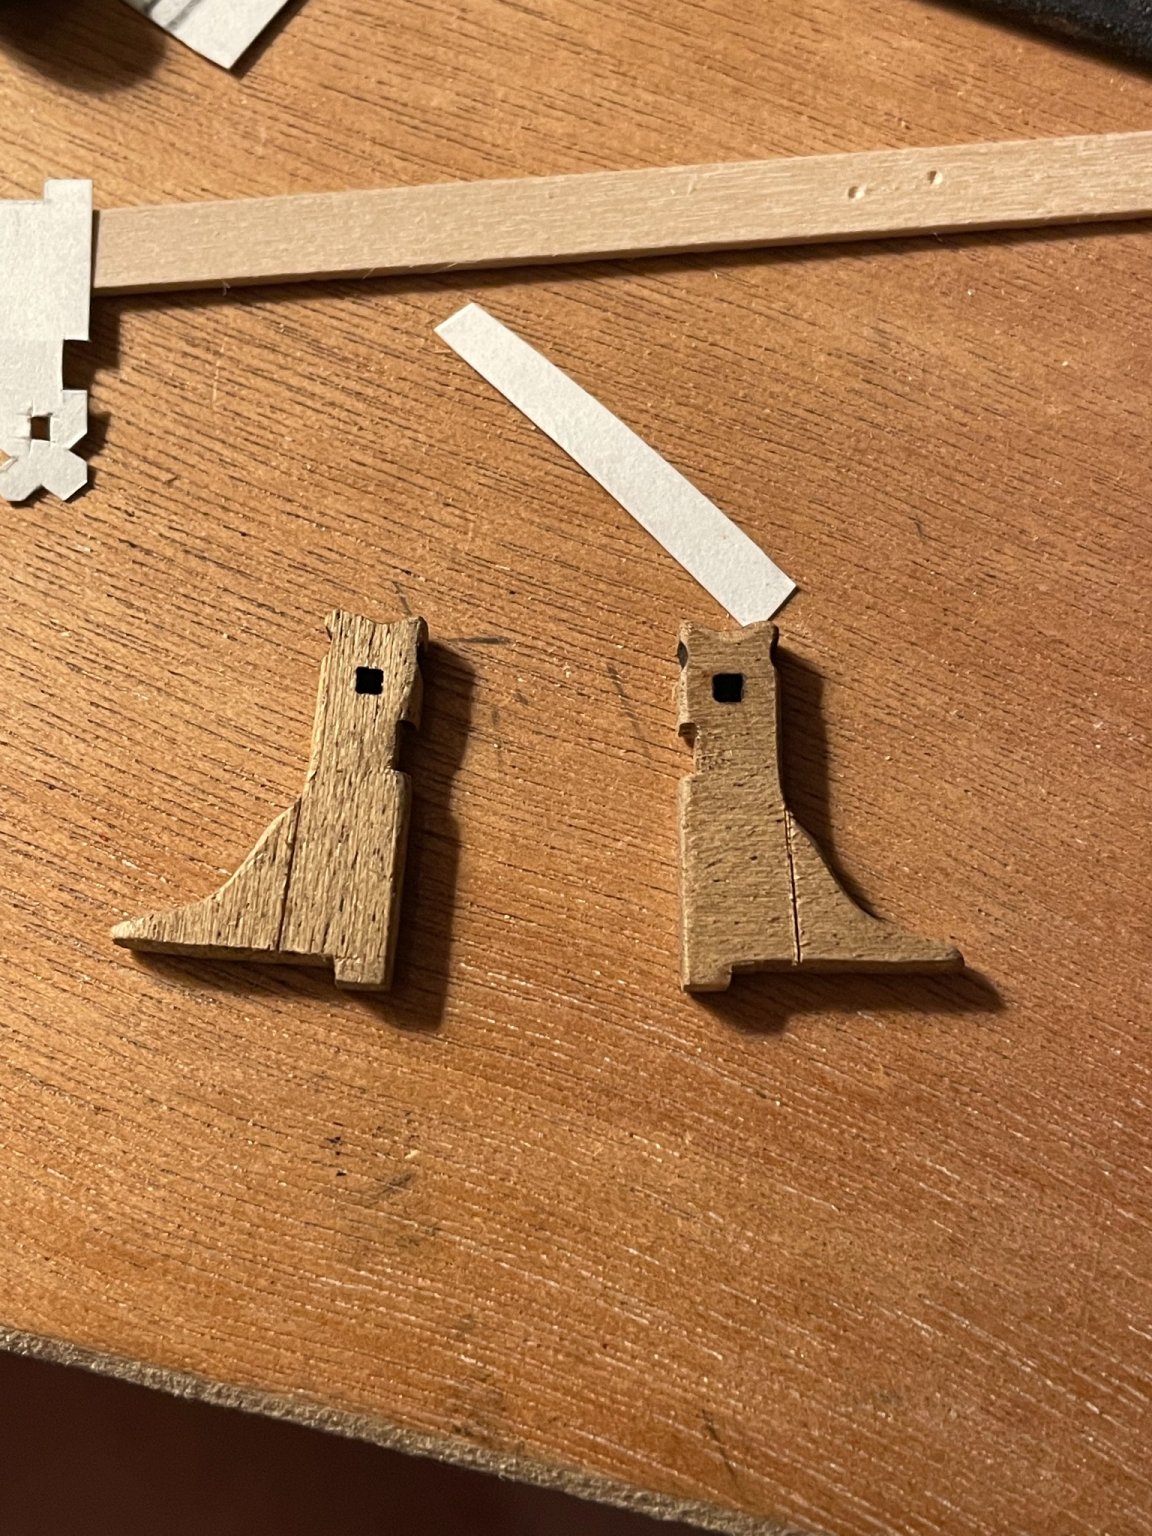
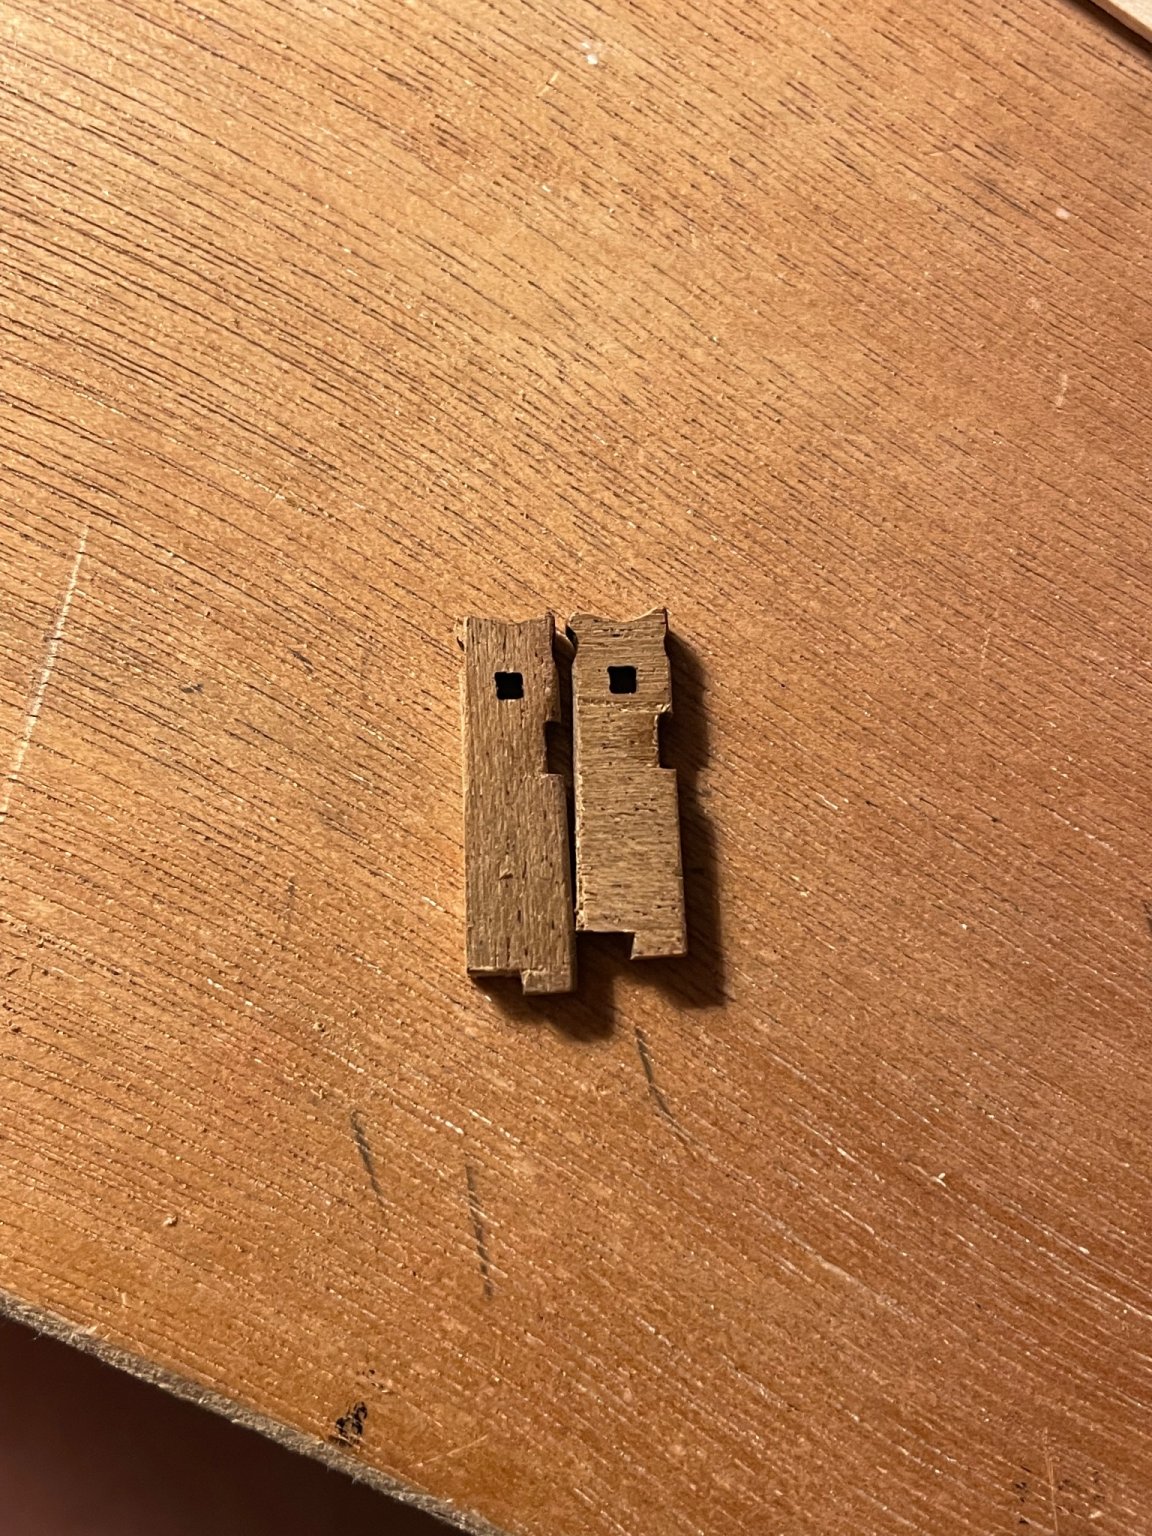
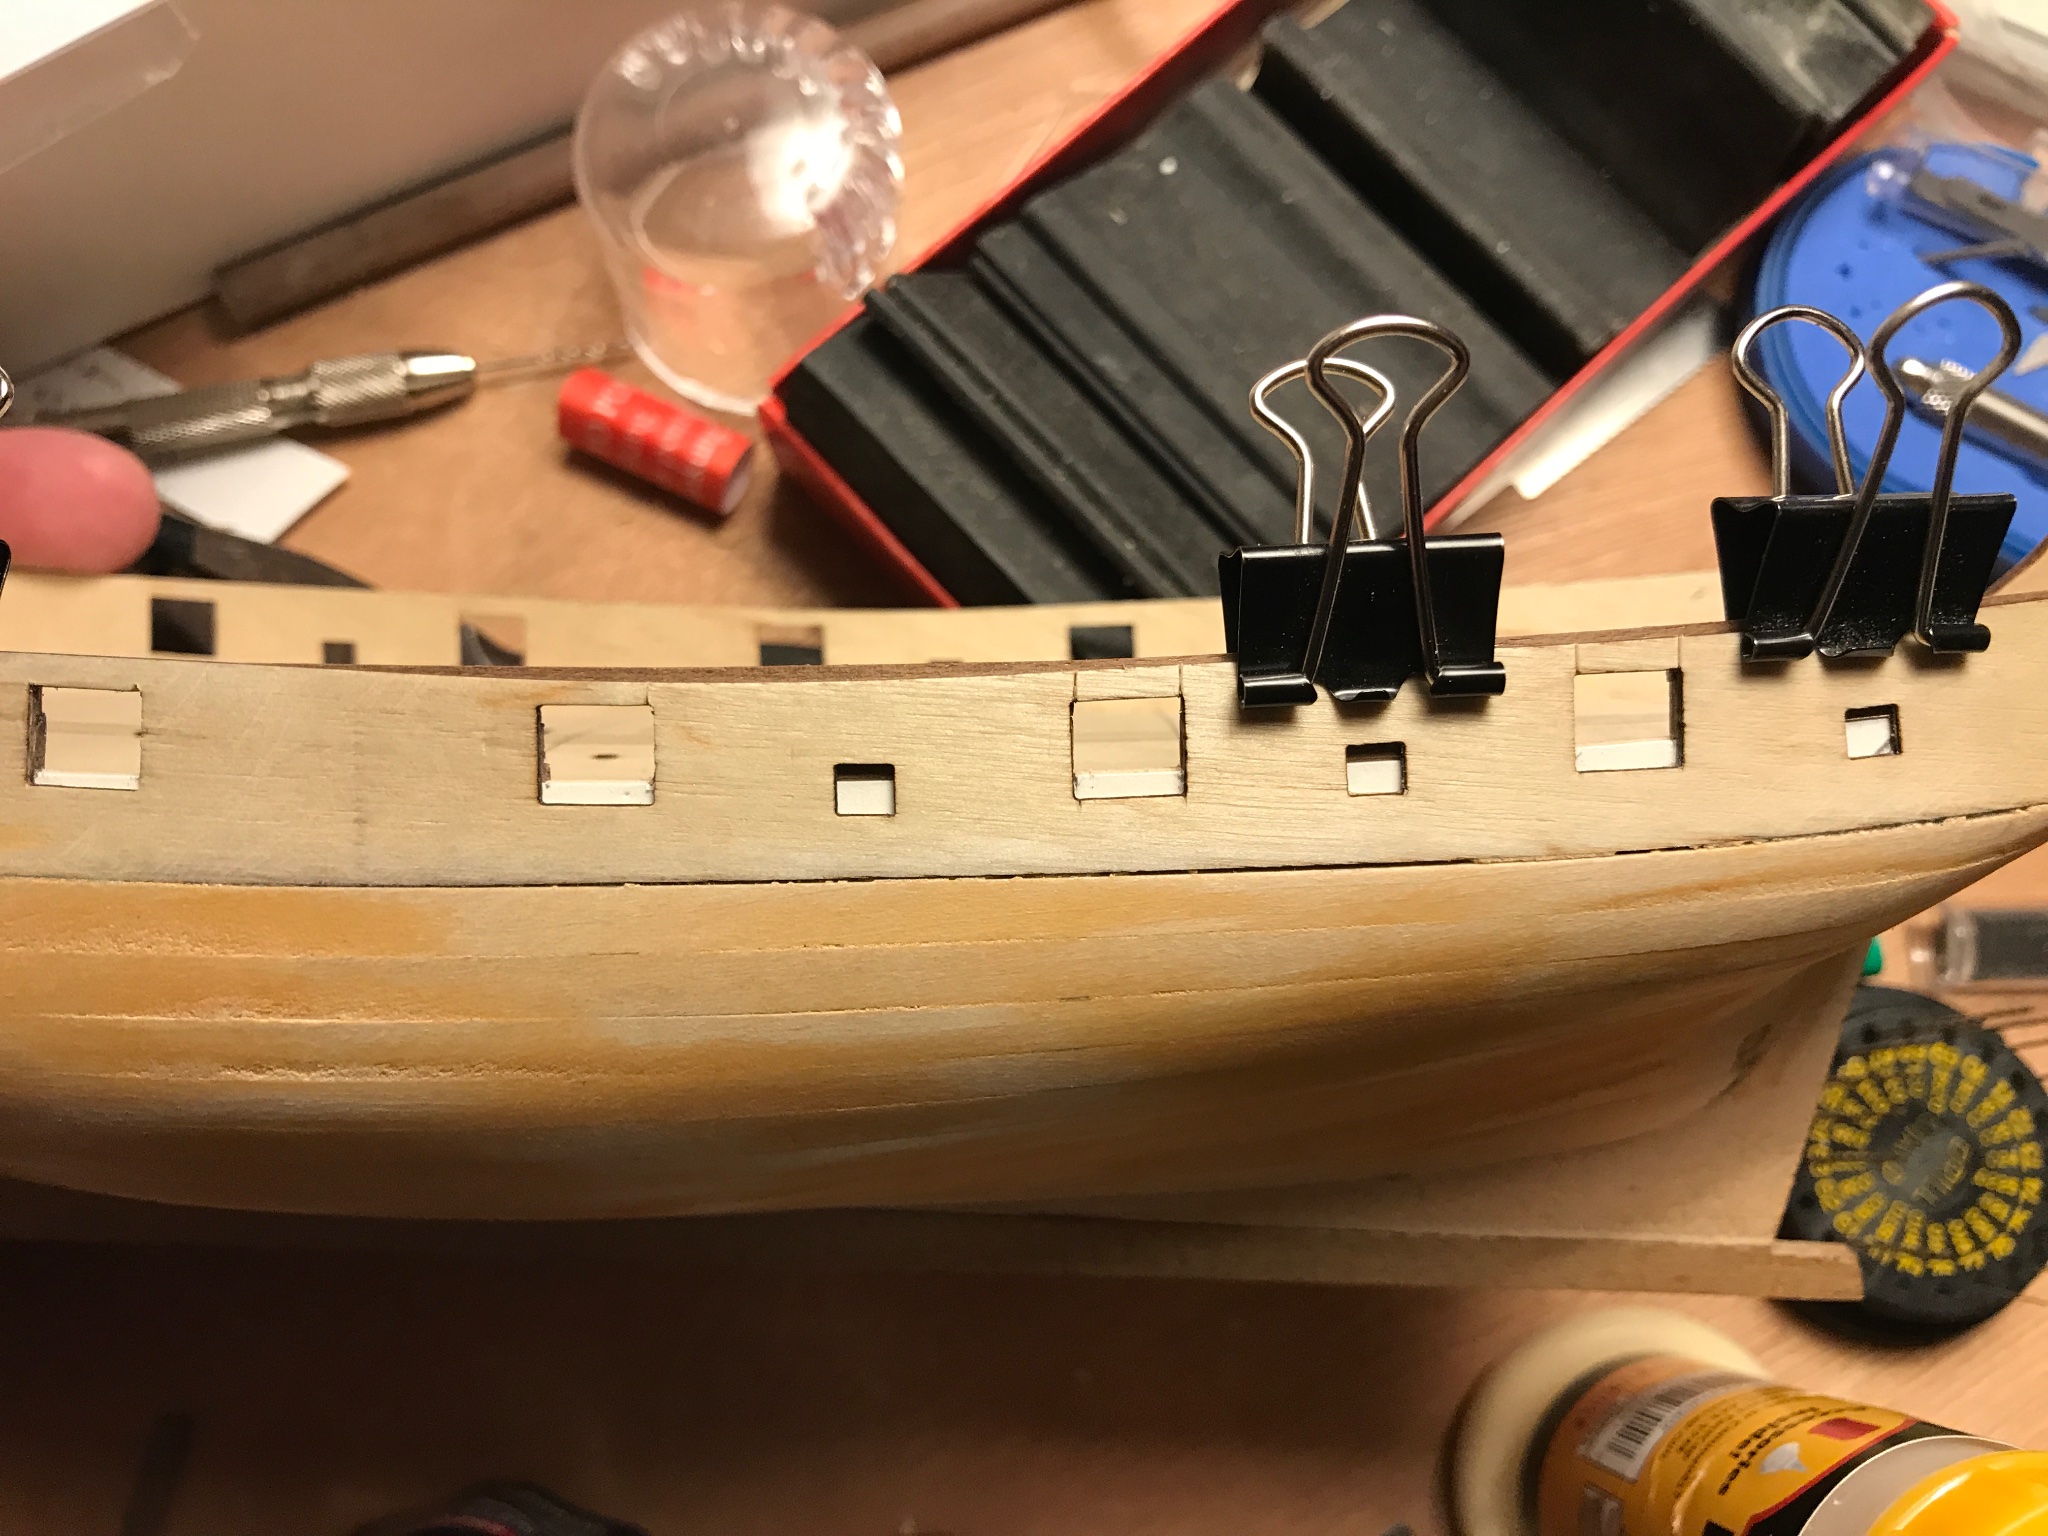
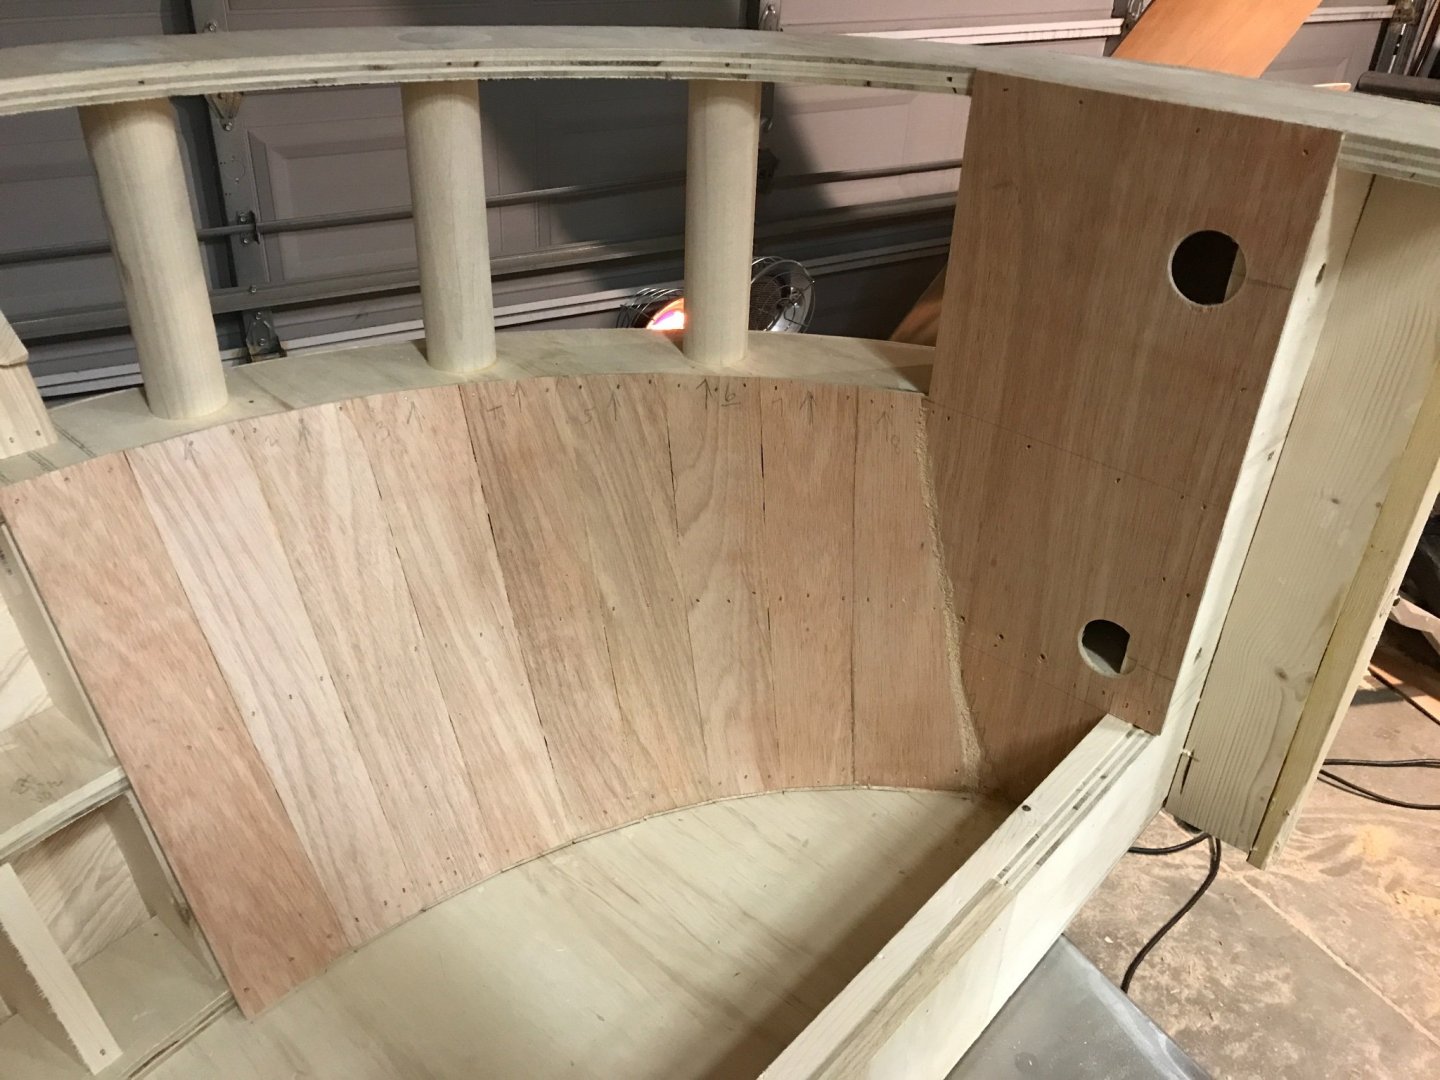
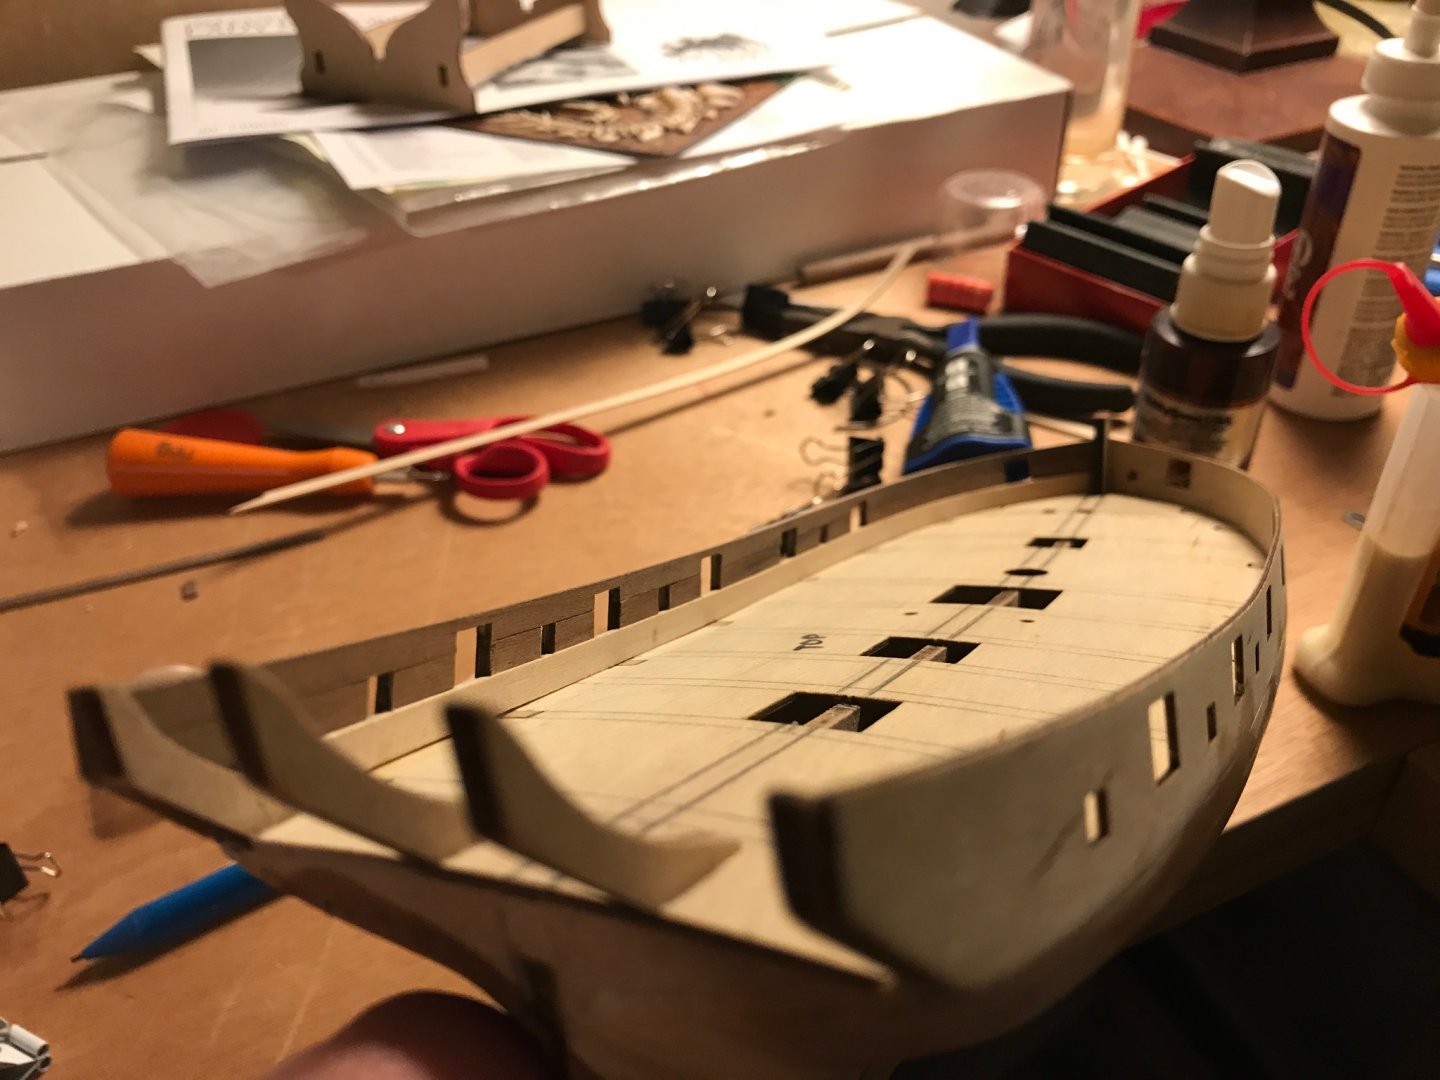
So after a long break, the pouring rain today gave me some time to make some sawdust. I finished up the inner bulwark planking. After a lot of confusion on which parts the instructions were referring too, I shaped and fitted the stern counter and fitted the planks that go under it. Going to have to do a little filling between the stern planks and the hull before second planking. I held the stern post in place with a binder clip while I fit the stern planks. I don’t want to glue the post on until after the second planking is done. I keep finding excuses to not start the deck planking, but I also want to make sure I fully understand how all of the deck structures fit together before I plank the deck. I needed to cut the notch for the bowsprit and also found (similar to Glenn’s build) that the bit was too high. I found that if I cut 1.5mm off the bottom of the vertical pieces it lined up very nicely, however, as I write this I realize that I will have to take another 0.6mm off to account for the deck plank thickness. I might have to scratch build one after all. I also sanded a slight groove in the horizontal piece so the bowsprit would site down and be centered with the hole in the vertical pieces.


- 139 replies
-
- 3
-
-
- Lady Nelson
- Amati
- (and 2 more)
-
I Thank you for the follow! It has been a bit, but I got some work done today. You will probably pass me pretty quickly. Hard to find the time to work. Might try to squeeze some time in here and there after the kids go to bed.
-
I feel like I can make do with the wood working side of things. The rigging has me a bit worried. It is an art within itself. I guess I will find out soon enough if my thumbs can manage!
-
Thank you! You are building the ship that got me into this hobby. I hope to build her some day once my skills are up to the challenge. If I have it my way it will be a scratch build in 1/64...but I have a long way to go before that will happen.
- 139 replies
-
- 1
-
-
- Lady Nelson
- Amati
- (and 2 more)
-
No worries and for sure no hard feelings! I appreciate you checking in on my progress. No way I can keep up on your pace. I think you have built 2-1/2 ships to my 1/16th! Lol. I think I understand your comment about the deck and sheer... the ports should follow the deck, but the sheer may be different depending on the ship? For the Lady Nelson, the deck and sheer are pretty much the same I think. I moved the ports to be parallel with the deck. I believe this would be correct typically? Something in me was twitching to not make them parallel with the deck. Hopefully that was right! The starboard side is coming along much more quickly than the port now that I know what I am doing.
- 139 replies
-
- 1
-
-
- Lady Nelson
- Amati
- (and 2 more)
-
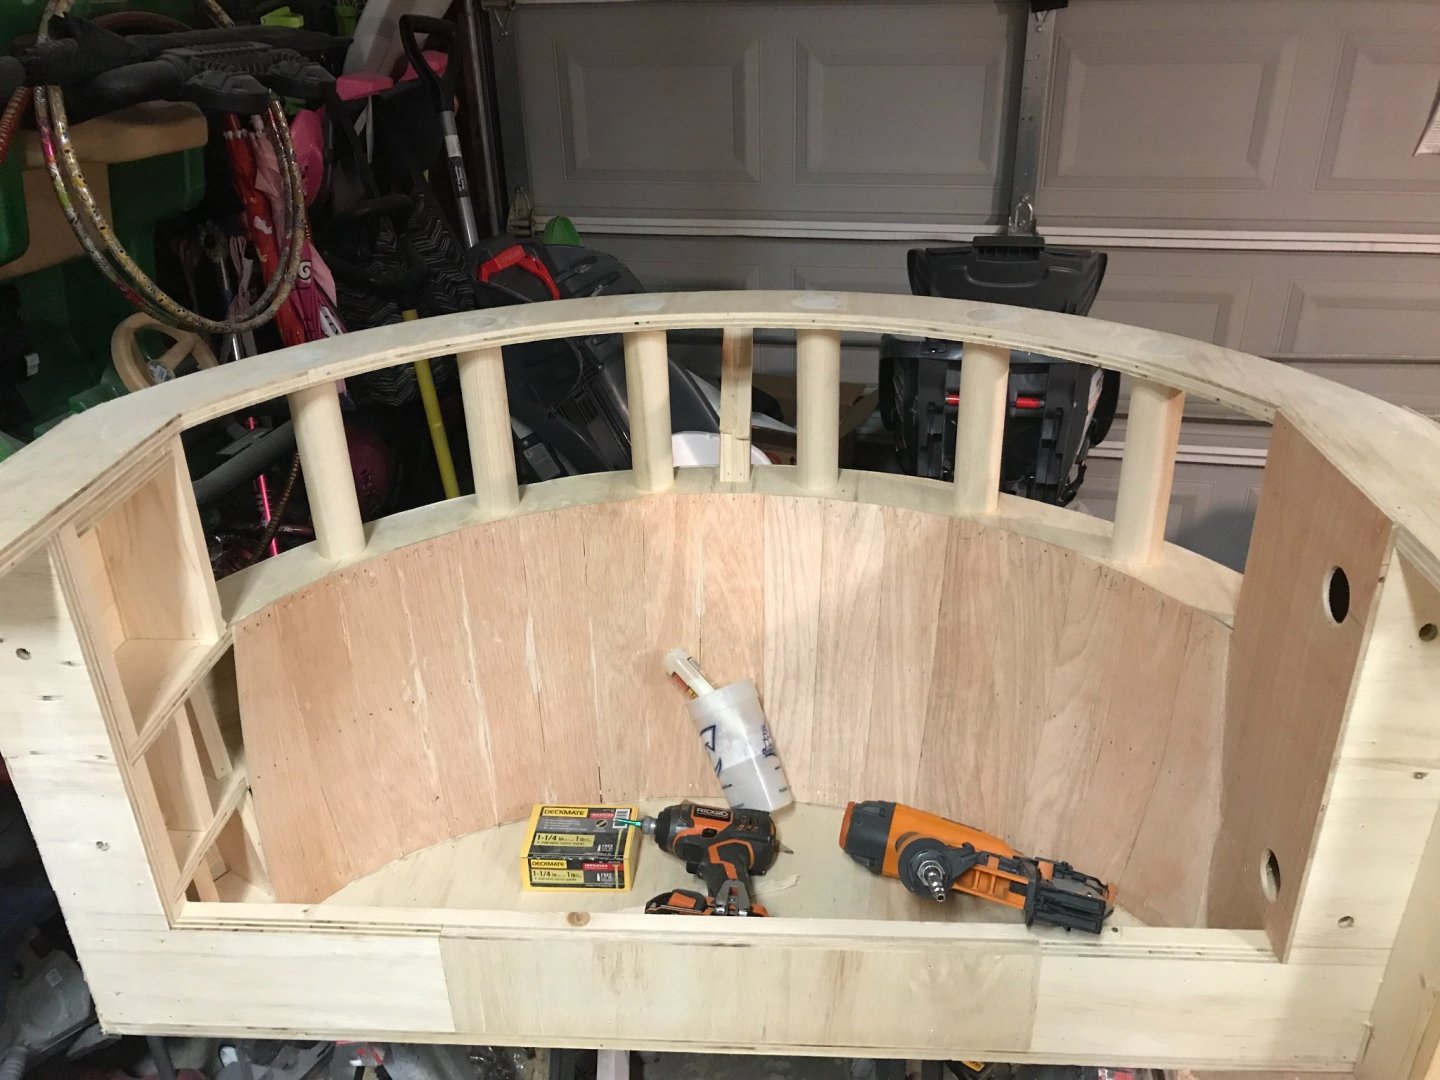
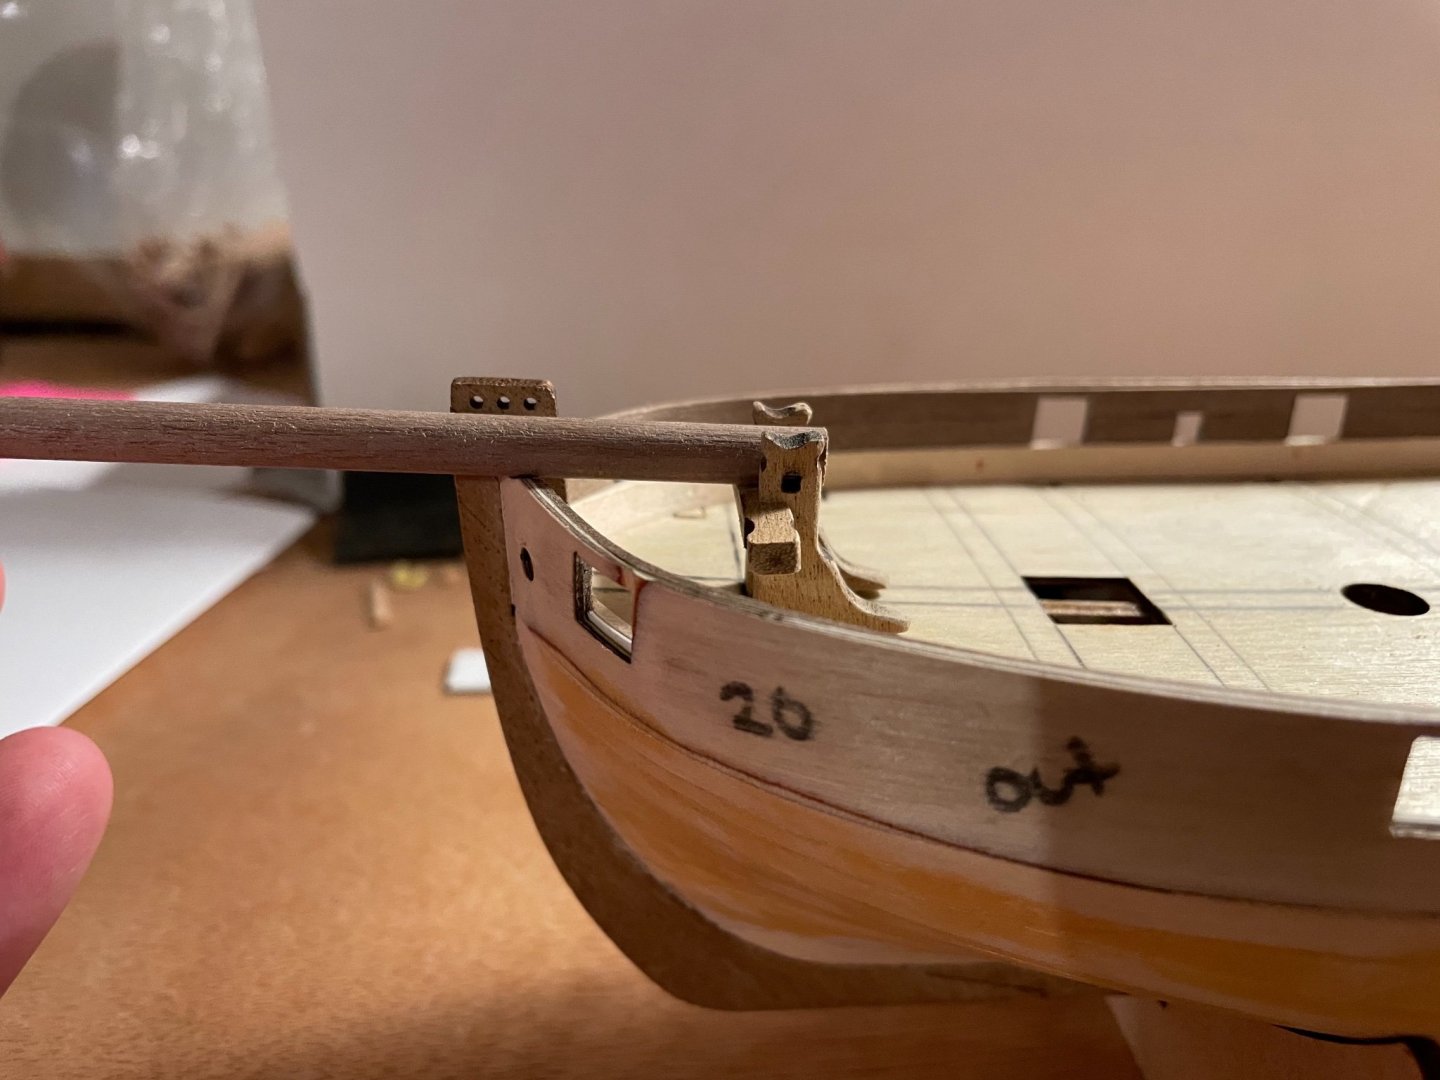
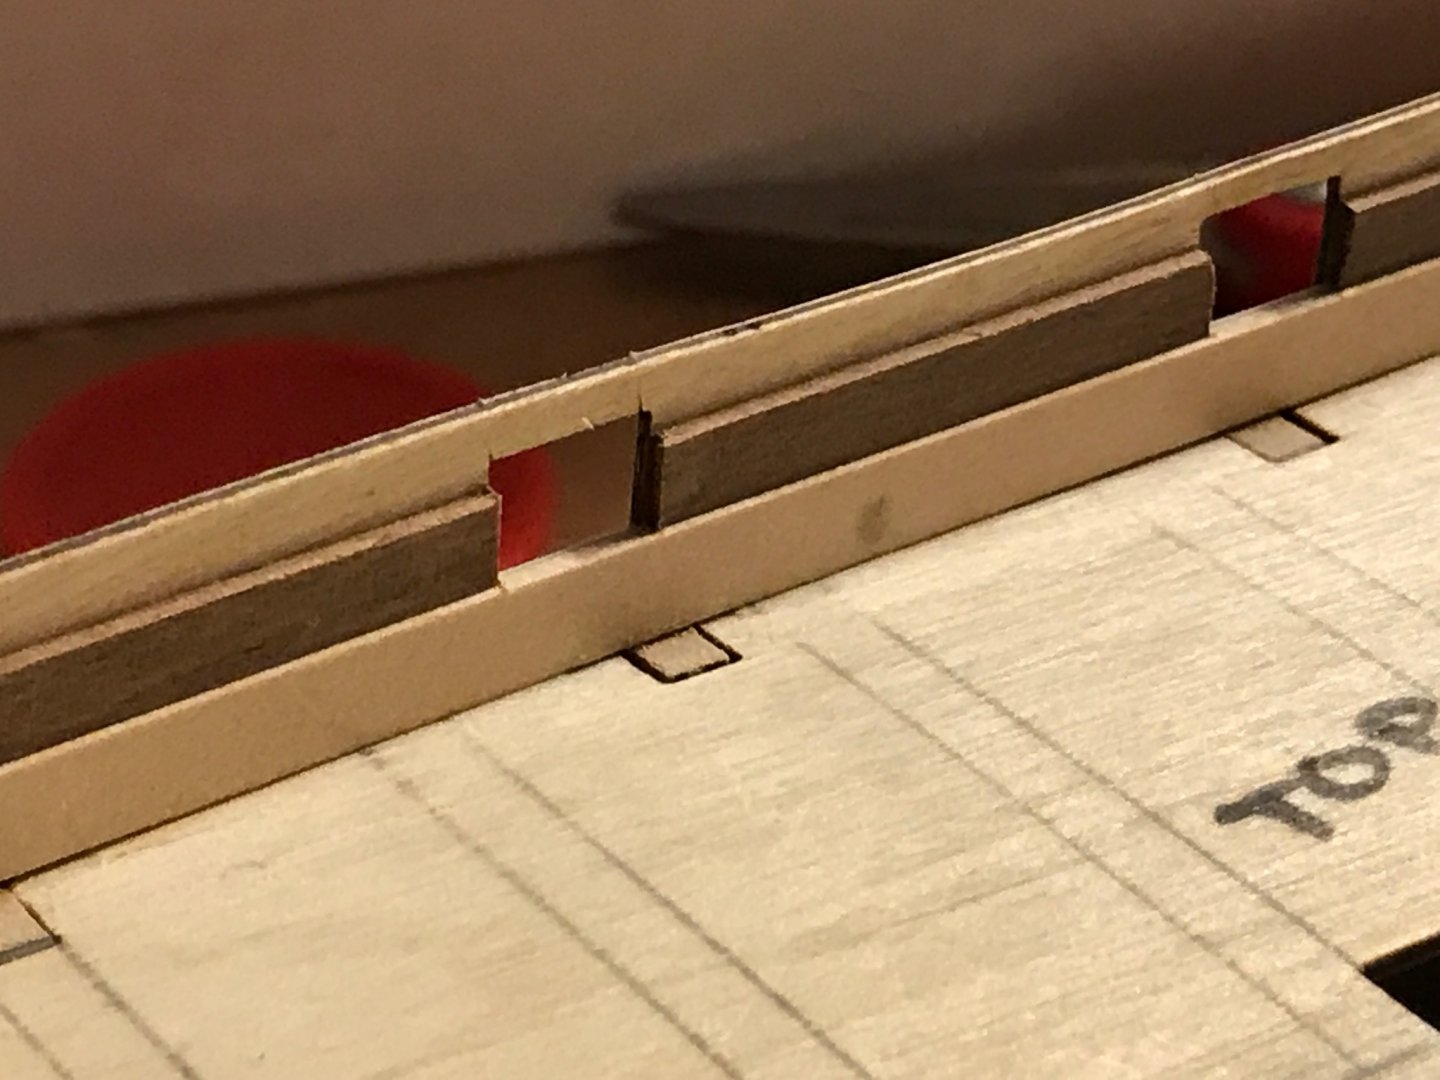
Found some time to work on the Lady Nelson and I have managed to complete the inner bulwark planking on the port side. Even though it was a little extra work to adjust the positioning of the gun and sweep ports I think the end result was worth it. The gun port closest to the bow didn’t need any adjusting, and it got worse as I went back to the stern. The last sweep port was almost completely covered by the spirketting plank!


- 139 replies
-
- 2
-
-
- Lady Nelson
- Amati
- (and 2 more)