CDW
-
Posts
7,260 -
Joined
-
Last visited
Content Type
Profiles
Forums
Gallery
Events
Everything posted by CDW
-
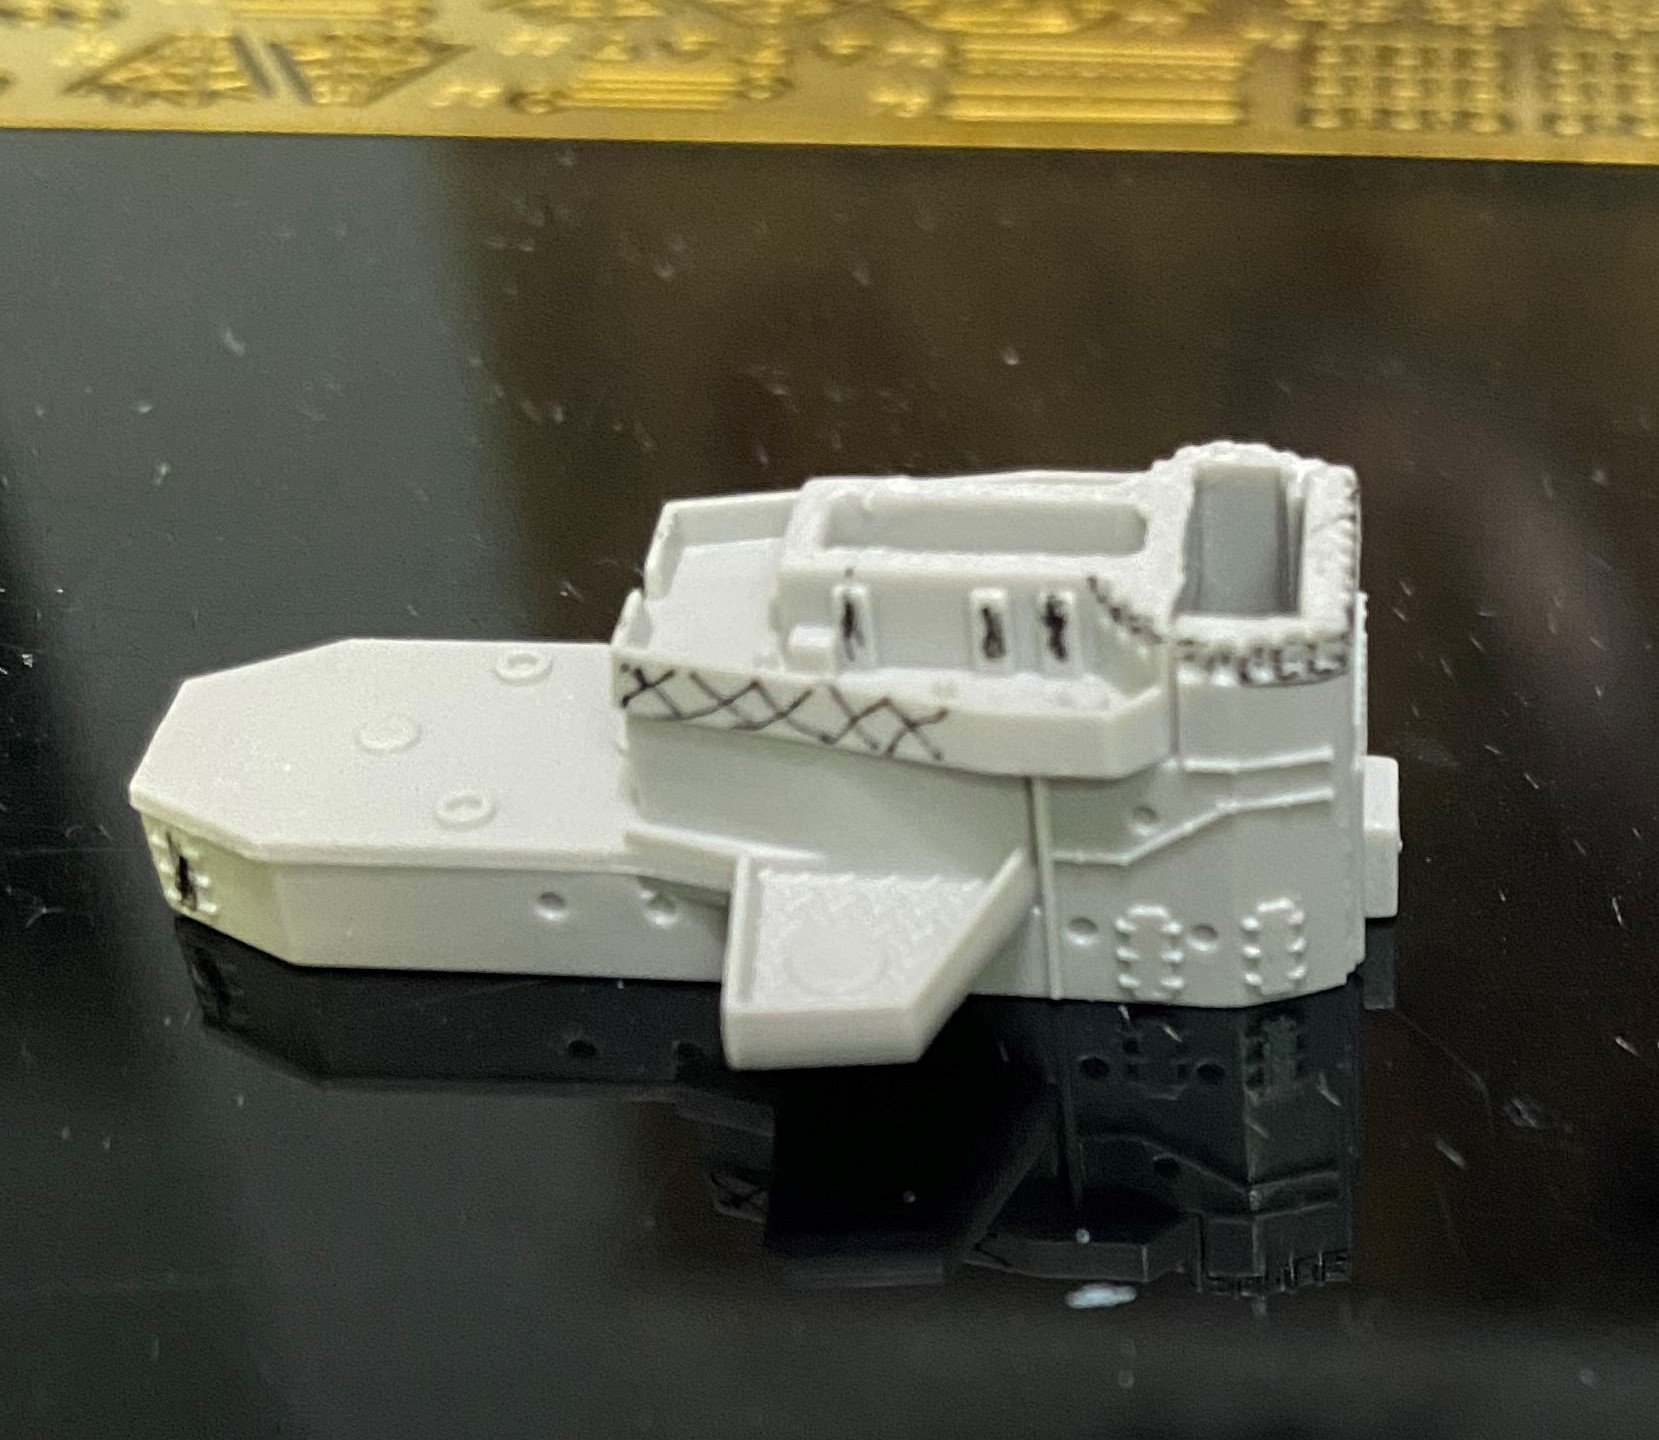
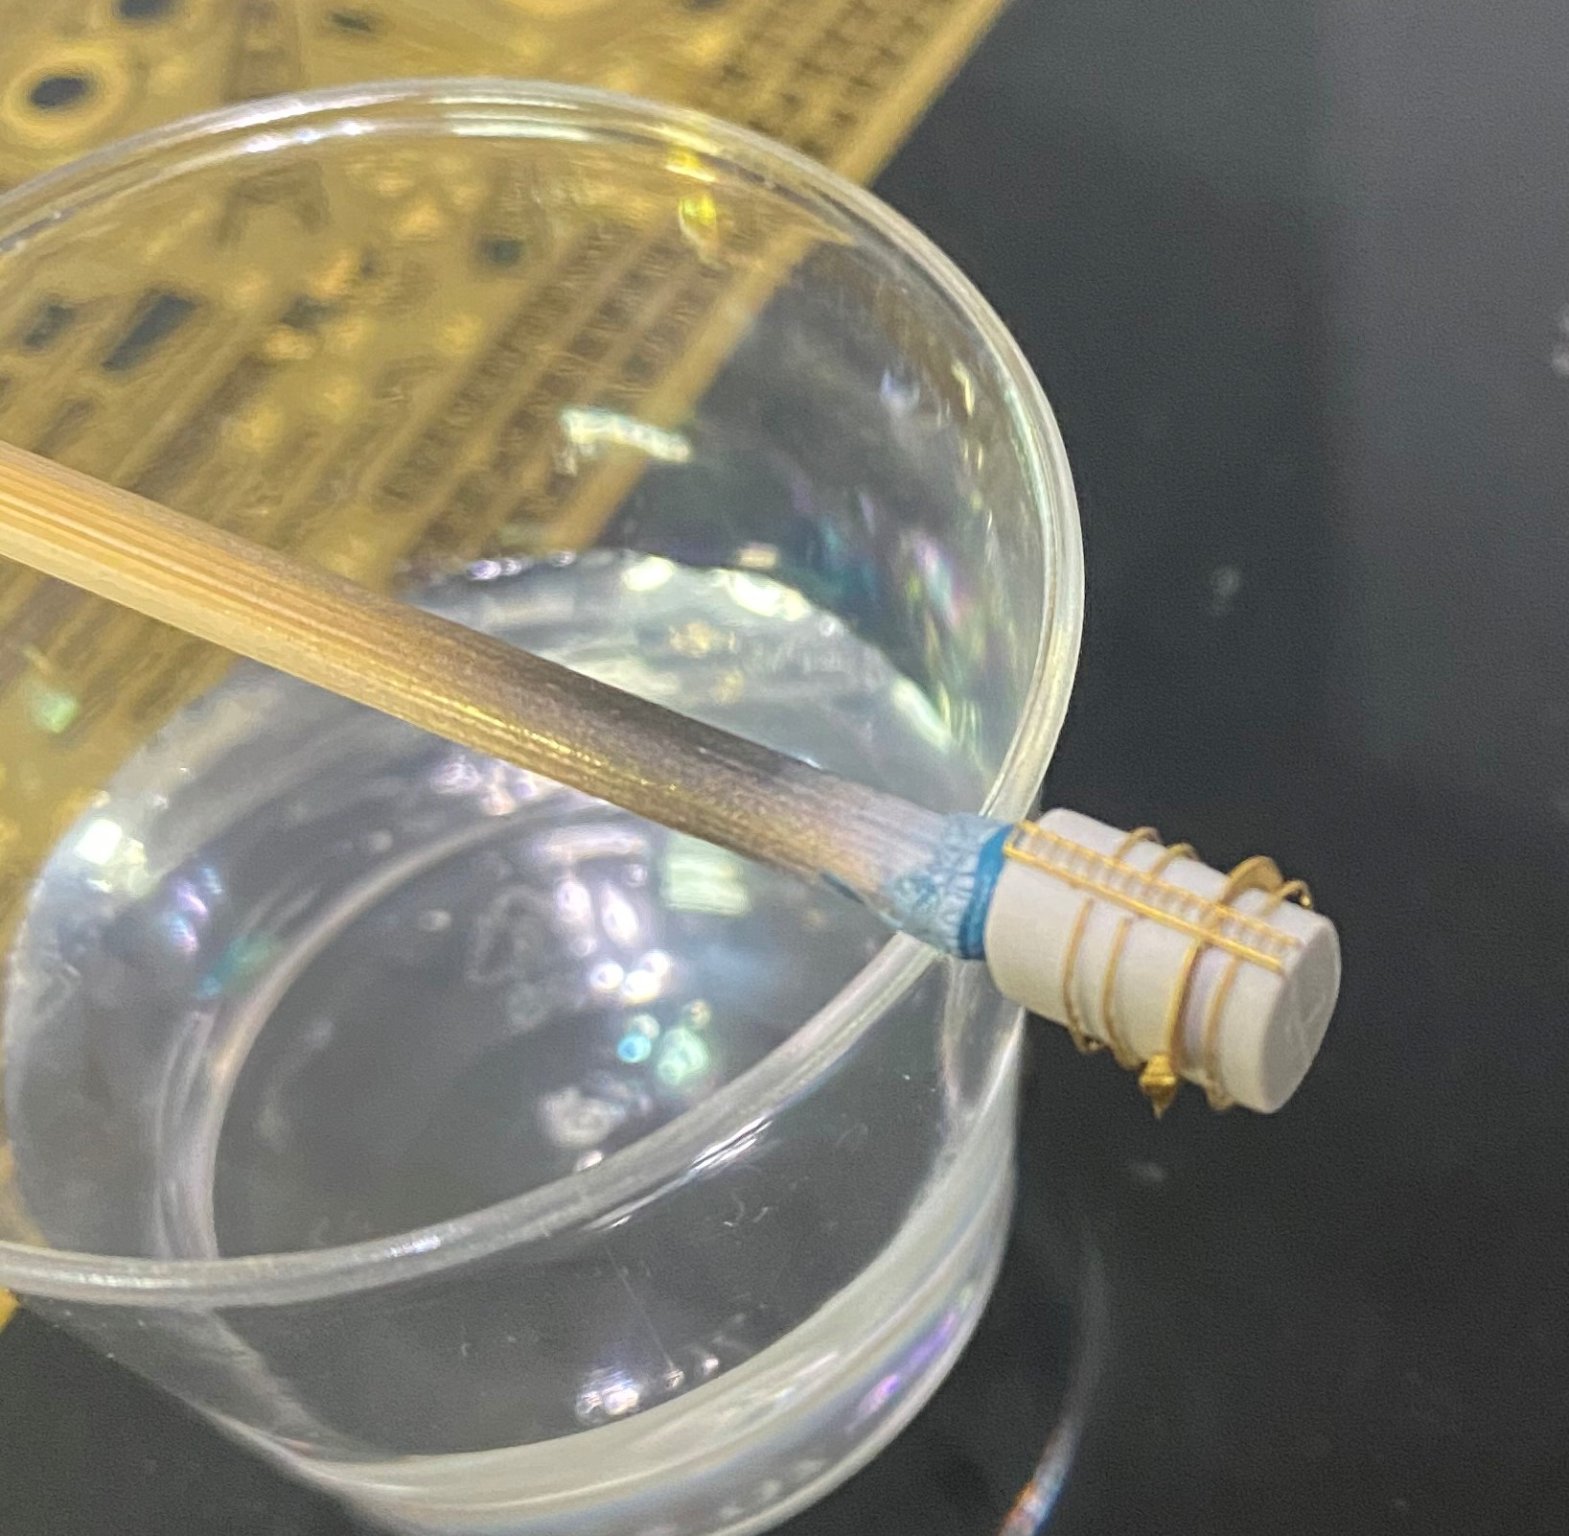
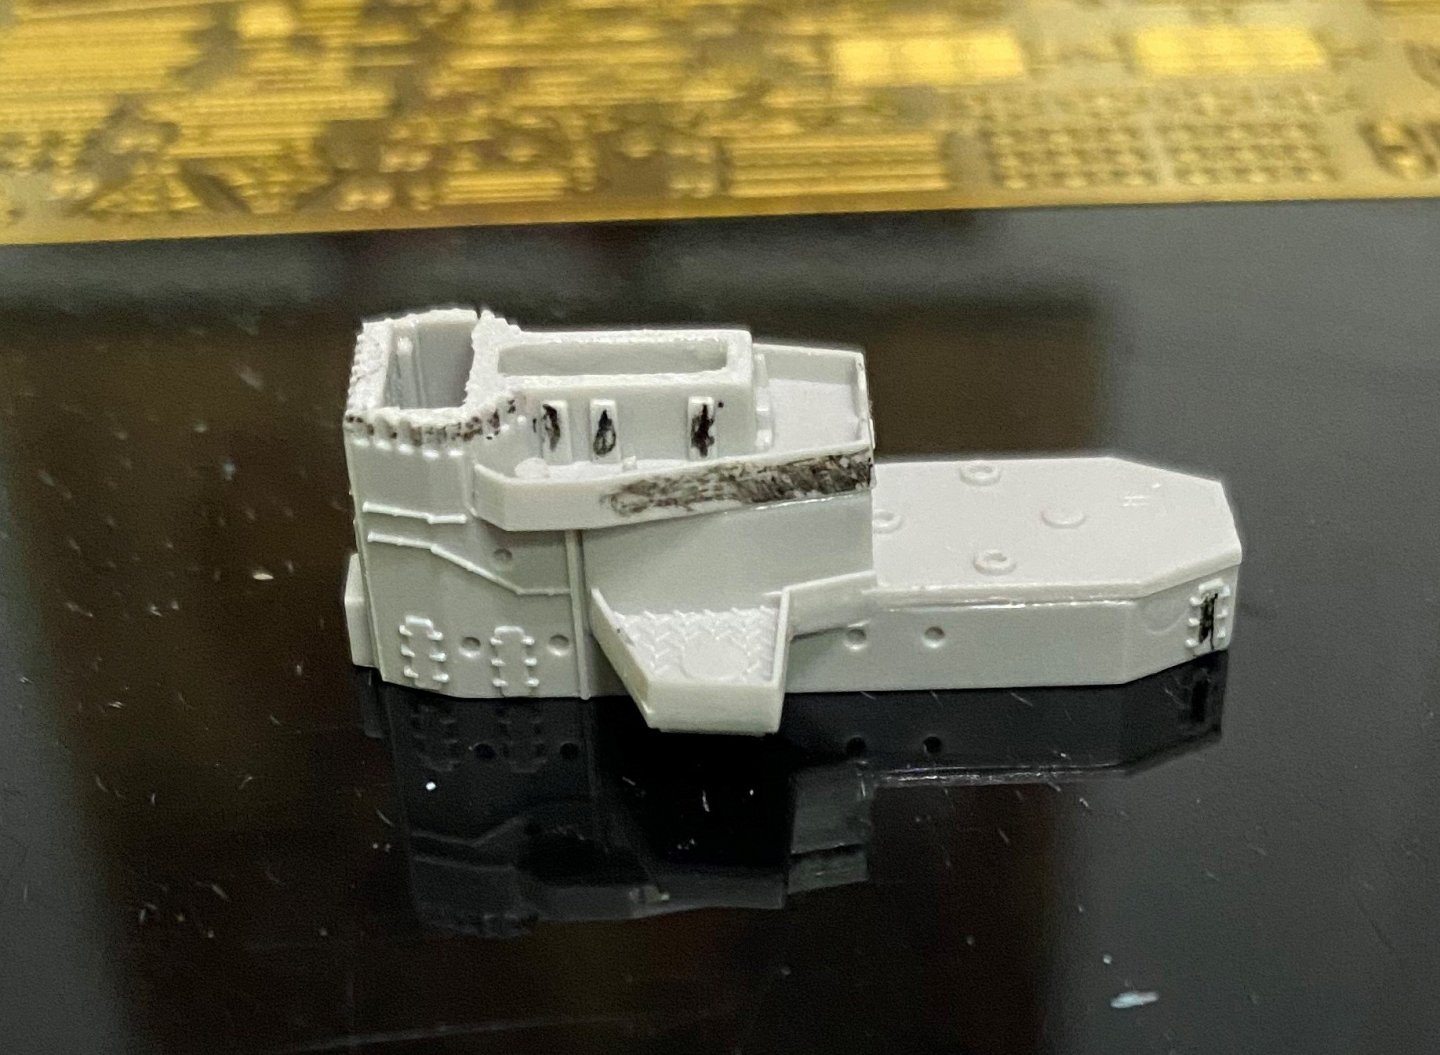
 I remembered a while back building a black shadow box for taking photos. Popped the funnel in there to see if it helped the focus. Wow, what a difference that shadow box makes! Everything marked in black on the superstructure gets removed for photo etch replacement.
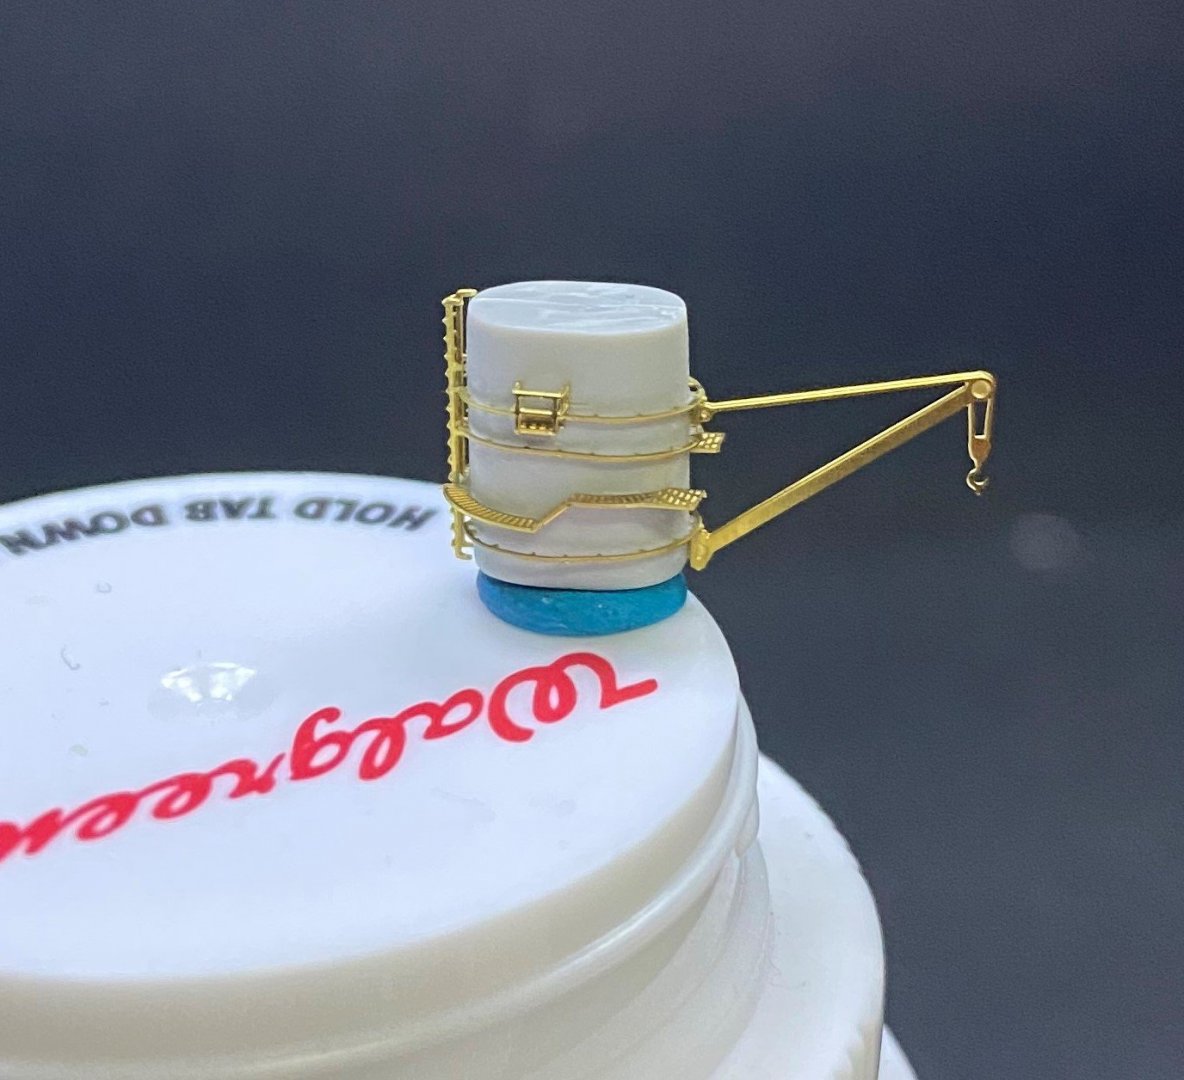

- 127 replies
-
- 10
-

-

-
- Akitsushima
- Pit Road
- (and 2 more)
-
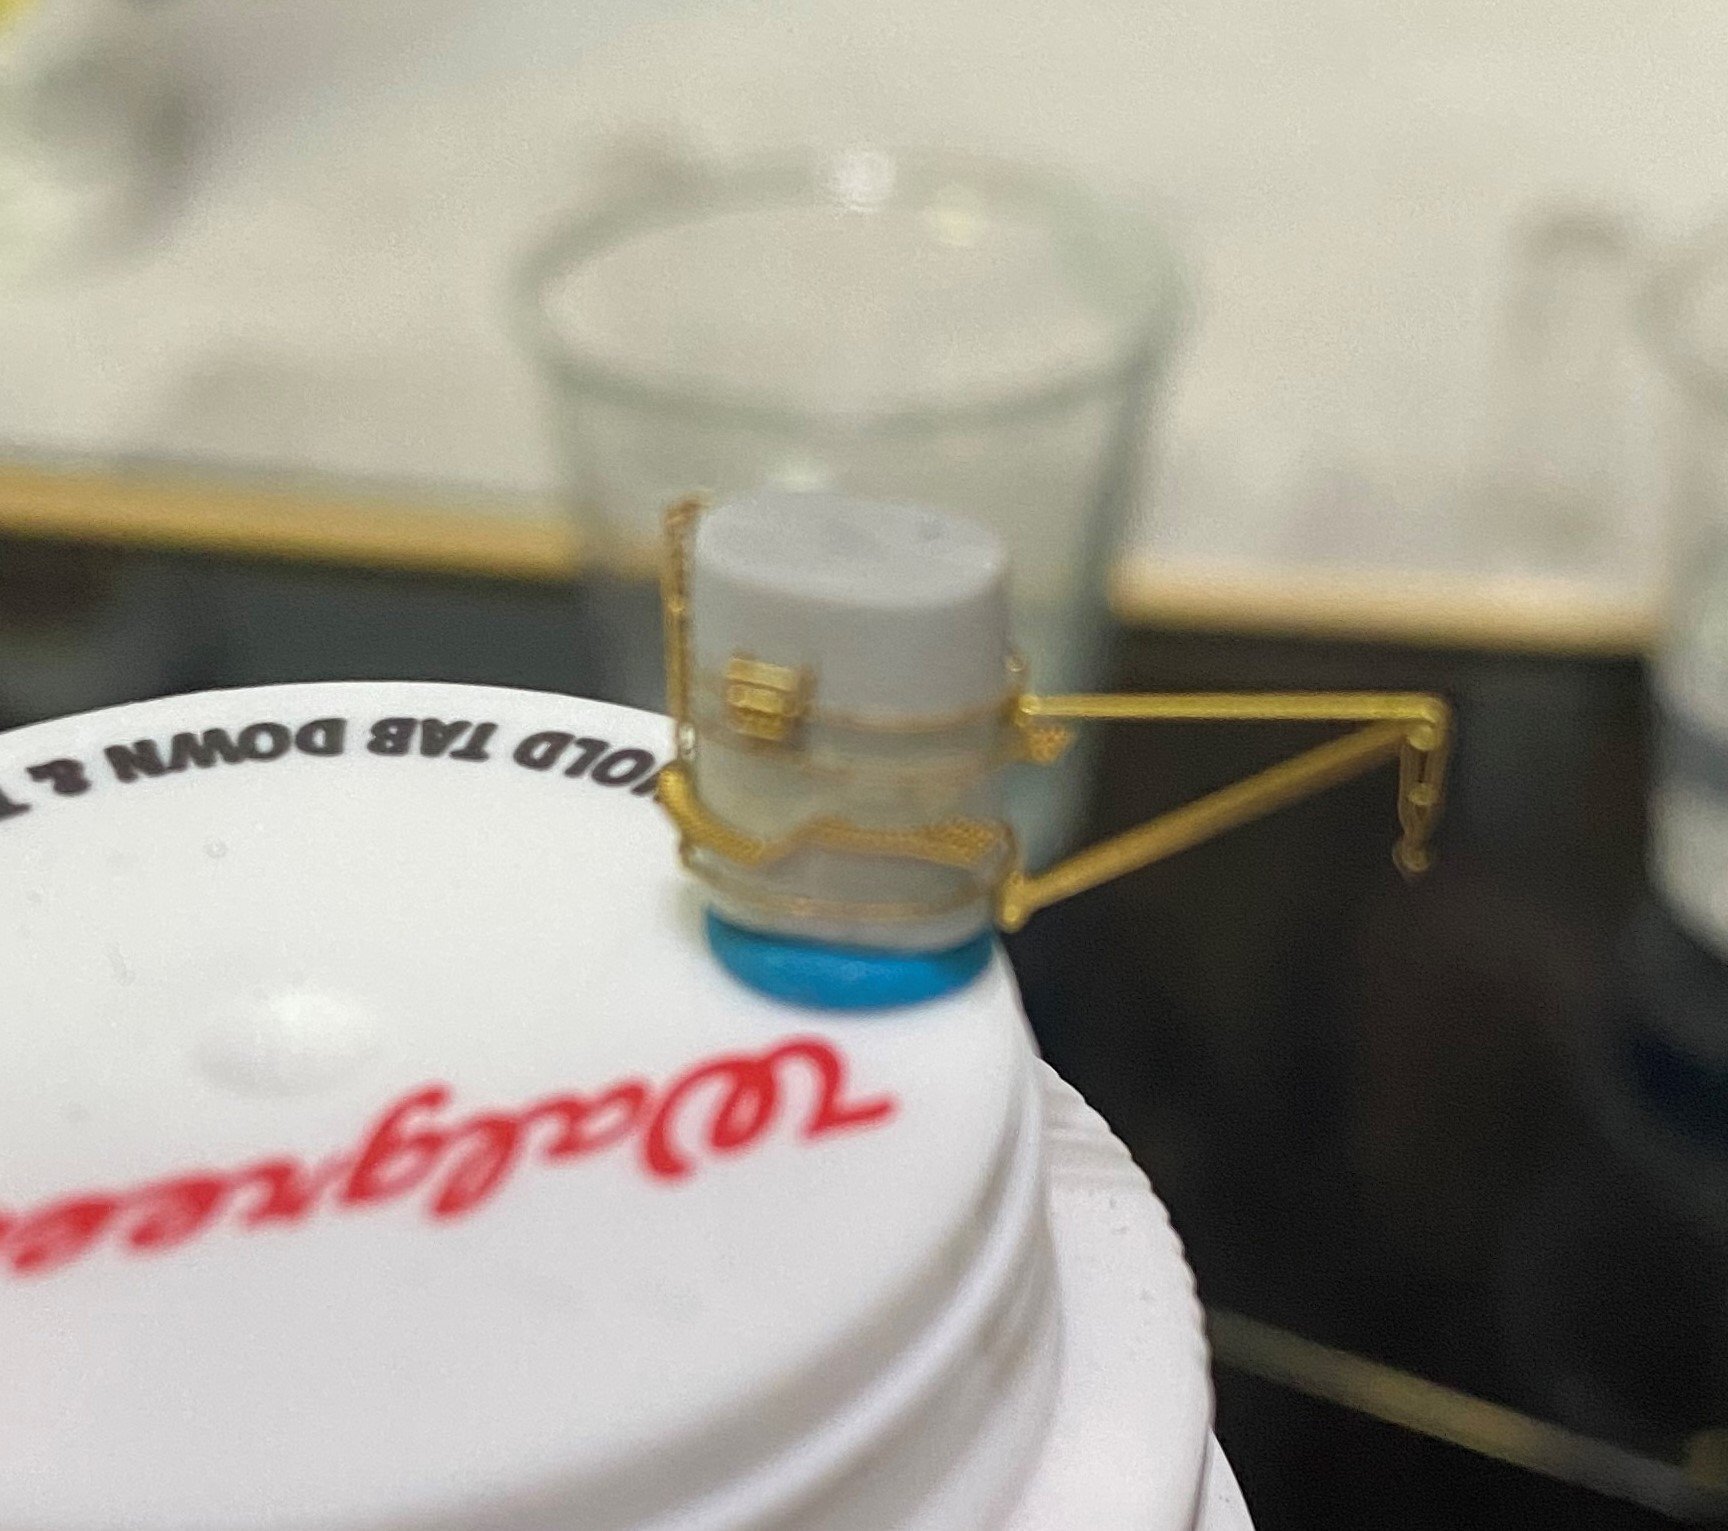
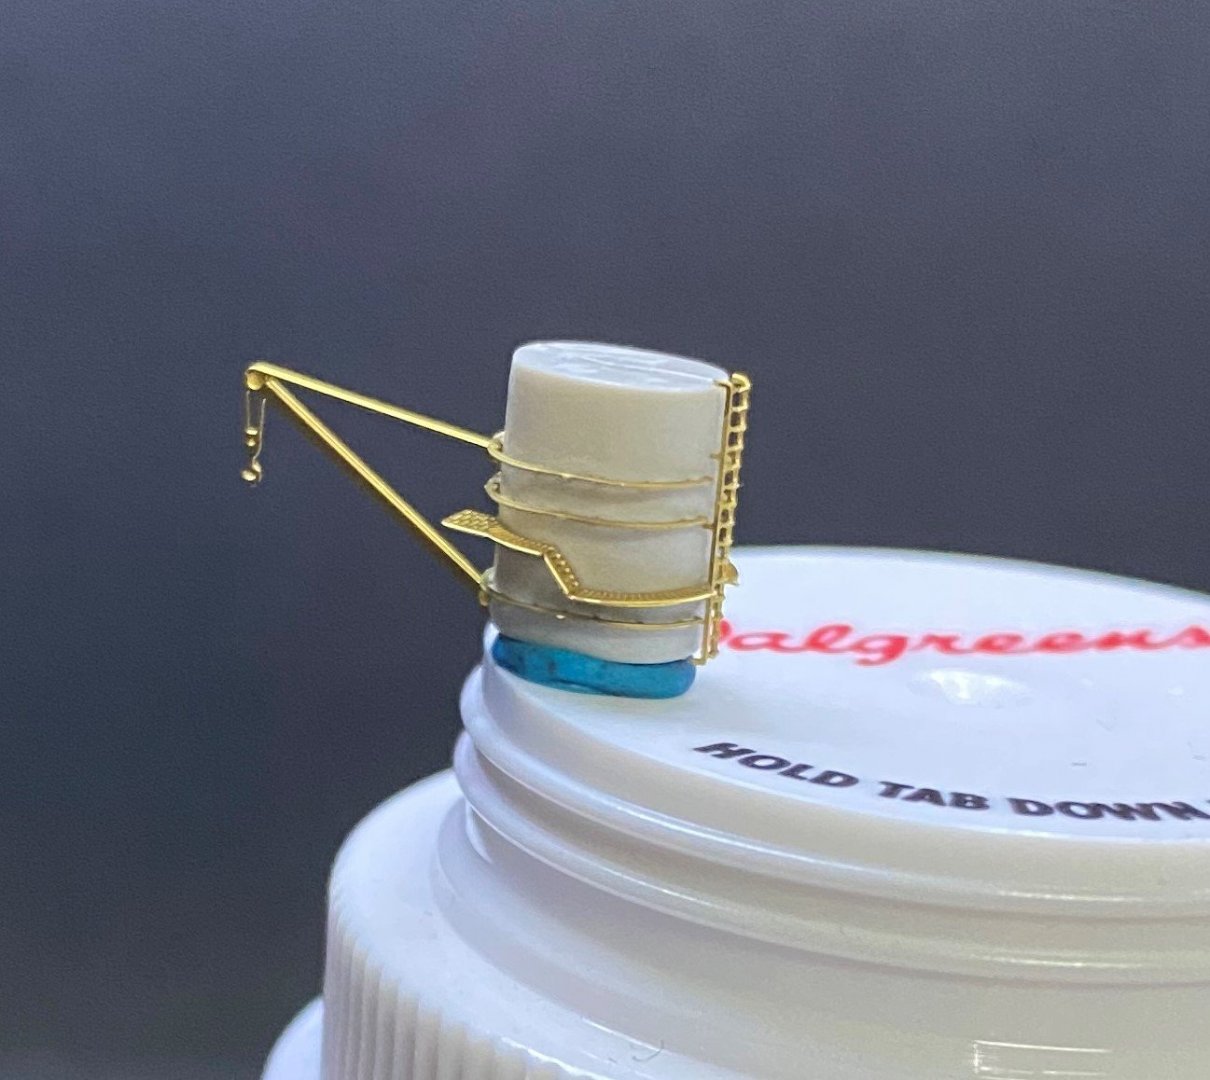
The auto focus on these cameras seem to operate with a mind of their own. Seems in this instance, it insisted on focusing on the print on the bottle cap rather than the part I wanted it to capture. I don't how to manually focus on a particular object or if that's possible.
- 127 replies
-
- 3
-
-
- Akitsushima
- Pit Road
- (and 2 more)
-
Totally agree on the masts. Best I have ever seen in plastic, but so are a lot of other Flyhawk plastic parts. They have set a new standard in 1:700 scale for all the other companies out there. Some of the new Pit-Road and Very Fire offerings are good too, but not quite as fine as Flyhawk.
-
Thanks for the kind words Alan. I agree on the benefits of Gator's Grip. It's not perfect for every photo etch gluing situation, but it certainly comes in handy where you need extra time to situate the small pieces. If I tried doing those same pieces with CA, would have a big mess, but I have seen others do it without a lot of adverse issues.
- 127 replies
-
- 5
-
-
- Akitsushima
- Pit Road
- (and 2 more)
-
Hi Alan I just now found your build log for the Penelope and have spent some time looking through the photos of your work. Looks super! Looking forward to following along as I also have this model in the stash of to-do's.
-
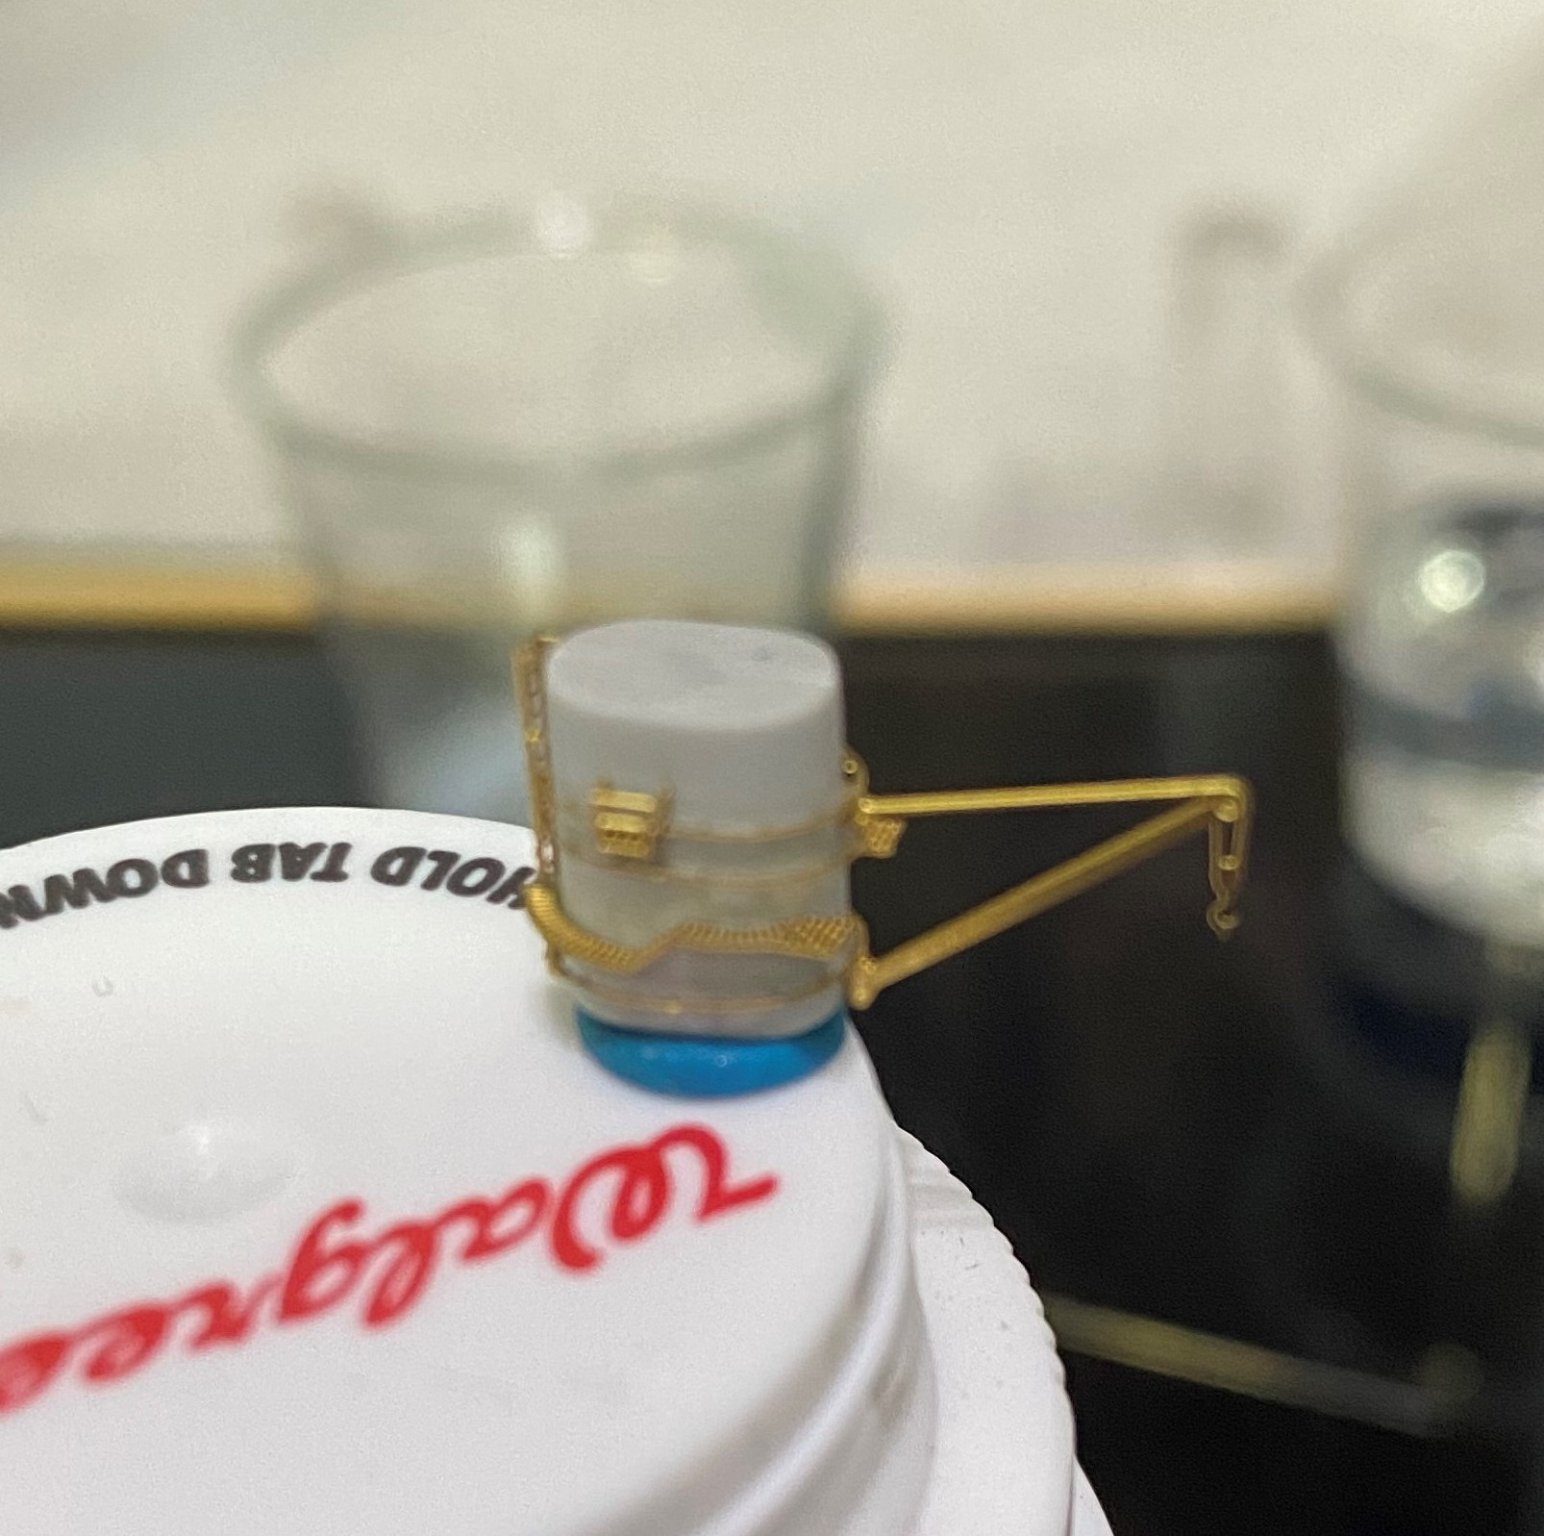
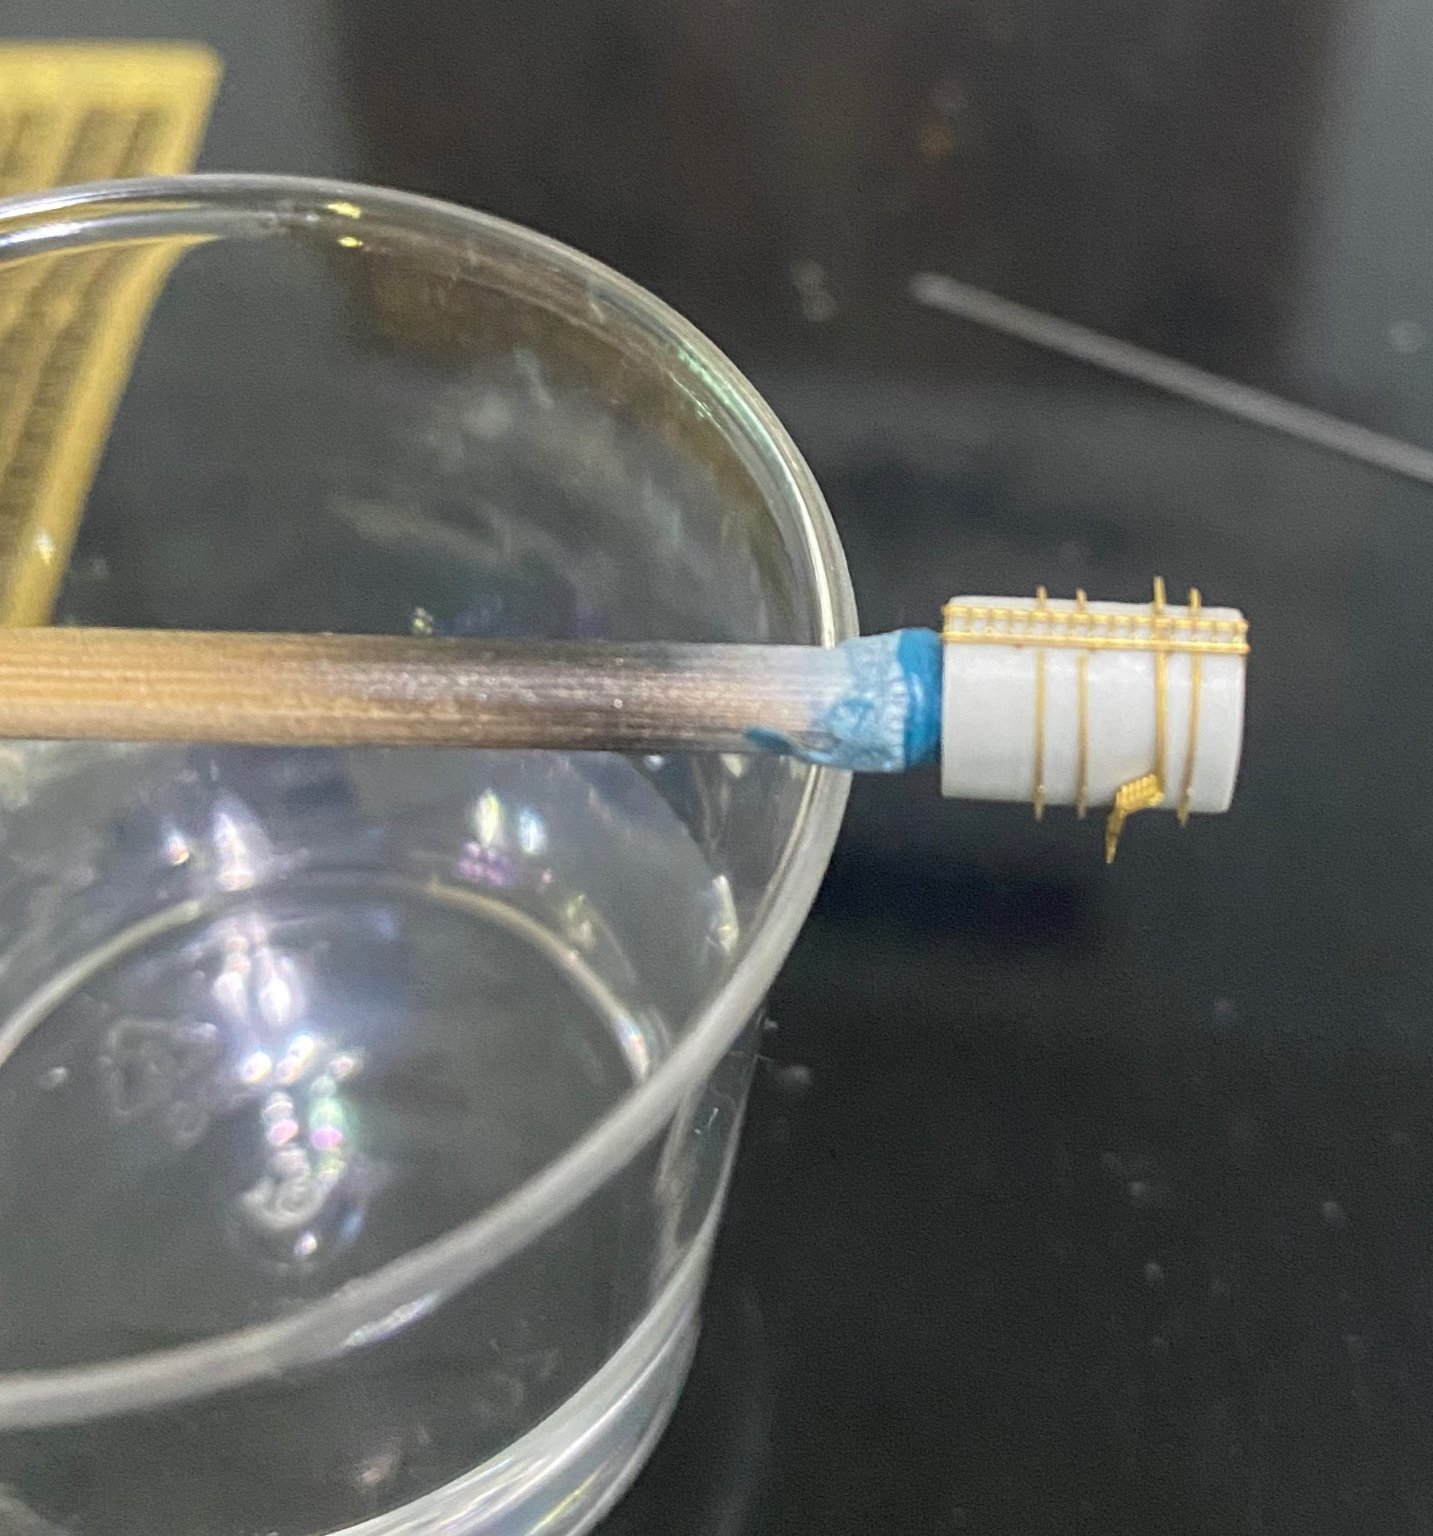
Having a hard time getting my phone camera to focus in on the macro level needed to capture the details being added to this tiny part.


- 127 replies
-
- 9
-
-
-
- Akitsushima
- Pit Road
- (and 2 more)
-
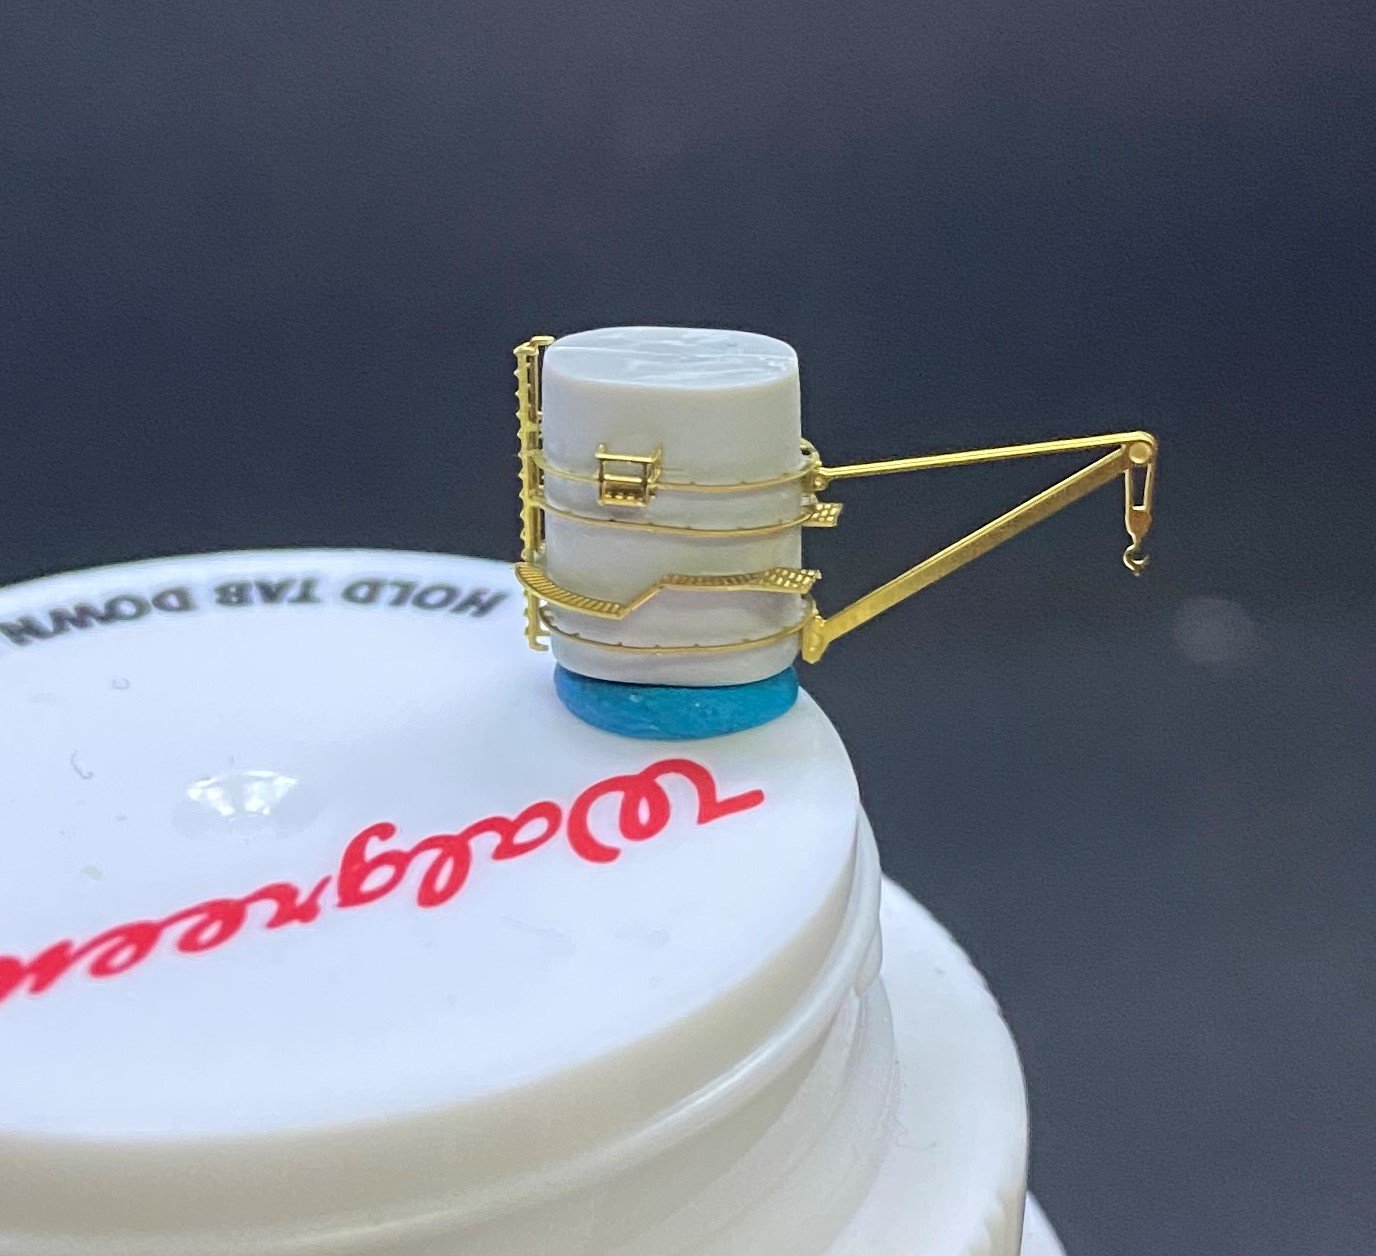
The funnel on a model of this size in this scale would be a plain blob of plastic without the photo etch enhancement. In reality, I had to cut away and sand smooth some molded on details before applying the photo etch, but it would have looked "blah" without the photo etch. Gator's Grip acrylic glue was used here in this instance. I brushed it on the funnel then slid each photo etch piece in place while the glue helped steady it in the correct position while I got the multiple pieces lined up and spaced the way i wanted them. It would be much more difficult to do using CA glue in my opinion. The acrylic glue gives that extra working time to sort things out.


- 127 replies
-
- 7
-
-
-
- Akitsushima
- Pit Road
- (and 2 more)
-
Fine Molds are producing a lot of beautiful 1:700 scale injection molded weapons and accessories sets nowadays better than resin, but man, they are so darned expensive for the small amount of contents in each box. Excellent products but everything I see is in Japan, overpriced, and a high cost for shipping. Would like to see Flyhawk produce some more WW2 IJN subjects. You get a lot for the money with their products. My Scharnhorst kit comes with quite a few extra accessories and weapons, more than required to finish the kit. I need to find out if I can buy case lots of Fine Molds products for a good discount.
- 127 replies
-
- 4
-
-

-
- Akitsushima
- Pit Road
- (and 2 more)
-
Did some searching and figured out how to do the translation. It is a process, but it's explained very well in this short video. (411) How to Convert Image to Word Document - YouTube I tried it out and was able to translate the Japanese text in my instructions to English in fairly short order, but you will need to go through a few steps to do it. My instructions: img20210611_14132694.pdf The translation from Word: ・ Kawanishi Type 97 Flying Boat (H6K) It is the first four-engine flying boat in Japan, and at the same time it is a special aircraft in the history of Japan Airlines as the first four-engine aircraft designed by a Japanese. In 1934, the Japanese Navy instructed Kawanishi Aircraft to prototype nine large-scale flying boats. Kawanishi Aircraft, which had previously returned to short companies in the UK and had the know-how of making large metal flying boats, made full use of the state-of-the-art construction technology of the time, such as a double-digit box structure using waveboards, to complete a beautiful aircraft that had not been seen in flying boats in various countries until then. The first unit, which made its maiden flight in July 1946, showed good stability and maneuverability, with no other problems that were somely lacking horsepower. After the increased prototype up to Unit 4, it was adopted as a type 97 flying boat in January 1948, and made its actual debut in the latter half of the Sy-China War. His main mission was to patrol and transport the oceans, but it was also used for bombing and long-distance transport of torpedoes. However, in the middle of the Pacific War, low-speed and poor bulletproof equipment began to cause damage from anti-aircraft fire and enemy aircraft, and it was likely to be easily shot down in air combat with U.S. bombers (especially B-17 and B-24) and, consequently, Catalina flying boats. Therefore, the end of one great war went to the rear mission, and one main duty was replaced by the type 2 flying boat. However, the stability and the transportation ability were changed, and the 97 type flying boat was used as an airliner in the private sector before the war. The southern route by Dainair, which received 18 aircraft, gracefully fyed across almost the entire western South Pacific, including Saiban, Bangkok and Ponave. The Allied codename is Mavis. ◎ Data (Type 23) Overall width: 40.0m, Total length: 25.6m, Engine: Venus 53 type air-cooled 1300hPX 4, maximum speed. 385km/h, armed: 20mm machine gun x 1, 7.7mm machine gun x 4, 800kg torpedo or bomb x 2 ・ Kawanishi Ni type flying boat (H8K) Appeared as a follow-on aircraft of type 97 flying boat, it is a masterpiece aircraft boasting the world's best performance as a flying boat that appeared in World War II. The Type 97 flying boat, which was adopted in 1947, demonstrated excellent performance, but the short Sunderland of the British army and the Martin 156 clipper of the U.S. army, etc., which had been tested around the same time, all surpassed the 97 type, and the Navy immediately directed the trial manufacture of a new four-shot high-performance flying boat that could compete with these. The required performance is a maximum speed of 4 Km / h or more, a cruising range of 7,408 Km or more, 5 20 mm machine guns, 4 7.7 mm machine guns ...
- 127 replies
-
- 4
-
-
- Akitsushima
- Pit Road
- (and 2 more)
-
Keep in mind the aircraft was not transported by the ship, just loaded onto the ship for maintenance while anchored then offloaded when maintenance was completed. The mooring on the ship rotated so the aircraft could be positioned in any way that allowed maintenance to be performed, so i guess it would depend on exactly what maintenance or repairs was being performed as to the direction the aircraft was positioned.
- 127 replies
-
- 6
-
-
- Akitsushima
- Pit Road
- (and 2 more)
-
This is just a, "what if" suggestion. Never tried and don't know if it would work.... Online, there are cut and paste text translators to go from one language to another. In the web browser Microsoft Edge, there is an add-on language translator as well. When I go to certain foreign websites, I just click on the "translate" button to see what it says in English. Now it's got me wondering, what if you scanned and saved your instructions as a PDF file then opened them in the web browser. Would it translate the Japanese into English from the PDF file? I don't know but I am going to make it a point to give it a try. It just might work. I also have instruction sheets written in languages other than English that I will try out.
- 127 replies
-
- 5
-
-
- Akitsushima
- Pit Road
- (and 2 more)
-
Great idea Lou. Next time I'm at Lowes, will look for one of those.
- 127 replies
-
- 5
-
-
- Akitsushima
- Pit Road
- (and 2 more)
-
Thanks and welcome aboard, Denis! I see a larger scale scratch built Akitsushima in my dreams. It's only a dream at this point mind you. 🙂
- 127 replies
-
- 3
-
-
- Akitsushima
- Pit Road
- (and 2 more)
-
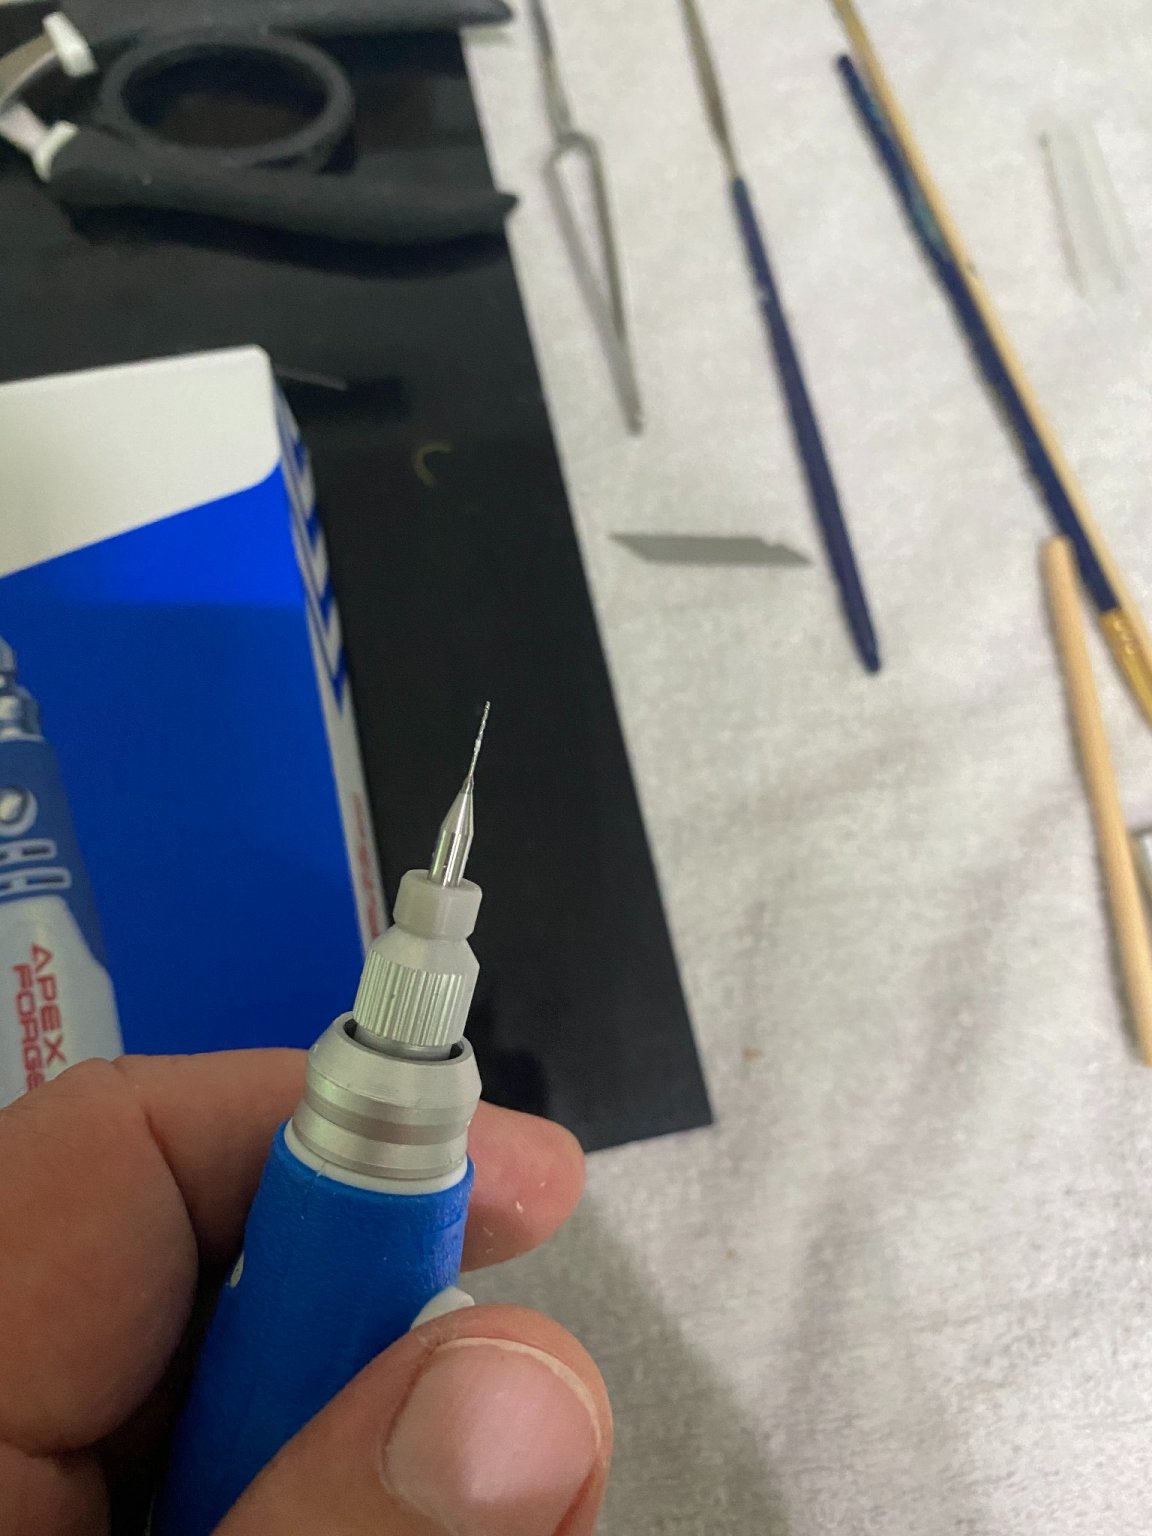
I would say it does a bit of both. However, at this micro gauge (small fraction of a mm), twist drilling using a hand tool is just not a viable option. You will be breaking bits ever time you turn around. Been there and done that, it just doesn't work.
- 127 replies
-
- 3
-
-
- Akitsushima
- Pit Road
- (and 2 more)
-
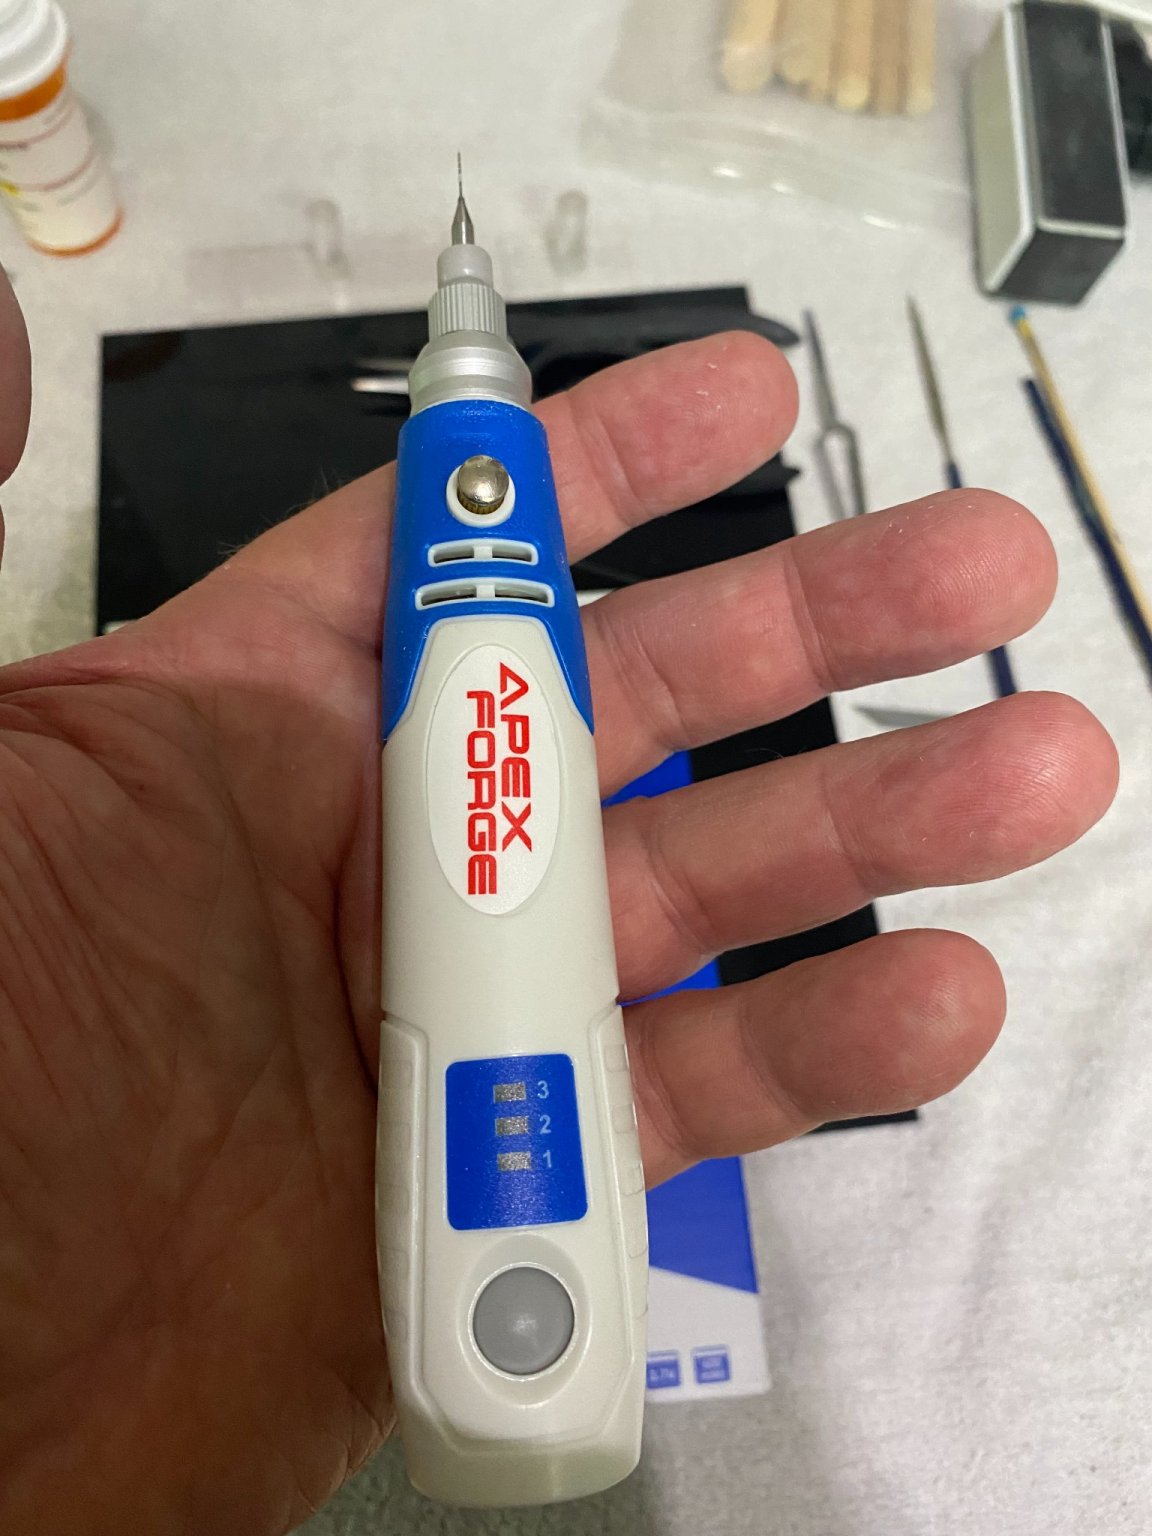
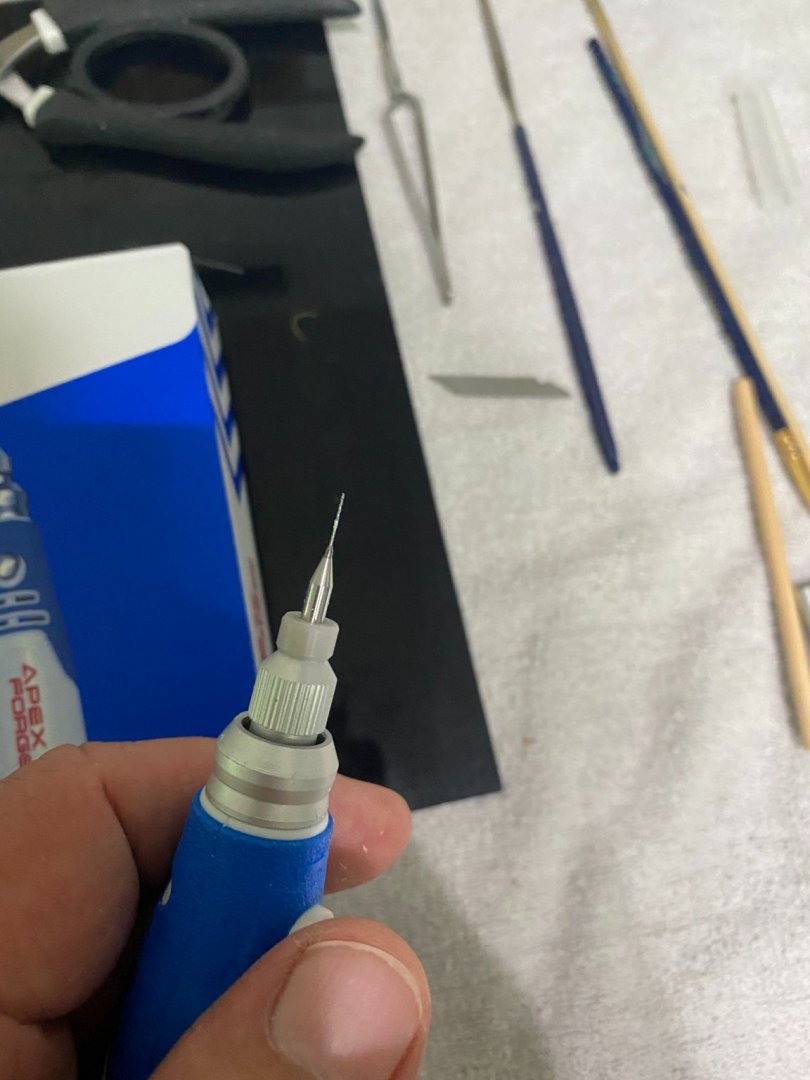
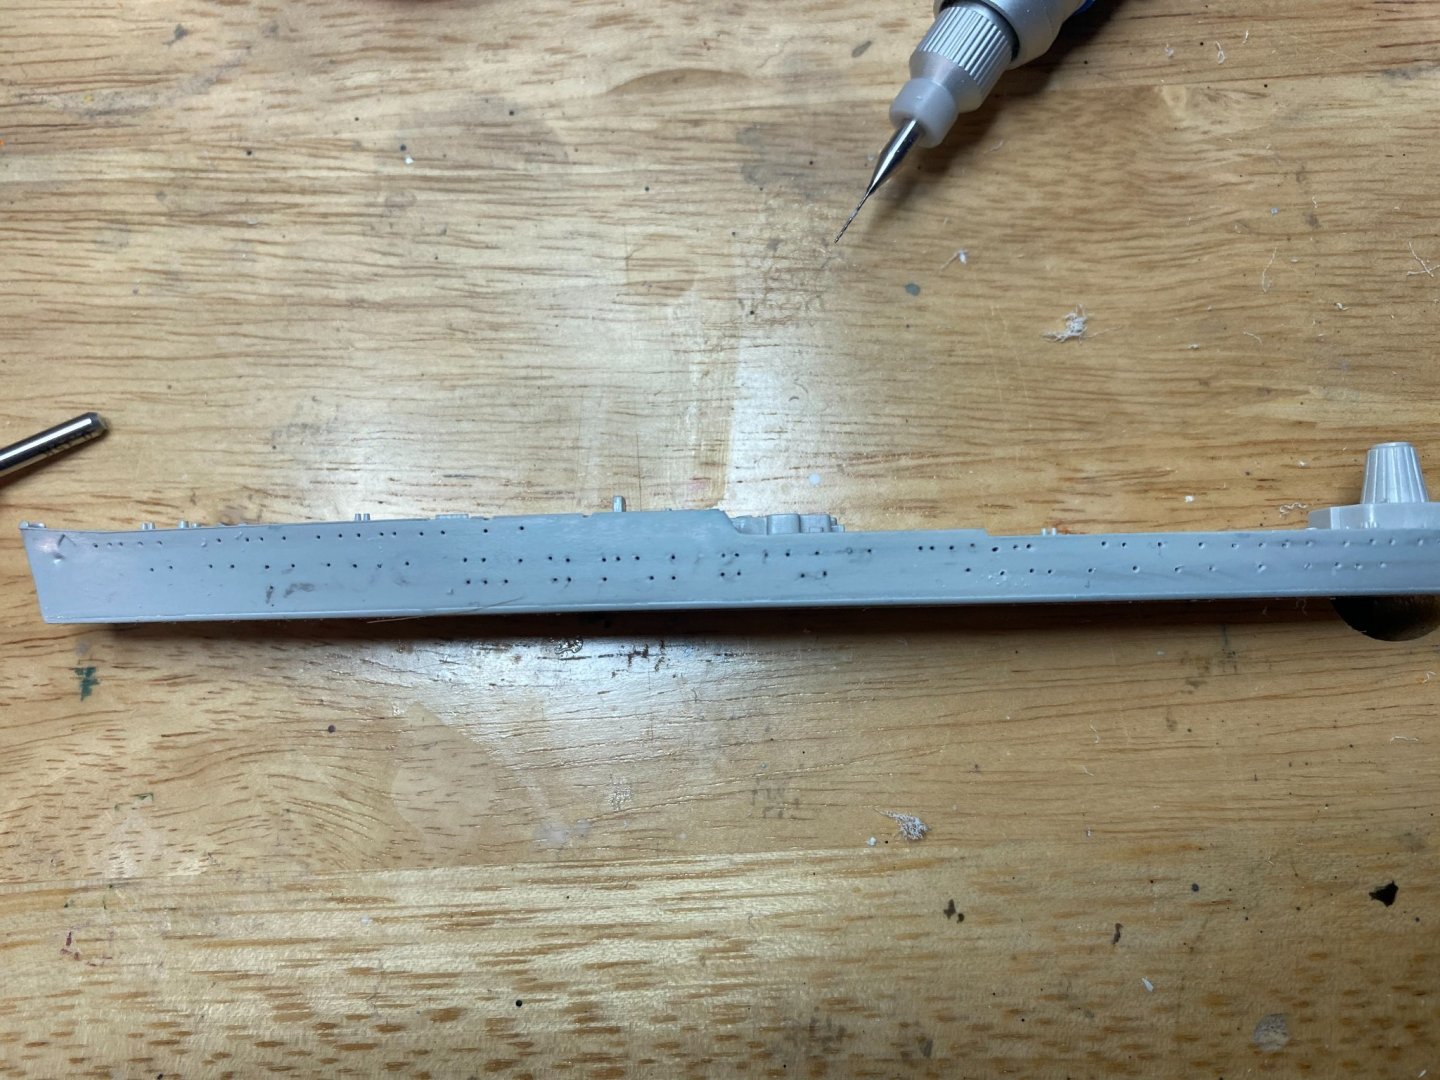
Maybe because the molds are a bit worn out, but my kit hull had sketchy porthole detail. I decided I would drill them out so they can be seen after the painting is completed on the hull. I have a corded Dremel tool, but find it a bit too large and clumsy to comfortably drill holes in small scale work. I found this little cordless three speed rotary tool on Amazon for a small price. After applying a couple of coupons I had, it brought the normal delivered price (with Prime) down from $20 to only $13. It runs on a 3.7 volt lithium ion battery and is charged with a standard cell phone charger. Has a variable three speed switch and comes with an assortment box of various "dremel type" bits. The drill bit I have chucked up in the photos is not included with the bits that came with the tool. Fits very nicely in the palm of my hand and gets the job done nicely. I think this tool will come in handy for a lot of small scale tasks working with plastic models.


- 127 replies
-
- 7
-
-
- Akitsushima
- Pit Road
- (and 2 more)
-
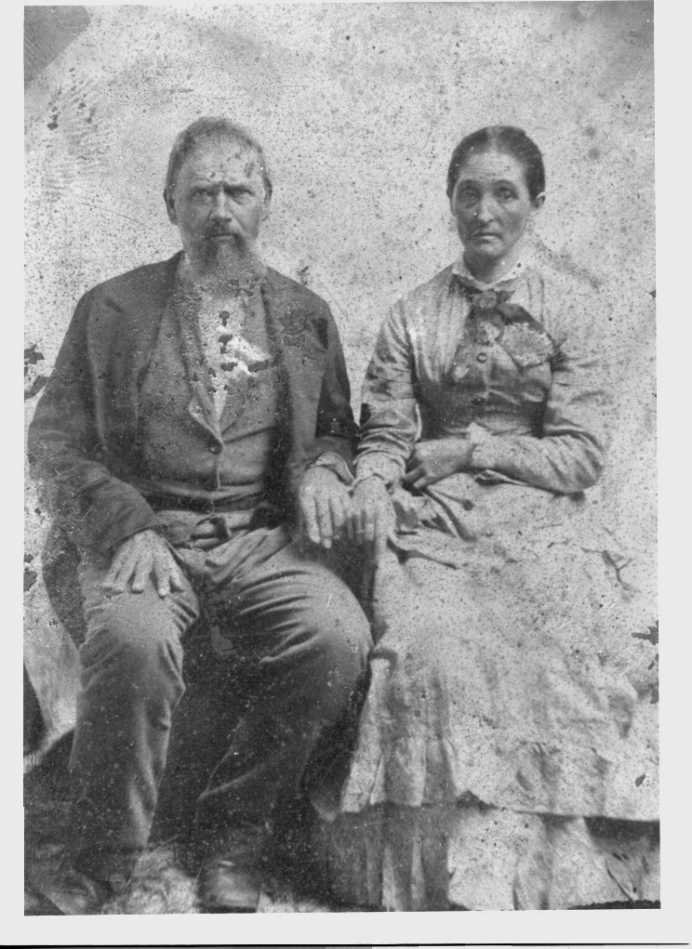
This is my great great grandfather and g-g-grandmother not too many years after the ACW ended. He died in 1892 at the age of 60. He was a cowboy long before the war started and a natural fit in the cavalry.
-
My great-great grandfather was part of Capt JJ Dickison's 2nd Florida Cavalry, H Company. A small confederate group with a storied combat history in the ACW. I heard a lot about it from my elders growing up. "Richard P. Weinert, a historian in the Office of the Chief of Military History, U.S. Army wrote “Dickison was one of the ablest guerrilla commanders produced not only during the Civil War, but probably in all military history of America.”
-
The program is old, from somewhere around 2006 or 7, called "Tile Print". It's no longer available for sale as the company appears to have gone out of business, webpage no longer functions. So by now there are probably a lot of programs and features I am unaware of. This program is one I used a lot when I built and was flying RC aircraft. By the way, when you receive the plans from this Polish site, they come in PDF a format that does not allow any modification whatsoever. Like Lou said in an earlier post, they even come watermarked with your name on them. It's to prevent pirating.
- 127 replies
-
- 5
-
-
- Akitsushima
- Pit Road
- (and 2 more)
-
I bought the Akitsushima drawings because they are in PDF format. Quick delivery via email or a site to download the file. Also, I have a program on my PC that will custom scale a PDF file object/s to any desired scale and then the capability to tile print the scaled drawings in 8.5 x 11.
- 127 replies
-
- 6
-
-
- Akitsushima
- Pit Road
- (and 2 more)
-
Another fine mess you've gotten me into, Ollie. You just had to go and show me that website, didn't you? Oh well, like the old saying goes, "we can't take it with us." You just helped me find something else to spend money on, Lou. 😄
- 127 replies
-
- 6
-

-
-
- Akitsushima
- Pit Road
- (and 2 more)
-
You can buy a 1:200 scale card model of the Akitsushima. I've never done a card model yet. Another option would be scratch buildING a 1:144 model, as there is the 1:144 Arii H8K2 Emily model. In my opinion, would rather start a scratch build project without having to do the aircraft by scratch as well as the ship. I bought my plans here: PM-039 - AKITSUSHIMA '43' air tender polish-made.com
- 127 replies
-
- 8
-

-
-
- Akitsushima
- Pit Road
- (and 2 more)
-
No worries at all Yves....I have been thinking exactly the same idea. Just this morning, I ordered the line drawings of the Akitsushima from Poland. I definitely want to try my hand at scratch building from plans but 1:72 scale is too much. Going to begin searching for a smaller scale sea plane and work from there. 1:200 scale would be good I think.
- 127 replies
-
- 7
-
-
-
- Akitsushima
- Pit Road
- (and 2 more)