HOLIDAY DONATION DRIVE - SUPPORT MSW - DO YOUR PART TO KEEP THIS GREAT FORUM GOING! (Only 24 donations so far out of 49,000 members - C'mon guys!)
×

CDW
-
Posts
7,747 -
Joined
-
Last visited
Content Type
Profiles
Forums
Gallery
Events
Everything posted by CDW
-
 Beautiful hulls - I love the work boats. That's a cute little dog in the next-to-last picture. Looks like he is standing on guard duty.
 -
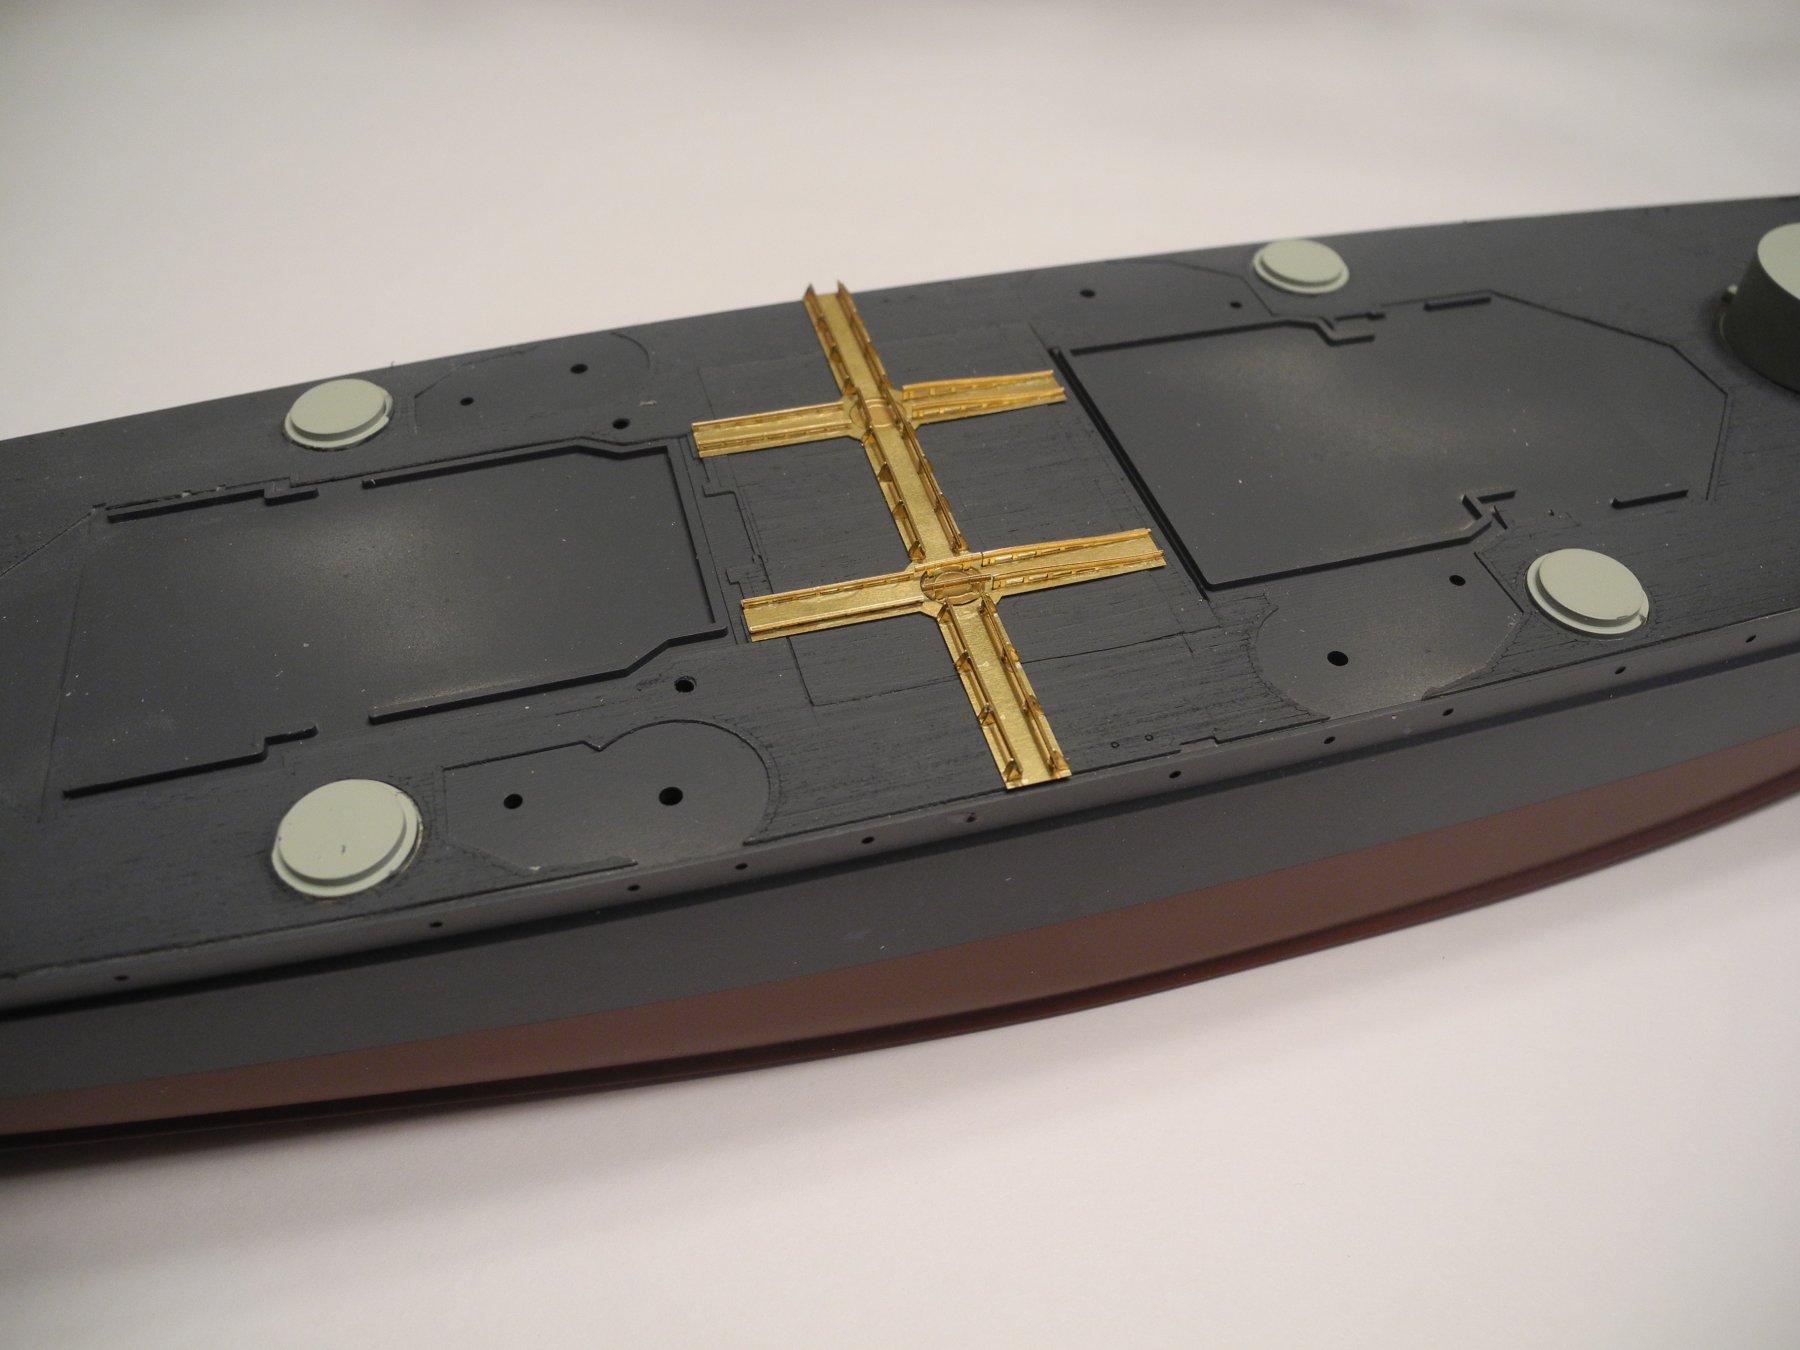
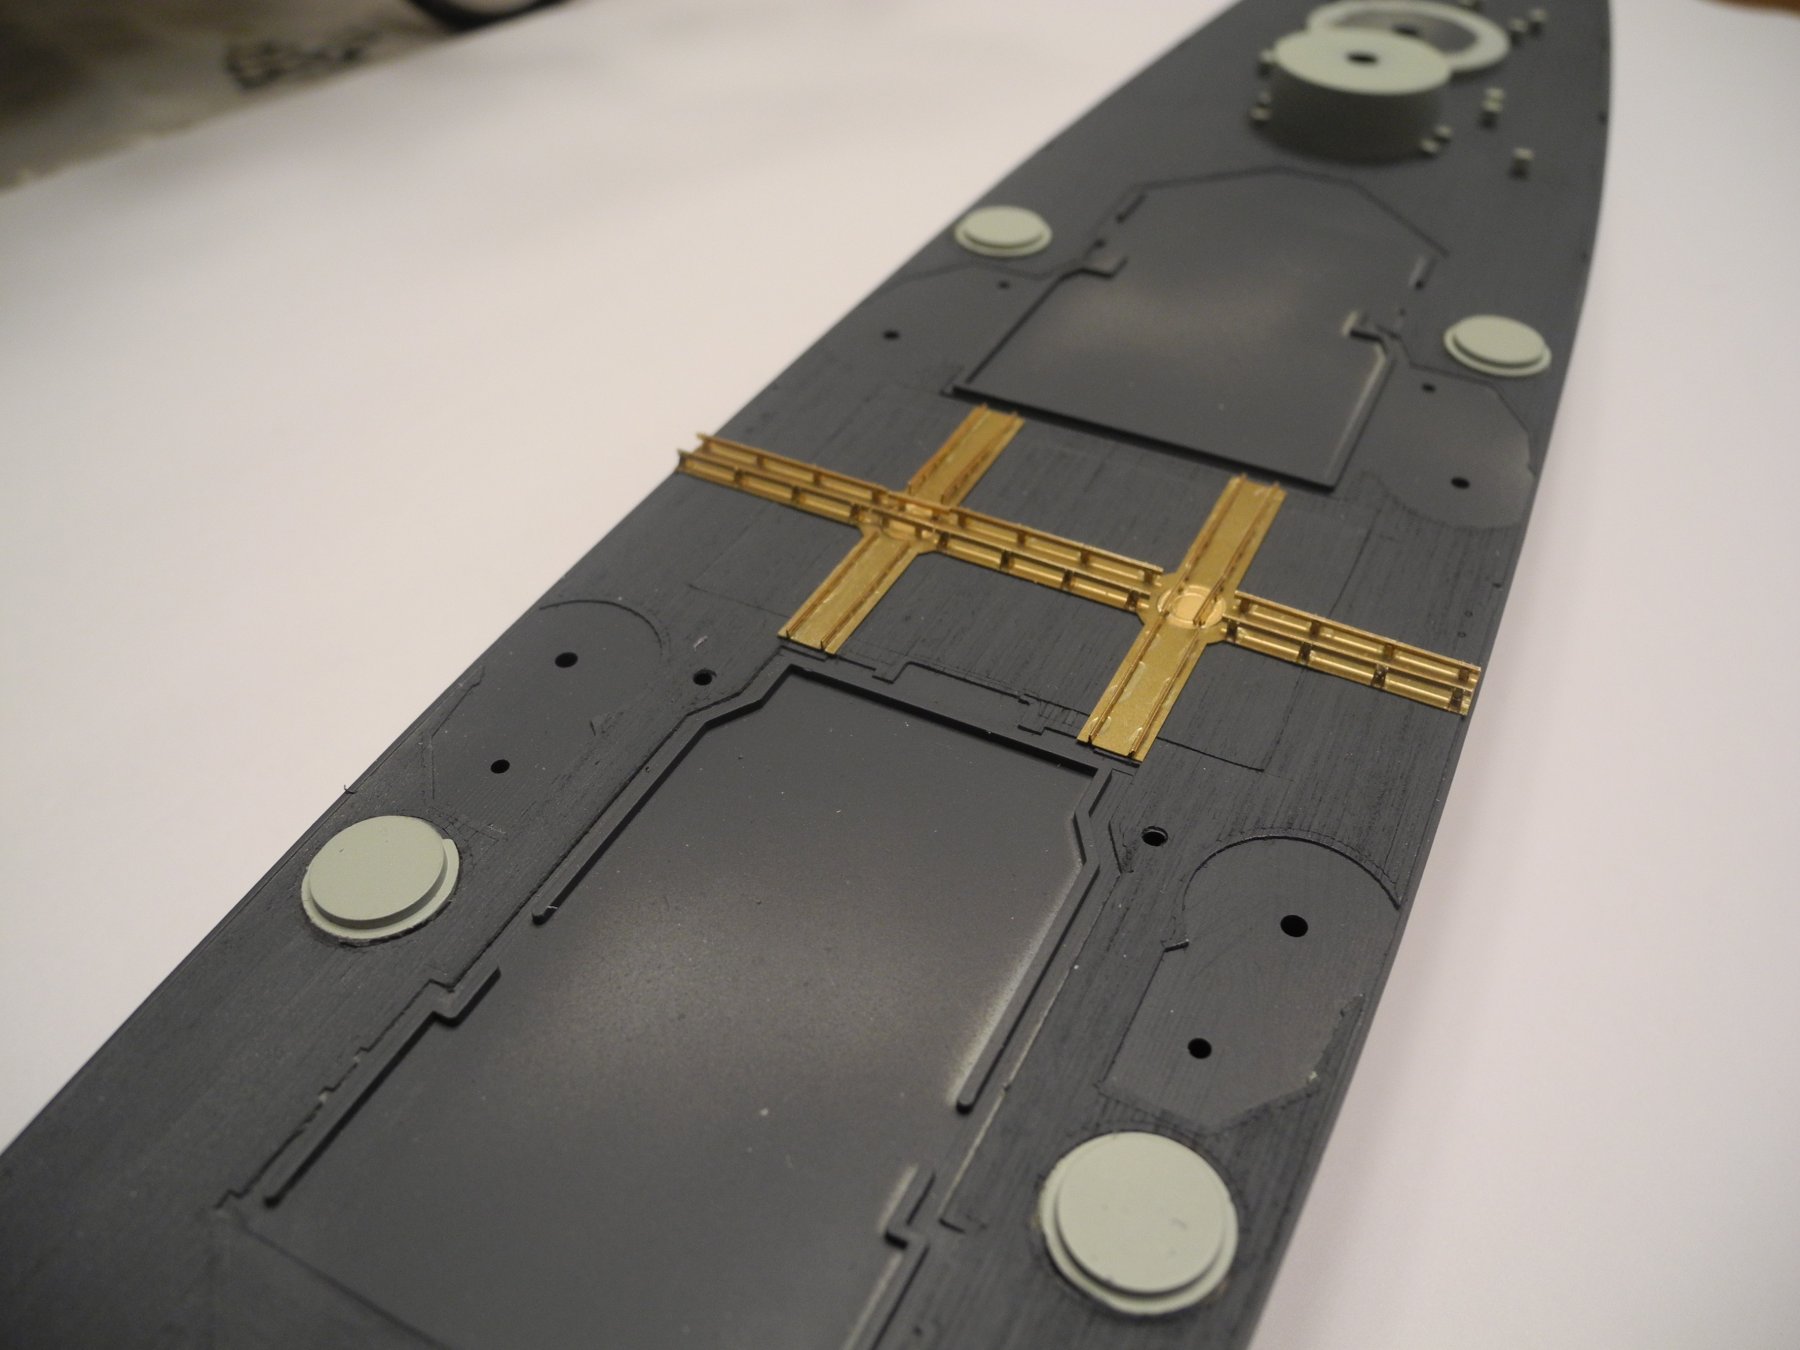
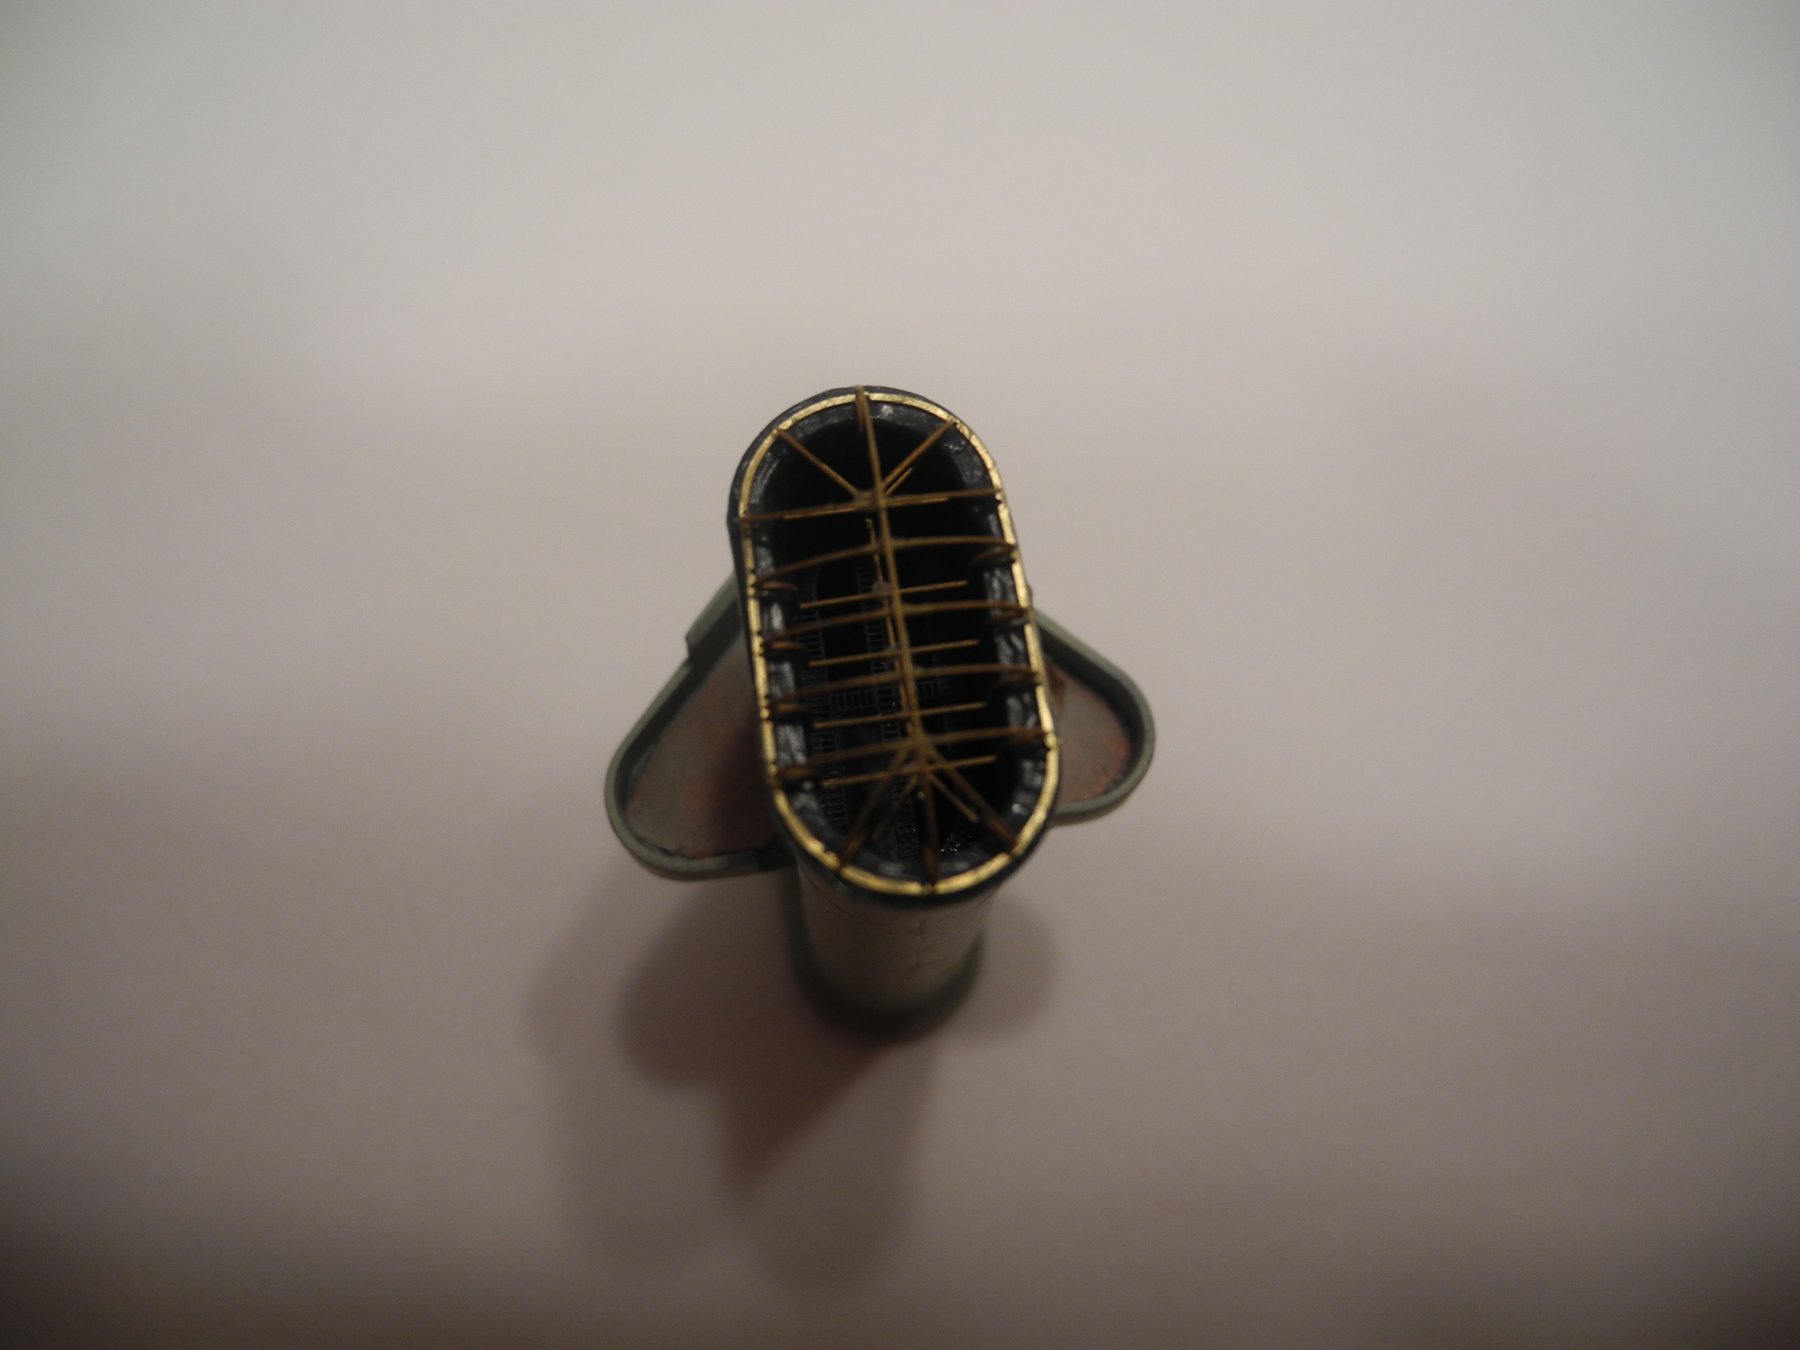
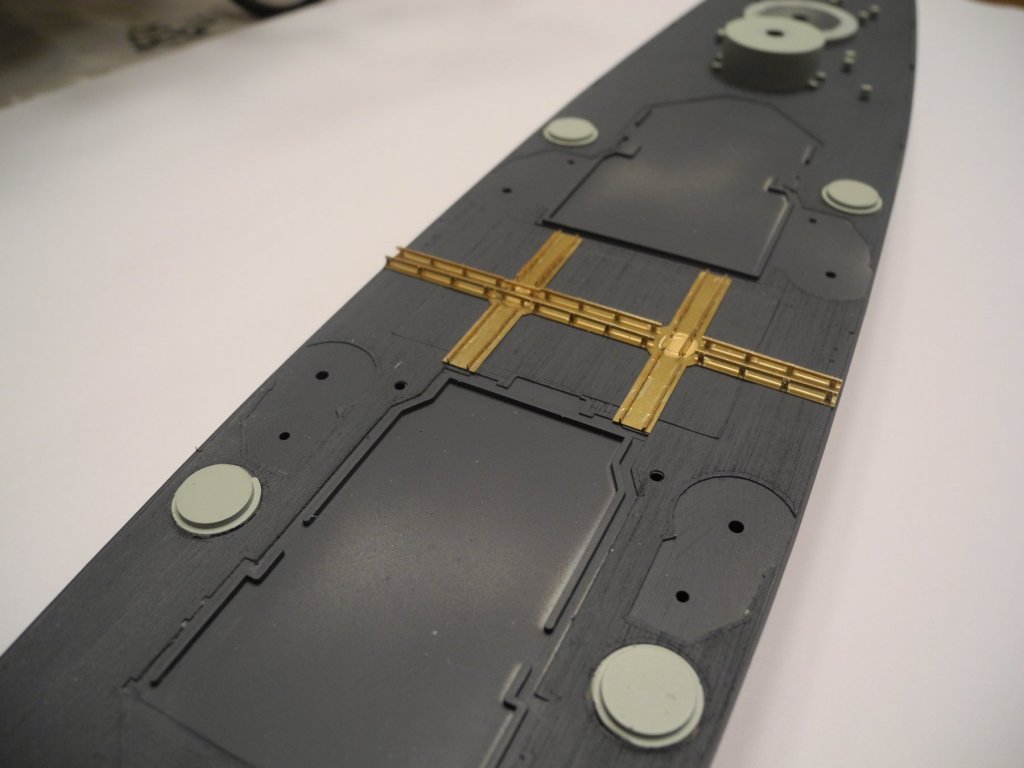
These photo etch parts/assembly represent the catapult launch rail system and turn tables for the observation aircraft on board the Duke of York.

- 151 replies
-
- 12
-

-
- duke of york
- tamiya
- (and 2 more)
-
Hi OC No, you didn't come across in a negative way at all to me. No apology needed. In all my years of modeling, there has never been a modeling subject that was more left to personal interpretation than color. It doesn't matter whether it's ship modeling, car modeling, armor modeling, or aircraft modeling. There are always various opinions and that's fine with me. Even if a color was matched exactly to the standard number for that country, there is always a difference to the eye when it comes to the scale of the model, lighting conditions, and natural weathering.
- 151 replies
-
- 7
-
-
- duke of york
- tamiya
- (and 2 more)
-
All this could be very well true. But it's too late for me to turn back now. Besides, no one who visits my home and sees my model ship will ever know the difference and I have no plans to enter her into any type of competition. At the time I made my decision, I did so based on the limited references I had at the time.
- 151 replies
-
- 6
-
-
- duke of york
- tamiya
- (and 2 more)
-
NRG 2017 Conference - Oct. 26-28, 2017
CDW replied to kurtvd19's topic in NAUTICAL RESEARCH GUILD - News & Information
It's a long time between now and October, but I don't know of a reason I can't be there. A local IPMS club used to have a bi-annual model contest in St. Petersburg and I always enjoyed attending that event. -
NRG 2017 Conference - Oct. 26-28, 2017
CDW replied to kurtvd19's topic in NAUTICAL RESEARCH GUILD - News & Information
Nice. That's just across the bridge from me, 30-45 minutes away. -
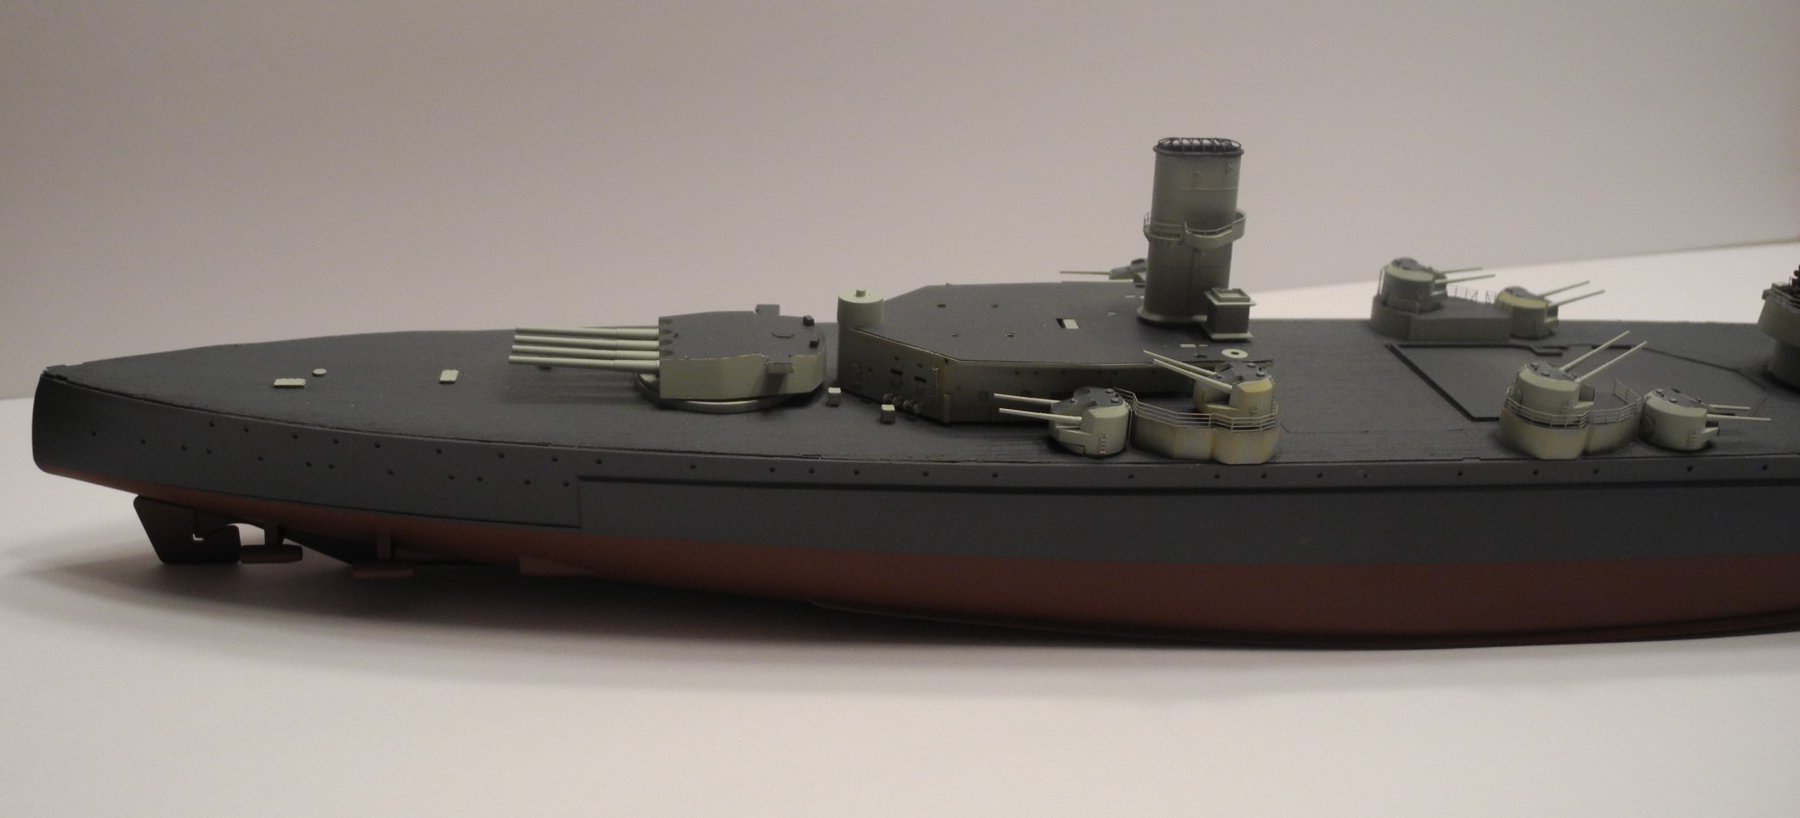
Captain Slog My poor lighting makes it look a little darker than it is in reality. However, I would choose a little lighter shade of gray if I had to do it all over again. It's much easier to use washes and other effects to darken a light color than it is to lighten a dark color. If you go back to post number 16, you'll see the color sheet I used to base my decision to use a dark gray, also that another modeler shared with me the color call out given in a reference book he had on hand. My color is Vallejo 71.110 UK exterior dark sea gray.
- 151 replies
-
- 5
-
-
- duke of york
- tamiya
- (and 2 more)
-
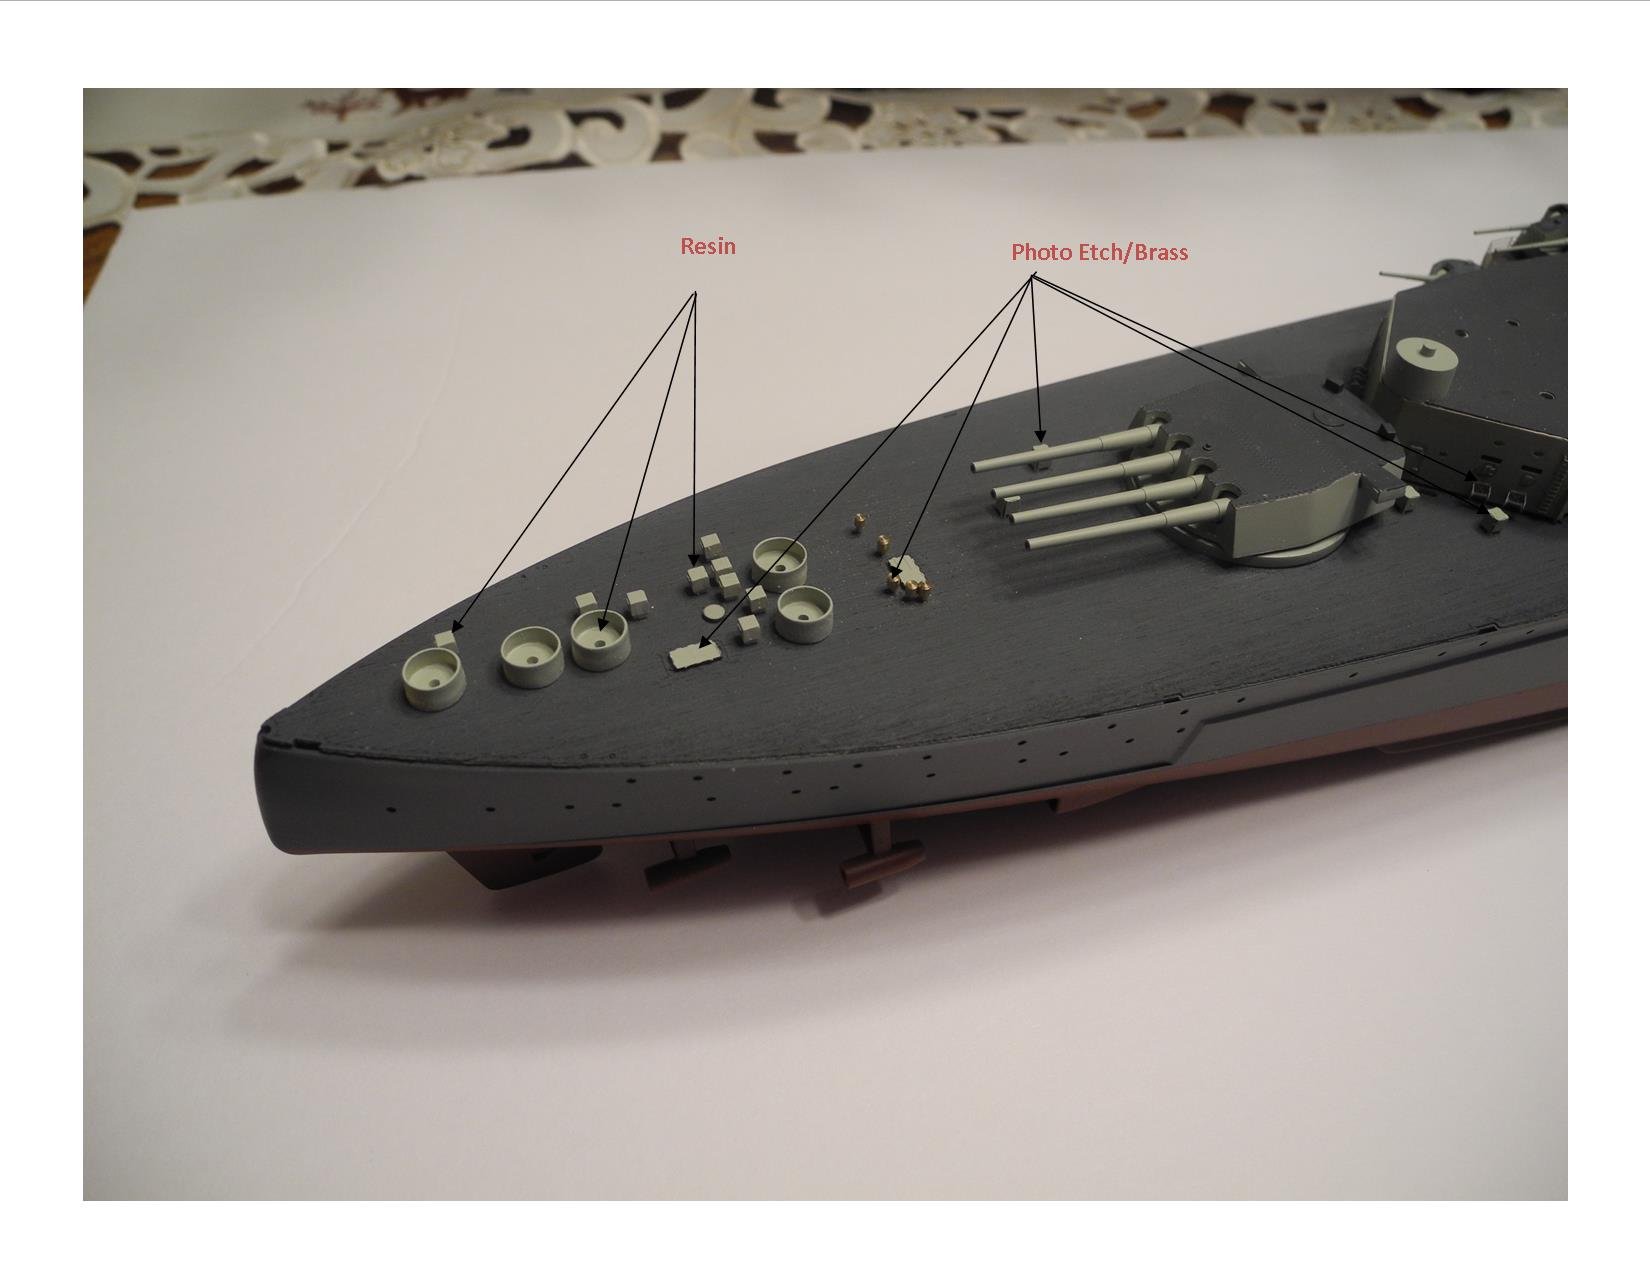
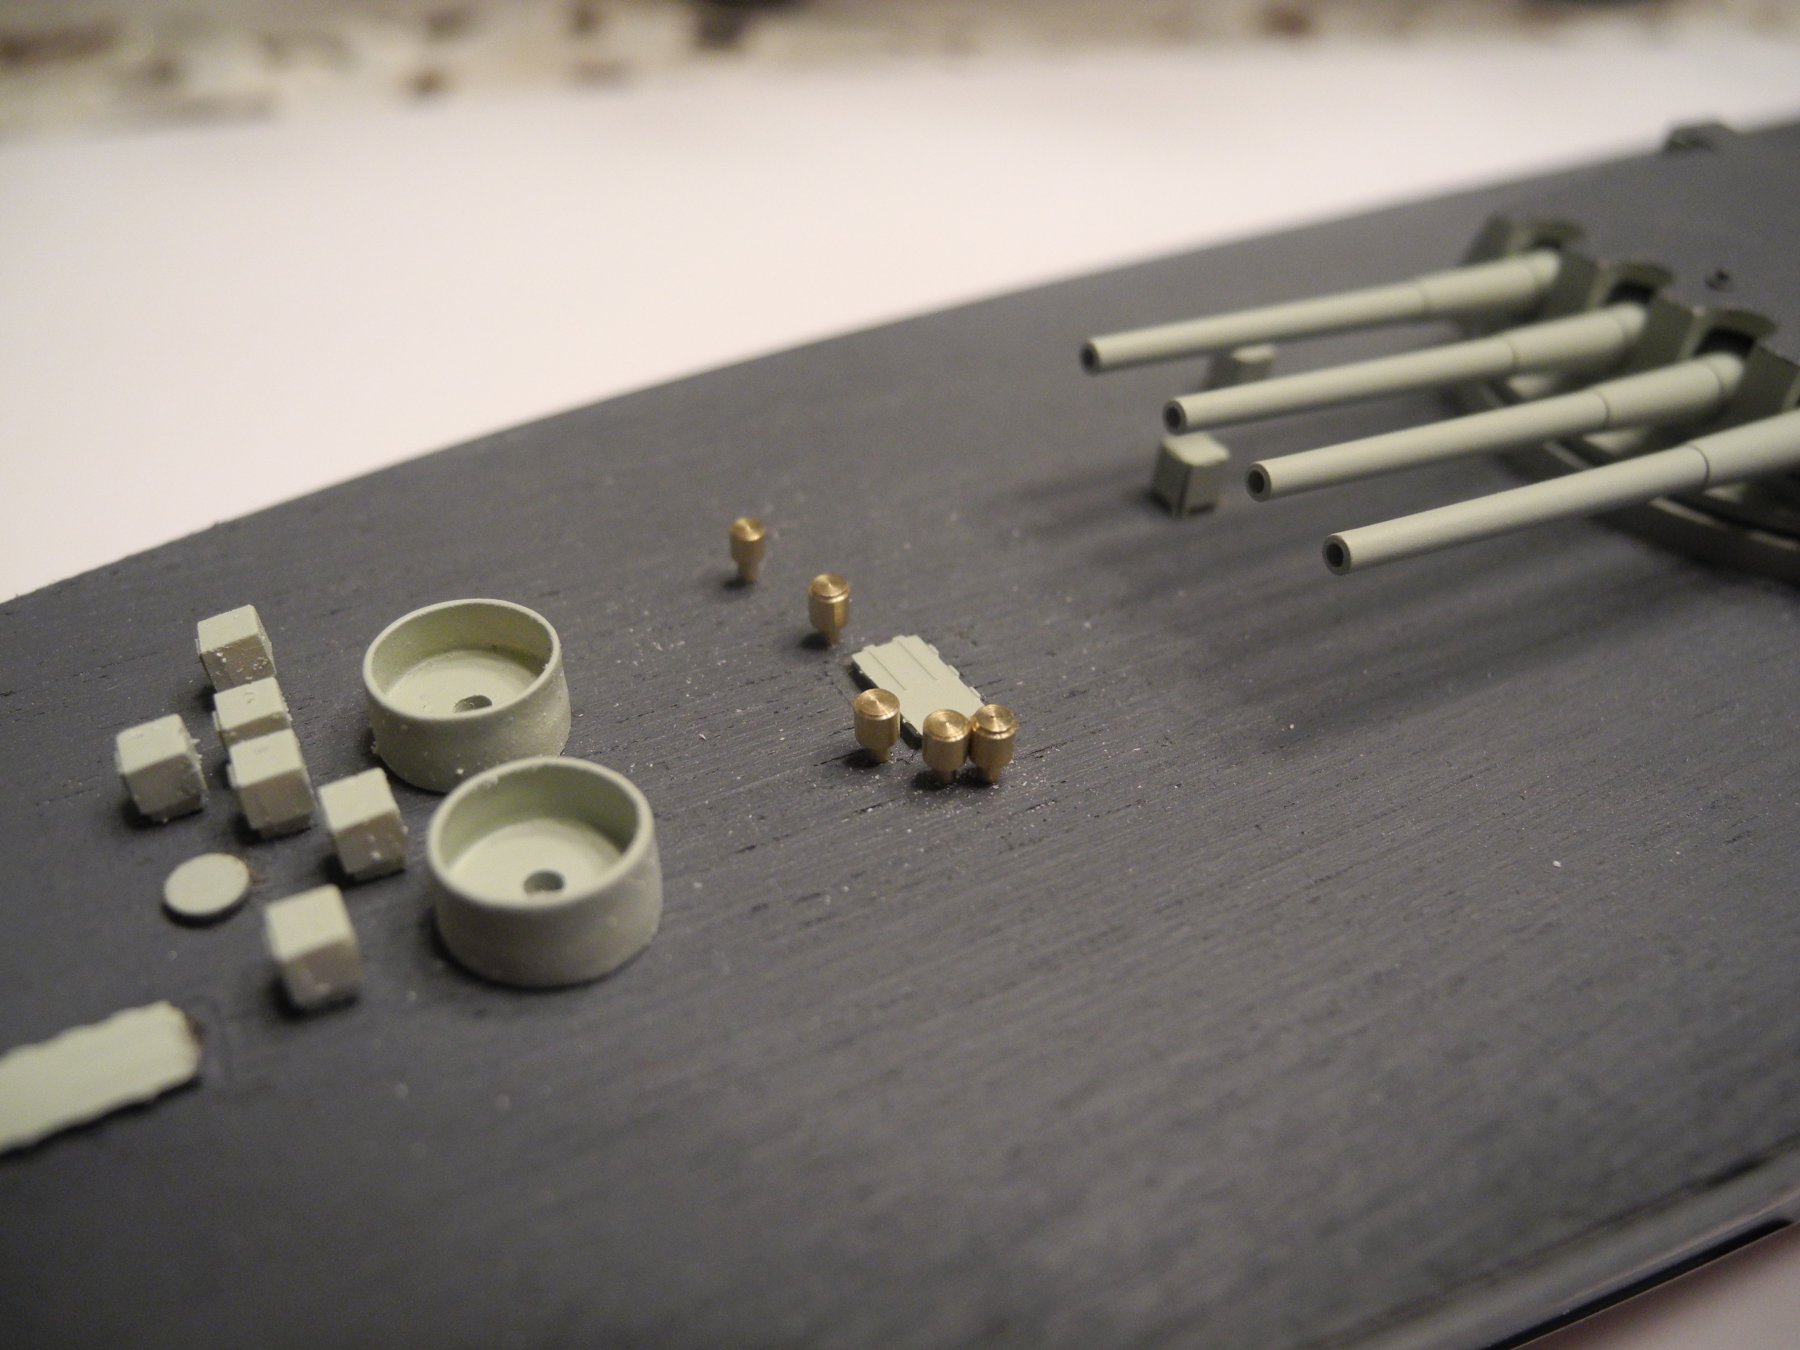
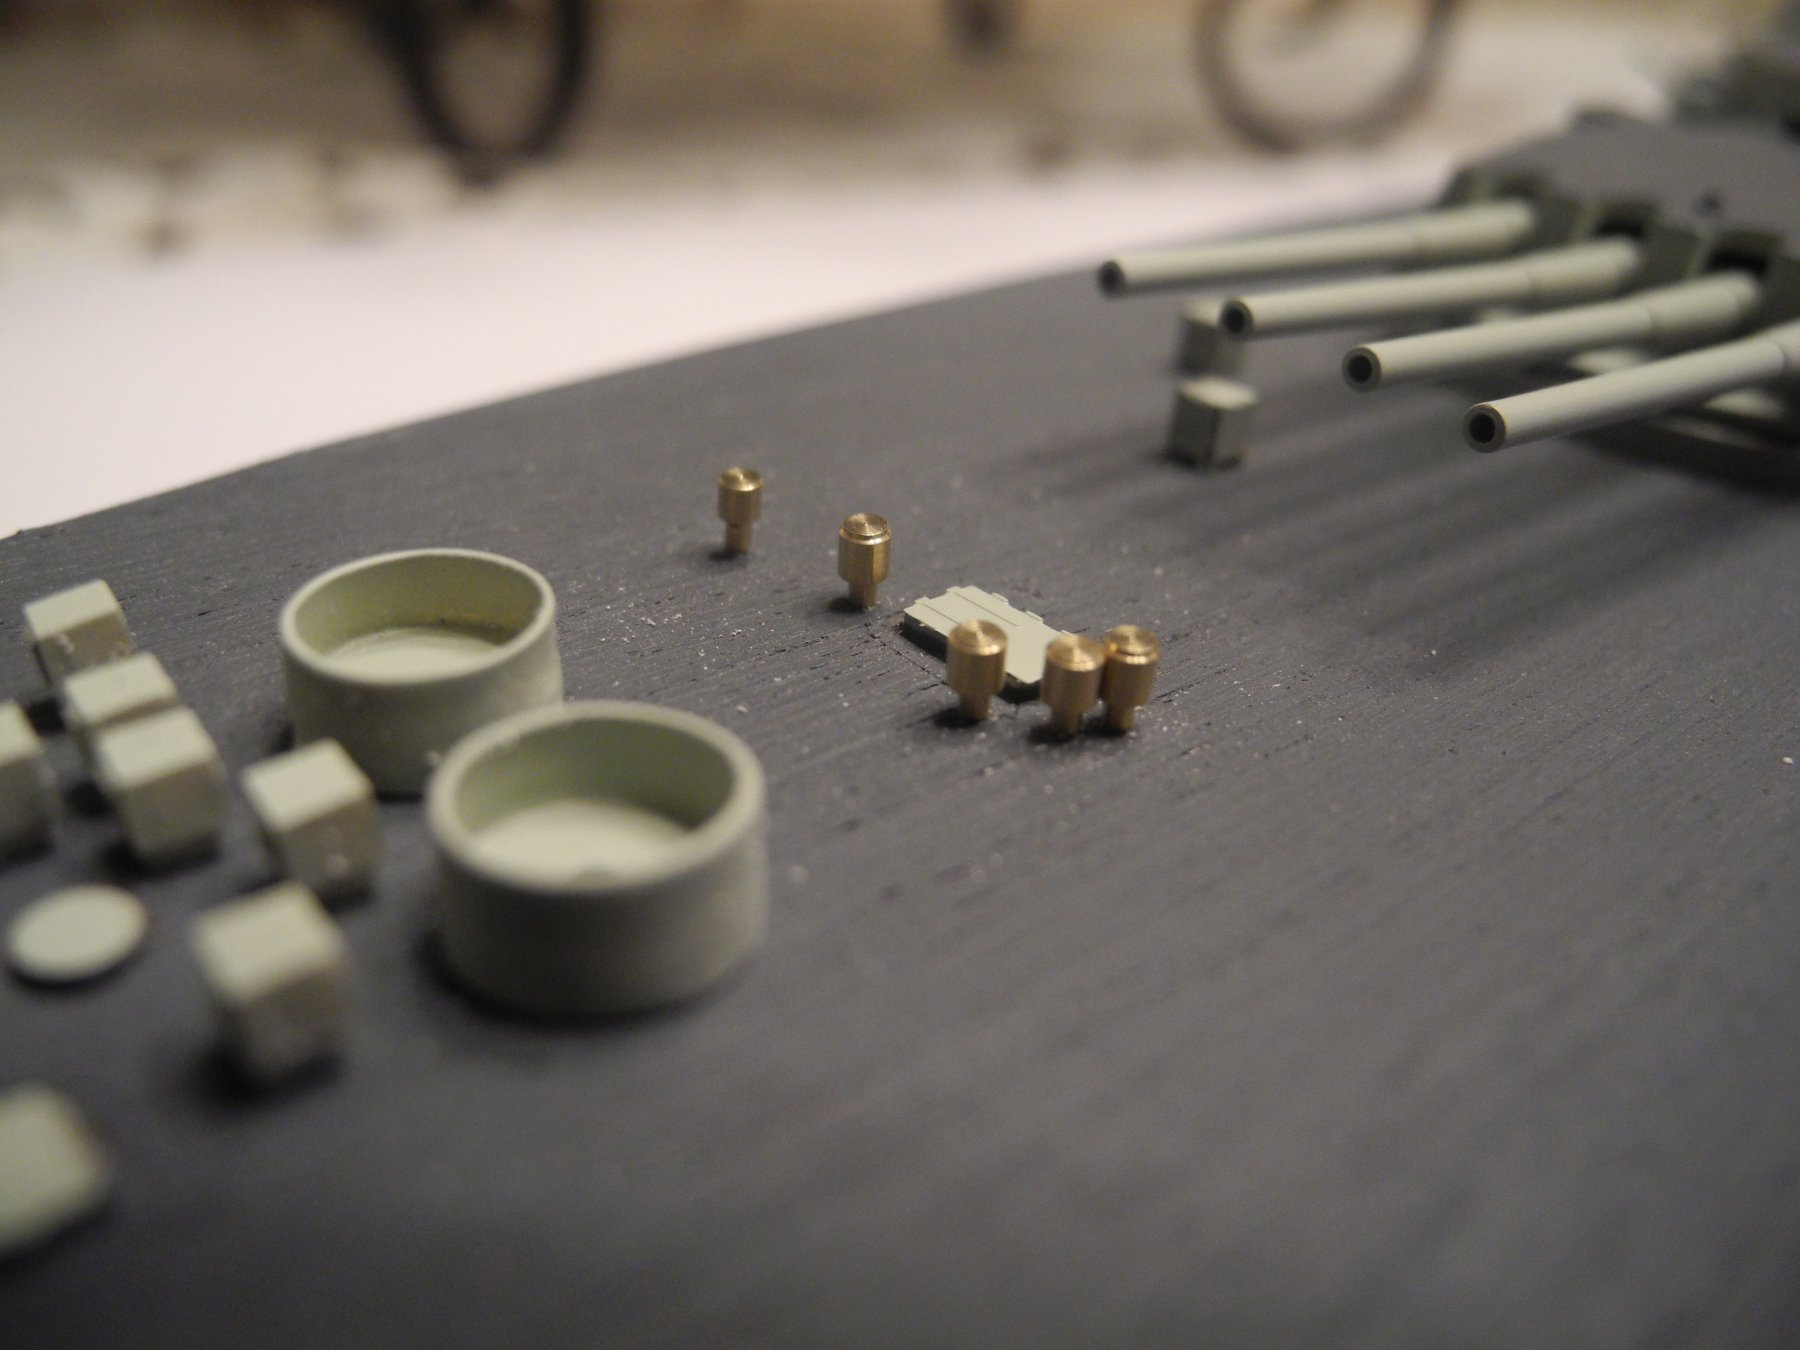
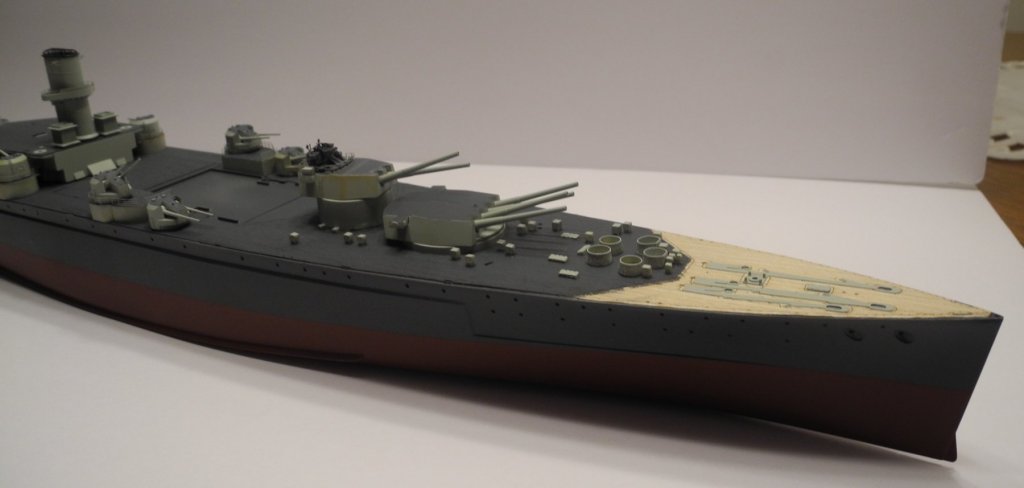
Believe it or not, a lot of the little protrusions you see on the deck are actually small folded brass PE pieces. Others are cast resin. I think these pieces represent vents and perhaps ammo lockers. All the molded on deck detail got removed before the wood deck was applied. Now, the slow process of adding it all back. I am painting the pieces before I glue them to the deck to keep from making a mess trying to paint it while attached.
- 151 replies
-
- 10
-
-
- duke of york
- tamiya
- (and 2 more)
-
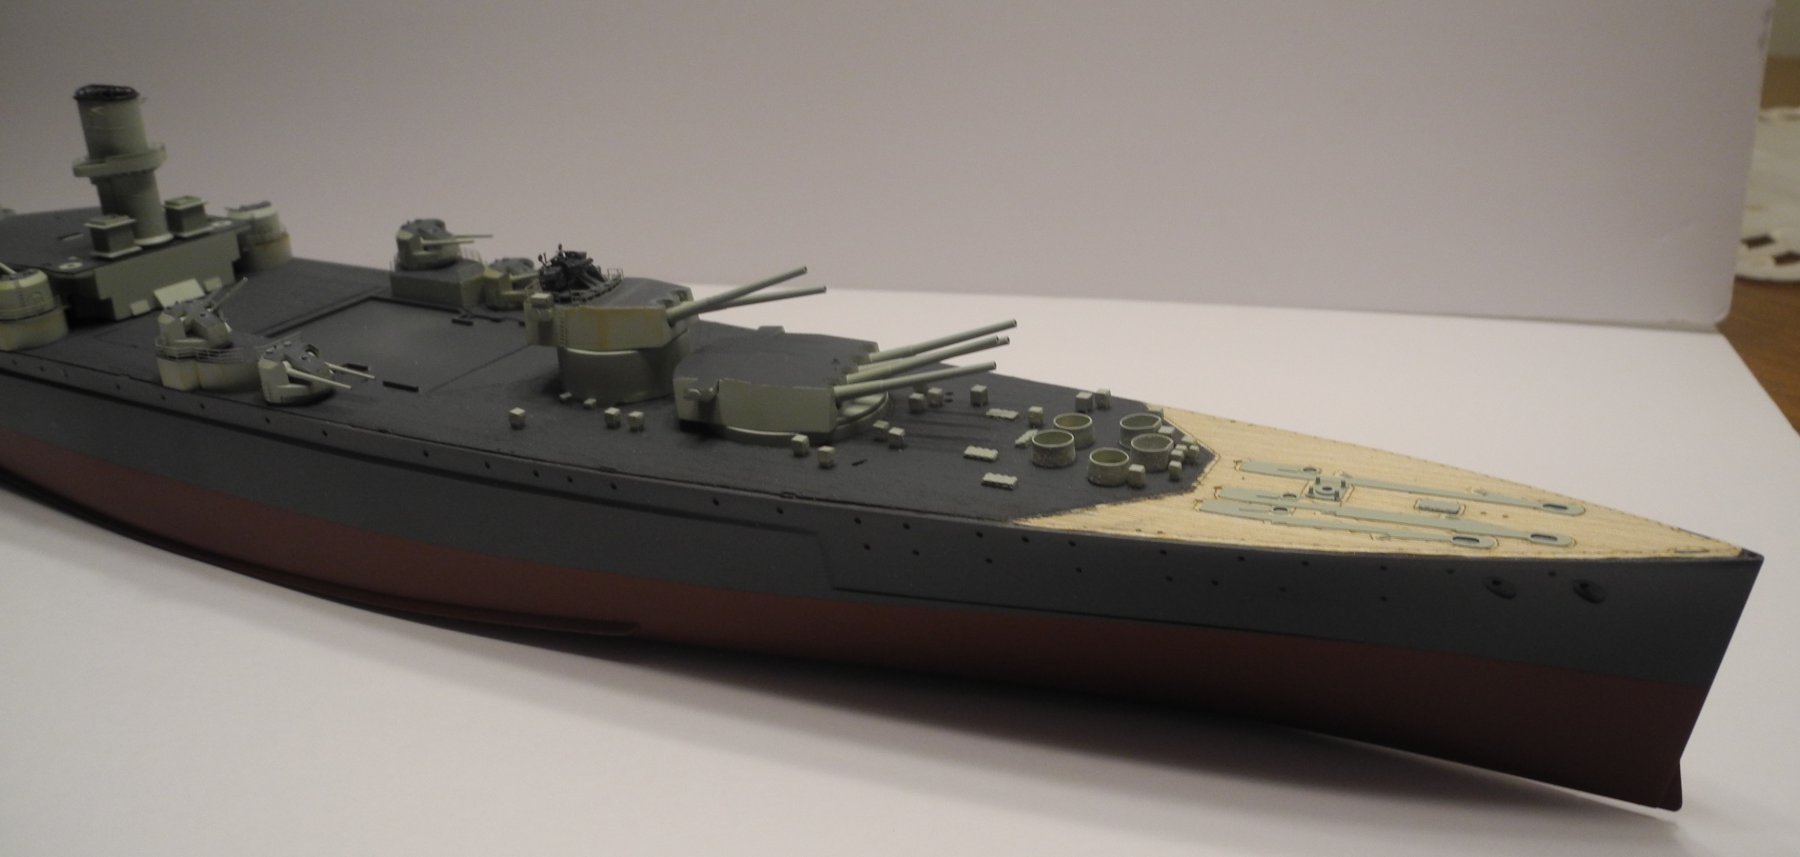
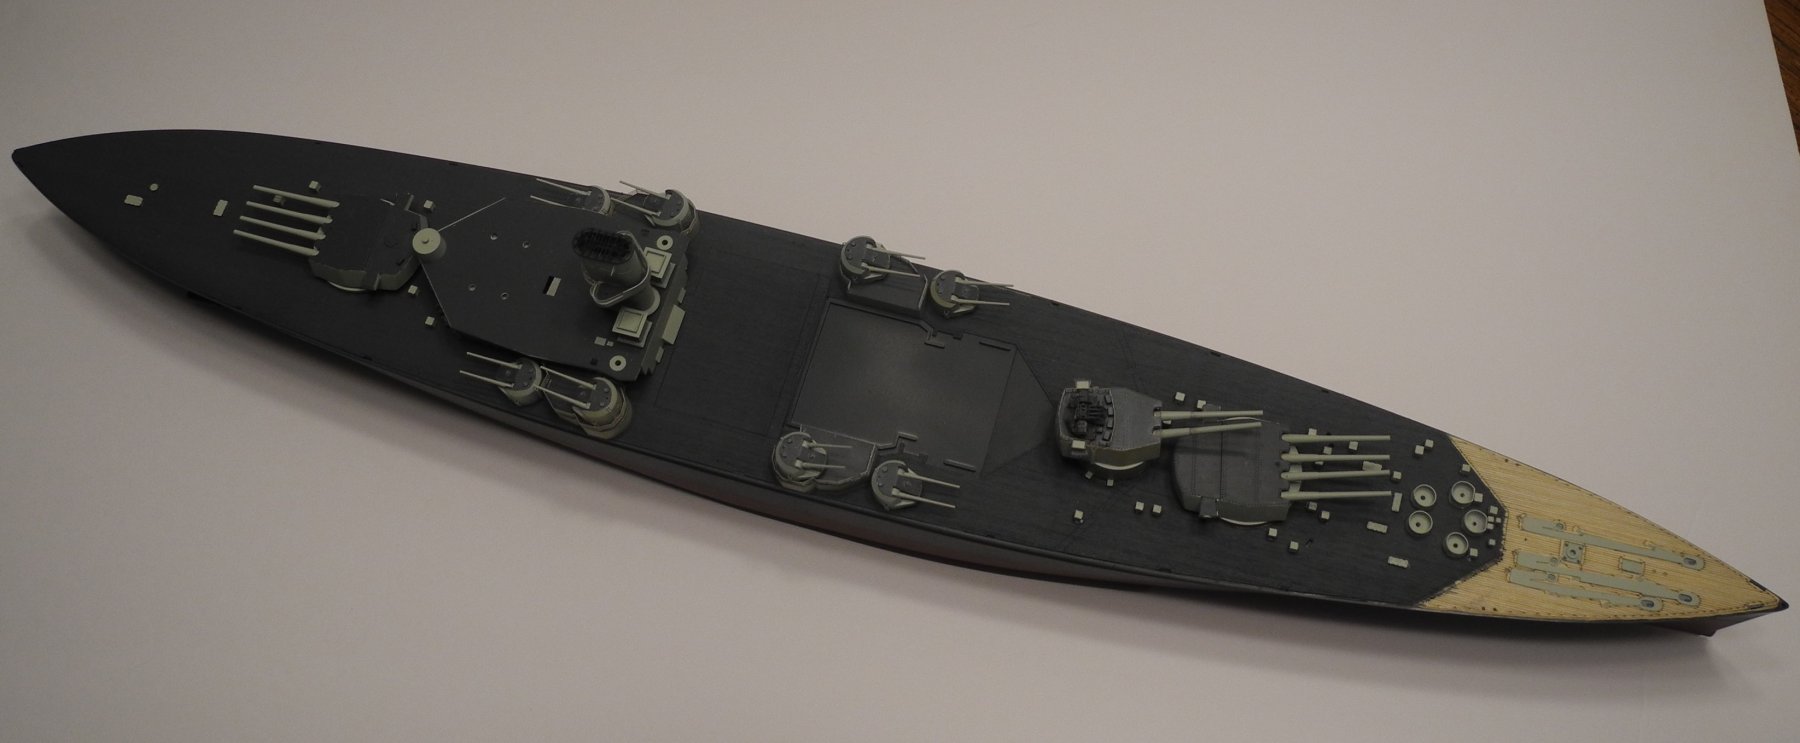
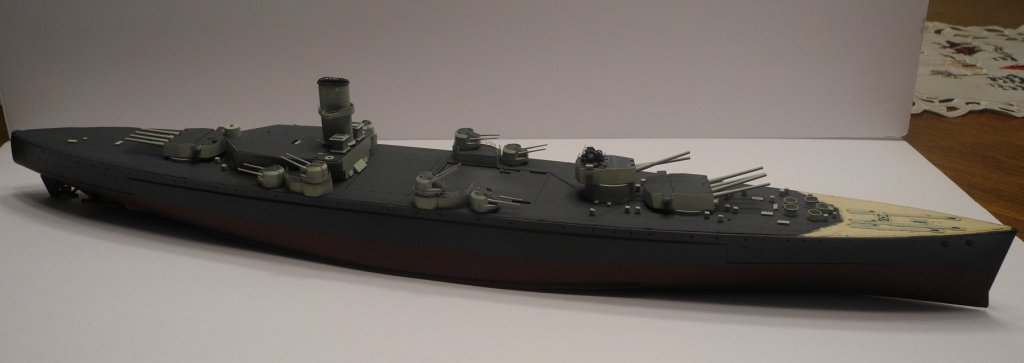
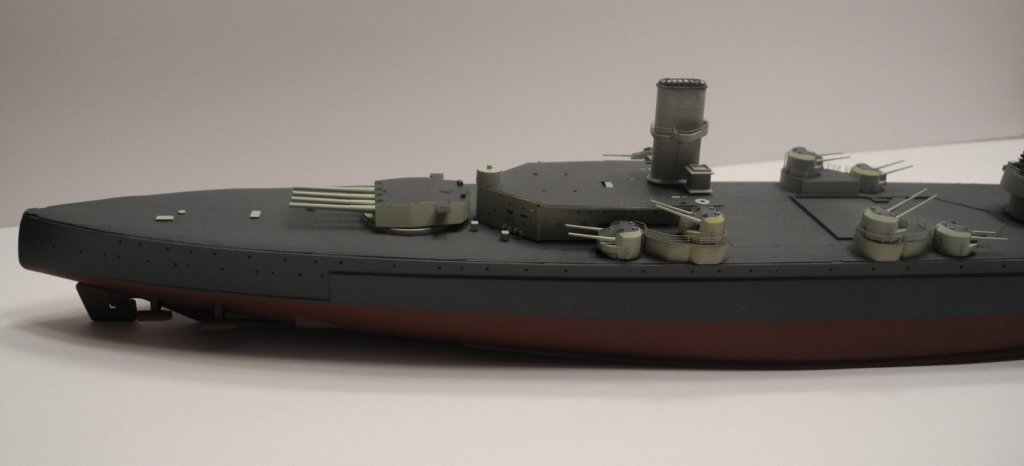
Just took a few photos with some of the superstructure parts I've been working on sitting on the deck, no glue yet. There are a lot of small details to cover. This remains a fun build and am looking forward to the remainder of it to finish.

- 151 replies
-
- 15
-
-
- duke of york
- tamiya
- (and 2 more)
-
Going to look super! Getting a much better idea of the size of this model sitting next to a chair. She's big.
- 146 replies
-
- 1
-
-
- dumas
- Chris-Craft Commander Express
- (and 2 more)
-
PS: I took this picture of my cousin just this year, in April. Gets around amazing for a man that's 96 years old. His mind is as sharp as a 20 year old and recalls things from 70 years ago like it was yesterday.

- 151 replies
-
- 10
-
-
- duke of york
- tamiya
- (and 2 more)
-
On this weekend before Memorial Day here in the USA, I wanted to post this little story written by my cousin about her Dad. "My father was born on the eve of our country's Independence Day in the year of 1921. He grew up the son of a carpenter/farmer/cattleman. He was next to the youngest of 6 children and he was the youngest son. He had 3 older brothers and one older sister and one younger sister. The oldest son was drafted into the Army when he was 30. His third brother joined the Navy when he was 17. My dad was also drafted into the Army when he was 22. My dad was in the Coastal Balloon Barrage Corps which manned helium filled barrage balloons. These balloons were designed to be flown held by cables over the ships making a protective field which the enemy planes could not penetrate. If the enemy planes tried to get close enough to the ships to bomb them they would get entangled in the cables and thus crash the aircraft. It was what it was at that point in our history. These things didn't always work and my dad was wounded by flying shrapnel from an exploded bomb. He was hit in the back, through one kidney and one lung and his spine was badly injured. The medics that picked him up pulled the sheet over his head saying....."This one won't make it".....My dad pulled the sheet down and said...."Yes, I will....get me help!!!!" So he was a patient in a MASH hospital in North Africa. He healed to a point that he could get up and walk about a little but later came down with jaundice so he remained in the hospital for quite some time. One day at the hospital in North Africa he was watching a bulldozer across the way that was preparing a landing strip. As the bulldozer scraped and moved the earth a water truck followed it to wet down the area to lessen the amount of dust that was disturbed. This was done as a precaution to lessen noticability. But even with this amount of caution the worst happened. An enemy plane saw the dust and made a swoop dropping bombs that blew up the makeshift hangar and the water truck. That was a grewsome sight because the fireball was enormous. Several months later my dad was sent back to the US and medically discharged from the Army. After he had made it home his older brother finally was discharged and came home. Both brothers coming home alive was cause for celebration. A feast was prepared and the neighbors were invited to celebrate two brothers safe at home!!! They were adjusting back to life at home in the early 1940s. One afternoon they were talking about things they had done and things they had seen. As they were talking one or the other brought up the day in North Africa when a water truck was bombed by enemy aircraft and blew up. Sometime during the telling of this my dad interrupted and said...."well I was really close to that incident, I watched it from my hospital room which was just across the field from the airstrip." My uncle said, " Well, imagine that.....I was watching it too. I was pretty close to it too. I was driving the bulldozer!" These brothers were within shouting distance of one another in North Africa and unaware. Two brothers from Oxford, Florida, together in North Africa, watching a water truck being blown up but unaware that they were together in North Africa until they returned to Oxford FL. I would like to thank these two men for their faithful service to our Country. My dad (92) and his brother (if he were alive would be 104). I would also like to thank every other service man and woman who has served in the Armed Forces protecting and fighting for me to have the right to live in a free country. P.S. My dad is now 95 and will turn 96 on July 3. Even though he is now blinded and deaf he still planted a wonderful garden this year and has had the best potato crop that he ever remembers.....Blessings on my "old man"....he is tough as nails and hard headed as a bull. We are truly blessed."
- 151 replies
-
- 9
-
-
- duke of york
- tamiya
- (and 2 more)
-
I've used Future, the acrylic floor product on my old decal sheets as well to prevent breakup - with great results. I spray the Future on with my airbrush. By the way, the new trade name for "Future", is Pledge Floor Care Finish. It can be found at WalMart and a bottle of it will last a modeler a lifetime (almost maybe).
- 151 replies
-
- 7
-
-
- duke of york
- tamiya
- (and 2 more)
-
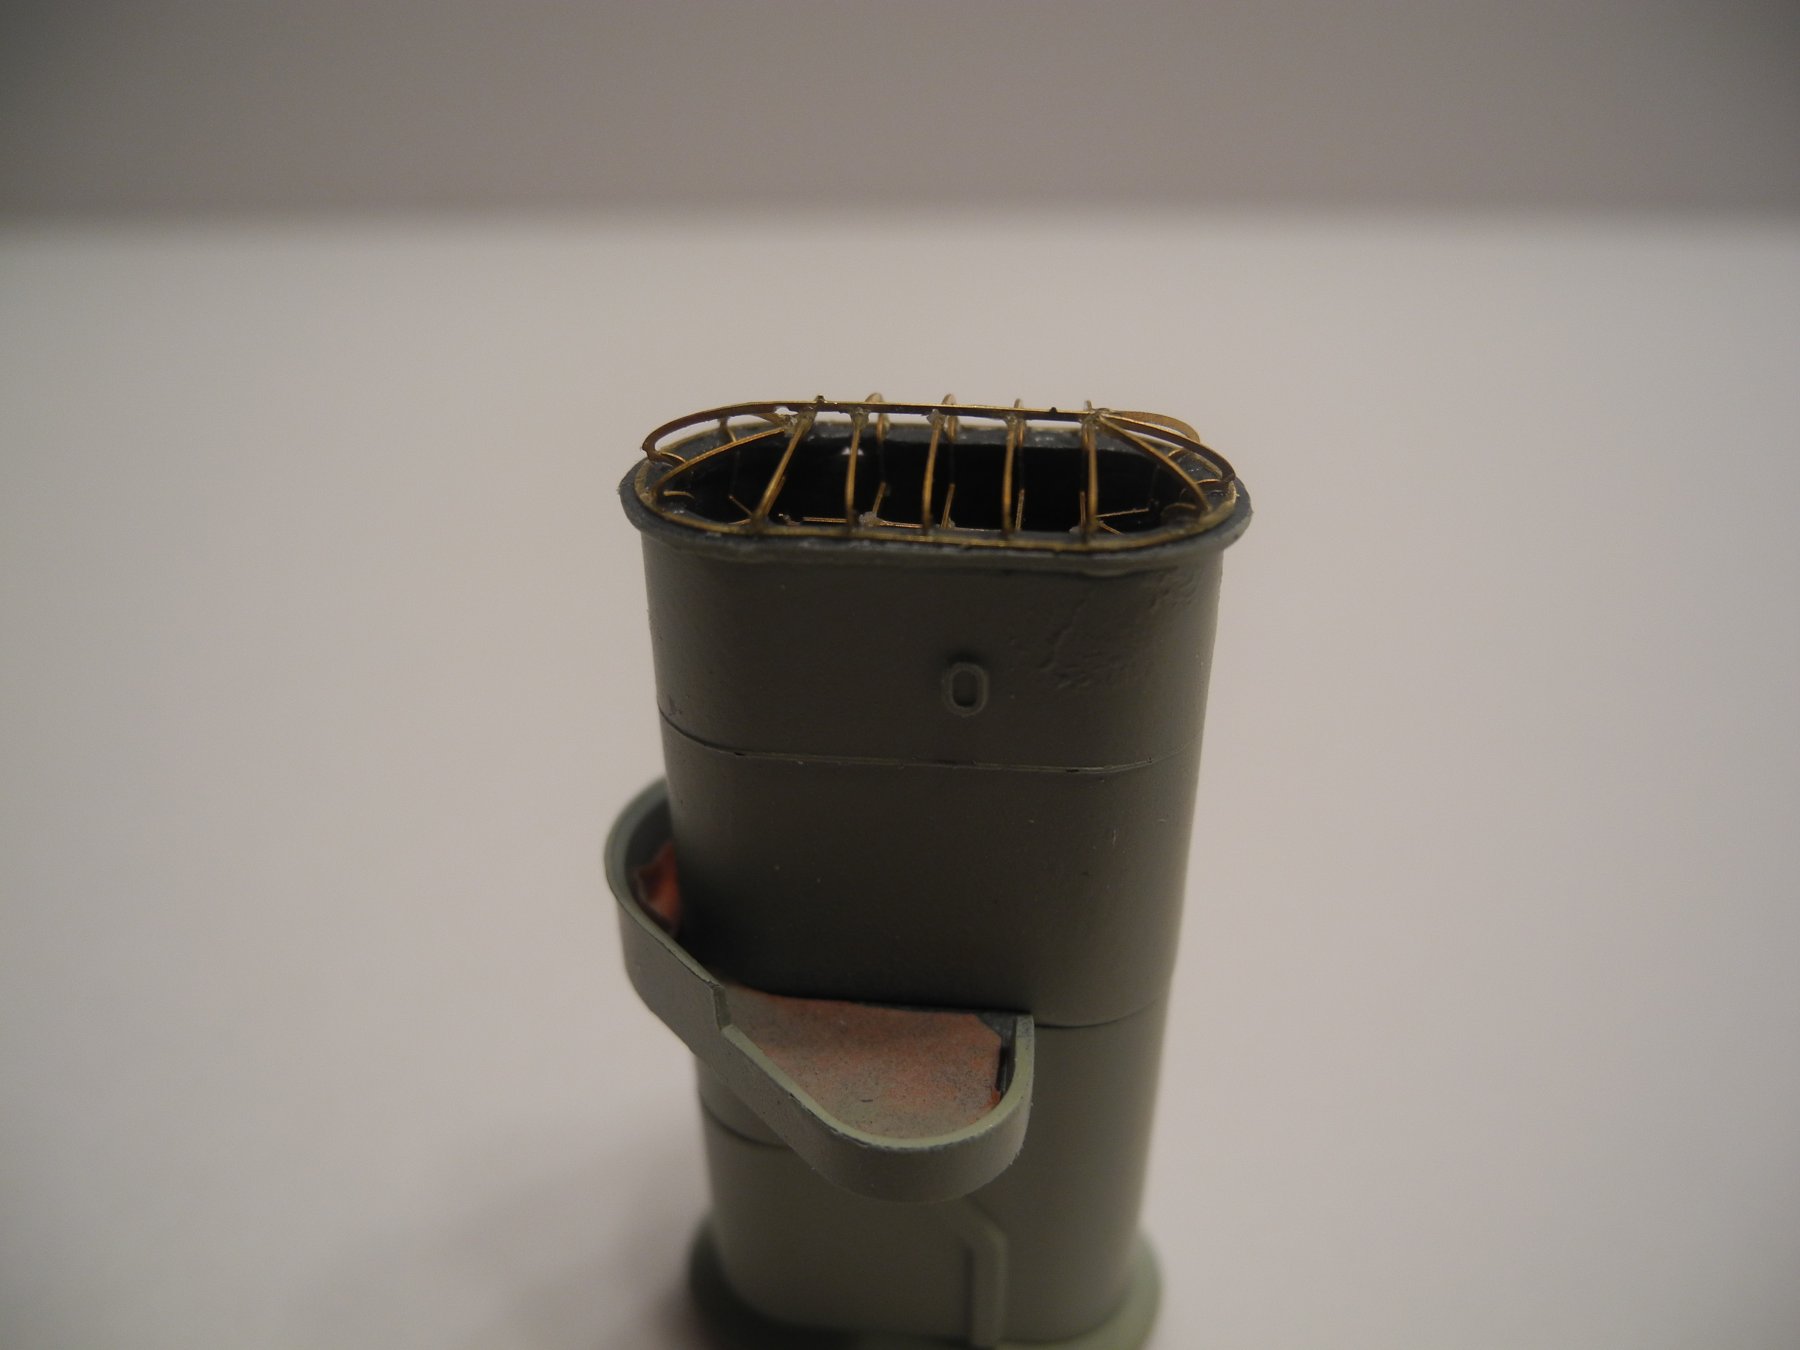
I got the 2nd funnel finished along with some more of the superstructure components. Will try to get some more photos up this weekend. I have noticed that replacement decals to include union jack flags are almost non existent. My kit decals have yellowed over the years. Just in case any of you don't know this little trick...if any of your decal sheets have yellowed over the years like the ones I mentioned above, just tape them inside a window facing outward for a day or so. The sun will bleach the yellow right out of the decal and they will look as good as new again. Now, don't go and leave them there for a long period of time because it may bleach out the desired colors all together, I don't know.
- 151 replies
-
- 6
-
-
- duke of york
- tamiya
- (and 2 more)
-
Thanks for mentioning the GPM model of the Bismarck. I looked it up and bookmarked the company. They offer some very interesting models, though I need to start with an appropriate model for a beginner using paper. Never tried it at all before, you you and Slog have convinced me it is a part of the hobby I need to try at least once.
- 193 replies
-
- 4
-
-
- cerberus
- paper shipwright
- (and 1 more)
-
I went back and looked at Capt. Slog's build thread for the 1:200 Bismarck to see those gun mounts. Had never seen his thread for the Bismarck before now. Great thread by the way. :-) What you guys are doing with paper is just amazing to me. Very realistic. Those guns will add a lot to your model.
- 193 replies
-
- 4
-
-
- cerberus
- paper shipwright
- (and 1 more)
-
Are you using the acrylic polyurethane for the black red? That poly paint is notorious for clogging the tip. In any event, if I encounter problems with tip clogging, a couple of drops of flow improver in my color cup usually takes care of the problem after the tip is cleaned.
-
Very, very nice work, Piet. So small and delicate. Really like the copy paper soaked with CA idea. Will need to remember that in the future as it could come in handy for different situations.
- 83 replies
-
- 6
-
-
- o16
- pacific crossroads
- (and 2 more)
-
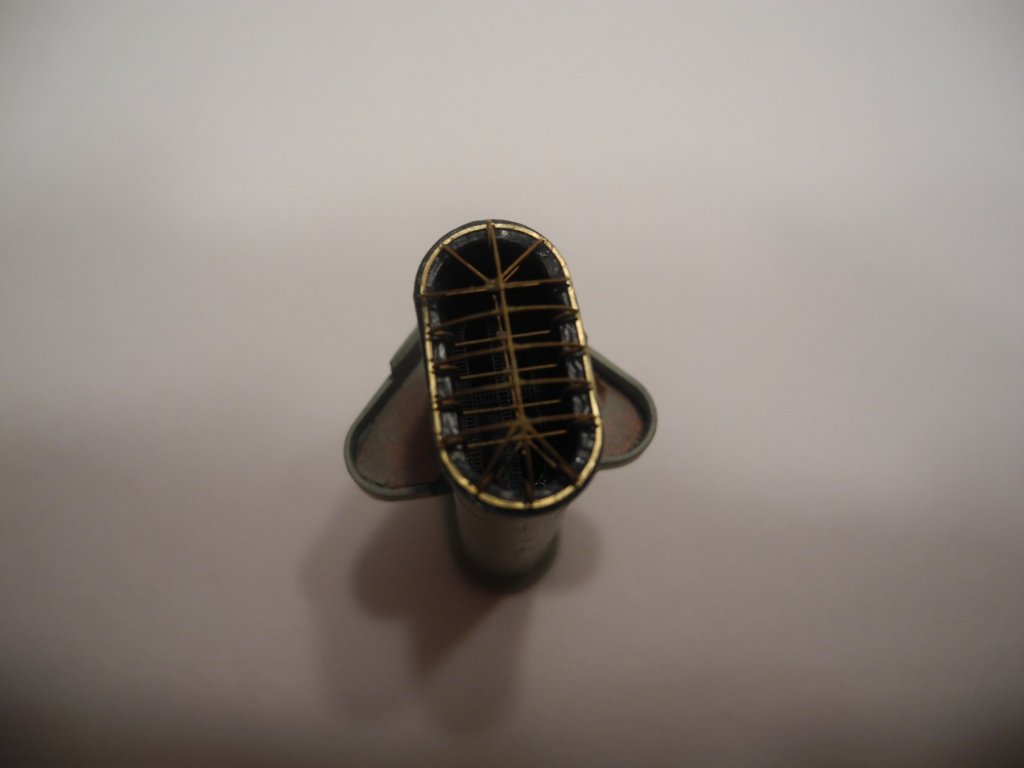
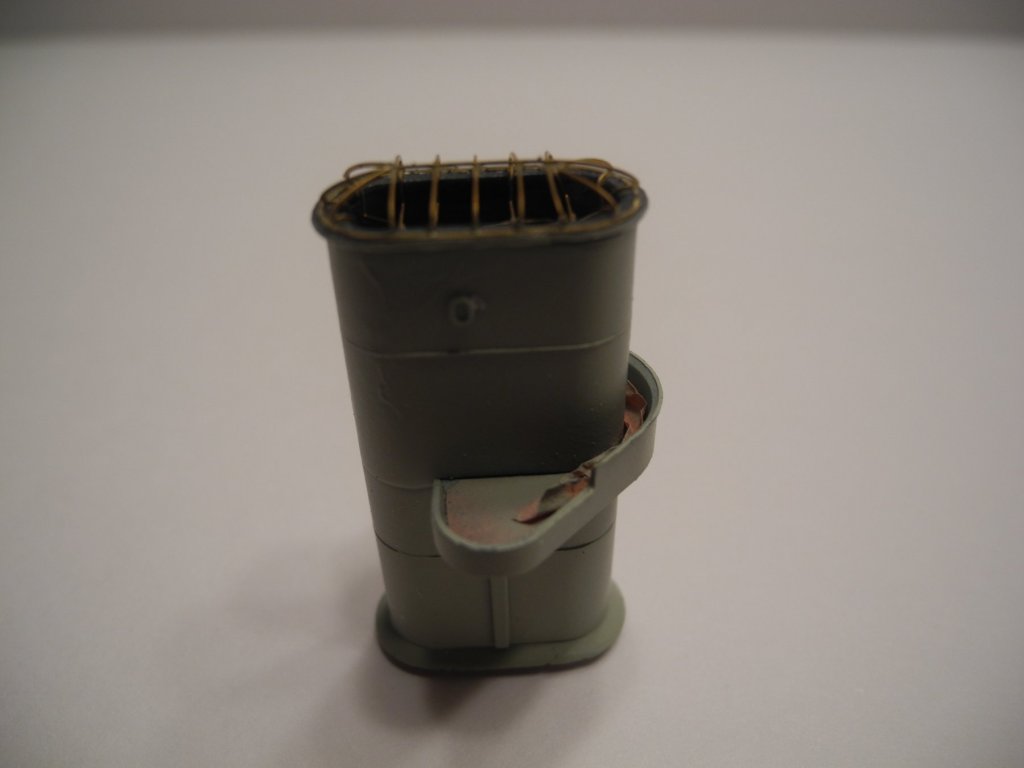
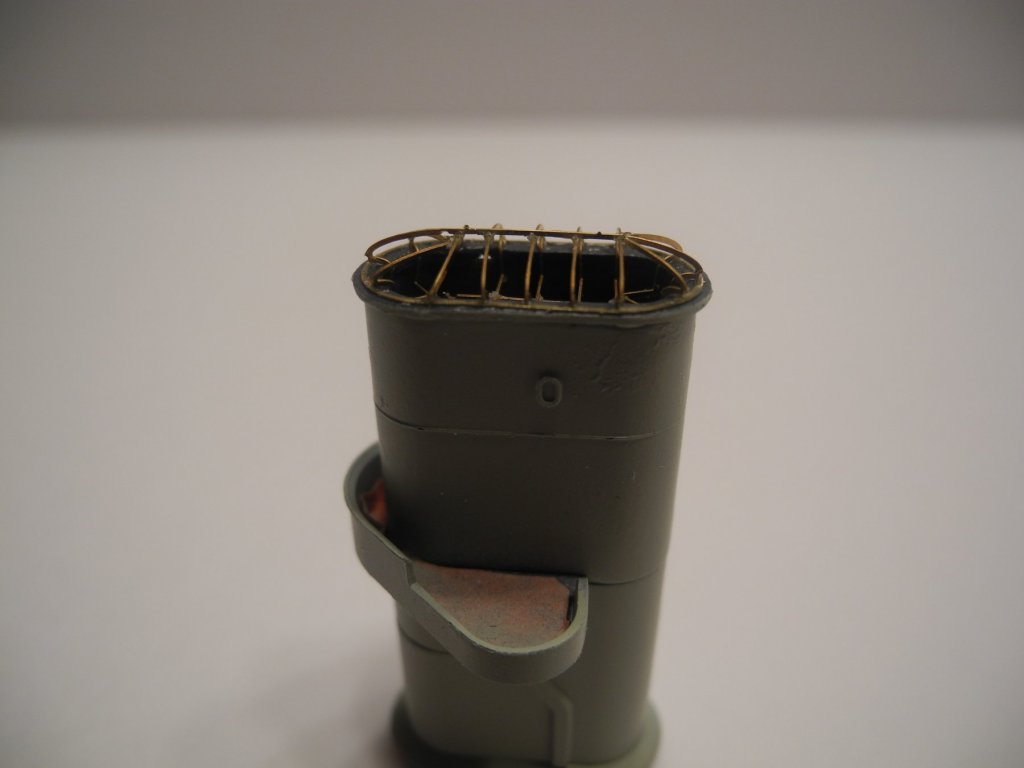
As the old saying goes, "if I had known then what I know now...." The Pontos set came with details to rework the tops of the ship's funnels. Sad to say, but it took me hours to figure out what I had to do to make these delicate PE parts fit. And that's just one funnel. If any of you decide to try this build for yourself, beware the funnels. The kit provided parts don't look too bad, and I'm not sure I would do it all over again. One consolation, the second one won't be half the problem of the first as now I know what I need to do. It takes a lot of delicate cutting, grinding, sanding, and fitting to get it to work. Once you cut the kit parts, you're committed, come hell or high water. Don't say I didn't warn 'ya!
- 151 replies
-
- 13
-
-
- duke of york
- tamiya
- (and 2 more)
-
Hi Eddie Those are exactly the ones I want to try. I'm getting the two mixed up, Ak Interactive and MRP. Aren't they the same company, but one is water based acrylics and the other lacquer based? The lacquer based paints are the ones I am most interested in trying.
- 151 replies
-
- 3
-
-
- duke of york
- tamiya
- (and 2 more)
-
I watched that little demo video of the AK lacquer paints and I very much want to try them. Will likely source them from Ebay.
- 151 replies
-
- 4
-
-
- duke of york
- tamiya
- (and 2 more)
-
I'm having the devil of a time sourcing the AK Interactive paints here in NA. Found one source in NA, and it's not a well known dealer. Found his selection to be very limited. I'm thinking it's because of product liability and difficulty in shipping lacquer based paints. It would definitely have to be ground shipped and the ingredients are likely illegal in the Peoples Republic of California and maybe some other states. But you are right, we are spoiled for choice here in the states.
- 151 replies
-
- 5
-
-
- duke of york
- tamiya
- (and 2 more)
-
I bought the gator grip glue from a vendor on Ebay, and believe he was the actual maker of the product (or at least bottled it up for sale). Since then, have noticed that Freetime Hobbies in Georgia carries it as well. Here: https://freetimehobbies.com/searchresults/?search_query=gator+grip&Search= Gator Grip really excels where you are gluing a photo etch piece to a plastic surface or to another piece of photo etch, and you need a little extra time to position the piece without having it set up on you too fast. To really take a good hold requires about 10 minutes of set time before it gets tacky.
- 151 replies
-
- 4
-
-
- duke of york
- tamiya
- (and 2 more)
-
Stage Coach 1848 by Eddie - Artesania Latina - Scale 1:10 - WOOD
CDW replied to Eddie's topic in Non-ship/categorised builds
A problem with a lot of the faulty products is a lack of proper quality control. Good quality control catches a bad run of products. But the reason much of the Chinese products are less costly is due to the lack of quality control. Sadly, the customers are their quality control. Glad you got those sorted out.