CDW
-
Posts
7,730 -
Joined
-
Last visited
Content Type
Profiles
Forums
Gallery
Events
Everything posted by CDW
-

Loarre Castle (Spain) by King Derelict - Aedes Ars 1/200
CDW replied to king derelict's topic in Non-ship/categorised builds
Well check this out...in my earliest years, I worked as a surveyor, doing mostly construction projects rather than land surveys. From the old men who were master surveyors, chiefs, I learned that the early measuring instruments were known as "chains" and were 66 feet in length. (our modern chains then were 100') One length of the chain (66') in width by 10 lengths of the chain in depth (660') 66 X 660 = 43,560 sq. ft., one acre. 80 lengths of the chain (66' X 80) = one mile. 6 miles X 6 miles = 36 sq. miles On our maps, everything is divided by sections (one sq. mile) and a Township and Range = 36 sq. miles What becomes quickly obvious is that all our measurements are evenly divisible by 6 and were designed to be that way since who knows how long ago. For what purpose or reason, I'm not certain but 6 is a very prominent number that was given much significance. -
Loarre Castle (Spain) by King Derelict - Aedes Ars 1/200
CDW replied to king derelict's topic in Non-ship/categorised builds
I have been told that the ancient builders, masons, were the forerunners of what we know today as the Masonic Order. The Blue Lodge. Today the Masonic Order uses symbolism to teach morality whereas the ancient ones used the actual tools in their work. The compass and square are symbols of Free Masonry, but the actual tools have been around for millennia. The masons of old took a solemn oath to never reveal their secrets of construction and nothing was written down. The masters of the craft we would know today as the architects or engineers. All their knowledge of the craft was kept inside their heads, never in writing. It was their way of protecting their craft and keeping themselves in demand. -
Renault RE20 Turbo by DocRob - FINISHED - Tamiya - 1/12
CDW replied to DocRob's topic in Non-ship/categorised builds
Looks very convincing! Nice work, Rob. -
De Havilland Mosquito by Javlin - FINISHED - HK Models - 1/32
CDW replied to Javlin's topic in Non-ship/categorised builds
Beautiful! Great work Kevin. -
Loarre Castle (Spain) by King Derelict - Aedes Ars 1/200
CDW replied to king derelict's topic in Non-ship/categorised builds
I wonder what type of tools they had in those days to keep everything on line and level. There is a lot of complicated engineering involved on something like this, not to mention logistics. It makes our architecture of today seem uninspired and "ordinary" by comparison. There's a whole lot of character in these magnificent structures which were built in a time when men's primary goals were just simply having the next meal (or so it would seem). There's a whole lot about ancient history that's hard for me to comprehend. I love your model project, Alan. It's inspirational. -
Alfa Romeo Spider Touring Gran Sport by CDW - Pocher - 1:8 Scale
CDW replied to CDW's topic in Non-ship/categorised builds
That's a good question but I really don't know for sure at this point. From what I've read, it's not unusual to have to go back, disassemble, refit, and reassemble various sub-assemblies as you're moving forward with construction of one of these. I've read this is particularly true of the chassis and body panel assemblies. Every single screw location needs to be drilled out, then threaded before assembly. It seems to me some glue is going to be essential and maybe lots of it could be glued together and use no screws but certainly not all of it. -
Alfa Romeo Spider Touring Gran Sport by CDW - Pocher - 1:8 Scale
CDW replied to CDW's topic in Non-ship/categorised builds
The supercharger screws to the side of the engine block and hooks up with the intake. When you dry fit the head to the engine block, you find that the head does not seat properly to the block and needs to slide forward about 2 or 3mm. In order to do this, the holes where the screws go through the engine block to attach the supercharger must be elongated to allow the blower assembly to slide forward those few MM to allow the head to fit the block.

- 51 replies
-
- 14
-

-
Alfa Romeo Spider Touring Gran Sport by CDW - Pocher - 1:8 Scale
CDW replied to CDW's topic in Non-ship/categorised builds
The model is designed to fit together with machine screws but lots of massaging is required to make that happen. I can see why some of it goes together with screws as it's necessary to fit, adjust, refit, then rinse and repeat. Some of the engine internal working features seem unnecessary as once it's all completed, they will never be seen. From everything I've read, getting all the chassis parts, drivetrain and body panels to fit will be a real challenge.- 51 replies
-
- 10
-
-
Alfa Romeo Spider Touring Gran Sport by CDW - Pocher - 1:8 Scale
CDW replied to CDW's topic in Non-ship/categorised builds
Thanks Kevin. You'll be in for a long ride following this one. It's a LOT of work getting these kits to fit together and look presentable. I've seen some amazing builds of these things but man, it's going to take some dedication to getter done. I'll definitely be working other things in between sub-assemblies. -
Renault RE20 Turbo by DocRob - FINISHED - Tamiya - 1/12
CDW replied to DocRob's topic in Non-ship/categorised builds
Very sharp! -
Alfa Romeo Spider Touring Gran Sport by CDW - Pocher - 1:8 Scale
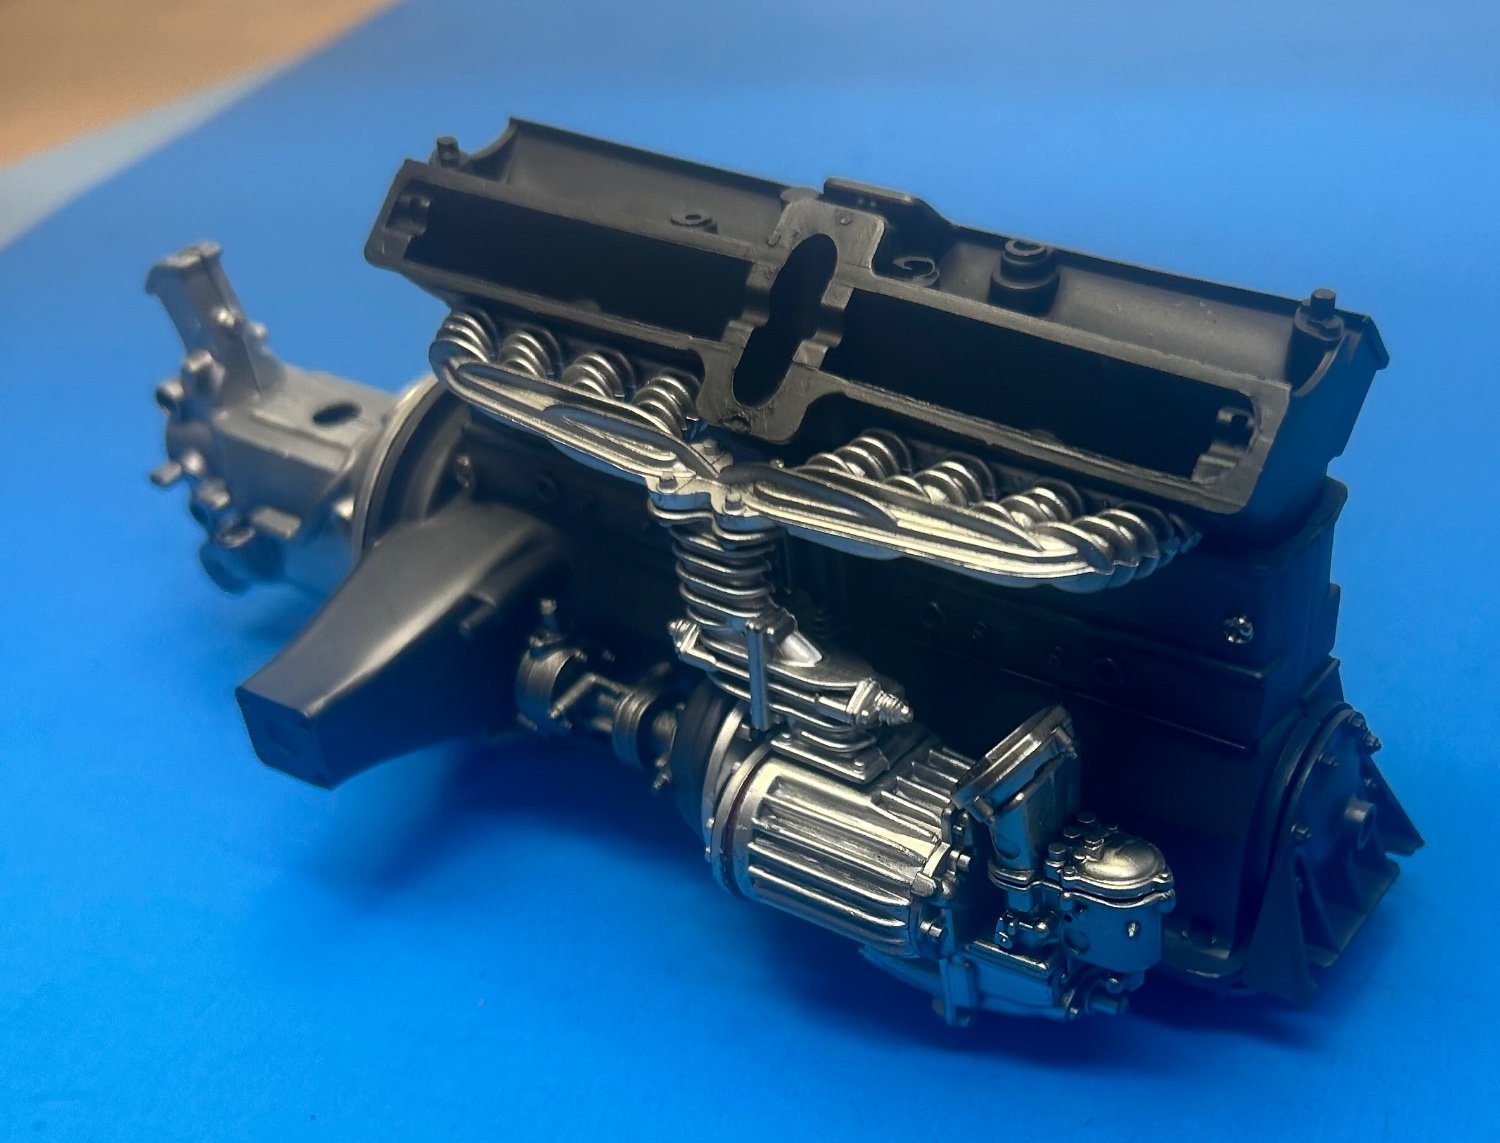
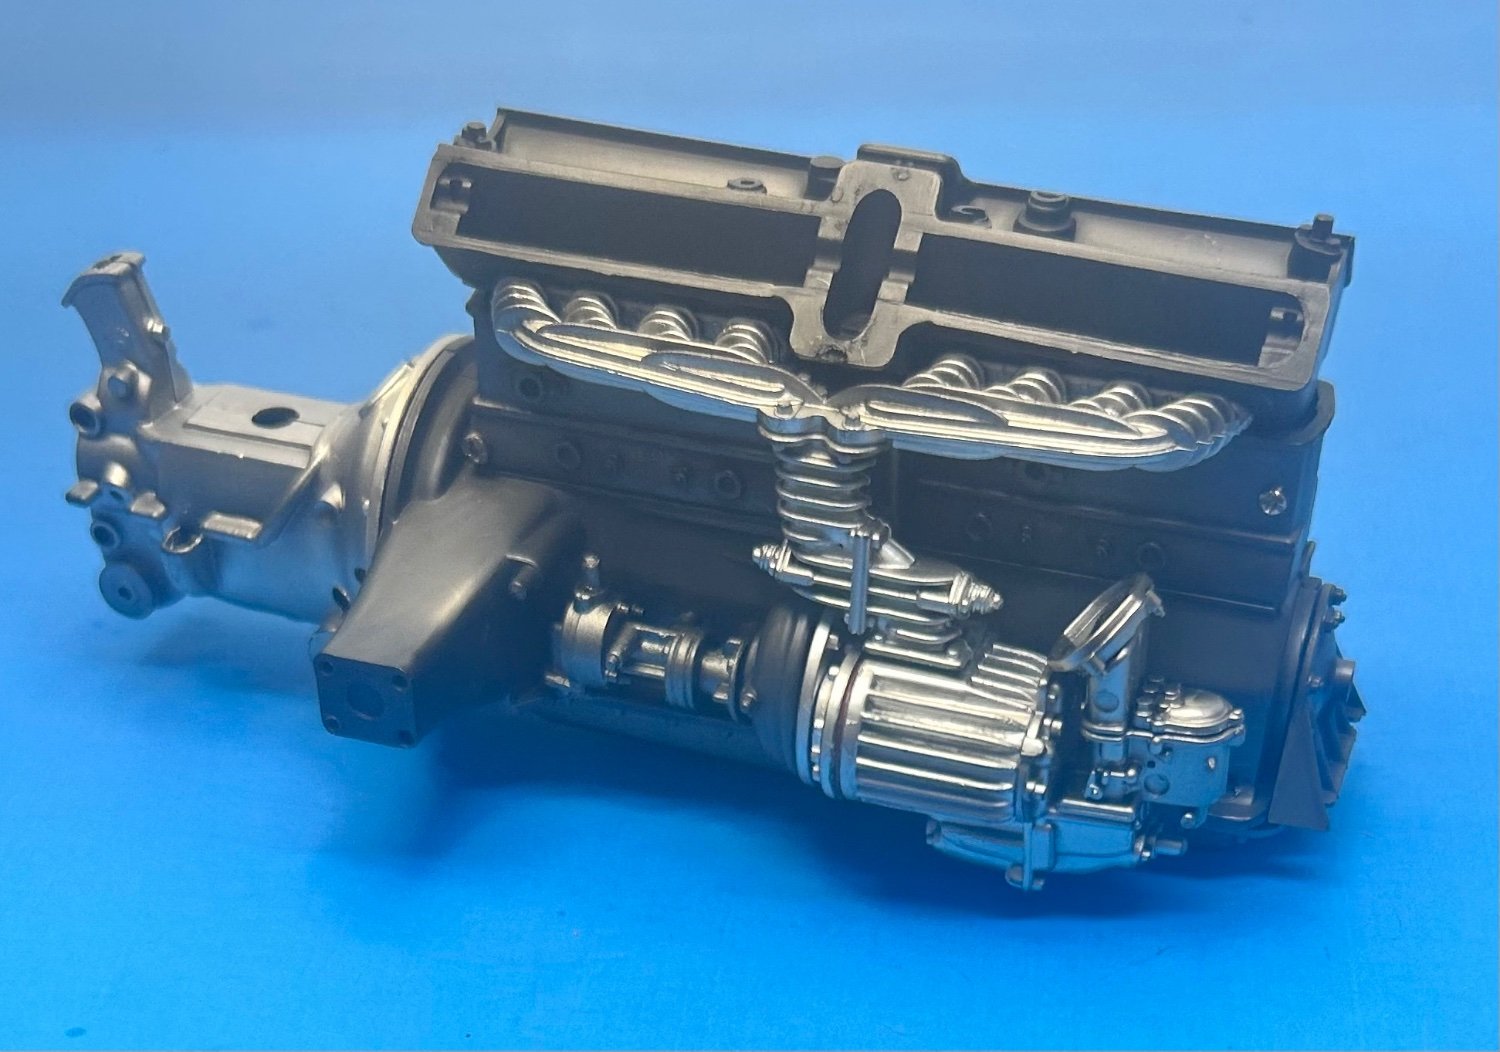
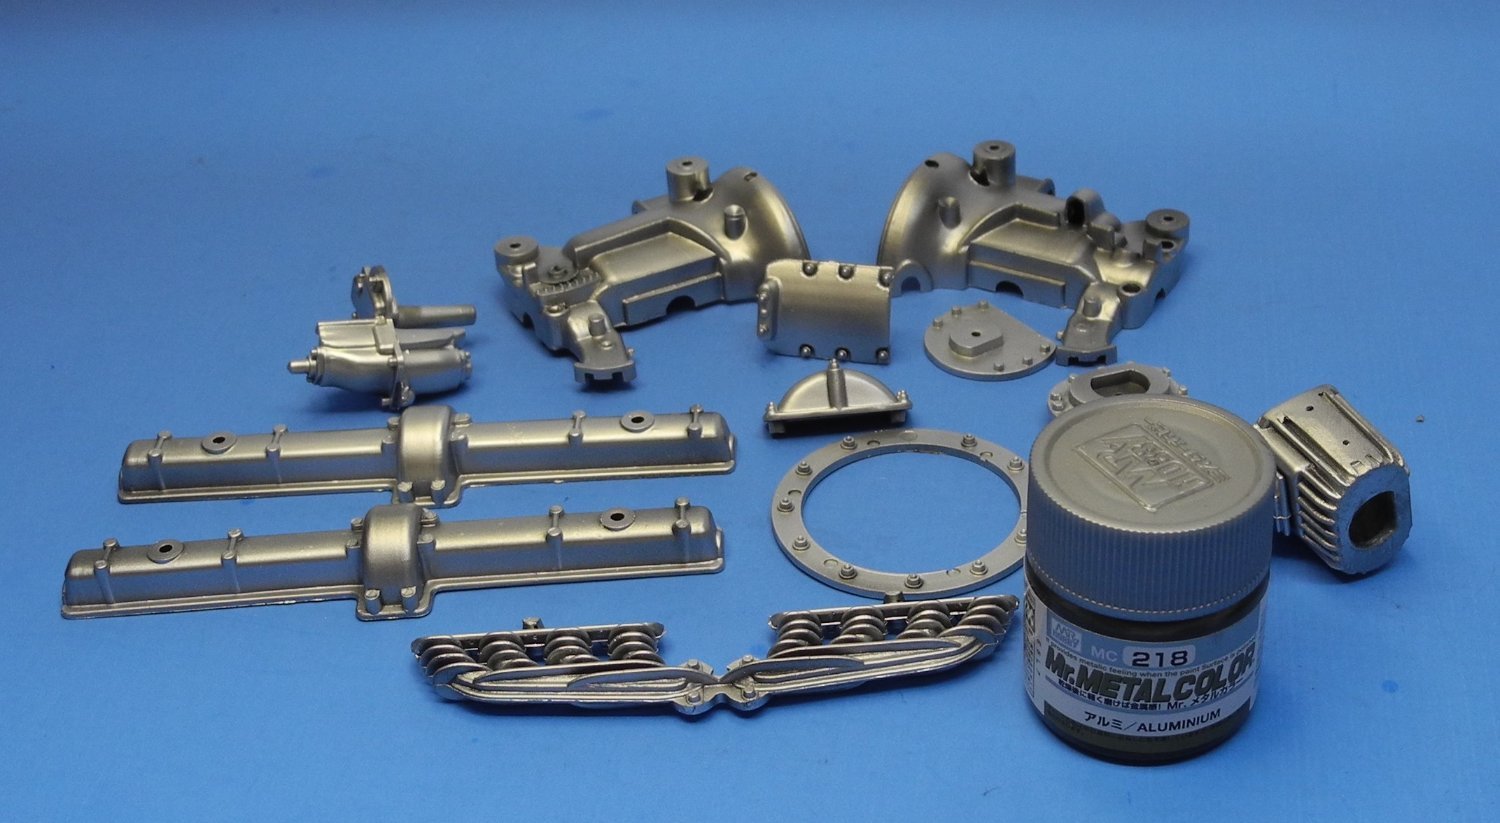
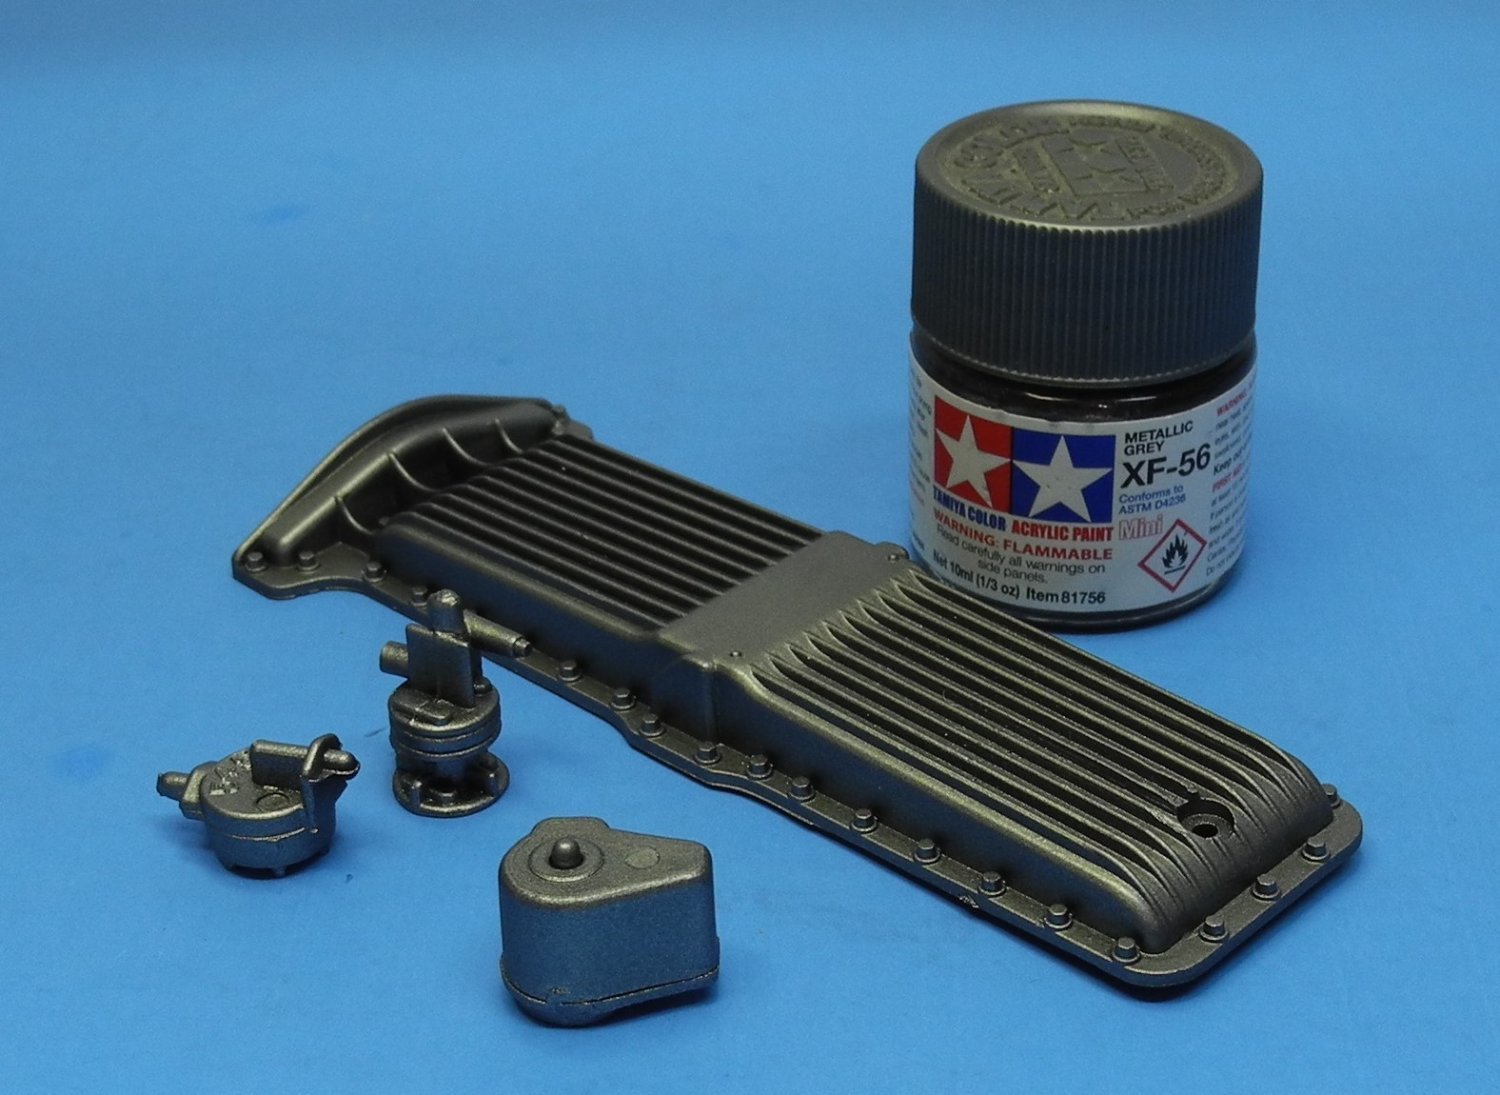
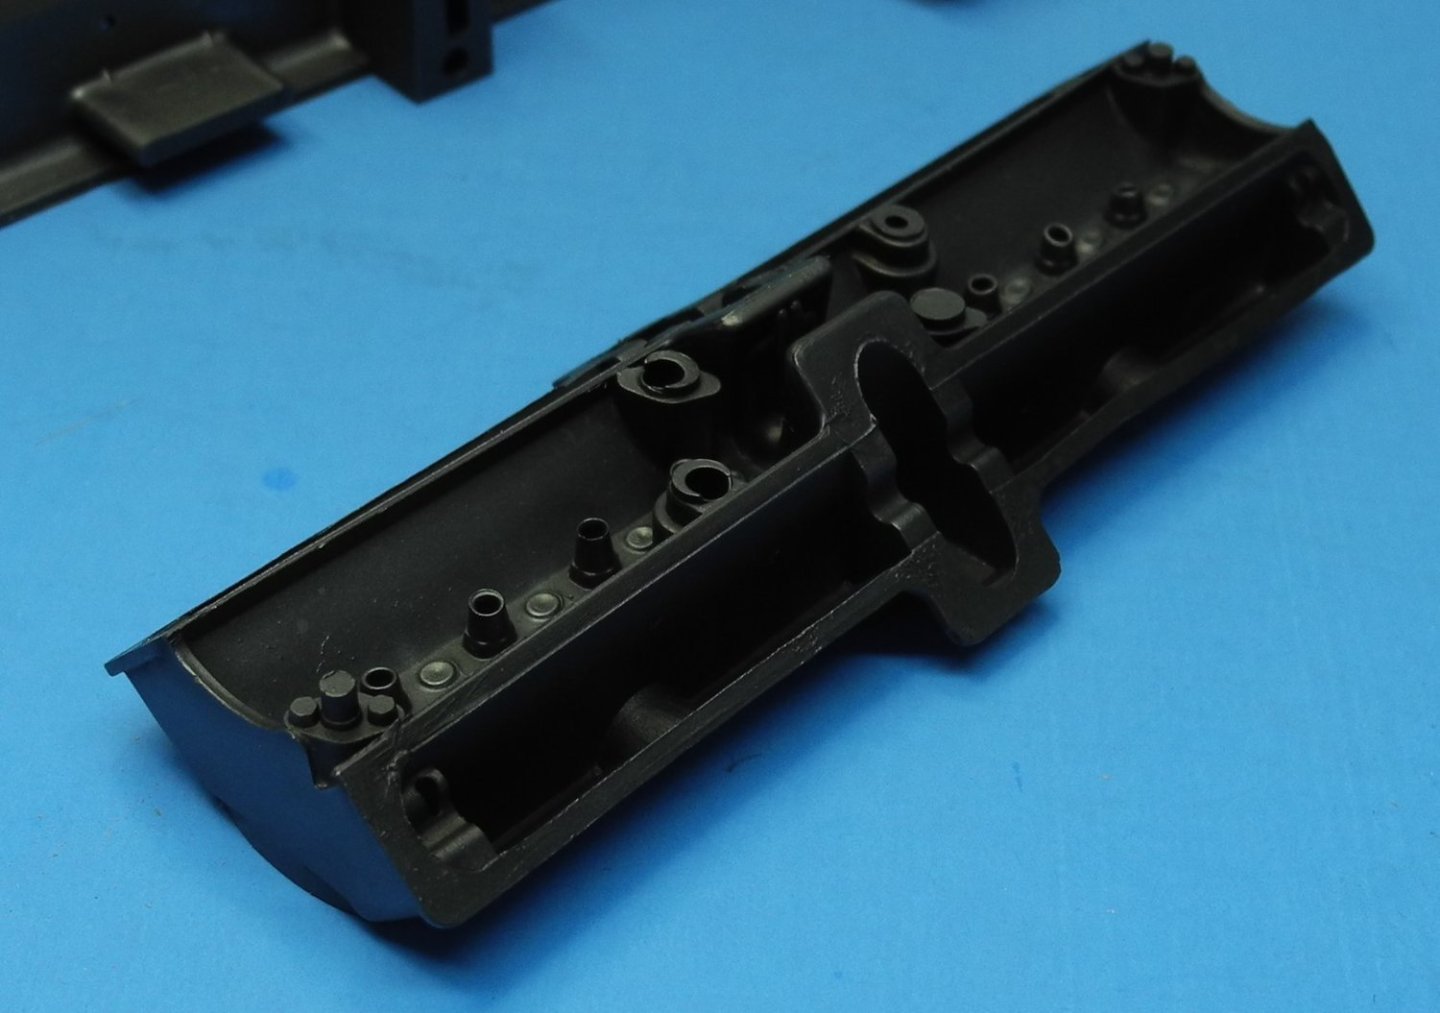
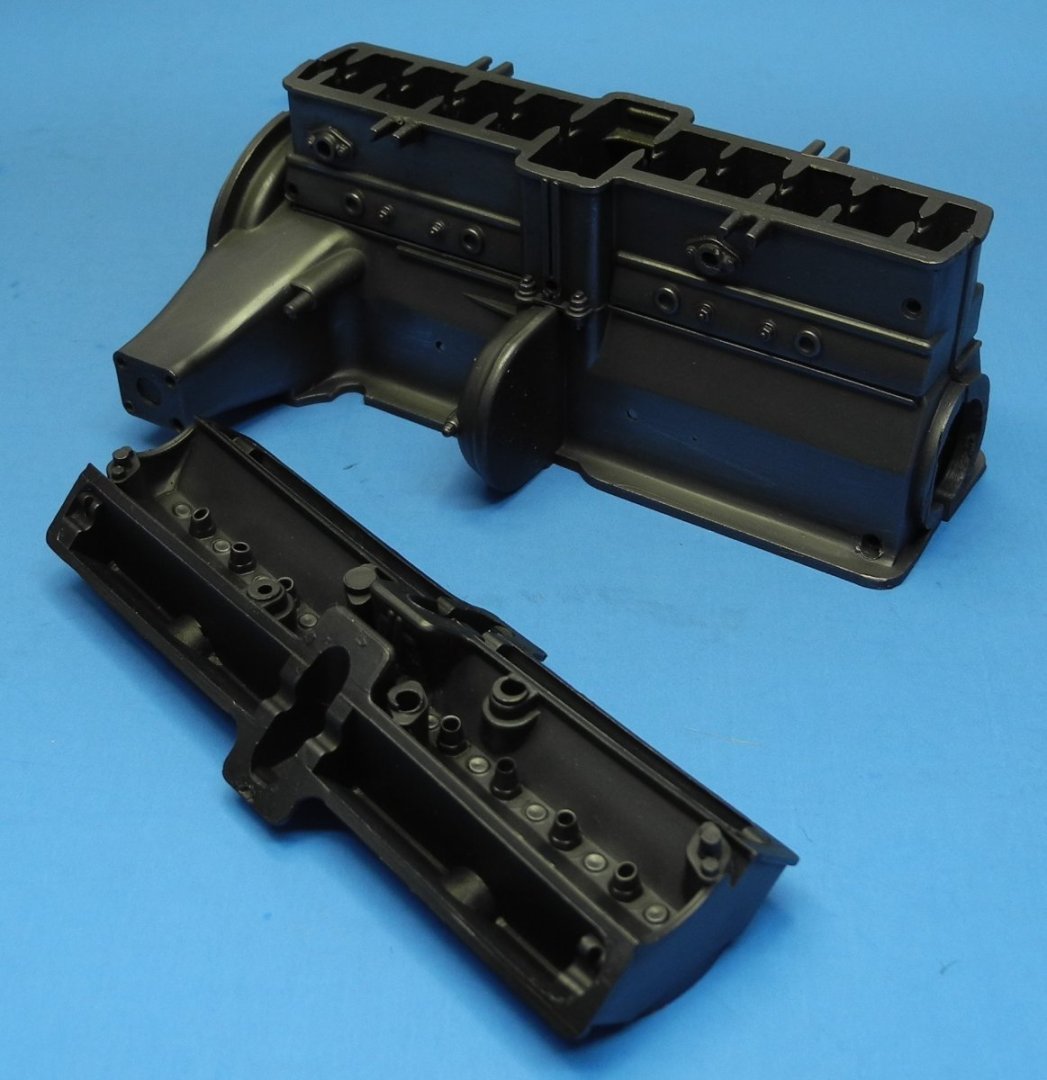
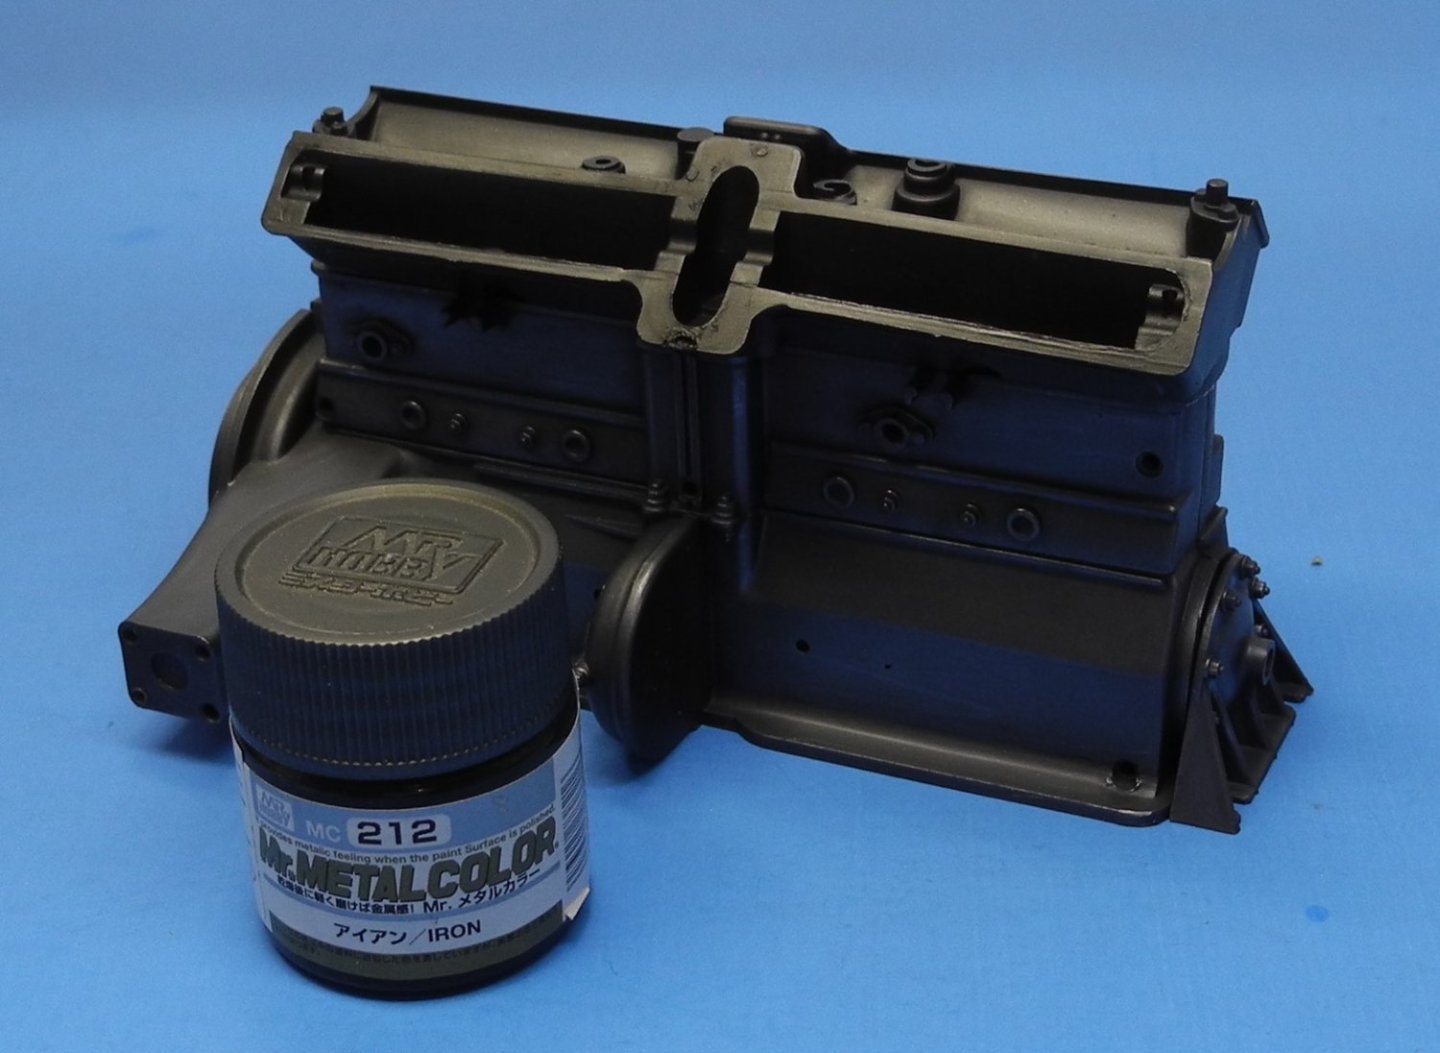
CDW replied to CDW's topic in Non-ship/categorised builds
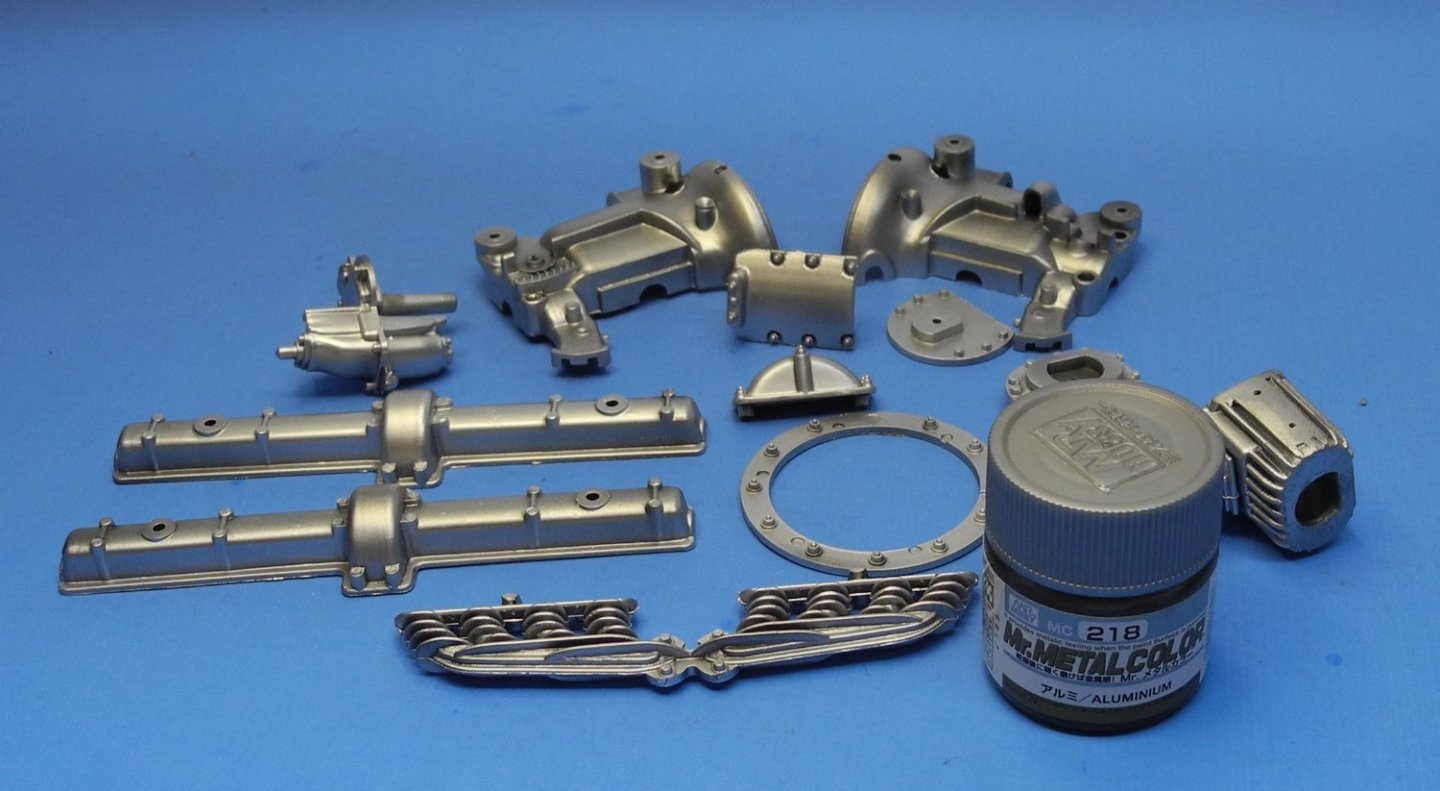
While waiting for a few custom engine parts from Scale Motorcars to arrive, I have cleaned up the engine parts and given them some paint. Generally, I want to follow Lars Wahlstrom's build of the Alfa Romeo Spider engine colors. Looking through internet references, I see modelers have interpreted the colors in many various and good-looking ways, but I particularly like the looks of Lar's engine. 32 Alfa Romeo 8C 2300 Spider Touring_en (prontomarketing.com)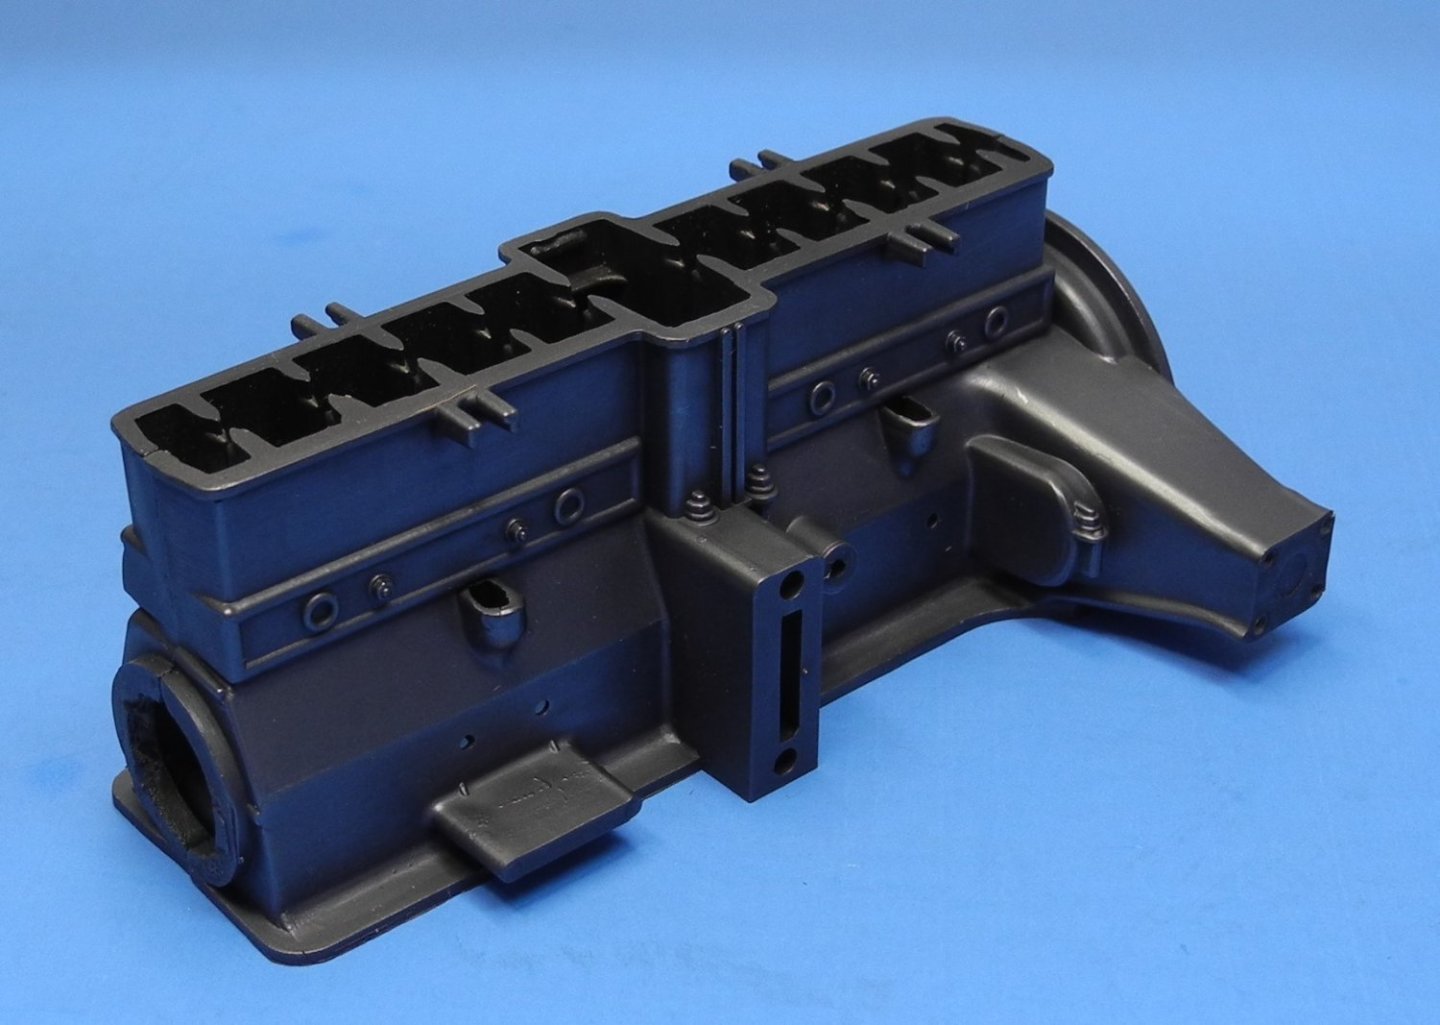

- 51 replies
-
- 17
-
-

-
Renault RE20 Turbo by DocRob - FINISHED - Tamiya - 1/12
CDW replied to DocRob's topic in Non-ship/categorised builds
I never recall seeing a Renault Alpine here in the USA. If I did, I didn't realize what I was seeing. I do agree, it is a beautiful car. -
Renault RE20 Turbo by DocRob - FINISHED - Tamiya - 1/12
CDW replied to DocRob's topic in Non-ship/categorised builds
The MFH tubes look very nice and convincing. I like the clear brown. MFH products are sometimes difficult to find here. -
Renault RE20 Turbo by DocRob - FINISHED - Tamiya - 1/12
CDW replied to DocRob's topic in Non-ship/categorised builds
I didn't know about the yellow Hiro tubing. I'll have a look for that as well while I'm at it. The tubing supplied with every plastic car and motorcycle kit I have owned all leave something to be desired, so I've been searching for alternatives though the ones I've found are on the expensive and not so easy to acquire side of things. -
Renault RE20 Turbo by DocRob - FINISHED - Tamiya - 1/12
CDW replied to DocRob's topic in Non-ship/categorised builds
She's looking real neat and tidy, Rob. Nice work. One of the things I'm not satisfied with are the rather thick and out of scale clear tubing supplied in Tamiya and other kits to replicate fuel lines. I am wondering if I can find some clear monofilament fishing line that might look closer to scale. Next time I make a trip to a store with fishing tackle, I'm going to have a look to see what I can find. -
Loarre Castle (Spain) by King Derelict - Aedes Ars 1/200
CDW replied to king derelict's topic in Non-ship/categorised builds
Once two or three months go past, it won't be as hot and humid as it is now. Glad to see you back and at the bench doing great things. Great fun things that is. -
Loarre Castle (Spain) by King Derelict - Aedes Ars 1/200
CDW replied to king derelict's topic in Non-ship/categorised builds
I sure am glad this hot Florida sun, heat, and humidity didn't short-circuit your ability to make wise decisions. 😄 Happy to see you're back on the modeling trail, Alan! -
Airplanes and Tanks in plastic by Jörgen
CDW replied to Jörgen's topic in Non-ship/categorised builds
Gorgeous Spitfire! -
Renault RE20 Turbo by DocRob - FINISHED - Tamiya - 1/12
CDW replied to DocRob's topic in Non-ship/categorised builds
Brilliant! -
Hawker Typhoon 1b "Car Door" by AJohnson - Airfix - 1:24
CDW replied to AJohnson's topic in Non-ship/categorised builds
I haven't even scratched the surface yet for everything that's available for download there. All sorts of material. -
Alfa Romeo Spider Touring Gran Sport by CDW - Pocher - 1:8 Scale
CDW replied to CDW's topic in Non-ship/categorised builds
Once you start down the road of building one of these kits, you quickly realize that nothing fits without massaging the parts. And I literally mean, nothing fits. It's not a complaint, just a warning to anyone who decides to undertake a project like this. Consider it a challenge, even for the most experienced of modelers. No wonder there are so many partially started kits out there for sale. In the case of my particular kit, it's easy to see that the previous owner who started this one was not an experienced modeler. Lucky for me that all that was started was the engine. Some of the parts are close to being ruined but I believe I can save them with a little elbow grease and determination (and patience). @gjdale Thanks a ton for recommending that assembly disk from Paul Koo. It's invaluable. I still haven't figured out the numbering system for identifying the kit parts. Maybe it's part of the information covered in the DVD and I just have not found it yet. -
Hawker Typhoon 1b "Car Door" by AJohnson - Airfix - 1:24
CDW replied to AJohnson's topic in Non-ship/categorised builds
Have any of you ever run across the website "Scribd dot com"? There are a ton of reference materials there for digital download all for a monthly subscription fee. First month is free and there is no obligation to actually continue to subscribe and pay a monthly fee. I guess it's all on the up and up but I'm no attorney so not sure how this all works its way through the legal system. I ran across the site searching for the "how to build the 1:24 Airfix Typhoon" book. -
Hawker Typhoon 1b "Car Door" by AJohnson - Airfix - 1:24
CDW replied to AJohnson's topic in Non-ship/categorised builds
Right now I'm thinking the styrene sheet stock route. I'll look around to see if I have some left over photo etch I might cut the plates from. -
Hawker Typhoon 1b "Car Door" by AJohnson - Airfix - 1:24
CDW replied to AJohnson's topic in Non-ship/categorised builds
The Mk 1 Design update set has them but I don't want to spend that much for their entire update set. It's around $220 USD plus postage. -
Hawker Typhoon 1b "Car Door" by AJohnson - Airfix - 1:24
CDW replied to AJohnson's topic in Non-ship/categorised builds
Will you plan to leave any opened panels or model it all closed up?