CDW
-
Posts
7,730 -
Joined
-
Last visited
Content Type
Profiles
Forums
Gallery
Events
Everything posted by CDW
-

Grumman F4F-4 Wildcat by ccoyle - FINISHED - WAK - 1/33 - CARD
CDW replied to ccoyle's topic in Non-ship/categorised builds
Come inside the cockpit and fly the Wildcat with one of my favorite local guys, Kermit Weeks. If you go back and watch video parts one and two, he gives a great walk-around and explanation for all the aircraft features. He cranks like crazy at the beginning to raise the landing gear. It was a lot of work flying one of these old birds as you will see in the video. A lot for the pilot to pay attention to and do.- 150 replies
-
- 14
-

-
SU-85 WW2 Soviet Tank Destroyer by CDW - MiniArt - 1:35 Scale
CDW replied to CDW's topic in Non-ship/categorised builds
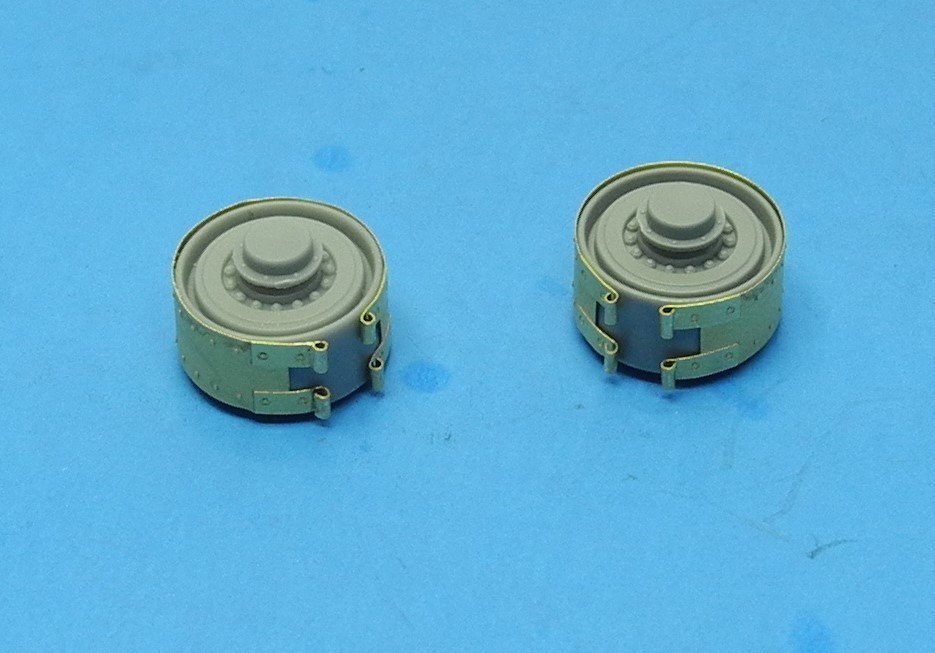
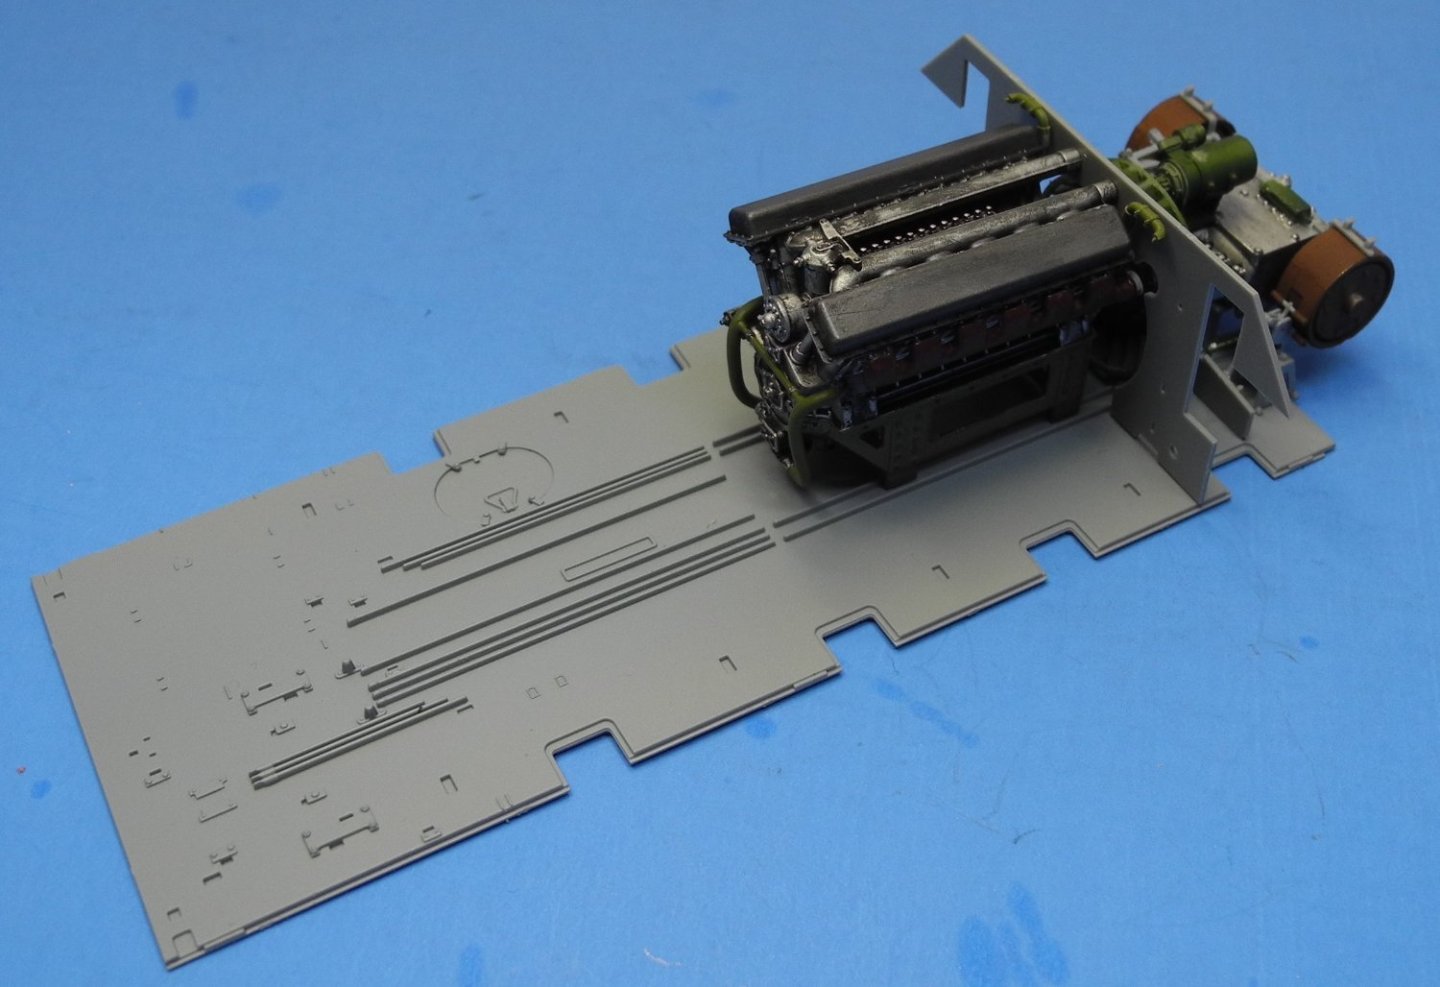
The eight vertical boxes, four on each side of the fighting compartment will contain springs for the suspension, to be added later. The main colors have been painted on all these parts. I'll play around with lighting and camera settings to try and get better color resolution on coming photos. With that huge engine and transmission taking up half the floor space, it must have been very loud and hot inside one of these vehicles. Stand by, there is a lot more detail that gets packed inside which will be revealed in subsequent steps.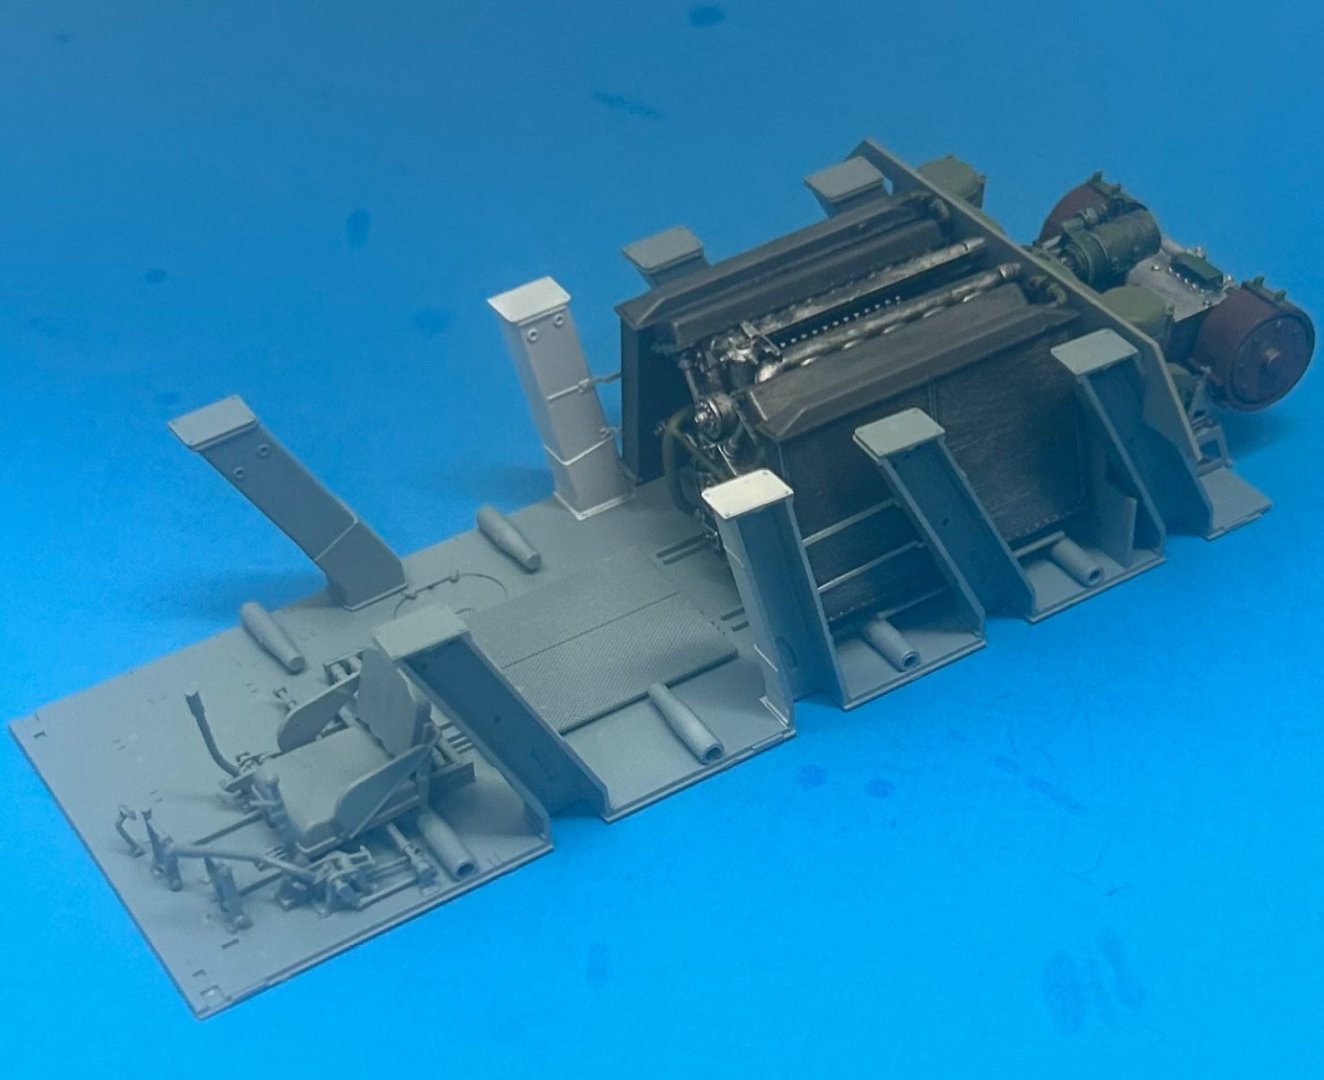
- 96 replies
-
- 13
-
-

-
Grumman F4F-4 Wildcat by ccoyle - FINISHED - WAK - 1/33 - CARD
CDW replied to ccoyle's topic in Non-ship/categorised builds
She's got a real nice weathered finish. -
SU-85 WW2 Soviet Tank Destroyer by CDW - MiniArt - 1:35 Scale
CDW replied to CDW's topic in Non-ship/categorised builds
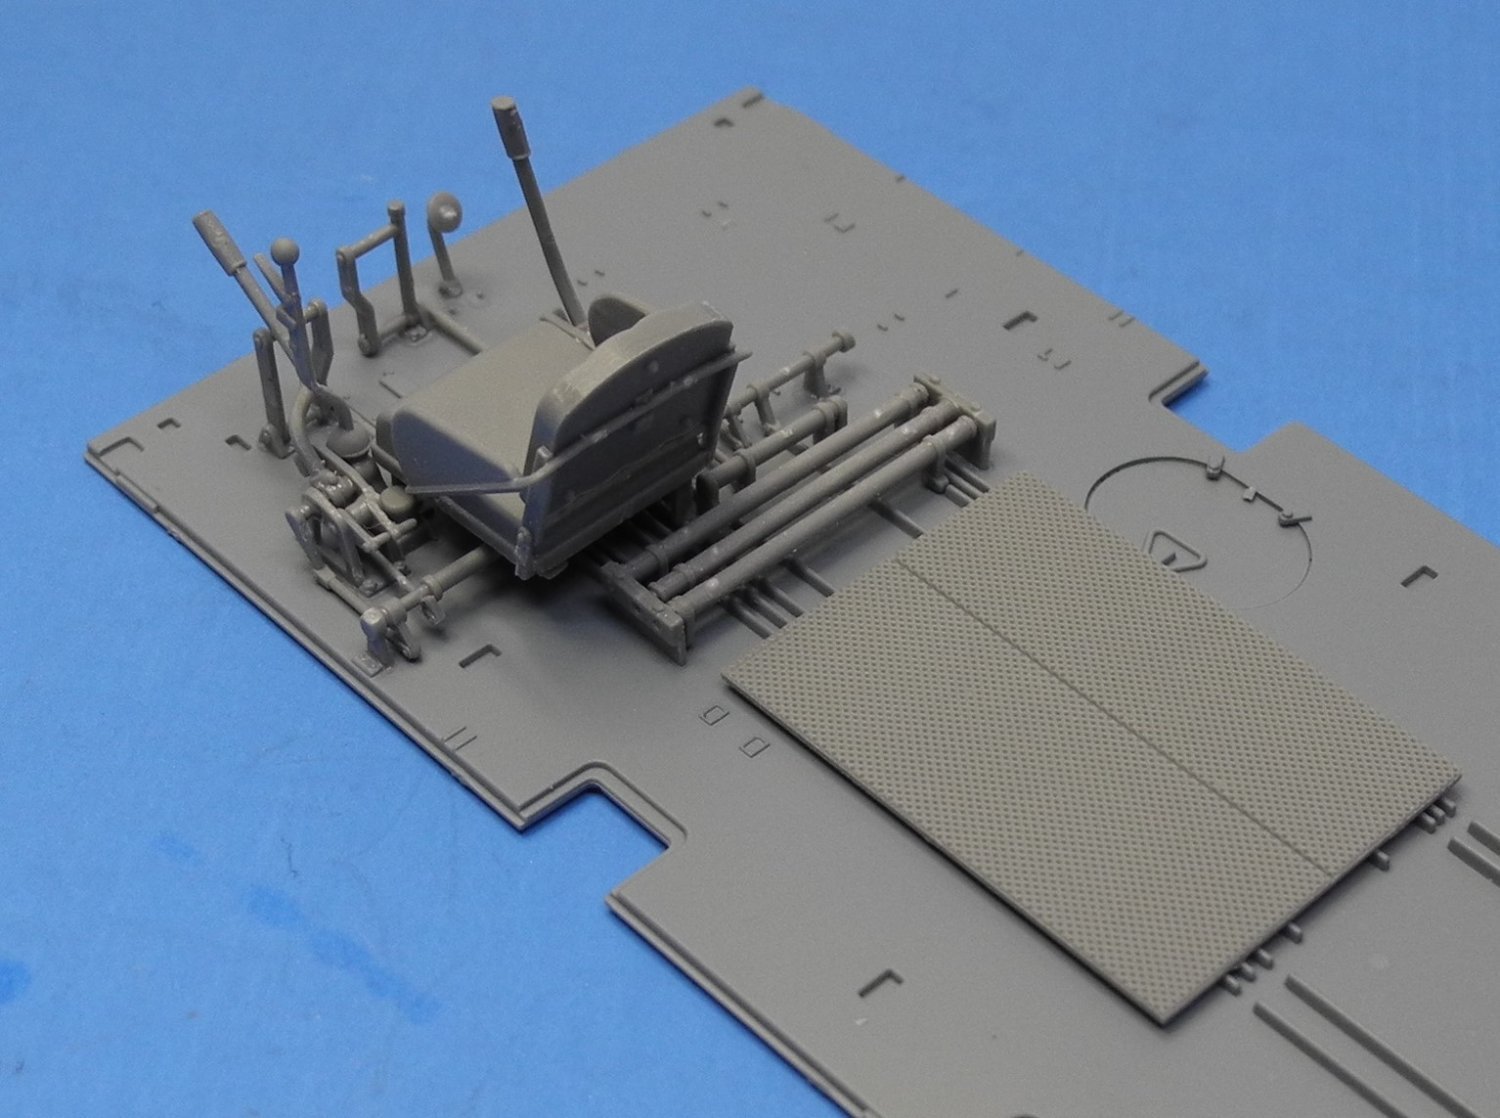
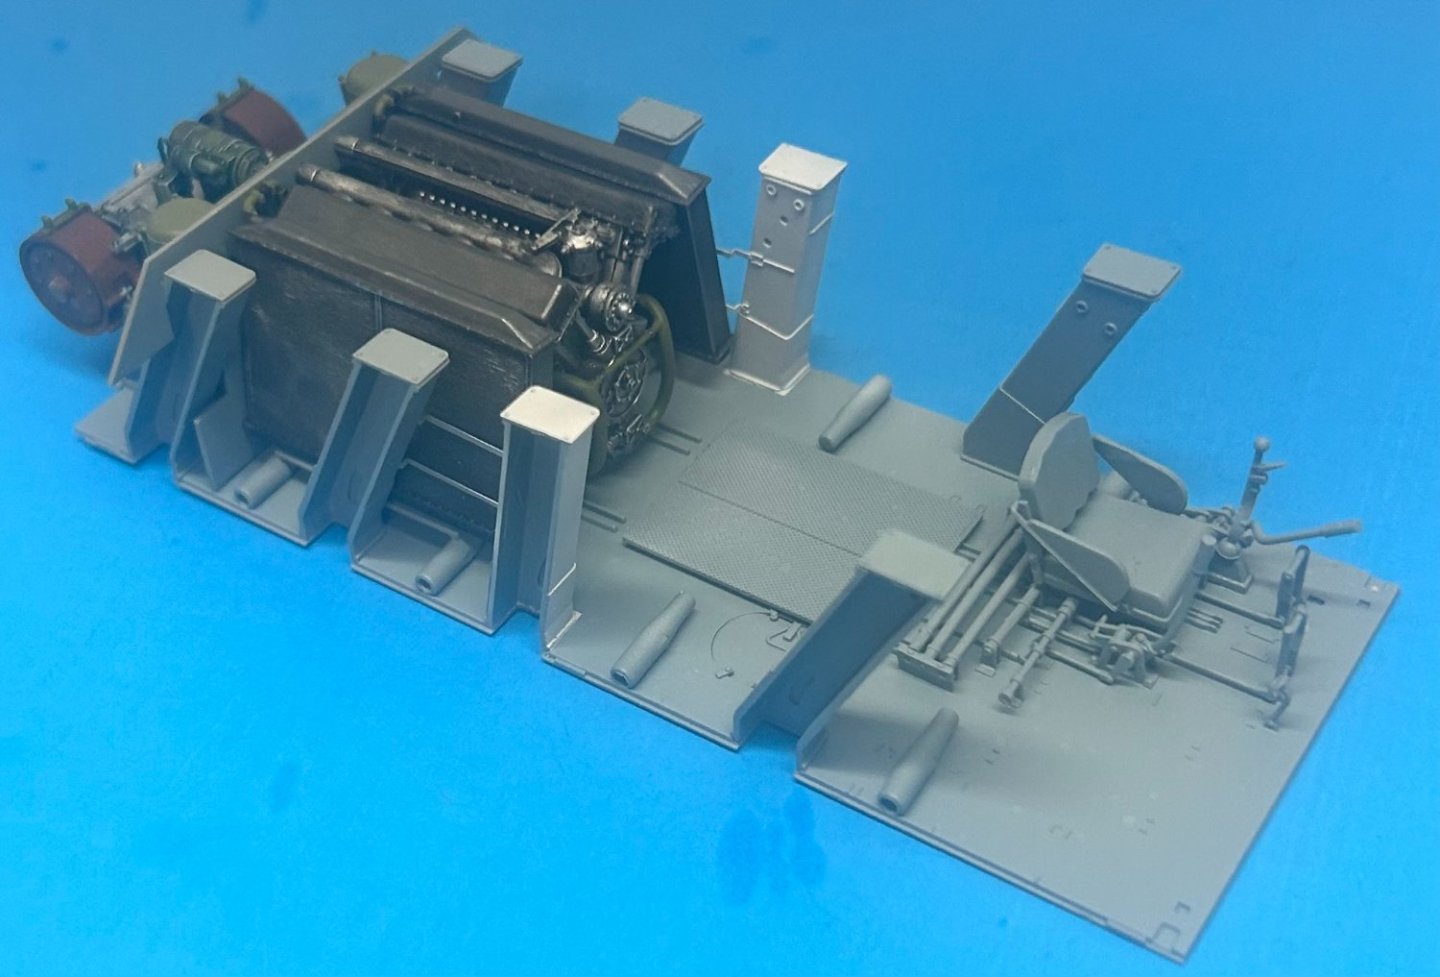
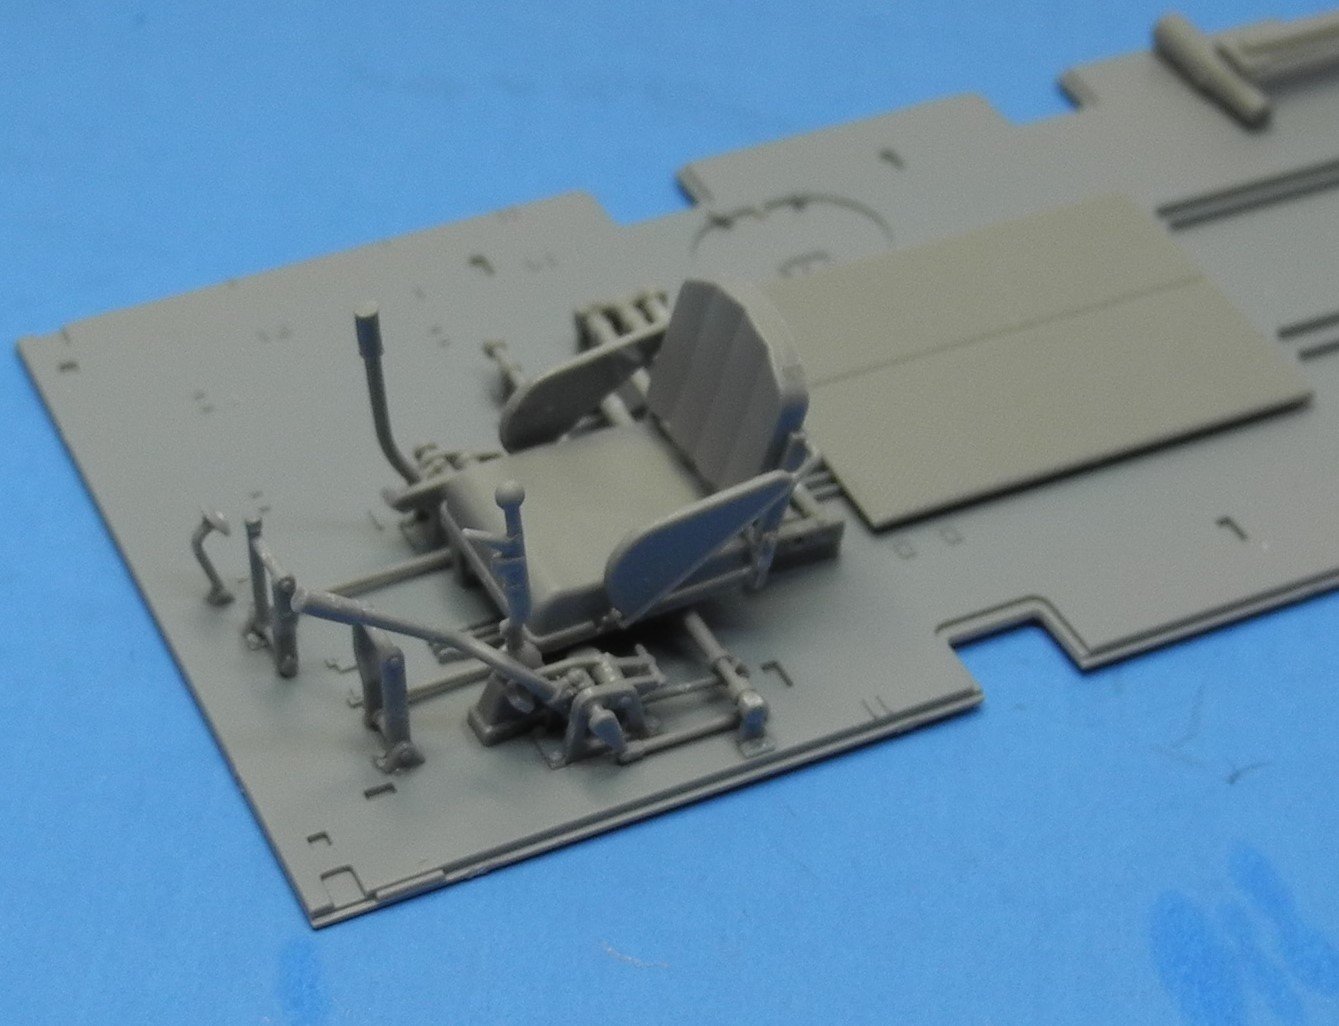
The driver's seat, controls and linkages are reproduced in significant detail.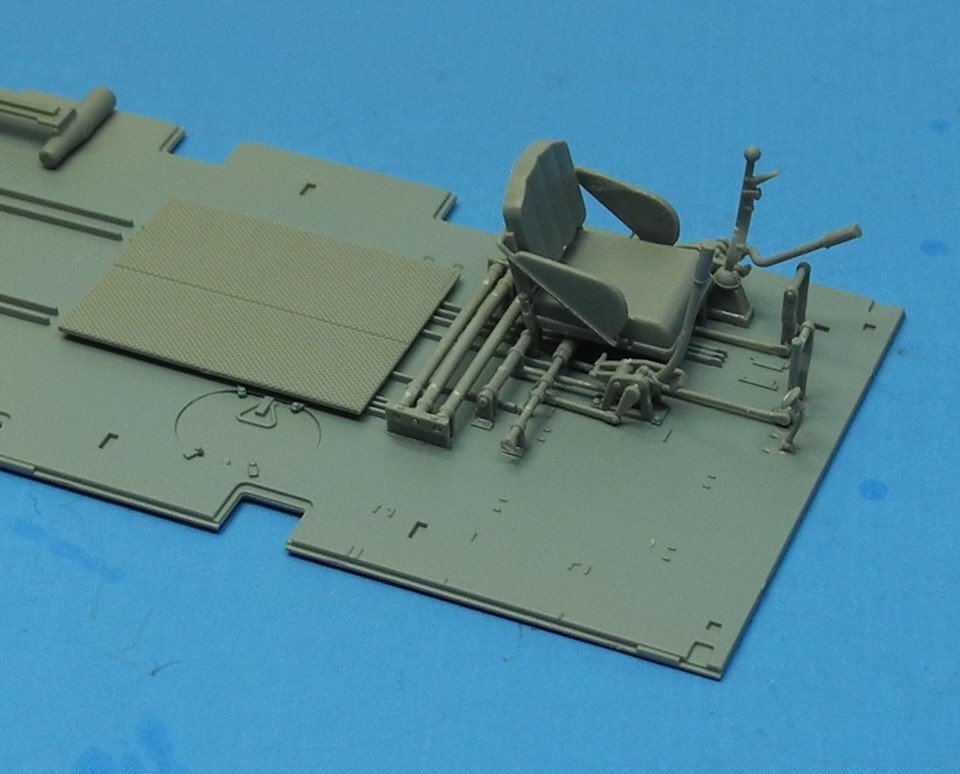

- 96 replies
-
- 15
-
-
Renault RE20 Turbo by DocRob - FINISHED - Tamiya - 1/12
CDW replied to DocRob's topic in Non-ship/categorised builds
Superb! Excellent build and very realistic. -
SU-85 WW2 Soviet Tank Destroyer by CDW - MiniArt - 1:35 Scale
CDW replied to CDW's topic in Non-ship/categorised builds
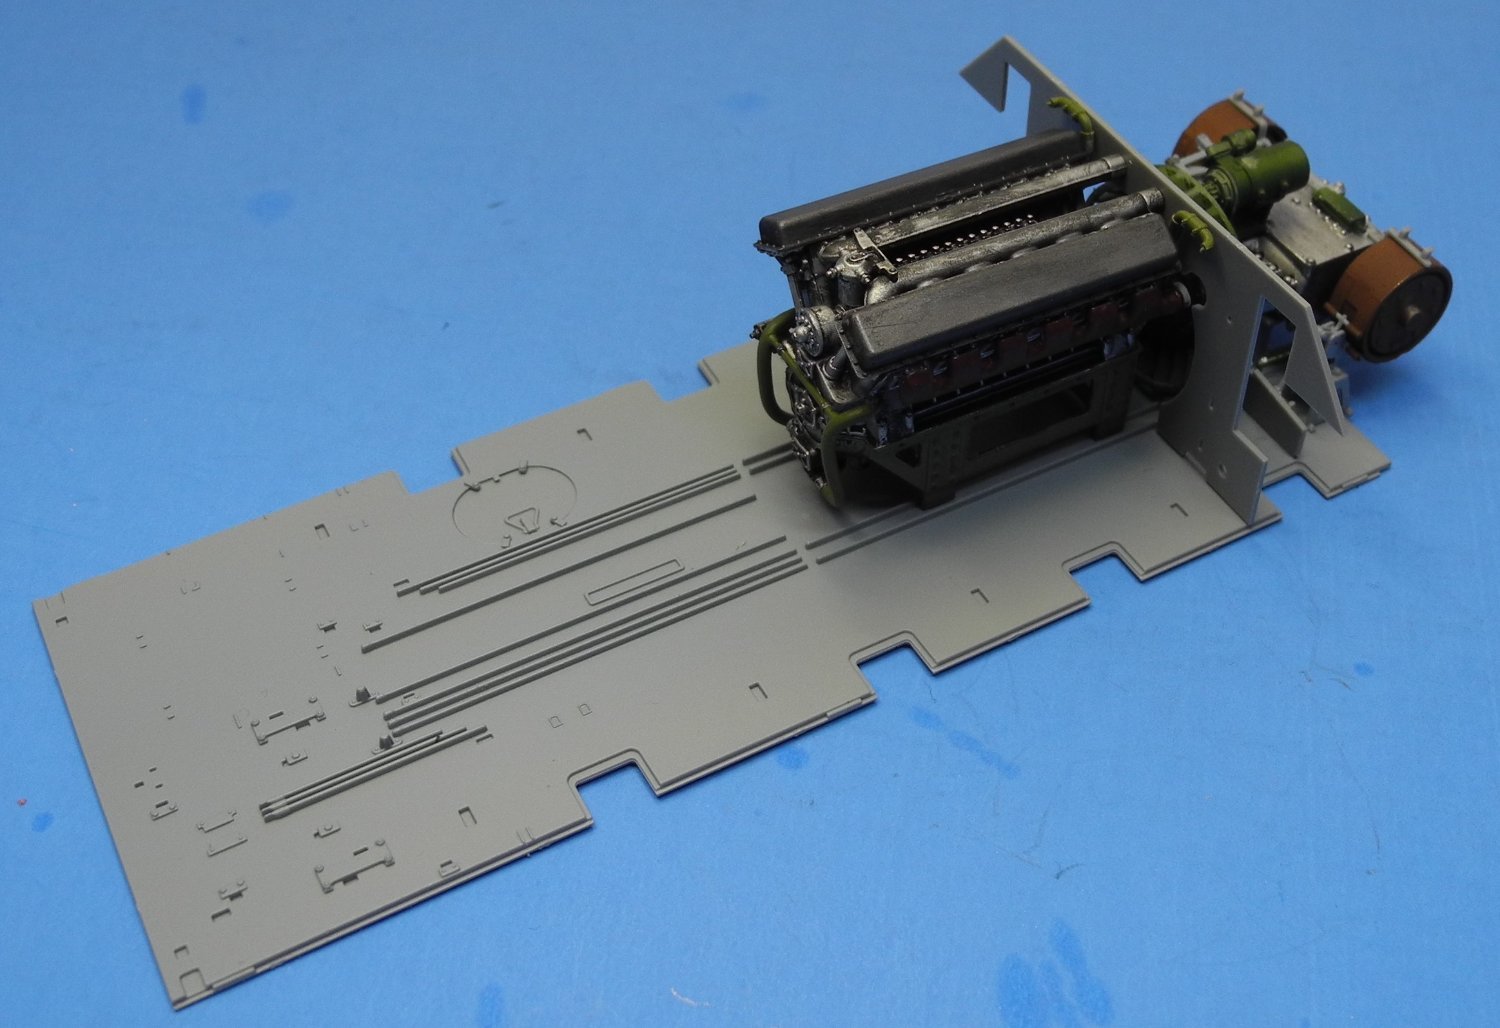
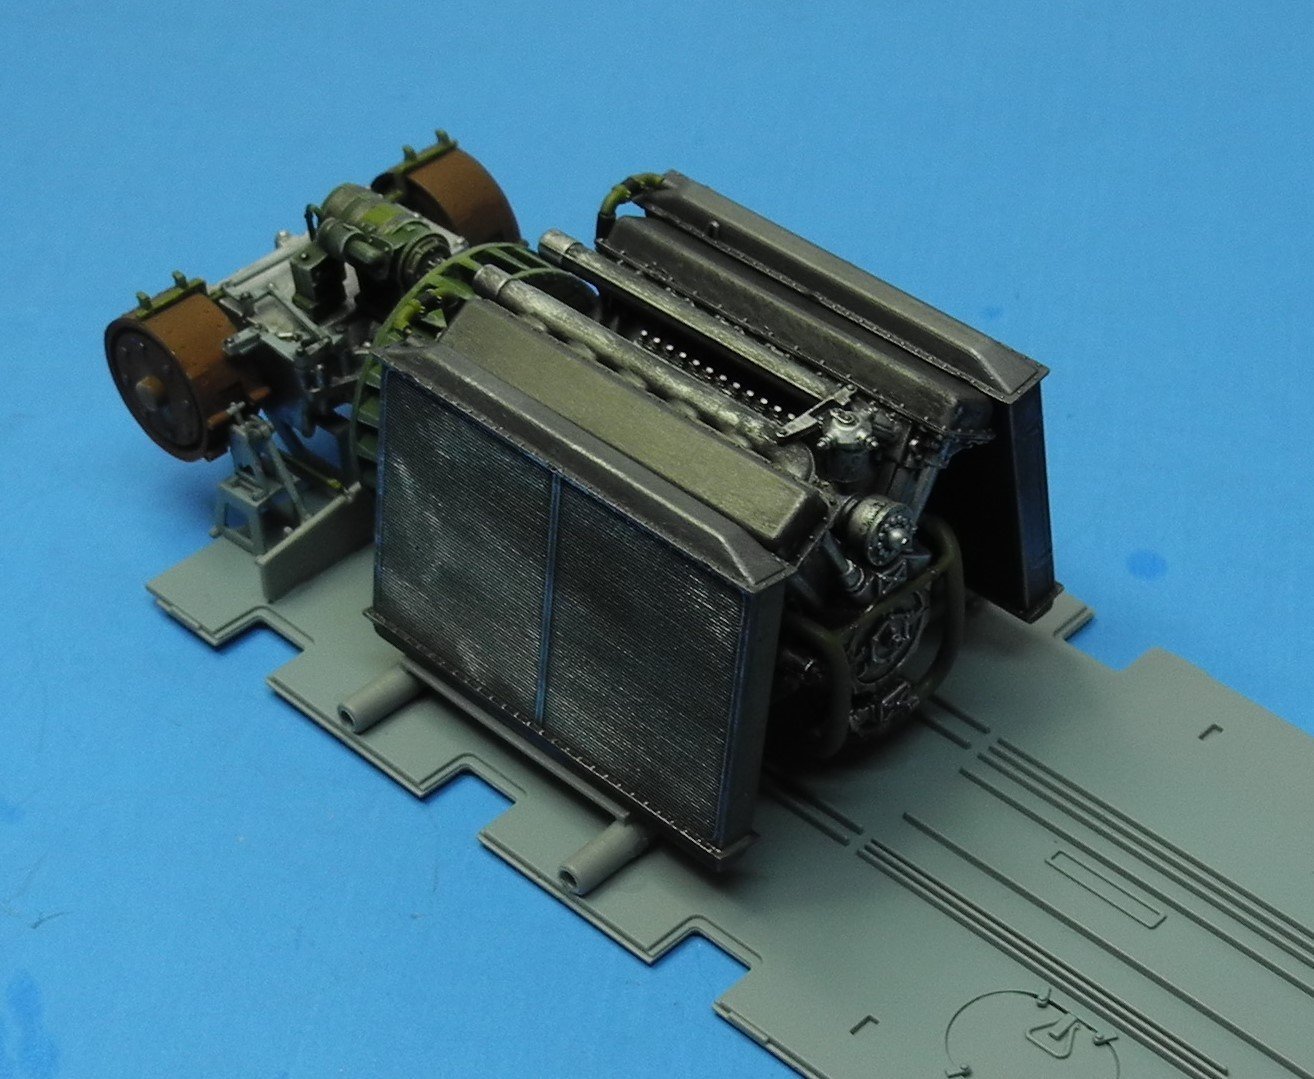
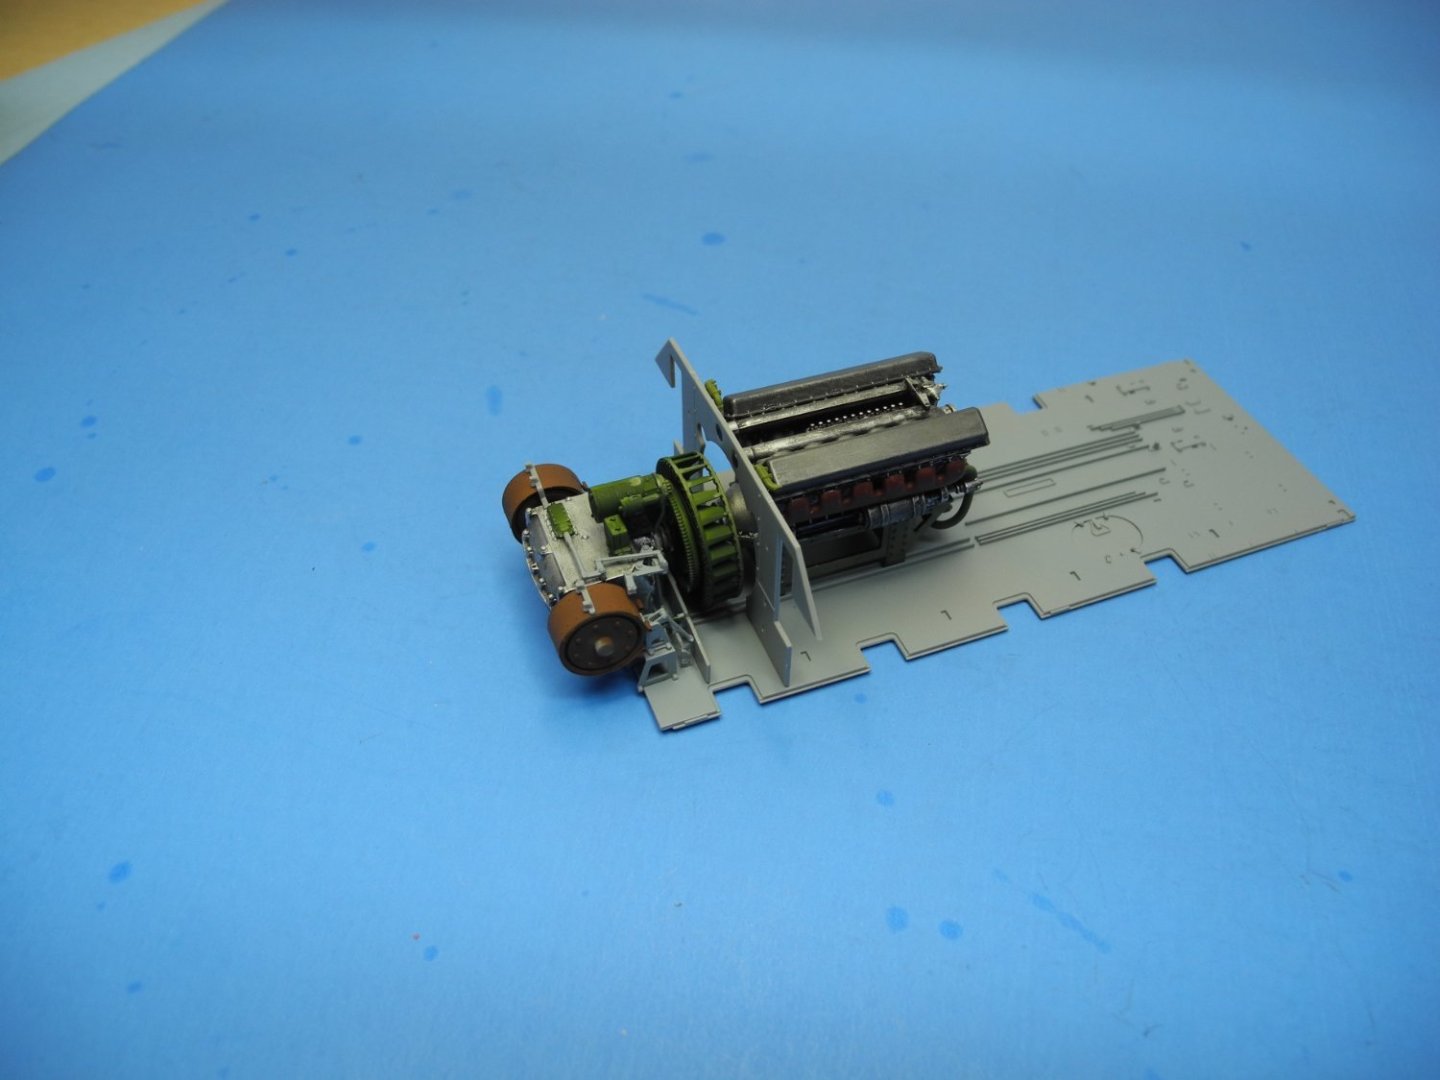
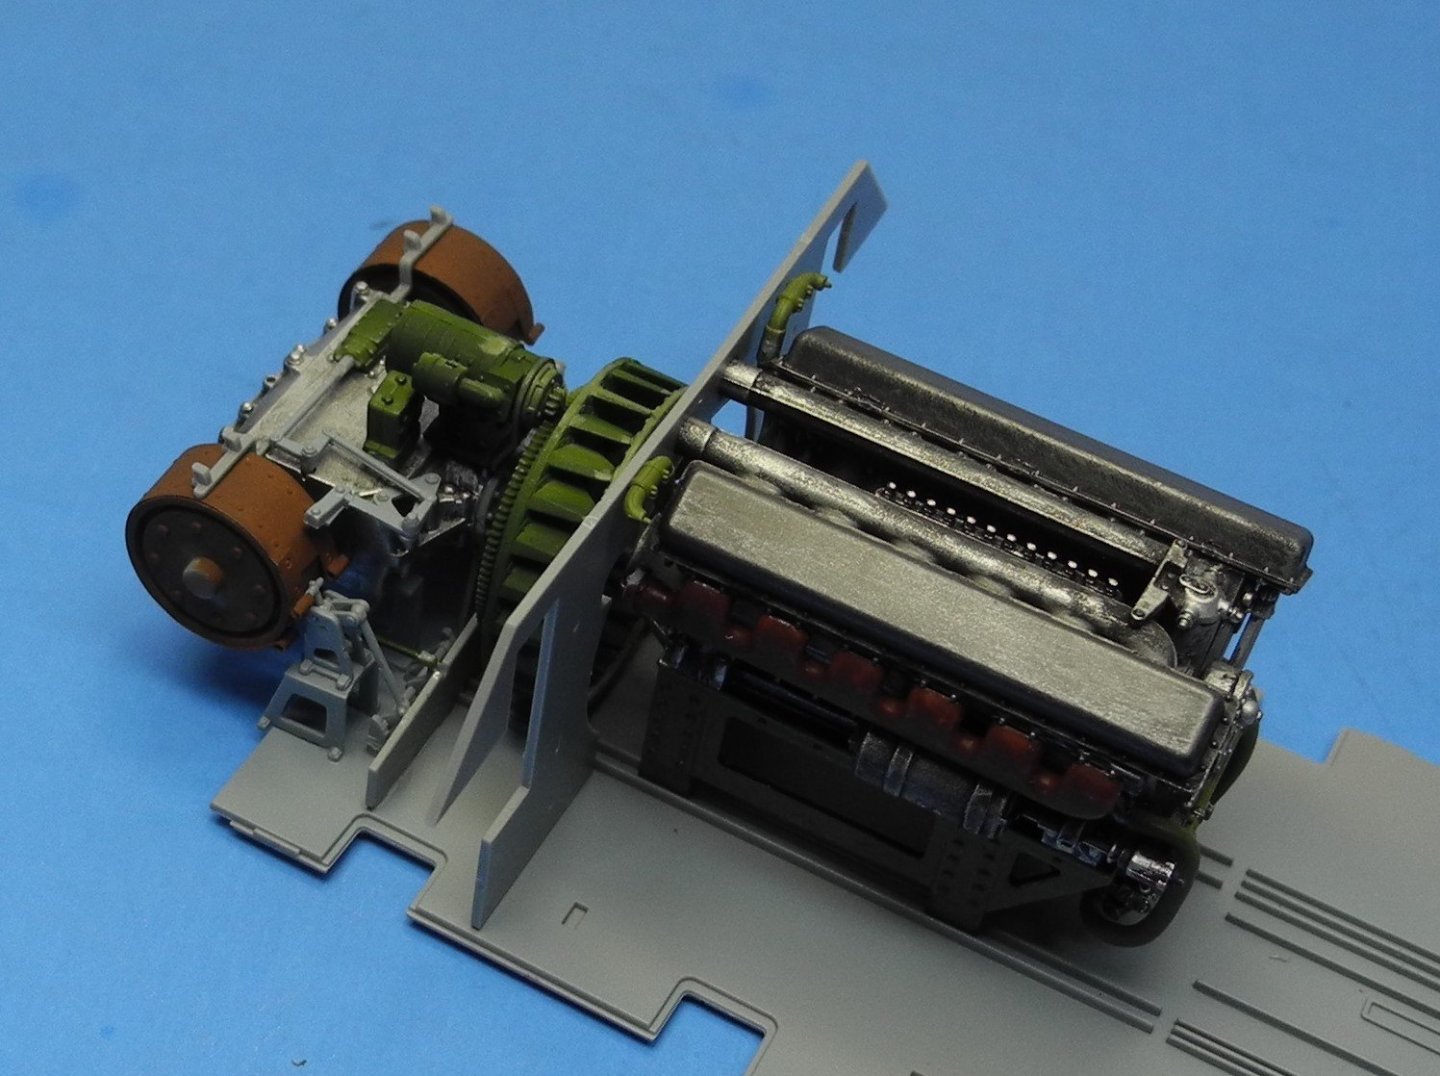
The engine gets sandwiched between two massive radiators.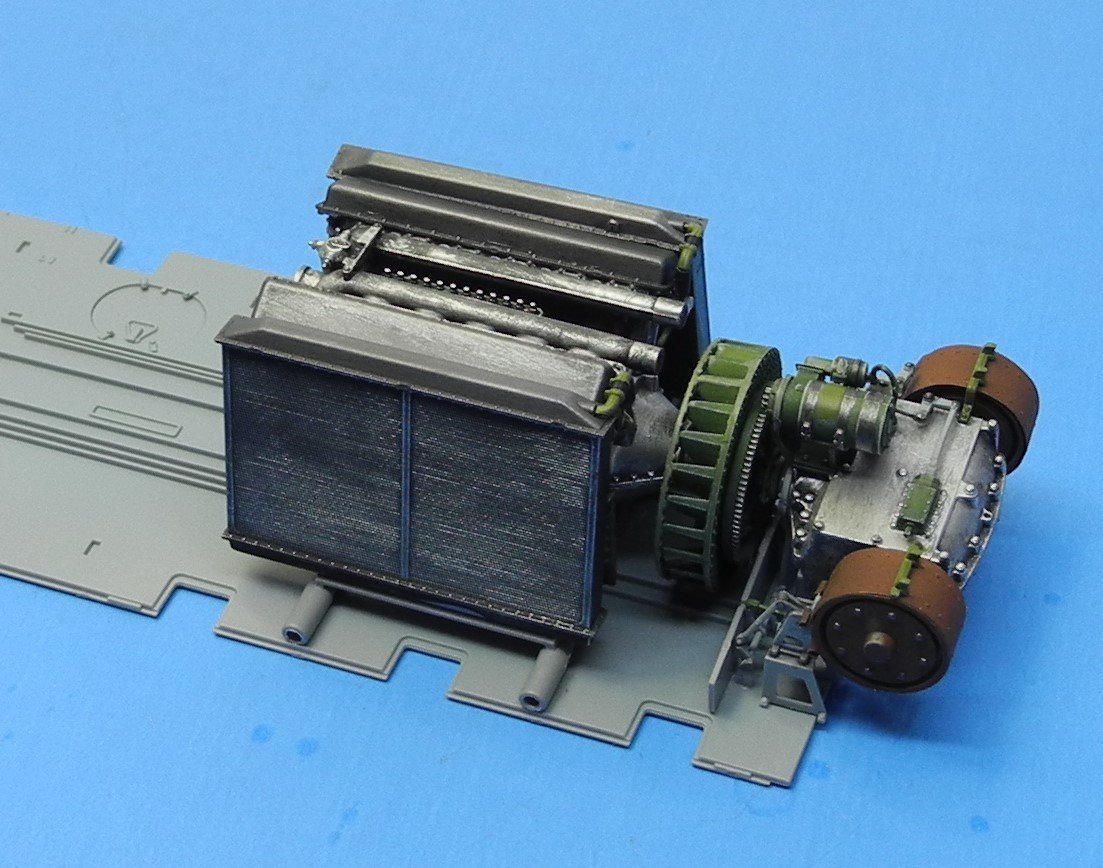
- 96 replies
-
- 13
-
-
SU-85 WW2 Soviet Tank Destroyer by CDW - MiniArt - 1:35 Scale
CDW replied to CDW's topic in Non-ship/categorised builds
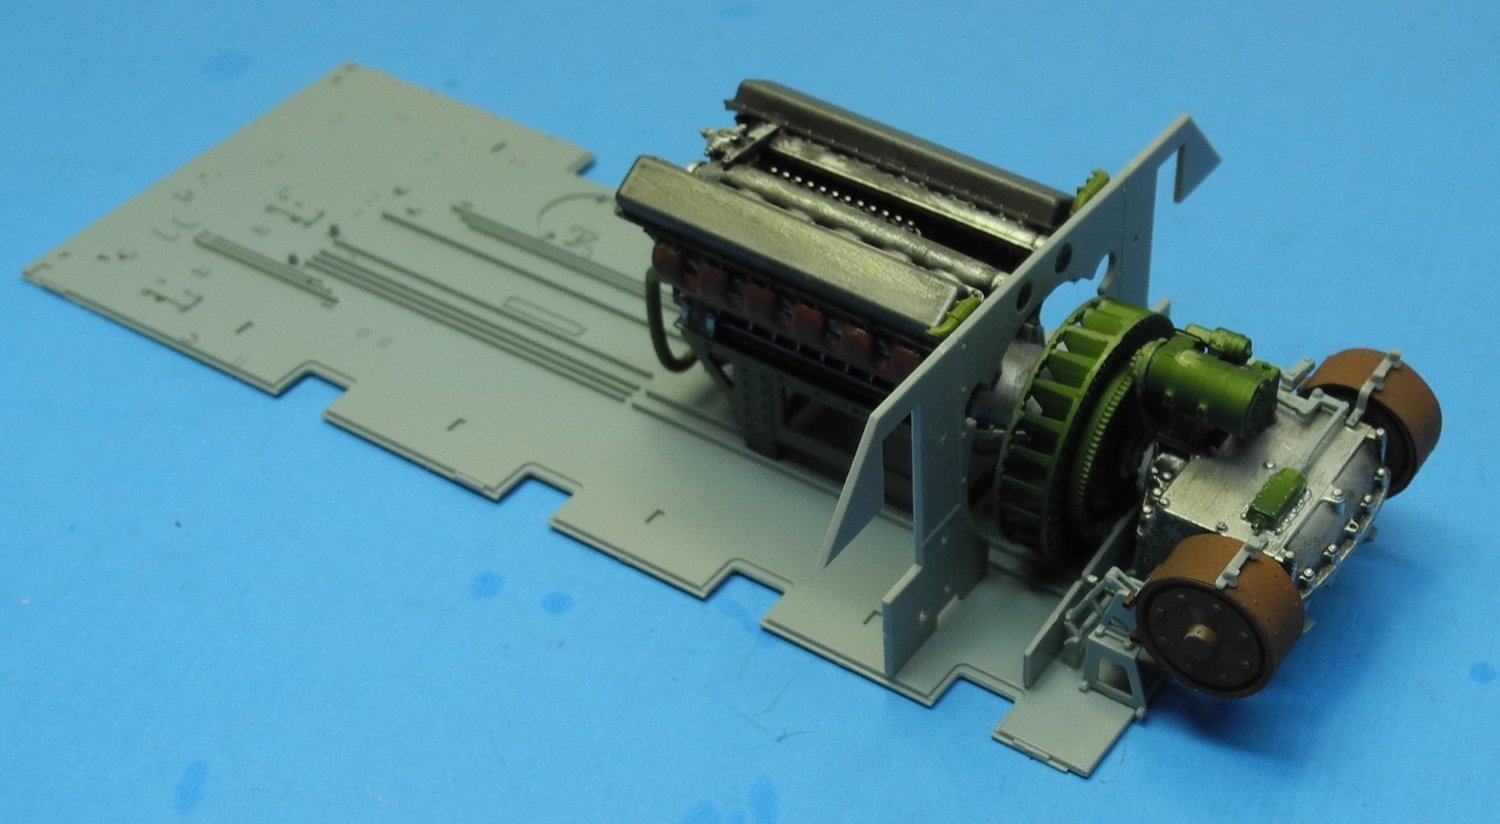
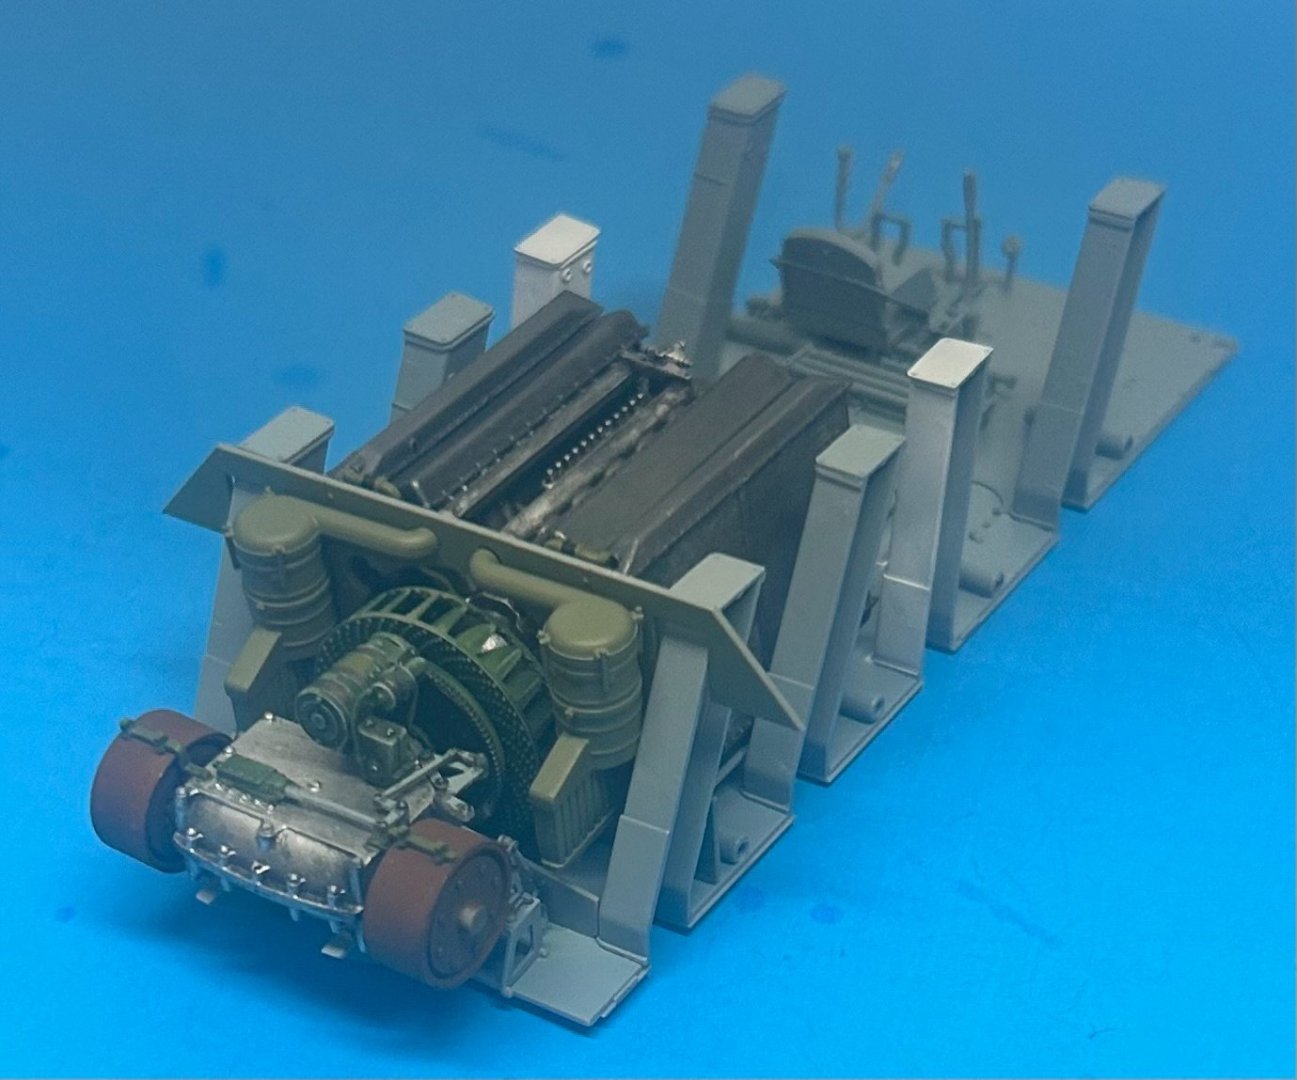
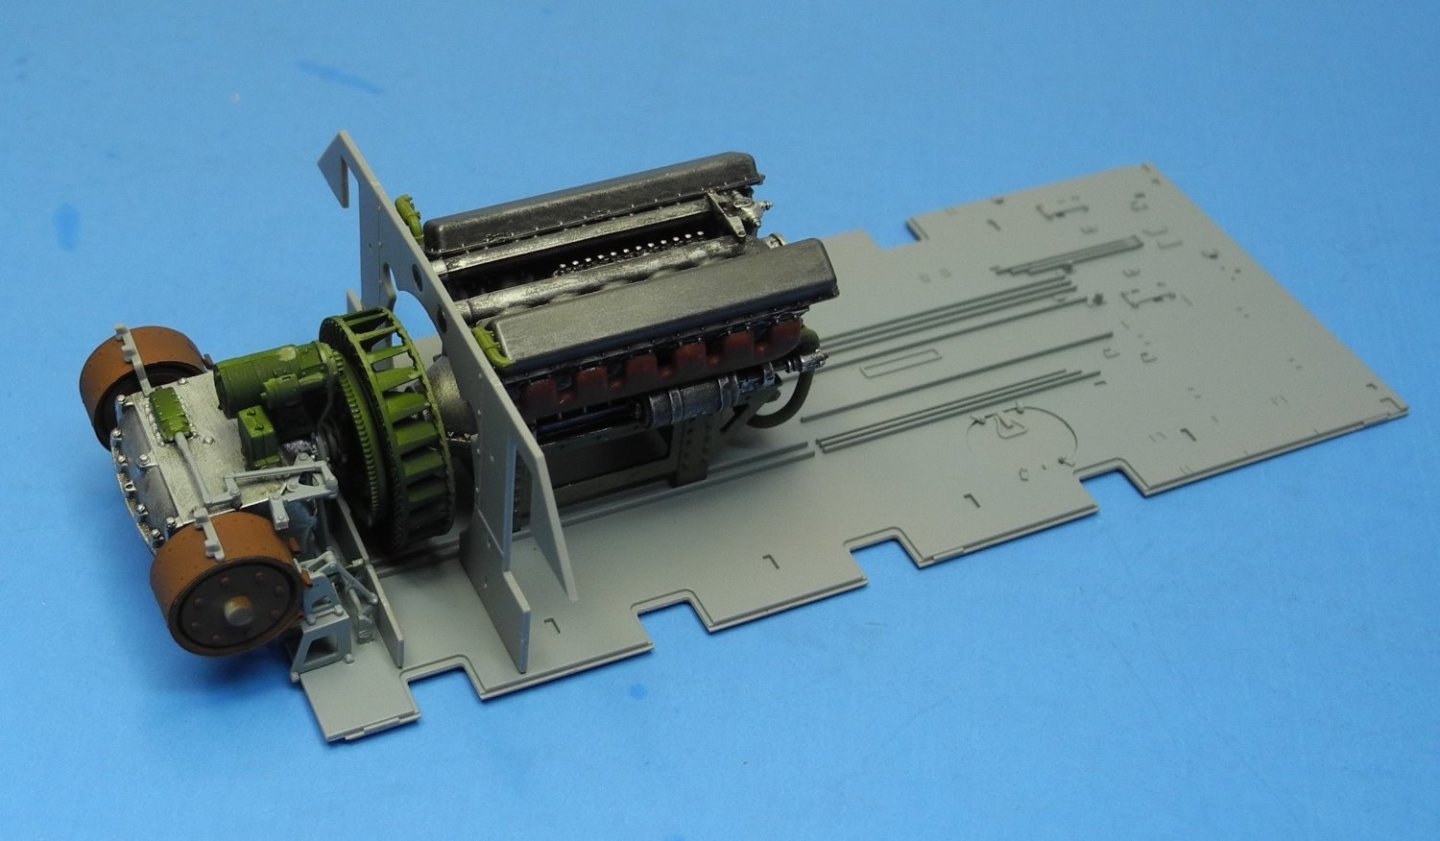
With the major components of the engine and transmission/steering clutches painted, will drop back now to pick out details and weather it up. Once the radiators are installed, much of the engine will get covered up, only to be seen from the top.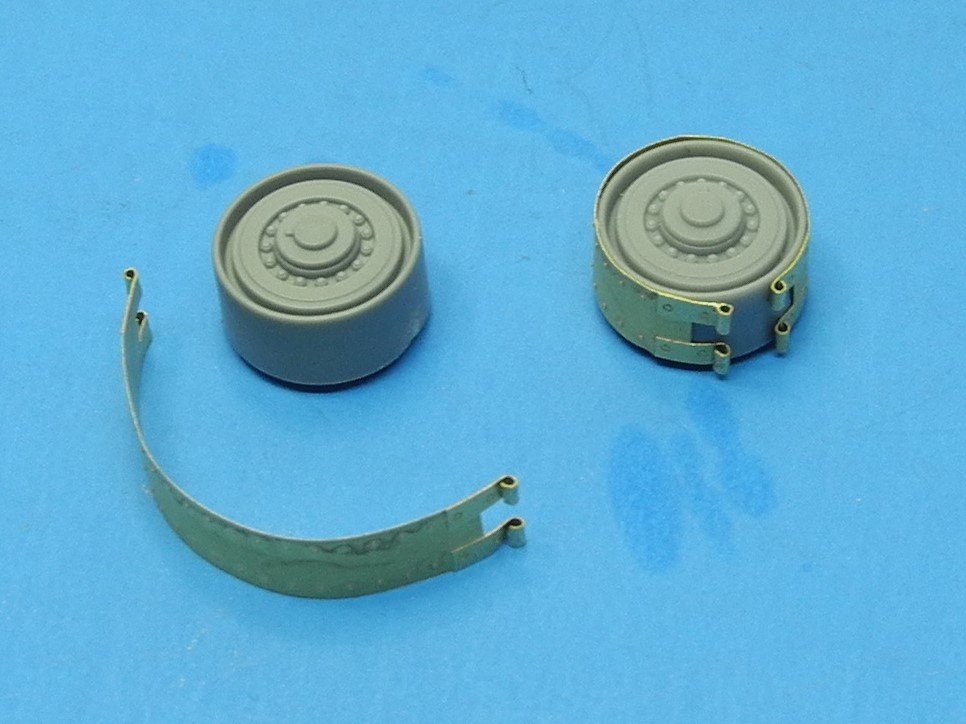


- 96 replies
-
- 15
-
-
SU-85 WW2 Soviet Tank Destroyer by CDW - MiniArt - 1:35 Scale
CDW replied to CDW's topic in Non-ship/categorised builds
Thanks for your comments Kevin. MiniArt packs an incredible amount of detail in the kits I've built so far, and for a fair price I must add. The cautions I would point out for 1st time builders of a MiniArt kit are 1. Pay close attention to the parts assembly by test fitting and looking several steps ahead. It's quite easy to assemble the parts in a way that will not fit later on when sub-assemblies are brought together. 2. The plastic is very soft. It's very easy to damage the parts without a gentle hand in prepping and cleaning them up. 3. There are a HUGE number of parts trees, all labeled a, b, c, etc. organize your parts trees with a clearly seen label or else you'll drive yourself nuts looking for the correct parts tree as you build your kit.- 96 replies
-
- 13
-
-
Renault RE20 Turbo by DocRob - FINISHED - Tamiya - 1/12
CDW replied to DocRob's topic in Non-ship/categorised builds
Doc, all your hard work to clean up the "old-mold" Tamiya parts is paying dividends. It's building up to a very realistic, highly detailed model. -
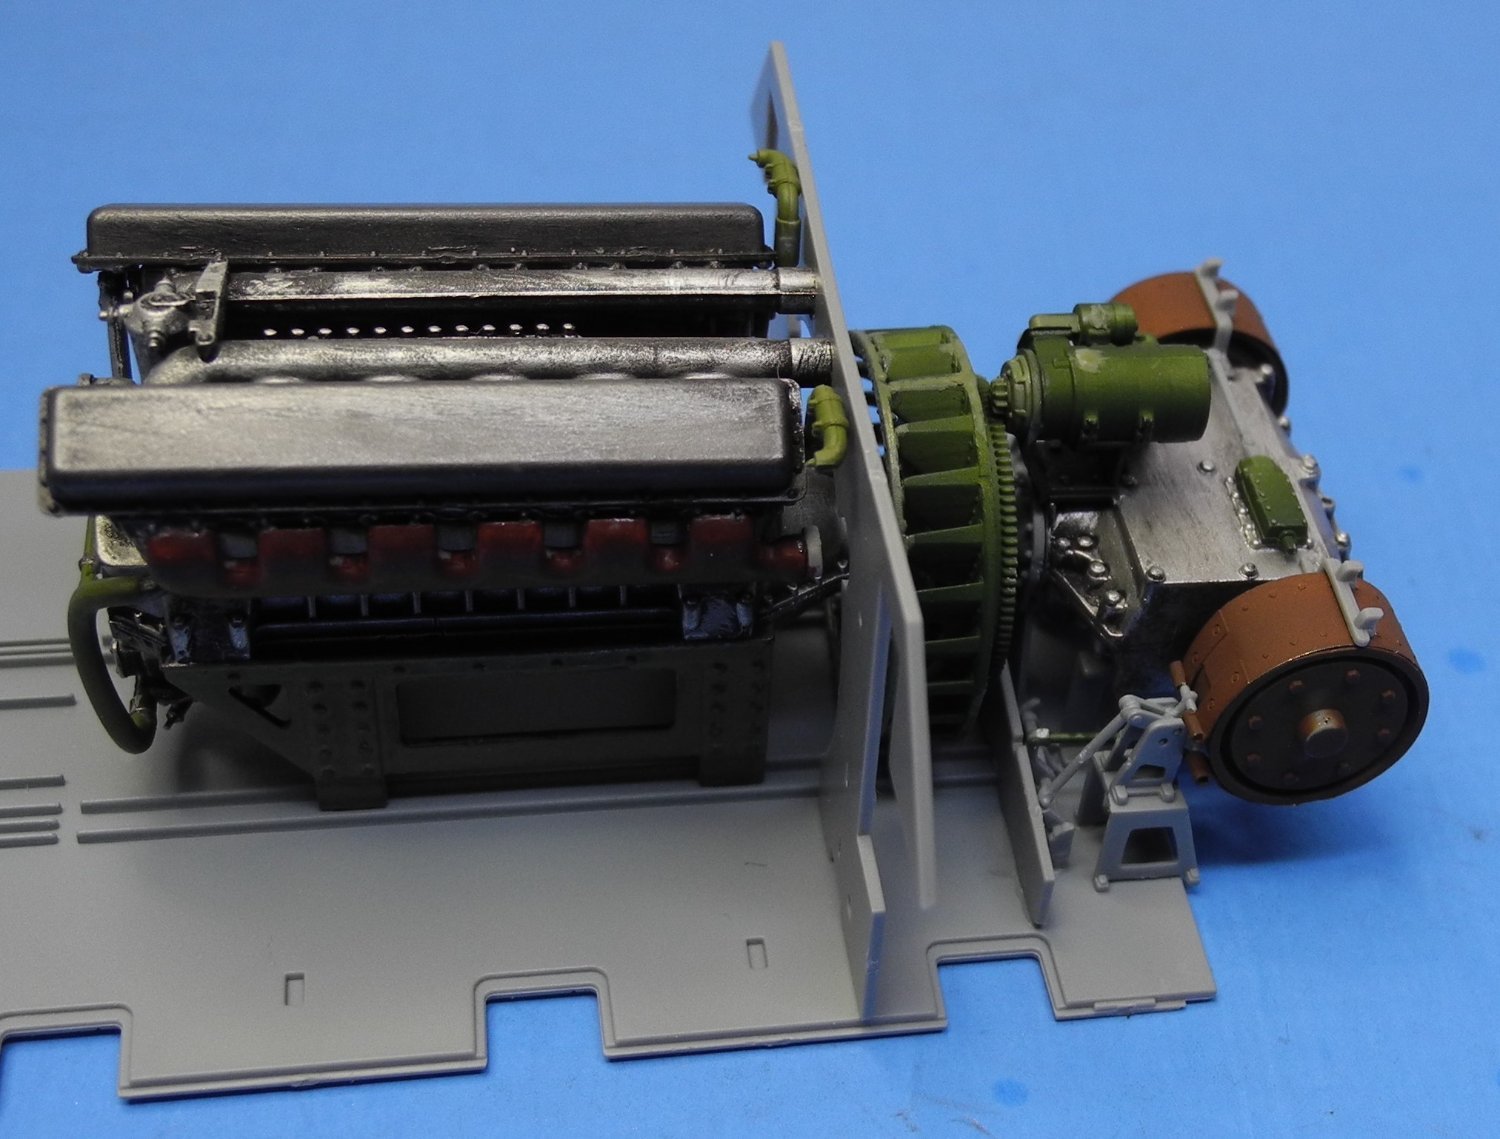
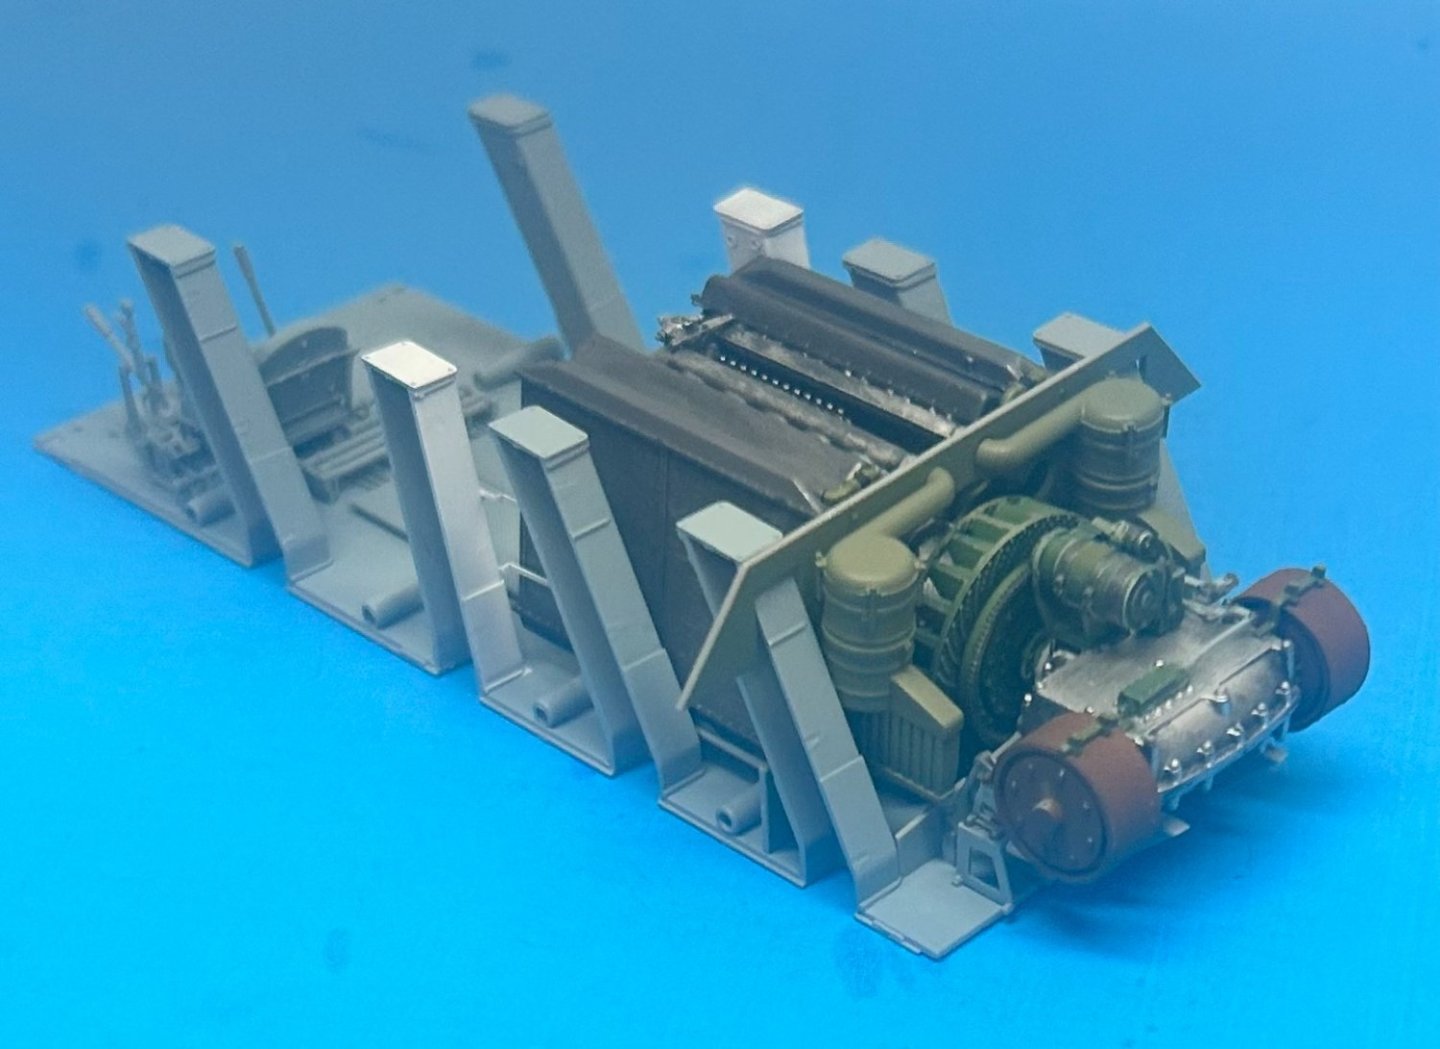
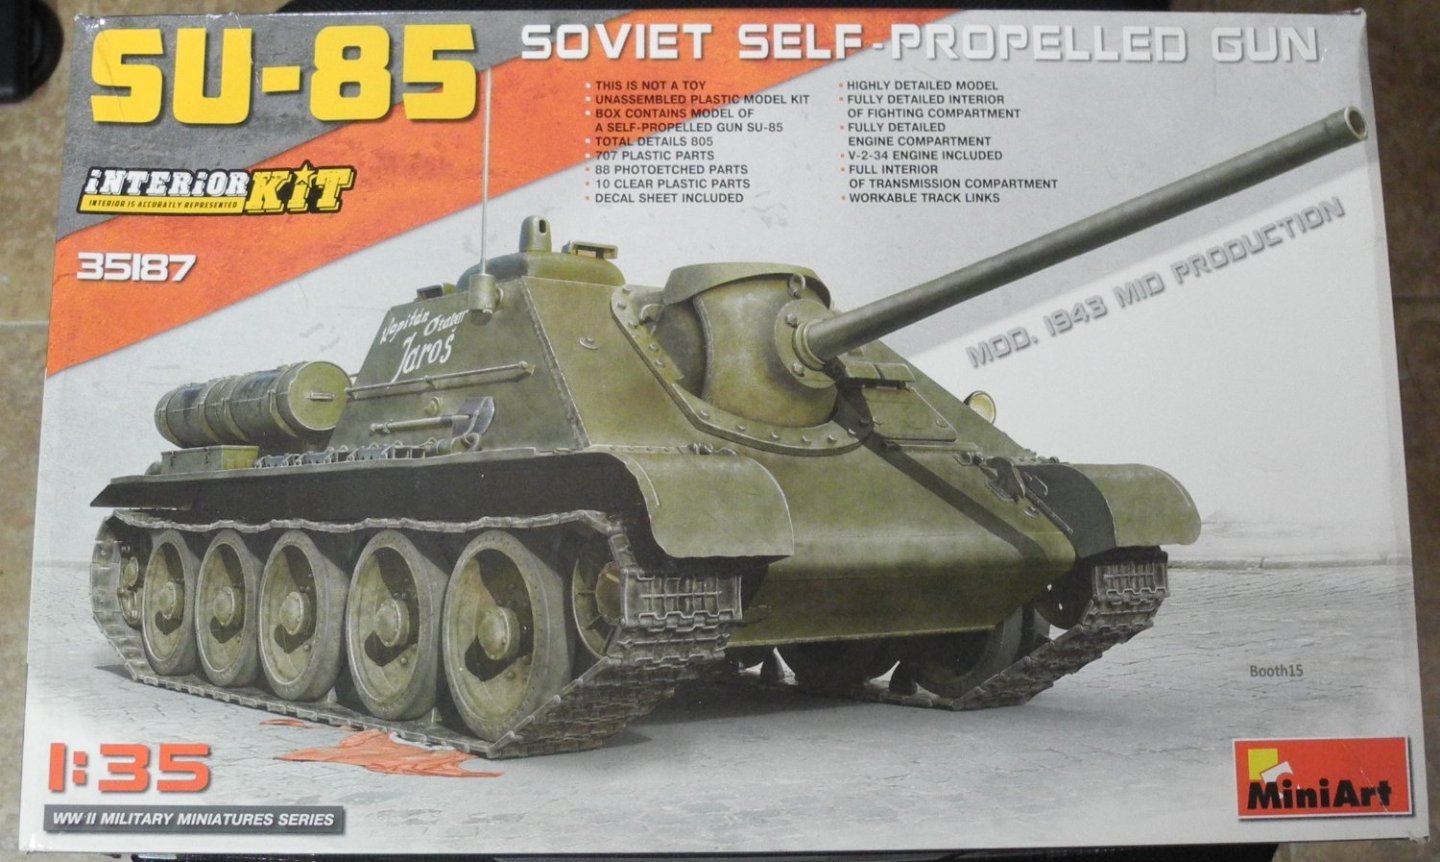
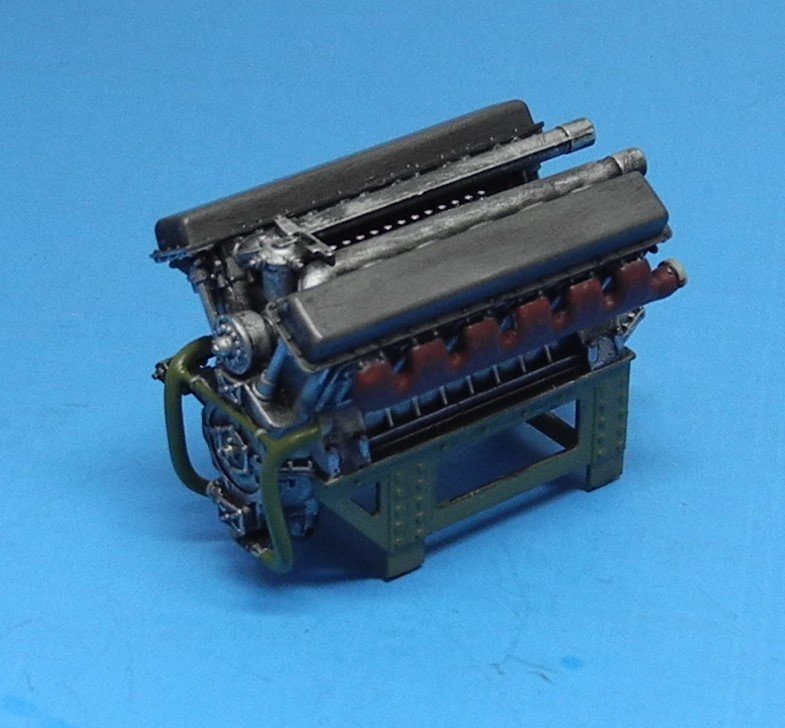
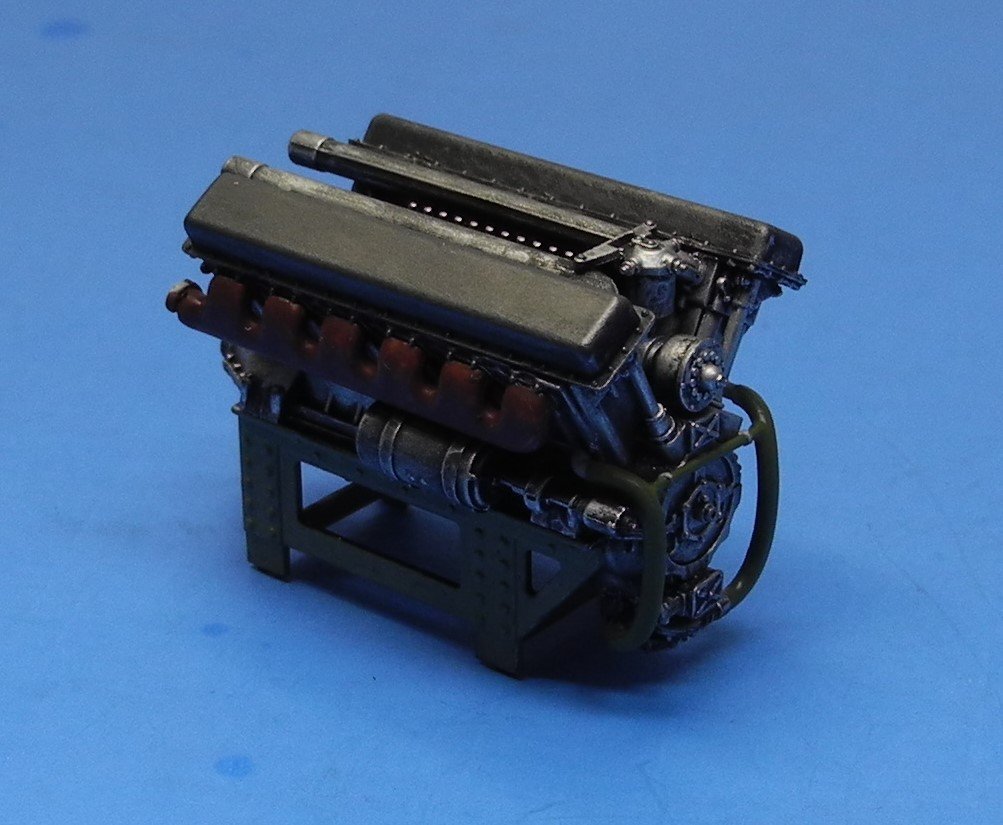
This is the 1:35 MiniArt SU-85 Soviet tank destroyer from the WW2 era. The kit reproduces the model with a full interior. There are more than 700 parts, making this kit a big heavy box of plastic. From Wikipedia: The SU-85 (Samokhodnaya ustanovka 85) was a Soviet self-propelled gun used during World War II, based on the chassis of the T-34 medium tank. Earlier Soviet self-propelled guns were meant to serve as either assault guns, such as the SU-122, or as tank destroyers; the SU-85 fell into the latter category. The designation "85" means the bore of the vehicle's armament, the 85 mm D-5T gun. Development history[edit] Early in World War II, Soviet tanks such as the T-34 and KV-1 had adequate firepower to defeat any of the German tanks then available. By the fall of 1942, Soviet forces began to encounter the new German Tiger tank, with armor too thick to be penetrated by the 76.2 mm guns used in the T-34 and KV tanks at a safe range.[2] The Soviet command also had reports of the Panther tank, that was in development then and possessed thicker armor than the Tiger; both represented an advance in German tank design. Although the Panther was not seen in combat until July 1943, the new generation of German vehicles meant the Red Army would need a new, more powerful main gun for their armoured formations. In May 1943, work was begun on a new anti-tank gun. Military planners directed the design bureaus of both Gen. Vasiliy Grabin and Gen. Fyodor Petrov to modify the 85 mm anti-aircraft gun for use as an anti-tank weapon. Petrov's bureau developed the D-5 85 mm gun. Though much too large for the T-34 or KV-1 turret, it was thought the gun could be mounted upon the chassis of the SU-122 self-propelled gun to give the weapon mobility. The version of this gun intended to be mounted upon the SU-85 was called the D-5S, with the "S" standing for self-propelled. Initially the production factory at Uralmash rejected the proposed design. Nevertheless, the administrators at Uralmash were persuaded to proceed, and the new design was put into production. The weapon was later modified to include a telescopic sight and a new ball gun mantlet. This vehicle was retitled the SU-85-II.[2] Description[edit] The SU-85 was a modification of the earlier SU-122 self-propelled howitzer, essentially replacing the 122 mm M-30S howitzer of the SU-122 with a D-5T high-velocity 85 mm antitank gun. The D-5T was capable of penetrating the Tiger I from 1000 m.[3] The vehicle had a low profile and excellent mobility. Initially given an armored commander's cap on the first batch, the SU-85's observational optics were improved by the introduction of a standard commander's cupola - the same as on the T-34/76 model 1942 - in addition to the already existing prismatic observation sights installed in left side and rear. On later vehicles, the same optics were added, allowing all-around observation.[4] Production history[edit] SU-85 (1944) SU-85 production started in mid-1943, with the first vehicles reaching their units by August. When the up-gunned T-34-85 medium tank entered mass production in the spring of 1944, there was no point in continuing production of a tank destroyer without superior firepower.[5] In light of this, SU-85 production was stopped in late 1944 after 2,650 vehicles had been produced. It was replaced on the production lines by the SU-100 tank destroyer, armed with the more powerful 100 mm D-10S gun, but due to delays with 100 mm ammo, a stopgap version called SU-85M appeared in September 1944, which was SU-100 fitted with 85 mm gun, already with thicker frontal armor and commander's cupola. Service history[edit] The SU-85 entered combat in August 1943. It saw active service across the Eastern Front until the end of the war. Though a capable weapon, it was found that its 85 mm weapon was not adequate to penetrate the armour of the larger German armoured fighting vehicles.[citation needed] It was replaced by the SU-100. The SU-85 was withdrawn from Soviet service soon after the war, and was exported to many Soviet client states in Europe and elsewhere. Some SU-85s were converted to use as command and recovery vehicles.[6] Countries such as North Korea and Vietnam kept it in service for many years.[7] Construction begins with a very well detailed drive train assembly. This is the Kharkiv Model V2 493 horsepower V-12 Diesel Engine
- 96 replies
-
- 19
-
-
Grumman F4F-4 Wildcat by ccoyle - FINISHED - WAK - 1/33 - CARD
CDW replied to ccoyle's topic in Non-ship/categorised builds
Indeed! -
Oh yeah, I like this A LOT! Very unique way to give a visual tour of the model. Inspiring work, Ras!
-
P-47 by Javlin - FINISHED - Trumpter - 1/32 - "Sigma Nu Girl" -
CDW replied to Javlin's topic in Non-ship/categorised builds
Awesome Thud, Kevin. Now you have my attention to start/finish mine. Mr Color replenisher is a godsend for their metallic range of paints. For some reason, they seem to dry out quite a bit. I read where some say not to shake the paint after adding replenisher, but instead to stir it up. Not sure what difference it would make but I've been following the advice to stir. -
Panard EBR 11 by RGL - FINISHED - Hobbyboss - 1/35
CDW replied to RGL's topic in Non-ship/categorised builds
Great-looking start Greg. Looking forward to your build. -
Great-looking bike, Ras! So glad you finished her up and gave it the spot she deserves on your display shelf.
-
Renault RE20 Turbo by DocRob - FINISHED - Tamiya - 1/12
CDW replied to DocRob's topic in Non-ship/categorised builds
The seatbelts look like the real thing. The entire model is looking very realistic in this scale with the work you are doing. I like it a lot. Ive been thinking there must be a better way to model the Tamiya snap on tie rod ends. These parts from Tamiya disappoint me. -
Airplanes and Tanks in plastic by Jörgen
CDW replied to Jörgen's topic in Non-ship/categorised builds
Oh, by the way, if you have a subscription to the internet streaming service, MGM+, you can watch the film titled, "The One That Got Away", a British production about the story of von Werra. My wife and I will watch it today as it sounds very interesting. Quite an escape artist was von Werra. -
Airplanes and Tanks in plastic by Jörgen
CDW replied to Jörgen's topic in Non-ship/categorised builds
Outstanding model. Now you got my attention and will read up on the von Werra story as I am unfamiliar with it. -
Alfa Romeo Spider Touring Gran Sport by CDW - Pocher - 1:8 Scale
CDW replied to CDW's topic in Non-ship/categorised builds
Hmmm...There you go. That's a thought worth considering. I've got a feeling the internals would need a whole lotta love to pull that off. This is a reasonable facsimile as it is, but lacking in many details that would need to be made from scratch. -
Alfa Romeo Spider Touring Gran Sport by CDW - Pocher - 1:8 Scale
CDW replied to CDW's topic in Non-ship/categorised builds
Thanks Alan to get the engine block firmly seated on the divide along the center of it, glue is going to be required. Same for the cylinder head, front crank/engine block housing, as well as the oil pan. Not sure why I should add the internal parts except that the crankshaft needs to be there. The rods, pistons, and cylinder sleeves will never be seen once the engine is complete and mounted on the chassis. I am still waiting on the parts I ordered from ModelMotorcars. Hope this isn’t the normal waiting period from them.
- 51 replies
-
- 13
-
-
Airplanes and Tanks in plastic by Jörgen
CDW replied to Jörgen's topic in Non-ship/categorised builds
Edward Scissors Hands built that. 🙂 -
Loarre Castle (Spain) by King Derelict - Aedes Ars 1/200
CDW replied to king derelict's topic in Non-ship/categorised builds
Works just fine on my end. Very interesting, too. -
Renault RE20 Turbo by DocRob - FINISHED - Tamiya - 1/12
CDW replied to DocRob's topic in Non-ship/categorised builds
That looks super nice!