CDW
-
Posts
7,756 -
Joined
-
Last visited
Content Type
Profiles
Forums
Gallery
Events
Everything posted by CDW
-

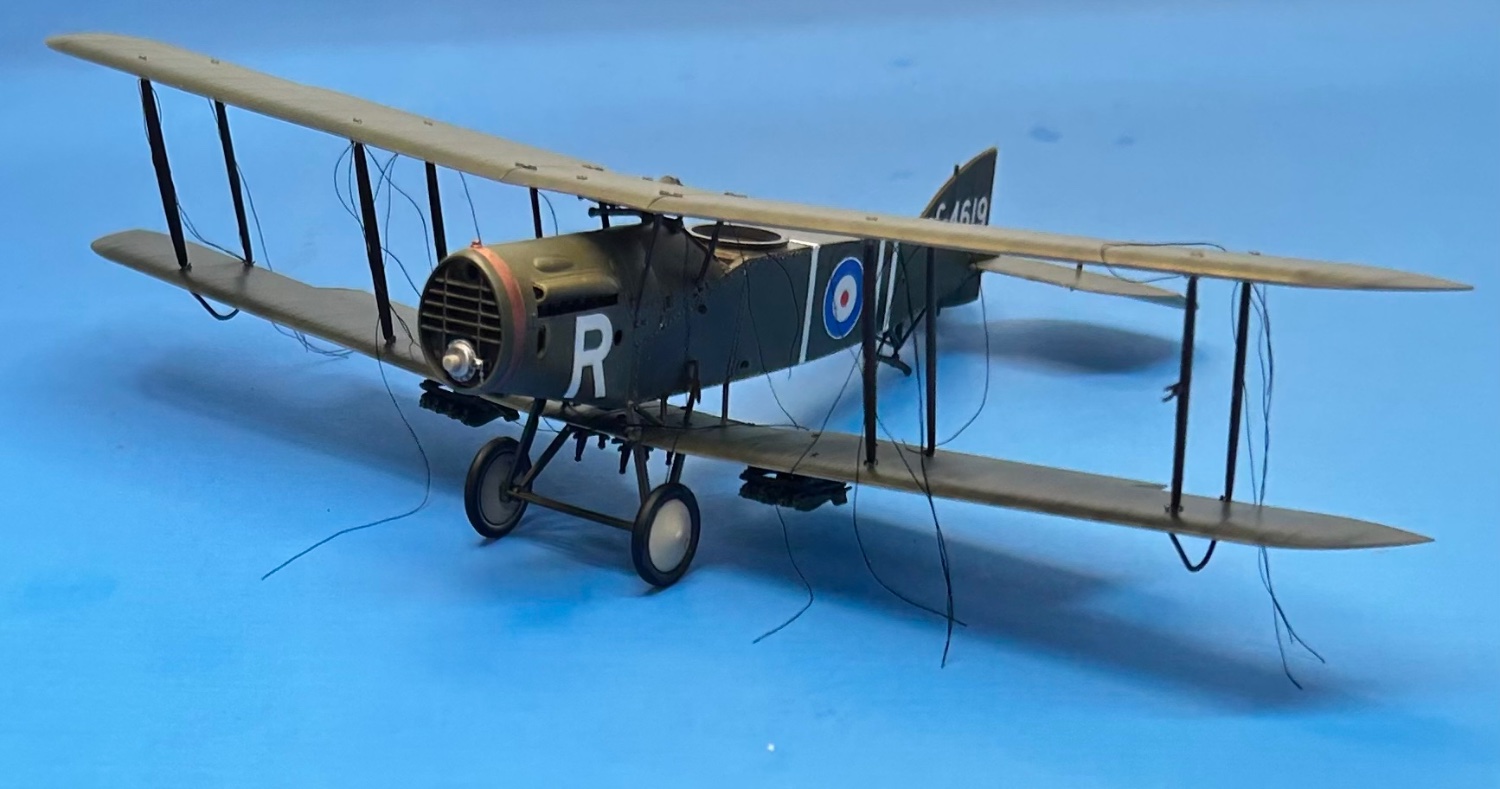
Bristol F.2B WW1 Fighter by CDW - FINISHED - Eduard - 1:48 Scale
CDW replied to CDW's topic in Non-ship/categorised builds
My first dog came to me as a free pup when I was eight years old. He was a cross between a German Shepard and Collie. He was a great dog that lived until I was well into my twenties. Never sick until the end. And yes, puppies are not free anymore, generally speaking. On the other hand, if they are properly cared for, the owner will have an investment in vet expense that needs to be covered. -
Richmond No problem at all. Glad to hear from you again. I used Vallejo white-gray for that.
- 467 replies
-
- 4
-

-
- mikasa
- wave models
- (and 1 more)
-
Bristol F.2B WW1 Fighter by CDW - FINISHED - Eduard - 1:48 Scale
CDW replied to CDW's topic in Non-ship/categorised builds
He's a Cavapoo, cross between a King Charles Spaniel and Toy Poodle. Until today, didn't know there was such a thing. -
Bristol F.2B WW1 Fighter by CDW - FINISHED - Eduard - 1:48 Scale
CDW replied to CDW's topic in Non-ship/categorised builds
This was our little buddy that passed away, Jasper.


- 140 replies
-
- 12
-
-

-
Bristol F.2B WW1 Fighter by CDW - FINISHED - Eduard - 1:48 Scale
CDW replied to CDW's topic in Non-ship/categorised builds
Yes, the top wing sits forward of the bottom, so it has a tendency to slide forward while under any pressure to bind the top wing to the bottom. Styrofoam could work well to maintain the correct distance between the wings. With this particular model, the cabane struts mount individually to little slots in the fuselage. Those need to first be cemented to the fuselage at the correct angles and at the right height before the two wings can be joined. Cementing them in place at the correct angles and height is tricky. If they are off at all, nothing else will fit. -
Bristol F.2B WW1 Fighter by CDW - FINISHED - Eduard - 1:48 Scale
CDW replied to CDW's topic in Non-ship/categorised builds
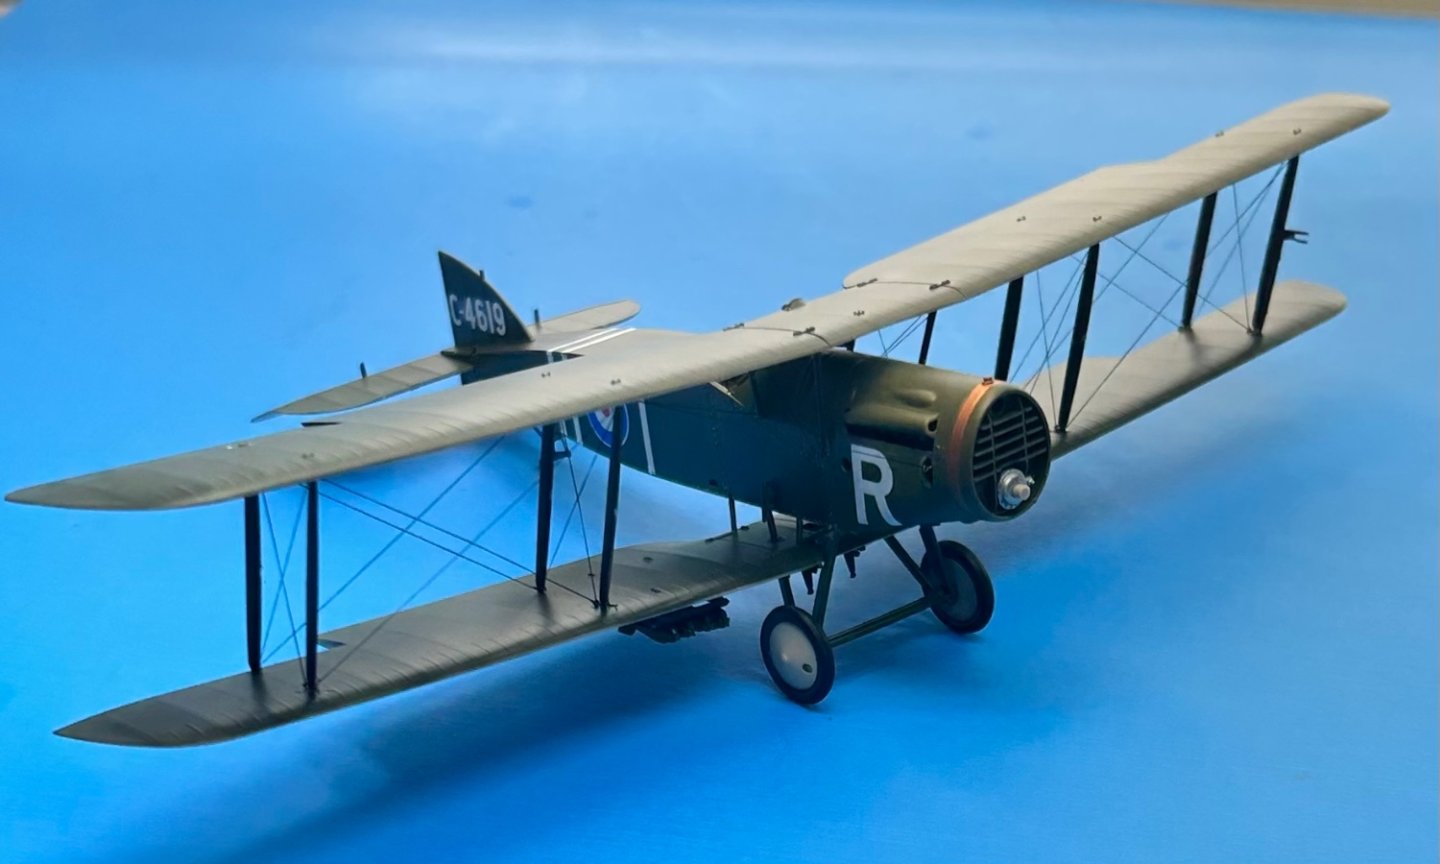
Rigging between the top and bottom wings is attached. Now to reattach all the parts I broke off while doing the rigging. I didn’t say anything about it at the time, but one of our little dogs passed away three weeks ago after suffering with diabetes the past seven years. It finally got the best of him, but he lived thirteen good years and was loved by all, particularly our youngest daughter. Today we bought another little buddy to bring home. His name is Topaz. He will be eight weeks old on November 20 when we bring him home. Our daughter is thrilled.

- 140 replies
-
- 12
-
-
Bristol F.2B WW1 Fighter by CDW - FINISHED - Eduard - 1:48 Scale
CDW replied to CDW's topic in Non-ship/categorised builds
You got that right -
Bristol F.2B WW1 Fighter by CDW - FINISHED - Eduard - 1:48 Scale
CDW replied to CDW's topic in Non-ship/categorised builds
I used my vast storehouse of vile language while attaching the top and bottom wings. Fiddly doesn’t begin to describe the nature of it, though I do believe there is a certain benefit from going through the ordeal. Patience and endurance maybe?
- 140 replies
-
- 18
-
-

-

-

-
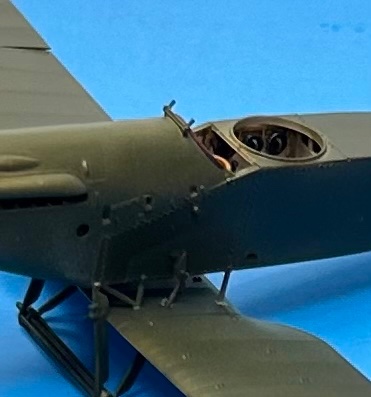
Very nice cockpit. 3D cockpits are a great addition to the aircraft modeling detail parts arsenal. Been seeing some real nice examples of them on Ebay from eastern Europe.
-
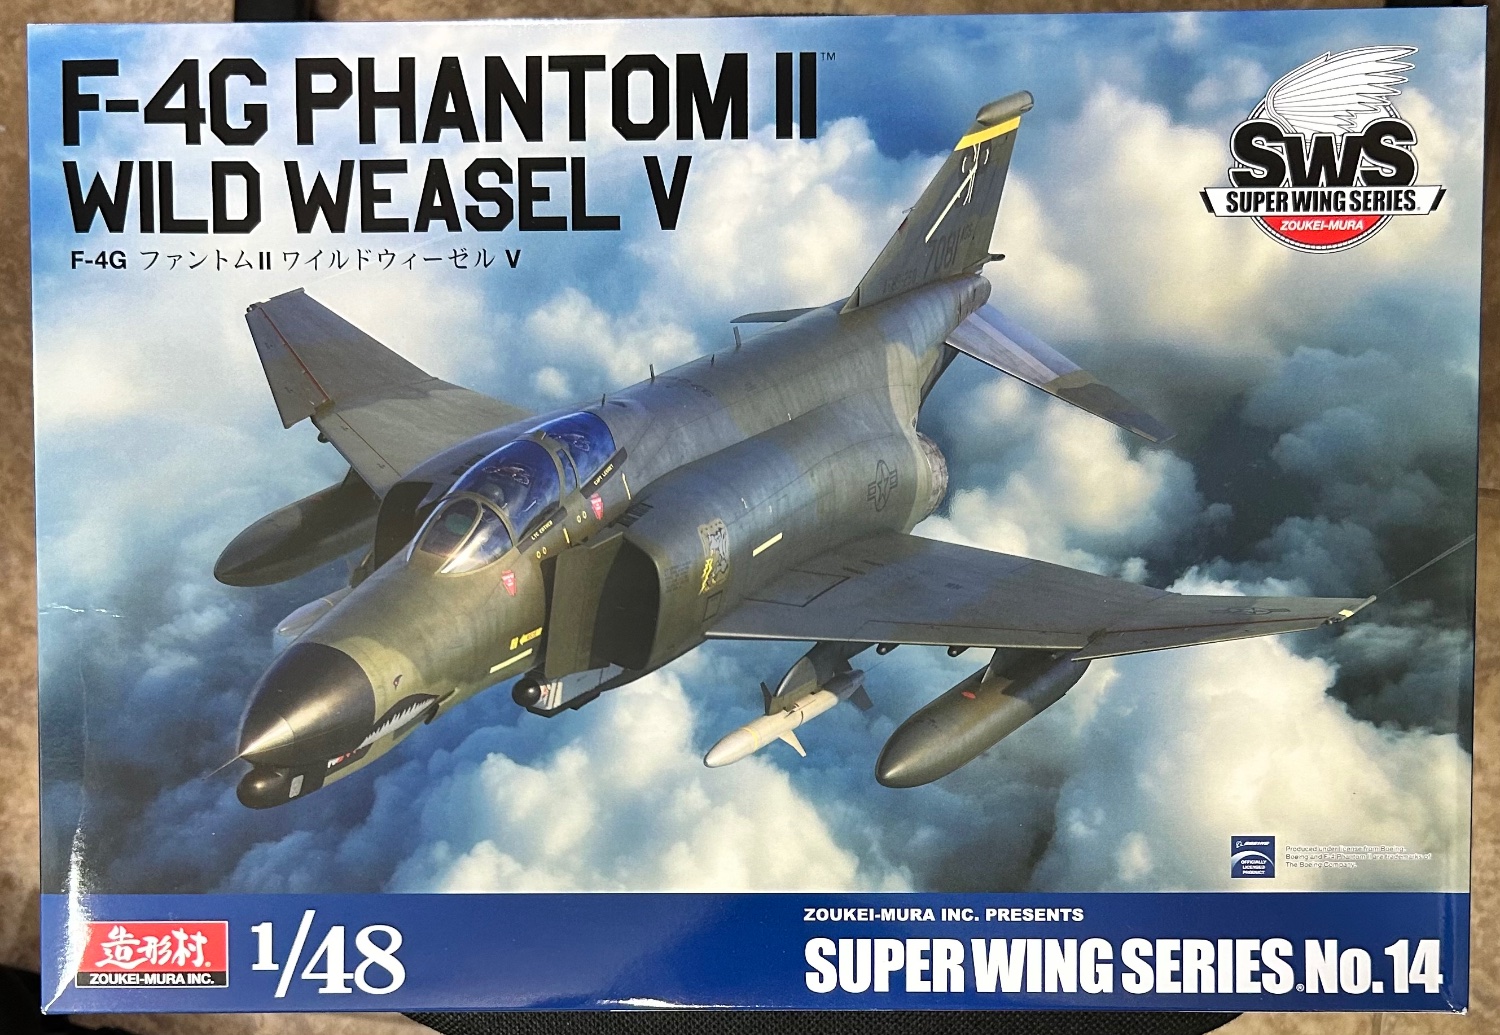
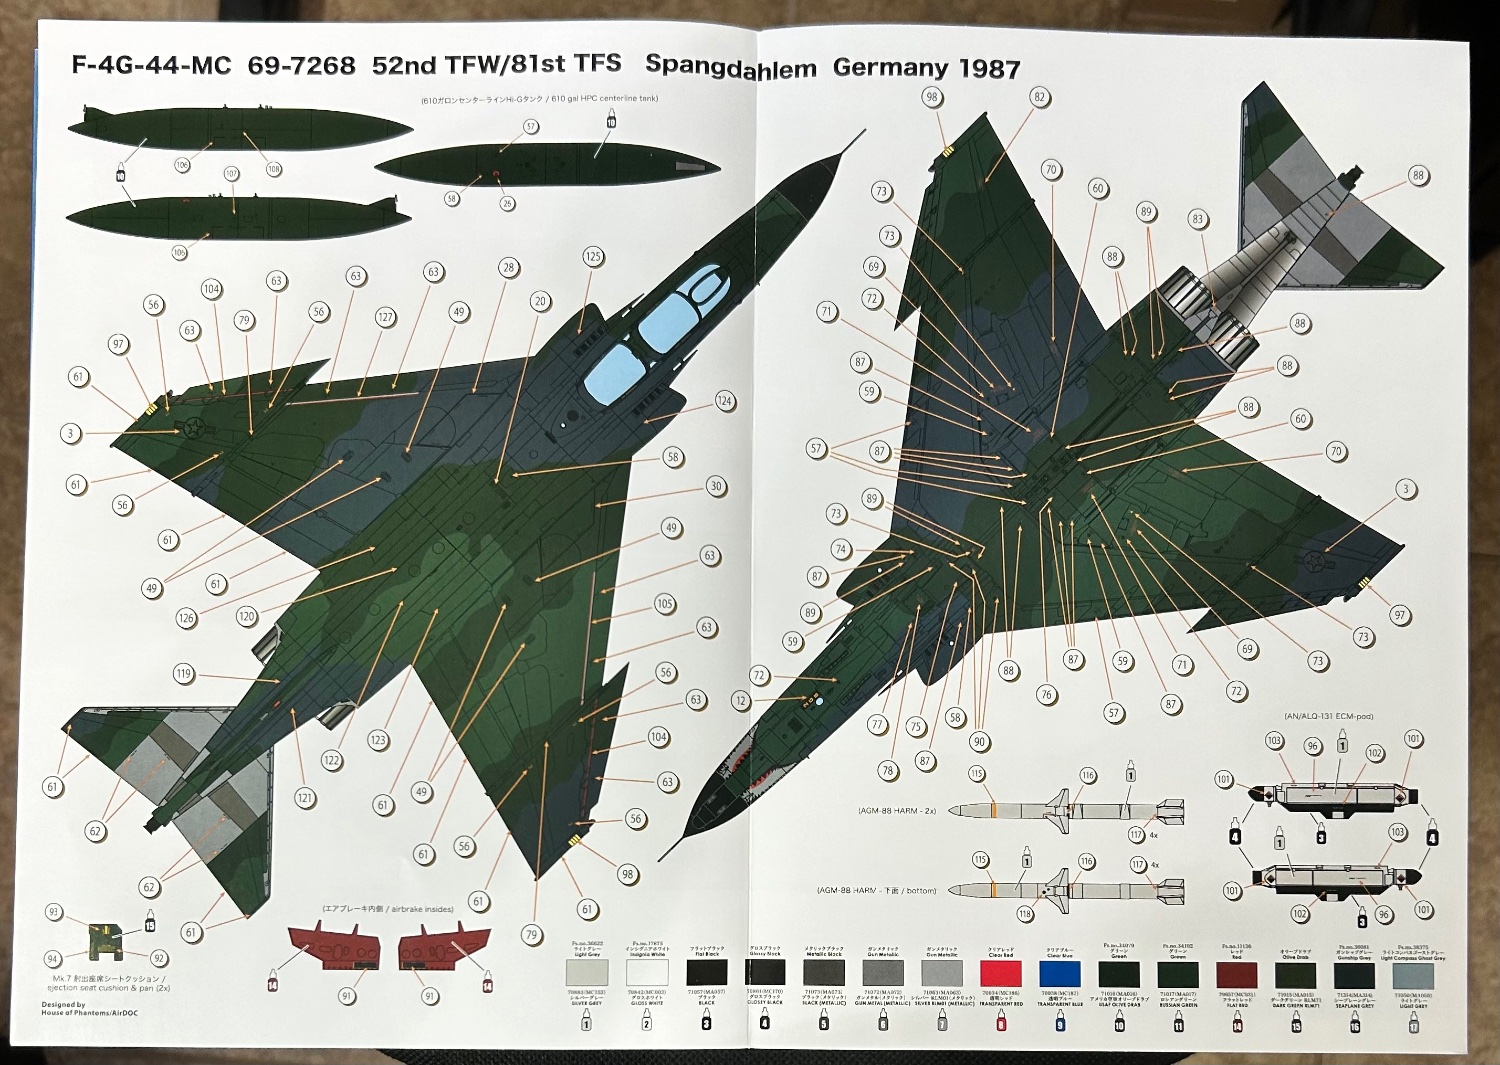
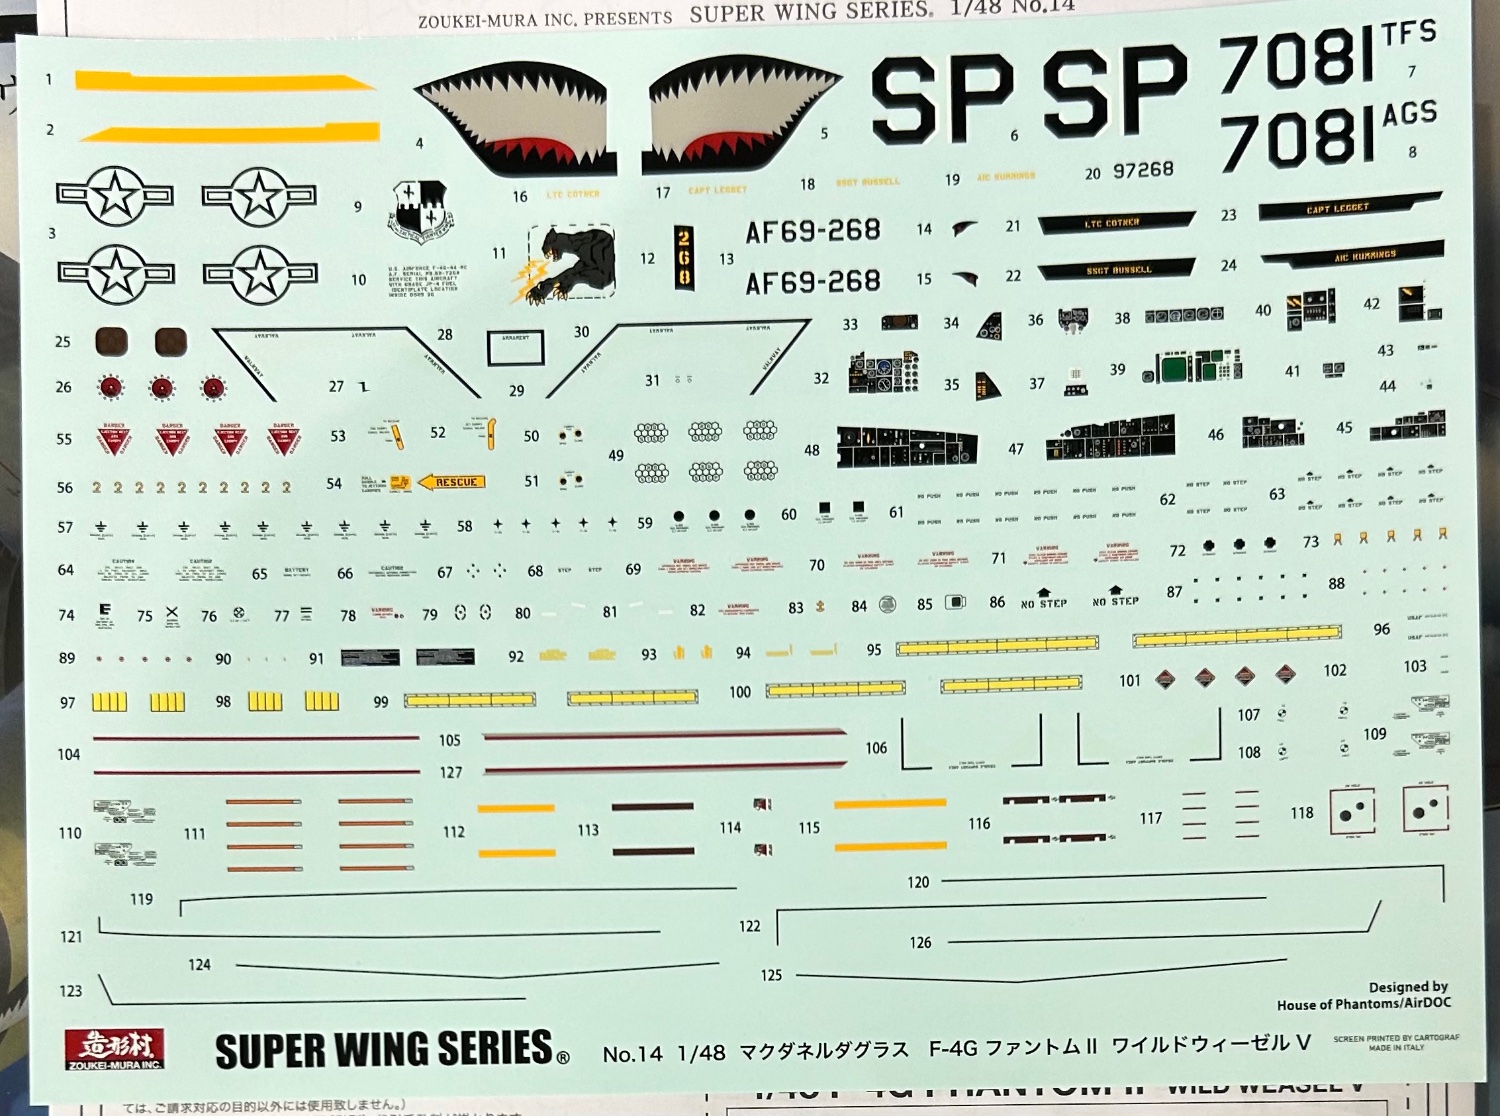
F-4G Phantom II Wild Weasel V by CDW - Zoukei Mura - 1:48 scale
CDW replied to CDW's topic in Non-ship/categorised builds
There’s a whole ZM family of F-4’s out. I wanted the F-4E, but it’s on back order for now. -
The 1:48 scale F-4G from Zoukei Mura. I wanted a Phantom on my shelf and decided to build this one for that spot. It won’t be started until I finish my current F.2B project.


- 11 replies
-
- 12
-
-
Bristol F.2B WW1 Fighter by CDW - FINISHED - Eduard - 1:48 Scale
CDW replied to CDW's topic in Non-ship/categorised builds
Yes, top and bottom wings are supported, and each wing incidence angle can be set separately. I rig the top wing before gluing the struts in place. Once the struts are in place with glue dried, I will attach the rigging from the top wing to the bottom wing. -
Bristol F.2B WW1 Fighter by CDW - FINISHED - Eduard - 1:48 Scale
CDW replied to CDW's topic in Non-ship/categorised builds
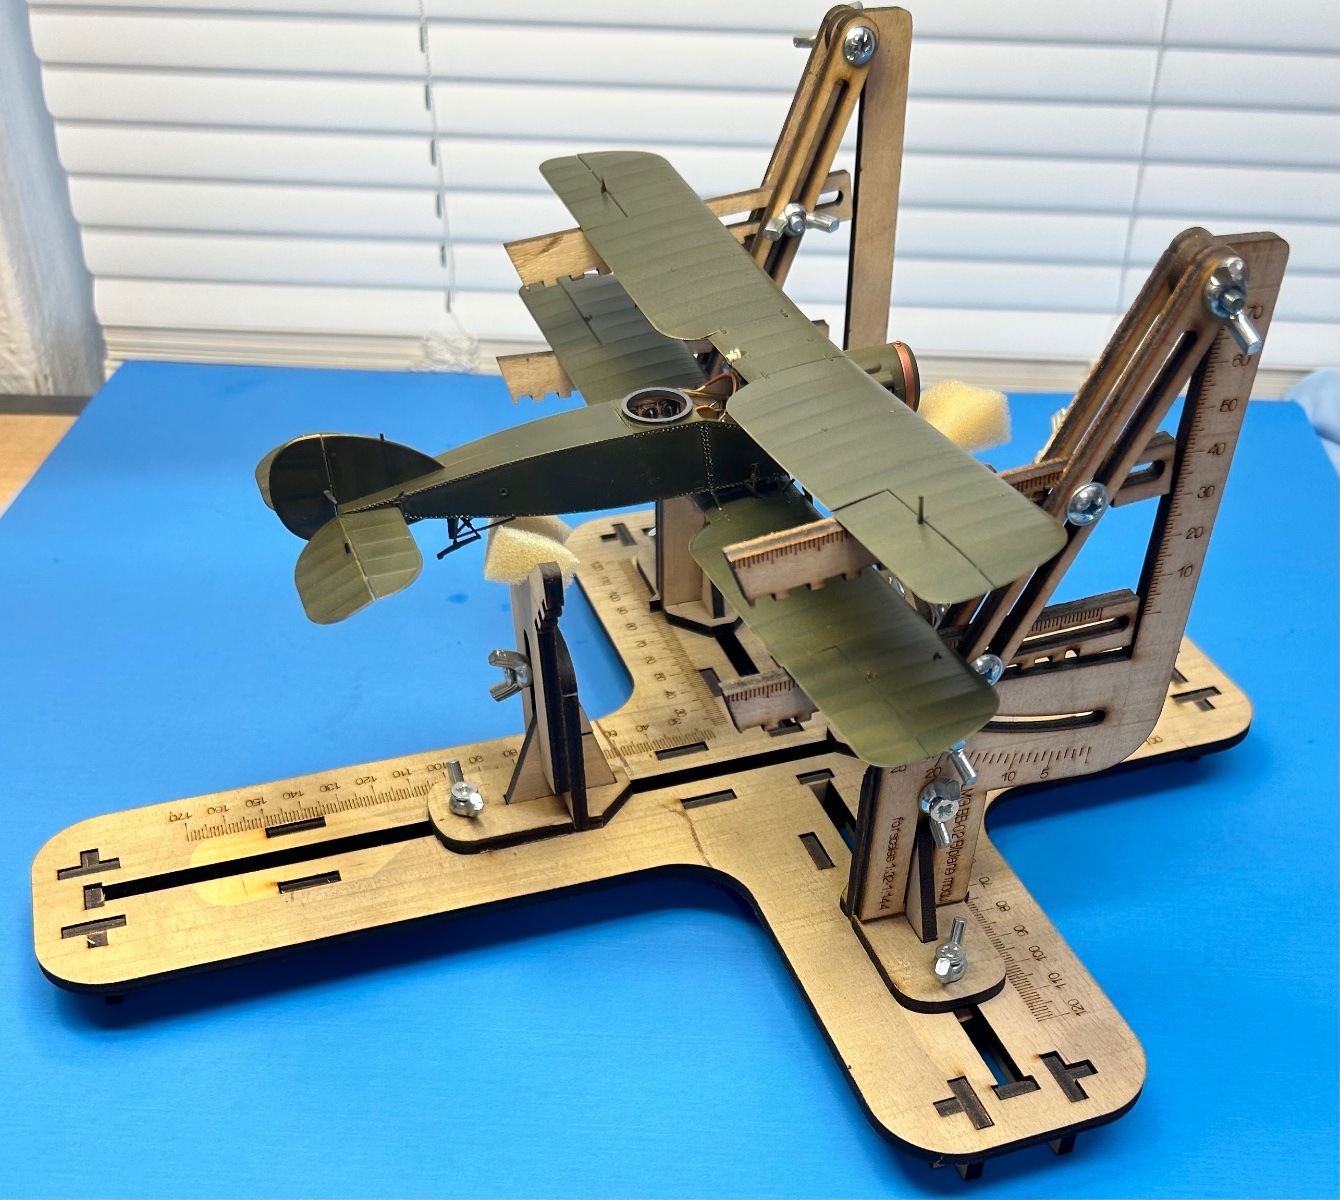
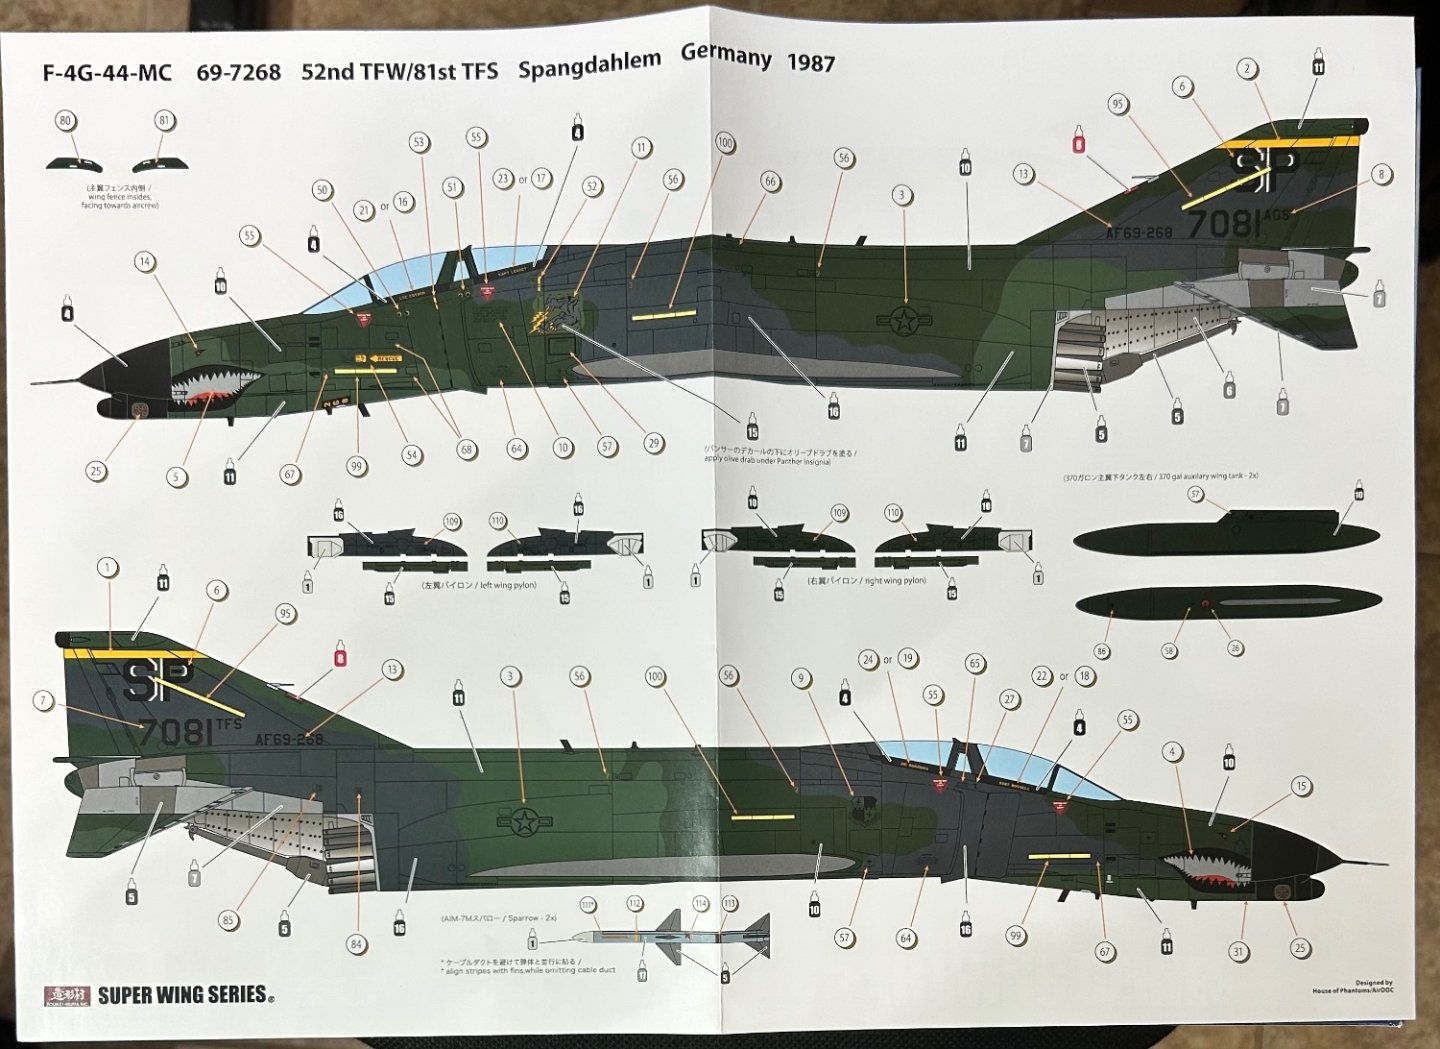
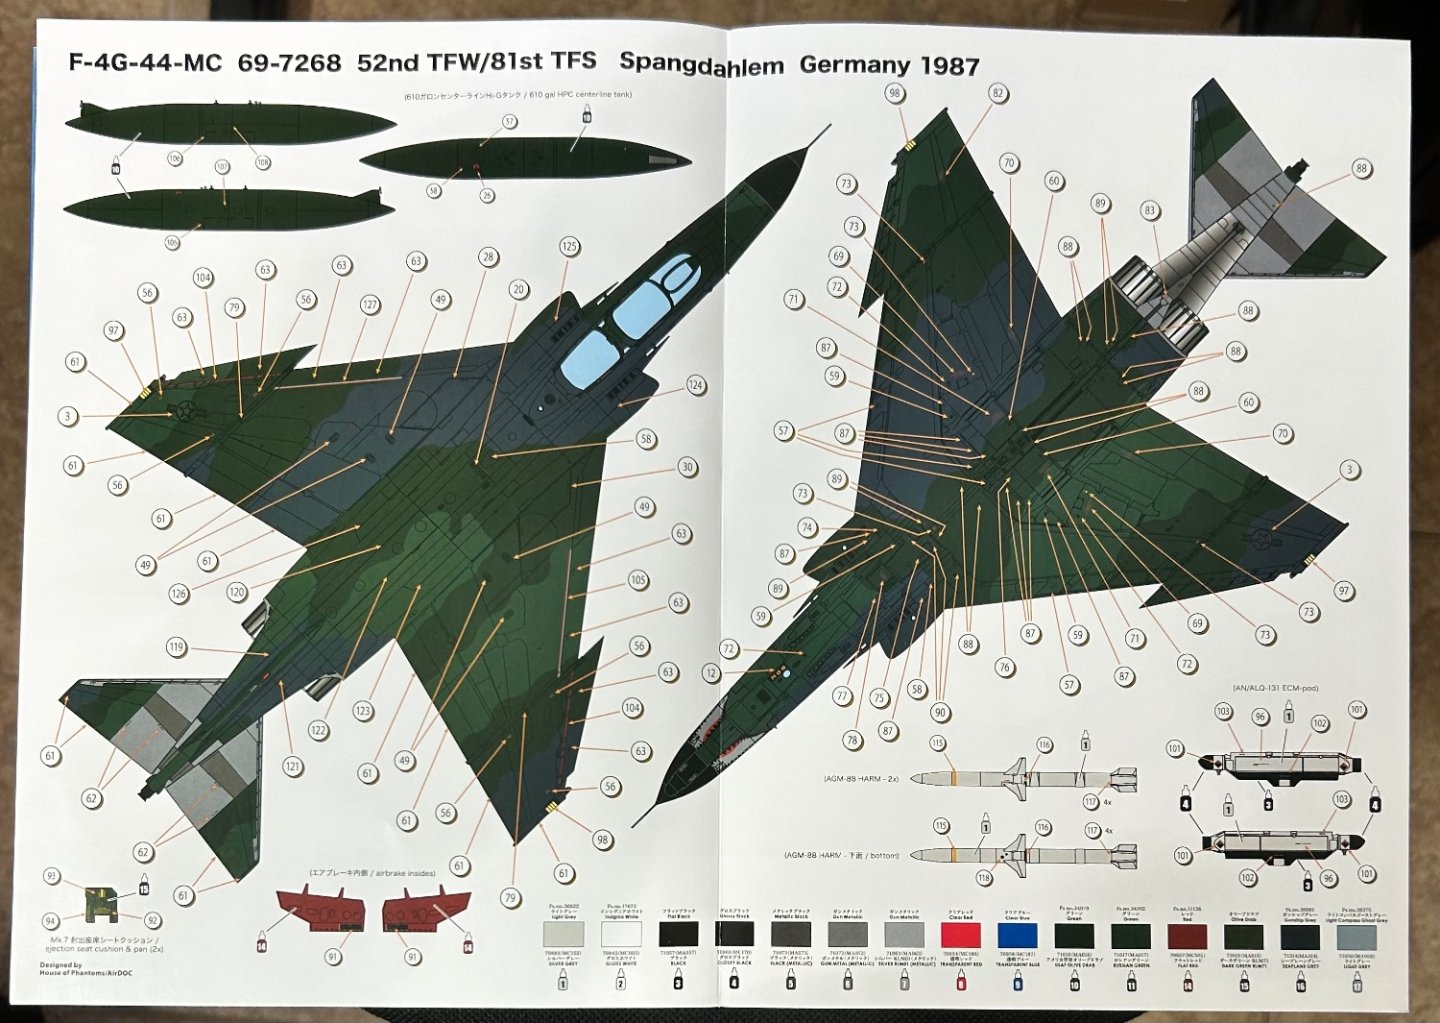
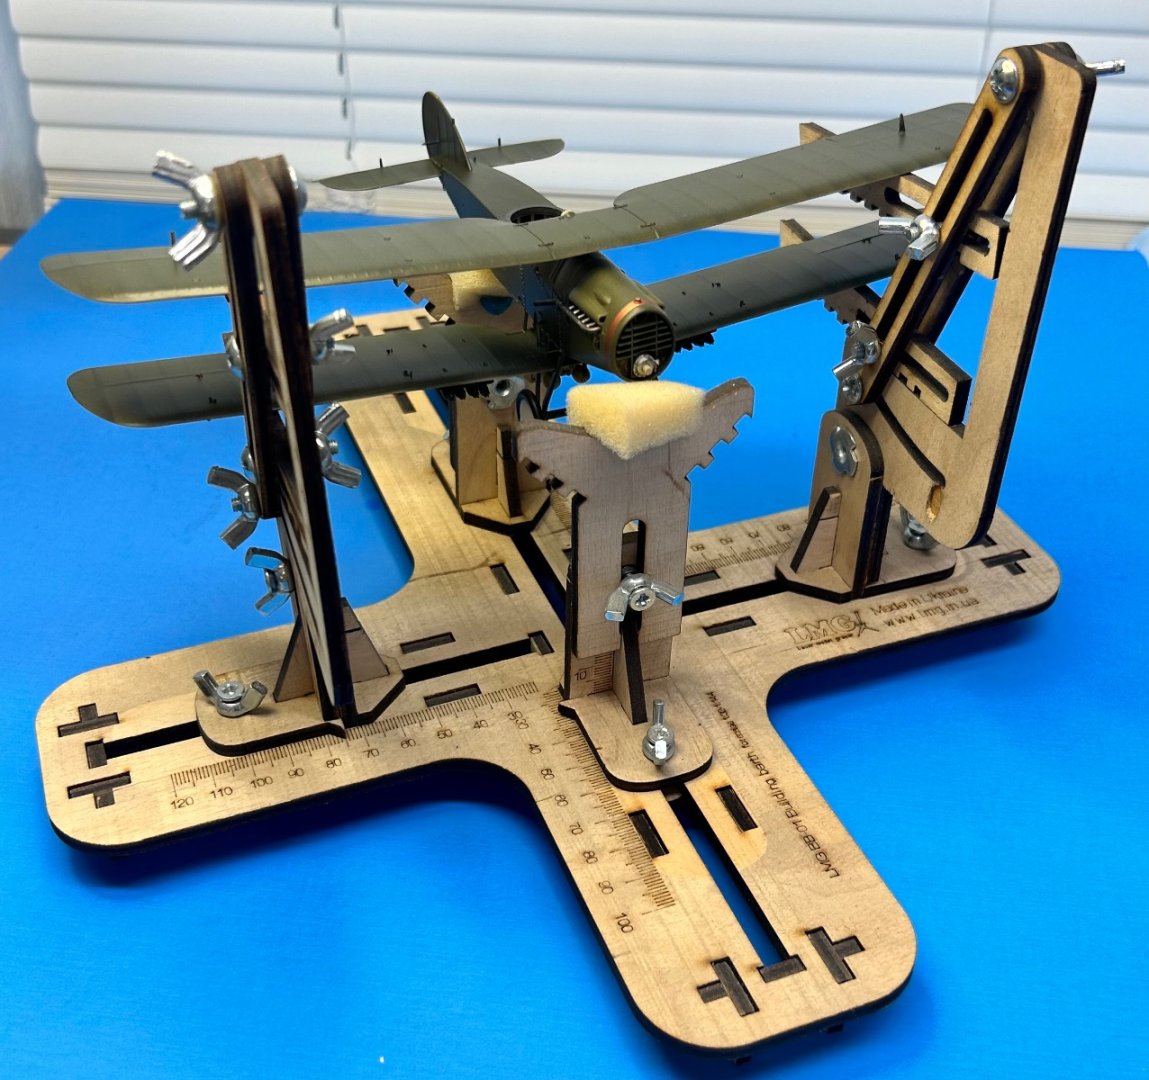
It didn’t come with instructions so finding the best way to set it up is a bit of trial and error. What I want it to do is hold everything in position at the correct angles and spacing to allow the wing struts to be glued into correct position. The way I pictured the device with the model in place is not ideal for this task. It needs to be in a nose down attitude to best achieve this ( in my opinion). The device is capable of this but it takes patience to set it up the first time. If you notice, the upper wing of many biplanes sit forward of the lower wing. It helps a lot to know this angle. The device has a graduated scale in degrees for this purpose. It also allows for setting the correct wing incident angles.- 140 replies
-
- 10
-
-
-
Bristol F.2B WW1 Fighter by CDW - FINISHED - Eduard - 1:48 Scale
CDW replied to CDW's topic in Non-ship/categorised builds
Thanks Rob. Just ordered some from Amazon. For any that might be interested, check out and bookmark a great WW1 model aircraft site: ww1aircraftmodels.com -
Bristol F.2B WW1 Fighter by CDW - FINISHED - Eduard - 1:48 Scale
CDW replied to CDW's topic in Non-ship/categorised builds
Where did you source the Pyrn thread? I read about it but never used it. My experience with photo etch is limited to a Tamiya Swordfish. It sagged. -
Bristol F.2B WW1 Fighter by CDW - FINISHED - Eduard - 1:48 Scale
CDW replied to CDW's topic in Non-ship/categorised builds
Thanks Rob. Hope it doesn’t disappoint too much but I won’t be doing flat rigging with this model. Wasn’t prepared to source the materials needed which on first thought would need to be photo etch. Could possibly do it by repurposing some small scale ship railing but in this case will cheat and use round rigging instead.- 140 replies
-
- 10
-
-
Bristol F.2B WW1 Fighter by CDW - FINISHED - Eduard - 1:48 Scale
CDW replied to CDW's topic in Non-ship/categorised builds
I will use this contraption to align the wings and glue the struts in place. It’s not aligned yet, just posed for a “before” photo. The “after” photo will come later.

- 140 replies
-
- 20
-
-
Bristol F.2B WW1 Fighter by CDW - FINISHED - Eduard - 1:48 Scale
CDW replied to CDW's topic in Non-ship/categorised builds

- 140 replies
-
- 19
-
-
Bristol F.2B WW1 Fighter by CDW - FINISHED - Eduard - 1:48 Scale
CDW replied to CDW's topic in Non-ship/categorised builds

- 140 replies
-
- 18
-
-
Bristol F.2B WW1 Fighter by CDW - FINISHED - Eduard - 1:48 Scale
CDW replied to CDW's topic in Non-ship/categorised builds
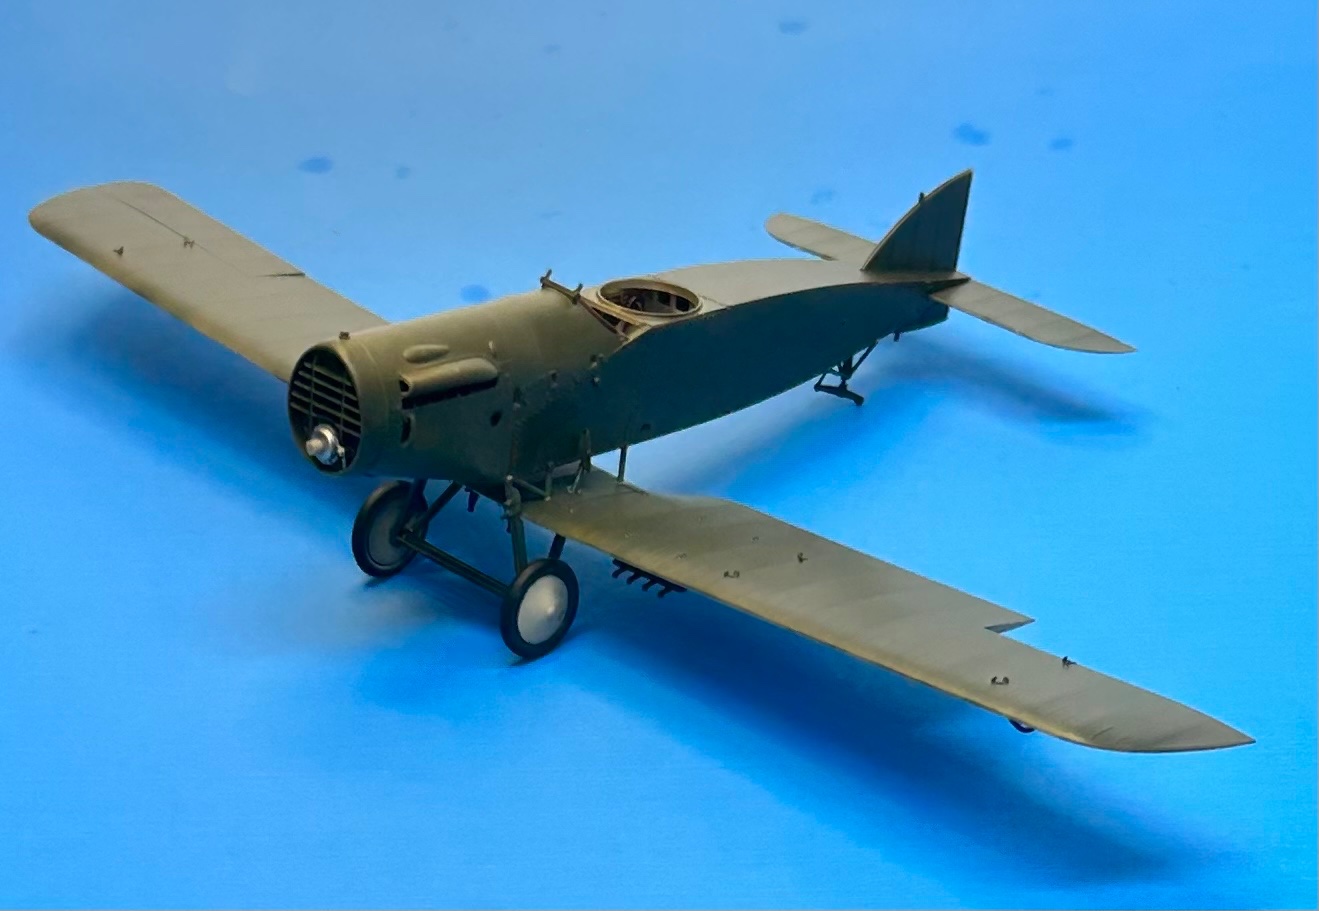
Here you can see the odd way the lower wing is mounted to the fuselage as well as how the landing gear struts pass through the wing to attach to the fuselage.
- 140 replies
-
- 19
-
-
Bristol F.2B WW1 Fighter by CDW - FINISHED - Eduard - 1:48 Scale
CDW replied to CDW's topic in Non-ship/categorised builds
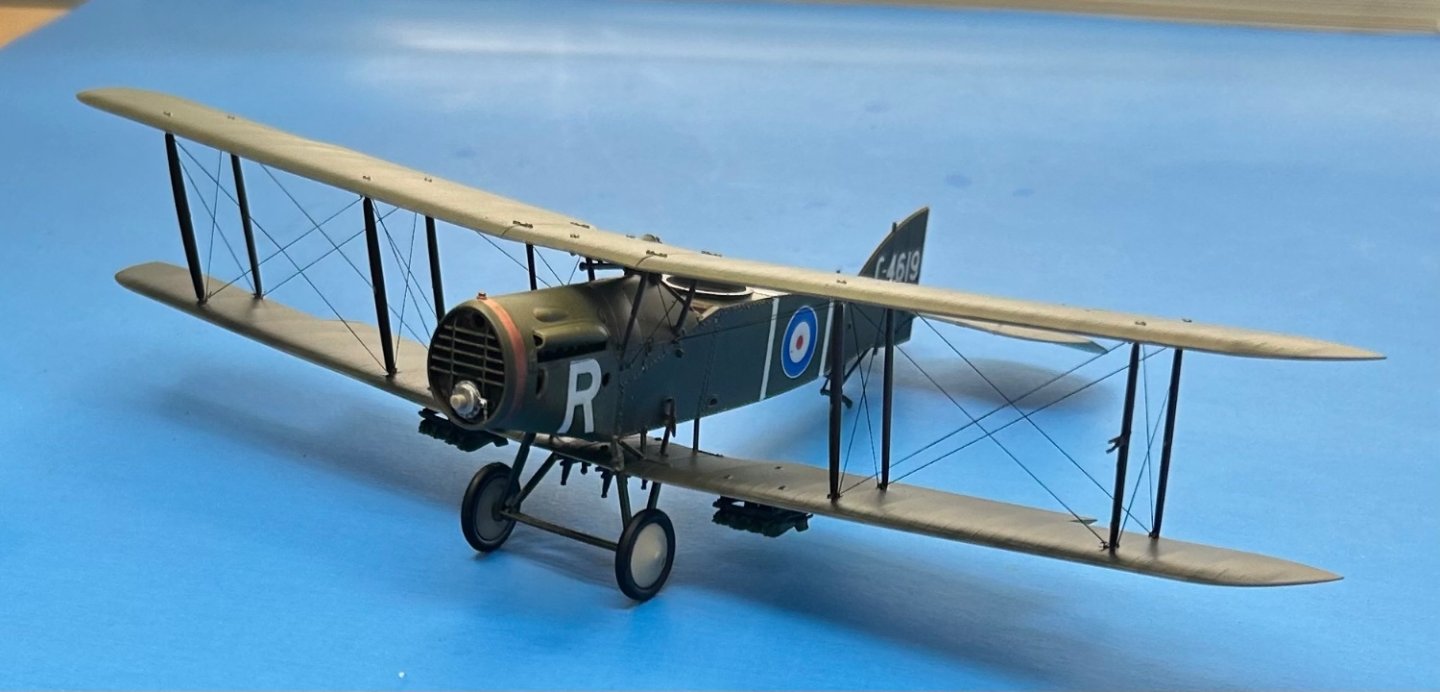
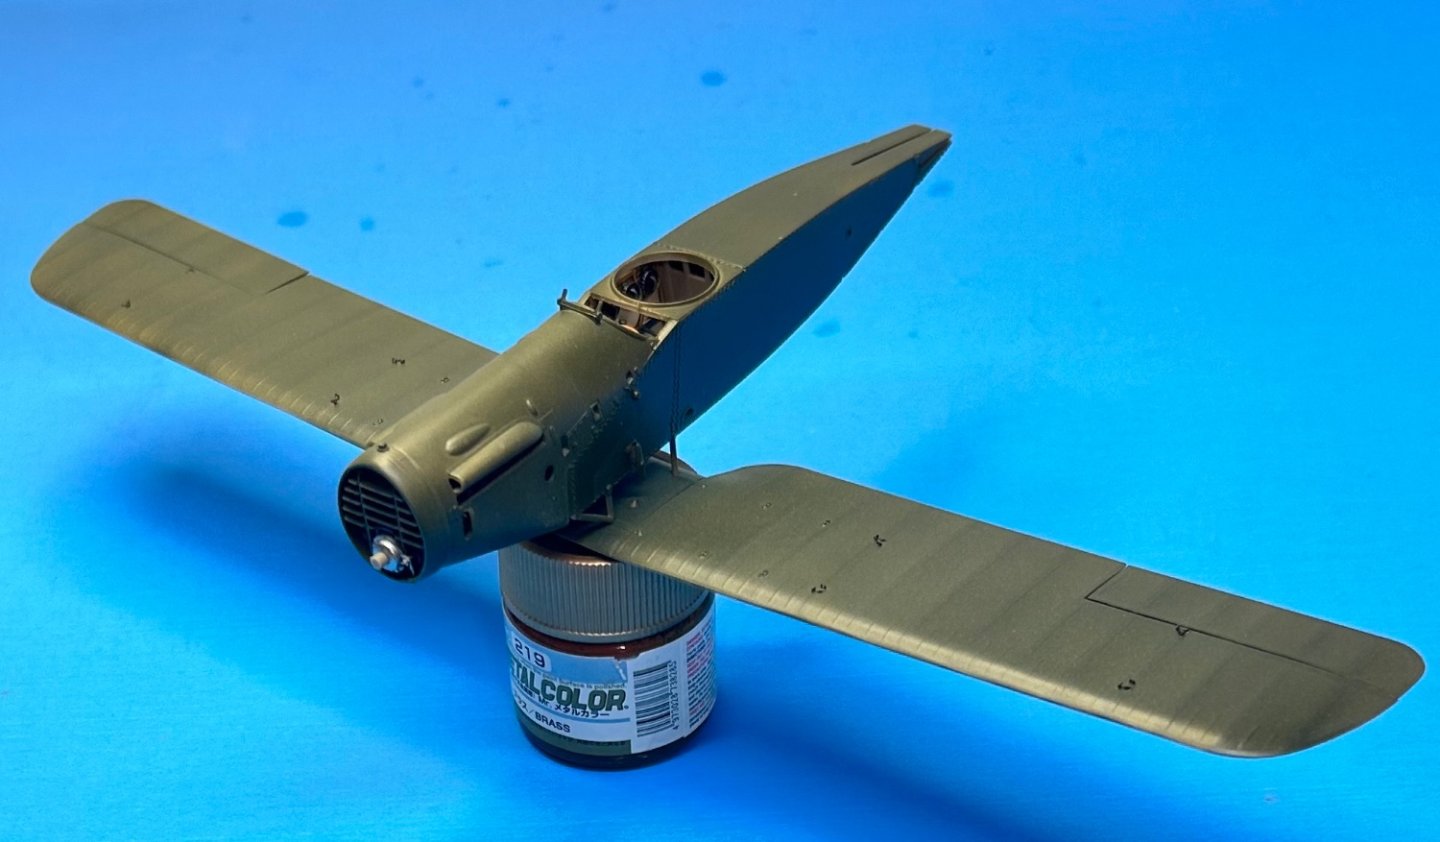
Have a little paint on the major portion of the kit now. Will add more paint to the struts then will begin the assembly of the sub assemblies 😁 Mucho weathering and rigging to follow.


- 140 replies
-
- 22
-
-
On Hold - Nakajima Type KO 3 by CDW - Answer - 1:33 Scale - CARD
CDW replied to CDW's topic in Non-ship/categorised builds
I disassembled my three kit books and took the pages to Office Depot for copies on their laser color printer. I got one full size copy and one half size copy of each book for a grand total cost of $20 after tax. That’s a total of 24 pages on similar paper as the original. 4 of those pages were 11x17. Great quality as well as great price IMO. I won’t be cutting my original books any more from this point forward. Copies only.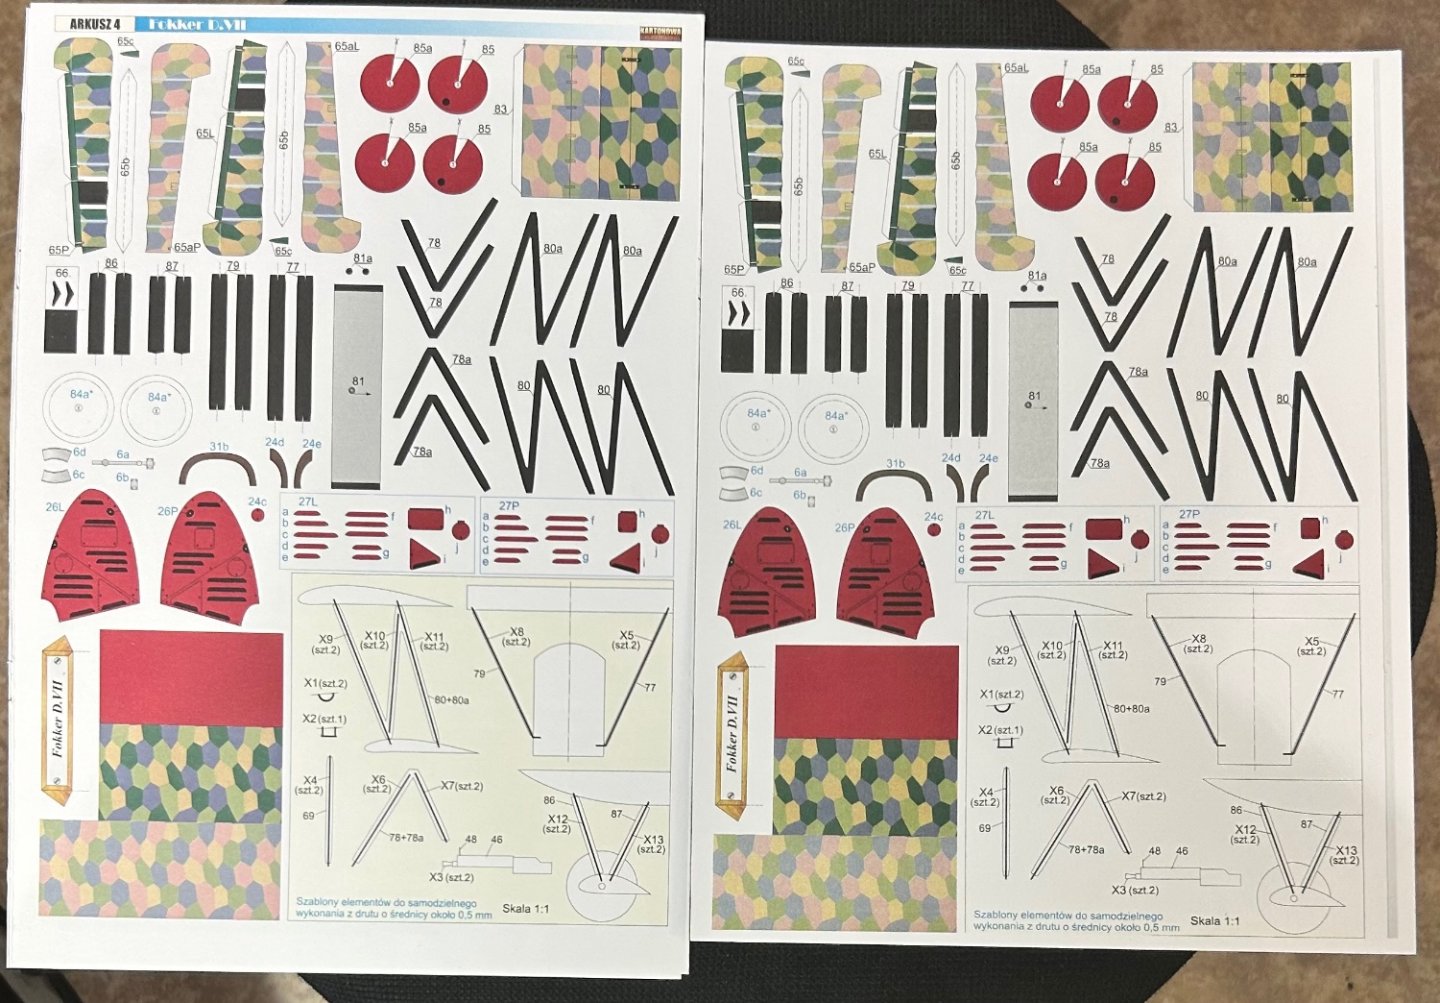
- 114 replies
-
- 11
-
-
Bristol F.2B WW1 Fighter by CDW - FINISHED - Eduard - 1:48 Scale
CDW replied to CDW's topic in Non-ship/categorised builds
For any of you that own this kit or a variation of it from Eduard, be aware the instruction part number call outs for the fuselage - lower wing struts are backward. Test fit the strut fuselage to wing fit before gluing the parts to the fuselage. If you don’t do this, you will find out the hard way and likely need to scratch build another set of struts.- 140 replies
-
- 10
-
-
-
Bristol F.2B WW1 Fighter by CDW - FINISHED - Eduard - 1:48 Scale
CDW replied to CDW's topic in Non-ship/categorised builds
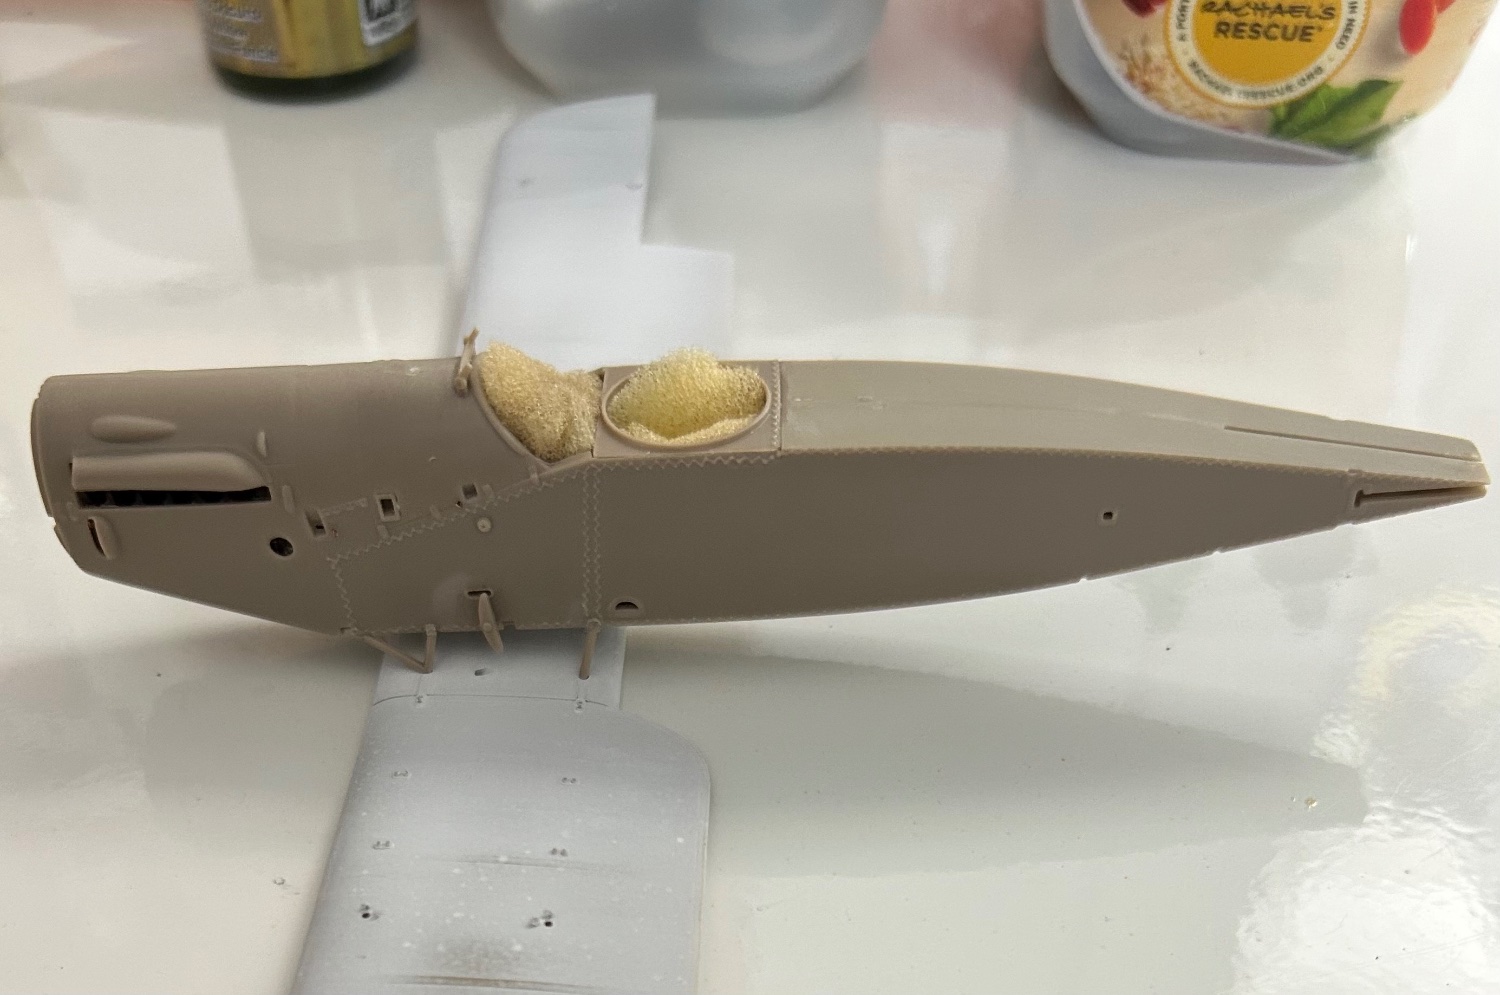
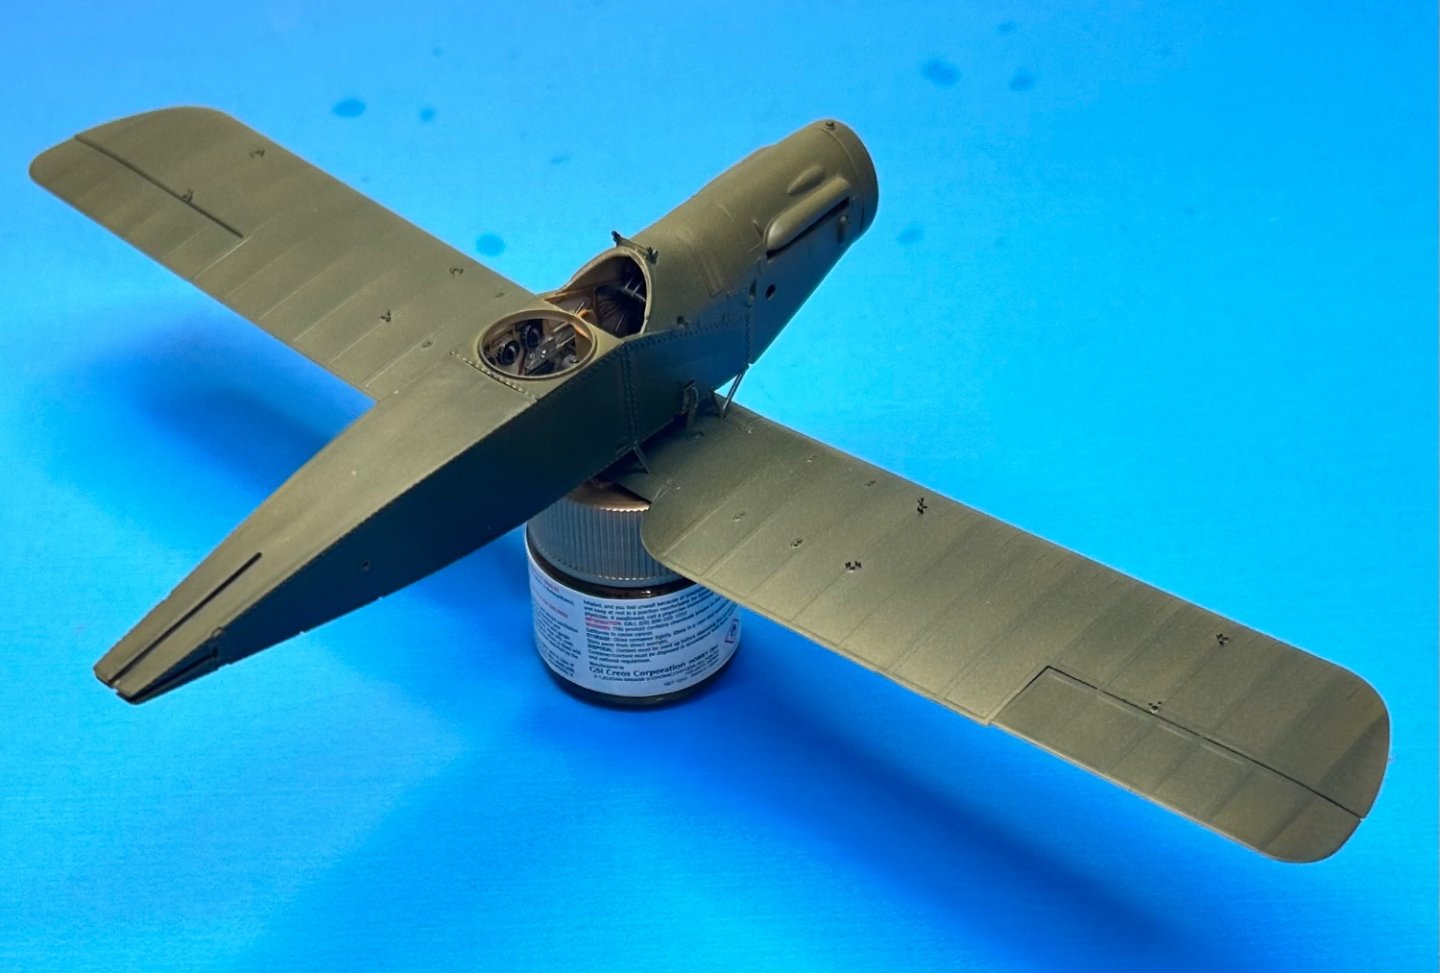
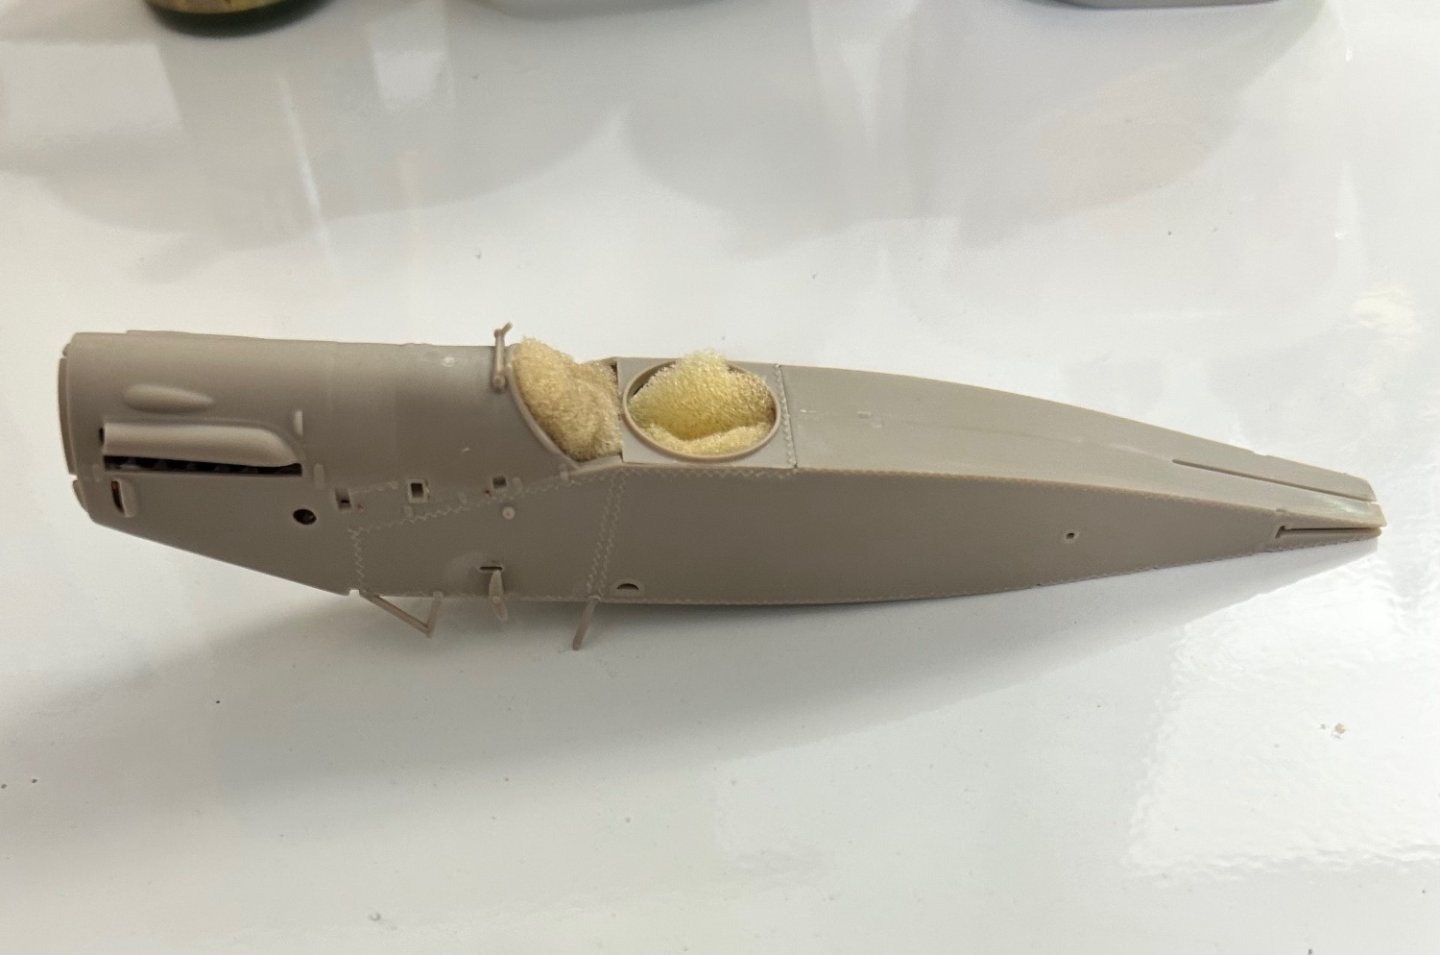
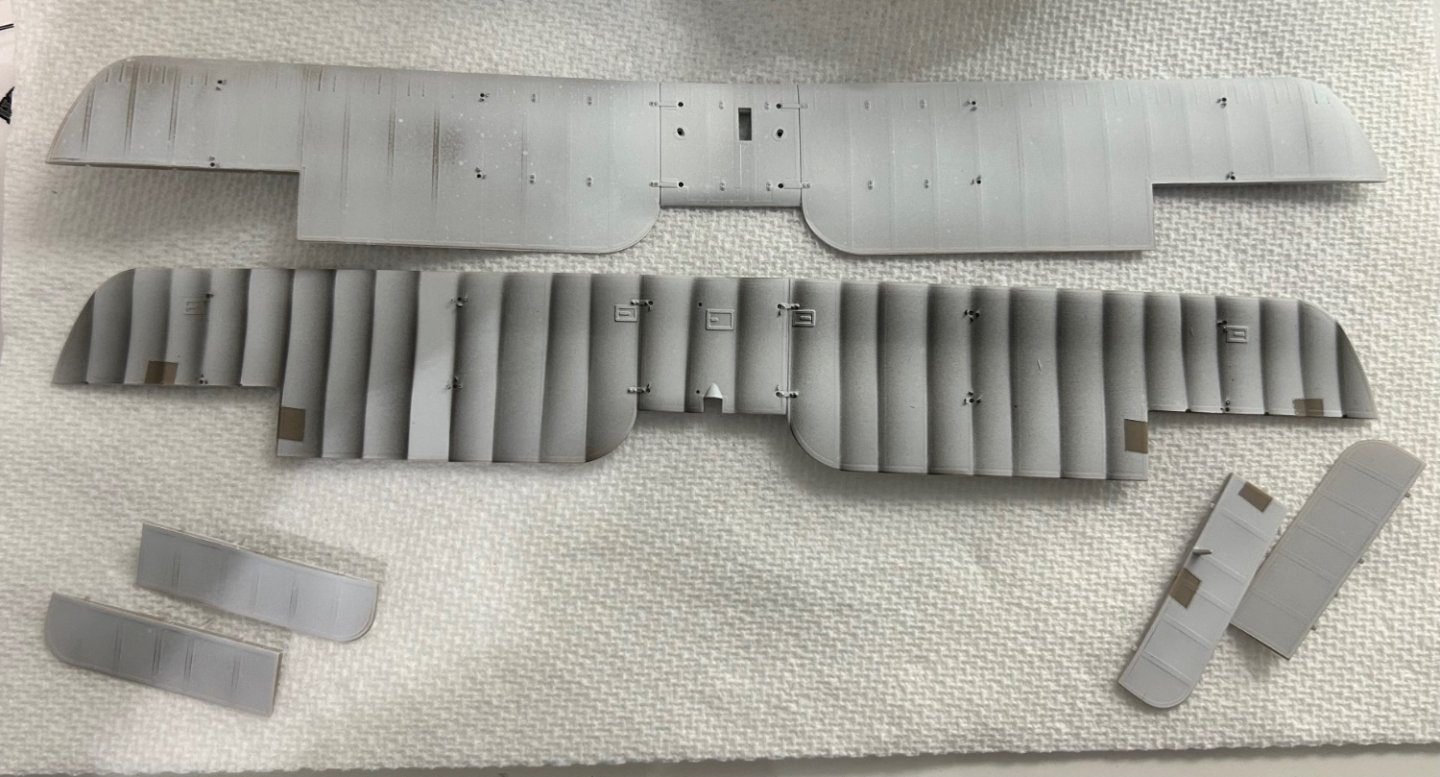
Fuselage is ready for paint. The F.2B had a unique wing mounting system on the bottom wing. The wings have been primed in white while the rib locations are pre shaded n black before color coats.
- 140 replies
-
- 17
-
-
Churchill Mk.III tank by King Derelict - Italeri - 1/72
CDW replied to king derelict's topic in Non-ship/categorised builds
Nice haul!