HOLIDAY DONATION DRIVE - SUPPORT MSW - DO YOUR PART TO KEEP THIS GREAT FORUM GOING! (83 donations so far out of 49,000 members - C'mon guys!)
×

genericDave
-
Posts
209 -
Joined
-
Last visited
Content Type
Profiles
Forums
Gallery
Events
Everything posted by genericDave
-
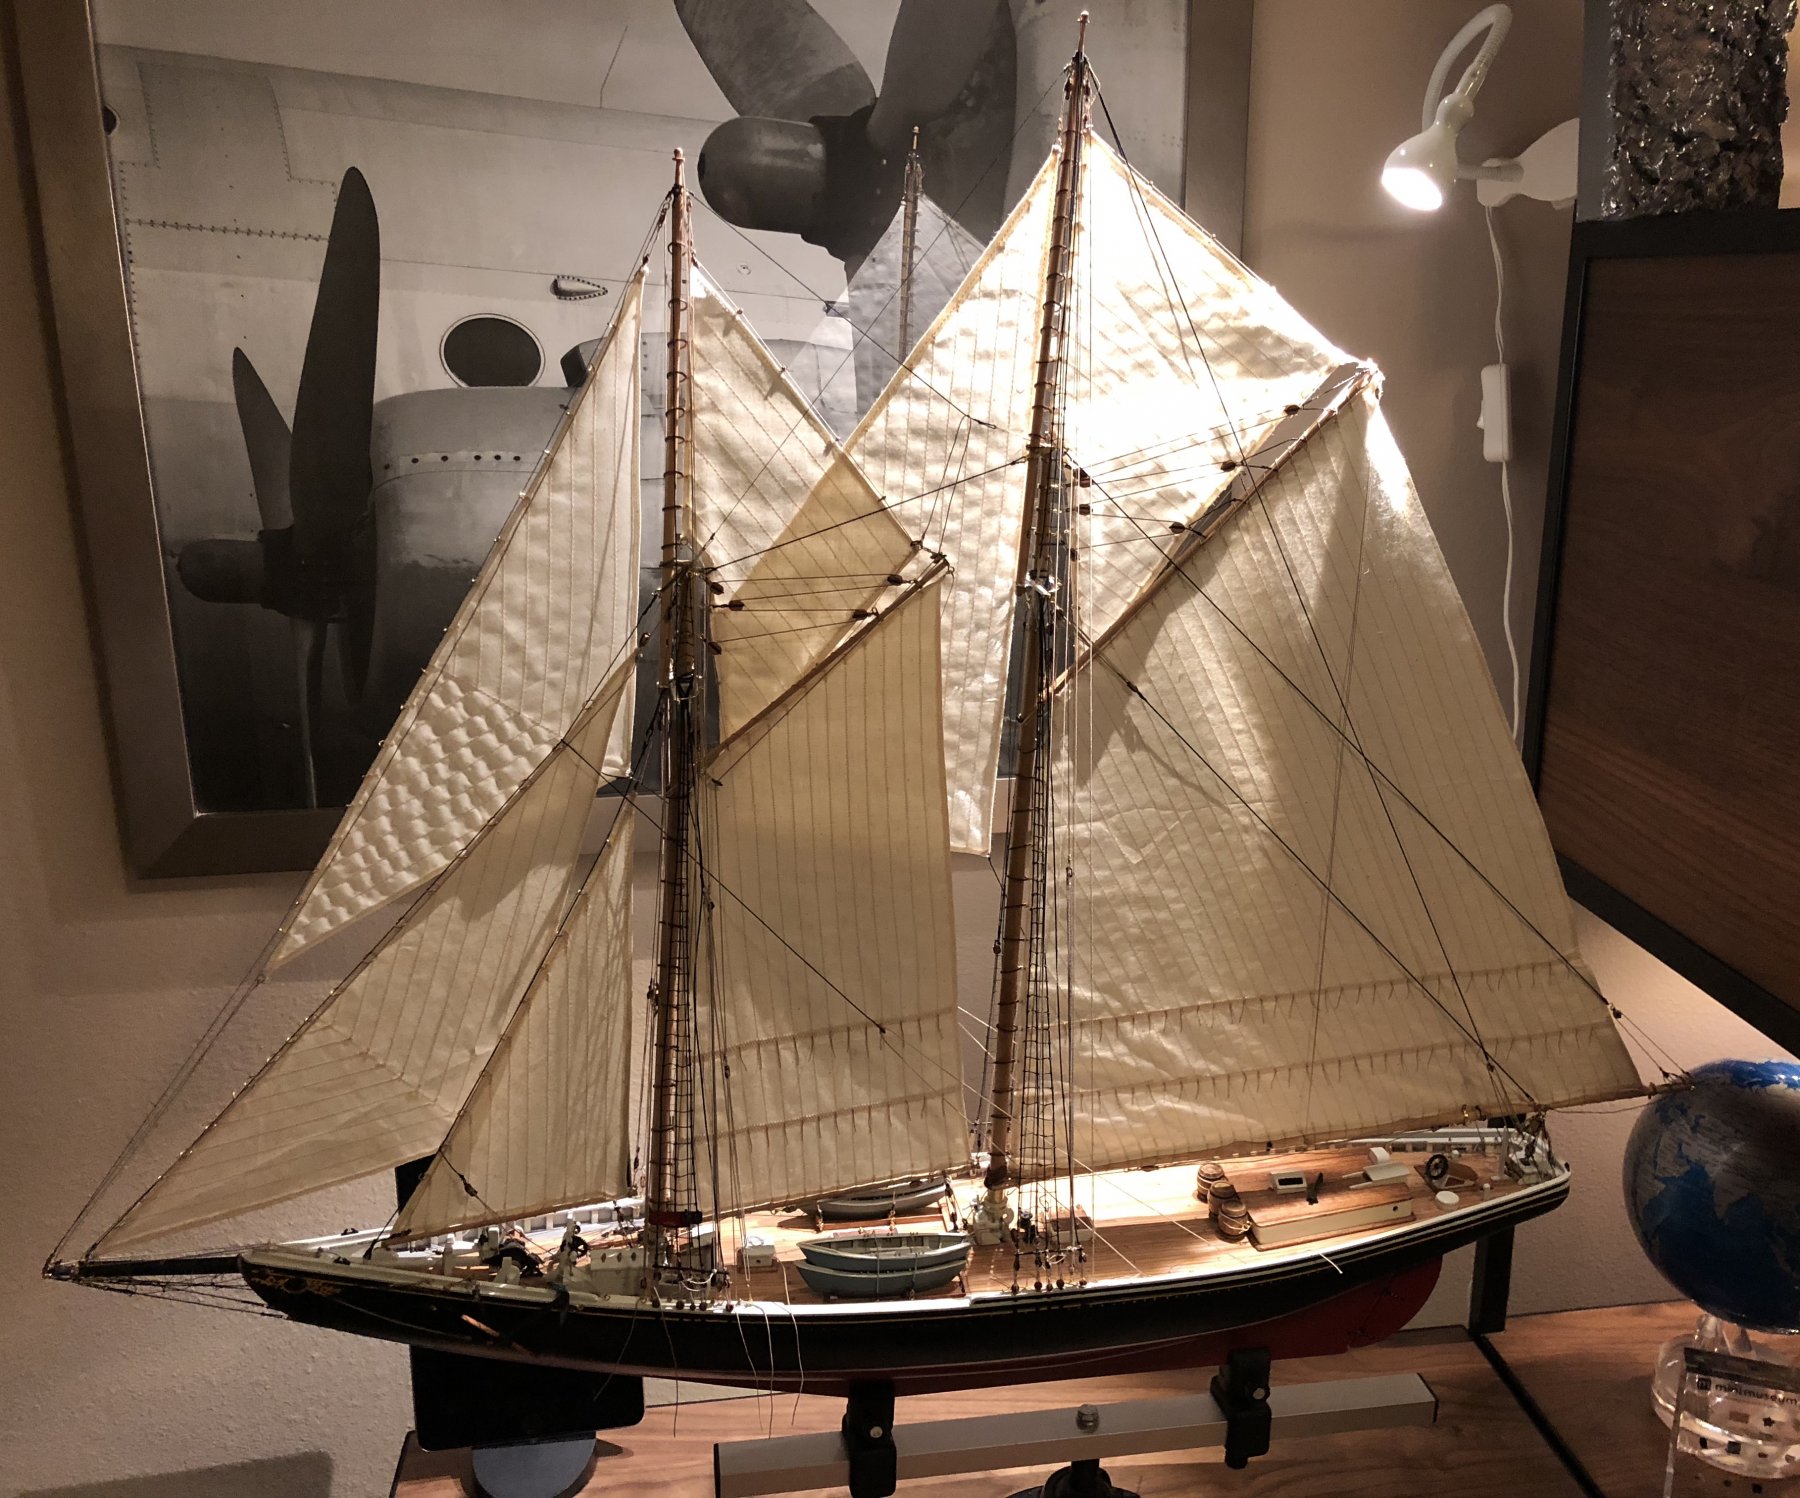
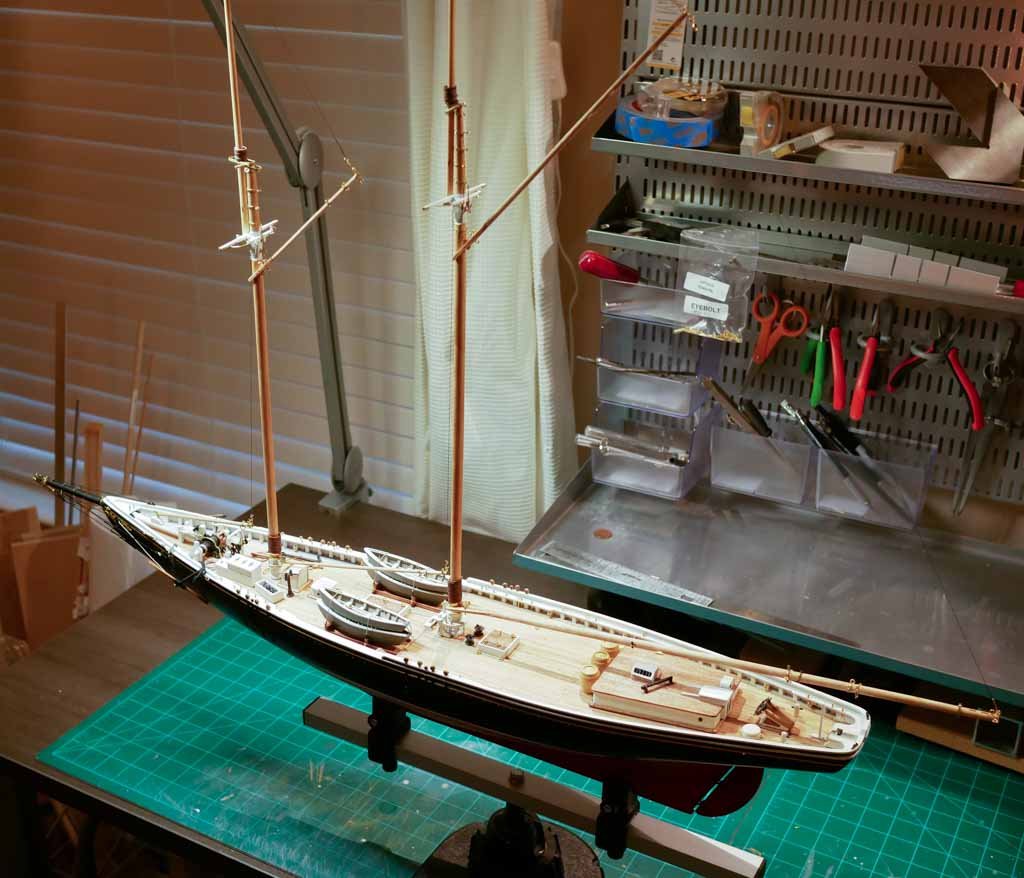
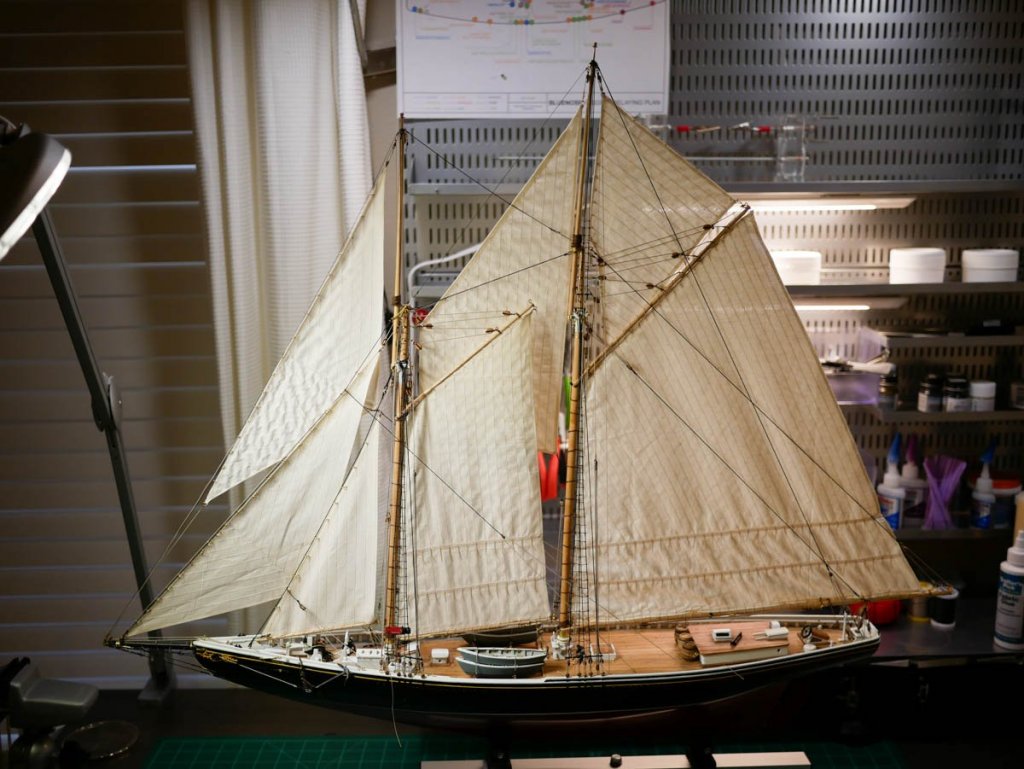
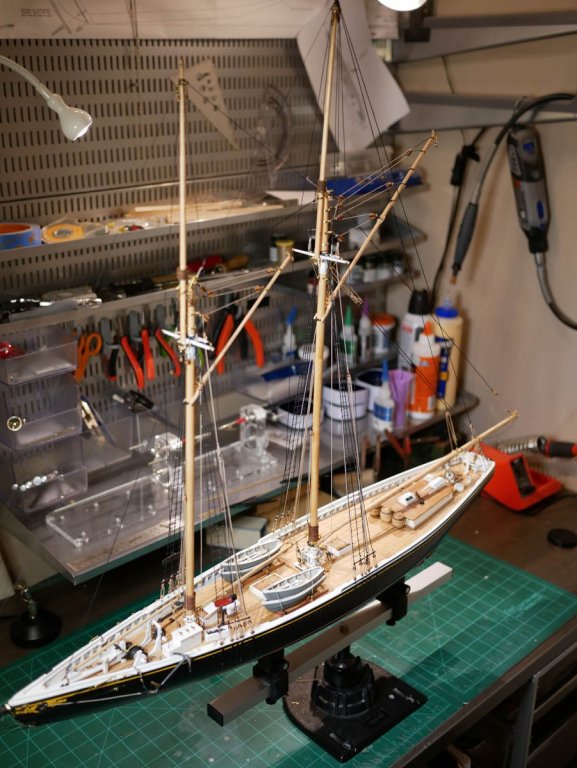
 Didn’t quite finish by the end of 2017, but came close. (A new puppy in the house ate up some time!) The final sail was installed and all the rigging is finished (including flag halliards and dory tackles). Still to do: - go over all the rigging and tighten as needed, trim excess line. - rope coils - flags - final pass to fix anything I’m not happy with - mount to display board
- 245 replies
-
- 12
-

-
- bluenose
- model shipways
- (and 1 more)
-
Thanks guys! Attaching the sails to the mast hoops is a little tedious (not difficult, and it doesn't take long, just something I don't particularly enjoy), so I decided to wait until I get both the fore topsail and main topsail installed, then I'll attach both of their hoops in one sitting. I was all geared up to have that finished this week (only the fore topsail remains), but life has gotten in the way...maybe next week!
- 245 replies
-
- 2
-
-
- bluenose
- model shipways
- (and 1 more)
-
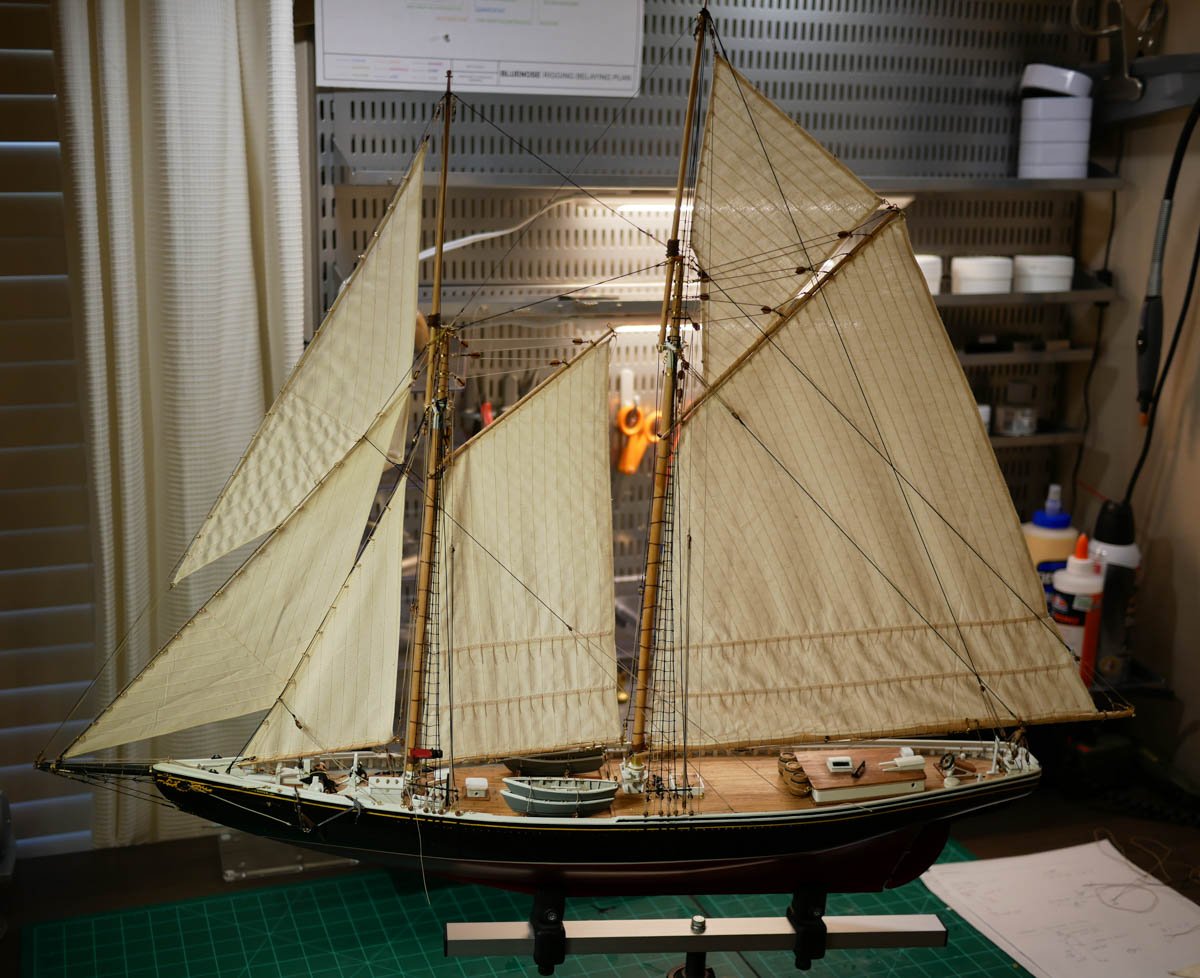
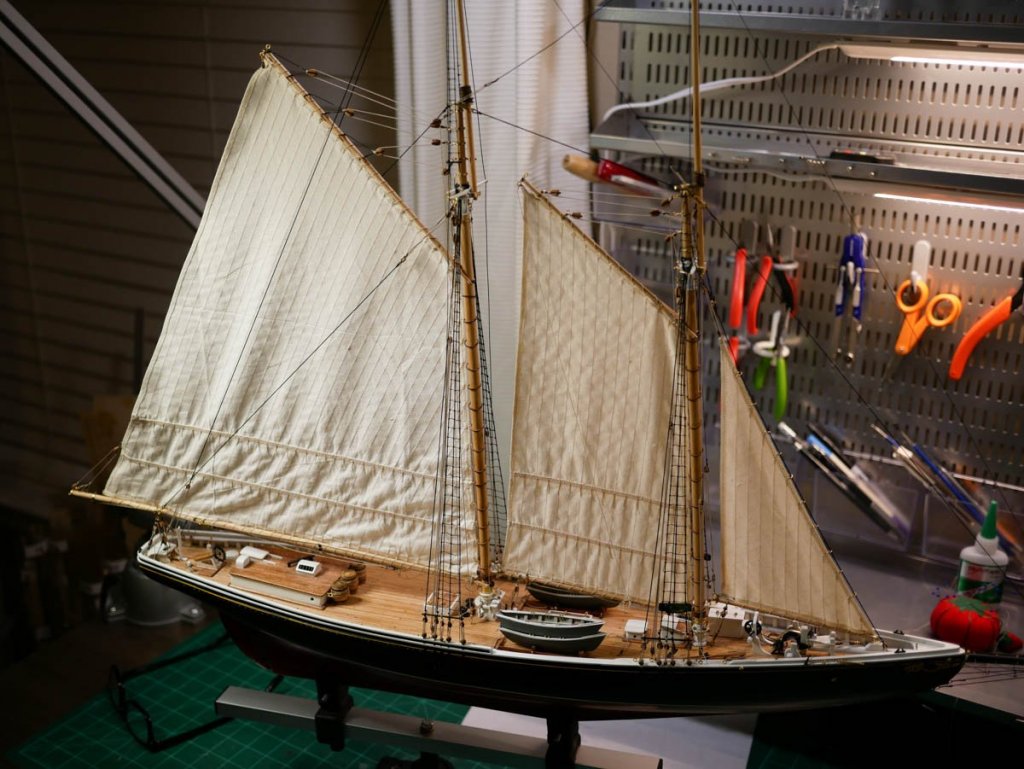
Fnkershner, there's two sails still to be attached in that last photo - the stay sail and the fore top mast sail. I'm not seeing a fisher man sail on the plans...only those two remain. The stay sail is pretty big, and runs between the two masts...might be what you're referring to. The fore top sail also sits between the two masts, and runs from the fore gaff to the fore mast (and uses those remaining mast hoops). Since my last post, I have rigged the stay sail. The halliard for that was just...weird. The plans offered two different versions of that halliard. One was more complex, with multiple blocks and hooks that could be switched from side-to-side. The simpler version just used a line with hooks on either end run through a block. I opted to go with the simpler version. Here's the ship with the stay sail rigged (the only sail still missing is the fore top sail)... Unfortunately the last sail (fore top sail) will have to wait until after Christmas. It is ready to go, but I'm about to be pulled way for family stuff so I don't want to start rigging it if I can't get it all done. I'm sure I'm going to be thinking about finishing this build over the holiday. My wife told me that last night she woke up in the middle of the night and I was standing at the window in our bedroom holding the rod that opens/closes the blinds. She asked what I was doing, and apparently I told her I could use the rod on my ship. I have no memory of that...but it seems I'm now so focused on finishing this build that I'm sleepwalking to find parts for the boat.
- 245 replies
-
- 11
-
-
- bluenose
- model shipways
- (and 1 more)
-
So close... The jib sail, main top sail, and balloon jib sail have been installed. I've got the stay sail and fore top sail made - just need to rig them and install them. I tried to convince my wife to let me skip the trip to see the family over Christmas so I could finish up, but she wasn't having it. Assuming all goes well, I think I can have this finished in the next week. Aside from installing the sails, I've got a few misc. things to rig (flag halliards, dory tackles, etc.), and I need to go through and tighten some rigging, trim extra lines, add rope coils, etc. I'll also need to make the display board and mount the ship. I've got some brass pedestals, and I did the holes in the keel for mounting about a year ago. In preparation for mounting, I swung by my wife's jewelry shop yesterday and we engraved the name plaques for the board. I've had a bunch of blank brass plaques for a couple years (I got them to use on my Phantom build, but never got around to engraving them). My wife has an industrial computer controlled engraver for her business, so we finally sat down and engraved the plates for both the Bluenose and my Phantom. We saved all the configs on the engraving machine so we can easily remake these in a few months if I realized something is misspelled The end is in sight...just trying not to rush. But I do think I can realistically be done before the end of the year. Then onto the next one (box is already open and I've already scanned in the plans and started getting organized...)


- 245 replies
-
- 8
-
-
- bluenose
- model shipways
- (and 1 more)
-
Fnkershner, for the hanks I just substituted rings made from brass wire. I found some at a craft store, but they were a little too big and the wrong material (I decided way back to stick with brass for all the metal fittings). I considered making some more proper hanks from the wire, but wasn’t able to make them look good at scale.
- 245 replies
-
- 1
-
-
- bluenose
- model shipways
- (and 1 more)
-
Thanks Fright! Things are going pretty fast now. Jib sail and main topsail are made and going on tonight (assuming my wife does actually work late )
- 245 replies
-
- 1
-
-
- bluenose
- model shipways
- (and 1 more)
-
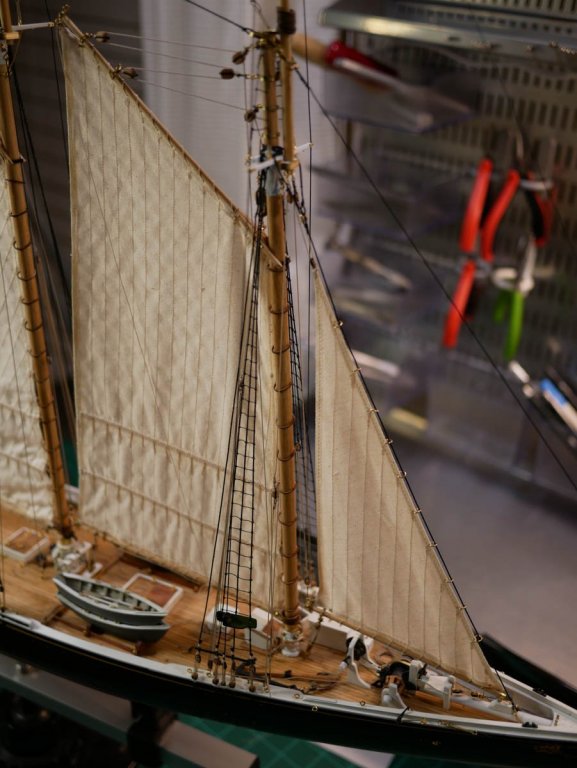
Making progress... I've made and installed the jumbo jib sail, fore sail, and main sail. Each one is getting easier. The jumbo jib sail took 4 tries, the fore sail took 3 tries, and the main sail just took one try. Getting my hands on a 'real' sewing machine really helped. Previously I installed and rigged the booms and gaffs, but didn't use any glue when securing the rigging. This let me make paper templates based on the actual placement of the booms and gaffs on my build. Once the sails were made, I de-rigged the booms and gaffs and removed them from the ship. The sails were laced on, and everything was re-installed. I'm actually enjoying working on the sails quite a bit. As I've been working through installing the sails, the various bits of rigging are starting to finally 'click' for me. I'm finally starting to really understand what each line does instead of just running lines according to the plans. Three sails down, five more to go!
- 245 replies
-
- 9
-
-
- bluenose
- model shipways
- (and 1 more)
-
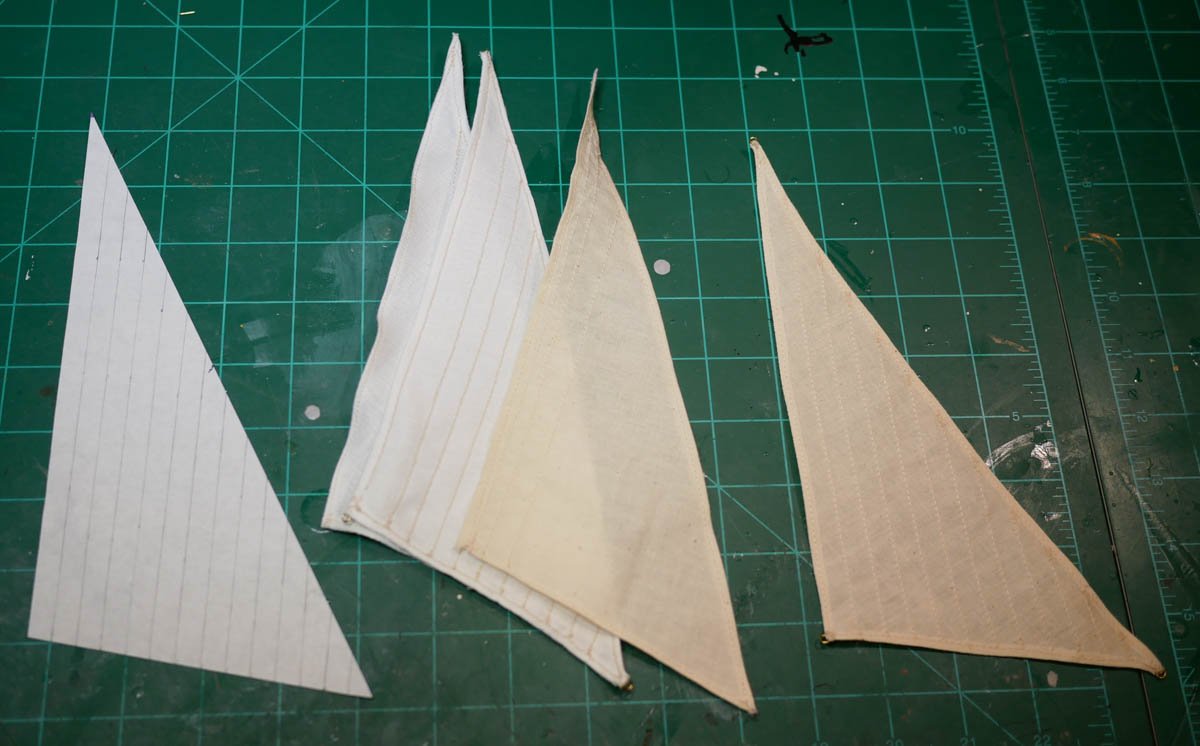
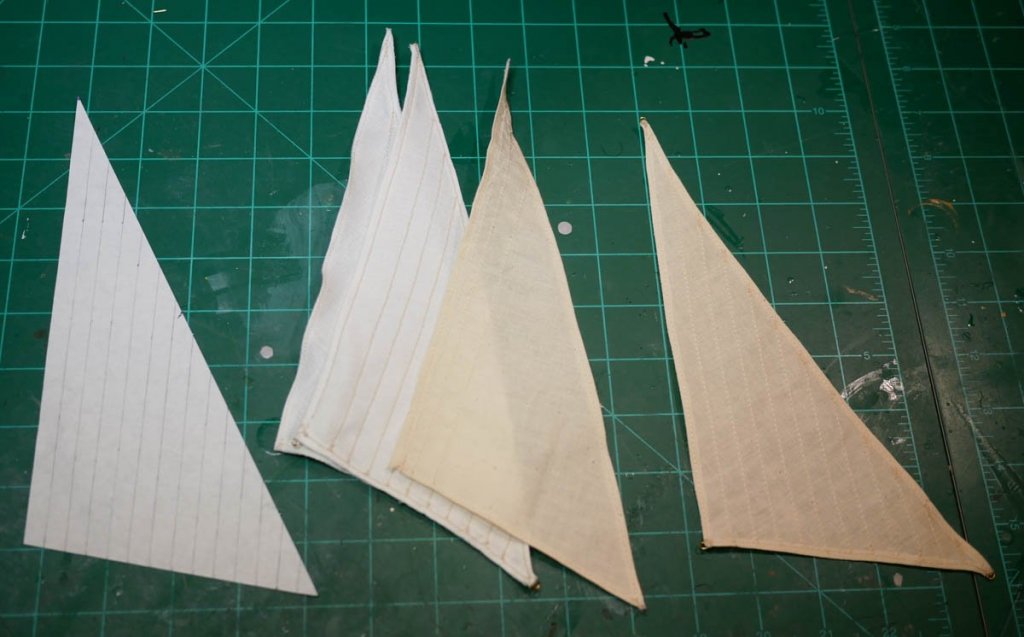
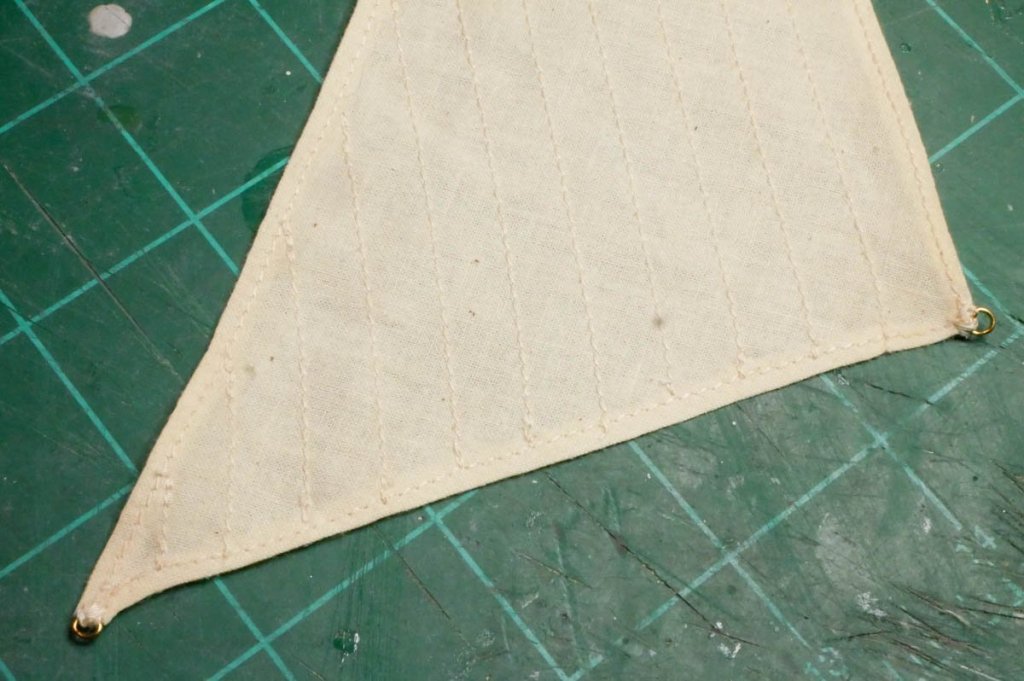
I think I've manage to make a sail. I started with the jumbo jib sail since it was small (wastes less fabric on each attempt), it only has 3 sides, and there are no curves. I made a paper template first, then did a test run with some random thin white fabric I picked up at the craft store. Since I had to buy a sewing machine and learn how to use it, the first two attempts with the random fabric were really just to get familiar with sewing. Once I got my confidence up, I tried making one from the actual sail cloth. It almost worked. I pulled the fabric too much while sewing, which resulted in the edges not being straight. The fourth attempt finally turned out usable. The final version fits well, and the sewing is 'good enough'. Since I've chosen the port side as my 'display side' for the ship, I did my sewing from that side so any 'ugliness' would be on the other side. I made three small rings and sewed them into the corners for securing lines. Hopefully the remaining sails don't take as many tries!

- 245 replies
-
- 5
-
-
- bluenose
- model shipways
- (and 1 more)
-
Thanks Jon! I'm expecting that it will probably take me 2 or more tries to get the sails good enough that I can live with them. I've made some paper templates, and even just having those taped in place really changed the look of the ship. It certainly motivated me to try and make the sails work. I did a trial-run last night sewing the jumbo-jib sail. Unfortunately the (very, very cheap) tiny sewing machine I got died, so I'm going to get a 'real one' this weekend and give it another try. Right now I'm using some generic white cloth I bought for the test sails, and I've ordered a second set of sail cloth from Model Expo. Hopefully I'll have enough material to redo these a few times
- 245 replies
-
- 1
-
-
- bluenose
- model shipways
- (and 1 more)
-
Thanks Derek! Your Bluenose is progressing nicely! (Although seeing all the work you had to do on the stanchions gave me flashbacks and nightmares )
- 245 replies
-
- 1
-
-
- bluenose
- model shipways
- (and 1 more)
-
Thanks Fright! I feel like the end is in sight. I'm at 600+ days on this build, and have taken over 4500 photos of the build process. I wouldn't say that I'm 'ready to be done', but I am starting to get an itch to open the other two kits sitting on my self! I've also discovered that while I do find rigging to be fun, it is really difficult to photograph rigging progress and equally difficult to post meaningful updates during rigging. I suspect that's why I see so many build logs that seem to magically jump from 'rigging started' to 'finished' if you don't look closely at the dates
- 245 replies
-
- 1
-
-
- bluenose
- model shipways
- (and 1 more)
-
Rigging is progressing nicely. I've got the main boom, fore boom, jumbo jib boom, main gaff and fore gaff all rigged. I'm not 100% sure if I'll end up adding sails or not. I want to try, but I've never done sails before so I'm not sure they will turn out well. So, I decided to go ahead and rig the booms and gaffs. None of the lines were glued - they were all tied off, allowing me to remove the various runs as I tackle the sails. Over the next week or so I hope to try making a sail. If that turns out OK, I'll de-rig the appropriate runs and install the sail. If I fail miserably, I'll probably just continue on with the running rigging and get this thing finished up. Even without the sails, the ship just hit the 'impresses the in-laws' point. With the booms and gaffs installed, it looks 'done enough' that non-modelers who see the ship are impressed. For a second build, I consider that a success. We'll see how sewing sails goes...
- 245 replies
-
- 7
-
-
- bluenose
- model shipways
- (and 1 more)
-
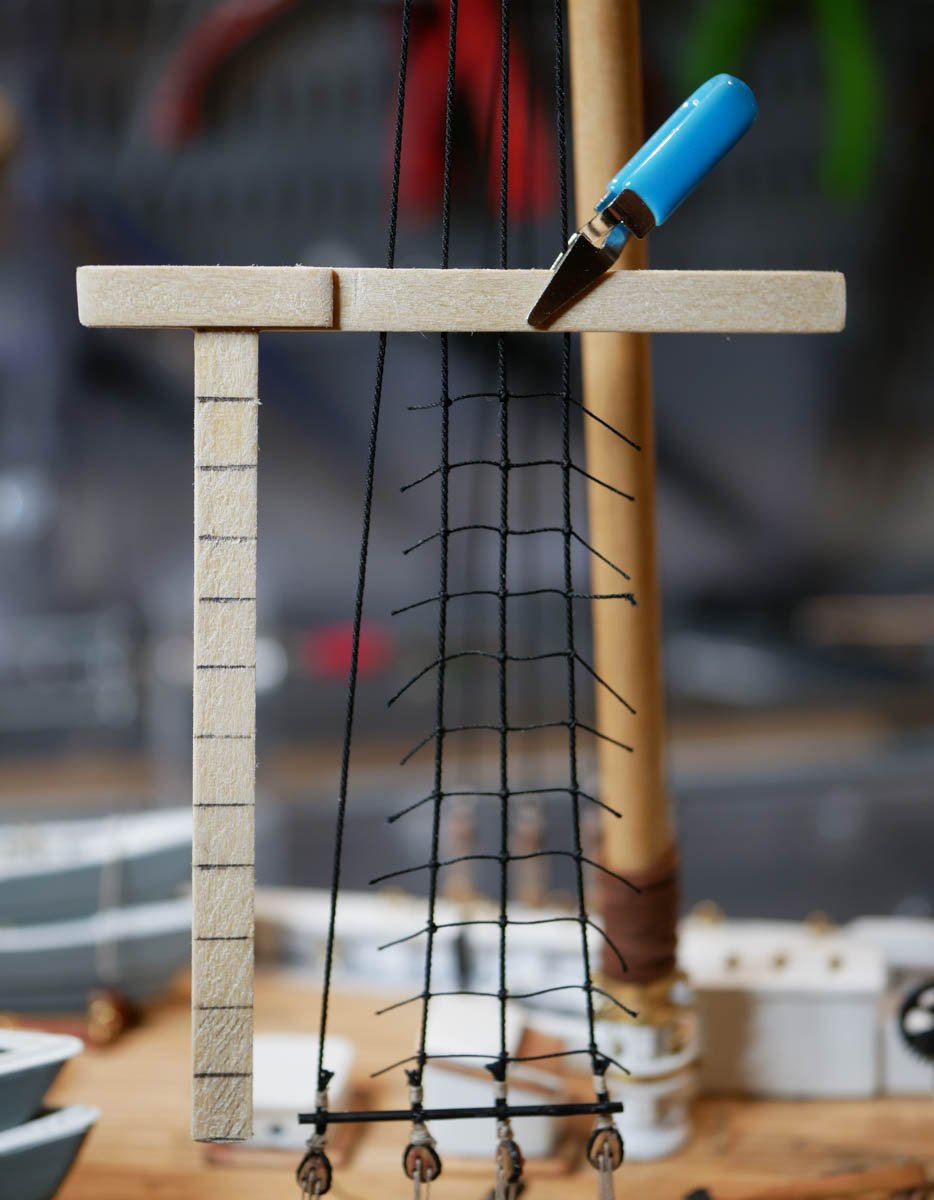
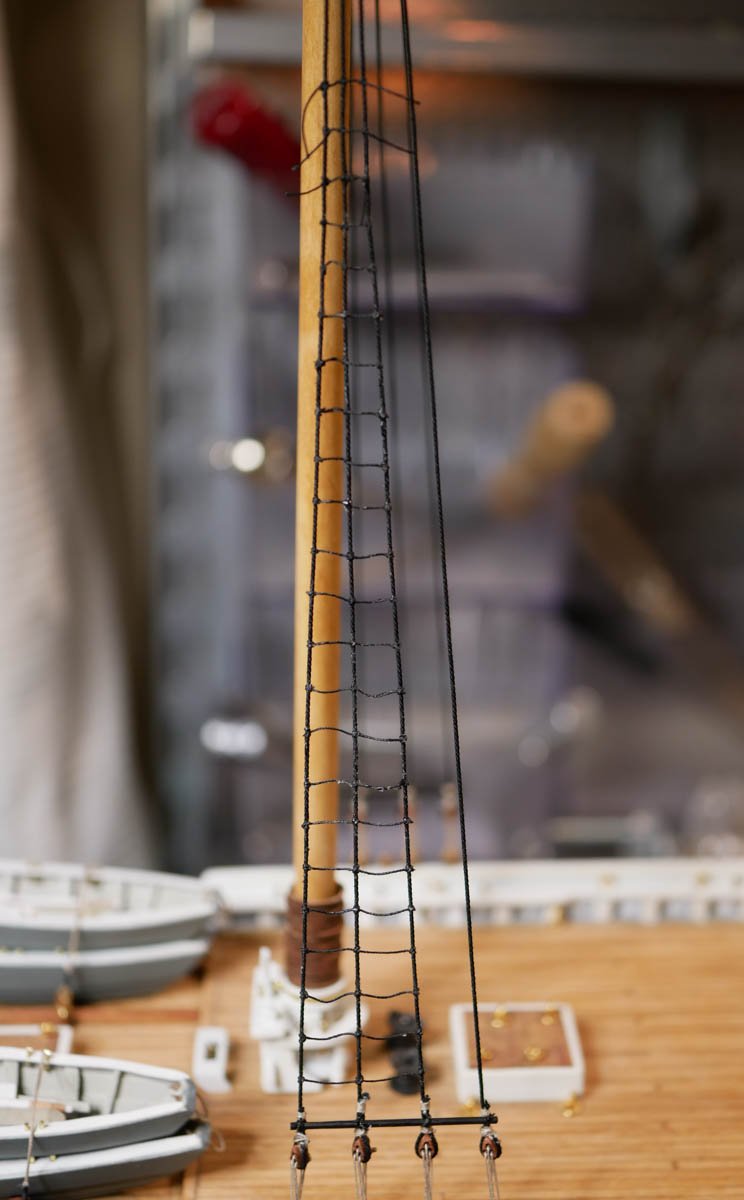
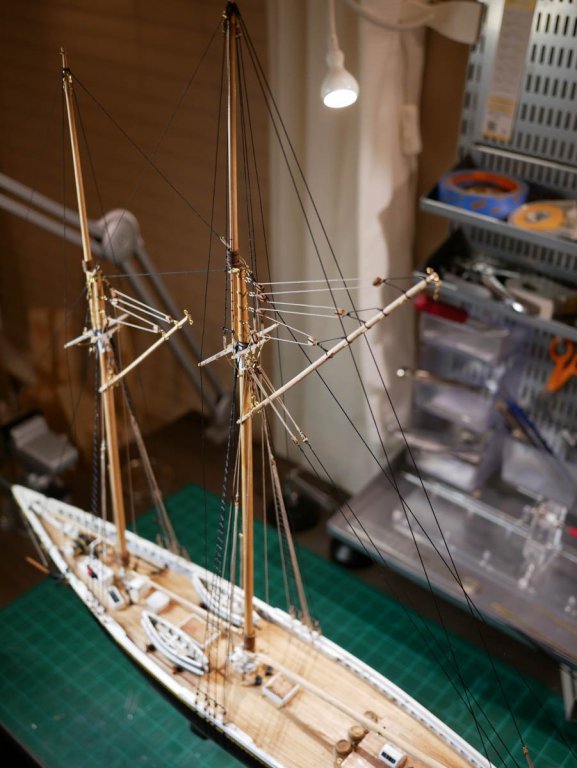
Ratlines, top mast shrouds, and running lights are done. The ratlines went faster and easier than I was expecting. I ended up making jig out of some strip wood to help keep the shrouds apart and the ratlines at the right intervals. It is made of a couple strips that are glued together on one end then clamped over the shrouds. A vertical piece has tick marks to help with ratline spacing. I did my best to tie them all with clove hitches, or at least something resembling clove hitches. Even though I tied 488 of them, I probably still couldn't tie a proper clove hitch under normal circumstances. But tying a clove hitch-like knot for ratlines using tweezers? No problem! Once the ratlines were done on the lower masts and upper masts, I ran the top mast shrouds. I had held off on these since they would be in the way while doing the ratlines. These were run from the top of the top masts, through the spreader bars, and down to the chain plates. The running lights were made with some strip wood and the cast metal pieces from the kit. I wasn't a huge fan of the kit's castings, and considered trying to replace them, but decided it would take too much work and likely not look any better. They were painted red and green. I decided to paint the backs and the edges black - no idea if that is accurate or not - but I felt like it made the colored areas pop out a little more. So, 590 days into the build, and I'm finished with all the rigging on the masts themselves. Next I'll be starting to install the booms and gaffs.


- 245 replies
-
- 3
-
-
- bluenose
- model shipways
- (and 1 more)
-
Rigging continues. I've realized that posting updates about the details of rigging is a little tedious...rigging is kind of repetitive and most of the details aren't that interesting. (Once you've done one block, the rest are basically identical). So, I'll just kind of 'sum things up' and get my build log up to date. (If any Bluenose builders out there are really looking for details on every line I'm running, I'm putting all the boring details on my blog...link in signature...but not adding them here as they'd be a little redundant given the amount of great rigging tips/advice available here). Anyway...the update... I've installed the top masts, and run the spreader lifts, main top mast shrouds, pullback stay, main top mast stay, and balloon jib stay. These were all pretty typical. Lots of eye splices and a few lanyards. I've also run the port and starboard flying backstays. These were fun, as they required some blocks and such. I still need to run the shrouds that go from the top masts, through the spreaders, and down to the deadeyes. But I think once these are installed, it will be harder to tie all the ratlines. So, I've gone ahead and added the sheer poles and started in on the ratlines. This is my first time doing ratlines (my first build, the Phantom, didn't have any). I've quickly become very familiar with clove hitches, or at least a fast way of tying clove hitches for these ratlines. The plans indicate that the ratlines sometimes cover all four shrouds, but often only cover three. I've gone with three shrouds simply because it means fewer knots to tie. I'm about 60% done with one lower set, so I have a long way to go.


- 245 replies
-
- 6
-
-
- bluenose
- model shipways
- (and 1 more)
-
Looking good! I agree that the stanchions from the bulkheads leave a bit to be desired. I ran into the same thing. They do stand out once you get the others in there. If I remember correctly from my build, I left the stanchions from the bulkheads in place and added the bulwark planking. Once that was secure, I added the 'false' stanchions. Once those were all in place, I went back and cut the bulkhead's stanchions out and replaced them with 'fake' ones. This way I was able to get the planking nice and straight thanks to the bulkhead's stanchions, but ended up with a uniform look since I cut them out later. If you cut the bulkhead ones off first, I think it might take some work to keep everything aligned for the bulwark planking.
-
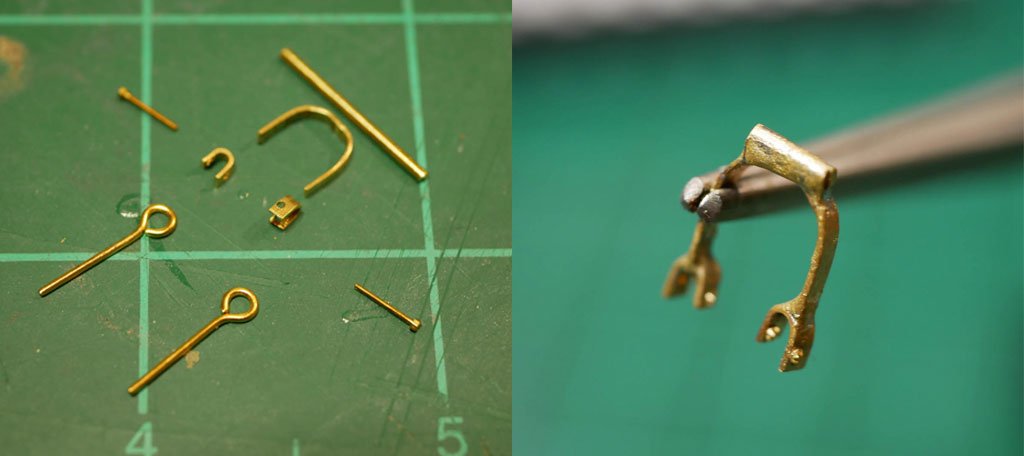
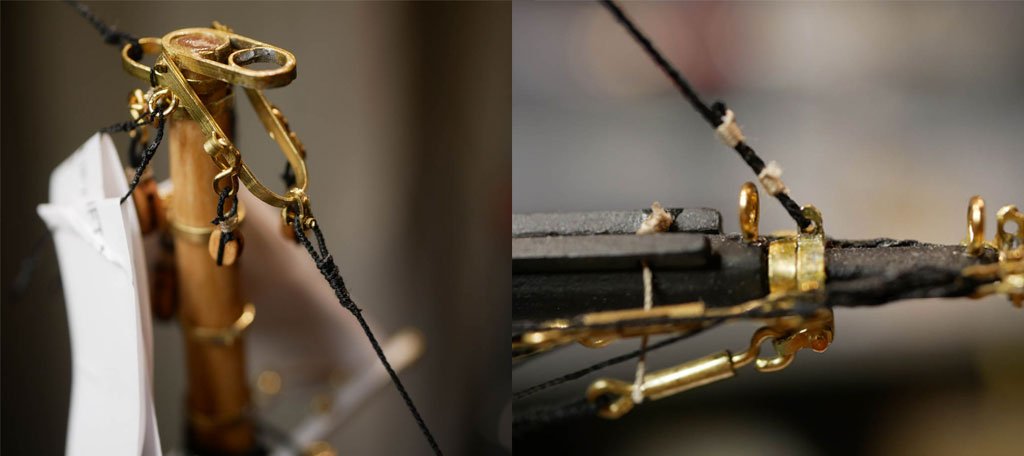
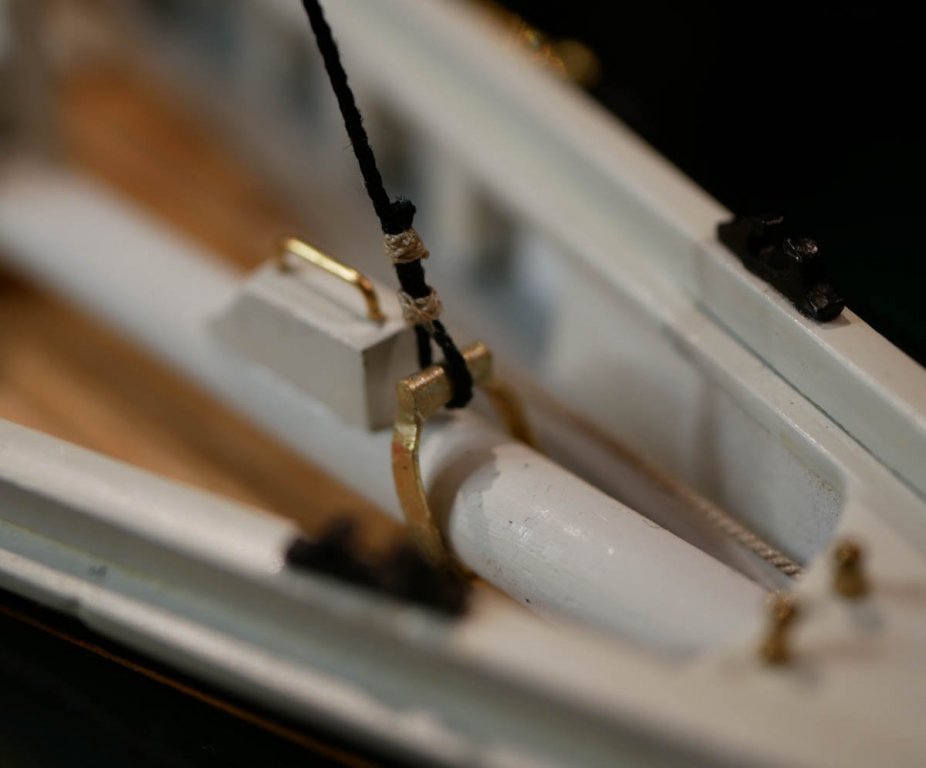
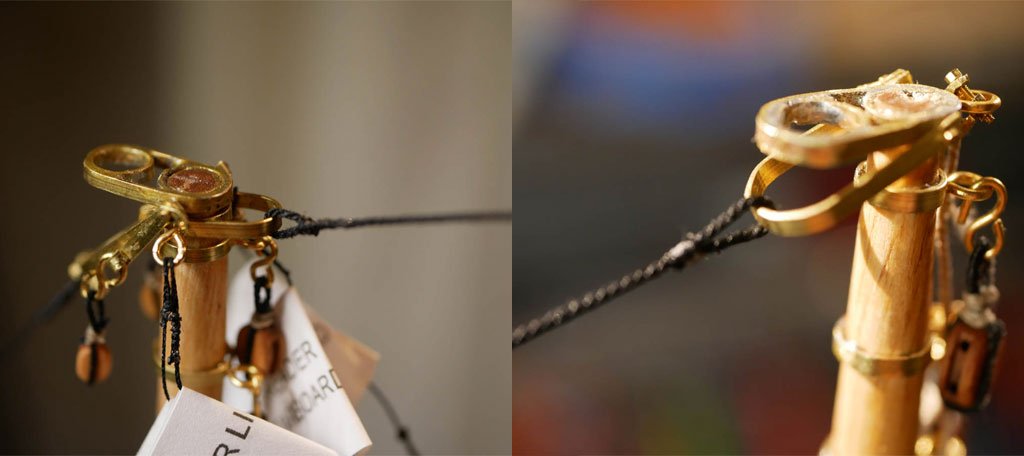
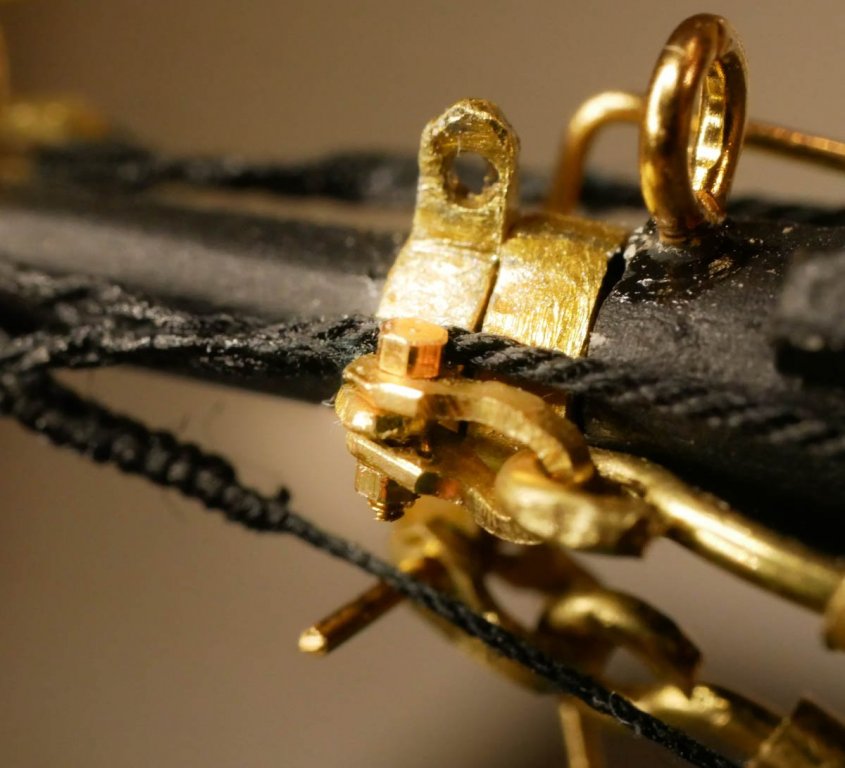
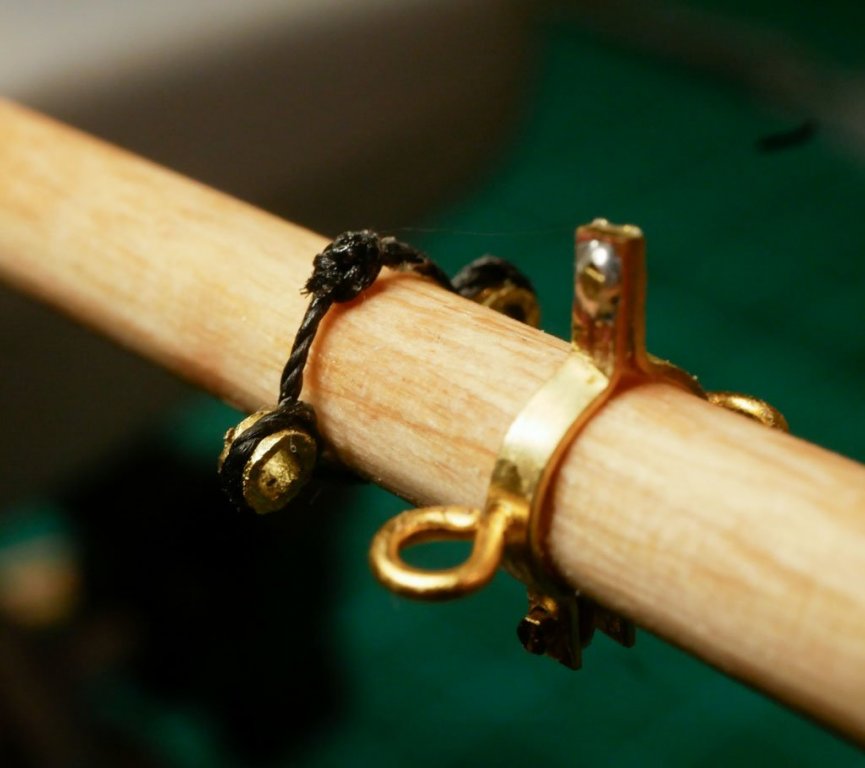
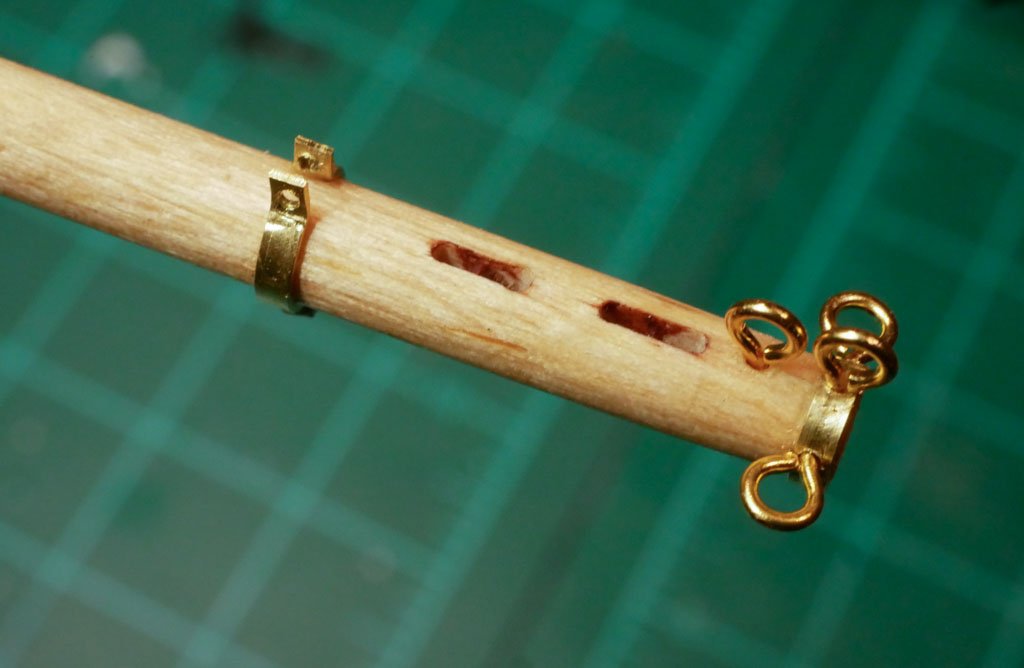
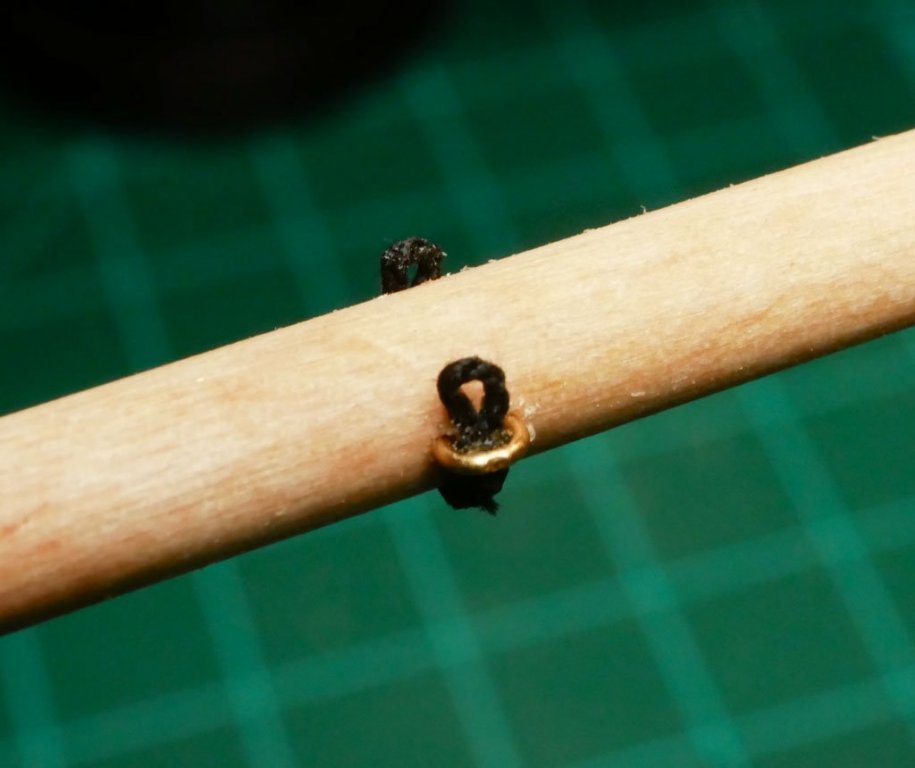
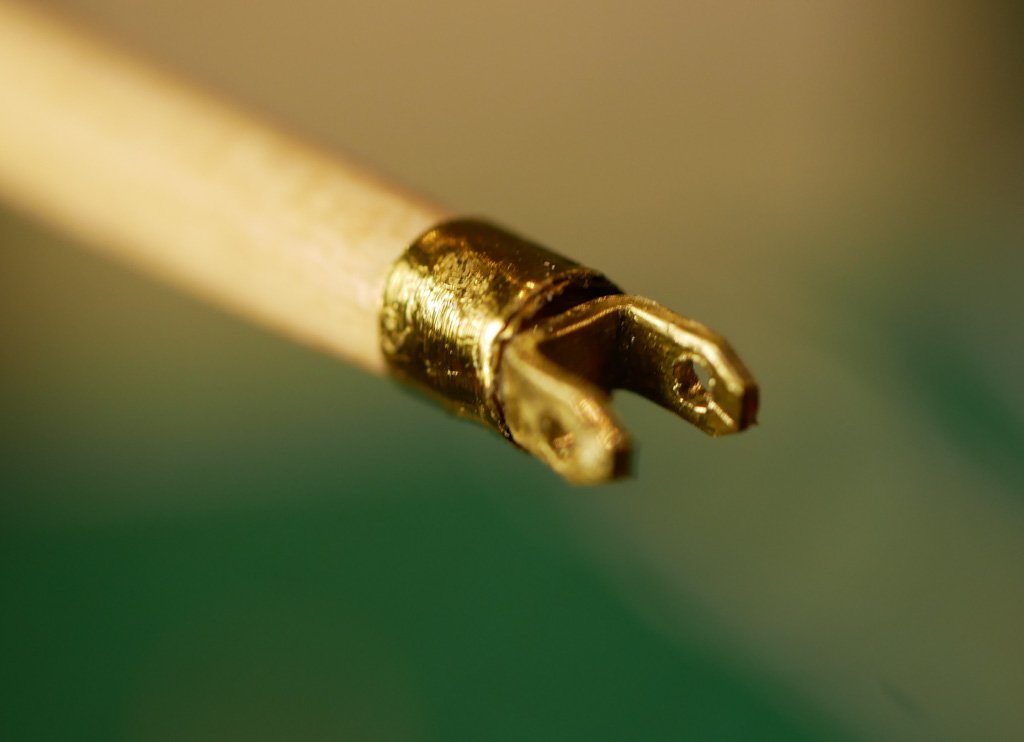
To finish up the standing rigging on the lower masts, I installed the spring stay, jib stay, and jumbo jib stay. As with all my rigging, I've replaced the kit's rigging line with some from Syren Ship Model Company. The spring stay is pretty straight forward. It runs from the main mast cap to the fore mast cap with eye splices at either end. The jib stay is also pretty simple. It is attached to the fore mast cap using a shackle, and run to the bowsprit where it is seized onto one of the bands. The jumbo jib stay required a bit more work. It seems to have two parts to the line. The first part is served and wraps around the fore mast right above the trestle tree, with eye splices in both ends. Those are shackled to the second line, which runs down to the jumbo jib stay bail. The bail is a custom piece that attaches to the deck and wraps over the bowsprit. I started by getting the top of the line installed on the mast. The jumbo jib stay bail was made from brass, in keeping with how all the other metal parts on my build have been done. It is basically a large shackle, so I made it similarly to how I made the shackles. Since it was larger, I fashioned the 'feet' that will hold the bolts separately instead of making it all one piece. I'm also using a brass rod to form the top, which appears to be rounded on the plans. I'll secure it to the deck using a couple small bolts running though some eyebolts. The entire thing was prepped, soldered, and cleaned up. The bail was installed on the deck over the bowsprit, and the jumbo jib stay was seized to it. I *think* that finishes up the standing rigging for the lower masts. I'll wait to do the ratlines until later (not really looking forward to those). Next step will be to seat the top masts and get their standing rigging lines installed.

- 245 replies
-
- 6
-
-
- bluenose
- model shipways
- (and 1 more)
-
Jon, Thanks! Rigging is probably my weakest skill right now. It's completely specific to ship modeling, and this is just my second build. I'm *trying* to take my time and do the best I can, which was part of the reason for the 3 month delay - I didn't want to force myself to work on it and end up rushing things. I was just looking at your recent posts earlier today - very jealous of your trip to the Bluenose II!
- 245 replies
-
- 2
-
-
- bluenose
- model shipways
- (and 1 more)
-
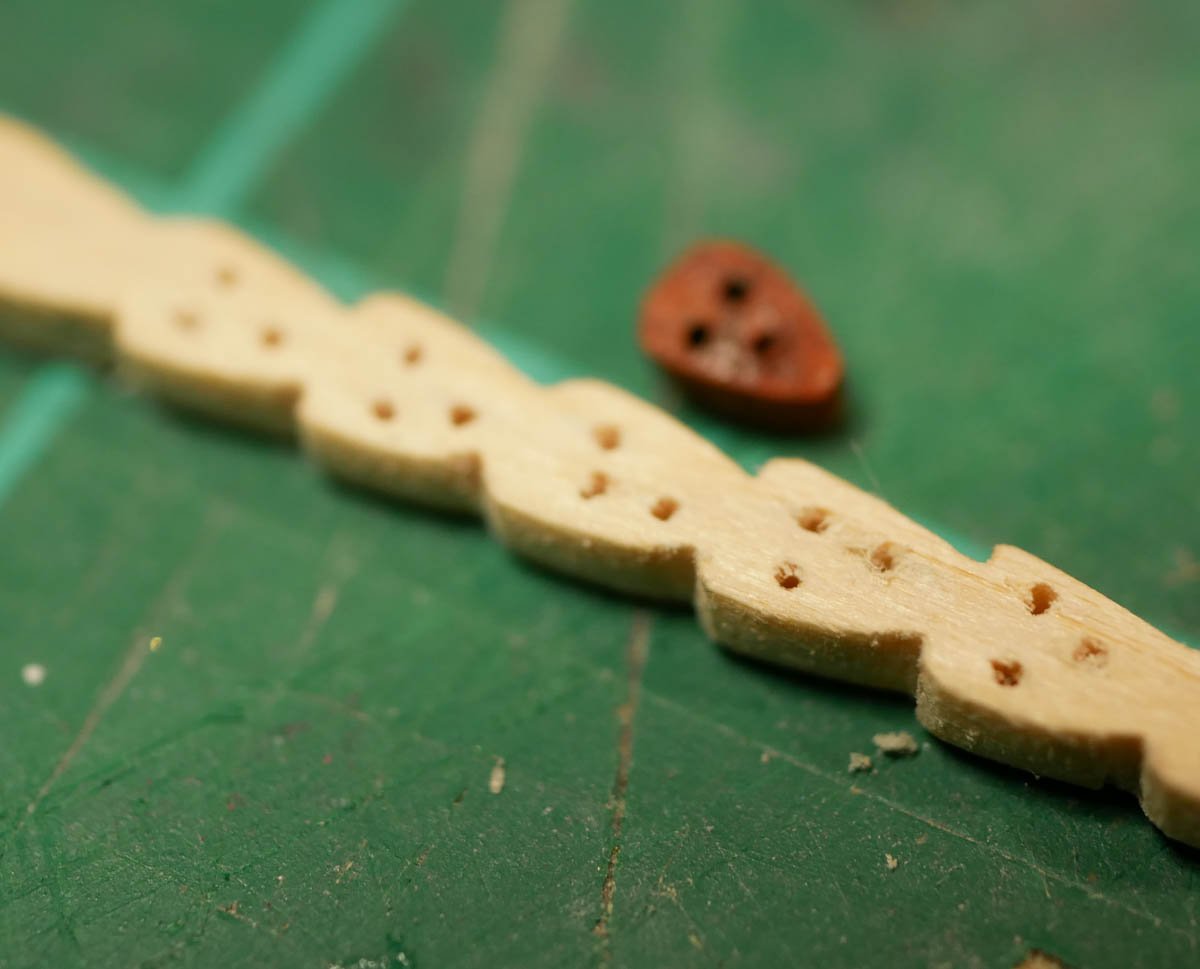
Nirvana, I used some 3/32" thick basswood I had laying around. I think the kit parts were basswood too. I think the problem with the kit parts came from cutting them free (they were laser cut). I didn't get a clean cut when I freed them, so as I was cleaning them up, the wood broke up. My replacements weren't perfect, but once they got sanded, stained, and tied off they look fine. I made several, even though I only needed two so that I could replace an entire set (and avoid having mis-matched ones next to each other). Someday I'll start collecting some higher quality wood for making parts like this. I can get basswood locally at my hobby shop, but I'd have to order anything fancier.
- 245 replies
-
- 4
-
-
- bluenose
- model shipways
- (and 1 more)
-
100+ days later... Back in June, I finished 'construction,' leaving just the rigging. I had all the rigging prepped on the main and fore masts, and I thought I'd be able to finish the build fairly soon. When I sat down to start attaching shrouds, I just didn't feel like working on it that day. I took the day off from the build. I ended up taking all of July to install some home automation gear. I took all of August off from modeling to focus on work. All of September was spent helping my wife prepare for the opening of her first retail store. But finally, after 3 months, I was ready to dive back in. Over the last week I've got the first few pieces of standing rigging installed. All the shrouds for the lower masts have been installed. I used the 'wire jig' method that's described everywhere to keep the deadeyes even. The Bluenose has 16 lower shrouds and 4 top mast shrouds. So far I've only installed the lower masts, so those 4 top mast shrouds will get run a bit latter when top masts get installed. The shrouds use tiny heart-shaped deadeyes at the top of the lanyard, and I found the ones in the kit to be a little fragile. They are laser cut, and I had several simply fall apart. I ended up making several of my own from some strip wood. I also installed the spring stay, jib stay, and the fore mast spreader lifts. Excited to back on the build!
- 245 replies
-
- 5
-
-
- bluenose
- model shipways
- (and 1 more)
-
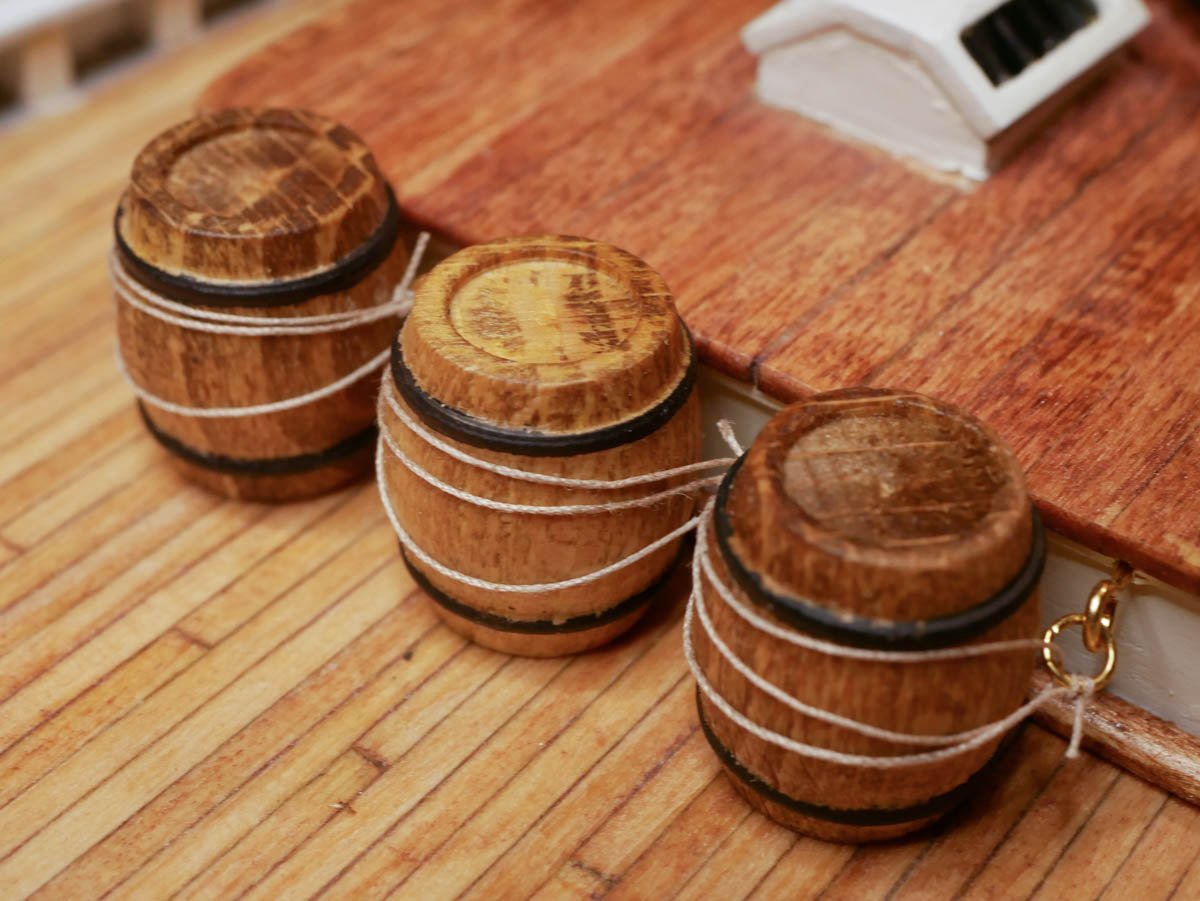
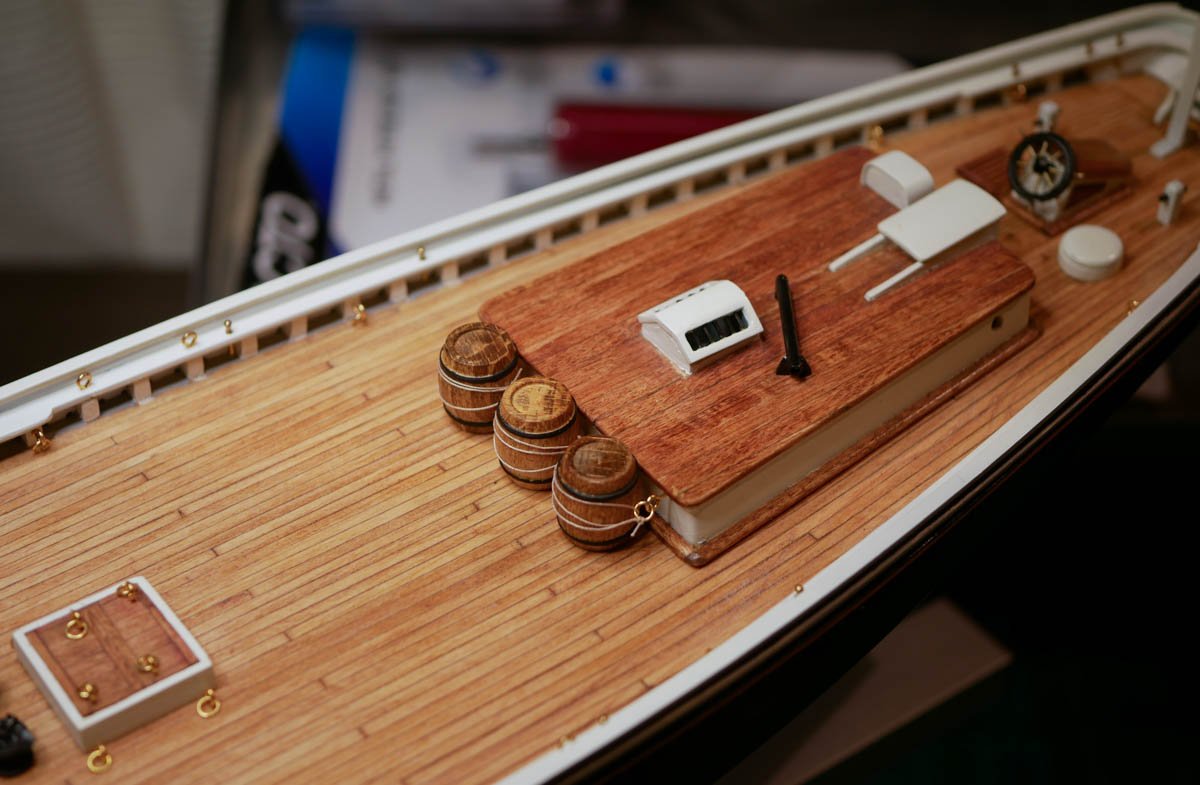
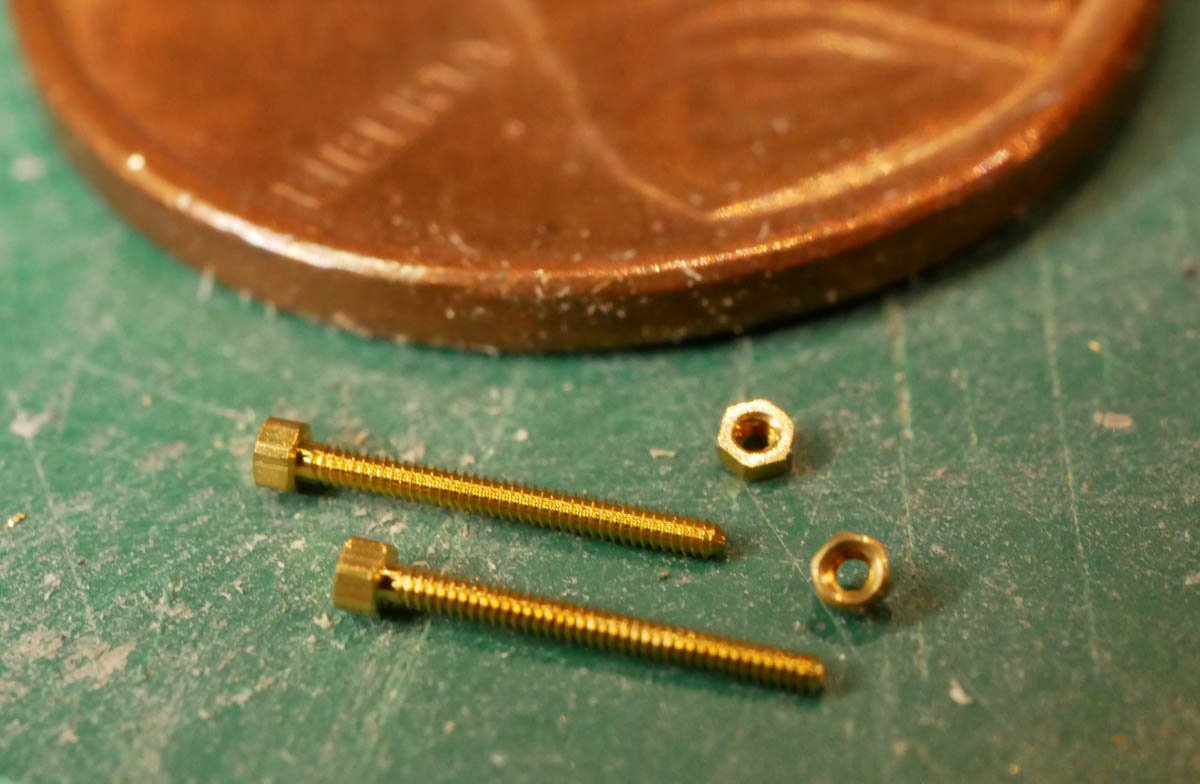
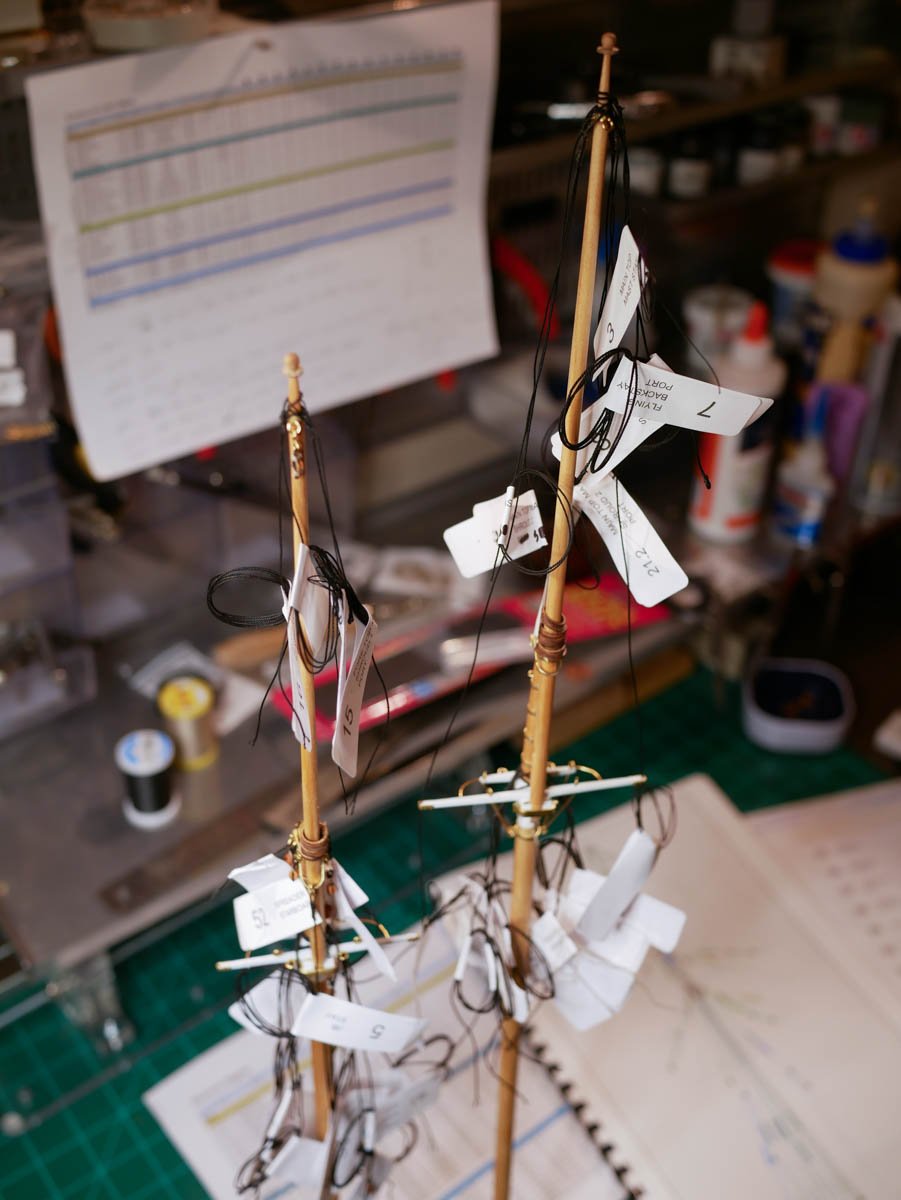
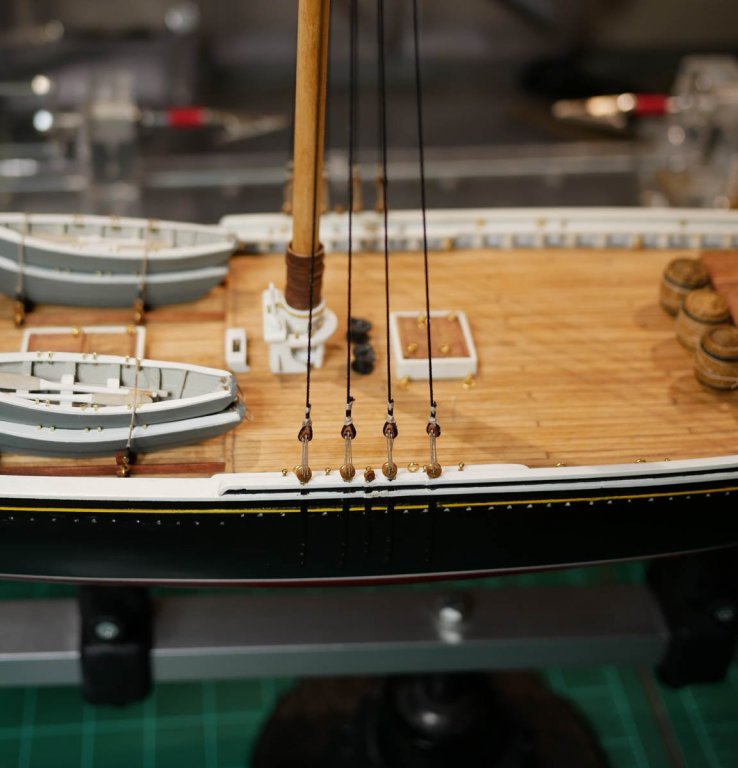
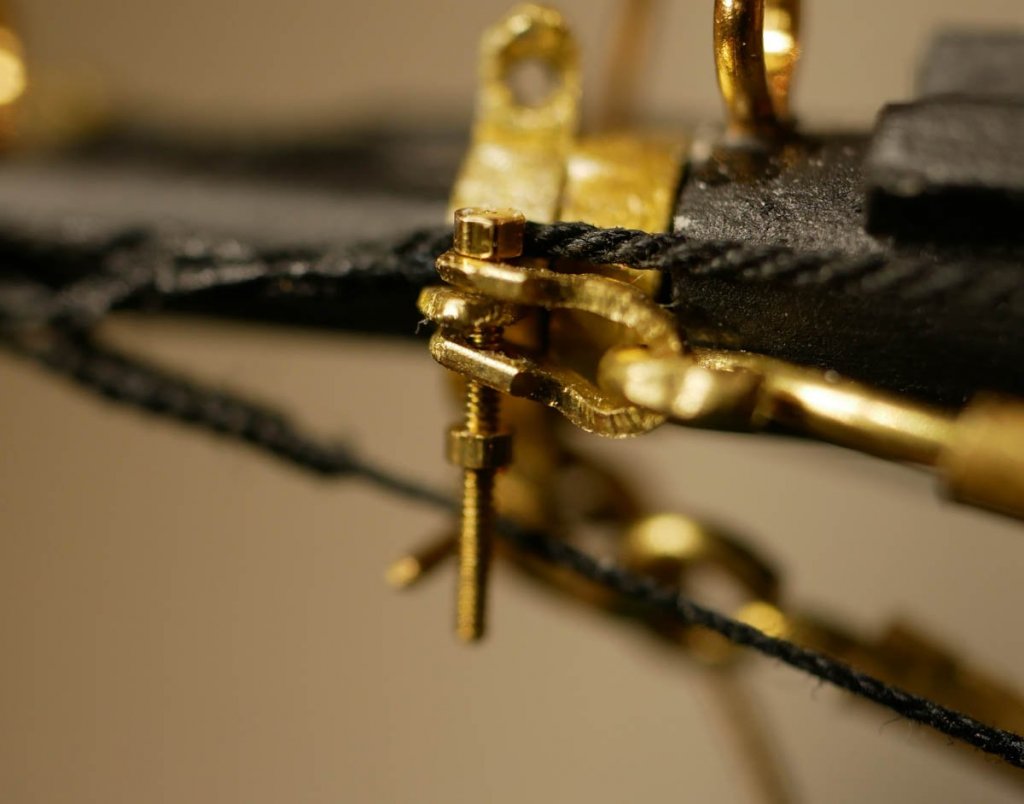
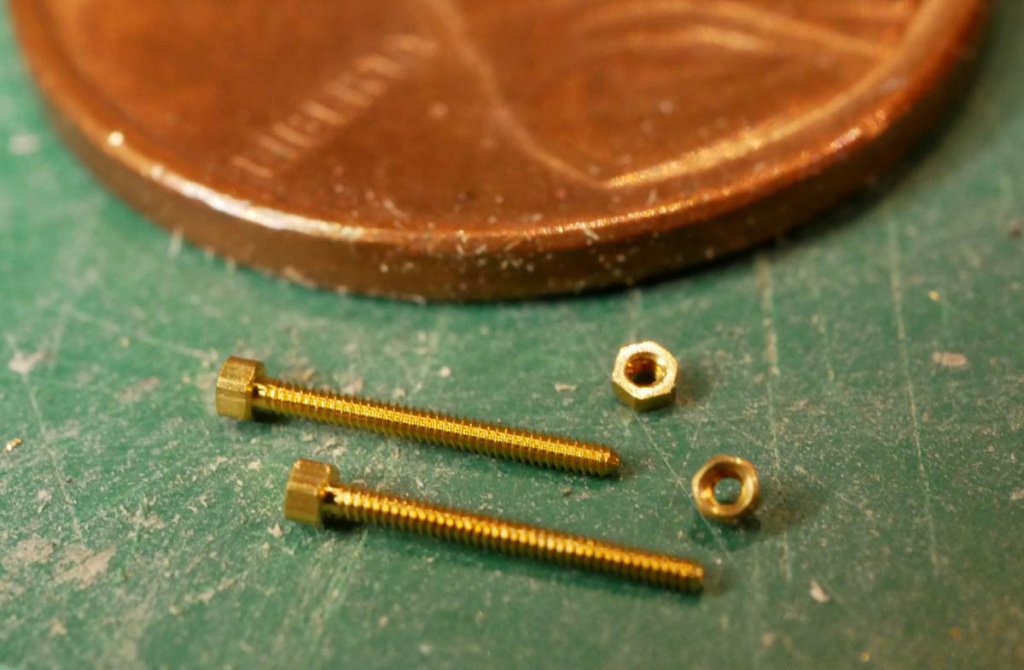
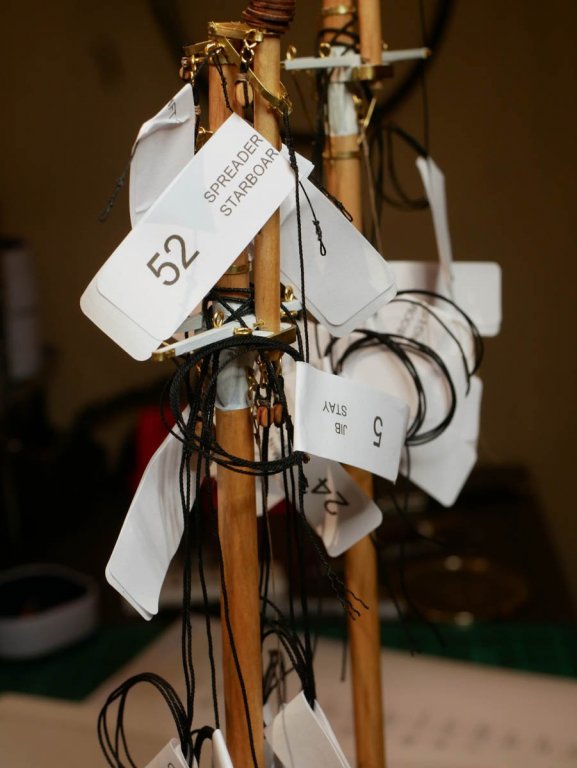
Over the last couple of weeks, I've cleaned up some details and started in on rigging. Barrels I finally got around to staining and installing the wooden barrels on the deck. I ordered some in different sizes from a few different places, and finally found some that I liked. I stained them to match my color scheme and tied them down. Shackle Pins I also went back and replaced all of the temporary pins I had placed on the bowsprit with actual nuts and bolts. These nuts and bolts are from Model Motorcars. I was a little worried that I wouldn't be able to screw the nuts onto the bolts since these things are tiny, but it wasn't too bad. I'm really happy with how these bolts turned out. They look better than I could do with brass wire or rod, and since they are actual, working bolts, no glue is required. This means I can unscrew the nut at any time to adjust the rigging. I also fixed the placement of the iron fids on the top mast as Bob pointed out That left me with no excuses left...it was time to start rigging. Rigging Prep I'm trying to do all the rigging prep I can before the masts are installed on the ship. So, I made labels for all the lines and a spreadsheet listing out every rigging line. I started with the fore mast, then moved on to the main mast. I've got all the standing rigging ready, and I've prepped lines for some of the lifts as well. I'm also installing all the blocks on the masts for the running rigging while I'm at it. I have the running blocks in place for the fore mast, and I hope to have the main mast's blocks installed this weekend. Right now it seems like a horrible mess of lines, but I'm hoping this makes things easier once I get the masts installed. (On my first build, I did all the rigging after the masts were mounted, and frequently struggled to work in tight spaces as more lines were installed.) All the rigging lines are done with rope from Syren Ship Model Company (I'm replacing all the lines provided with the kit). The blocks are also from Syren. I've been very happy with the quality, and I'm very comforted by the fact that if I make mistakes and run out of line/blocks, I can always order more. I've tried a few different methods for stroping the blocks, and haven't yet settled on one that I like. Tomorrow I'm going to try a couple different methods I've read about. Overall, rigging is going very quickly. I think I can get all the remaining prep work done this weekend. Next weekend will be a long weekend (I take a couple extra days off around the 4th of July for a little 'staycation' each year). If I'm really lucky, and don't run into problems, I might have everything rigged in the next week and half. Then I get to decide on sails... It's both sad and exciting to think that I might be done with this build in the next month or two.


- 245 replies
-
- 7
-
-
- bluenose
- model shipways
- (and 1 more)
-
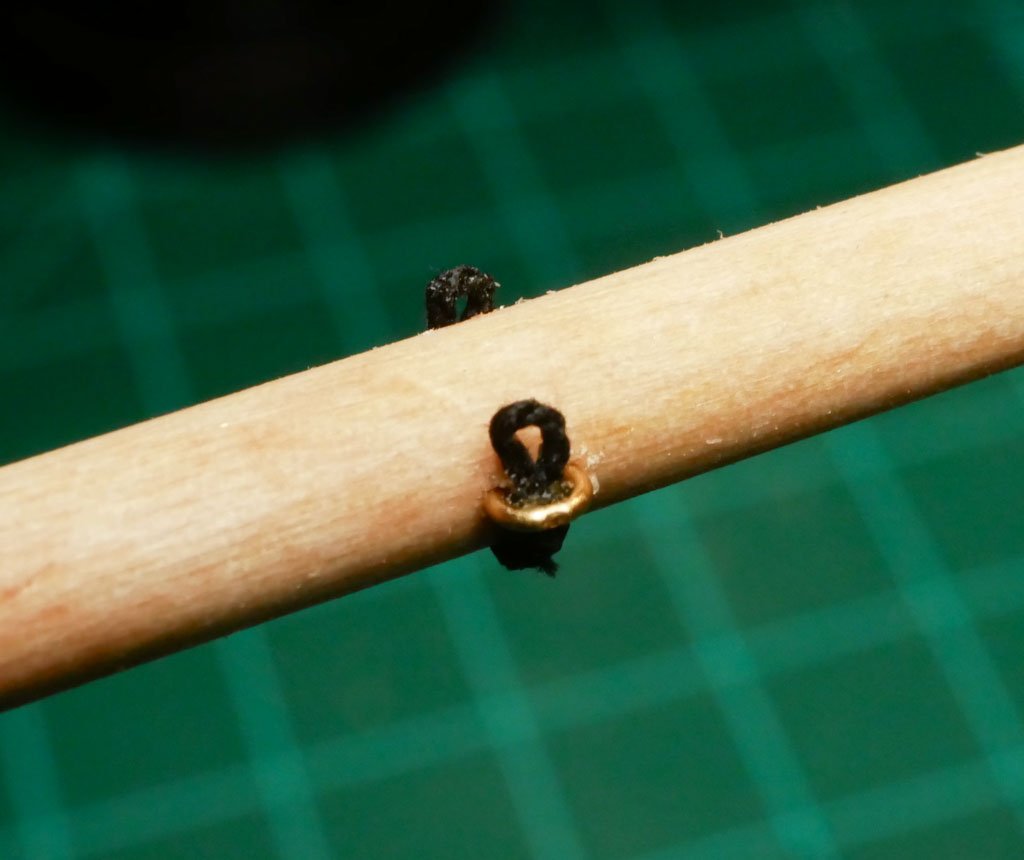
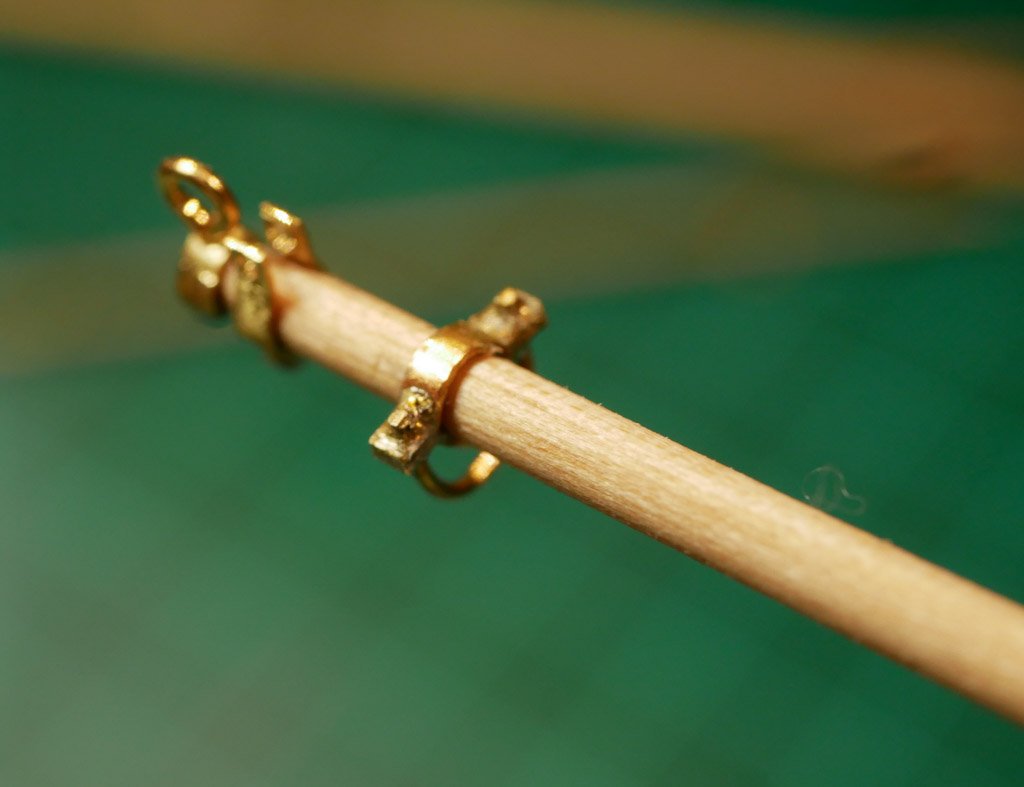
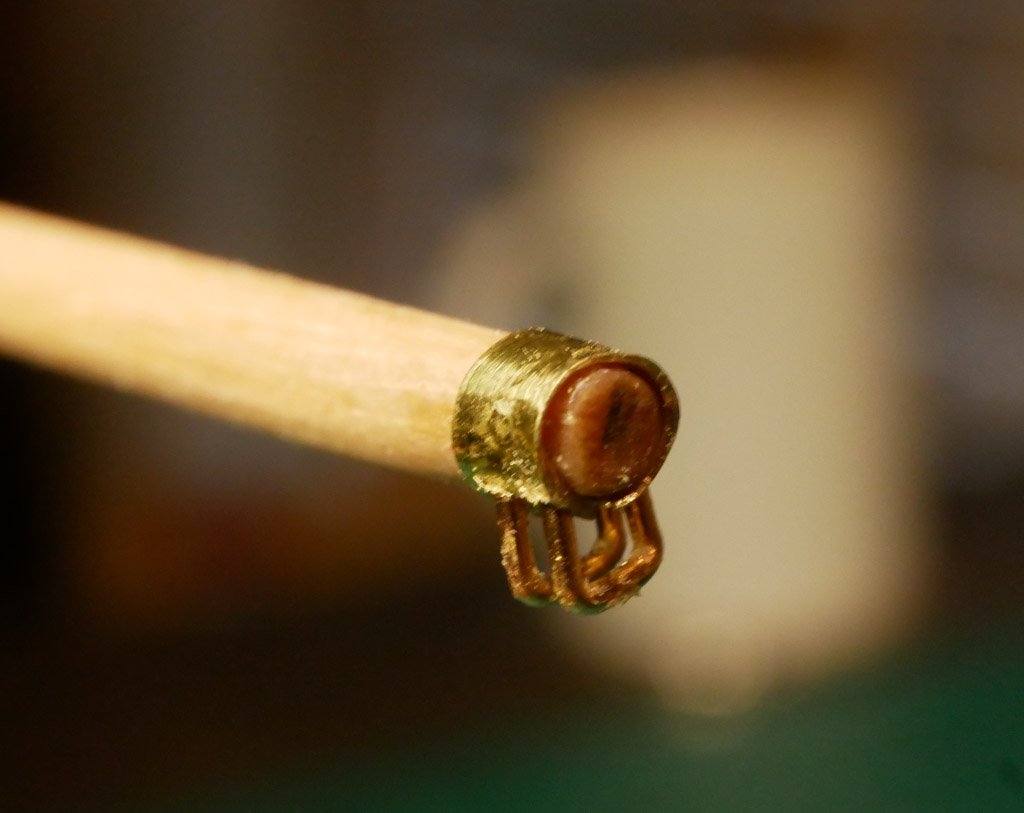
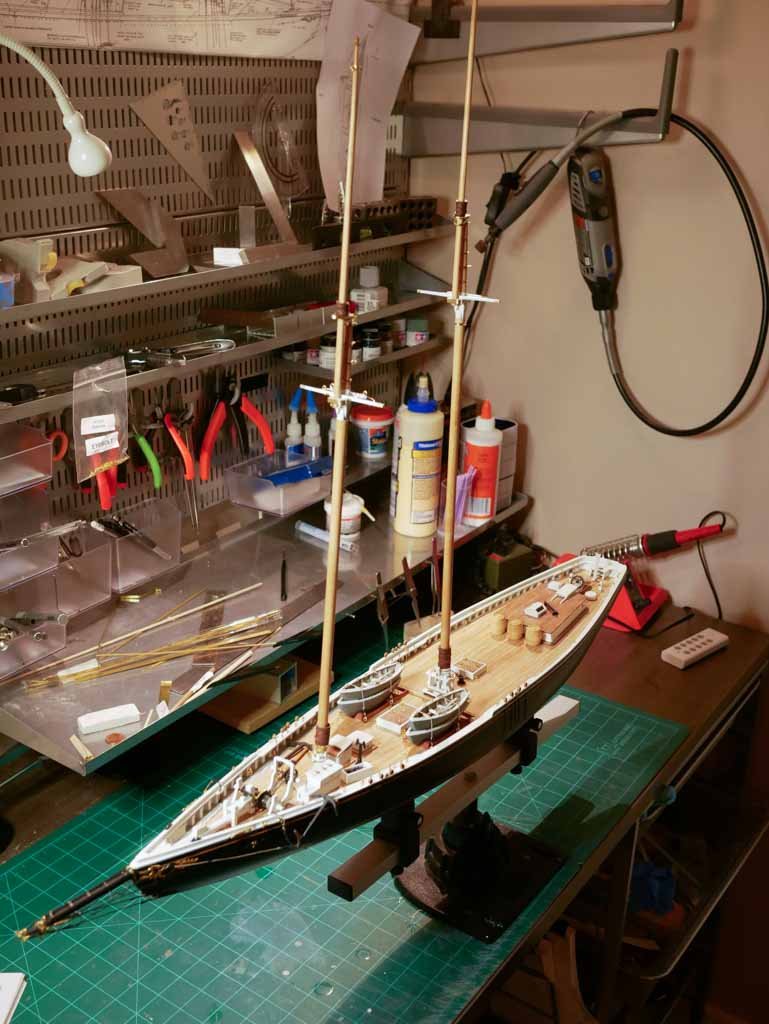
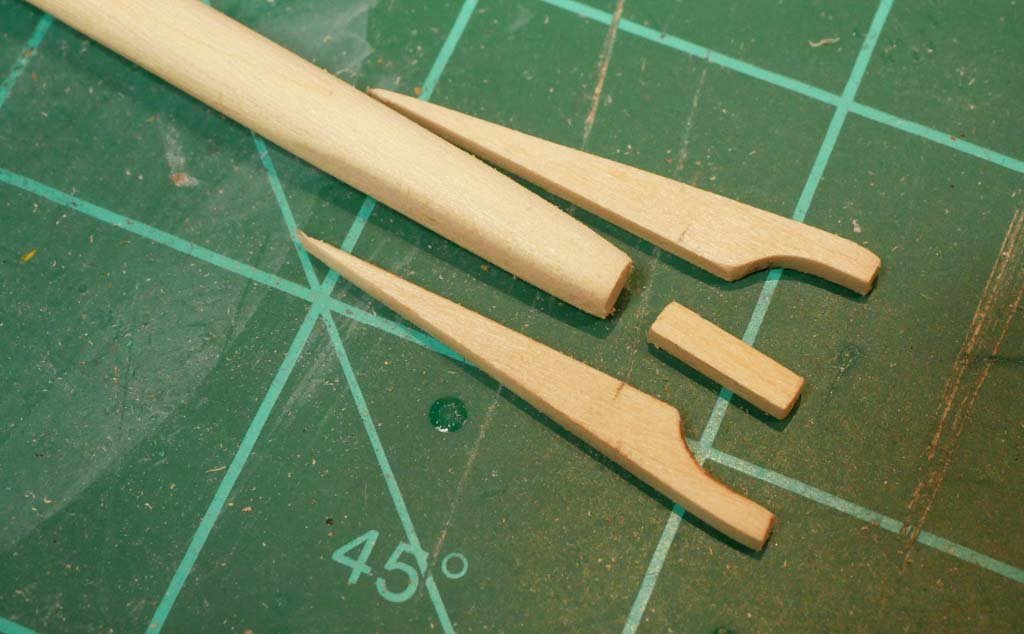
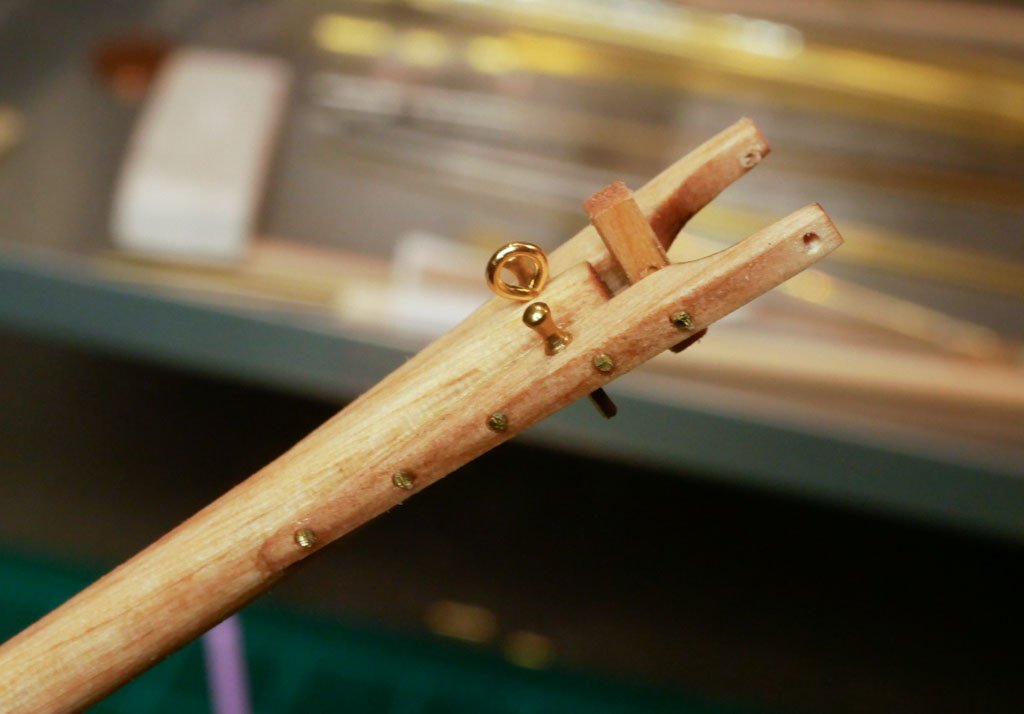
Surprisingly, I was able make all three booms and both gaffs over the weekend. I really expected these to take longer. Main Boom I started with the main boom. The kit provides laser-cut jaws that were cut loose and cleaned up. The boom itself was made from a tapered dowel. All the various holes were drilled after the jaws were glued in, and brass wire was used to simulate bolts on the sides. Everything was stained to match the masts and deck. On the masts I used eyebolts to simulate fairleads, but here I decided to try and make them from scratch. The main boom has a couple fairleads secured with rope. I made them from brass tube that had a groove cut into the outside edge for the rope. Unfortunately I had to use a little CA glue here to keep everything together, and I realized after I was done that I had put the knot on the top. Oh well. Once I get everything rigged it probably won't be noticable. The assorted bands were also made as indicated on the plans, using brass strip, wire, and eye bolts. The eyes for the lazy jack line were made from some rigging rope with eye splices, stapled into the sides of the boom. The other end of the boom got a couple sheaves, done the same way I did the ones for the top mast. Fore Boom The fore boom was a bit simpler, as it doesn't have jaws or sheaves, and has fewer parts. Instead of the jaws, it appears to have a 'cap' on the end with some hardware to attach to the gooseneck on the fore mast. I made this by gluing on some 'U' shaped brass strip (drilled with holes), then using some brass tape around the end of the boom to finish out the 'cap'. ' The other end just had a few typical brass bands. Jumbo Jib Boom The jumbo jib boom was also very simple, but does require another special end to be made. This one connects to the traveller on the bowsprit. From the plans, this appears to be a wide band with two wires on the bottom, both bent into a squared-off 'U' shape. I made the band from the thin brass sheeting that I acquired for the metal sheet on the mast. Then I drilled four holes in the bottom and glued in wire. Fore Gaff Next I moved on to the two gaffs. I started with the fore gaff. By this point, it was getting pretty routine. Main Gaff Then on to the main gaff. This one has a number of stops that need to be added. These were made by gluing on 1/32" pieces of wood, then sanding them down to the right shape. Then suddenly I realized I was done. Just for fun, I made some temporary rigging lines (just some thread with hooks on either end) and hung all the booms and gaffs. I just wanted to see what everything looks like on the ship. With these completed, I'm basically done with construction and ready to start rigging. I really didn't expect to be ready to rig for a few more weeks, so I haven't done as much planning/prep as I need. I'm going to start by pulling the masts/booms/gaffs back off the ship (nothing was permanently installed). Then I'm going to do a pass over the whole ship and look for anything that I want to correct or clean up. I think this will be much easier before I get rigging in place. I know I need to adjust the top mast iron fids as Bob pointed out, stain and tie down my barrels, glue the dories oars in place (they are loose right now), and remake the connector between the gooseneck and fore boom (with the boom attached, it doesn't sit right). I'm sure I'll find other things to clean up while I'm at it. During all that, I'll start researching the rigging that I haven't figured out yet. I plan to do as much rigging as I can with the masts off the ship - at least the standing rigging. I took a lot of shortcuts while rigging my first build (I just tied knots everywhere), so I'm looking forward to trying to do this one correctly. We'll see if I'm able to use the right method of attaching lines/hooks/eyes to blocks in the right places


- 245 replies
-
- 9
-
-
- bluenose
- model shipways
- (and 1 more)
-
Very nice! I love seeing these plane builds on the forum. I built this kit back in 2014 (it was my entry into wooden kit modeling, which eventually led me to building ships). Your engine and propeller look great!
-
Bob - I think you're totally right. I hadn't really looked at exactly how the fid interacted with the trestle trees. I just noted the location and assumed it went below the trestle trees. This seems like an easy fix. I'll drill new holes for the fids in the correct place and fill the old holes in with some wood filler. Thanks for catching that!
- 245 replies
-
- 3
-
-
- bluenose
- model shipways
- (and 1 more)
-
Per - Thanks! I've been keeping an eye on your build over the last few days and you're making some great progress! I keep hoping that I'll log in one morning and see that you've passed me up and I can start referring to your build for rigging
- 245 replies
-
- 2
-
-
- bluenose
- model shipways
- (and 1 more)
-
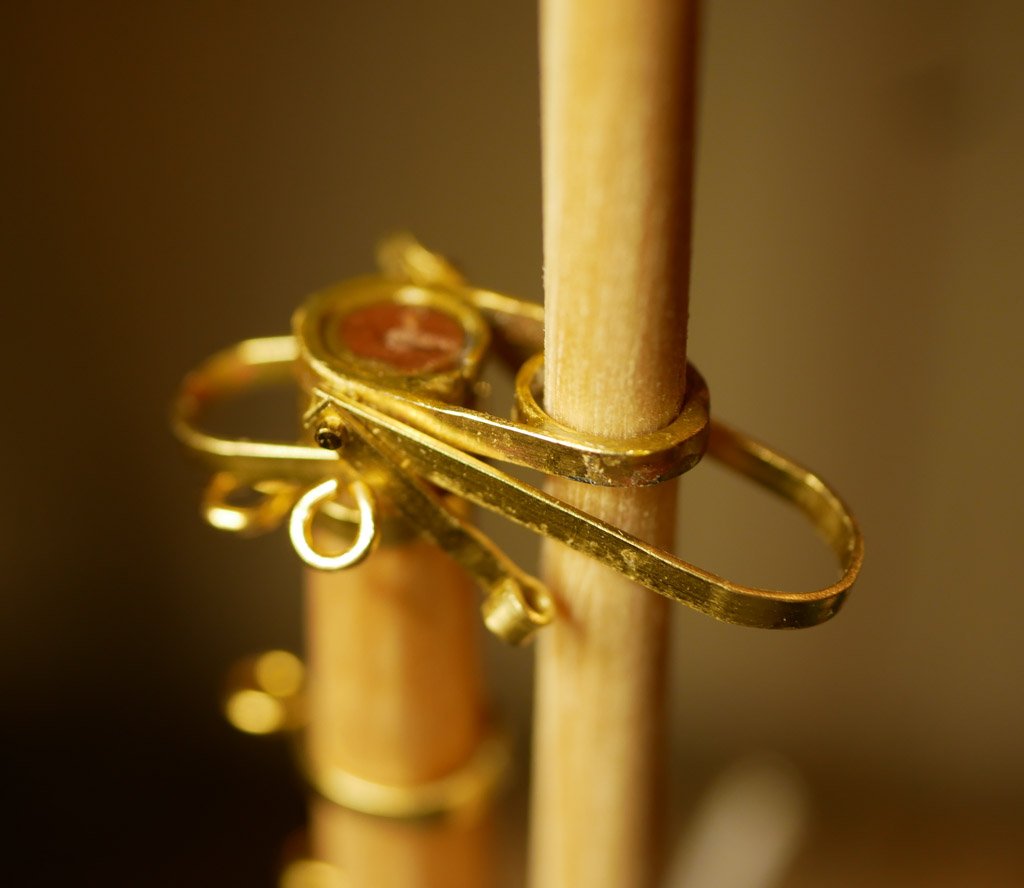
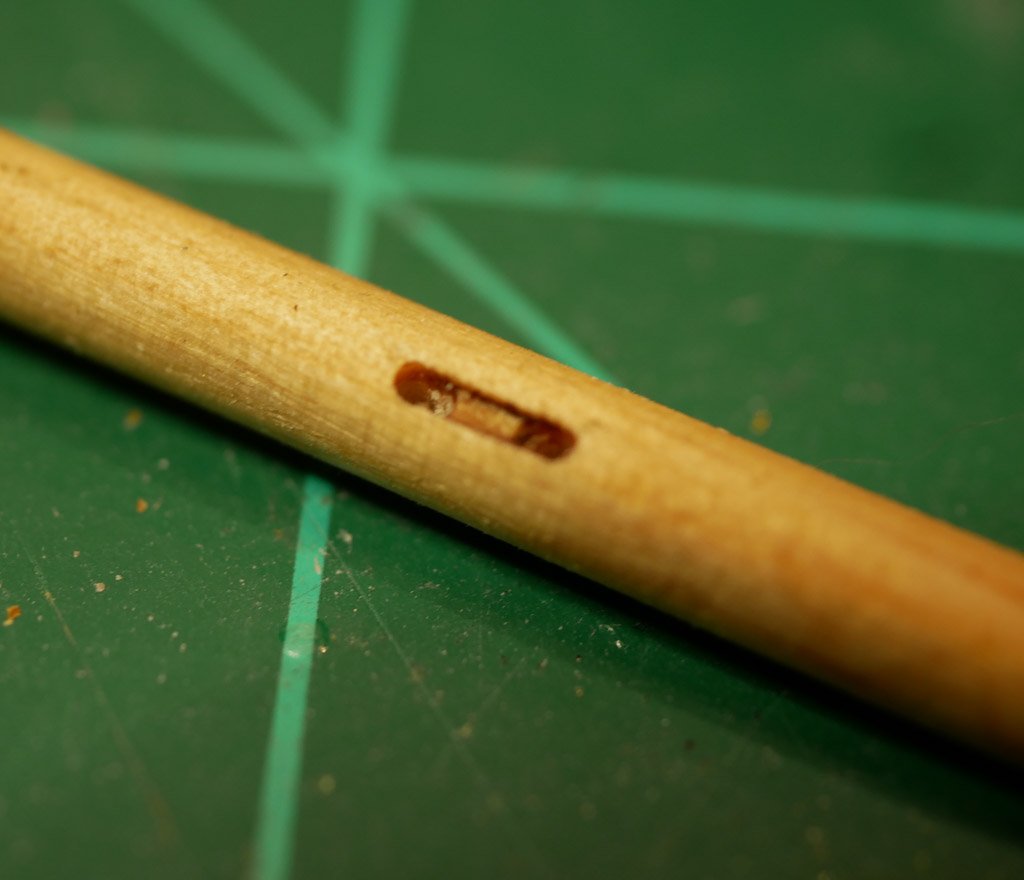
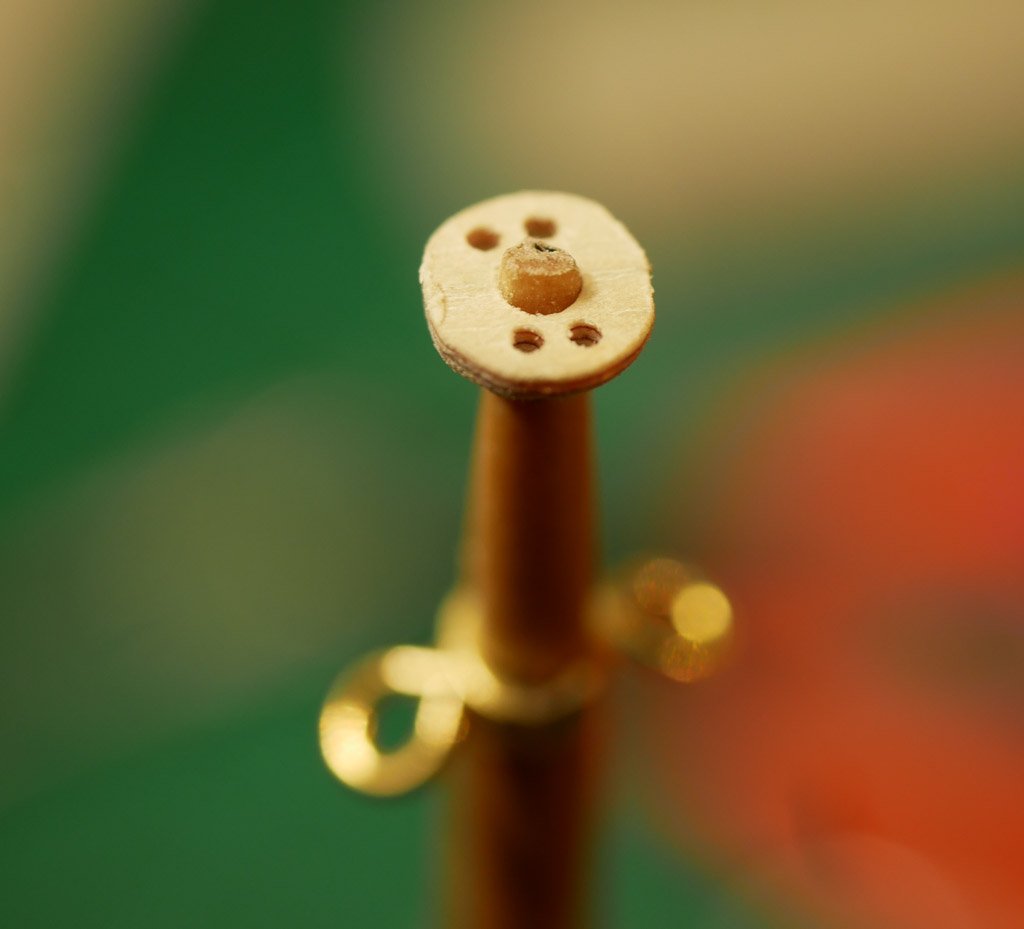
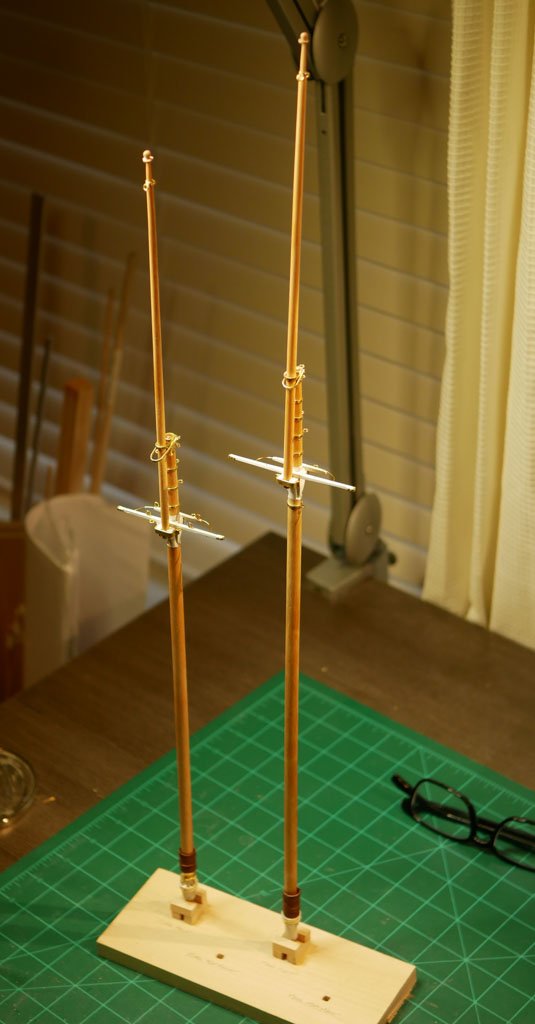
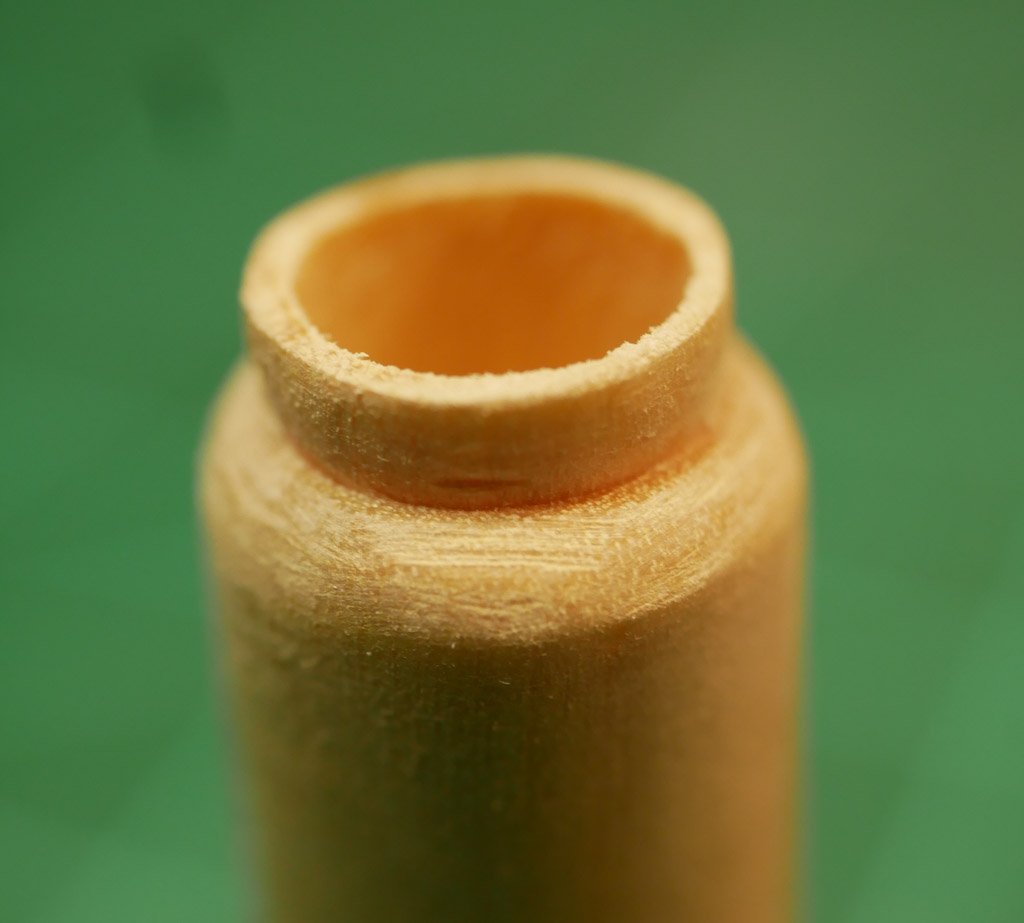
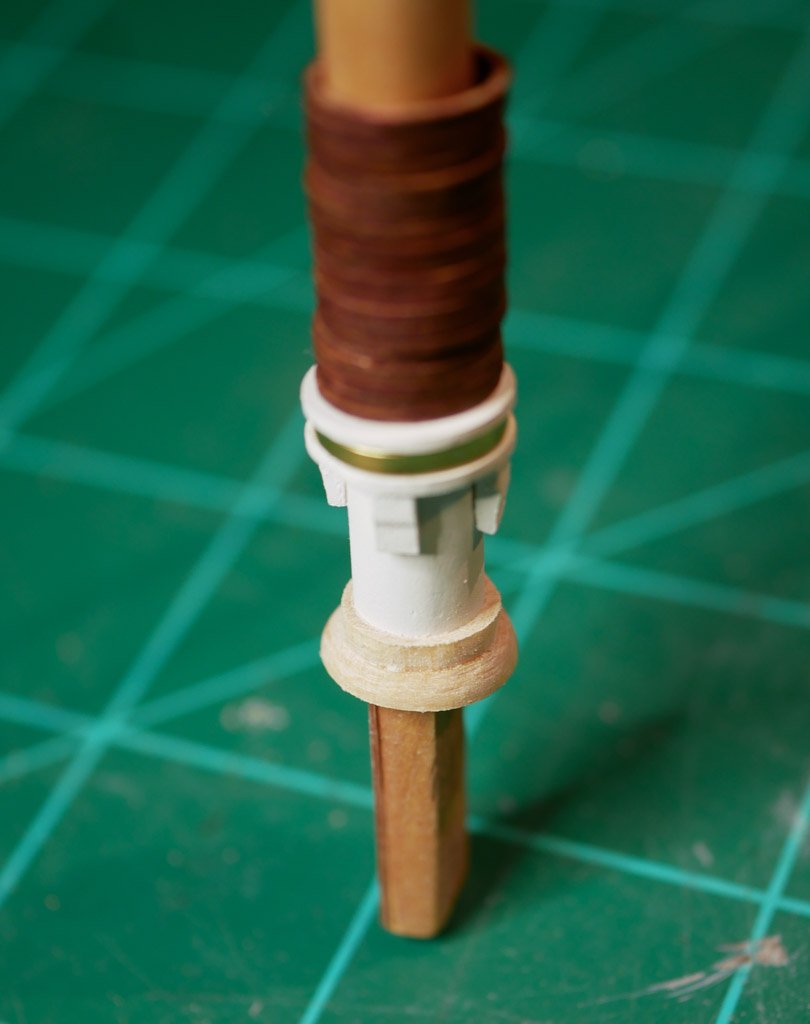
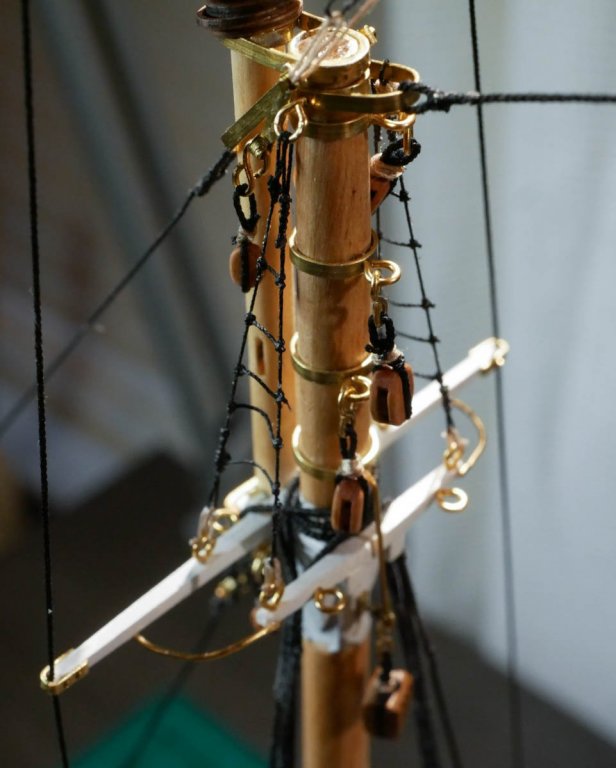
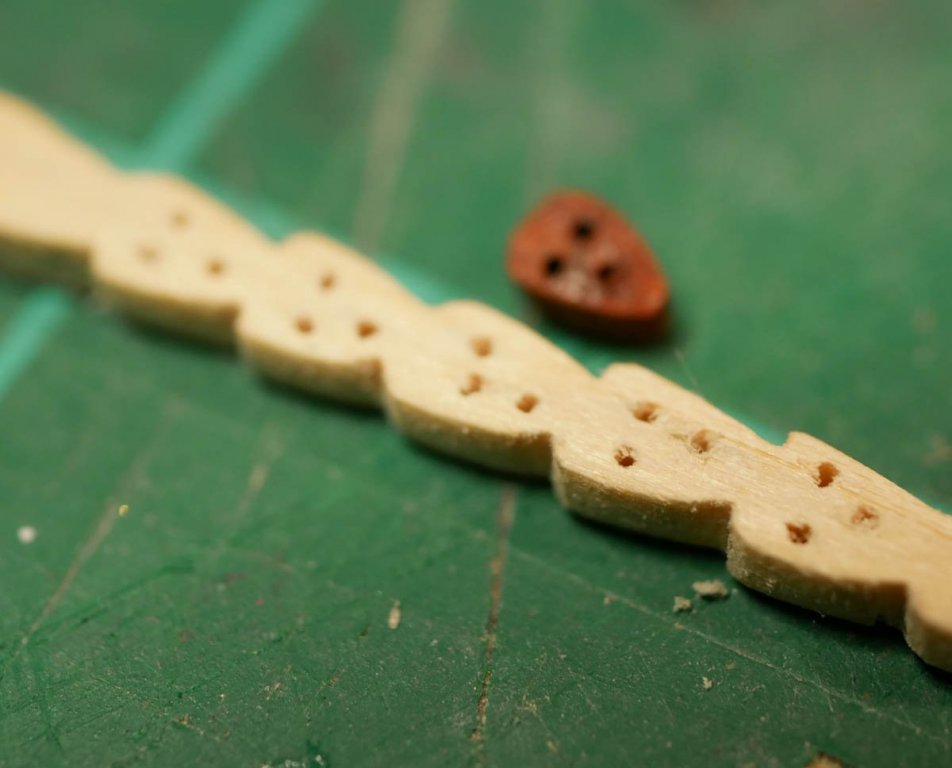
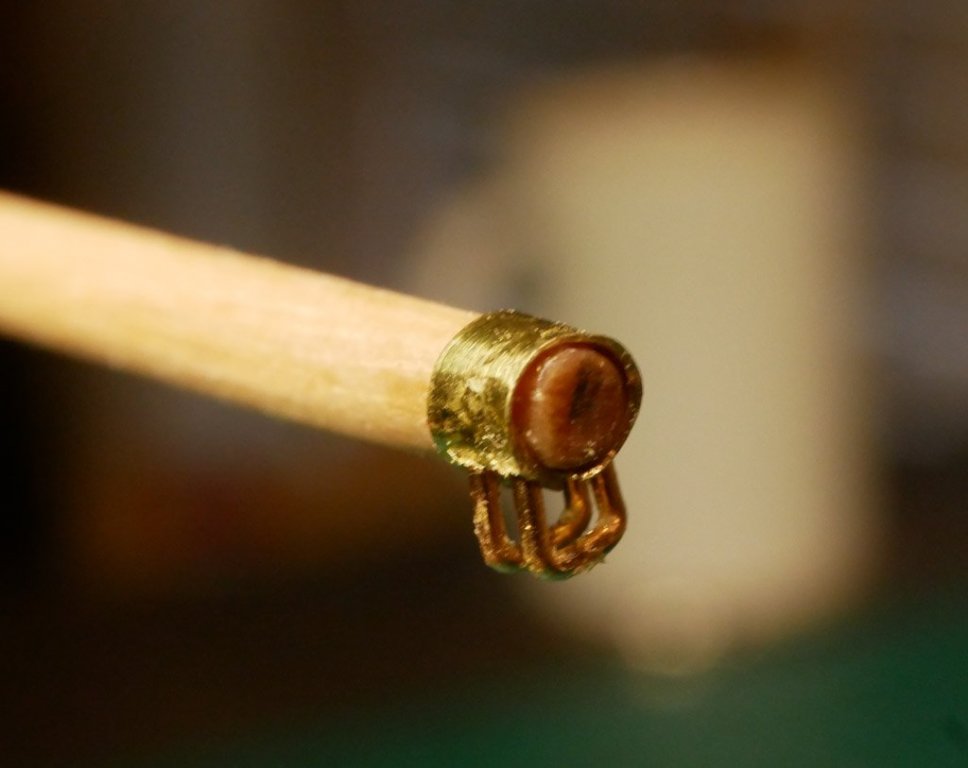
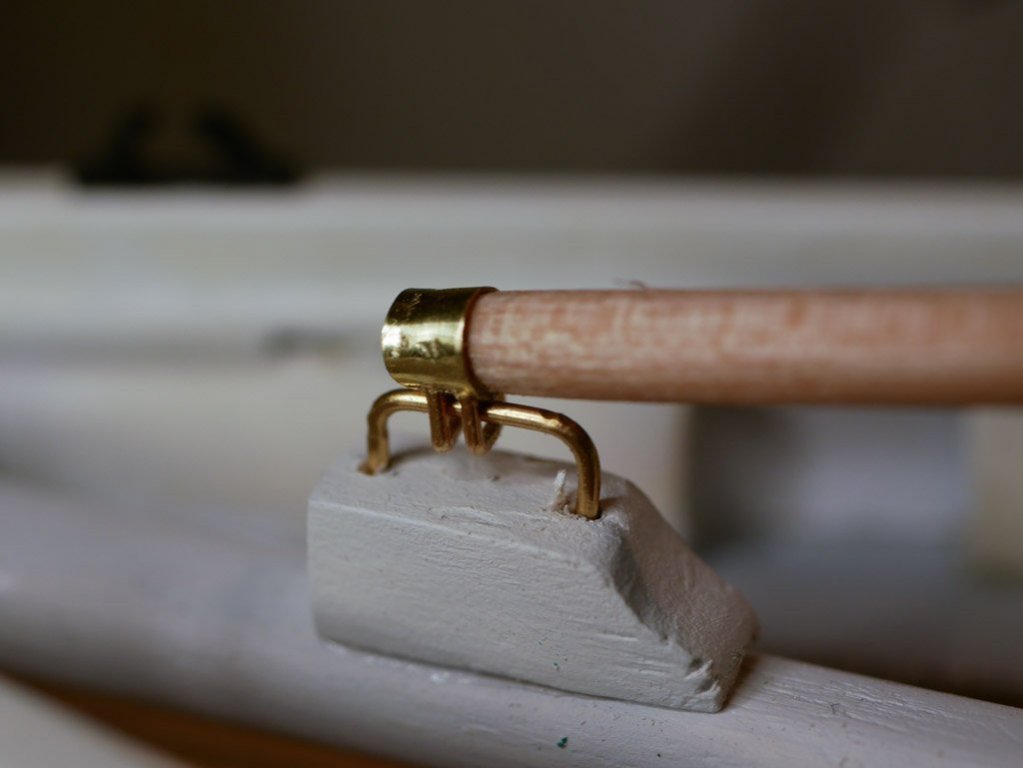
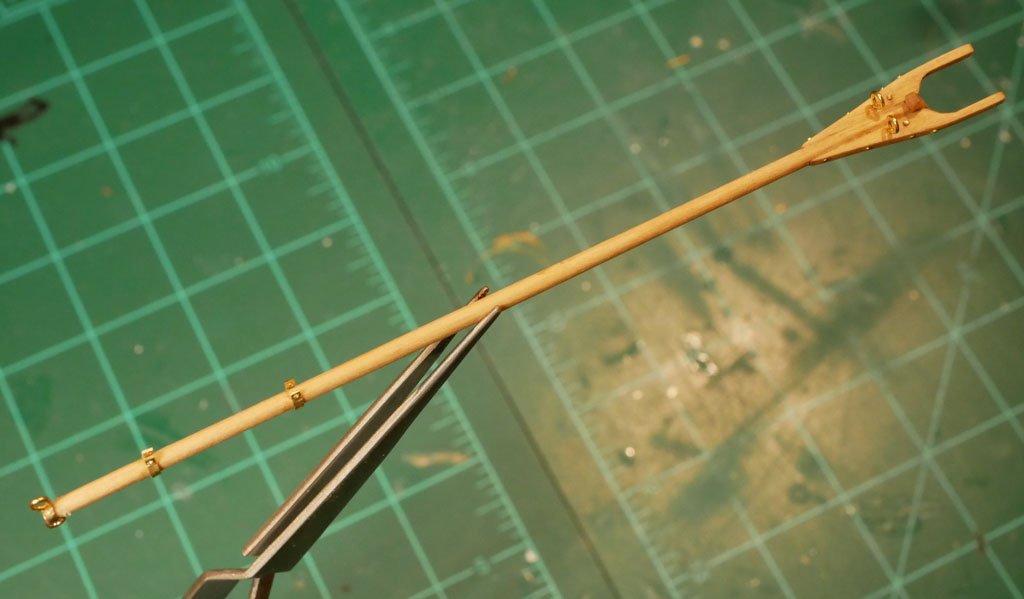
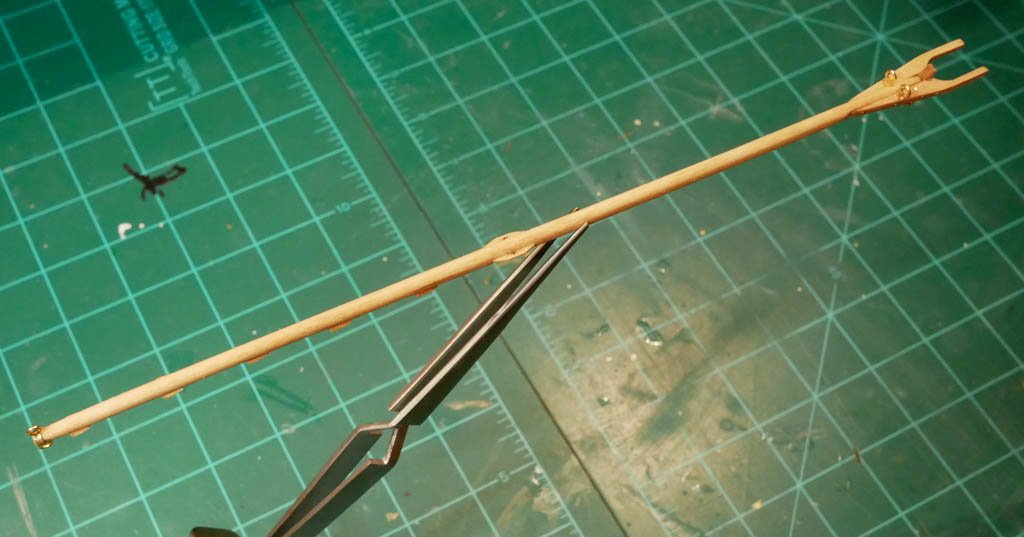
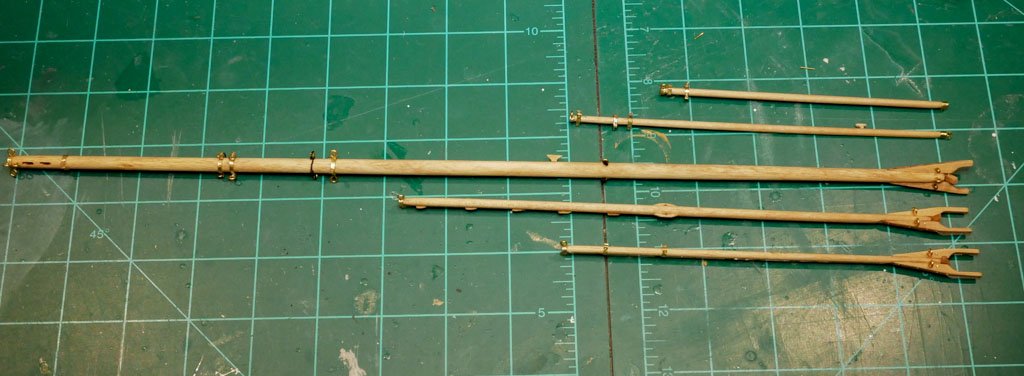
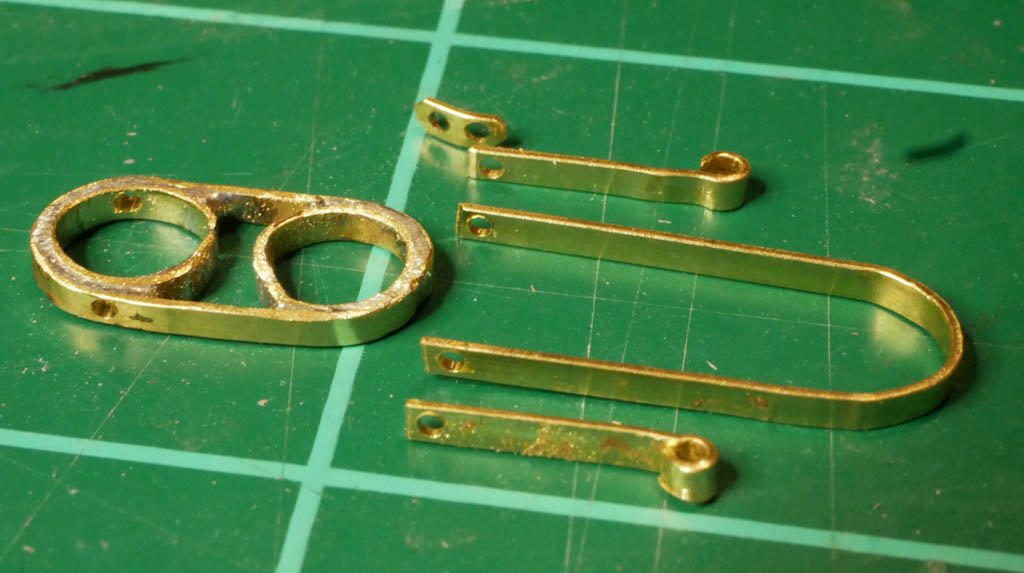
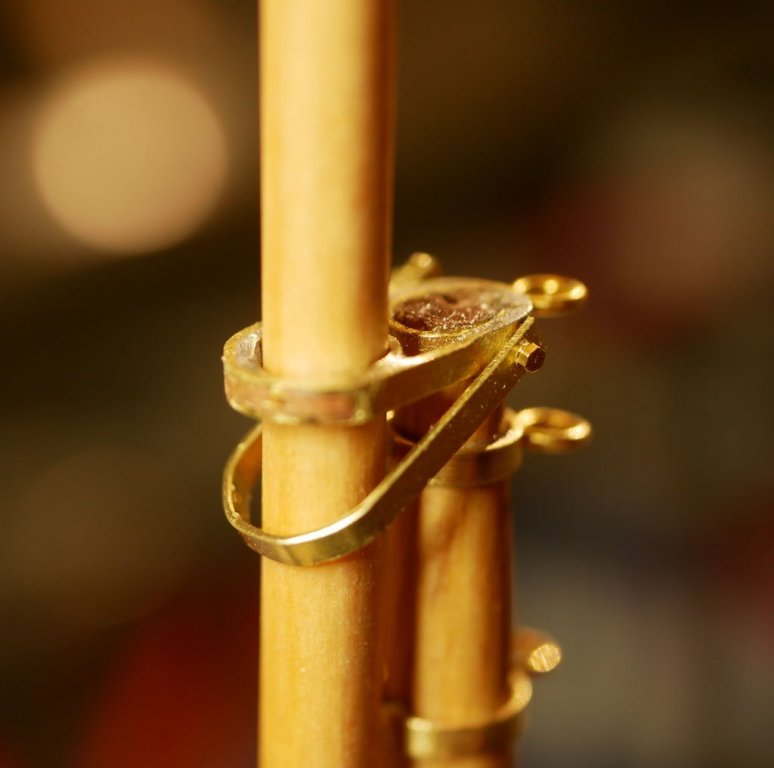
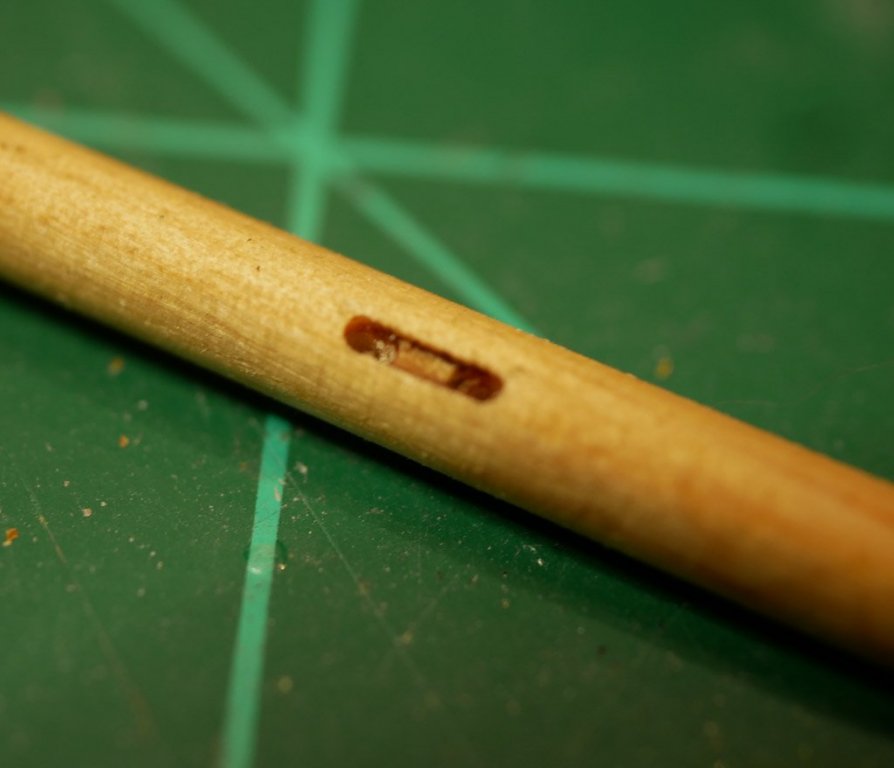
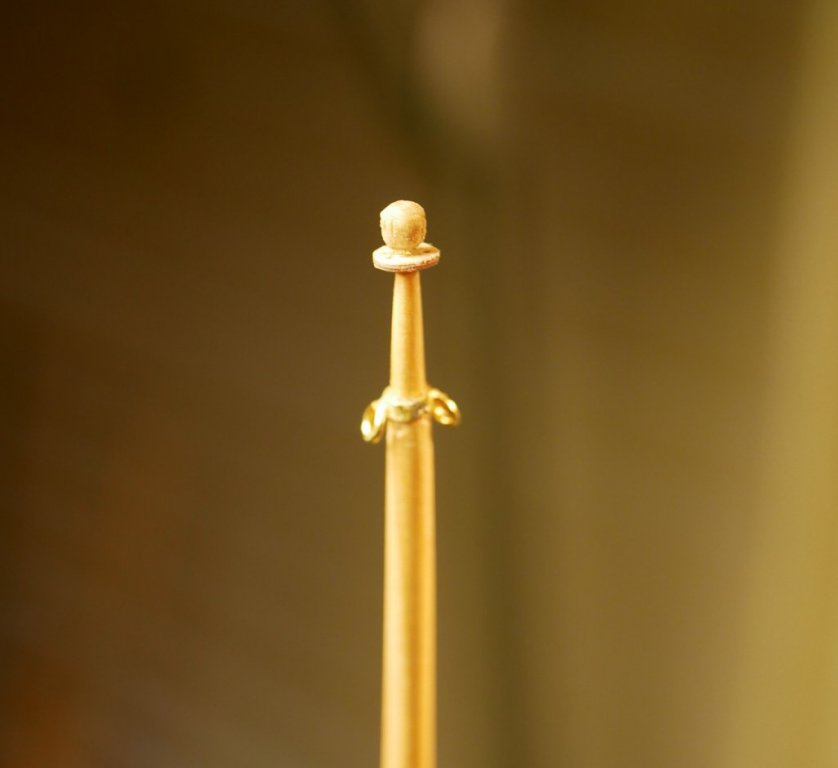
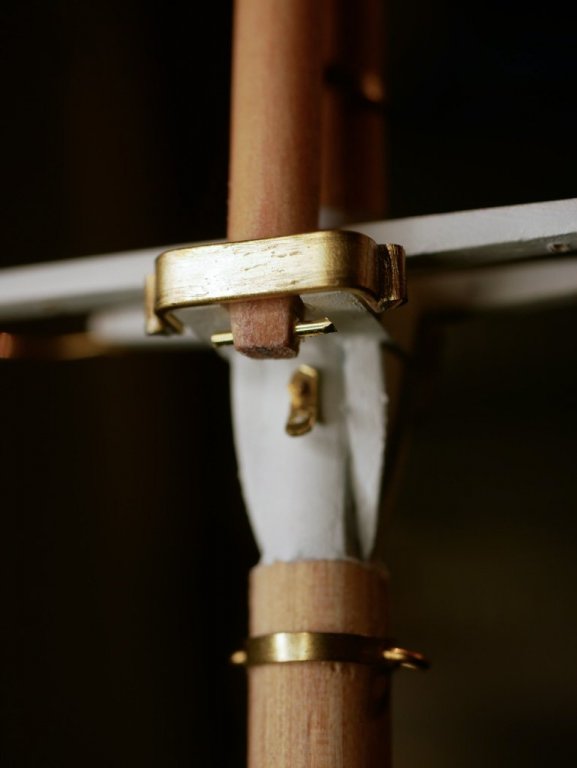
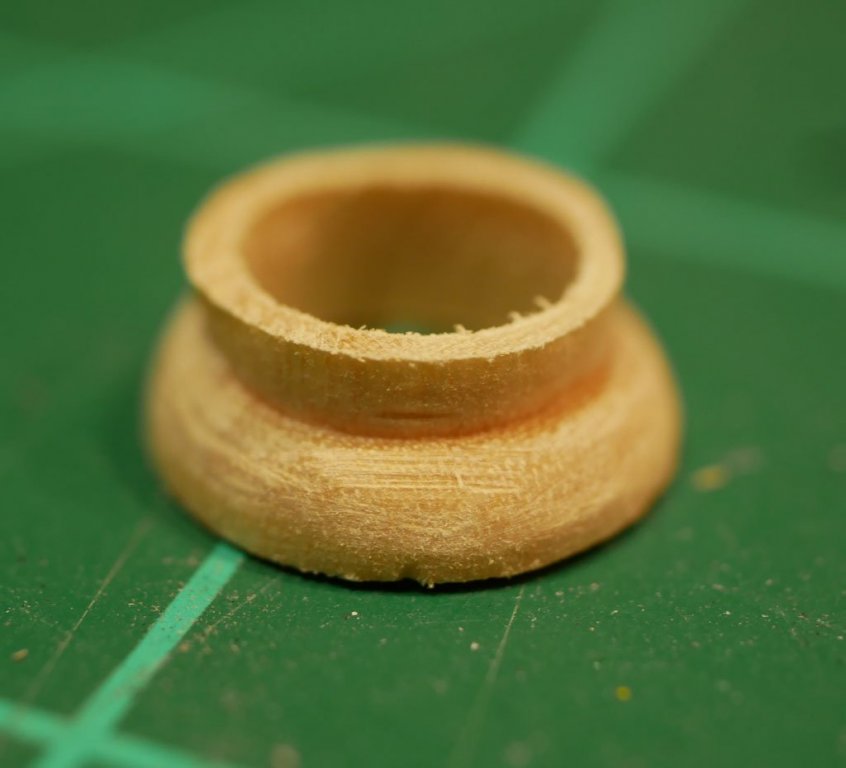
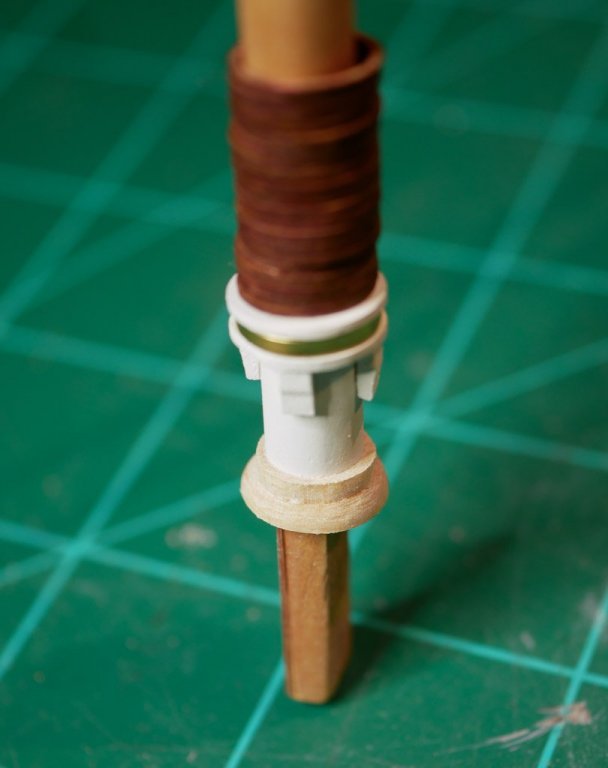
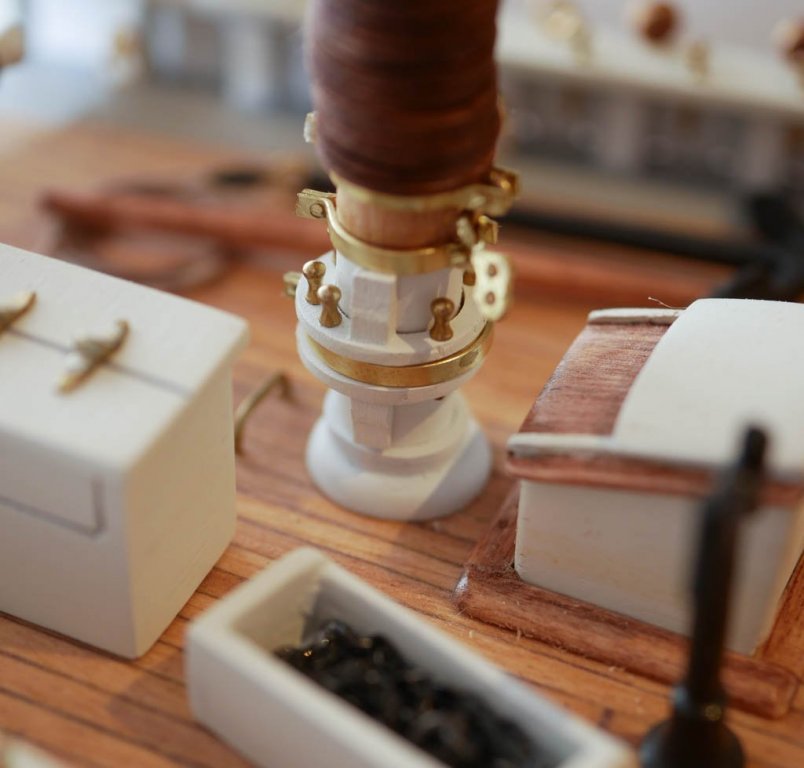
It has been a relatively slow week of ship building, but I did manage to get the rest of the main and fore masts finished. Mast Caps The mast caps were made from brass strip. I shaped the inner bands around the appropriate masts, then soldered them into a larger outside band. I made the bails and long links from brass strip as well. (They really should have been brass wire, but I went with strips so I could better control the 'hole' that would hold them in place. The process for the fore and main mast caps was the same, but with slightly different pieces. The fore mast cap gets the two long links, while the main mast cap skips those but adds an eyebolt. The parts for the fore mast cap... And the fore mast cap installed, using more of the small brass bolts I acquired for my shackles. The main mast cap... Top Masts With those complete, I moved on to finishing up the top masts. I had previously shaped the top masts back when I first started on the masts, so now I just need to add the details. I started by replicating the mast tackle sheaves. From the plans, it doesn't look like I actually need to use these for anything, but the plans call for them, so I added them. I made them by drilling two holes, then using my mill to shape the curved inner part. Since I'm staining my masts a light natural color, I stained the inner part of the sheaves a little darker so they look like they are made from something else. The shoulder bands at the top were straight forward - just a couple brass bands with eyebolts glued into the masts through some holes. Those really should have been pieces of looped brass wire soldered on, but I wanted them to be a little sturdier. Plus, gluing them into the mast through holes in the bands helps keep the bands in place. The gilt ball and truck gave me a lot of trouble. I probably tried making these 4-5 different ways. The ball is pretty simple, but the truck is problematic because it needs holes to act as the sheave for the flag halliards. I've seen some builds omit these, and I was very, very tempted to skip them after several hours of failures. What ended up working for me was to trace the round shape of the truck onto some 1/32" birch plywood sheet (basswood just fell apart when tried). I then drilled a hole in the center to match the size of the top mast's tip. Then I drilled two small holes on either side to form the sheave. The holes are just big enough to get some thread through for the flag halliards. I carefully cut it out and sanded it down. Here's the truck installed without the gilt ball... The gilt ball itself was carved from a dowel rod. I drilled a shallow hole in the bottom that covered the little bit of top mast that poked through the truck, and glued it all together. It is a little bigger than it should be, but I think once all the lines are rigged up it will look fine. For the record, attempts that failed: carving the whole thing as part of the mast (destroyed two top masts that way), carving it all on a separate dowel to be glued on, making the truck from a slice of dowel, making the truck from brass, and making the truck from a basswood sheet. The last piece to the top masts were the iron fid bars to hold them in place. For these I just drilled a hole in the bottom of each top mast and used a piece of brass rod as the fid. For now the fids are not glued in. I'm going to wait to permanently install the top masts until I get the rigging lines installed. Then I made a bunch of even smaller mast hoops, which was easy but annoying. Those got installed on the top masts. Mast Coats Finally, I made the mast coats. The kit provides some laser cut pieces for these, but I decided to go a different route. When working on the lower masts, I used some larger dowel rods to make the pin saddle. I had drilled a hole through that dowel rod that fits the lower mast exactly. Naturally, it took several tries to get that hole centered, and I kept a few of the rejects. I made my mast coats from one of those rejects. I started with a dowel that had a hole drilled through it for the mast. The hole is off center, but that's OK. I think the mast coat was canvas or leather, so it probably wouldn't have been uniform all the way around. I used my mill to thin out a bit around the top, then rounded things off below that. The piece was then cut free. The unpainted mast coat temporarily fitted to the main mast... Once painted and temporarily installed (again, not permanently installing anything yet), I'm happy with how it turned out. The final, painted mast coat on the fore mast... And now I'm done with the fore mast and main mast! I'm going to start in on the main boom next, followed by the other booms and gaffs. Once all those are done, I'll prep as much of the rigging as I can before anything gets installed. After 432 days of building, seeing the masts up on the ship is a great motivation. Even though I've probably got 2-4 months left, I feel like the end is in sight!


- 245 replies
-
- 10
-
-
- bluenose
- model shipways
- (and 1 more)