-
Posts
55 -
Joined
-
Last visited
Content Type
Profiles
Forums
Gallery
Events
Everything posted by NWdiverTodd
-

Seattle Shipwrights!?
NWdiverTodd replied to Justin P.'s topic in Modeling tools and Workshop Equipment
If you head north during the week, Bellingham has Hardware sales and Grizzly. Hardware sales has most every tool you can imagine, both power and hand. They also have all sorts of raw stock and fasteners. Grizzly has some great deals on things like machinist squares\micrometers and other tool items. -Todd- 5 replies
-
- local shops
- stores
-
(and 2 more)
Tagged with:
-
Very slick!
-

Need advice with Byrnes saw
NWdiverTodd replied to bigcreekdad's topic in Modeling tools and Workshop Equipment
Hi Bigcreek, At first blush I would think you are adding pressure into the side of the blade. This usually happens when you are pushing stock through the saw with pressure added past the leading edge of the blade. The reason people do this is to keep the stock tight against the fence, but in essence you are pressing (or pinching) the stock into the blade. The following link has lots of good ideas for using the saw: http://www.hobbymillusa.com/byrnes-saw-operation.php Another possibility is that the wood has a strong counter grain and would be better cut from the other end of the sheet. -Todd -
Very nice! Keep the pictures coming. What did you use for the binnacle handles?
- 227 replies
-
- syren
- model shipways
-
(and 1 more)
Tagged with:
-
Thanks very much for posting this part of your build! I really dislike the bits that came with the kit, but have not allowed myself to think about how hard it will be to scratch these. Your work and process will be invaluable to me in the near future. These are coming along very well indeed! -Todd
- 227 replies
-
- syren
- model shipways
-
(and 1 more)
Tagged with:
-
Thanks Richard. I am totally with you on not spending another $100 on pretty woods for a first build. Well, I say that but... I was planning on just ordering boxwood for the planking above the wales, then I was thinking, it's not THAT much more to grab some holly for the deck, and I might grab some for the cap rail, and perhaps a bit of beech for the stern, and, and , and... So, now I'm ordering some wood to play with. Thanks to your pictures, I have to run down and buy the dremel "router" table. I've been using a spindle sander, but the dremel will fit in my ship work area and i'll have better control with smaller pieces. At least that's what I'm telling myself. What do you think of your proxon jigsaw? I like the small footprint. -Todd
-
Thanks Charley! I'm fumbling my way through. If you see me heading for a mistake, don't be gentle, kick me to get me back on track... I have only laid out the first three gun ports. The very first on both sides have the bulkhead leaning slightly aft rather than 90 deg to the lintel and sill. If I matched the angle of the bulkhead I would have a slight trapezoid gunport, so I added a angled shim to make the gunport square with the sill. I'm not sure this is correct, but it looks better to my eye. I sent a message to Chuck about the longboat, we shall see what the boss says :-)
-
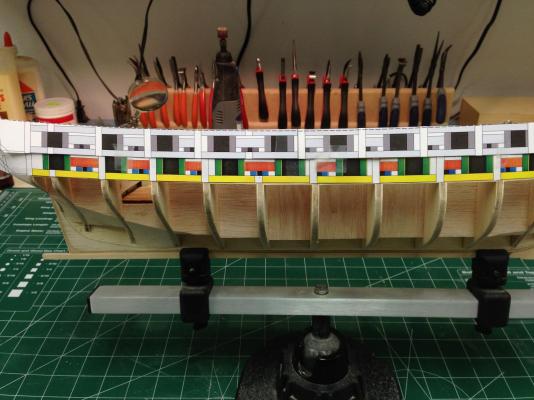
The lintel and sills are complete. Well, I have a bit more sanding to do, but I figured I would complete that after I add the rest of the parts. Like many others, the template that came with the kit was the wrong size. My thanks to Charley for sending me new ones! My new challenge is that when I line up the aft most bulkhead with the template (per the instructions) I am off at the forward bulkhead by 1/8". As both sides are the same my plan is to adjust the template to fit between each bulkhead and both sides should match. Please let me know if there is a problem with this idea! The picture shows both templates, the color is the new one.
-
I need some help from you other Syren folk. I was playing with the ship's boat and while laying out the parts I noticed that I have only 4 "lifts" and the bottom. I'm missing the top most lift. This is an issue because it is shaped very different than the others. It looks like only 4 lifts are shown on the plans. I don't see where it should have been in the kit. There is no room on the sheet that included the other lifts. I can ask for another sheet, but before I do that, would you kind folk have a look and see what came with your kit? Thanks very much, Todd
-
The chopper does have some limitations, but over all it works really well. I have been using the chopper III to cut close, then follow up with a slide sander to make the angle I want. I'm sure that many of the experienced folks do it by "feel", but I don't have that knack yet. Your framing looks great Charley, much better than mine. I'm working on it as well. I am having the most trouble getting the thickness uniform. Your lines look fantastic! -Todd
-
Thanks again Richard! It is really nice to have the whole list. I ordered from http://www.megahobby.com/modelflexpaintmarinecolors1ozbottlesbadger.aspx They have a really nice webpage for the paint. The price is $3.02 per bottle. I looked at badger's site, and they want $16 per bottle!! I read about using india ink for the black so I picked up a bottle, it looks really nice on my test pieces, works like stain but it seems like I can touch it up and it doesn't show the rework. I might try this. I'm a little worried that it will follow the grain so touch up near another color might be an issue. -Todd
About us
Modelshipworld - Advancing Ship Modeling through Research
SSL Secured
Your security is important for us so this Website is SSL-Secured
NRG Mailing Address
Nautical Research Guild
237 South Lincoln Street
Westmont IL, 60559-1917
Model Ship World ® and the MSW logo are Registered Trademarks, and belong to the Nautical Research Guild (United States Patent and Trademark Office: No. 6,929,264 & No. 6,929,274, registered Dec. 20, 2022)
Helpful Links
About the NRG
If you enjoy building ship models that are historically accurate as well as beautiful, then The Nautical Research Guild (NRG) is just right for you.
The Guild is a non-profit educational organization whose mission is to “Advance Ship Modeling Through Research”. We provide support to our members in their efforts to raise the quality of their model ships.
The Nautical Research Guild has published our world-renowned quarterly magazine, The Nautical Research Journal, since 1955. The pages of the Journal are full of articles by accomplished ship modelers who show you how they create those exquisite details on their models, and by maritime historians who show you the correct details to build. The Journal is available in both print and digital editions. Go to the NRG web site (www.thenrg.org) to download a complimentary digital copy of the Journal. The NRG also publishes plan sets, books and compilations of back issues of the Journal and the former Ships in Scale and Model Ship Builder magazines.


