mikiek
-
Posts
2,276 -
Joined
-
Last visited
Content Type
Profiles
Forums
Gallery
Events
Everything posted by mikiek
-
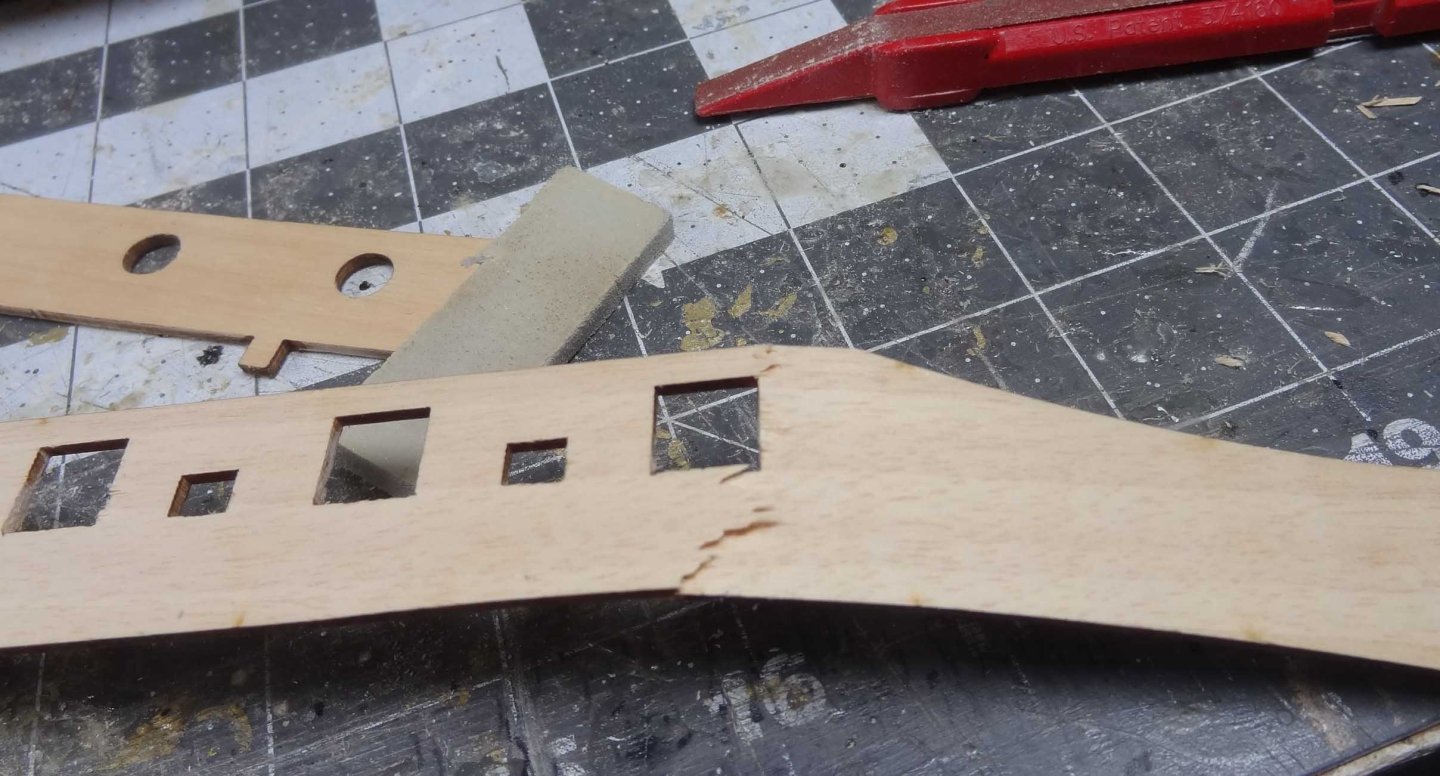
 Mike - I am totally at a loss as to how to deal with the bulwark strips. I have temporally ditched the strip I was planking and just trying to figure things out with the other bare strip. After many dry fits I see no way for the bulwark strip to be fixed to the hull. The strip has to bend around the hull (not a big deal) but must also bend seriously horizontally to glue to the frames. The strip has broken on almost every attempt on a dry fit. Hoping you might have some suggestions on how to make this happen. I'm on the verge of dumping this kit.
 -
Quite interesting as I am building Jabeque Cazador which appears to be similar in a lot of areas. Love your research photos!
-
Thanks Mike - my first inclination was to glue the bulwark with no planking - should have listened to my gut. I can still do that on the starboard side, but I think I have gone too far on port to try and remove the planking that I have done. And trying to soak the strip half planked seems like a recipe for disaster. One thing I noticed, while repairing the broken strip, I used a couple of bulldog clips to clamp down the broken area. I did a partial dry fit during that time (I never learn) and nothing else broke. The break always seems to happen in the same general area, so maybe that is a weak point. With the clamps in place, and no further planking I think I'll try gluing the bulwark as is with the clips around the weak spot. I appreciate your feedback!
-
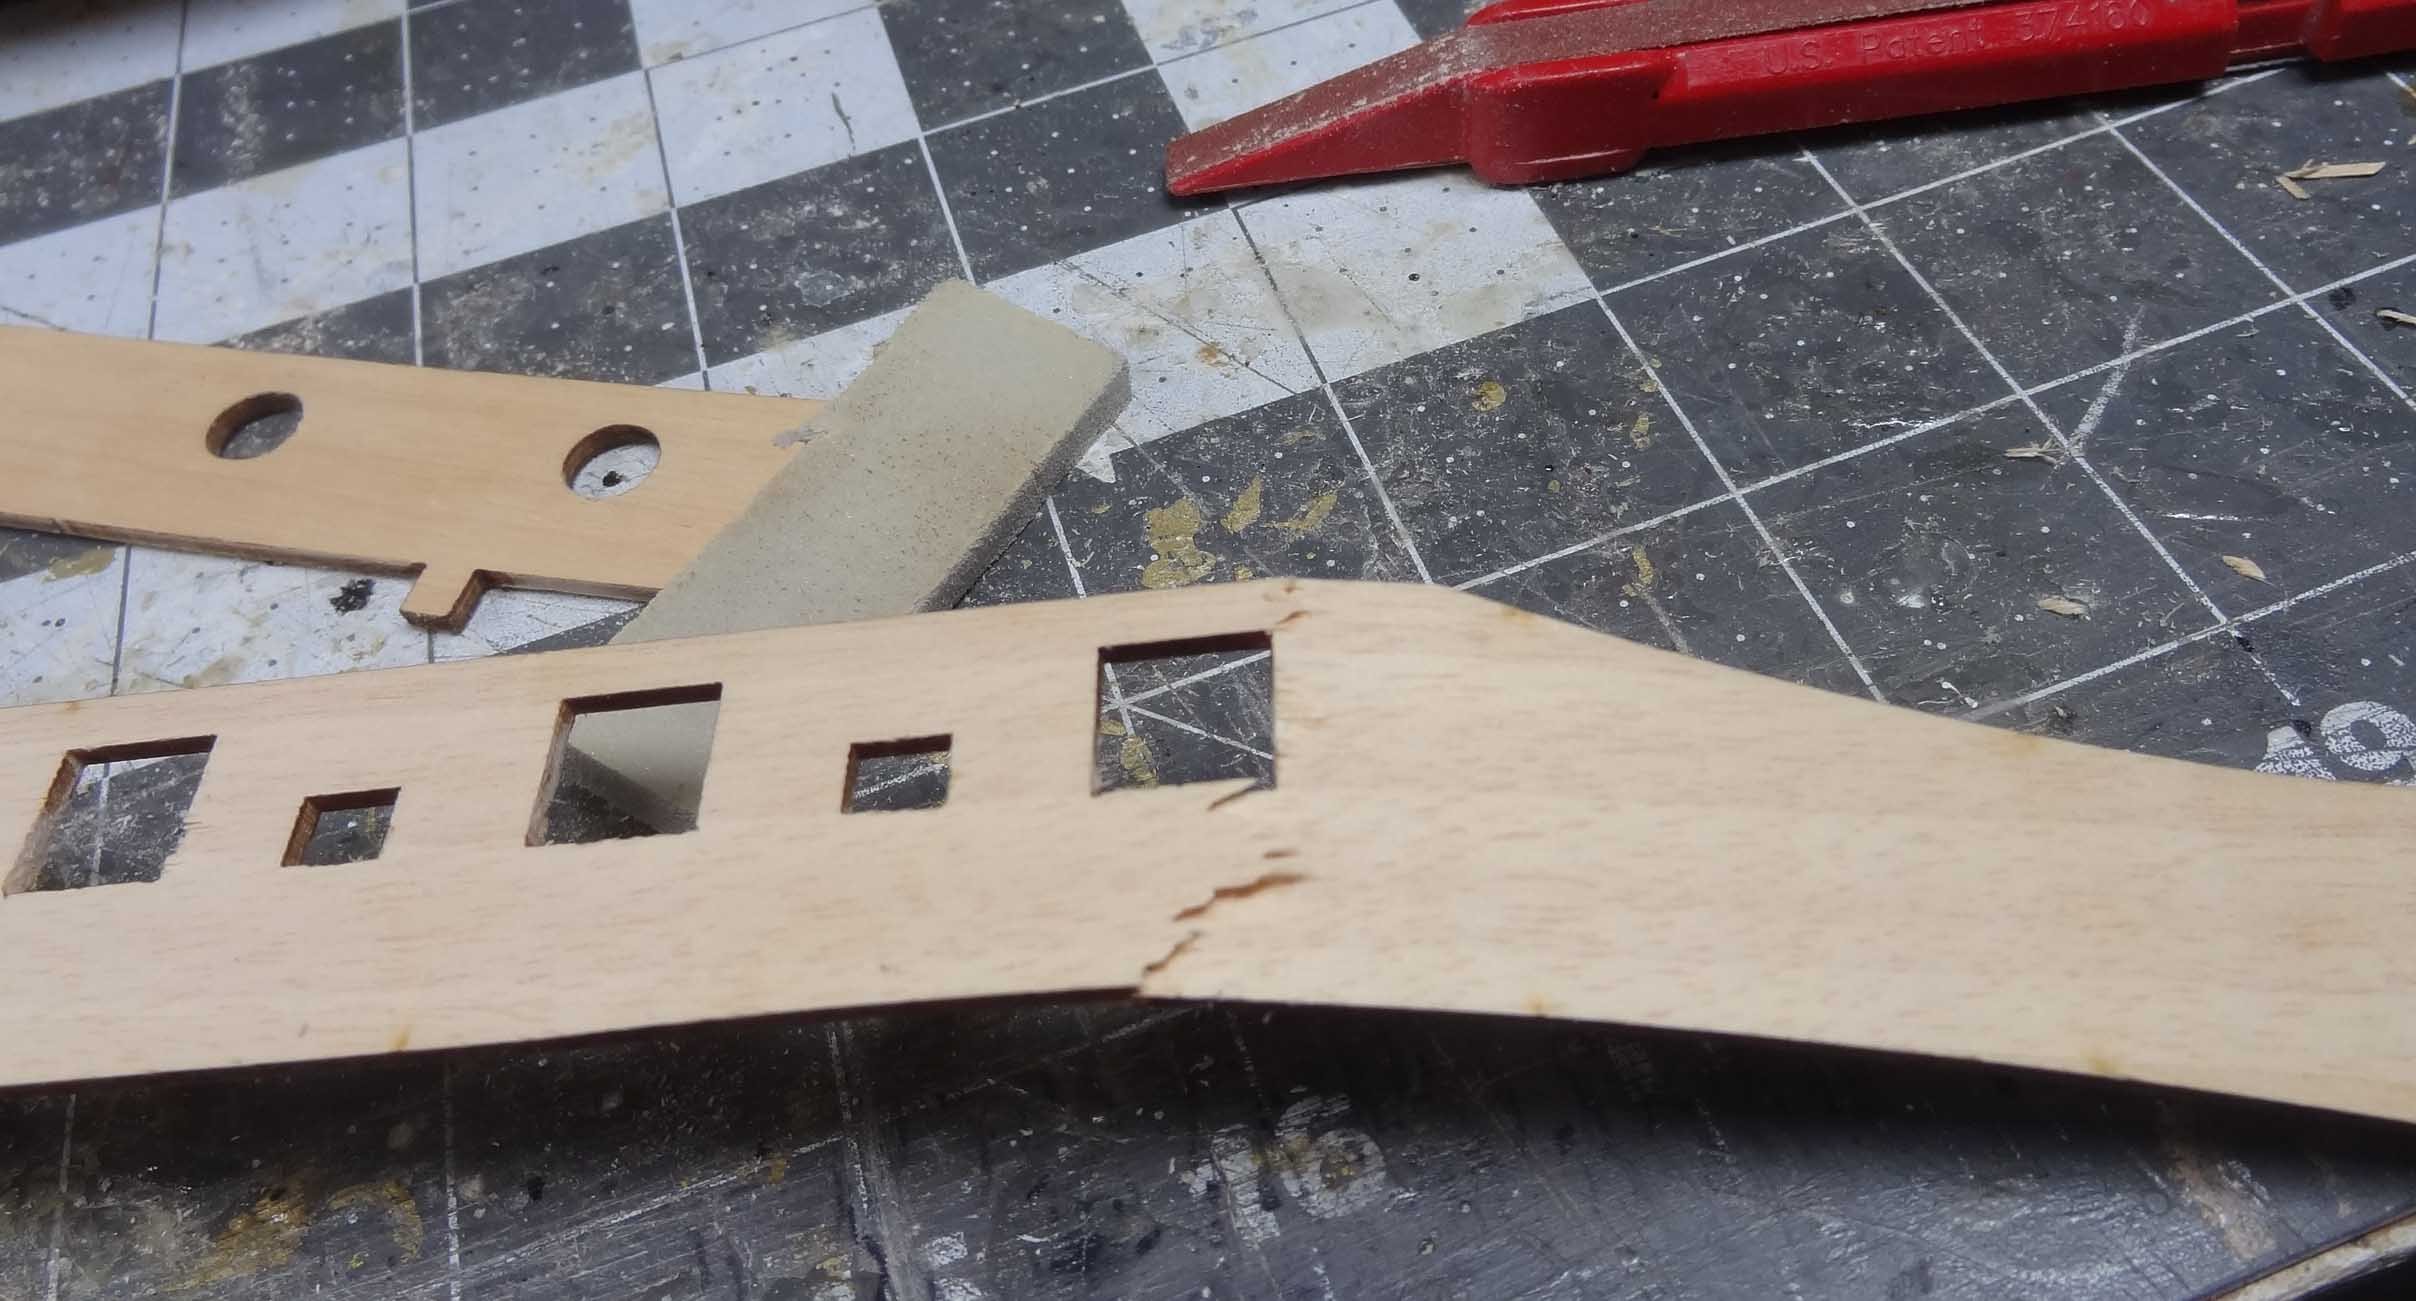
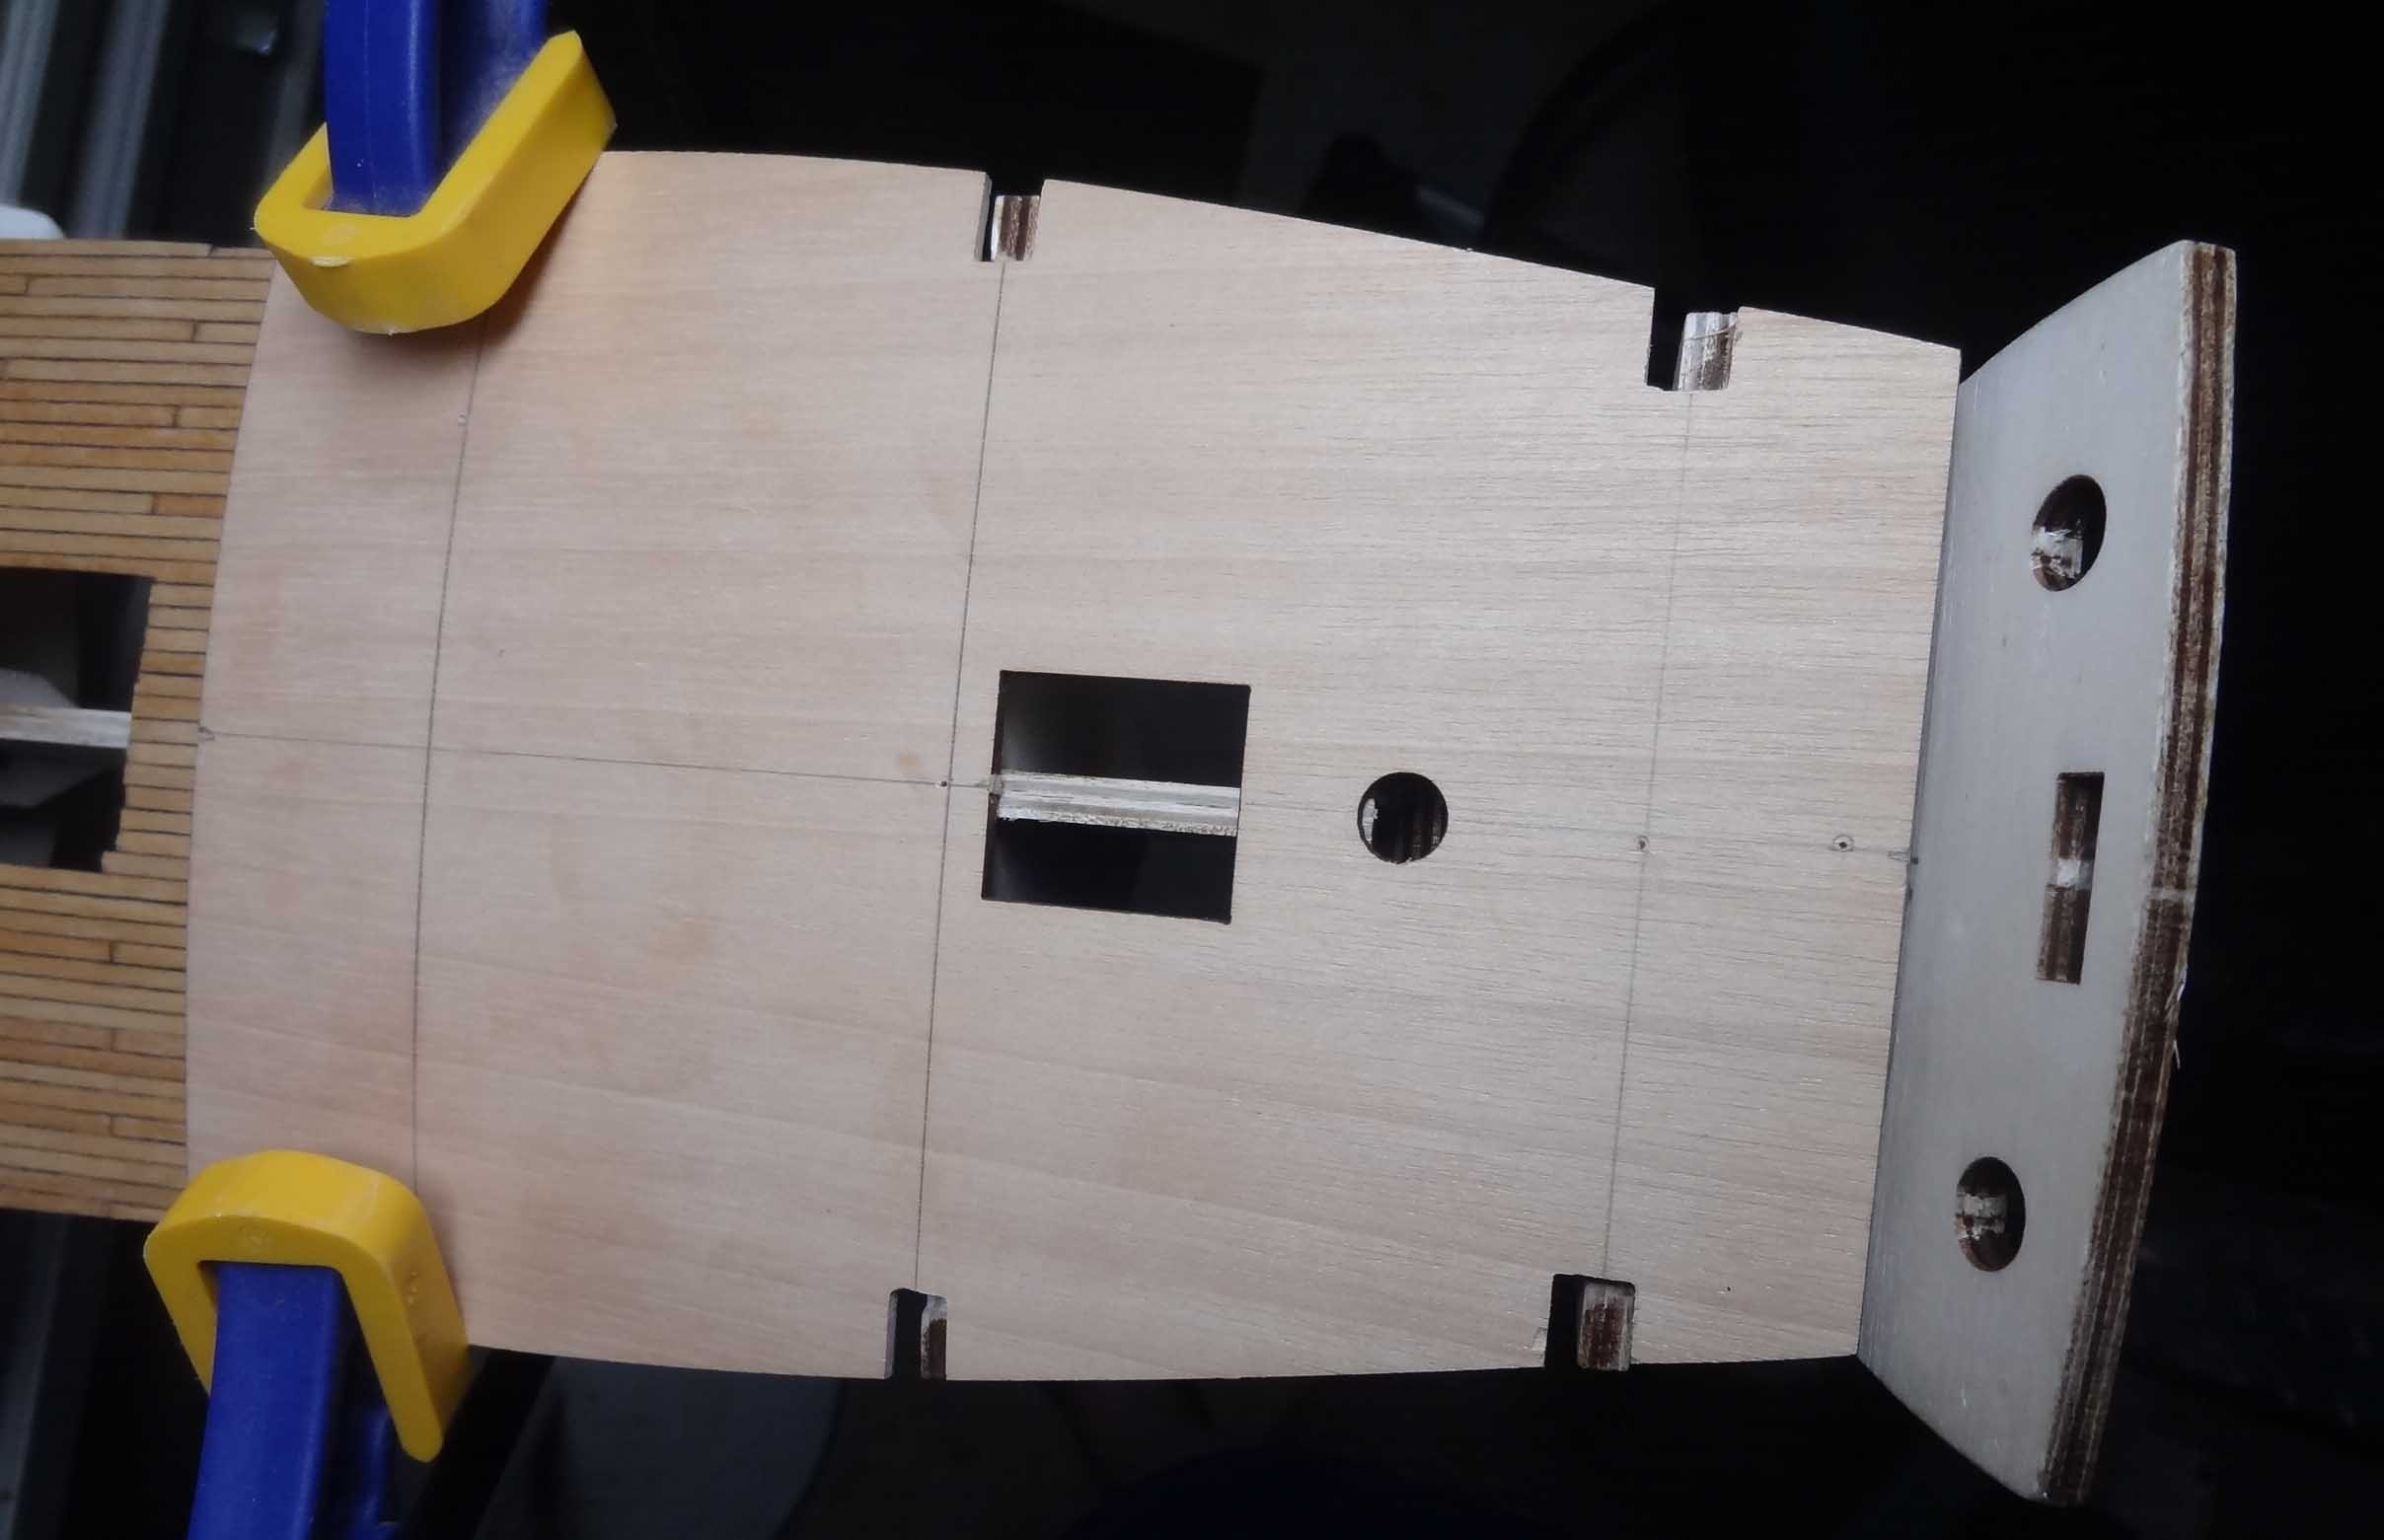
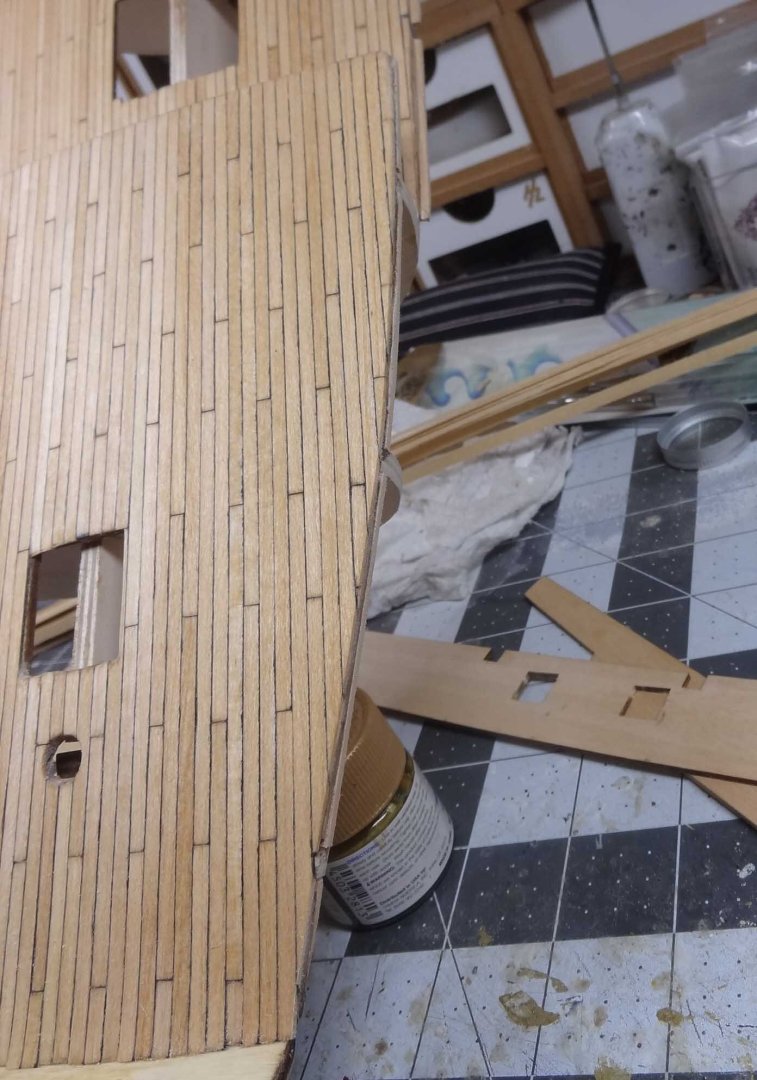
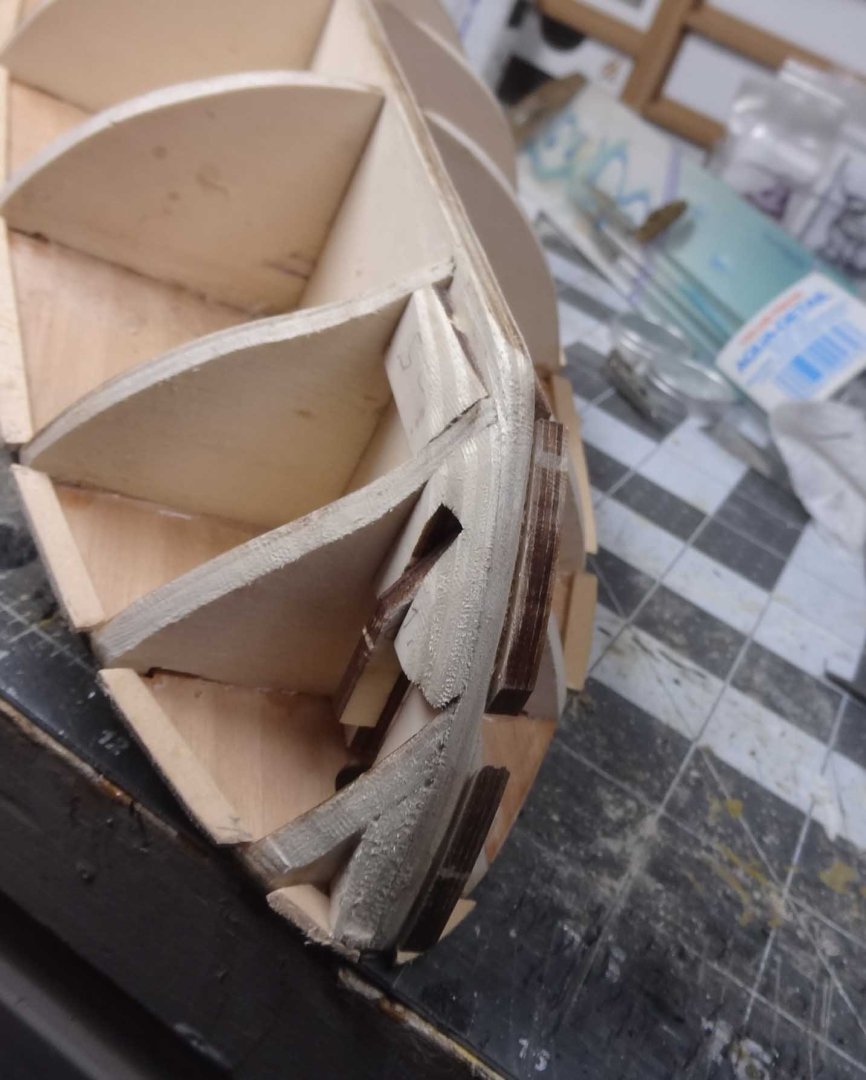
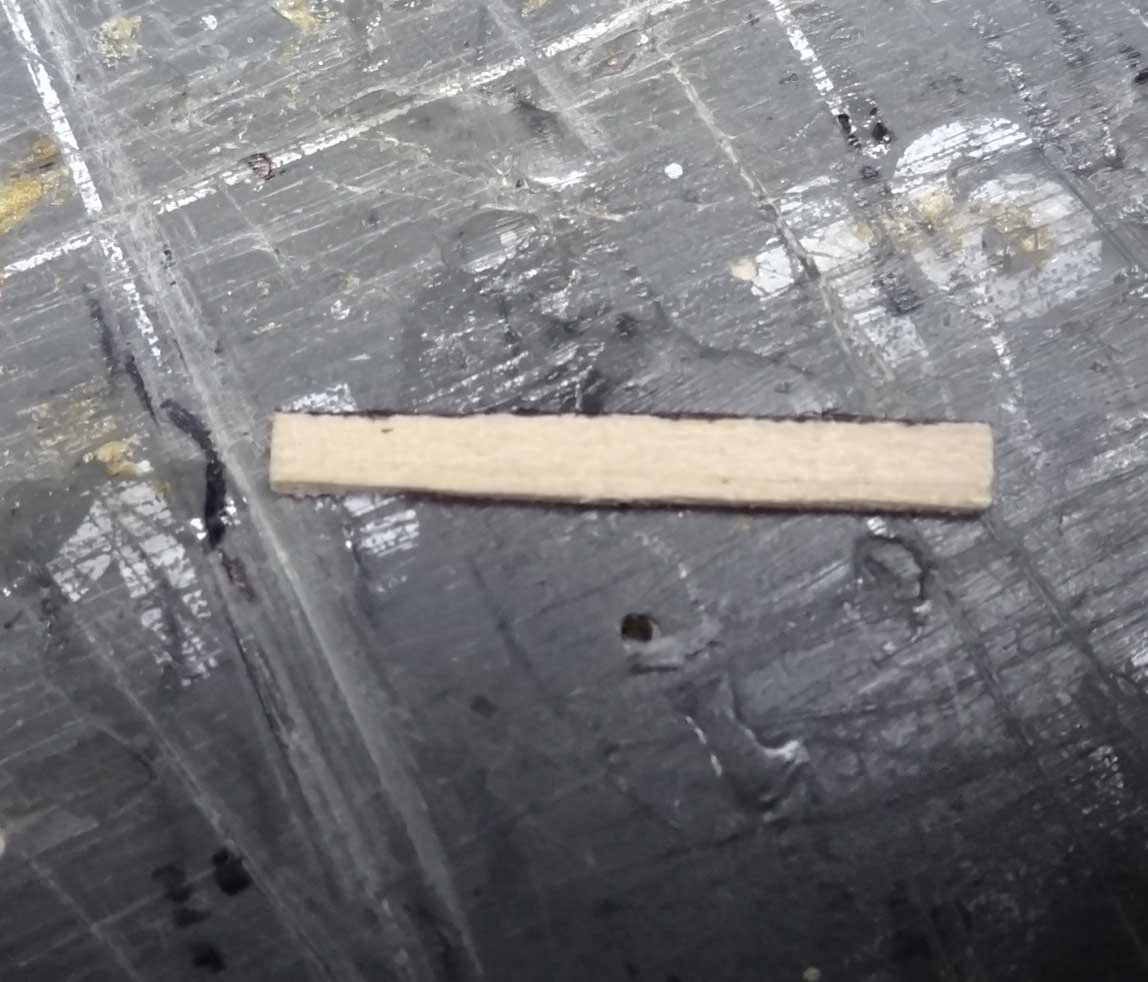
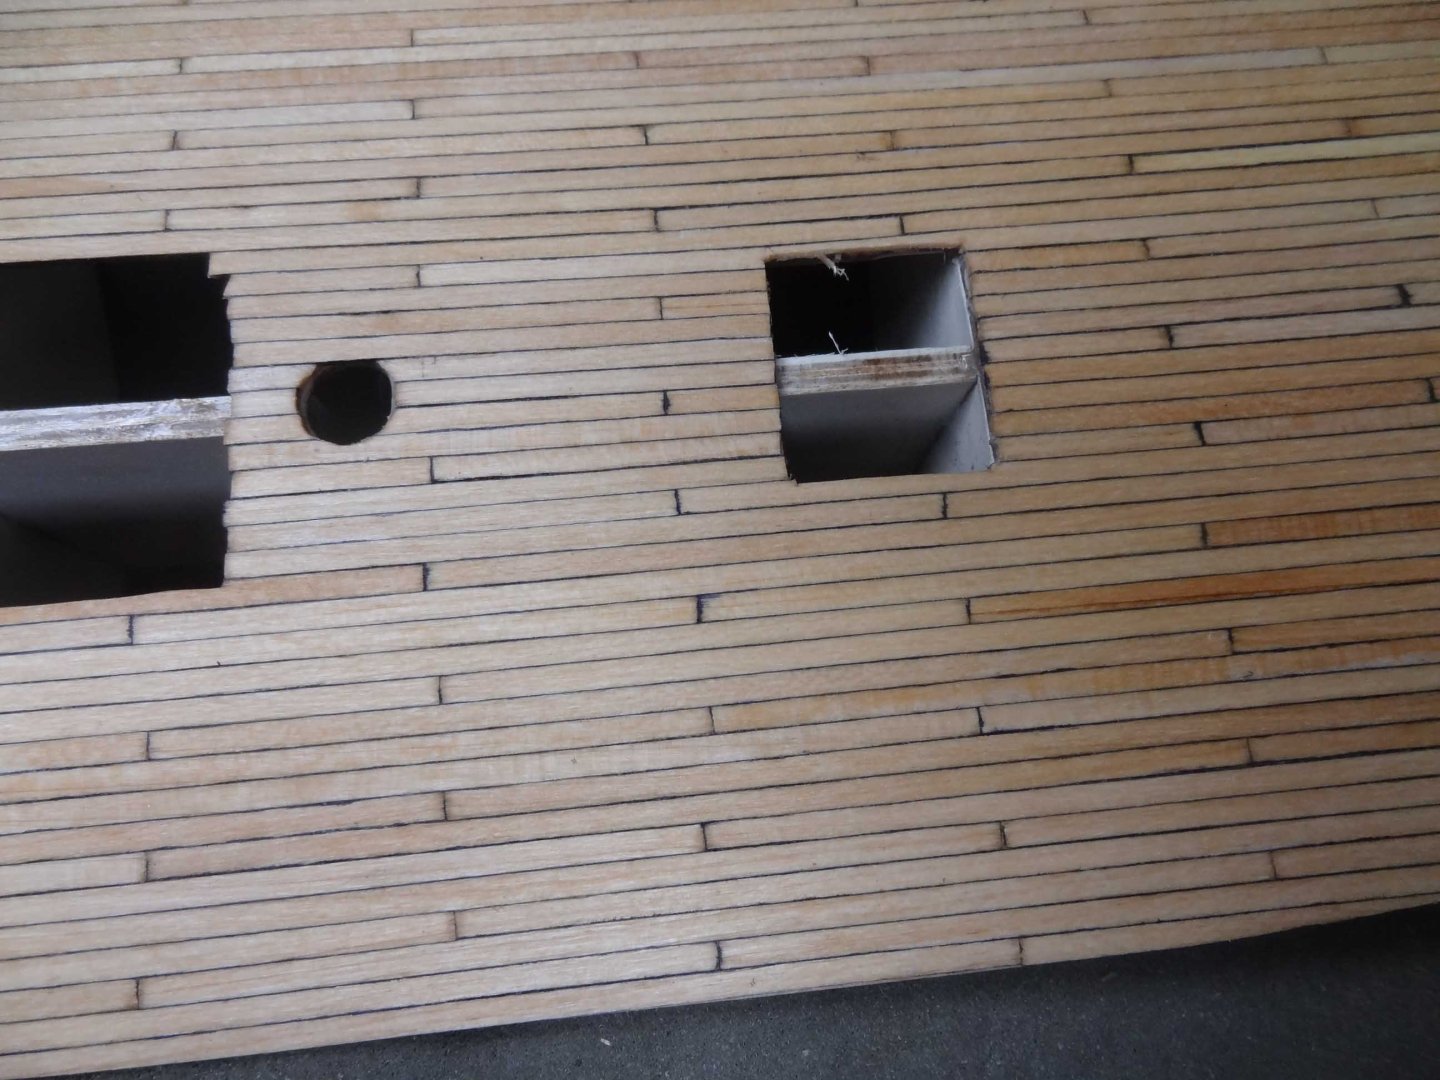
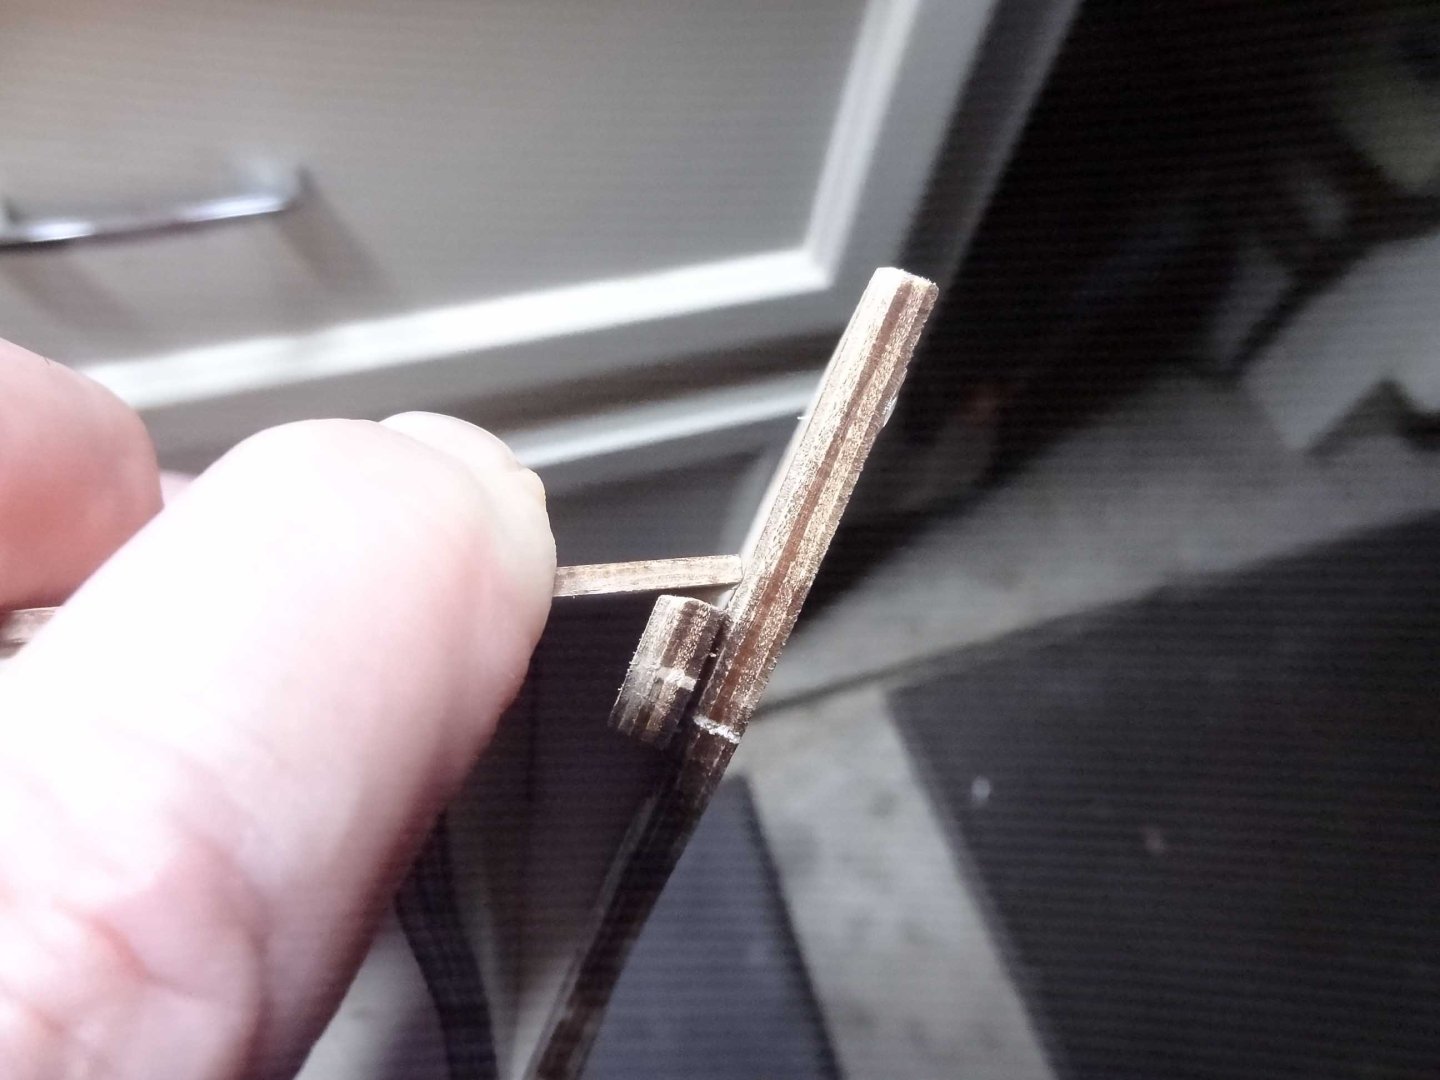
Hey everyone - my last post was way too long ago. I'll describe what has happened since, but my overall strategy was to go slow and plan the next few major steps based on installing the bulwark strips. What a disaster. Above is the bulwark strip that is supposed to be glued to the edge of the main deck and some of it beyond to under the quarterdeck. I think in my last post I showed the strip broke as I was just trying to dry fit it in place. That was just with the undressed strip. Sadly the instructions say to plank (line) the inside of the strip facing the deck before gluing down the strip. Obviously this makes the strip more rigid, and almost as expected it broke again on a dry fit. It gets worse but before that, I just gotta ask, what is with all the divots they took out of the edges of the strip? Some may reply, that's just the shaping to get the bulwark to fit around the bow. To that I reply, Nonsense. Totally unnecessary. So I begin planking the inner bulwark strip before attempting to fix it to the deck/hull. Well the strip has a bunch of cutouts for gun and oar ports. Obviously if you plank over those, you will have to cut out the planks covering the ports. I ran into some serious problems attempting to cut away the overlap. Look closely at some of the port edges and you will see how the plank strips flaked away from the ports. The morale to this piece is make sure you have applied glue all the way to each edge of every port. Hopefully that will be enough to hold a plank in place while you cut it to reopen a port. Looks like I am going to have to cut out a bunch of the plank pieces and replace. And then if things weren't bad enough - another dry fit and the strip broke again. Truly a bad design. No idea how I am going to fix the bulwark strip to the hull. A comment was made to soak the strip before gluing, and that would be the logical solution in most cases, but the strip has planks glued to it (white glue) and I think soaking would cause additional problems. Would appreciate any ideas. It goes on.....


-
Scott - bolt rope is a good idea. It adds a lot of realism, but I'm not sure how much it will help you shape the sail. I did the wire thing in both my Enterprise and Trajta builds. Links are in my signature. Honestly it just depends on what you want your sails to portray.
- 34 replies
-
- 2
-

-
- muscongus bay lobster smack
- Model Shipways
- (and 1 more)
-
Scott if you have to make another set of sails (or for future reference) you might consider adding a thin piece of wire inside the hems. This can give you an easy way to add shape to your sails. It's easy when you make your own sails, but I have also done it with kit sails.
- 34 replies
-
- 2
-
-
- muscongus bay lobster smack
- Model Shipways
- (and 1 more)
-
I have inserted thin wire into the hems of sail. This allows for a lot of shaping that you can't easily do otherwise. Just be sure the wire is non-corrosive.
-
Hey Mike - no I did not soak first as this was just a dry (no pun intended) run. I was just going frame by frame, holding the bulwark on one frame and curving it up to the next frame. Shouldn't have been much stress. To make things worse, I am supposed to plank the inside of the bulwark before installing. This has got to make the bulwark even less flexible. I may look into seeing if I can mount the bulwark first, then plank.
-
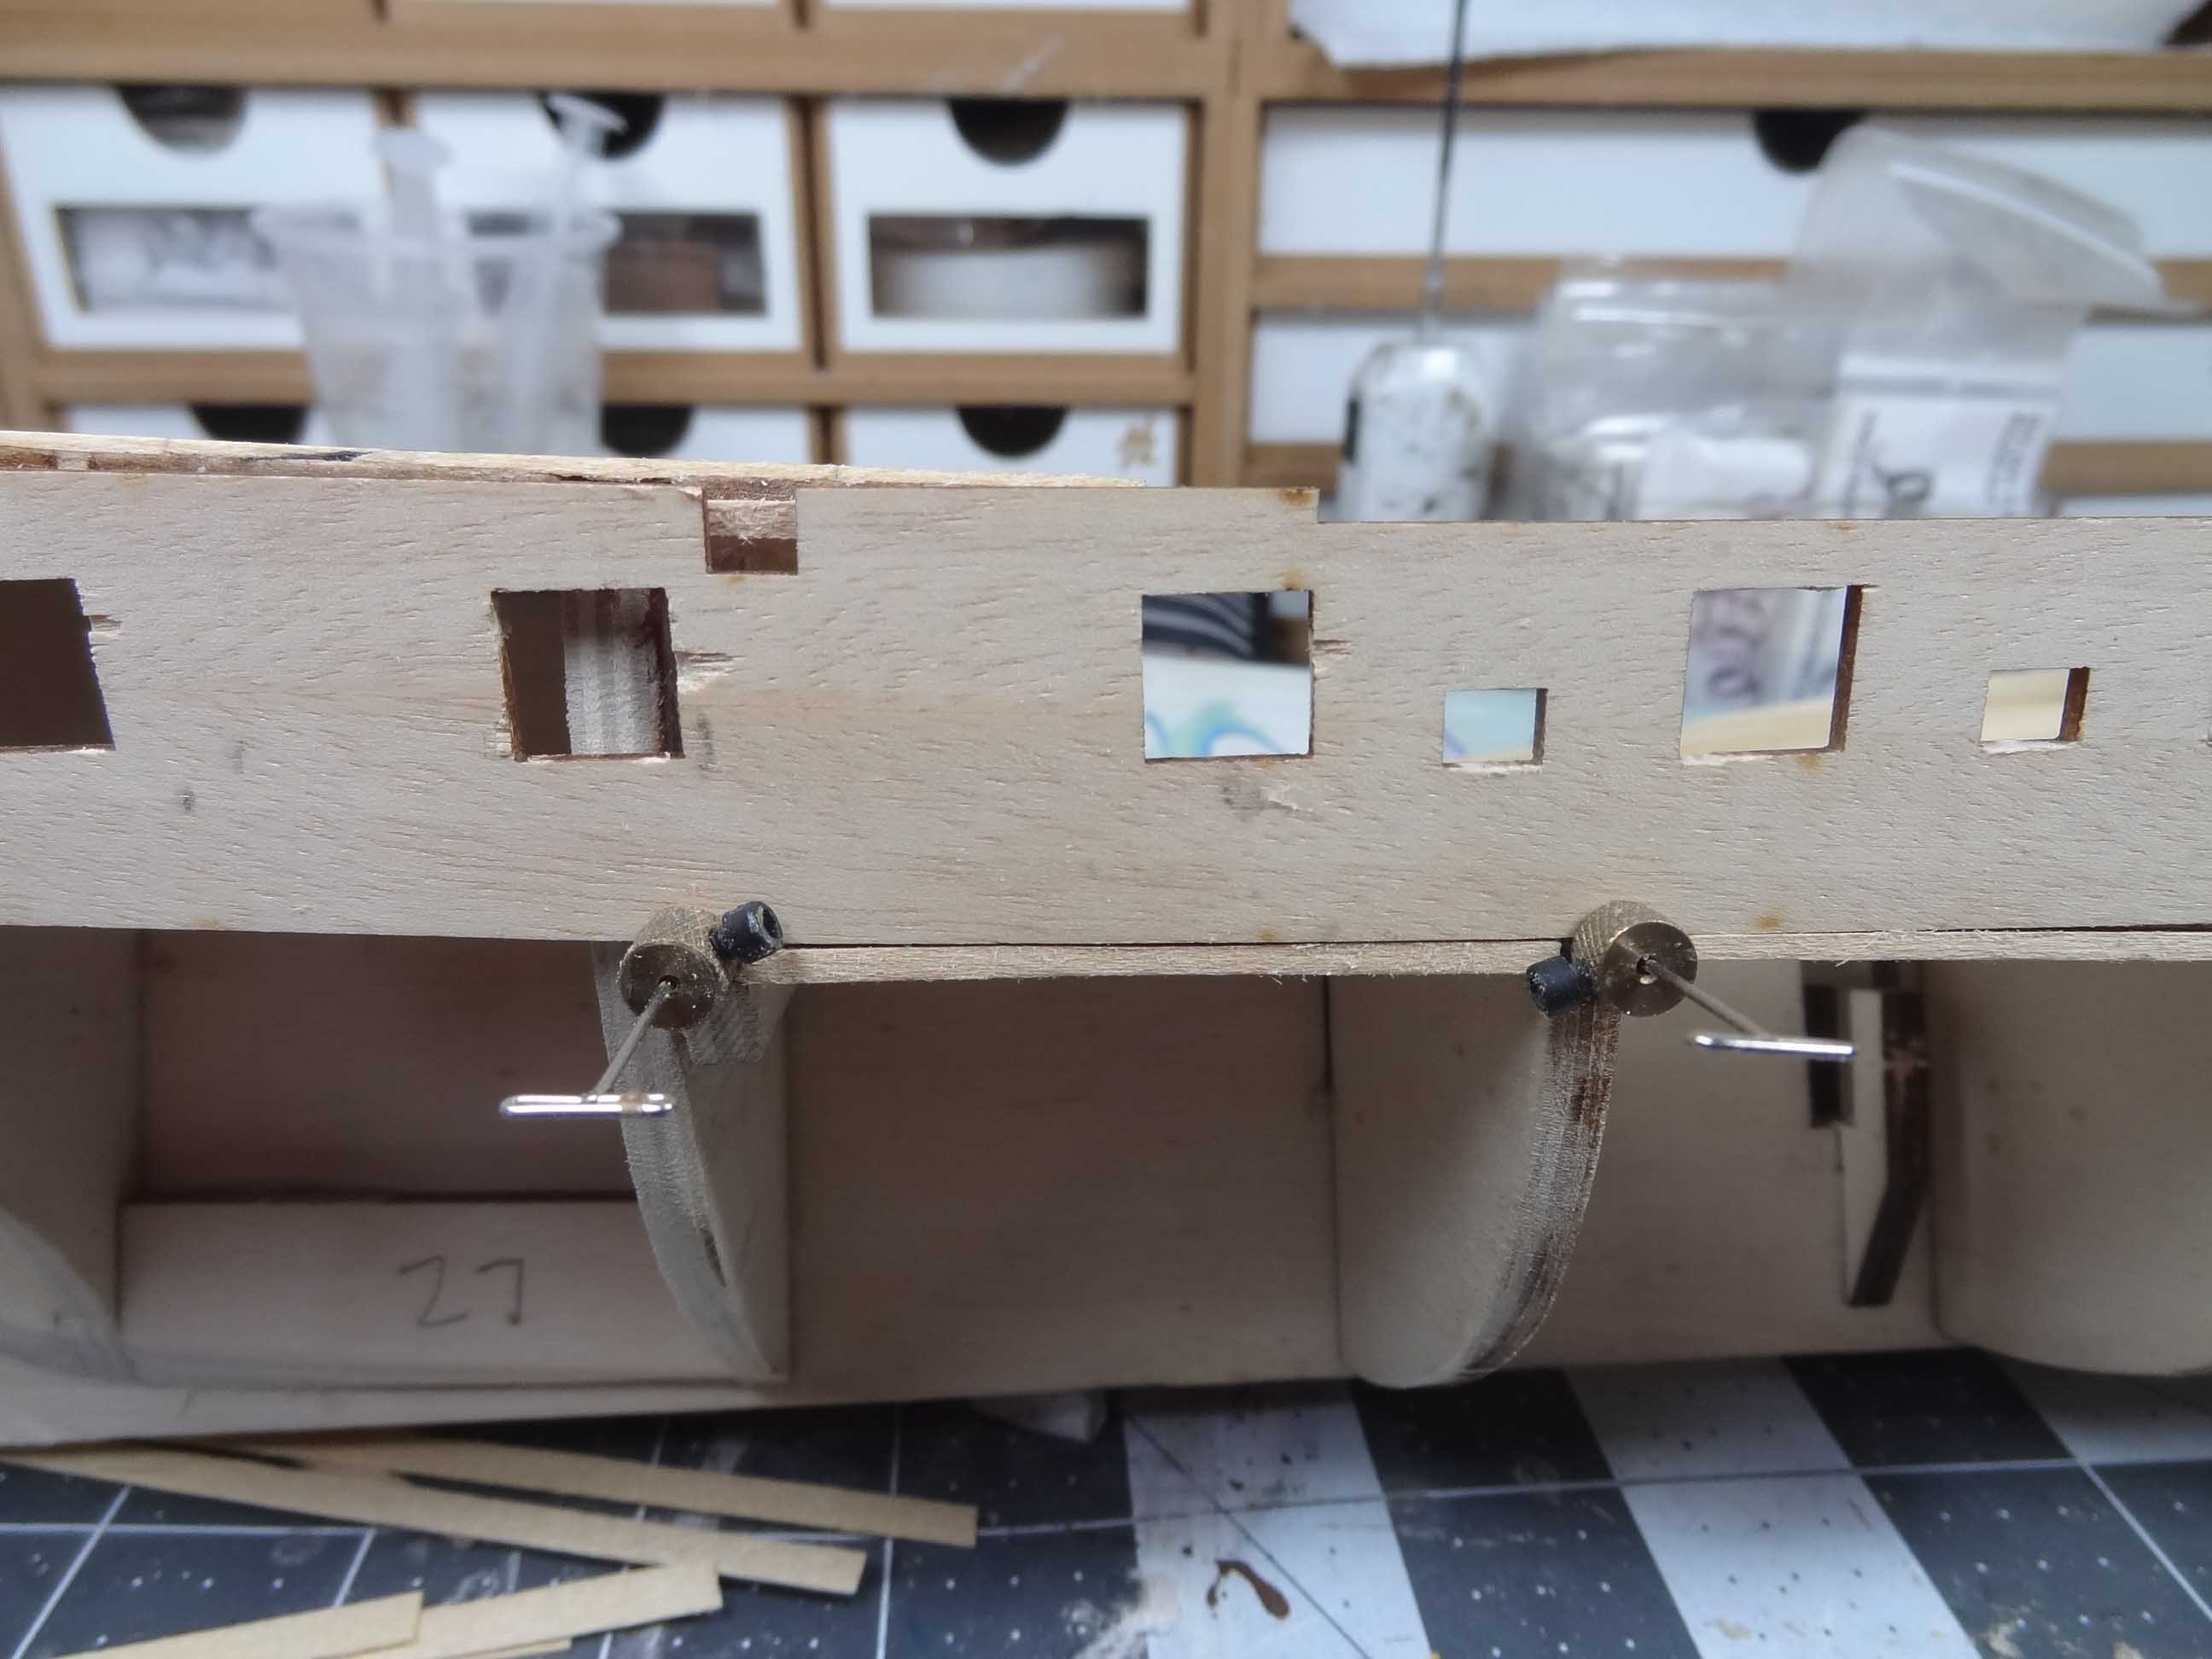
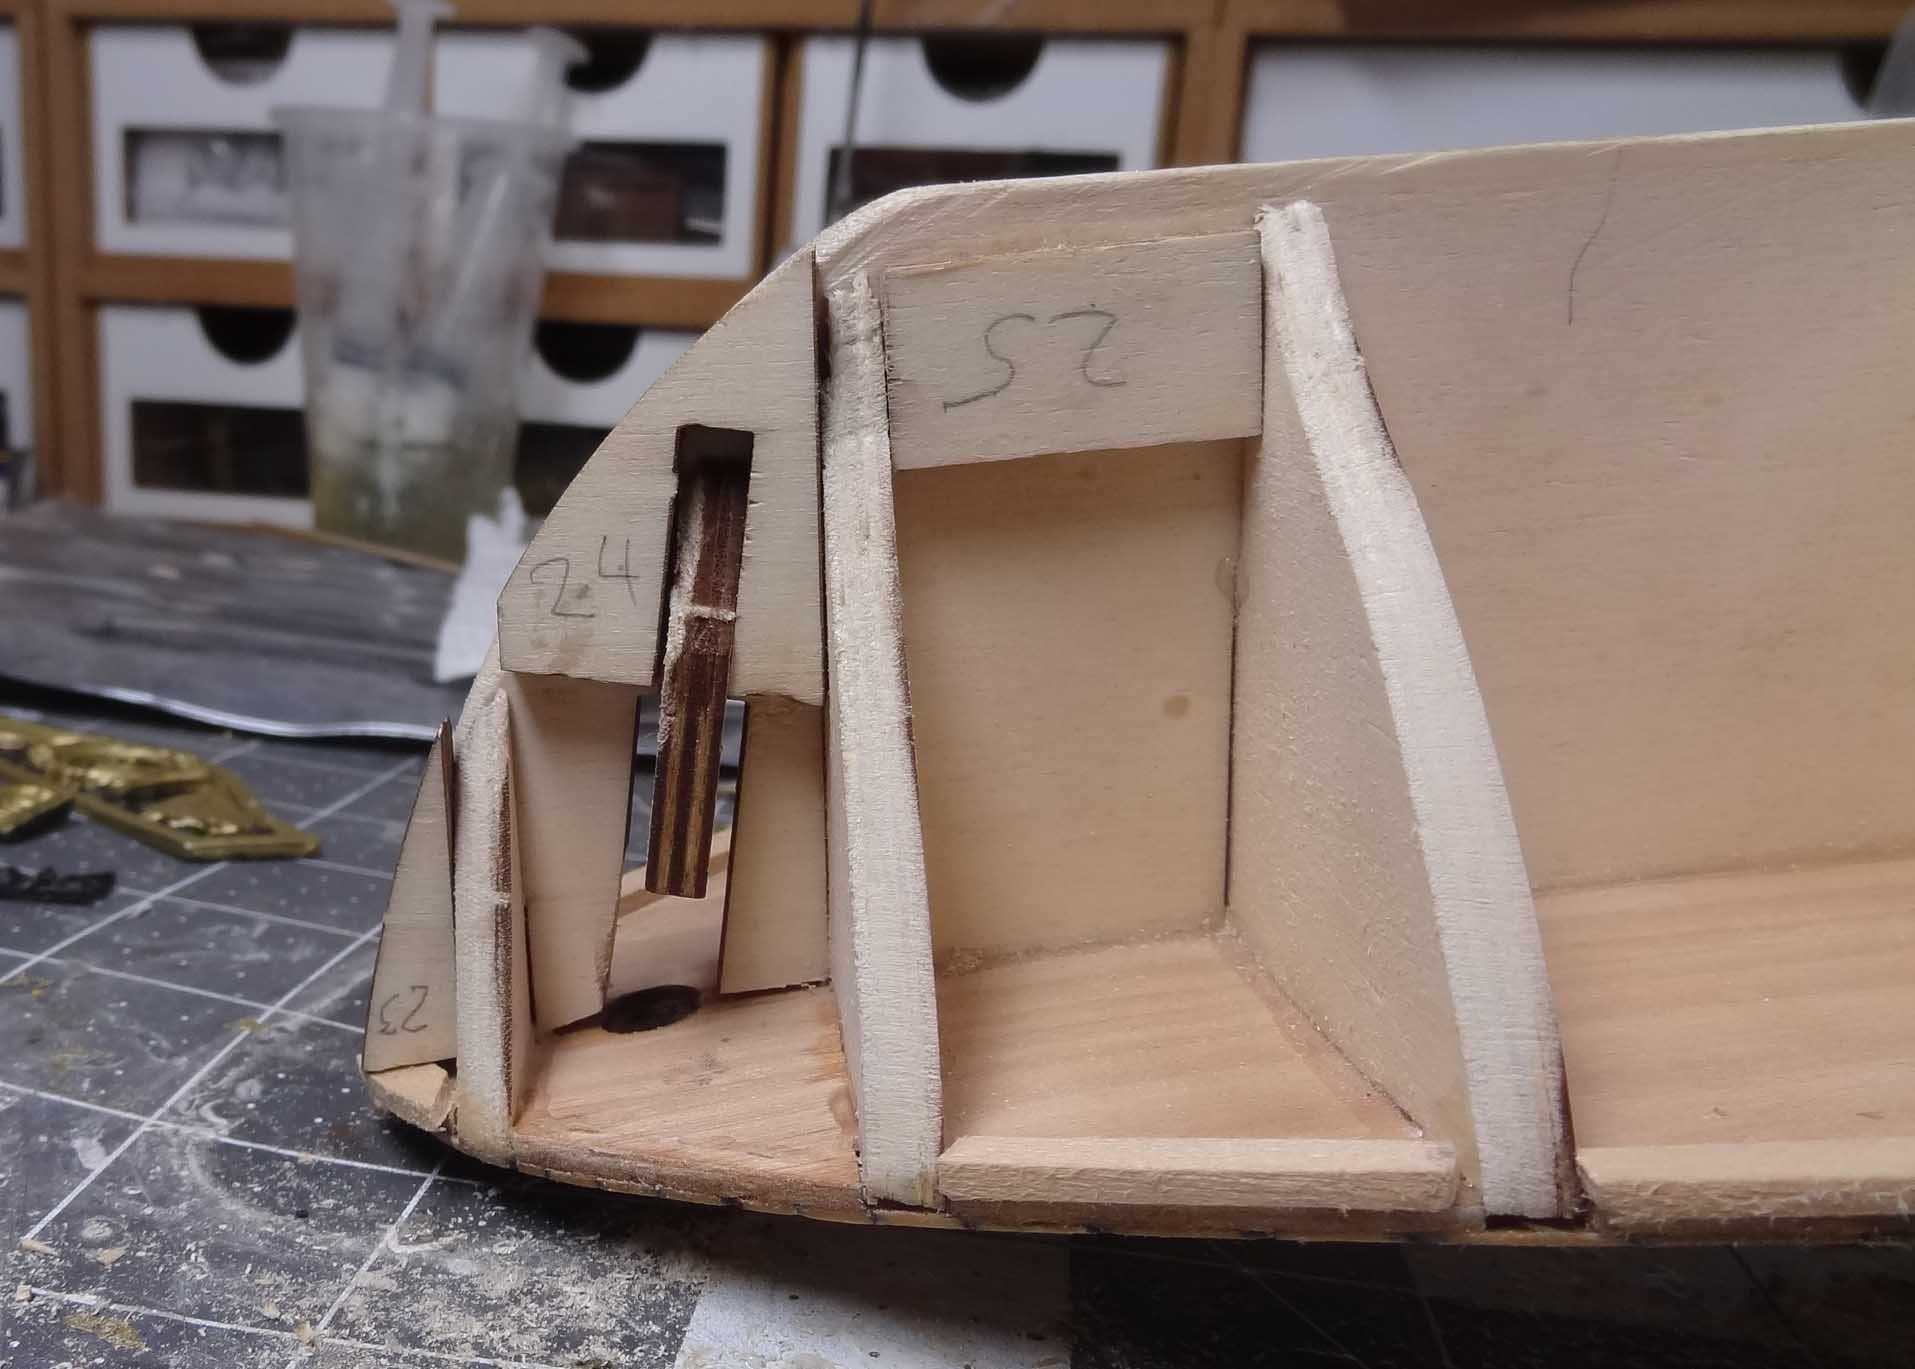
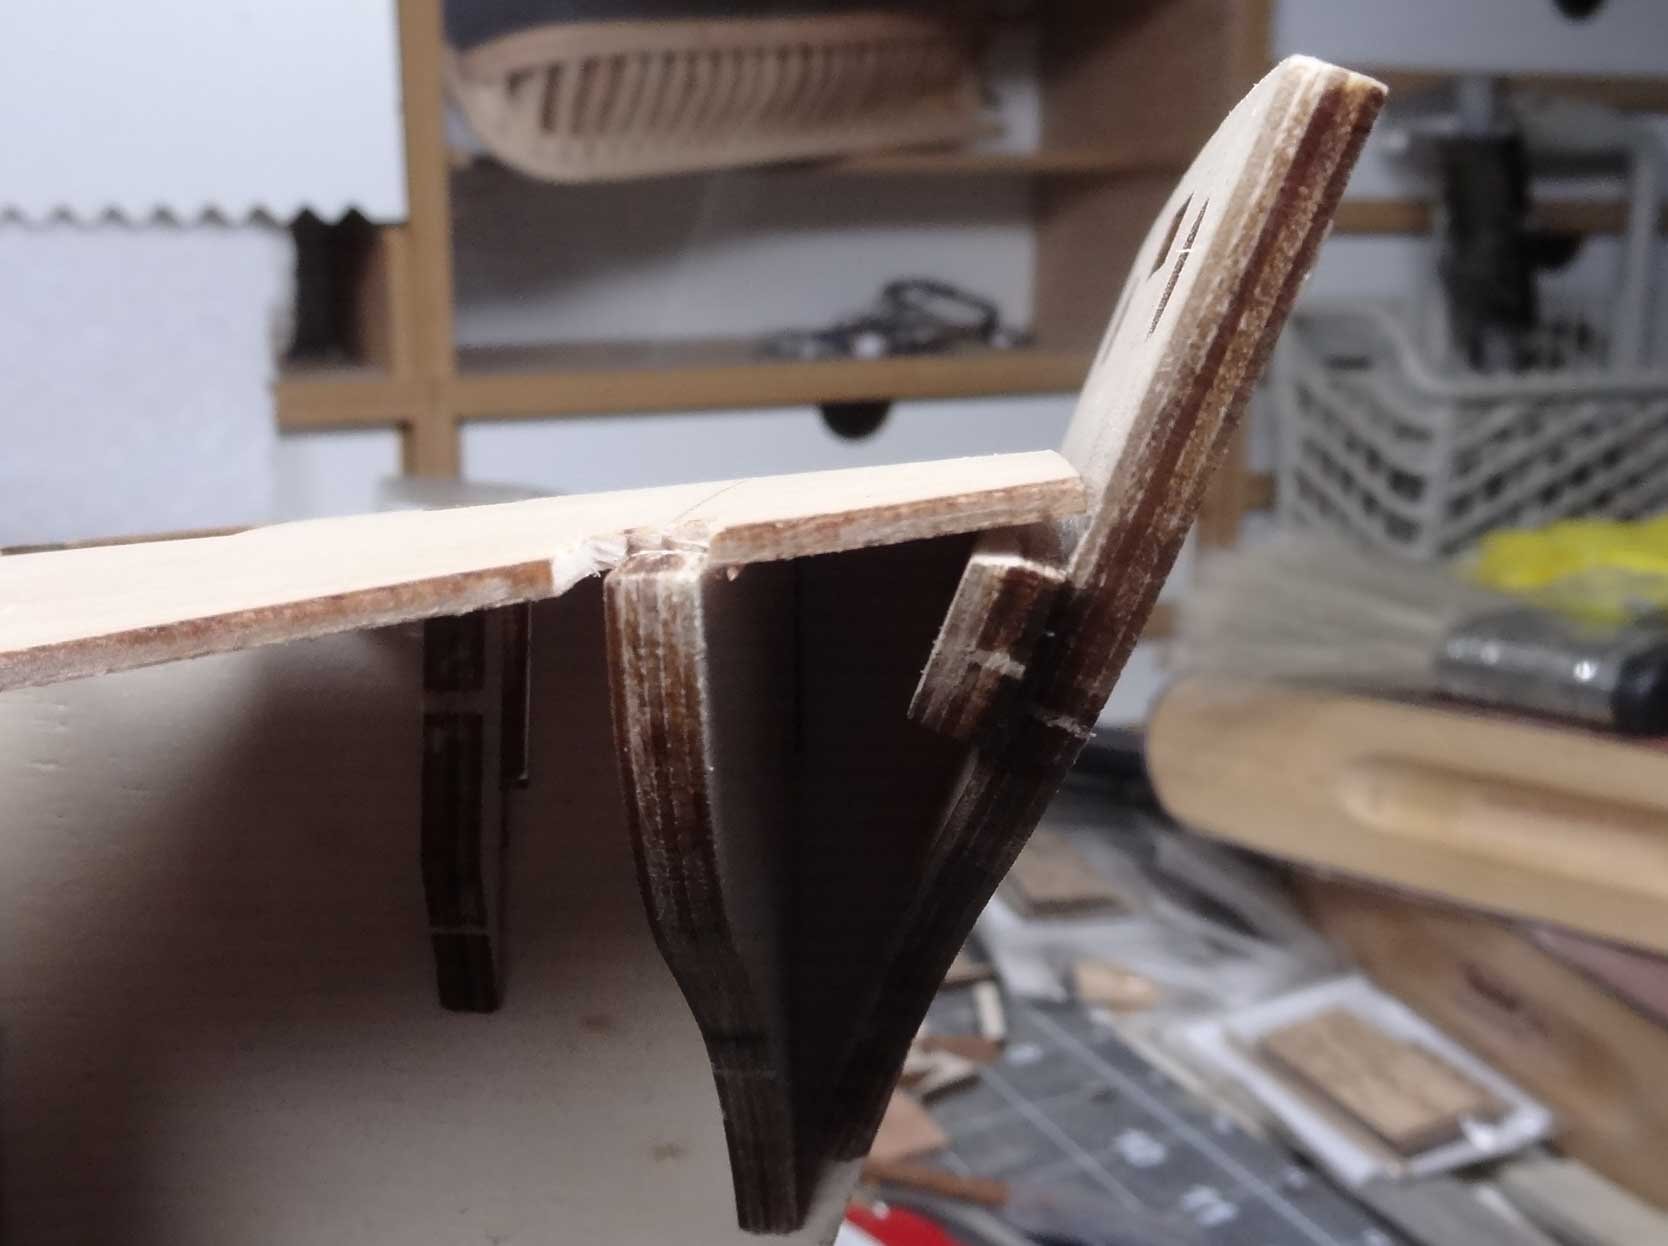
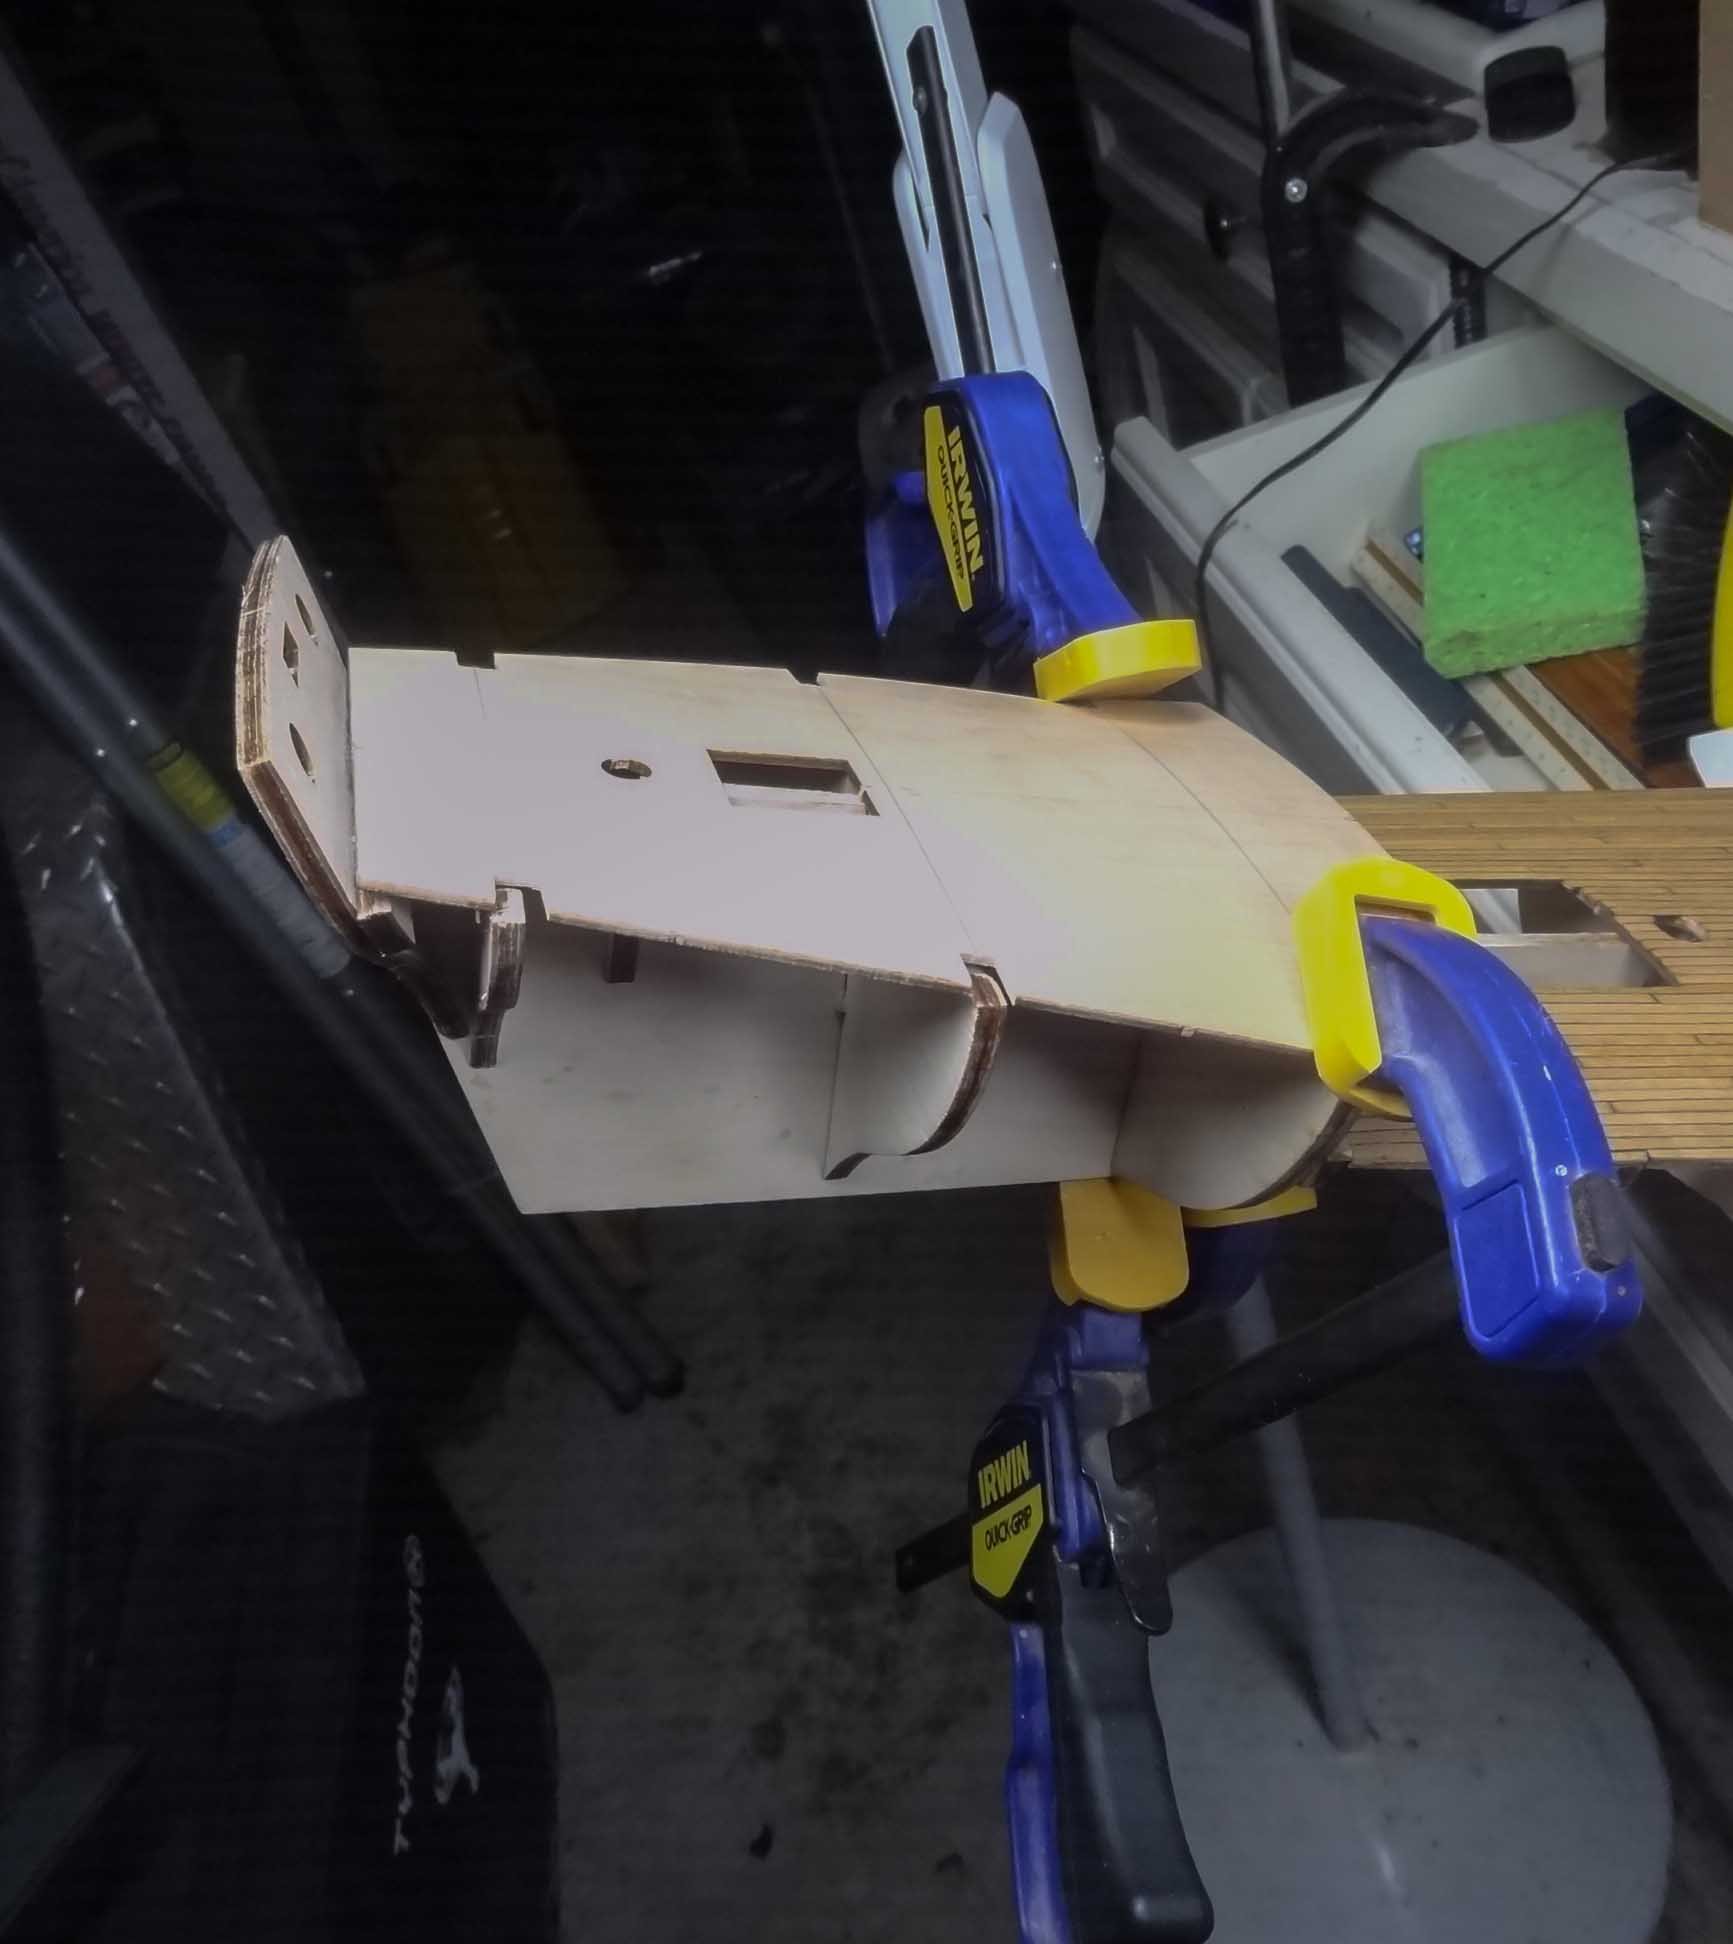
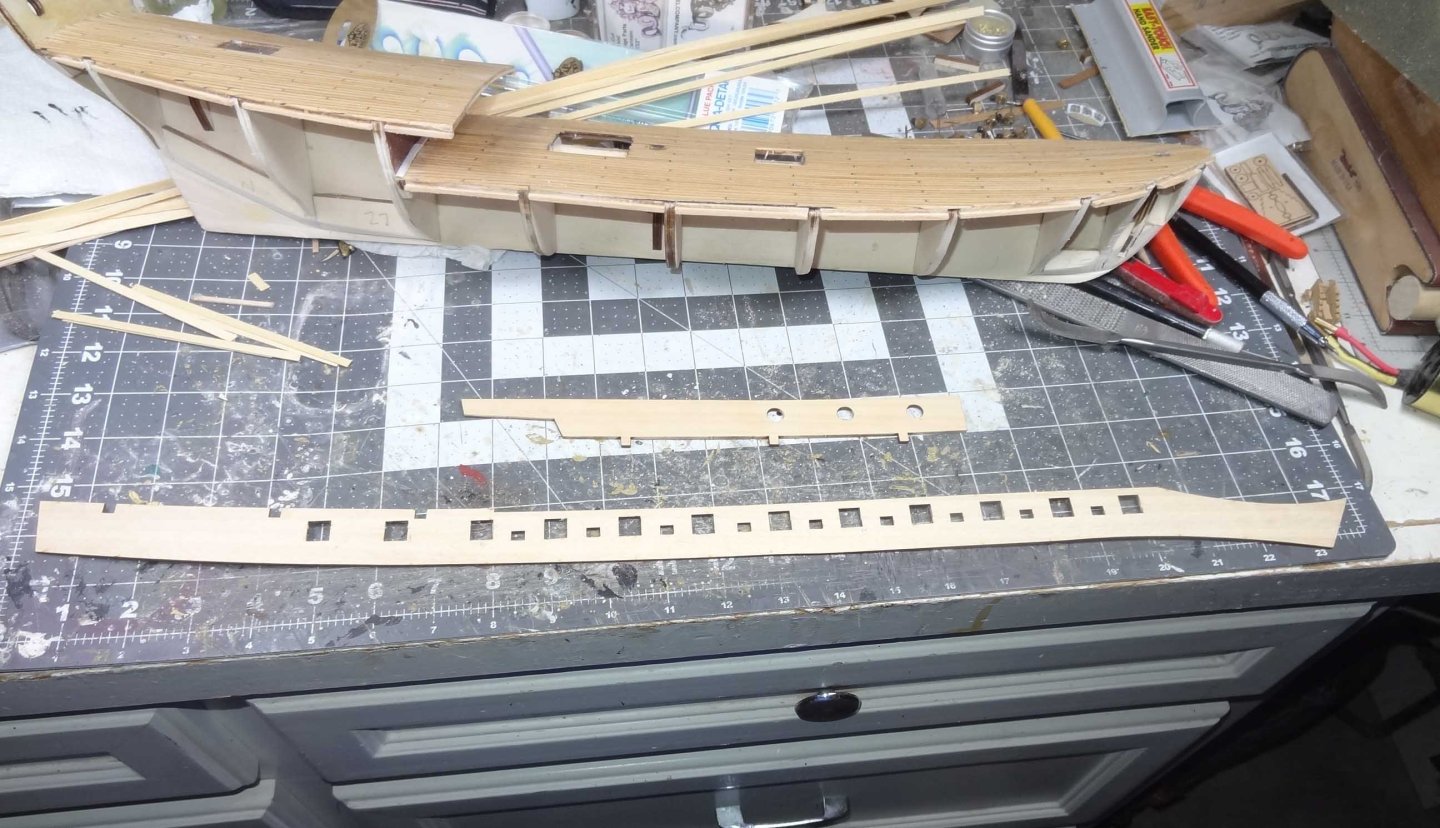
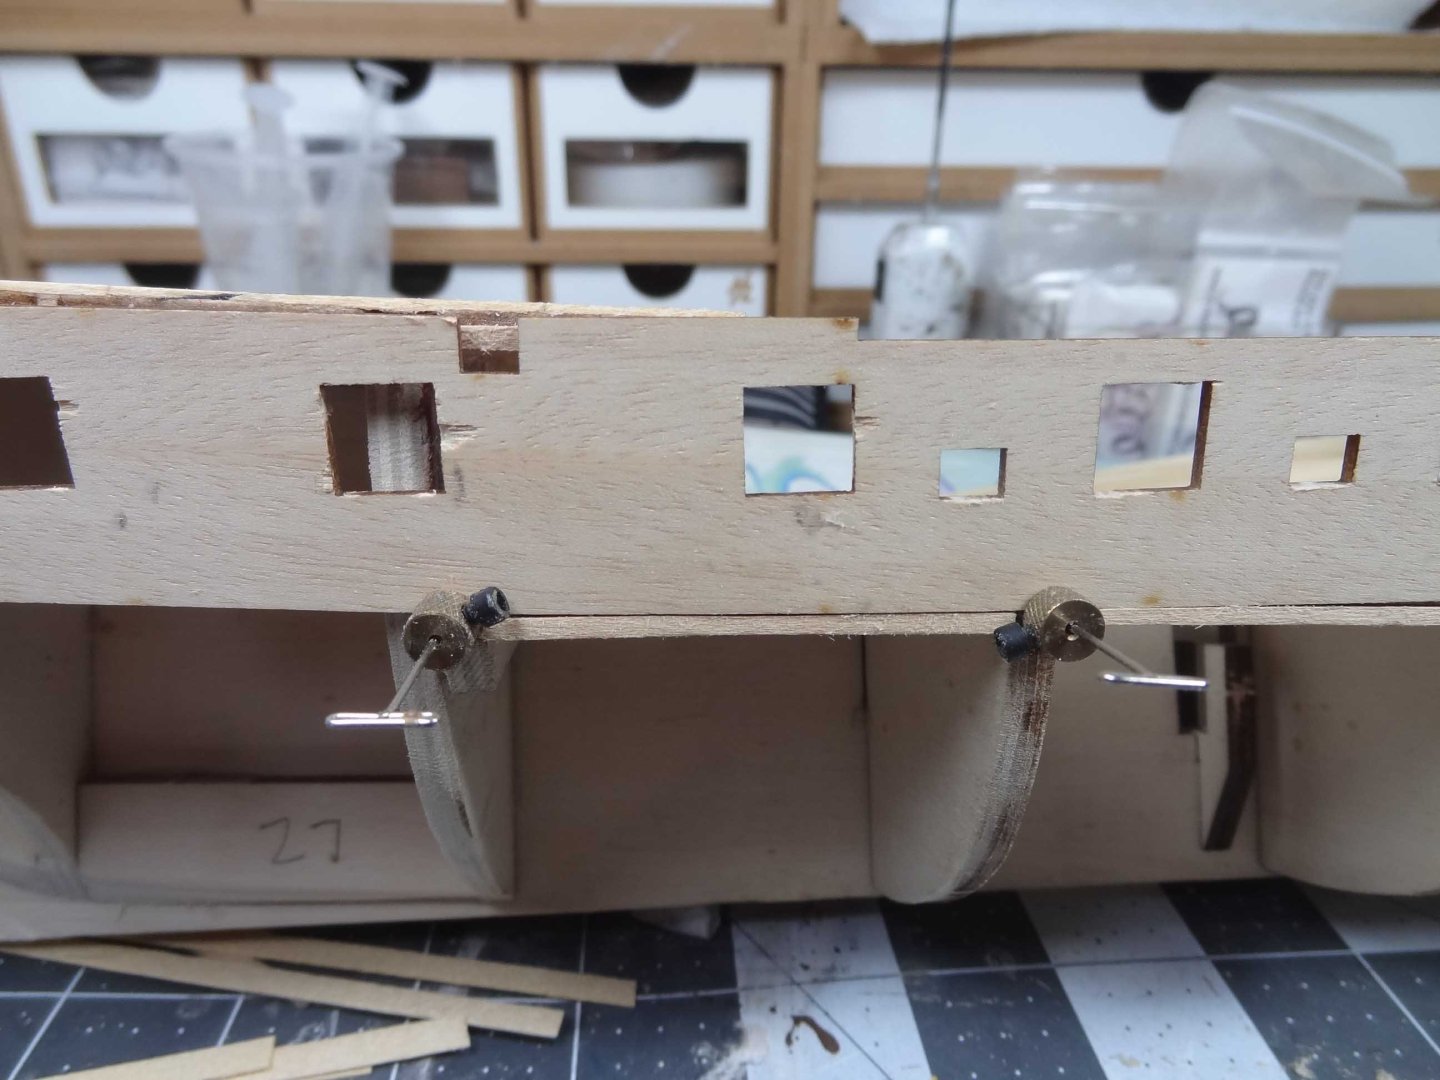
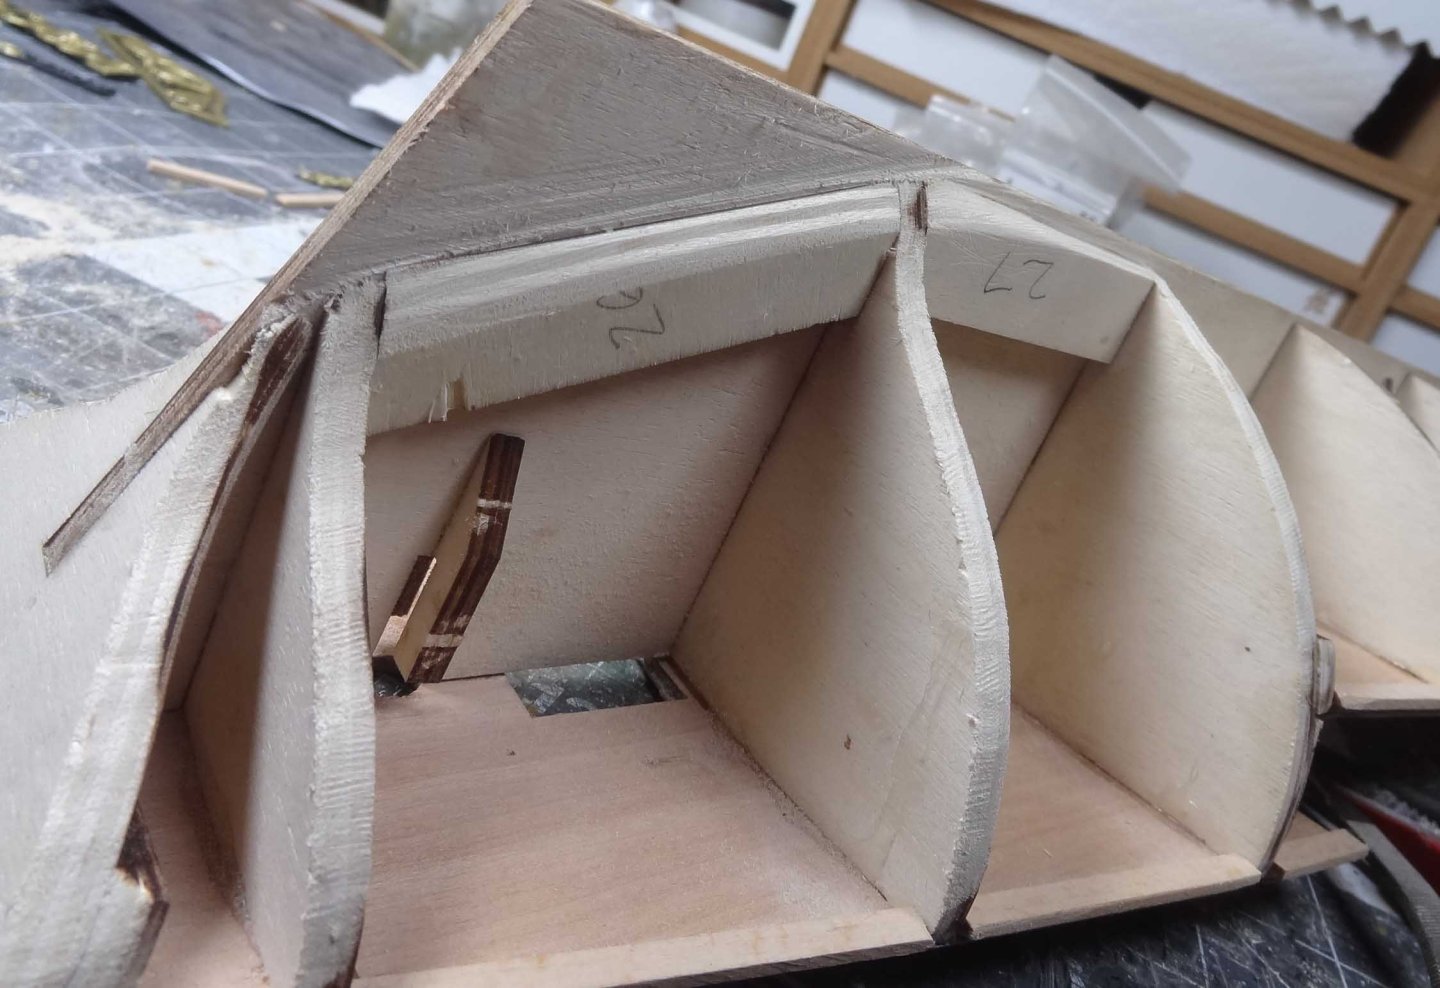
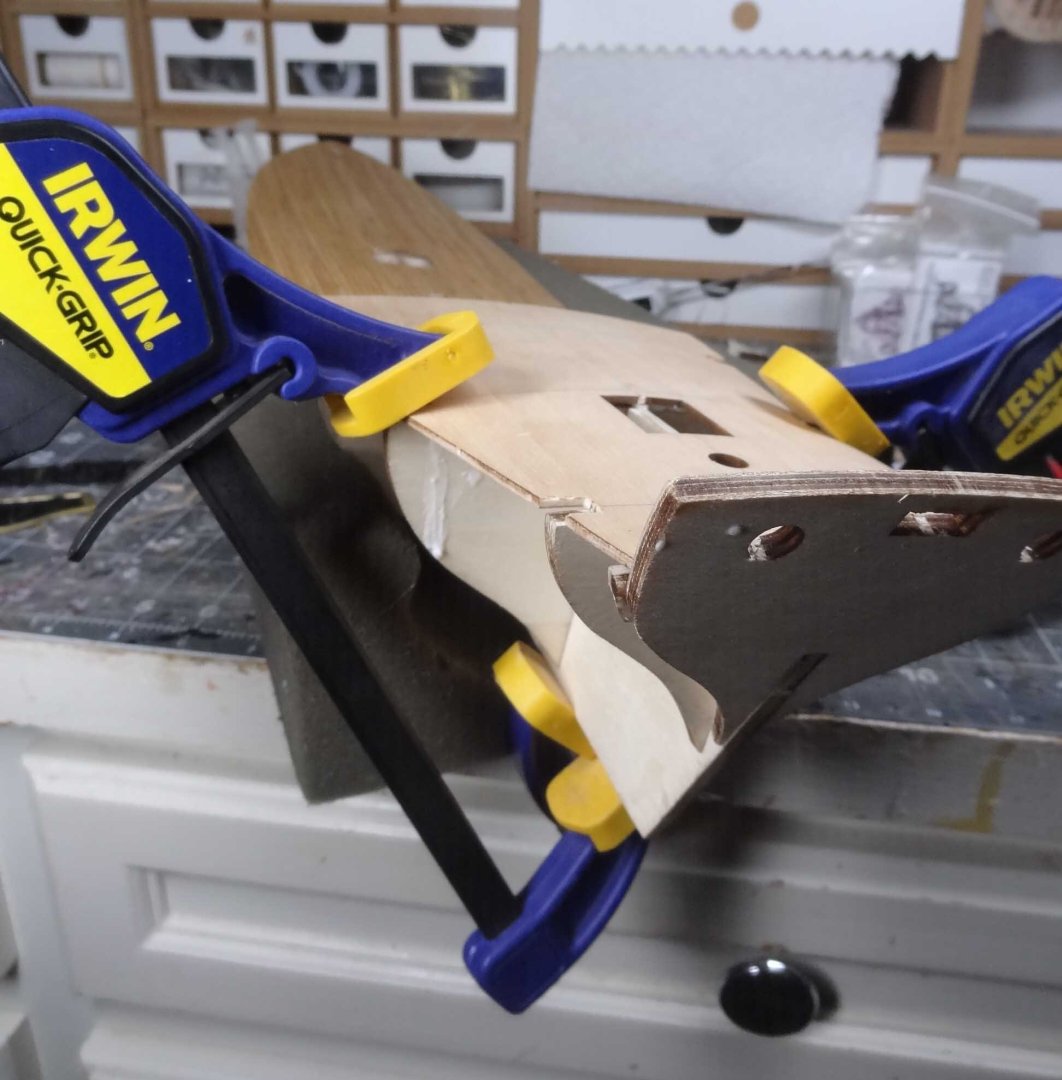
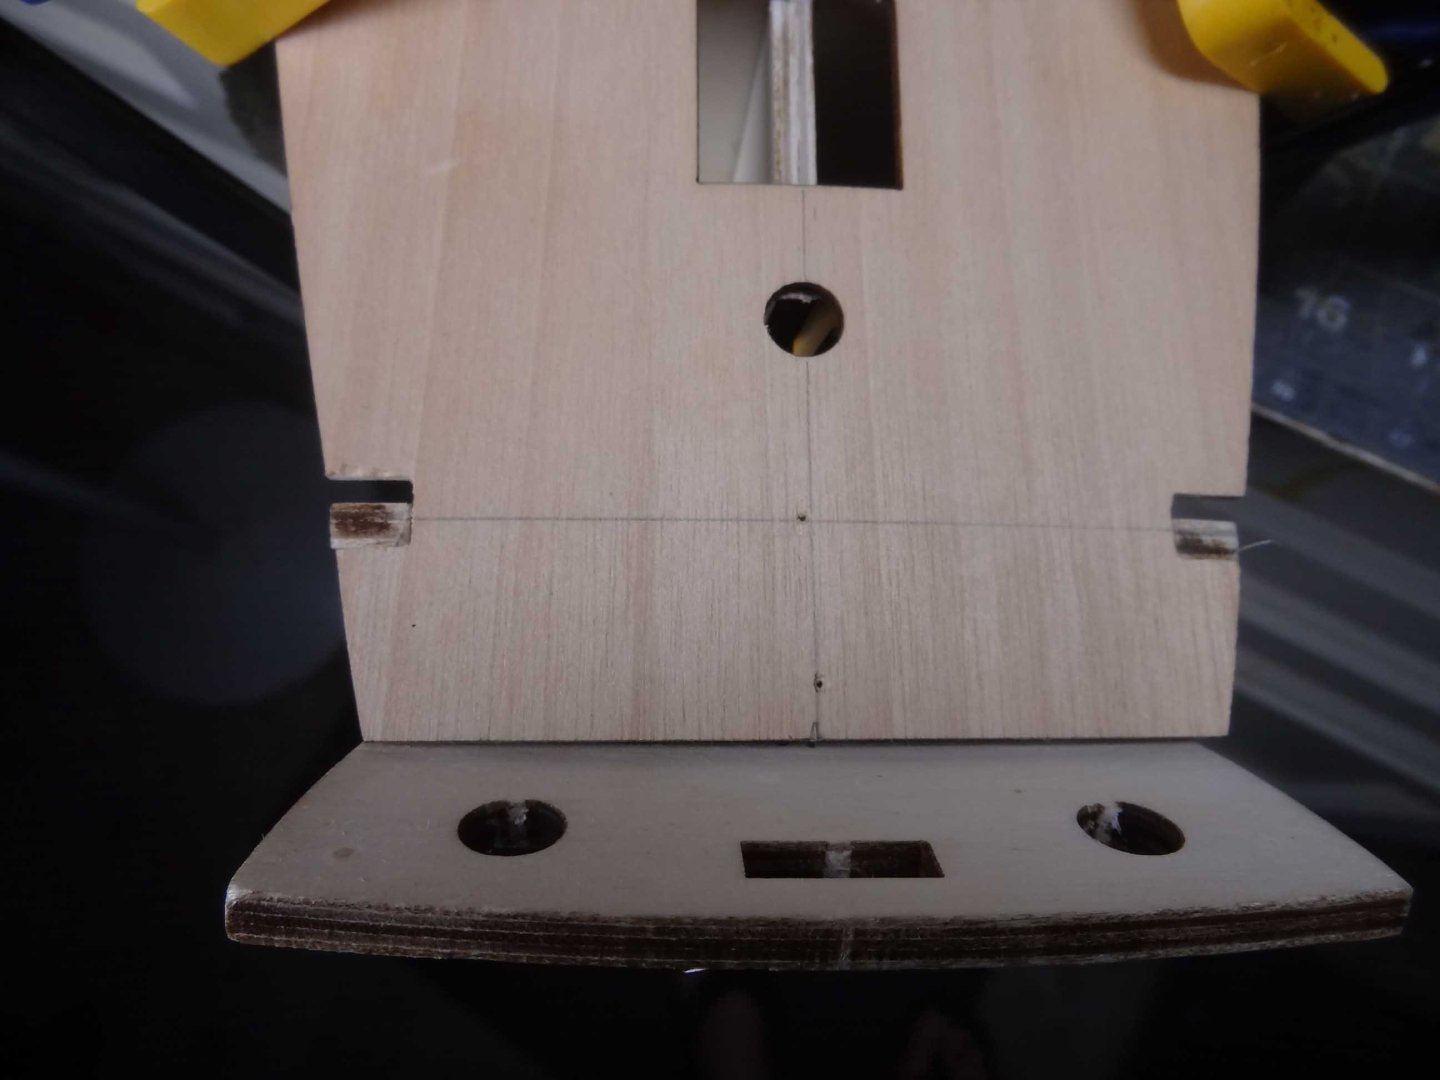
I've run into the first real screwup in the instructions. While I am still doing some final fairing on the hull frames, I have started to look at the bulwark installation which is the next step according to the instructions. The bulwarks are thin strips of plywood that run the length of the hull. IMO this design really sucks. Would much have preferred planking some timberheads to make the bulwarks. As I mentioned in my previous post, I am supposed to glue some support strips on the underside of both the foredeck and the quarterdeck. The strips should extend a small amount beyond the edge of the deck so that the bulwark strip is supported. Tried dry fitting the bulwark strip. This shot shows the lower bulwark strip sitting on the foredeck support strips. The fit is OK but each of those support strips need to be leveled out with the others. Worse, If you notice the notch in the upper edge of the bulwark, you can see the support strip that is attached to the quarterdeck. Ain't no way the aft end of the strip is going to fit to the quarterdeck, and no way the quarterdeck bulwark strip is going to fit into the lower strip. What needs to happen? The "support" strips on the quarterdeck are NOT there to support the quarterdeck bulwark. They should be sanded down to the edge of the quarterdeck which will provide a bigger surface for gluing the upper edge of the foredeck bulwark to the edge of the quarterdeck. I hope that made sense. It may get clearer as I actually glue the foredeck bulwark and show some pix. Just be aware that the instructions went totally south on this one. Attempting to dry fit the foredeck bulwark, the usual happens. This bulwark thing is going to be a nightmare....
-
Post all you want dude. It can be helpful more than you know.
- 90 replies
-
- 2
-

-
-
- Friendship Sloop
- bluejacket shipcrafters
- (and 1 more)
-
Hey Gary - a little late I know. If you haven't figured it out the triangular piece is usually called a stealer. Based on other builds I've done the one supplied is pretty big. Usually you plank with regular sticks and make a few stealers to fill in gaps at the stern where you just can't bend a plank. Often times the hull surface width at the bow is less than at the stern. For instance say you could plank your bow with 20 sticks. If you ran those sticks all the way to the stern you might see some gaps. This is where you would add one or more stealers. Also the garboard you mentioned is typically the first plank laid next to the keel. Often times you are called on to make a rabbet in the keel and the long edge of the garboard fits into it. The rabbet makes for a solid place to glue the garboard. There's a number of posts here regarding those topics. Maybe the big stealer is used for this kind of boat or maybe it was just a decision by the kit designer. Thanks for keeping your log going. I'll be following along.
- 90 replies
-
- 2
-
-
-
- Friendship Sloop
- bluejacket shipcrafters
- (and 1 more)
-
Wow Scott -I can't imagine trying to bend that sheet around the frames. You did a great job all things considered.
- 34 replies
-
- 2
-
-
- muscongus bay lobster smack
- Model Shipways
- (and 1 more)
-
Hey everyone - it's been a while since I posted. I have been mulling over several ideas and issues and wanted to get them resolved before moving forward. The big one was whether to make filler blocks for the bow and stern frames. The kit doesn't ask for them and the hull does not look like it will be hard to plank - the bow is pretty sharp. I was just considering making blocks because I have never used them in a build. The kit does call for some precut plywood pieces in key areas to provide a bit more gluing surface. Of course they will require fairing along with the frames. Painting this build has also been a consideration. I really wanted to break out the airbrush and do some painting as I haven't used that in 5-6 years. Of course that requires some thinking regarding colors and when to do the painting. A lot of times I find it is much easier to paint parts before they are installed. Parts are easier to reach and you don't have to do a lot of masking. But the more I looked at the images on the box cover, I started realizing this is a darned nice looking build just using the natural wood combinations. There are a few places that could be painted but I've decided to go with the box image colors. So more dust collecting on the airbrush equipment. In thinking about all this I have had to really look ahead and see what all is required to complete planking. There's a few odd things about this hull design. There is no rabbet or garboard. Planks are laid all the way to the keel. Then there are some strips that are glued to the keel. The bulkheads are just a long plywood strip that run from the bow to the quarterdeck and another strip that is glued to the edge quarterdeck. The instructions call for gluing strips to the underside of the deck to act as a support. It's a little odd, I would prefer to build a bulkhead with planks. It is what it is. Over all I'm still pretty happy the the instructions. The English instructions are good but occasionally a little light on detail. However for every paragraph of instructions there is a matching photograph so so far I have been able to figure things out. The fairing has taken quite a bit of elbow grease. I was considering breaking out the Dremel but have not done so yet. Talk to ya soon......


-
Buying Filler Blocks
mikiek replied to mikiek's topic in Building, Framing, Planking and plating a ships hull and deck
I appreciate your comments and glad it worked for you, but I really didn't get any real benefit from that article. I'm not about to get into that level of detail just make a few filler blocks. Looks like I'm back to a plank by plank fastened to frame by frame install. -
Buying Filler Blocks
mikiek replied to mikiek's topic in Building, Framing, Planking and plating a ships hull and deck
Anyone able to provide links to posts that have described the build filler block process? I have seen more than a few and there appears to be no consensus on how it should go. -
Man I am really struggling with trying the filler blocks. The kit offers a few minor "supports" - one at the bow and two in the deadwood at the stern. I'm still trying to visualize what these pieces might offer. The instructions are very vague. A few lines of how to install them but no details as to why. Obviously, if I go the filler block route, these pieces go in the trash. But honestly, I am disappointed in what I have found on MSW regarding making/shaping filler blocks. Some posts claim making a single block out of a big chunk of wood, others say use scrap and glue together some sort of a block, others are even saying to scavenge home construction sites to retrieve the butt ends of 2x4s (pine) and use that to make fillers. Anybody reading this have any ideas, suggestions or links that help with how to make fillers?
-
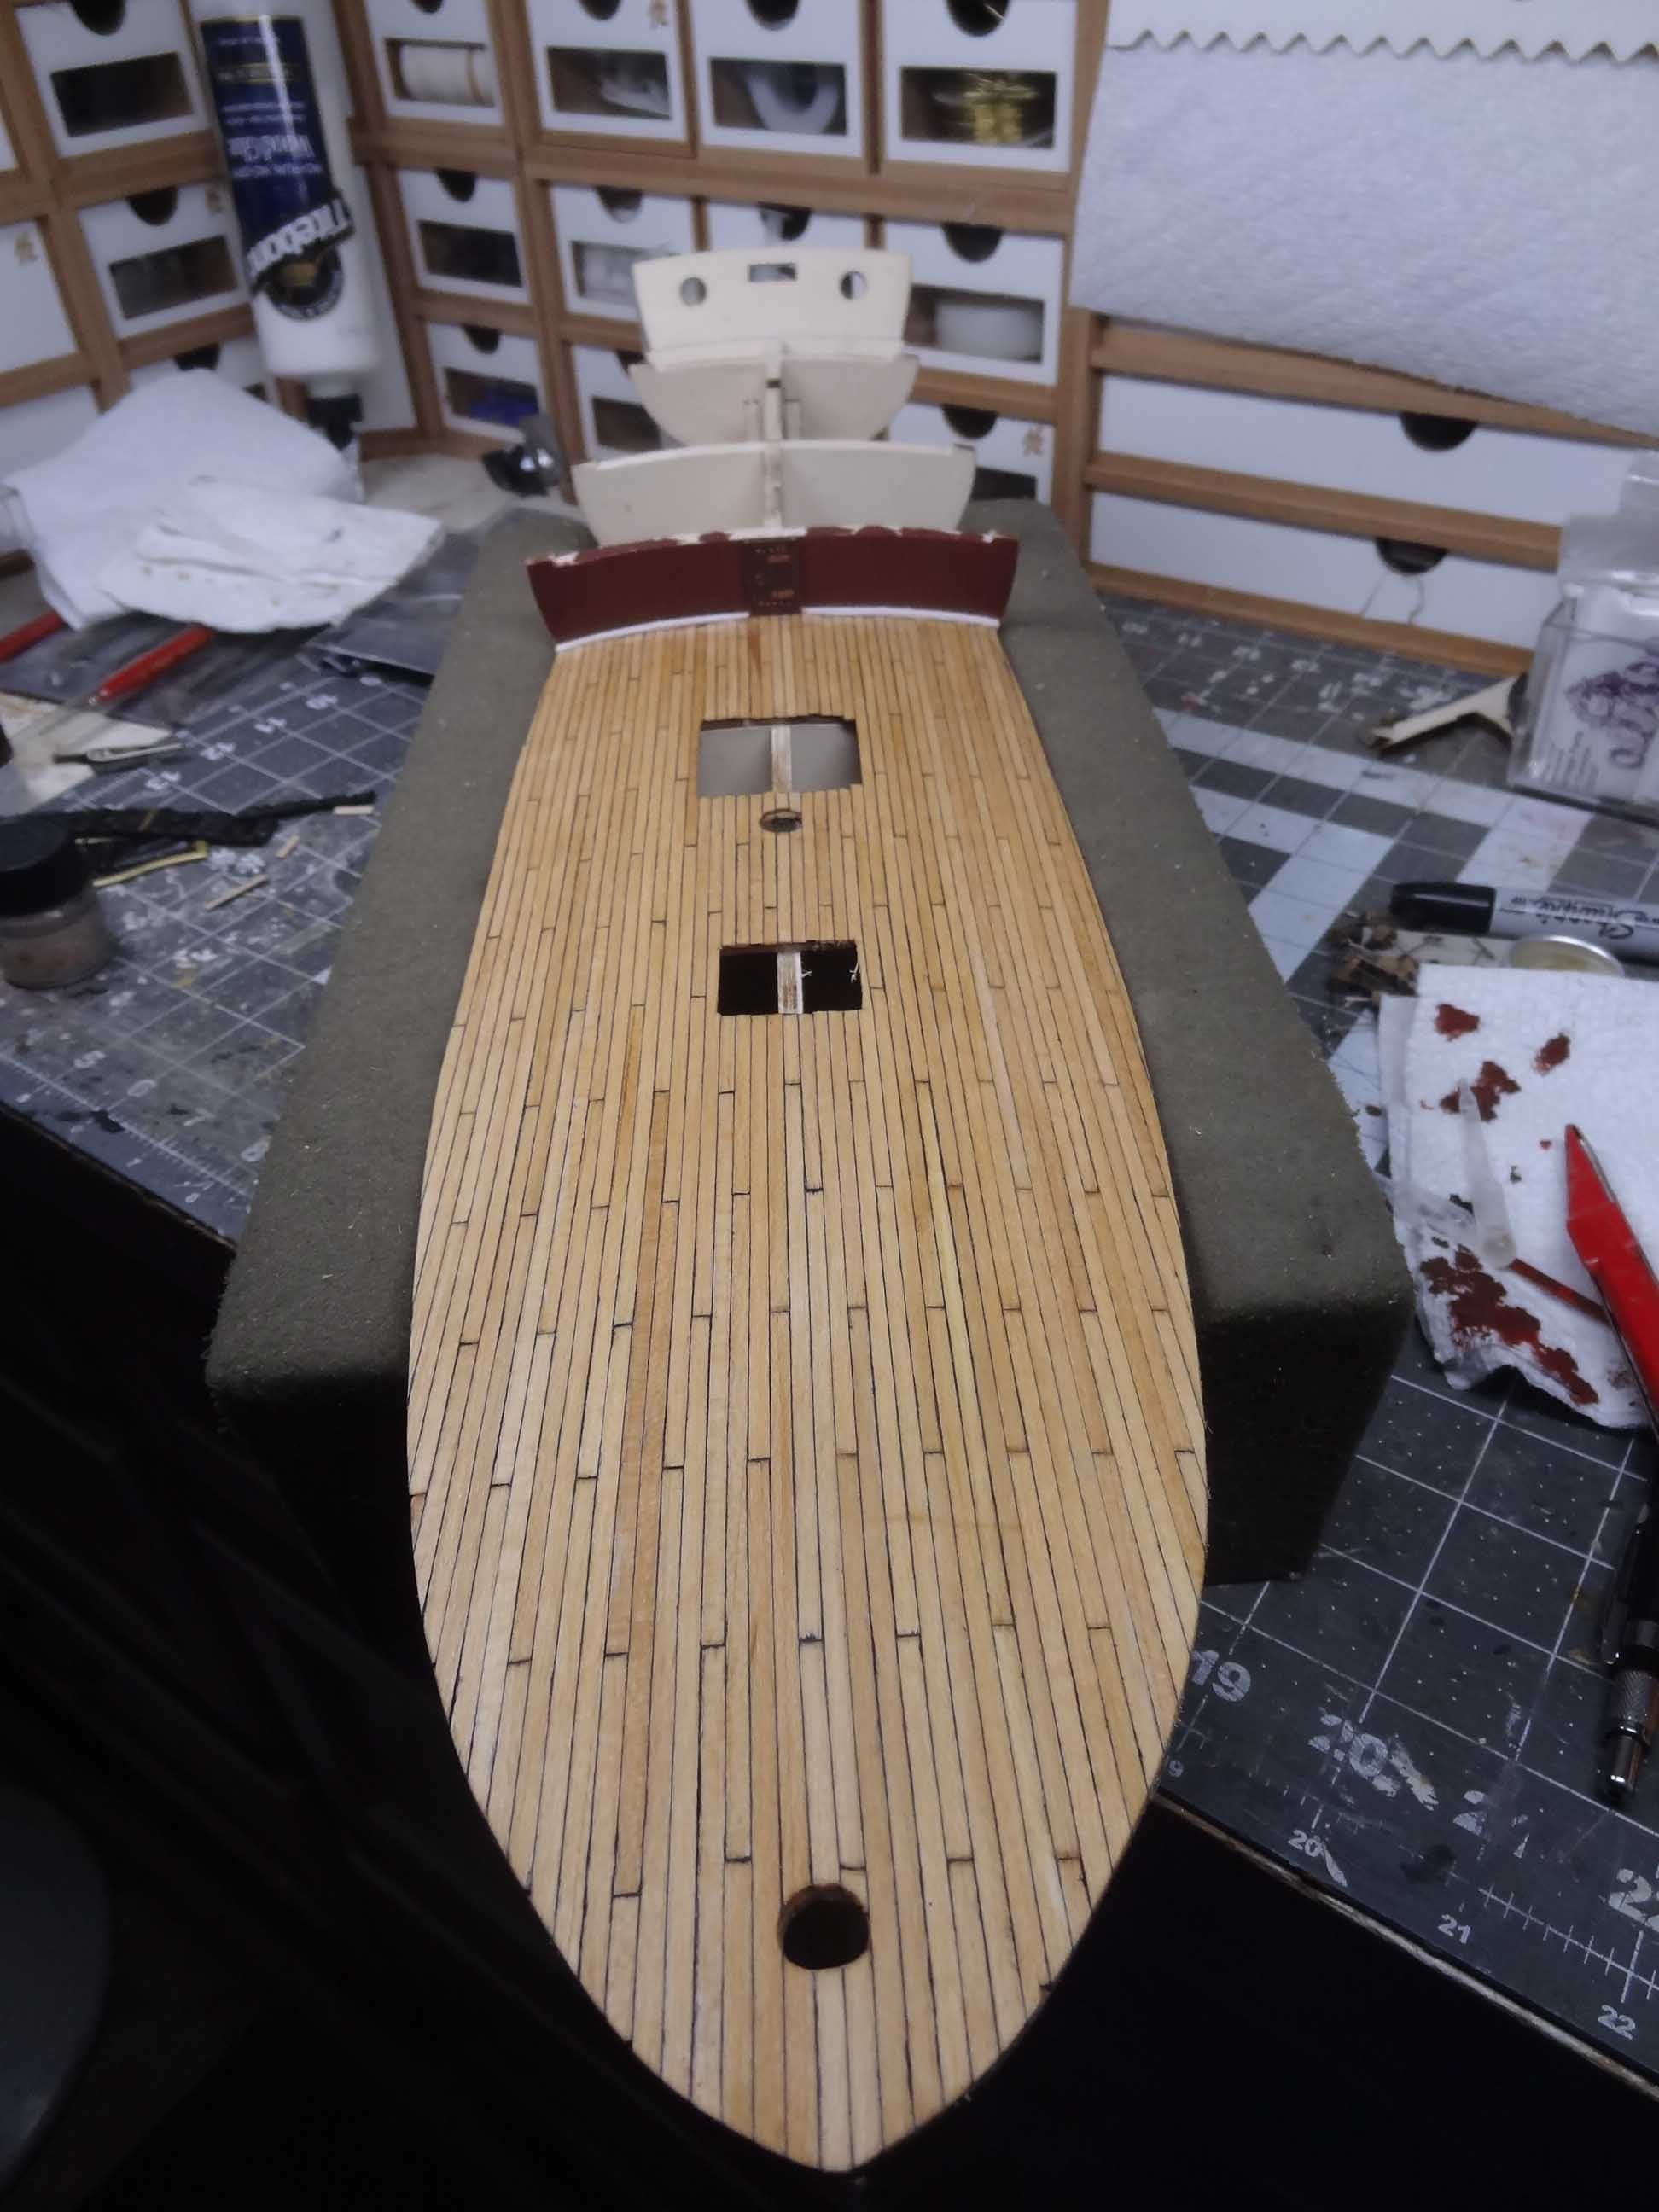
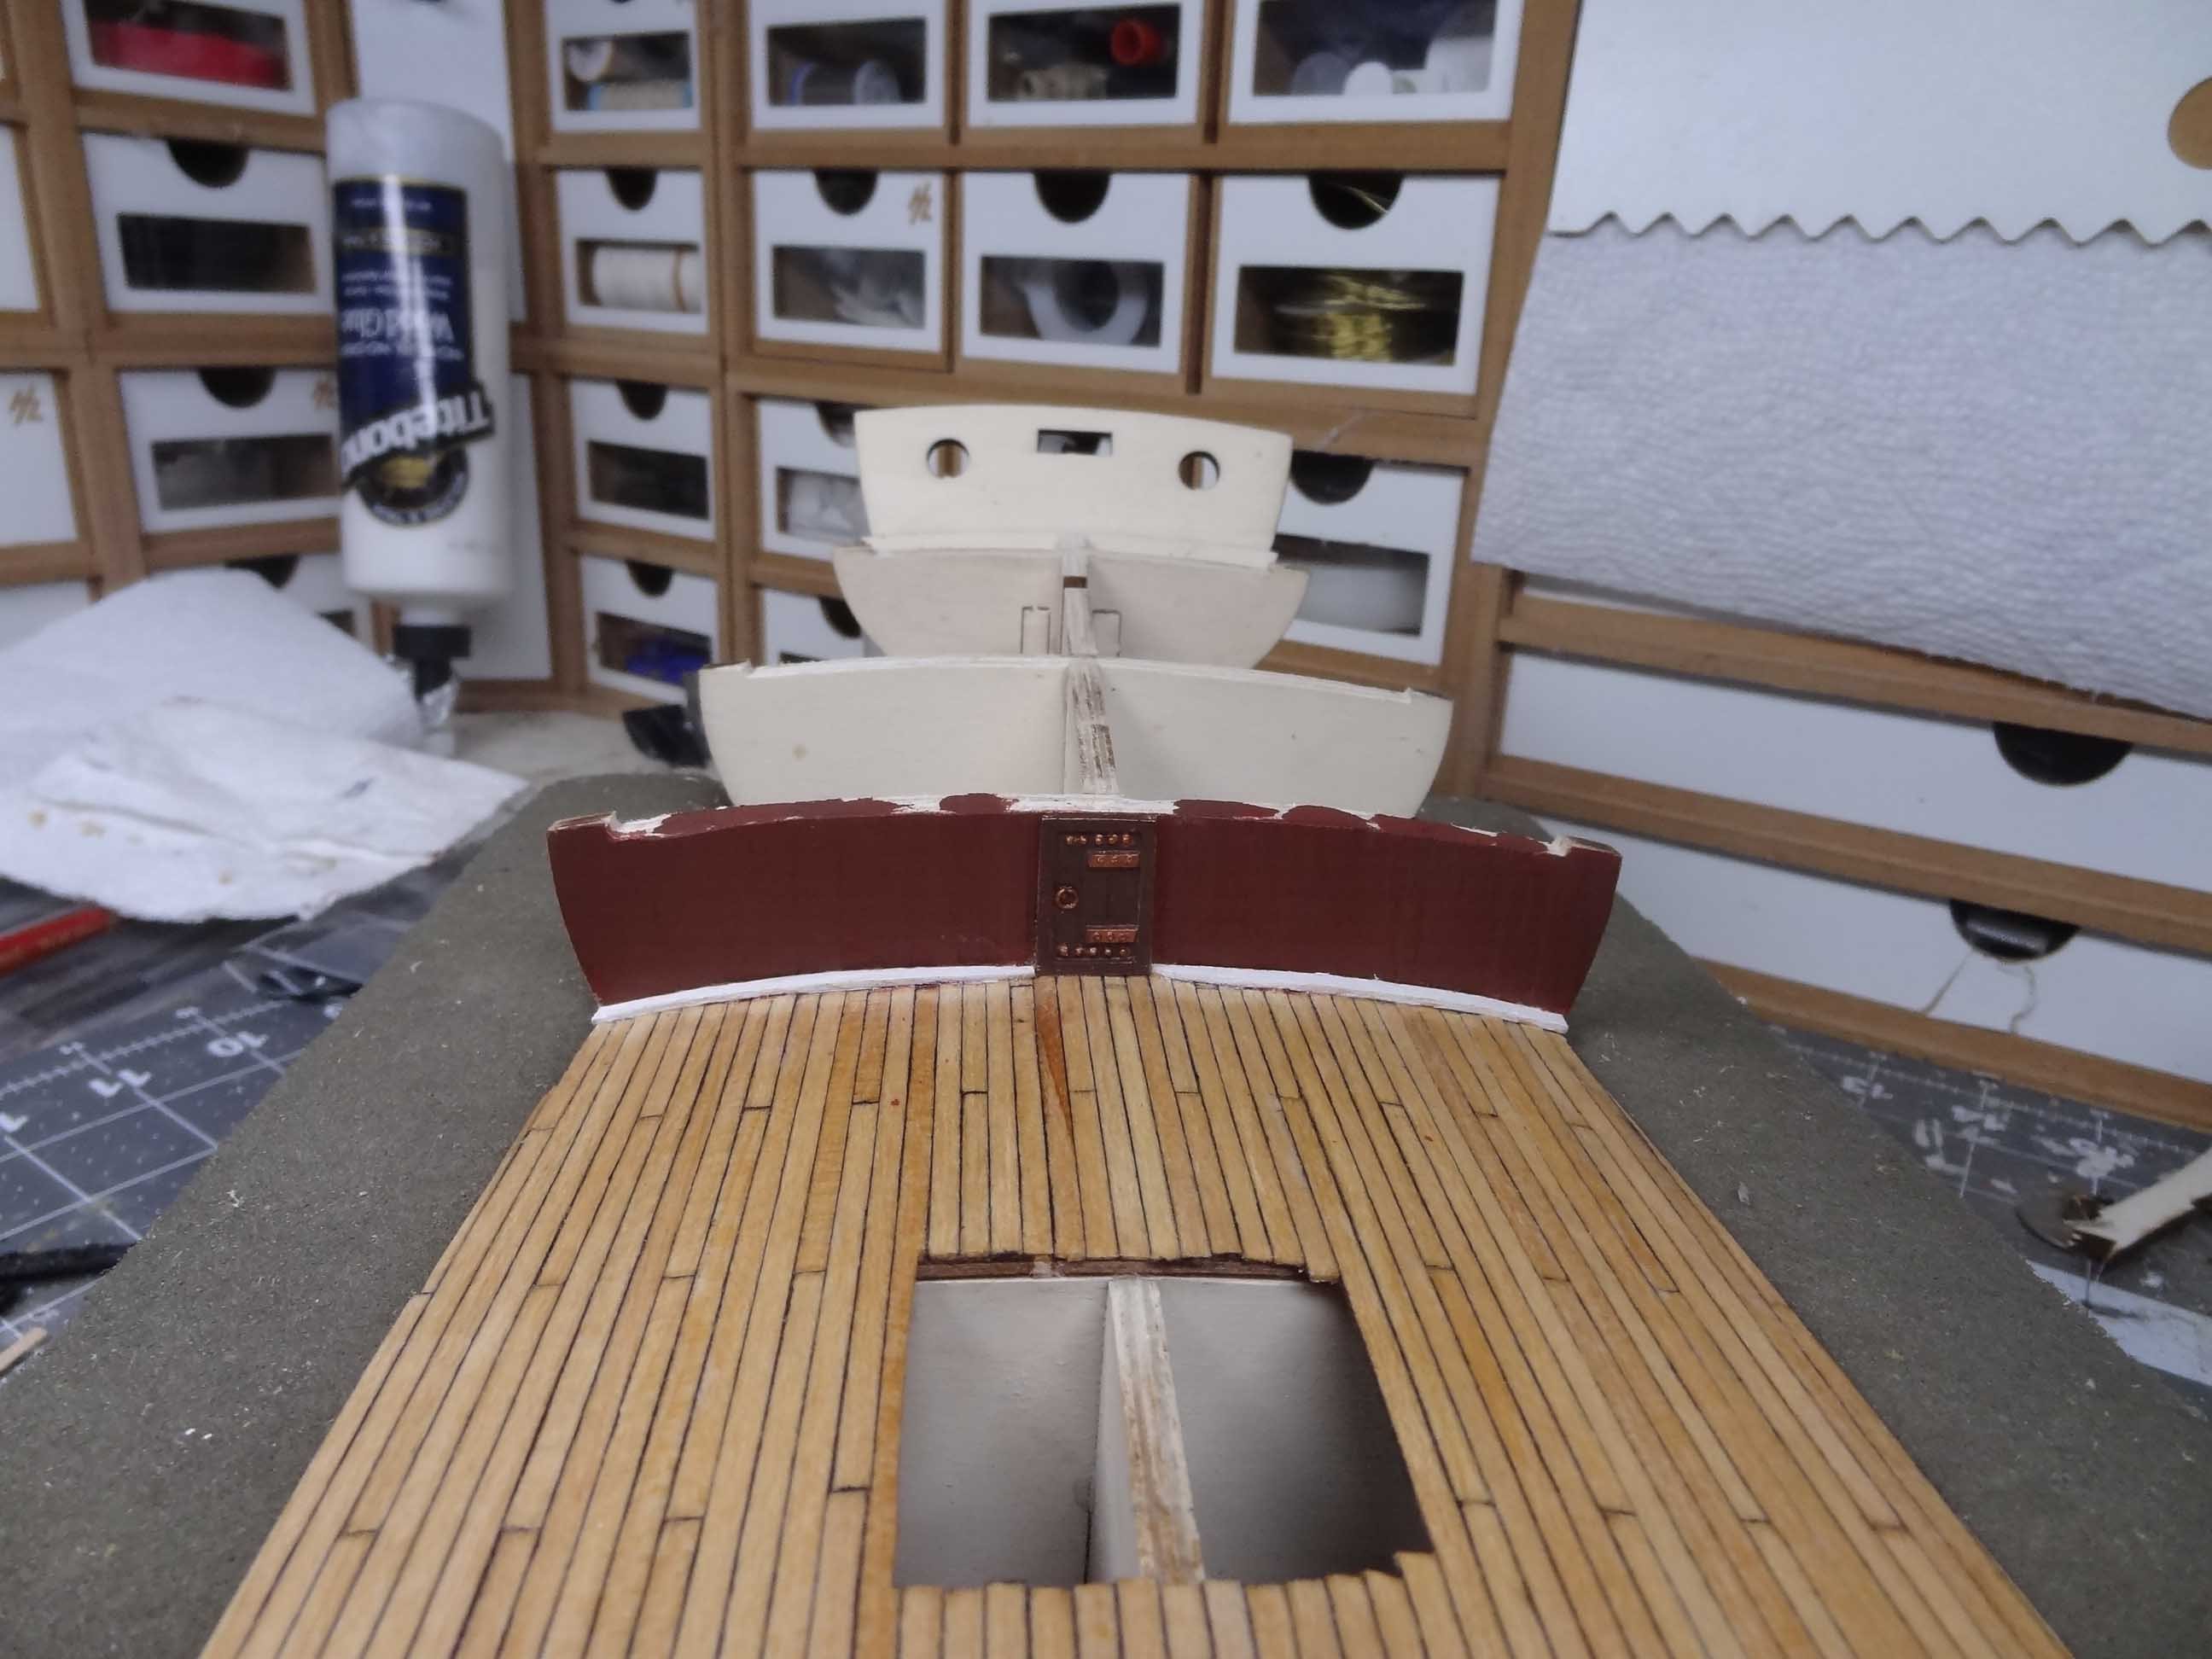
Finishing off the quarterdeck, I stained (Minwax Natural) and finished it with some matte varnish. I have also continued to paint the Britannia ornaments, some done, some in a continuous cycle - paint black, paint gold, paint black........ I'm cycling thru the top few pieces - obviously black will be the next application. I did come across a set of brushes I didn't even remember I had. Great for detailing.


-
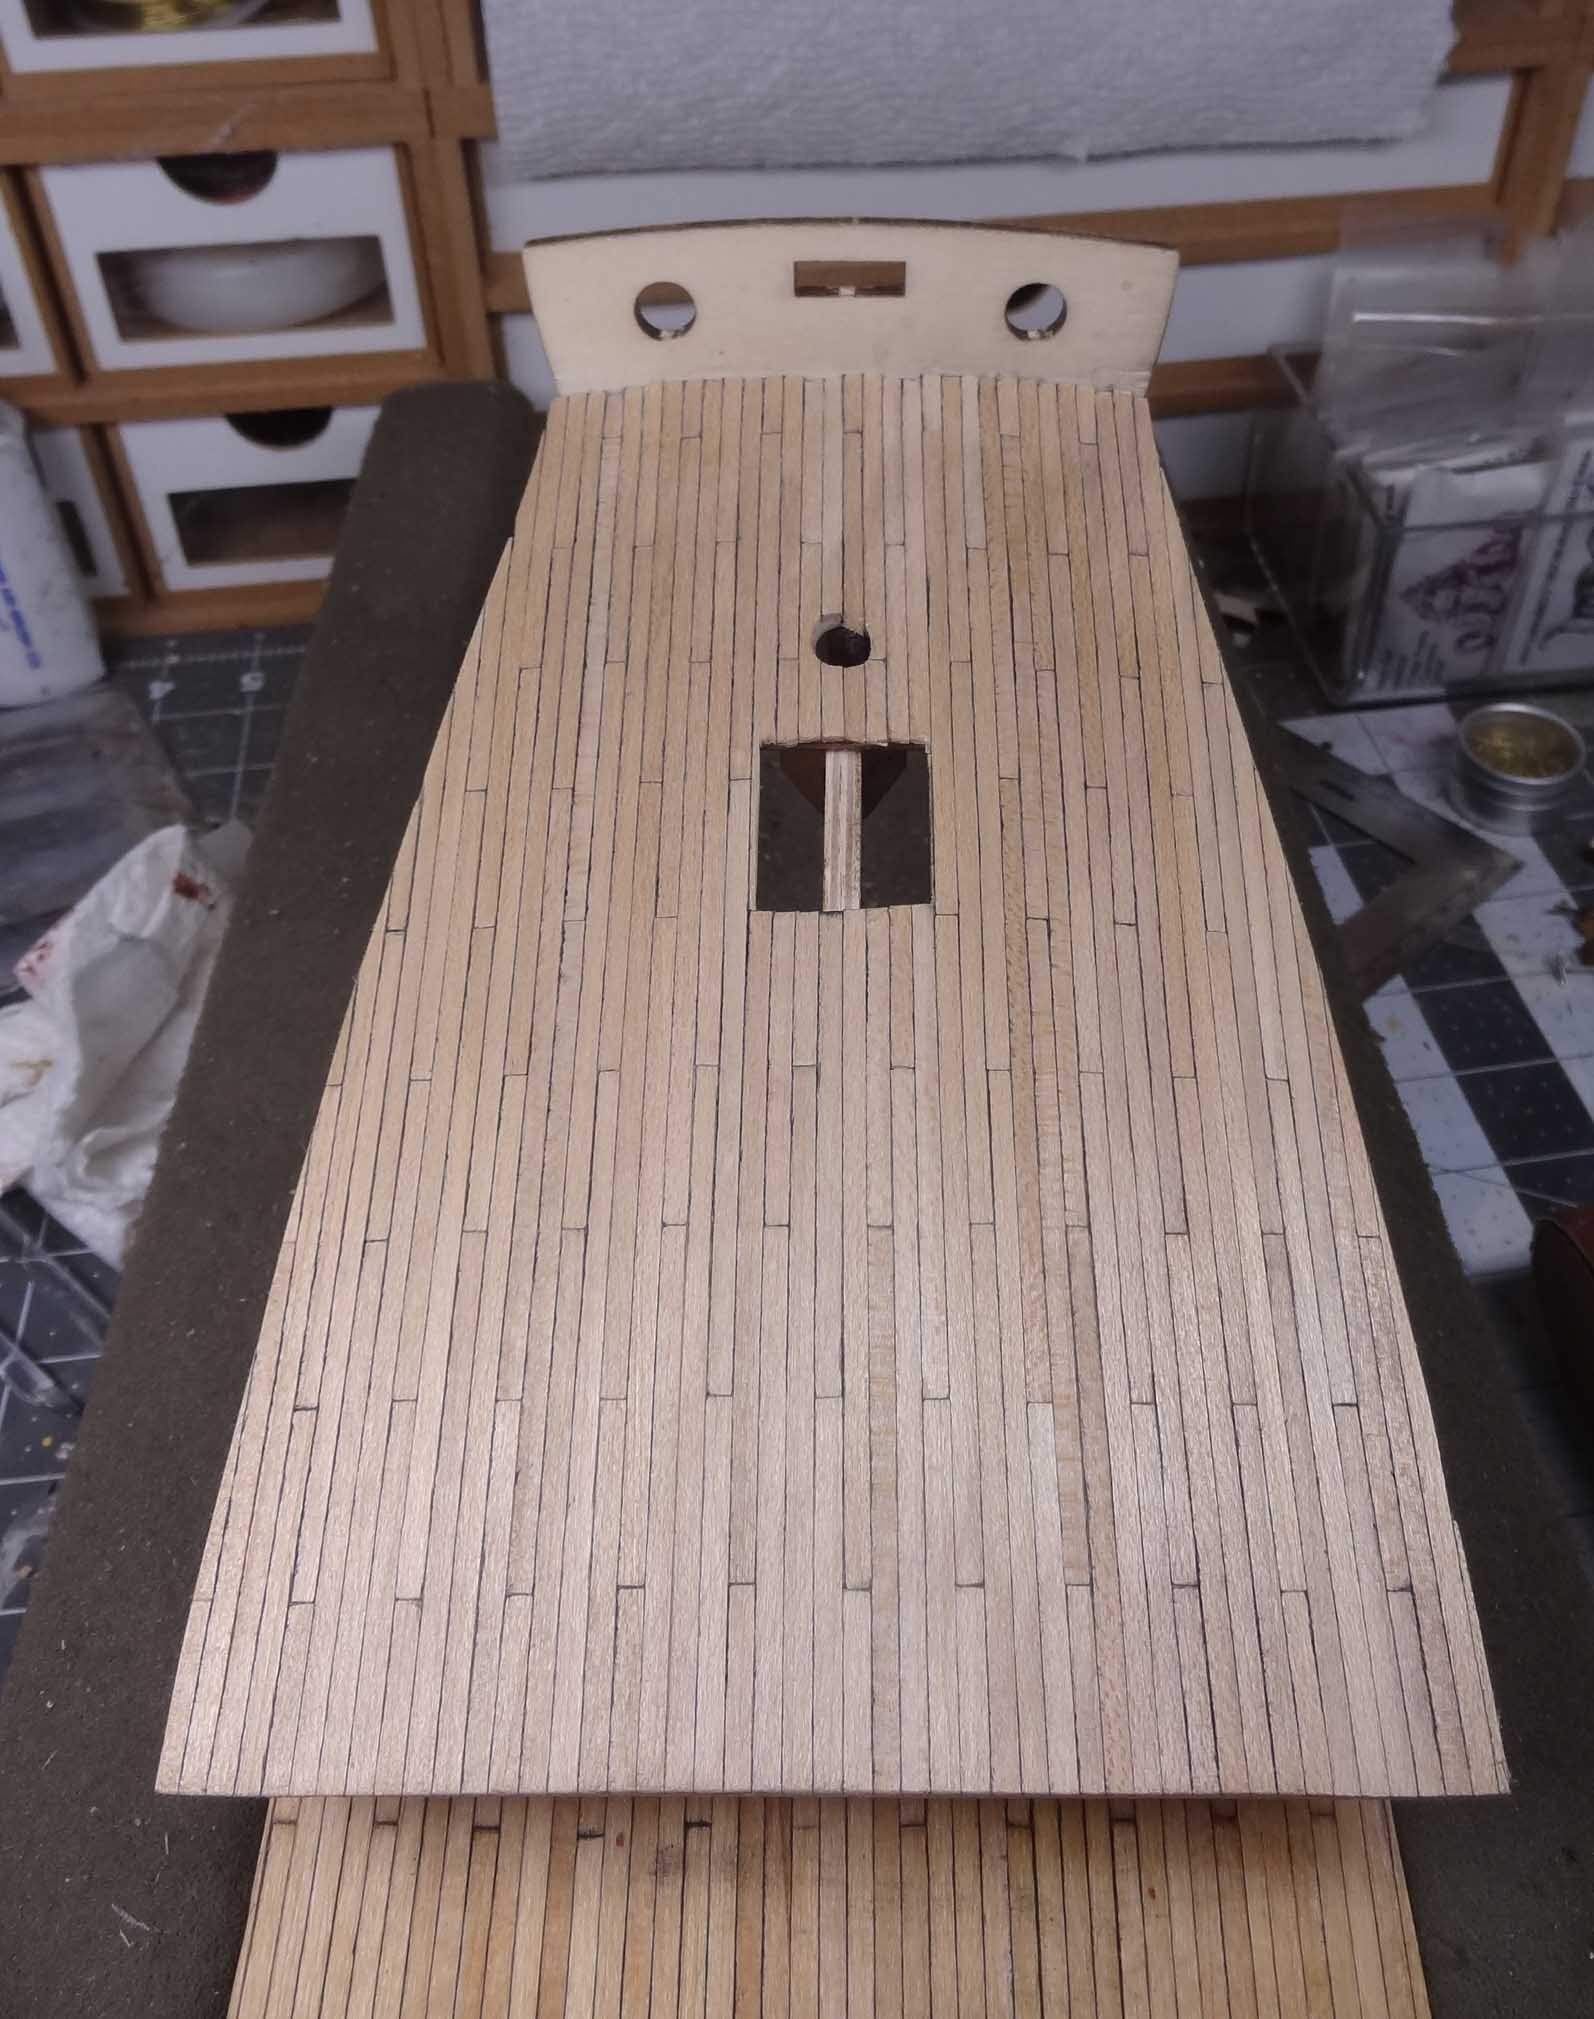
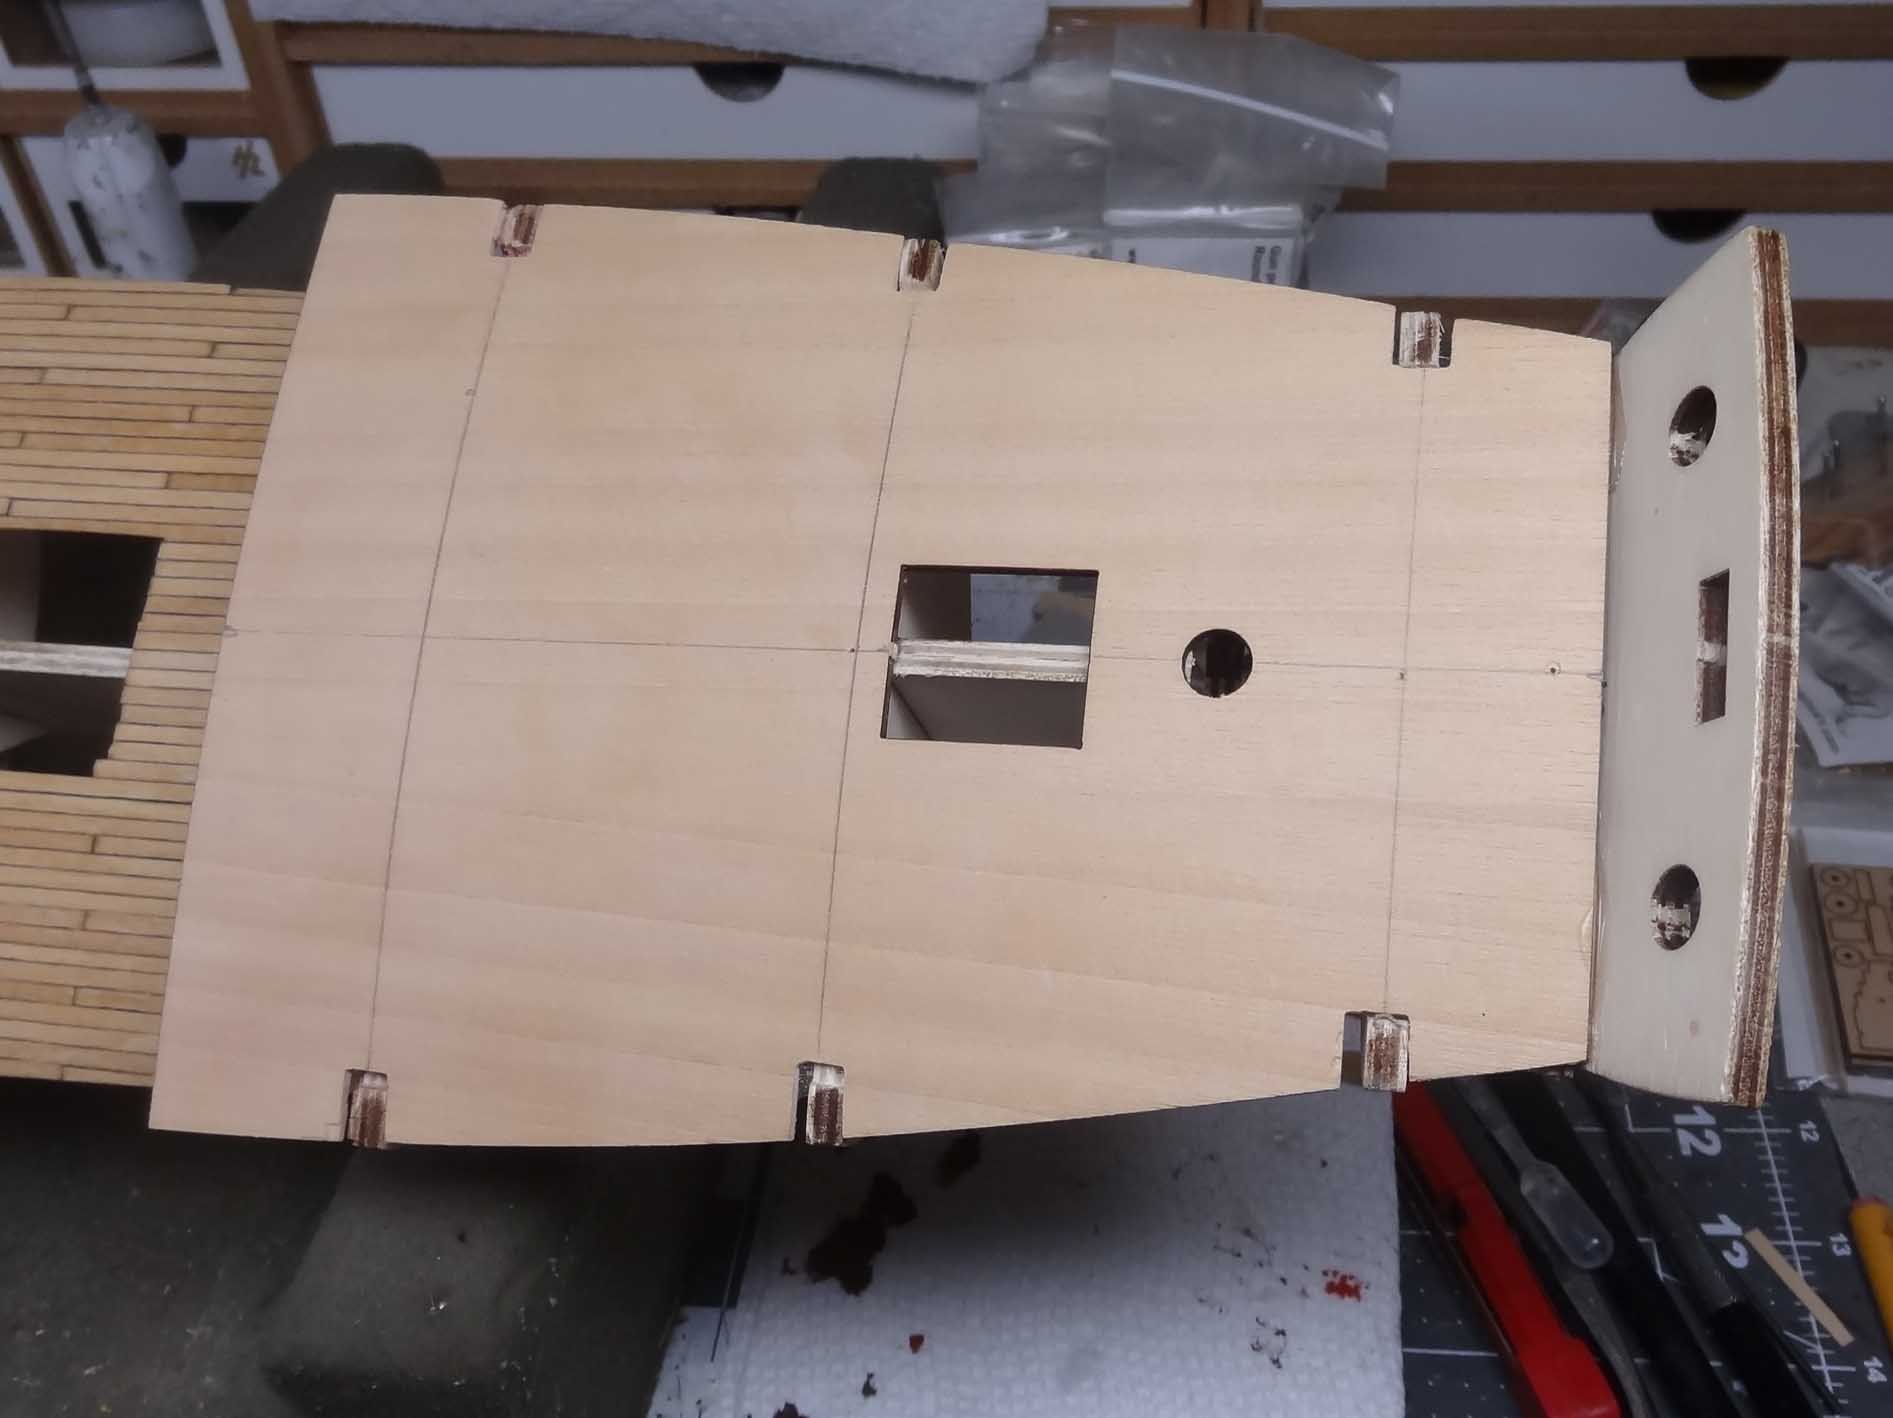
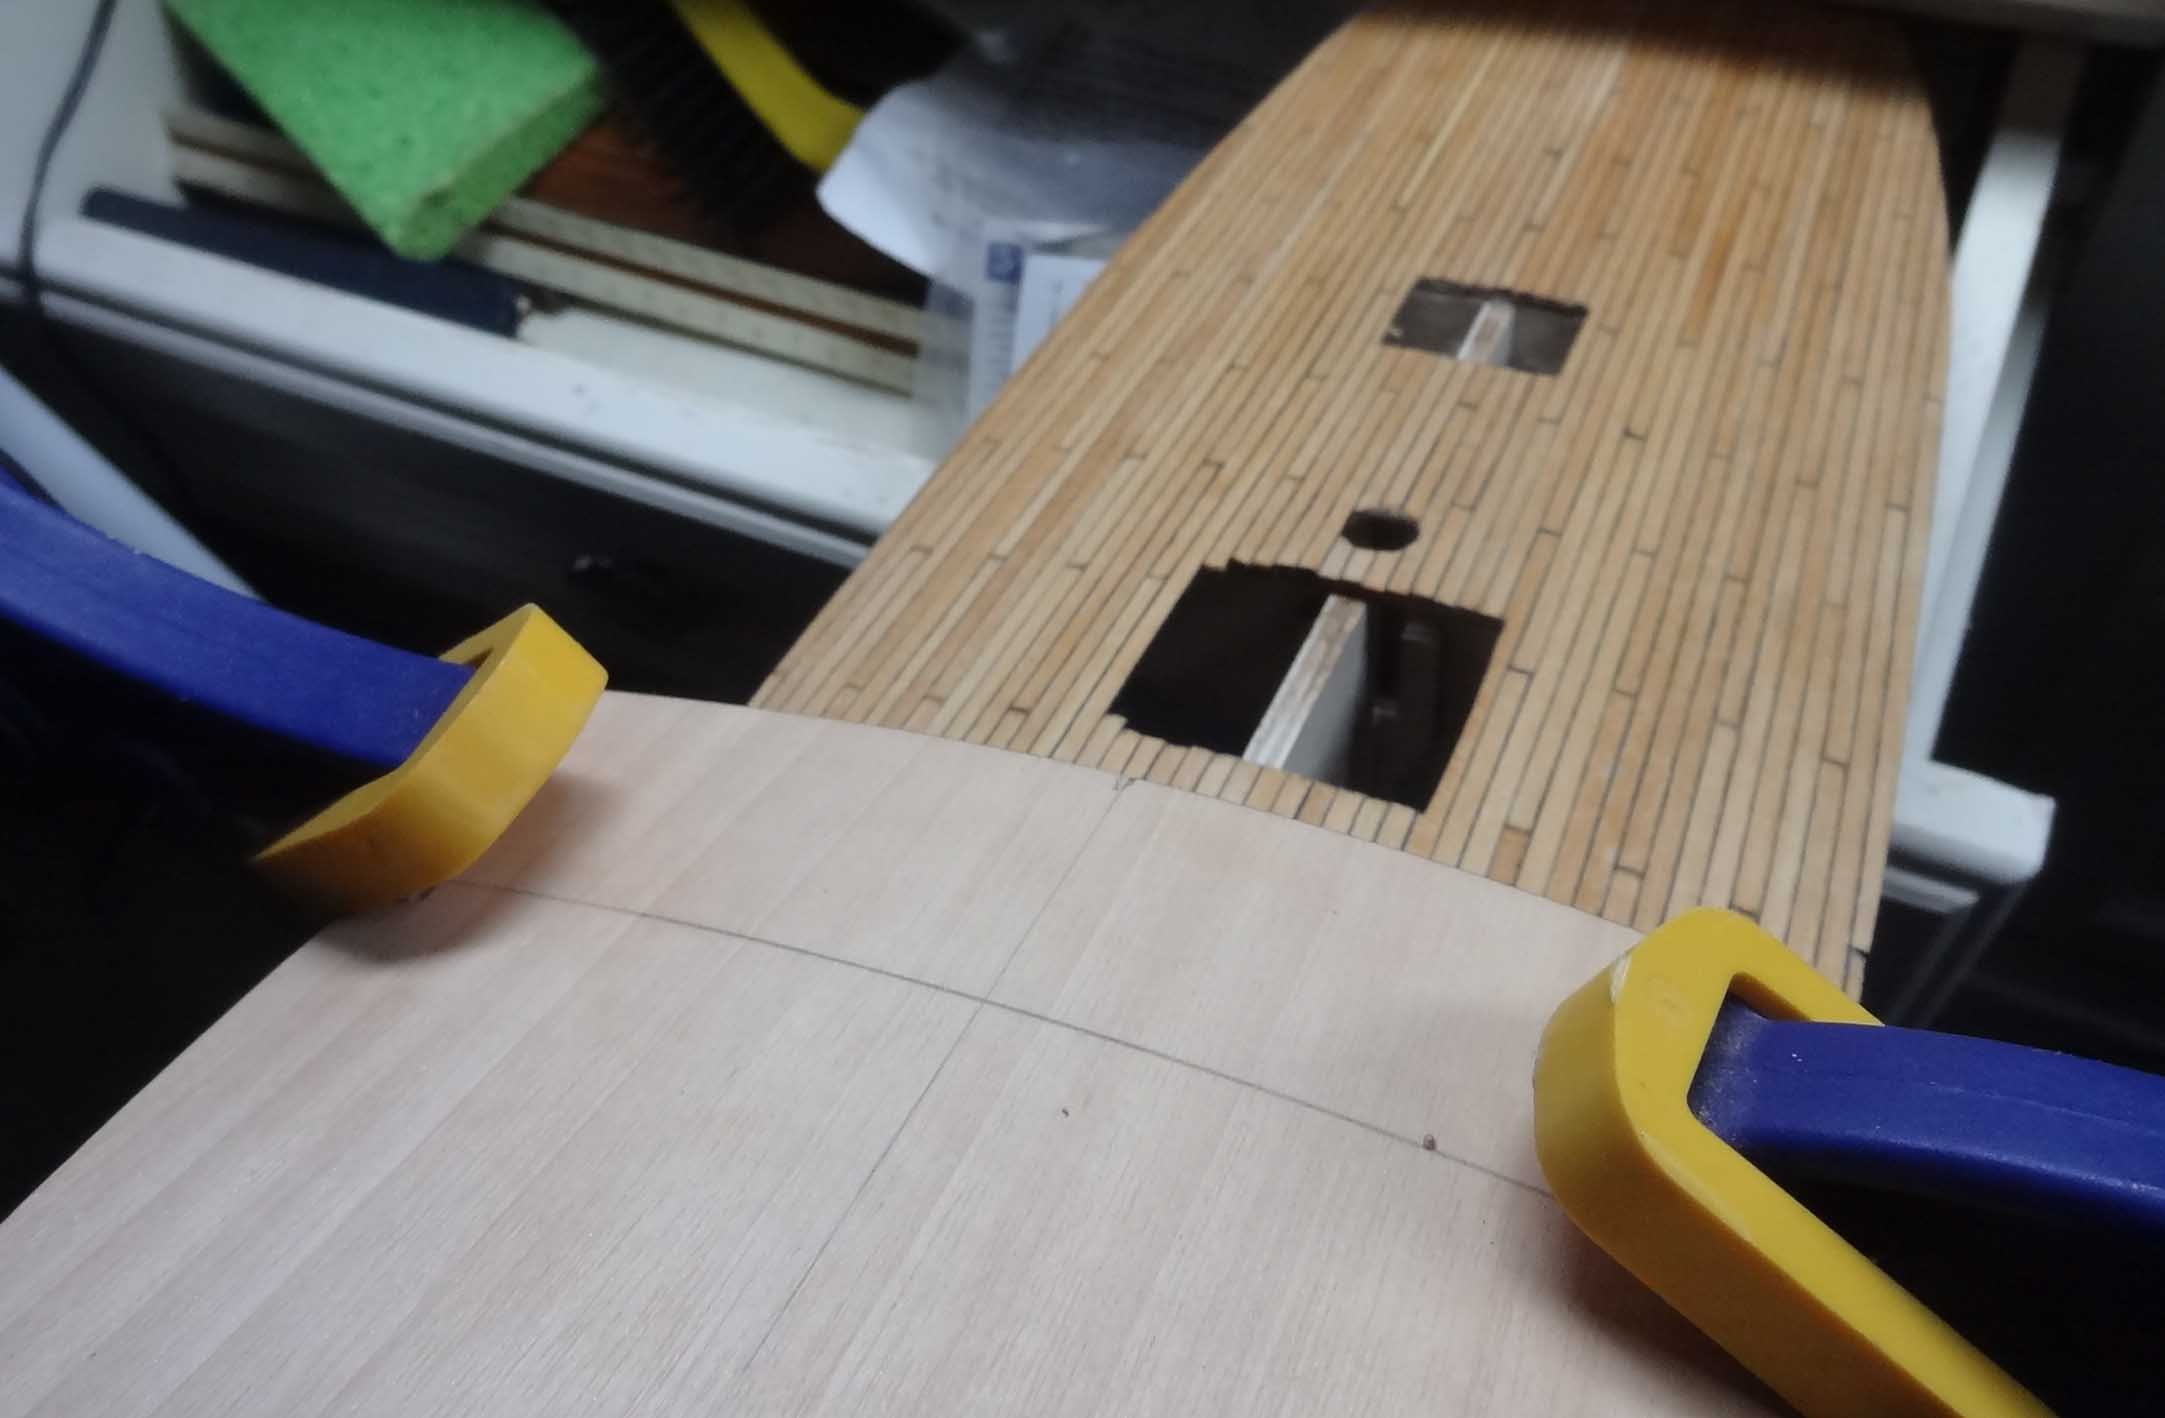
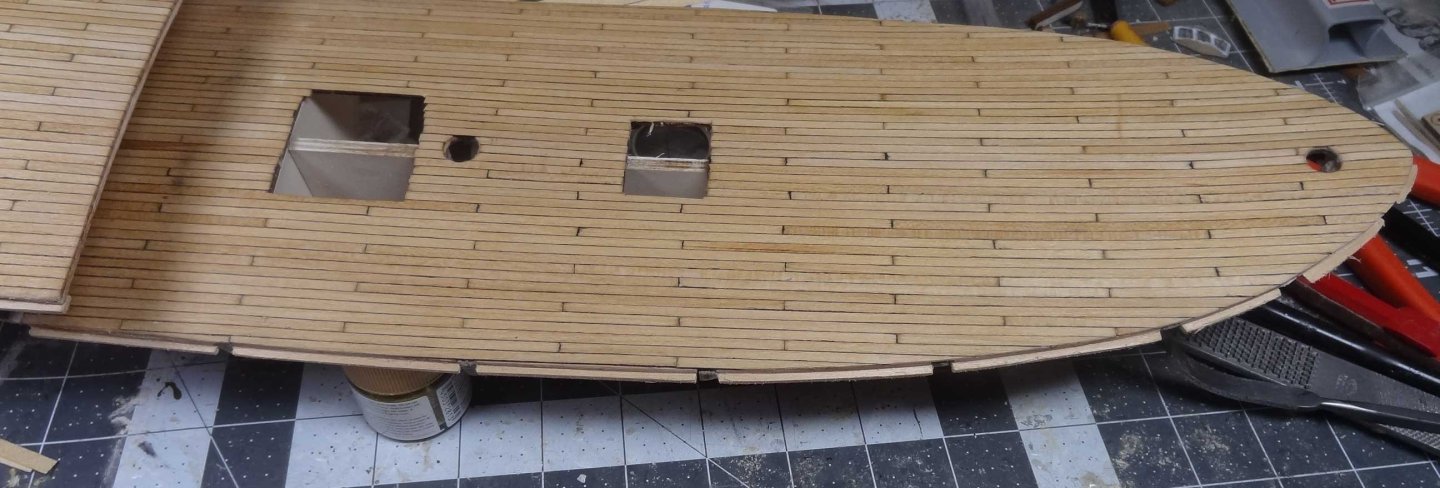
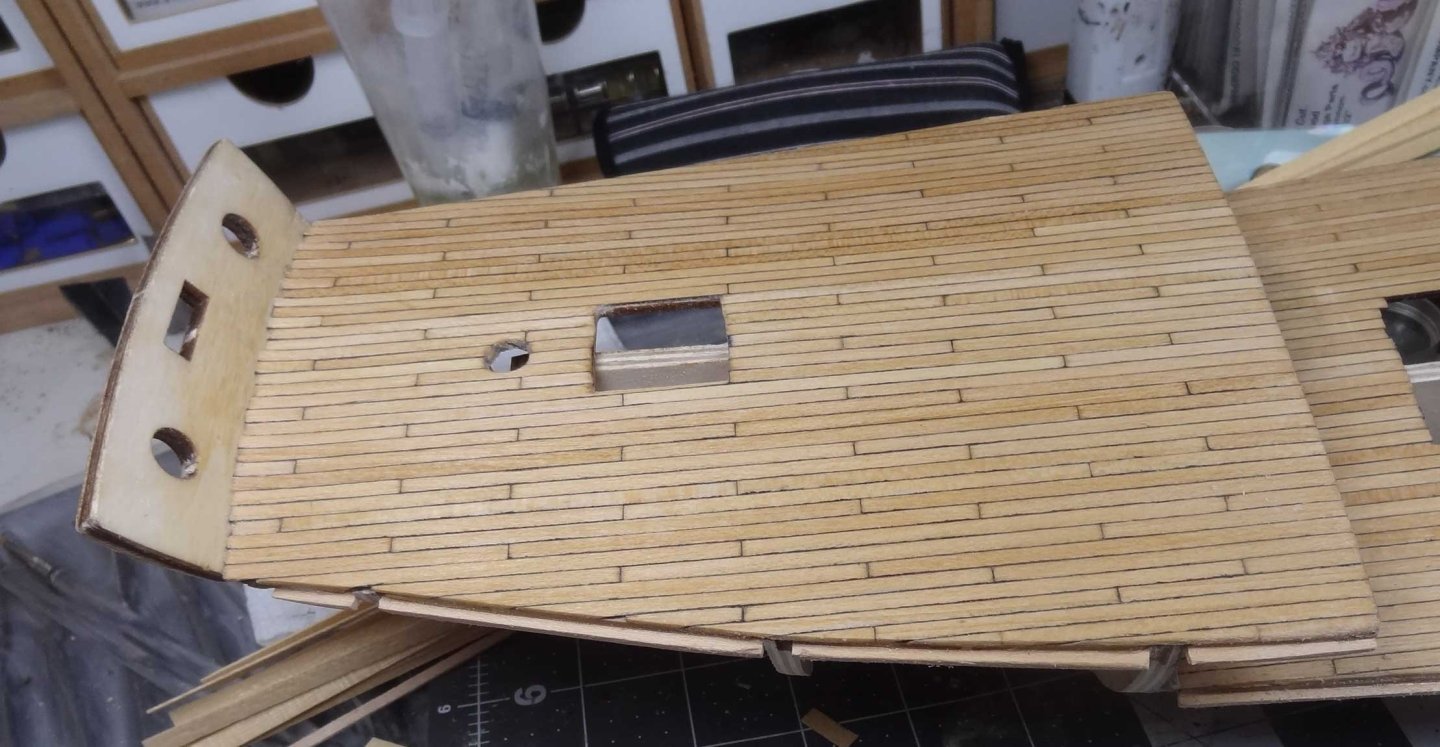
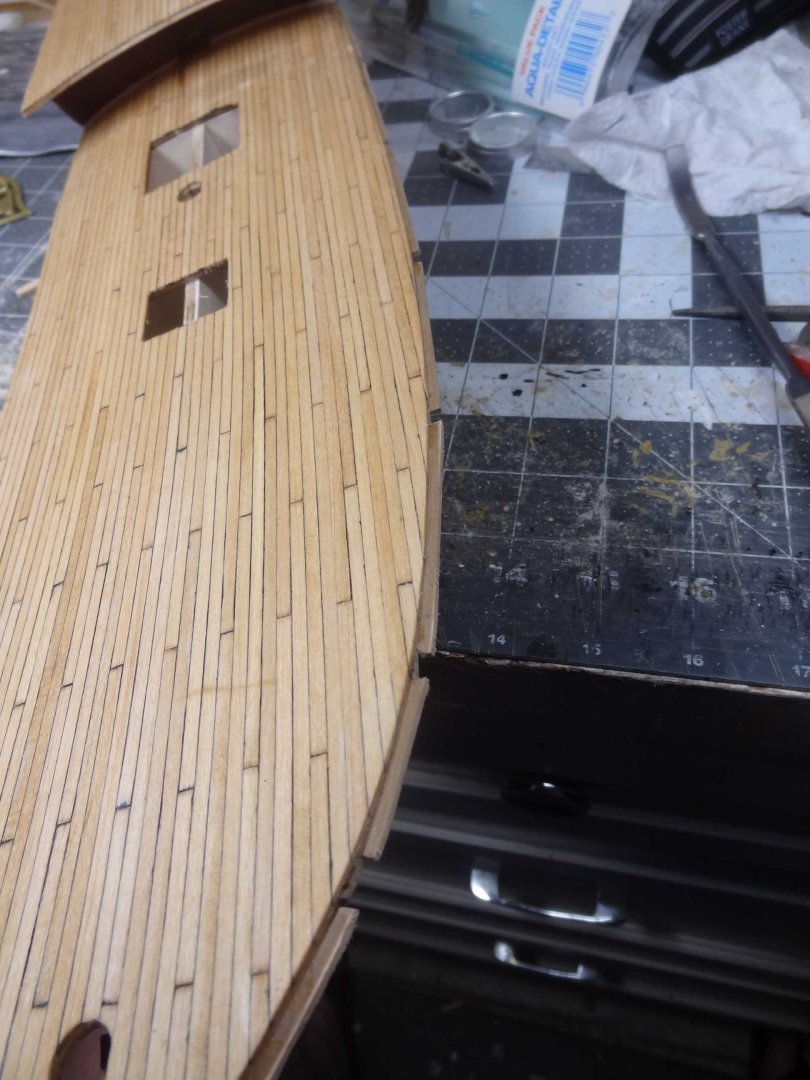
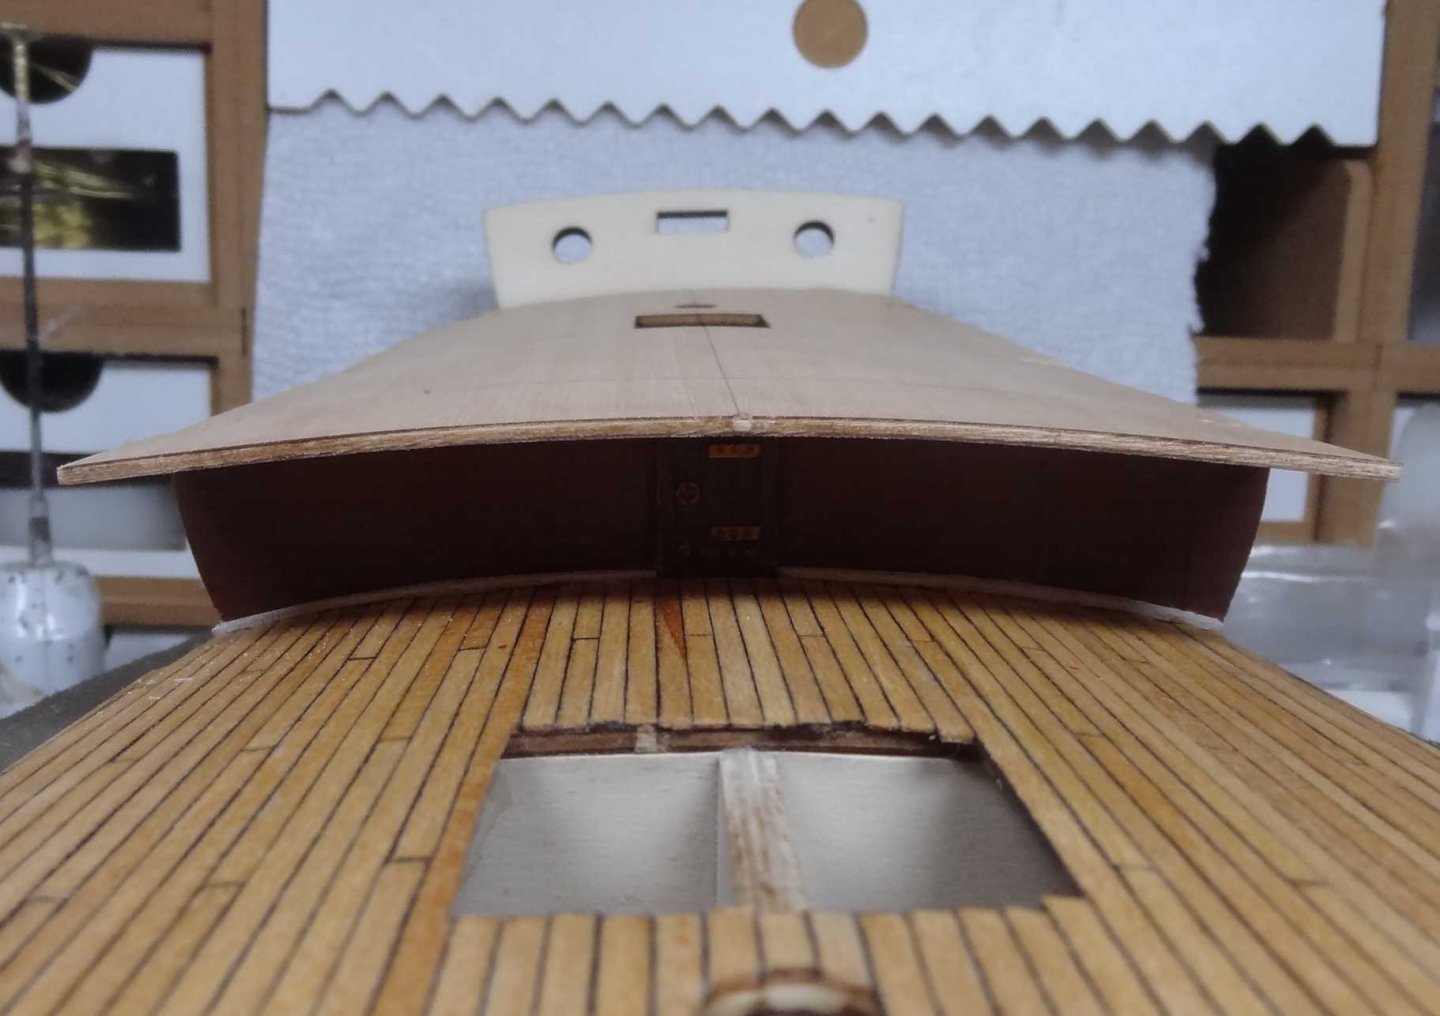
Hey - quarterdeck is now planked. Nothing too odd to report from that exercise. I went with a 4 plank pattern (same as foredeck) but I shortened the plank length from 120mm to 80mm. Why? Because I could 😀 I really like the result of my new faux caulking (see previous post). It shows what needs to be seen, but in a much more subdued way. At this scale (1:60) I'm not planning on trying to mark treenails. Too busy and distracting. I have to say the kit sticks for the deck planking got worse towards the end. Maybe I just got lucky at first. The milling was really bad. The sticks are supposed to be 1mm 3mm. Measuring the same stick would show 4-5 different dimensions from one end to the other. This forced me to do a lot of edge sanding after a strake was laid so the next strake would lay clean with the previous. Also the long edges of the sticks were poorly manicured. No point in complaining anymore, pretty typical of kit wood. I think the next steps are to get the hull ready for planking. The instructions show some minor wood inserts at the bow and stern. I'm not real sure what they may accomplish. I have been considering picking up some balsa blocks to fill the bow and stern frames. Never had to do that before and I'm not sure it is really necessary for this build, but since this is my "learning build" I thought it would be a good time to try that out. Onwards.......

-
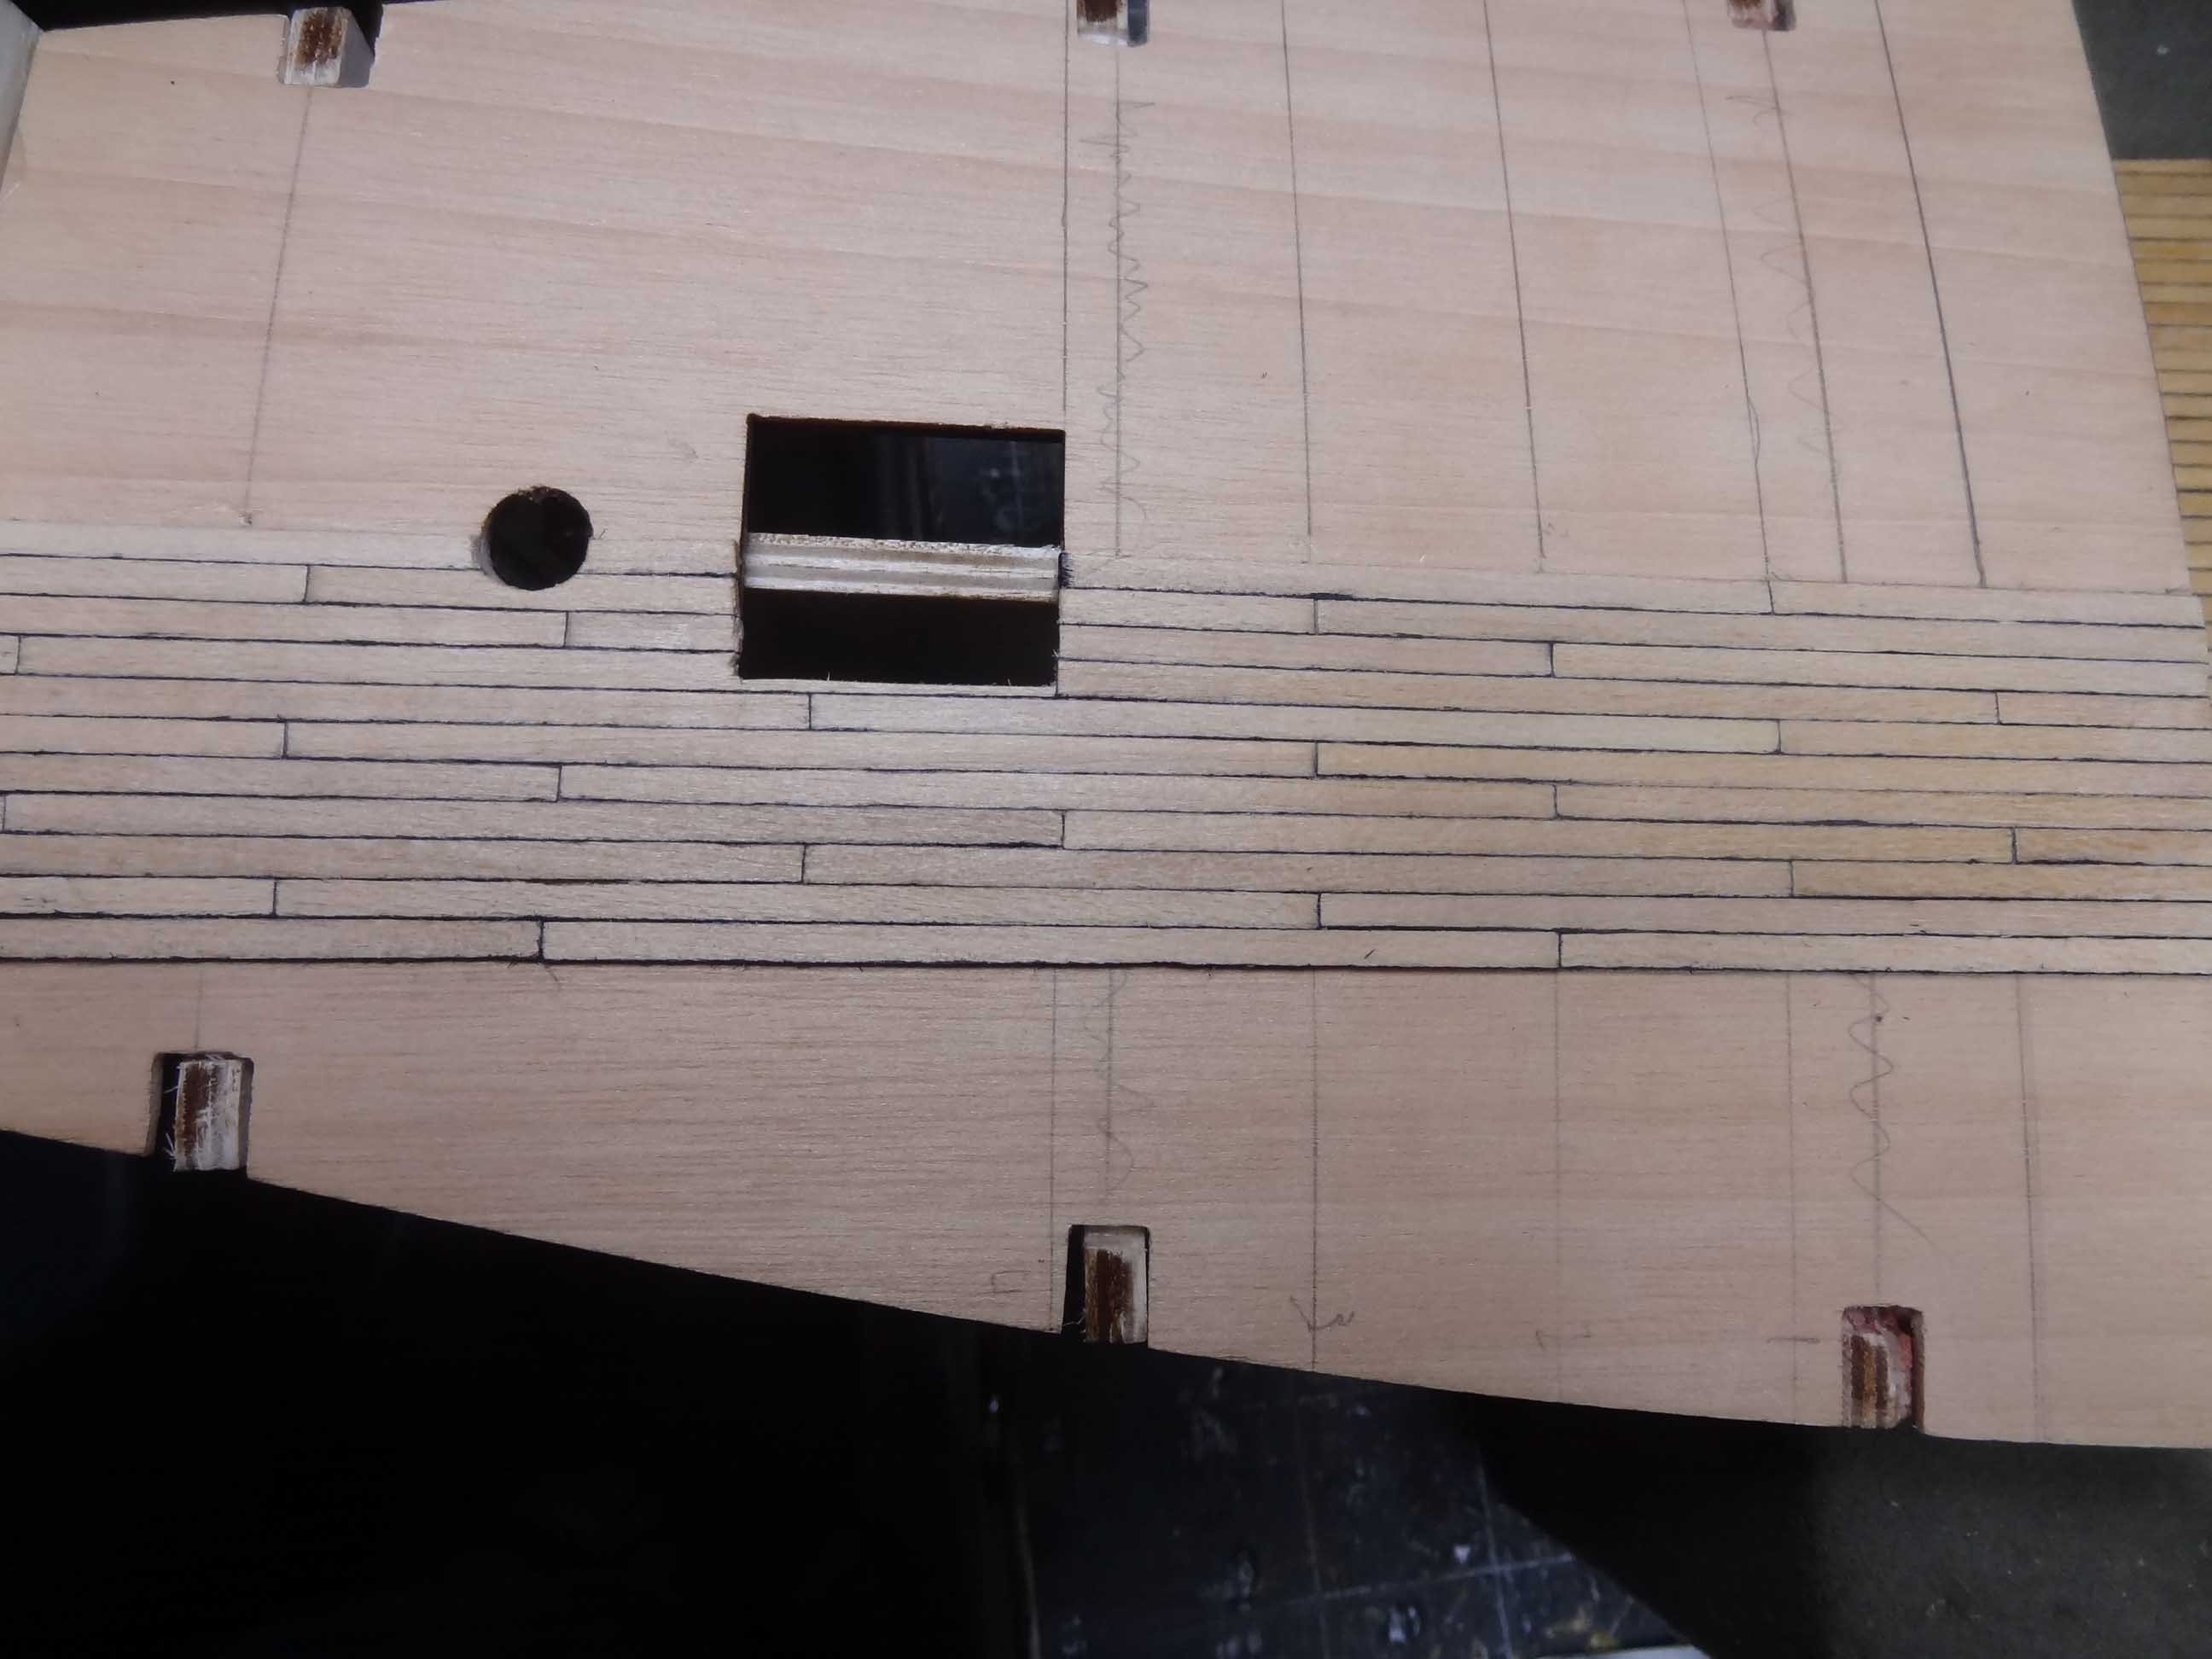
I started planking the quarterdeck last nite. Given that this is a relearning/learning build I decided to experiment with the plank caulking simulation. I used to use a chisel tip Sharpie and outline all four edges of a plank. The long edges of the stick didn't look too bad but the short edges tend to absorb the ink and did not get a clean look. This is especially true of softer wood (read kit wood). I started the planking on this build same as always, but towards the end of decking the foredeck I started only outlining one long edge and one short edge. This looked better but some of the short edges still absorbed some ink. Before starting the quarterdeck, I fooled around with some different combinations of markings. I know a lot of people use pencil lead for darkening so I gave that a try. I didn't care for it on the long edge but it looked pretty good on the short edges. So my new plan for decking and planking is pencil lead on the short edges and Sharpie on one long edge. I'll probably finish out this build like that. See what you think. Top image is the Sharpie on all four sides. Bottom image is my new technique. If you look closely at the top image you can see some of the short edges that have absorbed ink. Just a note - On my very first build I was doing the four sided Sharpie thing and didn't have the bleeding problem. The difference is I subbed out all the kit planking materials with boxwood which is a much harder wood. C'ya next week....

-
😁
-
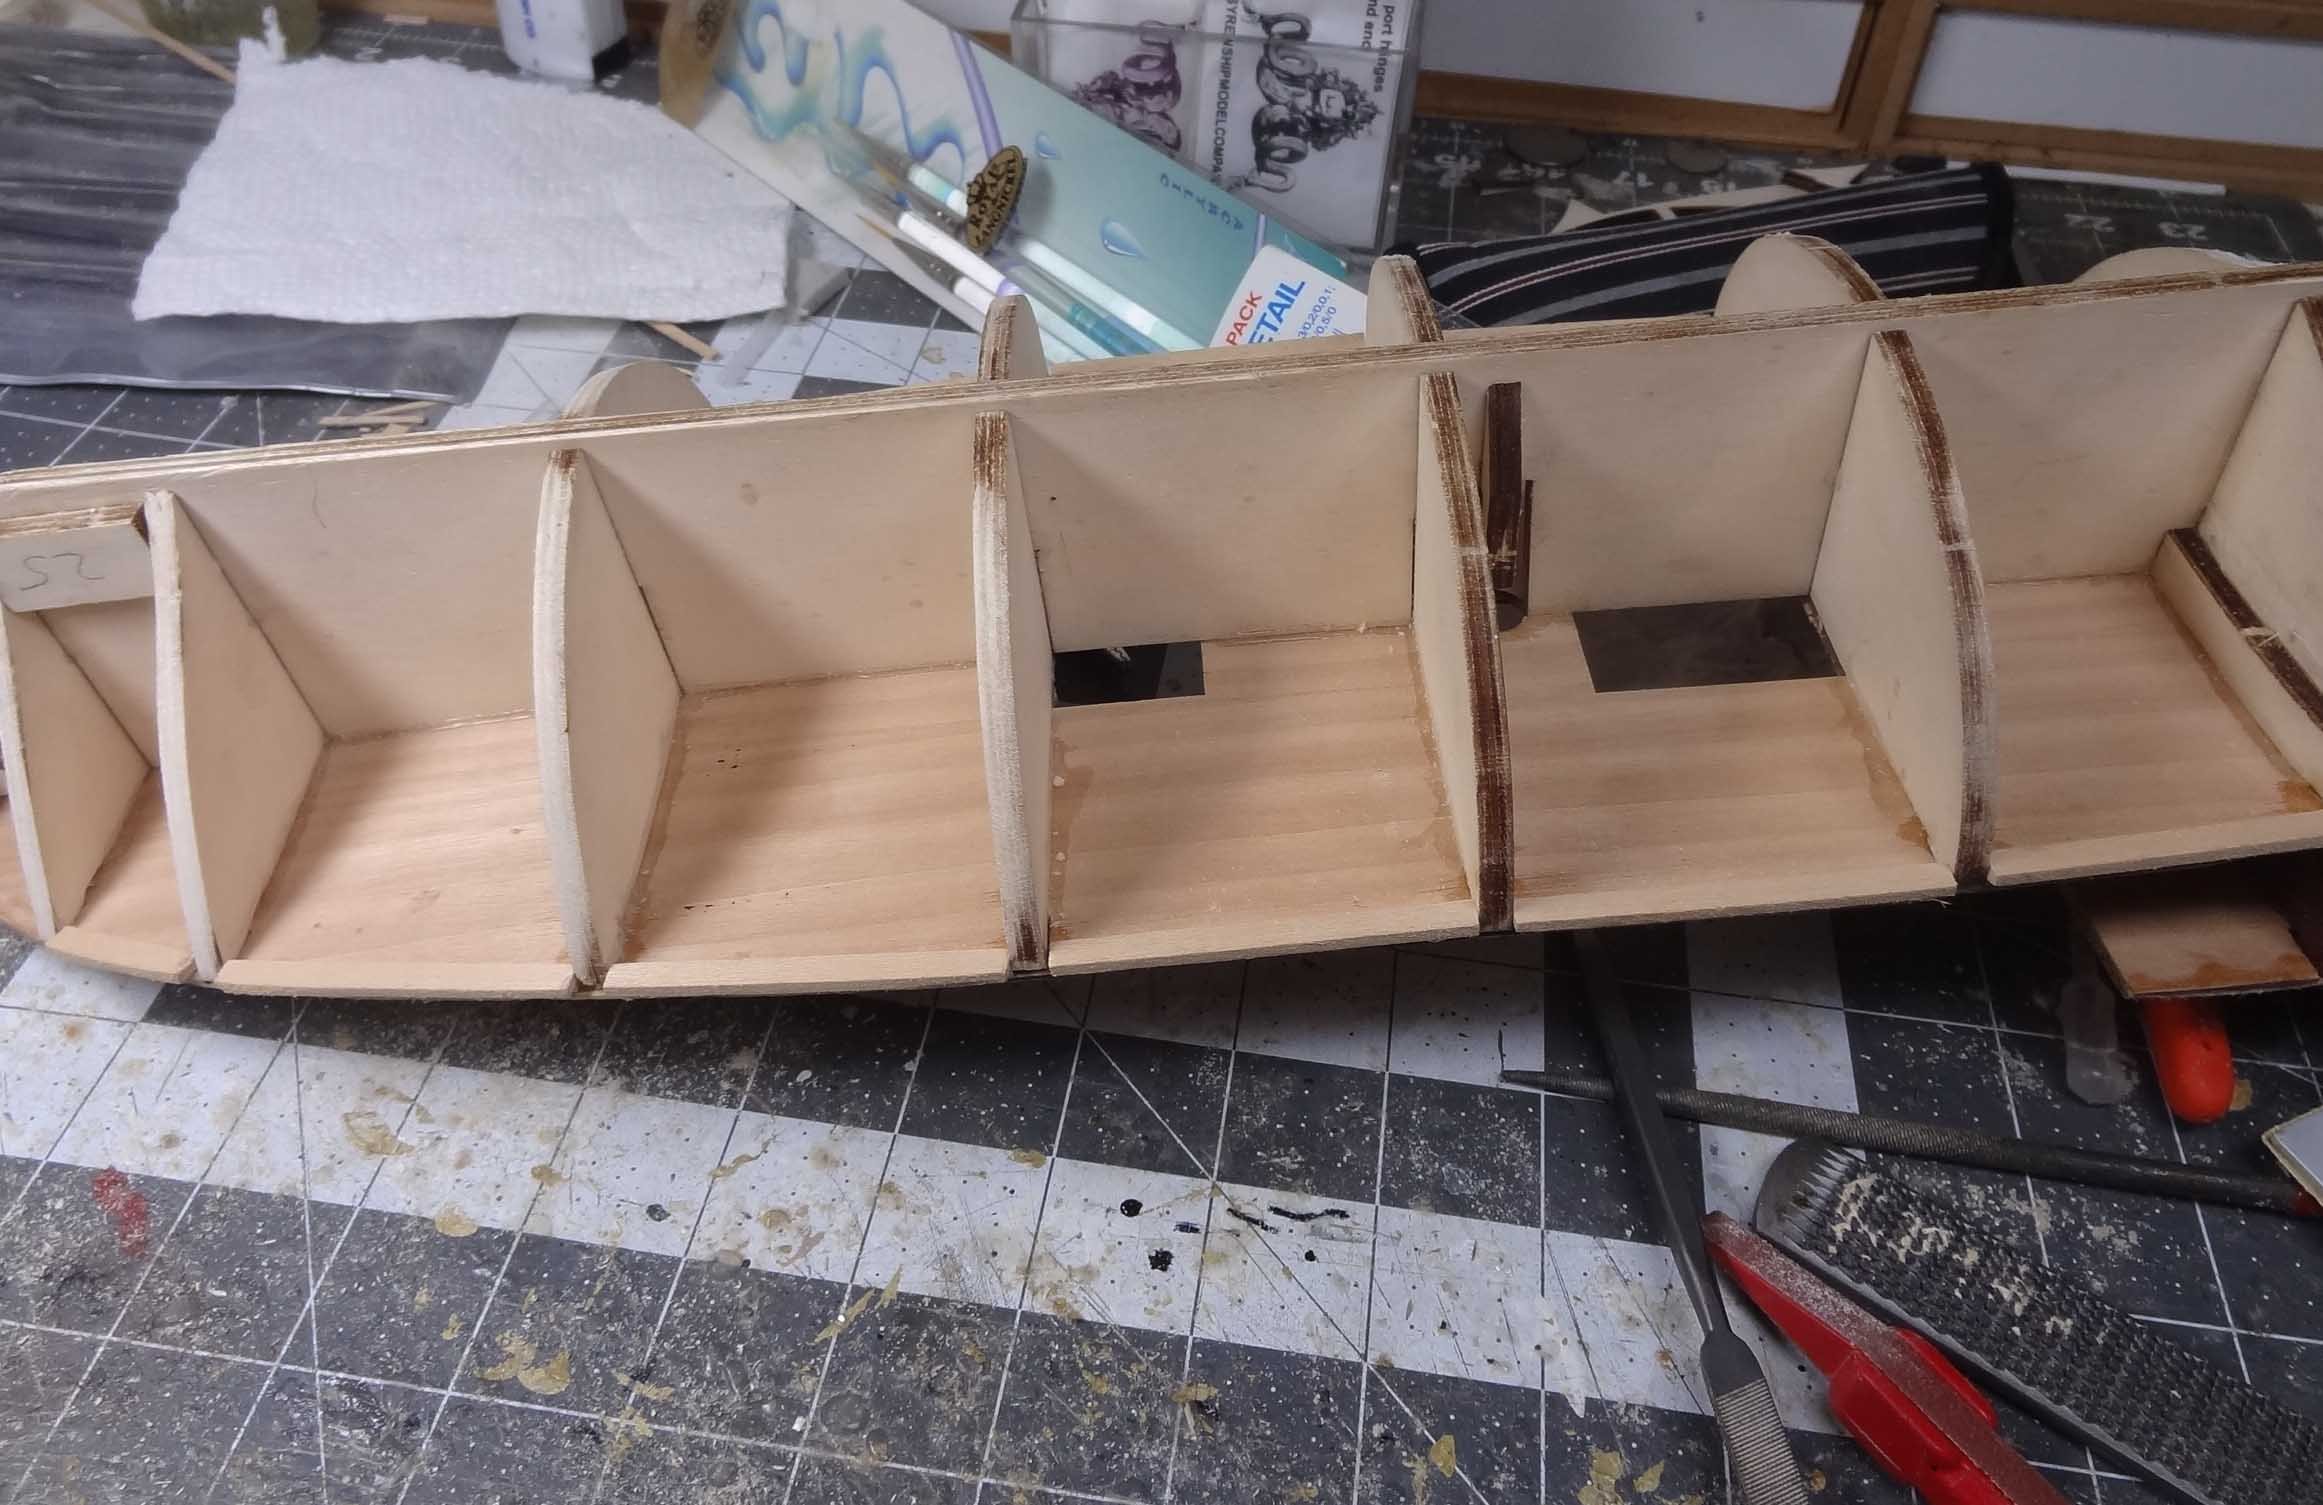
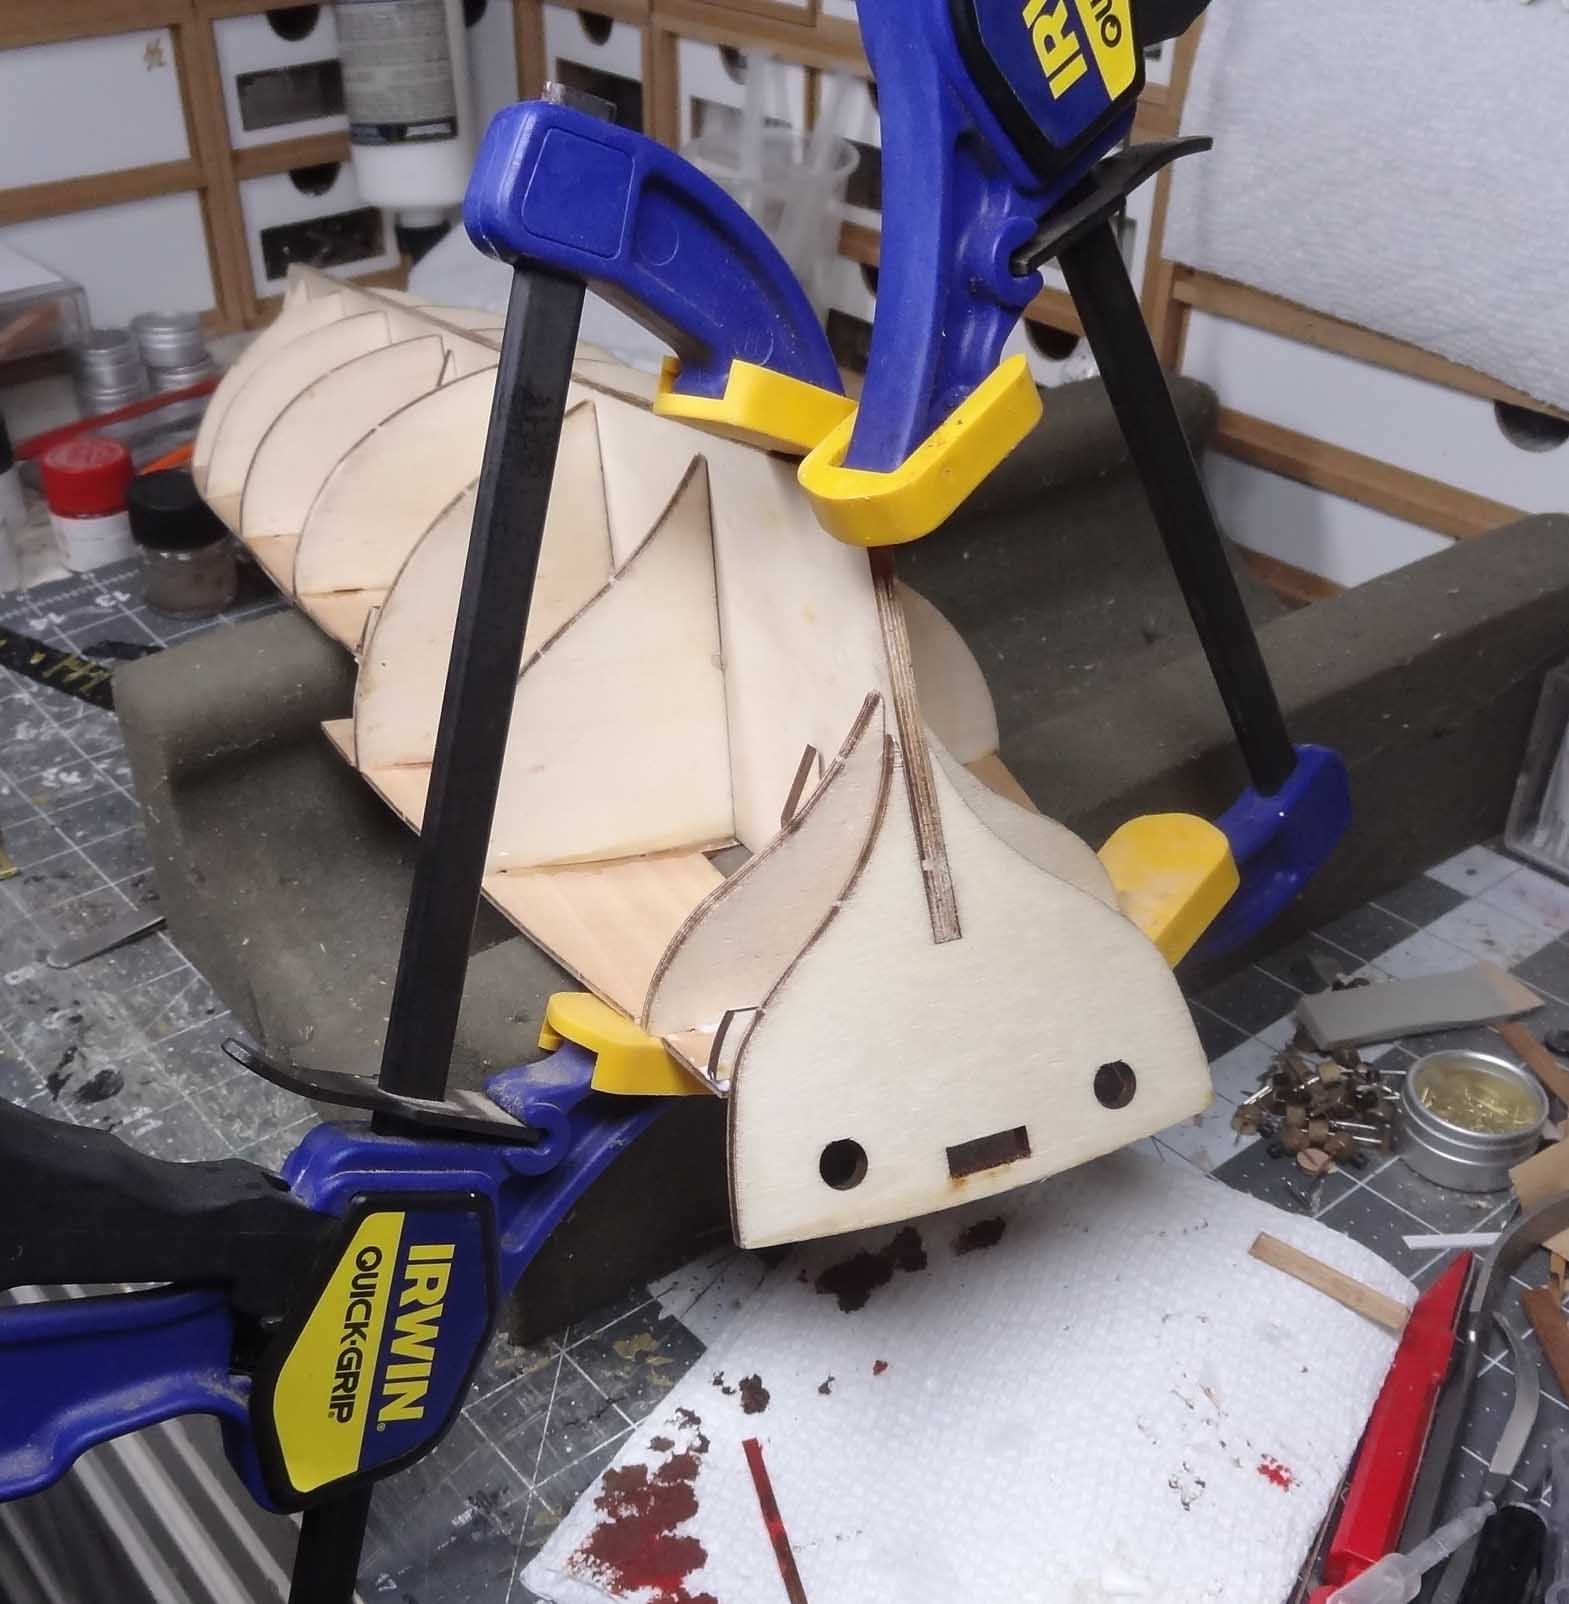
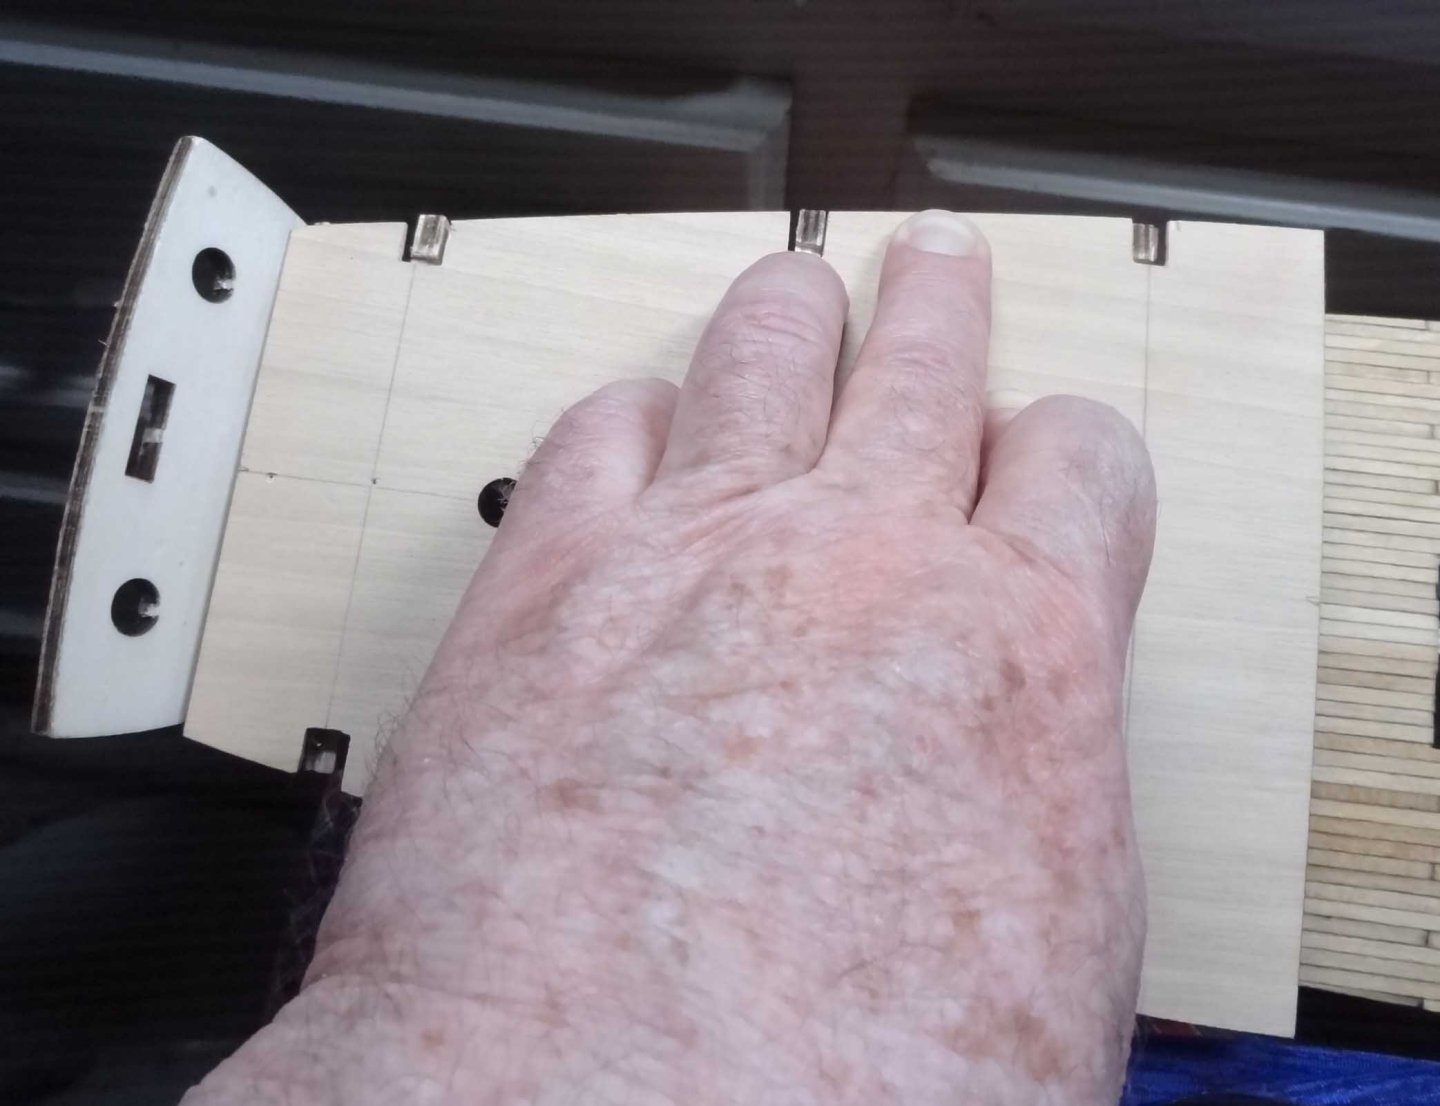
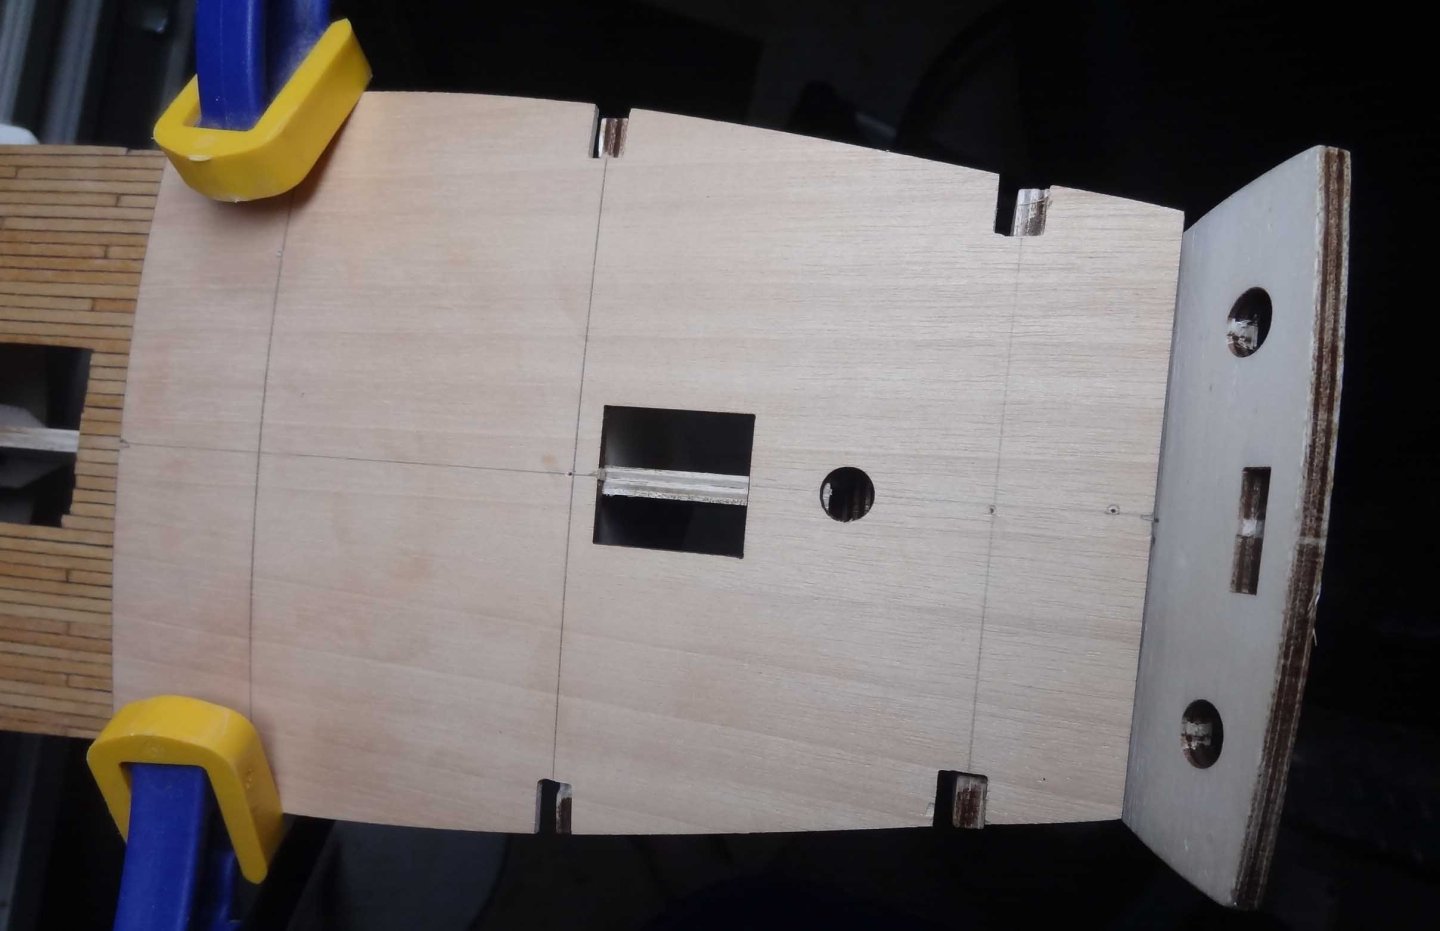
Evening! - Here's a summary of several days work. Gluing the quarterdeck subdeck to the first frame worked out pretty well and the result looks OK. There was a decision as to whether to glue in succession the second frame then the third or the third and then second. I did several dry runs each way and then took a look at how the unglued frame would be affected. Given the fact that the keel was not straight and that whichever way I went there was going to be some forcing the frames into the deck notches I decide to do them in order. The second frame actually went down pretty easy. What I did notice is that there is a pretty big gap between the end of the deck and the transom. I assume planking will cover that. This pic also shows the uneveness of the frames/keel. The starboard notch not quite making it onto the frame without some force. Time goes by. The second frame glued pretty well but I noticed a couple of things. There's a support on the transom that the deck is supposed to rest on. As you can see there is no contact between the two. Even when I force it down there is not much contact area. This support needs to be faired just like the frames. No mention of this in the instructions. Last frame glued. Final result. This is the camber in the frames I was fighting. It doesn't look like all that much but it did cause some grief. To be sure all the dry runs made this step go a lot smoother. Not just seeing what happens to the frame you are working with, but what happens to the other frames. One other note. Because I was not not totally sure how the frames were going to fit in the deck notches, I cheated and enlarged the notches a fair amount. It will all be covered by decking Thanks for following....


-
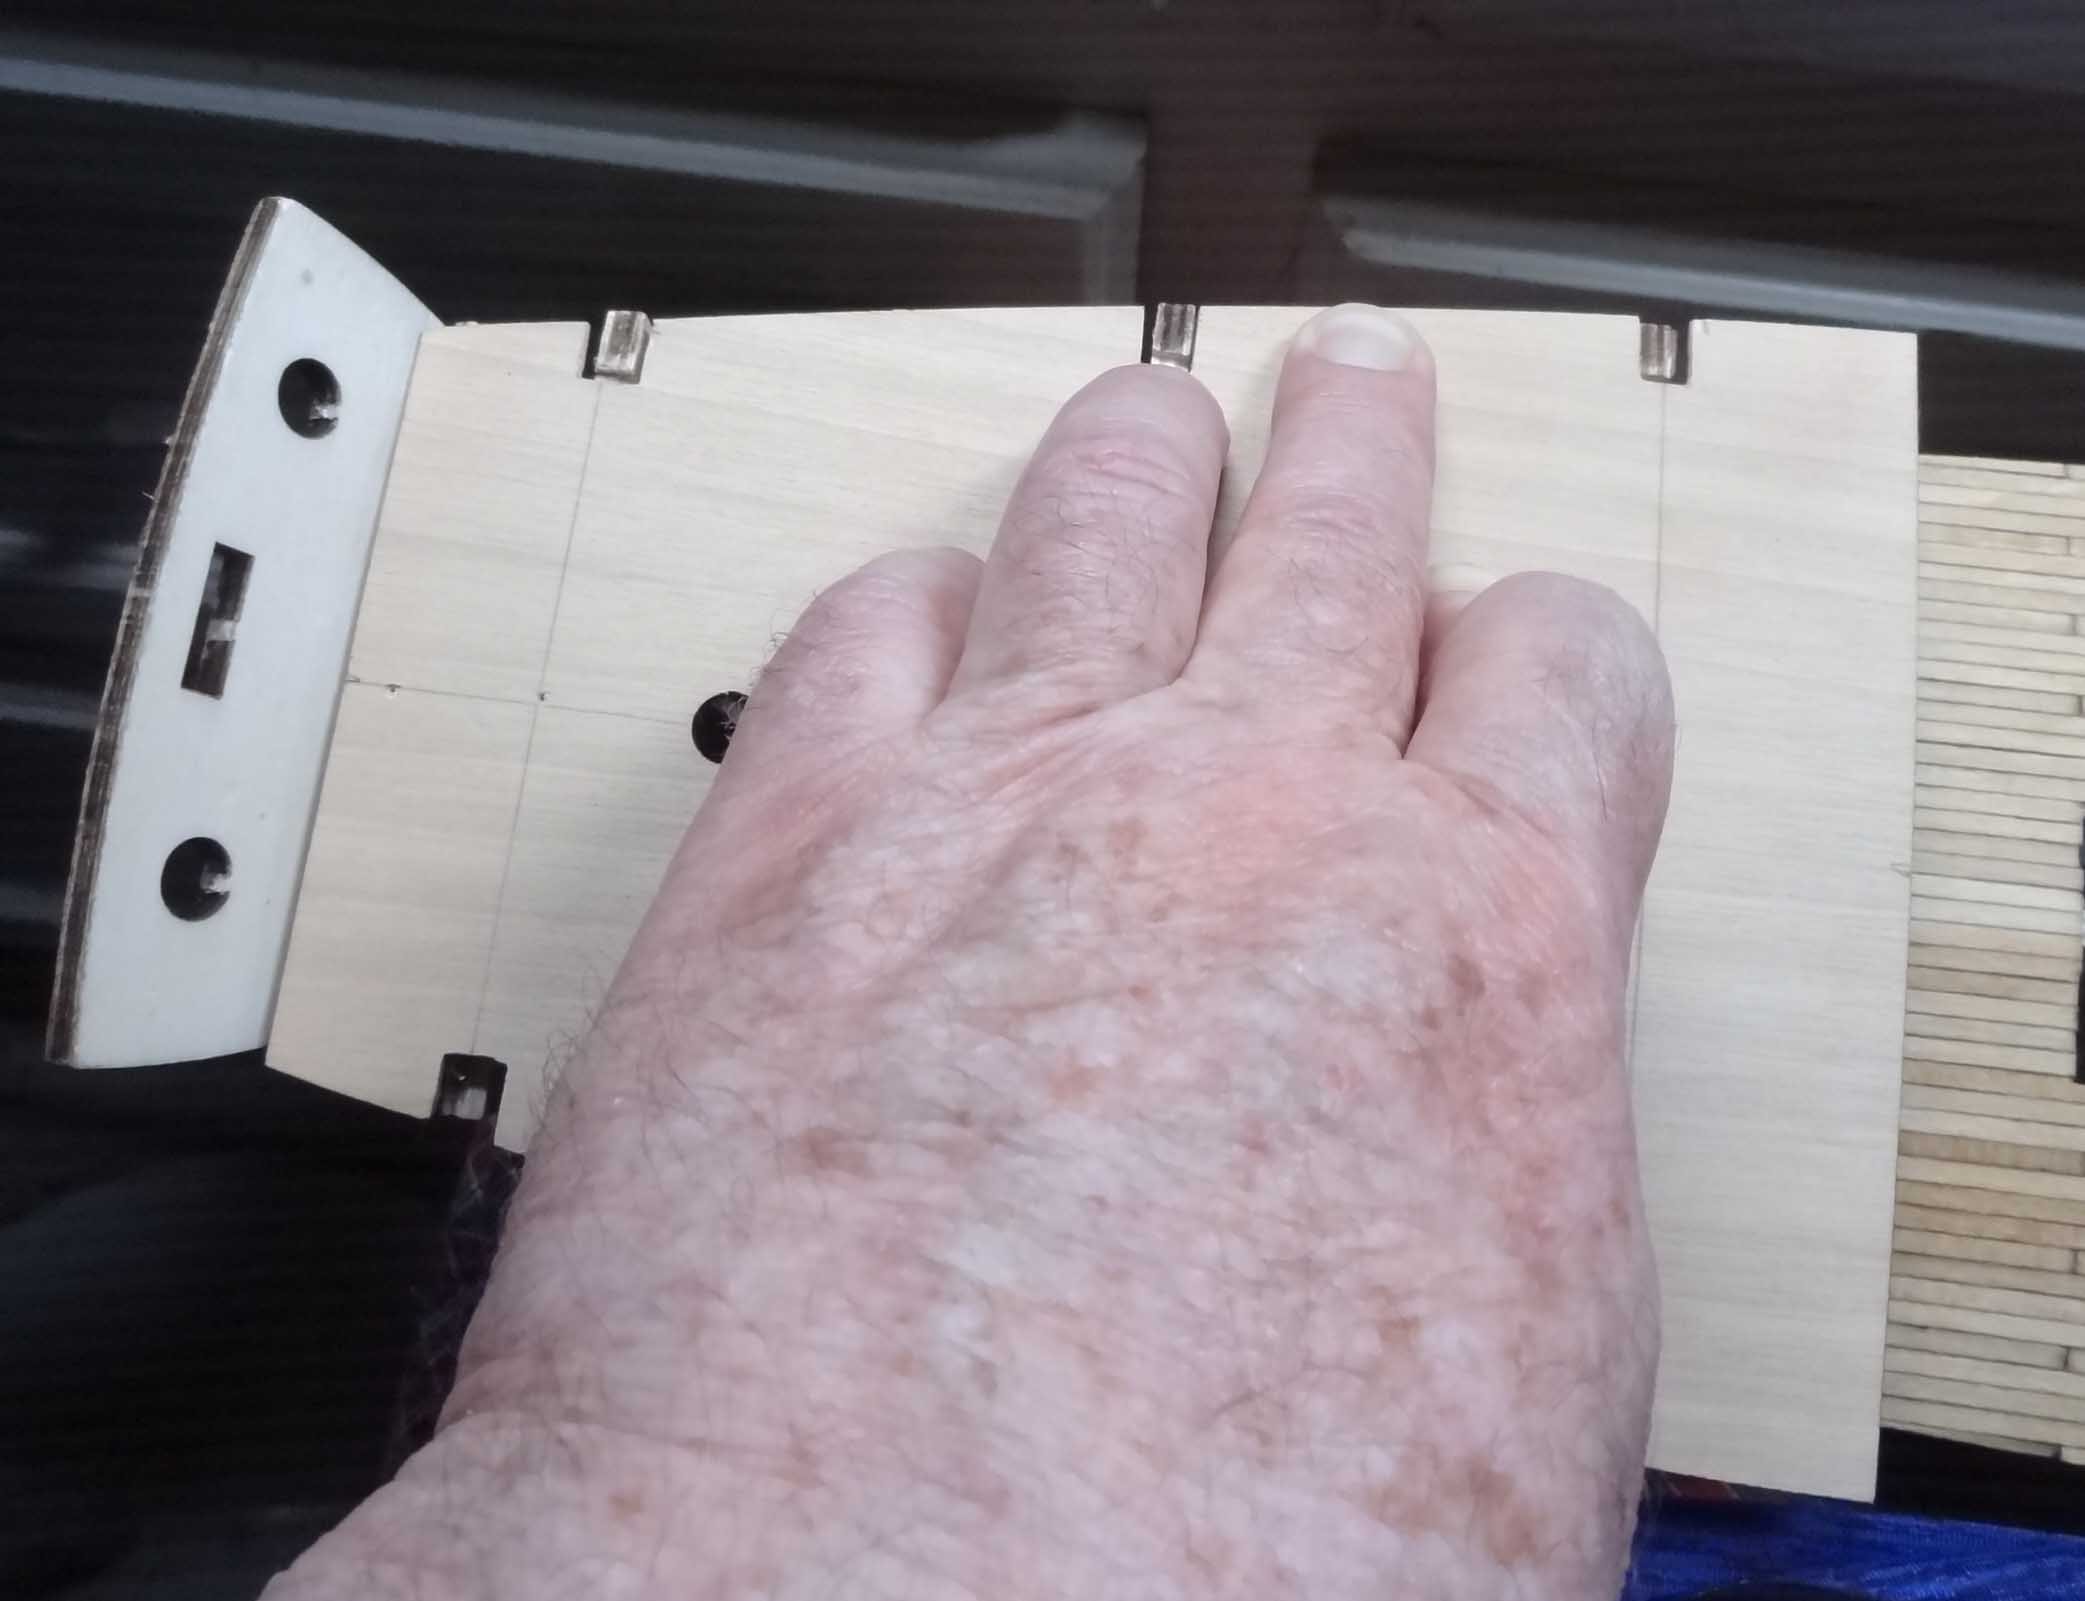
Hey Everyone - As I start gluing the quarterdeck subdeck I think I got lucky. Probably from at least 6 dry runs on the install. On run #1 I could see that the keel was not in line with the foredeck which obviously put all the quarterdeck frames out of line. After a couple more dry runs, I figured if I could get the deck and the first frame (the frame with the facing and cabin door) glued, I could bend the rear of the keel and the other frames would line up with the deck. This exercise and the similar one for the foredeck would be better handled if you could get the Admiral or a Seaman to help hold things. It was incredibly difficult for me to hold and make an image at the same time. Here is what the deck should be glued to. Be aware that those frames need to be faired to provide a decent surface to glue the deck to. The instructions do not mention this. So, after all the dry runs it's time to put the money down. Glue needs to be applied to the frames, the deck needs to be positioned and clamps need to be applied. I got really lucky and nailed that all in the first attempt. Without question, the dry runs made that possible. Obviously I had to use pretty large clamps. Setting the hull down somewhere to let the glue set was not easy. I had to wedge the hull into a drawer and let the clamps hang outside. And finally, I wanted to show the bend in the subdeck to match the camber of the frames. I couldn't get a perfect angle but this might help. It's strange. The deck is plywood but only 2mm thick. But it just doesn't want to bend at all. I want to give this first gluing (white glue) a full 24 hours to cure. Hopefully tomorrow I can get the rest of it done. C'ya


-
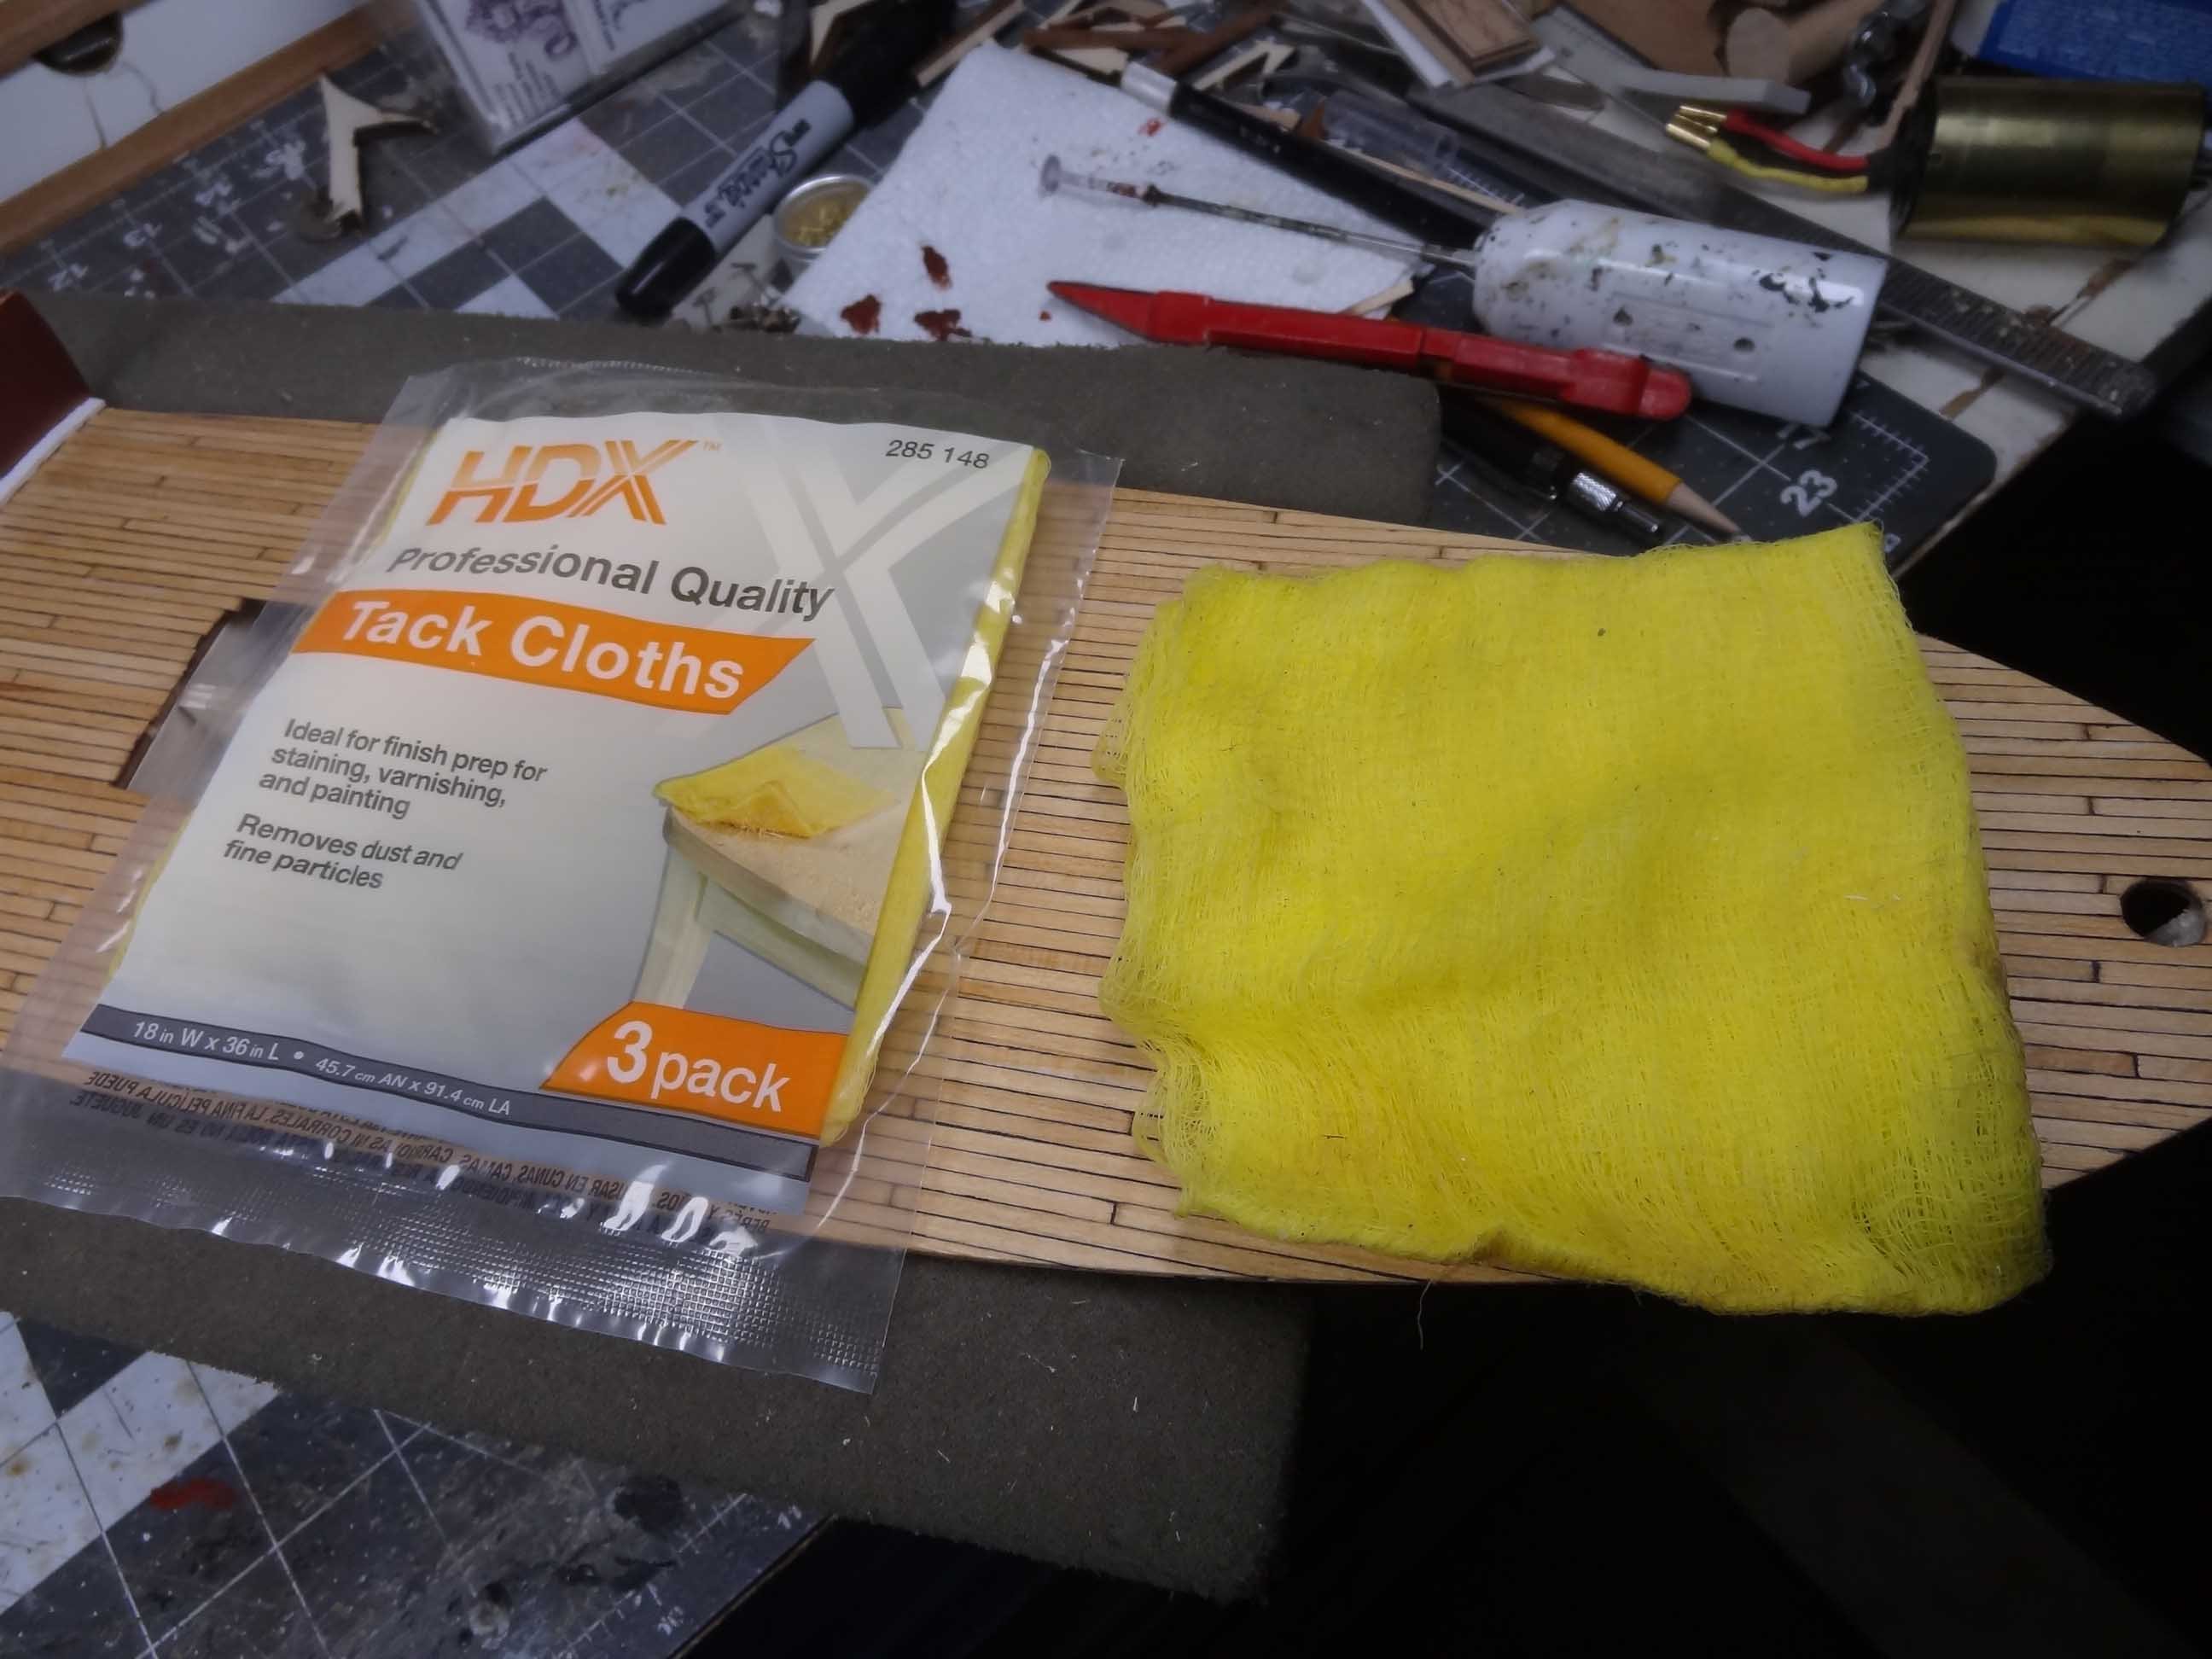
Hello Everyone - I think I am finished with the foredeck and facing. Although I have learned that when you paint/stain/finish early on in your build, you usually end up having to do some touch up down the road. Last post mentioned tack cloth. Here's what I used and is typical of the product. Again it's great for picking up all the grit and grime from a surface before painting. I won't bore you with 10 images of the deck but here I offer proof that it is finished 🙂 I'm seeing my pics are getting worse. I'm using a 15 year old point & shoot. Several of the manual controls no longer work. I'm debating whether to just pull out the big guns (my DSLRs) or look into a new P&S. Anyways, it looks like fastening the quarterdeck subdeck is next on the agenda. I'm not looking forward to this. There is some serious camber in the frames and a dry run did not go well. The subdeck is going to have to bend quite a bit. The same material was not cooperative for the foredeck.


-
Hey everyone - given the 1"+ overhang of the quarterdeck (once installed), I figured I better do whatever I want on the facing while it was easy to get to. So I painted that, glued the Britannia door and placed a coaming at the facing base. I painted it all. I even decided to go ahead and stain the deck (Minwax Natural). I took some pix but then realized I probably needed to varnish it just to show it finished. So I've done that and will have final images. One thing I did pick up that has been really useful is tack cloth, sometimes known as painters cloth. If you know what I am referring to then skip this. The product is something like a strip of cheesecloth coated with a waxy substance. It is fantastic at pulling up dust, grit, etc. from surfaces after they have been sanded/filed. It just picks up every last bit of everything before you paint/stain. All the big box stores sell it, I sure you could get it on Amazon as well. Highly recommended. It did a great job of cleaning up the deck before staining. Also works great on hull planking.
-
Buying Filler Blocks
mikiek replied to mikiek's topic in Building, Framing, Planking and plating a ships hull and deck
Thanks for all the replies. I guess what I am wondering is if it is more efficient to buy a couple of big blocks and cut smaller filler pieces or buy smaller pieces. I'm kinda thinking a big block would be better but there might be more waste.