HOLIDAY DONATION DRIVE - SUPPORT MSW - DO YOUR PART TO KEEP THIS GREAT FORUM GOING! (Only 20 donations so far - C'mon guys!)
×


mikiek
-
Posts
2,276 -
Joined
-
Last visited
Content Type
Profiles
Forums
Gallery
Events
Everything posted by mikiek
-
Great explanation JCF. That makes perfect sense.
-
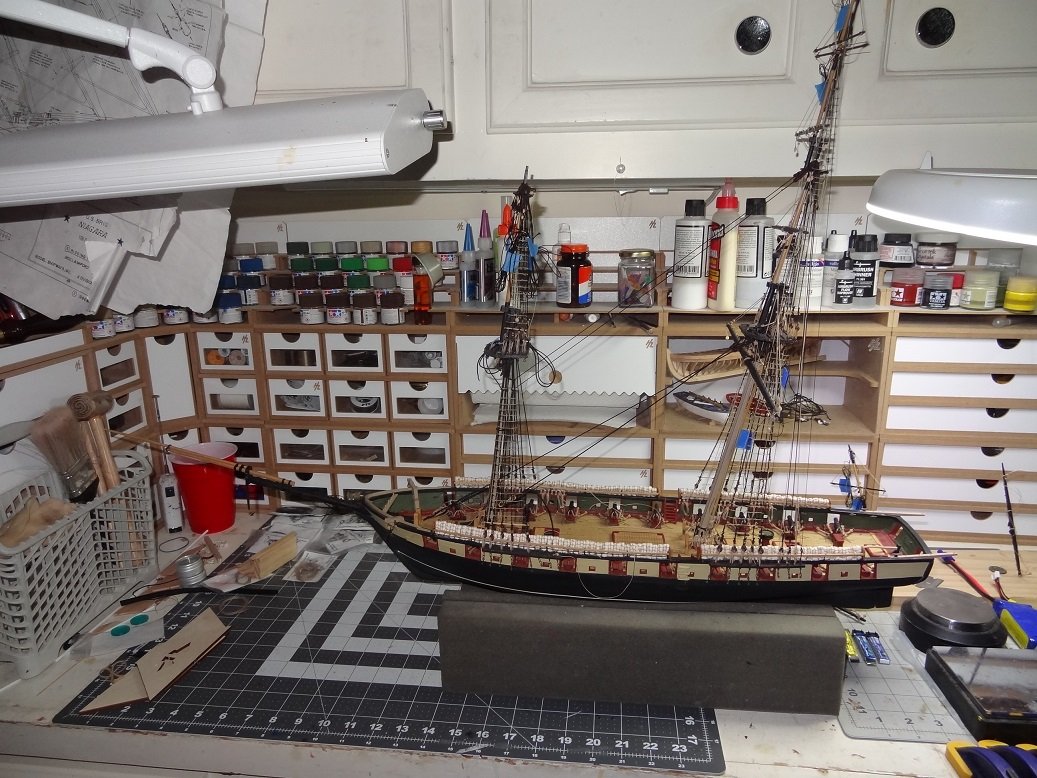
 Getting more serious. I made enough room on the bench to have the boat, masts and bowsprit. Ok so it's on the bench. Turning it around to get to the other side is a bear. Was looking the deck over and realized I never built a bellfry. So I put one together real quick. Must have lost the bell so had to make another. Of course now I'm worrying what else did I forget?

- 843 replies
-
- 6
-

-
- niagara
- model shipways
- (and 2 more)
-
Just wondering. My Niagara build shows a few thimbles reeved almost like a block for a couple of backstays. Seems like a block would make more sense. Henry's comment about a bullseye as a fairlead shows up in the plans too. That makes more sense.
-
What's the difference? Both seem like wood donuts with a groove around the outside. Assuming there is a difference, when do you choose one over the other? Thanks.
-
Steve - yes those black pieces are supports. I would make those along with some wire shoved into the back side of the rail and into the bulwark. That will add some reinforcement from 2 different angles.
-
Great rope work Don. Don't ya just love lateen rigs? What rope/thread are you using to serve the shroud? That came out nice. You may have taught me something about pix of the rigging. It's got to be a solid background. And smooth. Even a bath towel has too much texture and clashes with all the ropes, knots, etc.
- 653 replies
-
- 3
-
-
- trabakul
- marisstella
- (and 1 more)
-
Crazy like a hurricane. We got rain but that's about it. Of course trying to do anything in Houston was an adventure.
- 843 replies
-
- 1
-
-
- niagara
- model shipways
- (and 2 more)
-
Hey Don - thanks. Good to see you. I haven't seen many posts from you lately. Hope things are OK. Is it cooling down up there yet?
- 843 replies
-
- 1
-
-
- niagara
- model shipways
- (and 2 more)
-
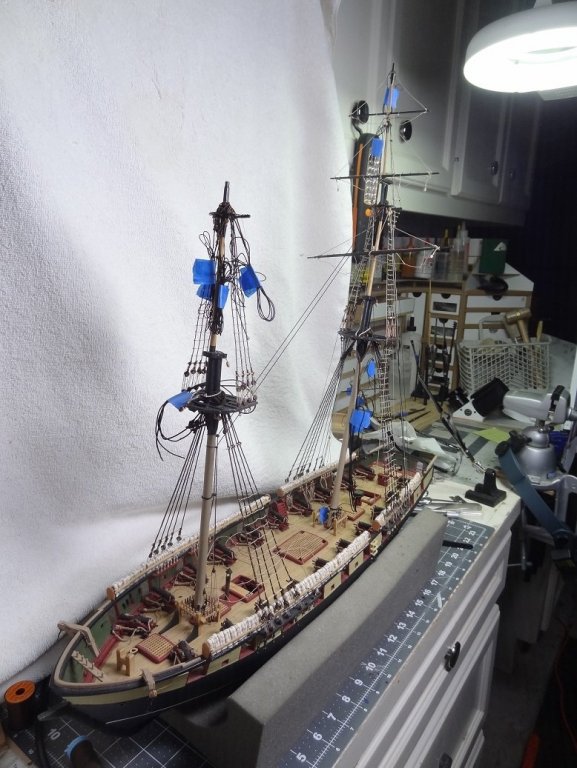
Hello Bob - I'm trying to do all I can without the bowsprit in place. Once I go down that path there's an extra 2' I will need on the workbench. My lighting will be affected as well. Both lamps are clamp on and I will have to spread them some in order to have enough room to get the build on/off the bench. That will darken things a little. Of course I do realize I am just postponing the inevitable
- 843 replies
-
- 1
-
-
- niagara
- model shipways
- (and 2 more)
-
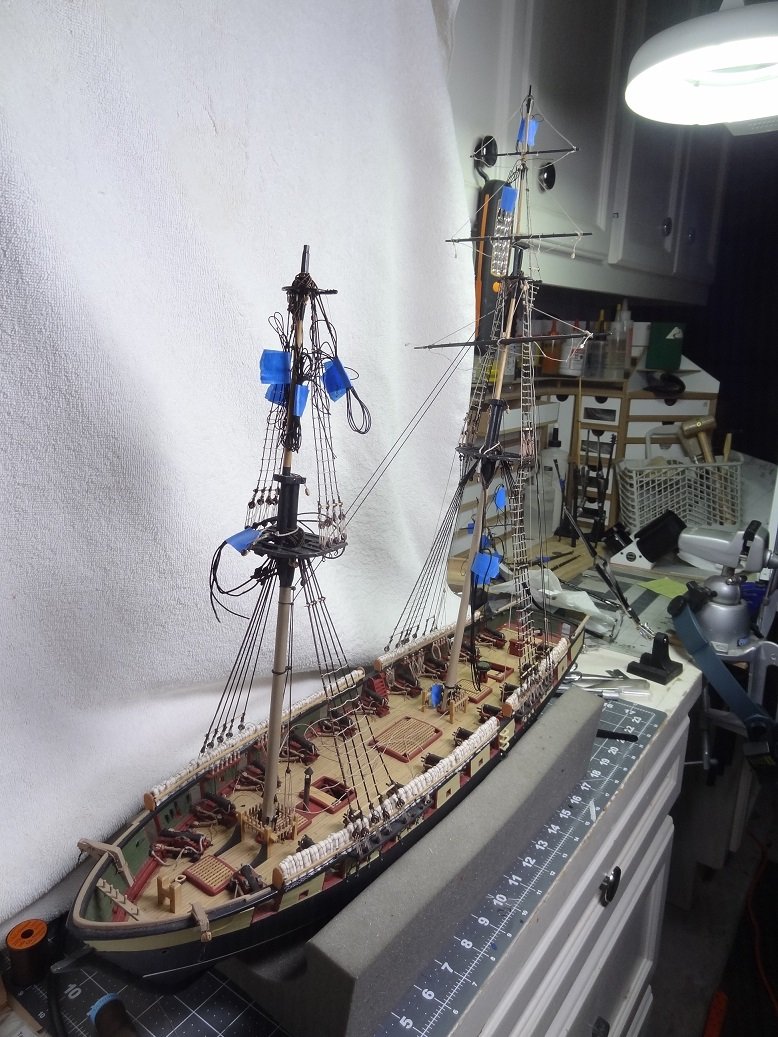
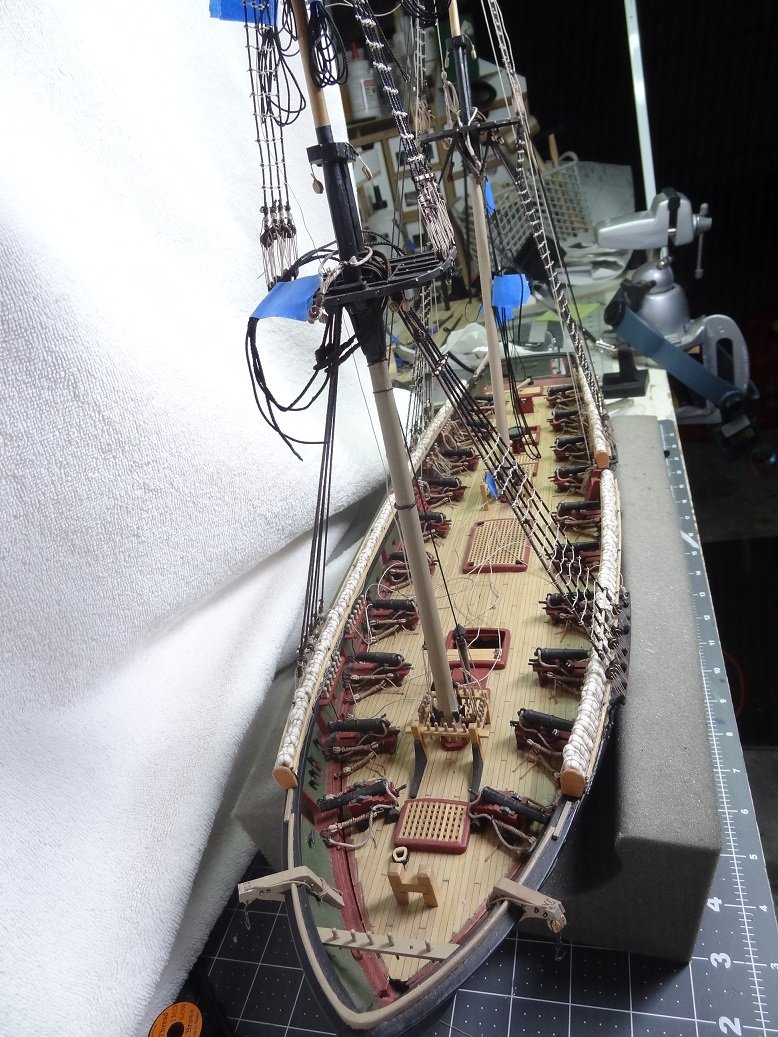
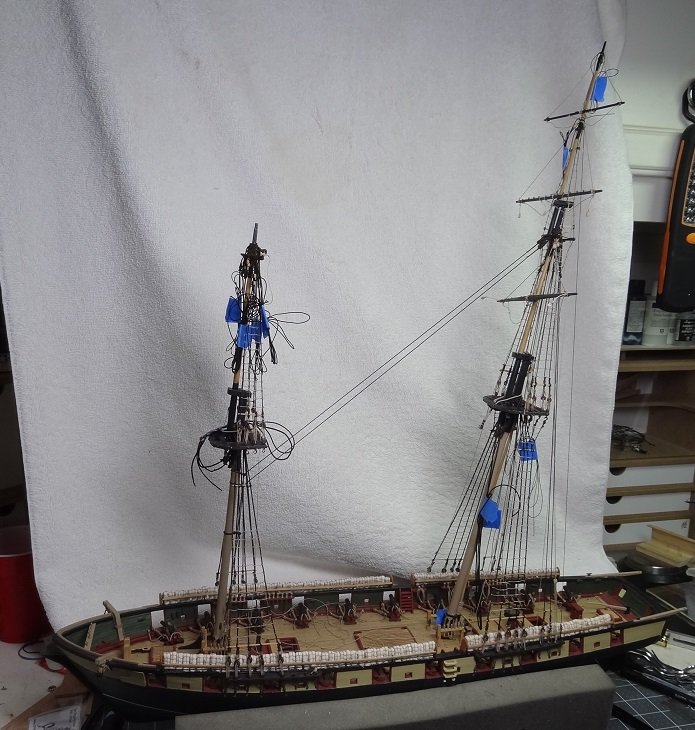
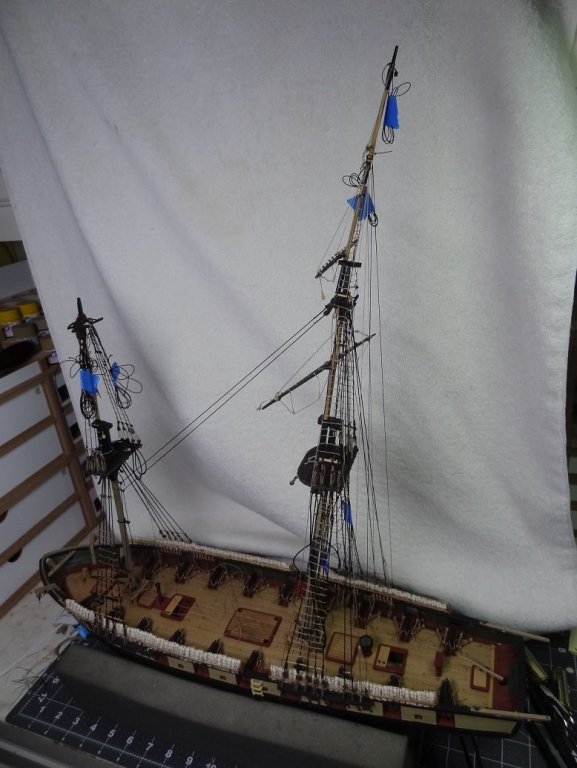
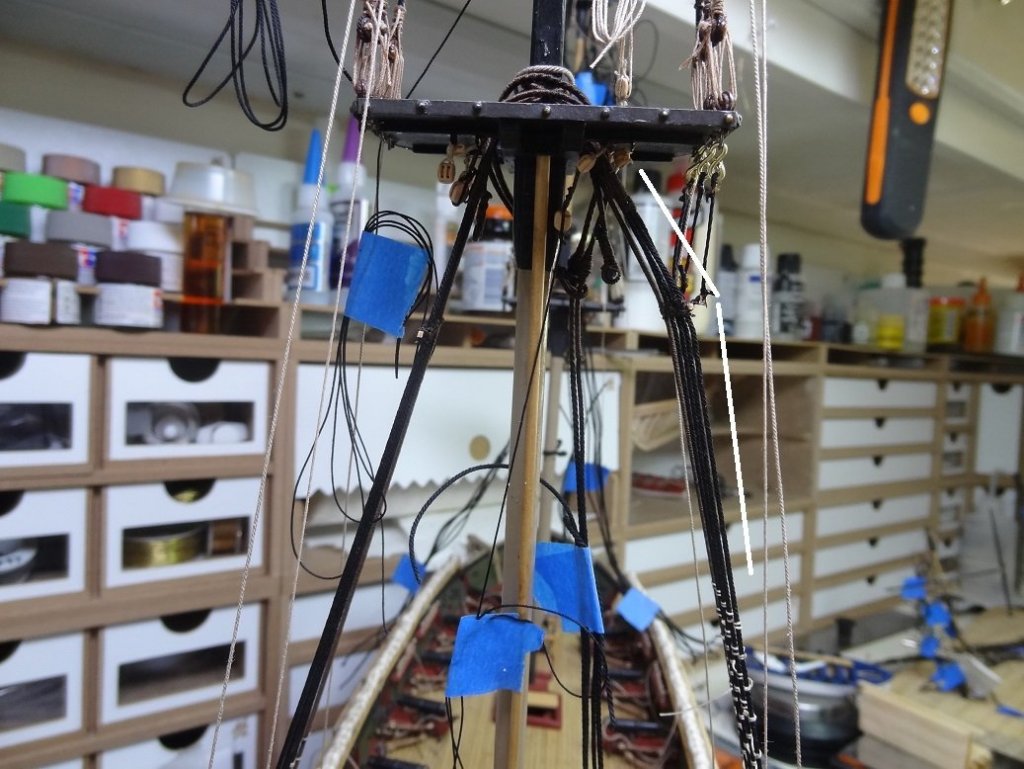
Hey folks - just needed to prove that I am still alive and well. Rigging is moving along. I'm still debating whether I prefer all the ropes or something more like an admiralty style build. This one is for Joel and he was always after me to rig the thing so that's what it will be. Sure wish someone would comment on taking pix with all the ropes. For some reason they really stink since rigging started. I've tried various backgrounds, going outside. They all look bad. Be that as it may, here's progress. Main mast is mostly done, still have the forestays to do. Course yard as well. Fore went in next, finishing up shrouds & rats. I'm working bottom up on the fore so I don't even have the top gallant/royal in place yet. Will be doing a little bit of running rig - halyards, braces, lifts. I'm a little concerned that it may not be enough, but then again maybe it will.


- 843 replies
-
- 4
-
-
- niagara
- model shipways
- (and 2 more)
-
I'm not afraid of heights but I am afraid of falling from heights. I'm rigging Niagara and was doing the main shrouds & futtocks. It made me start wondering how they got to the mast top. I can see going up the rats on the shrouds & futtocks. But then you're right under the top and there really isn't much to grab hold of. There's no hole to go thru so you would have to climb up over the edge. At that point about the only thing to pull yourself up is the deadeye lashing. How do they do it?
-
I am honored to be on your list. I research in the opposite mode - a bizillion saved links, somewhat organized so I have to weed thru when looking for a topic. And then there's the books on the wall. At any rate I'm glad this helps. Your first few will be tricky. I wish I could do a video instead of pix.
- 843 replies
-
- 2
-
-
- niagara
- model shipways
- (and 2 more)
-
Good morning Doug. Thanks for stopping by and I hope it can help you. If I wasn't clear on something don't hesitate to ask about it. You know it's funny. I'm raving about this technique of sliding a seizing up or down a rope. Versus my old method of seizing it has opened a lot of doors and I can now seize in places I wouldn't have dreamed about before. Almost like the zip seizings people talk about here. The big difference is that this seizing is actually functional - it will hold ropes just like a seizing was designed to. But anyway, I sometimes wonder if I was the only builder here that didn't know about the technique. Well, we're always learning....
- 843 replies
-
- 4
-
-
- niagara
- model shipways
- (and 2 more)
-
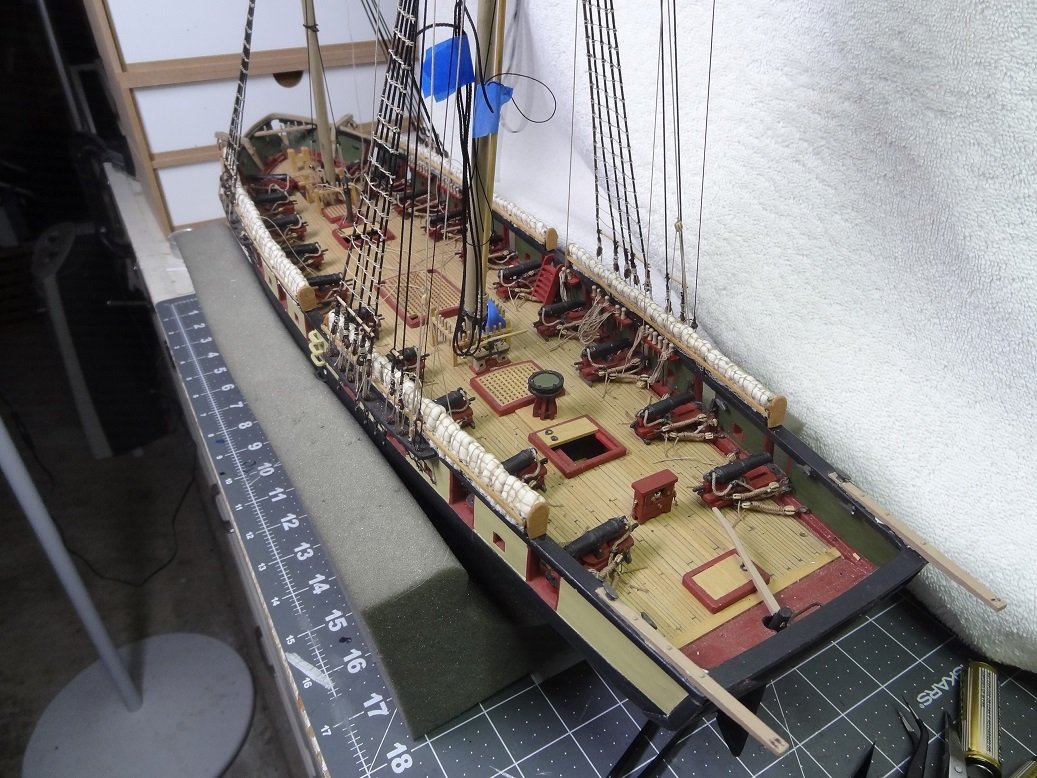
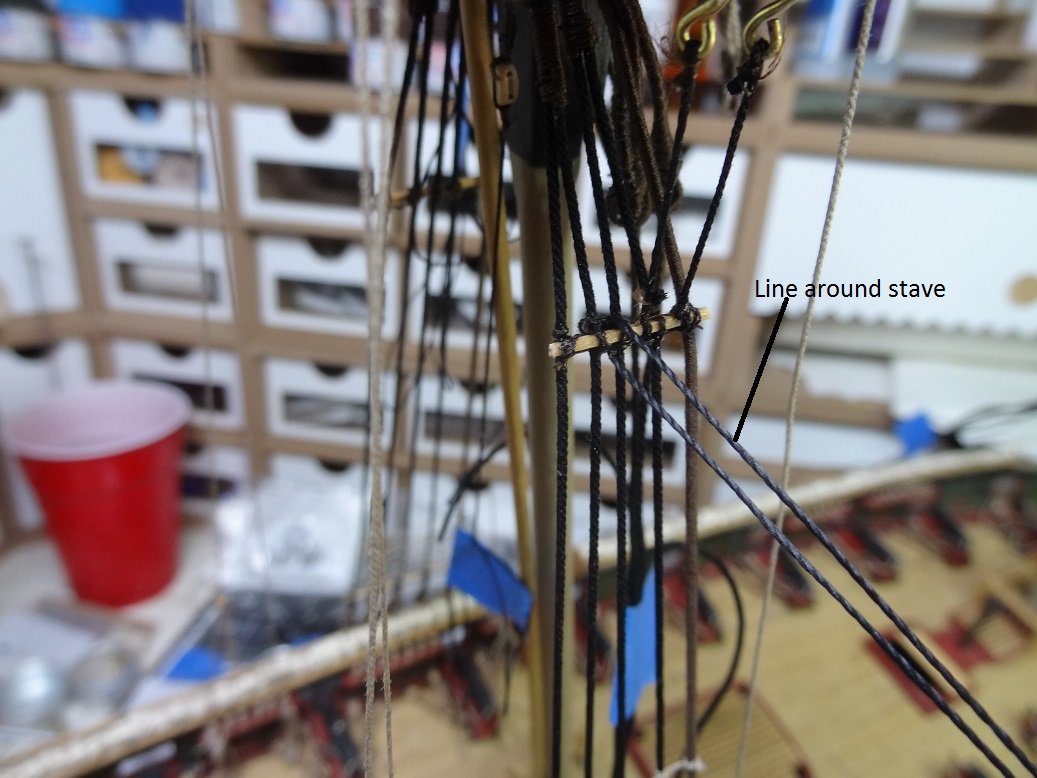
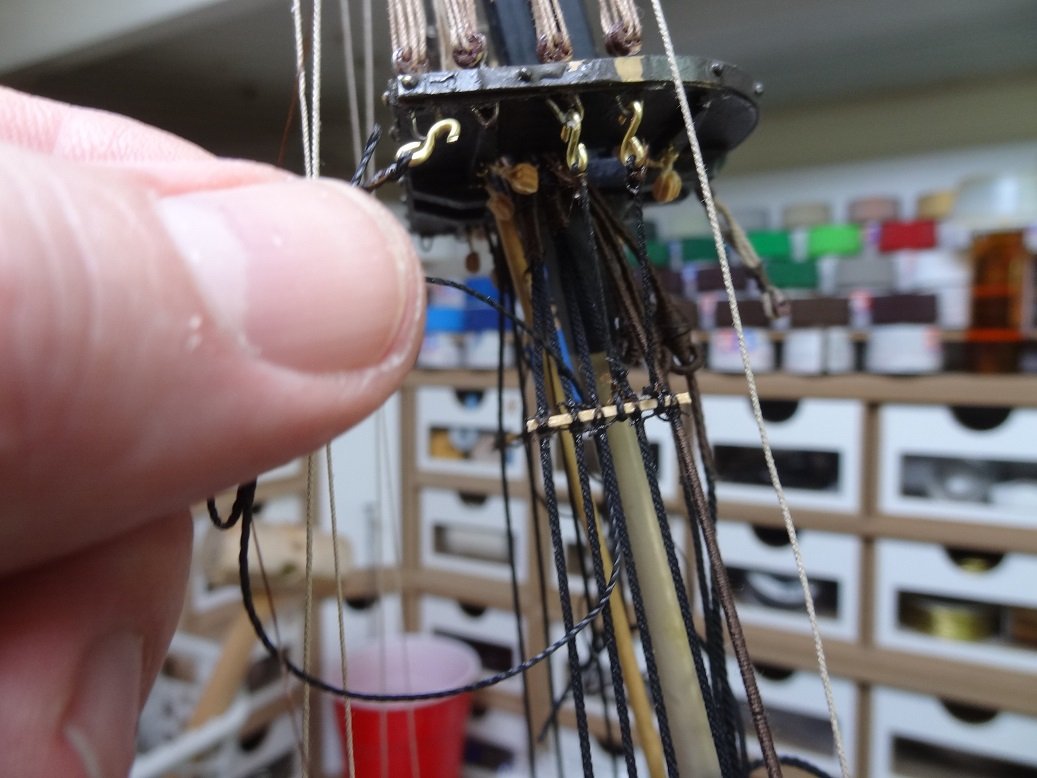
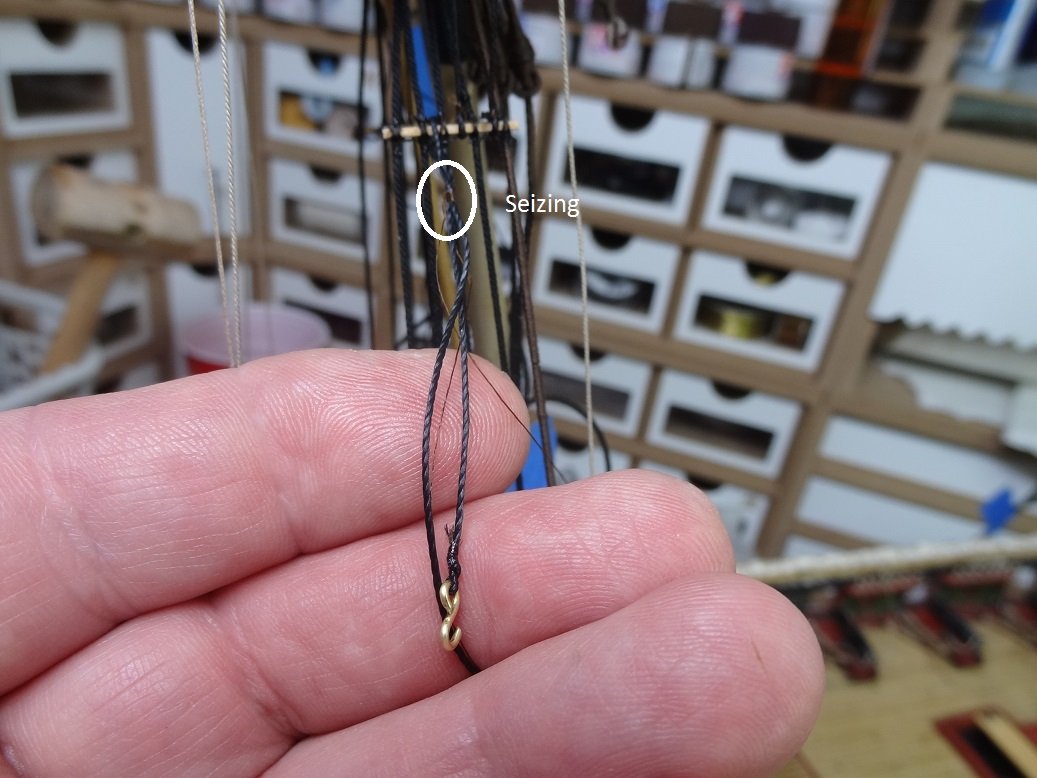
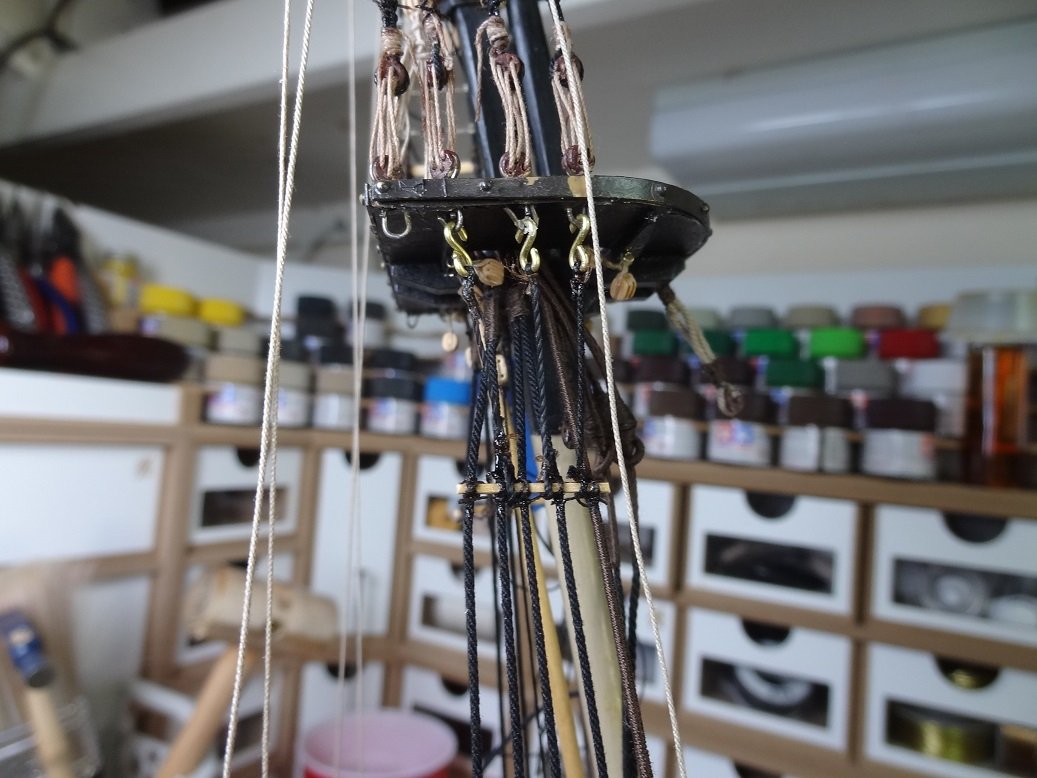
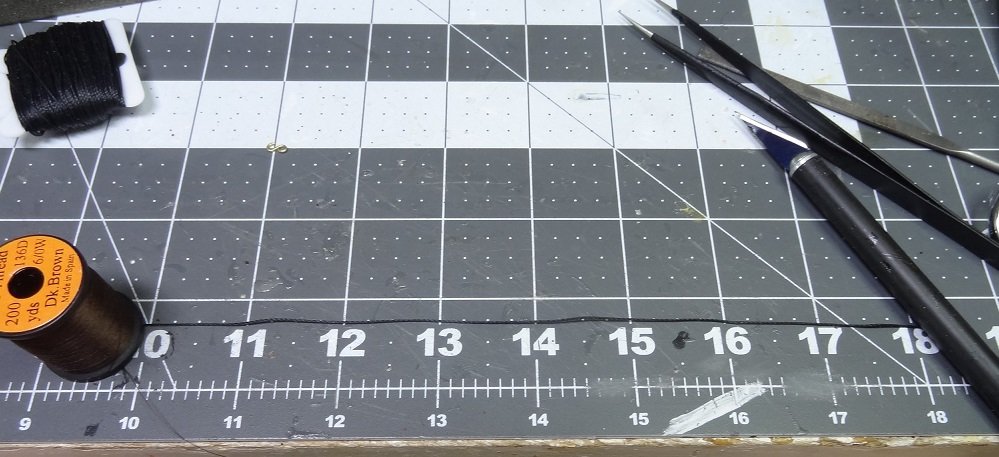
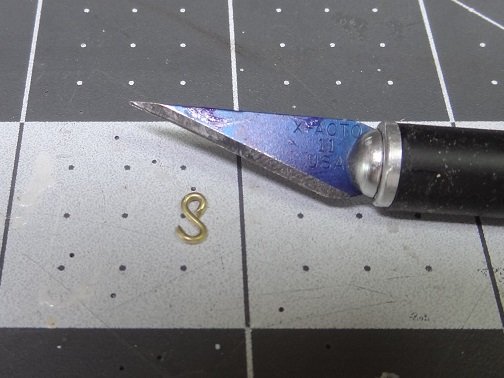
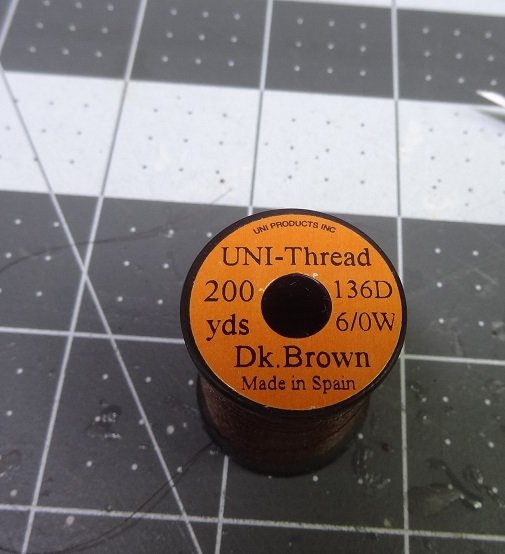
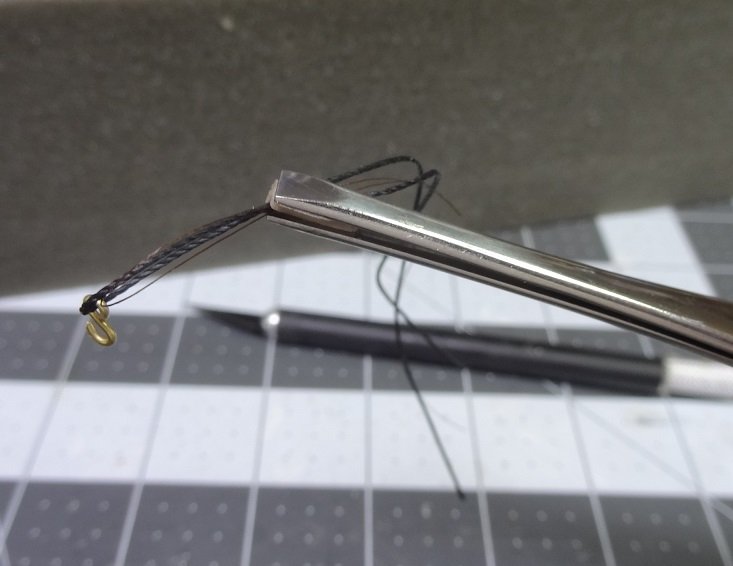
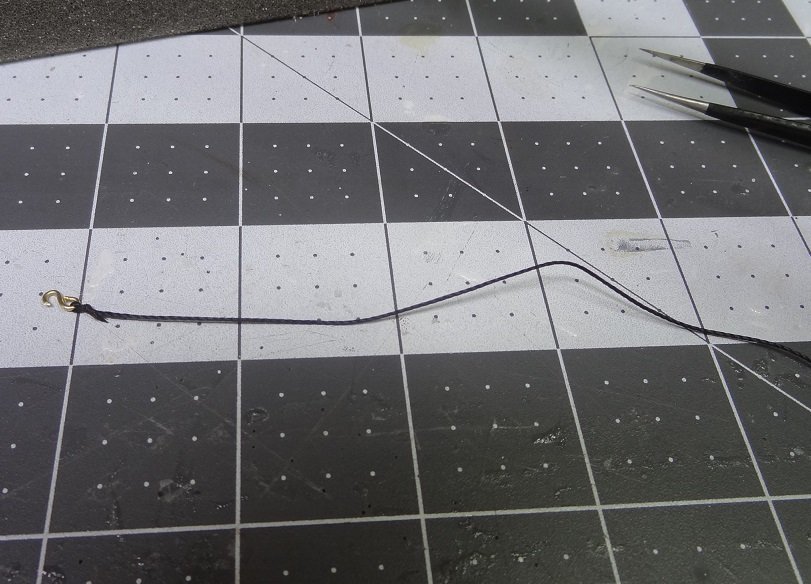
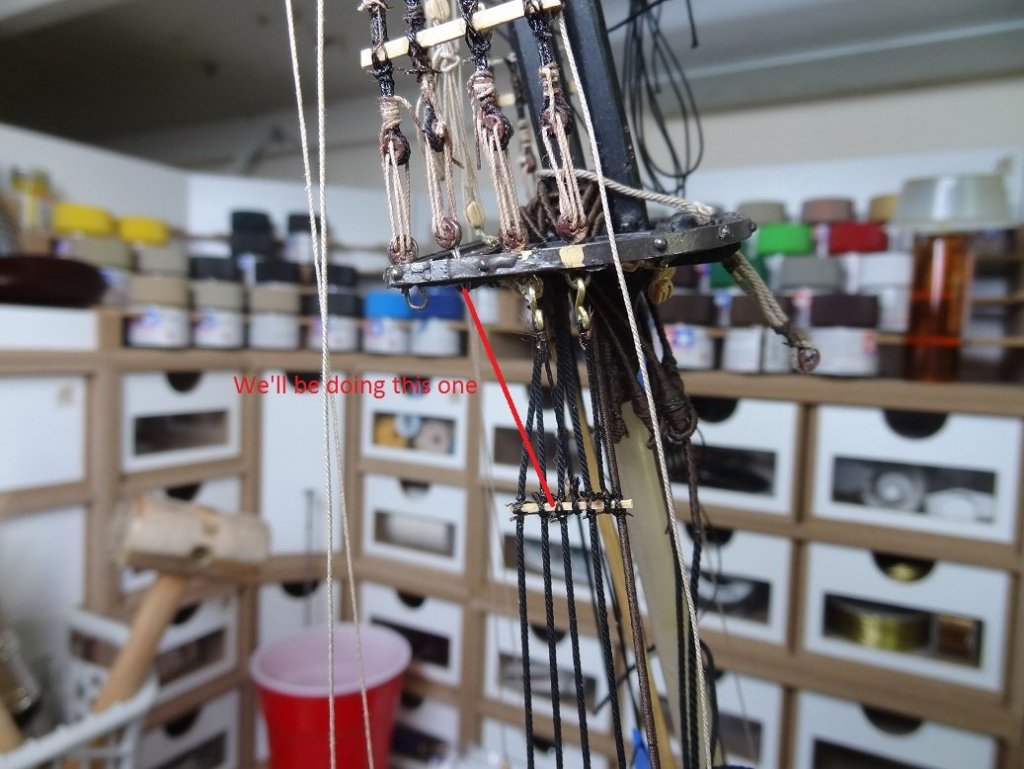
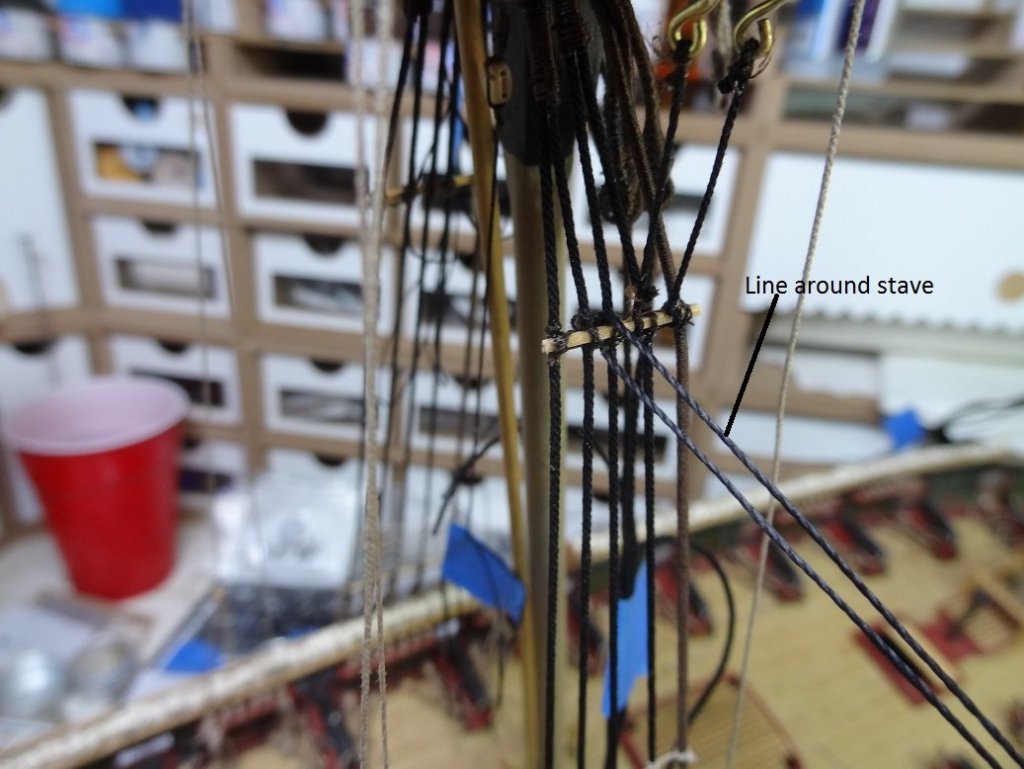
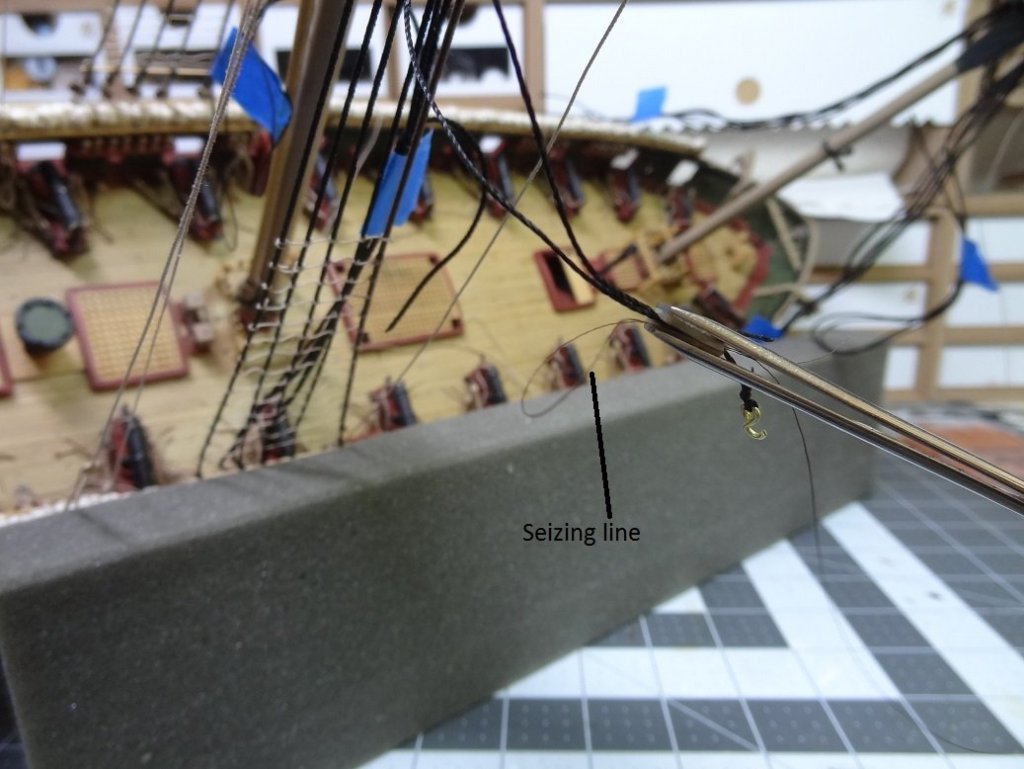
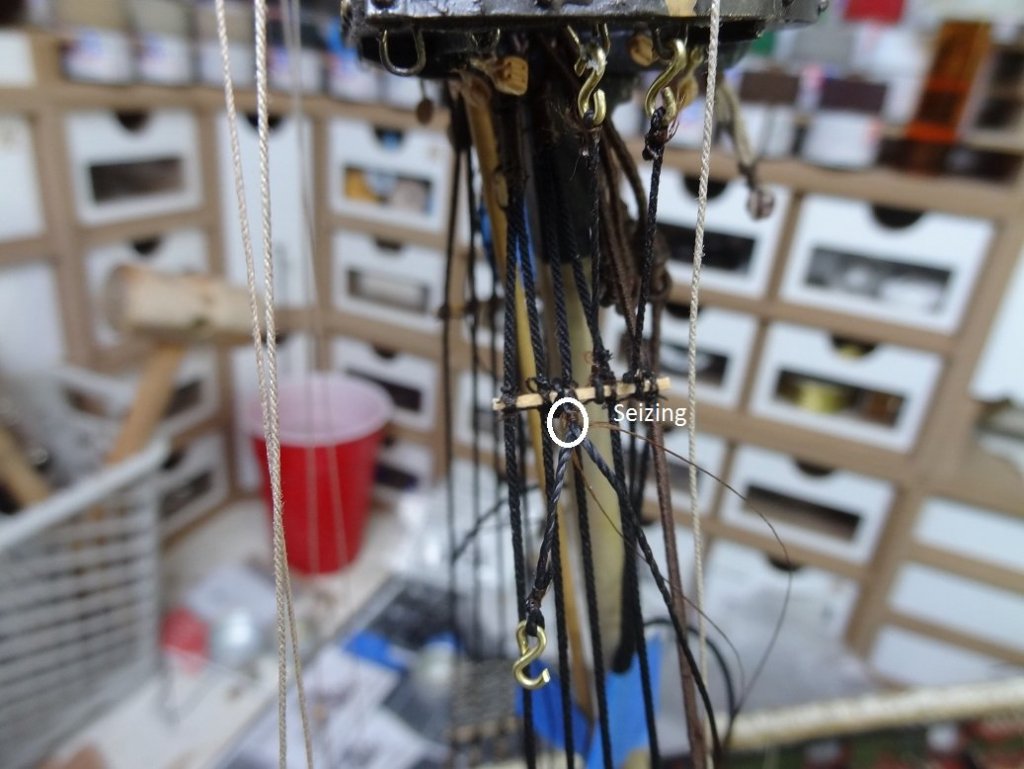
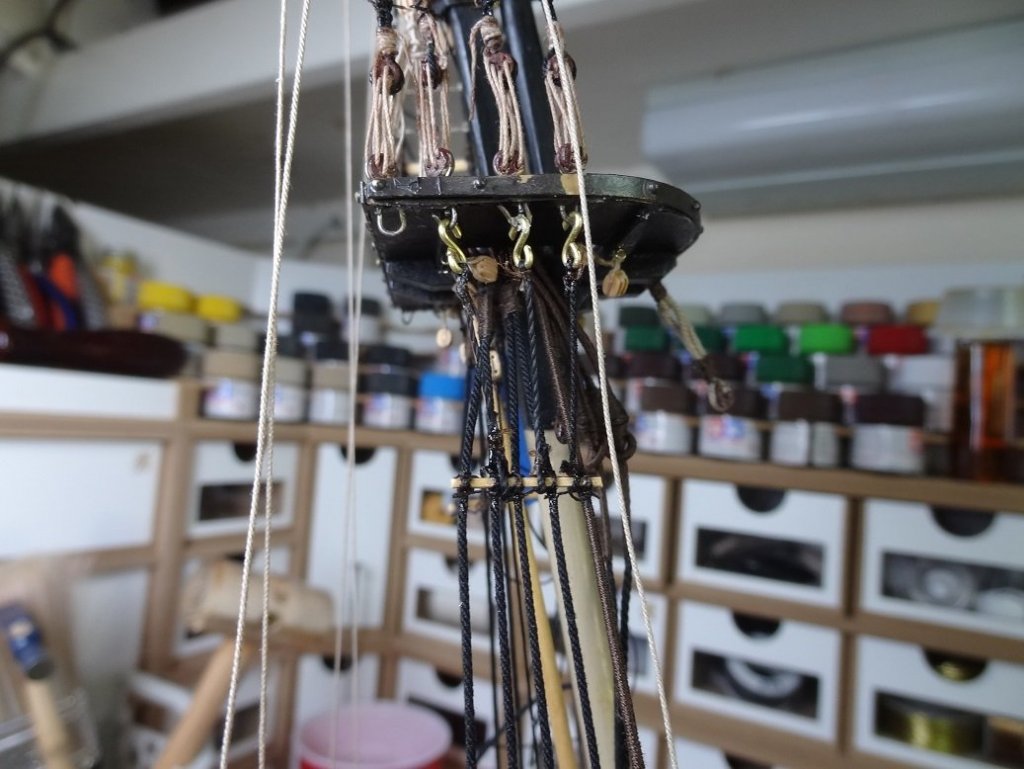
A beautiful day today. Had both ends of the shop open. No fans. No A/C. Part of what stinks about rigging is there's not a lot of need to post. Nobody needs to see every new rope that gets hung. Then all of a sudden all this stuff is done and you gotta show it to someone. While doing the rats on the lower shrouds I started wondering about the futtocks. Seems like many new riggers wonder when to do those - so did I. After finishing the futtocks for the main I think the answer is - early on. Maybe even before the rats. I will say they put a lot of good tension on the shrouds. Thought I would pass on how that went down. I think most would agree the shrouds need to be fastened down before you can think about the futtocks. That will usually mean masts have been stepped and all of a sudden it's a lot harder adding and seizing ropes to spars. Futtocks are a pretty simple task, they're just not easy to fasten on. This process wastes quite a bit of rope so I went cheap and used the kit supplied stuff instead of the Syren rope. I think it's hidden enough that it doesn't show. As you can see I started with an 8" piece for what will end up a 1 1/2" stretch. I'm assuming everyone can make a hook. I've been using this fly tying line for seizing. It's about as thick as a hair. The hook is seized to the end of the rope. Use your best method here. Ready to rock. This will be the third out of four futtocks. Wrap the futtock shroud around the stave. Sidebar - if you don't have one of these foam hull holders why not? As you can see it will hold the hull at extreme angles and is very gentle on exterior appendages. OK - so this is why we used such a long piece of rope. The hook we can hook to the loop under the mast top but the other end must be seized to the stave. Not an easy thing. So using our extra long seizing clips we put a 7-8 wrap seizing on the futtock shroud. Doesn't really matter where. Typical method, make a loop with the seizing line and lay it on the rope. Take one end of the seizing line and wrap it around the rope like a noose. Stick that end of the line thru the loop and pull both ends of the seizing line tight. This is standard stuff. One thing I never realized. I always figured the seizing was supposed to stay where you seized it. NOT TRUE! The seizing will slide up and down the rope. This will make like much easier. Right now the futtock shroud is seized (well at least kinda) around the stave but it is much too long. So I just slid the seizing around some while also pulling on the shroud to make it all fit. Of course the seizing needs to end up at the stave with just enough shroud to barely allow the hook to reach the loop under the top. The whole trick is moving the seizing around and pulling on one piece or the other of the shroud and eventually it all fits into place. It takes a little practice but this same technique is useful in countless situations. You just have to use enough rope so that you can get a seizing on it SOMEWHERE. Then you just slide the seizing around. I have even managed to seize a few ropes buried deep under other ropes. Oh yeah, the finished shroud. You can see I was even able to get enough torque on the futtocks to tension the shrouds. So yea! I got to post today. I also better disclaimer. I didn't invent any of this. It's just a combination of various techniques that has really changed my attitude on rigging. Especially seizing. And let's face it, if done properly almost every part of rigging is seized to something. If you can make a seizing and then move it where it needs to go, that can open a lot of doors.


- 843 replies
-
- 3
-
-
- niagara
- model shipways
- (and 2 more)
-
Due to the hurricane last week I had many days to stay at home. I did so much in the shop. You've no idea how ready for retirement I am. Get some of these builds out of here.
- 843 replies
-
- 2
-
-
- niagara
- model shipways
- (and 2 more)
-
Dr. Per - how good to hear from you! Sounds like you may be on the road? Did you ever finish the antique boat you were building? There's one I'm going to pick up pretty soon. It has an RC option and I am waiting for the drive to be available so I can get it all at once. It's the Amati Riva Aquarama.
- 843 replies
-
- 2
-
-
- niagara
- model shipways
- (and 2 more)
-
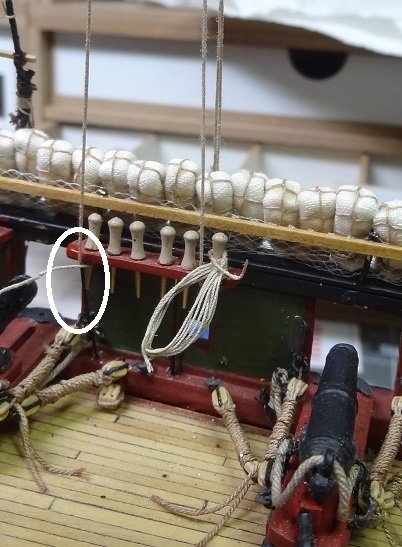
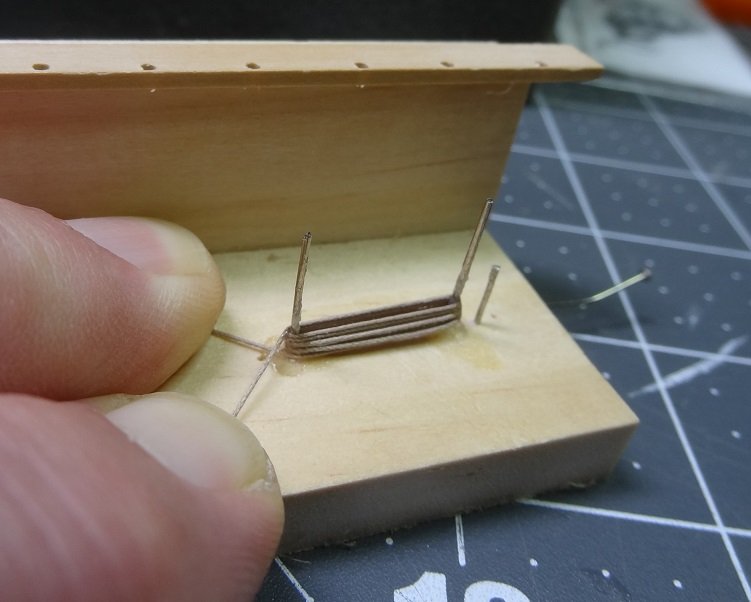
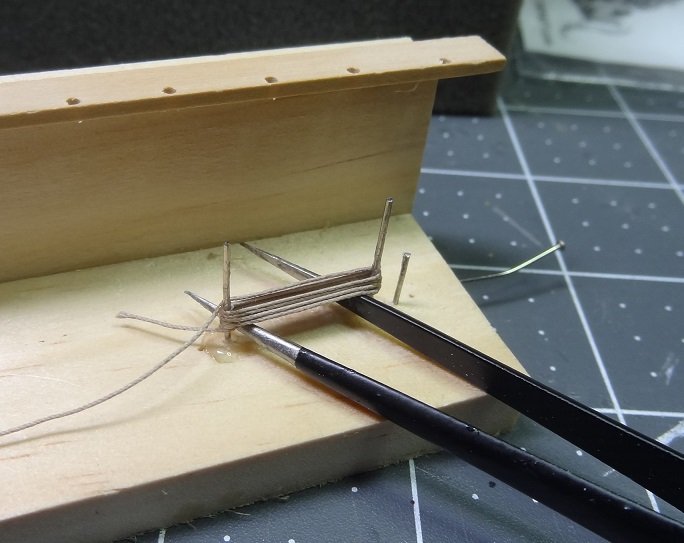
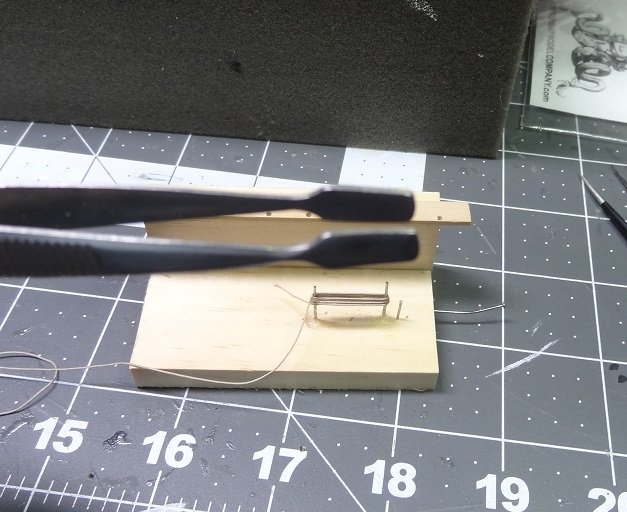
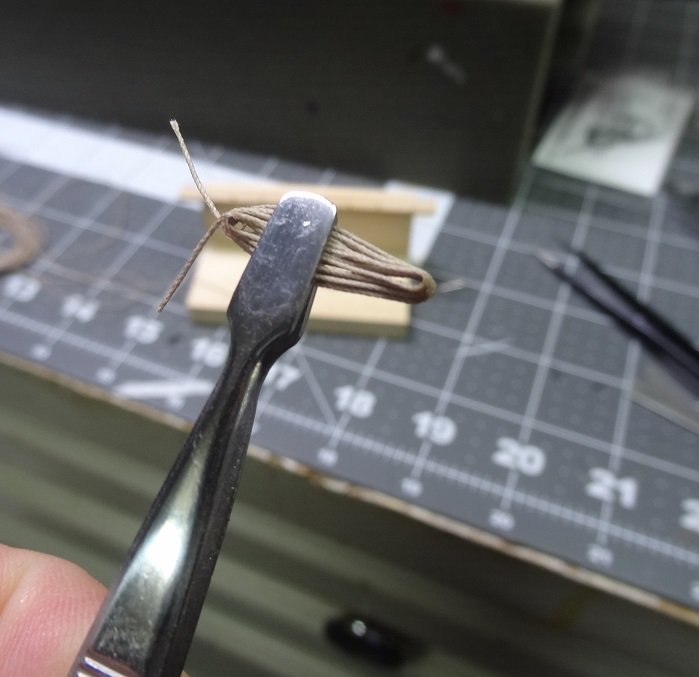
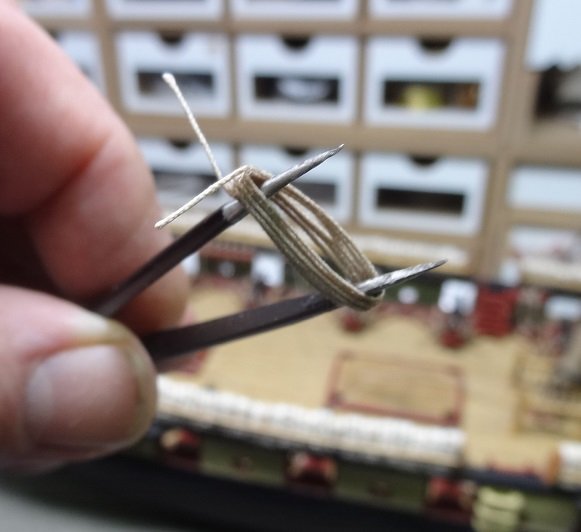
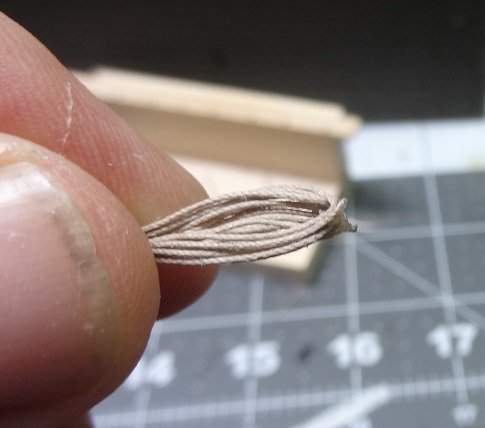
OK - getting into some work on the belay pins - fastening the rope and adding a coil. Disclaimer - I didn't invent any of this. It's just how I decided to do it after looking around a little. It's pretty easy and I like easy. So this is about any rope that ends up at a belay pin. The most important thing is that your rope make it to the pin and still have an extra 2". You'll see why in a minute. So maybe you've seen the video where the do the X thing to get the rope started on the pin. You could still do it if you want but totally unnecessary. Wrap the rope around the pin under the rail and put a dot of CA to hold it in place. A little jig to wrap the rope. How far apart are the pins? About as far as the belay rail to the waterway - your mileage may vary. Using the same size rope as what is glued to the belay pin, wrap some around the 2 pins. Number of coils may vary. You could just do 5-6 for every pin and it would probably look just fine. Or you could rough size each individually. Either way, when you are done cover each end (where the rope does the 180) with CA. Yes you could use white glue too or even watered down white glue. I used CA so it dries quick. MAKE SURE you get the 2 ends glued well. After about a minute (longer with white glue) slide the coil up a bit so it doesn't get glued to the base of the jig. Give it another minute or two to dry. I have these paddle nose tweezers that made it easy to grab the entire coil without deforming the coil too much. Use some pointy tweezers to spread open the coil a little. CAREFULLY. Snip off the two loose ends as close to the coil as possible. You want to hide the ends. Here's why you needed that extra 2" at the end of your real rope. You want to thread the end thru the coil. Slide the coil down to the rail and then wrap the excess around the top of the pin one time. Bring the end around in front of the coil and add a spot of CA. At this point the coil is in place but you may need to wrestle with it a little to get it set the way you want. It may even take another couple dots of CA. Don't open the coil up too much as it will have neighbors pretty soon and it may get crowded. Hope this helps. At least help me remember how to do it in a few months.

- 843 replies
-
- 3
-
-
- niagara
- model shipways
- (and 2 more)
-
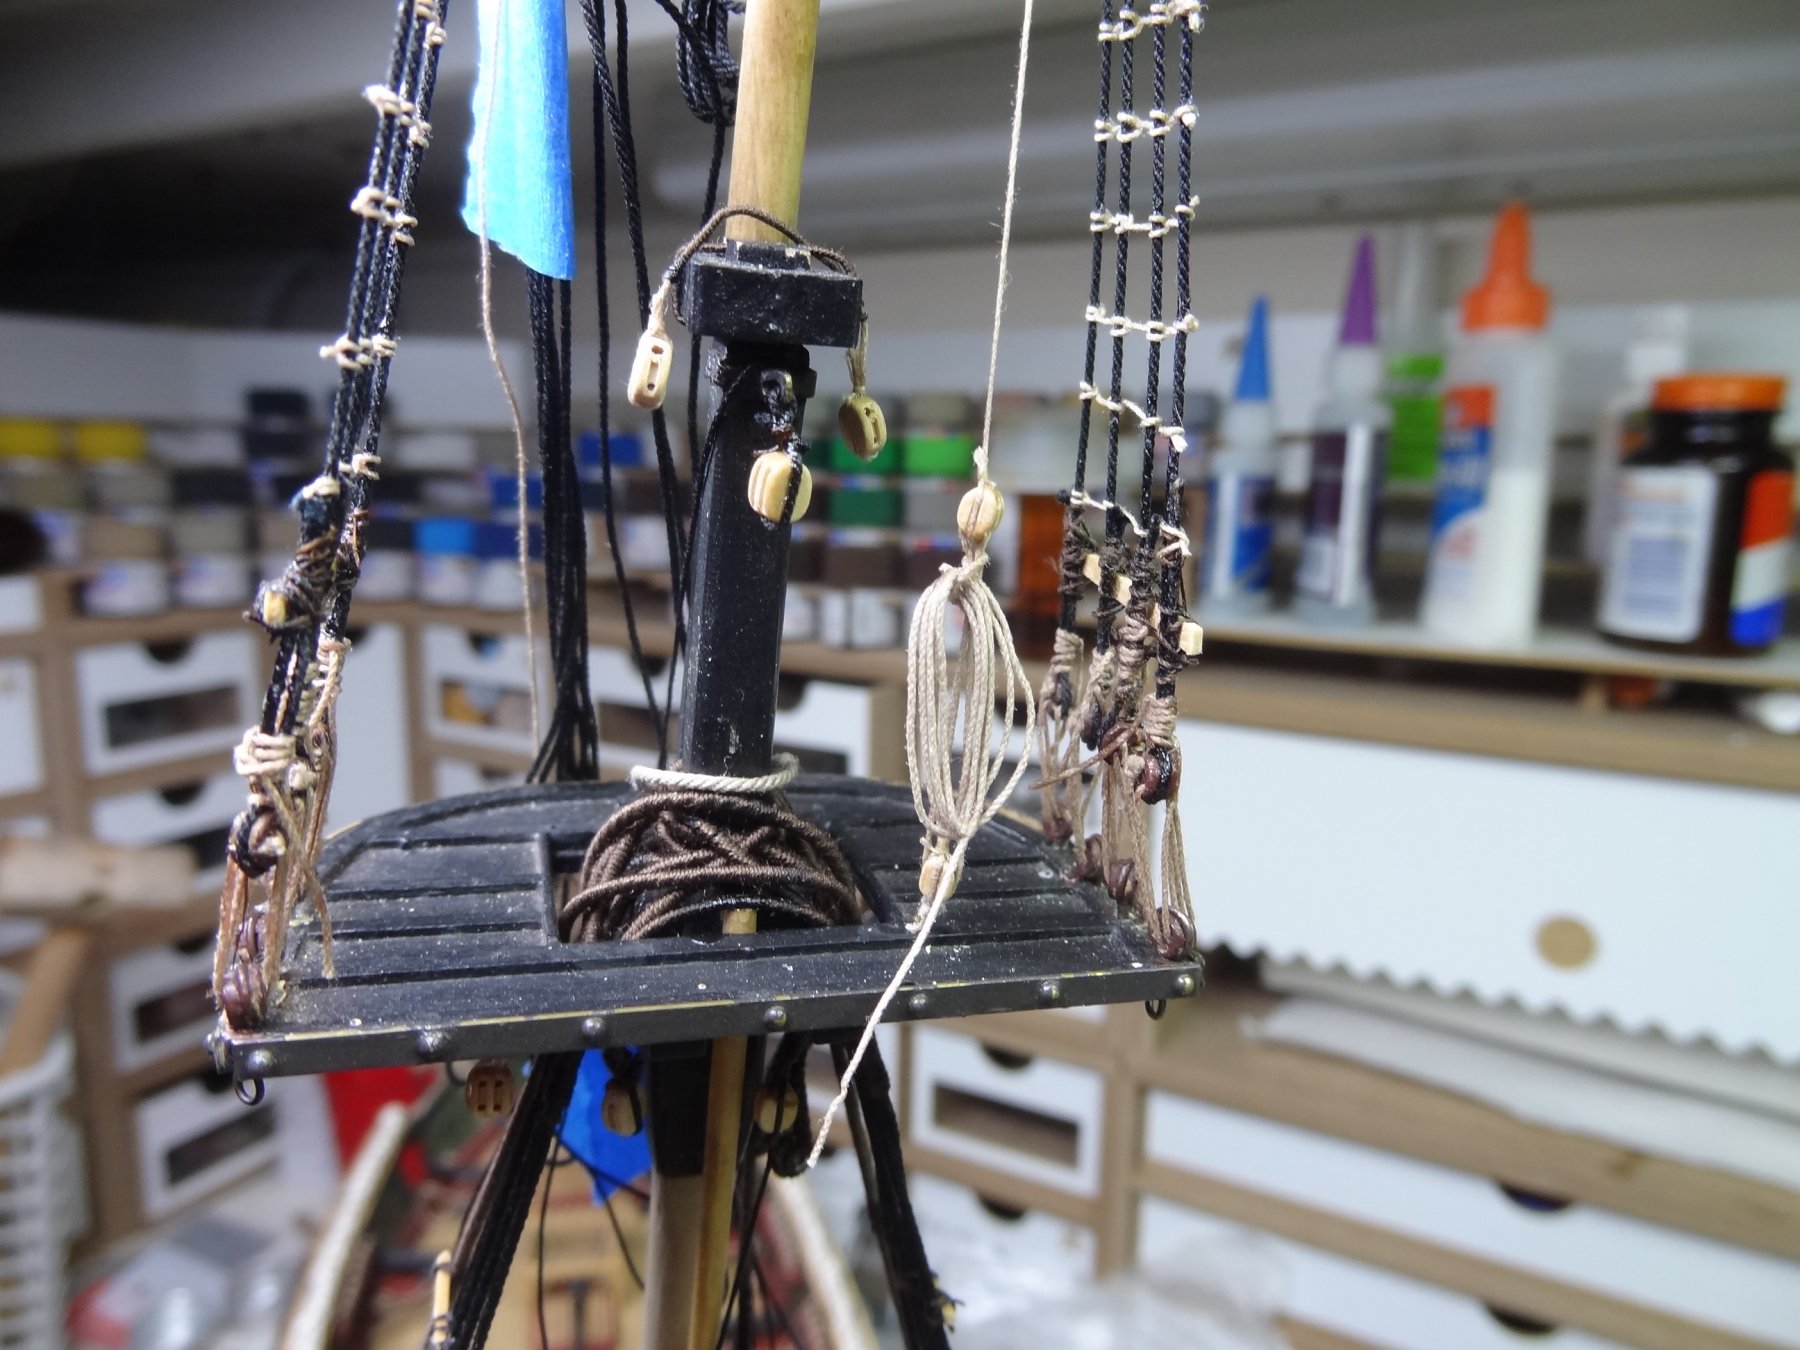
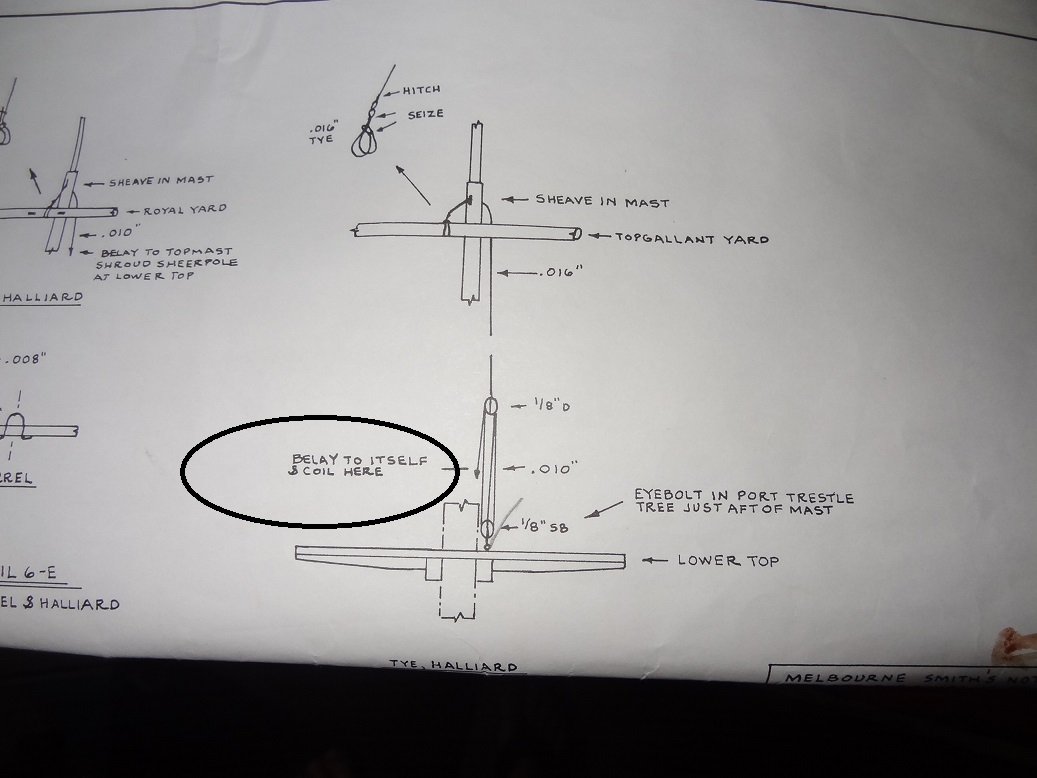
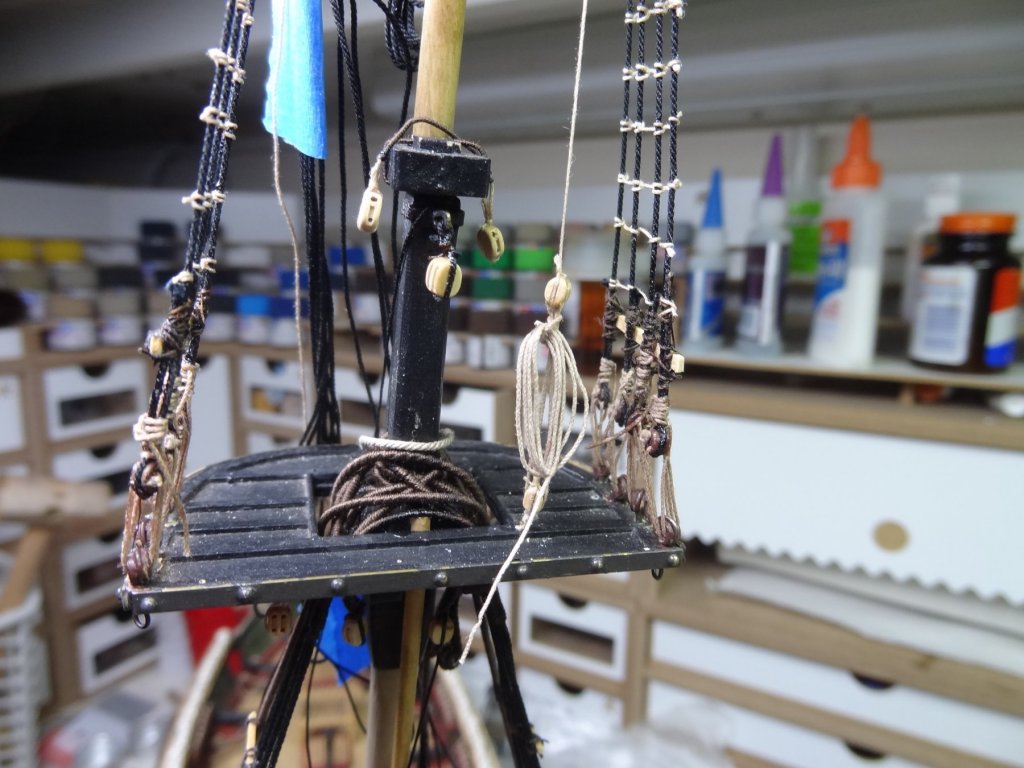
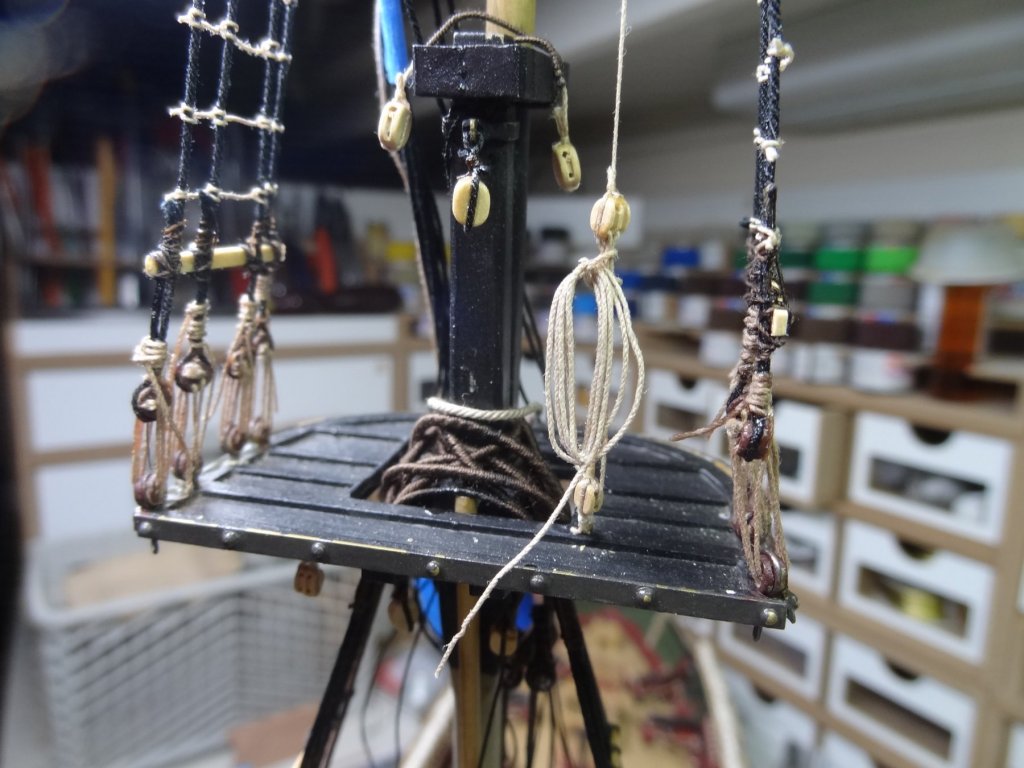
Well right or wrong here is the halyard and tackle belayed to itself. Oh the magic we do with CA glue
-
Great idea Keith. I completely forgot about that. Now would be a really good time to go back and have a second look. I'm taking a short break from the Niagara rigging to do some woodwork on another build, so this is perfect timing. Thanks!
-
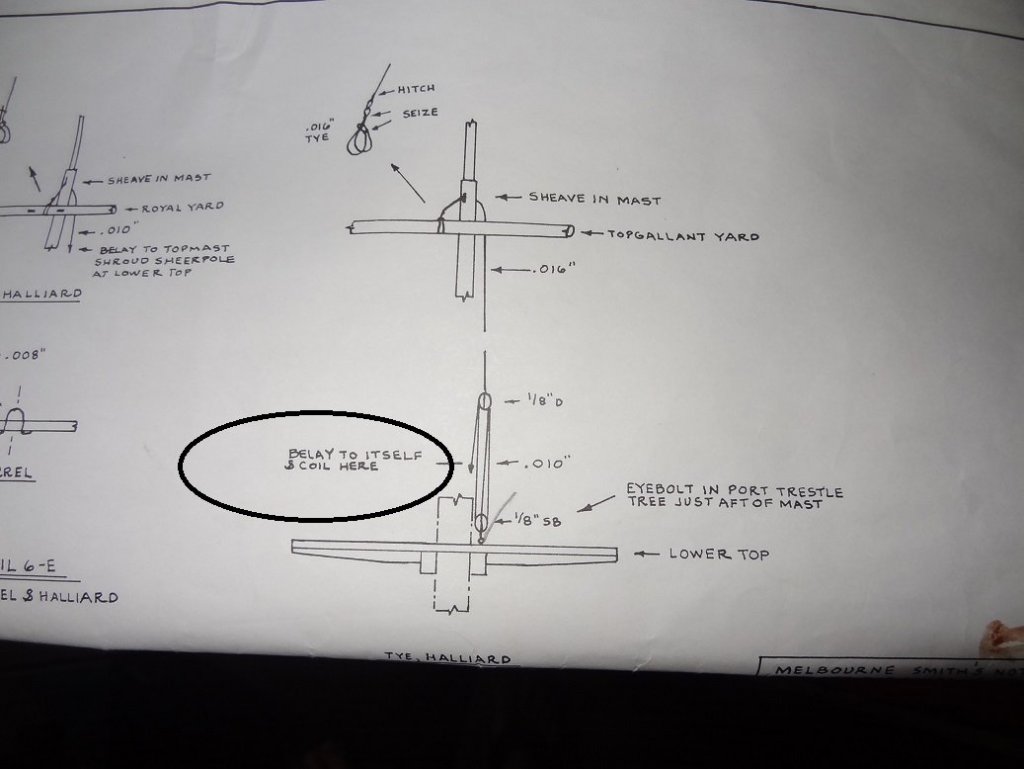
Hey Keith - your picture taught me something. I've seen a line faked but never knew what it was called. I've also heard the term fake but didn't know what it was. I'm still stumped as to what you do with the rope shown in the plans as it exits the upper block. A half hitch? Then coil the fall? Given that this is all happening on the lower top, I doubt if anything would be left on the flooring.
-
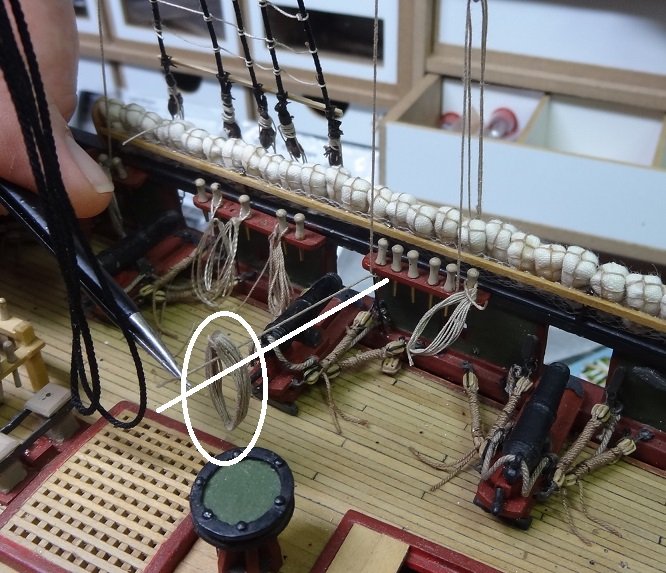
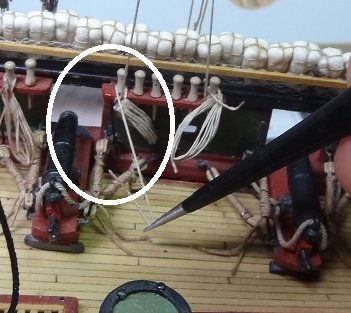
This has been a great conversation, however I just realized I am still wondering about the OP. Should have posted this pic at the start. ???
-
Thanks Mark - I see your point. I would wager that this is similar to the "coil" of rope in the 4th pic Frankie posted. I mean honestly, what else can you do with that much big rope? I doubt if it would roll into the dainty pinwheels we see all to often. I would also wager that it was someones job to make the rounds and ensure that they haven't been tossed about and remain neatly stowed on deck.
-
Always good to have another option. Glad it helped Tom.
-
Hey Darrell - thanks. Catharpins - another one of those not too clear items on the plans. I'm looking around for other renditions. Did you do them before the rats or after?
- 843 replies
-
- 1
-
-
- niagara
- model shipways
- (and 2 more)