HOLIDAY DONATION DRIVE - SUPPORT MSW - DO YOUR PART TO KEEP THIS GREAT FORUM GOING! (Only 20 donations so far - C'mon guys!)
×


mikiek
-
Posts
2,276 -
Joined
-
Last visited
Content Type
Profiles
Forums
Gallery
Events
Everything posted by mikiek
-
 Tom - what kind of glue did you use on the rail? If white, that'll loosen up easy enough with some alcohol. I've loosened CA with acetone just be careful how you apply it. I would definitely give removing the rails a try.
 -
We've been working on a cross section build - barely started. Looks like it would be easiest to "furnish" each deck before you install the next one.
-
Mounting Stand to the Hull
mikiek replied to mikiek's topic in Building, Framing, Planking and plating a ships hull and deck
Hey Richard - Niagara had a short crew. Partly from the area, just not a lot to pick from, draft, borrow, etc. Commodore Perry was fortunate to be loaned quite a few men from the army although they were not familiar with many of the tasks required onboard a ship. Real seamen were not interested in crewing because the opportunity for prizes on a lake was almost nil. And then there was the competition with Chauncey on Lake Ontario who had a fleet of his own he needed to man. It was thought that a rolled hammock might slow down a musket ball - I have my doubts except maybe at long range. They were also supposed to absorb splinters as the boats took hits. I suspect it was also the fact that a doubled over hammock added about 3' in height to the rails. This might help conceal the gunners from marine snipers on the enemy boats. It could also keep a gun crew from seeing over the rail and realizing the situation - reducing distraction. You know there are several ways hammocks were stashed on the rails. I honestly don't know if my representation is legit. Most of the time they are shown with a canvas cover wrapped around them. Most likely this is how they were kept on ocean going vessels to keep them dry. This method is also easier to model. You don't have to roll all the hammocks. Just roll your canvas cover into a tube with some cotton or other stuffing inside and put the tube on the rail. I tried a few prototypes like that but they didn't do a lot for me. I ended up going individual because I thought it looked better and again because lake sailing was different than ocean sailing (and not well documented) I figured I could get away with it. Good luck -
I'll be transporting Niagara to my dad's soon. I think I'll use the foam holder that I used for the build so I took the stand off. The foam keeps her from rolling, so if I can just keep the foam from rolling I should be OK. I figure a lot of towels wrapped around it will keep the foam still and also act as padding should she fall for some reason. I'll be sorry to see her go.
- 843 replies
-
- 3
-

-
- niagara
- model shipways
- (and 2 more)
-
Mounting Stand to the Hull
mikiek replied to mikiek's topic in Building, Framing, Planking and plating a ships hull and deck
Ken - I like your idea of not using screws. I've already had to attach and unattach the stand several times, each time puts the boat at risk and opens the hole a bit, weakening the whole assembly. -
Mounting Stand to the Hull
mikiek replied to mikiek's topic in Building, Framing, Planking and plating a ships hull and deck
Hello Richard and thank you. Honestly, I was short by quite a bit. I have about 140 on the rail. Full crew would have been about 170 although they were at 135 if memory serves. And then each sailor was supposed to have 2. We have found that protocol for sailing the lakes was different than for ocean voyages. Given there was only 2 decks where did they sleep? Hammocks are usually hung on the beams under the decks. It's possible there was not enough room on Niagara for the usual sleeping shifts. In many cases gun crews on the ocean slept by their gun, their hammock hanging from the beams above it. If Niagara's gun crews slept by their gun, they'd be out on the main deck. So the bottom line is, I measured off some space on the hand rails and filled that space with hammocks. I will say the hammocks are to scale - 6'x3'. Rolling those suckers was a real chore. -
A very nerve wracking couple of minutes while drilling holes in the keel. Shoulda done that a LONG time ago. There's a sign that you're close to done. To anyone out there with a Niagara kit - built or on the shelf. Did your kit come with a stand? The instructions reference one, but I sure didn't get one.

- 843 replies
-
- 3
-
-
- niagara
- model shipways
- (and 2 more)
-
Mounting Stand to the Hull
mikiek replied to mikiek's topic in Building, Framing, Planking and plating a ships hull and deck
Decided on the brute force approach and dived right in. That may have been the tensest few moments of the build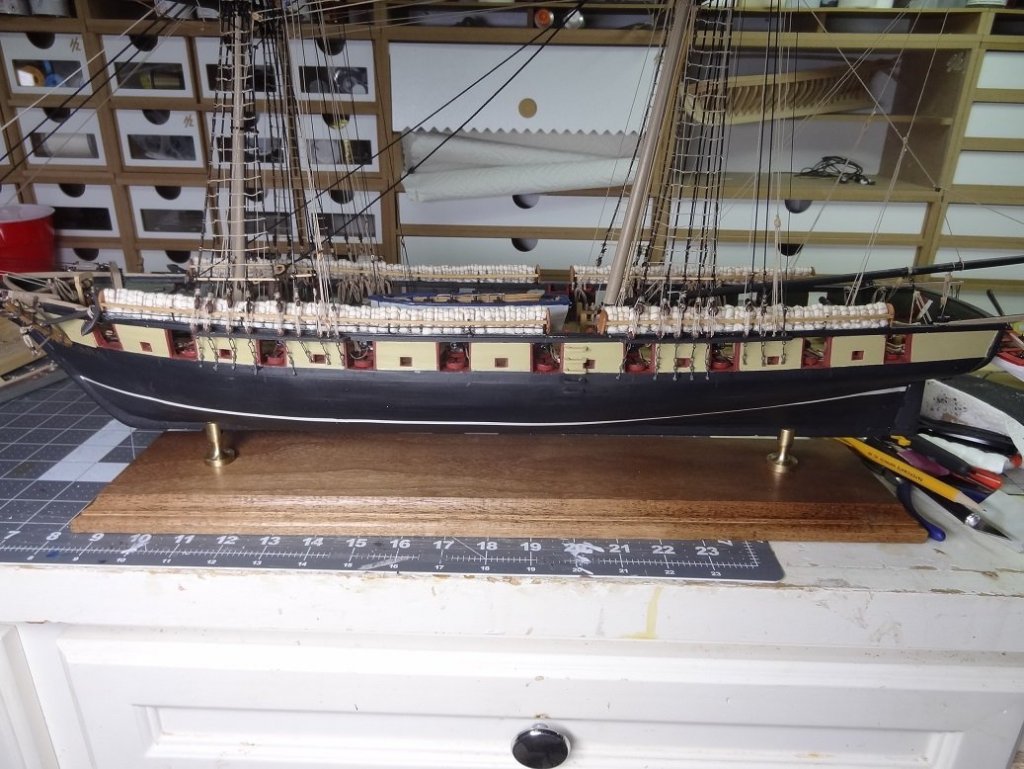
-
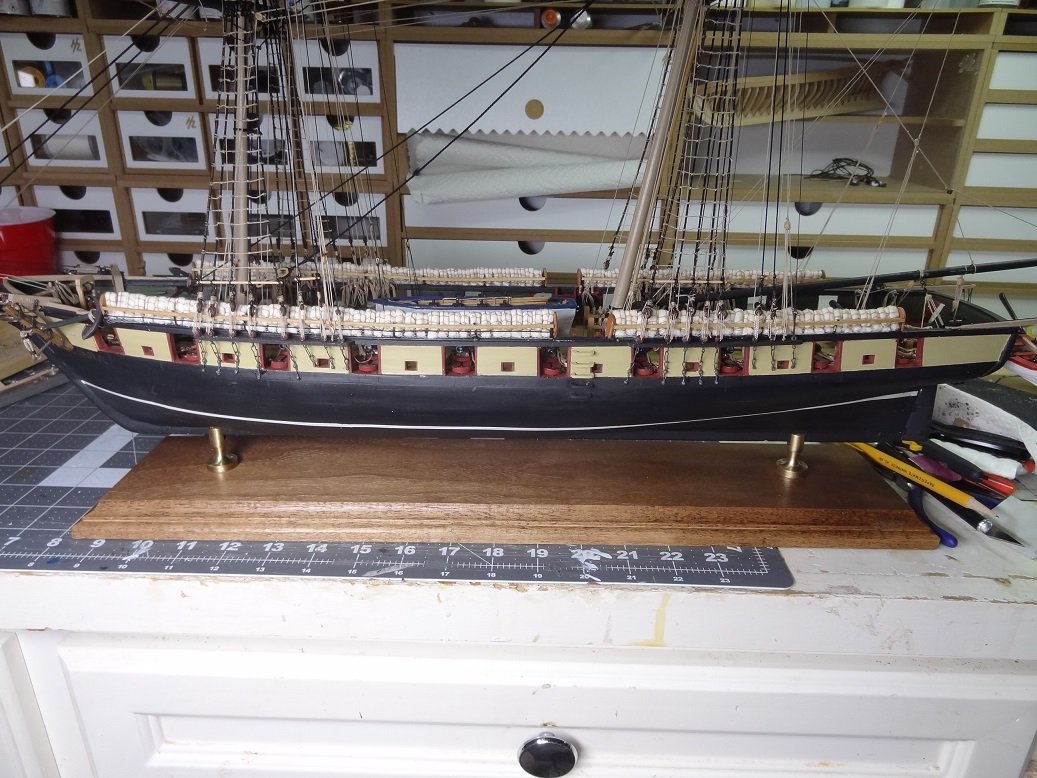
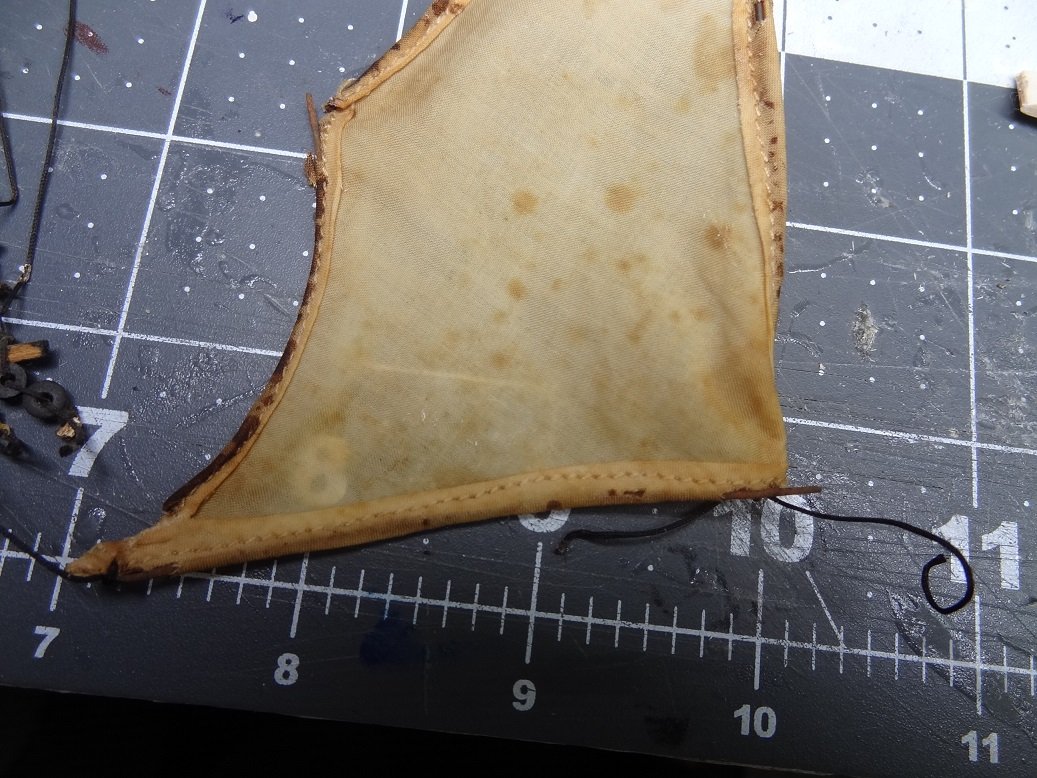
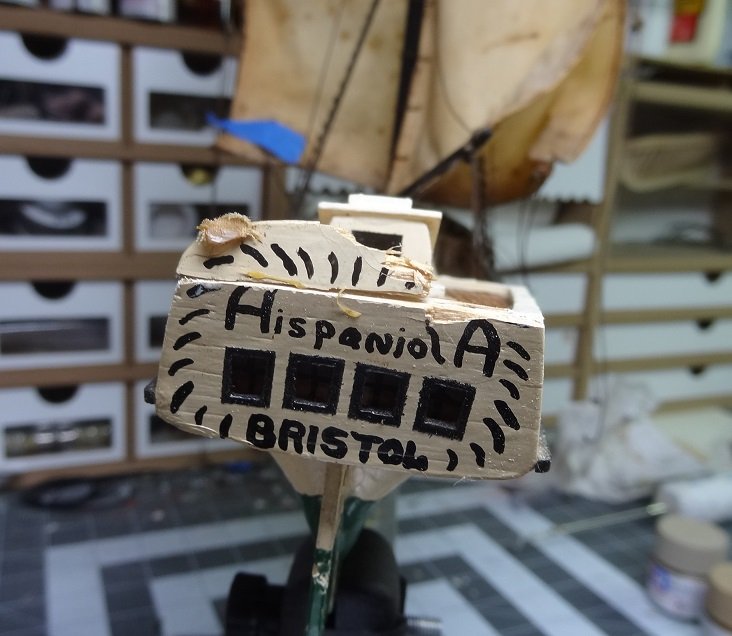
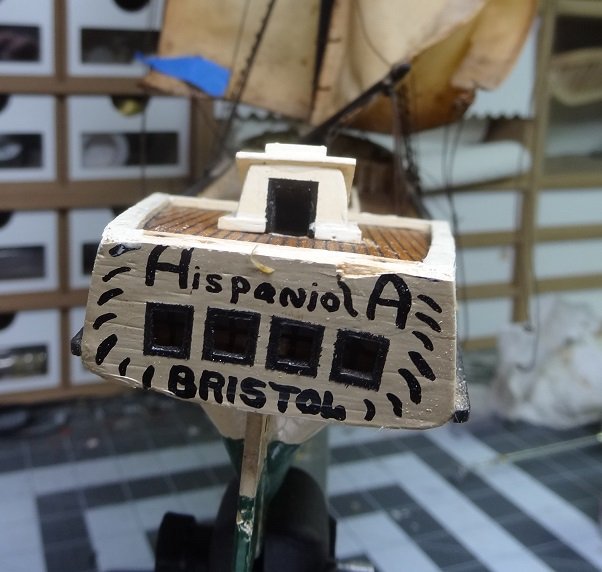
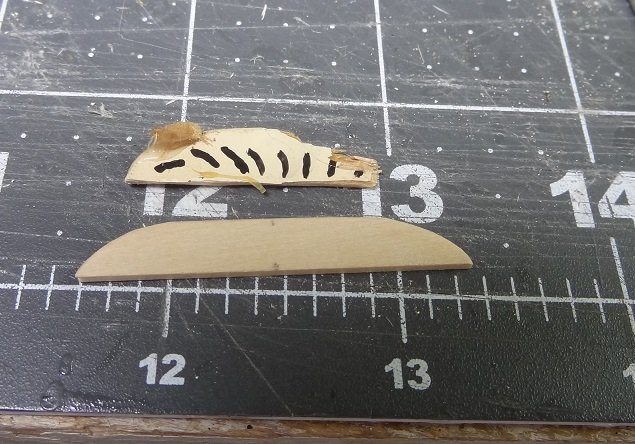
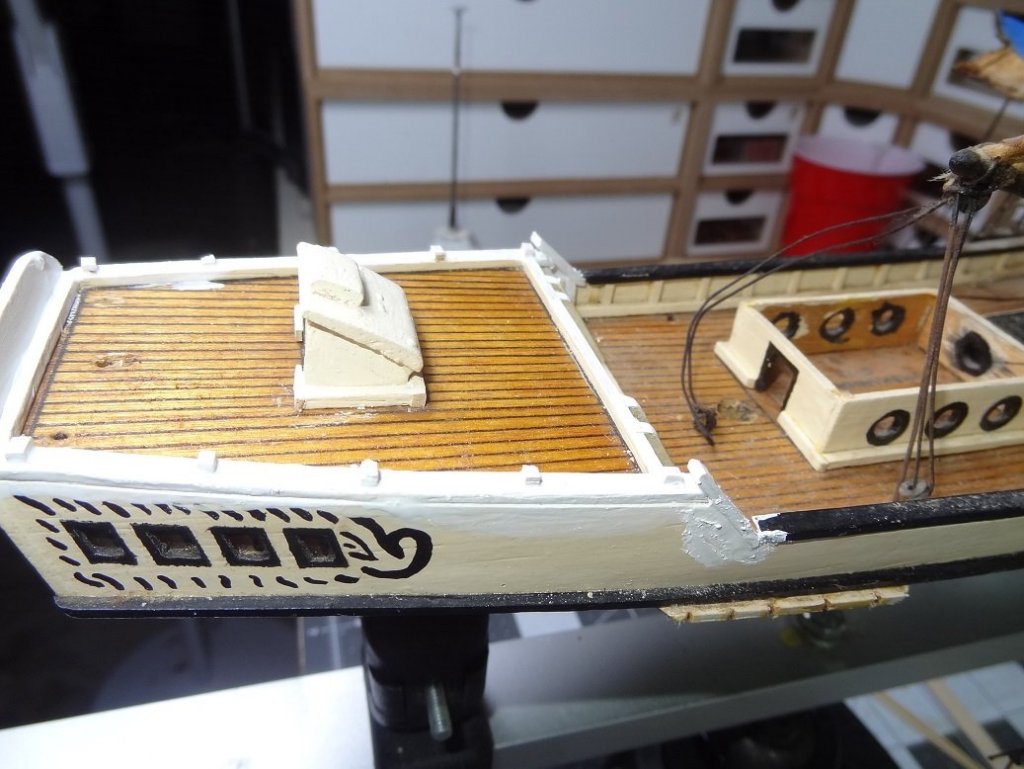
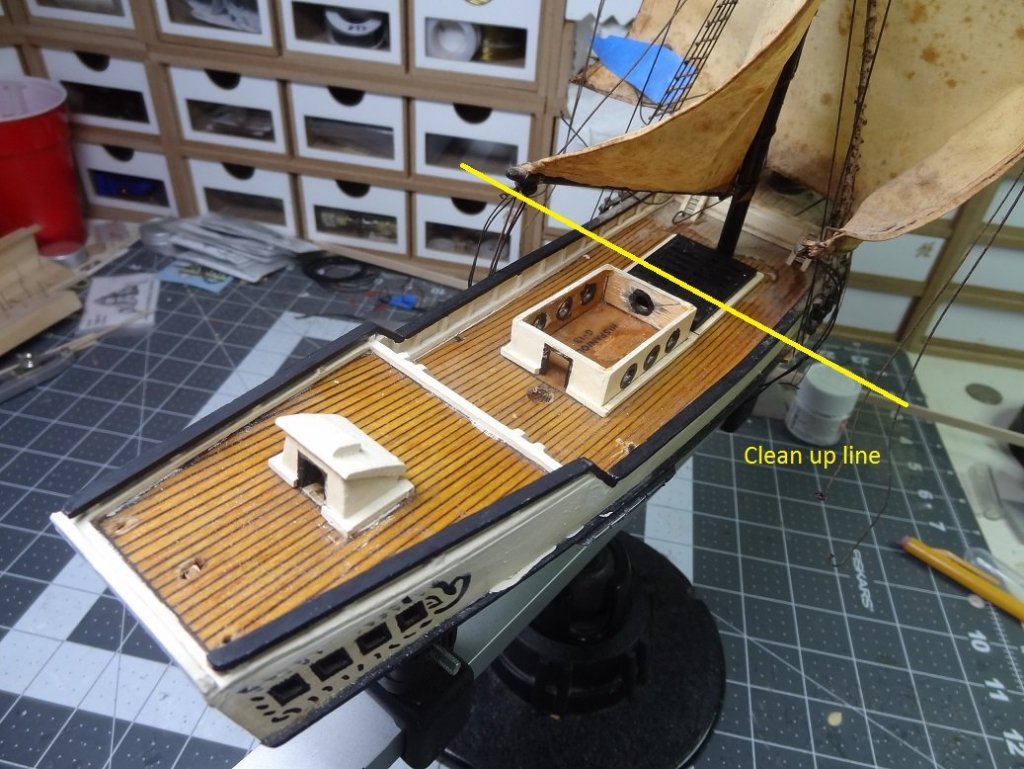
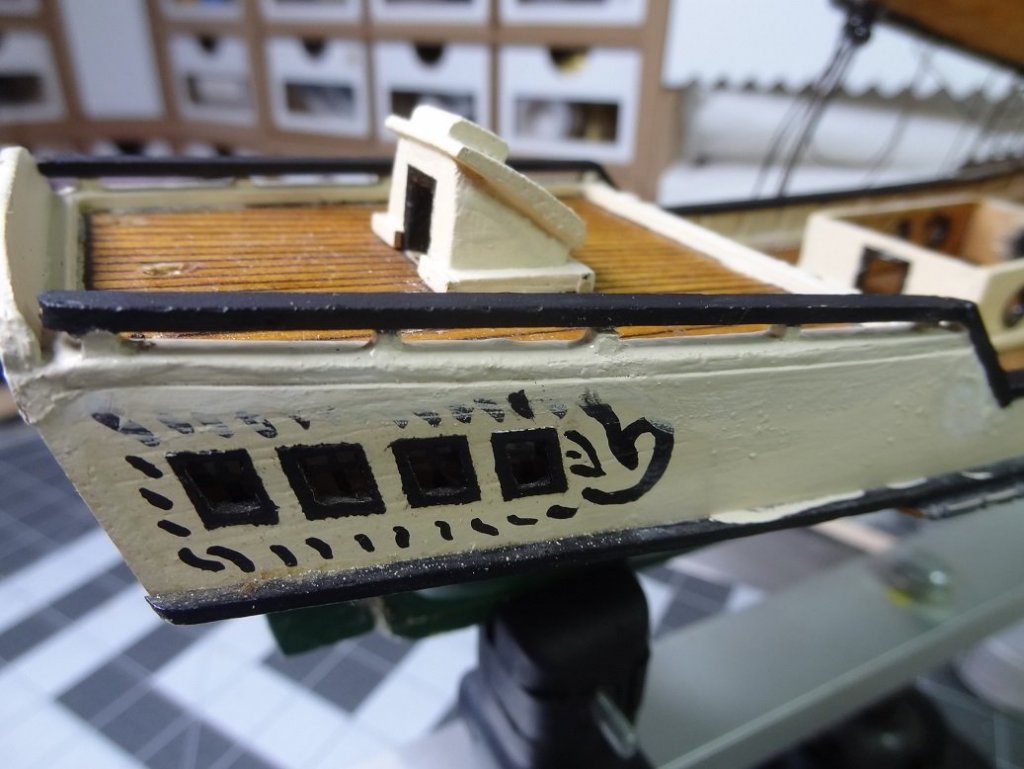
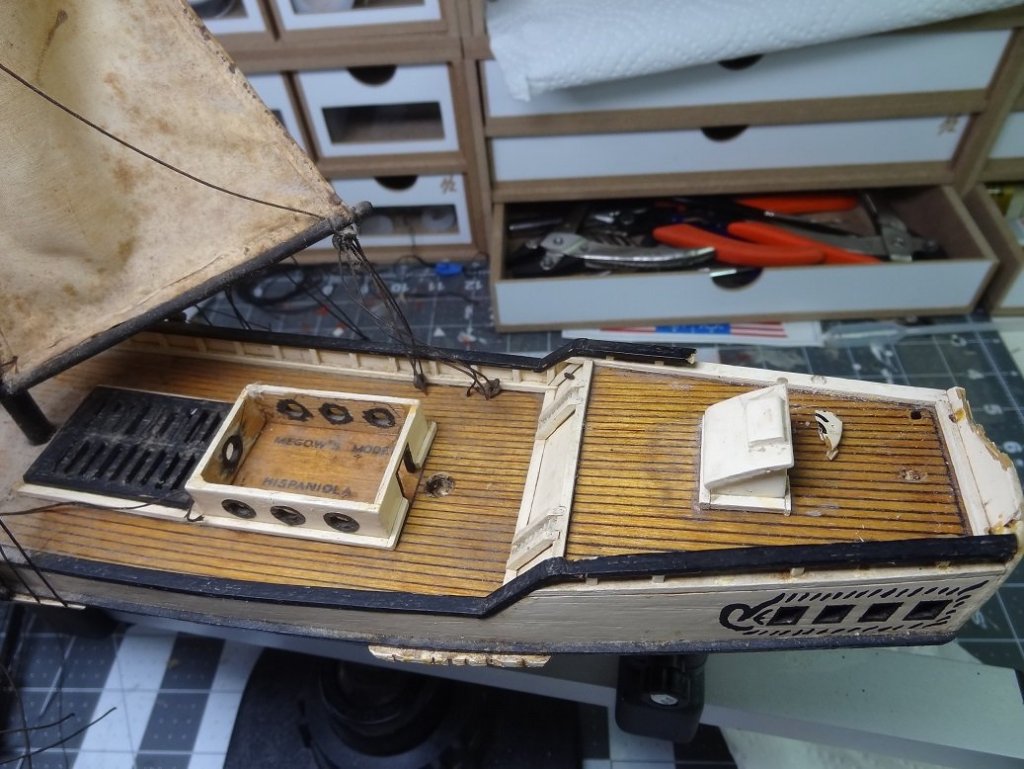
Jumping right into this, after removing the rear mast I have cleaned up what I can reach. The plan is to remove a single mast with everything still hanging on it, work the area under the mast (dust, repair,paint), then work the mast (repair, new sails), then put the mast back on the boat. I'll do the 3 jib sails next. Then the foremast. Assessing the situation on the stern. Broken transom, dirty, broken hand rail. Old Old transom. R Cut away upper transom and removed hand rails Replacement transom piece. Replacement in position. Still working with some filler putty to smooth out the joint. Replaced supports for handrails New rails. Yellow line is about as far forward as I can clean until I pull the foremast. Looking more ship shape! Was all ready to do some experimenting for the sail replacement. Couldn't find my material, even after an hour of searching

-
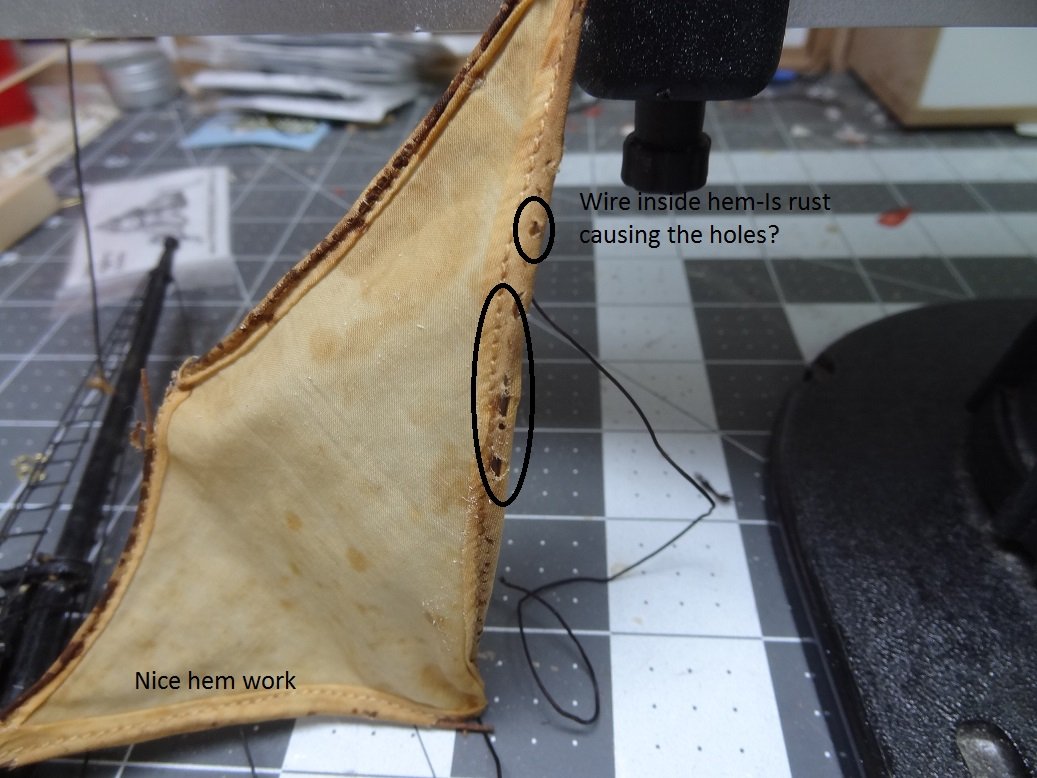
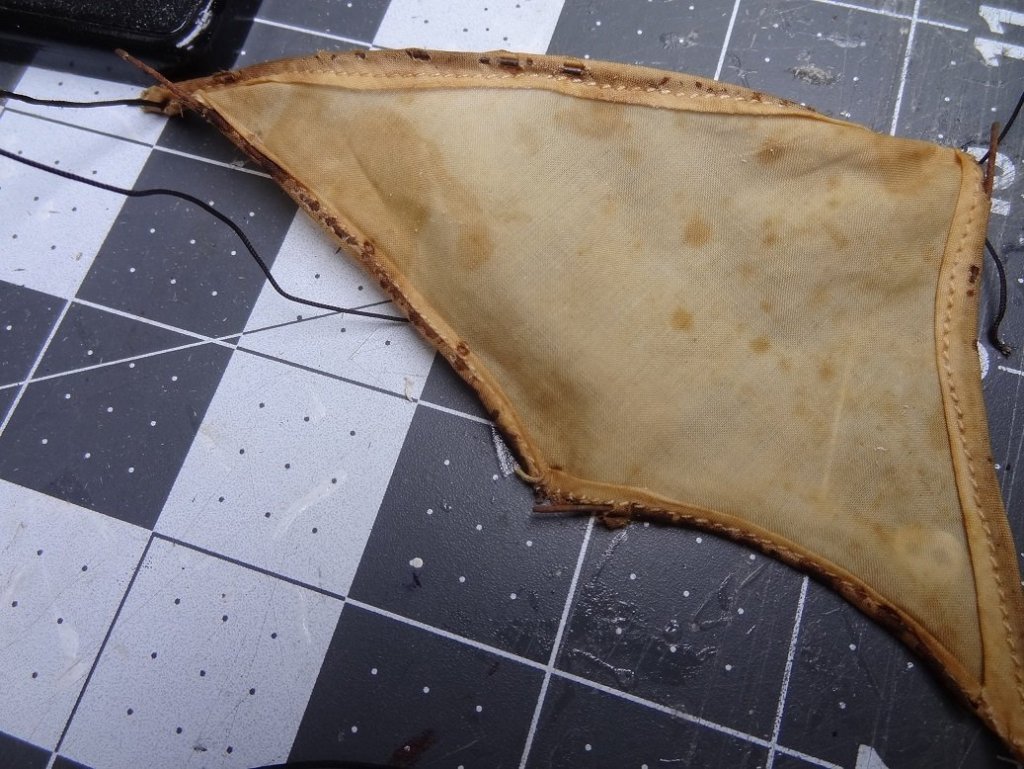
Cool Chris. A $1000 or a hidden letter from JFK would have been better, but this will do. I saw a lot of adds for them in the vintage Popular Science mags. I didn't see if sails came with that kit or not. It didn't state specifically. I've been trying to determine if the sails on this build came with the kit or were made by the builder. The sewing on the hems is very well done, especially considering there is rope or wire inside most of them. Gonna have to decide pretty quick whether I want a sewn hem in the replacements or just use some of that spray on stuff.
-
It makes me smile every time I see a build that is off the beaten path if you know what I mean. So many of the same ole, same ole. My appreciation to Zoran for making available something different. And Don, to your painstaking attention to detail and your willingness to share it It's a nice feeling to change that thread title isn't it? Thanks!
- 653 replies
-
- 6
-
-
- trabakul
- marisstella
- (and 1 more)
-
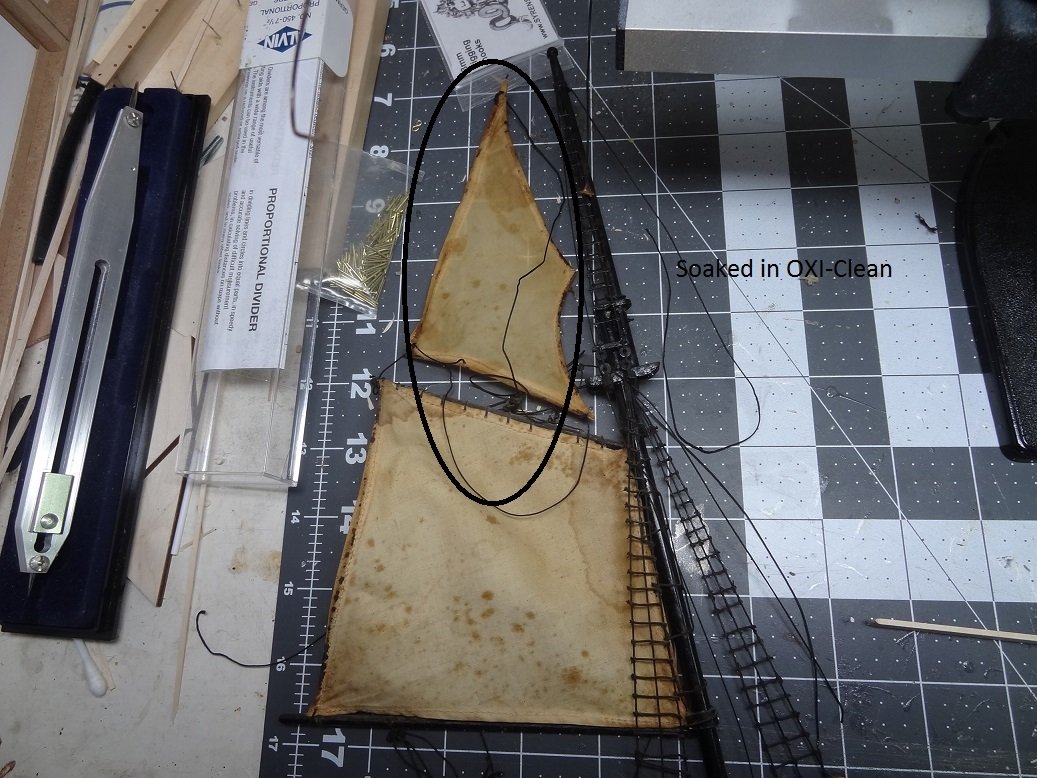
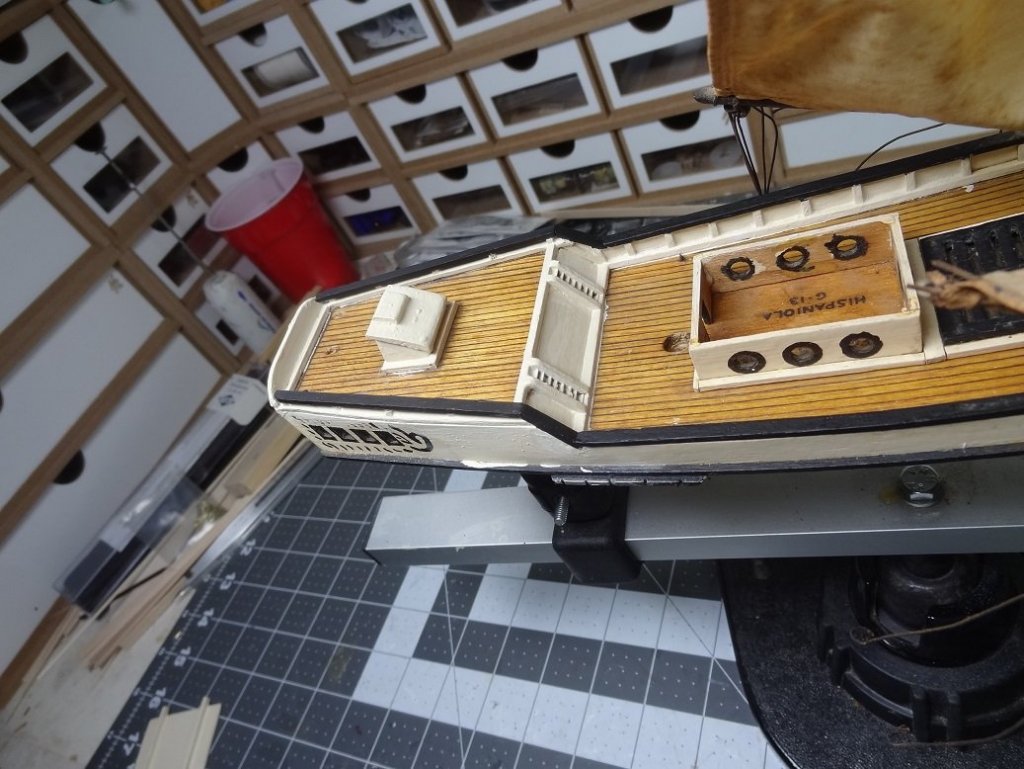
First off I welcome you to this thread. It was started in the General Discussion forum. I was just going to ask a couple of questions regarding restoration. Things kinda snowballed and I realized what it all was turning into so I asked to have the thread moved to one of the build forums. The moderator figured it was a scratch build and she landed here. More on that in a second. Since this is a restore of a build done approximately 70 years ago I have no plans or boxes to show. So at the moment, as would be expected, I am dismantling parts of the boat so that I can get down to the deck for some serious cleanup. The rear mast (is it still the main when it's a fore/aft?) is out and as previous pix show I am making a dent in all the dust. I was having trouble getting into some corners around the main cabin so I pulled it off. When I did I found something interesting As you can see I am making some progress on the deck. You've probably read my debate regarding the sails. Leave them? Clean them? Replace them? So I finally dunked one in some water & OXI-Clean for about a minute. Pretty disappointing. Maybe ti dulled down the mildew spots a bit but that is about all. So I think cleaning them is out. Closer inspection also shows holes in the hem areas where I supposed wire, that was in the hem, corroded and damaged the fabric. Problem with new sails is I don't have a clue how to sew hems. As you can see in the pix, the hemming is quite good. And almost all of them have either wire or rope inside them.


-
Mounting Stand to the Hull
mikiek replied to mikiek's topic in Building, Framing, Planking and plating a ships hull and deck
Good point Richard - I'll need to look around for some place I can get the masts horizontal to drill. Chazz - They are drywall screws, but as you suggest I may go look for some a little thinner. With the ones I have I'd have to drill starter holes just about as wide as the keel. Don't like that. Of course ME has probably sold thousands of these fittings with the screw. I'm sure we would have heard by now if they had problems. -
I guess this can fit into this forum. I'm about finished with Niagara. This is the first kit that did not come with a stand. So I bought a slab of walnut and a couple of those brass, I think they call them pedestals from Model Expo. Notched on one end so the keel will fit in, which it does - snugly. Then there's a screw that goes up thru the walnut, thru the pedestal and into the keel. The screw is almost as wide as the keel and I have concerns the keel might split when I tighten up the screw. I'll definitely be drilling starter holes in the keel but they can't be too big or the screw won't get enough bite and the boat won't sit steady. Any DO's or DON'Ts when working with these pieces? Am I worrying about nothing?
-
I'll be getting back to it this weekend so I'll let you know how that worked druxey. I've been debating the sails a lot. Discolored and mildewed. We work hard to make our stuff look just like that. There just doesn't seem to be any way to test if I could clean them 'a little'. No obscure places to try anything. It seems like I am going to have to either dive in and commit to doing it or do nothing. And if I decide to do it, I keep thinking it would be best to make new sails - there are some small holes and tears in the current ones. Not bad, but I imagine they'll get worse going thru a cleaning process. Then I'll need to get the Admiral and her sewing machine involved
-
Interesting thought Ron. It probably would clean small spaces better. I can say Q-Tips are not working well in the corners. Been trying ideas like a baby wipe on the end of a screwdriver blade with mixed results.
-
The mount arrived today. Just the usual 2 brass keel fittings and a slab of walnut. Installation looks straight forward. Anything to watch out for? Do's or Dont's?
- 843 replies
-
- 2
-
-
- niagara
- model shipways
- (and 2 more)
-
Thank you Michael - putting this one to bed is a good feeling for a lot of reasons. re: the rigging - I only hung about half the running rigging that is called for in the plans.
- 843 replies
-
- 2
-
-
- niagara
- model shipways
- (and 2 more)
-
Mark - the more I think about it the more I think finding one that seals the mouth & nose well would be a good investment. Those paper things we are talking about don't seal up well at all. Hope you're doing OK.....
-
Dang Michael - sounds pretty rough. But if it works for ya then here's to it. Not sure how many of these restores I will ever do. Hadn't planned on these. They are intriguing though. All my personal builds are in cases and I must say they look as good today as the day they went under and I live with 2 cats and an admiral that hates housekeeping . But in full disclosure, nothing is very old yet.
-
Welcome back Elijah. And thank you for all your support. I know you have been on this wagon for a long time. I know everyone is hammering me about the case. I have had some buyers remorse but not enough to call it off. I keep saying the pedestal is what jacked up the price so much. I have the same arrangement on 2 smaller builds and it looks fantastic if I do say so myself. However for something this large, I believe next time I will go with one box and a removable top piece. That would have run a little over $400 which is about right. It's just a fact in our hobby. Cases cost more than most kits. But they do add a lot to the final presentation, reduce maintenance and keep the kittys away. Take a look here and you'll see what I mean about maintenance. This build spent 60-70 years in the open.
- 843 replies
-
- 3
-
-
- niagara
- model shipways
- (and 2 more)
-
Got a cloudy day today robdurant. I will go give the cloudy option a try. Also had not considered playing with the f stop. A big fancy camera and I leave it on Auto 99% of the time. Blurring out the background will make a difference. That was killing me on the workbench - too many little things behind it tended to blur out the subject.
- 843 replies
-
- 3
-
-
- niagara
- model shipways
- (and 2 more)
-
Druxey - never considered that for a new build. But this is some kind of dust with a lot of decades to boot. I have some of the cheap paper ones that barely fit over your mouth & nose. I hate to invest too much, unless this turns into more than just a favor for a friend.
-
I'll try that Steve although the way my house runs getting direct sun in a place where I can set a boat may be challenging. I did try it outside one time. I guess I wasn't overly impressed. Maybe I need one of those bluebird days where it's perfectly clear, no haze and around lunch time so the sun is over head. I will be home tomorrow so I'll check the forecast later.
- 843 replies
-
- 3
-
-
- niagara
- model shipways
- (and 2 more)
-
Per - If I were going to have it stand from the ground I probably would try to make some sort of cabinet looking thing. Since this will be on a mantle the pedestal will only be about 2" tall. The pedestal has to be considered a 2nd box. It is completely optional. I could have just had them do a removable top piece and it would have been around $425. Also don't forget the size 44"x28"x16" using 1/4" plexi. It's a big box. I was trying to add one of the images but the uploader is failing. Go to the last page of either my Arrow build or Cross Section build (links in my signature) and you can see an example. Joel and I used to always joke about making Niagara an admiralty style build so I wouldn't need such a big display case. Time to pay the piper.
- 843 replies
-
- 3
-
-
- niagara
- model shipways
- (and 2 more)