HOLIDAY DONATION DRIVE - SUPPORT MSW - DO YOUR PART TO KEEP THIS GREAT FORUM GOING! (Only 20 donations so far - C'mon guys!)
×


mikiek
-
Posts
2,276 -
Joined
-
Last visited
Content Type
Profiles
Forums
Gallery
Events
Everything posted by mikiek
-
 Thank you Don. And thanks for staying along for the ride, It's been over 2 years since this journey began. Display case was priced today $860. That's for the clear top and a black pedestal. Turns out the pedestal almost doubles the price. It's considered a box just like the clear upper part. Even though it is only 2" tall. It will all sit on a marble mantle with a huge mirror behind it. I'll be sure and post a few pix when she's "docked".
- 843 replies
-
- 2
-

-
- niagara
- model shipways
- (and 2 more)
-
Thanks Ron. I need to look into the string thing a little further. I can't tell if is was hardened with something or not. It seems pretty stiff considering how thin it is. But then, I have no experience working with 70 year old string. If I can use new rope and put it back on the way it was that might be an option and IMO would not interfere with the spirit and intentions of the original builder. This project is quite interesting. There's a big angle to this that I have not experienced in a build before.
-
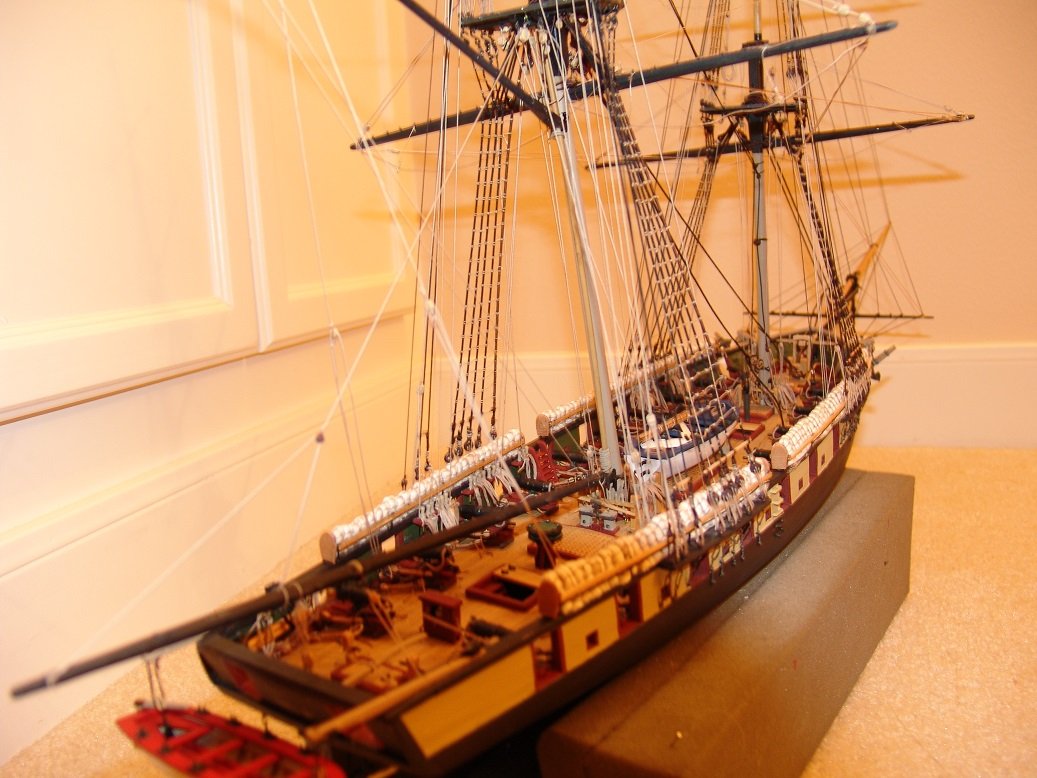
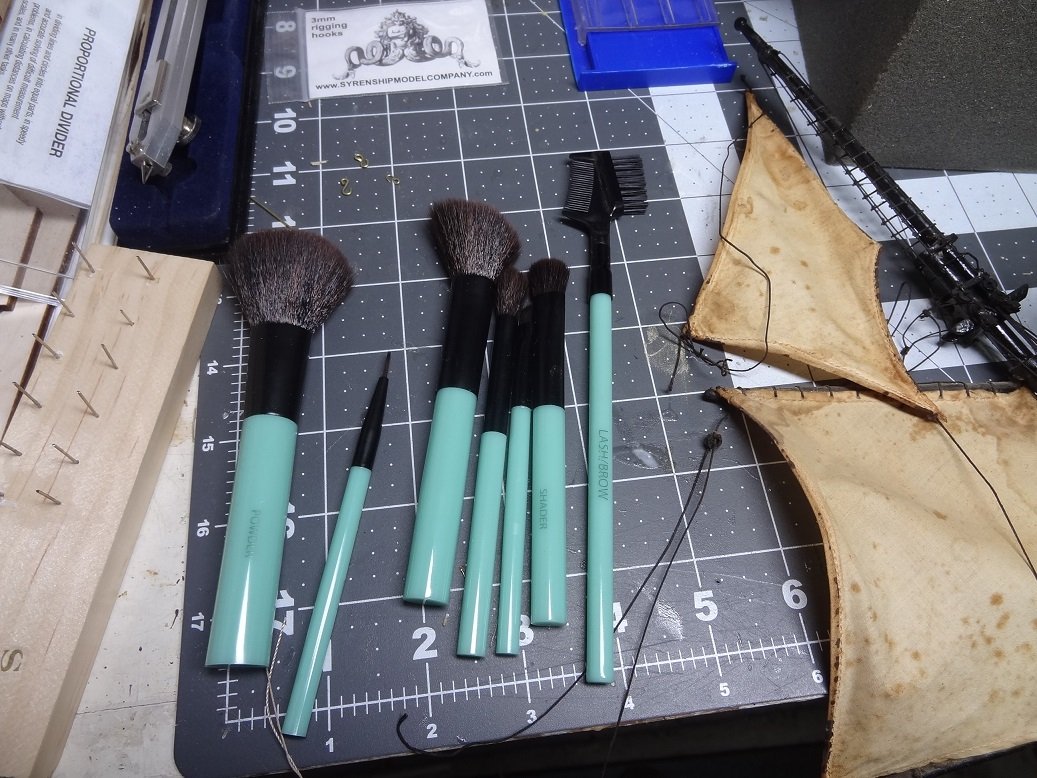
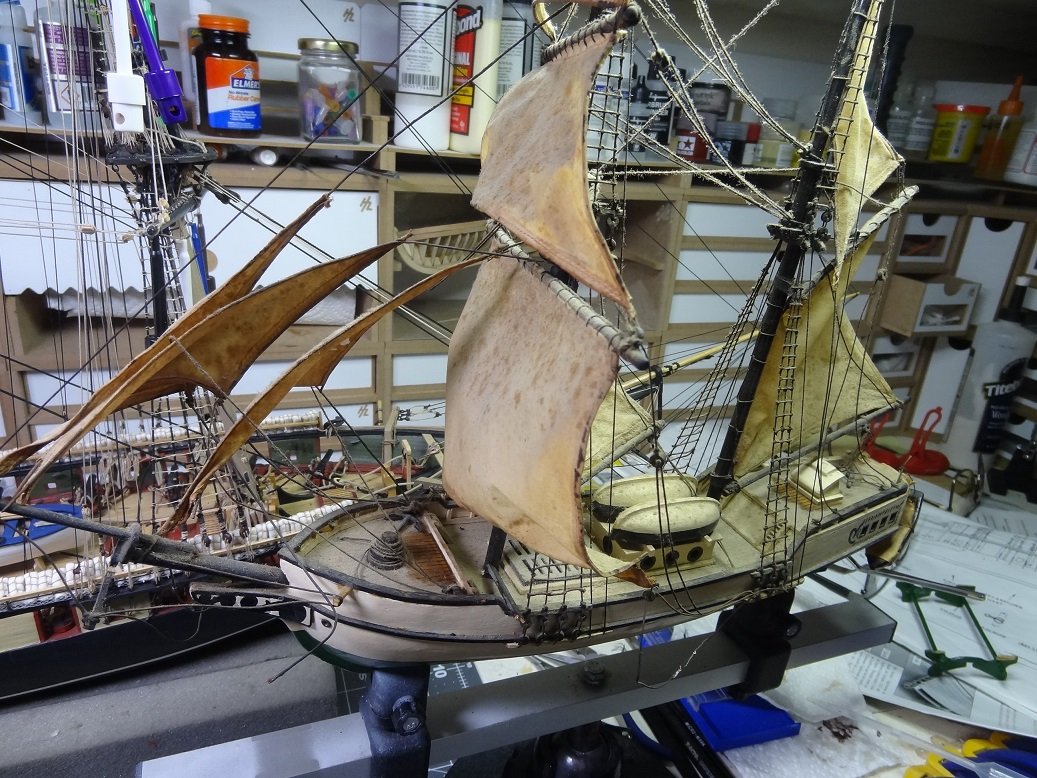
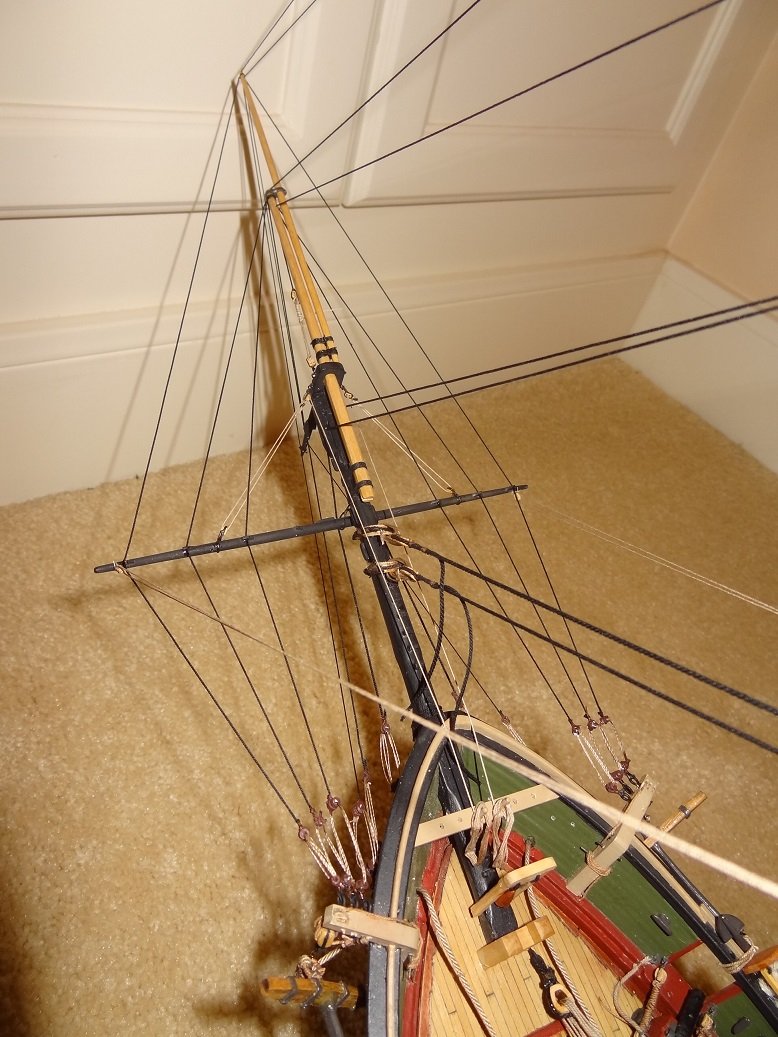
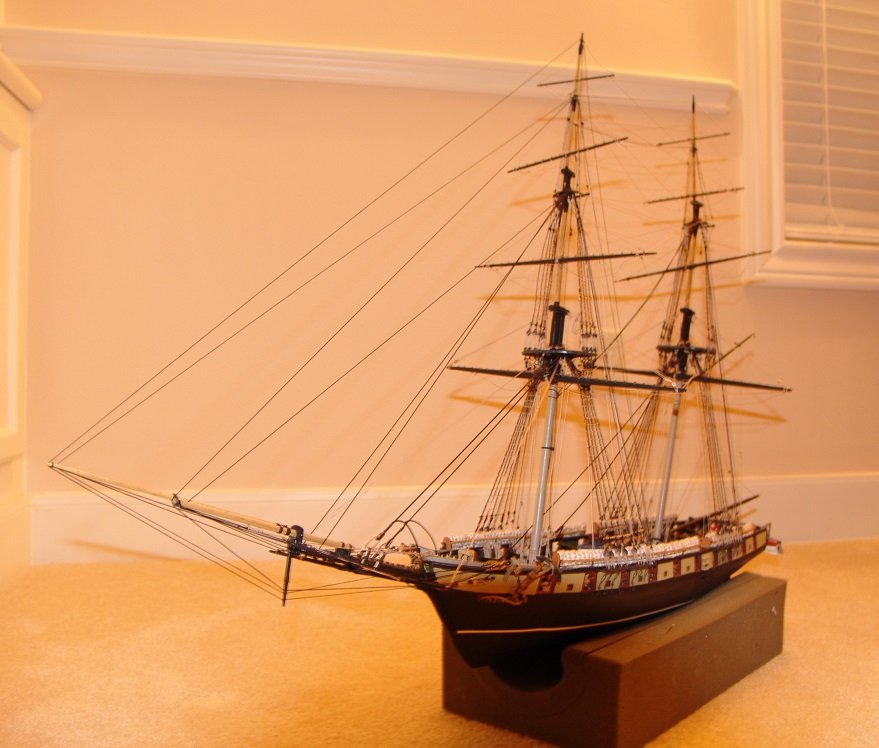
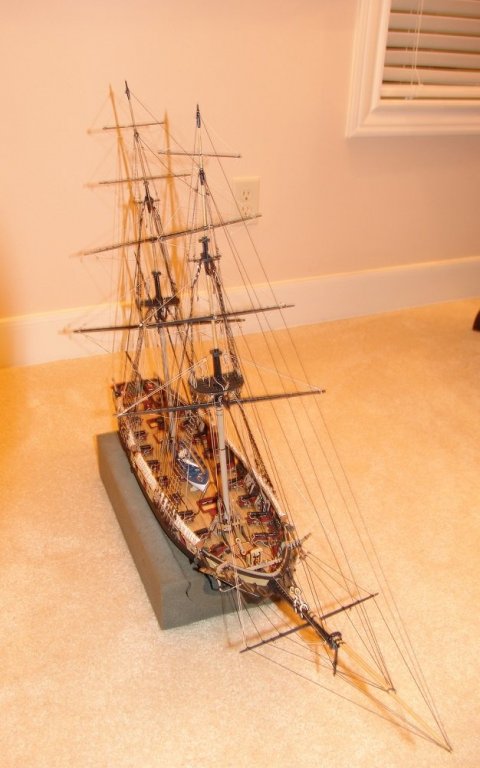
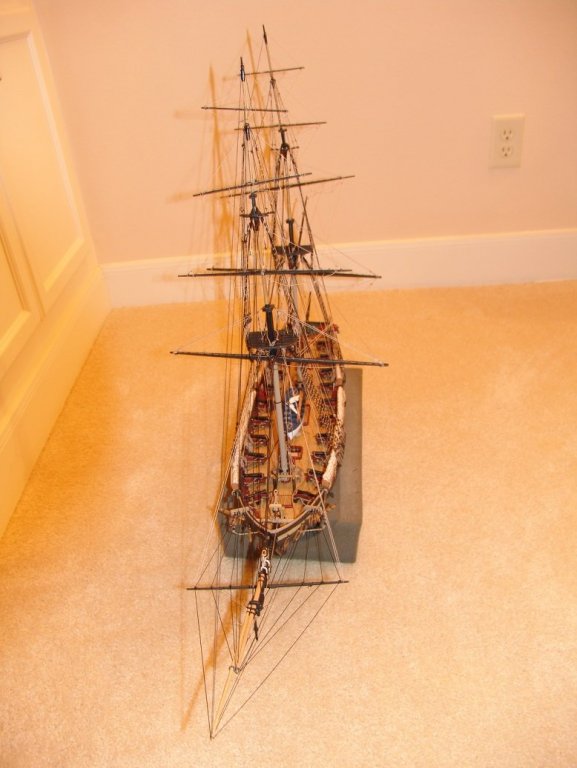
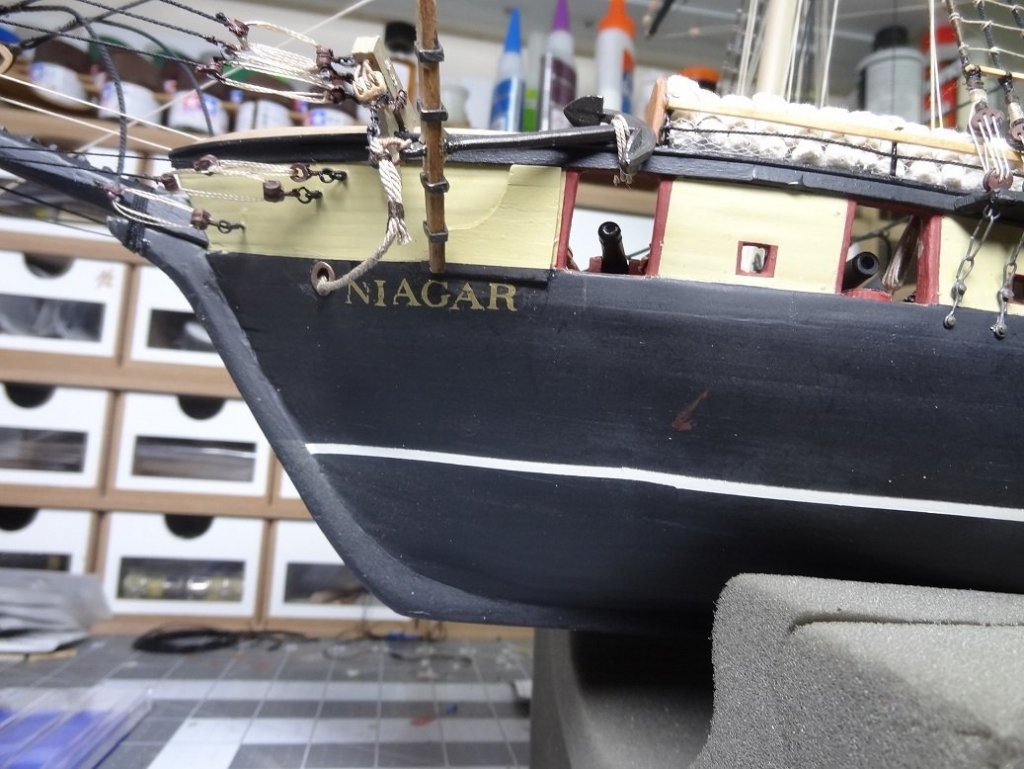
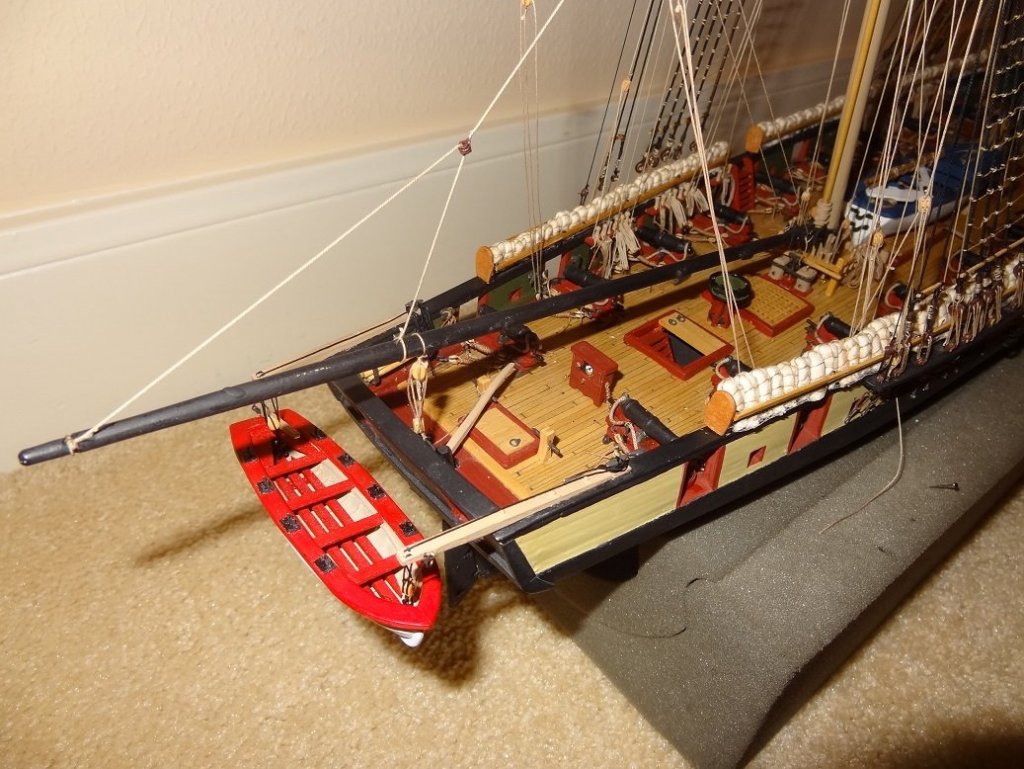
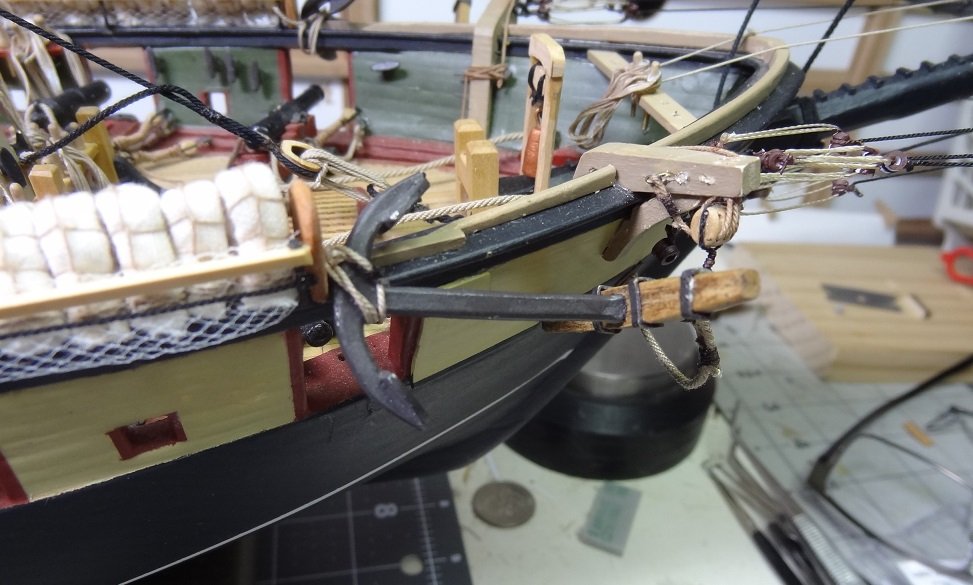
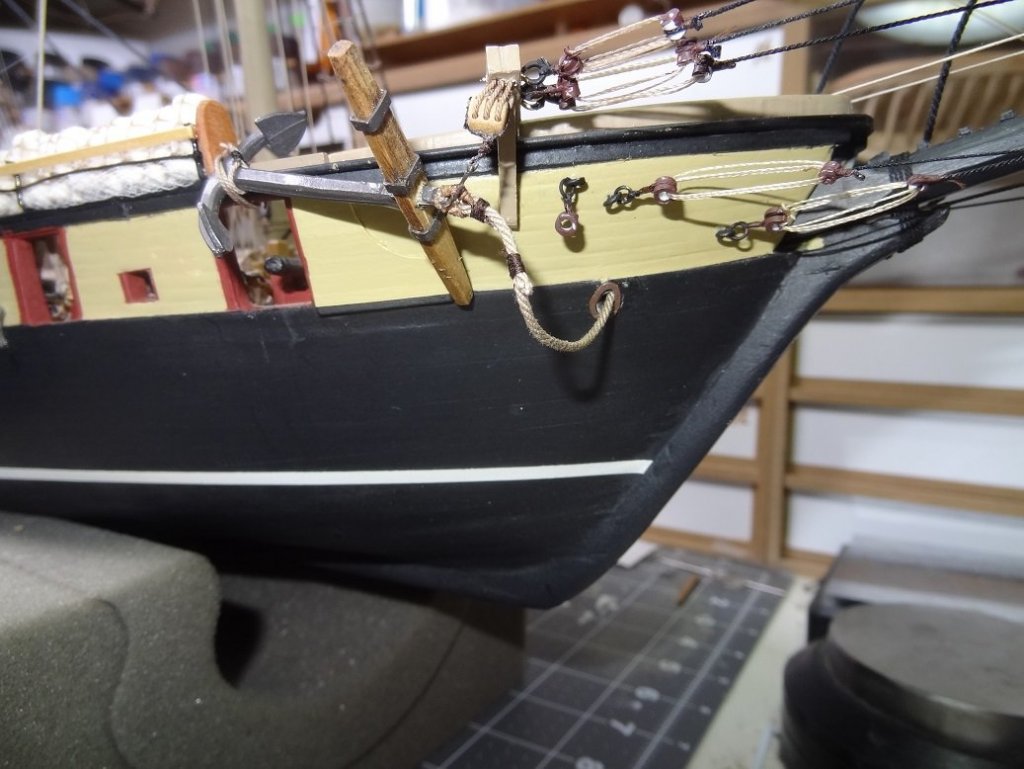
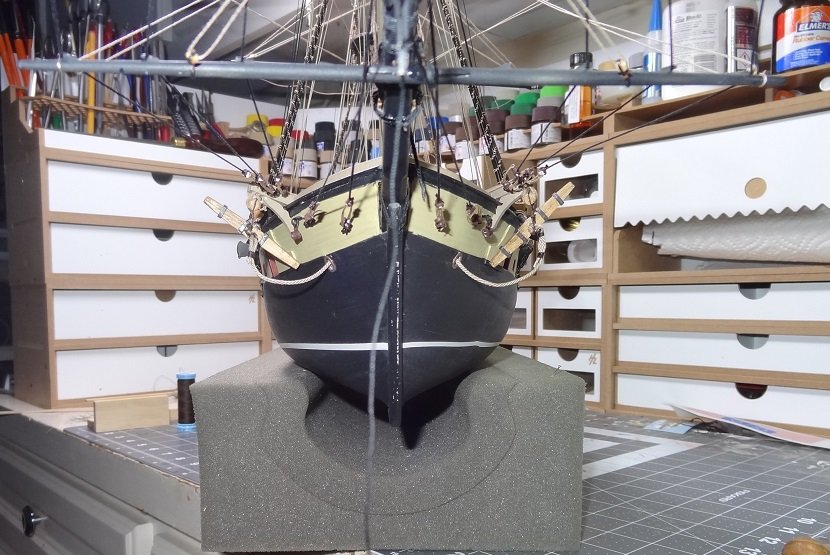
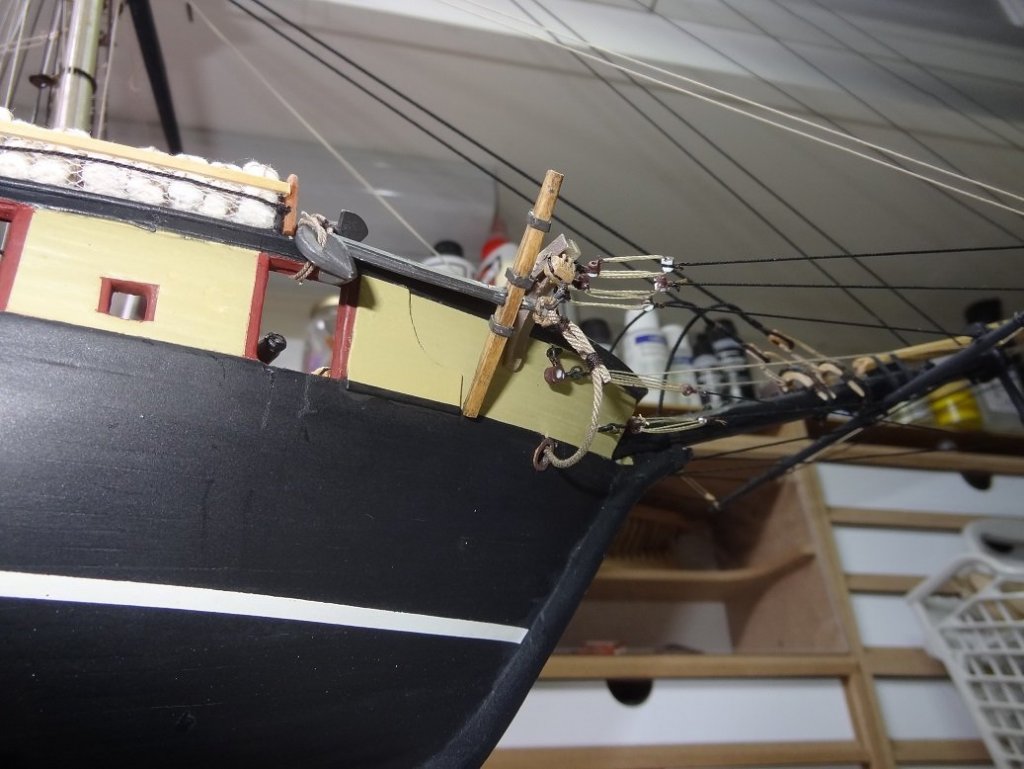
More pix with a different camera. Not a lot better, but I still get to flood this thread with pix. I'm at a point where I am having to think up things to do. I believe all the tasks are done. Added the rudder chain. Got the tiller and boom rigging done, although I kinda bashed the design in the plans. I just couldn't do it that way. I even started the boat name using dry transfer stickers but I ran short one "A". More on order and I will probably paint over what you will see in the pix and try again. Those decals ain't easy. Got out the compressor and began blowing as much junk as I could off. Found that some make up brushes are very good at brushing lint/dirt around without doing damage to things. They are very soft and come in all sorts of shapes & sizes. Got quite a set at Walmart today. Also ordered the display case today. This one is going to my dad's. Back a few months when Joel passed I said I was dedicating the completion of the build, particularly the rigging to him. So at some point I will put together a few words in his memory. If you have anything you'd like to add on his behalf be thinking about that. We'll figure out how/where to publish it. Well here's a few more pix.


- 843 replies
-
- 12
-
-
- niagara
- model shipways
- (and 2 more)
-
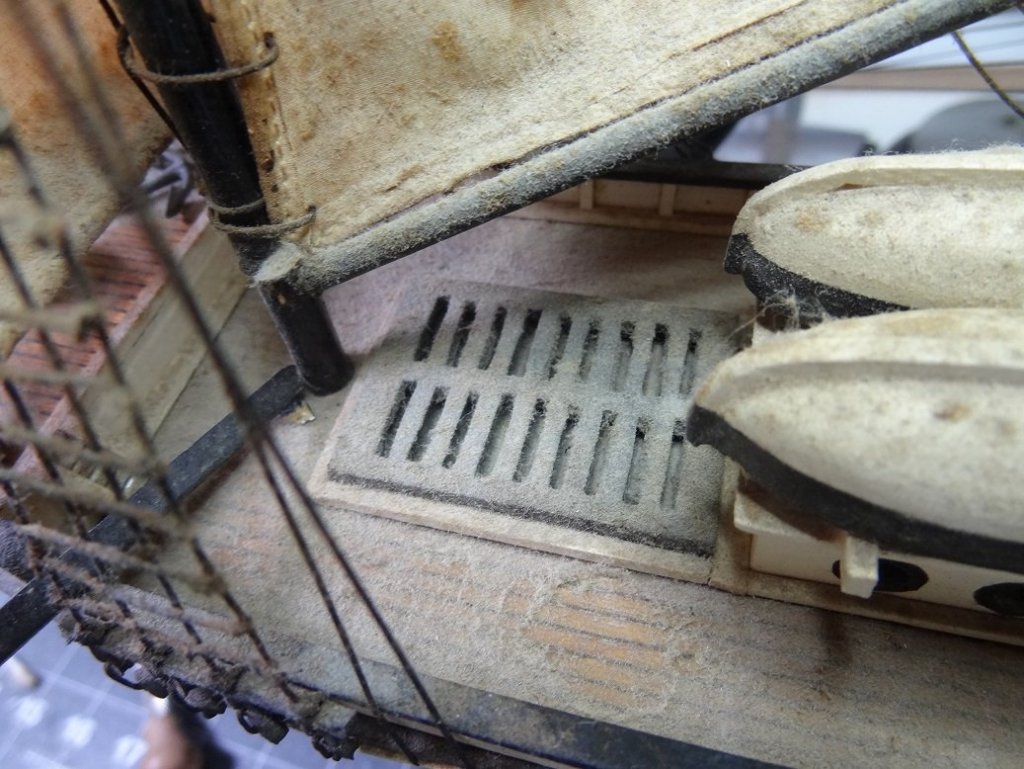
Wow. Spit rules! Didn't use it on the deck but it sure does loosen up the knots/glue. A good slimy finger full then drip it on the knot, wait about 2 minutes and then just start fiddling with it using some very pointed tweezers. No problem. Based on the notion of a good clean up and a few repairs I decided to pull the masts with everything intact. Got the rear one out and started in on the deck. I'm going with the Murphies wood soap. I can see it is going to take several passes, but you can see the improvement. The only problem I see so far is the transom, the upper part of which is crunched. Cutting that part out and replacing will not be too big a deal. However there is some artwork on the outer side and my cut would go right thru the middle of that. The pattern is reproducible but it almost looks like it was done with a fountain pen not a brush. Oh one other thing. The "blocks" appear to be made from a dowel with a hole drilled out and then sliced. Like little donuts. I broke one and another was already broken so I'll have to come up with a way to make a few of these. I guess a lot is going to depend on if the owner wants clean sails or not. There is also some slight damage to the edges of a few sails but I may leave that unless they will be replaced. Ropes bring up some questions as well. If I just clean and put back together I'll leave them be. But if I have to replace any there's going to be an obvious mismatch. What's on there now looks kind of like a woven fishing line. Odd color too - dark, dark brown. Found a good cleaning tool(s) - make up brushes. They come in all sizes and some have very soft bristles while others are fairly stiff. That dust is wreaking havoc on my nose. I may consider a mask Ya know I'm not sure if this post belongs here now or over in one of the build forums.

-
Agreed Roger. That was my struggle although you worded it much better. So one of the pieces of magic becomes how to save the good stuff even when it may need to come off temporarily. And of course with that, how to put it back when you are ready?
-
I'm with you Per. Think how hard we try to get the sails colored just like that. I'll talk to the owner. Maybe just getting the dust off will be enough. Also, the sails have a very nice "action" to them. They look like they're blowing and the material is slightly hardened. I don't know if that is from being 70 years old or if it is something the builder did on purpose way back
-
Had in mind trying Murphys wood & furniture cleaner. It sure does a nice job on our cabinets. Problem is I will just about have to remove everything on the deck to be able to get into all the nooks & crannies. Thought the sails could use a soak in some weak Oxi-Clean. Personally I like the look of the sails as they are. They look well used. On a slightly different note, the shrouds & rats are pretty well done and other than being dirty they are in good shape. I'm kinda torn between trying to salvage those or replacing. If I replace, I end up with a hull that the gentleman made and everything else I replaced. That just doesn't sit real well with me.
-
Yes, it turns out that some of the jib stays are wire. Same thing with the fore aft sails.
-
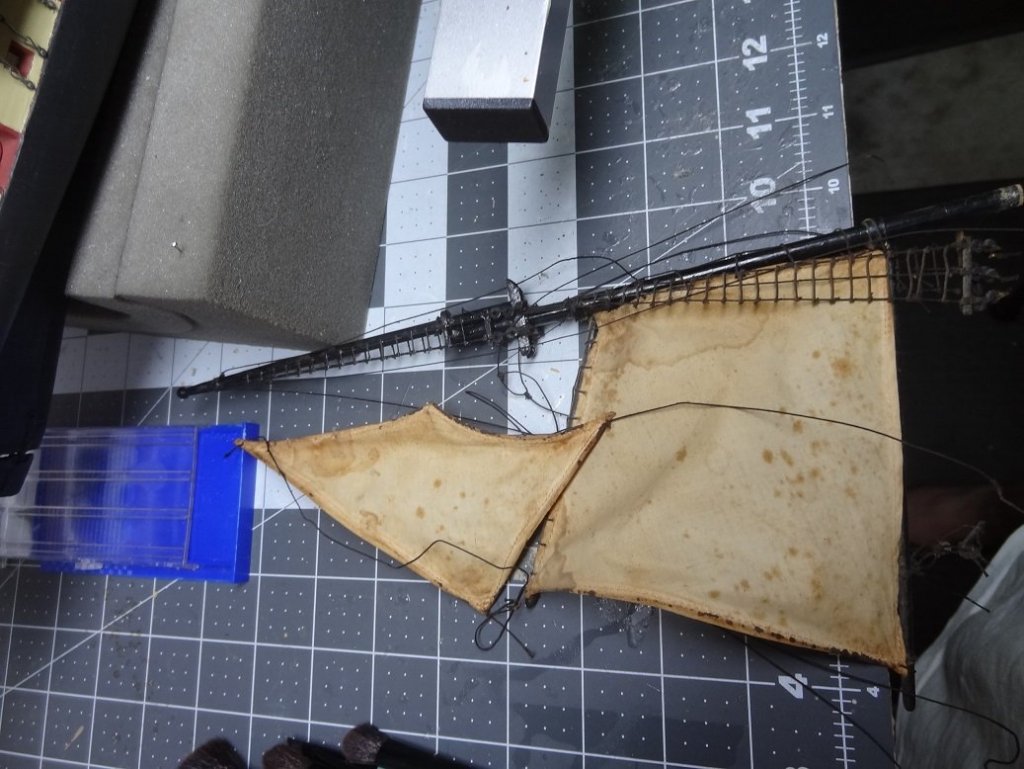
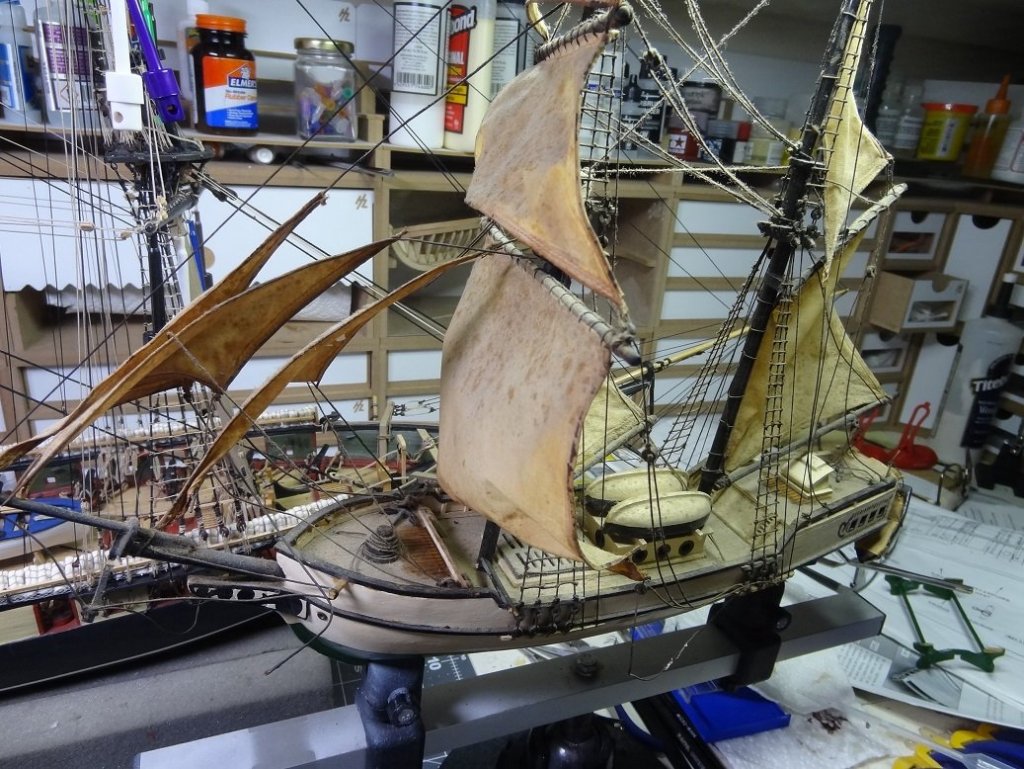
Thanks druxey. I'm thinking I need to go interview this guy now that I've had a closer look. He claims he did the builds when he was in high school so that would make them about 70 years old. Hopefully he may have a few details he can add. Good call on the sails. Only problem is they are shaped and hardened as if they are under a wind - and a good job he did at that - so I am going to have to soften them up just to get them spread out so I can get a pattern. Not sure if they were kit sails, but someone did a real good job sewing a hem. It also looks like he stiffened up some rope (maybe with glue) to help shape the sails. This stiffened rope is inside the hem. I've not heard of this technique but it actually makes the jibs very life like.
-
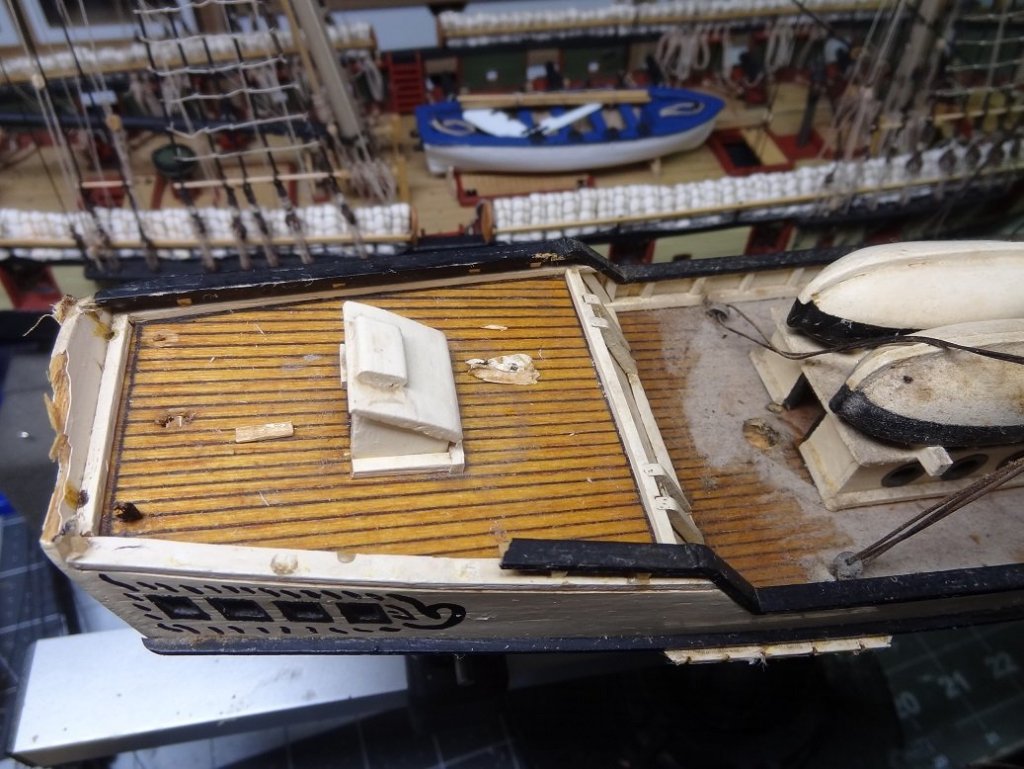
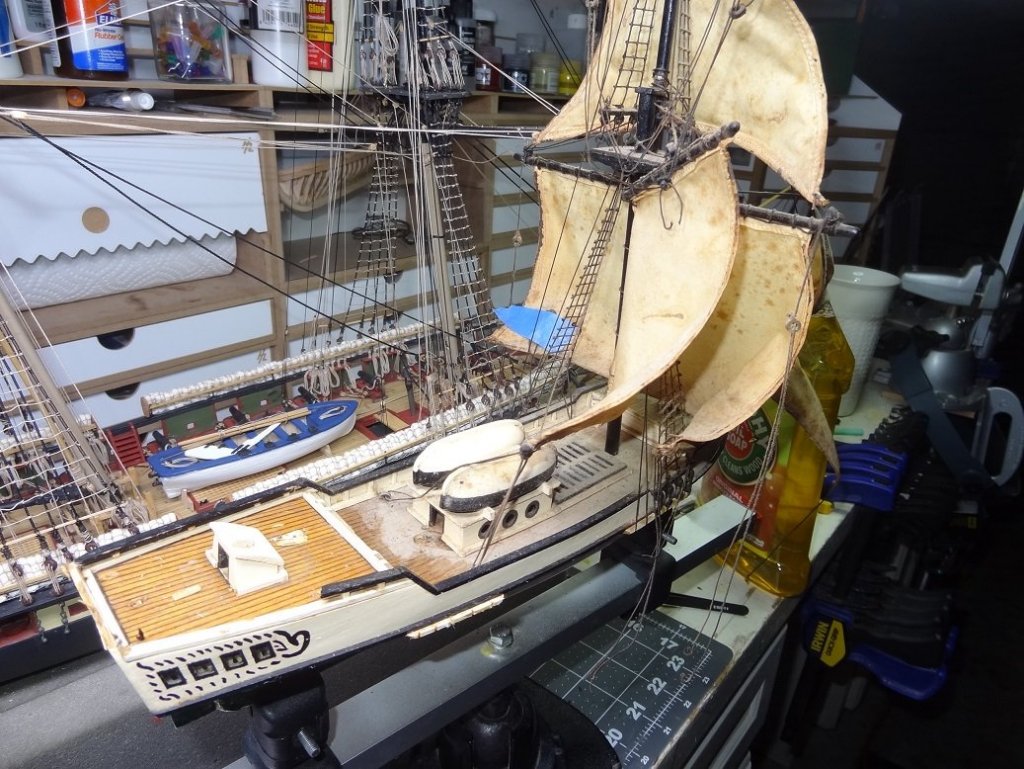
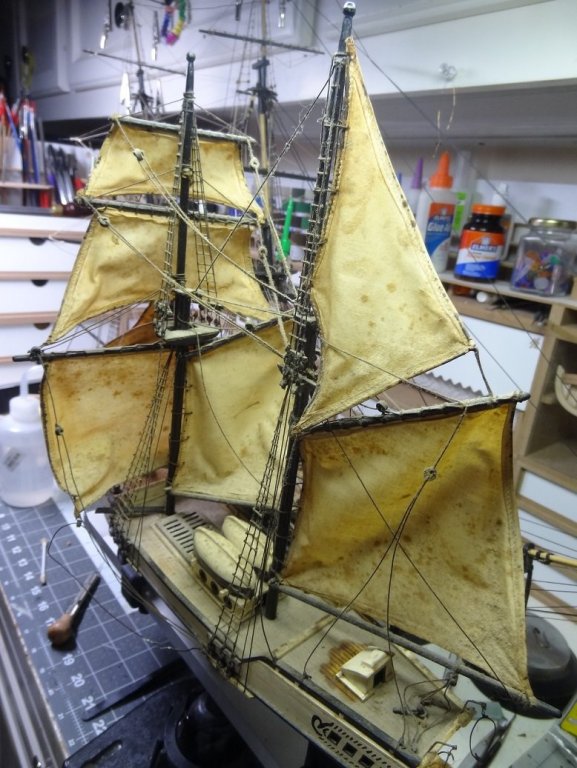
Took my dad to see an old friend he hadn't seen in years. Way,way back we used to live in the same neighborhood. Ever since I started modeling I've had this vision - I was a child and in someone's house (some friend of parents) there was a wooden model ship in their hallway. No idea who it was. I kinda suspected it might be this old friend and sure enough it was. He still had the model and one other. This guy is almost 90 and it was over 50 years ago when I used to go to their house. Kept out in the open, you can probably imagine what they look like now. The gentleman was truly excited when I told him I built boats, and asked if I would have a look at his. Long story short, I now have 2 restoration projects. One boat is Constitution not sure of the scale but it's pretty small. The other is Hispaniola, The boat from the book Treasure Island. I guess due to the small scale they are both pretty simple with just some basic rigging. They do both have sails. Hispaniola's are set - Constitution's are furled. Overall they are not in terrible shape. Structurally sound. Most rigging is still in place or hanging off where it should be. Sails are filthy and mildewed. Everything has a thick layer of dust. Here's a few shots of Hispaniola. Never done a restore before so I have some general questions. 1. Sails need a cleaning or replacement. I imagine that means removal. For this and general rigging, do you try to save the original work or just cut it all away and replace? 2. Removing parts - no idea what glue was used but both are all wood builds. Short of prying them up, is there any tricks I should try to loosen the old glue? 3. You've seen the dust. It doesn't blow off, it doesn't wipe off with your finger. Just go with water or is there a mild solvent that might clean better? 4. No idea what type of paint was used. Overall it is in decent shape, but if I needed to touch up or paint over something what's best for that? 5. Given my memory these days I imagine the first thing to do is take tons of pix. Neither of these models is particularly nice. If you saw them at a flea market you'd probably walk right by. However, they do hold a lot of sentimental value both for the owner and to a lesser extent to me. So I don't mind putting some $$$ and elbow grease into fixing them up. I don't see a lot of posts about restores here at MSW. If you know of any other resources I would appreciate hearing about them. Oh man, what has he done now
-
So are you making these pieces because the kit calls for you to? Broken in the box? Just got the urge? If it's the kit then did the plans provide you with dimensions?
-
Friskit Low Tack Masking Film
mikiek replied to grsjax's topic in Painting, finishing and weathering products and techniques
I tried it. Gave up too. 1. Be careful when you trim the edges, it's easy to cut into the wood below. 2. I had some problems getting a good seal on soft or grainy wood. The stuff really isn't made to penetrate wood grain. You end up with the same problem as masking tape - wicking underneath. 3. That which does penetrate can get stuck down in the grain when you go to remove it. Your mileage may vary. -
Just got some as well. Wish they were heavier. Sure I could dangle some weight off them but I could do that with an alligator clip too.
-
Did you have to carve that stern piece? Can't imagine a part like that coming from the kit. Looks like it came out well.
-
The boat has beautiful lines Per.
-
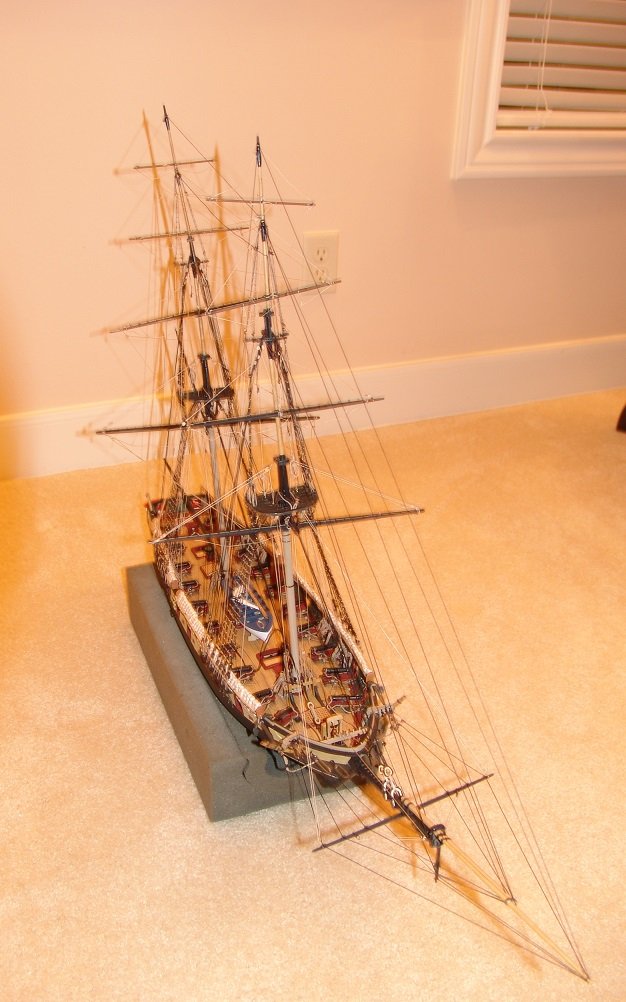
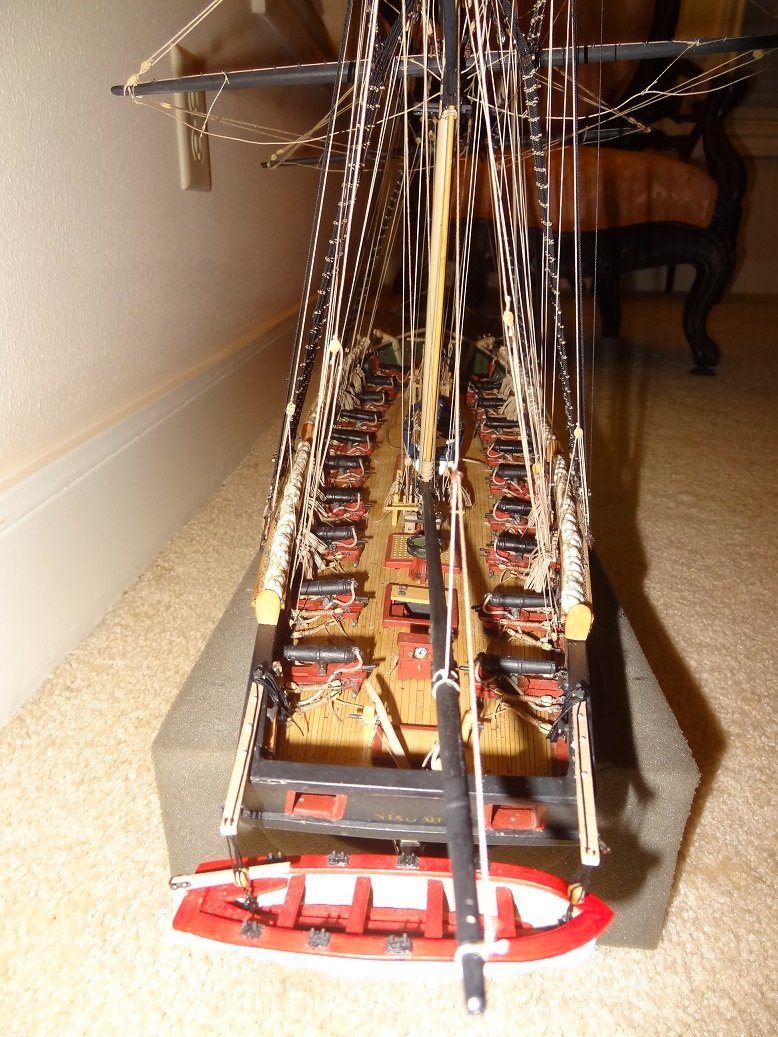
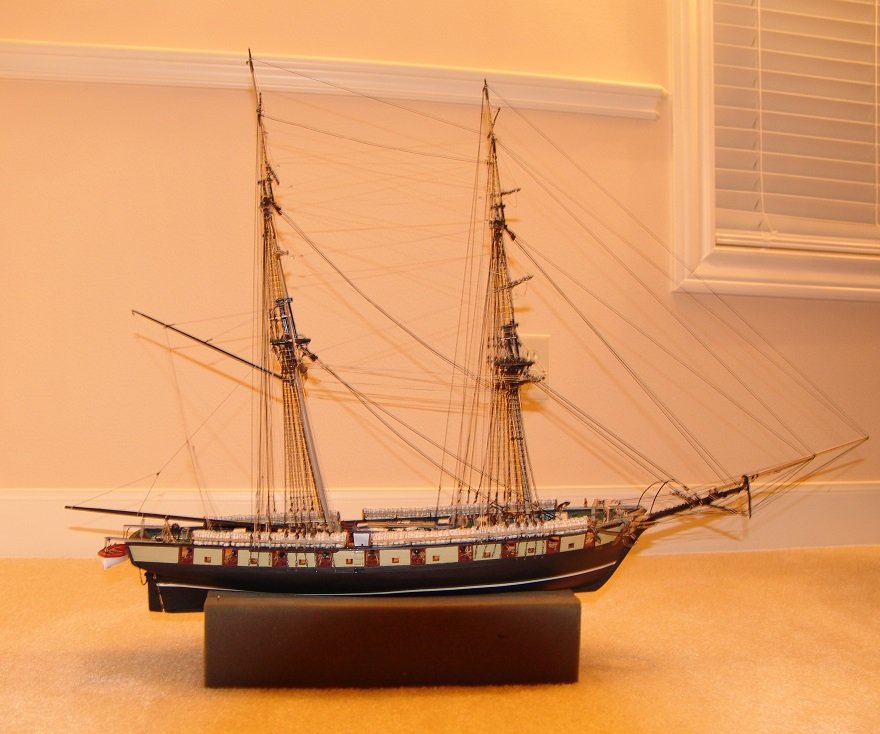
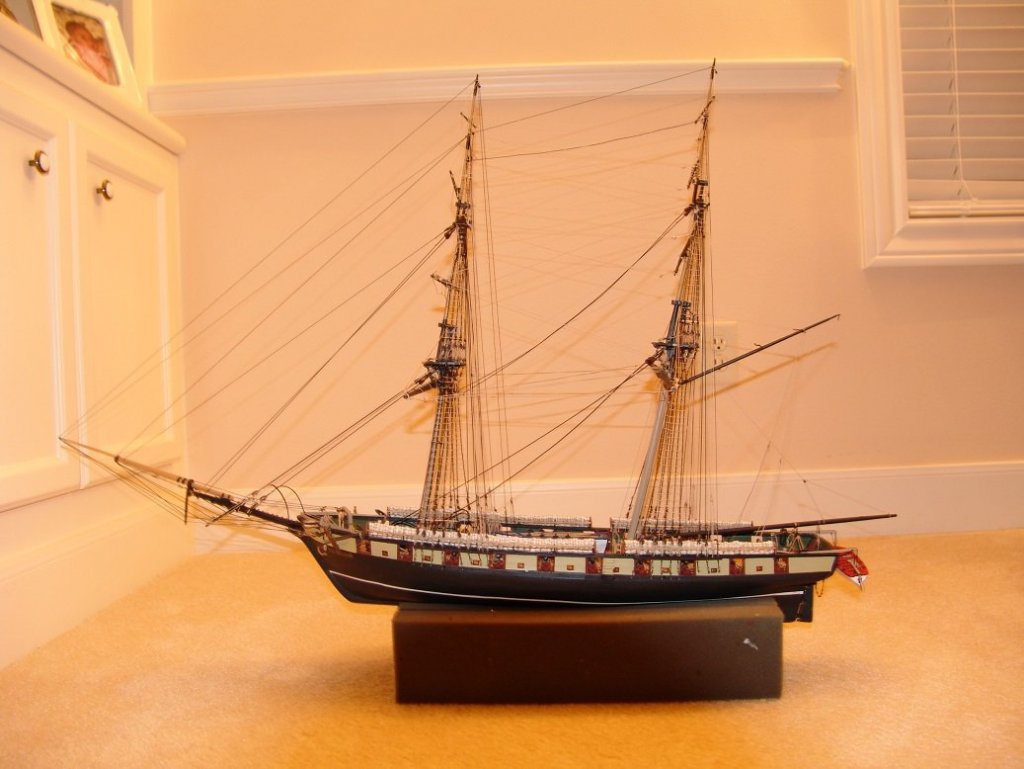
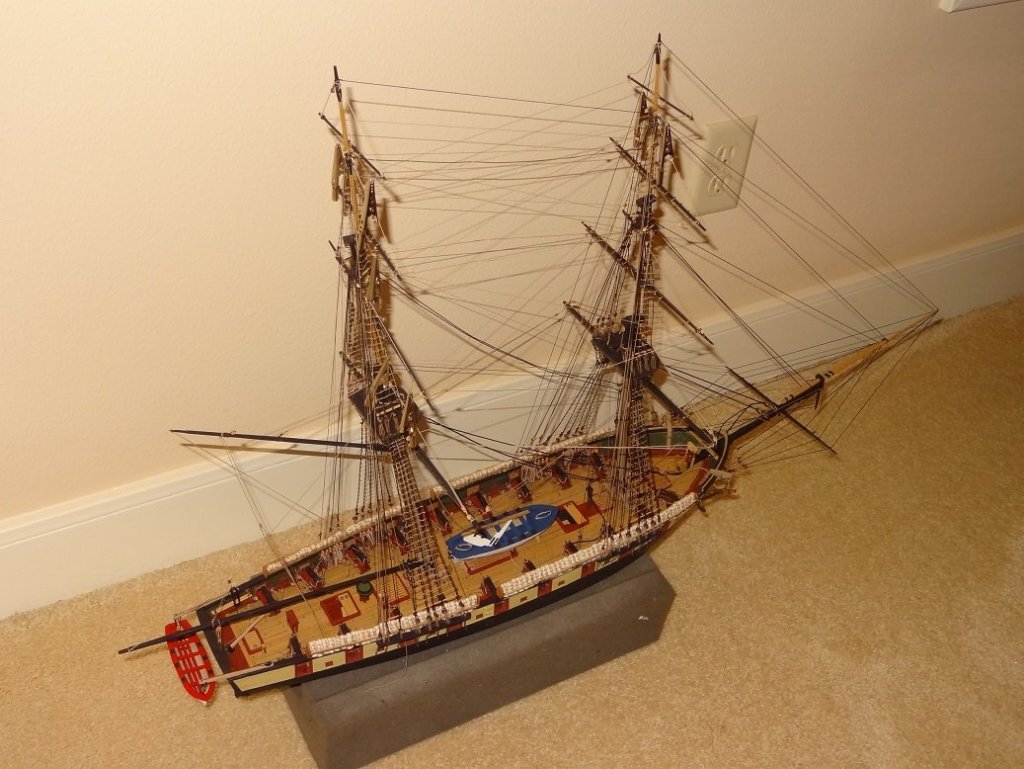
I tried again to get some pix. Brought the boat in the house. Put it up against a blank wall, Used the flash every time. I'm still not happy with the outcome. My one last try will be with a different camera. Here's a few of the ones that came out better. Keep in mind this is only the standing rigging and maybe 1/2 of the running rigging - sheets, halyards and braces. But I think it is enough to give the general impression. Can't imagine how busy the thing would be had I added all the lines for sails. Maybe even too much. Left to do: rudder chain, tiller and boom rigging, trim loose ends of ropes, clean the deck (dust bunnies), name on sides & stern. Regarding the last item. I tried some dry transfer decals with minimal success. Seems like that would have been the easiest way. I found some lettering that I liked - good font, good size. But they just don't transfer very well. Of course it is hard to hold the boat at the right angle, hold the transfer sheet still, then burnish the lettering. I'm wondering if a sort of 'name plate' would work where I take a strip of wood, paint it, apply the letters then glue that on the boat. Gonna need something like decals for this - painting is out of the question.


- 843 replies
-
- 8
-
-
- niagara
- model shipways
- (and 2 more)
-
Michael - I appreciate the encouragement. I'm not too far behind you - 61. I've been taking care of my father at a senior place - he's 91. I've watched the slow deterioration over the years (aging). I've also seen it in other residents and his friends at the same place. But it has been a slow gradual thing. What I am dealing with I can almost tell you the day it started. Within about 3 weeks I went from no problem to reaching to pick something up and completely missing it. I had an ongoing joke with myself, when I sat down at my bench it was almost a guarantee that I would drop something on the floor within the first 30 seconds. The latest doctor is calling it exhaustion. But I come home and build all night. That's supposed to be R&R. Go figure. Anyways, one good thing about this hobby - if you are having a tough time with a task, you can put it away and work on another. One reason for keeping 3-4 builds going at one time. OK, back to work And thanks guys!
- 843 replies
-
- 5
-
-
- niagara
- model shipways
- (and 2 more)
-
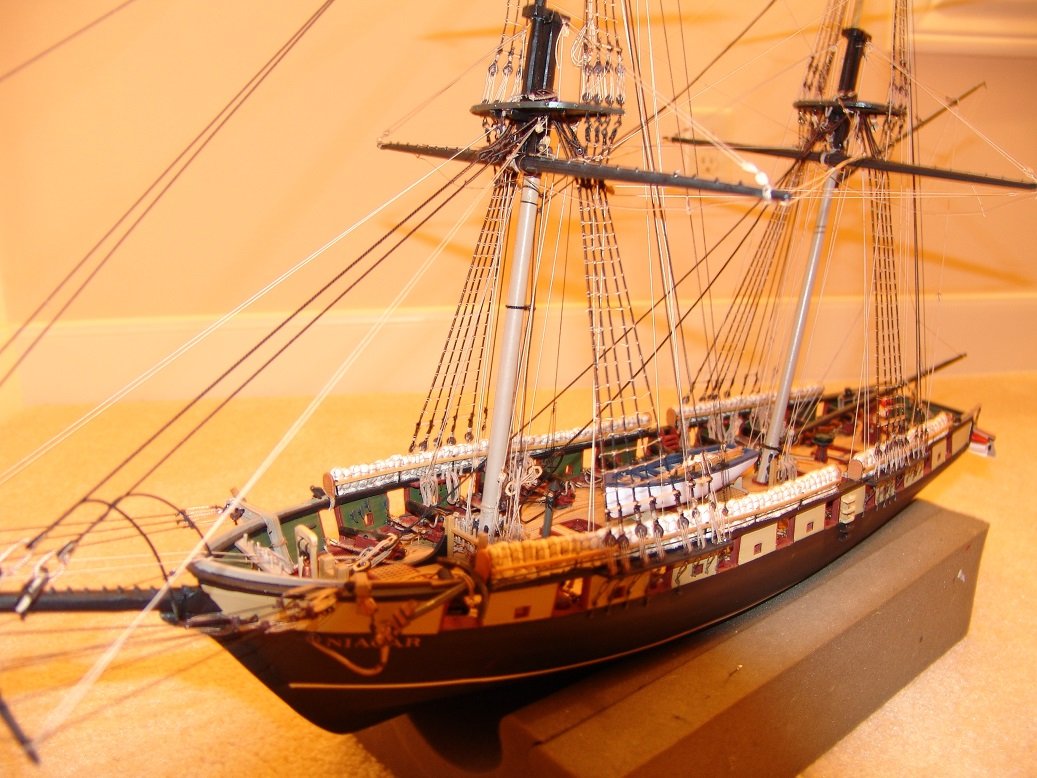
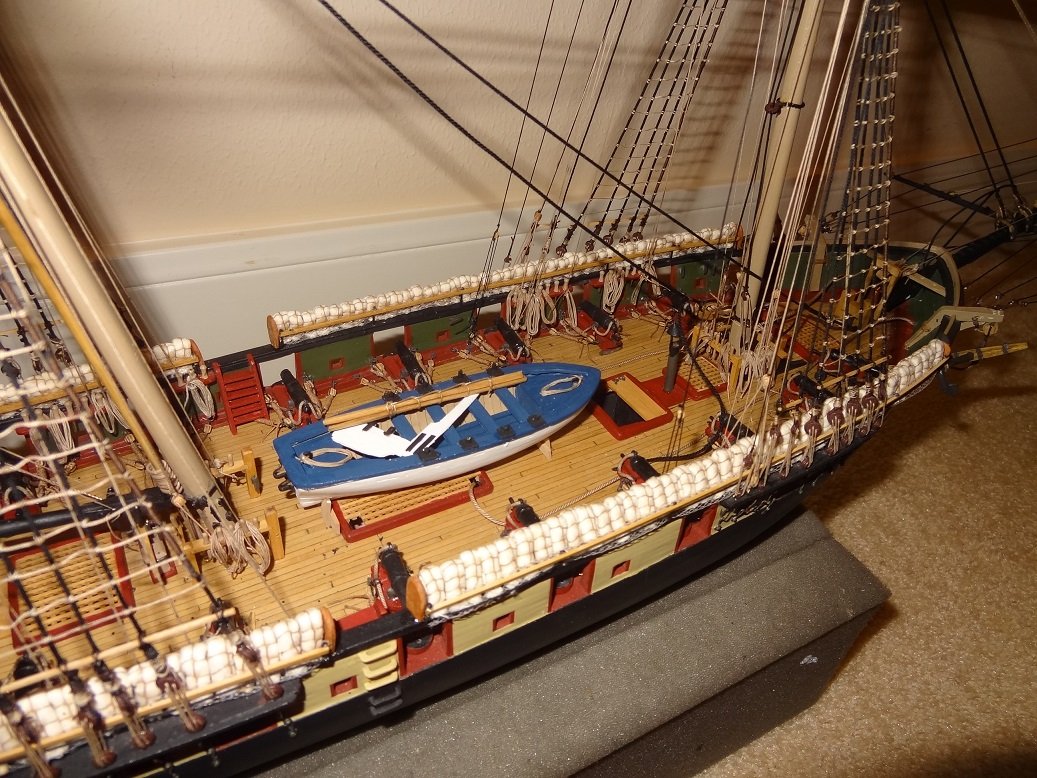
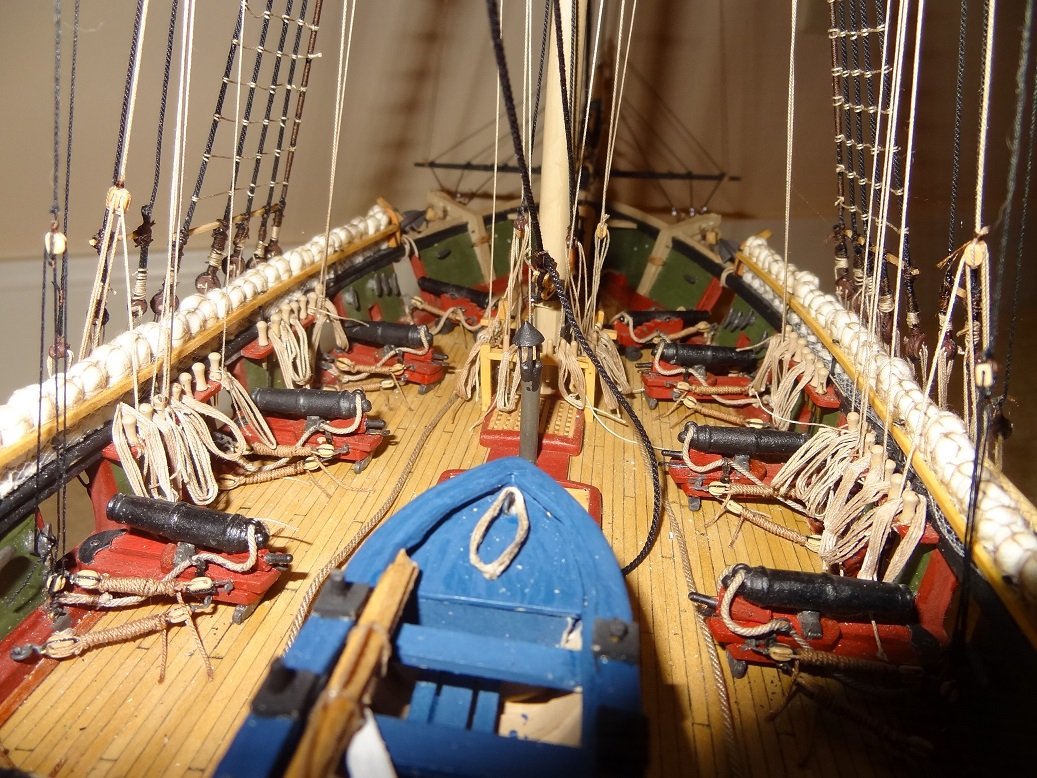
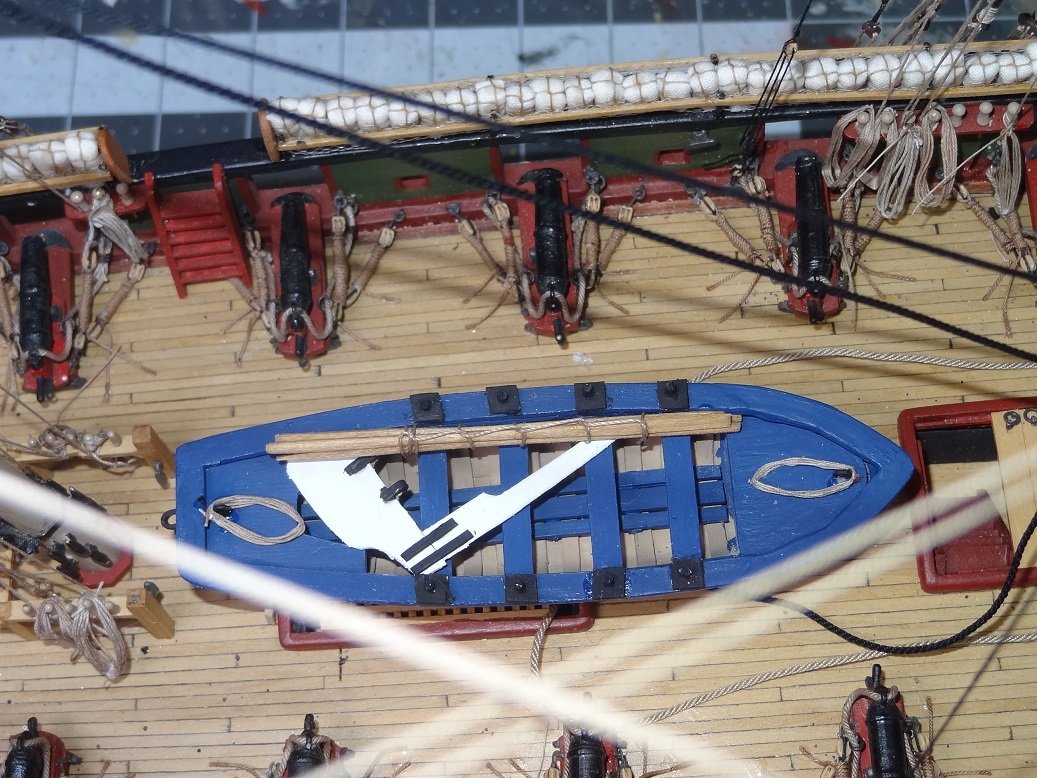
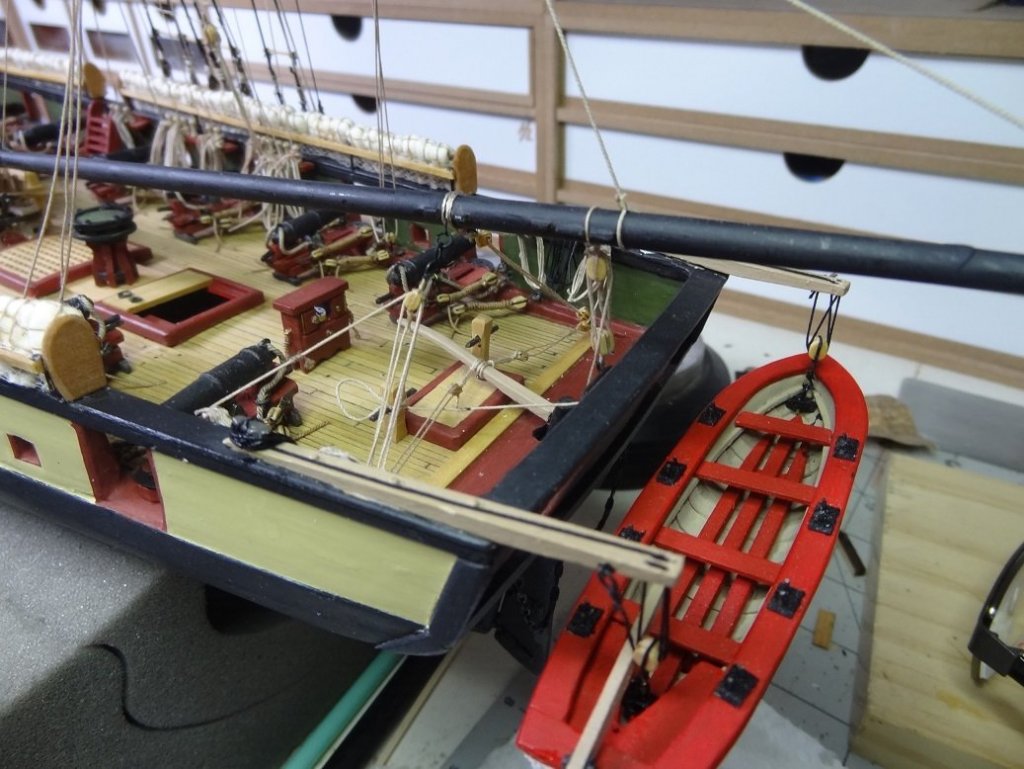
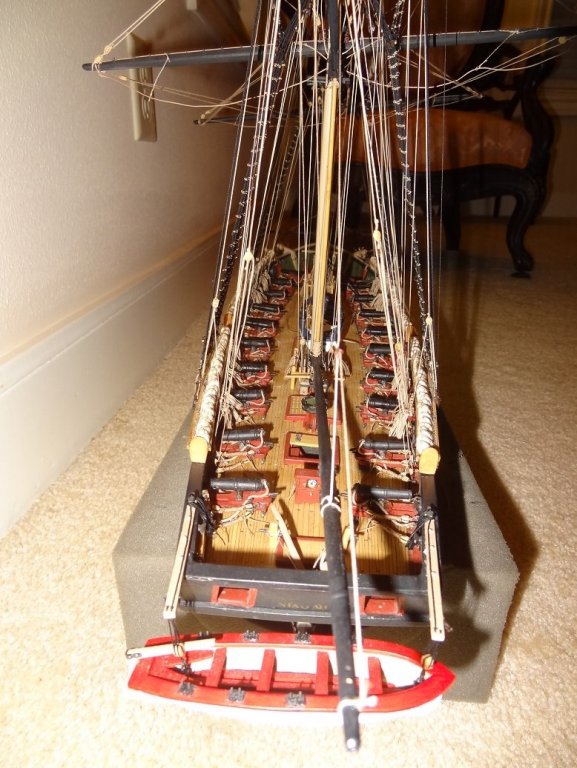
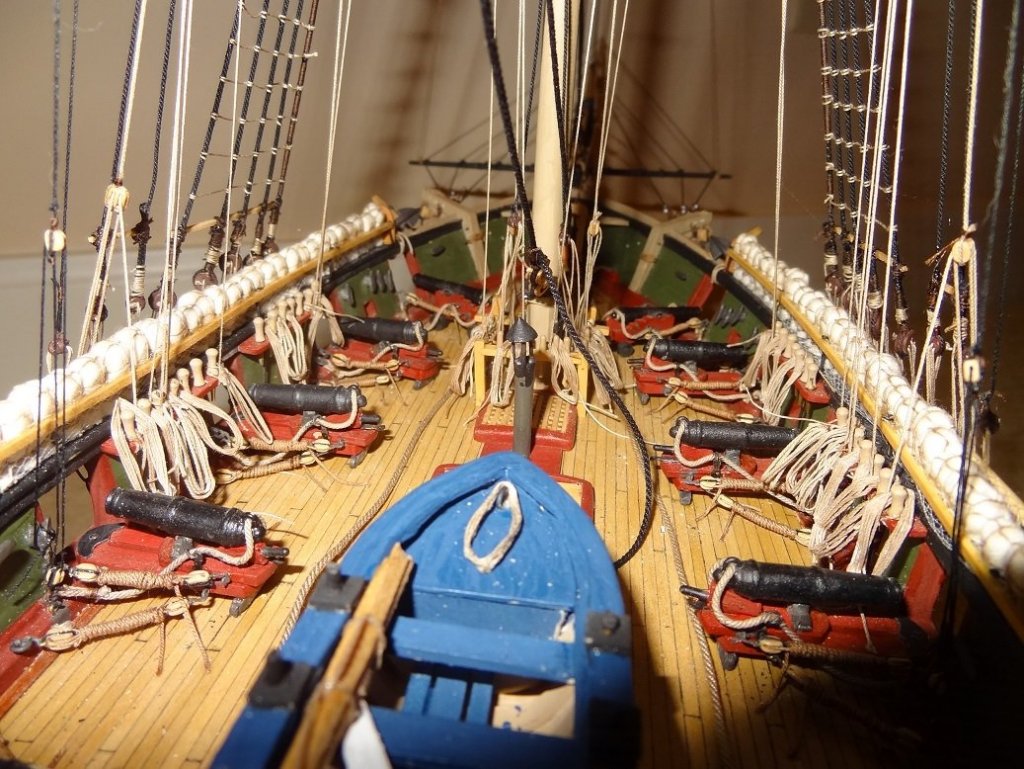
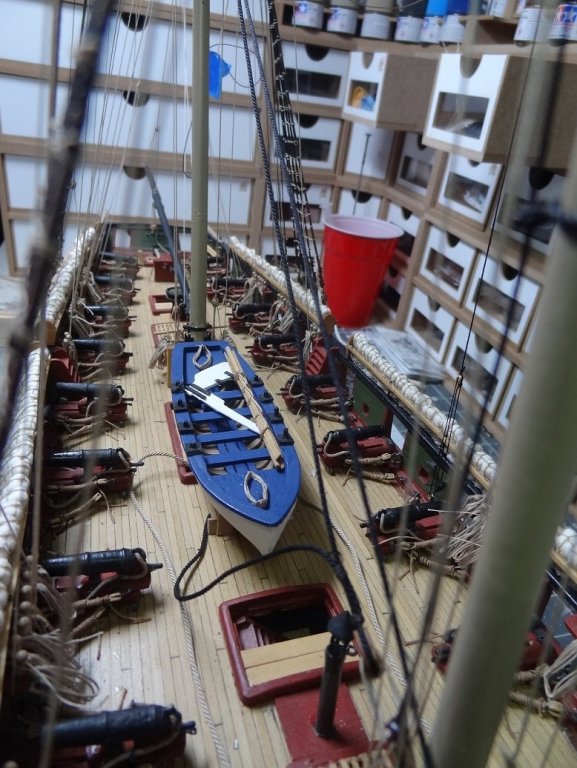
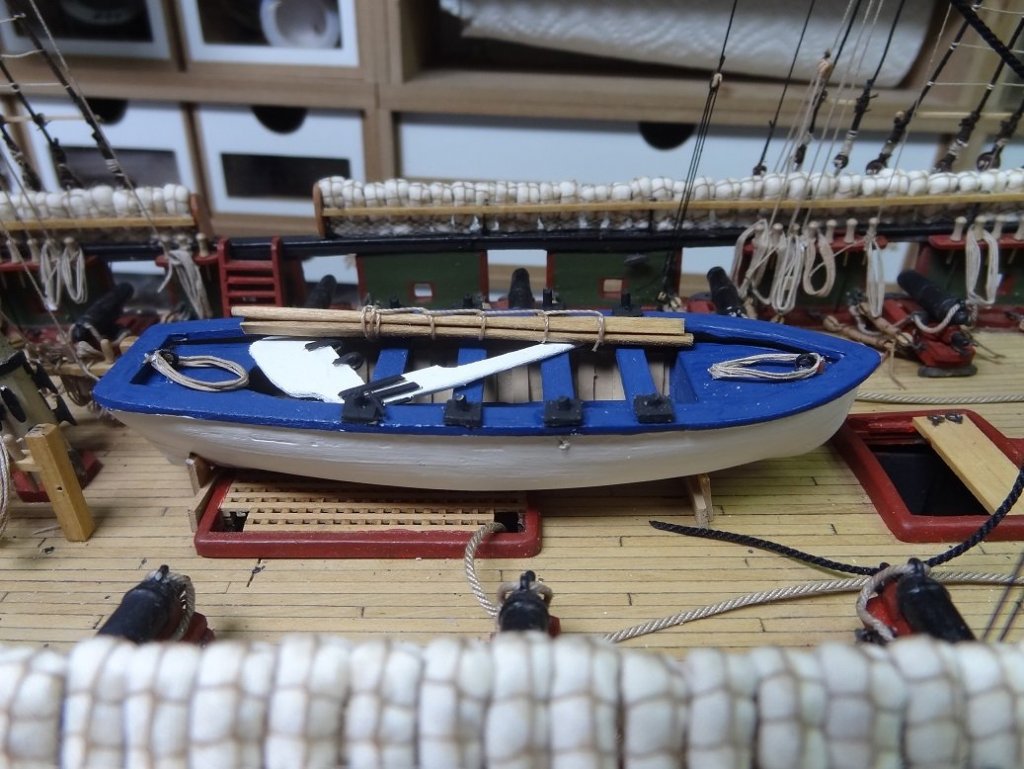
Man, some really bad timing. I have had a few spells in the last couple of months where I just couldn' t do any tasks requiring eye/hand coordination. Doctor says it's fatigue, your hands just won't do what your brain & eyes tell them to do. At any rate, it's hit me again and I just can't get the rigging finished off. I have 8 blocks that need line seized to them and the tiller. Two hours Wednesday nite and one hour tonite and I don't have a single one done. I do have at least a half dozen Syren blocks somewhere on the floor. Very frustrating. So I started some of the cleanup tasks. I never mounted the anchors I made over a year ago, so they're in place and look pretty nice. I made a cheezy stand for the cutter and glued that to the deck. And I started rigging the rear davits to hang one of the yawls - I'll only be going with 2 ships boats. Guess I'll wait and try the rigging again tomorrow. Here's a few shots of tonites work: Yeah, I know the boat is blue. I got tired of red everything.

- 843 replies
-
- 8
-
-
- niagara
- model shipways
- (and 2 more)
-
Right on with your comment about the fore & aft rigging and sails. It really gives one a shot at the whole she-bang and if you have to redo something it's not a terrible thing. Keep the pix coming Don.
- 653 replies
-
- 4
-
-
- trabakul
- marisstella
- (and 1 more)
-
Welcome aboard Michael! I would suggest a PM here to user "Chuck". He's the site web admin and also the owner of Syren. I'd be willing to bet he ships to Europe, but I don't know what the postage would be. If you made a big order it might not be cost prohibitive. I really wish I had kept track of all the sizes and quantities of rope I used. I do know it was a lot more than I expected. It packs pretty small.
- 843 replies
-
- 4
-
-
- niagara
- model shipways
- (and 2 more)
-
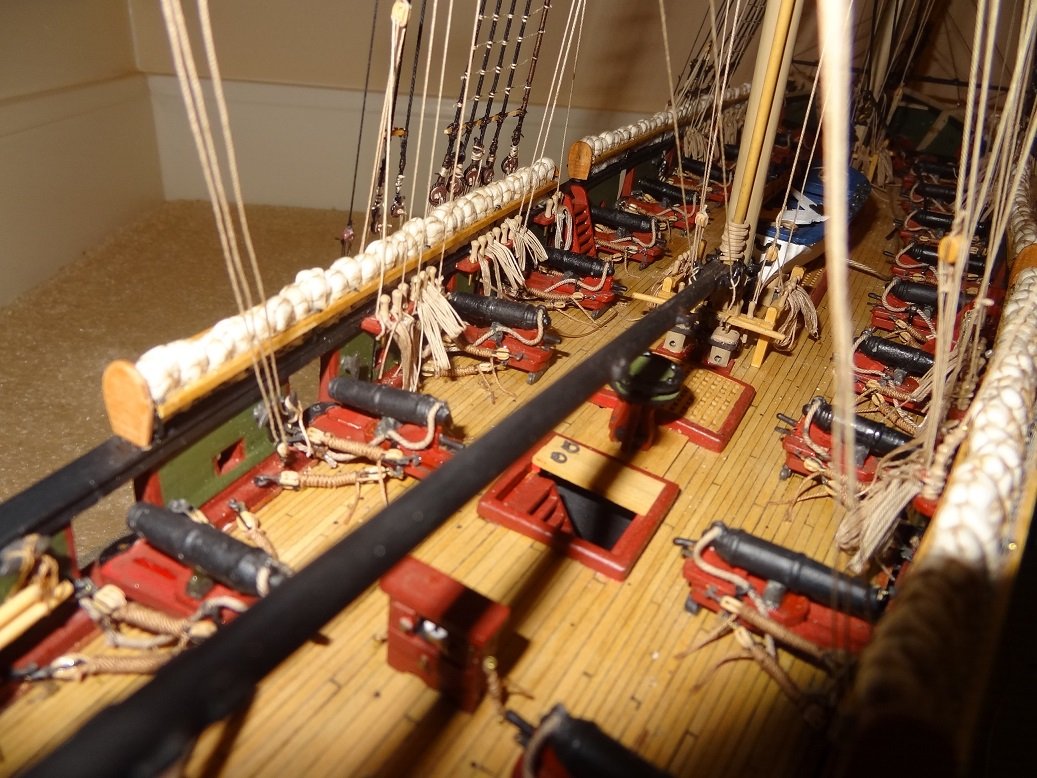
I would agree with you Tom. I was just thinking maybe it was really old or something. I thought the spacers were odd because I don't remember having to do that at all. What you've done looks real nice though. From a realistic point of view - carronades (which is Niagara's type of gun) had a problem with setting nearby rigging on fire.This was due to a larger aperture and the type of load. The quickest solution for this was moving the gun as far out from the side of the ship as possible. The small holes in the waterway in the middle of each port are for pins that keep the gun carriages in place. It also is kind of a mark showing where your carriages will sit. The barrels slid forward and back on the carriage. If you're looking for a side task you might build a few of the guns and then see where the barrels end up. Particularly forward. I'm a little concerned that those holes are not far enough forward and the barrels won't protrude outside of the bulwark. Of course everything I just brought up would be something you or me might know, but the casual observer - ehh. So maybe who cares? Just something to think about.
-
Hey Mike - thanks for looking in. The ropes are a mixture from the kit and Syren Model Ship Co. Blocks. deadeyes and hearts as well. Most of the long runs are the Syren rope. Cheap guy that I am, a lot of the short and inner runs are from the kit. If you could notice from the pix, you have a good eye. The Syren products, particularly rope, is a step above anything else out there.
- 843 replies
-
- 4
-
-
- niagara
- model shipways
- (and 2 more)
-
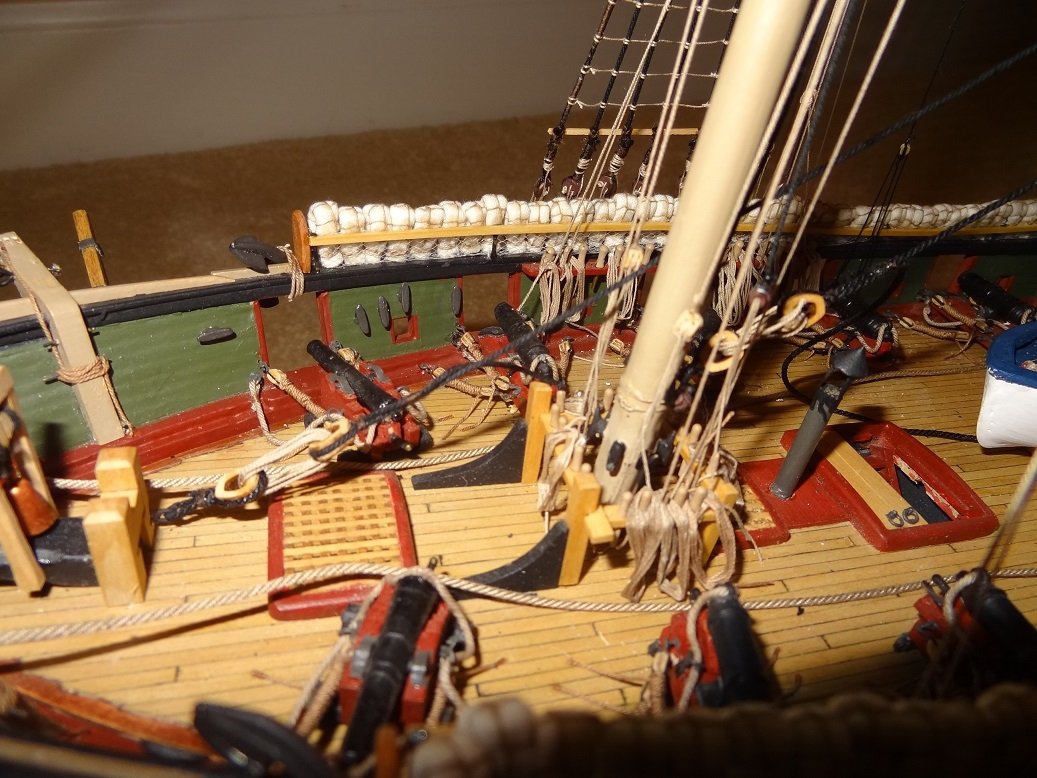
I believe rigging is almost over. I'm at a point where I don't plan on adding any additional lines. I need to go back and tighten a few of the first ropes I put on. Already done 2 and broke them both. Meaning they had to be reinstalled with all the other rigging in place. I'm still working on the coils for the belay pins. I'm not real happy with how they are coming out. Rather then throwing the whole coil over the pin, I've gone back to looping the fall thru and around the coil and then looping that part over the pin - at least for now. No pix until I can figure out how to get some decent shots. I'm tired of all the crappy looking pix. So I'm about to get into clean up mode. Finding all the unfinished odds & ends, like brass eyebolts that need painting. The other thing I need to start is getting all the dust & bugs off. My shop is the garage and she has spent some time 'on the shelf' so there's plenty of nastiness around. I guess just small brushes and a lot of compressed air. I need to go ahead and put in the order for the display case. Not looking forward to that bill Yup, starting to sound like this one will be done in a few weeks.
- 843 replies
-
- 4
-
-
- niagara
- model shipways
- (and 2 more)
-
Kinda odd that every space needed one. Did you just buy your kit or was it a closet queen?