HOLIDAY DONATION DRIVE - SUPPORT MSW - DO YOUR PART TO KEEP THIS GREAT FORUM GOING! (Only 20 donations so far - C'mon guys!)
×


mikiek
-
Posts
2,276 -
Joined
-
Last visited
Content Type
Profiles
Forums
Gallery
Events
Everything posted by mikiek
-
 Don - Amazon has variety packs of styrene in different shapes. Rods, tubes and strips all in one. If you can get past the "it ain't wood" mentality, it can be very helpful on occasion. I used some as frames on the ships boats. Short of carving some wood frames I couldn't get wood strips to bend enough. The styrene did it easily. I have a nice Sherline lathe and I'm embarrassed to say I know almost nothing about it. I did turn some square sticks into spars but that was just holding sandpaper while they spun. I don't know much about using the cutting tools.
- 843 replies
-
- 3
-

-
- niagara
- model shipways
- (and 2 more)
-
I'll check them out Don - thanks....
-
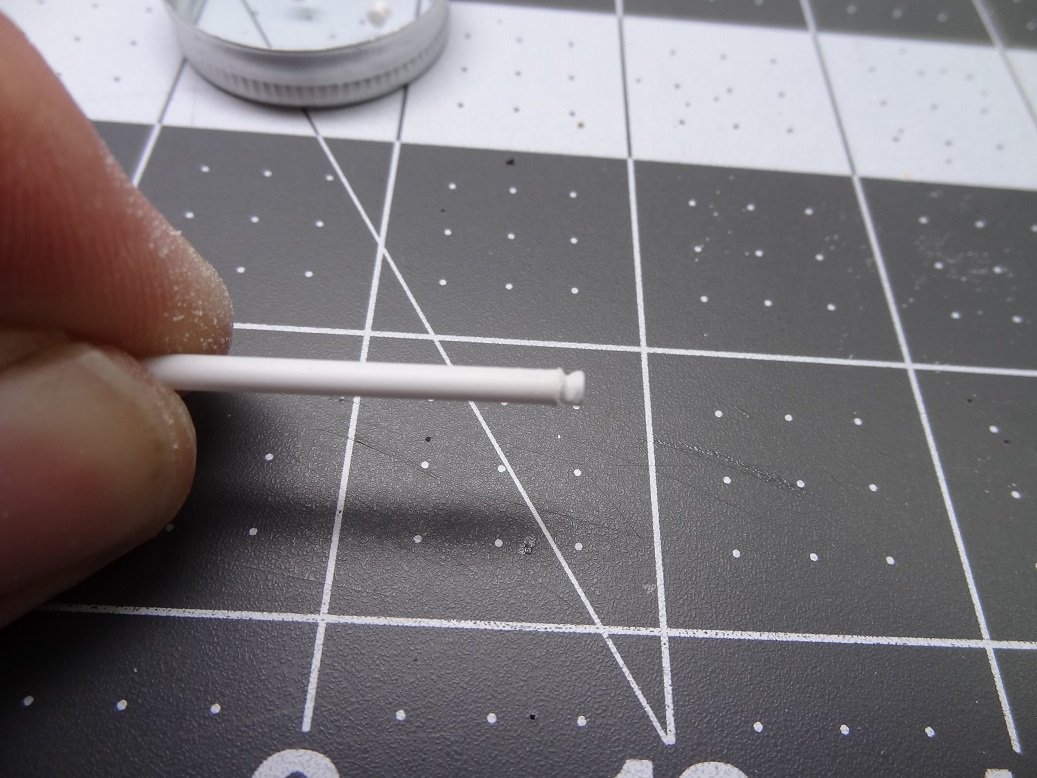
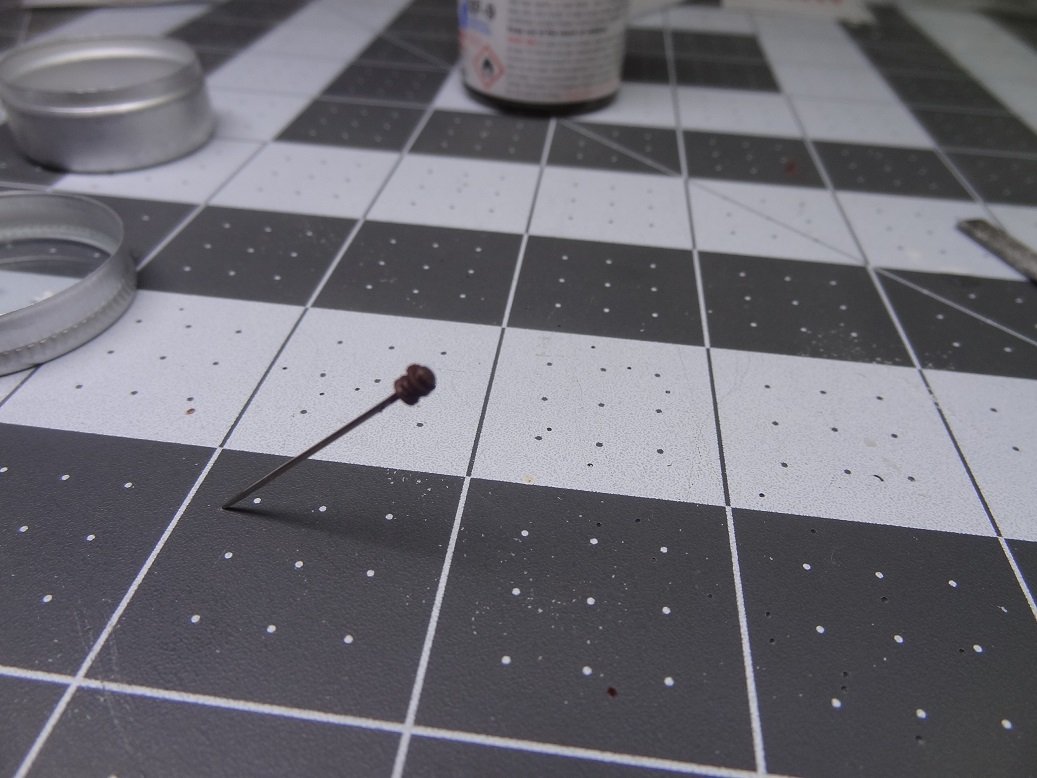
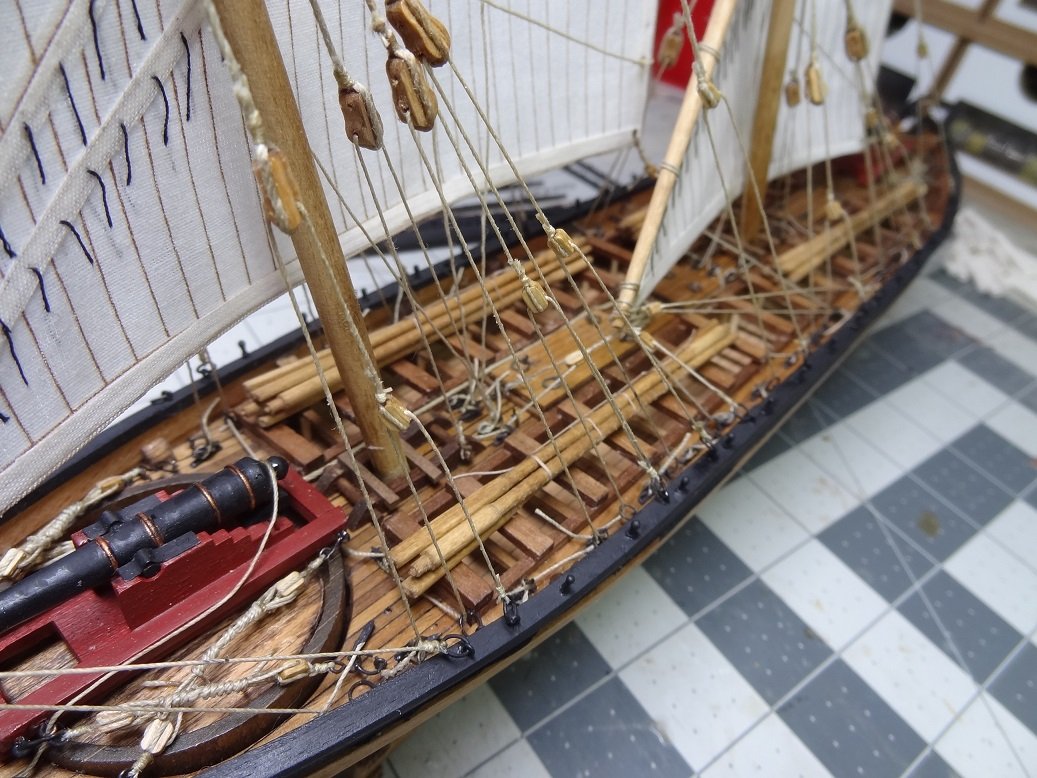
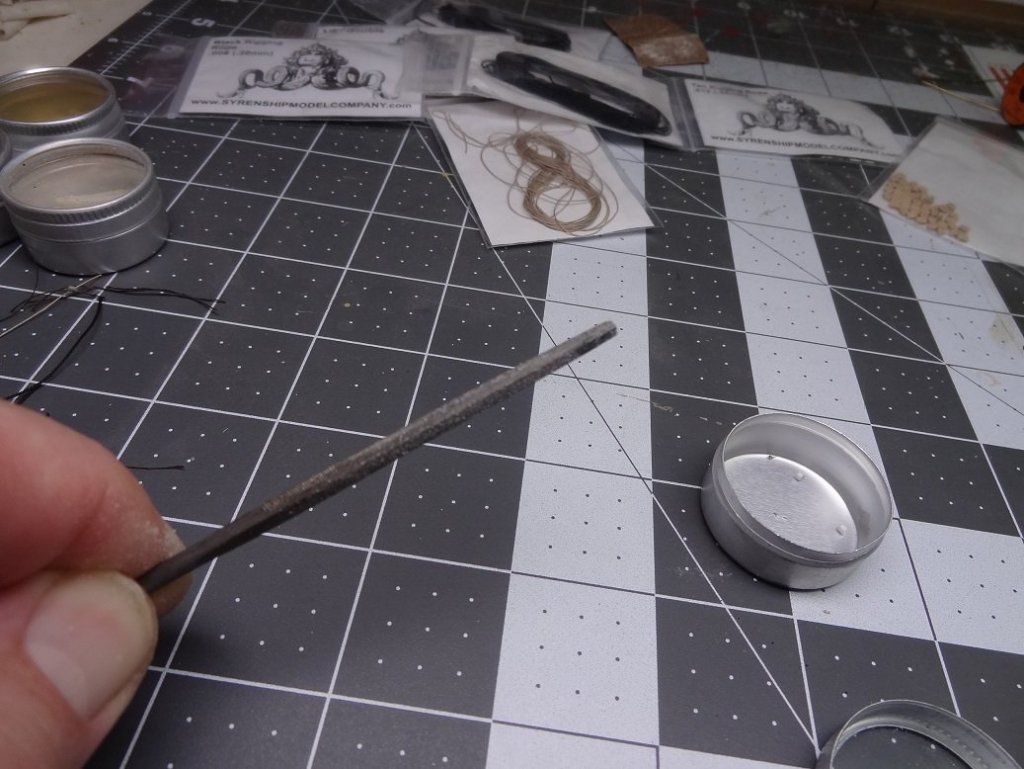
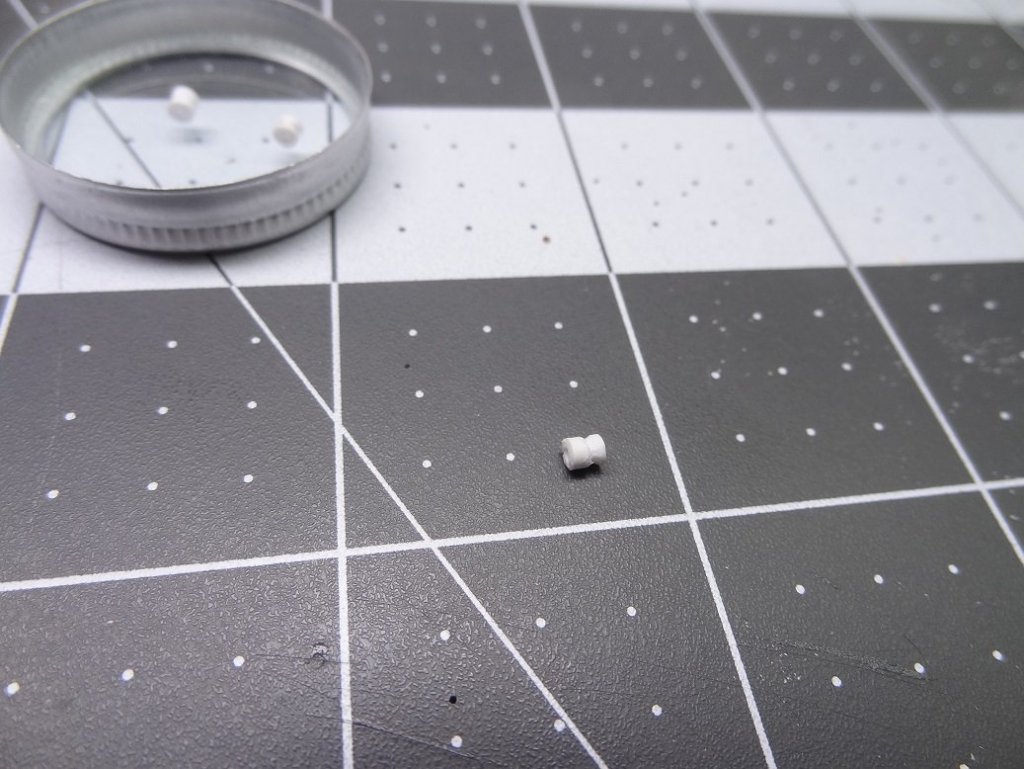
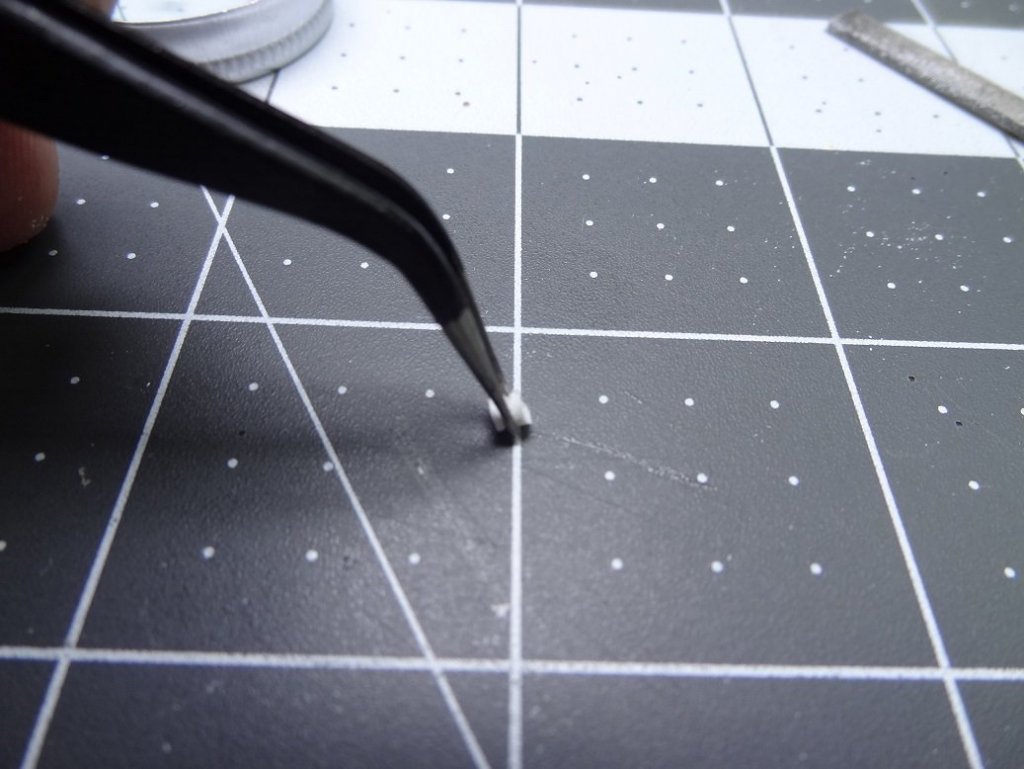
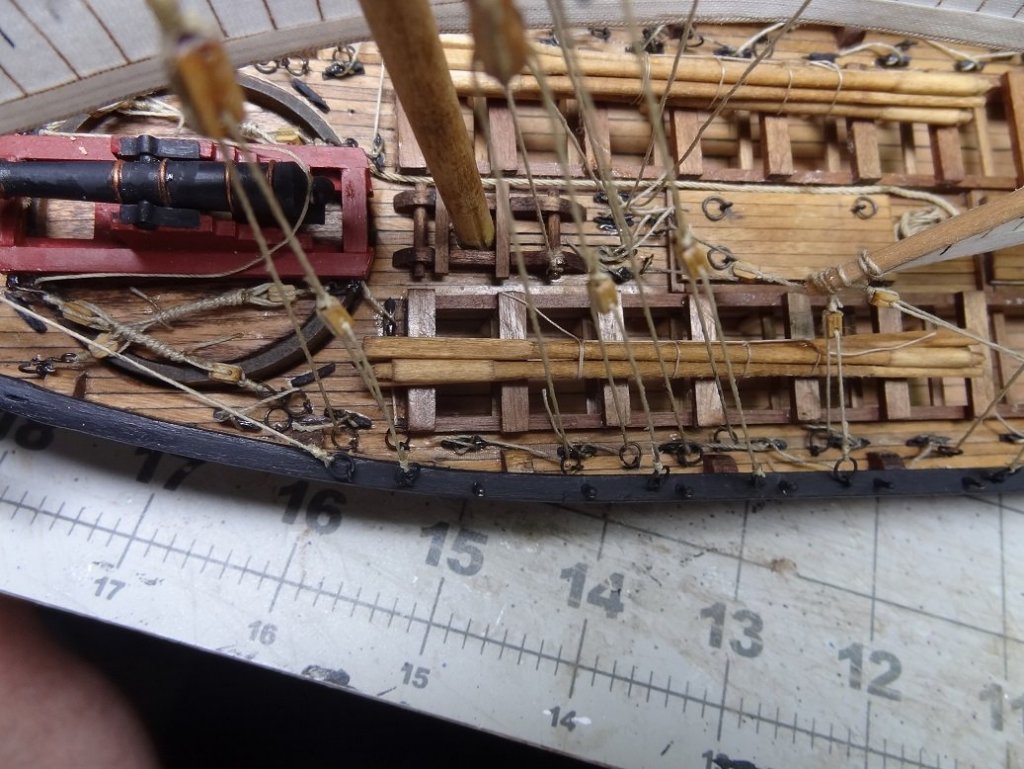
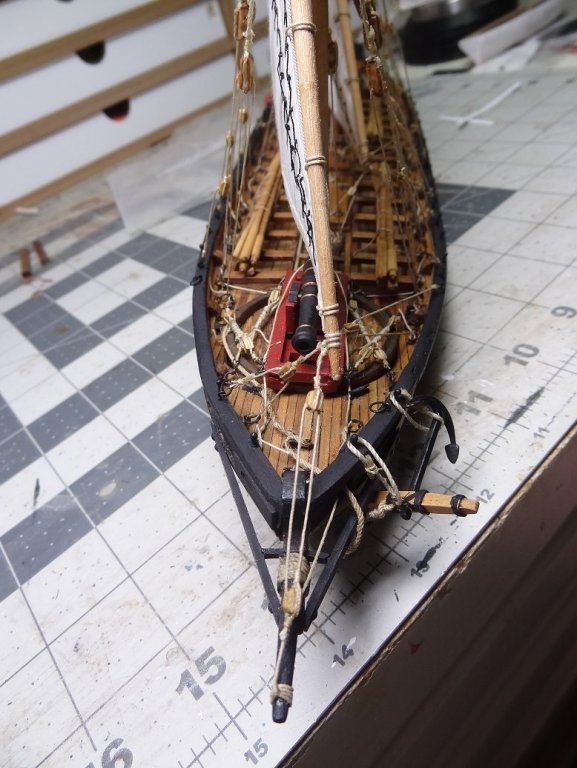
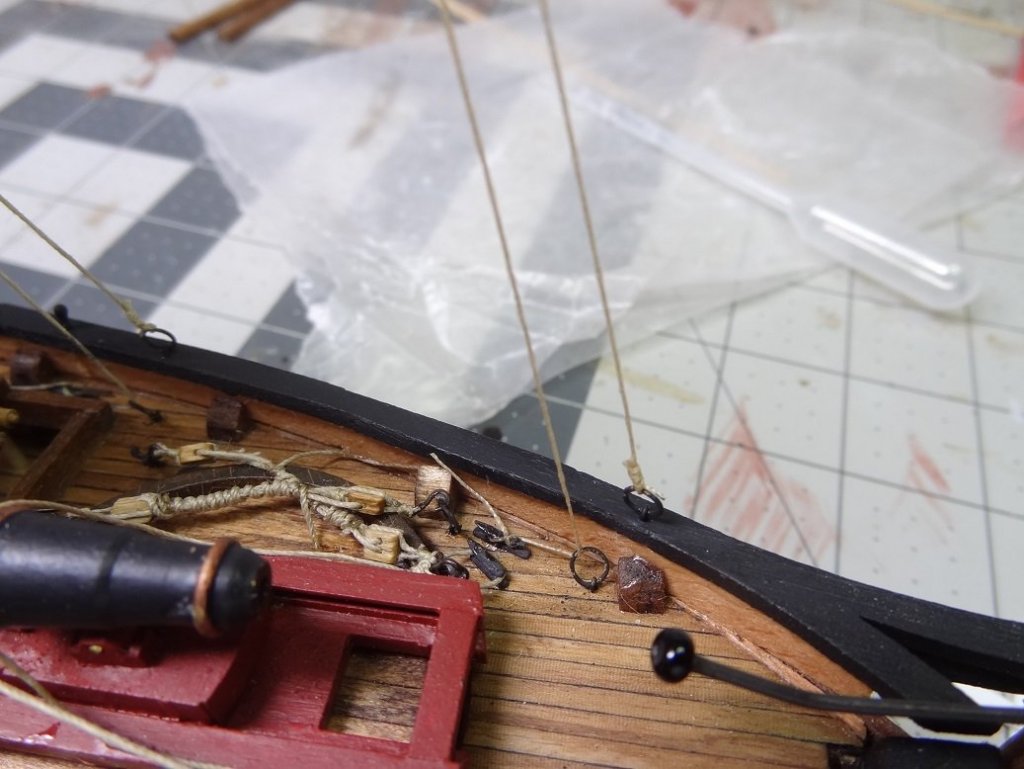
Slowly moving on. Shrouds for the top mast are finished. So far I have not deemed it necessary to post a 'how to' for any of the rigging. I'm not doing anything revolutionary, so I think there are enough threads like that out there. Mast spars are still not glued together yet. Shrouds are served where they encircle the mast head. I've been bouncing back and forth between the kit supplied rope and rope from Syren. In an effort to save, I am using the kit rope for things that either won't be easy to see or things that are pretty small. Seizing and serving for the shrouds was done with dark brown Gutterman silk thread. On the smaller ropes (0.08) I started using 6/0 fly line - the thread was too thick. I didn't like the fly line at first, I found it a little difficult to use. Now it is easier and I think the result is more to scale. One thing I will show you guys - the rigging plans call for a lot of thimbles. Of course they are not supplied. I have a lathe but no clue what to do with it so I am taking a different approach - styrene. I have used styrene before with good results. It is easy to cut, size & shape. It bends nicely. It files very well. It is easy to paint. It comes in sheets, rods, tubes, bars and more. Can you tell I like styrene So back to the thimbles, at 3/32" doing something on a lathe would be challenging even if I did know what I was doing. I have some 3/32" O.D. styrene tubing that I used to make them a different way. It takes a small square file - be sure the corner edges have teeth and are not smooth. Holding the tubing in one hand file around the tube, cutting a shallow groove maybe 1/32" from the end all the way around the tube. Use the fingers that are holding the tube as a guide for the file. Sorry I don't have any action pix, it takes both hands to file so no hands for a camera. Once the groove is filed, cut the tubing with a knife just inward of the groove. Make sure you have a finger on the thimble as you cut, otherwise it will likely shoot across the bench and disappear into parts unknown. Holding the thimble with some tweezers you can file the ends to flatten them out and to shorten them if they were cut a little long Then paint whatever color you need. When the thimbles are seized in a rope they look decent. It takes less than a minute to make one - that's a big plus in my eyes.


- 843 replies
-
- 5
-
-
- niagara
- model shipways
- (and 2 more)
-
Hello Zoran - I am following up from your reply regarding any updated instructions for the Trajta kit. I don't know if what I have is new or old. I bought the kit about 8 months ago. I'd love to get started on Trajta. I don't seem to be able to PM the maristella.hr account
- 653 replies
-
- 3
-
-
- trabakul
- marisstella
- (and 1 more)
-
Hey Don - That's good to know about the updated instructions. I'll see if Zoran can get me a copy. My other Maristella kit is the cog and I don't want to do that one as a secondary build. I know what you mean about putting things off. It's easy to do. Of course when I do that, I end up getting frustrated that things are not progressing. You can't win either way. From the pix I have seen I think all the Maristella kits should have sails. It will come to you when the time is right. Stay with it.
- 653 replies
-
- 3
-
-
- trabakul
- marisstella
- (and 1 more)
-
Glad to see you're still busy on this build Don. I was wondering something - I am considering starting a new build and was debating whether to pull Trajta off the shelf. I was reading thru the instructions and really struggled with the English. I decided I didn't want to fight that right now so I'll look for something else to start. Are the instructions for Trabakul any better?
- 653 replies
-
- 2
-
-
- trabakul
- marisstella
- (and 1 more)
-
Glad to see someone else using them. They can serve a lot of different purposes. With planking and decking I find them very helpful.
- 228 replies
-
- 4
-
-
- gunboat
- model shipways
- (and 1 more)
-
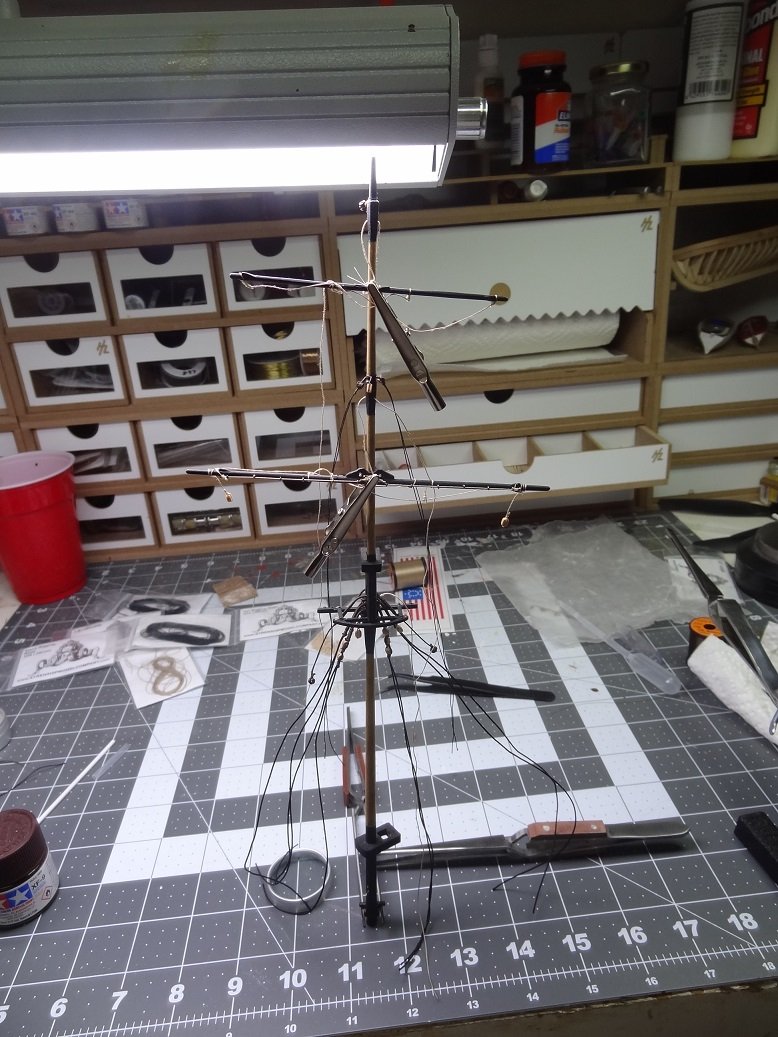
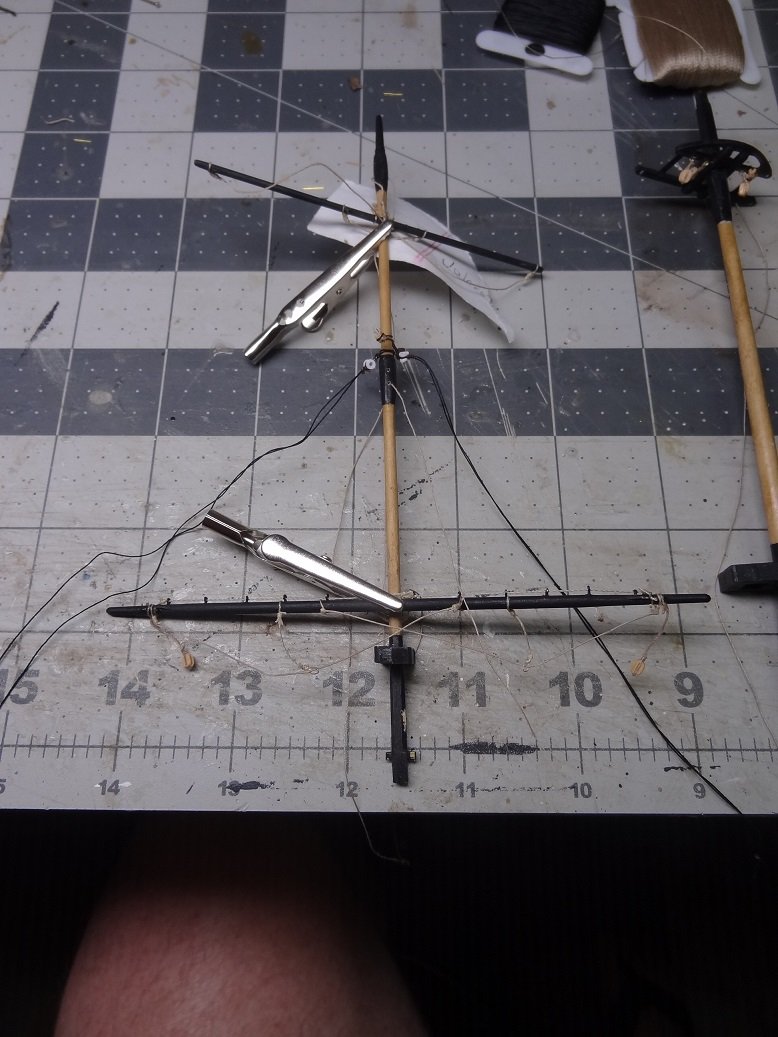
Greetings - believe it or not this build does go on. I've had some family issues and health issues but I find I would rather deal with this build then everything else. I think stress is getting to me as I am fumbling around a lot more than usual. And rigging doesn't always help the attitude I'm still working thru the upper spars. I not sure of the wisdom in that but it is what it is (until it ain't anymore). These pix are rather poor, I think I need a different color background. Come to think of it that might help with the rigging too. Can't tell you how many times I have tried to thread a loop and missed 5-6 times. I guess the pix are proof things are slowly moving ahead. Guess I could have cropped my knee out of the pic A different color cutting mat is on the Walmart list.

- 843 replies
-
- 6
-
-
- niagara
- model shipways
- (and 2 more)
-
Mike - I lost your log, somehow it stopped 'following'. Your build came out wonderfully. Many fine details that add so much to the overall looks. Congratulations!
- 129 replies
-
- 2
-
-
- finished
- model shipways
- (and 1 more)
-
I'm glad you're OK and back in the saddle Mark. It looks like your 'brain fog' days still come out better than my best days. Keep it up.
-
Good thinking Elijah. I thought your compass was some dividers at first glance. Looks like it fits fairly well - good & snug all the way down the edge.
- 228 replies
-
- 3
-
-
- gunboat
- model shipways
- (and 1 more)
-
Hi Scott and thanks. I do like cases for looks and even more for protection. The cross section build looks the same now as the day I put it under the plastic. Fortunately, both builds I have completed are small. When I finish Niagara it's going to need a case 3-4 times larger than either that I have now. It will be quite an investment. I did learn one thing at the plastics company, when figuring the size of your case, costs for materials goes up every 6". So a 12" x 12" x 12" case is a lot cheaper than a 12 1/2"x12 1/2"x12 1/2". And a 17 7/8" x 17 7/8" x 17 7/8" is the same cost as a 12 1/2"x12 1/2"x12 1/2". So plan accordingly if you can.
-
The Easy Touch is helpful in some instances although I will say other block sanders are just as effective. The annoying thing with the ET is replacing the paper. What they provide you with doesn't last all that long and removing the piece that is stuck on can be difficult. On the good side, if your hands are small the ET is easier and more comfortable to hold compared to the typical block sander. Good luck with your Niagara. If I can be of assistance let me know.
- 843 replies
-
- 2
-
-
- niagara
- model shipways
- (and 2 more)
-
Hah!! How could I miss this? Was going thru the kit box and found the flag. It's paper and it just folds over a rope. I'm trying to decide how to rough it up a bit.
-
Thanks for checking in Don. Yup, Niagara is on the front burner again although I have been debating whether to get something else started as well. I learned a lot about rigging on this build. Not that Arrow & Niagara are the same but just general techniques. The Lauck Street tutorials really showed me a lot about seizing and how to do one almost anywhere on the build. That was huge for me.
-
Thank you Michael! I found a local shop in Houston that makes that sort of thing. I went over and ordered in person and picked it up today - Contemporary Plastics. It was a lot more comfortable talking it out with them face to face. I knew we were all on the same page. Cases seem to add something to the finish. More elegant maybe? It did the same for the cross section build I finished a while back. Plus it keeps the contents clean as a whistle and intact. With 2 house cats it's a must.
-
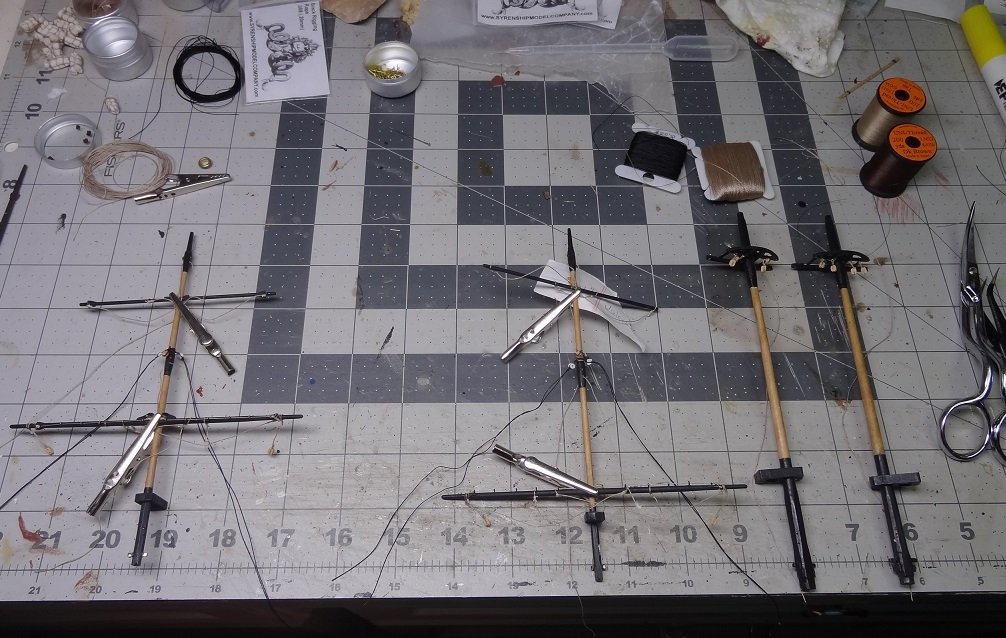
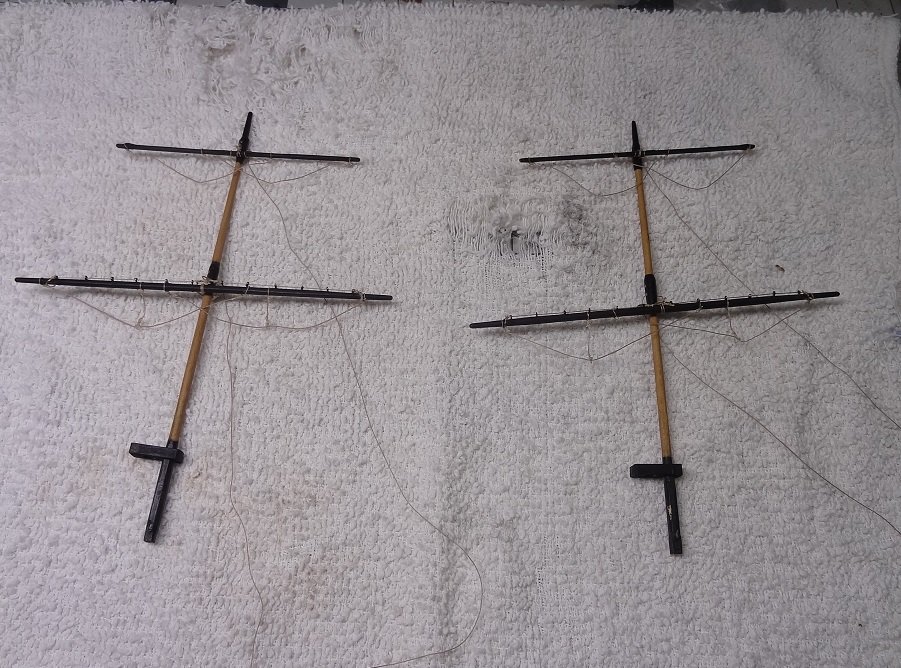
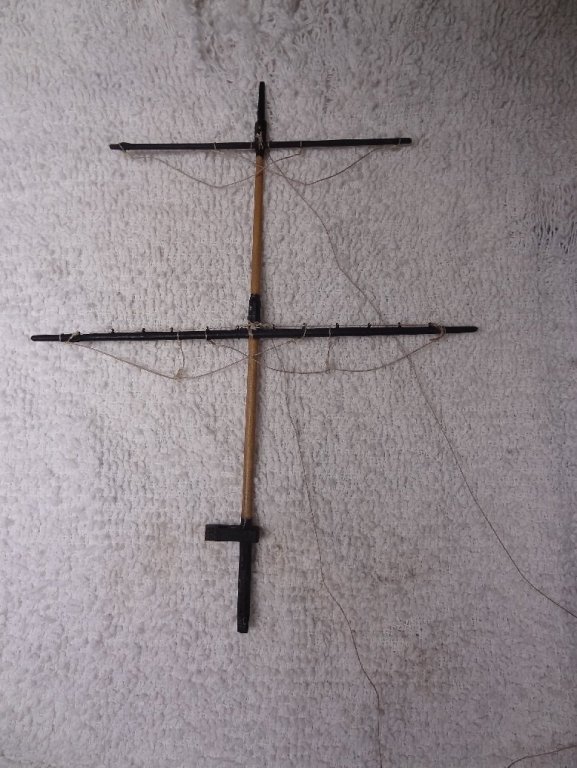
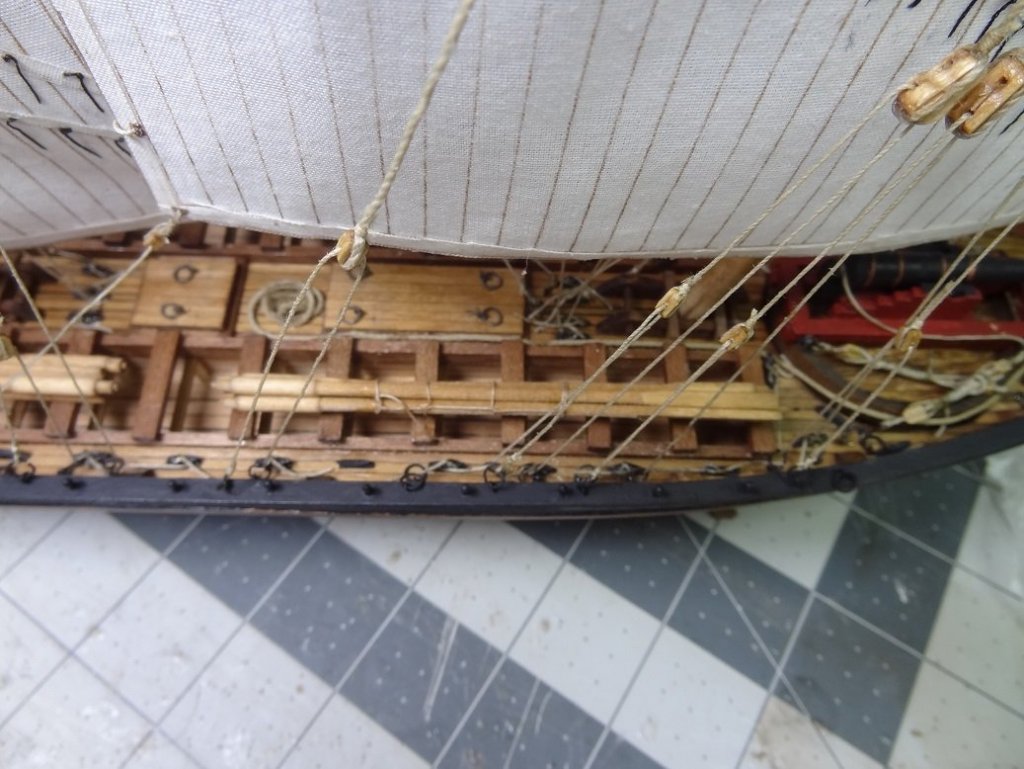
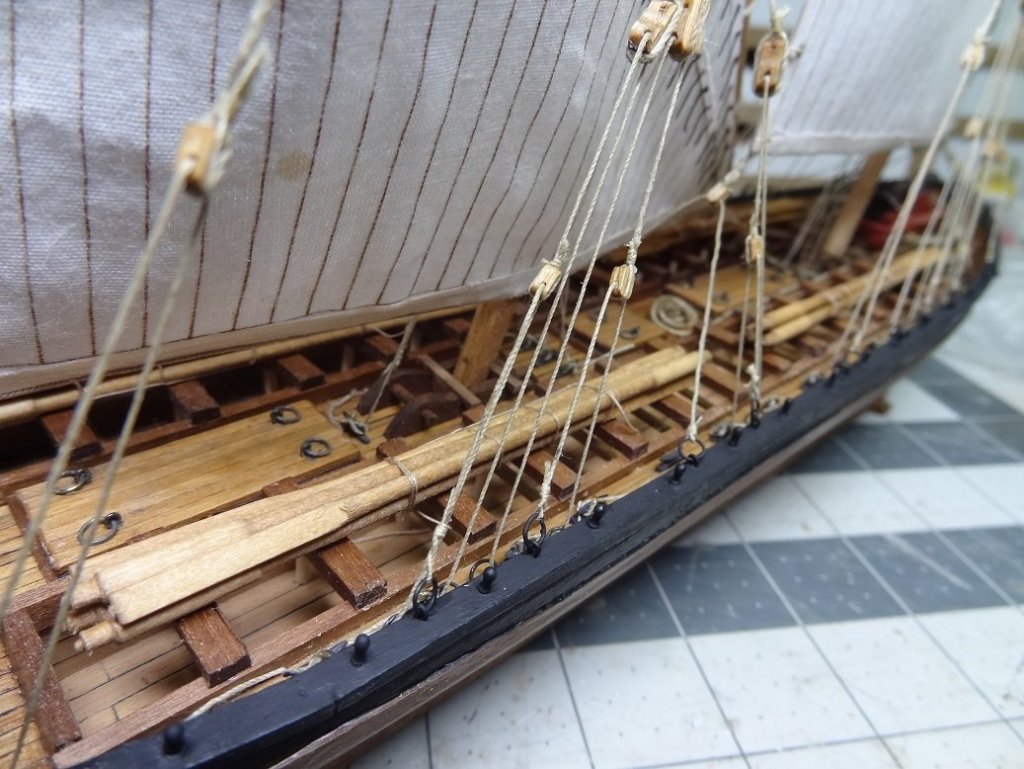
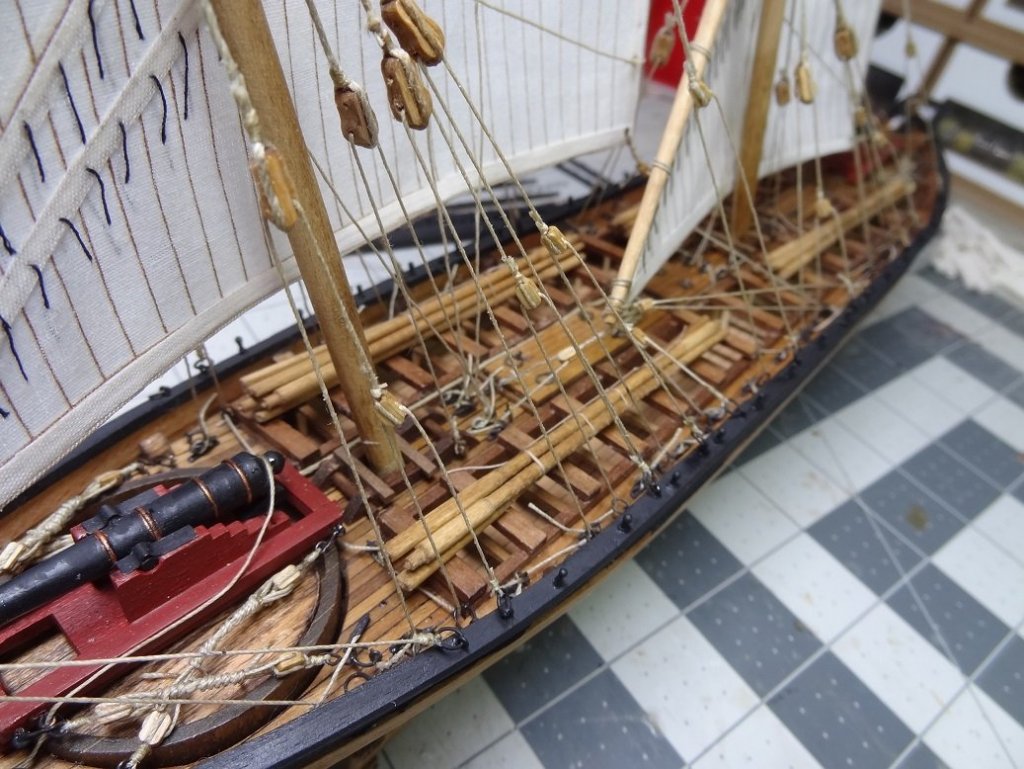
Continuing with rigging. I have a good start on the upper yards - footropes, jackstays, parrels & halyards. So far it hasn't been too bad. I'm really going over the plans carefully to make sure I get all the blocks & eyebolts on now. There are 2 pages of rigging plans. One is mostly standing rigging which is pretty good. The other has running rigging AND the sail plan including the ropes. I do not plan to have sails on this build and the difficulty I am having is trying to determine what running rigging I should include and what should be left out.
- 843 replies
-
- 5
-
-
- niagara
- model shipways
- (and 2 more)
-
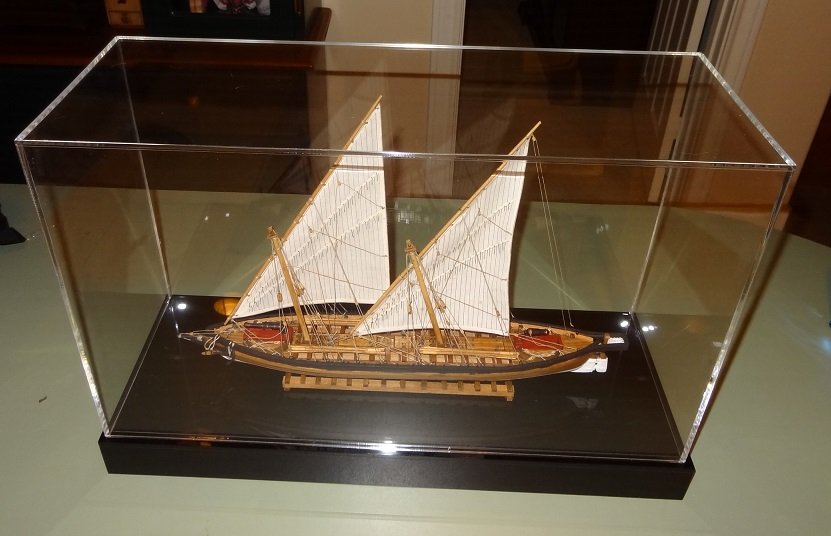
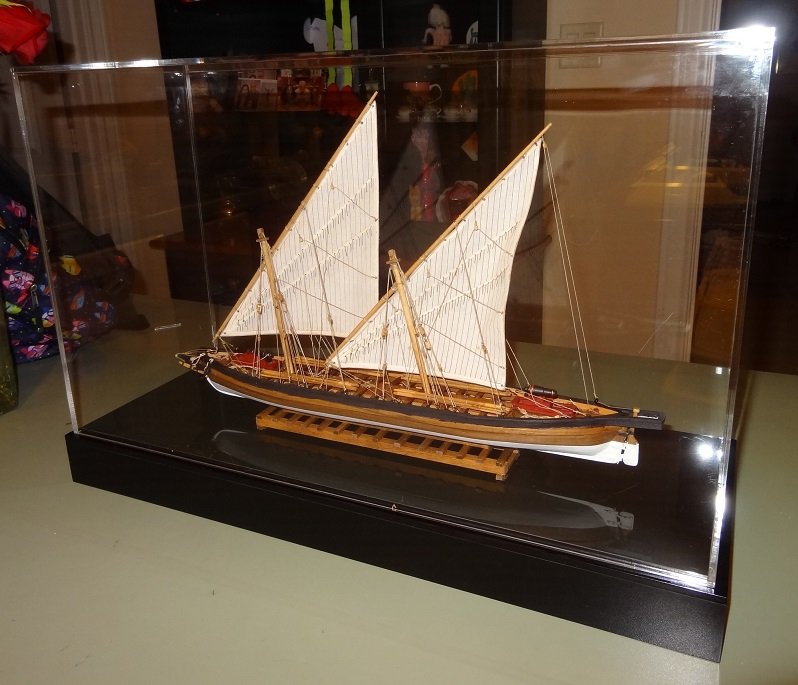
Changed the title to FINISHED yesterday. Must be a slow time of year at the plastics manufacturer - ordered the case Monday, picked it up today. Came out pretty nice. I may try a mirror backpiece for my next build. This is my second case from these guys. On both I had them build the black pedestal. Costs twice as much because they are really building 2 boxes. But I do like the look. I need to figure out the best way to do some sort of plaque with name & brief description. Maybe just some card stock in a laser printer with a nice font.

- 138 replies
-
- 12
-
-
Hey - thanks you guys. I'm looking these up and they appear to be just what I was hoping for. I may have to read them too.
-
Thank you Scott. This build was exactly what I needed. It didn't take too long and I got some more basics in my 'toolbox' now. I'm in a good frame of mind to get back to Niagara and be productive.
-
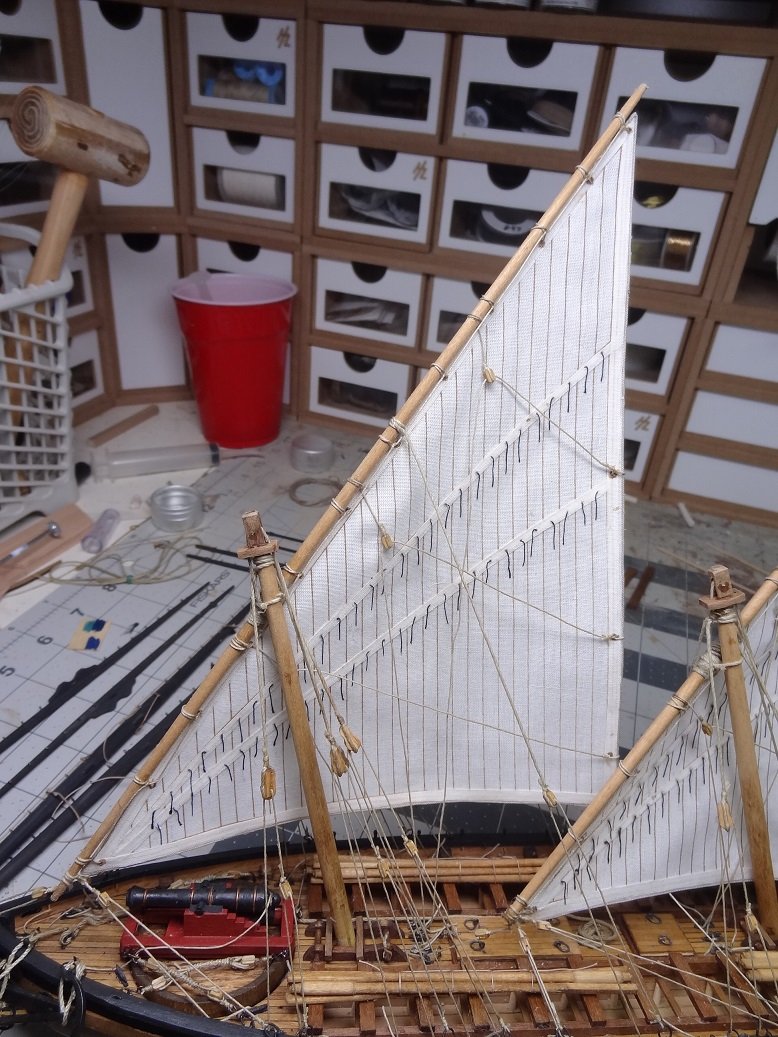
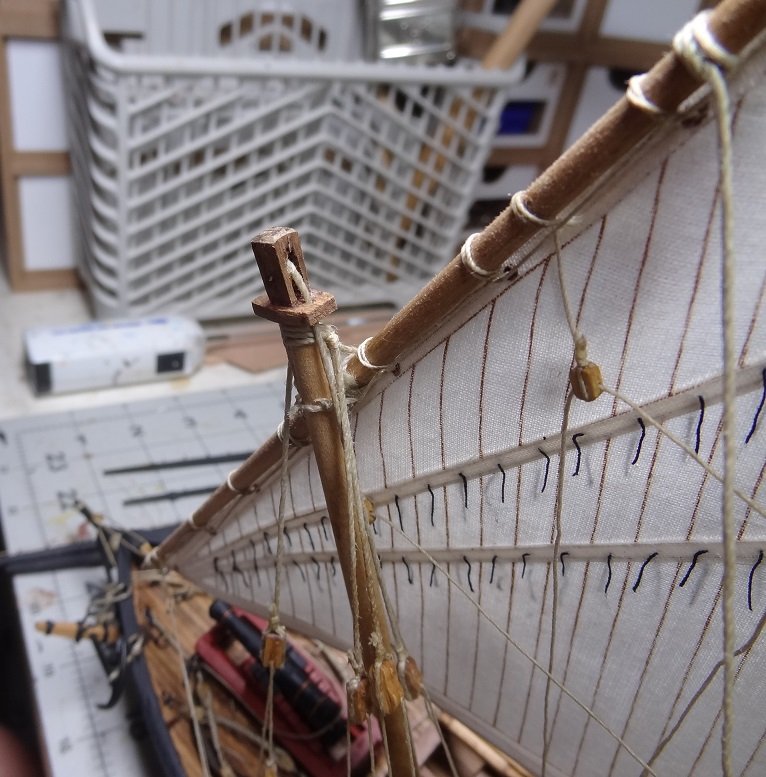
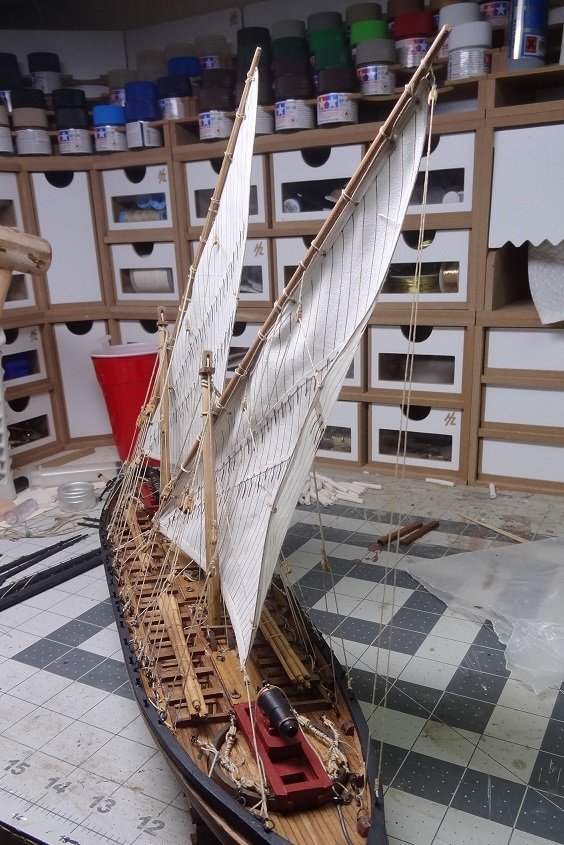
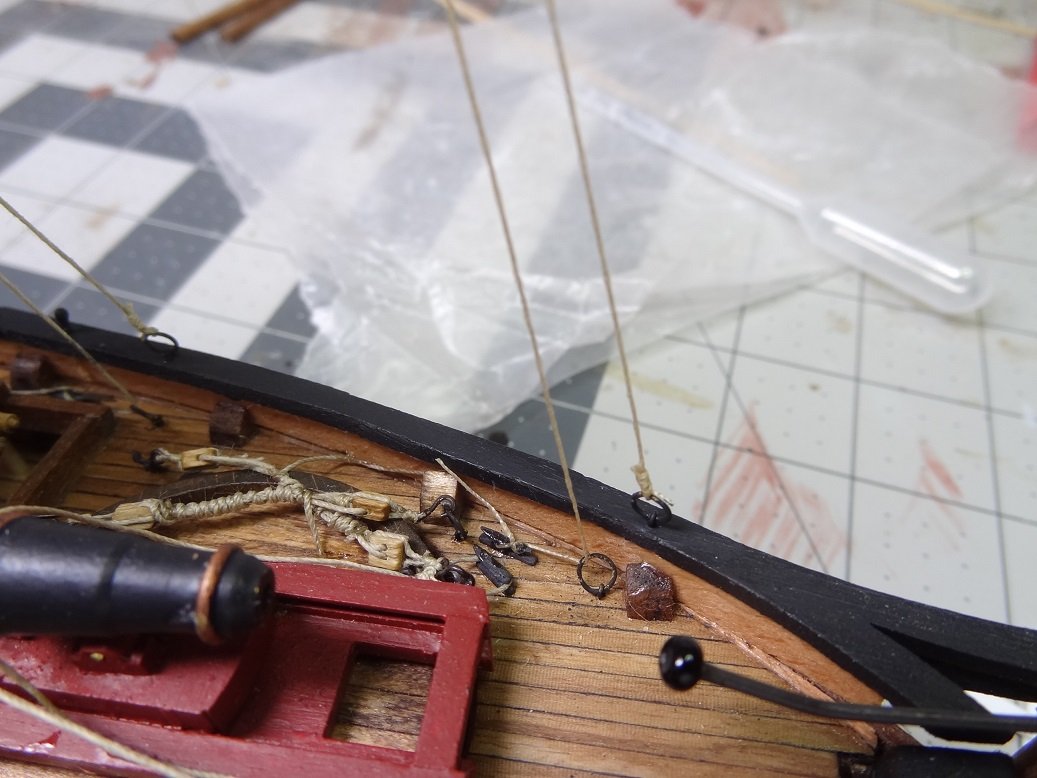
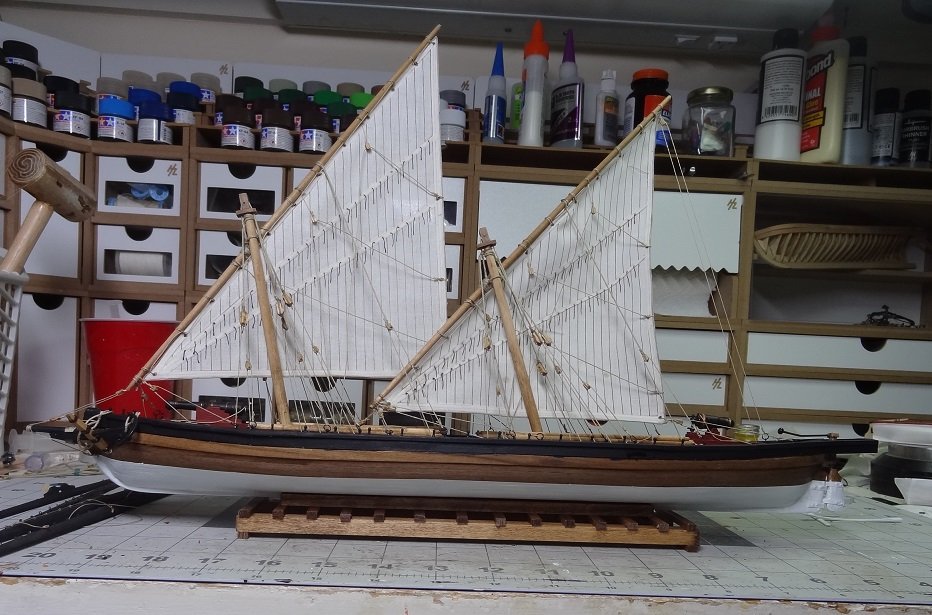
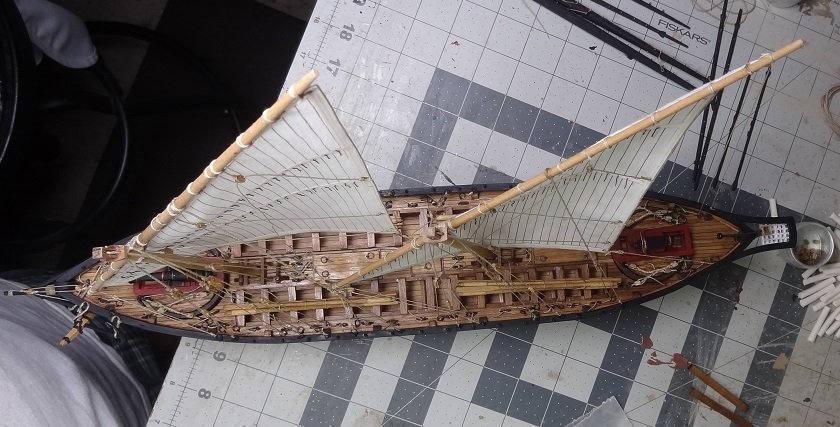
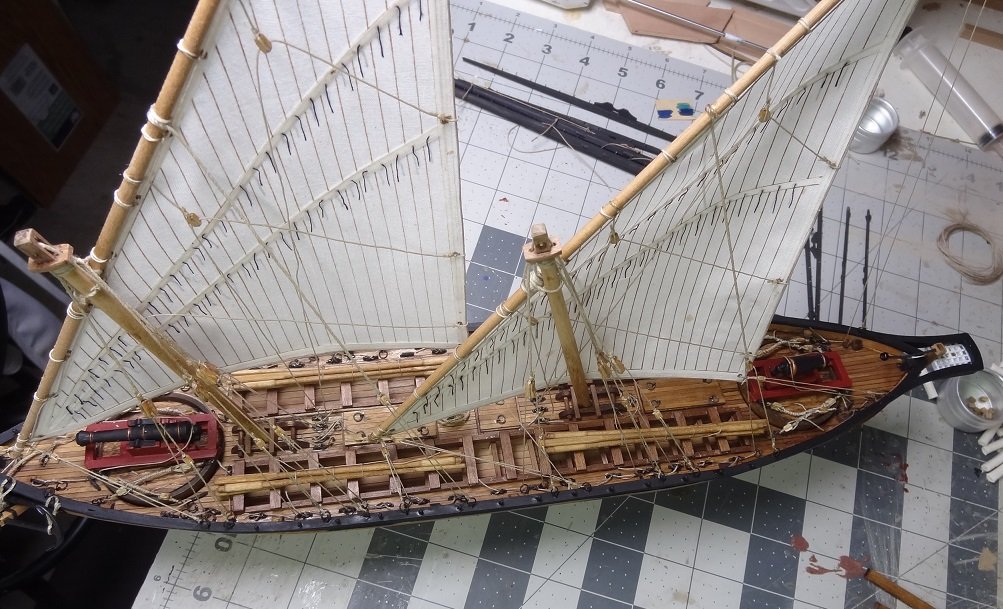
Losing my mind. I could have sworn I posted this same info last nite. At any rate, I'm about to retitle this thread to Finished. I'm waiting a couple more days for spot painting and last minutes fixerups. But I have no more major tasks for this build. I ordered the display case yesterday, should look cool inside it. Overall this kit was not too bad. The build wasn't overly difficult. Probably to the toughest part was the process for reading the instructions. The kit came with 2 pages of plans, 1 instruction booklet with pix in Italian and a smaller booklet in English that referenced the pix in the big booklet. So I really had to have both open. After I understood what they were trying to tell me the rigging plan made pretty good sense. I do wish they had labeled the various ropes - with the lateen rig I imagine there would be some new terminology. The rigging was different. Shrouds were cleated rather than terminating in deadeyes & channels. As a matter of fact most all the ropes would feed thru an eyebolt on the rail or deck then tie off to a cleat on deck. This allowed for a certain amount of tightening of the ropes which I liked. So this was my first rigging and first sails. That was one of the goals of this build, so I get a gold star there. The other goal was to go along with the instructions - no bashing. One thing I tried & liked (maybe everyone does this) was painting the finished rigging with matte lacquer. I was hoping it might make the ropes shrink and tighten up a little. It did not do that but it did stiffen everything and I like the result. Materials were good, I ended up a little short on some of the hardware - had to order some more. Also some of the sticks were shorter than they were supposed to be but I did manage. I would rate this kit slightly above beginner mainly because I was left to figure out a few things and prior experience helped there. But I will recommend it if you are looking for something a little off the beaten path. This would have been a tough boat to crew. No room for anything. Probably even difficult to stand up and stretch. No wonder they had a hard time mustering a crew. So here she is.


- 138 replies
-
- 11
-
-
My dad is 90 and spends a great deal of time reading these days. I gave him one of the Jack Aubrey series and he loved it so I have been feeding the rest of the series to him. He's got about 4 left in the series. He raves about them a lot - really likes them. So I'm trying to think ahead. What's next when he's finished the last book? I'm asking for suggestions for anything similar. A nautical theme preferably a series - the more the better. Ideas?