HOLIDAY DONATION DRIVE - SUPPORT MSW - DO YOUR PART TO KEEP THIS GREAT FORUM GOING! (Only 24 donations so far out of 49,000 members - C'mon guys!)
×


mikiek
-
Posts
2,276 -
Joined
-
Last visited
Content Type
Profiles
Forums
Gallery
Events
Everything posted by mikiek
-
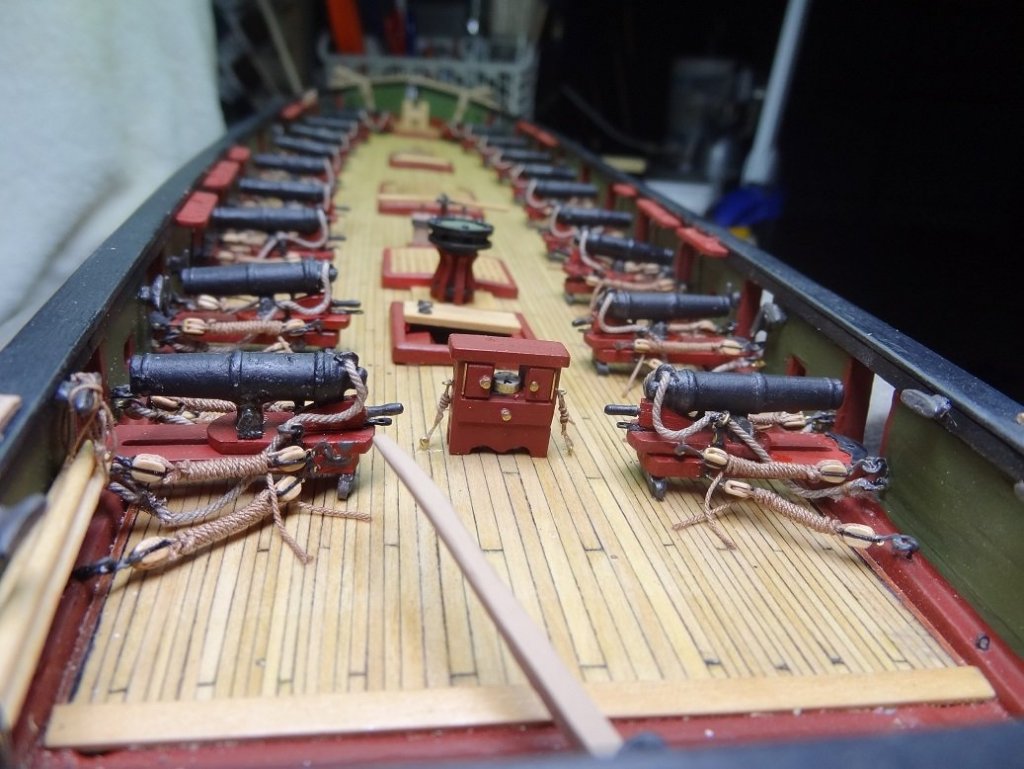
Great pix Frankie! I've seen the technique in the 2nd pic and was tempted to go that route rather than the frap. Interestingly (and a little humorously) I was told that it was probably a museum rig and probably not used. Go figure. The one thing I do notice - not a coil in sight.
-
Thank you Ulises. Frapping was for real, especially on the open water. And I agree, I like the look. Especially with the Syren rope.
-
Agreed Ron. It's not like today when the bad guy could be right around the corner. You usually had plenty of time to prepare. On the other hand, some of the running rigging - where the plans say belay to itself - did have to be accessible very quickly. I have read accounts of Niagara describing how top heavy she was under full sail. A big gust during that time could have been disaster. Of course they had upwards of 30 men in the spars just about all the time to be ready to furl or reef a sail.
-
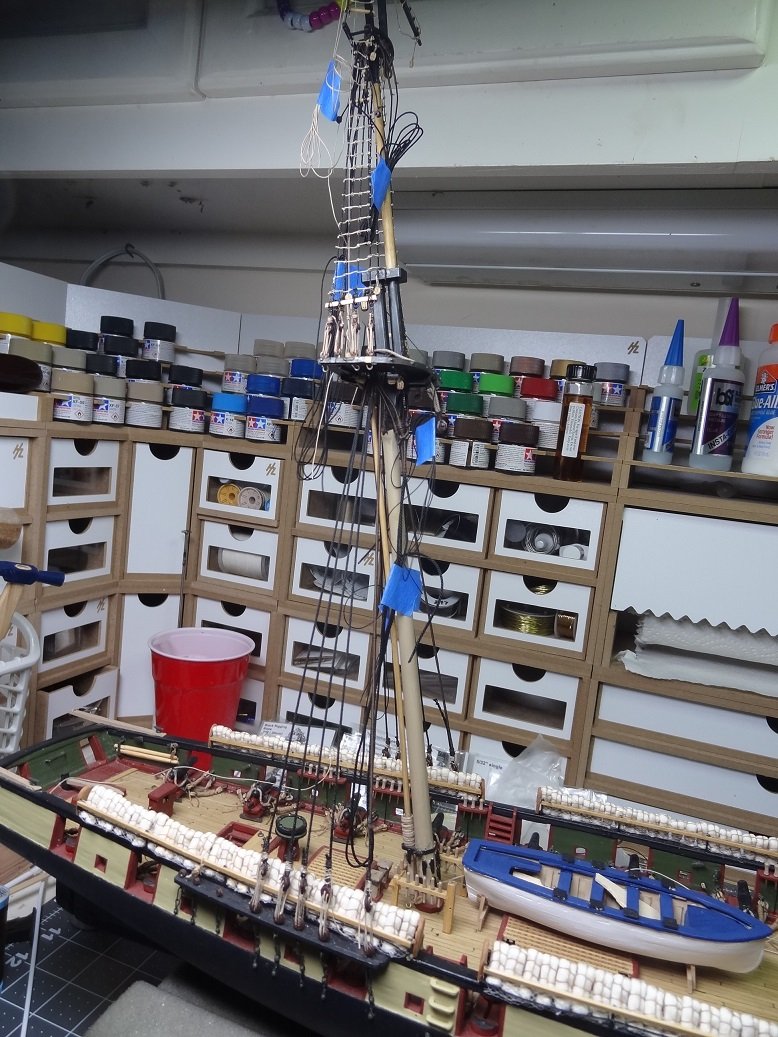
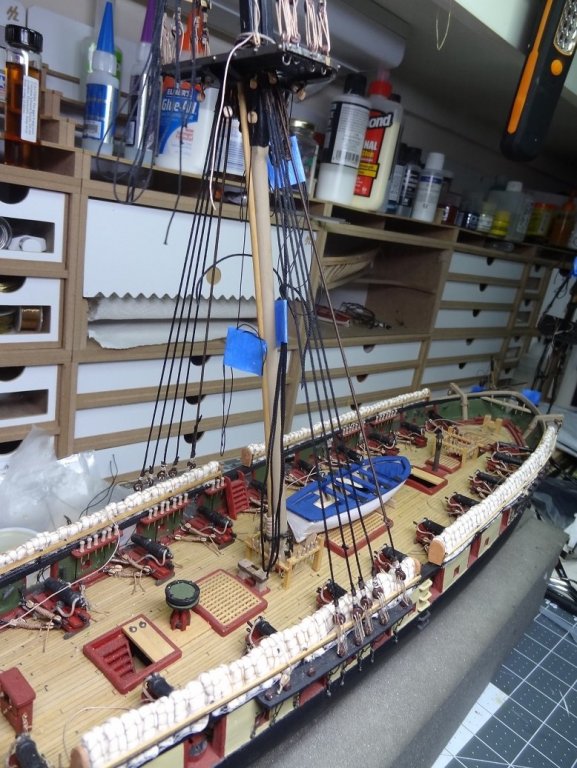
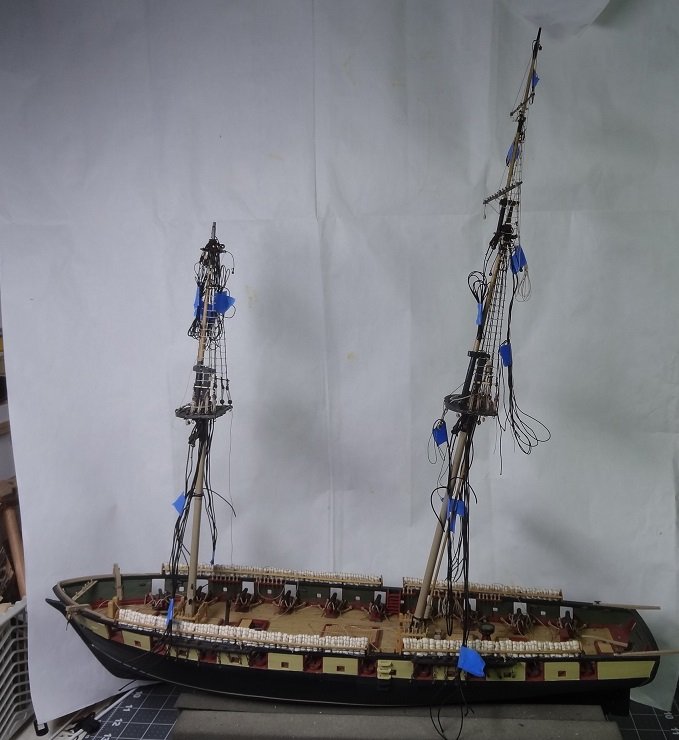
 Continuing on in my tradition of really bad pix, here's a few that show the main mast actually stepped. That's like in place. Not coming out again. I must say the Lauck St. tutorials on this topic really made it pretty easy. Still trying to get as far as I can with out doing anything with the bow spars. The main shrouds are not very tight. I believe adding ratlines, sheerpoles, etc should stiffen them up some. Catharpins too. Oh yes, how about the blue trimmed long boat. Gonna put that on the deck rather than the quarter davits. It still has a way to go. I sure do feel like putting the strings aside and doing some woodwork.
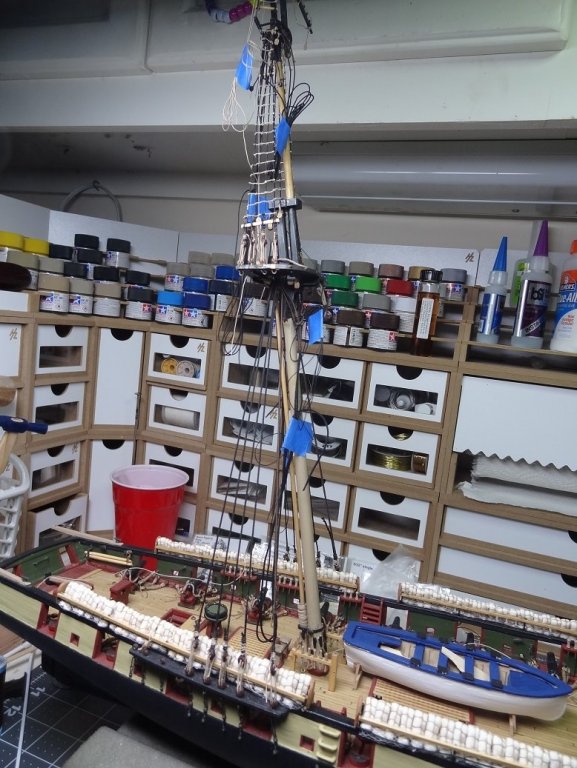
- 843 replies
-
- 2
-

-
- niagara
- model shipways
- (and 2 more)
-
There are statements to the effect that coils on deck were done for inspections or when the brass would be hitching a ride on your ship. I'm with you Bill, they don't seem real practical for everyday use. Decks should be as clear as possible. It is interesting to think if gun tackles were frapped during open water activities and would be unfrapped for drills or action, what did they do with all the excess rope?
-
Maybe the difference between contemporary rigging (belayed to itself) and historical? I know a lot of compromises were made during the rebuild due to the fact that there isn't 150+ guys to work the boat any more. I prefer frapping where possible because I believe the coils on the deck look contrived, would have posed a safety hazard and likely wouldn't stay put for very long. Lavery and Lees both have references to frapping in various applications (guns included), most of which seem to have to do with getting excess rope out of the way. My understanding is that frapping was done in open water where the need for instant release was low. A good application for guns where there was time to unravel and do whatever with the fall before action started.
-
All of the above and a satin that has almost no shine.
- 228 replies
-
- 5
-
-
- gunboat
- model shipways
- (and 1 more)
-
A little sanding to smooth things out. You could also try some filler HOWEVER if you go the route Chuck described stay away from things you apply to the wood. Filler or the glue/sawdust mix will almost guarantee some color inconsistencies when stain is applied. On the other hand inconsistencies can add a lot of character to a build but it's mostly luck. Keep it up Elijah.
- 228 replies
-
- 4
-
-
- gunboat
- model shipways
- (and 1 more)
-
A while back I picked up a hi-speed engraving tool - air driven. Spins bits at over 400,000 rpm, which makes them literally melt thru just about anything. Most of the bits are the size of the ones we use in a pin vise, diamond coated. They are pricey, but if you are going to get serious with carving it is a good thing to have in the arsenal. The detail you can bring out is very cool. I can dig up the link if you are interested. One of the things they do with these engravers is copy pictures to clear plastic appliques, then tape the plastic to wood and there is your template. They sent me a few sheets. They claim it will print in a laser printer. So put your rail (from the plans) in the copier, start it up and feed in a plastic sheet. Tape the sheet to your wood surface and go to town.
-
Sounds like you have a Sherline and need something to do with it. My situation exactly. I just don't have a clue yet how to do anything. As to your rail, would a Dremel with some engraving bits work? You would have to freehand it, but if you work slow it might work.
-
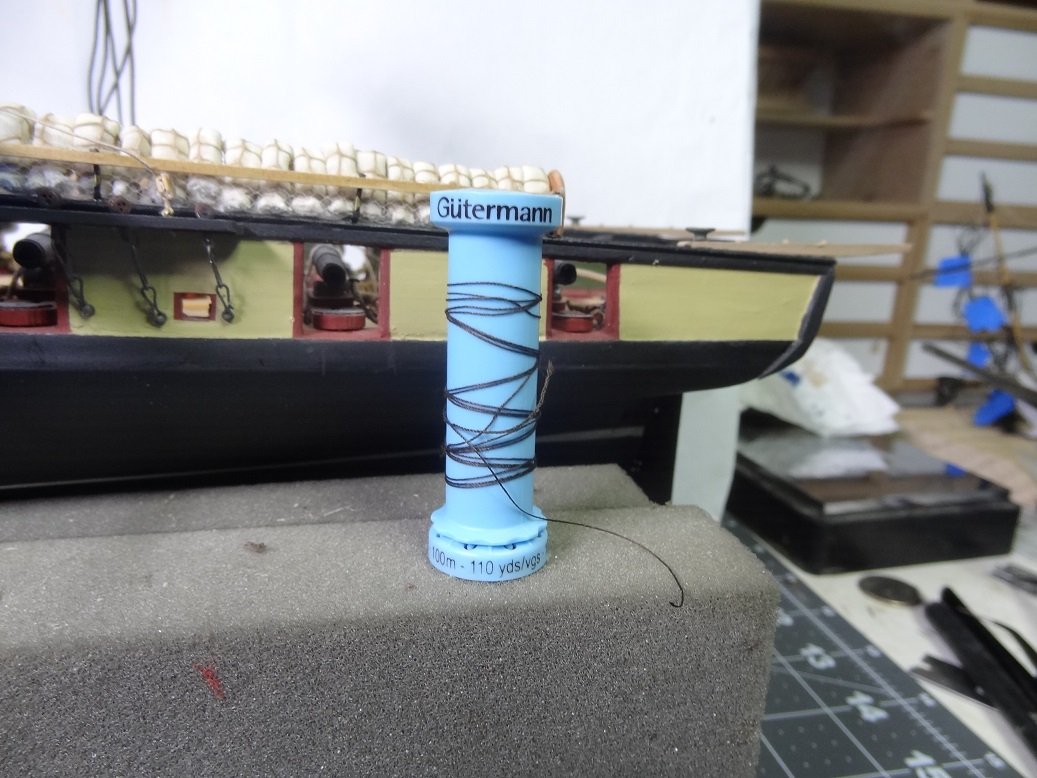
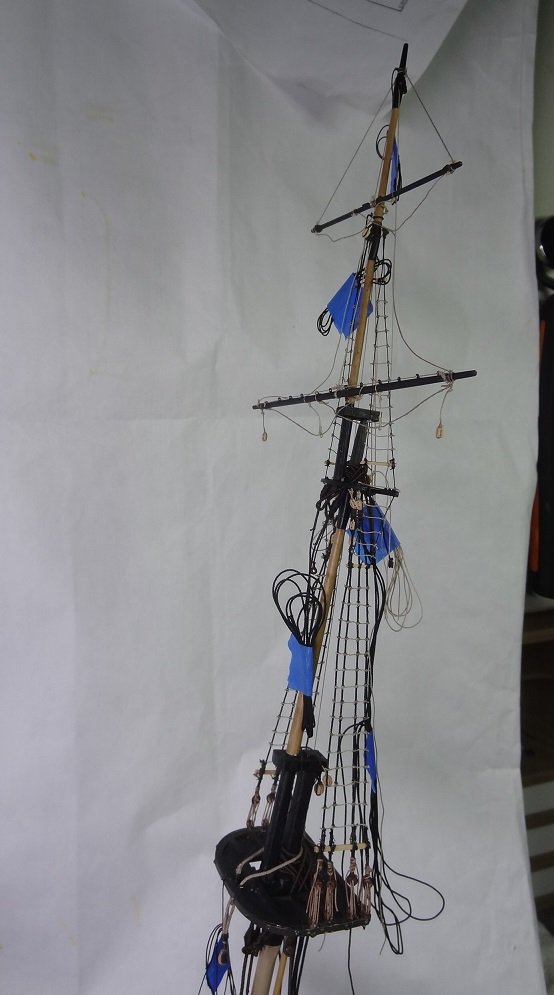
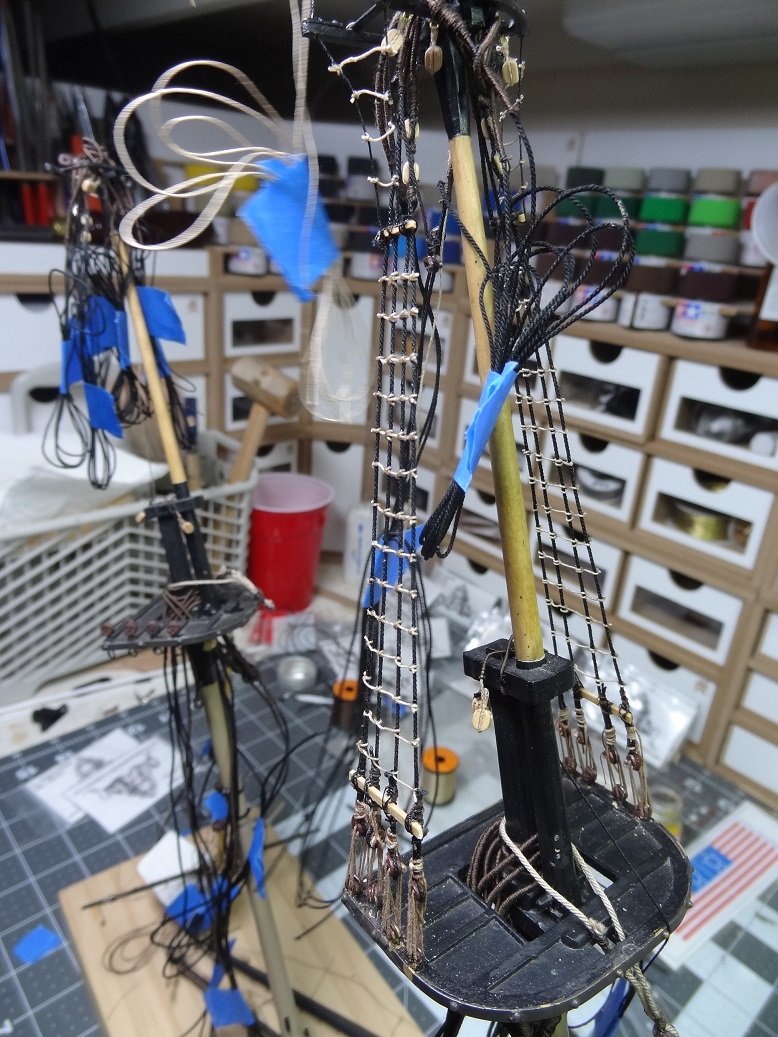
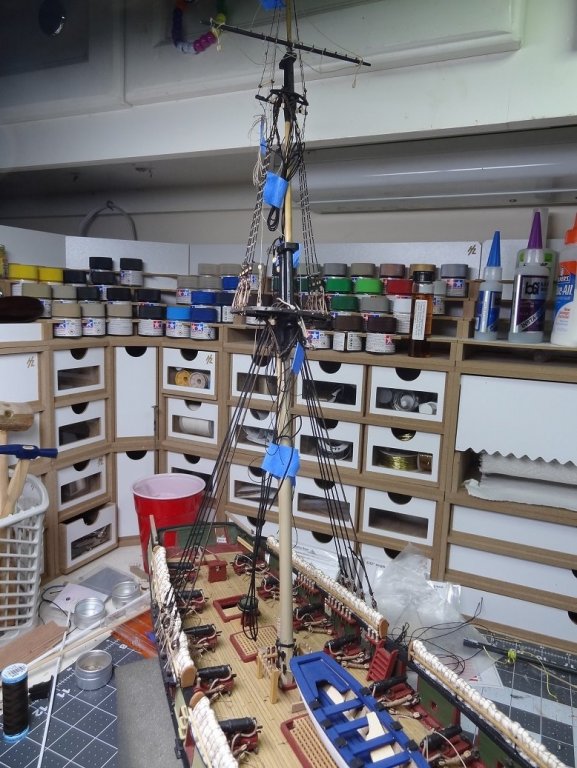
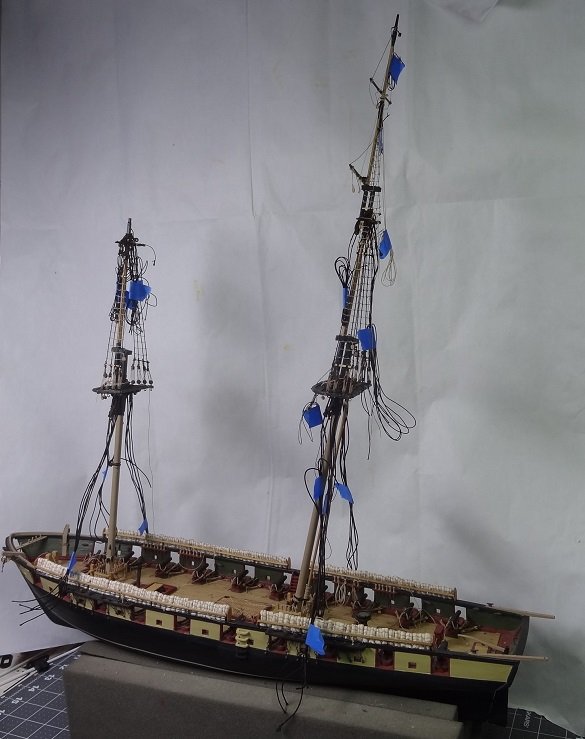
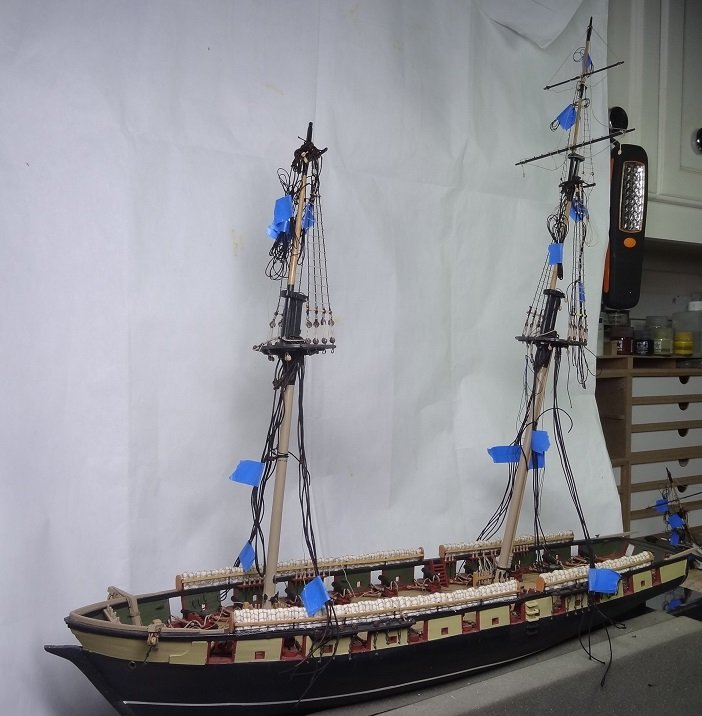
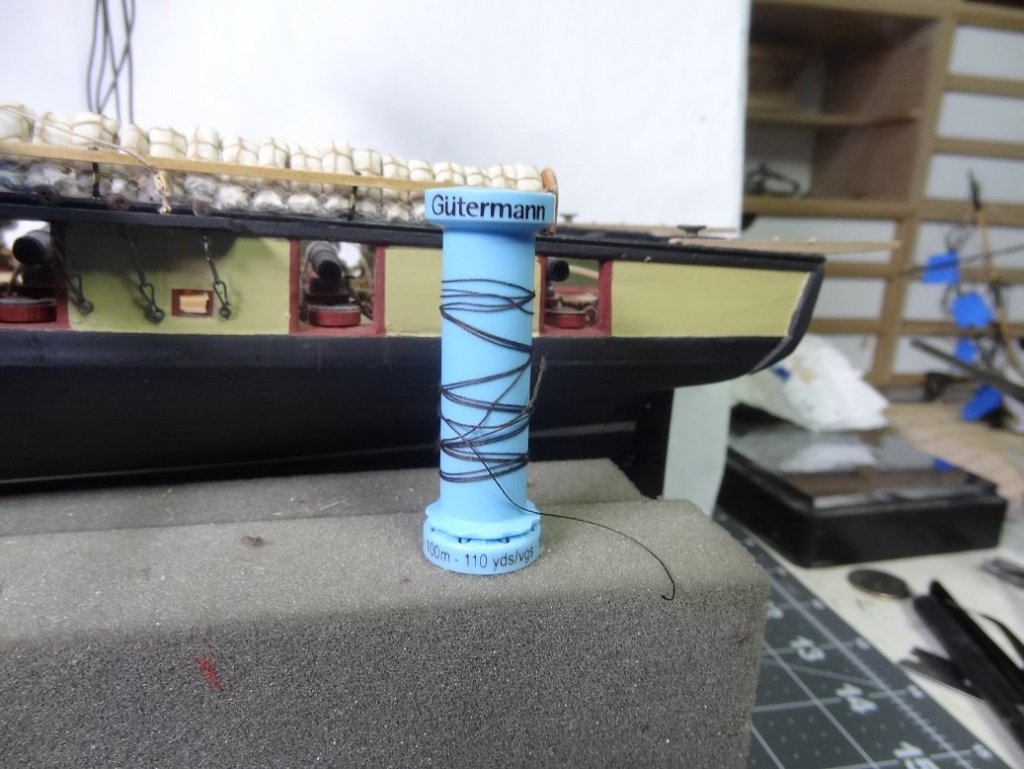
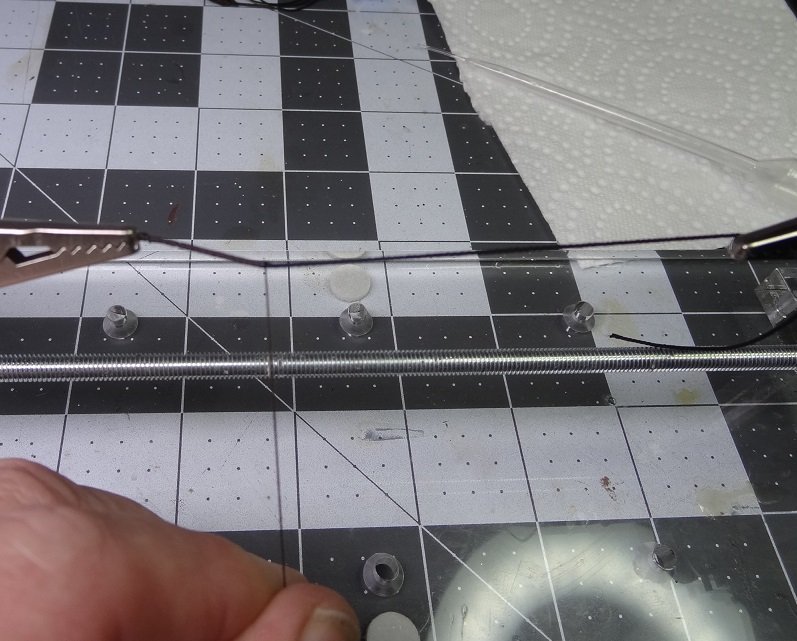
Well like I said, nothing like a hurricane to get you some quality build time. I'm starting to string up the 2nd mast. Will be doing this one in a different order. For the main I did top to lower, then top gallant to top. Probably the best approach but that mast got tall in a hurry. Bench lights and upper cabinet doors are clobbering the thing while I work on it. Add another 4"-5" being stepped in the boat and it's going to get worse. So for the fore mast I'm doing top to lower, then stepping lower into the hull and finishing all the lower rigging. I'll do the top gallant down the road. But that puts me at the time to step both masts to the hull. I'm trying to think of last minute items to do before then. So fill in this sentence - Before you step the mast be sure you _____________. The pix are still coming out lousy even though I tried a background this time. Sorry. Well here's proof I have been working. 100 meters of thread used for serving and seizing the larger ropes. I panicked until I found a new spool. Can't get much in the way of supplies right now. The whole city seems like it is shut down.

- 843 replies
-
- 4
-
-
- niagara
- model shipways
- (and 2 more)
-
How does that headset do size wise? My hat size is 8 3/4. A lot of the 'one size fits all' headgear products don't fit.
-
Running out of room on the work bench. Especially as the Niagara rigging progresses. The big problem is, with the added masts and bowsprit, I don't have a secondary place to put her so that I can work on something else. I've also taken up RC boats and had a build in progress there. Trajta was just too much. Nothing wrong with the kit, just overloaded and couldn't give her the attention I wanted to. These last few days I have been considering making some time (and room) to pick that project up again.
- 99 replies
-
- 1
-
-
- essex
- cross-section
- (and 1 more)
-
Mark - I tried frapping one last night. It definately make sense, a good strong bind and the excess is out of the way. I just wish I had done the frapping a little earlier in the rigging process. Now I'm having to do it using a pair of tweezers in each hand. BTW - I did frap all my gun tackles on this build.
-
Good call Michael. There are a few "cleated" shrouds in the plans and I did not honestly pay close attention to them. Was also thinking that belayed to itself could be something like frapping. Hope you can stay dry in the next few days. We are soaked through here.
-
Probably just missed it, but I don't see any references to magnifiers be they glasses, lenses, scopes, whatever. My eyes are good for about 5 minutes with nothing and then they start crying for help. I use readers sometimes but I don't like that they lose focus so quickly when I back away from a piece of work. Partly wondering about the scopes because I have an opportunity to buy one for < $100. It has stereo eyepieces, a large depth of field, on a moving arm- it was used for inspections. Overkill I know and I wouldn't pay hundreds for a new one but this looks like a good deal. It could be helpful with my ultra high speed engraving tool as the bits for that are tiny. Mag range is 2.5x to 50x. Other than that, what do y'all use?
-
Thank you Darrell. I've had a lot of time since Friday to work on this. Rain has even kept the shop nice & cool. I could get used to this - minus the water. Hey I posted this in a separate thread but no response. What does it mean when the plans say a rope should be belayed to itself?
- 843 replies
-
- 1
-
-
- niagara
- model shipways
- (and 2 more)
-
The rigging plans for Niagara have several places calling for belaying some running rigging (halyards mostly) to a shroud sheerpole or stave. What does that look like exactly? A few wraps then a coil? Seized? There was even one halyard that come down to a tackle mounted to a top and the plan says belay to itself.
-
A little rigging underway There's more but the rest of the pix came out lousy. I think I need to make the back ground a little less busy. Main top and top gallant are in place now - no glue. Still have not stepped the main yet. That is going to be a logistical nightmare. I'm already bumping the royal on my bench light fixtures. Putting them on the hull will add another 5"-6". Don't even want to think about the bowsprit.

- 843 replies
-
- 2
-
-
- niagara
- model shipways
- (and 2 more)
-
It's almost a must for smaller scale builds. Even sewing thread can look too big. That said it can have you seeing double before too long. I don't remember the first brand/size I got but I didn't like it. Almost seemed like it was made of lots of pieces and under some conditions it would loosen up, fray and even come apart. From a suggestion here I use Uni-Thread 6/0 now and it has worked quite well.
-
Nothing like a good hurricane to make for some quality building time
- 843 replies
-
- 1
-
-
- niagara
- model shipways
- (and 2 more)
-
Just to update - I picked up the first volume of several series mentioned here - Kydd and Sharpe for starters. My dad loves them! He's going thru one every 4-5 days and asking for more. Thank goodness for Amazon Prime. Thanks to everyone for contributing! This was a very helpful thread.
-
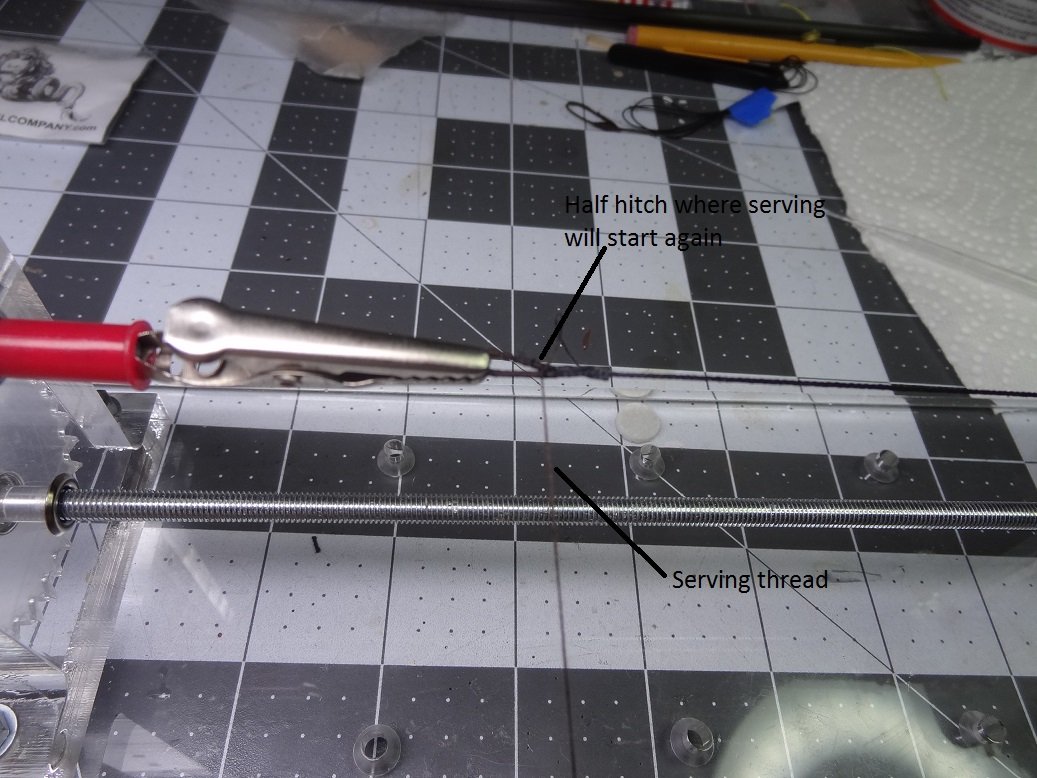
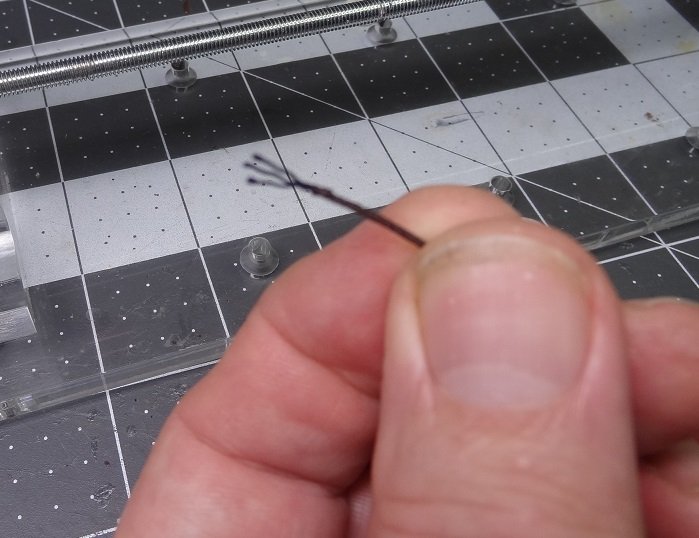
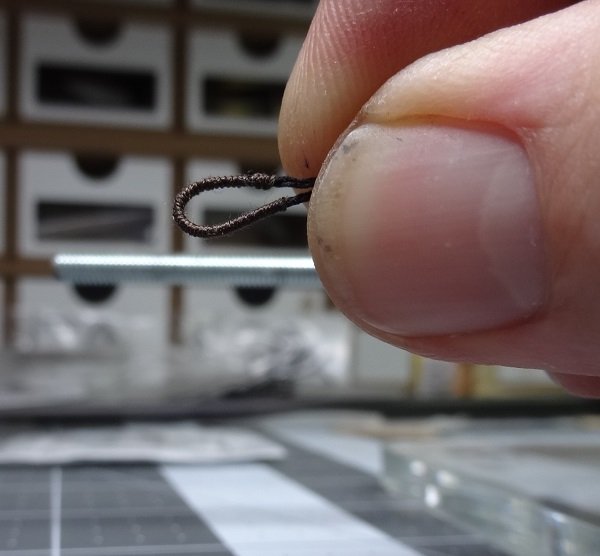
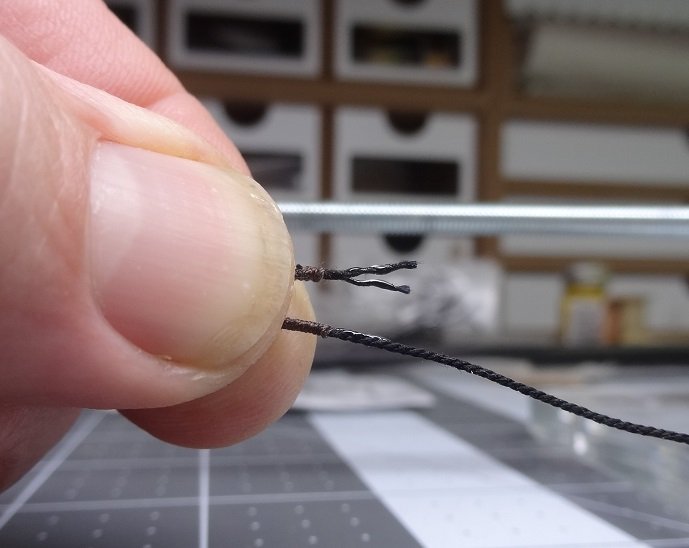
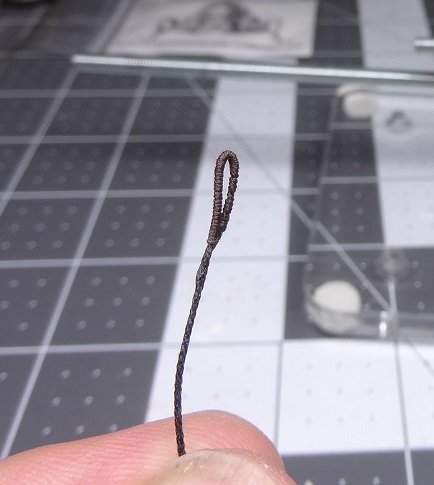
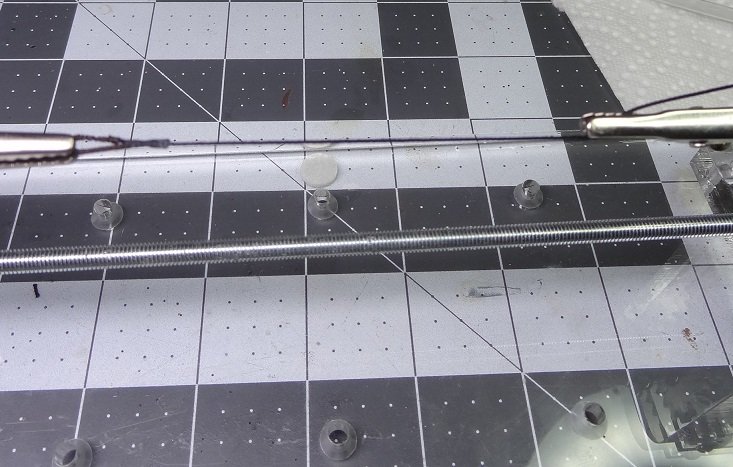
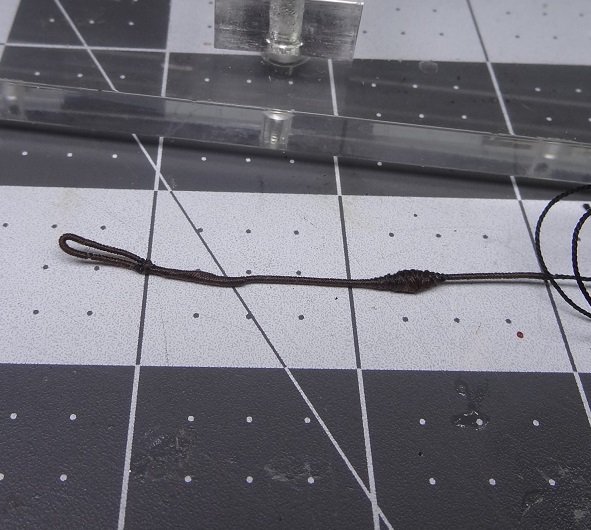
Found a good way to eyesplice for stays. Since they are served it's pretty easy. On a serving machine put one end of your rope with at least 3/8" inside the clip so that it is not served. I do this left side to right so this end is in the left clip. Serve about 1/2"-3/4" starting at the left clip moving right. Put a spot of CA at the end of the serve cut the thread, tie a half hitch and CA that. Take rope out of machine. Trim the left end so there is 3/8" unserved rope. Unravel the end of the rope all the way to where the serving starts. Fold the rope over at the half way point of the serving. Where the serving starts and ends should be together now, you should have a loop of served rope and the unfrayed end should overlay. Now for the cheating part. Put some CA on the unfrayed strands and then twist them around the other side of the rope. You may need to do this twice but when complete all the unfrayed strands are now glued to the other side and you have a served loop. Clip the served loop into the left clip on the serve machine. Pull the rope tight and clip rope into the right clip. Take your serving thread and tie a half hitch right where the two served ends meet. The idea here is you are going to serve over the unfrayed rope that is now glued to the other end. This will cover up any messyness from the fake eyesplice. Serve a few inches or so and you should be ready to add your mouse.


- 843 replies
-
- 5
-
-
- niagara
- model shipways
- (and 2 more)
-
Thank you Darrell. I looked at so many pix I can remember where it was but it showed the top stay and jib stay moused. It also showed the eyesplice was threaded thru the outer (side) opening in the top, passed around the mast and then threaded thru the opposite outer opening. Then the fall reeved thru the eyesplice. This sort of makes sense for those 2 stays, but I haven't figured out the the outer jib stay. I may just do as you describe for that one. Need to do something, I've been fretting over this one for several days now.
- 648 replies
-
- 2
-
-
- niagara
- model shipways
- (and 1 more)
-
I've been stumped on how to fasten some of the fore stays to the mast. There are 3 that finish at the fore top mast head,but it is difficult to determine if they are seized (don't think so), or eyespliced & moused (more likely). I found a few pix showing the top fore stay with the standard eyespliced end looped around the masthead and moused. Since the inner jib stay is the opposing line I will assume it is fastens the same way. So I'm still stuck on the outer jib stay.
- 843 replies
-
- 2
-
-
- niagara
- model shipways
- (and 2 more)