HOLIDAY DONATION DRIVE - SUPPORT MSW - DO YOUR PART TO KEEP THIS GREAT FORUM GOING! (Only 20 donations so far - C'mon guys!)
×


mikiek
-
Posts
2,276 -
Joined
-
Last visited
Content Type
Profiles
Forums
Gallery
Events
Everything posted by mikiek
-
 Hey, I'll get right into it. From your pix it doesn't look like you have put coils on the the belay pins yet. I had a suggestion to do that first, before shrouds, stays, etc clutter up and get in the way of doing that. Did you have any thoughts on that as you started rigging?
- 648 replies
-
- 1
-

-
- niagara
- model shipways
- (and 1 more)
-
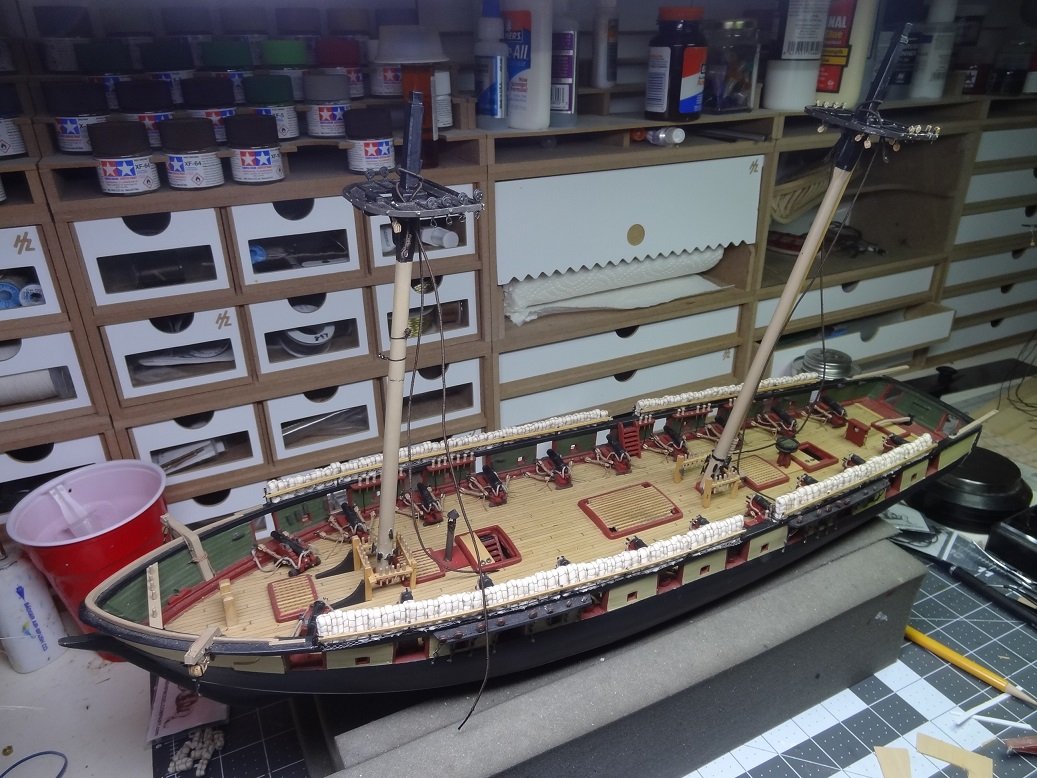
Wonderful workspace! New tools should serve you well. Would love to see a panorama shot of the whole shop. Are those wood racks kind of a home made thing or does it look like that is exactly what they are? I need to do something with mine - it's all in mailing tubes. Glad there were no catastrophes moving the boat. I'm glad to see you back here again!
- 648 replies
-
- 3
-
-
- niagara
- model shipways
- (and 1 more)
-
Need a tip on staining or coloring the running rigging
mikiek replied to Tallsails2's topic in Masting, rigging and sails
Walnut Ink crystals - https://www.amazon.com/Walnut-Ink-Crystals-Ounces-Jar/dp/B004L6HRZU You can go from barely coloring to very dark brown. Frankie is right. Either stain it all at once or make a huge batch that can be reused. Trying to mix the same color twice from scratch - ain't gonna happen. -
Bow looks very symmetrical - well done. In addition to your boat building skills, your picture taking skills have taken a step up as well.
- 228 replies
-
- 4
-
-
- gunboat
- model shipways
- (and 1 more)
-
I agree Steve. I was thinking that it means I'll need to run down the rope to pin chart to determine what size rope on each pin. Not quite as easy as looping a lot of .008 rope on all the pins.
- 843 replies
-
- 3
-
-
- niagara
- model shipways
- (and 2 more)
-
Herb - seems like there should be more than that, but you are right - a little trial and error. I imagine if there's a bunch of coils all crammed together it probably looks like more. Which will raise another question. Do I want to use my good Syren rope for that or just the rope that came in the kit? Did you make your coils from the same diameter rope as the rope feeding into the belay pin? In other words if the rope coming down to the pin from the masthead was .018" did you make the coil with .018"?
- 843 replies
-
- 2
-
-
- niagara
- model shipways
- (and 2 more)
-
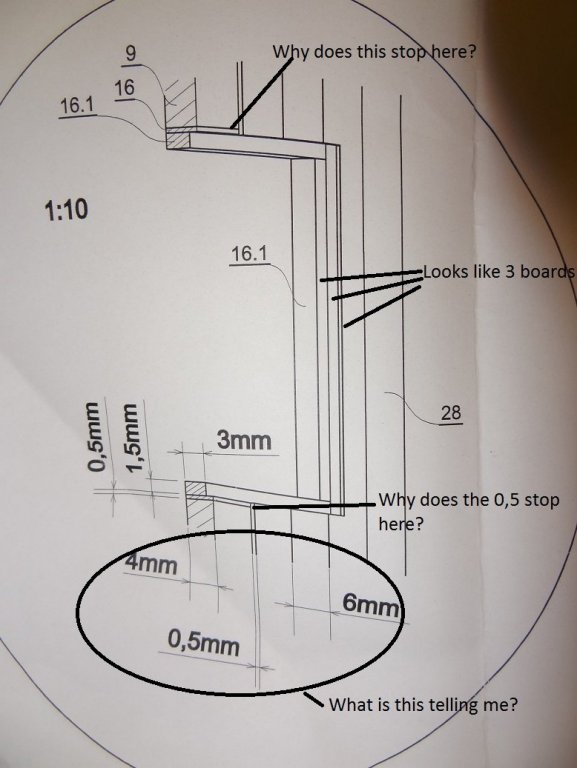
Julie - yes the drawing shows half of the opening. It's a bulkhead piece which normally wouldn't even be seen in a build. But this boat has an open hold - a big square hole in the deck. So a couple of the bulkhead surfaces are exposed and the idea is to dress them up. There is an opening in the bulkhead (what the drawing shows) and there is actually a door of sorts that covers that. So we have the builkhead opening framed by a 0,5 liner and then framed inside that with a 1,5 liner. The 1,5 is 3mm thick the bulkhead 4mm so it gives a recess. The door will fit into the recess. The entire bulkhead is 'planked' around the door. I don't believe the 0,5 frame will even be seen. Neither will the 1,5 for that matter. Thanks for your work on that drawing! I hope I get smarter or this is going to be a long build
- 204 replies
-
- 2
-
-
- trajta
- marisstella
- (and 1 more)
-
Hello Julie - It's been a while. I need to pop over to your yacht and see how things are. Don - the picture is getting clearer. It's funny how different designers try to lay out all the information. Some think like you. Some don't. I'm not sure I would ever pre-cut 54 pieces. What if I read the wrong measurement One of those Oh s*** moments
- 204 replies
-
- 2
-
-
- trajta
- marisstella
- (and 1 more)
-
Sounds like a challenge You're pressing my buttons now I'll see what I can do.
- 843 replies
-
- 3
-
-
- niagara
- model shipways
- (and 2 more)
-
iiihmb - good idea with the coils on belaying pins now. How do you tie down the actual line to the pin when it is covered with coils? Don - that boat is bright, huh?. Of course the easiest thing would be to set the boat upside down on the deck. Then I wouldn't have to worry about any interior details. I've read that they were set right side up. Wonder why? When it rained or rough seas would fill it up that way.
- 843 replies
-
- 3
-
-
- niagara
- model shipways
- (and 2 more)
-
OK Don that clears it up for the most part. The 0,5 liner is actually a 6x0,5 stick which means 2mm will extend out beyond the edges of the opening. And as you said the 5x1,5 (trimmed to 3x1,5) will create a recess on the opening. Is the excess from the 6x0,5 supposed to be trimmed at the edge of the opening (making a 4x0,5) or left to overhang? I get the feeling it needs to be trimmed. First time I've had to whittle down the width of a stick. There are 2 different lengths of the 6x0,5 strips. Not sure which should be used here. Made a guess and used the shorter ones. Which raises another question. On the material list the 0,5 are listed twice: walnut strips 0,5x6mm 54x6cm walnut strips 0,5x6mm 2x63cm The kit supplied 5 of each. What is the 2nd part of the line telling me? 54 & 63 appear to be the length, no idea what the 6 & 2 are for? 3D can be confusing if it's not done perfectly. Have you ever seen that illusion of the castle with stairs running all around the top. Each set of stairs looks like it is going upwards. When I look at the P2 inset, it starts doing that to my eyes. The top ledge of the opening and the bottom ledge do not follow the same angle. Thank you for your advise.
- 204 replies
-
- 3
-
-
- trajta
- marisstella
- (and 1 more)
-
Elijah - glad you stopped in! Will definately PM Zoran. I have no doubt he will have the answers. I was trying to catch his attention here first so that his replies will become public knowledge in case someone else has this problem. I think Antony and Elijah are on the right track. It probably would have been easier to figure out if the drawing was a cutaway (2D) instead of 3D.
- 204 replies
-
- 1
-
-
- trajta
- marisstella
- (and 1 more)
-
Well it did not take long to stump the band. I'm confused with several items on the finishing of bulkheads 7 and 9. My understanding is the opening should be framed twice. Once with with a 0,5 thick plank. Then a 1,5 thick plank. There's a spot on the plans (inset P2) that appears to show 3 planks. To me there are places shown where the 0,5 plank suddenly stops and does not go all the way around the opening. Also can't tell what the 3 numbers at the bottom are telling me. Looks like I will need to get the hang of these drawings.
- 204 replies
-
- 1
-
-
- trajta
- marisstella
- (and 1 more)
-
Anthony and Doug - greetings and welcome. I'm glad to have you guys along on this adventure..
- 204 replies
-
- 3
-
-
- trajta
- marisstella
- (and 1 more)
-
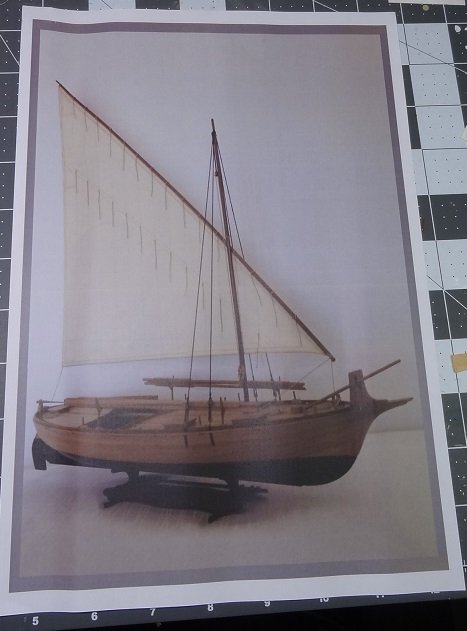
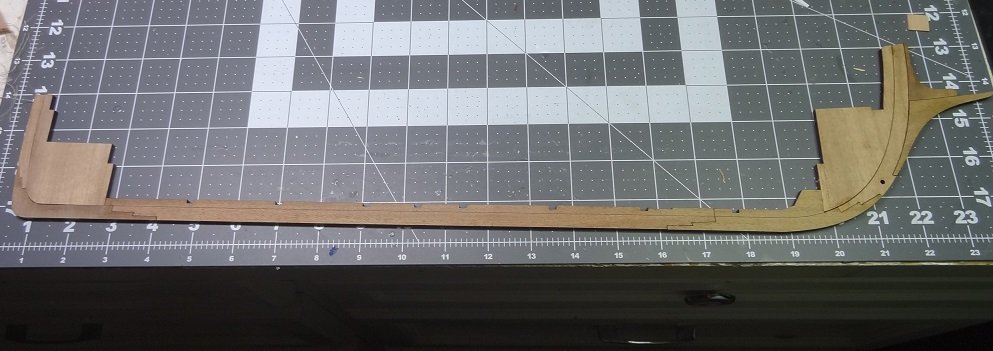
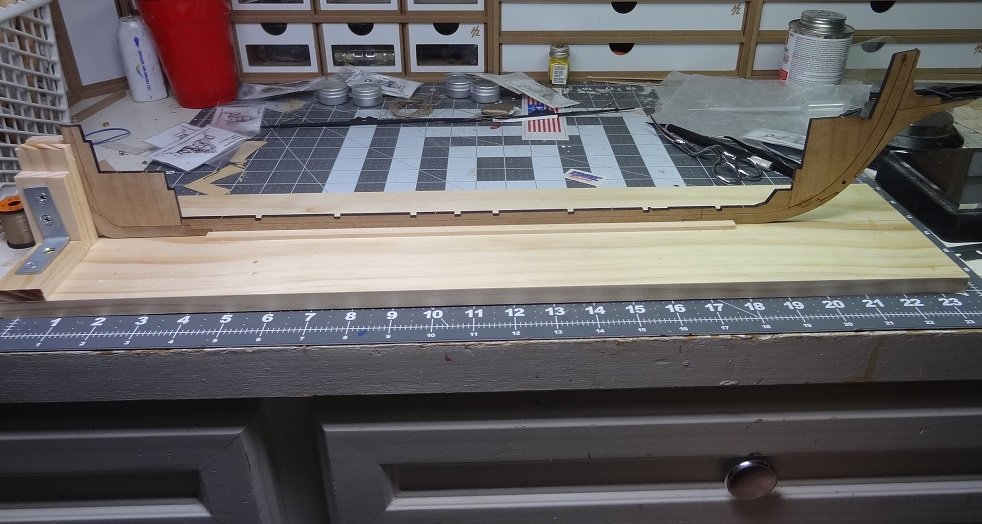
Sometimes I feel like I need a new build like I need a hole in the head. Other times it's nice to walk away from one build and get some distraction with another. Trajta is my first Marisstella kit and I have their Cog on the shelf. I'm not one to take lots of pix of the box and contents, actually the Marisstella boxes are blue on the outside and do not show a pic of the boat. Here's one (a pic of a pic) and you can go to the Maristella site to see more about this boat. Lot's of good pix and a very good write up on the history. As I alluded to, this is my 2nd build in progress at the moment. I am making a concerted effort to complete Niagara - kind of a personal commitment - so Trajta will be playing second fiddle for a while. If you would like to follow along, please consider that and have patience. The keel has been assembled and the next step will be the bulkheads. As there is a pretty big open hold on this boat, a few of the bulkhead pieces need some dressing up as they will be visible. I've also made a feeble attempt at a build board - recommended in the instructions. I'm not crazy about that, but I'll play along for now. I think the Amati stand would probably be sufficient. Speaking of instructions, the English version has just been revised. Don Robinson has played a big part there so he deserves a lot of credit as does Zoran from Marisstella for continuing to improve on his product. Thanks for reading and I hope you'll stay along for the ride.
- 204 replies
-
- 10
-
-
- trajta
- marisstella
- (and 1 more)
-
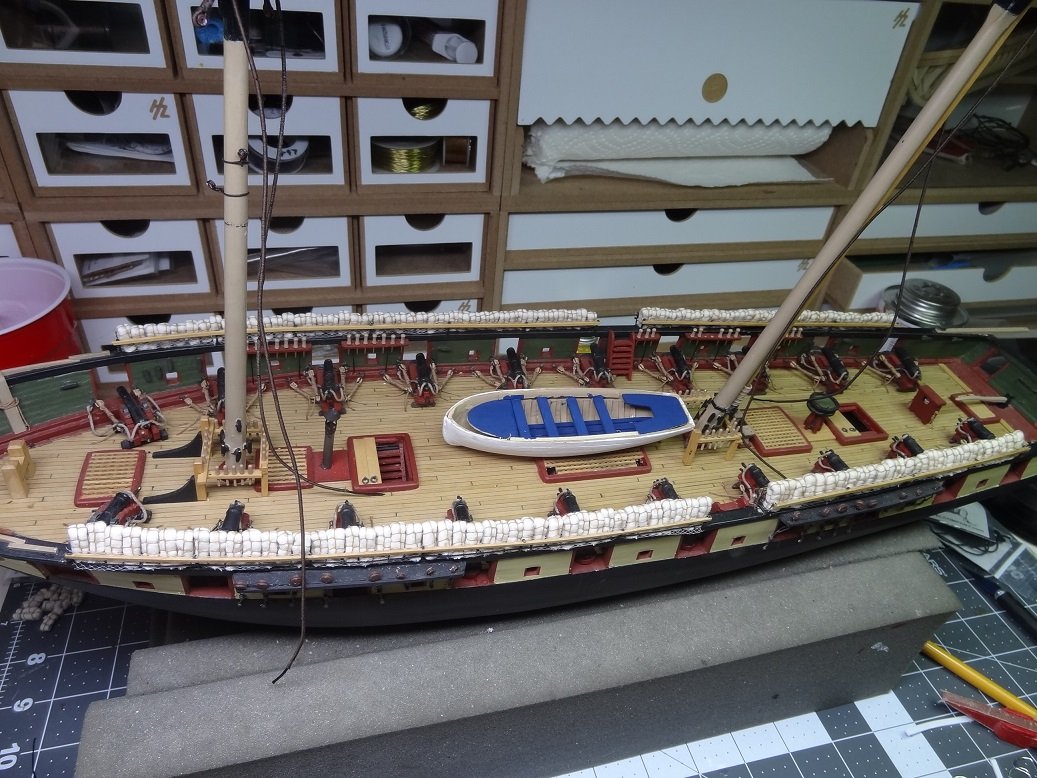
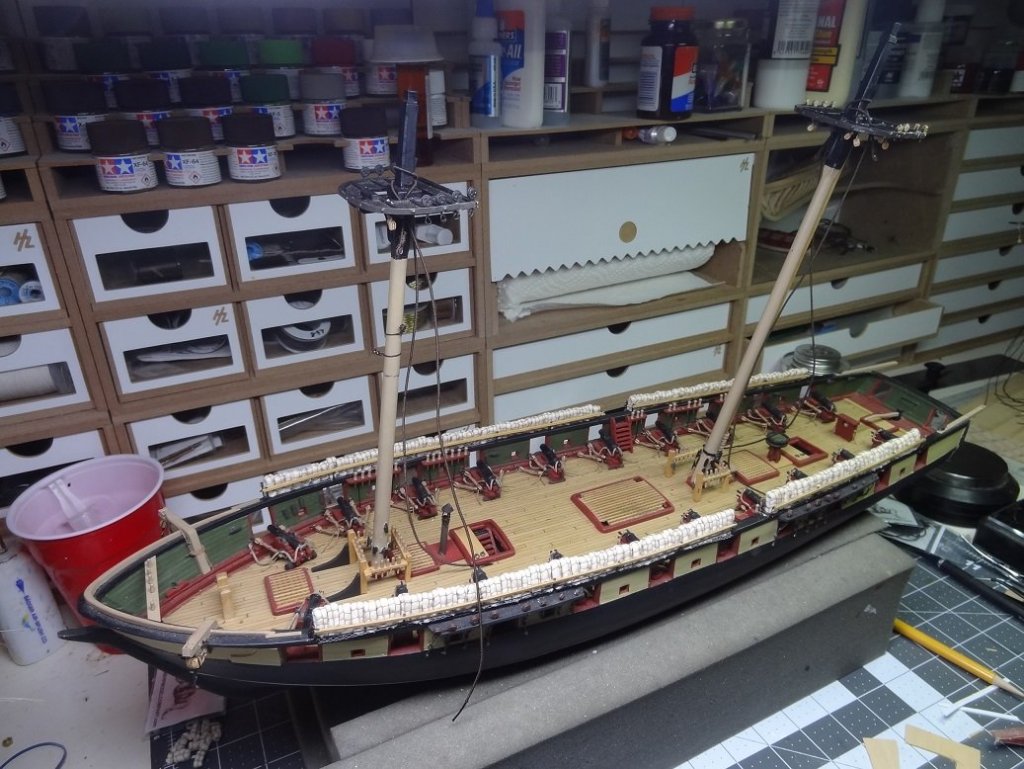
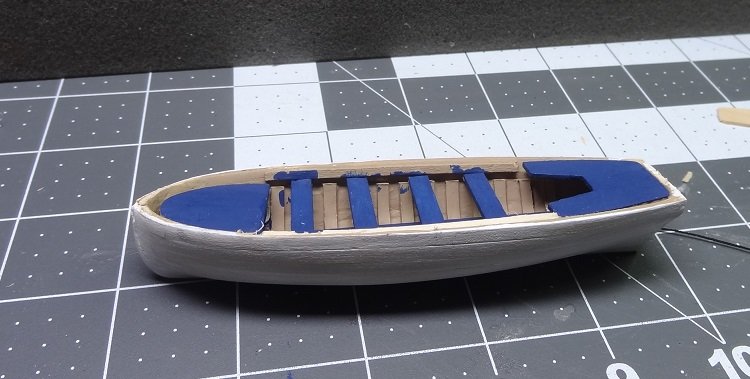
One of the most mundane tasks on this build is about done. I rolled and wrapped the rest of the hammocks today, put in the last stanchion rail and got the hammocks glued down. I would give the overall look a 7 out of 10. The detail is intriguing but at the same time almost too much. There is no historical basis for my implementation, just reasoning based on the actual situation. Whatever was simplest and quickest. As I said earlier, had this been a deep sea boat I would have done it differently. Heck, given the limited space on board we don't even know if the crew used hammocks. Being on a lake some could even have gone onshore. Another old task that I am trying to finish up, the last ship boat - the cutter. I'm using the sandwich style hull assembly but the rest is just made up. The rails are still in progress. I opted for something different than the fire engine red that ships boats often are painted. The blue is not near as bright in person as they look in the pix. If I had it to do over, I would go for the red ochre that I used on board. I am foregoing the quarter davits - don't care for that look. The cutter will be fastened to the deck And yes, those are some shrouds hanging from the mastheads. Lower masts are not actually glued yet. Am seriously considering no glue, just get them held in place with shrouds and stays. I do realize that may be easier said than done when I start lacing up the deadeyes. Other rigging completed but not shown - course yards have all the foot ropes, stirrups, jackstays in place. Working on the top yards.

- 843 replies
-
- 4
-
-
- niagara
- model shipways
- (and 2 more)
-
Depends on the type of ship. Actually the history of onboard stoves is pretty interesting - the progression from brick/stone to metal. Crew size has a lot to do with it too. A little cabin stove might work for 5-6 people. A different matter for a crew of 500.
- 653 replies
-
- 4
-
-
- trabakul
- marisstella
- (and 1 more)
-
I'll review those John. Thank you. You know I didn't realize there was so much out there. I'm glad I posted this question.