HOLIDAY DONATION DRIVE - SUPPORT MSW - DO YOUR PART TO KEEP THIS GREAT FORUM GOING! (Only 20 donations so far - C'mon guys!)
×


mikiek
-
Posts
2,276 -
Joined
-
Last visited
Content Type
Profiles
Forums
Gallery
Events
Everything posted by mikiek
-
 Hey Elijah - the double fold and binding was pretty standard. Hammocks were stowed like that for a variety of reasons. To get them out of the way. To let them air out. And yes, for limited protection against flying objects. Lead, wood and otherwise.
- 843 replies
-
- 3
-

-
- niagara
- model shipways
- (and 2 more)
-
I'll agree with you Joel. An entirely different venue. I imagine the Great Lakes fleet broke a lot of traditions. Do what they must but not much more.
- 843 replies
-
- 3
-
-
- niagara
- model shipways
- (and 2 more)
-
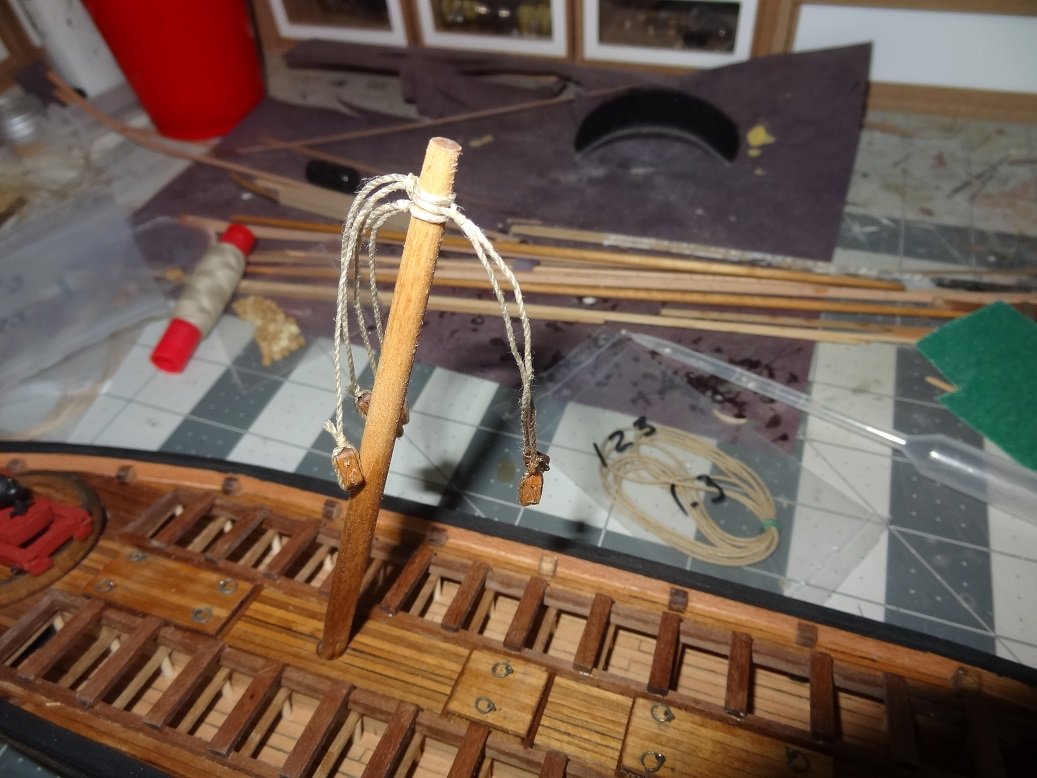
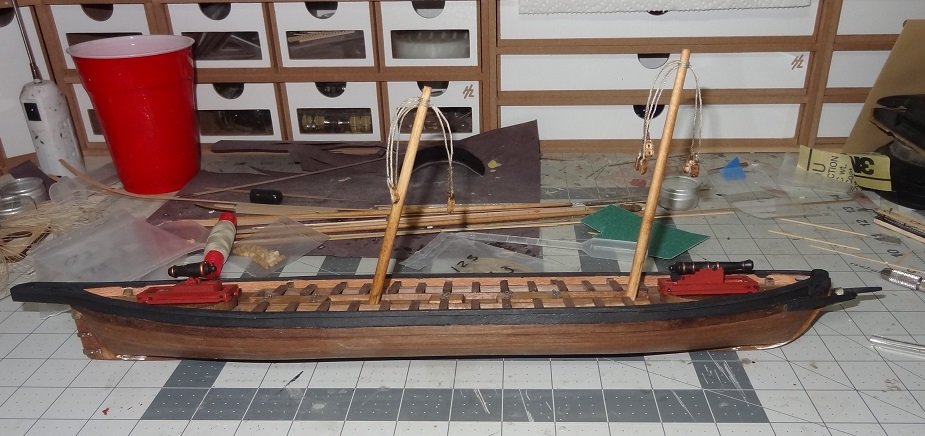
Now that the tug is winding up I can get more time for Arrow. This is a good break from rolling hammocks for my Niagara build. It's funny, I guess the person that was translating the English instructions was changed somewhere about where the guns start. I had no complaints with the instructions for the hull - framing, seats, planking. However when I started the guns, the grammar got worse and parts started to be mislabeled. I was having to reread everything 3-4 times to make sense of it. I'm now starting rigging and they are better again. So - rigging. If you have followed the Niagara log, you know my thoughts on that. One of the big reasons I choose this build was due to the lateen rig. Much simpler than square rigging. I also picked up the Lauck Street tutorials and practicums a while back and I've found the pieces on rigging very helpful. The techniques for seizing made good sense and watching the video gave me the urge to give it a try. I can't say it will help everyone, but it was a good investment for me. I've started with the mast tops and shrouds - per the instructions. I suspect I'll be jumping out of order pretty soon as the plans call for shrouds to fasten to eyebolts with rings (no channels or deadeyes) and none of those are in place yet. There's about 35 of those all around the deck and rails. So here's the kids first attempt: No the masts are not raked backwards. This is the lateen rig. The Lauck Street seizing technique lets you slide the seizing around (it's not the zip seizing) to tighten up around blocks, etc. Each one of these ropes was a loop on each end for a block and one in the middle to go around the mast.

-
Does that mean I can stop making hammocks at 130??
- 843 replies
-
- 3
-
-
- niagara
- model shipways
- (and 2 more)
-
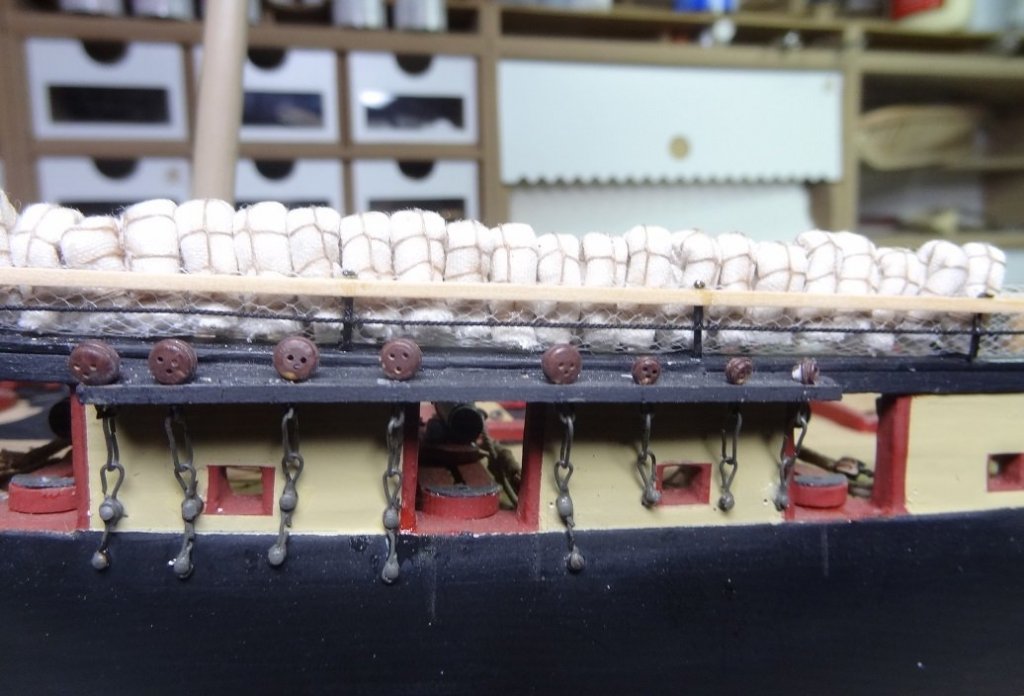
Thank you Joel. I'm pretty happy with them or at least how I envision them. Somewhere I saw where the troughs were closed off with a slab of wood at each end. From the pix I see I still need to clean up the ends - terminate the rails at the stanchion.
- 843 replies
-
- 4
-
-
- niagara
- model shipways
- (and 2 more)
-
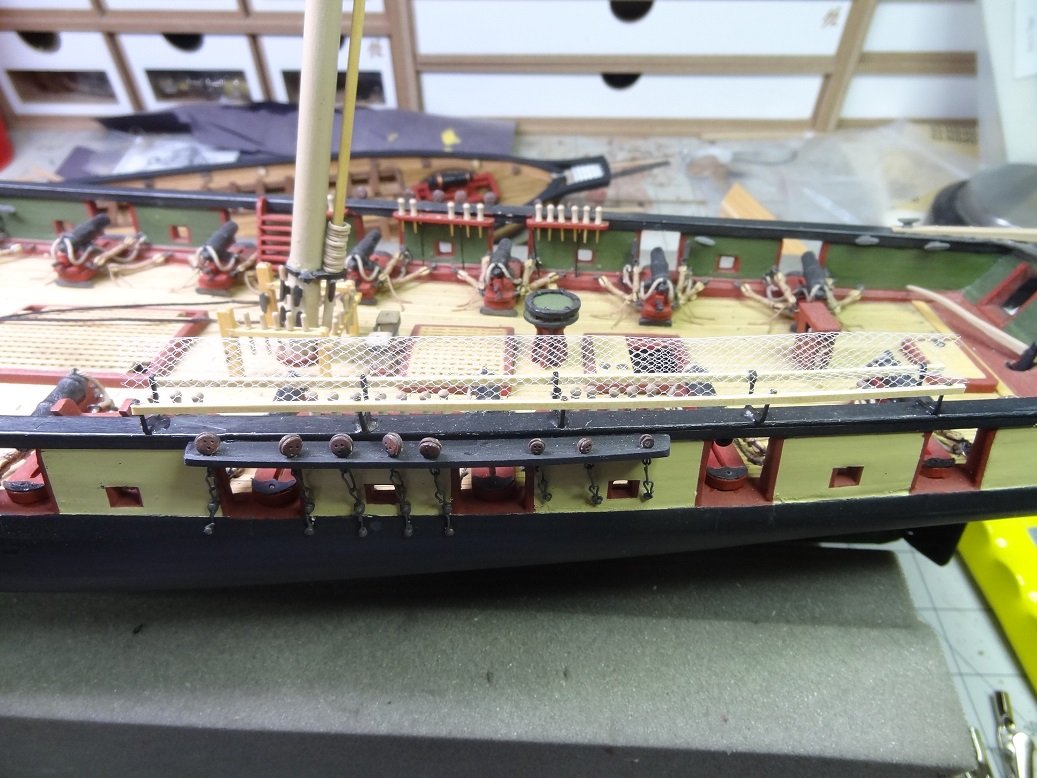
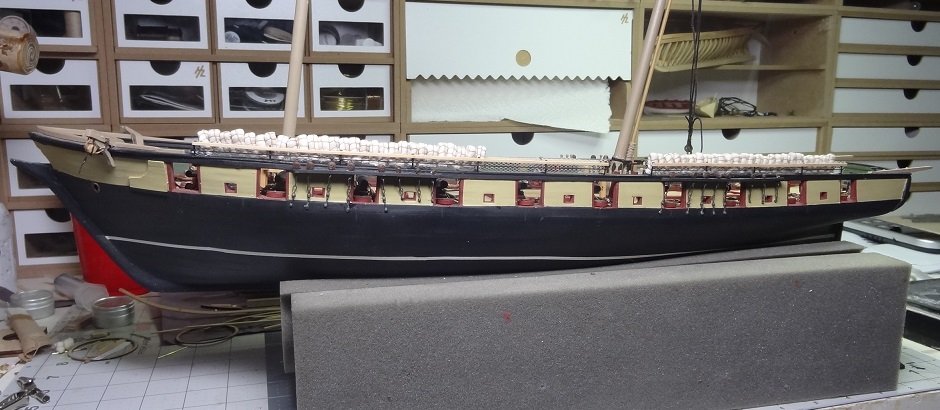
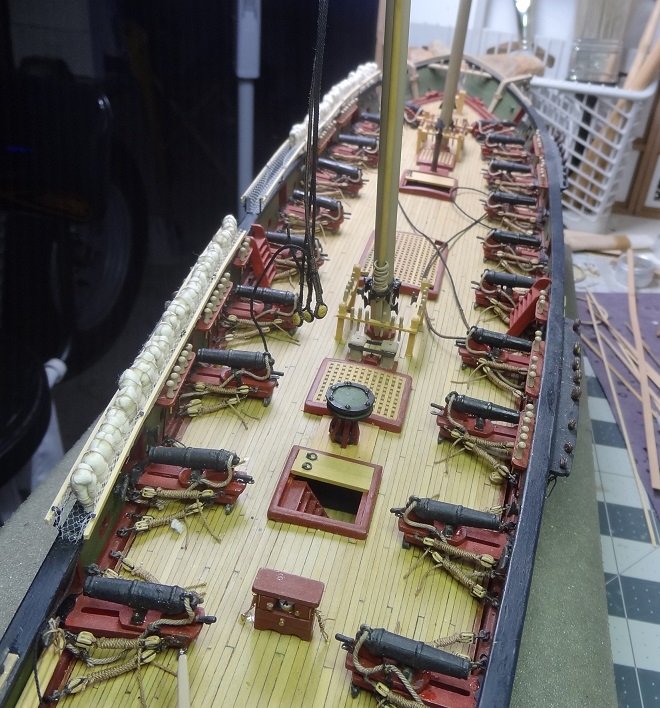
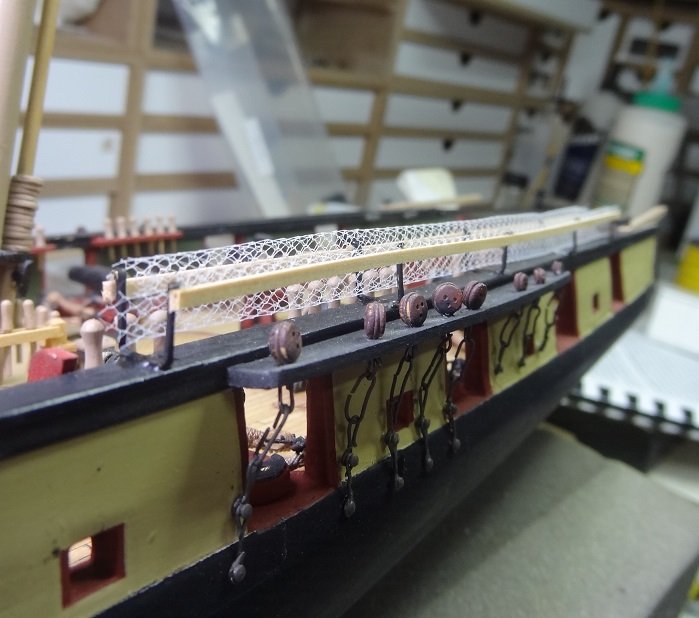
Rigging hammocks is almost as tough as gun tackles. Talk about repetition. I've made 55 of the little guys and I'm not even finished with the port side yet. The forward stanchion assembly went in without incident. Now I just gotta fill it up. Pretty much as I figured, it will take about 75 per side. They look a little disorderly now as I have not glued them yet. I feel pretty confident that when I do I can get them lined up nicely. So far I'm still glad I went with this approach.

- 843 replies
-
- 12
-
-
- niagara
- model shipways
- (and 2 more)
-
That happens to me too Per. Some forgotten tool in the back of the drawer. Usually you find it right after finishing some task where you really needed it.
-
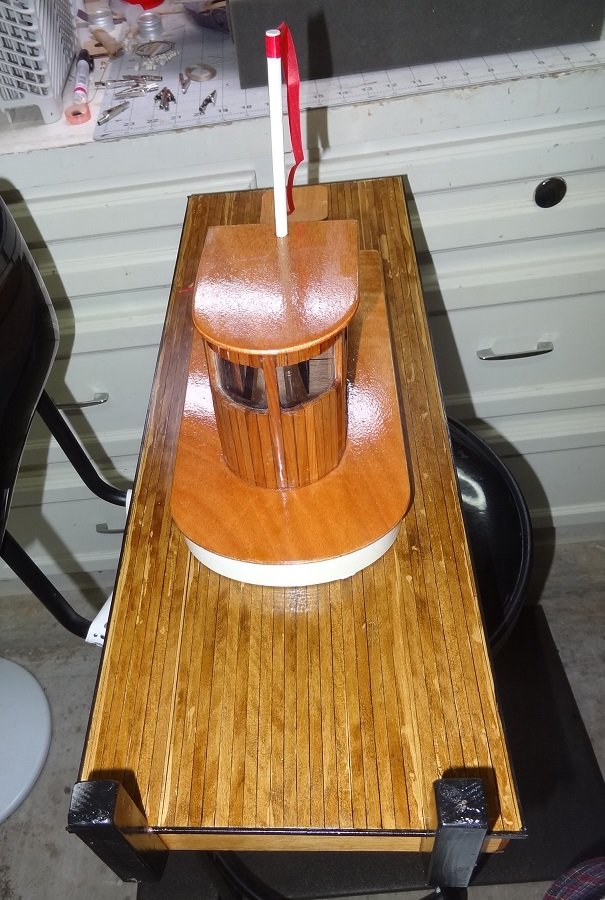
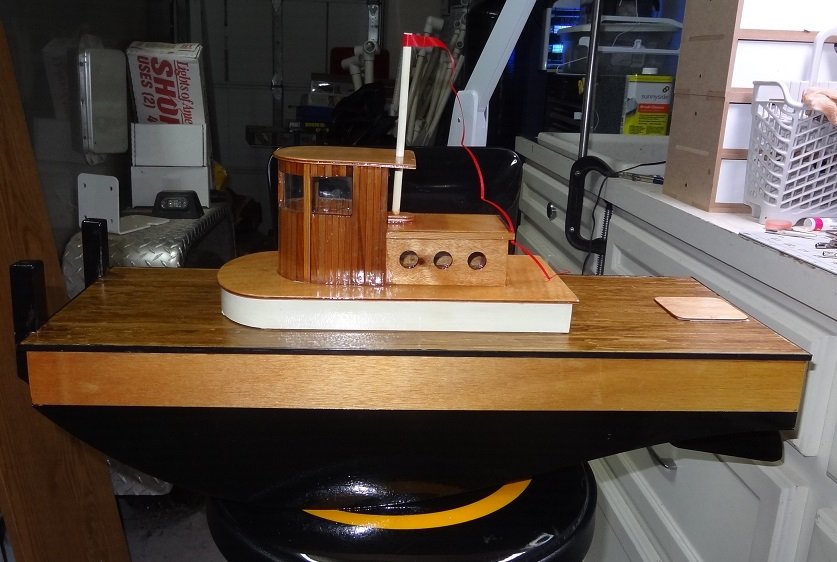
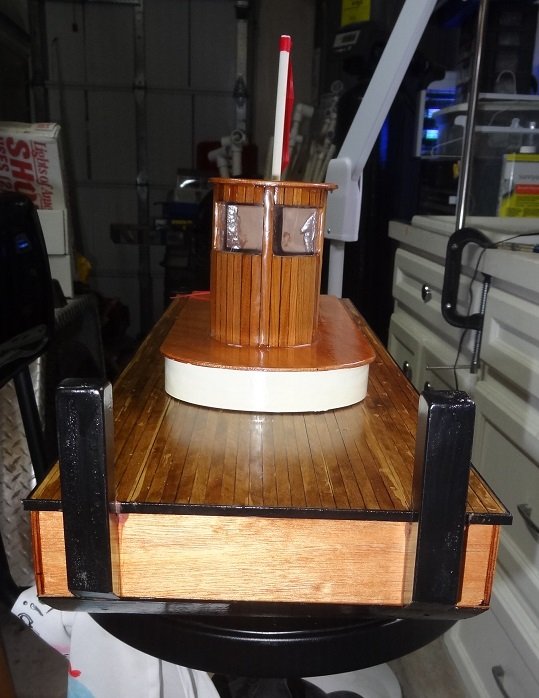
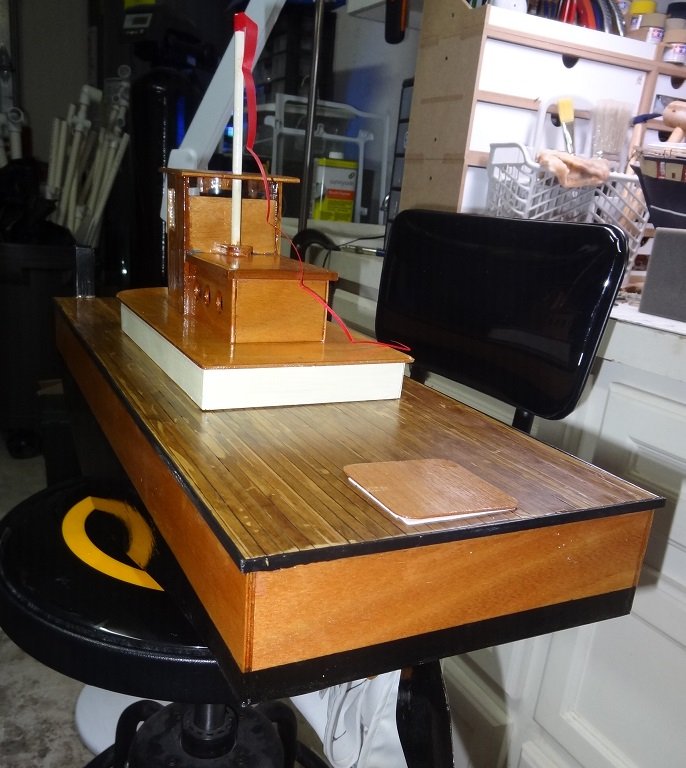
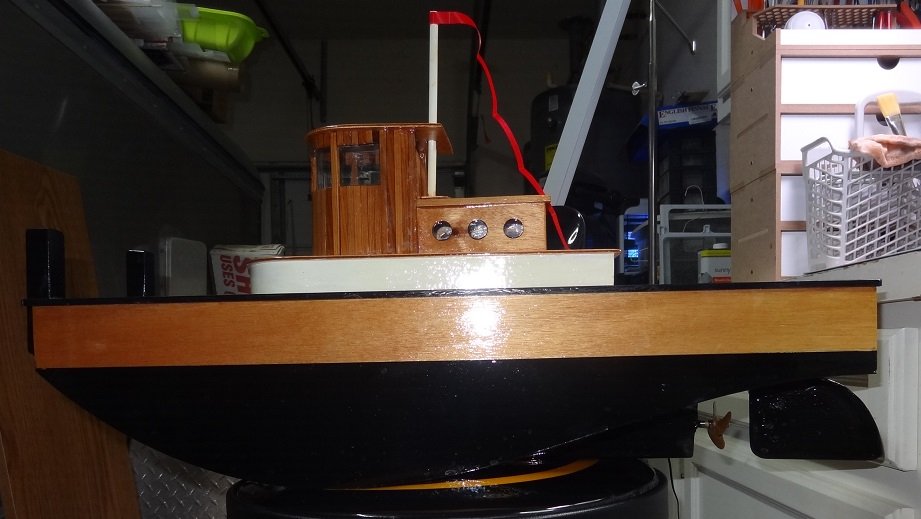
Construction on this build is finished. I'm not changing the thread title yet because I still have a few things to "trick it out" - tires, airhorns, exhaust pipes. I had her on the water today for a few minutes. She rides higher than I thought. At full throttle she will do circles around the RC sailboats. The motor has an incredible amount of torque. I didn't have the prop shaft fastened tight enough in the universal joint and it twisted loose pretty quick. I have to come up with somewhere a little more elegant to take final pix I'll try to get some water shots real soon. I still have the marker hauling barge to build. That looks pretty simple. Guess that means I need some sort of hitch for hauling. And right as I was typing that I thought of some big mooring cleats. All tugs have lots of those.

- 96 replies
-
- 6
-
-
- tugboat
- Tippecanoe Boats
- (and 2 more)
-
Fact of life - no matter what you do you will end up with glue somewhere you didn't want it
- 50 replies
-
- 1
-
-
- artesania latina
- Virginia
- (and 2 more)
-
Dave - re your question. I've found that sometimes I have to to some sort of action to make the software "think" I have read earlier posts. Something like click on the thread or click to go to the next page. Also, if you haven't seen it, on the Content I Follow page there's a heading bar about 1/3 from the top. There's a column called Read Status. Click the little down arrow to the right and check out those options. It works for me. The bad part is the options are not saved so every time you go to Content I Follow I have to reset it.
- 653 replies
-
- 4
-
-
- trabakul
- marisstella
- (and 1 more)
-
It sure is tight Mark. I suppose it would make a difference whether they used that center beam to get from bow to stern. I imagine they would or else just stay put. No wonder no one wanted to crew these things.
-
Matt - I agree with Steve. If at all possible, pull the stern post and make the right sized one.
- 50 replies
-
- 1
-
-
- artesania latina
- Virginia
- (and 2 more)
-
Glad you straightened me out. I didn't realize that was a drilled out rod. Probably even better. It would have been difficult to find various sizes of tubing.
- 653 replies
-
- 6
-
-
- trabakul
- marisstella
- (and 1 more)
-
I took the one shroud that I made and put it on the main port side and it looks like they will be fine Touching slightly but not enough to put a bend in the shroud. However Darrell said the clearance was worse on the fore. I need to make another webbing thing for the forward port.
- 843 replies
-
- 2
-
-
- niagara
- model shipways
- (and 2 more)
-
Fantastic Don - What a good process. Looks like you can get very consistent output like that. That's always my downfall. Nice looking hooks but no two are the same size. What was the size of the tubing you used? Looks like the tube ID needs to be about the same as the OD of the bit?
- 653 replies
-
- 6
-
-
- trabakul
- marisstella
- (and 1 more)
-
Good idea Joel. I imagine I will need to do something. That might also cut down on the number of hammocks I have to make Paul - I appreciate that. The guns were quite an adventure.
- 843 replies
-
- 2
-
-
- niagara
- model shipways
- (and 2 more)
-
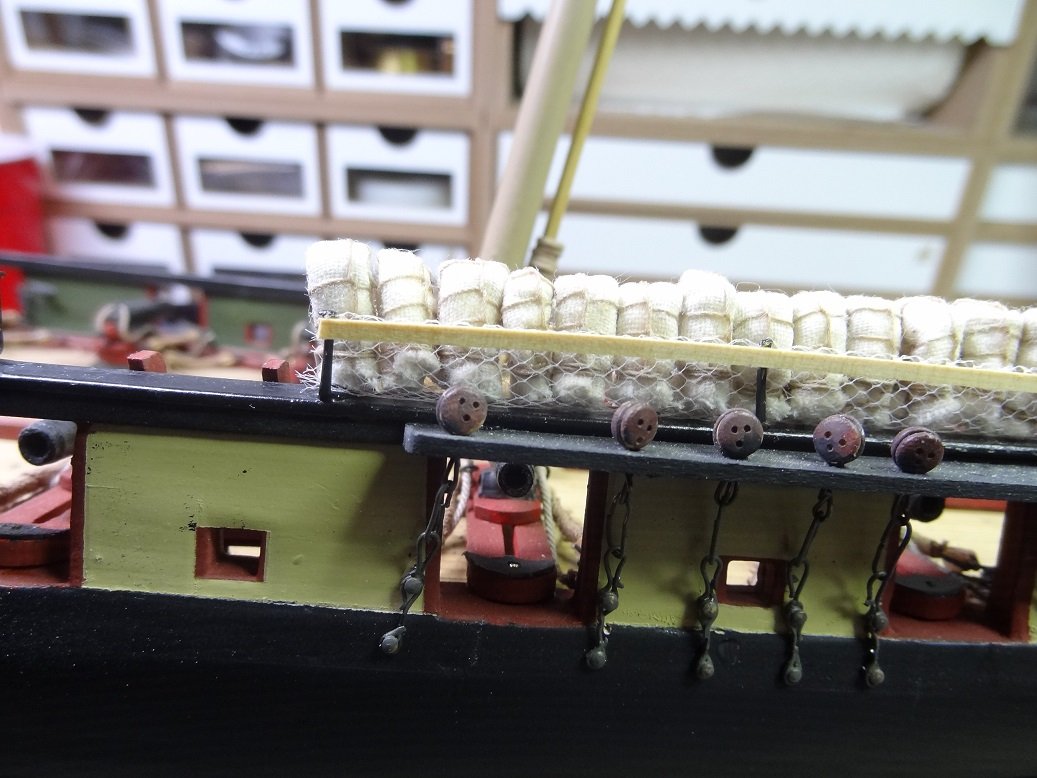
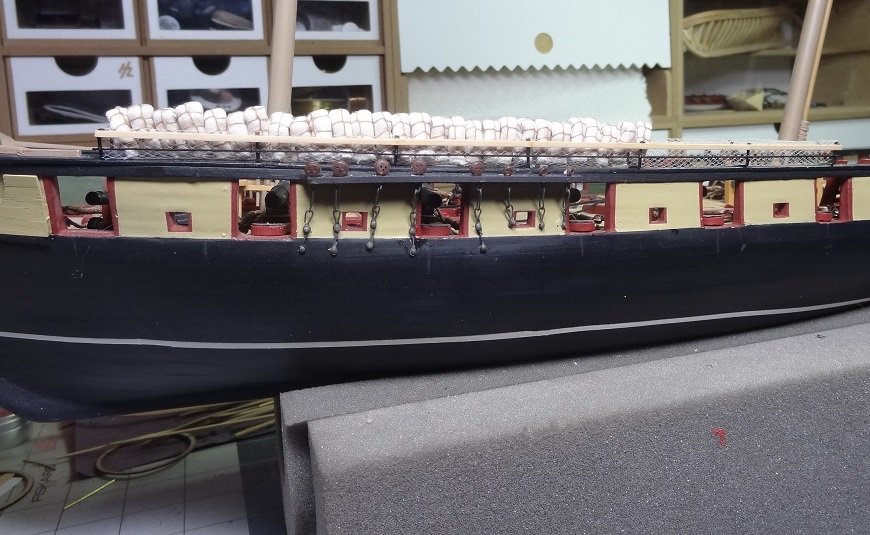
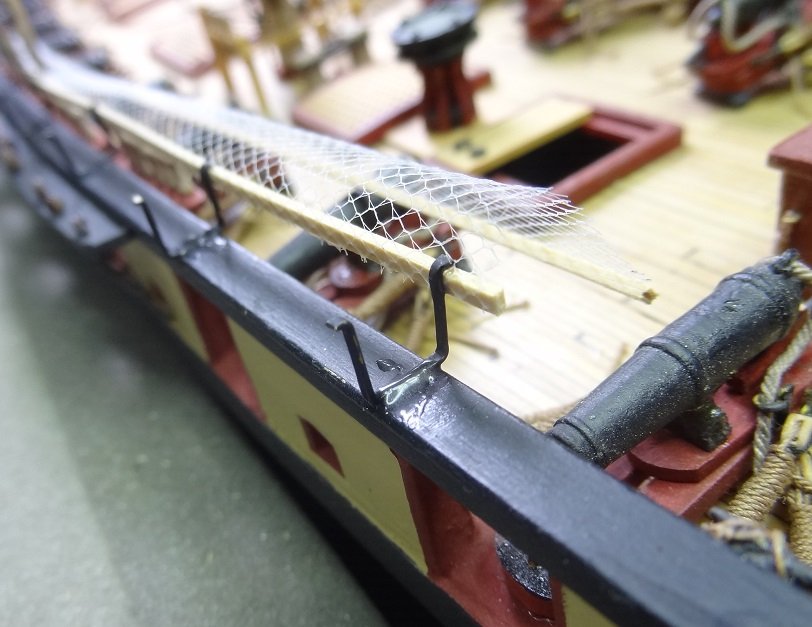
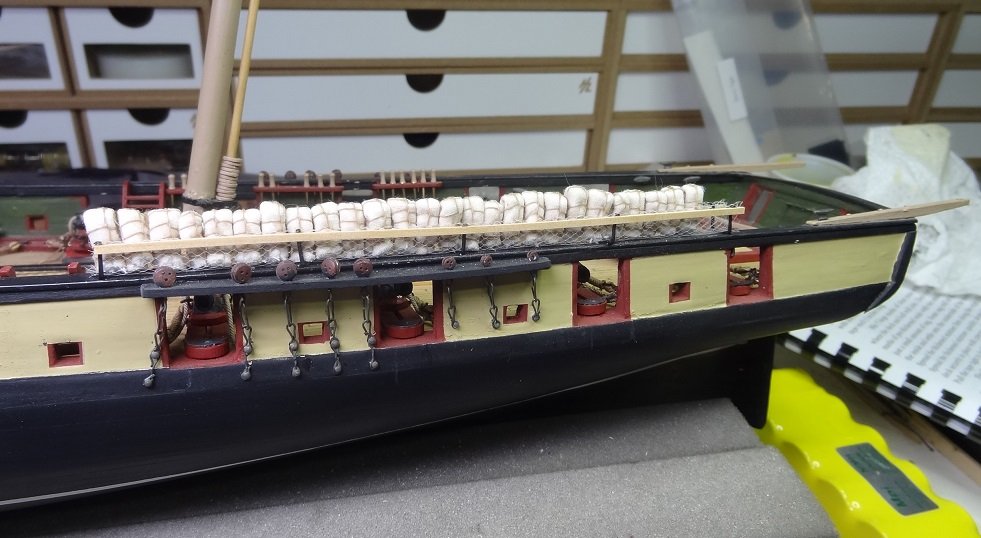
My first attempt at the hammock stowage. The stanchions were glued to the hand rail yesterday. Today it was time to add the webbing and top rail. Here's that - I explained it in a previous post. So when I made the stanchions (another previous post) I put a slight "lip" at the top of the uprights. You can see it in the first pic. Under that lip is where the top rail is glued, making sure that the side of the rail that has the webbing glued to it faces the inside of the stanchion. Then I glued the other rail. Push the webbing down in between the uprights, add hammocks and there it is. I'll stretch a line across the uprights below the top rail - like I did in the prototype (still another previous post). You better duck now - looks like that carronade has a bead on you


- 843 replies
-
- 5
-
-
- niagara
- model shipways
- (and 2 more)
-
Don - if you have time some pix would be great. I'm about to start rigging Arrow and there are calls for hooks and of course none supplied.
- 653 replies
-
- 4
-
-
- trabakul
- marisstella
- (and 1 more)
-
Good luck with the burns. They give me a devil of a time.
-
The problem is if you use glue on your hull, when you go to stain/varnish it the glue doesn't take like the raw wood right next to it and you end up with spots. This might give you some ideas.
- 50 replies
-
- 1
-
-
- artesania latina
- Virginia
- (and 2 more)
-
I forgot to mention I did order some 1:24 model car tires to tie on around the sides. Should be a nice feature.
- 96 replies
-
- 5
-
-
- tugboat
- Tippecanoe Boats
- (and 2 more)
-
Right Steve - she's been collecting too much dust and dead bugs in the garage
- 843 replies
-
- 2
-
-
- niagara
- model shipways
- (and 2 more)
-
It does Don. However having no experience with sails myself, I have no idea whether they are any good or not. Will have to research sail making when I get to that point.
-
Looks really sharp Don. How does the kit rope compare to Syren? How do you use the hook tool?
- 653 replies
-
- 5
-
-
- trabakul
- marisstella
- (and 1 more)