


Julie Mo
-
Posts
885 -
Joined
-
Last visited
Content Type
Profiles
Forums
Gallery
Events
Everything posted by Julie Mo
-
 Next thing was what to do with the caulking? While I was trying to see how to make the deck plank work with the above idea, I opened the drawer under the workbench top looking for some tape, I saw guitar binding. I bought some for an acoustic but never used it. The thinnest is 0.0115" but sold as 0.01". The deck planks and binding aren't as tight as they would be finished but it seems to work and the plastic won't bleed. When using plastic binding on guitars, acetone is used to glue it to the wood parts on the guitar. Not sure how this would work for the decking but I'll experiment.
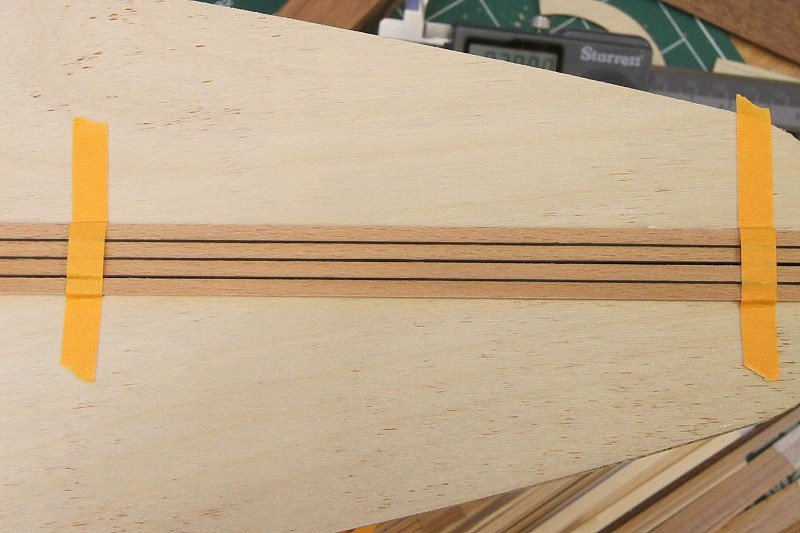
-
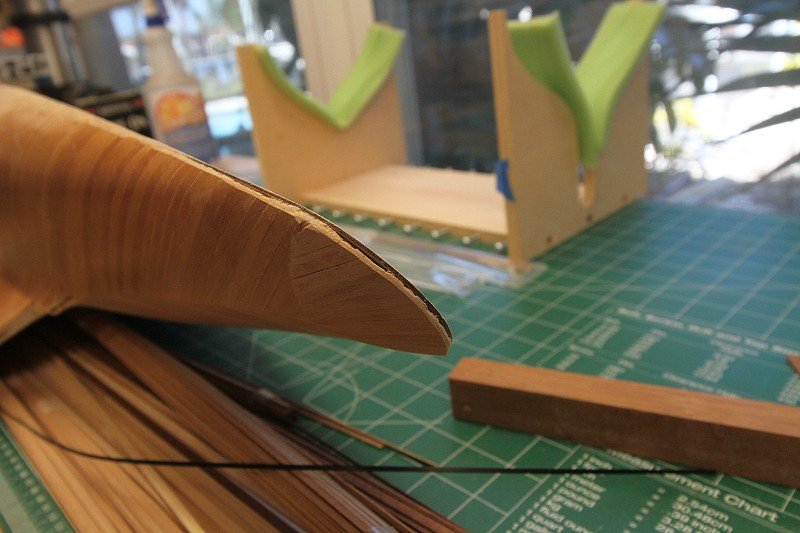
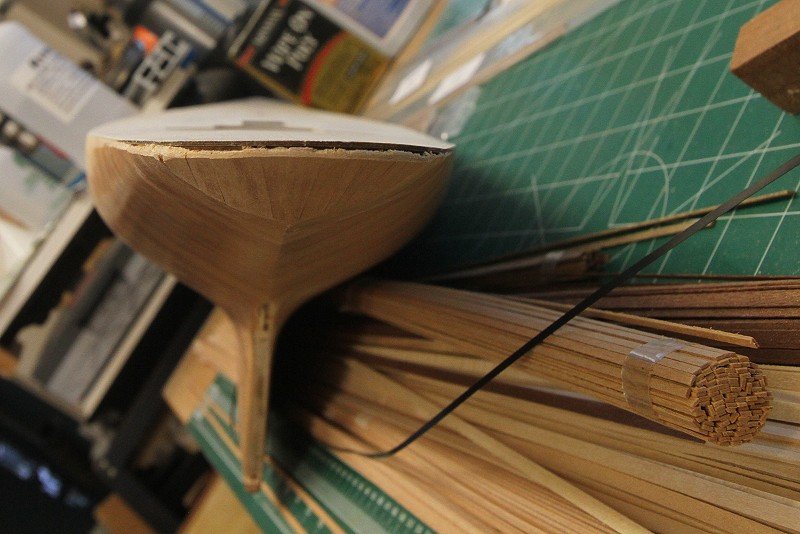
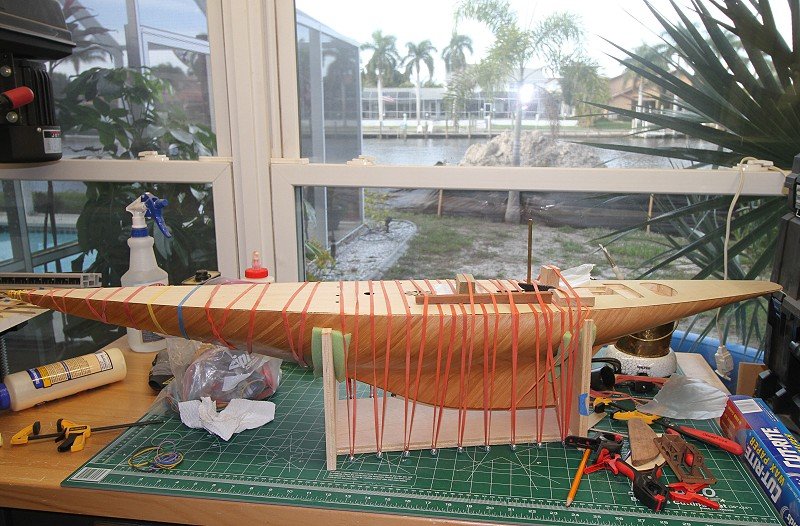
Now that I'm close to finishing the minor interruption in this build, remodeling the house , I've been trying to motivate myself to get back to the model. I sort of painted myself into a corner when I modified the planking, but yesterday I decided to roll the dice and see what would happen. The hull planking protruded from the stern making the kit piece for the stern deck useless. I took a sanding block to it and started trimming away. It's now even with the plywood top but there is a gap that needs to be filled between the deck and hull planking. I'm looking at something to wrap the entire hull and come up flush with the finished deck.
-
Keith, I was looking at your build to get some motivation to get back to mine. My next step is the deck. I was thinking about creating a caulk effect, too. The table my model sits on is also used for guitar work. It has two drawers under the top, one with mostly guitar materials. I was looking for some tape and saw plastic guitar binding and wondered if this would work. So I put a piece of black binding in between two planks and it seemed to work. The "caulk" line was very clear and clean. The binding I was using is 0.01" thick but it's available in 0.02", 0.04", 0.06", and 0.09" . For gluing it to a guitar, acetone is used. That makes me wonder if this method could be useful for this application, too. If I've got the numbers right, the 0.0115" (actual thickness of what I have) binding would translate to 0.4" for a 1:35 scale. I think caulking should be 1/4" to 1/2" so it should work.
-
The blade I've been using to cut fret slots (so far in maple, ebony and cocobolo) is one I bought from StewMac for about $100. (It's $122 today.) It's 100 teeth are not carbide tipped. I've probably slotted a dozen or so fretboards and it definitely needs sharpening now.
-
Jim, how do your blades hold up to cocobolo, hard maple, ebony and other dense hardwoods? I'll most likely build another guitar before I start another model. Seeing another luthier sing the praises of your TS for guitar building has re-sparked my interest. Prior to this, I couldn't justify the cost just for model building.
-
Go to 13:40 in this video. Is that the sound you guys hear?
-
I just saw a Byrnes table saw review from Maximum Guitar Works. He did an out of the box run from unpacking to making the first cut. No tinkering beforehand. When he went to turn it on there was a clicking or knocking, as if something was hitting something else during the rotation of the blade. The MGW guy seemed a bit concerned at first and checked around a bit. But then he just started making the cuts. He never addressed the noise issue. Is that clicking/knocking noise typical in these machines?
-
Oh what a mini shop to have with all those nice Byrnes tools, and all the accessories, too. But, ask Kirk would say, "Dream on Klingon!" Got a reply from Crown. Since they don't stock wood, they have to get it, mill it and then it's ready to send out. But I should have it soon.
-
Still waiting on those strips from Crown Timberyard. It's been almost two weeks and not a peep! I don't own any of those fancy tools for milling tiny wood. Maybe I need a shop full of Lilliputian shipwrights.
-
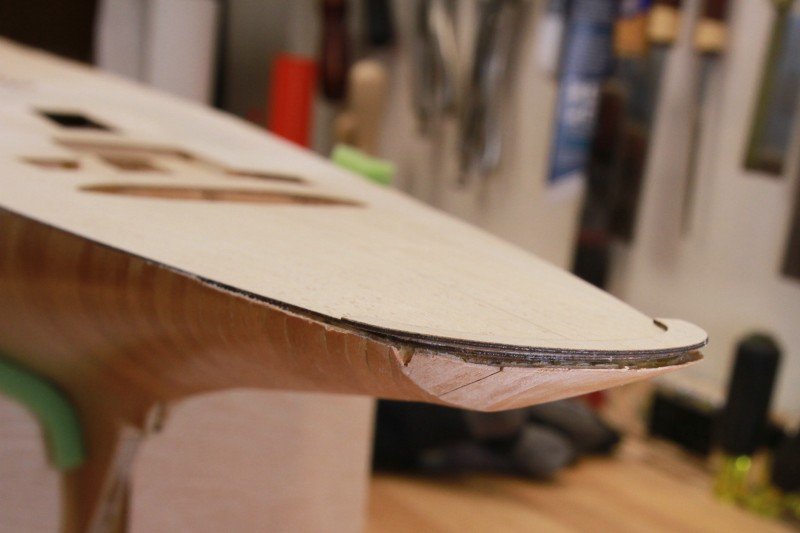
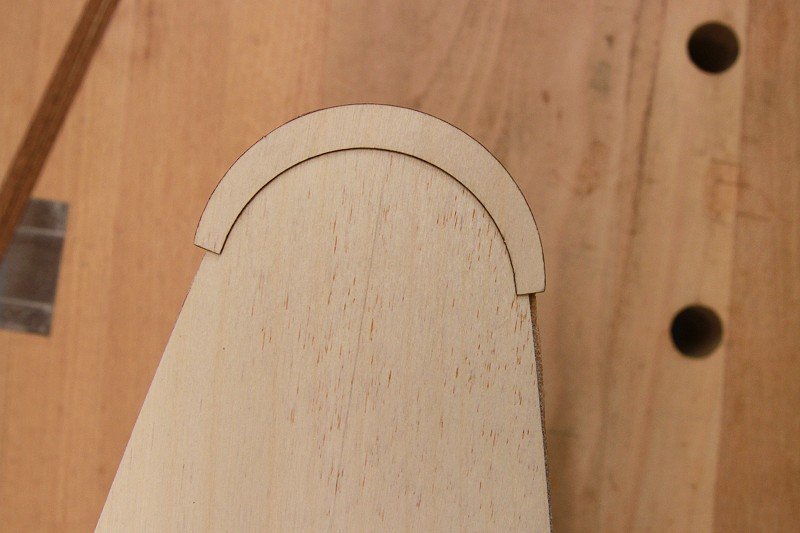
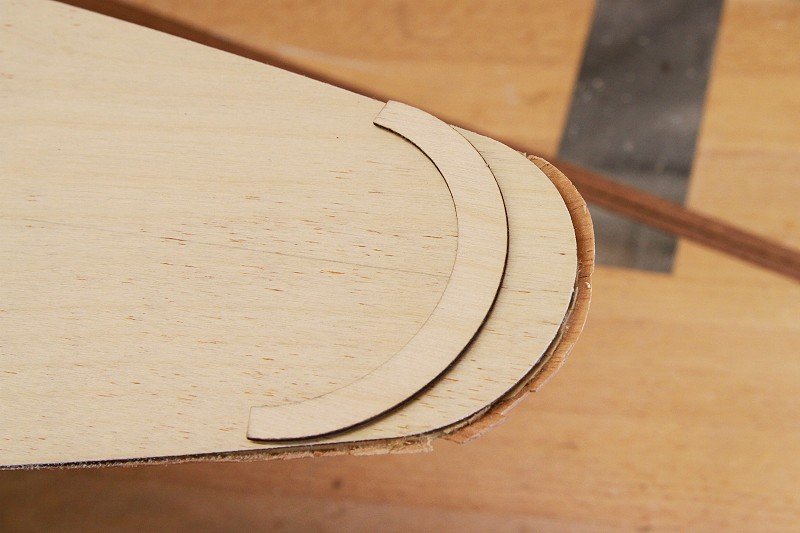
I'm looking at the stern piece for the deck and I can't believe Amati had this in mind. I realize I didn't use their material for the second hull planking but I can't see how that gap could have been prevented. The instructions look as if that deck piece ends up flush with the hull planking. Here's some top pics: They say to use (2) 1x3mm strips to butt up to that piece to run from stern to bow. To do that and cover the hull planking overhang on the transom that stern piece has to be where it is in the above pic. I looked at Keith Aug's Endeavour pics and it looked like he probably didn't have this issue.
-
So I'm ready to start on the deck and the first thing I need is 1x3mm strips. They are nowhere to be found. I looked everywhere. I even checked to see if I had foolishly used them during my customization phase. Nope. I finally broke down and ordered it. Is there a gremlin out there trying to trip me up? 🤔
-
Oh, the house is still making her demands, Carl, but I'm turning a deaf ear for now. As for being unable to insert a photo, I've tried the "Insert other media" button below and chose "Insert image from a URL". When I paste the URL location and click "Insert into post" the space where the URL was pasted turns a pale red but nothing else happens. I can click on the insert button all I want and that pop-up window just remains. When I choose the "Drag files here to attach, of choose files..." option I get " There was a problem processing the uploaded file. -200". The Uploaded Images box says the upload failed. EDIT: It just worked!
-
I'm back... Or at least the work on the model is. The huge obstacle was that curved raised cabin. I didn't have the time or desire to learn through the school of hard knocks. The other day I cleaned up the workshop of the live edge coffee table mess and pulled the model off the shelf. I realized it was never going to be finished if I refused to accept the fact I had bitten off more than I cared to chew. I'm going to keep the helm section and guest seating as modified and drop the raised cabin modification and just go with what came with the model. For some reason I can't insert an image from my website and the upload feature failed, twice. I'll try later.
-
Rope-Stropped Blocks for Boom Vang
Julie Mo replied to Julie Mo's topic in Masting, rigging and sails
I have the Marlinspike Sailor and refer to it whenever I'm trying to make rope do what I want it to do. I also have the Splicing Handbook by Barbara Merry. I've had both for quite a while. When my dad had his sailboat, I made up a rope kit with fids, marlinspike knife, pusher, twine, etc. That bag followed me long after he and the boat were gone. Still have it, along with spare lines from the boat. Maybe one day I'll be able to use them on my sailboat. Here's to dreams coming true... -
Rope-Stropped Blocks for Boom Vang
Julie Mo replied to Julie Mo's topic in Masting, rigging and sails
Well, I tried to muscle the two eyes using the same size strop as the triple. I ain't that strong. Went ahead and finished it because I'm bullheaded. Temped in a bowline where the eye splice will be. I'll need to buy some more rope to make a proper sized strop, plus for eye splice lines to go where who knows? -
Rope-Stropped Blocks for Boom Vang
Julie Mo replied to Julie Mo's topic in Masting, rigging and sails
The strop is a rope grommet. I saw a formula for determining the length necessary to make the correct length strop. Problem is I measured the triple block and eye and applied the formula. It worked great for the triple block. But was too short for the double with two eyes. Should have measured that first. When I fashioned up the double block with eyes at either end, it just looked wrong. I tried to find pictures of one actually being used on a sailing vessel but no luck. I'll cut me some more rope for the other strop and if it ain't lookin' right, have me some rum. Thanks for the help! -
I'm making a full sized set of wood blocks with intentions of making a boom vang. One block will have three sheaves, the other two. This is what I have so far On the double block, I want something like a becket on one end. The other will look something like the triple above on the other end. I made up two eyes for the double block but when I went to see how it would look, with an eye at either end, it looked unwieldy. I saw this online and wondered if I made up an eye splice for one end of the boom vang line and secured it to the rope, like below, rather than having a second wood eye. Would this be something you would have seen on an old sailing vessel?
- 20 replies
-
- 10
-

-
Keith, you are amazing! While I've been off doing what I thought was fairly decent work, you have created a masterpiece. I just hope this beauty finds itself in a place all can admire. Nicely done!
-
Thanks Michael. When I started this I thought I'd be done in a few months. At the time I was looking for something to keep me busy while house hunting. Once we bought the house, the model progress suffered greatly. I think it's now been two years. When I do get back to the build, I sometimes forget what I was doing the last time I worked on it. That's what I discovered last night when I was in the shop cleaning up the work bench - all these parts I forget I made or where they went.
-
It's a Micro Fence plunge base. I own the Stew Mac base but it pales in comparison to the Micro Fence base. Lee Valley now makes a plunge base for Dremel and Foredom but I haven't seen any reviews on it or how it compares to Micro Fence. But at around a fourth of the price of the Micro Fence, I would have given the Lee Valley base a try had they offered it when I bought the Micro Fence.
-
Thanks, Carl. It seemed like we signed on to a work camp. Our friend in need was really in need! Imagine hoarders combined with the cat lady in a house that hadn't seen any kind of upkeep in 26 years. In two months we only had one day for ourselves - we went out out and hit a bucket of balls, never actually getting to the golf course. That's how much work there was to be done. And the day before we were leaving, our packing day, she hands us a list of more she wanted done before we left. I thought it was a joke. Last time we take that kind of vacation again!
-
Only been back a few days and have only looked at the model. When we arrived late Monday I walked into the shop and saw her right where I left her. Then I remembered the images Irma's storm surge put in my head as it approached our home. I figured I'd never see the model to completion. Extremely lucky and grateful is not enough to describe the emotions. It may be a few weeks or so until I have the time to get back to working on her. The to-do list comes first.